Creating creamy, scoopable homemade ice cream without owning an expensive machine might sound like a fairy tale, but it’s genuinely possible — and honestly, some of the best ice cream I’ve ever made came together in my kitchen using nothing fancier than a mixing bowl and a freezer. The secret isn’t some mysterious technique that only commercial producers understand. It’s about understanding what ice cream actually is and working with the natural physics of freezing to create a smooth, rich texture that rivals the stuff from a shop.
Most people assume an ice cream maker is essential because they think the machine’s job is to freeze the mixture. That’s only half the story. The real job of an ice cream maker is to break up the ice crystals that form as the custard freezes, keeping them microscopically small so the ice cream stays creamy rather than turning into a hard, icy brick. A machine churns continuously while freezing, which prevents large crystal formation. But without a machine, you can achieve similar results by manually stirring and scraping the mixture at strategic intervals — it just requires a little more hands-on time. The payoff is worth it: homemade ice cream with real cream, real eggs, and whatever flavors you’re craving, made with complete control over ingredients.
The beauty of non-machine ice cream is flexibility. Whether you prefer the folding method (incredibly easy, minimal effort), the hand-churning approach (more traditional), or the no-churn whipped cream technique (faster), there’s a path that fits your style and your kitchen. Each method produces genuinely excellent results, and you might find you prefer the texture of one over the others. Let me walk you through every approach, complete with a foolproof recipe and all the technique knowledge you need to succeed.
Understanding Ice Cream Structure and Why You Don’t Need a Machine
Ice cream is fundamentally just three things: fat, air, and frozen water. Cream and egg yolks provide the fat, which contributes richness and helps create smoothness. Sugar dissolved in the mixture lowers its freezing point, so it doesn’t become rock-hard solid at 0°F (−18°C). Air beaten into the mixture lightens it and improves mouthfeel. Everything else — vanilla, chocolate, fruit, cookies — is just flavoring.
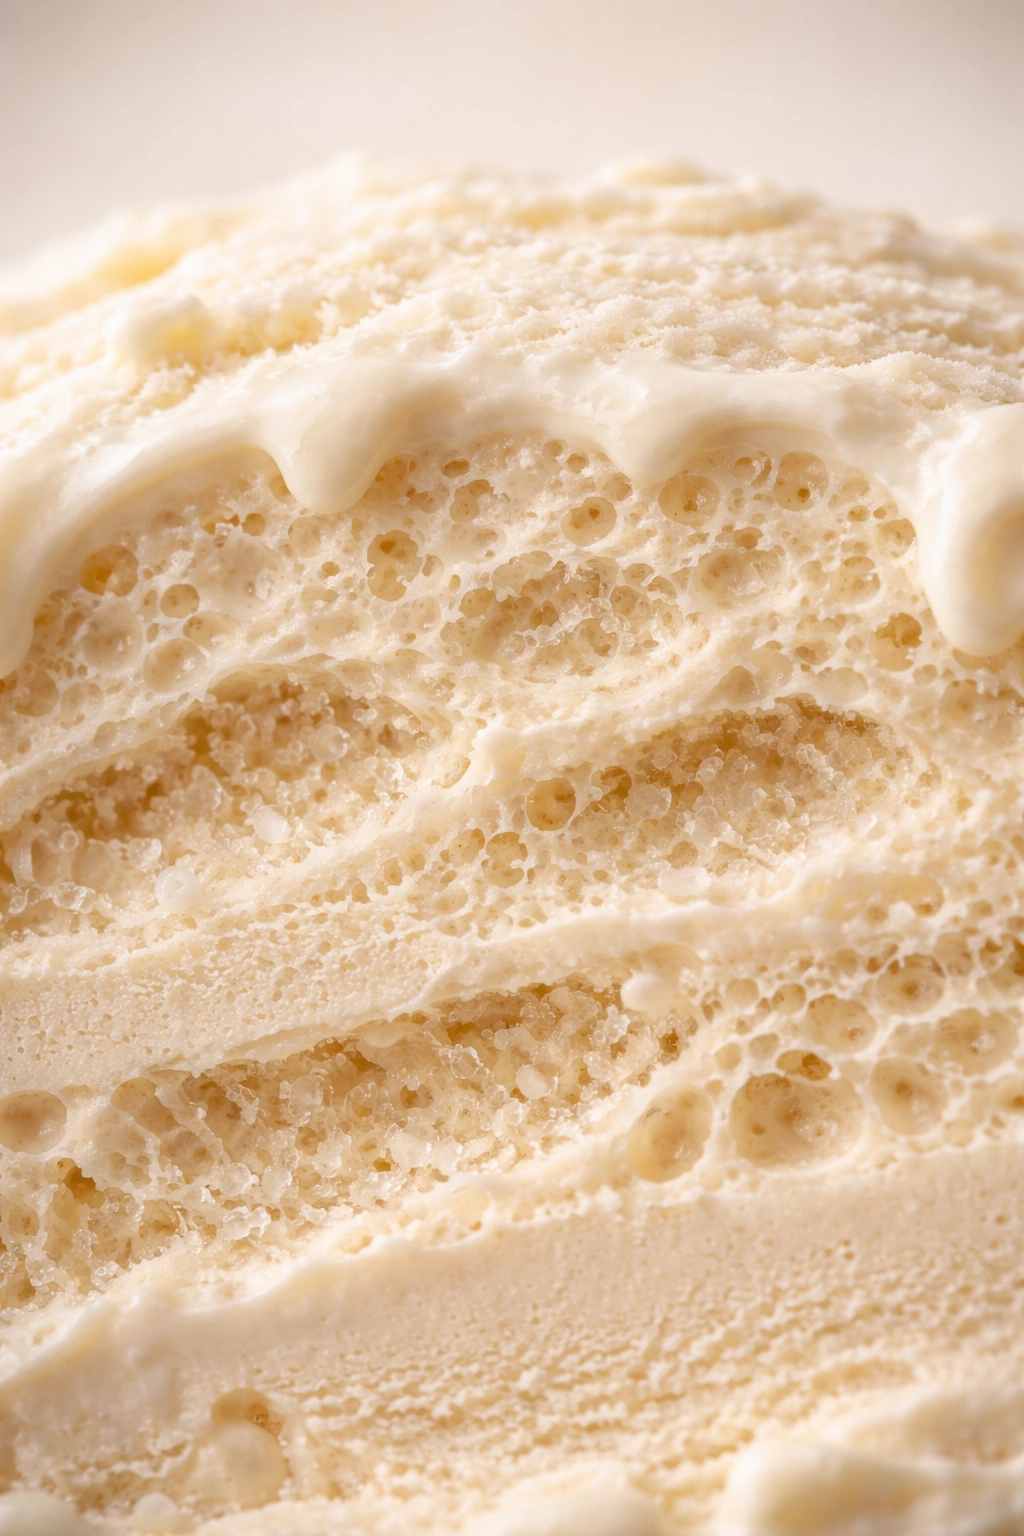
The challenge of freezing ice cream without a machine is that as water freezes, it naturally forms large ice crystals. Large crystals feel grainy and icy on your tongue. A machine prevents this by constantly agitating the mixture while it freezes, keeping the crystals too tiny to feel. Without a machine, you can achieve the same effect through manual intervention — stirring and scraping the partially frozen mixture every 30 minutes or so throughout the freezing process. Each time you break up the frozen edges and fold them into the unfrozen center, you’re creating the same mechanical disruption that a machine would.
The key is consistency. If you forget about the mixture and leave it to freeze solid without stirring, you’ll end up with ice rather than ice cream. But if you’re willing to check on it four or five times over the course of 2 to 3 hours, you’ll get genuinely creamy results. The work itself is minimal — 2 minutes of stirring every half hour — but the timing matters.
The Still-Freeze Method: The Simplest Approach
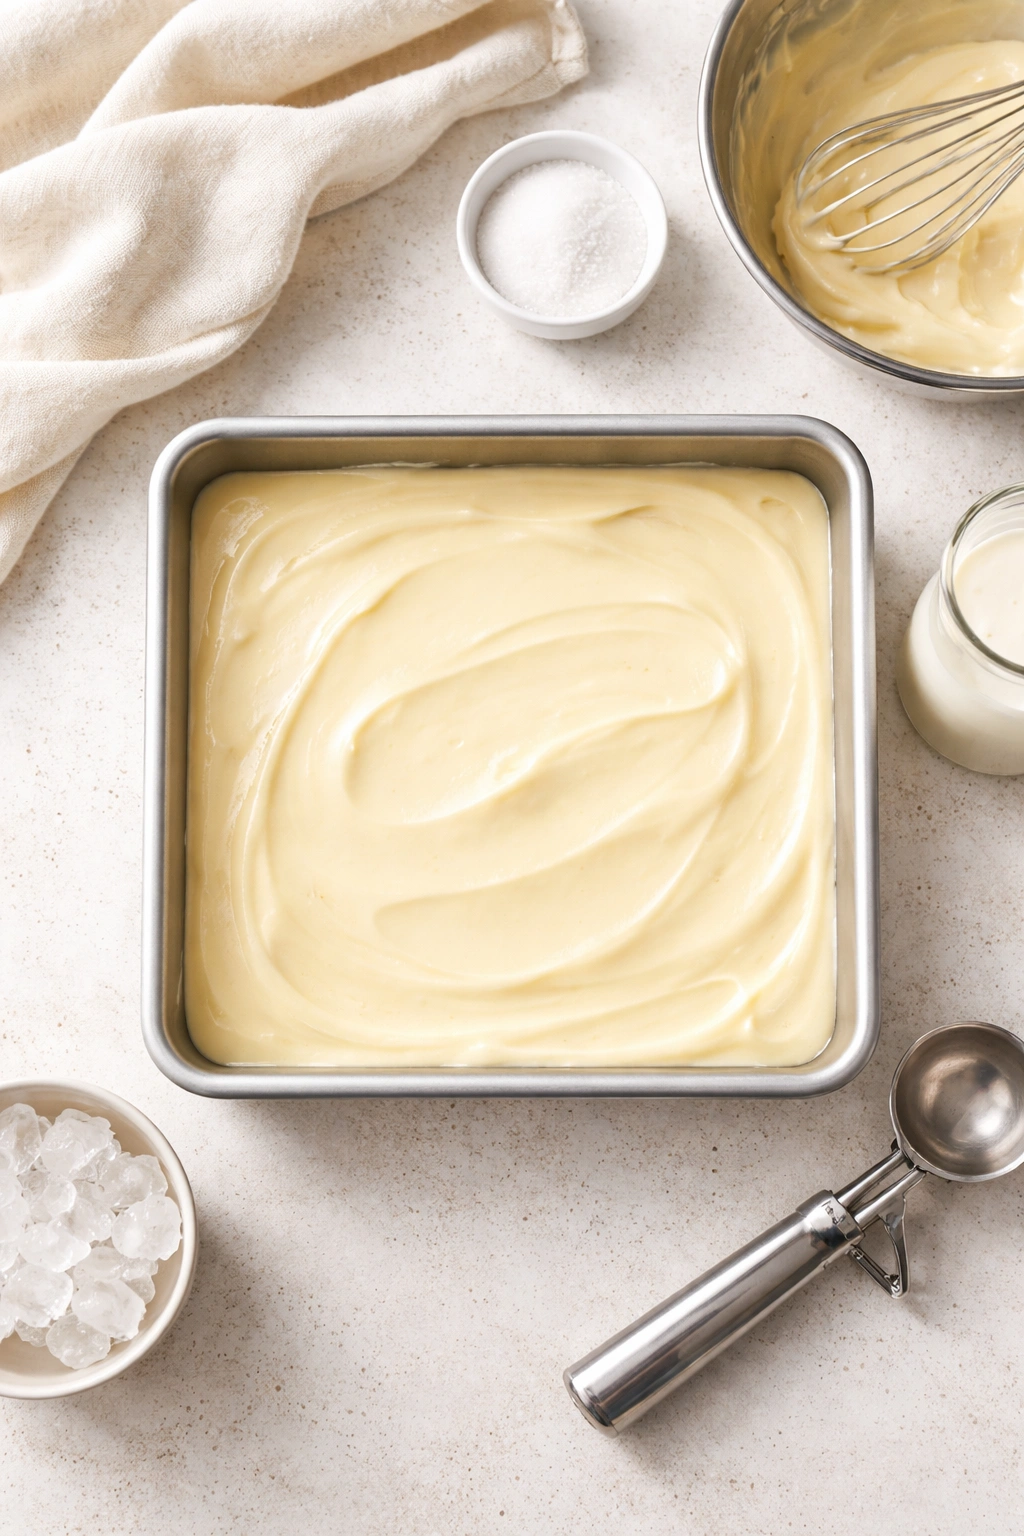
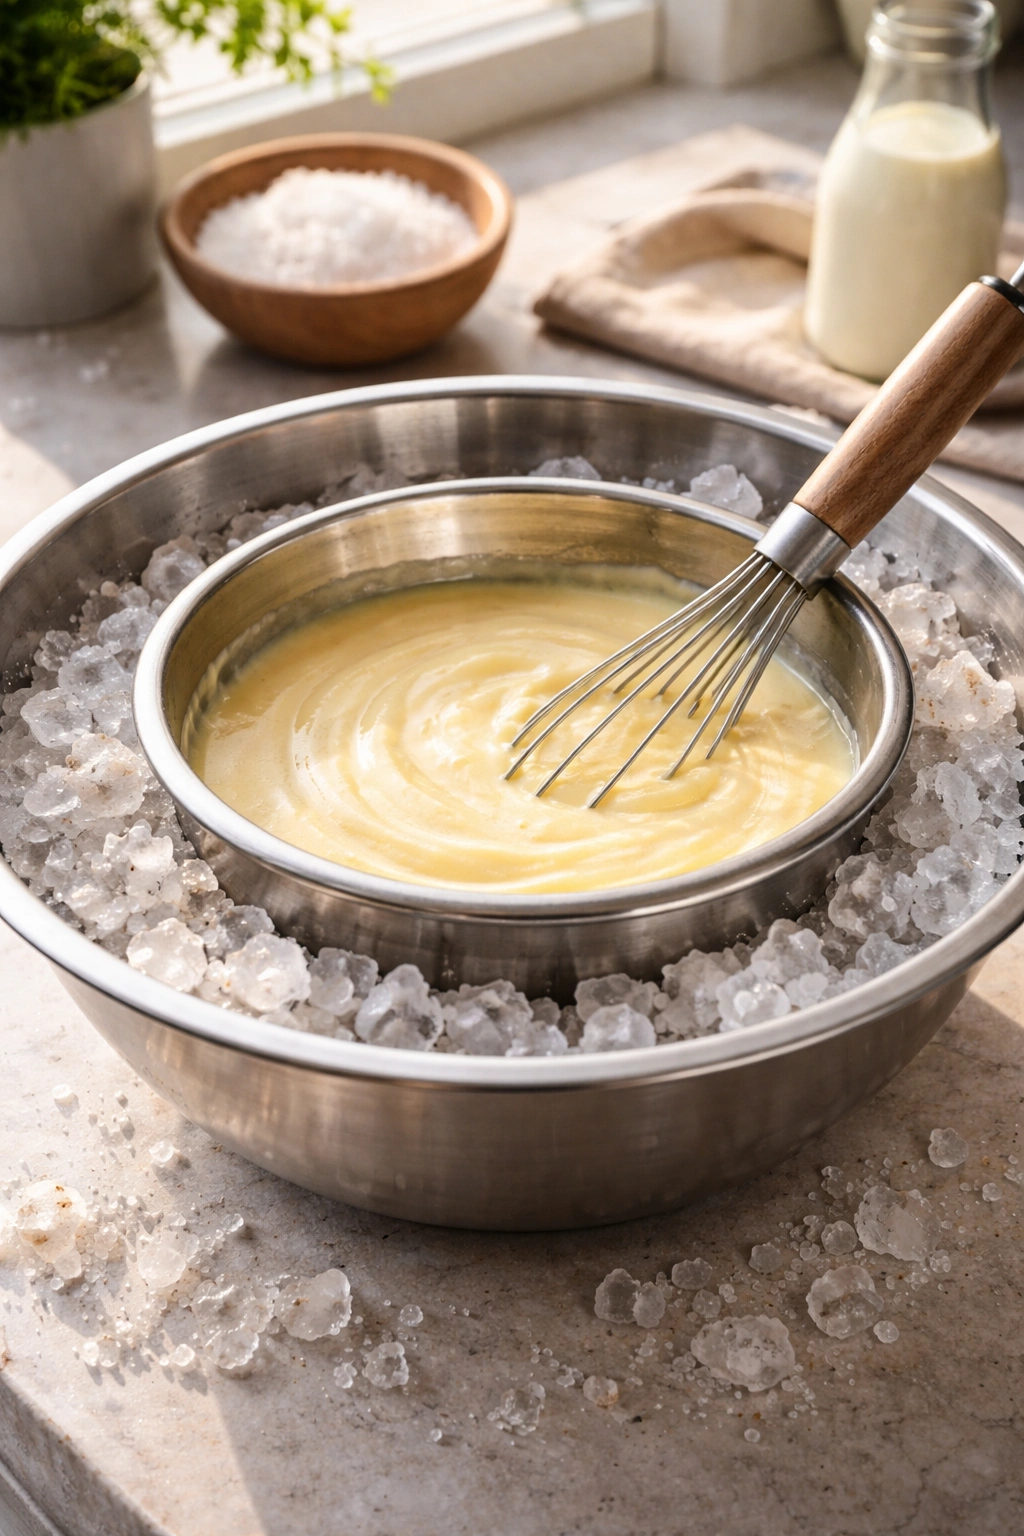
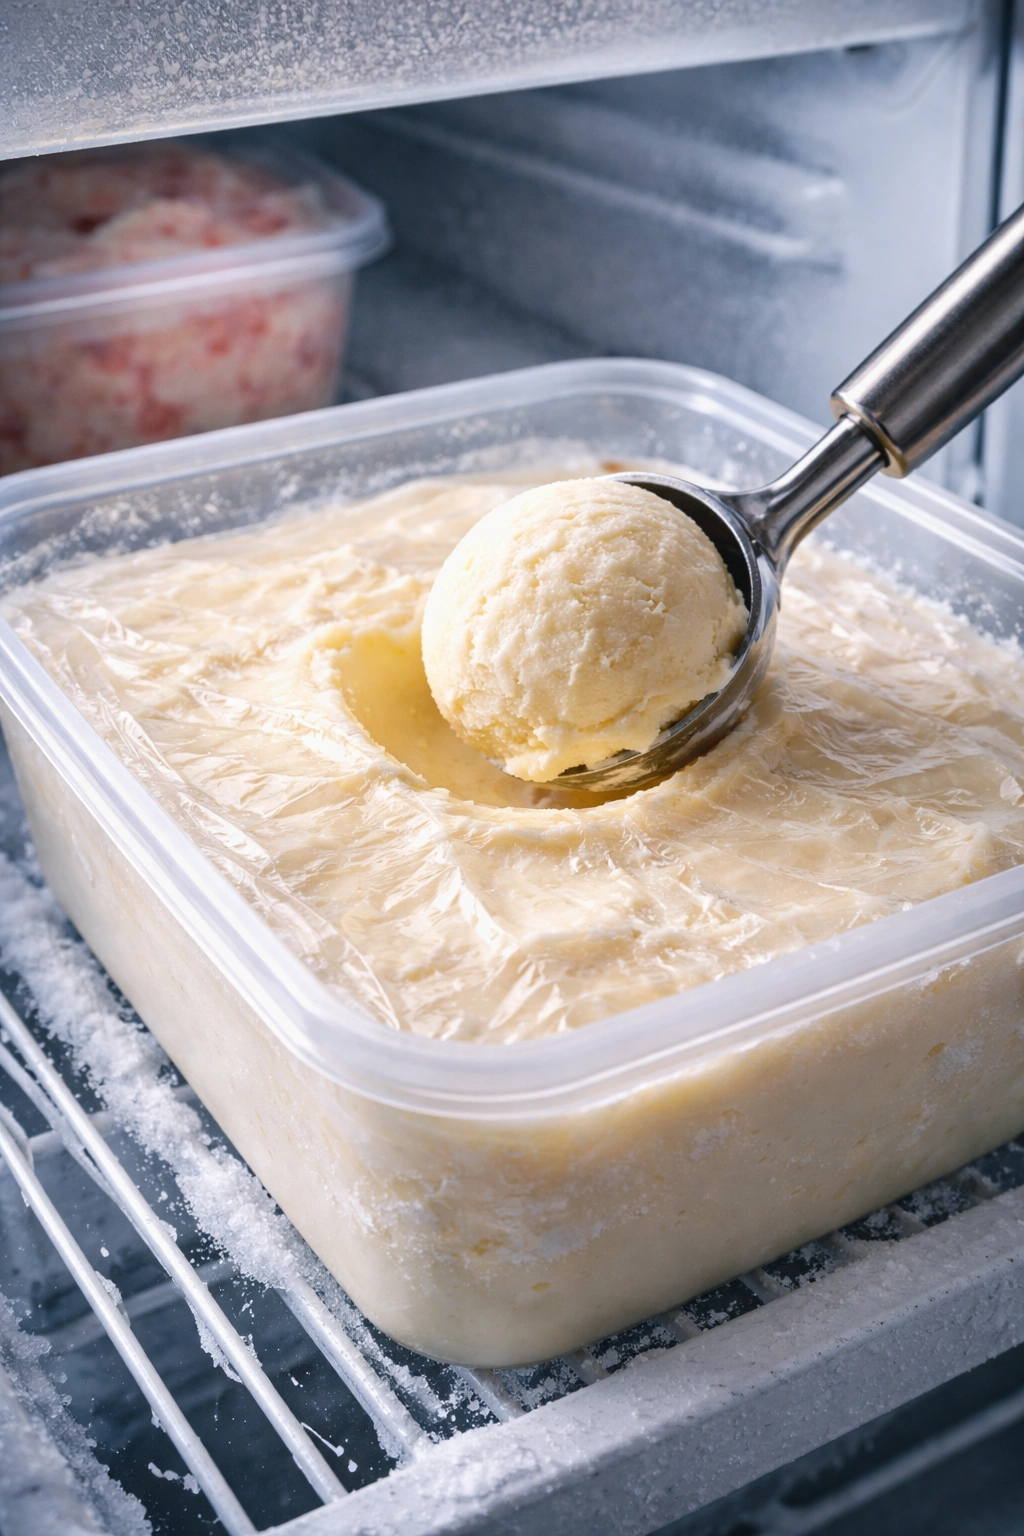
The still-freeze method is the path of least resistance. You pour your chilled custard or cream mixture into a shallow pan (a 9×9-inch baking dish is ideal), cover it, and stick it in the freezer. Here’s where it differs from just leaving it alone: you pull it out every 30 minutes and stir it thoroughly, scraping frozen edges into the center and breaking up any crystals that have started to form. After 2 to 3 hours of this cycle, the mixture transforms from liquid to creamy frozen dessert.
Why shallow over deep? A shallower container freezes faster and more evenly. The mixture at the edges freezes first, which is why you scrape those frozen edges toward the center — they’re naturally churned into the still-liquid middle during this process. Use a sturdy whisk or a fork to break up chunks as you stir. You’ll notice the mixture gets thicker and grainier each time you stir it, gradually developing the texture of soft-serve, then scoopable ice cream.
This method works because the repeated stirring interrupts crystal growth at a microscopic level. You’re essentially doing manually what a machine does automatically. The downside is commitment — you need to be home and available for those 30-minute intervals. The upside is zero equipment beyond a pan and whisk, and the results are genuinely excellent.
No-Churn Whipped Cream Method
Here’s the laziest legitimate ice cream technique: whipped cream ice cream. The method relies on already-whipped cream, which contains billions of tiny air bubbles. When you fold sweetened whipped cream together with a flavored condensed milk or custard base, you’re creating an airy mixture that freezes to an ice cream-like texture without any churning or stirring.
To make it, whip heavy cream to stiff peaks, fold in sweetened condensed milk (which acts as a sweetener and stabilizer thanks to its density and lower freezing point), add whatever flavoring you want, and pour the mixture into a loaf pan or shallow dish. Freeze for 4 to 6 hours without any stirring whatsoever. The texture is slightly lighter and more mousse-like than traditional ice cream, but it’s genuinely delicious and requires almost no effort.
The reason this works is that the air bubbles in whipped cream prevent ice crystals from growing large. The dense sweetened condensed milk also interferes with crystal formation. This method is especially good for making ice cream on a busy day when you won’t be home to stir, or if you’re making it for the first time and want to see results without any complexity. The trade-off is that the texture is less rich and dense than churn-based methods, though many people love it precisely because it’s lighter.
Hand-Cranked and Hand-Stirred Techniques
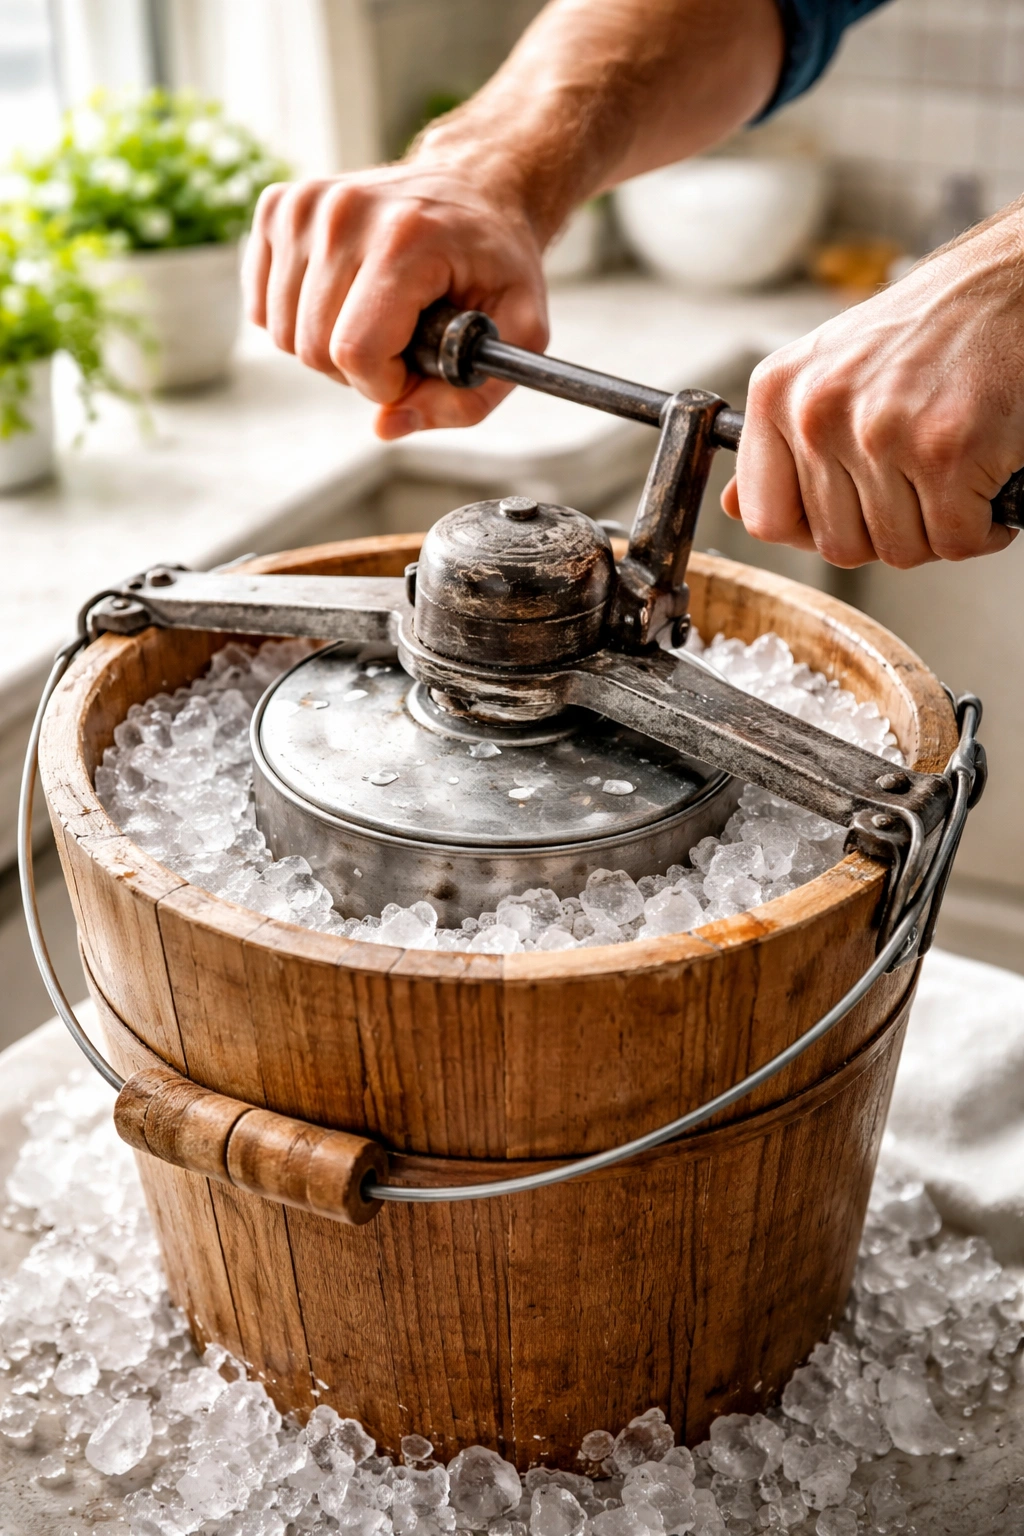
The hand-crank method connects to old-fashioned ice cream freezers that produce remarkable texture. If you have access to a hand-crank bucket (the kind with a metal insert and a crank handle), you’ve got a non-electric ice cream maker that produces professional results. You pour your chilled custard into the metal insert, pack ice and salt around it, and crank the handle steadily for 10 to 15 minutes while the mixture gradually thickens.
Without a hand-crank freezer, you can still achieve similar results through vigorous hand-stirring. The key is starting with a very cold custard (ideally chilled for 8+ hours) and a very cold pan. Place your mixing bowl in the freezer for 15 minutes before you begin. Pour the cold custard in, then stir constantly with a whisk, making sure to scrape the frozen edges into the center, for about 5 to 10 minutes. You’ll feel the mixture thickening against the whisk. Rest it in the freezer for 15 minutes, then repeat this vigorous stirring session 3 to 4 times.
This approach creates excellent texture because the constant, forceful stirring breaks up ice crystals more aggressively than leisurely 30-minute-interval stirring does. It’s more physically demanding on your arm, but the entire process can happen in under 90 minutes instead of stretching to 3 hours. People who’ve used this method swear it produces the densest, creamiest results of any non-machine technique.
The Salt and Ice Method (Classic and Effective)
The salt-and-ice method is genuinely magical and connects directly to how ice cream freezers work. The principle is that salt lowers the freezing point of water, causing ice to melt. As ice melts, it absorbs heat energy from its surroundings (your ice cream mixture), dropping the temperature well below 32°F (0°C) and freezing the custard much faster than a regular freezer could.
To set this up, you need a metal bowl or ziplock bag containing your chilled custard, nested inside a larger bowl filled with ice and rock salt (or table salt if rock salt isn’t available). Use about 1 part salt to 4 parts ice by volume — the salt doesn’t need to dissolve into the ice cream, it’s just doing its job in the ice bath below. Stir the custard every 3 to 4 minutes as it freezes. The freezing happens fast — often within 15 to 20 minutes you’ll have soft-serve consistency ice cream.
The magic here is speed and texture. Because the temperature drops so aggressively, the mixture freezes quickly, which limits crystal growth. You’ll notice a noticeable improvement in texture compared to standard freezer methods. This works especially well if you’re making ice cream for an event and need it ready quickly.
Fair warning: salt and ice can get very cold — cold enough to cause ice burns if you handle it with bare hands for extended periods. Wear gloves or wrap the metal bowl in a towel if you plan to do a lot of hand-stirring. Kids love cranking the handle on a hand-crank freezer with the salt-and-ice method, making it a fun kitchen activity. Teenagers and adults can absolutely handle the stirring themselves with minimal protection.
Classic Vanilla Ice Cream (Recipe)
This is the foundation recipe that teaches the still-freeze method with perfect reliability. Once you’ve mastered vanilla using this approach, you can apply the technique to any flavor. The custard base uses both egg yolks and whole eggs — the yolks contribute richness and help create a silky mouthfeel, while the whole egg adds structure and makes the mixture slightly less custard-like and more ice cream-like.
Yield: Makes about 1 quart (4 to 6 servings) Prep Time: 15 minutes (plus 8+ hours for chilling custard) Cook Time: 12 minutes for the custard base Total Time: 12 minutes active + 8 hours chilling + 2 to 3 hours freezing Difficulty: Beginner — the only potentially tricky step is tempering the eggs (bringing them up to temperature slowly), but the recipe walks you through it clearly, and the rest is straightforward.
For the Custard Base:
- 1 cup heavy cream
- 1 cup whole milk
- 1 vanilla bean, or 1 teaspoon pure vanilla extract
- 5 large egg yolks
- 1 large whole egg
- ¾ cup granulated sugar
- Tiny pinch of fine sea salt
Prepare the Custard Base:
-
If using a vanilla bean, split it lengthwise with the tip of a small knife and scrape the seeds out with the back of the knife blade — you’re looking for the tiny black specks inside, which are pure vanilla flavor. Add both the seeds and the empty pod to a saucepan with the cream and milk. If using vanilla extract, you’ll add it at the end of the recipe instead.
-
Heat the cream and milk (with vanilla bean if using) over medium heat until tiny bubbles form around the edges and steam begins to rise — do NOT let it boil. A cooking thermometer should read about 180°F (82°C). Remove from heat, cover the pan, and let it steep for 15 minutes. This infuses the cream with vanilla flavor if using the whole bean.
-
While the cream is steeping, prepare an ice bath: fill a large bowl with ice and cold water. Set aside.
-
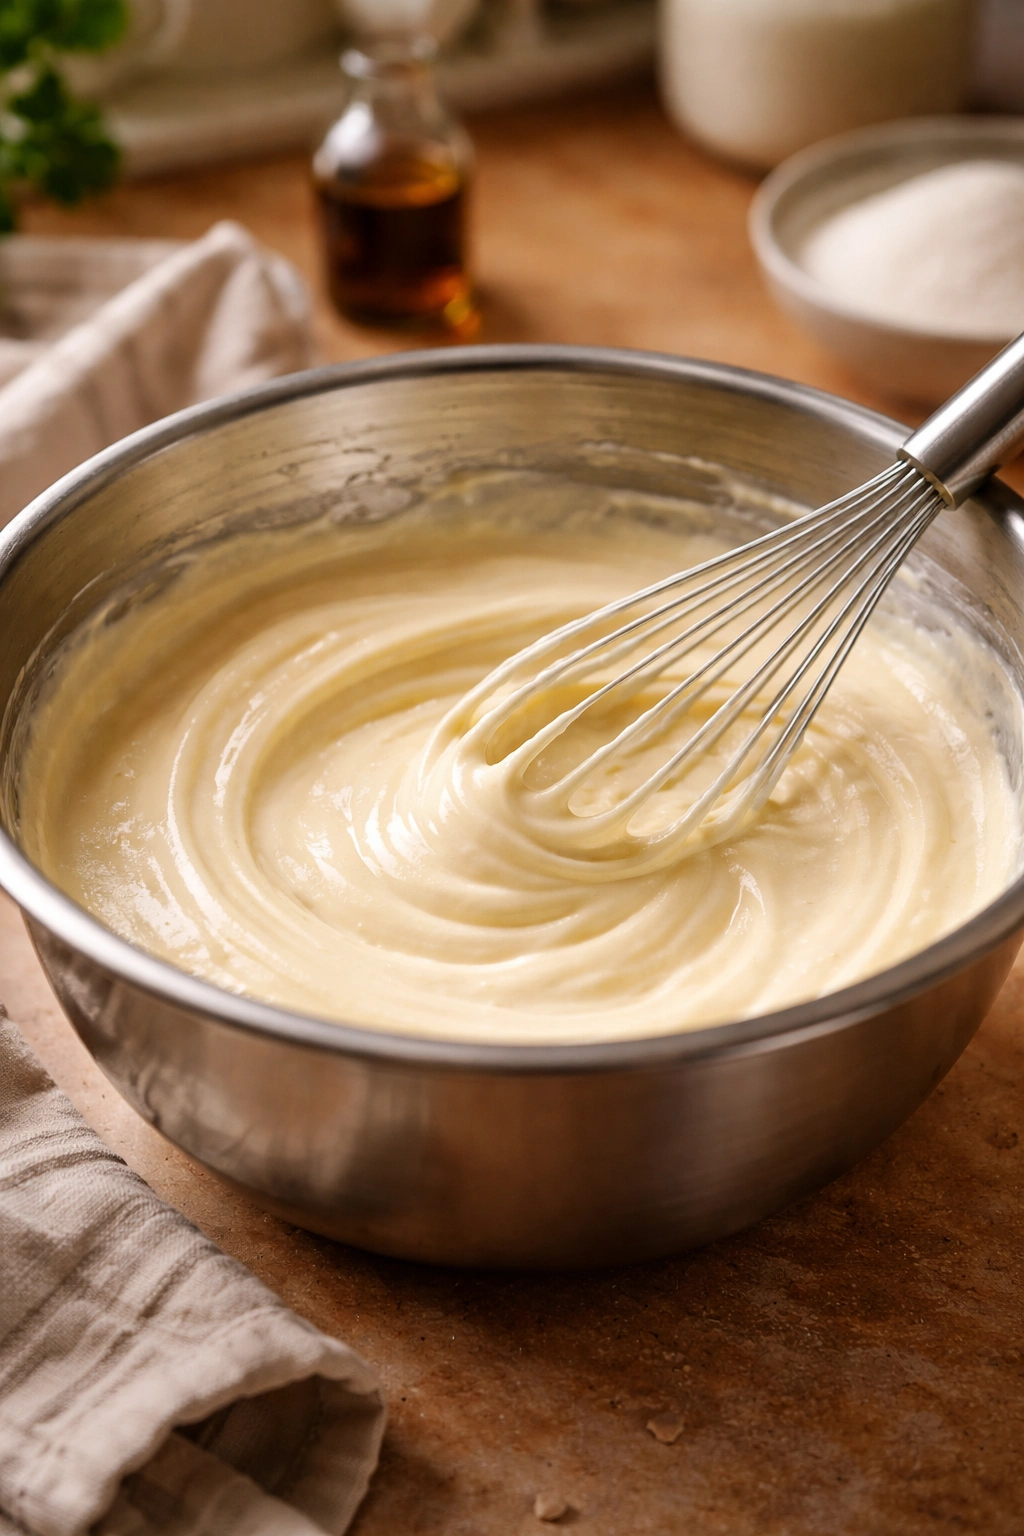
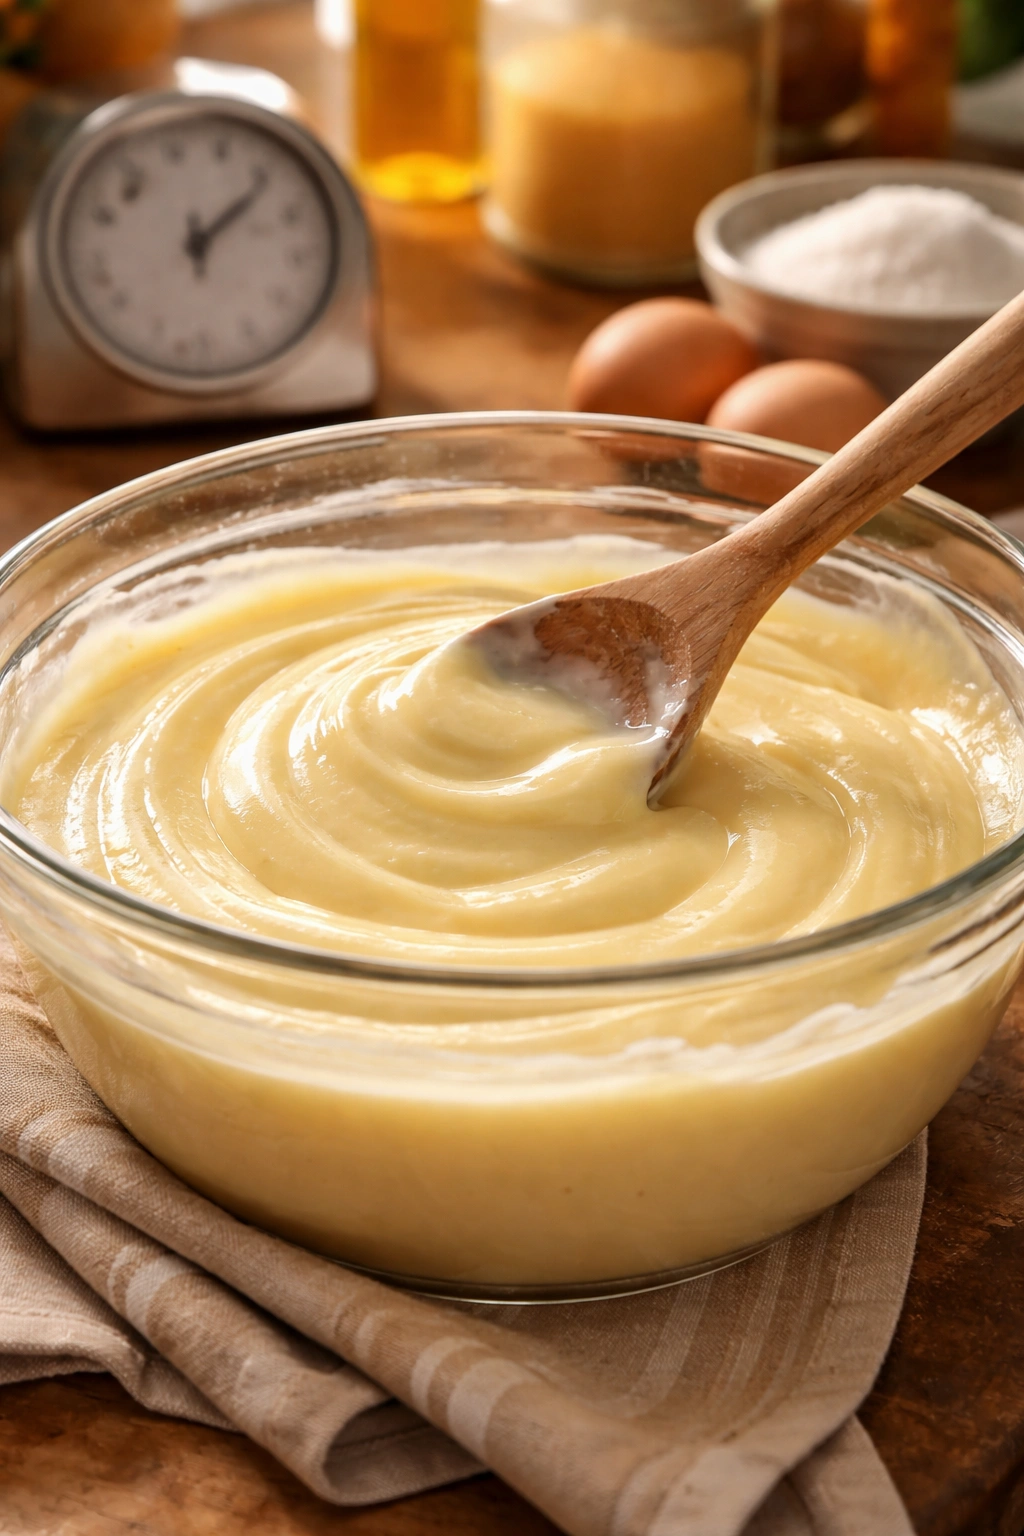
In a separate medium bowl, whisk together the 5 egg yolks, the whole egg, sugar, and salt. Whisk until the mixture is pale, slightly fluffy, and the sugar has mostly dissolved — about 2 minutes of vigorous whisking. Do not skip this step — whisking the eggs and sugar together creates a pale, aerated mixture that will give you the best texture. If you just try to mix cold eggs into hot cream, you risk ending up with sweetened scrambled eggs.
-
Remove the vanilla bean pod from the cream (if using). Slowly pour the hot cream into the egg mixture while whisking constantly. This is called tempering the eggs — you’re bringing them up to temperature gradually so they cook gently without scrambling. Pour the first third of the cream in slowly while whisking, then you can add the remaining cream a bit faster while still whisking steadily.
-
Pour the entire mixture back into the saucepan and set it over medium heat. Stir constantly with a wooden spoon or silicone spatula, moving all around the bottom and sides of the pan to prevent eggs from cooking on the hot surface. You’re looking for the mixture to reach 160°F (71°C) — at this temperature, any bacteria that might be present in the eggs will be killed, and the mixture will be thick enough to coat the back of a spoon. To test for doneness, dip the spoon into the custard, then drag your finger across the back — if the line you created stays put and doesn’t immediately run together, it’s done. If it closes back up, keep stirring.
-
The entire cooking process takes about 8 to 10 minutes from when you pour the cream into the eggs. The mixture will look slightly thicker and slightly more opaque, but it won’t be dramatically different — it’s easy to under-cook this step if you’re not watching the thermometer, so a thermometer is genuinely valuable here.
Advertisements -
Remove from heat. If you’re using vanilla extract instead of a whole bean, stir it in now. Pour the custard through a fine-mesh strainer into a clean bowl to catch any cooked egg bits (though you usually won’t have any if you tempered properly).
-
Set the bowl into the ice bath you prepared earlier. Stir the custard occasionally for about 5 to 10 minutes until it cools to room temperature. You’ll feel the difference immediately — the bowl stops being hot. Once cooled, cover the bowl and refrigerate for at least 8 hours or overnight. This resting period is important — cold custard freezes more evenly and produces better texture. If you skip this and try to freeze warm custard, the edges will over-freeze before the center has time to chill properly.
Freeze the Ice Cream:
-
Remove the custard from the refrigerator. Taste it now and adjust flavor if needed — add more vanilla extract if it tastes mild, or a pinch of salt if you want to enhance the vanilla flavor. Pour the custard into a shallow 9×9-inch baking dish or similar container and cover it tightly with plastic wrap or aluminum foil.
-
Place in the freezer. Set a timer for 30 minutes.
-
After 30 minutes, remove the dish from the freezer. Using a sturdy whisk or a fork, stir the mixture thoroughly, scraping the frozen edges (especially the corners where freezing happens fastest) into the center. You’re trying to break up any ice crystals that have started to form and distribute them evenly throughout the mixture. The mixture will look like partially frozen slush at this stage — that’s exactly right.
-
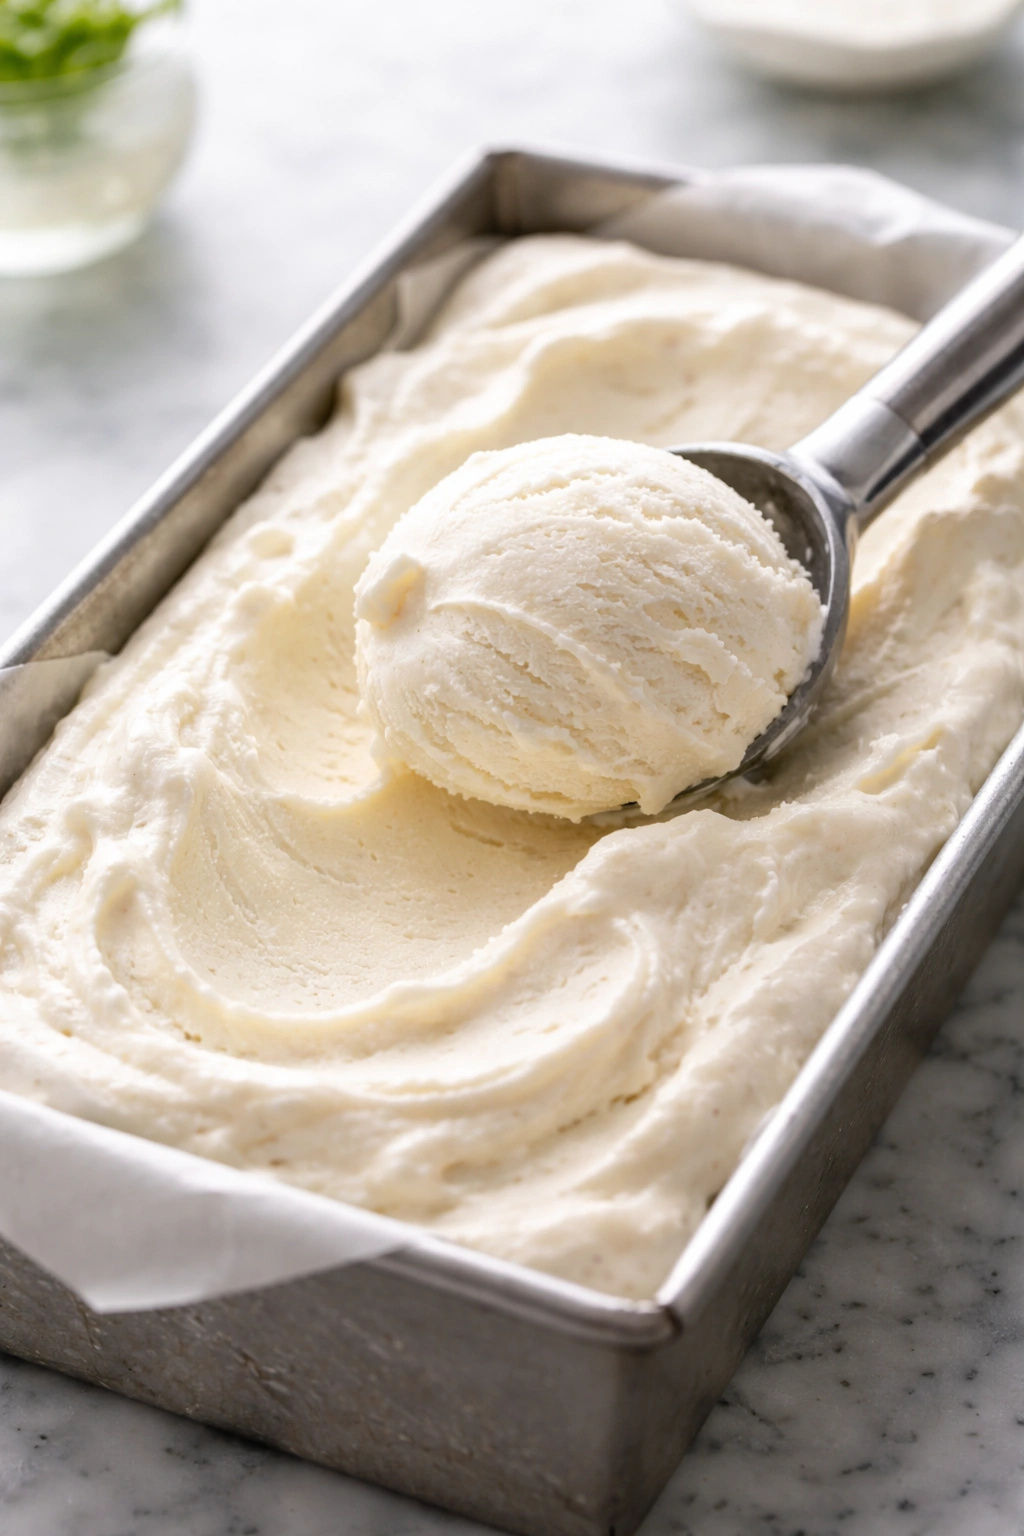
Cover again and return to the freezer. Repeat this 30-minute cycle for a total of 4 to 5 times — so about 2 to 2.5 hours of total freezing time. Each time you stir, you’ll notice the mixture getting thicker and less slushy, gradually developing the texture of soft-serve ice cream, then firmer scoopable ice cream.
-
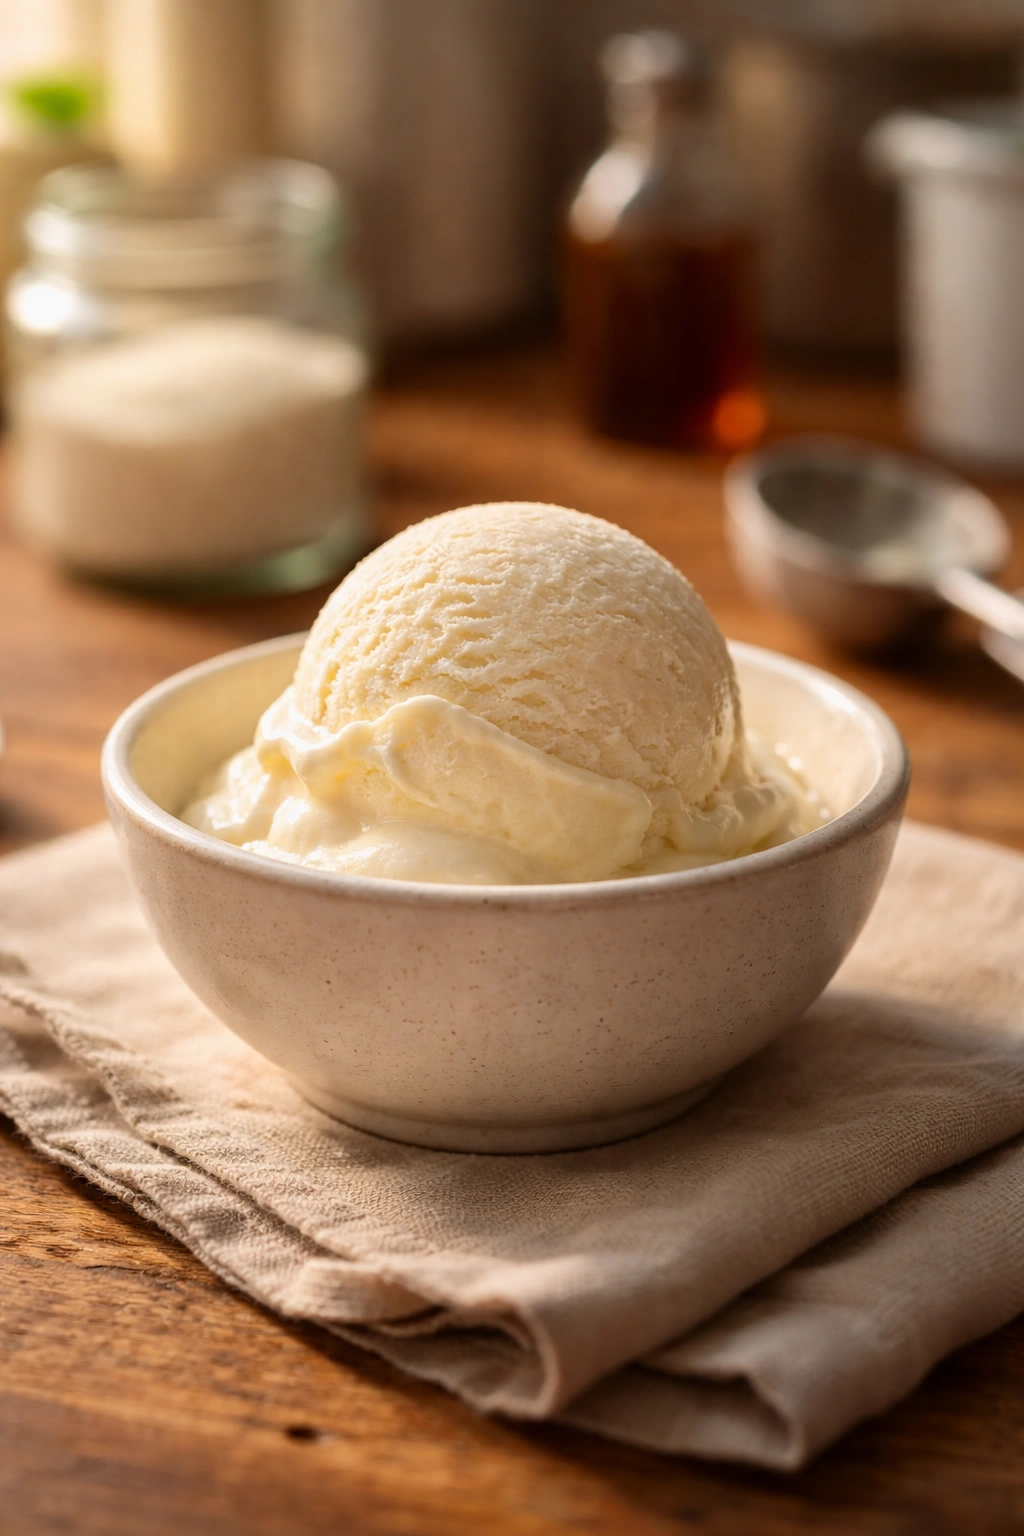
After the final stir (when the mixture is thick and relatively smooth), cover and return to the freezer for at least 1 more hour to firm up. At this point, you have soft-serve ice cream. If you want scoopable ice cream, let it freeze for 1 to 3 more hours until it’s firm enough to scoop.
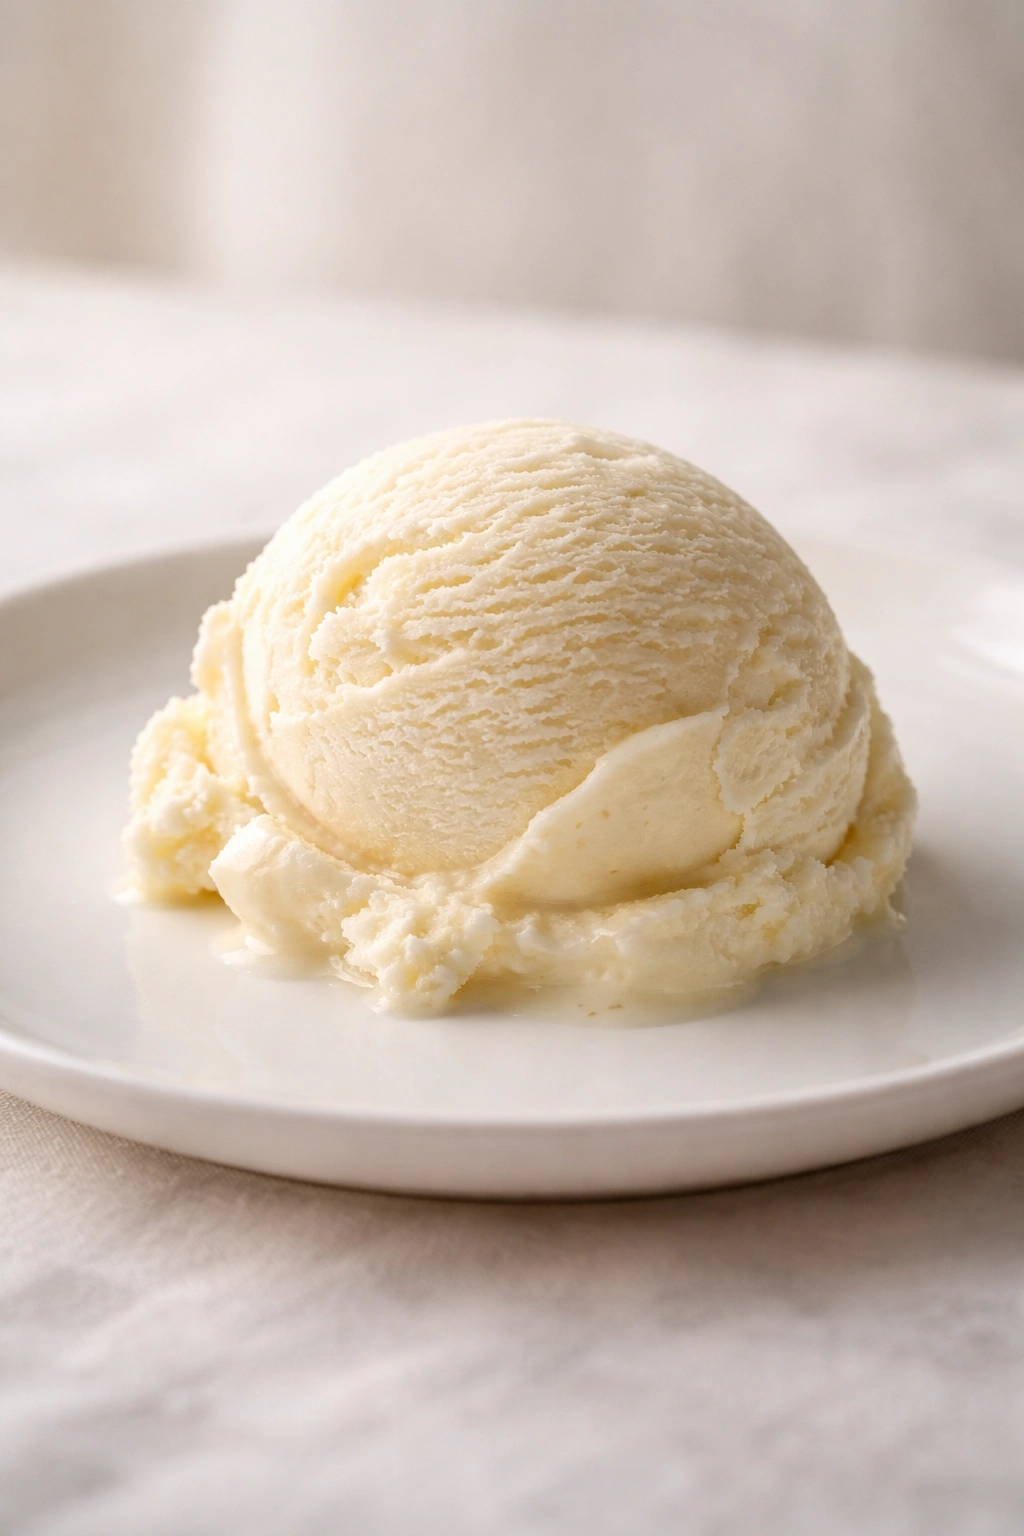
Best Served: Straight from the freezer into a pre-chilled bowl. The texture is best when scooped immediately from a freezer at 0°F (−18°C).
Practical Tips to Prevent Ice Crystals
The enemy of creamy ice cream is large ice crystals, and preventing them comes down to a few proven strategies. First, sugar. A higher sugar concentration lowers the freezing point of the mixture, so it doesn’t freeze quite as hard and stays creamy longer. The recipe above uses ¾ cup sugar per quart, which is standard — if you want even creamier texture, you can increase it to ¾ cup plus 2 tablespoons, but don’t go beyond 1 cup per quart or the ice cream becomes too soft and won’t scoop properly.
Second, fat matters. Cream and egg yolks contribute fat, which coats ice crystals and prevents them from bonding together into larger structures. Recipes that skimp on cream in favor of milk produce icy results. The recipe above is about 50% cream and 50% milk, which strikes a balance between richness and texture. If you’re adapting recipes and they call for mostly milk, don’t expect silky results.
Third, stabilizers help prevent crystal formation. Commercial ice cream uses things like guar gum and locust bean gum. You can achieve similar effects at home by adding 1 teaspoon of cornstarch or tapioca starch to the custard base (whisk it into the sugar before you temper the eggs). The starch particles act like tiny spacers between ice crystals, keeping them separated and small. Some bakers add a tablespoon of light corn syrup to the sugar, which also interferes with crystal growth.
Fourth, the temperature of your freezer matters. If your freezer runs warm (above 0°F / −18°C), ice cream won’t set properly and will become icy. A thermometer (the inexpensive stick-on kind works fine) tells you what temperature you’re actually working with. Ideally, your freezer should sit between −4°F and 0°F (−20°C to −18°C).
Finally, the hand-stirring schedule is crucial. Don’t stretch the intervals between stirrings beyond 30 minutes, especially in the first hour of freezing when the mixture is still mostly liquid. Once it’s firm, you can let it sit longer without stirring.
Simple Additions and Mix-Ins
The beauty of homemade ice cream is customizing it exactly how you want. The simplest additions are flavoring extracts or liqueurs stirred into the custard before chilling — think almond extract, peppermint extract, bourbon, or brandy. Use about ½ teaspoon of extract or 2 tablespoons of liqueur per quart.
Fruit puree is another easy addition. Blend fresh berries, stone fruit, or tropical fruit into a smooth puree and strain it to remove seeds if desired. Add 1 to 1.5 cups of puree to the custard (reducing the milk by an equal amount to keep the texture right). Fair warning: very acidic fruits like lemon and passion fruit can sometimes cause the custard to curdle when mixed, so taste the finished custard — if it seems separated or grainy, strain it before freezing.
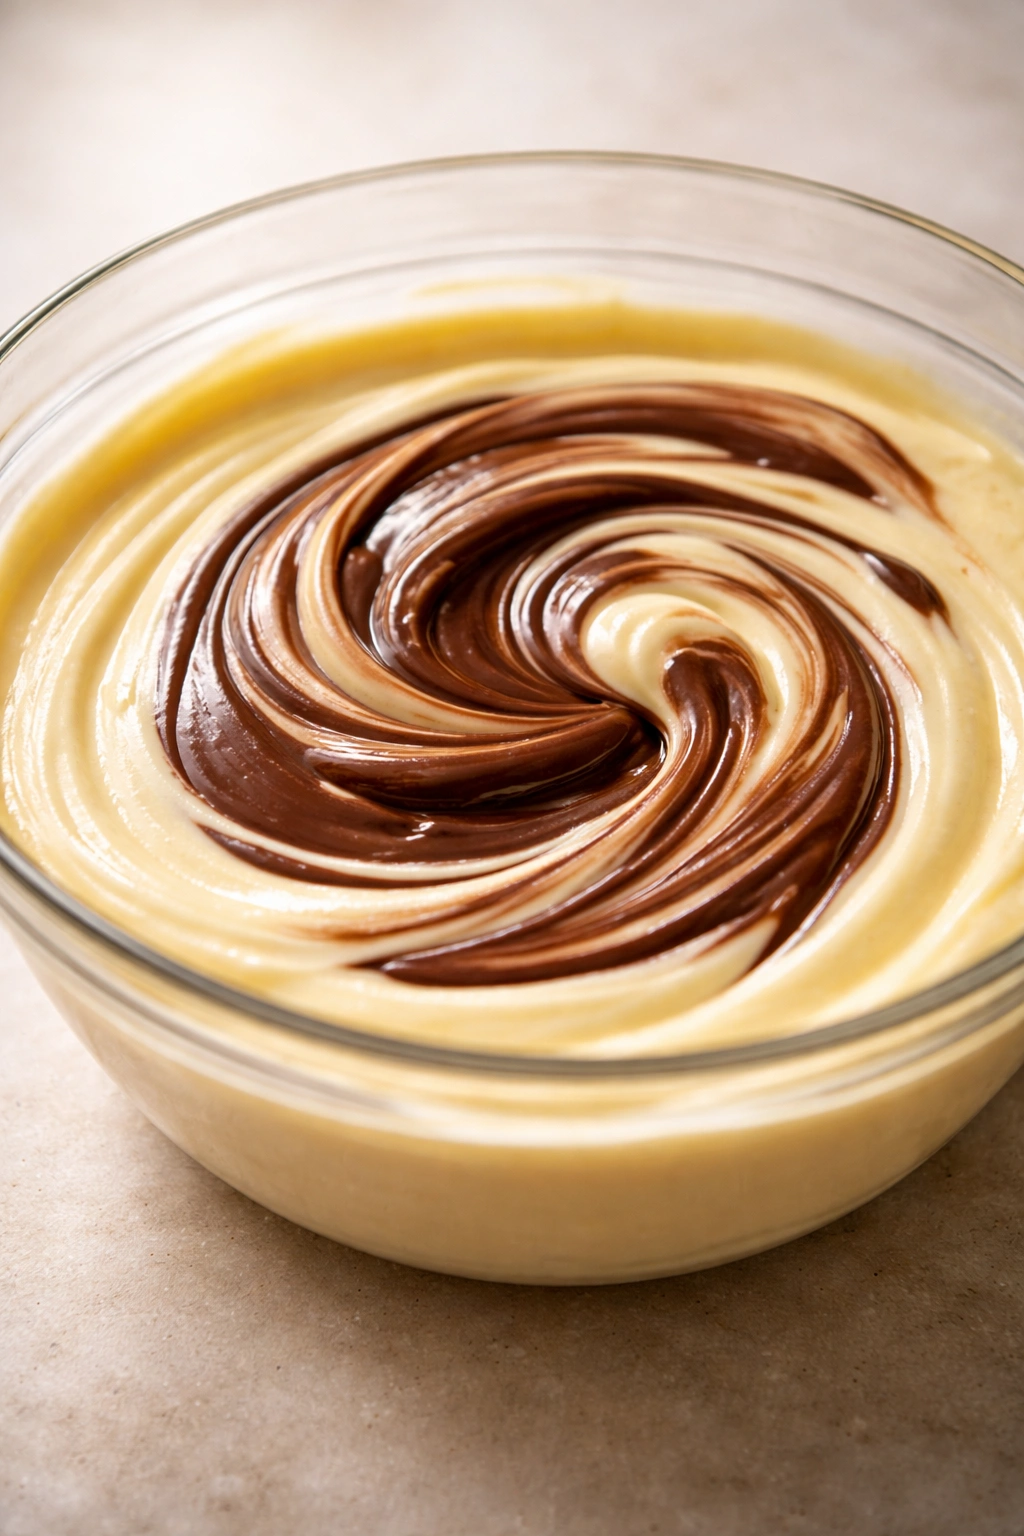
Chocolate can be added by melting quality chocolate and whisking it into the warm custard, or by adding chocolate syrup or cocoa powder. About 4 ounces of melted dark chocolate per quart of custard creates rich chocolate ice cream. If using cocoa powder, dissolve 3 to 4 tablespoons of unsweetened cocoa powder in a bit of the warm custard, then whisk the slurry back into the full batch.
Solid mix-ins like cookie pieces, nuts, or brownie chunks should be folded in after the ice cream reaches soft-serve consistency (after maybe 3 or 4 of your stirring sessions), not at the beginning. If you freeze them from the start, they tend to freeze too hard and become unpleasant to bite through. Fold them in gently to distribute evenly.
Flavor Variations Worth Trying
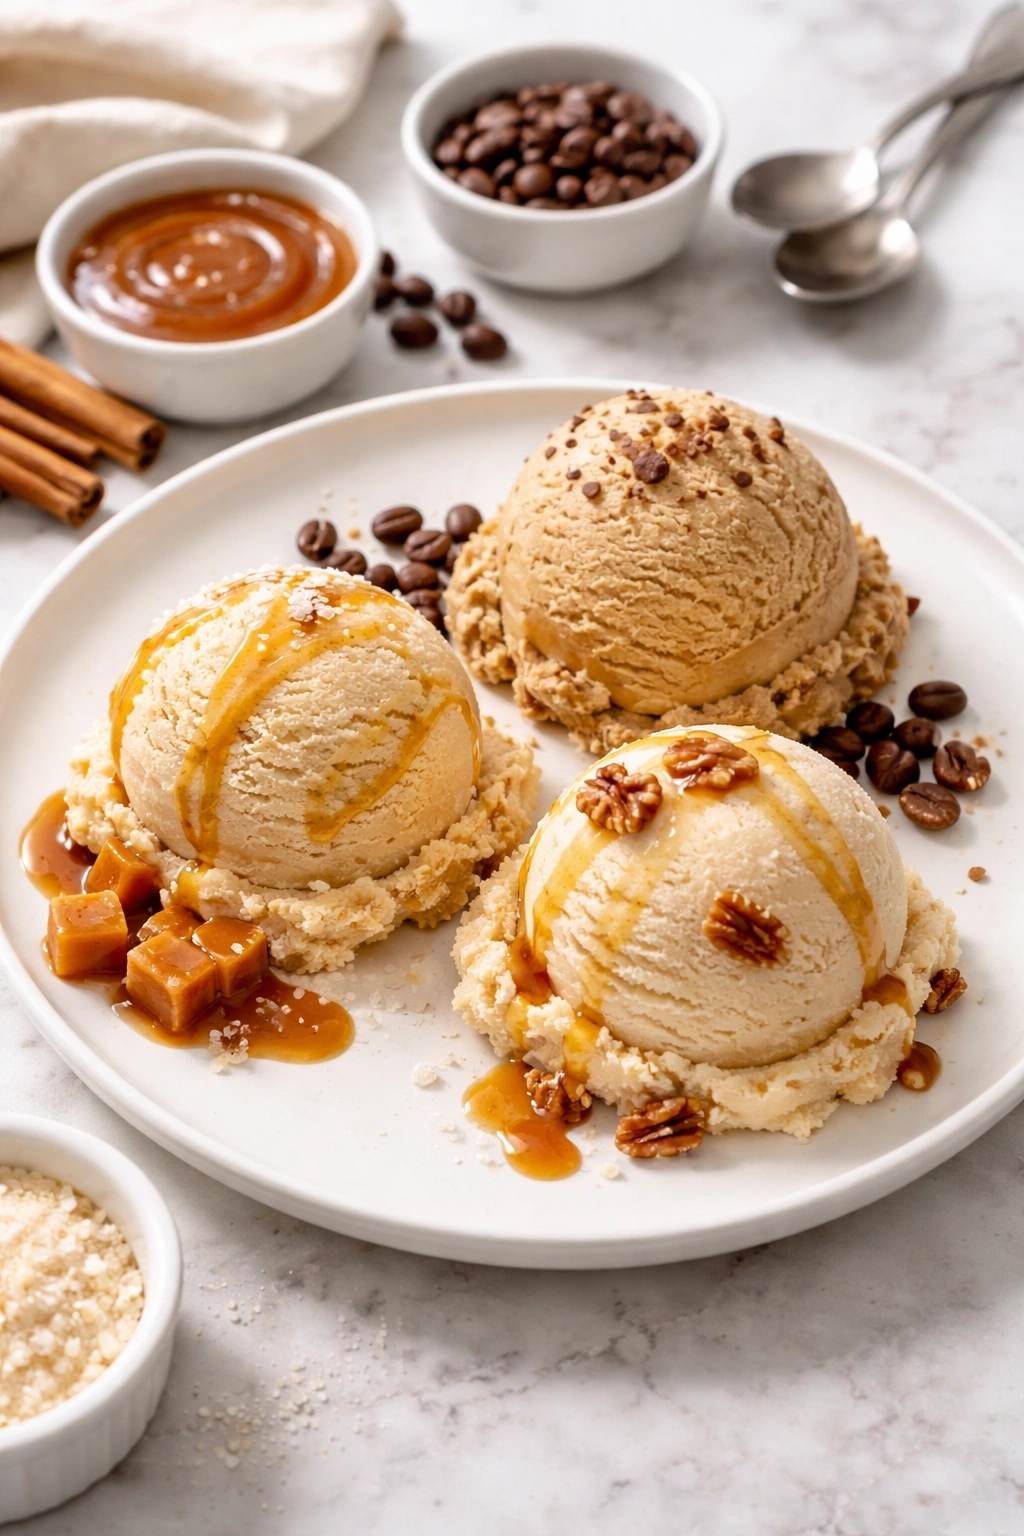
Once you’ve nailed vanilla, the world opens up. Salted caramel is a crowd-pleaser: make a simple caramel sauce by melting ¾ cup sugar in a saucepan over medium heat (watch it carefully, don’t stir, let it melt on its own), then carefully add ½ cup heavy cream and 3 tablespoons butter — it will bubble vigorously, so do this off heat and stir carefully. Add 1 teaspoon of fleur de sel or sea salt, cool the caramel, and fold it into the ice cream during freezing along with a pinch of extra salt stirred into the custard base.
Cinnamon and brown sugar creates a warm, comforting flavor: add 2 teaspoons of ground cinnamon and replace ¼ cup of the white sugar with packed brown sugar. The cinnamon should be stirred into the sugar before tempering the eggs.
Coffee ice cream comes together by brewing strong espresso or cold brew coffee and adding 2 to 3 tablespoons of it to the warm custard base. The coffee flavor is subtle but unmistakable. Some people add a pinch of espresso powder too, for extra depth.
Maple ice cream works beautifully: use ½ cup pure maple syrup and ¼ cup granulated sugar instead of ¾ cup sugar, and reduce the milk by 2 tablespoons since syrup adds liquid. This creates a genuine maple flavor, not a syrupy sweetness.
Brown butter elevates vanilla dramatically: brown ½ cup (1 stick) of butter in a saucepan until the milk solids turn deep golden and smell nutty (about 5 minutes), then strain it through a coffee filter to remove the solids, let it cool completely, and whisk it into the custard before chilling. The butter solids have toasted flavor that vanilla alone doesn’t have.
Storage, Scooping, and Serving
Homemade ice cream keeps in the freezer for about 2 weeks before it develops off-flavors or becomes overly icy. The lifespan is shorter than commercial ice cream because homemade versions usually lack the preservatives and stabilizers that keep commercial stuff fresh for months. To maximize freshness, press plastic wrap directly onto the surface of the ice cream before covering the container — this keeps freezer air from causing freezer burn.
Scooping is easiest if your ice cream spends 10 to 15 minutes on the counter before you try to scoop it. Even just setting it out while you’re getting ready to eat will soften the surface enough to make scooping easier. A warm scoop (run it under hot water and dry it) also helps. Pro tip: If you find yourself with rock-hard ice cream that won’t scoop, let it soften for 20 minutes at room temperature, or transfer it to the refrigerator for 10 to 15 minutes — the slight temperature increase makes all the difference.
Serving presentation benefits from pre-chilled bowls or cones. Cold vessels slow the melting of ice cream enough to extend your eating window by several minutes. A simple garnish transforms homemade ice cream from casual to special — a drizzle of salted caramel, a dusting of crushed cookies, fresh berries, or a sprig of fresh mint all add visual appeal.
Common Mistakes and How to Fix Them
The most common mistake is not chilling the custard long enough before freezing. If you’re impatient and freeze custard that’s been chilled for only an hour, the freezing process takes way longer and the texture suffers. The 8-hour resting period isn’t arbitrary — it gives your freezer adequate time to bring the custard’s internal temperature down evenly, which prevents icy edges and a slushy center.
Another mistake is skipping the tempering step with the eggs. If you try to pour hot cream directly into cold eggs without gradually bringing the eggs’ temperature up first, you end up with a grainy, broken custard that never becomes silky. It won’t ruin the ice cream entirely, but the texture will be noticeably less smooth.
Stretching the stirring intervals past 30 minutes creates larger ice crystals. People get busy and think they’ll stir in 45 minutes instead of 30, and the first half-hour of freezing is actually the most important for texture development. Stick to the schedule, especially for the first two rounds of stirring.
Over-freezing (leaving the finished ice cream in the freezer for more than a few hours beyond when it’s scoopable) turns even smooth homemade ice cream icy over time. If you know you won’t be eating it immediately, transfer it to the fridge 20 minutes before serving to warm it up just slightly.
Using a flavoring that’s too intense can overpower the custard. I once made ice cream with a tablespoon of peppermint extract instead of half a teaspoon and created something that tasted like frozen mouthwash. When in doubt, start with less — you can always add more, but you can’t remove it.
Final Thoughts
Making ice cream without a machine isn’t a workaround or a disappointing substitute. It’s a legitimate technique that produces genuinely excellent results, often with better control over ingredients and flavor than any commercial alternative. The time investment is minimal — we’re talking about 2 to 3 hours of freezer time with maybe 10 minutes of actual hands-on work (five 2-minute stirring sessions). That’s a bargain for homemade ice cream that tastes incomparably better than most store-bought options.
The real value of making ice cream at home, without fancy equipment, is the freedom. You can make it exactly when you want it, customize flavors to your exact preferences, control the quality of every ingredient, and avoid additives you don’t want. Once you’ve made vanilla once using the still-freeze method, you’ll have the confidence to experiment with any flavor combination you’re craving. The technique is transferable — master it with one flavor and you can apply it to strawberry, chocolate, salted caramel, brown butter, coffee, or anything else your imagination suggests.
Start simple. Make the vanilla custard, commit to the 30-minute stirring schedule, and taste what real homemade ice cream is supposed to be like. After that first batch, you’ll understand why people talk about making ice cream at home with such enthusiasm. You might never go back to the store-bought kind.