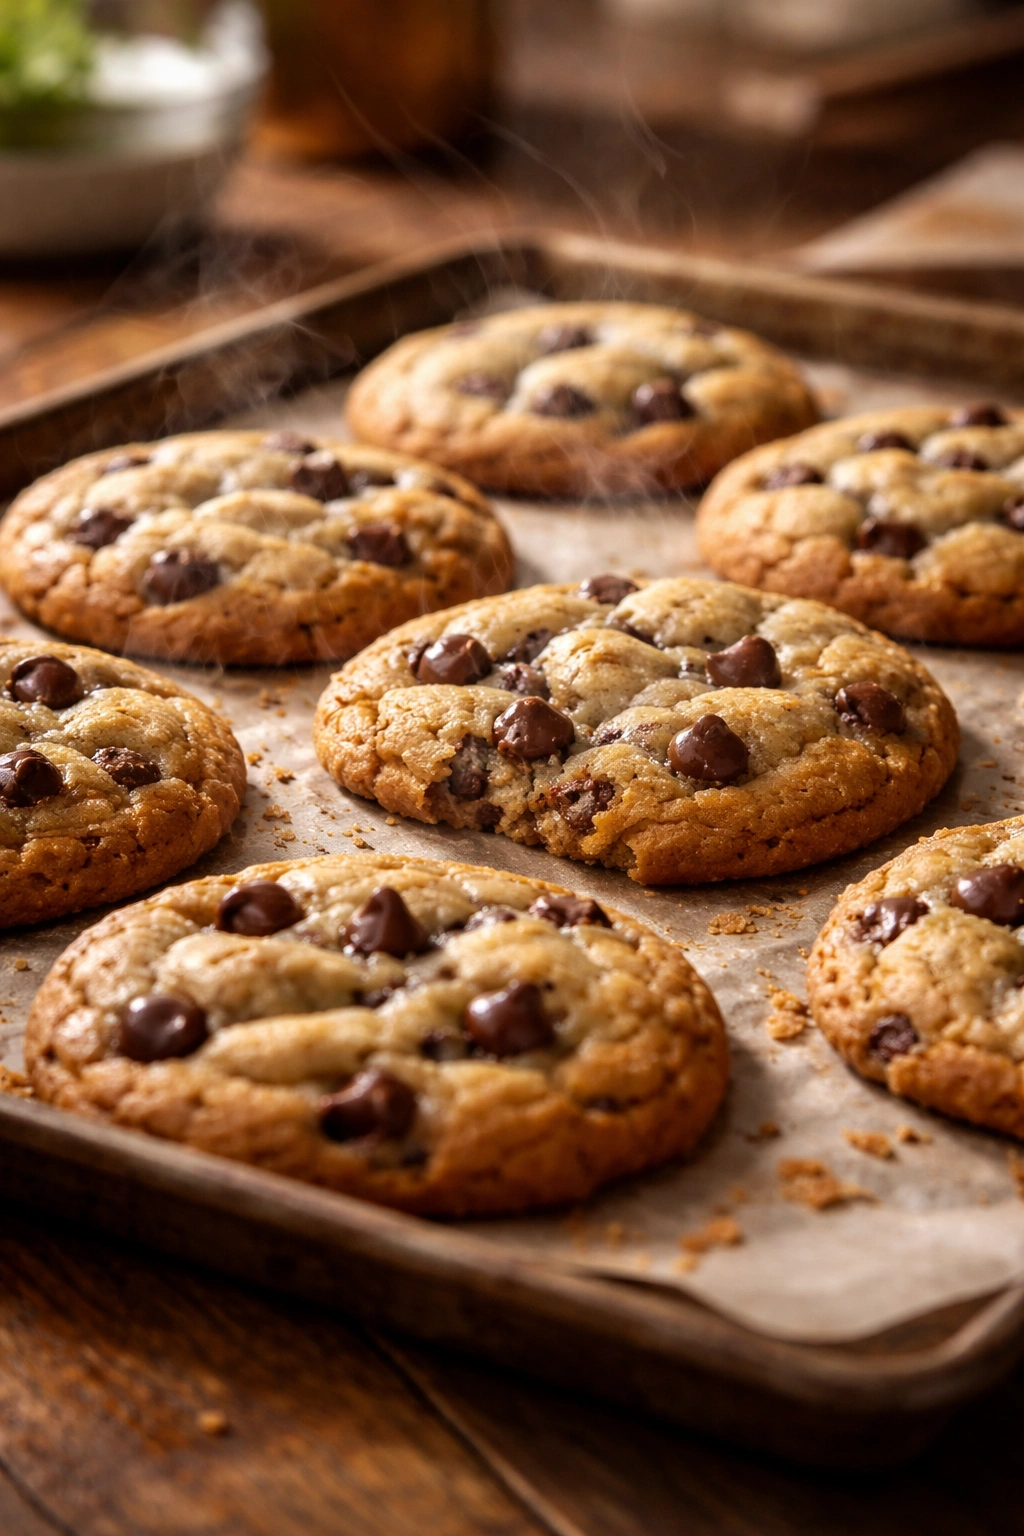
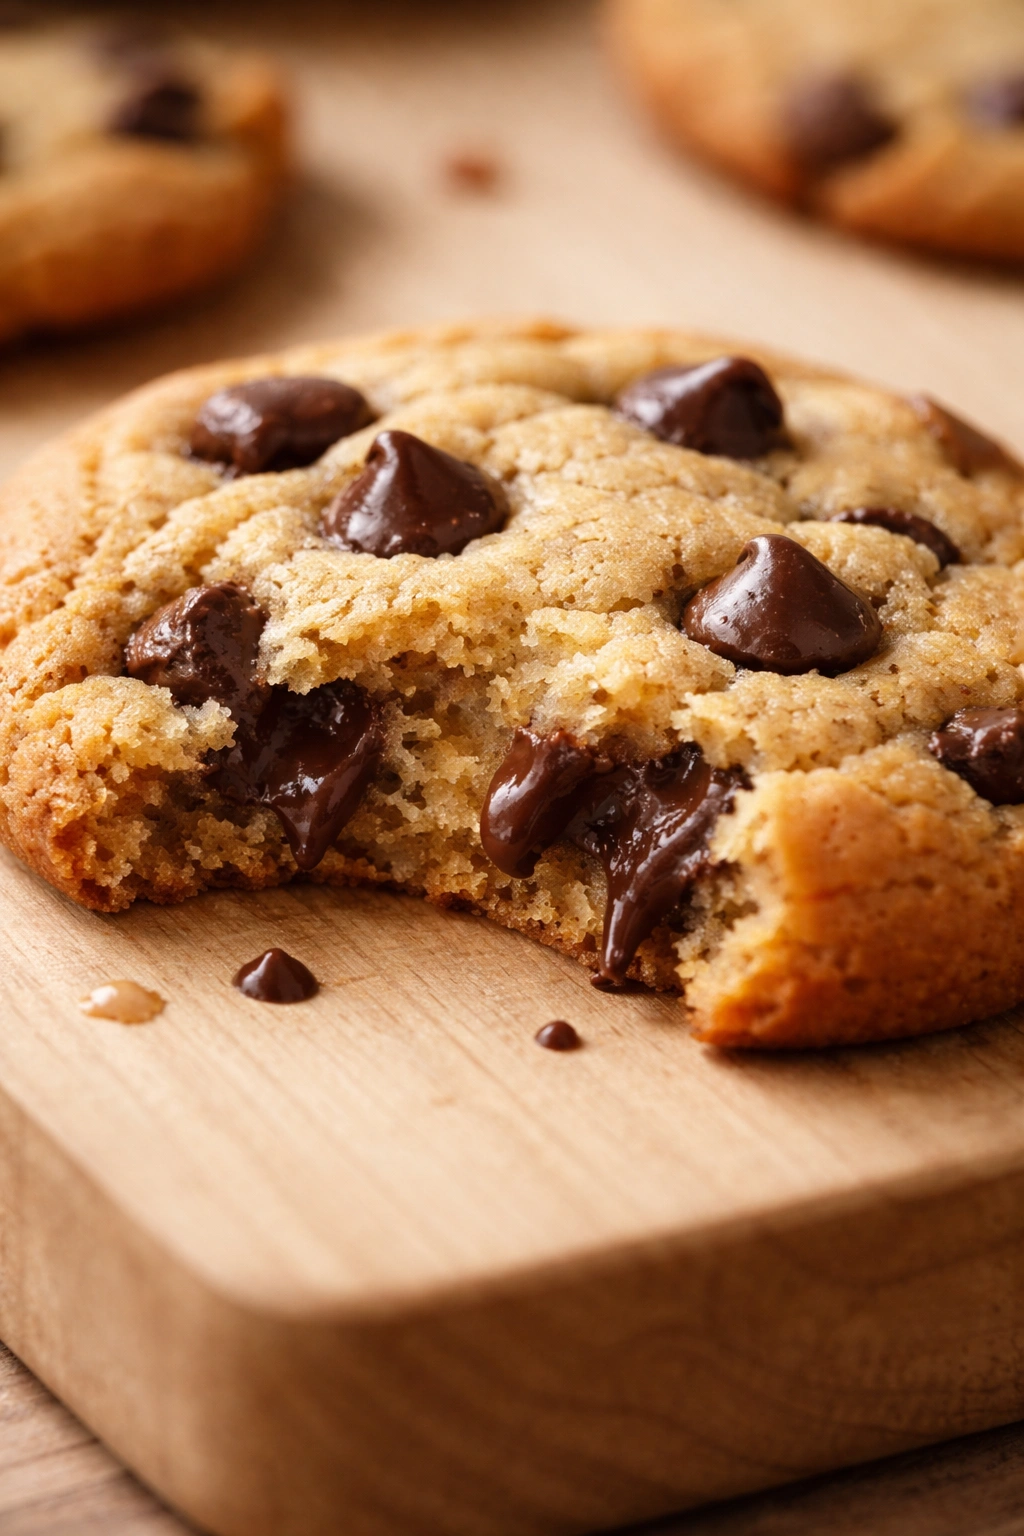
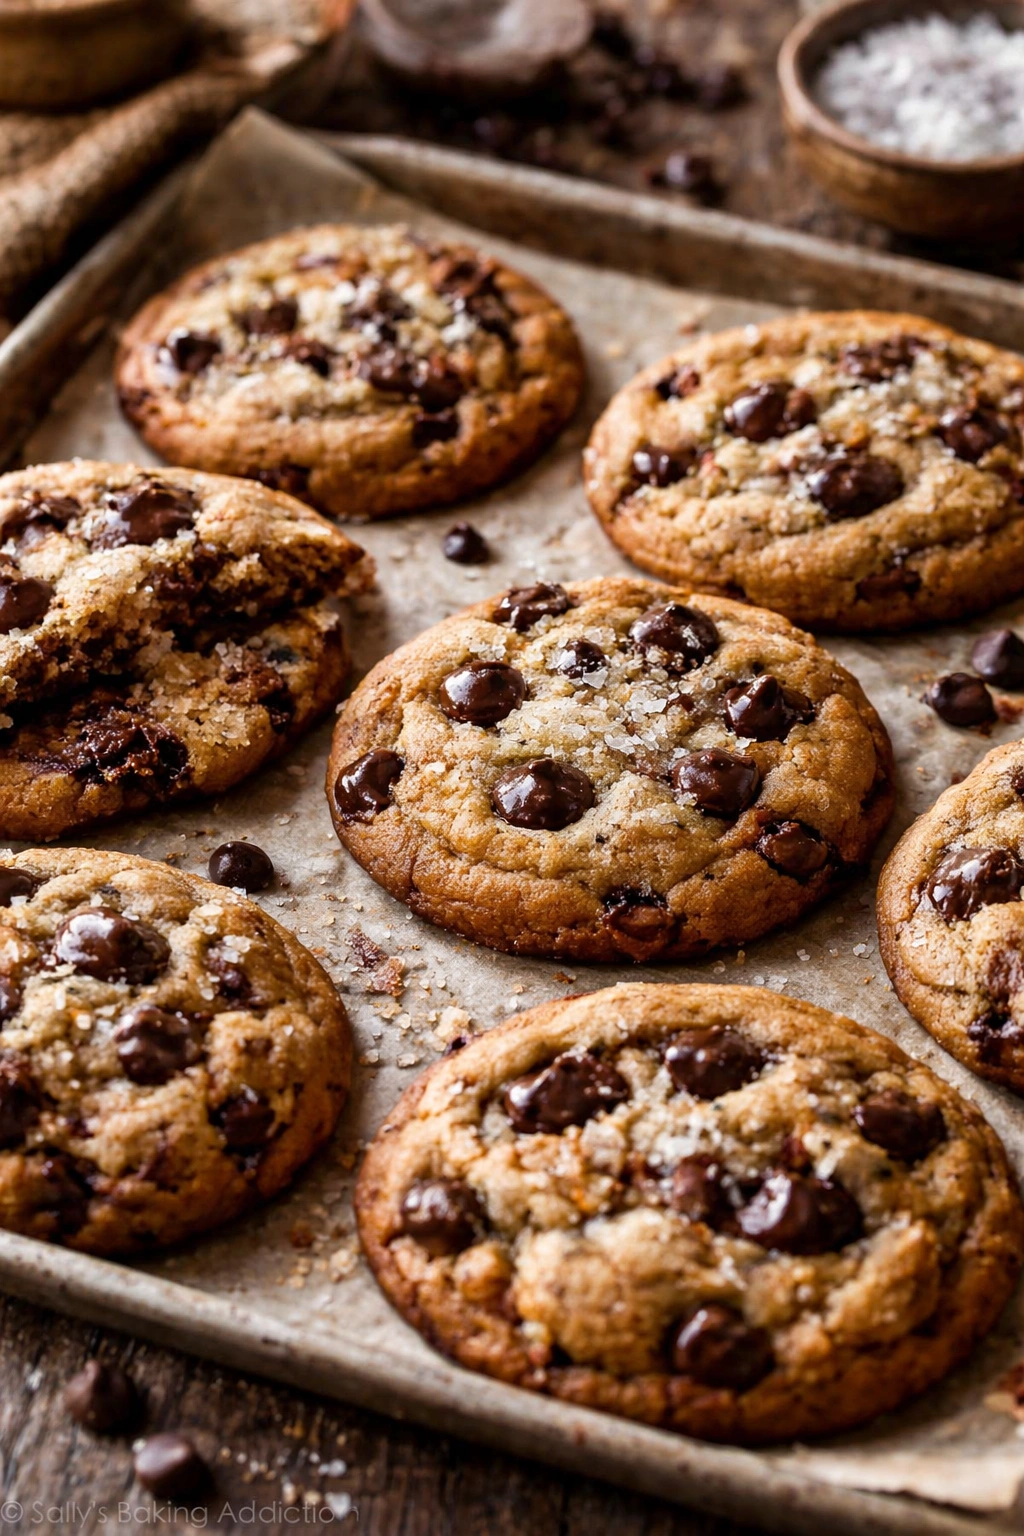
There’s a moment, usually around the three-minute mark after pulling a batch from the oven, when a soft chocolate chip cookie reaches absolute perfection. The edges have just set enough to hold their shape, but the center is still warm and slightly yielding under gentle pressure—that sweet spot between chewy and cake-like that separates a truly great cookie from all the rest. Most people assume this texture requires either bakery secrets or professional equipment. The truth is far simpler: understanding a few key techniques, respecting your oven’s personality, and knowing exactly when to pull the pan out makes all the difference.
What makes a chocolate chip cookie stay soft rather than turning hard and brittle during storage comes down to moisture, structure, and chemistry. Brown sugar contributes both hygroscopic properties (it naturally draws moisture from the air) and molasses, which adds a tender crumb. The ratio of butter to flour, the amount of flour itself, and the baking time all work together to create a cookie that holds onto softness for days. This isn’t difficult chemistry—it’s just intentional baking based on understanding how each ingredient and technique plays its role.
The cookies you’re about to make will rival anything from a specialty bakery. They’ll have crispy, caramelized edges that give way to a genuinely soft, chewy center loaded with melted chocolate chips. More importantly, they’ll stay that way for nearly a week when stored properly. You’ll find yourself reaching for one with your morning coffee, sneaking another after dinner, and wondering why you didn’t start making these at home years ago.
Why Homemade Cookies Beat Store-Bought Every Single Time
Store-bought cookies often contain preservatives specifically designed to extend shelf life—which actually works against the texture you want. These stabilizers and emulsifiers keep cookies from staling, but they also prevent that genuine, tender crumb from developing in the first place. Homemade cookies contain only the ingredients you choose, which means you control the ratio of soft to crispy, the depth of flavor, and the exact amount of chocolate in every bite.
Making cookies at home also lets you use genuinely good chocolate. A quality chocolate chip will melt at a lower temperature and contribute actual chocolate flavor, not just sweetness and cocoa solids. Room-temperature cookie dough also ferments slightly as it sits, which develops deeper vanilla and butter flavors that rushed commercial doughs never develop.
The emotional return on homemade baking is impossible to quantify. The smell of cookies baking fills your home. You can hand-deliver warm cookies to a neighbor. You can make a double batch without spending more than thirty minutes total. That tangible sense of having made something delicious yourself is worth the minimal effort alone.
What Makes Cookies Stay Soft, Not Hard
The enemy of soft cookies is over-baking. One minute too long in the oven can mean the difference between chewy and crispy. This is why understanding your specific oven matters—ovens vary by as much as 25 degrees from their displayed temperature, and some have uneven hot spots. Before you do anything else with this recipe, invest two dollars in an oven thermometer and place it on the shelf where your cookies will bake. This single step eliminates more cookie failures than any other technique.
Brown sugar is another crucial player. Unlike granulated sugar, which crystallizes and creates structure (making cookies spread more and bake crisper), brown sugar contains molasses that softens the final crumb. Using a combination of both gives you spread and chewiness. The ratio matters—in this recipe, brown sugar slightly outnumbers white sugar.
Under-mixing the dough is the third essential technique. Overmixed dough develops too much gluten, which creates tough cookies. You want to mix just until the flour disappears and the dough comes together. This isn’t about creating a perfectly homogeneous mixture; it’s about hydrating the flour without over-developing the structure. The dough should still look slightly shaggy before you stop mixing.
Yield: Makes 24 cookies
Prep Time: 20 minutes
Cook Time: 11 to 13 minutes per batch
Total Time: 1 hour (including chilling time and cooling between batches)
Difficulty: Beginner — No special equipment required. The steps are straightforward, and the dough comes together in minutes.
The Ingredient List That Changes Everything
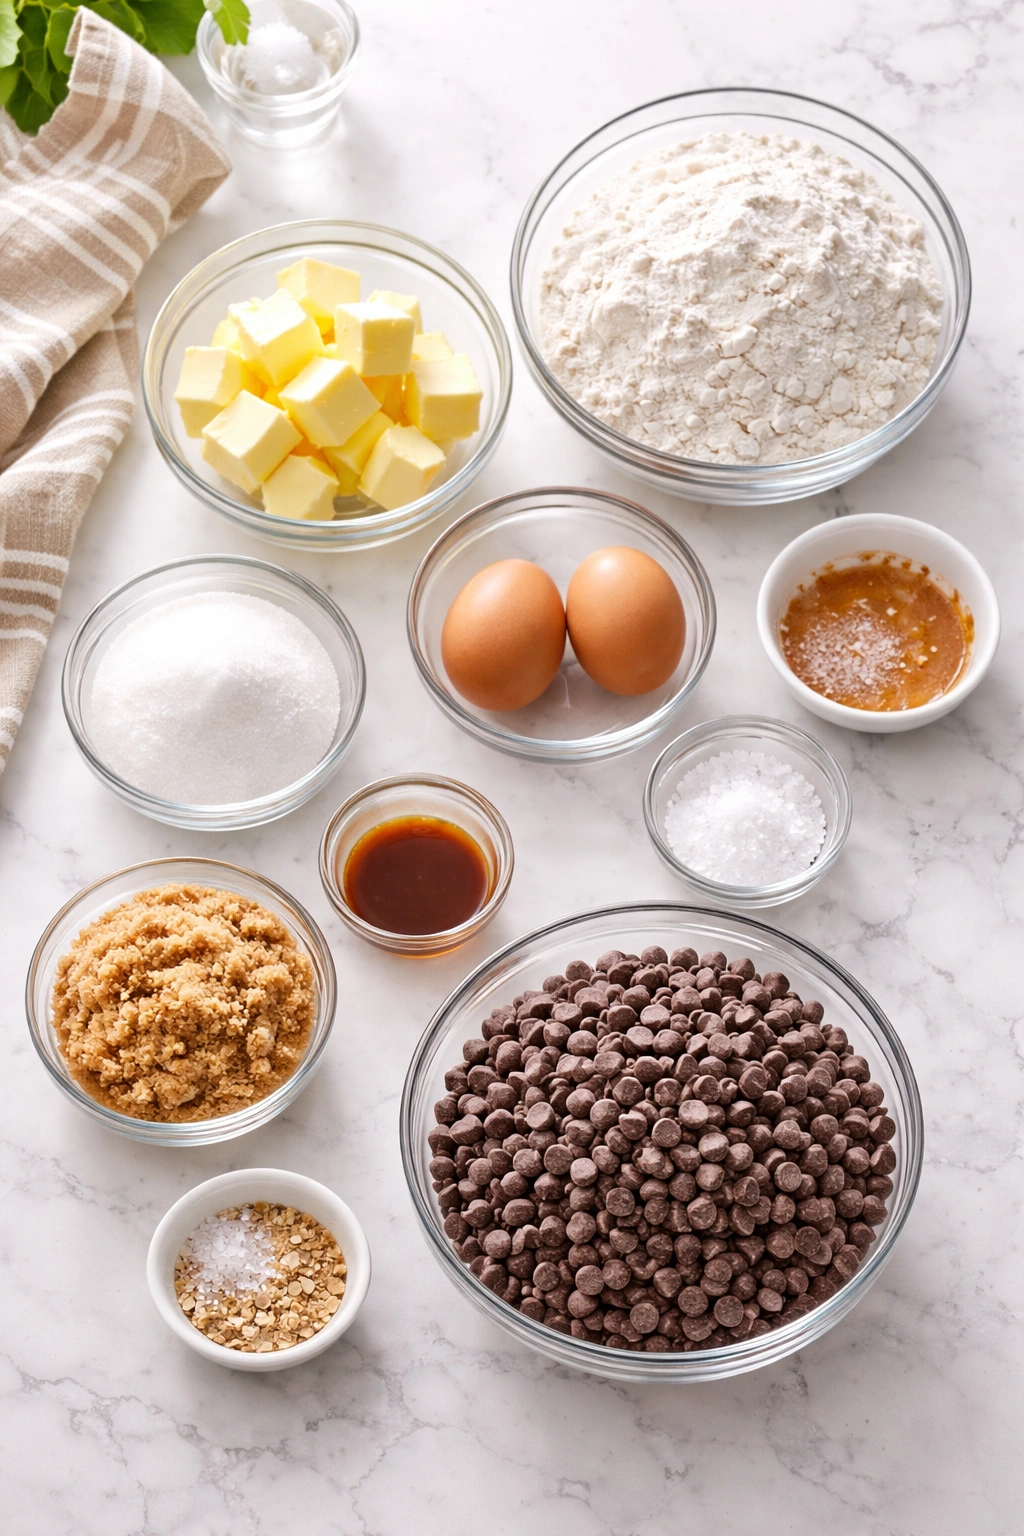
For the Cookie Dough:
- 2¼ cups (281 grams) all-purpose flour
- 1 teaspoon baking soda
- 1 teaspoon fine sea salt
- 1 cup (2 sticks / 226 grams) unsalted butter, softened to room temperature
- ¾ cup (150 grams) packed light brown sugar
- ¼ cup (50 grams) granulated white sugar
- 1 large egg, room temperature
- 1 teaspoon pure vanilla extract
- 2 cups (340 grams) semi-sweet chocolate chips (or a mix of semi-sweet and dark chocolate)
Optional Flavor Additions (choose one or omit for classic cookies):
- ½ teaspoon fine sea salt sprinkled on top of dough before baking (for salted chocolate chip cookies)
- ¼ teaspoon ground cinnamon mixed into the dry ingredients (adds subtle warmth without changing the chocolate flavor)
- 2 tablespoons of browned butter cooled to room temperature and substituted for 2 tablespoons of the regular butter (deepens the butter flavor significantly)
The Tools That Actually Matter
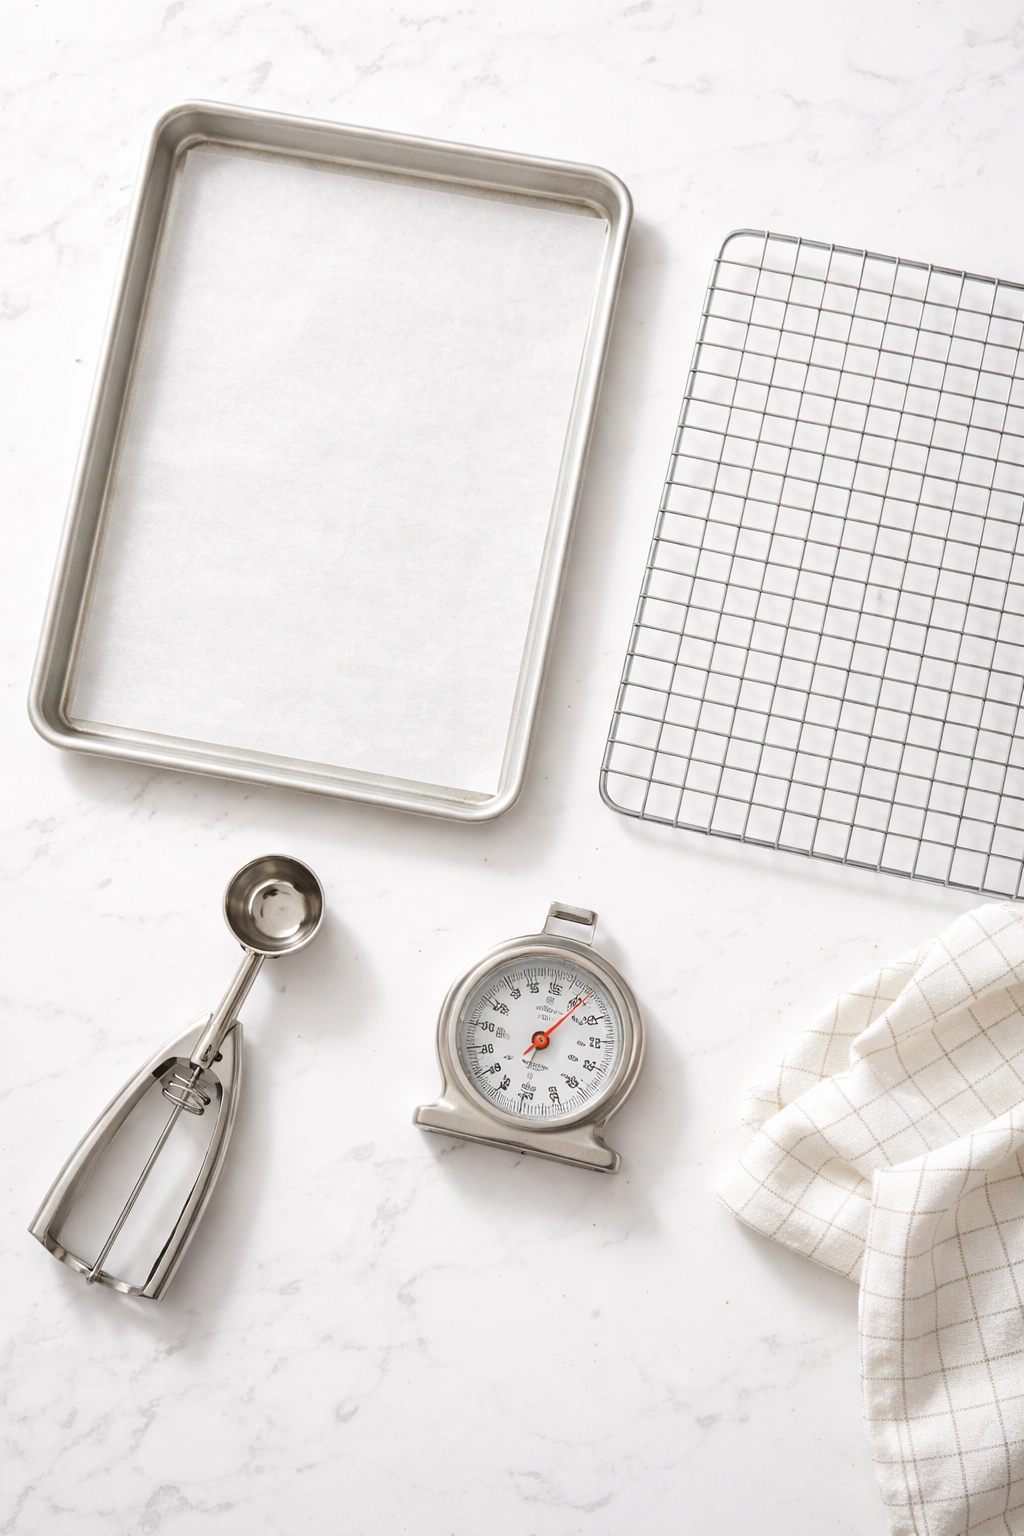
You don’t need specialty equipment for exceptional cookies, but certain tools genuinely make the process easier and more reliable. An oven thermometer is non-negotiable—it costs just a few dollars and eliminates guesswork about your oven’s actual temperature. A stand mixer or hand mixer speeds up creaming the butter and sugar, though a bowl and wooden spoon work perfectly fine if you’re willing to spend a couple of extra minutes.
A cookie scoop (a small spring-loaded scoop with a release lever) creates perfectly uniform cookies that bake at the same rate. This isn’t essential, but it removes the guesswork of how big to make each cookie. If you don’t have one, a tablespoon measure works—use slightly more than a standard tablespoon per cookie, roughly the size of a walnut.
A baking sheet (standard 13×18 inch) and parchment paper prevent sticking and allow heat to circulate evenly. You’ll also want a cooling rack so cookies can release moisture without steaming against a hot pan—this is crucial for maintaining that soft, chewy texture.
Prep Time Breakdown:
- Measuring and gathering ingredients: 5 minutes
- Mixing dough: 10 minutes
- Scooping and refrigerating: 5 minutes
Creaming Butter and Sugar: The Foundation of Everything
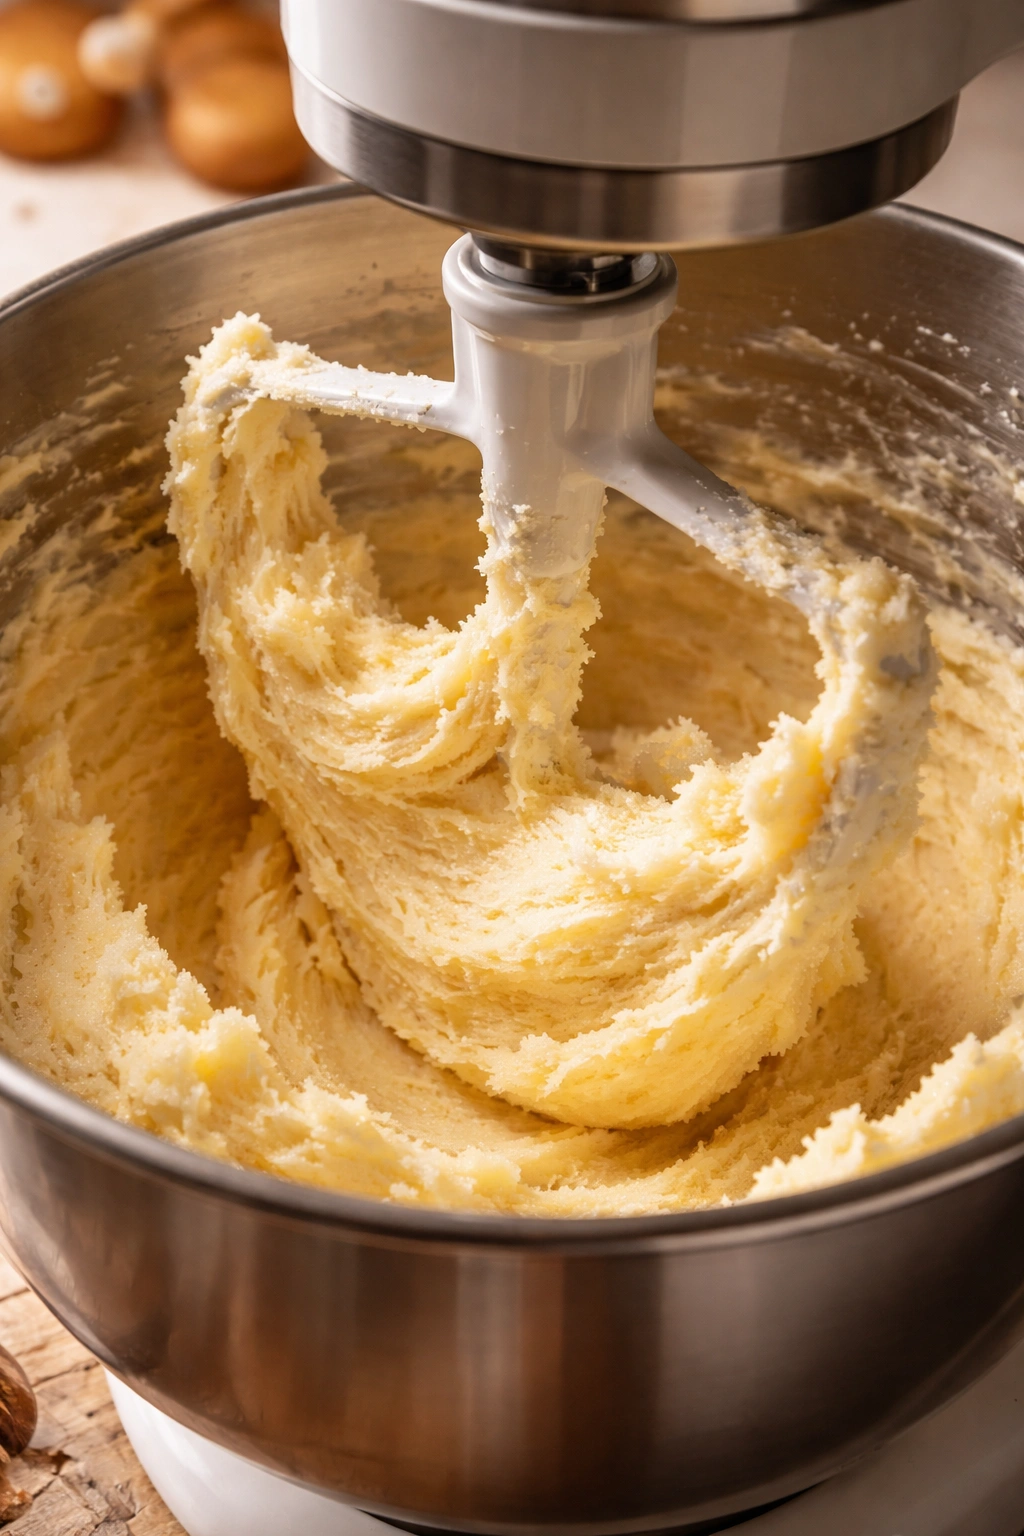
Creaming—beating softened butter with sugar until it’s pale and fluffy—is the single most important step for soft cookies. This process incorporates air into the butter, which helps the cookies rise during baking. If your butter is cold, your mixer will work harder and the mixture takes longer to cream. If it’s too warm (nearly melted), the cookies spread too much and won’t have the right texture.
Your butter should feel like clay—soft enough to leave a finger impression, but still holding its shape. Room temperature typically means taking it out of the refrigerator 30 to 60 minutes before you start baking, depending on your kitchen temperature. In a cool kitchen, it might take longer. In a warm kitchen, faster. When in doubt, test it with a finger.
Cream the butter and sugars together for 3 to 4 minutes. You’ll notice the mixture change from yellow to pale, nearly white. The volume will increase noticeably, and it should look grainy and light, like wet sand. This aeration is what gives soft cookies their tender crumb. If you stop too early, the cookies will be denser and tighter. If you somehow over-cream (which takes effort with a mixer), they can become slightly greasy, though this is rare.
Adding Eggs and Vanilla: Building Flavor and Structure
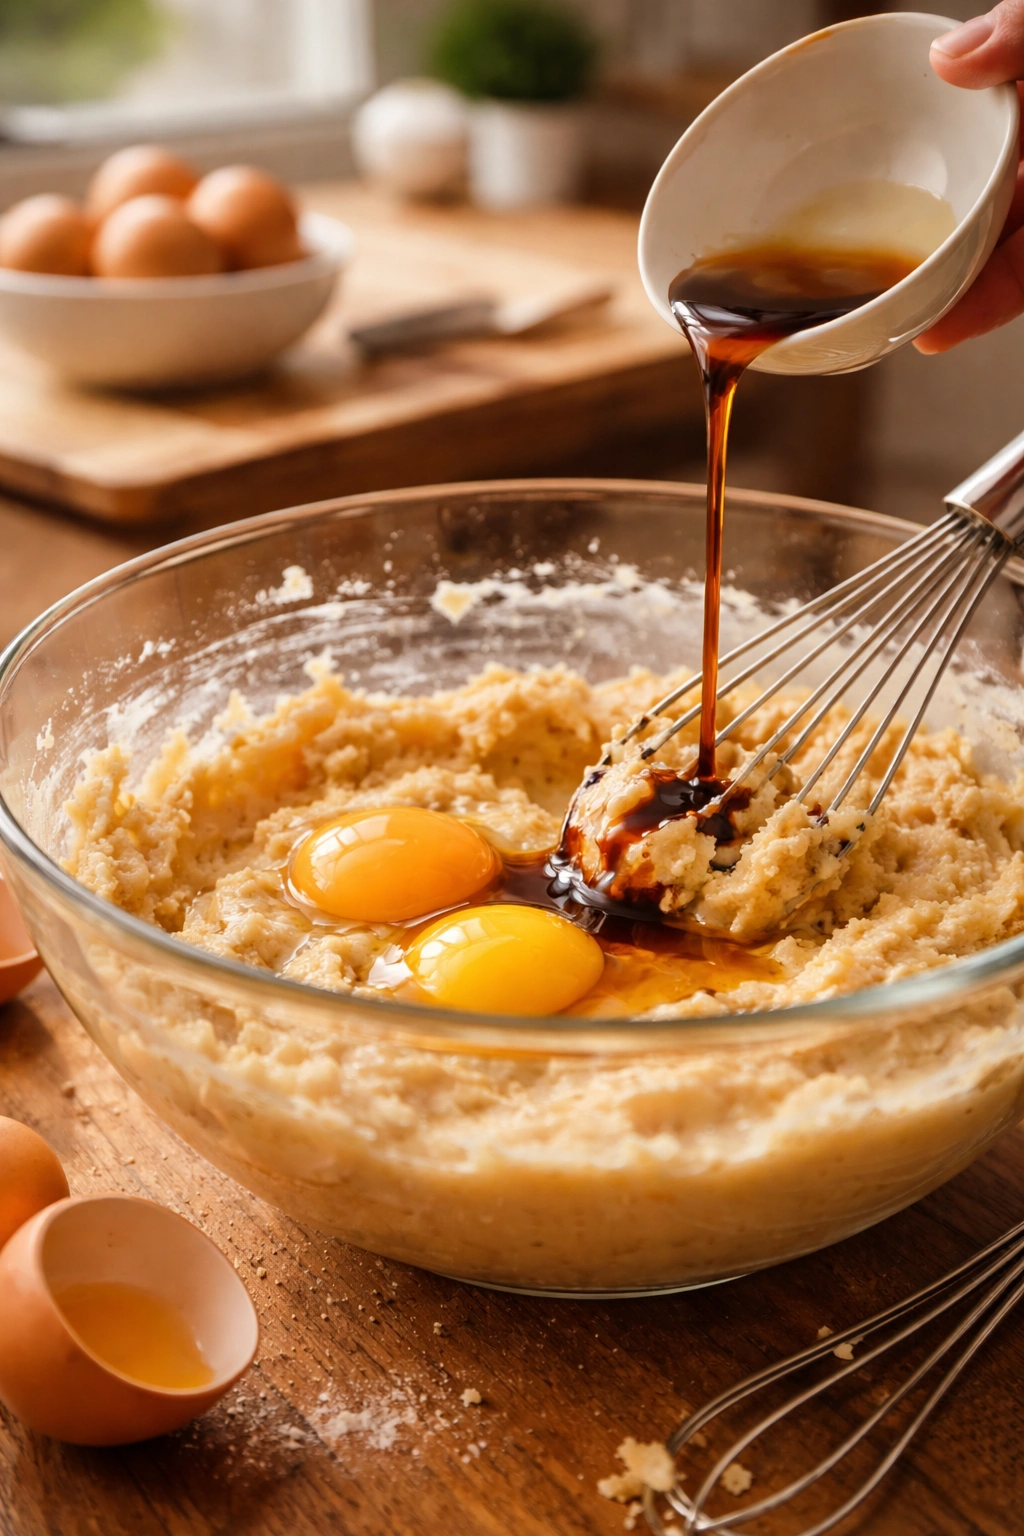
A single egg provides structure and richness without overwhelming the chocolate flavor. Room-temperature eggs mix in more smoothly and prevent the dough from becoming too cold, which is important for maintaining the right texture. Cold eggs can cause butter to re-solidify slightly, creating graininess in the dough.
Add the egg slowly and beat for about 30 seconds, scraping down the sides of the bowl. The mixture might look slightly curdled at this point—this is completely normal and will come together once you add the flour. Then add the vanilla extract and mix for another few seconds to combine.
Vanilla serves a crucial purpose beyond flavor. It acts as a flavor amplifier, making the butter and chocolate tastes feel more rounded and complex. Use pure vanilla extract, not imitation. The difference is subtle but real—real vanilla adds a complexity that imitation vanilla, which is primarily vanillin, simply cannot match.
Combining Dry Ingredients Without Overworking
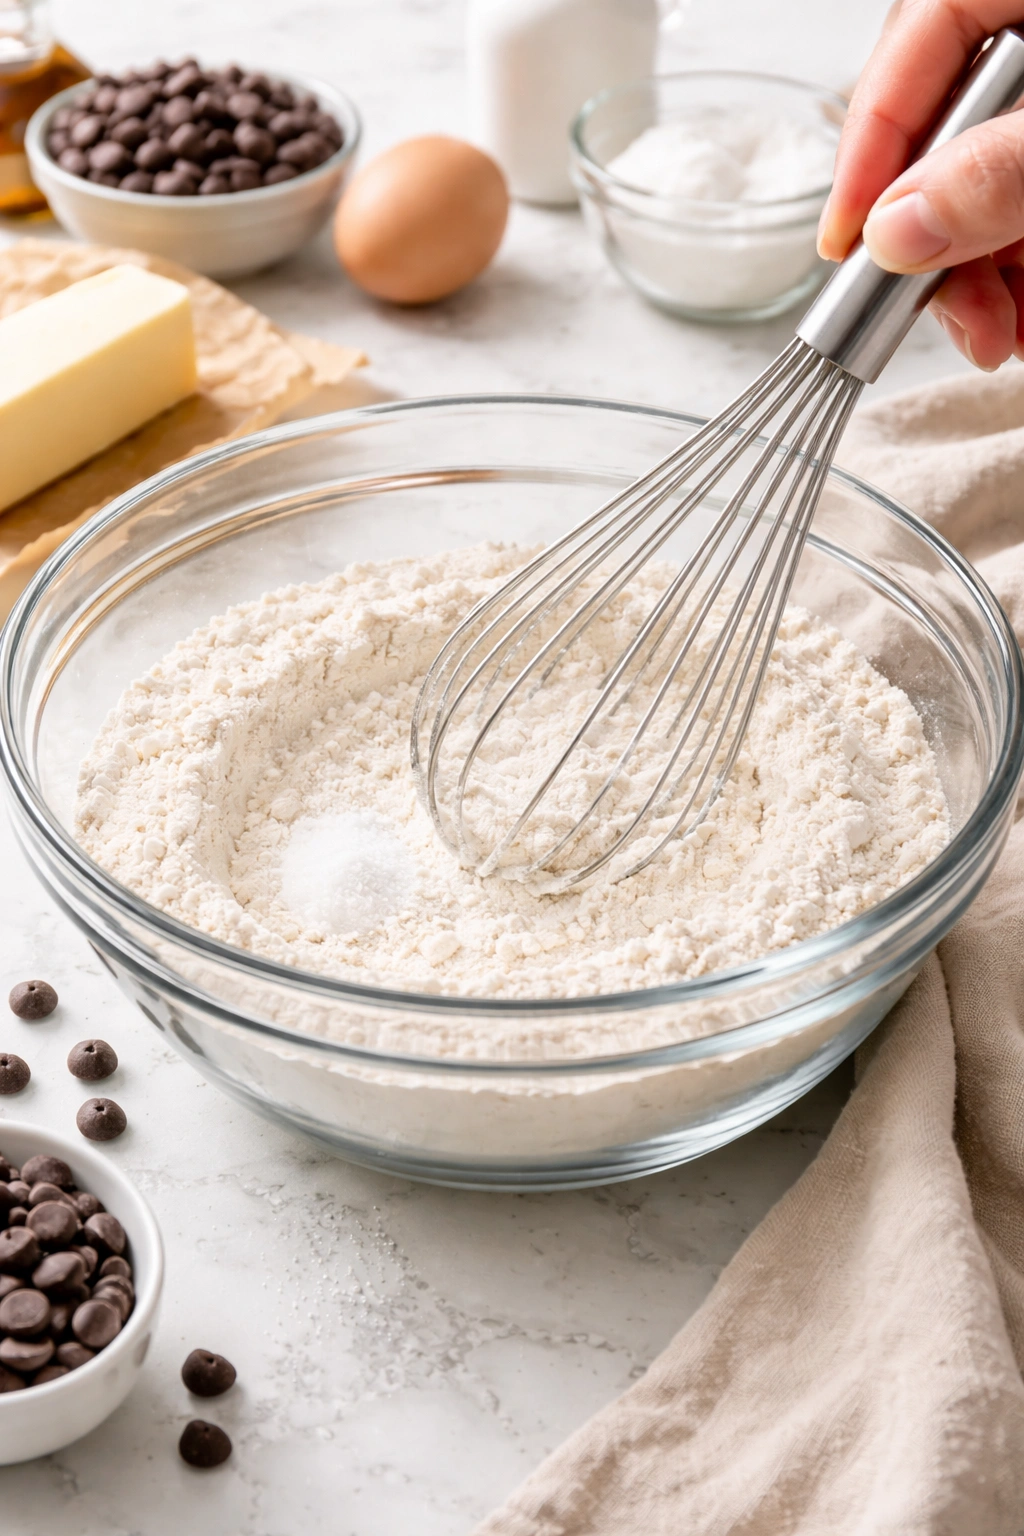
Whisking flour, baking soda, and salt together in a separate bowl accomplishes two things: it distributes the leavening evenly throughout the flour, and it breaks up any lumps that might create tough spots in the baked cookie. This takes one minute and prevents uneven rising.
Add the dry mixture to the wet ingredients in two additions, mixing on low speed until each addition just disappears. This is the point where patience matters. A few flour streaks remaining is better than over-mixed dough. Over-mixing develops gluten, which is excellent for bread but terrible for cookies—it creates tough, chewy cookies rather than tender, chewy ones.
Once the flour is almost incorporated, stop the mixer immediately and fold in the chocolate chips by hand using a rubber spatula. This protects the chocolate from excessive heat generated by the mixer and prevents any remaining flour from being over-worked. Hand-folding takes 20 seconds and makes a measurable difference in the final texture.
Refrigerating Dough: The Secret Nobody Talks About
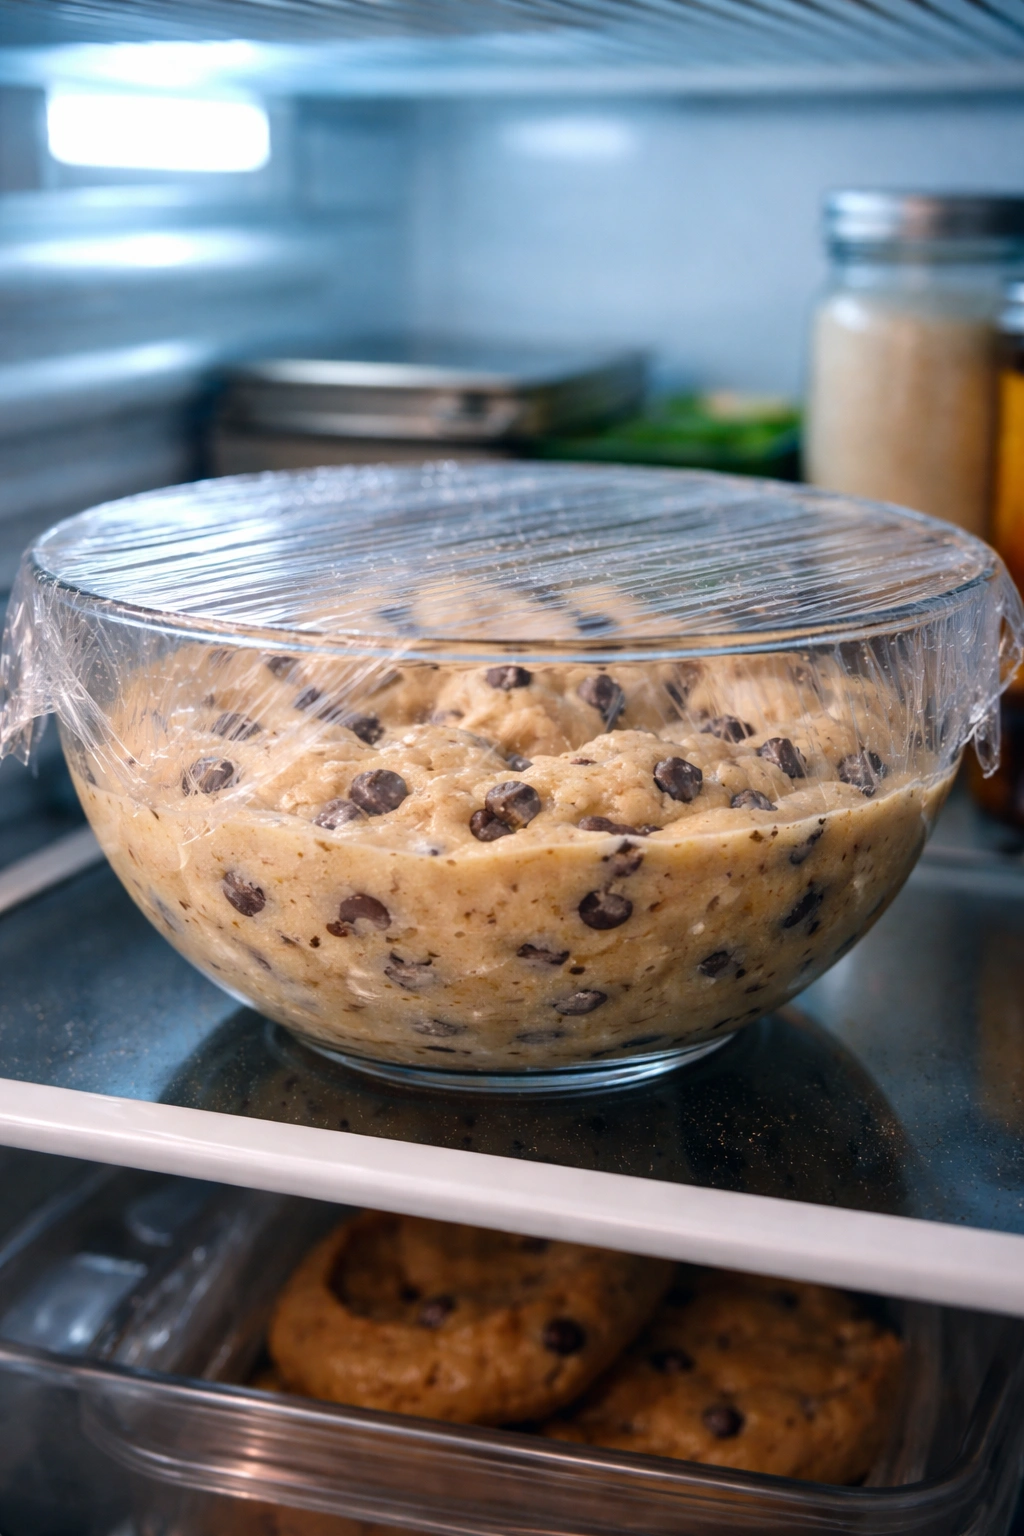
Refrigerating cookie dough for at least 30 minutes—and ideally for 1 to 2 hours—does several crucial things. It allows the flour to fully hydrate, which prevents the cookies from spreading too much during baking. It firms up the butter, which keeps cookies from flattening into lace-thin wafers. It also gives flavor compounds time to develop and meld together, creating a more complex taste.
Refrigerated dough bakes into cookies with better structure and a more balanced texture. The edges set up more slowly, allowing the center to stay soft while the edges caramelize to golden-brown perfection. If you’re short on time, even 15 minutes of chilling makes a noticeable difference, though 30 to 60 minutes is ideal.
You can also refrigerate the scooped, ready-to-bake dough on a baking sheet, then slide it straight into the oven. This is handy if you want fresh cookies multiple times over several days—scoop the dough, freeze on the sheet, transfer to a freezer bag, and bake directly from frozen (adding one to two minutes to the bake time).
Baking Temperature: Why Your Oven Thermometer Matters Most
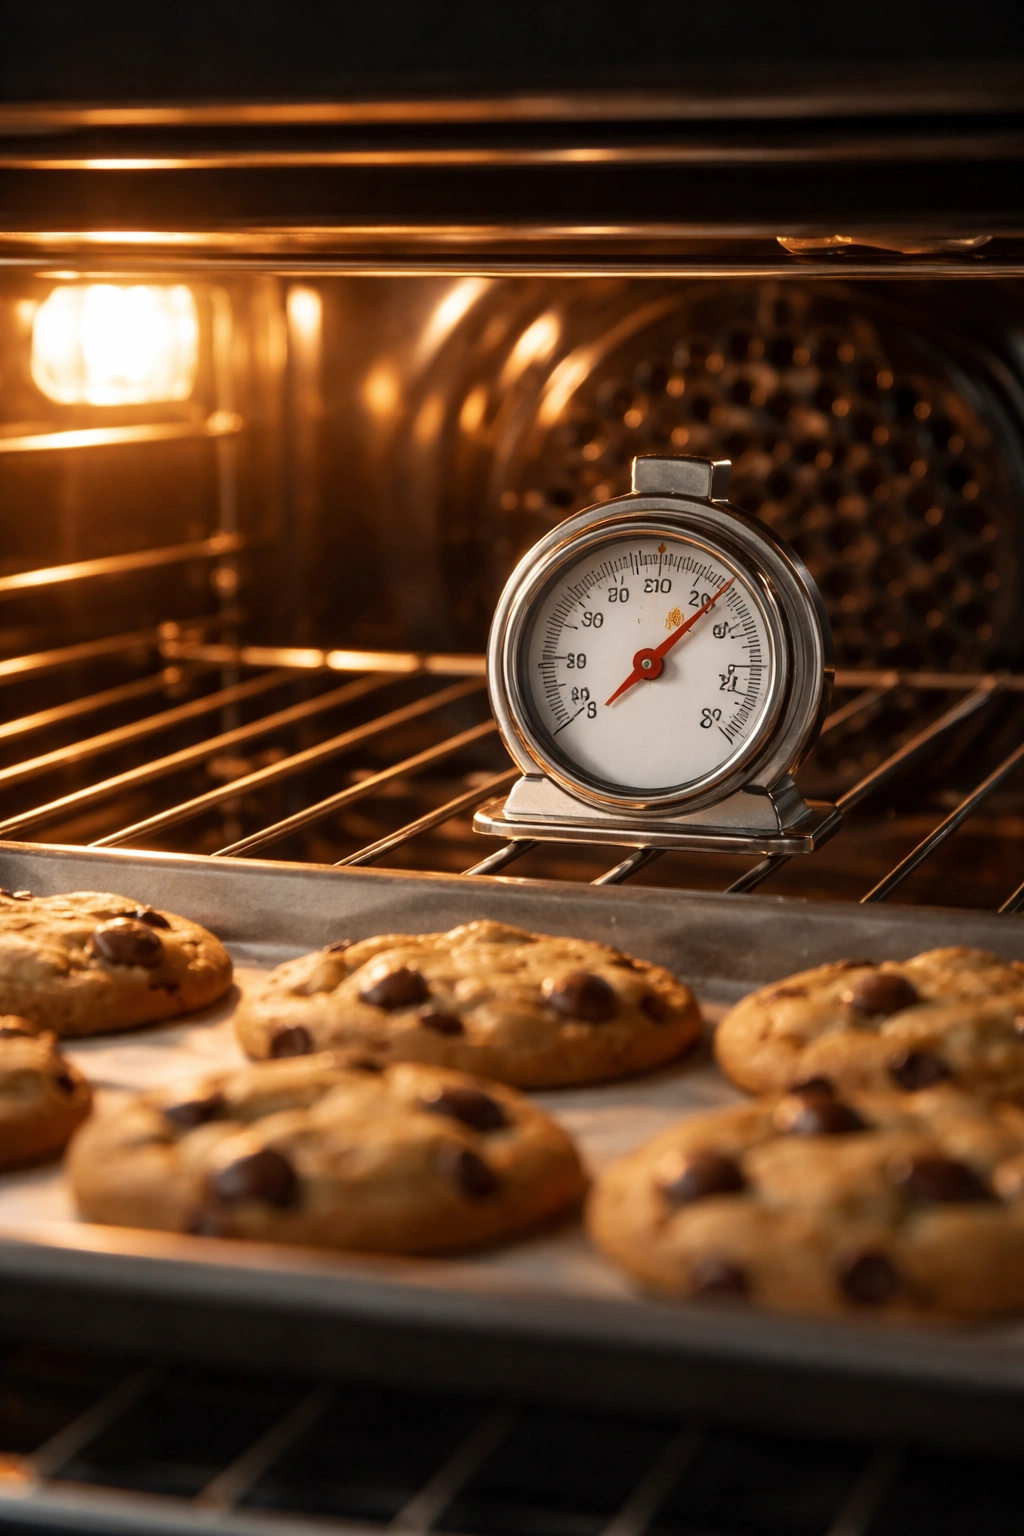
Most home ovens run 15 to 25 degrees cooler than their display indicates. Some run hotter. This one variable causes more cookie baking failures than any other factor. An oven thermometer (placed on the actual shelf where your cookies will bake) takes the guesswork out. You want your oven to be genuinely at 375°F (190°C) before you put the cookies in.
Preheat the oven for at least 15 minutes. This allows the oven to reach true temperature throughout, not just the air temperature but the baking surface itself. Cold baking sheets and oven racks can cool a hot oven significantly when you open the door and slide a batch in.
Position the oven rack in the center of the oven. This ensures heat circulates evenly around the cookies from top and bottom. If your cookies bake much faster on one end of your baking sheet, your oven likely has a hot spot—rotate the sheet halfway through baking to compensate.
The Baking Process: Watching for the Perfect Moment
Prepare for Baking:
-
Preheat the oven to 375°F (190°C) and position the rack in the center. Place an oven thermometer on the rack to verify the actual temperature. Allow the oven to preheat for at least 15 minutes.
-
Line two baking sheets with parchment paper. If you only have one sheet, you can bake cookies in batches—let the sheet cool for 2 to 3 minutes between batches before adding fresh dough.
Shape and Chill the Dough: 3. Remove the chilled dough from the refrigerator. Using a cookie scoop or measuring tablespoon, portion the dough into 24 equal pieces, placing them about 2 inches apart on the prepared baking sheets. The dough balls should be roughly the size of a walnut.
- Return the shaped dough to the refrigerator for at least 15 minutes (or up to overnight). This additional chilling helps the cookies bake evenly and maintain their soft centers.
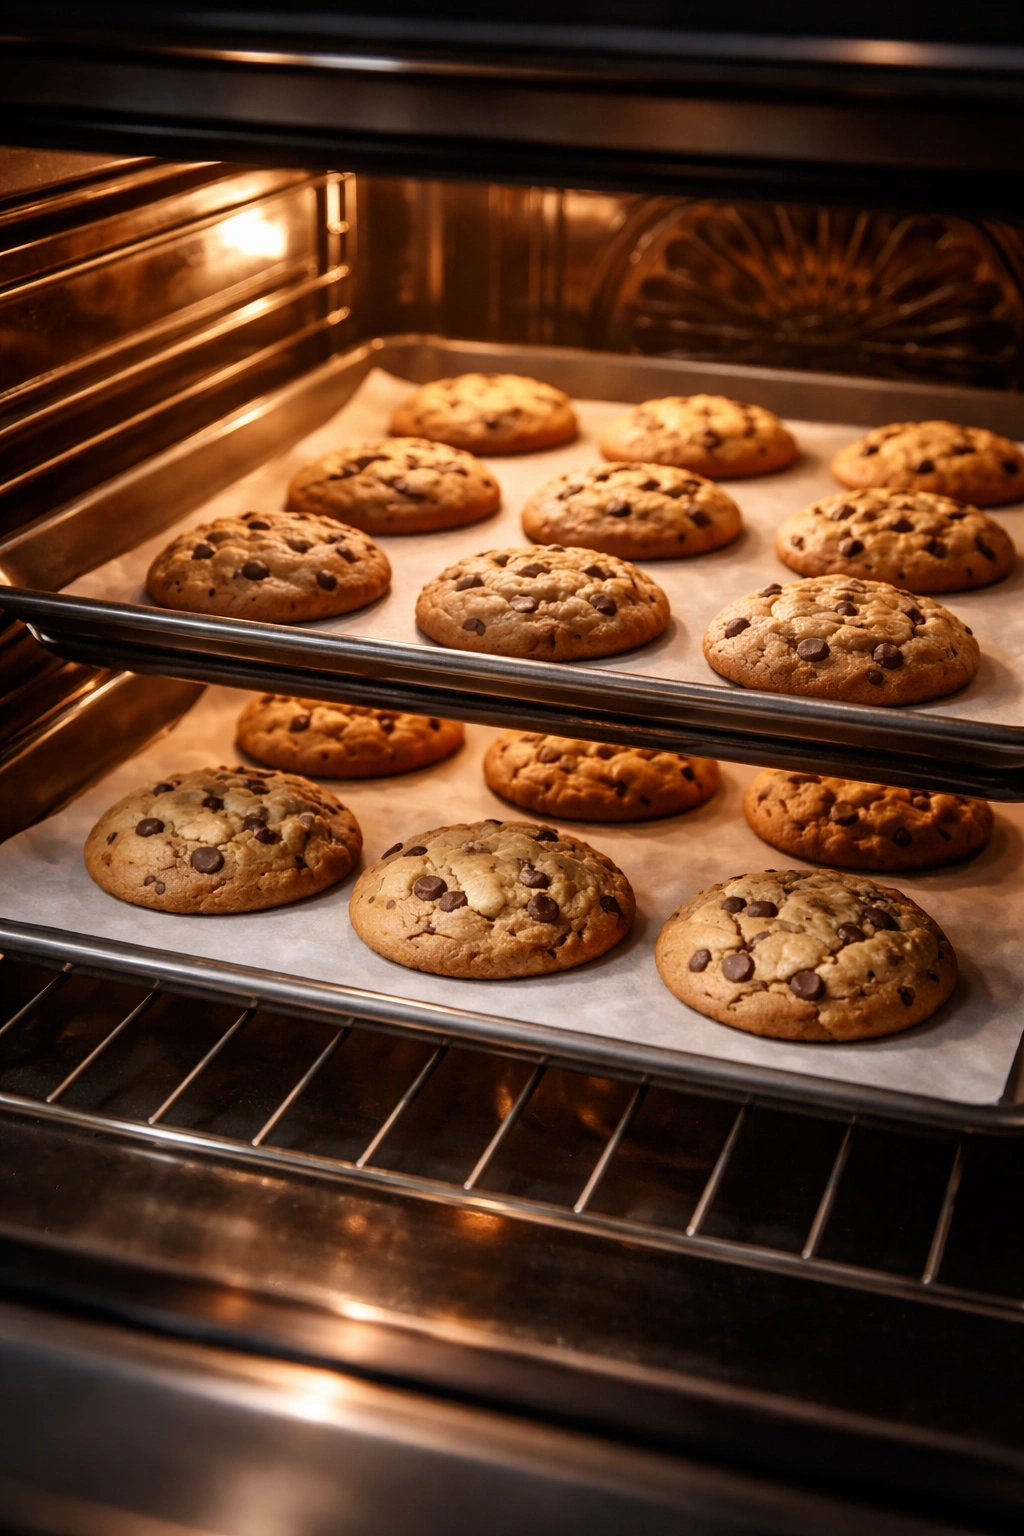
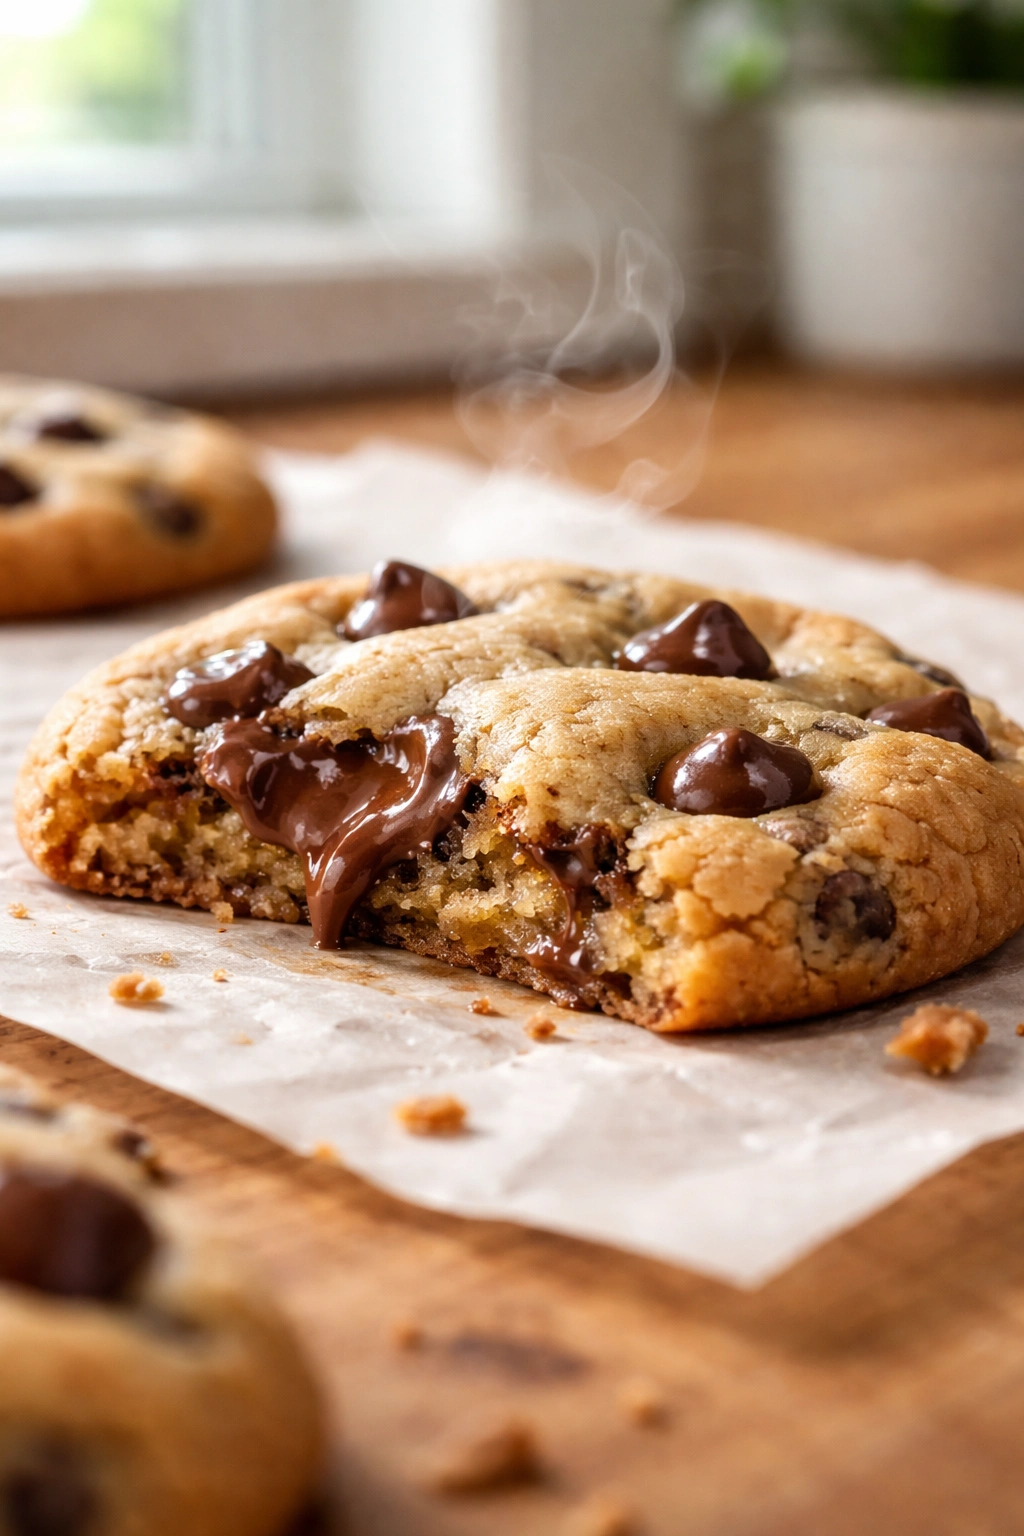
Bake the First Batch: 5. Place one baking sheet in the preheated oven and bake for 11 to 13 minutes. You’re aiming for cookies that are light golden-brown around the edges but still pale and soft-looking in the very center. Do not wait for the centers to look fully baked—they will continue cooking on the hot sheet after you remove them from the oven. If you bake until the entire cookie looks set, you’ve over-baked them.
-
Remove the sheet from the oven when the edges are golden but the centers still look slightly underdone—this is the correct moment. It might feel uncomfortable to pull cookies out when they look this pale in the middle, but this is exactly what creates that perfect soft texture.
-
Allow the cookies to rest on the hot baking sheet for 5 minutes before transferring them to a cooling rack. This resting period is non-negotiable. It allows the structure to set slightly without the bottoms overbaking. After 5 minutes, use a thin spatula to lift each cookie gently onto a cooling rack, where they’ll finish cooling completely over the next 15 to 20 minutes.
Bake Remaining Batches: 8. While the first batch cools, slide the second sheet into the oven. Repeat the baking and cooling process. If your baking sheets are warm from the previous batch, let them cool for 2 to 3 minutes and wipe away any crumbs before placing new dough on them.
Why That Golden-Brown Edge Is the Secret Signal
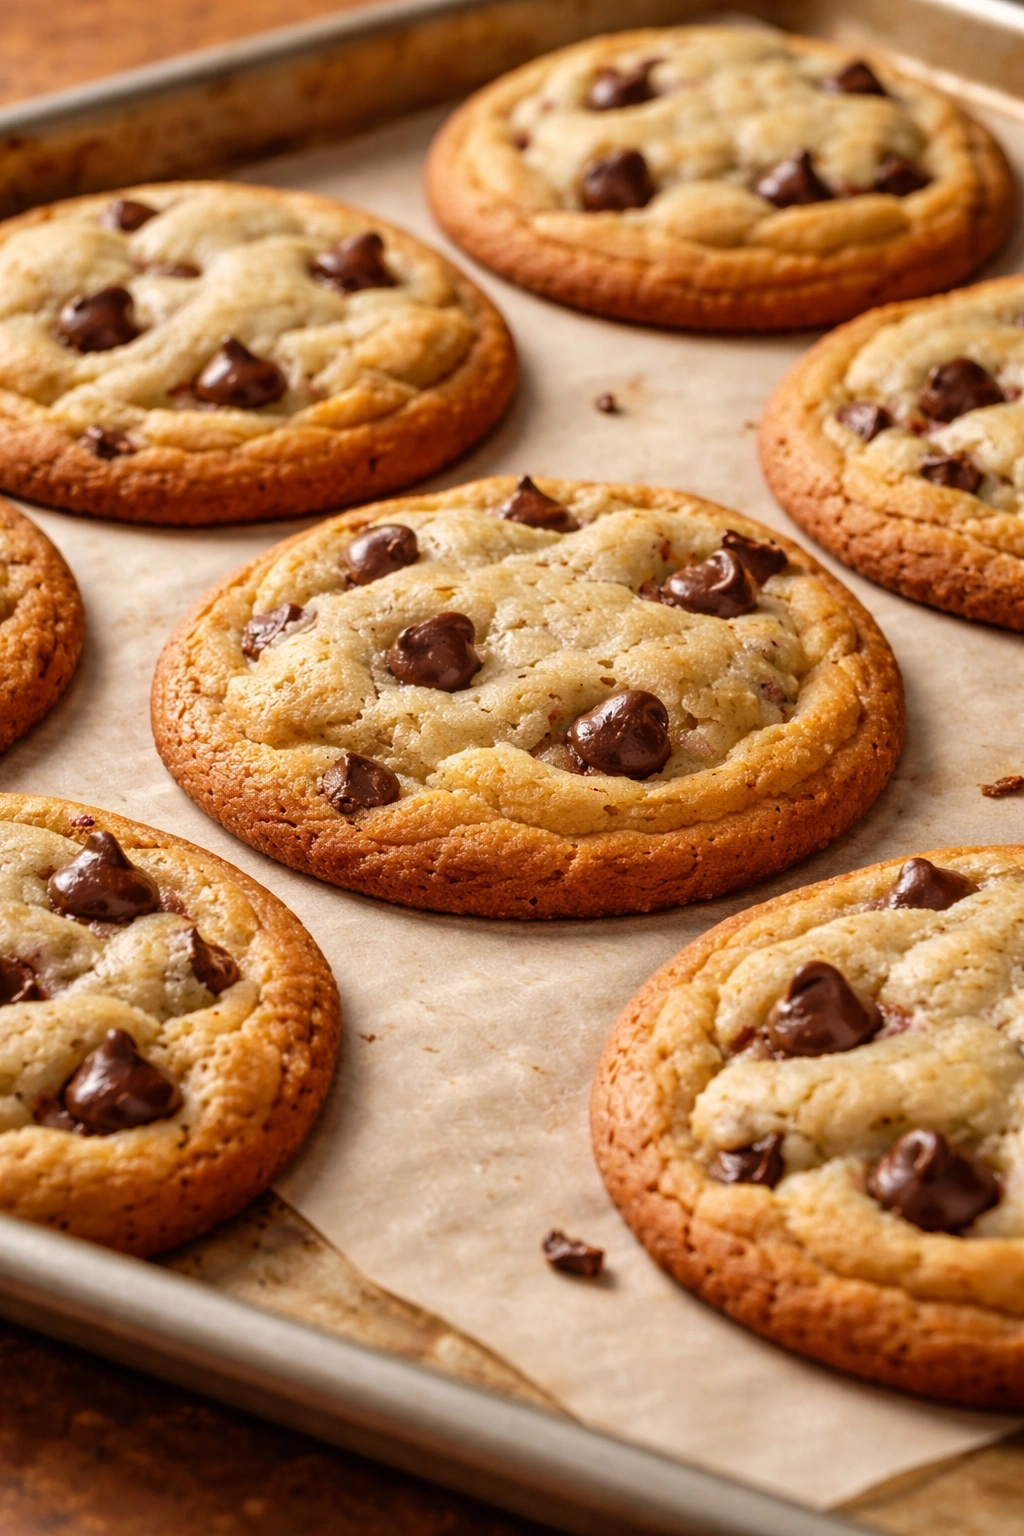
The color at the edges of your cookies is the most reliable indicator of doneness. As butter and sugar heat, they undergo the Maillard reaction—a chemical change that creates that rich, golden-brown color and toasted flavor. This development happens at the edges first because they’re thinnest and heat fastest. The center, being thicker, lags behind.
Pull the cookies from the oven the moment the edges turn golden-brown but before the entire cookie has set. This timing—usually 11 to 13 minutes depending on your oven—ensures the edges have developed full flavor while the center remains soft and slightly underbaked. The residual heat of the baking sheet will finish cooking the bottom and center during that crucial 5-minute rest.
Your oven thermometer is essential here because timing varies dramatically based on actual temperature. At a true 375°F, the timing above should be nearly exact. At 350°F, cookies take about 15 minutes. At 400°F, they need only 9 to 10 minutes. Get the temperature right and everything else becomes predictable.
Common Mistakes That Ruin Otherwise Perfect Cookies
Over-baking is the number-one culprit behind hard, crispy cookies when you wanted chewy. This happens when you’re too cautious about pulling them out of the oven, or when your oven runs hotter than you realize. The solution is simple: use an oven thermometer and trust your eyes. Those slightly underdone-looking centers are not a mistake—they’re the goal.
Skipping the refrigeration step creates flat, spreads-too-much cookies that bake unevenly. Warm dough spreads quickly before the structure sets, resulting in thin, crispy cookies. Even 15 minutes of chilling prevents most spreading issues.
Using melted or overly-warm butter creates dough that’s too greasy and soft. Cookies made from melted butter spread dramatically and bake crisper than intended. Softened butter (not melted) is essential.
Adding chocolate chips straight from the refrigerator can cool your dough too much. If you refrigerate chips, let them come to room temperature before folding them in, or just keep them at room temperature in your pantry.
Measuring flour by scooping the measuring cup directly into the bag compacts the flour. You end up with more flour than the recipe intends, which creates denser, drier cookies. Always spoon flour into the measuring cup and level it off, or better yet, weigh ingredients using a kitchen scale.
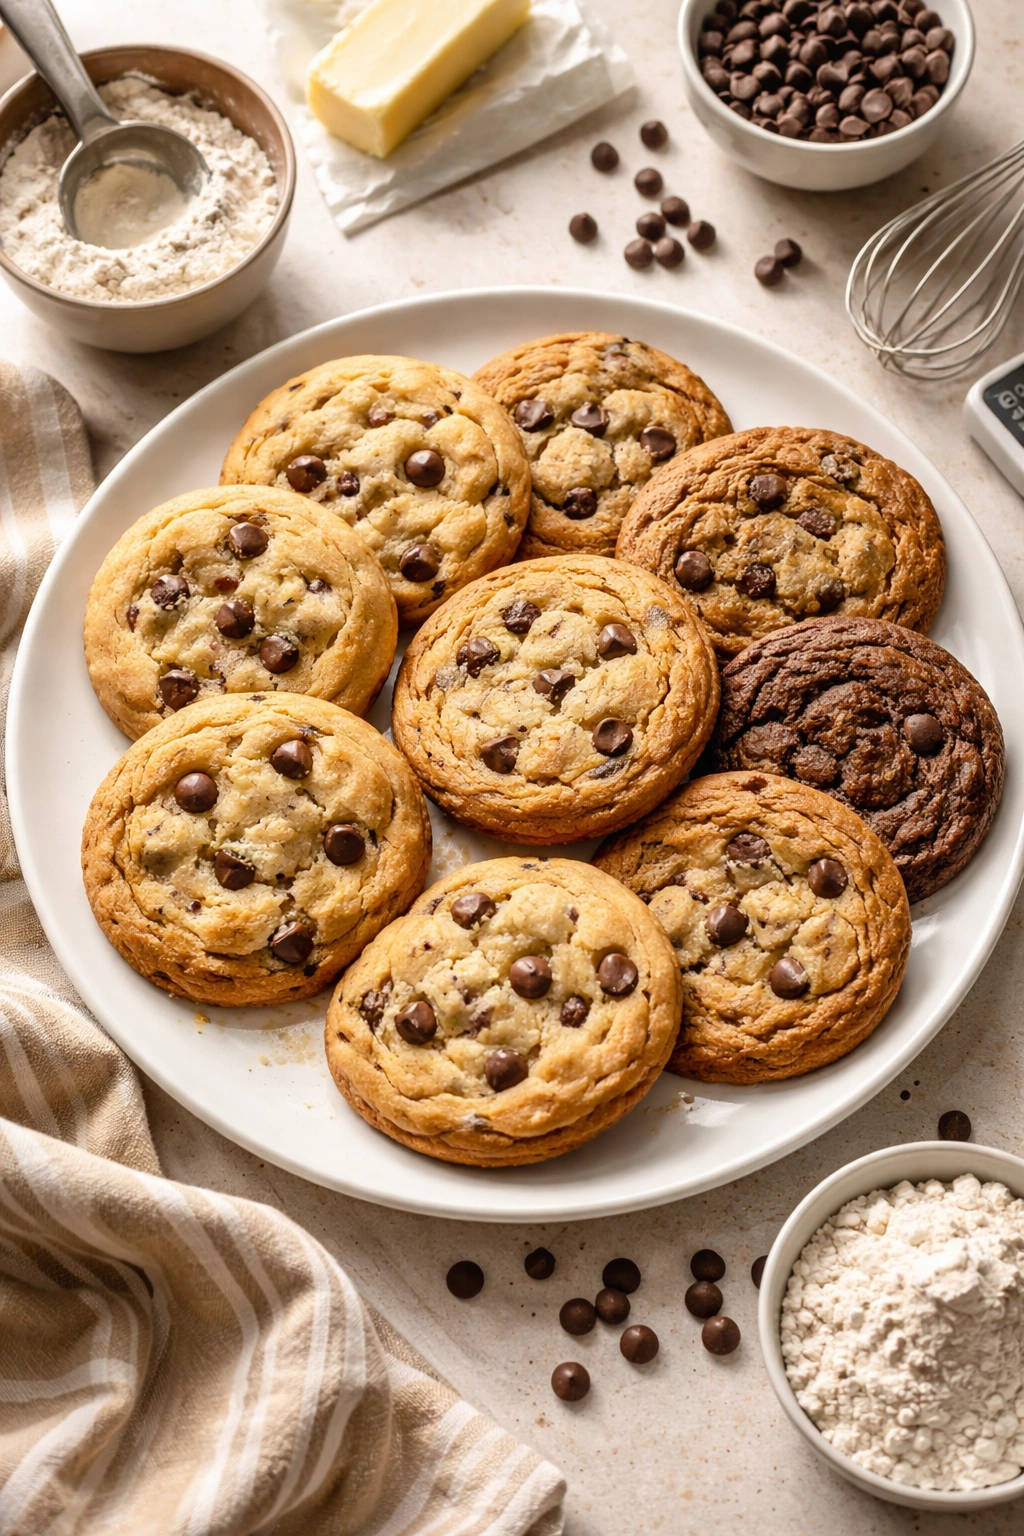
Variations That Turn Classic Cookies Into Something New
Browned Butter Chocolate Chip Cookies: Brown 2 tablespoons of the butter separately by melting it in a small saucepan over medium heat and letting it simmer for 5 to 7 minutes until the milk solids on the bottom turn golden-brown and nutty-smelling. Strain through cheesecloth to remove solids and let cool to room temperature. Substitute this for 2 tablespoons of the regular softened butter in the recipe. This adds an incredible depth of flavor that makes these cookies taste almost caramelized.
Sea Salt and Dark Chocolate: Replace half the semi-sweet chocolate chips with dark chocolate chips (60% to 70% cacao). After baking and while still warm, lightly sprinkle the top of each cookie with fleur de sel or another finishing salt. The salt heightens the chocolate’s complexity and creates an unexpectedly sophisticated cookie.
Brown Butter and Sage: Follow the browned butter variation above, then add ½ teaspoon of finely ground dried sage to the dry ingredients. This sounds unusual, but sage and chocolate have a strange, wonderful affinity—the herb adds earthiness that makes the chocolate taste richer.
Double-Chocolate with Espresso: Add 1 tablespoon of instant espresso powder (or 2 tablespoons of strong cold brew coffee) to the wet ingredients. Use a mix of milk and dark chocolate chips. The espresso enhances chocolate flavor without making the cookies taste like coffee.
Cookies and Cream: Crush 8 to 10 vanilla sandwich cookies (like Oreos) into small chunks and fold them in with the chocolate chips. You’ll have both chocolate and cookie pieces throughout.
Gluten-Free Variation: Replace the all-purpose flour with a one-to-one baking flour blend (not almond flour or coconut flour—those are too dense). The baking chemistry is slightly different, so you might need to add an extra tablespoon of flour if the dough seems too soft, but the results are remarkably similar to the original.
Storage That Keeps Cookies Soft for Days
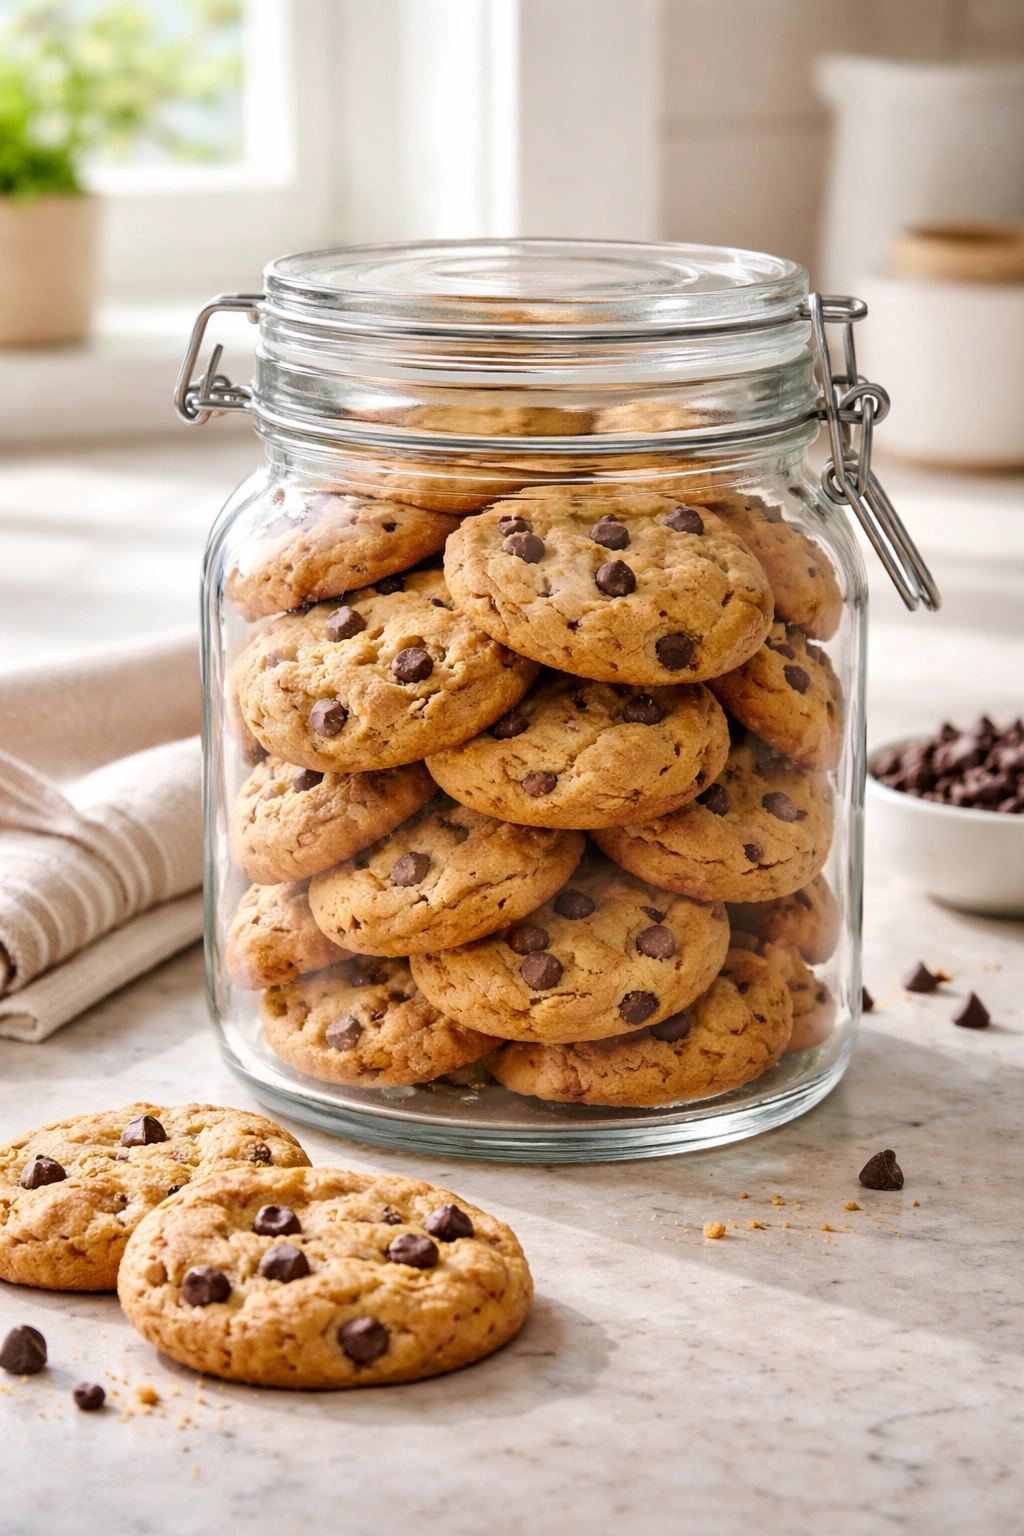
Soft cookies stay soft when stored in an airtight container at room temperature. An airtight cookie jar, a resealable plastic container, or even a ziplock bag all work. The key is preventing moisture from escaping. Room-temperature cookies taste best and have the ideal texture—cold cookies are harder and less flavorful.
Stored properly, these cookies stay soft and delicious for 5 to 7 days. If they do start to harden slightly as they age (which happens naturally as they lose moisture), you can restore softness in a few ways. Place a slice of soft bread in the container with the cookies for a few hours—the bread releases moisture that the cookies reabsorb. Or, wrap a cookie in a damp paper towel, place it on a microwave-safe plate, and microwave for 8 to 10 seconds. It will be steaming hot inside and soft as it cools.
Freezing Raw Dough: Scoop the dough into 24 portions on a baking sheet, freeze until solid (about 2 hours), then transfer to a freezer bag. Frozen dough keeps for up to 3 months. Bake directly from frozen, adding 1 to 2 minutes to the baking time. This is incredibly handy for always having fresh, warm cookies available.
Freezing Baked Cookies: Cooled cookies can be frozen in an airtight container for up to 2 months. Thaw them at room temperature for 30 to 60 minutes. They’ll taste just as good as the day you baked them, though you might want to warm them in a 275°F oven for 3 to 5 minutes to restore that just-baked texture.
Why Chocolate Quality Actually Makes a Difference

The chocolate you choose determines the flavor profile of the entire cookie. Semi-sweet chocolate chips, the classic choice, contain cocoa solids (usually 40% to 50% cacao) and cocoa butter balanced with sugar. They add sweetness and tend to melt throughout the cookie, creating pockets of soft chocolate in every bite.
Dark chocolate chips (60% to 70% cacao) contribute deeper, more complex chocolate flavor. They resist melting slightly more than semi-sweet, so they hold their shape better while still providing that chocolate hit you’re after. Many bakers prefer a blend—using 1 cup semi-sweet and 1 cup dark for a more sophisticated flavor.
Chocolate chips made with real cocoa butter (check the ingredient label) melt smoothly and contribute authentic chocolate flavor. Cheaper chips often use palm oil or other fats that create a waxy mouthfeel and plastic-like taste. The price difference between quality and budget chocolate chips is usually just a dollar or two per bag, and you’ll taste the difference.
Some bakers prefer chopping a quality chocolate bar into irregular chunks rather than using standard chips. This works beautifully—chunks of Lindt, Ghirardelli, or Toblerone throughout the cookie create pockets of rich chocolate that feel luxurious. Use about 8 ounces of chopped chocolate, which equals roughly 1⅓ cups of chips by volume.
Serving These Cookies Five Different Ways
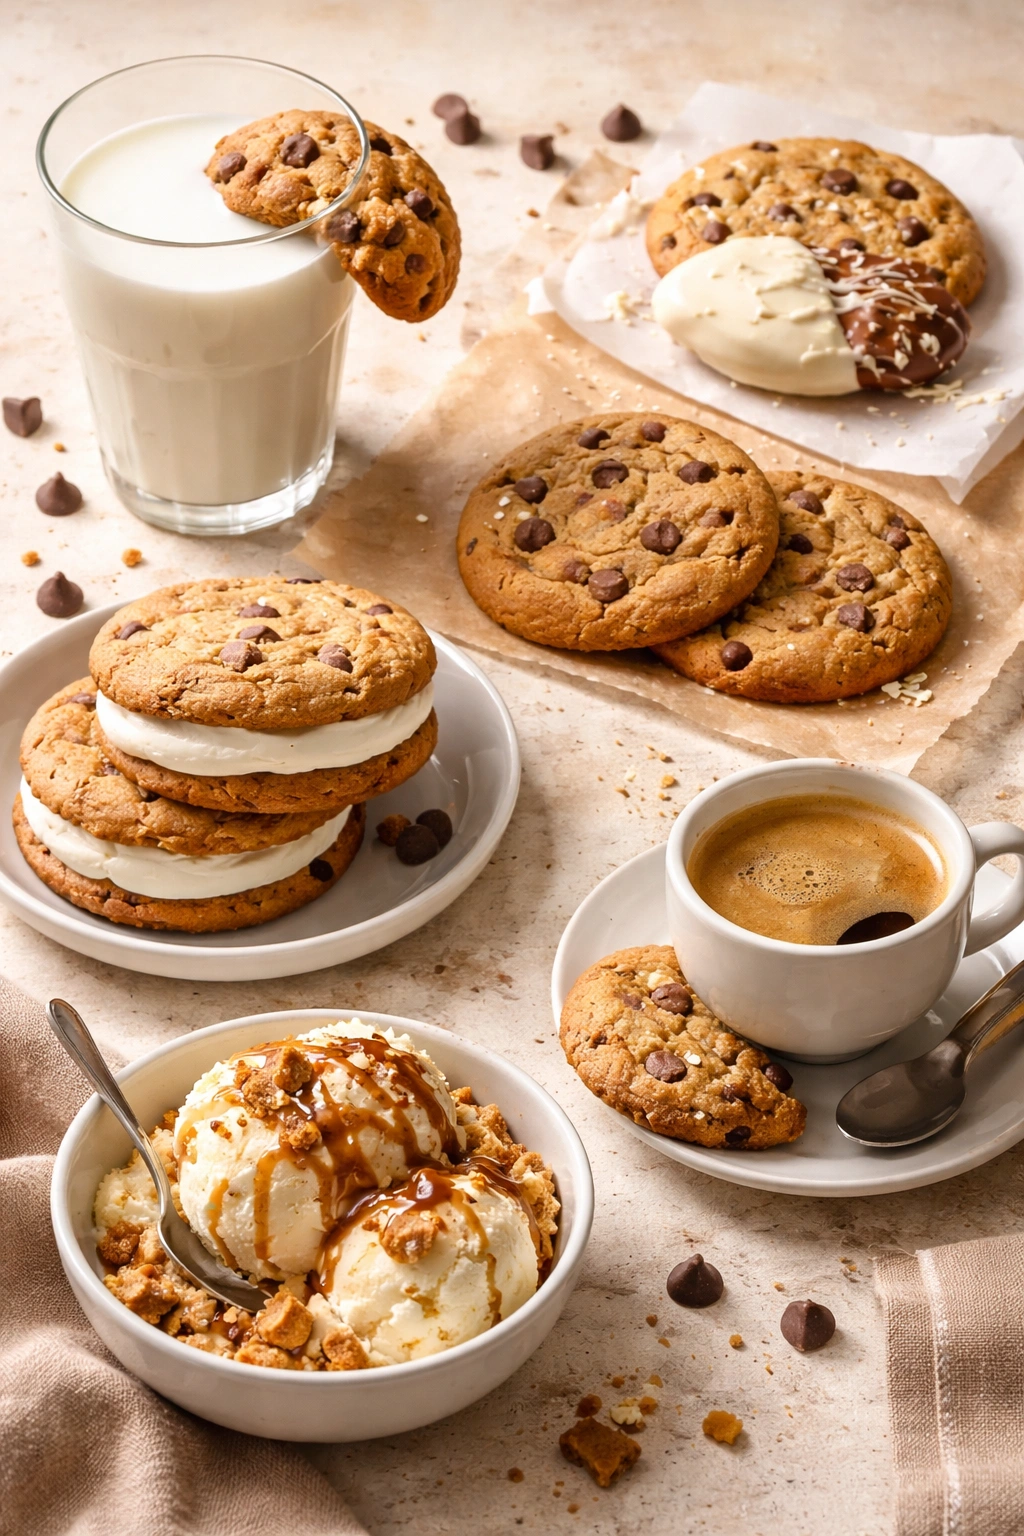
With Milk, Straight and Simple: A glass of cold milk is the classic pairing for cookies that have melted chocolate and soft centers. The cool milk contrasts beautifully with warm cookies.
Dipped in Melted White Chocolate: While a batch is still warm, dip the bottom half of each cookie in melted white chocolate and let it set on parchment paper. The white chocolate creates a silky contrast against the dark chocolate-studded cookie.
Sandwiched with Frosting: Two cookies with a tablespoon of buttercream or cream cheese frosting between them create a cookie sandwich. These are stunning at parties and freeze beautifully.
Crumbled Over Vanilla Ice Cream: Warm cookies crumbled over a scoop of vanilla ice cream create a textural contrast between warm and cold, soft cookie and cold cream. This is an effortless but genuinely elegant dessert.
With Espresso After Dinner: A single warm chocolate chip cookie with a cup of hot espresso or strong coffee becomes an understated, satisfying ending to a meal. No dessert plate needed—just the cookie and the coffee.
The Science Behind That Perfect Soft Texture
Cookies stay soft when they retain moisture, which happens when you remove them from the oven before they’re completely set. Baked goods are hygroscopic—they naturally absorb moisture from the air. Brown sugar, because of its molasses content, is particularly good at pulling moisture from the air and holding onto it. This is why brown sugar in your cookie jar will soften hardened cookies over a few days.
Underbaking slightly works because the cookies continue to cook on the hot baking sheet during that crucial 5-minute rest. This passive heat sets the structure enough that they can be moved without falling apart, but not so much that they become firm and hard. It’s a precise balance, which is why oven accuracy matters so much.
Storage in an airtight container prevents moisture loss to the air, keeping cookies soft indefinitely (within reason—they do eventually go stale, but it takes a week or more). A cookie jar or sealed plastic container maintains the humidity level inside, preventing cookies from hardening like store-bought ones that have been open too long.
Final Thoughts

Baking soft chocolate chip cookies at home teaches you something valuable about precision without obsession. You need an accurate oven, proper ingredients, and a few specific techniques, but you don’t need special equipment or years of experience. The first batch you make will be good. The second batch will be better because you’ll understand what’s happening. By the third batch, you’ll have internalized the rhythm—how the oven sounds, what perfectly-baked edges look like, exactly when to pull that sheet out.
More importantly, these cookies become something you can make on a Tuesday morning because you want warm cookies with lunch, or on a Sunday afternoon because a friend is stopping by. They’re straightforward enough to teach to a child. They’re impressive enough to bring to a potluck. They’re reliable enough that you’ll make them repeatedly, tweaking small things each time until they’re absolutely perfect for your preferences and your oven’s specific personality.
The soft texture you’re after isn’t luck or bakery magic. It’s the result of understanding that baking is chemistry, that timing matters more than temperature once your oven is right, and that under-baking intentionally creates better results than overbaking cautiously. Master that, and you’ll have chocolate chip cookies that rival anything you’ve ever bought—and they’ll be warm, and they’ll be homemade, and they’ll be exactly the way you want them.