Homemade protein ice cream hits that sweet spot between indulgence and nutrition that store-bought versions rarely achieve. Most commercial protein ice cream products are either chalky, overly sweet, or loaded with ingredients you can barely pronounce. When you make it yourself, you control the protein source, the sweetness level, the texture, and every single flavoring — which means you can create something genuinely delicious that actually supports your fitness goals instead of working against them.
The best part? You don’t need fancy equipment or advanced culinary skills. Whether you have an ice cream machine gathering dust in the back of a cabinet or no specialized equipment whatsoever, there’s a method that fits your kitchen and your lifestyle. Four distinct approaches exist, each with different advantages depending on what you’re trying to achieve: maximum creaminess, minimal effort, realistic soft-serve texture, or a yogurt-based alternative that tastes almost indistinguishable from traditional frozen desserts.
Your success depends far more on understanding the science of how protein powder behaves in frozen environments and knowing a few key tricks than it does on having the perfect setup. The protein powder itself changes how liquid freezes and how quickly ice crystals form — it’s thicker, richer, and requires slightly different techniques than regular ice cream.
Why Make Protein Ice Cream at Home
Store-bought protein ice cream typically contains 15-25 grams of protein per serving, which sounds impressive until you realize that most of it comes from milk solids and emulsifiers rather than actual protein powder. The texture is often disappointingly icy because manufacturers have to balance shelf stability with nutritional density, and those two goals don’t play well together.
When you make it yourself, you’re starting with a blank canvas. A single serving can contain 25-35 grams of quality protein depending on how much powder you use and which type you choose. You avoid all the gums, stabilizers, and artificial sweeteners unless you actively choose to include them — and you probably won’t want to, because homemade versions taste dramatically better without them.
The cost difference is staggering over time. A premium protein ice cream from the grocery store runs $5-8 per pint. A homemade batch using protein powder, simple dairy, and sweetener costs roughly $1.50-2.50 per pint when you calculate ingredient costs. For someone eating protein ice cream regularly, that’s a difference of hundreds of dollars per year.
Beyond the practical benefits, there’s genuine satisfaction in creating frozen desserts at home. The kitchen smells amazing, the process feels manageable, and the final result tastes noticeably fresher than anything that’s been shipped and stored.
Choosing Your Protein Powder Type
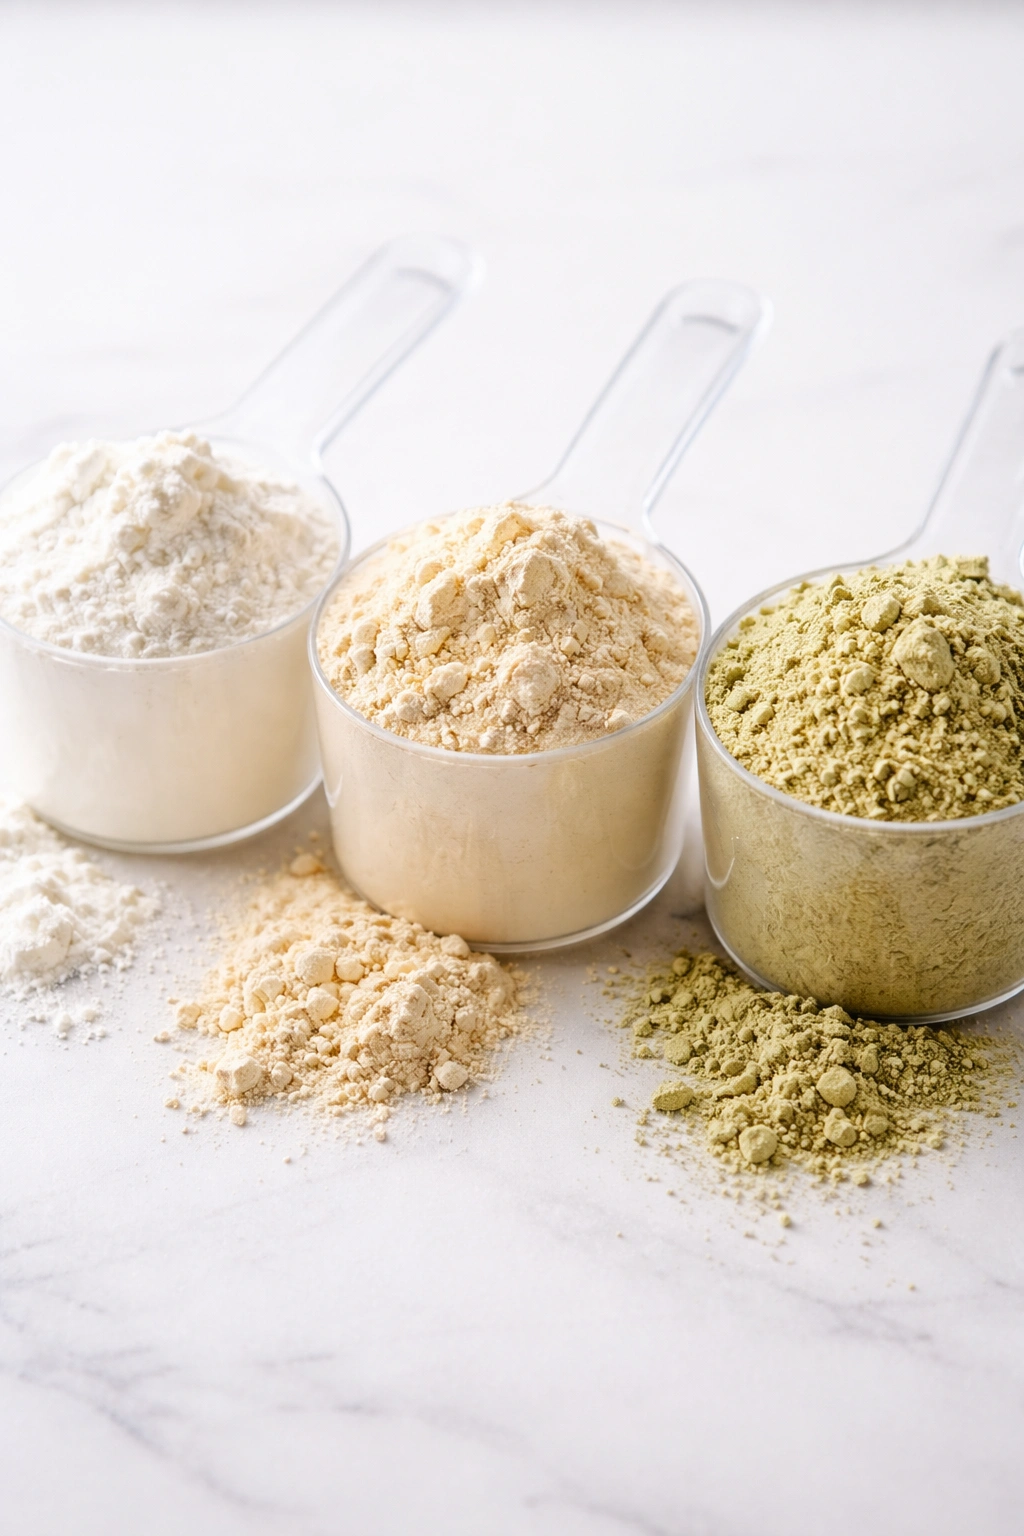
Not every protein powder works equally well in ice cream. Whey protein isolate creates the smoothest, creamiest result because it dissolves completely and doesn’t leave a grainy texture — this is the ideal choice if you have access to it. Whey protein concentrate works beautifully too, with a slightly richer mouthfeel. Plant-based proteins (pea, hemp, rice blends) require a bit more attention to avoid grittiness, but the newer versions blend far better than they did a few years ago.
The sweetener matters just as much as the protein. Erythritol and allulose freeze beautifully and create a texture closest to regular ice cream, while stevia can leave a slight aftertaste that becomes more pronounced in frozen applications. Monk fruit sweetener works well in combination with other sweeteners. If you’re using sugar, use slightly less than you would in a regular dessert — freezing masks sweetness, but concentrated protein can amplify it in unexpected ways.
Avoid protein powders with added ingredients like xanthan gum if you’re new to this. Single-ingredient protein powders give you the most control over texture and allow you to add your own stabilizers if needed.
Basic Equipment You’ll Actually Need
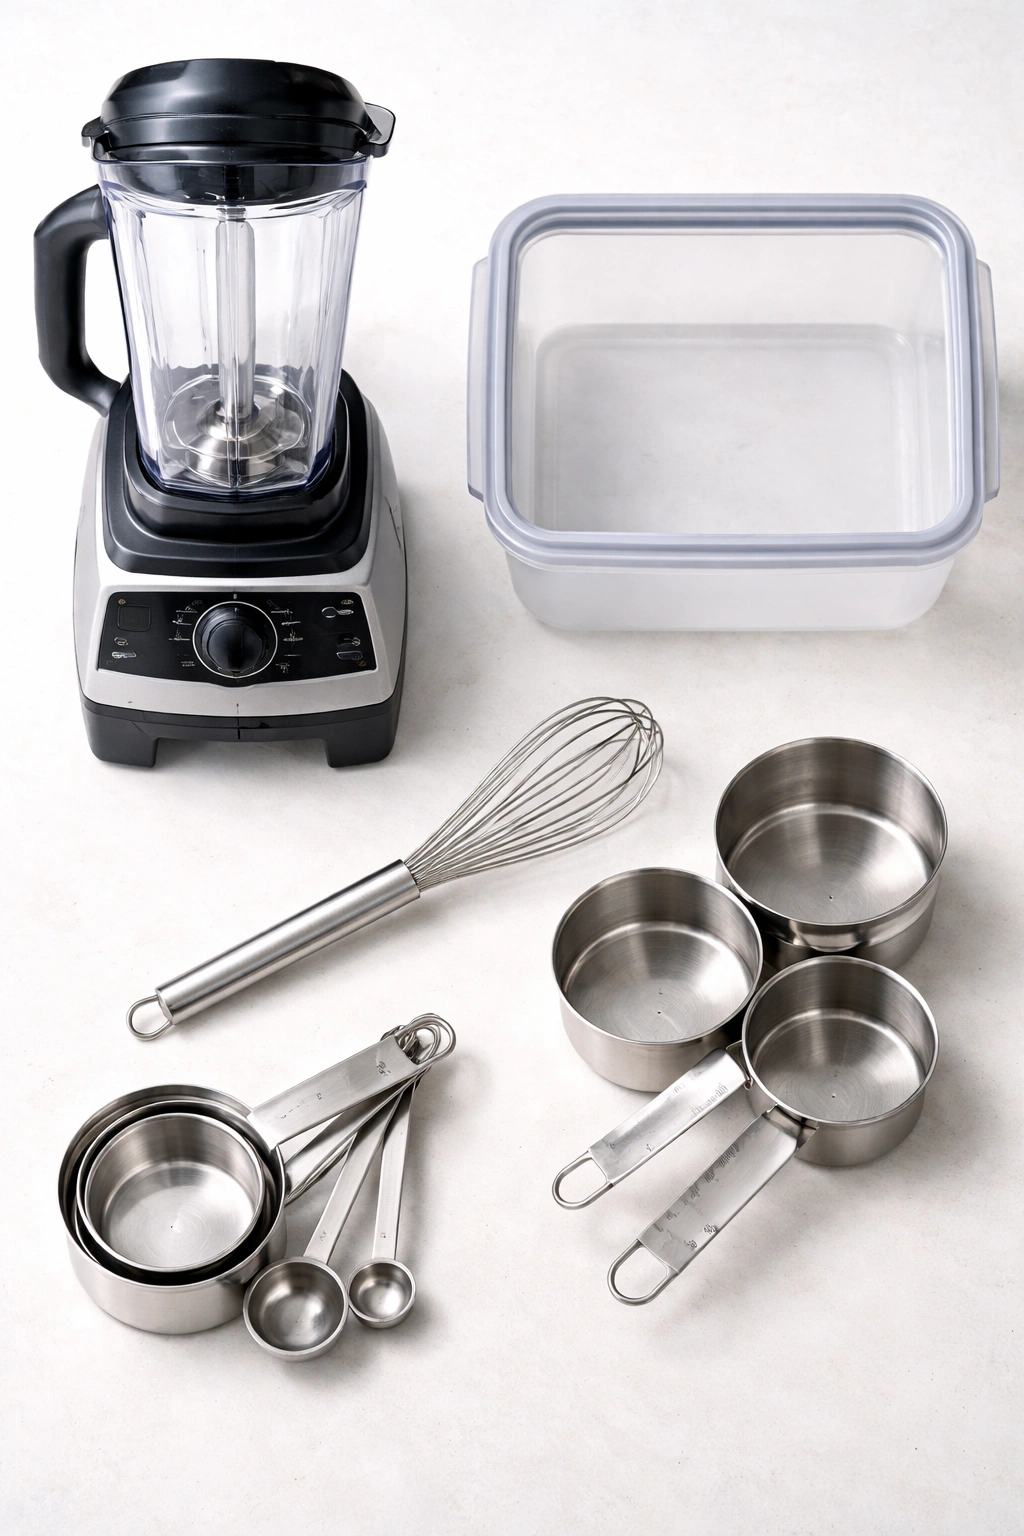
The beautiful truth is that you might already own everything required. An ice cream machine is optional but genuinely useful if you make ice cream more than a few times per year. A standard countertop churner costs $30-100 and does the work of manually churning ice cream, which otherwise requires standing at your freezer every 15 minutes for two hours.
Beyond that, you need: a blender or immersion blender, measuring spoons and cups, a whisk, a freezer-safe container, and a way to keep things cold. That’s genuinely it. An ice cream scoop makes serving easier, and a stand mixer speeds up whipped-cream-based methods, but neither is mandatory.
Method 1: Classic Churned Ice Cream Base
This method creates the creamiest, most traditional-textured protein ice cream with a smooth, dense bite that scoops cleanly straight from the freezer. It requires an ice cream machine, but the results justify the equipment investment if you’ll make this more than occasionally.
Ingredients for Classic Churned Base (Makes about 1 quart / serves 6-8)
For the Ice Cream Base:
- 2 cups heavy cream, cold
- 1 cup whole milk, cold
- ¾ cup sweetener of choice (erythritol or allulose work best; regular sugar works but creates slightly icy texture)
- 1 cup vanilla or neutral-flavored whey protein isolate powder (about 4 scoops)
- 1 teaspoon pure vanilla extract (optional but recommended)
- ⅛ teaspoon fine sea salt
- 2 tablespoons unsalted butter, melted
Equipment:
- Ice cream machine
- Blender or stand mixer
- Thermometer (optional but useful)
- Medium saucepan
Instructions for Classic Churned Ice Cream
Prepare the Base:
-
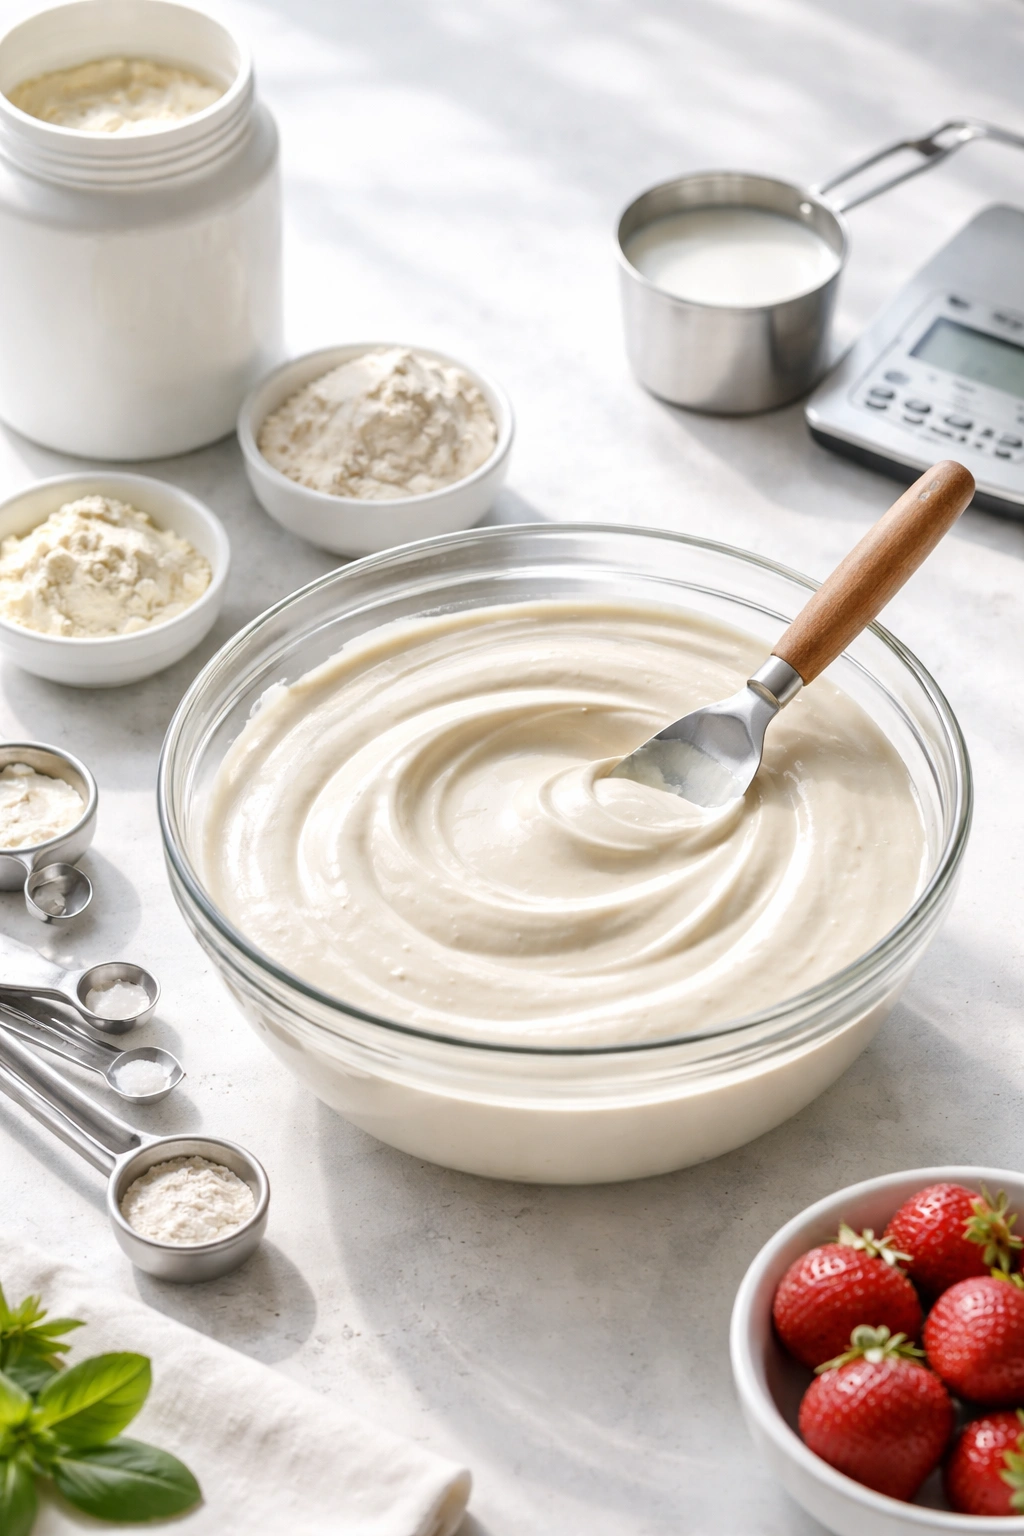
In a medium saucepan over medium heat, combine the cold milk and sweetener, whisking frequently. Heat the mixture to approximately 160°F (71°C), stirring occasionally — this is hot enough to fully dissolve the sweetener but cool enough that you can still comfortably hold your finger in it for 5 seconds. If you don’t have a thermometer, aim for steam rising but no bubbles breaking the surface. This step is crucial because it ensures the sweetener fully dissolves and won’t create crystalline texture in the finished ice cream.
-
Remove the pan from heat and let the mixture cool for 10 minutes at room temperature. You want it warm enough to still be liquid but cool enough that it won’t cook the protein powder.
-
Pour the warm milk mixture into a blender. Add the protein powder, vanilla extract, salt, and melted butter. Blend on high speed for 45 seconds to 1 minute, until completely smooth. Stop the blender and scrape down the sides with a spatula — any protein powder clinging to the blender wall won’t incorporate otherwise.
-
Pour the blended base into a separate bowl and stir in the heavy cream using a whisk. The base will appear slightly thicker and lighter in color once the cream is fully incorporated.
Advertisements -
Cover the bowl with plastic wrap and refrigerate for a minimum of 4 hours, ideally overnight. A cold base freezes more evenly and produces smaller ice crystals, which means a creamier final texture.
Churn the Ice Cream:
-
Remove the base from the refrigerator and let it sit at room temperature for 5 minutes — this makes churning easier.
-
Pour the base into your ice cream machine and churn according to the manufacturer’s instructions, typically 20-25 minutes. The base will gradually thicken and increase in volume as the machine incorporates air. It’s finished when it resembles soft-serve ice cream and pulls away from the sides of the machine when you tilt it.
-
Transfer the churned ice cream to a freezer-safe container. If you’re adding mix-ins like chocolate chips or brownie chunks, fold them in gently now with a spatula.
-
Cover the container tightly and freeze for a minimum of 2 hours before serving. Do not attempt to scoop before this — the ice cream needs time to firm up from the initial churning. The texture will be perfectly scoopable soft-serve immediately after churning, but it firms dramatically in the first hour of freezing.
Yield, Timing, and Difficulty
Yield: Makes about 1 quart (4 cups), serves 6-8 Prep Time: 15 minutes active work Chill Time: 4 hours to overnight (required before churning) Churn Time: 20-25 minutes Total Time: 25 minutes active + 4+ hours chilling + 20-25 minutes churning, then 2+ hours final freezing Difficulty: Intermediate — requires an ice cream machine and basic attention to chilling time, but the steps are straightforward.
Method 2: No-Churn Whipped Cream Method
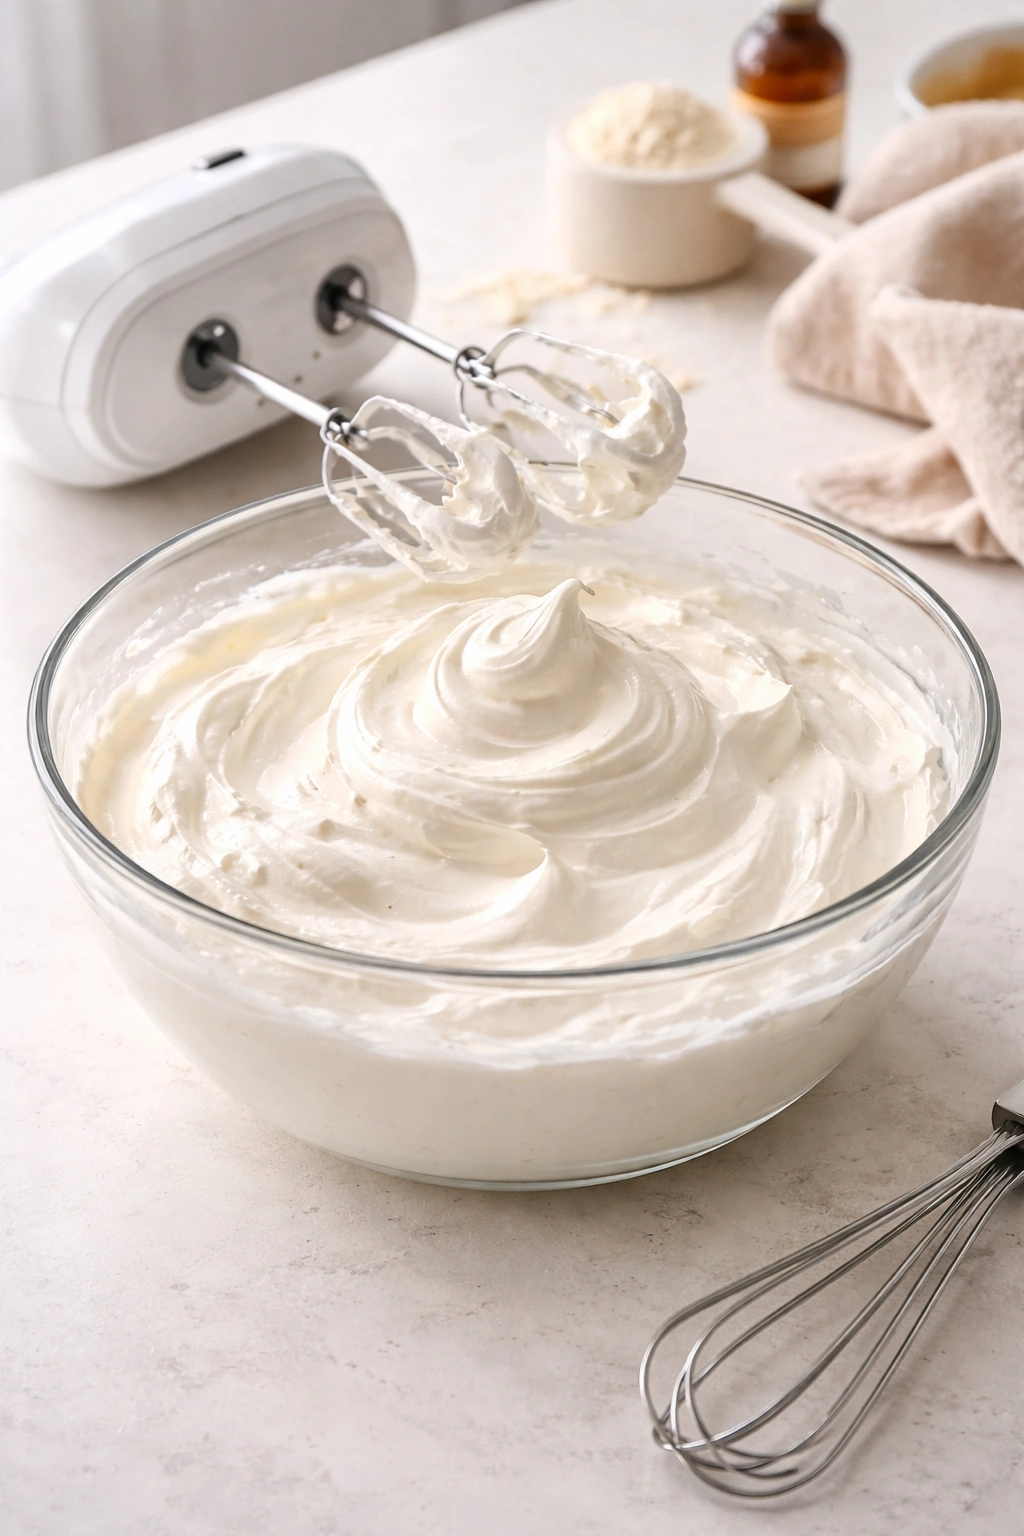
If you don’t own an ice cream machine, this method produces genuinely excellent results with nothing but a whisk or hand mixer. The texture is slightly fluffier and less dense than churned ice cream, but it’s smoother than you’d expect and scoops beautifully after freezing.
Ingredients for No-Churn Version (Makes about 1 quart / serves 6-8)
For the No-Churn Base:
- 2 cups heavy cream, cold
- 1 cup sweetened condensed milk (or ¾ cup sweetener mixed with ¾ cup heavy cream as a substitute)
- ½ cup plain Greek yogurt, full-fat
- ¾ cup vanilla or neutral whey protein isolate powder
- 1½ teaspoons pure vanilla extract
- ⅛ teaspoon fine sea salt
Instructions for No-Churn Method
Make the Whipped Base:
-
Pour the 2 cups of cold heavy cream into a large bowl. Using a hand mixer on medium speed or a whisk and some elbow grease, whip the cream for 3-4 minutes until stiff peaks form — when you lift the beaters, the cream should stand straight up. The cream should be completely opaque and thick enough that it doesn’t collapse. Do not overwhip or you’ll start making butter. If you accidentally whip it too far, fold in a splash of milk and it’ll come back to a perfect texture.
-
In a separate bowl, combine the sweetened condensed milk, Greek yogurt, protein powder, vanilla extract, and salt. Whisk vigorously for 1-2 minutes until completely smooth and no protein powder clumps remain. You’re looking for a thick paste that’s uniform in color. If it feels gritty when you rub it between your fingers, whisk for another minute.
-
Pour the protein-yogurt mixture into the whipped cream bowl, using a spatula to gently fold them together. Use the spatula to scrape from the bottom of the bowl up and over the top, rotating the bowl as you fold. The goal is a completely combined mixture with no white streaks of whipped cream visible and no gray streaks of protein mixture showing through — this takes about 10-12 folds if you use proper folding technique.
-
Pour the mixture into a freezer-safe container, using a spatula to press out any air pockets. Smooth the top with a spatula.
-
Cover tightly with plastic wrap (press it directly onto the surface of the ice cream to prevent ice crystals from forming) and freeze for 4-6 hours before serving. The ice cream will continue to firm up gradually for the first 24 hours.
Yield, Timing, and Difficulty
Yield: Makes about 1 quart (4 cups), serves 6-8 Prep Time: 20 minutes Freeze Time: 4-6 hours minimum (can be frozen longer) Total Time: 20 minutes active + 4-6 hours freezing Difficulty: Beginner — requires only basic whisking and folding skills, no special equipment, and the method is forgiving.
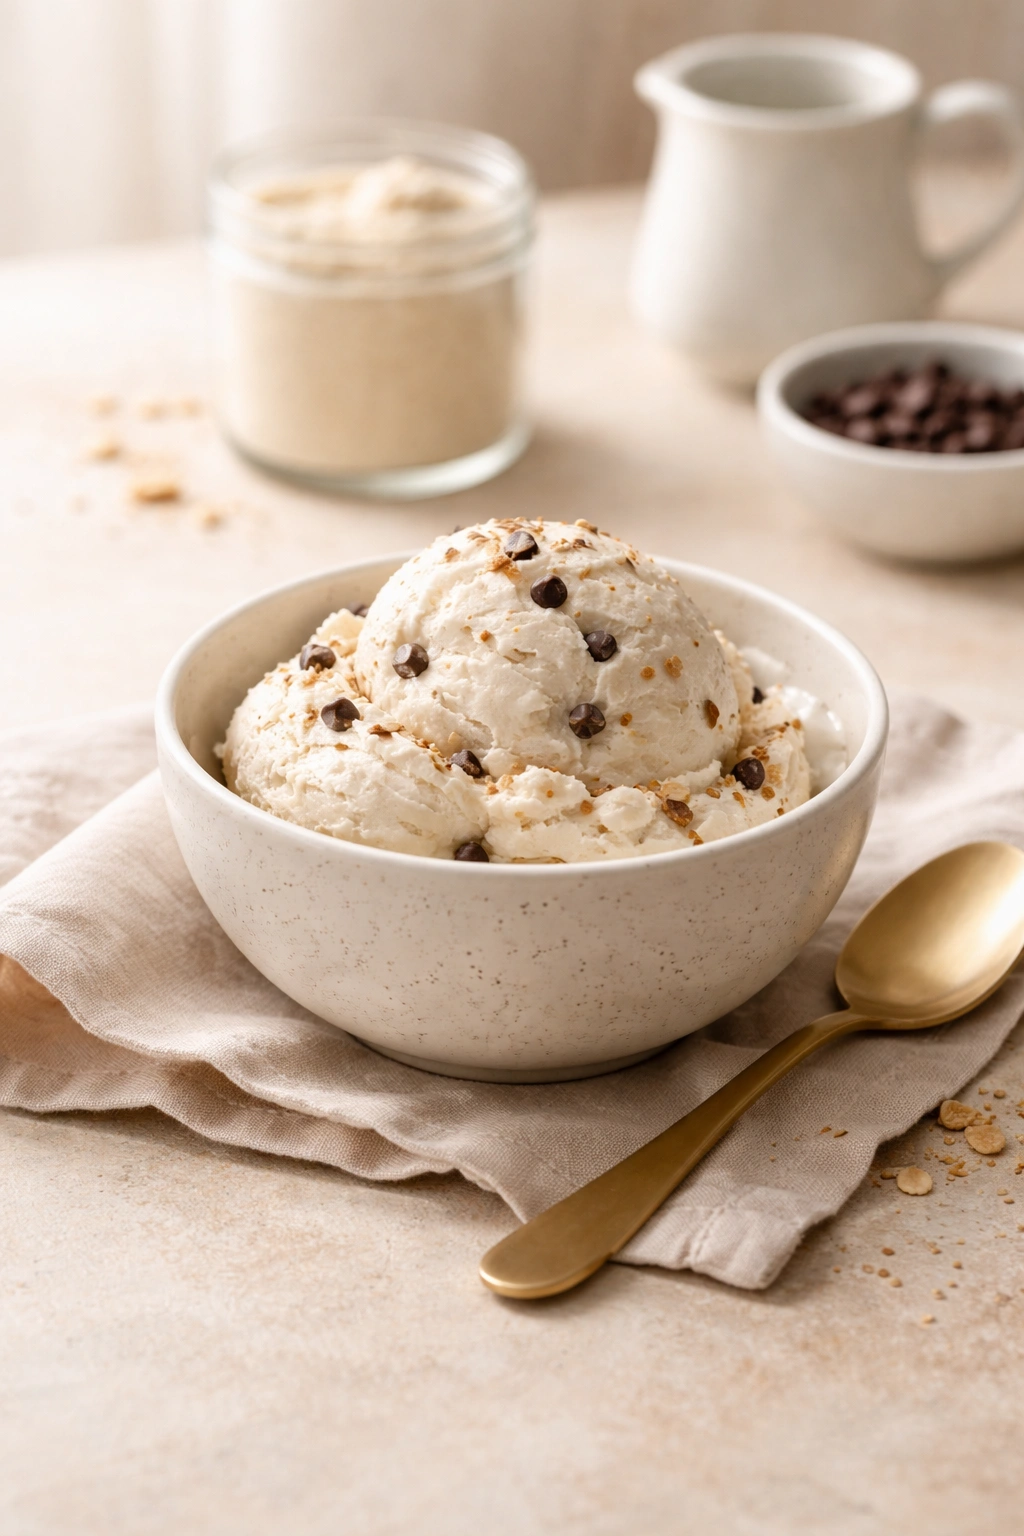
Method 3: Protein Powder Soft Serve
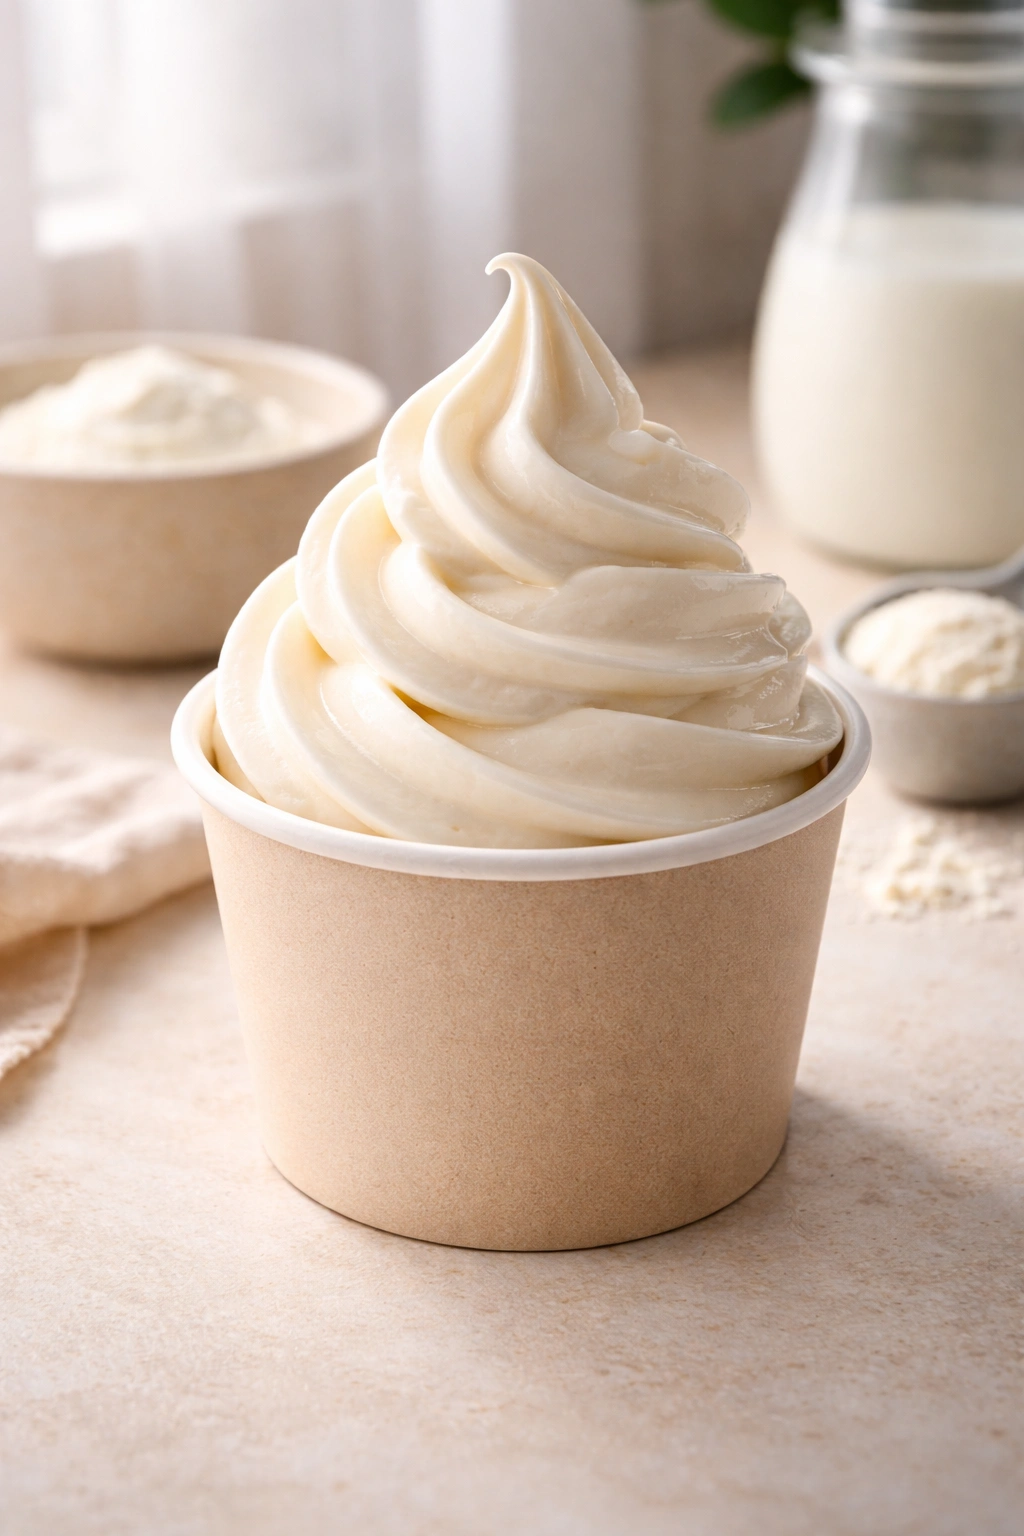
This method creates ice cream that tastes and feels like genuine soft-serve with an incredibly smooth, creamy texture that never fully hardens. It’s perfect if you prefer soft-serve over scoopable ice cream, or if you want an option that’s always ready to eat straight from the freezer.
Ingredients for Soft Serve Version (Makes about 4 servings)
For the Soft Serve Base:
- 1 cup plain Greek yogurt, full-fat
- 1 cup heavy cream
- ½ cup sweetener of choice (erythritol, allulose, or regular sugar)
- ½ cup vanilla whey protein isolate powder
- ½ cup whole milk
- 1 teaspoon pure vanilla extract
- Pinch of fine sea salt
Instructions for Soft Serve Method
Blend the Base:
-
Combine all ingredients in a blender and blend on high speed for 60-90 seconds, until completely smooth and no protein powder clumps are visible. Stop the blender and scrape down the sides with a spatula, then blend for another 20 seconds to ensure everything is fully incorporated.
Advertisements -
Pour the mixture into a freezer-safe container that’s at least 4 inches deep, ideally a loaf pan or square container. Cover with plastic wrap pressed directly onto the surface.
-
Freeze for 4 hours. At the 2-hour mark (halfway through freezing), remove from the freezer and stir vigorously with a fork or spatula, breaking up any ice crystals that have formed on the sides and edges. Push them toward the center and fold them into the softer mixture. This distributes ice crystals evenly and prevents large crystalline chunks from forming.
-
Return to the freezer for the remaining 2 hours. The mixture should reach a consistency where it scoops like soft-serve ice cream — soft and creamy rather than completely solid.
-
For serving, let the container sit at room temperature for 3-5 minutes before scooping. This slightly softens the surface and makes scooping much easier.
Yield, Timing, and Difficulty
Yield: Makes about 4 servings (3-4 ounces each) Prep Time: 10 minutes Freeze Time: 4 hours (with one stirring at the 2-hour mark) Total Time: 10 minutes active + 4 hours freezing Difficulty: Beginner — requires only blending and one mid-freeze stirring. The forgiving texture makes this the least demanding method.
Method 4: Frozen Yogurt Base Method
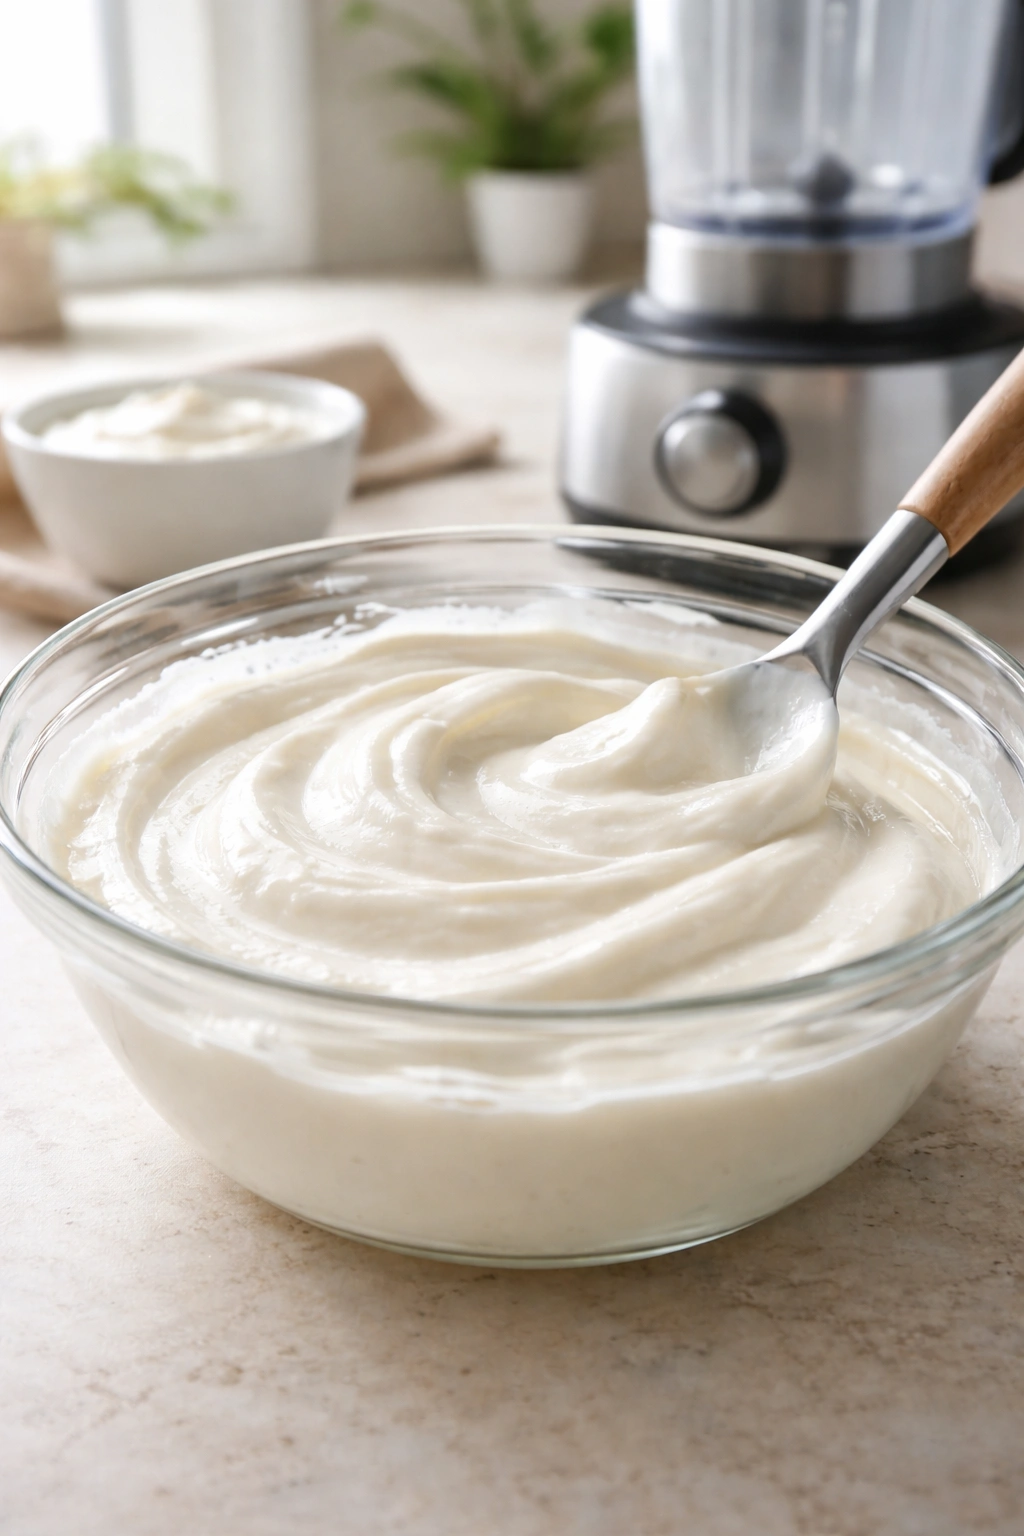
Frozen yogurt ice cream uses yogurt as the base instead of cream, creating a lighter texture with a subtle tang that works beautifully with fruit flavors and chocolate. This method works with or without an ice cream machine, making it the most flexible option.
Ingredients for Frozen Yogurt Base (Makes about 1 quart / serves 6-8)
For the Frozen Yogurt Base:
- 2 cups plain Greek yogurt, full-fat (not low-fat — it won’t freeze properly)
- 1 cup heavy cream
- ¾ cup sweetener of choice
- ¾ cup vanilla whey protein isolate powder
- 2 tablespoons honey or maple syrup
- 1 teaspoon pure vanilla extract
- ⅛ teaspoon fine sea salt
- Optional: 1 teaspoon lemon juice (brightens flavor without adding tartness)
Instructions for Frozen Yogurt Method
With an Ice Cream Machine:
-
In a blender, combine the yogurt, heavy cream, sweetener, protein powder, honey, vanilla extract, salt, and lemon juice if using. Blend on high for 90 seconds until completely smooth. This is crucial — yogurt that’s not completely blended will create a grainy texture.
-
Transfer to a bowl and refrigerate for 2 hours minimum.
Advertisements -
Churn in your ice cream machine according to manufacturer’s instructions, typically 20-25 minutes. The mixture will thicken and increase in volume as it incorporates air.
-
Transfer to a freezer-safe container and freeze for 2+ hours before serving.
Without an Ice Cream Machine:
-
Blend all ingredients as described above.
-
Pour into a freezer-safe container and freeze for 3 hours. At the 1.5-hour mark and again at the 2.5-hour mark, remove from the freezer and stir vigorously with a fork, breaking up ice crystals and folding them back into the mixture. This creates a smoother texture through repeated churning by hand.
-
After the third hour, the texture should be creamy and scoopable. If you prefer a softer consistency, it’s ready to eat; if you prefer firmer ice cream, freeze for another 1-2 hours.
Yield, Timing, and Difficulty
Yield: Makes about 1 quart (4 cups), serves 6-8 Prep Time: 10 minutes Chill Time: 2 hours (required before churning) Churn/Freeze Time: 20-25 minutes in machine or 3+ hours manually with stirring Total Time: 10 minutes active + 2 hours chilling + 20-25 minutes churning (or 3+ hours if stirring manually) Difficulty: Intermediate — straightforward if using an ice cream machine, slightly more involved if hand-churning but still manageable.
Essential Tips for Success
The protein powder will thicken your base significantly, which is why the ratios in these recipes are different from traditional ice cream. Using less milk and more cream compensates for the density that protein powder adds. If you use regular ice cream ratios (equal parts cream and milk), the finished product will be too dense and gummy.
Freezing temperature matters more with protein ice cream than regular ice cream. Aim for a freezer temperature of 0°F (-18°C) or colder. A warmer freezer produces ice crystals that make the texture grainy and disappointing. If your freezer tends to be warmer, leave the ice cream in slightly longer — it’ll firm up eventually but might take 3-4 hours instead of 2.
The first scoop is always the hardest. After you’ve scooped once and the container has been in the freezer for a few hours, subsequent scooping gets much easier. This is normal — the initial churning creates a dense structure that loosens after exposure to air.
Melting and refreezing destroys texture completely. Unlike regular ice cream, which can survive minor thawing, protein ice cream separates when it melts and never refreezes to the same texture. Keep it firmly frozen if you want to preserve the creamy quality. If it does start to melt, eat it as a protein smoothie bowl rather than trying to refreeze it.
Your personal protein tolerance matters more in ice cream than in other preparations. Some people find that concentrated protein powder in frozen form causes a slightly laxative effect, while others have no issue whatsoever. If you’re new to high-protein desserts, start with a smaller serving and let your system adjust before eating a full portion.
Flavor Variations and Customizations
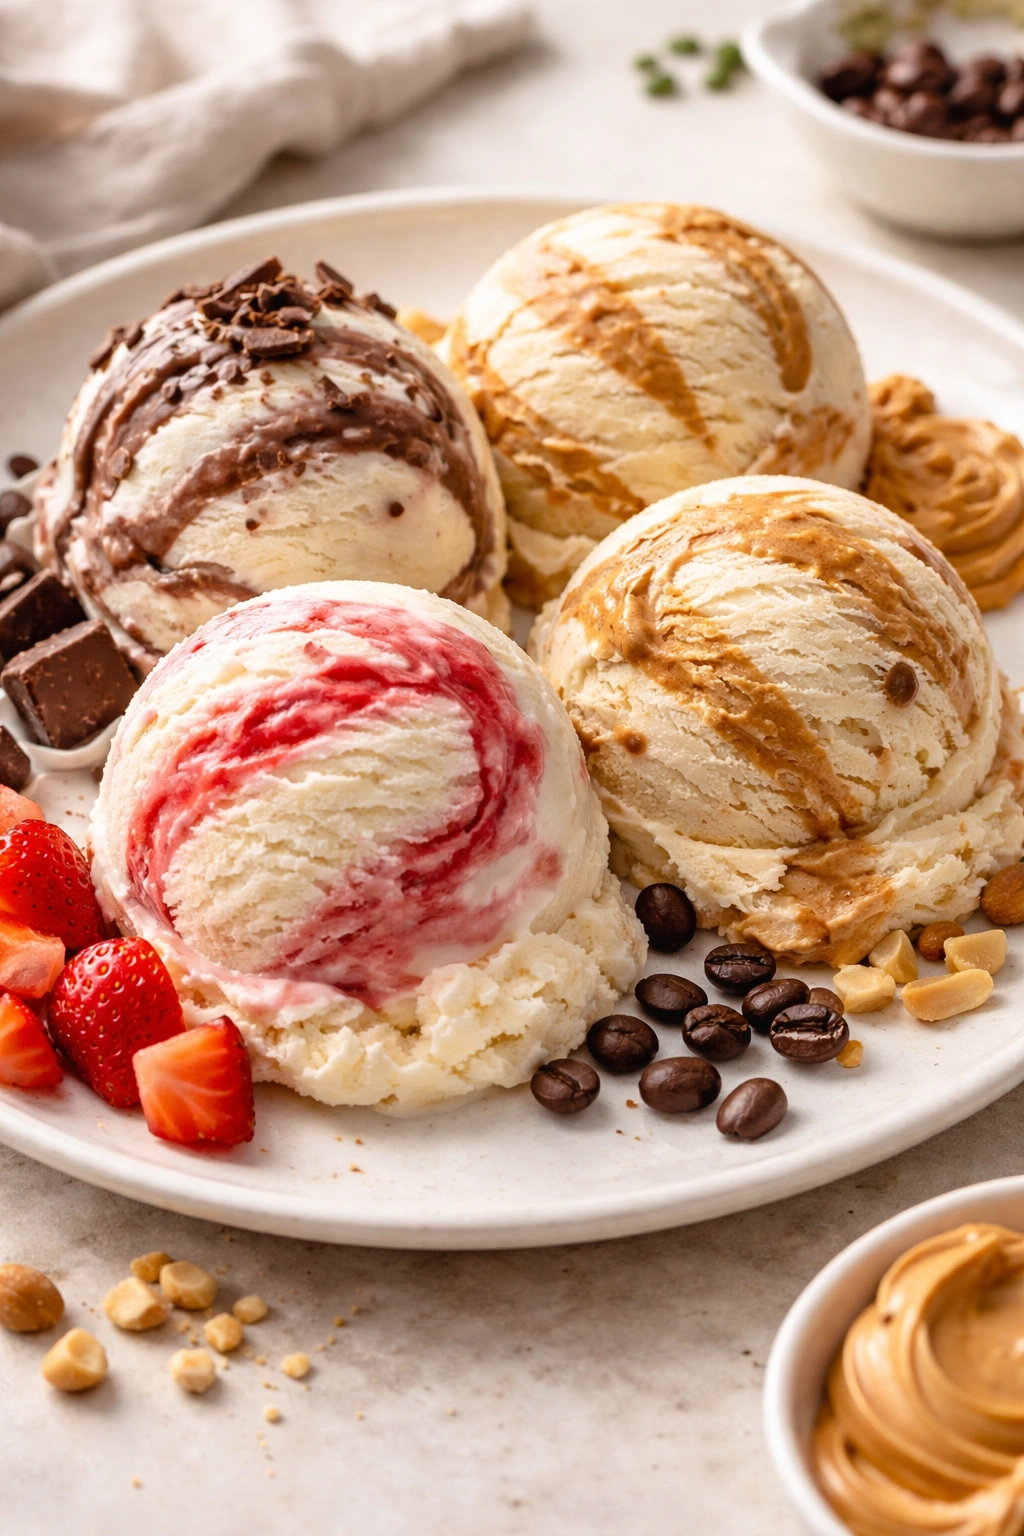
Vanilla is the safest choice for a first batch because it’s forgiving and complements every mix-in, but the real magic happens once you start experimenting with other flavors.
Chocolate Protein Ice Cream: Replace the vanilla extract with 1 teaspoon chocolate extract and add 3-4 tablespoons of Dutch-process cocoa powder (sifted to remove lumps) to the base before blending. For extra richness, melt 2 ounces of dark chocolate and let it cool before adding to the blender.
Strawberry Protein Ice Cream: Blend ¾ cup fresh or frozen strawberries into the base. The berries add natural sweetness, so reduce the added sweetener by 2-3 tablespoons. For a more intense flavor, use strawberry-flavored whey protein powder instead of vanilla.
Coffee Protein Ice Cream: Replace the milk with strong brewed coffee (cooled to room temperature) and add 1-2 teaspoons of instant espresso powder to the base. Use vanilla whey protein powder as your base.
Peanut Butter Protein Ice Cream: Add ½ cup natural peanut butter to the blender. Thin it out with an additional ¼ cup milk if it seems too thick. The fat in the peanut butter creates an incredibly creamy texture. Reduce the sweetener slightly since peanut butter adds subtle sweetness.
Cookies and Cream: Make the vanilla base, then fold in crushed vanilla wafers or Oreo cookies after churning. Add the cookies just before transferring to the freezer so they don’t become soggy from sitting in the liquid base.
Protein Powder Flavor Swaps: The protein powder itself can carry flavor. Vanilla bean is safest, but cookies and cream, chocolate, strawberry, and birthday cake protein powders all work beautifully. Just make sure to adjust other flavoring ingredients accordingly — you don’t want to double up chocolate if your protein powder is already chocolate-flavored.
The Mix-In Rule: For every 1 quart of base, add ½ to ¾ cup of mix-ins (chocolate chips, brownie chunks, cookie pieces, candy). Too many mix-ins make scooping difficult and disrupt the smooth texture. Fold them in gently just before the final freeze, or layer them in the container as you transfer the churned base.
Storage and Make-Ahead Guide
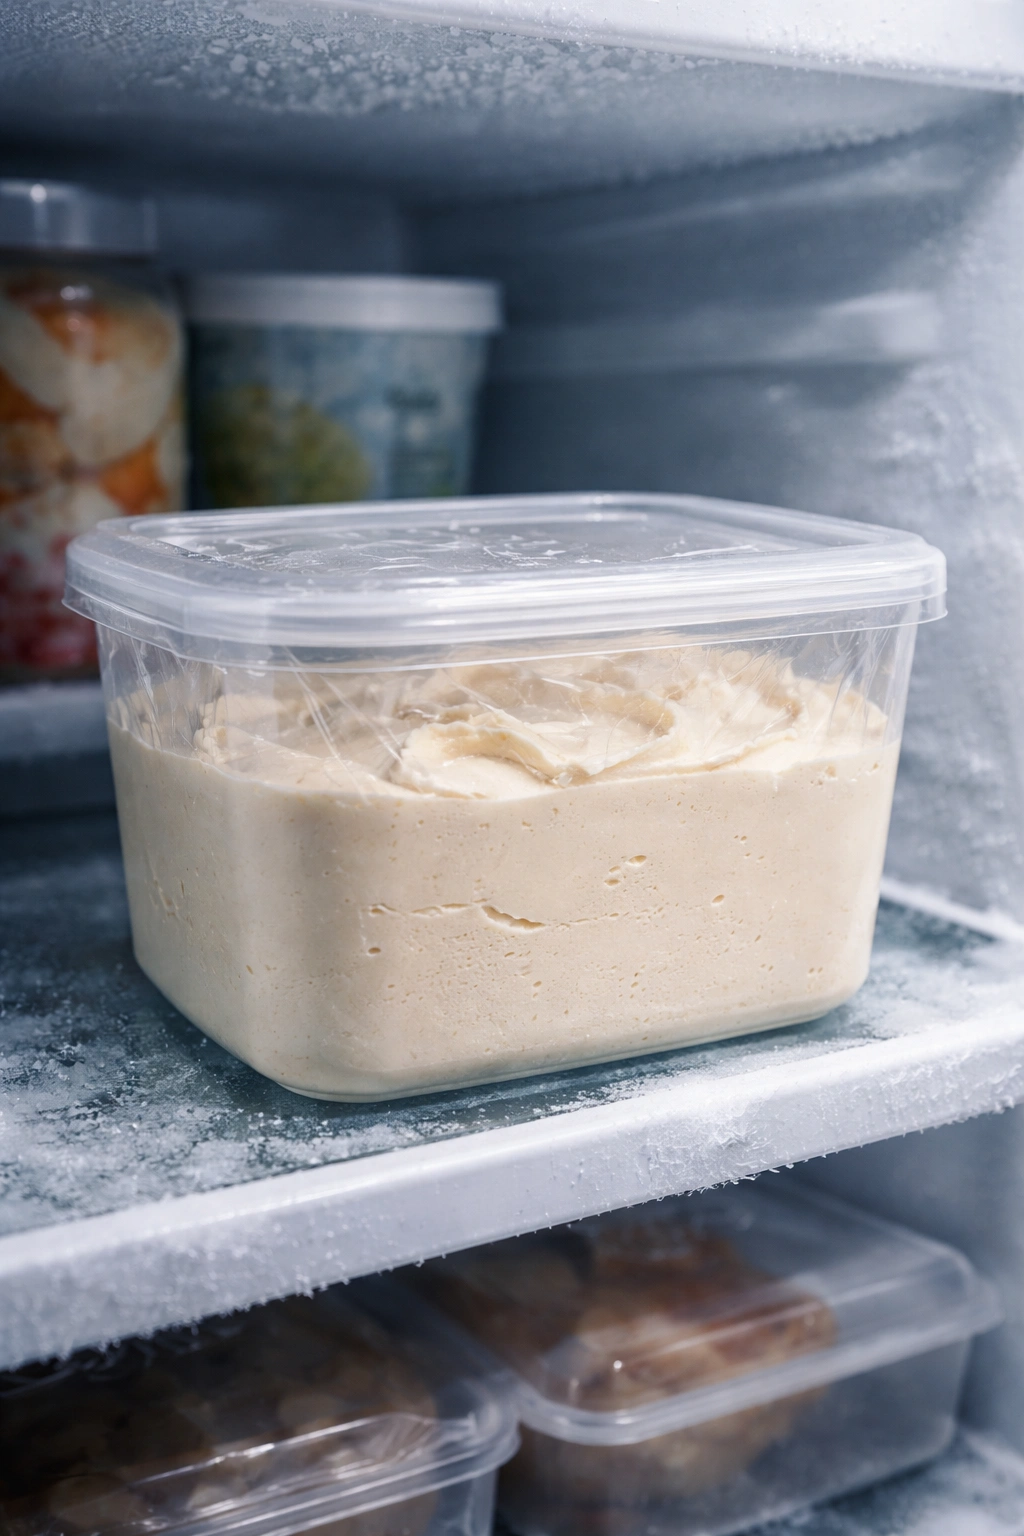
Homemade protein ice cream keeps beautifully in the freezer for up to 2 weeks, maintaining its creamy texture and flavor. After 2 weeks, it tends to develop freezer burn, and the surface develops ice crystals that make scooping slightly harder, though it’s still perfectly safe to eat.
To prevent freezer burn: Press plastic wrap directly onto the surface of the ice cream before covering the container with a lid. Air exposure creates ice crystals on the surface. Some people go a step further and double-wrap with both plastic wrap and aluminum foil, which works if you’re keeping it longer than 10 days.
The make-ahead advantage: You can prepare the base up to 24 hours before churning. This is actually beneficial because a base that’s been chilled longer freezes more smoothly. For the no-churn and soft-serve methods, you can fold the mixture and freeze it up to a week in advance — it’ll be ready to serve whenever you want.
If your ice cream gets too hard: Remove it from the freezer 5-10 minutes before scooping. This slight softening makes scooping infinitely easier without compromising the texture. You’re not trying to melt it, just to take the edge off the hardness.
What happens if it’s too soft: If your ice cream never firms up properly (usually because the base had too much liquid or your freezer isn’t cold enough), return it to the freezer for another 2-3 hours. If it still doesn’t firm, the base itself might be the issue — you may need to reduce the milk content by ¼ cup and add an additional ¼ cup heavy cream for more fat and less liquid.
Serving Ideas and Pairings
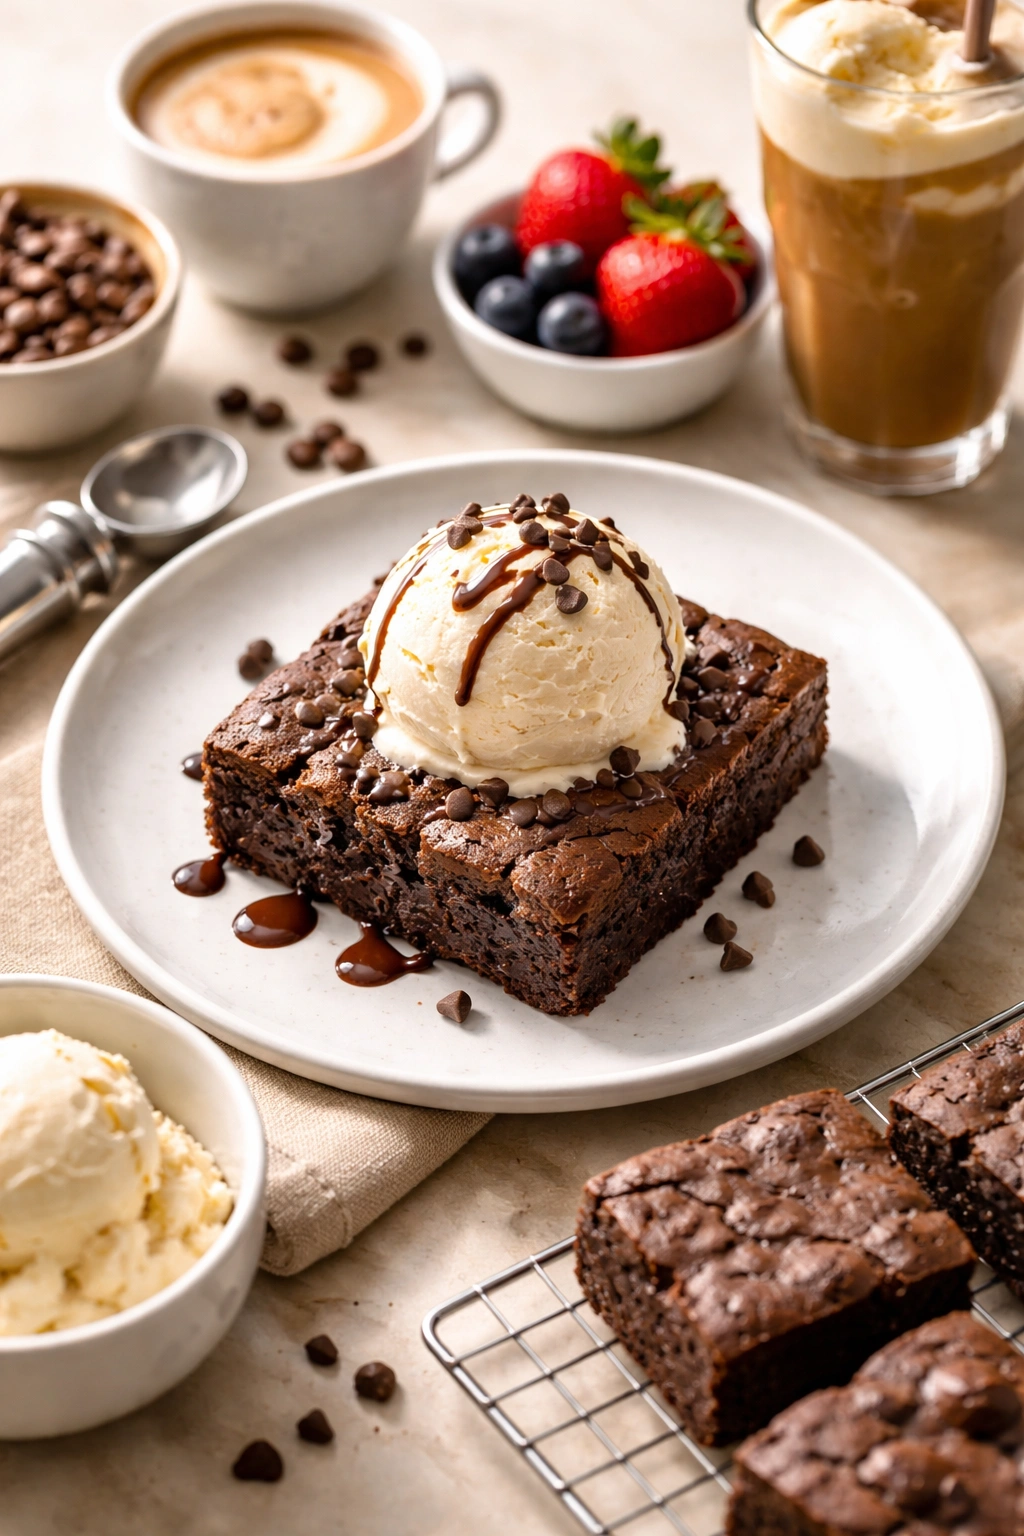
Protein ice cream is excellent on its own, but it becomes something special when paired thoughtfully with other elements. A scoop of chocolate protein ice cream on top of a warm chocolate brownie creates a temperature and texture contrast that makes both items taste better. The cold, creamy ice cream against warm, dense brownie is genuinely next-level.
Fruit pairs beautifully with vanilla and strawberry protein ice cream. A bowl of fresh berries, sliced peaches, or grilled pineapple alongside a few scoops of ice cream gives you fiber, fresh flavor, and concentrated protein in one nutritious-feeling dessert. Drizzle with a bit of honey if you want added sweetness.
Coffee protein ice cream belongs on top of warm desserts: brownies, apple pie, warm chocolate cake. The bitter coffee flavor cuts through rich sweetness and adds sophistication to typically simple desserts.
Protein ice cream floats work wonderfully: Instead of regular ice cream, top a glass of root beer, cream soda, or cold brew coffee with a generous scoop of protein ice cream. The protein ice cream melts more slowly than regular ice cream because of its denser structure, which means the drink stays cold longer.
Smoothie bowl base: If your protein ice cream melts or gets too soft to scoop, don’t waste it. Scoop the slightly-melted ice cream into a blender with a splash of milk, blend until smooth, and use it as the base for a smoothie bowl topped with granola, coconut flakes, and fresh fruit. This is genuinely delicious and masks any texture imperfections.
Protein ice cream sandwiches: Scoop slightly-softened ice cream between two soft cookies, let it sit in the freezer for 30 minutes, then wrap in parchment for grab-and-go snacking. The combination is nostalgic and hits harder nutritionally because of the protein density.
Final Thoughts
Homemade protein ice cream tastes so much better than commercial versions that once you’ve made it once, you’ll probably never go back to buying it. The choice of method depends entirely on your kitchen setup and how much texture control you want — there’s no universally “best” way, just the way that works best for your situation.
Start with whichever method matches your equipment. If you have an ice cream machine, try the churned method because it produces the most luxurious texture. If you don’t, the no-churn whipped method produces surprisingly good results with minimal fuss. The soft-serve method is your friend if you want something ready to eat immediately, and the frozen yogurt base gives you the lightest, tang-forward option.
Master one method before trying them all. Once you understand how one works, swapping between methods becomes intuitive. You’ll develop an instinct for how thick the base should feel before churning, how firm it should be at each freeze stage, and exactly when it’s ready to scoop.
The beauty of making protein ice cream at home is that you’re not locked into a single flavor or texture. Build a small rotation of bases (vanilla, chocolate, and maybe one fruit flavor), then play with mix-ins and add-ins seasonally. You’ll have genuinely impressive homemade desserts that actually align with your nutritional goals, and that’s something to feel good about.