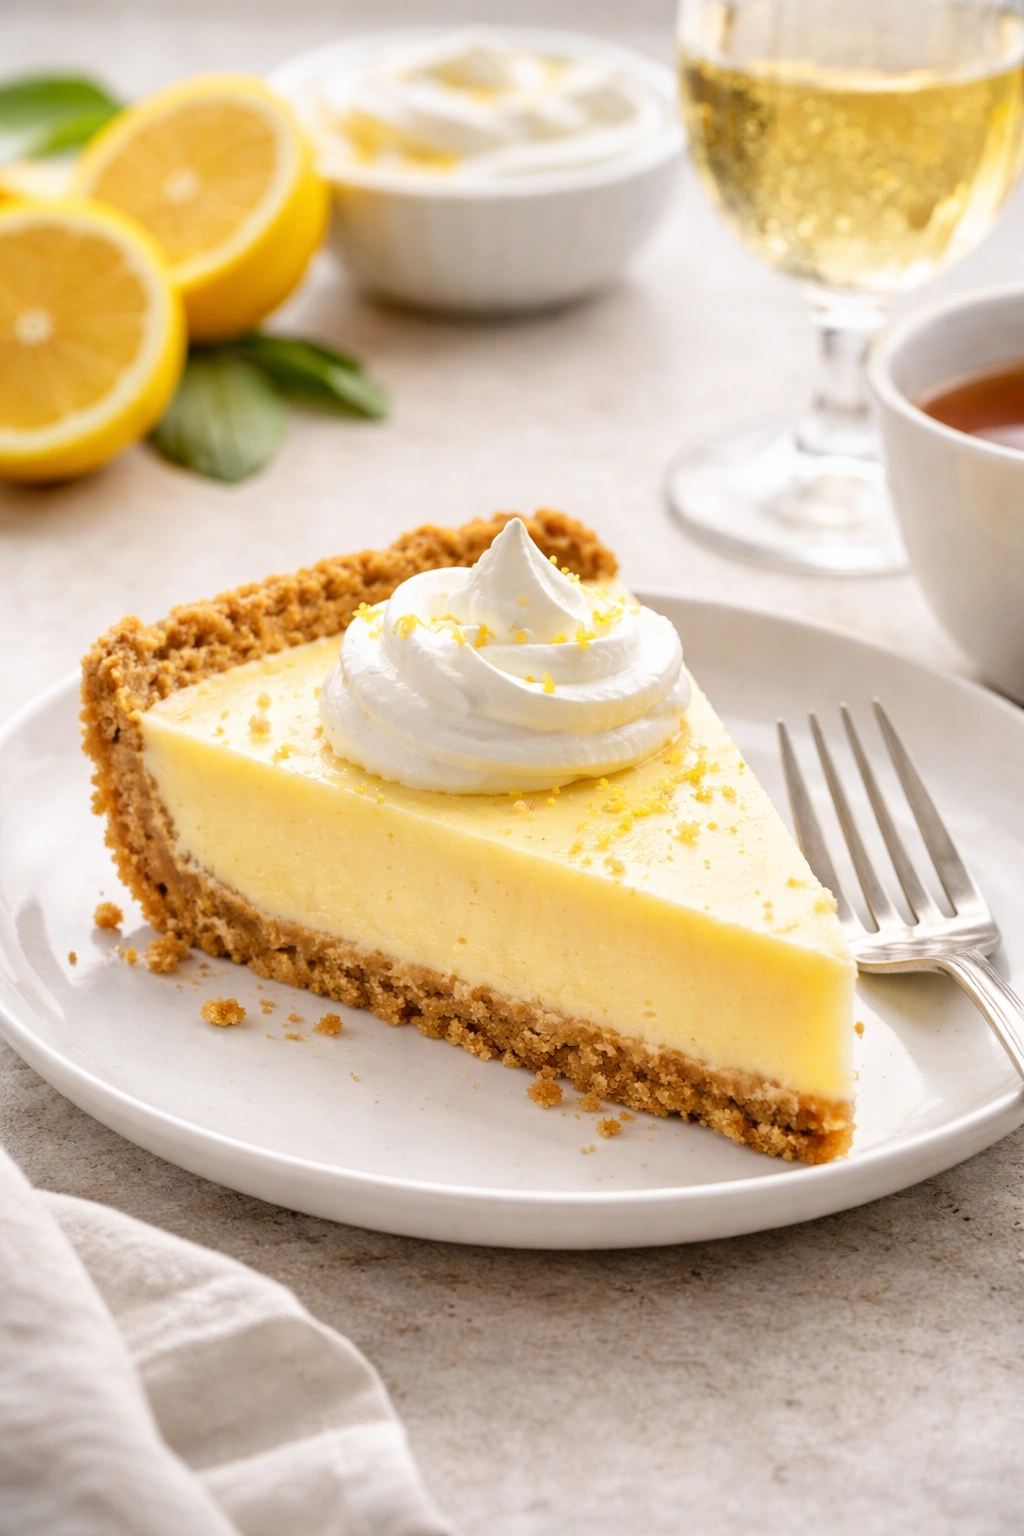
Atlantic Beach Pie is a centuries-old coastal dessert that combines tart, bright citrus with a rich, custardy filling all nestled in a buttery graham cracker crust. Originally created in — you guessed it — Atlantic Beach, North Carolina, this pie has become a beloved Southern classic that shows up at holiday tables and beach house dessert spreads across the East Coast. The magic lies in its contrast: the crispy-then-creamy texture, the intense citrus flavor that tastes both refreshing and indulgent, and the fact that it’s somehow sophisticated enough to serve at a dinner party yet simple enough to make on a weeknight.
The traditional version requires chilling time that stretches hours — sometimes overnight — which means planning ahead. But here’s what I’ve discovered after making this pie dozens of times: you don’t actually need to wait. With a few strategic shortcuts and ingredient adjustments, you can have a fully set, utterly delicious Atlantic Beach Pie ready to serve in about 30 minutes. The pie will be chilled and sliceable, the flavors will be perfectly balanced, and nobody eating a slice will know you didn’t spend half the day on it.
The key isn’t skipping steps or compromising on texture — it’s understanding which steps actually need time and which ones just feel like they do. This version uses a no-bake crust and a filling technique that sets rapidly without sacrificing that iconic custard-like consistency that makes this pie so craveable. Let me walk you through exactly how to pull it off.
Why This 30-Minute Version Actually Works

The traditional Atlantic Beach Pie involves making a homemade crust, baking it, preparing a filling with eggs and condensed milk, baking that, and then chilling everything for hours. Each step feels necessary because, well, that’s how the recipe has always been written. But when you break down what’s actually happening in each stage, you realize some shortcuts don’t change the final result at all.
A no-bake graham cracker crust sets completely firm in the freezer in about 5-7 minutes instead of needing 10 minutes of baking time plus cooling time. You save time and get a crust that’s actually more tender and easier to slice than a baked one. The filling, which is traditionally baked in a water bath for 15-20 minutes, can be chilled in the refrigerator for just 10-15 minutes if you start with chilled ingredients and use a shallow pie dish that increases surface area for faster cooling.
The sweetened condensed milk is the real MVP here. This ingredient is pure genius for fast desserts because it’s already cooked and stable — there’s no risk of curdling or foodborne illness that you’d have with raw eggs in a traditional custard. You can essentially “bake” this filling through chilling rather than oven heat, and it comes out with the exact same silky, slightly jiggly texture that makes Atlantic Beach Pie legendary.
The citrus element works in your favor too. Fresh lemon and lime juice are acidic enough that they actually help set the condensed milk and egg mixture faster than if you were using a neutral custard. The acid tightens the protein structure, which is why this pie firms up more quickly than you’d expect from a custard-based dessert.
The Secret Ingredient That Speeds Everything Up

Beyond the obvious shortcuts, there’s one ingredient that most recipes never mention but that actually speeds the whole process dramatically: unflavored gelatin. Now, before you think “that’s cheating,” hear me out — traditional Atlantic Beach Pie already contains enough acid and condensed milk that the filling firms up on its own, but it takes hours. A single packet of unflavored gelatin (just 1 teaspoon bloomed in a little lemon juice) gives the filling a silent boost that cuts chilling time from 2-3 hours down to 15 minutes without changing the flavor or texture one bit.
The gelatin doesn’t make the pie jiggly or rubbery — it just accelerates what would happen naturally anyway. Think of it like yeast in bread; it’s not creating something new, it’s just speeding up a process that was already going to occur. Most people won’t even taste that you’ve used it, and the pie will have that same creamy, barely-set custard consistency that makes Atlantic Beach Pie distinctive.
Some purists skip the gelatin entirely, and you absolutely can if you have 2-3 hours to chill. But if you’re actually trying to make this in 30 minutes, that gentle thickening agent is what makes it possible. I’ve made this pie both ways, and the gelatin version tastes identical to the long-chilled version — it just gets there faster.
Getting Your Ingredients Ready
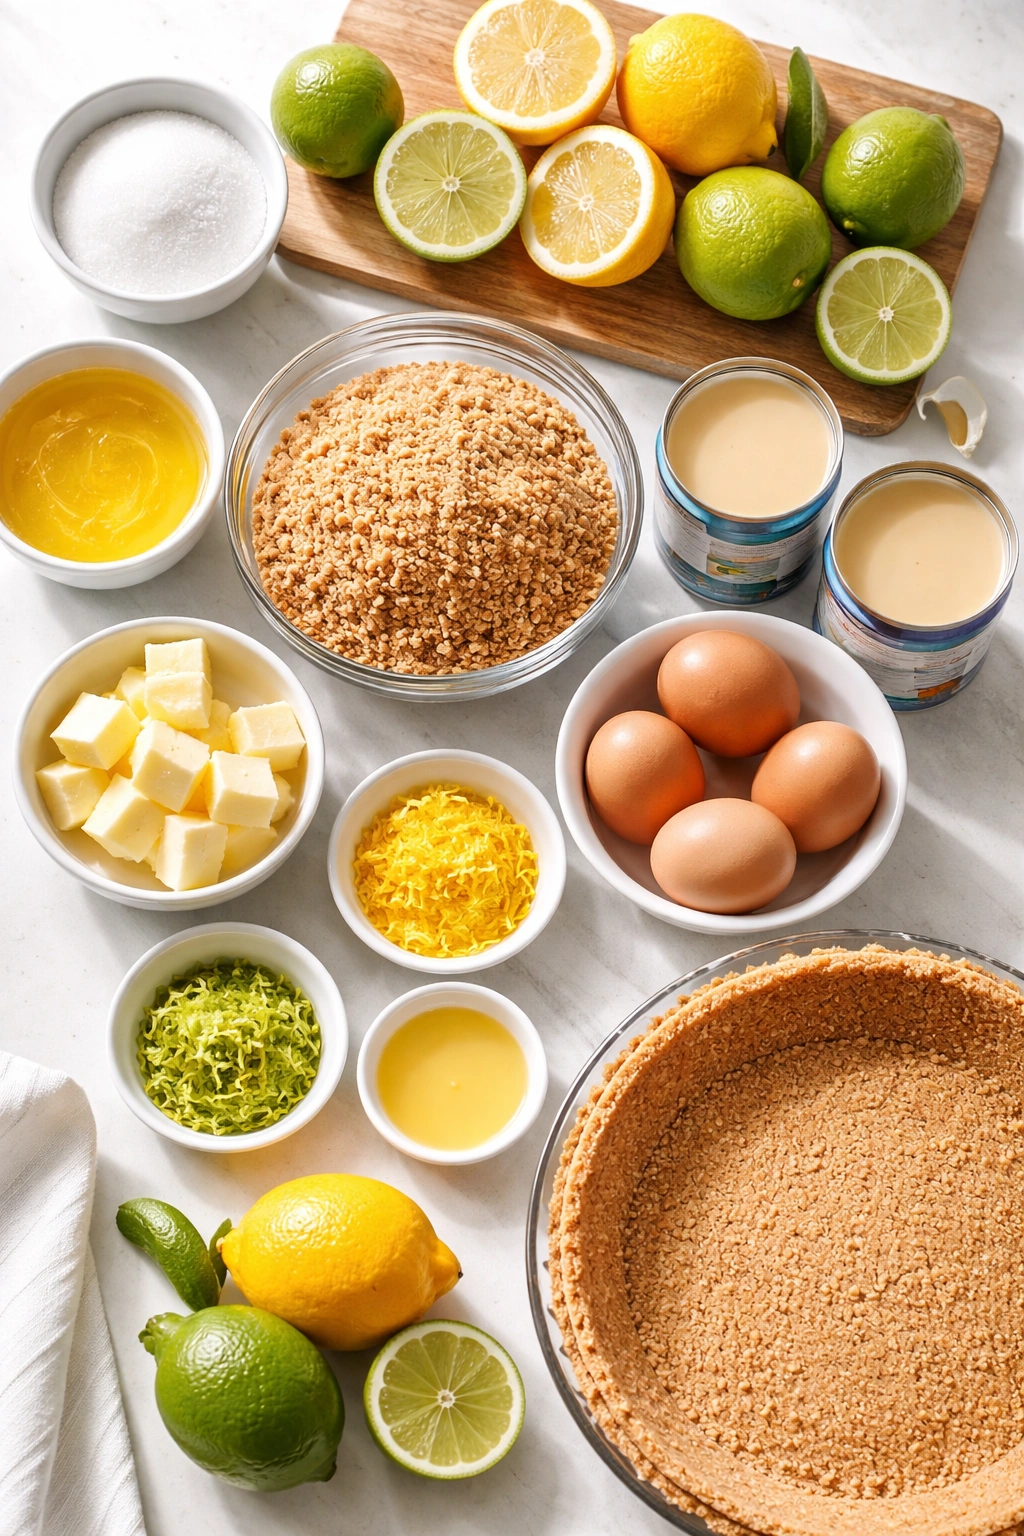
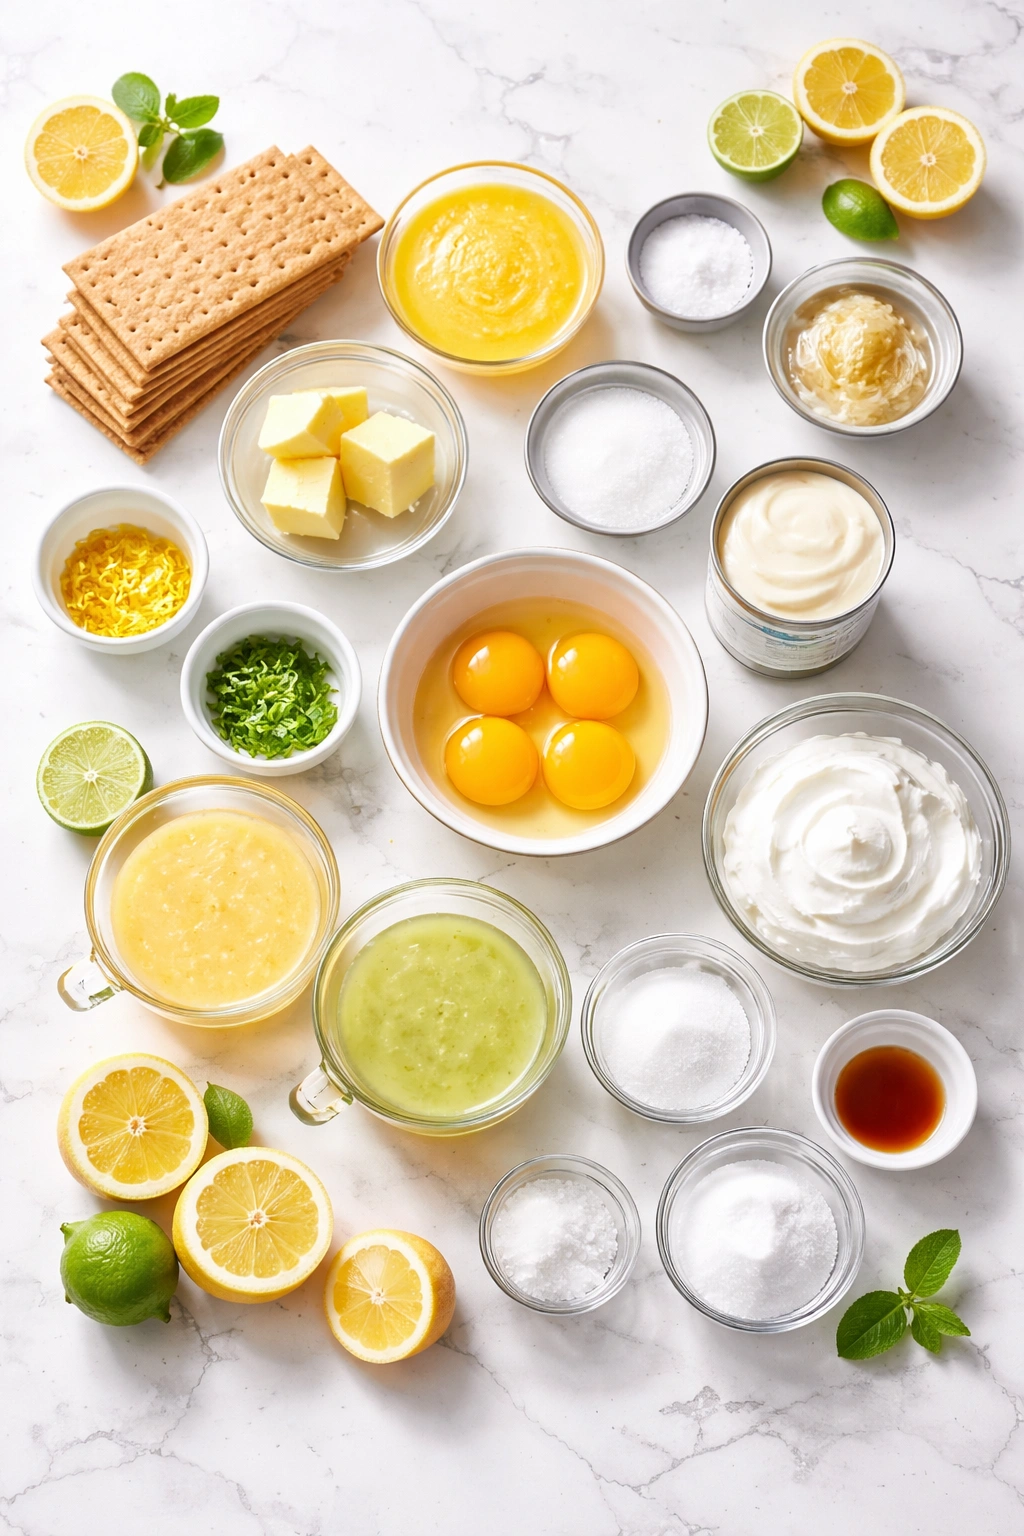
Success in a quick recipe lives or dies by preparation. Set everything out before you start: the sweetened condensed milk straight from the can (no need to warm it), your lemons and limes, the eggs, the butter, and everything else. Having everything visible and accessible means you won’t waste time hunting through the pantry mid-process, which absolutely kills your momentum when you’re racing against 30 minutes.
Zest your lemons and limes before you juice them — zest becomes harder to remove once the citrus is cut in half and you’ve squeezed all the juice out. Use a microplane zester for the finest, most flavorful zest; a box grater works too, though you’ll get slightly thicker shreds. You want about 1 tablespoon of zest total, which gives you that intense citrus aroma and bright flavor without making the filling gritty.
Juice your citrus into a small bowl and pass it through a fine-mesh strainer to catch any seeds or pulp. You need about 1/2 cup of fresh juice total, and it’s absolutely worth squeezing fresh — bottled lemon juice tastes flat and one-dimensional compared to the bright, complex flavor of juice you just pressed from whole fruit. If you happen to have Meyer lemons available (they’re sweeter and slightly more aromatic than regular lemons), this pie becomes even more special, though regular lemons work beautifully too.
Separate your eggs carefully — you need whites and yolks kept completely separate. Even a tiny bit of yolk in the whites, or shells in either component, will cause problems. Use eggs that are room temperature if possible; they incorporate more smoothly into the filling. If your eggs came straight from the fridge, place them in a bowl of warm water for 5 minutes while you’re prepping the crust.
Serving and Timing Block

Yield: Serves 6 to 8
Prep Time: 12 minutes
Chill Time: 15 minutes
Total Time: 27 minutes
Difficulty: Beginner — This recipe requires no baking, just basic mixing and refrigeration. No special equipment needed beyond a stand mixer or handheld mixer and a 9-inch pie dish.
The Complete Ingredient List
For the No-Bake Graham Cracker Crust:
- 1½ cups graham cracker crumbs (about 10-12 full crackers, crushed into fine crumbs)
- 5 tablespoons unsalted butter, melted
- 2 tablespoons granulated sugar
- Pinch of fine sea salt
For the Citrus Custard Filling:
- 1 (14-ounce) can sweetened condensed milk
- 4 large egg yolks, room temperature
- 1 teaspoon unflavored gelatin
- 3 tablespoons fresh lemon juice (from about 2 lemons), divided
- 2 tablespoons fresh lime juice (from about 1 lime)
- 1 tablespoon fresh lemon zest
- ½ teaspoon fresh lime zest
- ¼ teaspoon fine sea salt
For the Meringue Topping:
- 4 large egg whites, room temperature
- ¼ teaspoon cream of tartar
- 3 tablespoons granulated sugar
- ½ teaspoon vanilla extract
Optional garnish:
- Additional lemon or lime zest
- Candied lemon slices (store-bought are fine)
Step-by-Step Instructions
Prepare the Crust:
-
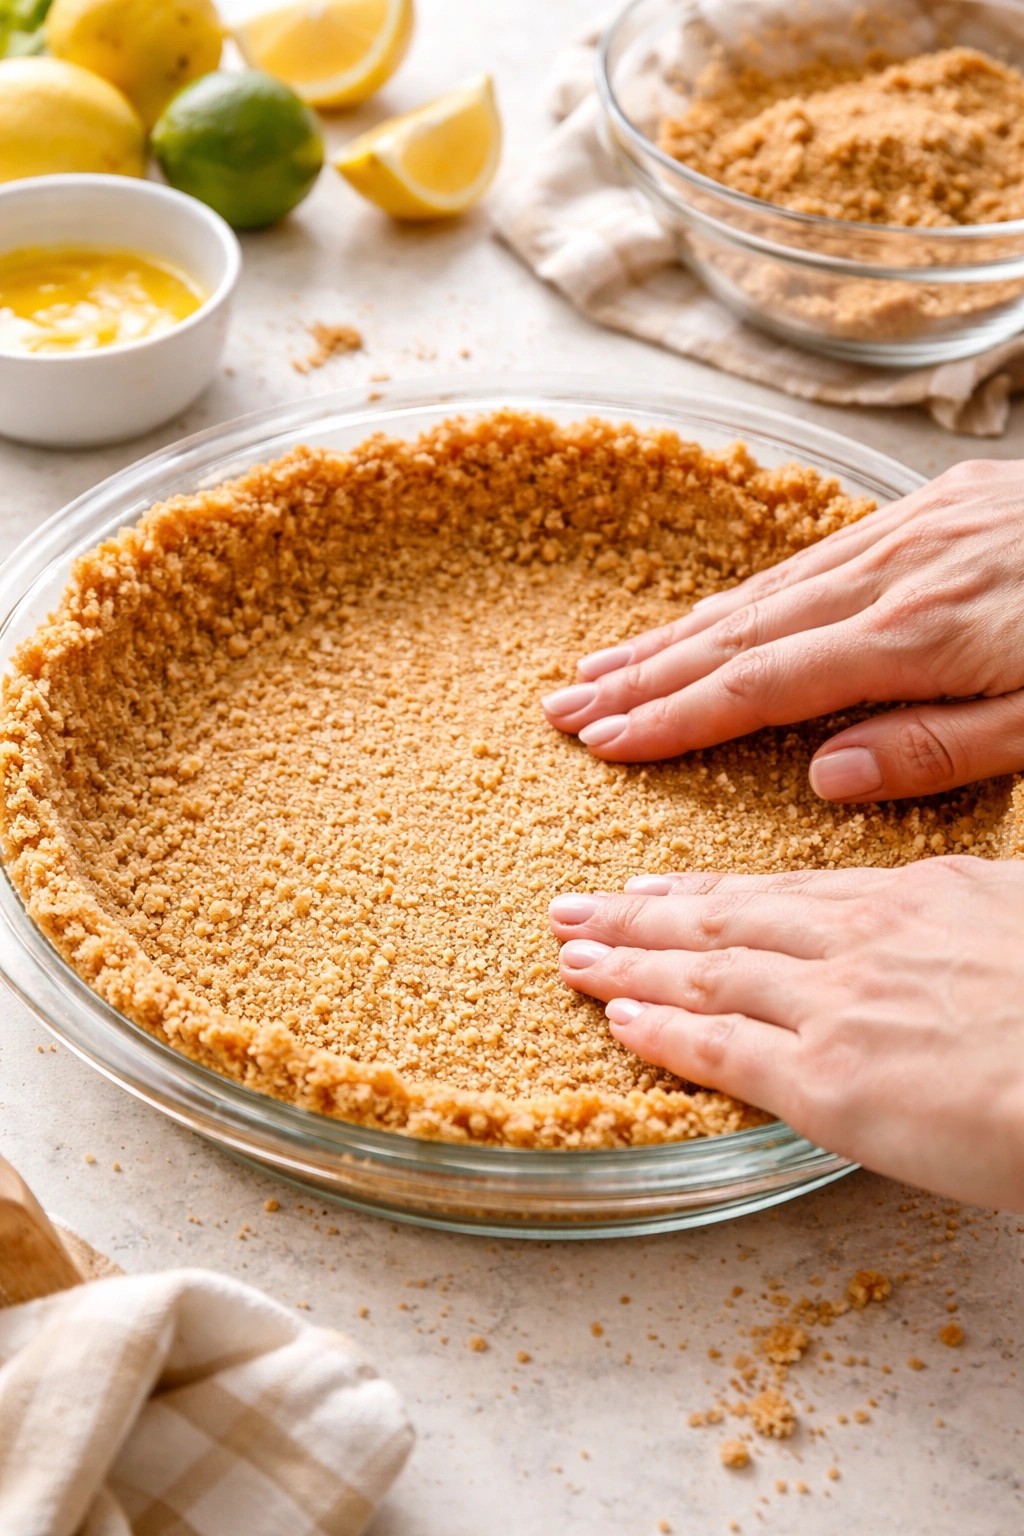
Pour the graham cracker crumbs into a 9-inch pie dish. Add the melted butter, sugar, and salt, then toss everything together with a fork until the mixture resembles damp sand — every crumb should be coated with butter but not clumped into paste.
-
Press the mixture firmly into the bottom of the pie dish, then press it up the sides to create a crust that’s about ¼-inch thick. Use the bottom of a measuring cup to create an even thickness across the bottom. Don’t press so hard that you compress it into a dense brick, but press firmly enough that it holds together when you slice the pie later. Place the crust in the freezer immediately while you prepare the filling.
Prepare the Gelatin Mixture:
-
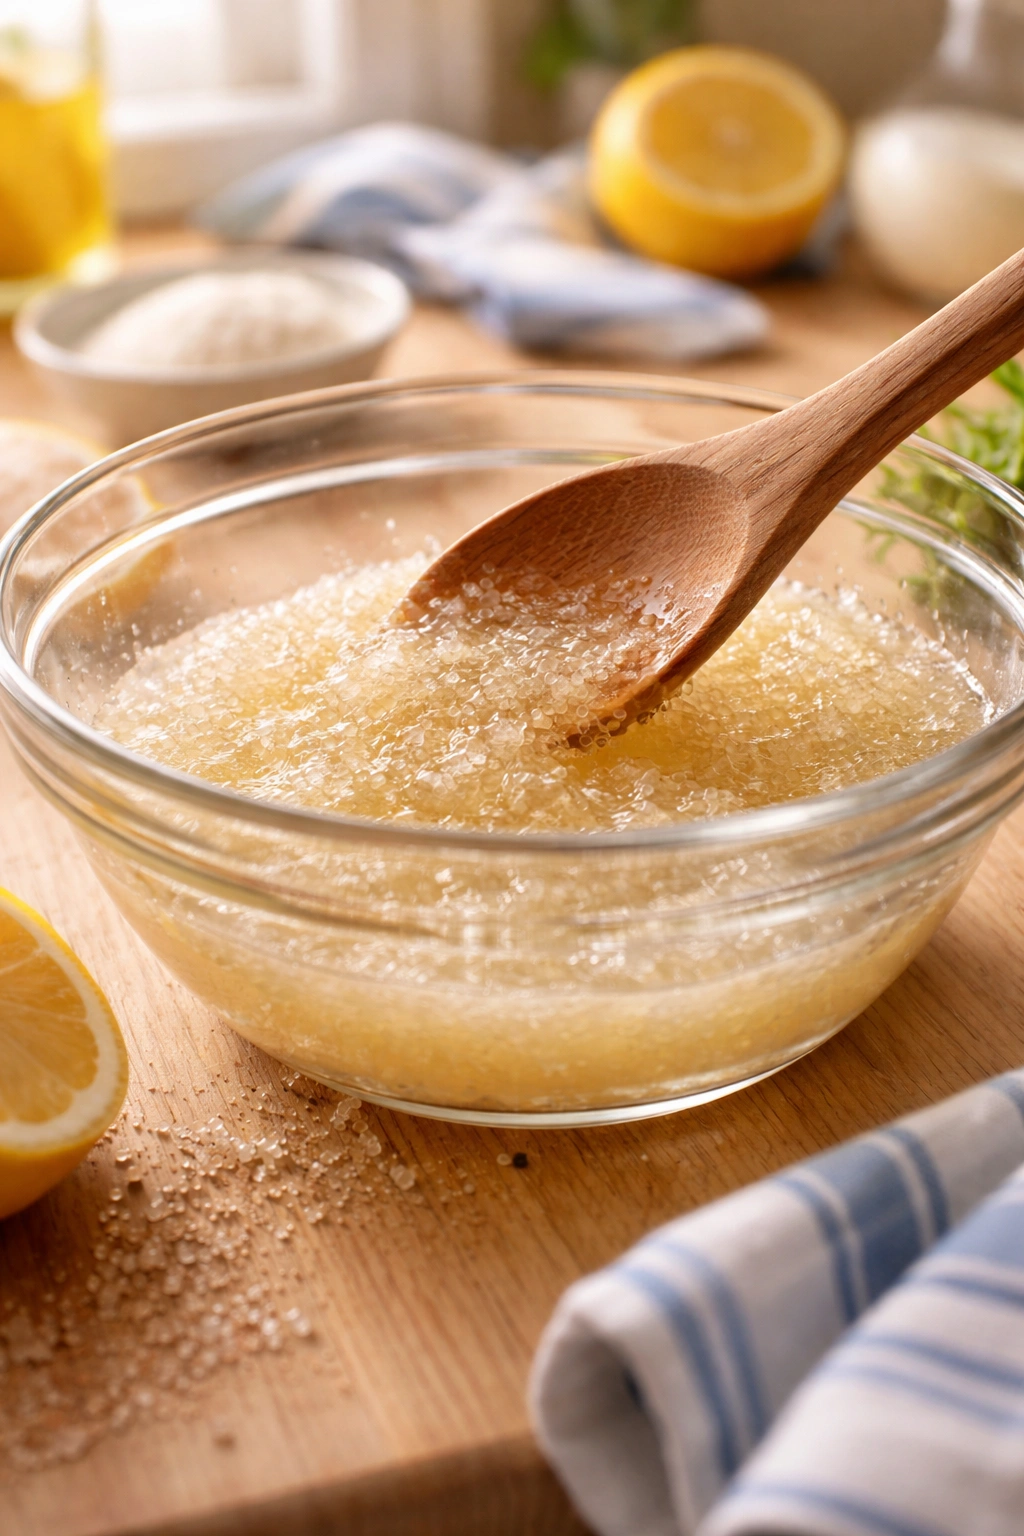
Pour 1½ tablespoons of the lemon juice into a small bowl, then sprinkle the unflavored gelatin over the top. Let it sit for exactly 2 minutes so the gelatin can absorb the liquid (this is called “blooming”). Do not skip this step — if you add dry gelatin directly to the filling, it will clump and create grainy texture.
-
After 2 minutes, place the bowl with the bloomed gelatin over a pot of gently simmering water (you’re creating a makeshift double boiler). Heat just until the gelatin dissolves completely and the mixture is warm to the touch, about 1-2 minutes. The mixture should be clear and pourable, with no visible gelatin granules remaining. Remove from heat and let cool for 1 minute.
Make the Custard Filling:
-
In a medium bowl, whisk together the sweetened condensed milk and the 4 room-temperature egg yolks until completely combined and smooth. The mixture will be pale yellow and should take about 1 minute of whisking.
-
Add the remaining 1½ tablespoons lemon juice, the lime juice, lemon zest, lime zest, and salt to the condensed milk mixture. Whisk vigorously for 30 seconds until the zest is distributed throughout and the mixture is homogeneous.
-
Pour the cooled gelatin mixture into the citrus-condensed milk mixture and whisk gently until completely incorporated. The filling will be silky and pale yellow with visible flecks of zest. At this point, the filling should be pourable but will set as it chills.
-
Remove the chilled crust from the freezer. Pour the filling into the crust and smooth the top with a spatula. Return the pie to the freezer while you make the meringue.
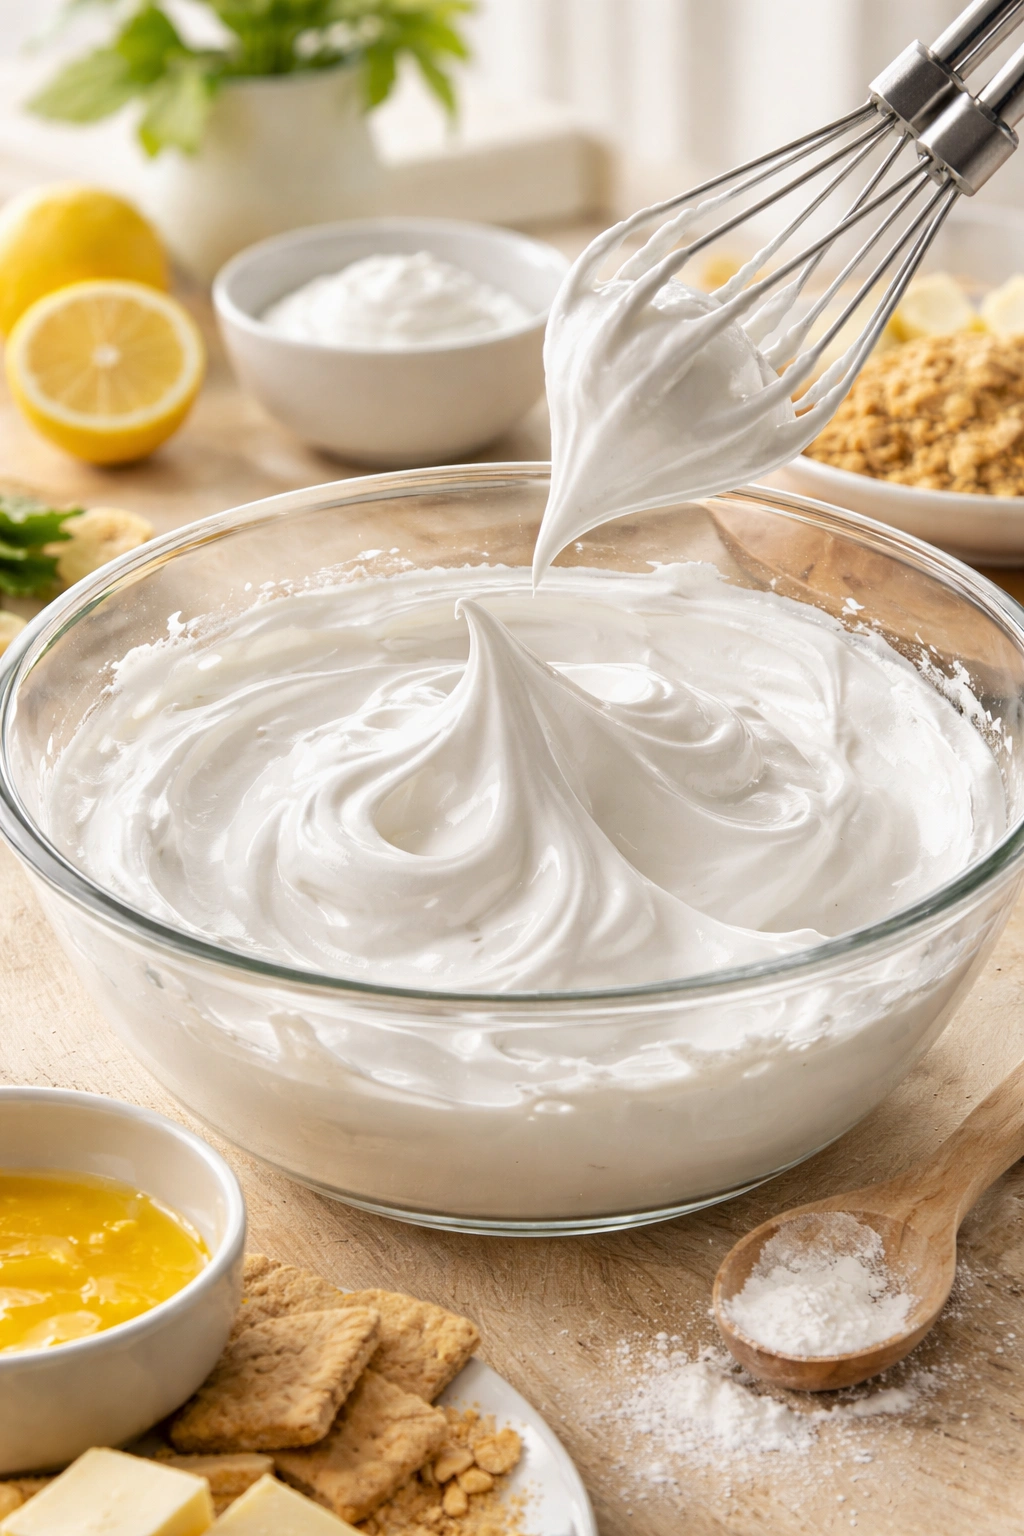
Make the Meringue Topping:
-
In a clean, completely dry bowl (even a tiny drop of water or a speck of yolk will prevent the whites from whipping), add the 4 room-temperature egg whites and cream of tartar. Using an electric mixer on medium-high speed, beat the whites for about 2 minutes until they’re foamy and opaque.
-
With the mixer still running, sprinkle in the sugar one tablespoon at a time, waiting 10-15 seconds after each addition before adding the next. Once all the sugar is added, increase the mixer speed to high and beat for another 2-3 minutes until stiff, glossy peaks form — when you lift the beaters, the peaks should stand straight up without collapsing. Add the vanilla extract in the last 30 seconds of beating.
-
Remove the pie from the freezer. Quickly dollop the meringue over the top of the filling in large spoonfuls, then gently spread it into an even layer using a spatula or the back of a spoon. Make sure the meringue touches the crust all around the edges (this prevents it from shrinking away during any light heat application). You can leave the top slightly rough and rustic, or smooth it into graceful peaks and swirls — both look beautiful.
-
If you prefer to skip browning the meringue, the pie is now ready to eat. For a lightly golden meringue top with a crisp exterior, use a kitchen torch to gently brown the peaks over a flame, moving the torch slowly and keeping it about 2-3 inches from the meringue. This takes about 1-2 minutes total and adds a delicious texture contrast, but it’s entirely optional — the pie is delicious either way.
Chill and Serve:
- Place the finished pie in the refrigerator for at least 12 minutes before serving. This allows the filling to firm up enough to slice cleanly. The pie will be perfectly sliceable at this point and ready to serve immediately. If you’d prefer to wait longer (up to 1 hour before serving), it will only get better — the flavors will settle and the texture will become slightly more custard-like.
Baking Tips That Keep This Quick Version From Failing
The biggest mistake people make with a 30-minute pie is rushing the gelatin step. That 2-minute bloom time isn’t negotiable — if you skip it or try to dissolve dry gelatin directly into the filling, you’ll end up with a grainy, curdled texture that ruins the whole pie. Bloom your gelatin, wait patiently for those 2 minutes, then dissolve it gently. This small delay saves you from disaster.
Your ingredients must be at room temperature, especially the eggs. Cold eggs don’t incorporate smoothly into the filling, and they cool down the whole mixture, which slows the setting process. If you forget to take them out of the fridge ahead of time, place them in a bowl of warm (not hot) water for 5-10 minutes.
Don’t skip the freezer time for the crust. Those 5-7 minutes are what allow the no-bake crust to set firm enough that it doesn’t taste crumbly when you bite into it. If you put warm filling into a still-soft crust, the crust softens further and becomes more like a graham cracker paste than a proper pie shell.
The meringue needs to be beaten to stiff peaks and used immediately after beating. If it sits for more than a minute or two, it starts to lose volume and become slightly watery, which means it won’t have that crisp exterior and fluffy interior texture. Make your meringue at the very end, just before you’re ready to top the pie.
If you’re concerned about serving undercooked egg whites in the meringue, you have two options: use pasteurized eggs (they’re safe to eat raw), or use aquafaba (the liquid from a can of chickpeas) instead of egg whites for the meringue. Aquafaba whips into a meringue that’s virtually indistinguishable from the real thing, and it’s completely shelf-stable and safe. Use 1/4 cup aquafaba plus 1/4 teaspoon cream of tartar and beat it exactly the way you would egg whites.
Common Mistakes to Avoid (Even When You’re In a Hurry)
People often skip the cream of tartar in the meringue because they think it’s optional, but it’s actually crucial. Cream of tartar stabilizes the egg white foam and helps it hold its peaks longer, which means you’re less likely to end up with a weepy, collapsed meringue. It’s inexpensive and lasts forever in the pantry — use it.
Melting the butter and then forgetting to let it cool slightly before mixing it into the graham cracker crumbs is a classic mistake. If your butter is still hot when it hits the crumbs, some of them will toast and brown, which changes the flavor and texture of your crust. Melt the butter, let it sit for a minute, then use it.
Many recipes call for a smaller amount of juice, which makes a filling that’s not nearly as flavorful as it should be. The juice is what makes this pie special — don’t skimp on it. You want a filling that tastes intensely citrusy with just a hint of creaminess from the condensed milk, not the other way around.
Overmixing the filling once you’ve added the gelatin can break down the protein structure and make it watery. Once everything is combined, stop mixing. A few gentle folds are plenty; you don’t need to beat it into submission.
Using bottled lime or lemon juice instead of fresh-squeezed is never worth the time you save. The difference in flavor is so dramatic that people will immediately notice something’s off. Spend the 3 minutes to juice fresh citrus — it absolutely matters here.
Flavor Variations You Can Make in the Same Time

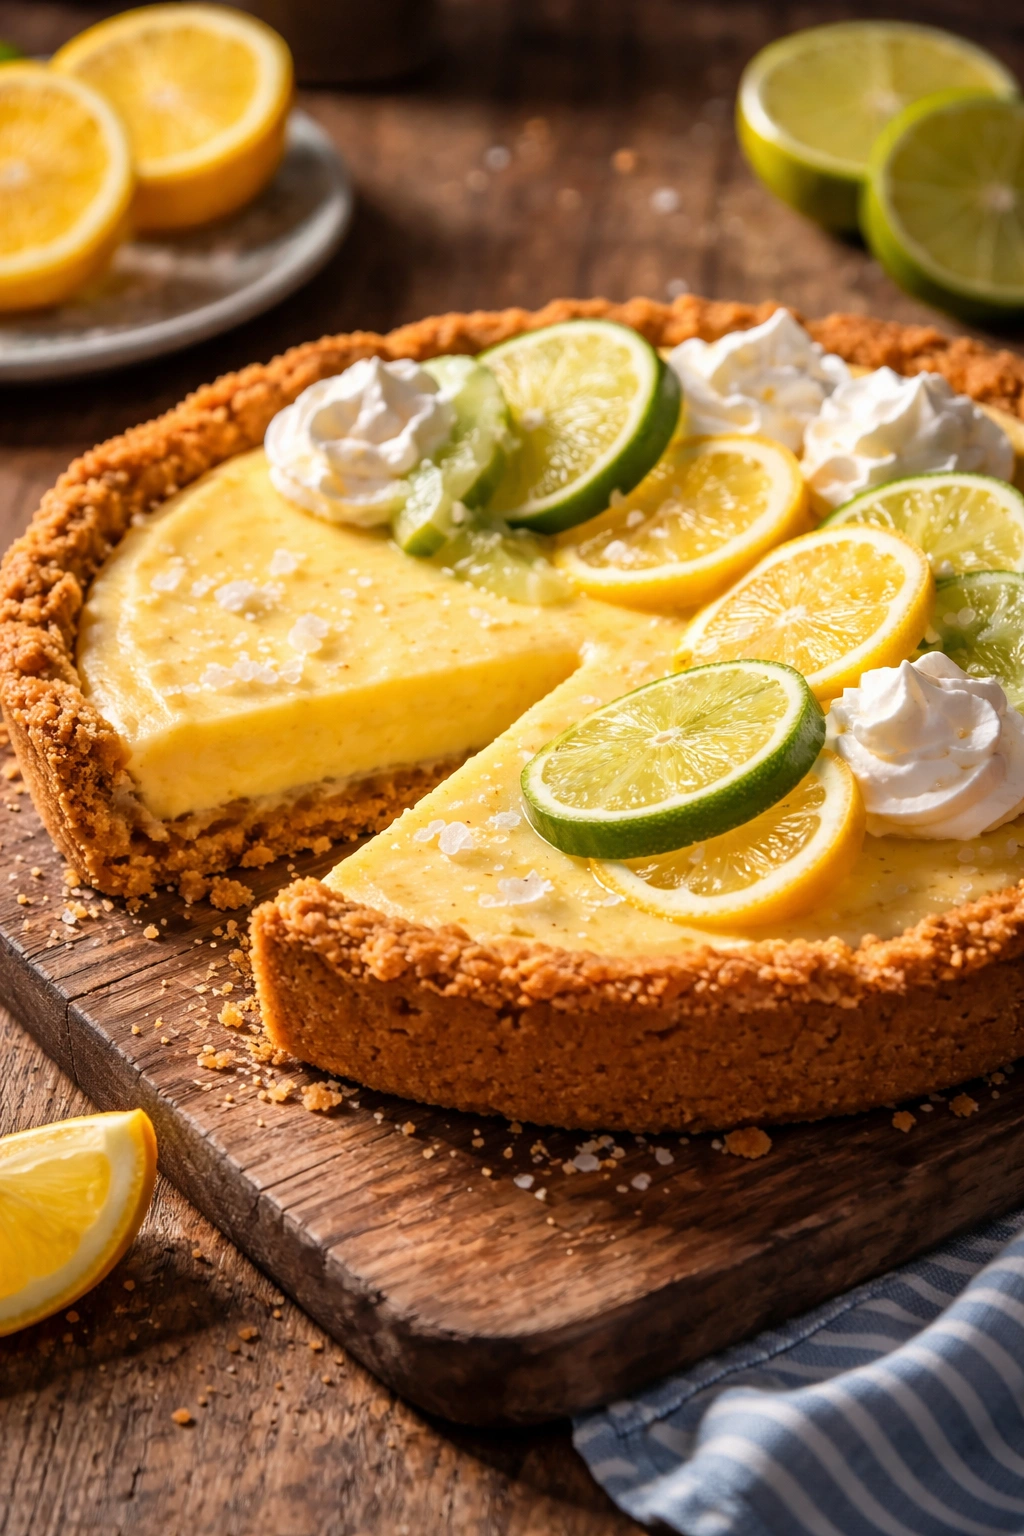
The classic Atlantic Beach Pie is perfect, but you can absolutely customize it to your taste without adding any time to the recipe. The simplest variation is all-lemon or all-lime — just use 5 tablespoons of one juice instead of the 3-tablespoon lemon and 2-tablespoon lime combination. An all-lemon version tastes brighter and more tart, while all-lime gives you a slightly different citrus profile that’s equally delicious.
For a grapefruit version, use half fresh grapefruit juice and half lemon juice (about 2.5 tablespoons of each) along with the zest of one grapefruit instead of the lime zest. This creates a pie that’s slightly more bitter and grown-up tasting, with a beautiful pale pink color that comes straight from the grapefruit.
A coconut variation is lovely for those who want something a bit more tropical. Reduce the condensed milk by 2 tablespoons and replace it with 2 tablespoons of coconut milk (the canned kind), then add ½ teaspoon of coconut extract to the filling. Use the same amount of citrus juice — the coconut doesn’t change the setting time or the basic chemistry. Sprinkle toasted coconut flakes over the meringue before serving.
The blueberry swirl version is stunning visually. Prepare the filling as directed, then fold in ½ cup of fresh blueberries gently right before pouring it into the crust. The berries distribute unevenly, creating pockets of berry flavor and a beautiful speckled appearance. Use slightly fewer zests (about ¾ teaspoon total) because the blueberries add their own flavor.
For something more savory, reduce the sugar in the meringue from 3 tablespoons to 2 tablespoons and add ⅛ teaspoon of finely ground black pepper to the filling. Pepper and citrus are a classic pairing, and this version becomes almost an open-faced tart that works as elegantly after dinner as it does as an afternoon treat.
Storage and Make-Ahead Options

This pie is absolutely best served the same day you make it, while the meringue is still crisp on the outside and the filling is perfectly chilled. However, it stores beautifully in the refrigerator for up to 3 days, covered loosely with plastic wrap. The meringue will gradually lose some of its crispness and absorb moisture from the filling, but the flavor remains excellent.
If you want to make the crust ahead of time, you can prepare it up to 2 days in advance. Assemble the crust, press it into the pie dish, wrap it tightly in plastic wrap, and freeze it. It will keep for up to 2 days this way. When you’re ready to fill it, just take it out of the freezer and proceed with the filling — you won’t even need to add extra time because the frozen crust will chill your filling faster.
You can also prepare the filling (gelatin mixed in) up to 1 day in advance and store it in a covered container in the refrigerator. When you’re ready to serve, simply pour it into your crust, make fresh meringue, top the pie, and serve immediately or chill for the remaining time. The gelatin will have set the filling slightly, but it will still pour into the crust smoothly.
Don’t freeze this pie. The custard filling doesn’t freeze well — it becomes grainy and separates slightly as it thaws. The meringue also becomes watery when frozen. If you have leftovers you want to keep, stick to refrigerator storage and enjoy them within 3 days.
Leftover slices can be loosely covered with plastic wrap and kept in the refrigerator. Eat them cold straight from the fridge, or let them sit at room temperature for 15-20 minutes to allow the filling to warm to a slightly softer, more custard-like consistency.
Serving Suggestions and Pairings
This pie is dramatic and elegant enough to serve at a formal dinner, but it’s also casual enough for a beach house afternoon. Serve it chilled straight from the refrigerator for the best texture and appearance. Chill your serving plates too if you have time — a cold plate keeps the meringue crisp longer and makes the whole experience feel more special.
Slice using a sharp knife dipped in hot water between each cut, wiping the blade clean after every slice. This prevents the meringue from sticking to the knife and keeps your slices clean and neat. Aim for slices about 1 inch wide — this pie is rich, so smaller portions are perfect.
A dollop of freshly whipped cream is the only accompaniment this pie needs, though you can skip it entirely if you prefer. The whipped cream should be barely sweetened (just 1 teaspoon of sugar per cup of cream) so it doesn’t compete with the bright citrus flavor. A little extra zest sprinkled over the whipped cream creates a beautiful final presentation.
Pair this pie with tea, coffee, or sparkling wine. The brightness of the lemon and lime makes this pie fantastic alongside hot tea, or with cold sparkling wine as a dessert course. It’s equally lovely with iced tea, cold milk, or even a simple glass of cold water — the citrus is refreshing and doesn’t demand a heavy accompanying beverage.
This pie also works beautifully as a no-fuss finale after a seafood dinner. Serve it after crab, shrimp, or fish, and the citrus flavors will echo and complement what came before. It’s light enough that it won’t feel heavy after a meal, but rich enough to feel like a proper dessert course.
For a casual gathering, serve slices on dessert plates with forks at the side, or package slices in small boxes to send home with guests. People consistently tell me this is one of the most memorable desserts they’ve eaten because it’s so bright, so simple, and somehow both comforting and impressive at the same time.
Final Thoughts
Atlantic Beach Pie doesn’t need hours of chilling to become absolutely delicious. With the right approach — a no-bake crust, chilled ingredients, a strategic bloom of gelatin, and a quick refrigeration period — you can create a pie that tastes like you spent all day on it in less than half an hour. The citrus flavor is vibrant, the texture is custard-soft with that crisp meringue contrast, and the whole thing feels luxurious without being complicated.
The real beauty of this quick version is that you haven’t compromised anything except time. You’re not using artificial flavoring, shortcut ingredients, or techniques that would make a traditional baker cringe. You’re just understanding the science well enough to accelerate what would naturally happen anyway. Serve this to friends and family, and they’ll be impressed — because a pie this good, made this quickly, is genuinely impressive.
Make this pie tonight, tomorrow night, or any time you want a sophisticated dessert that sounds like it took hours but barely dent your schedule. Once you’ve made it once, you’ll find yourself making it again and again.