If you’ve ever wondered why restaurant soy-glazed salmon tastes so impossibly better than what you make at home, you’re not alone. That glossy, caramelized exterior. That perfect balance of salty, sweet, and savory that hits your palate all at once. The salmon that’s somehow crispy on the outside yet silky and moist inside. You’ve probably assumed it requires some kind of professional technique or secret ingredient you don’t have access to.
Here’s the thing: restaurant-quality soy-glazed salmon isn’t actually complicated. It’s not about fancy equipment or obscure ingredients. It’s about understanding three core principles—how to build real flavor into your glaze, when to apply it during cooking, and which cooking method gives you that beautiful caramelized finish without drying out the fish. Once you master these, you’ll stop ordering takeout salmon and start making it at home in less time than delivery would take to arrive.
The magic of takeout-style salmon comes from that umami-rich glaze that clings to every surface of the fish. Unlike a simple marinade that requires hours of advance preparation, this glaze works fast because it reduces and concentrates right alongside your salmon as it cooks. You’re building layers of flavor—soy sauce’s deep saltiness, honey’s natural sweetness that caramelizes beautifully, fresh garlic and ginger’s aromatic punch, and often a touch of rice vinegar for brightness. When this combination hits hot metal and starts to thicken, it creates something genuinely spectacular.
Why Restaurant Salmon Outshines the Homemade Version
Restaurant salmon tastes different because restaurants are laser-focused on one thing: achieving a gorgeous sear and a sticky glaze simultaneously. Most home cooks either get a beautiful exterior but bland fish, or they focus so hard on keeping the salmon moist that they skip the sear entirely. The difference is usually one of three things.
First, restaurants use proper heat. A screaming-hot pan or oven creates that critical crust through a process called the Maillard reaction, where proteins and sugars combine at high temperatures to create new flavor compounds that don’t exist in raw or gently cooked salmon. You need temperature—not gentle temperature, not medium temperature, but actual heat that makes you instinctively pull your hand back from the pan.
Second, they don’t overcomplicate the glaze. While home recipes sometimes get bogged down with too many ingredients that muddy the flavor, restaurant glazes stick to the essentials: soy sauce for umami, a sweetener for balance and caramelization, aromatics for depth, and often acid to brighten everything. That’s it. Four to five ingredients, used in the right proportions, create something far more powerful than a complicated sauce.
Third, restaurants understand the timing. They apply the glaze strategically—not at the beginning when it would burn, not at the end when there’s no time for it to reduce, but right when the salmon needs it most to finish cooking with a glossy, thickened coating.
What Makes a Soy Glaze Actually Stick to Salmon

The biggest mistake people make with glazed salmon is assuming the glaze will coat the fish the way it does in restaurants. It doesn’t—not unless you understand what’s happening at a chemical level. Raw salmon is slippery. The moisture and fat on the surface want nothing to do with a liquid glaze. The glaze just runs off or sits in the pan while your salmon cooks naked underneath.
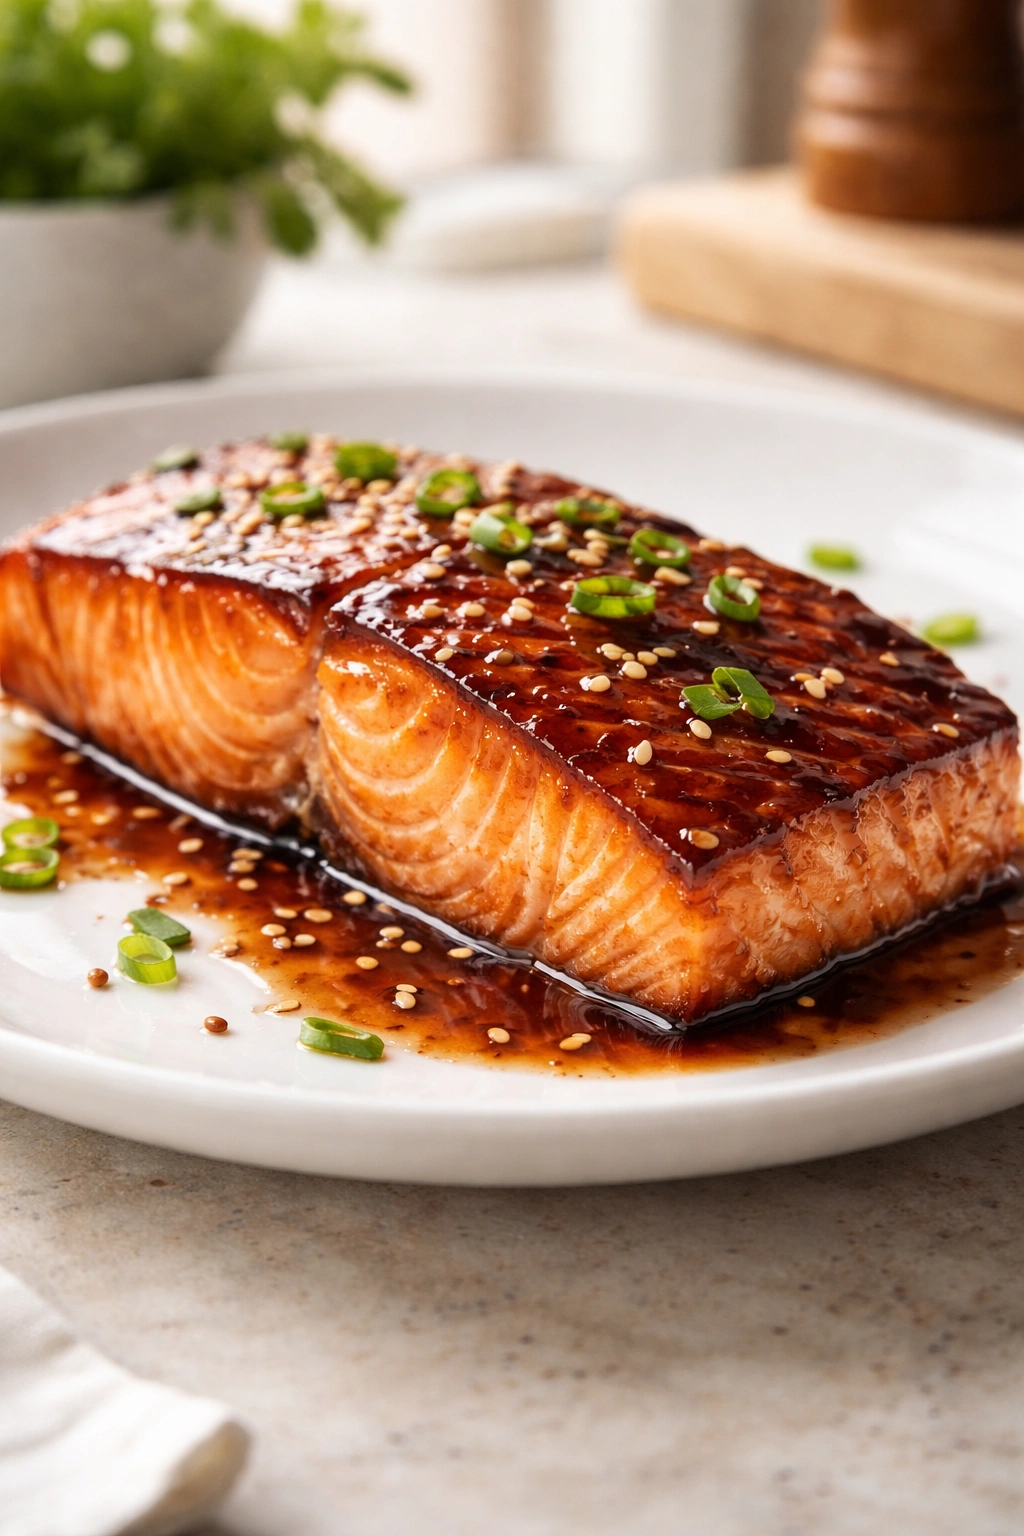
That changes dramatically once the salmon hits high heat and develops a crust. As the exterior proteins denature and firm up, they create a slightly rougher surface that catches and holds the glaze. This is exactly why searing matters. A properly seared salmon fillet has a microscopically textured exterior that grips the glaze like velcro, allowing it to build up and reduce into that glossy coating.
The glaze itself needs to be the right consistency as it reduces. If it’s too thin, it’ll stay liquid and slide right off. If it’s too thick, it’ll stick but become cloyingly sweet or overly salty. The sweet spot is when your glaze reduces by about one-third of its original volume—it should coat the back of a spoon in a thin, clingy layer and fall off slowly in a single stream when you tilt the spoon. At that point, every ounce of flavor is concentrated, every element is balanced, and it’ll coat salmon perfectly.
The honey does most of the heavy lifting here. As it heats, the honey’s natural sugars caramelize slightly, which adds depth and helps the glaze thicken without turning it into a sugar shell. Soy sauce provides the salty, umami base that makes the sweetness palatable. Fresh ginger and garlic add complexity that keeps the glaze from tasting one-dimensional. Rice vinegar or lemon juice acts as a counterbalance, preventing the whole thing from becoming cloying.
Choosing Your Salmon and Preparing It Correctly

The quality of your salmon matters here, but probably less than you think. You don’t need expensive wild salmon to make this dish taste incredible. What you do need is salmon that’s been handled properly—which usually means buying it from a fishmonger rather than from the back of a supermarket seafood case that’s been sitting under lights for hours.
Look for salmon that smells like the ocean, not fishy. Any ammonia or unpleasant smell is a sign the fish has been sitting around too long. The color should be bright and vibrant, not dull or graying. If the package has liquid pooled at the bottom, that’s a sign the fish has been thawing or is older. Choose fillets that feel firm when you gently press them—they should spring back rather than leave an indent.
Thickness matters for even cooking. Ideally, choose fillets that are about an inch thick. Thinner fillets (under ¾ inch) will cook through before you can properly sear them. Thicker fillets take longer to cook, and by the time the inside is done, the outside might overcook. An inch-thick fillet gives you the goldilocks zone where the exterior can develop that beautiful crust while the interior stays moist.
Pat your salmon completely dry before cooking—this is non-negotiable. Moisture is the enemy of browning. Use paper towels and press firmly. If your salmon has a ton of moisture on the surface, pat it dry, let it air-dry for a few minutes uncovered in the refrigerator, then pat dry again right before cooking. This extra step makes a visible difference in how much crust develops.
Season your salmon generously with salt and pepper on both sides at least 5 minutes before cooking. This gives the salt time to penetrate the flesh slightly and season it properly, rather than just sitting on the surface. Don’t be shy with the seasoning—salmon is a rich, fatty fish and can handle bold seasoning.
Building the Perfect Soy Glaze from Scratch
Yield: Serves 2 | Makes 1 pound of salmon (approximately)
Prep Time: 10 minutes
Cook Time: 15 minutes
Total Time: 25 minutes
Difficulty: Beginner — The glaze comes together in minutes and requires only basic cooking skills. The technique is forgiving and produces consistent results even on your first attempt.
For the Soy Glaze:
- ⅓ cup soy sauce or tamari (use reduced-sodium if you prefer less salt)
- ⅓ cup honey (or light brown sugar if you prefer less sweetness)
- 3 cloves garlic, minced finely (about 1 tablespoon)
- 1 tablespoon fresh ginger, minced or grated
- 1 tablespoon rice vinegar or fresh lemon juice
- ½ teaspoon sesame oil (optional but adds incredible depth)
- ¼ teaspoon red pepper flakes (optional, for gentle heat)
For the Salmon:
- 1 pound salmon fillets, skin-on or skinless (two 8-ounce fillets or four 4-ounce portions)
- 2 tablespoons avocado oil or another high-heat oil
- Salt and pepper to taste
Optional Garnish:
- Sesame seeds (white or black, toasted or raw)
- Thinly sliced green onions
- Fresh cilantro
- A drizzle of chili crisp
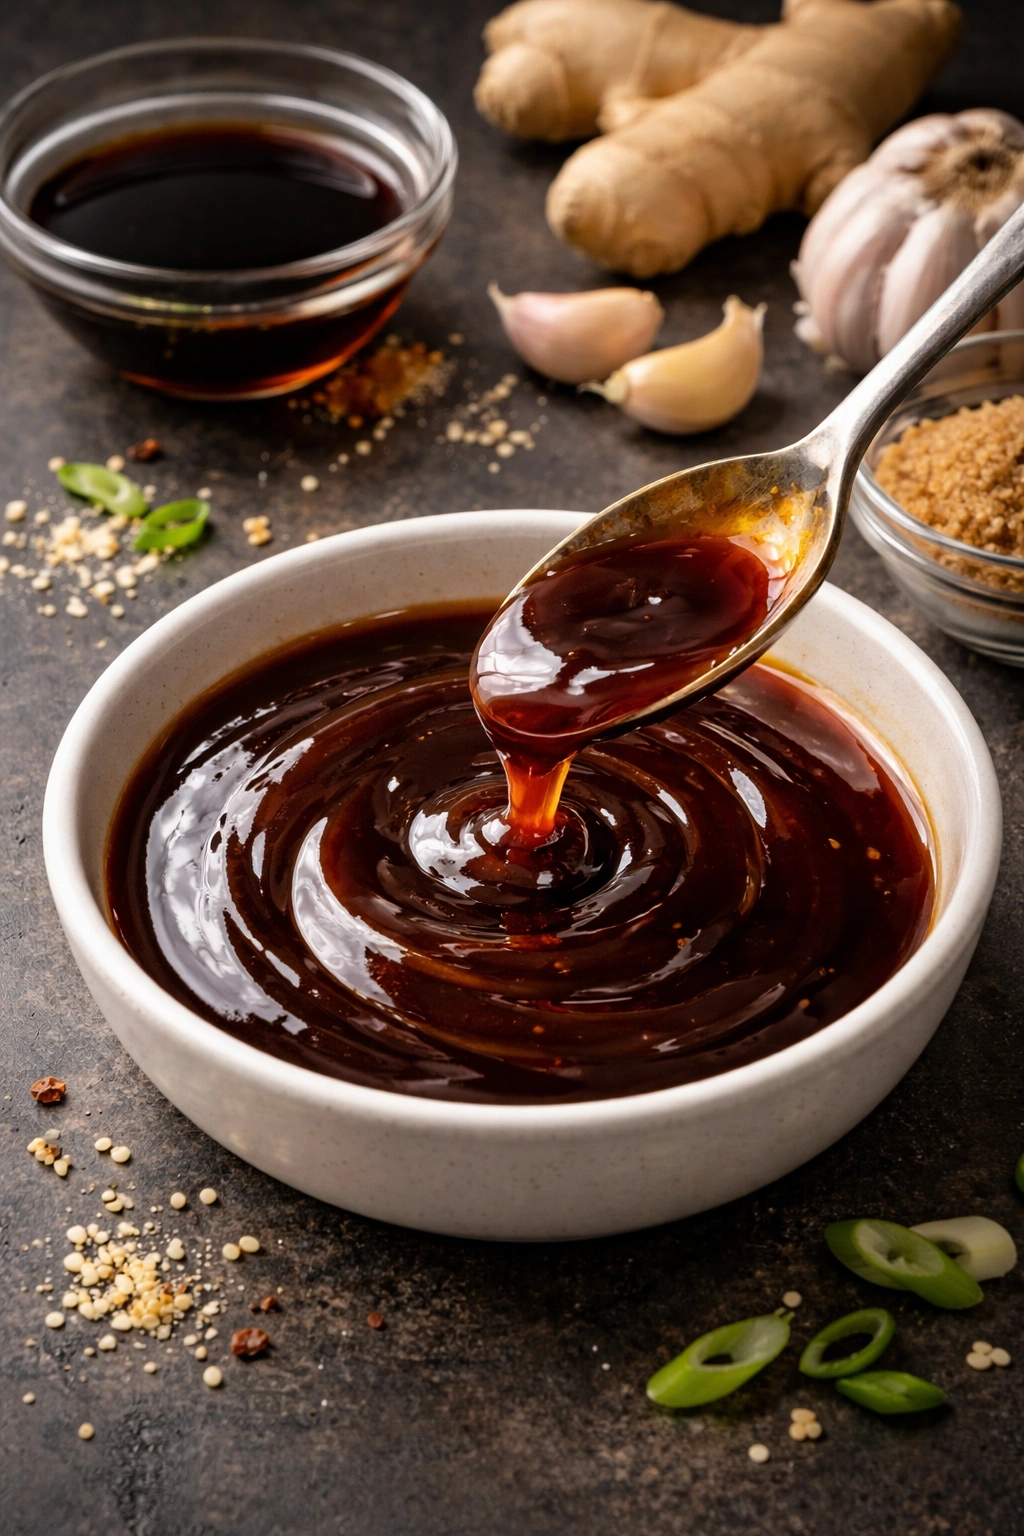
The glaze is where all the flavor lives. Combine soy sauce, honey, minced garlic, and minced ginger in a small saucepan. Don’t skip the fresh garlic and ginger—jarred versions work in a pinch, but fresh brings a brightness and intensity that transforms the dish. The difference is genuinely noticeable.
Place the pan over medium-high heat and bring the mixture to a gentle simmer, stirring occasionally. Let it reduce for about 5 to 7 minutes, until it’s visibly thickened and has reduced by roughly one-third of its original volume. You’re looking for a consistency that coats the back of a spoon and drips off slowly. Once it’s reached that point, remove the pan from heat and stir in the rice vinegar and sesame oil. The acid brightens everything and prevents the glaze from tasting heavy or cloying.
Let the glaze cool for a minute or two before using it. This prevents it from scrambling any eggs if you’re cooking in the same pan, and gives you a bit more control when applying it to the salmon.
Achieving That Restaurant-Quality Sear
The sear is everything. This is where your salmon transforms from looking like something you boiled to looking like something worthy of a menu.
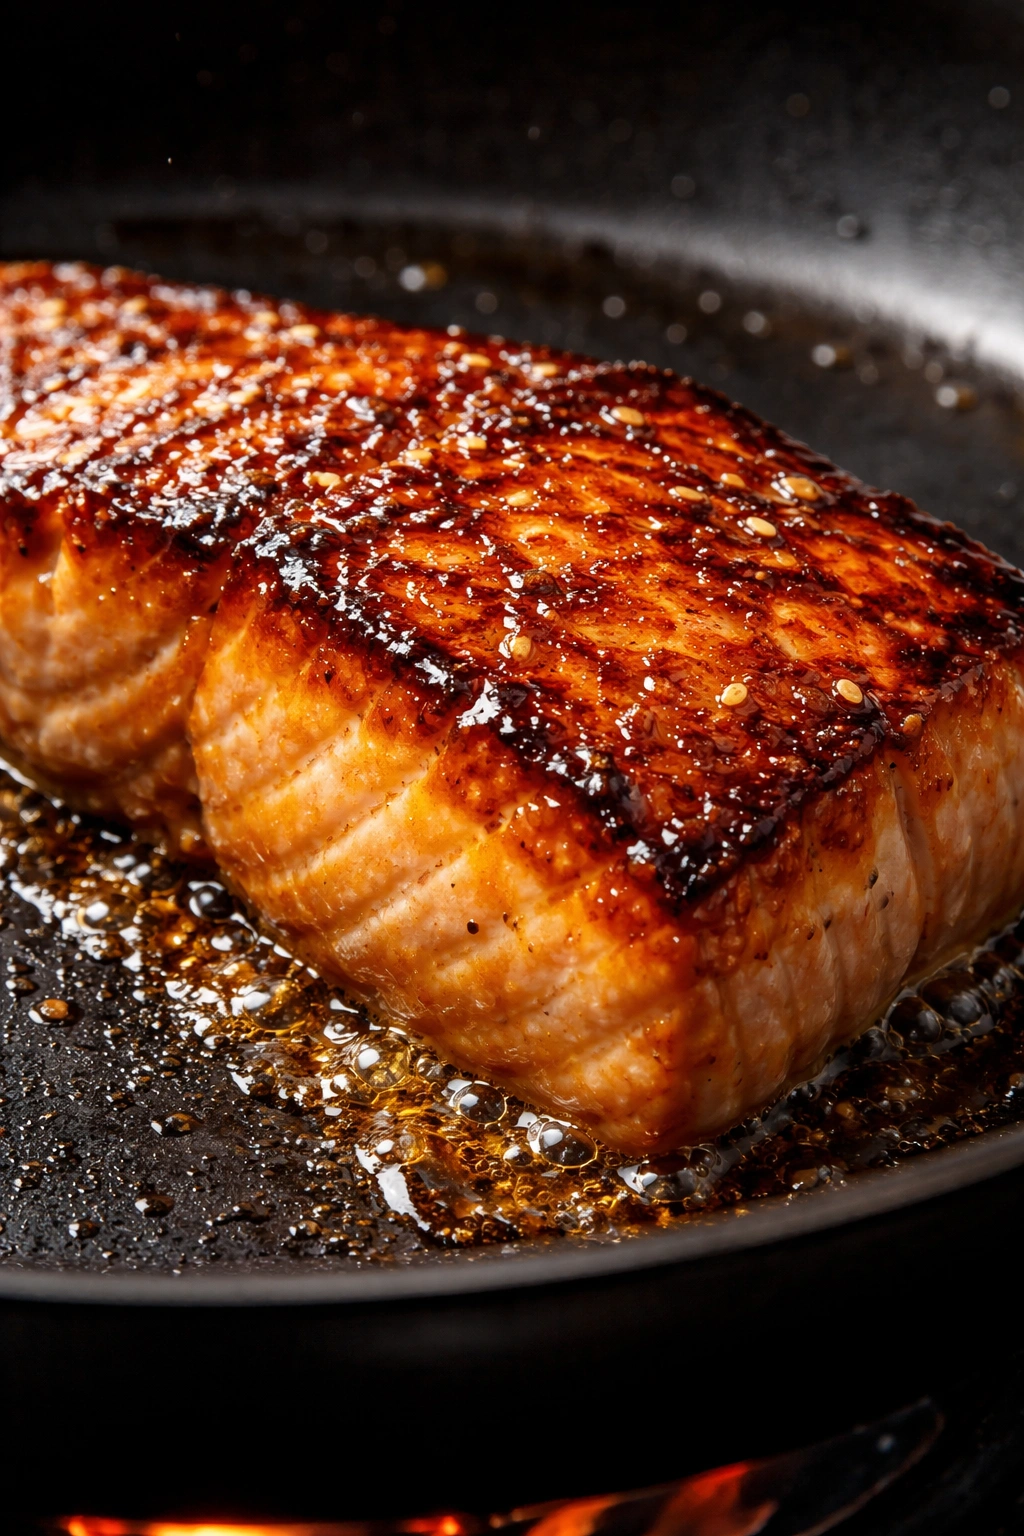
Get your pan screaming hot—this is crucial. Use a cast-iron skillet or a heavy-bottomed stainless steel pan (avoid nonstick, which can’t handle the temperature you need). Heat it over medium-high heat for at least 3 to 5 minutes. You want the pan so hot that a drop of water sizzles and evaporates instantly. If you have an infrared thermometer, you’re aiming for around 400 to 450 degrees Fahrenheit on the cooking surface.
Add your high-heat oil to the hot pan and let it shimmer for about 30 seconds. Swirl the pan to coat it evenly. The oil is your heat conductor—it carries the pan’s heat directly to your salmon and prevents sticking.
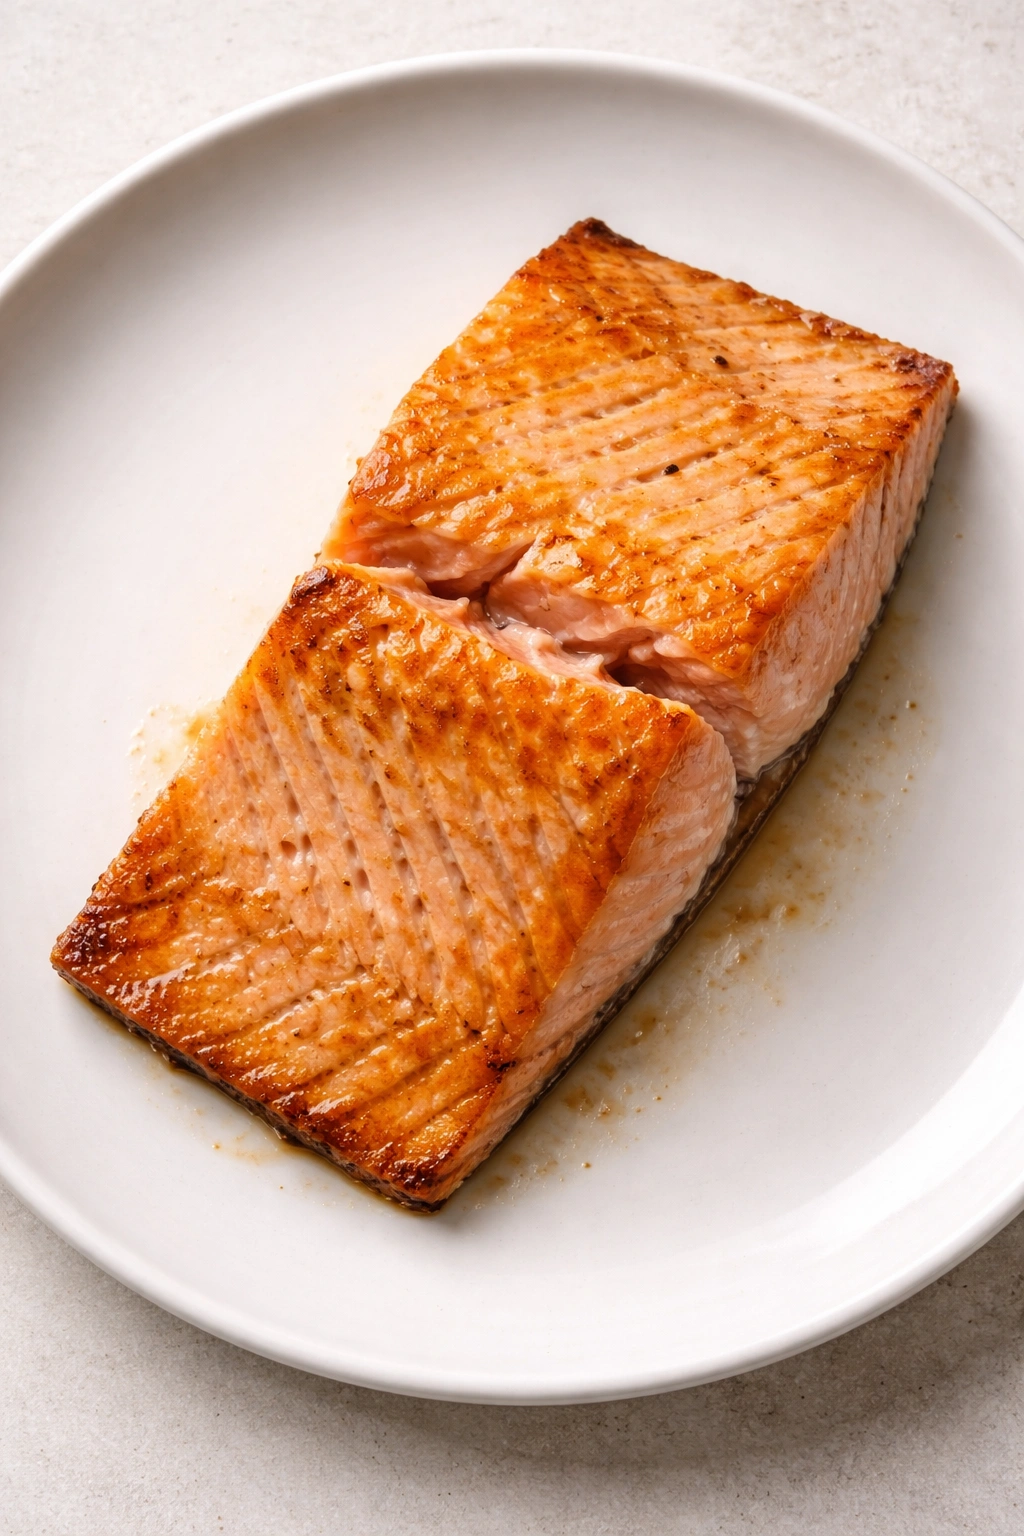
Place the salmon in the pan skin-side up (if it has skin). Don’t move it. Seriously, don’t touch it for at least 3 to 4 minutes. This seems like an eternity, but it’s during this time that the Maillard reaction is happening, creating hundreds of new flavor compounds and building that gorgeous golden crust. If you move it around, you break that crust and interrupt the process.
You’ll hear the salmon sizzle loudly when it first hits the pan. That’s good. That’s the sound of moisture evaporating and the exterior starting to brown. After about 3 minutes, gently peek at one edge with a fish spatula. If it’s golden brown and releases easily from the pan, you’re ready to flip. If it’s sticking, give it another minute.
Flip the salmon carefully using a fish spatula, and immediately reduce the heat to medium. Now the salmon cooks through on the flesh side while the skin side rests. This should take another 3 to 4 minutes depending on thickness. You want the salmon to be just barely cooked through—the internal temperature should reach 125 to 130 degrees Fahrenheit if you’re using a meat thermometer. It’ll cook a bit more as it rests, landing at a perfect 135 to 140 degrees.
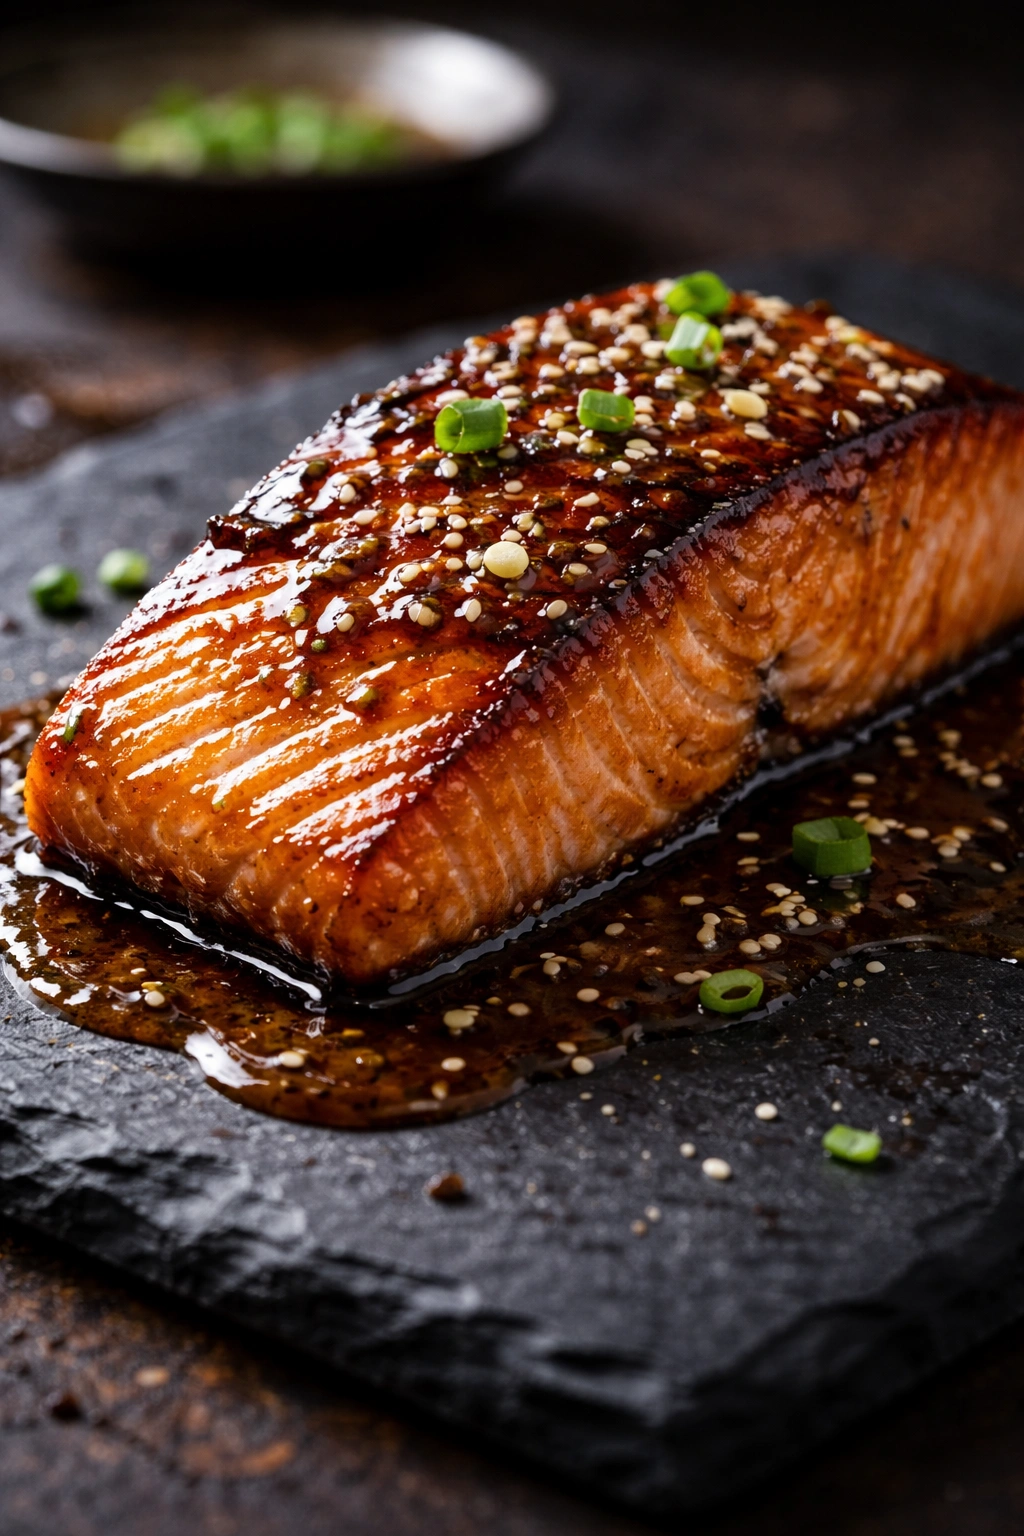
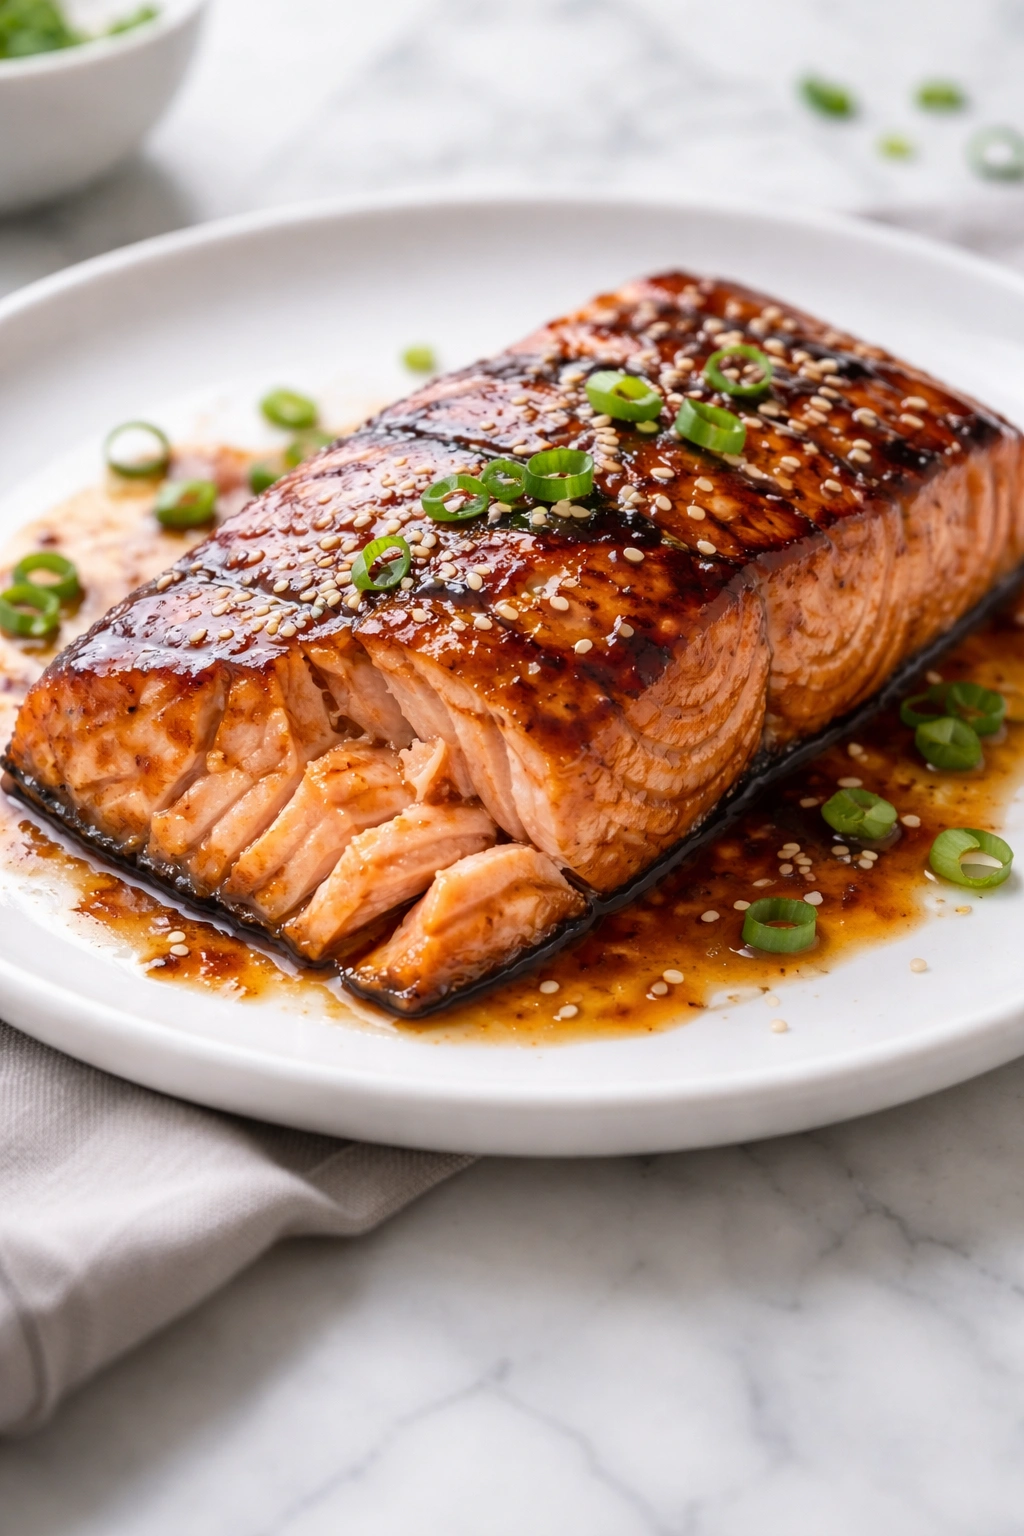
Glazing and Finishing Your Salmon
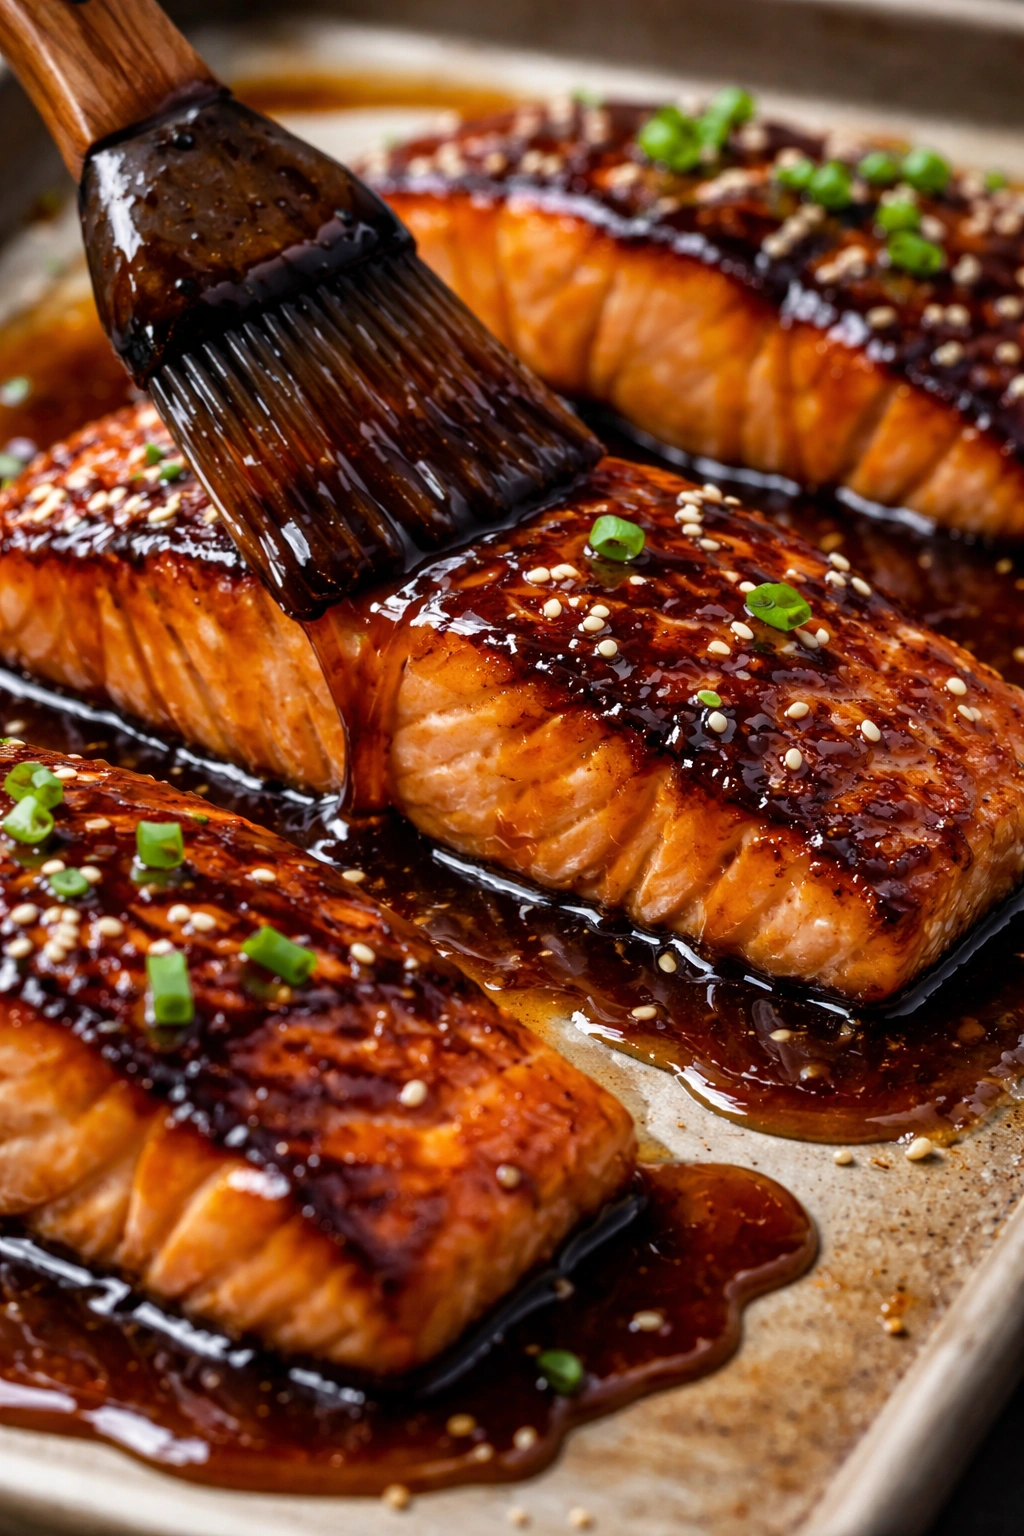
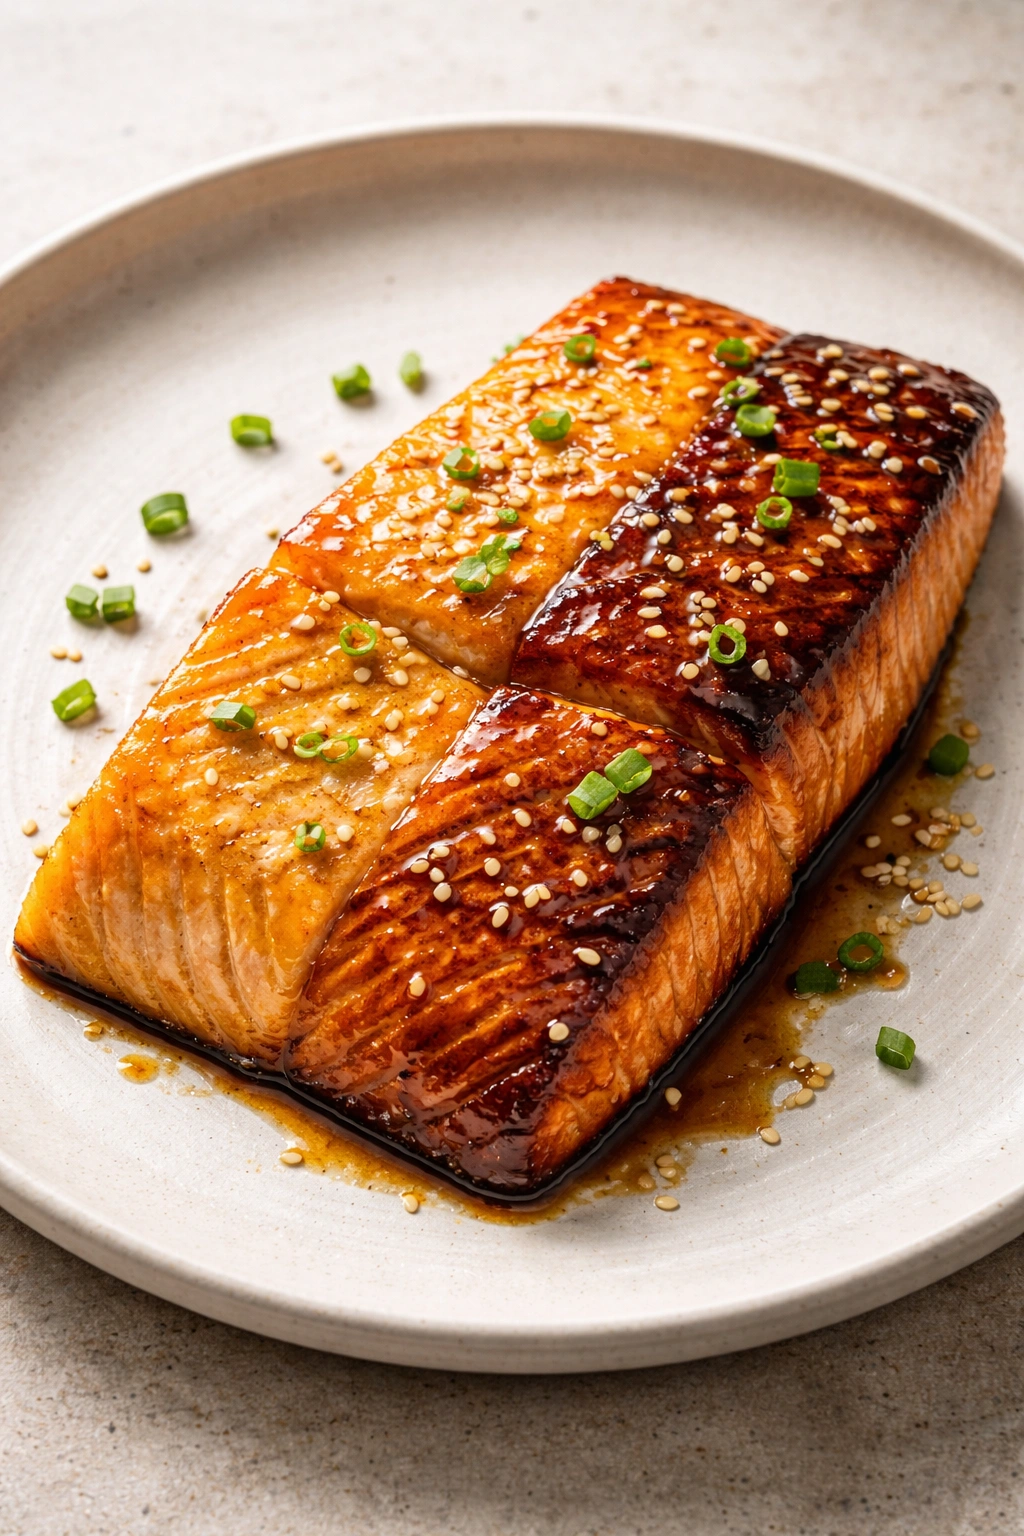
This is the moment where the magic happens. Once your salmon is nearly cooked through, reduce the heat to low and drizzle the glaze over the top of each fillet. Using a spoon, baste the salmon with the glaze that pools in the pan, coating it generously.
Let the glaze bubble gently for 2 to 3 minutes, tilting the pan occasionally so the glaze pools and coats different parts of the salmon. You’ll see it thicken and become more glossy as it reduces further. The honey will caramelize slightly, and the flavors will concentrate intensely. The pan will smell absolutely incredible—that salty-sweet aroma is your signal that everything’s working perfectly.
If you want an extra-caramelized finish, turn your oven’s broiler to high and transfer the pan (make sure the handle is ovenproof) to the broiler for about 1 to 2 minutes. Watch it closely—the glaze can burn quickly under the broiler. You’re just looking for the glaze to become even stickier and the edges to char slightly. This creates a textural contrast between the glossy, sticky center of the glaze and the crispy, caramelized edges.
Alternatively, if your pan isn’t broiler-safe, simply leave the salmon on the stovetop and let the residual heat and continued gentle bubbling deepen the glaze further. Either way, you’re aiming for a final texture that’s tacky and clingy, almost like a thin caramel coating.
The Science Behind Moist, Flaky Salmon Every Time
The reason restaurant salmon is so much more moist than most homemade versions comes down to understanding how fish proteins behave under heat. Salmon fillets are relatively thin compared to chicken breasts, and the flesh is delicate. It doesn’t take much overcooking to turn it from silky and moist to dry and mealy.
The target internal temperature for perfectly cooked salmon is 125 to 130 degrees Fahrenheit—slightly below the official food safety guideline of 145 degrees, but it’s crucial to understand that most of the cooking happens after you remove the salmon from the heat. As the salmon rests, carryover cooking continues to raise the internal temperature another 5 to 10 degrees. If you wait until it reaches 145 in the pan, it’ll be overcooked by the time you plate it.
Using a meat thermometer is genuinely the best way to guarantee perfect salmon every single time. Skip the guesswork of flaking it with a fork or looking for visual cues. Stick an instant-read thermometer into the thickest part of the fillet, making sure the probe is in the center of the flesh and not touching the skin or the pan. Once it hits 125 to 130 degrees, you’re done.
The pan’s residual heat and the glaze itself provide additional cooking power even after you remove the salmon from direct heat. This is why removing it slightly underdone is the right move. The carryover cooking brings it to perfect doneness by the time it hits your plate.
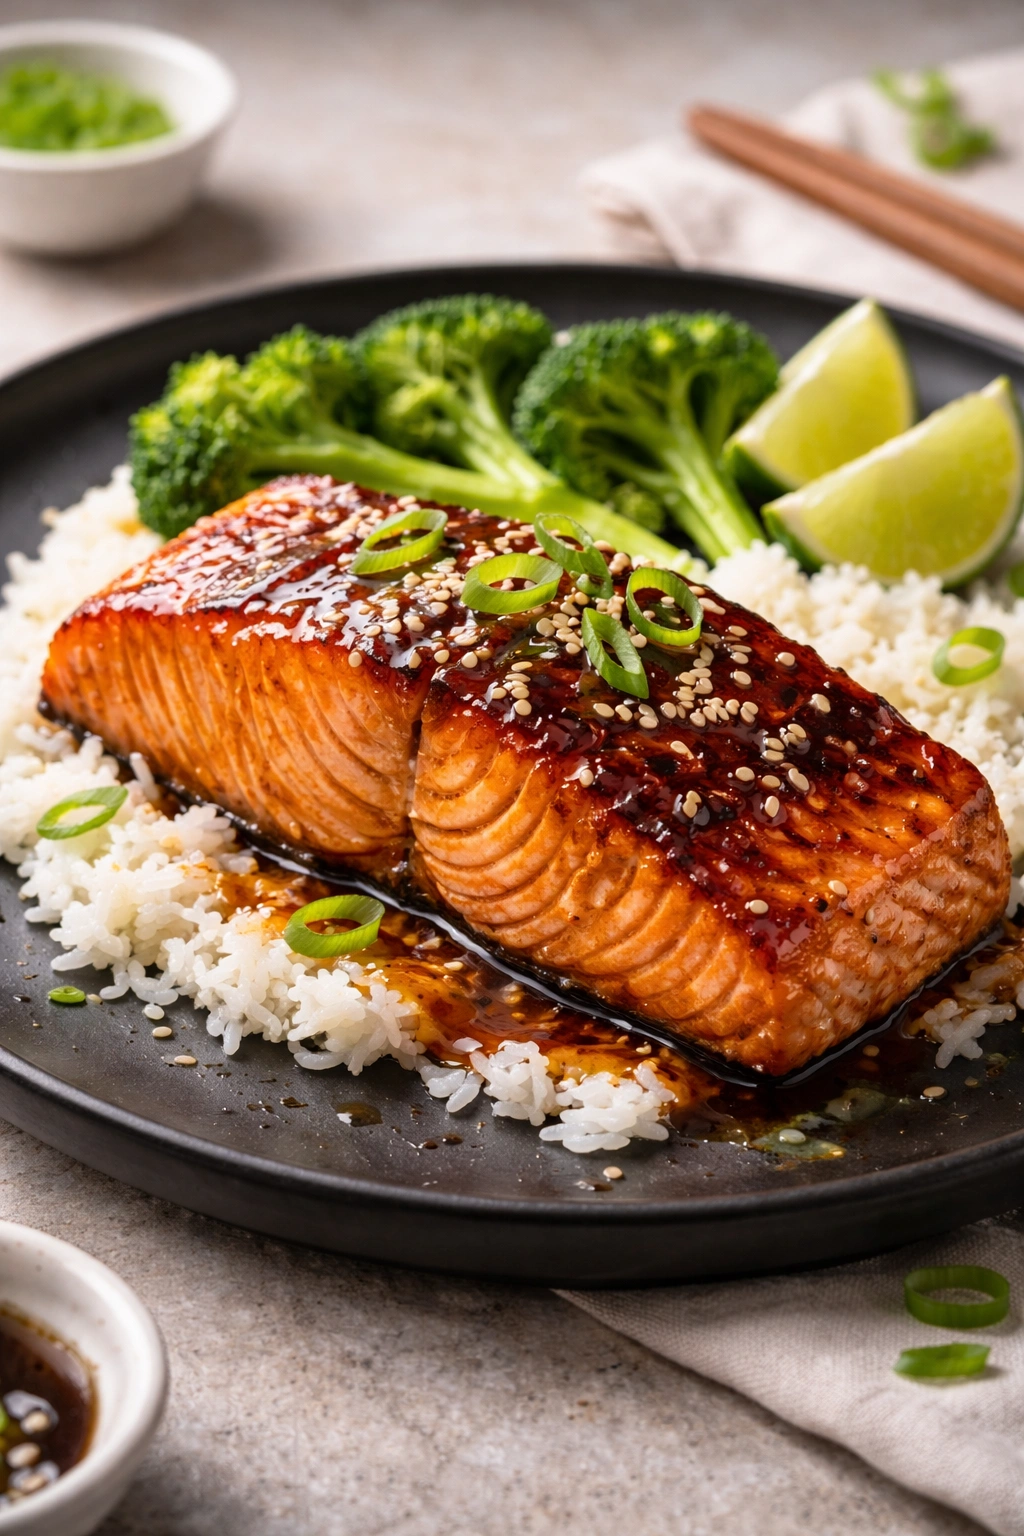
Perfect Accompaniments That Balance the Rich Glaze
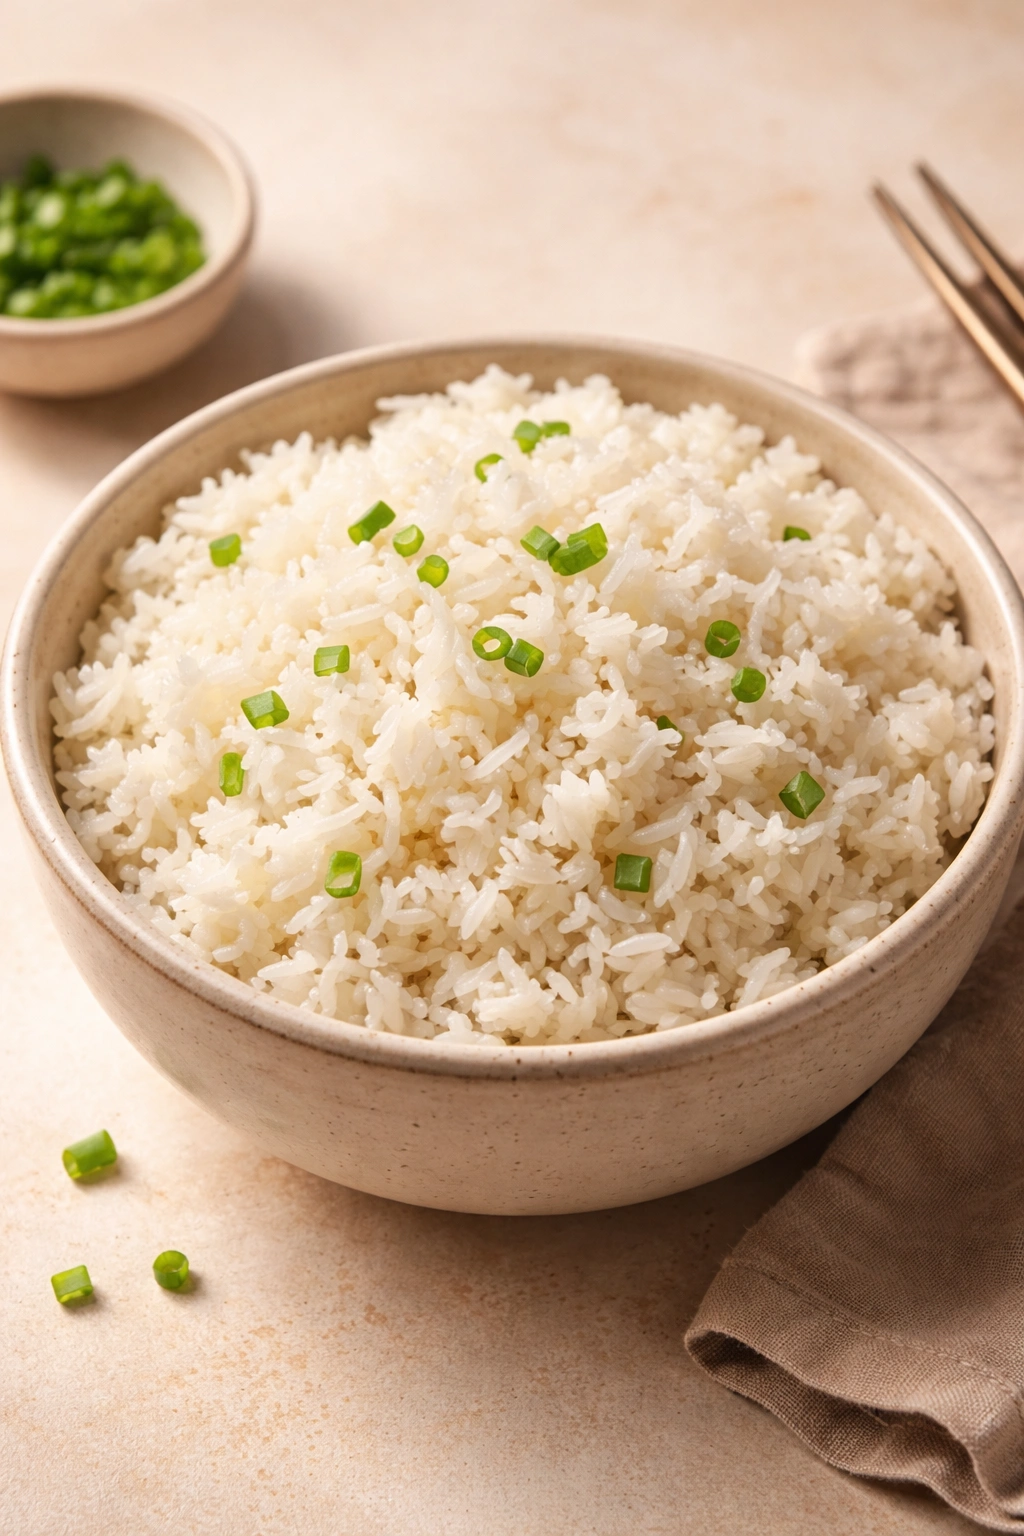
Soy-glazed salmon is rich, glossy, and intensely flavored. You want sides that either soak up the glaze or provide textural and flavor contrast. Plain white or brown rice is the classic pairing—fluffy rice acts like a sponge, absorbing the extra glaze that pools on your plate and making every bite even more delicious.
Jasmine rice is particularly good because its subtle floral notes complement the ginger and garlic in the glaze. If you want something a bit more interesting, try coconut rice or a simple fried rice with scrambled eggs and green peas. Both work beautifully and turn a simple dinner into something that feels restaurant-worthy.
For vegetables, focus on greens or cruciferous vegetables that won’t compete with the salmon’s richness. Steamed or sautéed bok choy is authentic and perfect—the mild, slightly bitter greens balance the sweet glaze beautifully. Broccoli works wonderfully, especially if you toss it with a little garlic and soy sauce to echo the salmon’s flavors. Sautéed spinach with garlic, stir-fried snap peas, or blanched asparagus all work well.
Avoid heavy sides like creamy pasta or rich potatoes. The glaze is already rich and sweet, and adding more richness creates flavor fatigue. The meal works best when there’s textural contrast—the creamy salmon against the slight crunch of vegetables, the sticky glaze against fluffy rice.
Variations That Keep This Recipe from Getting Boring
Once you master the basic soy-glazed salmon, the variations are endless. Here are the most successful tweaks that home cooks have found:
Add spice: Increase the red pepper flakes to ½ teaspoon for more heat, or stir in a teaspoon of sriracha or chili crisp to the finished glaze. The heat cuts through the richness beautifully. Include fresh ginger heat: Instead of just minced ginger, use a combination of minced ginger plus thin-sliced jalapeño added to the pan during searing. The jalapeño becomes slightly charred and adds a fresh, spicy element. Brown sugar variation: Swap the honey for light or dark brown sugar in equal amounts. Brown sugar brings a deeper, more molasses-forward sweetness that makes the glaze taste slightly more caramelized. Balsamic twist: Replace half the soy sauce with balsamic vinegar for a tangier, less salty glaze with beautiful color and complexity. This works especially well if you reduce the honey slightly. Maple upgrade: Use maple syrup instead of honey for a woodsy, slightly smoky sweetness that pairs beautifully with the soy. This version tastes fantastic with roasted Brussels sprouts. Garlic-forward version: Double the garlic and add thinly sliced shallots to the pan as the salmon cooks. Caramelize them in the glaze for a rich, almost gravy-like coating. Citrus angle: Replace the rice vinegar with fresh lime juice and add a teaspoon of orange zest to the glaze. This brightens everything and works beautifully if you’re serving with jasmine rice and steamed bok choy.
Each variation takes the same basic framework and pushes it in a different direction. Once you understand how the components work together, you can confidently adjust them based on what you’re craving or what you have in your pantry.
Troubleshooting the Most Common Salmon Mistakes
Even with the best intentions, sometimes things go wrong. Here’s how to identify and fix the most common issues:
Your salmon is dry: You overcooked it. This happens when the internal temperature reaches beyond 135 degrees Fahrenheit. Pull the salmon off the heat earlier next time—use a thermometer and aim for 125 to 130 degrees. The carryover cooking will handle the rest. The glaze is too thick and cakey: You reduced it too far or let it simmer too long. Once the glaze coats the back of a spoon, remove it from the heat immediately. It’ll continue to thicken as it cools. The salmon sticks to the pan: Your pan wasn’t hot enough when you started. Preheat for a full 5 minutes and make sure there’s shimmer in the oil before the salmon touches down. Also make sure your salmon was completely dry. The glaze tastes too sweet: Either your honey-to-soy ratio is off, or you’re using honey instead of a combination. Try using half honey and half brown sugar, or add an extra tablespoon of soy sauce to balance the sweetness. If you already made the glaze and it’s too sweet, stir in more rice vinegar or a squeeze of lemon juice. The glaze tastes too salty: You used regular soy sauce instead of reduced-sodium. Next time, use tamari or reduced-sodium soy sauce. If you’ve already made it, a touch of honey can help balance the salt (though this will make it sweeter). The skin is soggy instead of crispy: You’re cooking skin-side down too long, or your pan isn’t hot enough. Make sure the pan is screaming hot, and cook skin-side up most of the time. Only flip at the very end to finish cooking the flesh side.
Every one of these issues is easily preventable once you know what causes it. Most come down to temperature or timing, both of which become intuitive after you’ve made this dish a few times.
Making It Ahead and Batch Cooking for Meal Prep
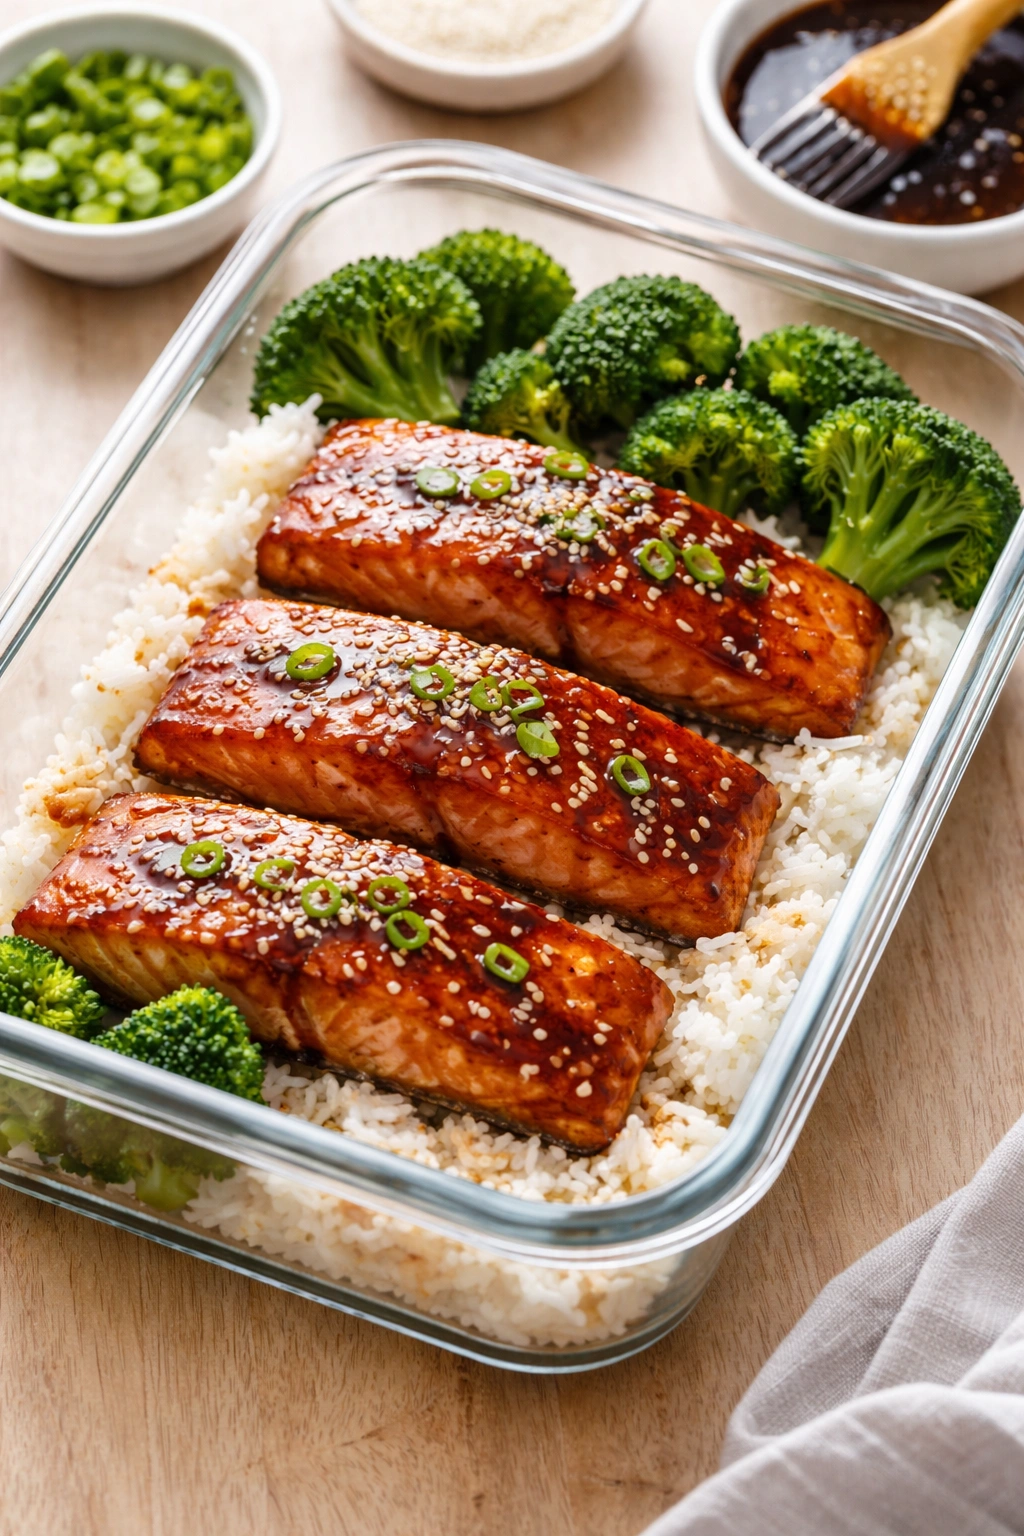
This salmon is perfect for meal prepping, which makes it especially valuable for busy weeks. You have several options depending on how far in advance you want to cook.
Make the glaze up to 3 days ahead: Combine all glaze ingredients, reduce it on the stove, and store it in an airtight container in the refrigerator. Let it come to room temperature before using it, or gently reheat it in a small saucepan over low heat. This cuts your cooking time down to just the salmon itself.
Cook the salmon and glaze together, then refrigerate: Once you’ve finished cooking, let the salmon cool completely, then store it in an airtight container for up to 3 days. Reheat gently in a 275-degree oven for about 10 minutes, loosely covered with foil. Reheating over direct heat can dry out the salmon, but gentle, low-temperature oven reheating preserves the moisture. Alternatively, reheat it gently in a nonstick pan over low heat, skin-side down, for about 5 minutes.
Freeze for longer storage: Once the salmon has cooled completely, wrap each fillet tightly in plastic wrap, then place in a freezer bag. It’ll keep for up to 3 months. Thaw overnight in the refrigerator before reheating. Don’t try to cook frozen salmon with the glaze—the outside will overcook before the inside thaws.
Prepare the salmon for cooking, then refrigerate: Pat the salmon dry, season it with salt and pepper, and store it in an airtight container for up to 24 hours. When you’re ready to cook, simply pat it dry again and proceed with searing. This lets you do the prep work when you’re not rushed.
The beauty of this dish is that it’s genuinely faster to make fresh than to reheat leftovers. From start to finish, including resting time, you can have takeout-quality salmon on your plate in 25 to 30 minutes. But having cooked salmon in the fridge means you can flake it into salads, pile it into rice bowls, or make salmon salad sandwiches throughout the week without any additional cooking.
Building Confidence in the Kitchen with This One Recipe
Here’s something that’s often overlooked: mastering one recipe well is worth more than knowing a dozen recipes poorly. This soy-glazed salmon is an excellent recipe to master because it teaches you fundamental cooking skills that transfer to dozens of other dishes.
You learn about heat management—understanding when and how to use high, medium, and low temperatures strategically. You learn about the Maillard reaction and how to properly sear protein. You learn how to build and reduce a glaze, which applies to everything from chicken to pork to beef. You learn how to use a meat thermometer for precision cooking. You learn how to properly season, how to time components so everything finishes at once, and how to plate something that looks restaurant-quality.
More importantly, you learn that restaurant-quality food isn’t some mysterious thing that requires special equipment or training. It’s the result of understanding basic principles and executing them with attention to detail. Once you get this recipe dialed in, you’ll feel genuinely confident cooking fish at home. You’ll stop ordering salmon takeout, not because you’re forcing yourself to eat homemade versions, but because what you’re making actually tastes better.
Make this dish once. Taste the difference proper heat and a well-made glaze make. Make it again the next week and watch how much easier and faster it gets. By the third time, you’ll be doing it without consulting the recipe. By the fifth time, you’ll be making variations and adjusting things based on your mood. That’s when you know you’ve truly mastered it.
Final Thoughts
Restaurant-quality soy-glazed salmon isn’t a mystery or a trade secret. It’s the result of using high heat to create a proper sear, building a glaze that’s balanced and flavorful, and knowing exactly when your salmon is perfectly cooked. Everything else—the variations, the sides, the plating—builds on these fundamentals.
The next time you’re thinking about ordering takeout salmon, remember that you can have something equally delicious on your table in less time than delivery would take, with ingredients that probably already live in your pantry. That glossy, caramelized exterior. That perfect balance of salty and sweet. That silky, moist interior. It’s not restaurant magic. It’s just salmon, soy sauce, honey, and attention to detail. You’ve got this.