Most people’s approach to side dishes is basically “throw something green on the plate and call it healthy.” The result? Steamed vegetables that taste like cardboard, salads made with whatever wilts first in the fridge, and the creeping sense that eating well means suffering through bland food. But here’s the thing: the best side dishes aren’t an afterthought or a health obligation. They’re genuinely delicious — the kind of dishes people actually want to eat, that make the main course better, and that happen to be packed with nutrients your body is craving.
The real secret isn’t finding magical vegetables or obscure superfoods. It’s understanding that healthy sides become craveable when you apply proper cooking techniques, build real flavor, and use good ingredients. A Brussels sprout that’s been properly roasted until the edges char and caramelize tastes completely different from one that’s been steamed. A grain pilaf with toasted spices and fresh herbs beats plain rice every single time. The vegetables don’t need to hide behind heavy sauces or deep frying — they just need to be treated with respect in the kitchen.
The sides you’re about to discover work with literally any main dish. Serve them alongside grilled chicken, roasted fish, lean ground beef, or plant-based proteins. Mix and match them into your weekly meal prep, double the recipe to have leftovers for lunch, or build your entire dinner around them. Each one delivers the kind of satisfaction that keeps you coming back, which is exactly how healthy eating becomes sustainable instead of something you white-knuckle through.
1. Roasted Brussels Sprouts with Crispy Edges
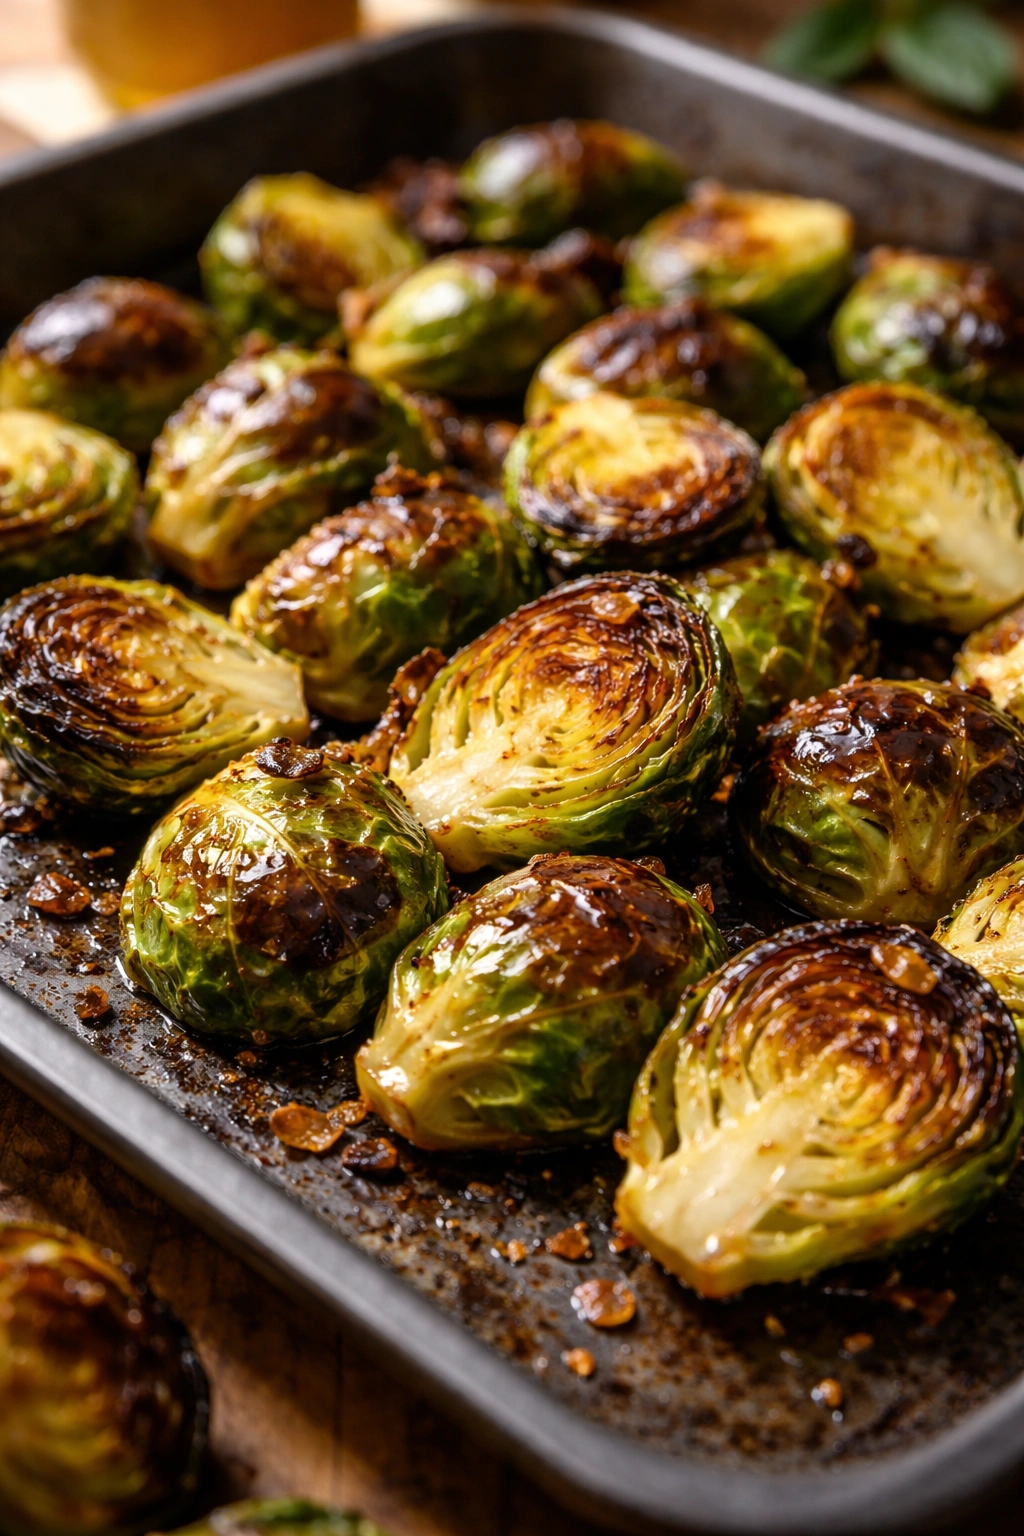
Roasted Brussels sprouts are a complete game-changer for people who think they don’t like Brussels sprouts. The transformation that happens in the oven is remarkable — the outside gets deeply browned and crispy while the inside turns sweet and tender, developing a nutty caramelized flavor that’s nothing like boiled Brussels sprouts. When you nail the technique, you end up with something that tastes almost decadent, even though it’s just humble vegetables and a little oil.
Why Roasting Changes Everything
The high heat in a hot oven creates something called the Maillard reaction, which is what happens when proteins and sugars in the vegetables brown together and develop hundreds of new flavor compounds. It’s the same chemical process that makes a seared steak delicious or a crusty piece of bread appealing. You simply can’t get that complexity from steaming — you need that direct, dry heat. The outer leaves become paper-thin and crispy enough to eat like chips, while the insides stay creamy.
How to Prepare Them Perfectly
Trim the stem end of each Brussels sprout and peel away any yellowed or damaged outer leaves. Rinse them and pat completely dry — this is crucial because any moisture on the surface will steam instead of roast. Slice them in half lengthwise, keeping the core intact so the layers stay together. Toss the halves in a bowl with olive oil (about 2 tablespoons per pound of sprouts), kosher salt, and black pepper. Spread them in a single layer on a baking sheet, cut-side down, and roast at 425°F for 20 to 25 minutes, until the flat side is deep golden brown and the tips of the leaves are crispy and charred. Don’t stir them — let them sit undisturbed so they develop that beautiful crust.
Flavor Variations to Try
- Garlic parmesan: Toss the finished sprouts with minced roasted garlic and freshly grated Parmigiano-Reggiano
- Balsamic glaze: Drizzle with aged balsamic vinegar right before serving for a sweet-tart finish
- Spicy kick: Add cayenne pepper or red pepper flakes to the oil before tossing
- Maple mustard: Whisk together Dijon mustard, maple syrup, and a splash of apple cider vinegar, then toss with the roasted sprouts
Pro tip: Save the crispy outer leaves that fall off during preparation and roast them separately on a higher rack — they become addictively crunchy Brussels sprout “chips” that are perfect for snacking.
2. Quinoa Pilaf with Toasted Nuts and Fresh Herbs
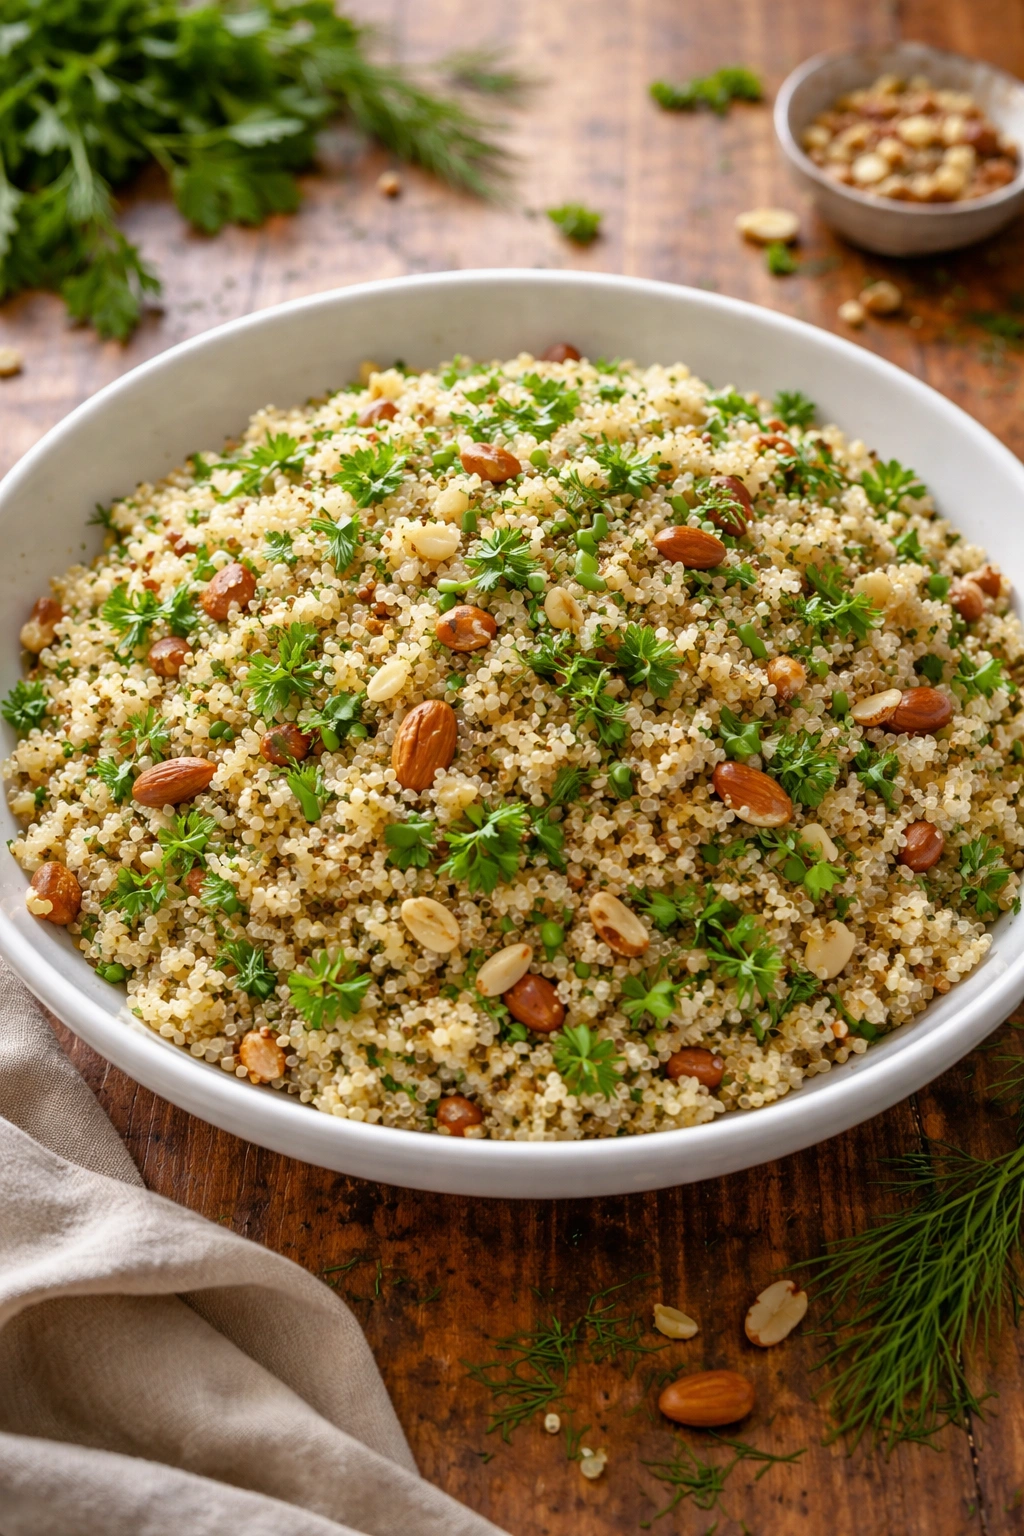
Quinoa gets a mixed reputation — some people find it bland and mealy if it’s not prepared with intention. But when you toast the grains first, build the cooking liquid with real flavor, and finish with fresh herbs and toasted nuts, quinoa becomes something completely different. It’s nutty, it has actual texture and complexity, and it pairs with almost any protein or vegetable combination you can imagine.
Why Quinoa Is Worth the Effort
Quinoa is a complete protein, meaning it contains all nine essential amino acids your body can’t produce on its own. Most plant-based sources of protein are incomplete, so this makes quinoa genuinely special from a nutritional standpoint. It also has a mild, slightly nutty natural flavor — not bland if you cook it right — and a light, fluffy texture when prepared properly. The grain absorbs flavors beautifully, so a well-made quinoa pilaf tastes like every ingredient matters.
Building Flavor From the Ground Up
Rinse dried quinoa under cold water, rubbing it gently between your fingers to remove any dust. Toast it in a dry pan over medium heat for about 2 to 3 minutes, stirring frequently, until it becomes fragrant and slightly darker — this step adds toasted nuttiness that’s otherwise missing. Pour in vegetable or chicken broth (use a 2:1 liquid-to-grain ratio), add a pinch of salt, and bring to a simmer. Cover and cook for 15 minutes, then let it rest off heat for 5 minutes before fluffing with a fork. While it cooks, toast chopped almonds or walnuts in a separate dry pan for about 3 minutes until fragrant, then set aside.
Quick Assembly After Cooking
Once the quinoa has cooled slightly, fold in the toasted nuts, fresh chopped herbs like parsley or cilantro, diced red onion, and a squeeze of lemon or lime juice. You can add diced bell peppers, cucumber, or halved cherry tomatoes if you want more texture and freshness. A drizzle of good olive oil and a taste of salt finish it off. The pilaf works warm or at room temperature, making it ideal for meal prep.
Real talk: The difference between bland quinoa and craveable quinoa comes down to toasting the raw grain and not skipping the herbs and acid. Those steps aren’t optional — they’re what make this dish actually worth eating.
3. Roasted Sweet Potatoes with Charred Edges

Sweet potatoes are one of nature’s most underutilized vegetables. Most people either bake them whole, which takes forever, or ignore them entirely. But when you slice them into wedges or chunks and roast them at high heat, you get crispy exteriors, creamy interiors, and a natural sweetness that makes them taste almost indulgent. They work as a side to savory mains, or you can eat them as their own meal.
The Nutritional Payoff Nobody Talks About
Sweet potatoes are loaded with beta-carotene, which your body converts to vitamin A — the nutrient your eyes, skin, and immune system depend on. They also contain fiber that keeps you satisfied, and compounds that have anti-inflammatory properties. Unlike regular white potatoes, sweet potatoes have a lower glycemic index, meaning they don’t spike your blood sugar as dramatically. You’re getting genuine nutrition that actually tastes like comfort food.
The Method That Actually Works
Cut sweet potatoes (skin on or off, your preference) into wedges about ¾-inch thick, or cut them into ½-inch cubes if you prefer smaller pieces. Toss them in a bowl with olive oil, smoked paprika, garlic powder, cayenne if you like heat, and a generous pinch of salt and pepper. The spices are optional — salt and oil alone are wonderful — but the smoked paprika adds a subtle depth that somehow makes the sweet potato taste even better. Spread them on a baking sheet in a single layer, making sure pieces aren’t crowded together, and roast at 425°F for 25 to 30 minutes, stirring halfway through, until the edges are deeply browned and caramelized and the insides are fork-tender.
Finishing Touches That Matter
A squeeze of fresh lime juice right after roasting brightens the flavor and cuts through the sweetness. A sprinkle of fresh cilantro, a drizzle of tahini, or a dollop of Greek yogurt with lime and garlic all work beautifully. For something different, toss the roasted pieces with a balsamic reduction or a drizzle of maple syrup mixed with Dijon mustard.
Worth knowing: Don’t peel the sweet potatoes before roasting — the skin protects the flesh and actually helps them caramelize better. You can eat the skin when it’s roasted, or peel it off after cooking if you prefer.
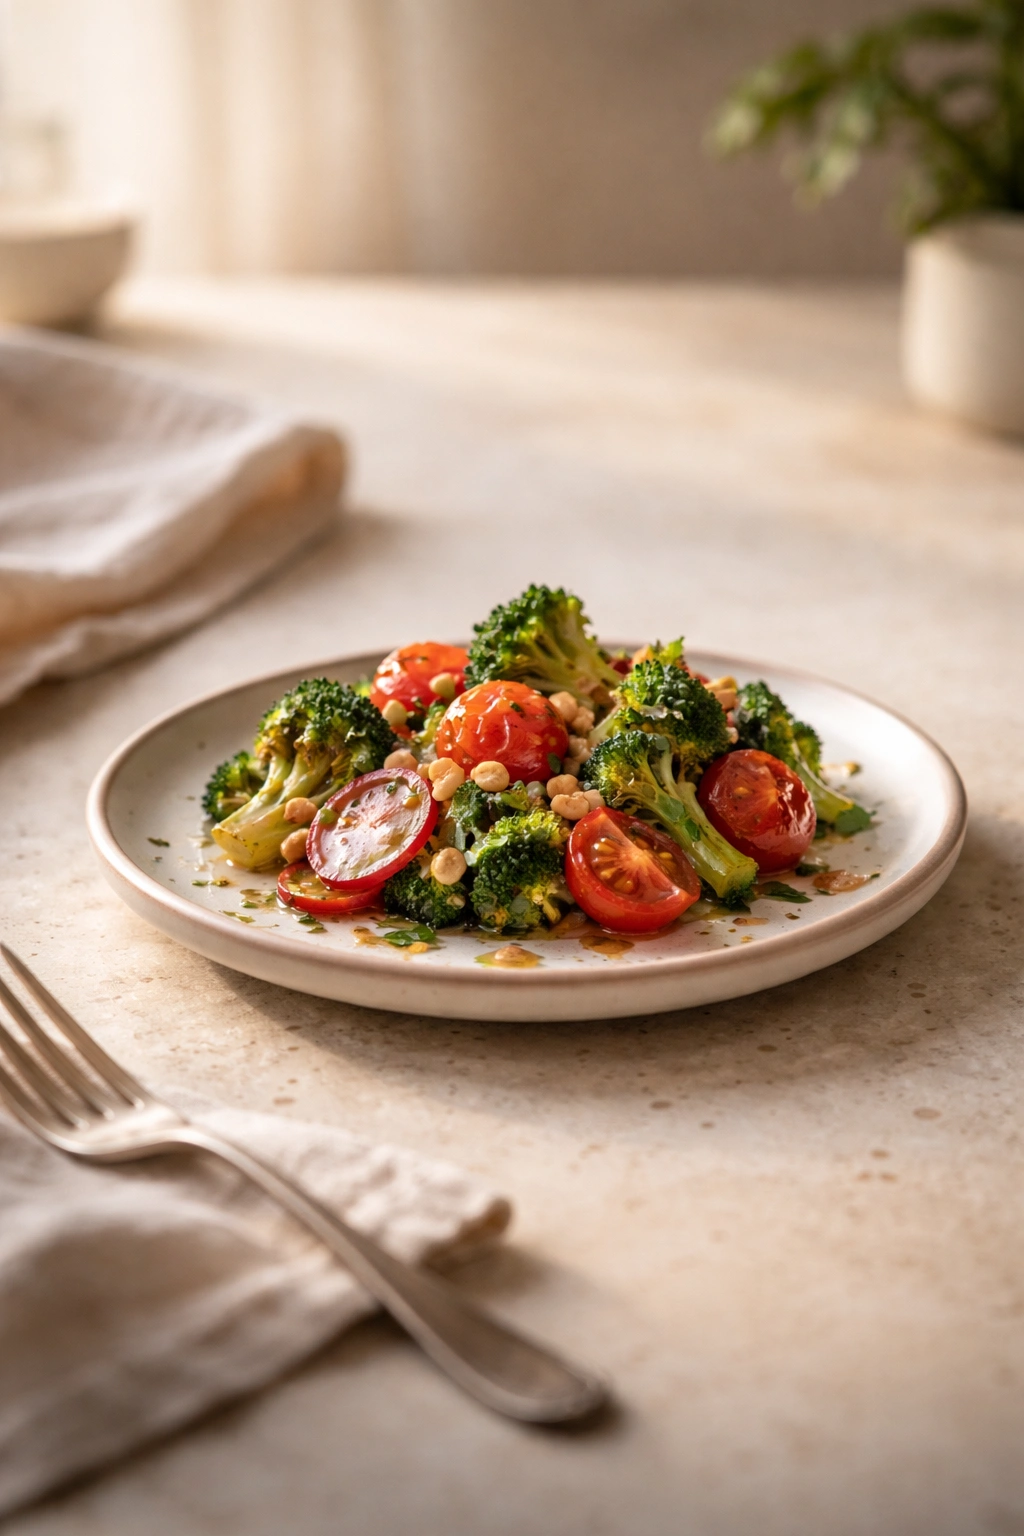
4. Steamed Broccoli with Garlic and Lemon
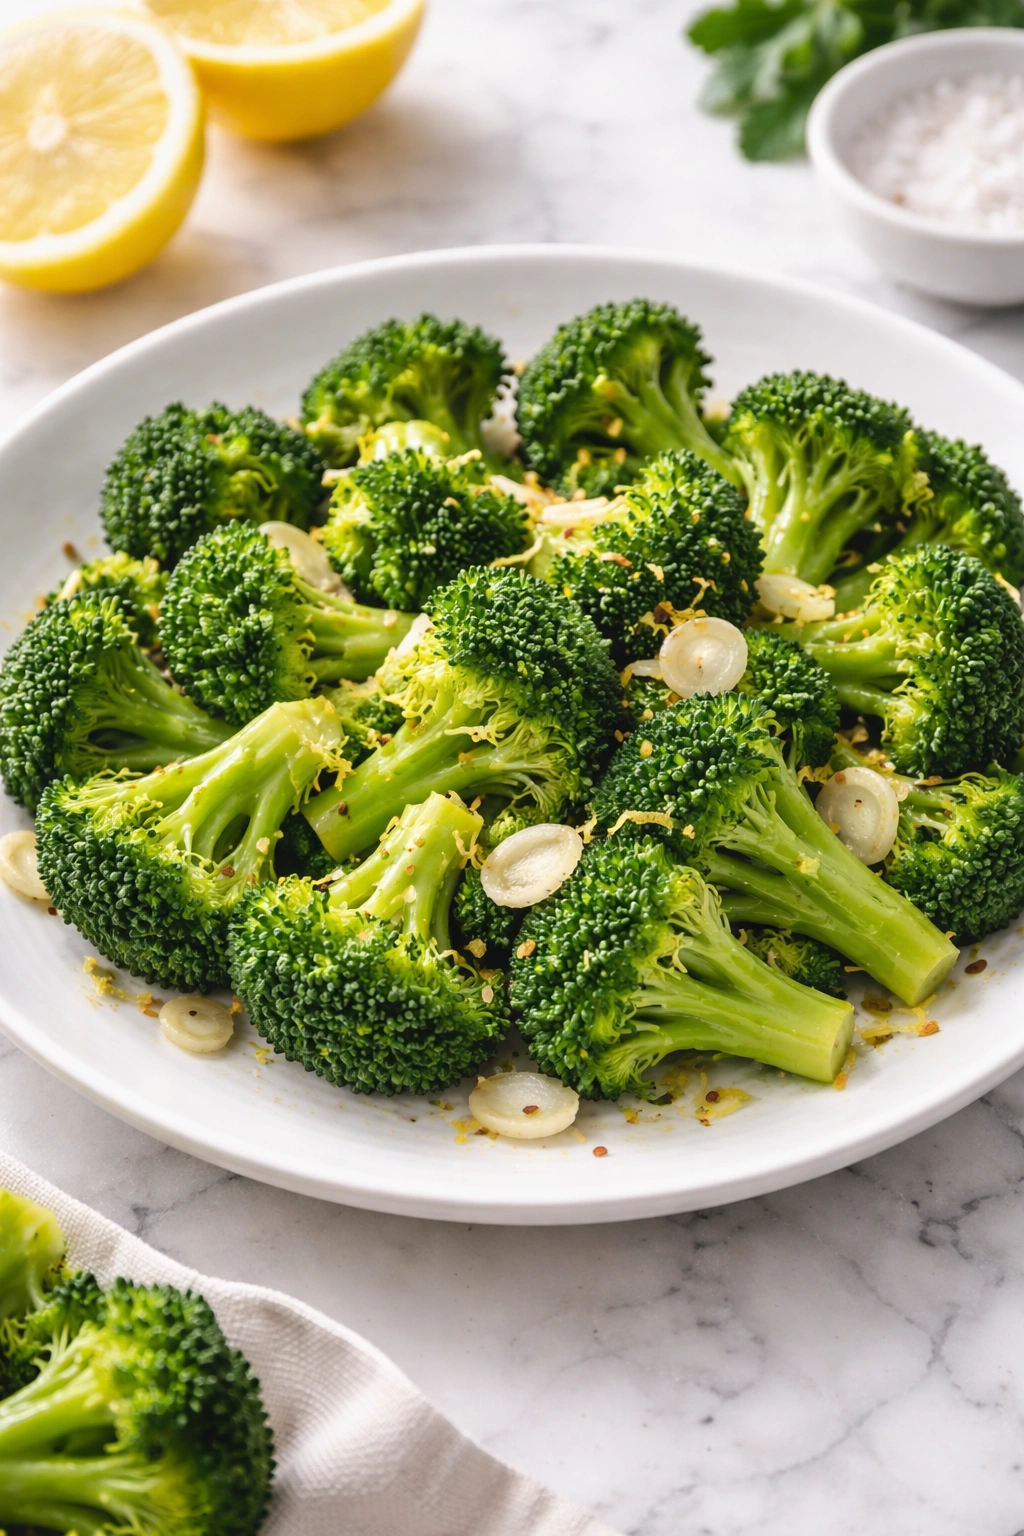
Broccoli has an image problem. Most people think of it as boiled, mushy, and something you choke down because it’s healthy. But properly prepared broccoli — steamed until it’s bright green and just tender-crisp, then finished with garlic, lemon, and good olive oil — is a completely different vegetable. It’s one of the easiest side dishes to make, takes less than 15 minutes from start to finish, and tastes genuinely good.
Why the Cooking Method Matters More Than You Think
Boiling broccoli is a culinary crime because it leaches all the nutrients into the water and leaves the broccoli waterlogged and sad. Steaming is better — the broccoli cooks in the steam without sitting in water, so it stays greener and retains more flavor and nutrition. But the real magic happens after steaming when you hit it with garlic, lemon, and fat. Those flavor elements transform simple steamed broccoli into something people actually request.
The Actual Technique
Chop a head of broccoli into florets, keeping the stems if you like them — they’re actually more tender than most people realize. Fill a pot with about an inch of water and place a steamer basket inside (or use a colander suspended over the water). Bring the water to a simmer, add the broccoli, cover, and steam for 6 to 8 minutes, until the florets are bright green and a fork pierces the stem easily but it still has some texture. Don’t overcook it into softness.
Meanwhile, mince 3 to 4 garlic cloves very finely and warm them in a small pan with 3 tablespoons of olive oil over medium heat for about 2 minutes. The garlic should soften and become fragrant but not brown. When the broccoli is done, transfer it to a serving bowl, pour the garlic oil over top, squeeze a whole lemon’s juice over everything, add a pinch of red pepper flakes if you want heat, and taste for salt. Toss gently.
Variations and Add-Ons
- Anchovy version: Chop one anchovy finely and warm it with the garlic in the oil — sounds intense but the umami flavor is incredible
- Parmesan crust: Toss the broccoli with the garlic oil, then sprinkle with freshly grated Parmigiano-Reggiano and a pinch of nutmeg
- Sesame twist: Use sesame oil instead of olive oil and finish with sesame seeds and a drizzle of soy sauce
Quick note: The key is not overcooking the broccoli. You want it to have a slight resistance when you bite it, not soft and gray.
5. Farro Salad with Roasted Vegetables and Vinaigrette
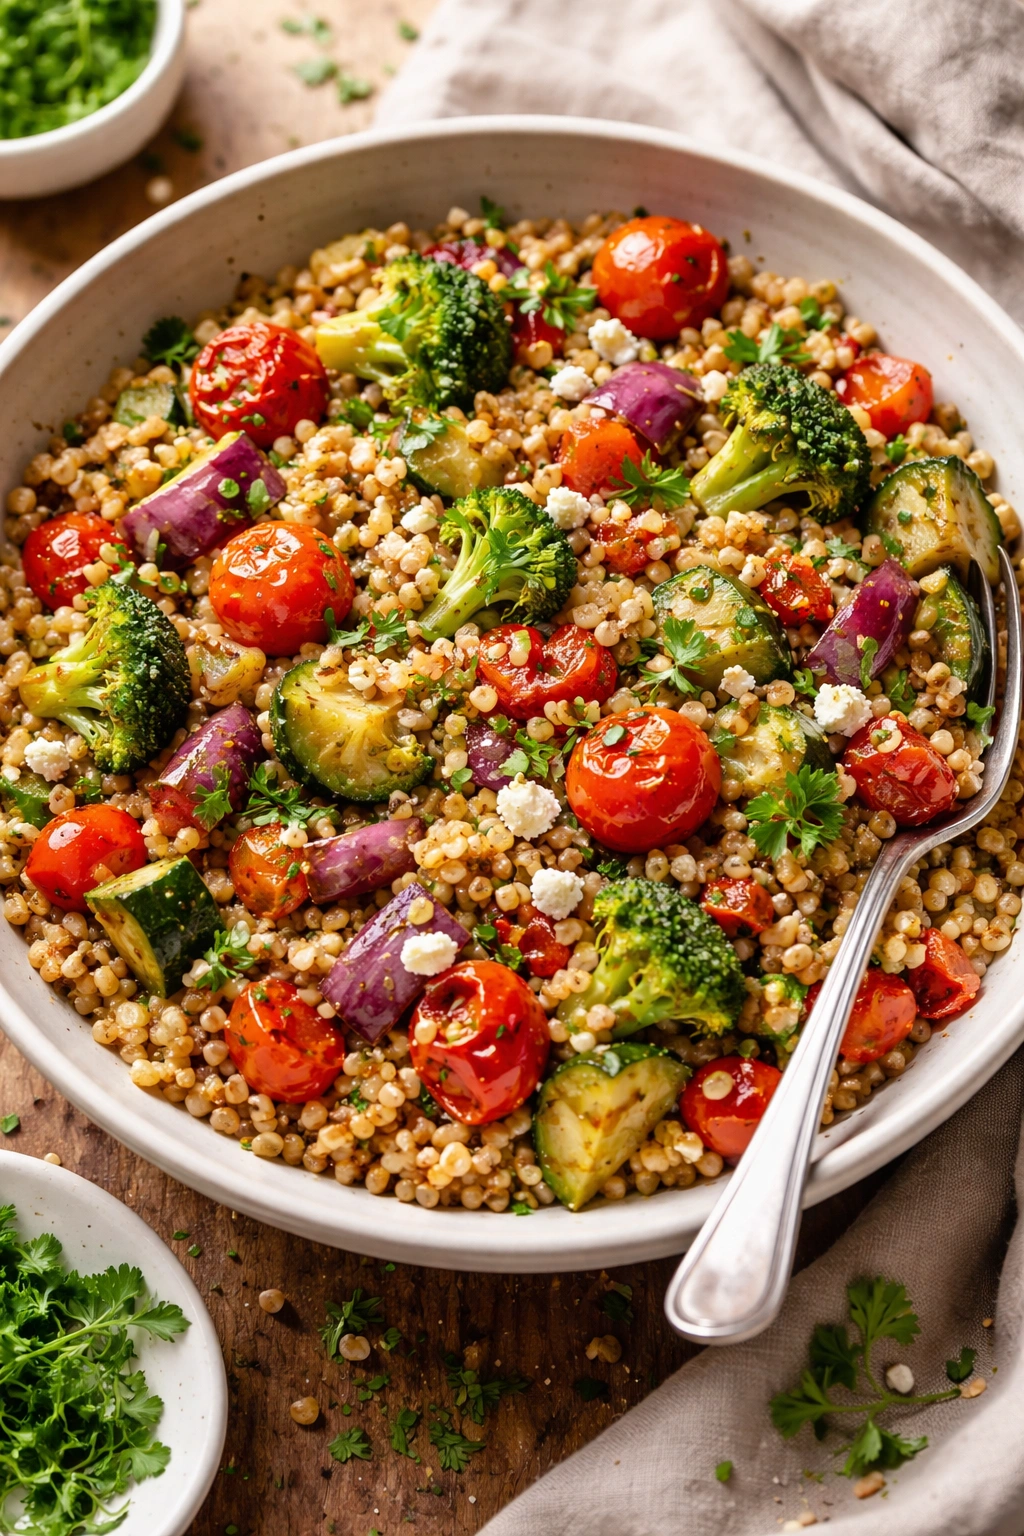
Farro is an ancient grain that’s been feeding people for thousands of years, and it deserves more space on modern tables. It has a slightly chewy texture and a nutty, complex flavor that’s more interesting than most grains. When you combine cooked farro with roasted vegetables, fresh herbs, and a good vinaigrette, you get a side dish that’s hearty enough to feel substantial but light enough to pair with any protein.
What Makes Farro Different From Other Grains
Farro contains gluten, so it’s not suitable if you have celiac disease or gluten sensitivity, but for everyone else, it’s an excellent choice. The grain holds its shape and texture beautifully — it doesn’t get mushy or break apart like rice sometimes does. It has a lower glycemic index than refined grains, meaning it won’t spike your blood sugar, and it contains more protein and fiber than many alternatives. The flavor is naturally appealing, almost like toasted nuts, so it doesn’t need heavy dressings to taste good.
Building the Salad From Scratch
Toast 1 cup of dried farro in a dry pot over medium heat for 3 to 4 minutes, stirring occasionally, until it smells nutty. Add 3 cups of vegetable broth, bring to a boil, then reduce to a simmer, cover, and cook for about 30 minutes until the grains are tender but still have a slight chew. Drain any excess liquid and spread the farro on a baking sheet to cool.
While the farro cooks, cut vegetables like zucchini, bell peppers, red onion, and cherry tomatoes into bite-sized pieces. Toss them with olive oil, salt, and pepper, spread on a baking sheet, and roast at 425°F for 20 minutes, stirring halfway through, until they’re caramelized at the edges. When everything is cool, combine the farro and vegetables in a large bowl.
The Dressing That Makes It Sing
Whisk together 3 tablespoons of red wine vinegar or lemon juice, 1 tablespoon of Dijon mustard, a minced garlic clove, and 5 tablespoons of olive oil. Pour the dressing over the farro and vegetables, then fold in fresh herbs like parsley, basil, or mint. Add some crumbled feta cheese or pine nuts if you want extra richness. Taste and adjust the seasonings — you might want more salt, more acid from the vinegar, or more herbs.
Pro tip: This salad actually tastes better the next day after the flavors have had time to meld together, making it excellent for meal prep.
6. Grilled Asparagus with Seasonal Accents
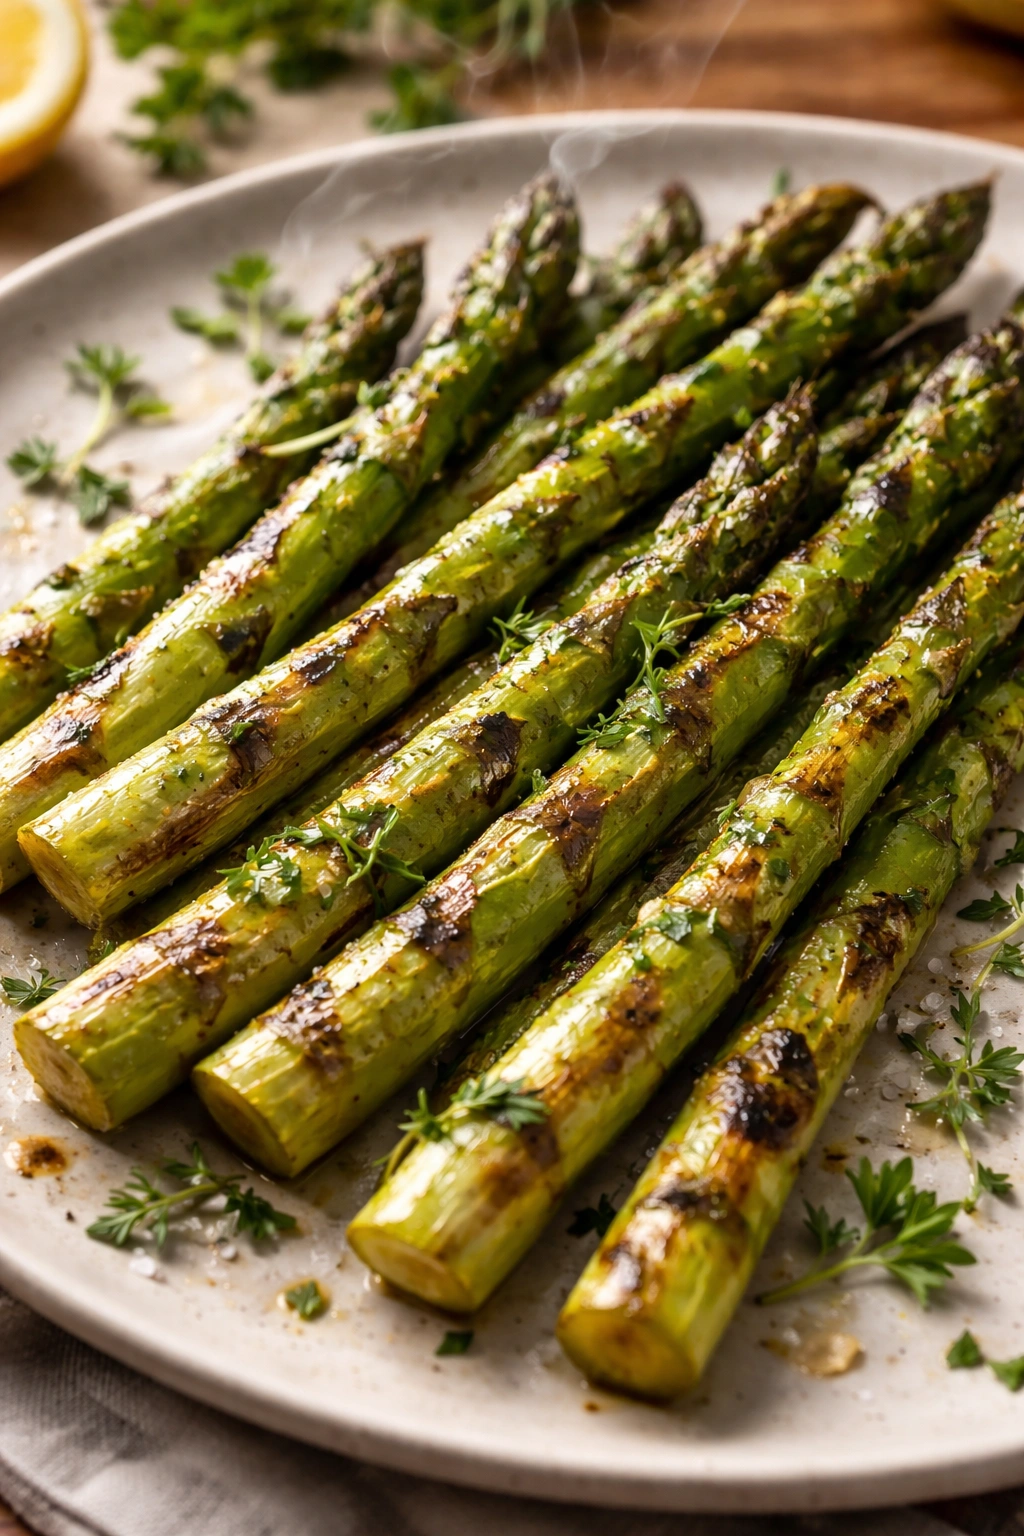
Asparagus is the vegetable that actually tastes like spring, and when you cook it on a grill or grill pan, you unlock a whole new dimension of flavor. The direct heat charrs the outside while keeping the inside tender, and the natural sweetness of asparagus becomes even more pronounced. It’s quick, simple, and works alongside almost any main dish.
Why Grilling Beats Every Other Cooking Method
Boiling asparagus is a waste of the vegetable. Roasting works but takes longer and uses more energy. Grilling creates charred edges that taste slightly smoky and caramelized, while the interior stays creamy and tender. The char also adds visual appeal — grilled asparagus looks more like restaurant food than home cooking, even though it’s almost impossible to mess up.
The Technique in Three Steps
Rinse fresh asparagus and snap off the woody ends by bending each spear until it breaks naturally — the spear will break right where the tender part starts. Pat them dry with a paper towel and toss with a little olive oil and salt. Heat a grill or grill pan to high heat and lay the asparagus perpendicular to the grates (so they don’t fall through). Grill for 3 to 5 minutes, turning once halfway through, until both sides have light char marks and the spears are tender-crisp. You want them to still have a slight firmness when you bite them, not soft.
Finishing Options That Transform the Dish
- Lemon and garlic: Squeeze fresh lemon juice over the hot asparagus and sprinkle with minced raw garlic
- Parmesan shred: Grate fresh Parmigiano-Reggiano over the top and drizzle with aged balsamic vinegar
- Hollandaise simplicity: A dollop of easy hollandaise or aioli on the side
- Asian-inspired: Brush with a mixture of soy sauce, sesame oil, and a touch of maple syrup while grilling
Real talk: The biggest mistake people make is grilling asparagus too long. Thin spears need only 3 to 4 minutes total. Thicker ones might take 5 to 6 minutes, but they should still have some resistance when you bite them.
7. Beet and Arugula Salad with Goat Cheese and Walnuts
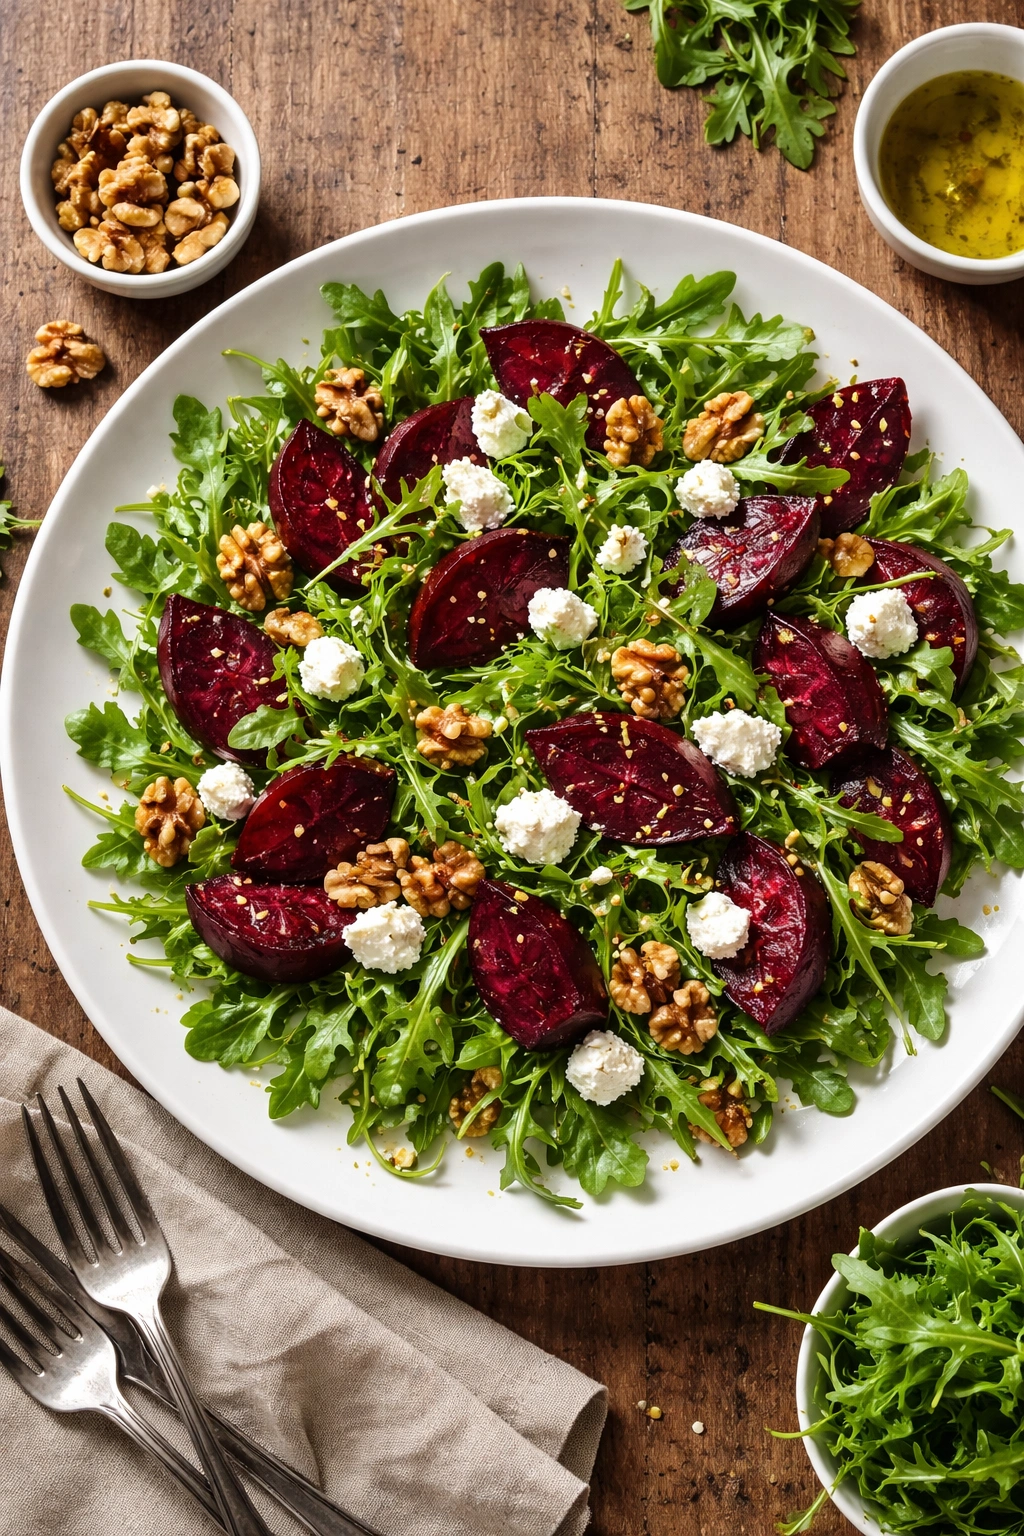
Beets are misunderstood vegetables — most people only encounter them as a mushy afterthought or overly sweet canned product. But roasted beets have an earthy, slightly sweet, complex flavor that’s genuinely delicious. When you pair them with peppery arugula, creamy goat cheese, and toasted walnuts, you get a salad that’s visually stunning, texturally interesting, and genuinely craveable.
The Nutritional Case for Beets
Beets contain betalains, which are powerful antioxidants that give them their deep red color and provide anti-inflammatory benefits. They’re also high in nitrates, which your body converts to nitric oxide — a compound that improves blood flow and supports heart health. They’re naturally sweet enough that they don’t need sugary dressings, and they’re high in fiber and folate. You’re getting serious nutrition packaged in a vegetable that actually tastes indulgent.
Roasting Beets Properly
Trim the stems and roots from fresh beets, scrub them under running water to remove dirt, and pat dry. You can peel them before or after roasting — before means less staining, after means the skin comes off more easily. Wrap them loosely in foil and place on a baking sheet. Roast at 400°F for about 45 minutes to an hour, depending on size, until a fork pierces the center easily. Remove from the oven and let cool slightly. Once cool enough to handle, rub the skins off under running water if you haven’t already peeled them. Slice or cut the beets into wedges.
Assembling the Salad
Toss a generous handful of fresh arugula with a simple vinaigrette made from olive oil, red wine vinegar, Dijon mustard, and a minced garlic clove. Spread the arugula on a plate and top with the roasted beets, a few crumbles of goat cheese, and a small handful of toasted walnuts. A drizzle of the vinaigrette over everything and maybe a pinch of fleur de sel finishes it.
Storage and Make-Ahead Notes
You can roast beets up to 3 days in advance and store them in an airtight container in the fridge. The salad components keep separately and can be assembled at the last minute to prevent the arugula from wilting.
Worth knowing: If you’re worried about beets staining your hands, wear disposable gloves while handling them, or rub your hands with lemon juice afterward — the acid helps break down the pigment.
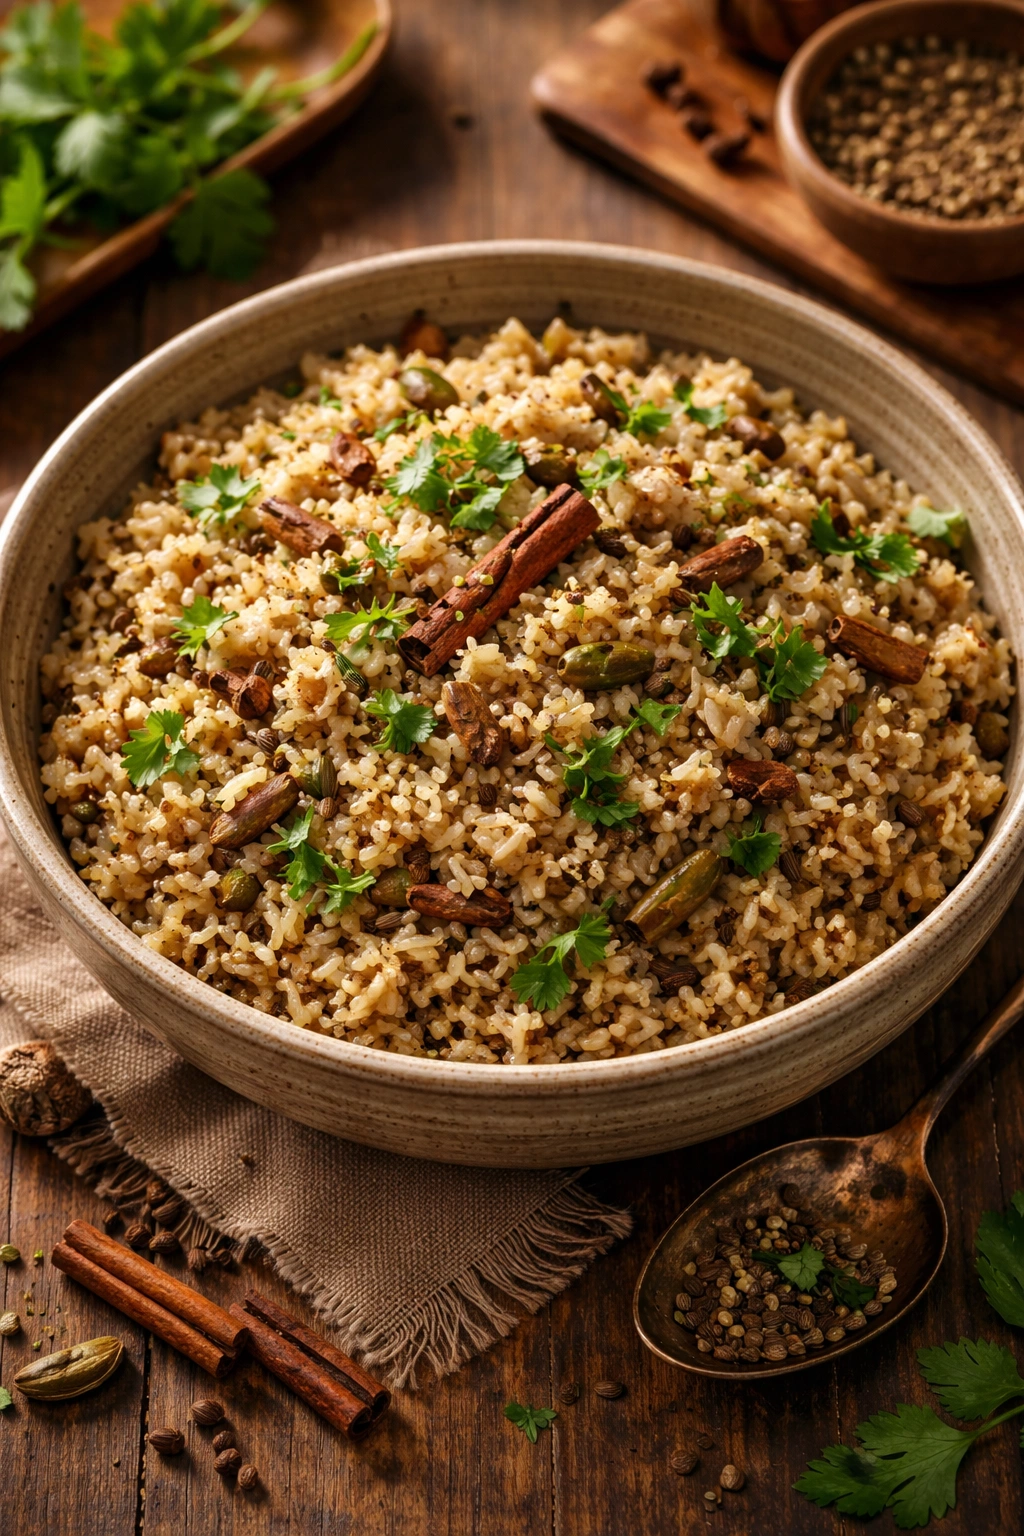
8. Brown Rice with Toasted Spices and Herbs
Brown rice gets overshadowed by trendy grains, but it deserves respect. It has a nutty flavor, a chewy texture that’s satisfying to bite into, and it pairs with literally any cuisine or protein. When you toast whole spices before cooking the rice and finish with fresh herbs, you transform plain brown rice into something that tastes intentional and flavorful.
Why Brown Rice Over White
Brown rice still has the bran and germ intact, which means it contains more fiber, more minerals, and more nutrients overall compared to white rice. It has a lower glycemic index, so it won’t spike your blood sugar as sharply. The trade-off is that it takes a bit longer to cook and has a slightly chewier texture, but most people prefer that once they experience good brown rice prepared with care.
The Toasting Method
In a heavy-bottomed pot, warm a tablespoon of olive oil over medium heat. Add whole spices — maybe a cinnamon stick, a few whole cloves, 3 or 4 cardamom pods (lightly crushed), and a teaspoon of cumin seeds. Toast for about a minute until fragrant, being careful not to let them burn. Add 1½ cups of long-grain brown rice and toast it in the spices for another 2 to 3 minutes, stirring frequently, until the rice smells toasted and nutty. Pour in 3 cups of vegetable or chicken broth, add a pinch of salt, and bring to a boil. Reduce to a simmer, cover, and cook for 45 minutes until the liquid is absorbed and the rice is tender with a slight chew. Remove from heat and let rest, covered, for 5 minutes.
The Finishing Touch
Remove the whole spices if you can locate them, then fold in fresh herbs like cilantro or parsley, a squeeze of lemon juice, and tasting it to adjust seasoning. You can also add some toasted nuts, dried fruit like raisins or cranberries, or diced vegetables if you want more texture and flavor.
Pro tip: Don’t skip the toasting step. It’s the difference between rice that tastes like filler and rice that’s actually interesting to eat.
9. Sautéed Spinach With Garlic and Pine Nuts

Spinach has the reputation of being virtuous but boring, probably because most people boil it into submission. But when you quickly sauté fresh spinach in good olive oil with garlic and finish with toasted pine nuts and maybe a squeeze of lemon, you get something that’s tender, flavorful, and elegant enough for a restaurant plate. It takes less than 10 minutes from start to finish.
The Nutritional Profile You Can’t Ignore
Fresh spinach is packed with nutrients that are actually better absorbed when the spinach is cooked. The heat breaks down cell walls and makes iron, calcium, and other minerals more bioavailable to your body. It’s loaded with lutein and zeaxanthin, compounds that protect your eye health. It contains compounds called oxalates, which some people worry about, but the amount in cooked spinach is minimal compared to raw, and the nutrient benefits far outweigh any concern.
Getting the Technique Right
Bring a large pot of salted water to a boil and blanch fresh spinach for just 1 to 2 minutes — this removes excess water and sets the bright green color. Drain it in a colander and gently squeeze out excess moisture with your hands. While that’s happening, warm 2 tablespoons of olive oil in a large pan over medium heat and add 3 or 4 thinly sliced garlic cloves. Cook for about a minute until the garlic is fragrant and just starting to color. Add the spinach and toss with the garlic oil, cooking for just a minute more until everything is coated and warm. Season with salt, freshly ground black pepper, and a squeeze of fresh lemon juice. Top with a small handful of toasted pine nuts.
Why the Blanching Step Matters
Blanching the spinach first might seem like an extra step, but it accomplishes two things: it releases a lot of the water content, so when you sauté it, it doesn’t become soupy, and it sets the bright green color so the spinach stays green instead of turning dark and muddy. It’s a restaurant technique that makes a noticeable difference.
Real talk: Pine nuts are expensive, so if your budget doesn’t allow for them, sliced almonds or walnuts work perfectly well — just toast them until fragrant before adding.
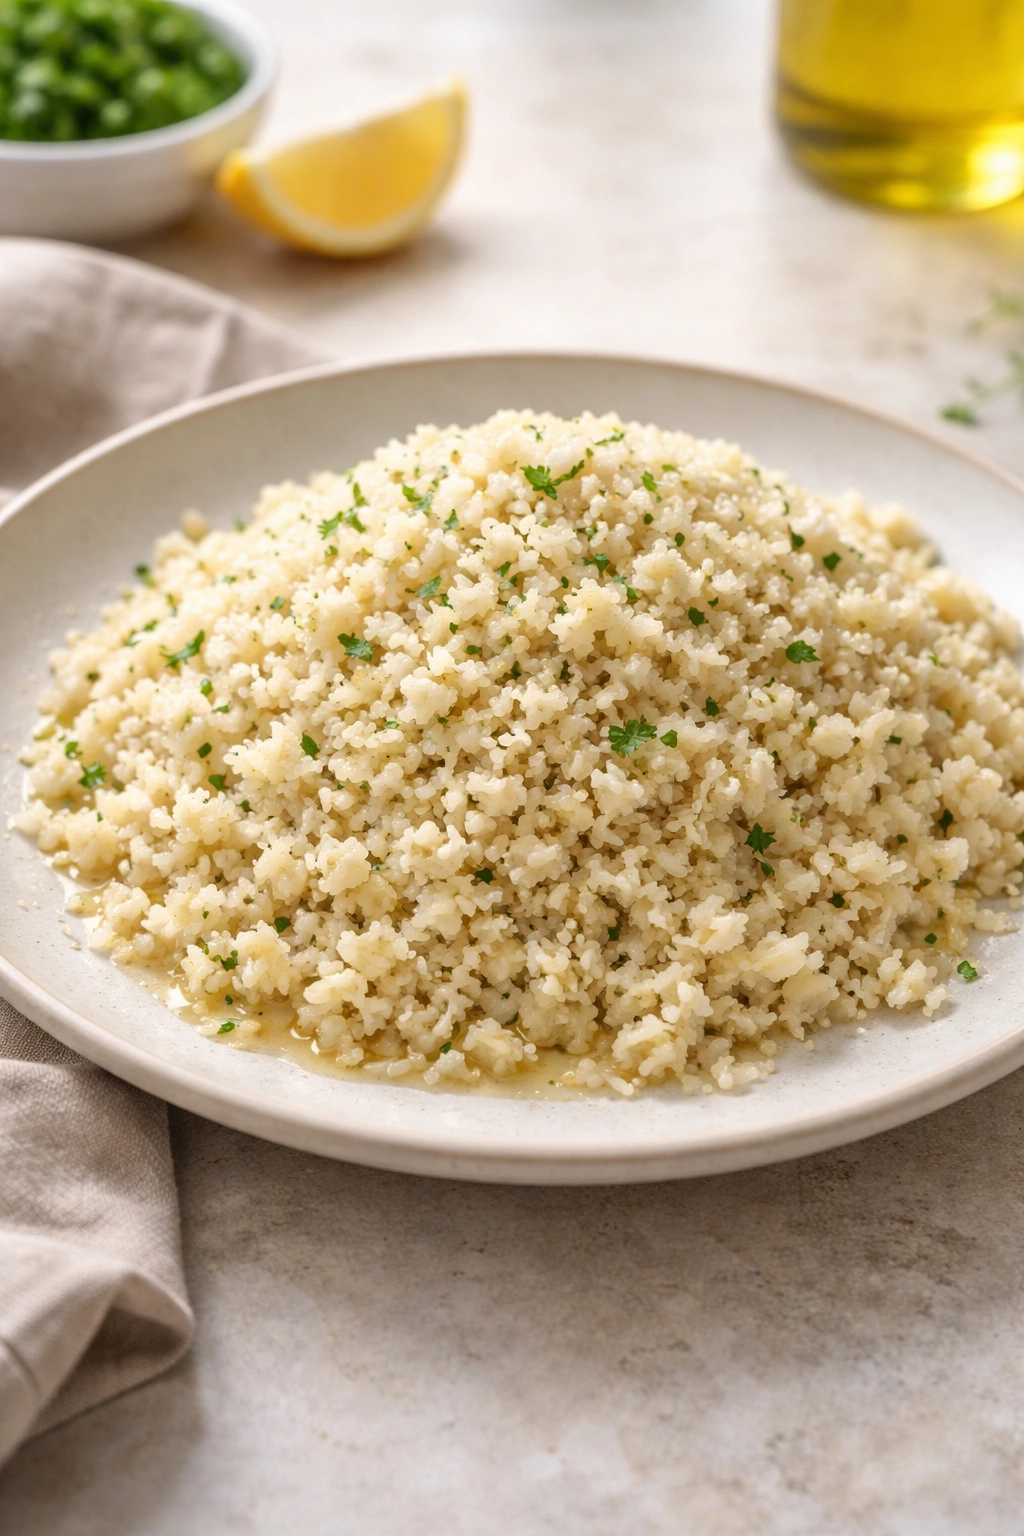
10. Cauliflower Rice as a Base or Side
Cauliflower rice has become ubiquitous in healthy cooking, but that popularity exists for a reason. It’s genuinely useful as a grain alternative for people watching carbs or calories, but it also tastes delicious in its own right when prepared with intention. It can be a light side dish on its own or a blank canvas for other flavors and ingredients.
Why Cauliflower Rice Deserves More Than Its Health Reputation
Cauliflower is lower in carbs than actual rice, but it’s not about restriction — it’s about satiety. Because cauliflower has fiber and water content, a larger serving volume fills you up more than rice would. It’s mild enough to pair with aggressive flavors or subtle enough to accent delicate fish. It cooks quickly, stores well, and can be bulked up with other vegetables to make it more substantial.
Preparing It From Fresh Cauliflower
The most flavorful approach is to start with fresh cauliflower. Cut a head into florets and pulse them in a food processor until they’re broken down into rice-sized pieces — don’t over-process into a paste. In a large skillet, warm 2 tablespoons of olive oil or ghee over medium-high heat. Add diced onion, carrots, or other vegetables if you want texture and sweetness, cooking for about 2 minutes until they start to soften. Add the cauliflower rice and cook, stirring occasionally, for 5 to 7 minutes until it’s tender but not mushy. Season with salt, pepper, and whatever flavorings suit your main dish.
Instant Flavor Builders
- Asian version: Add soy sauce, minced garlic and ginger, sesame oil, and diced scallions
- Mexican style: Add cumin, chili powder, lime juice, cilantro, and diced jalapeño
- Mediterranean: Add garlic, fresh dill, capers, and a squeeze of lemon
- Aromatic: Add turmeric, cumin, and cardamom for an Indian-inspired side
Storage and Make-Ahead Notes
Cauliflower rice keeps in the fridge for 3 to 4 days and can be reheated gently in a pan or microwave. You can buy pre-riced cauliflower to save time, though fresh tastes better and gives you more control over texture.
Worth knowing: The biggest mistake is overcooking cauliflower rice, which turns it mushy and watery. You want it tender but still with a slight texture, almost al dente like actual rice.
Final Thoughts
The shift from suffering through healthy sides to actually craving them comes down to technique, intention, and flavor. Every single one of these sides proves that eating well doesn’t mean sacrificing taste or satisfaction. A properly roasted Brussels sprout tastes better than a fry. A flavorful grain pilaf is more interesting than plain rice. Grilled asparagus is restaurant-quality with barely any effort.
The practical reality is that your main dish is only as good as what surrounds it. A lean protein without interesting sides becomes forgettable, no matter how well you’ve cooked it. But pair that same protein with a carefully prepared, thoughtfully seasoned vegetable or grain, and suddenly the whole meal feels intentional and worth sitting down for. That’s when healthy eating becomes something you genuinely want to do instead of something you force yourself through.
Start with whichever side sounds most appealing and make it this week. Notice what makes it work — the proper cooking temperature, the herbs, the acid, the fat, the timing. Once you understand those elements, you can apply them to other vegetables and grains you love. That’s how you build a real repertoire of sides that you actually want to eat, not just ones you’re supposed to eat.