There’s something genuinely special about a vegetarian pasta dinner—the way the noodles soak up silky sauces, how fresh vegetables become the star rather than an afterthought, and the satisfaction of putting together a complete, nourishing meal without meat at the center. Whether you’re committed to meatless eating, trying to expand your dinner rotation, or simply craving something lighter and brighter, vegetarian pasta dishes offer endless possibilities that go far beyond sad iceberg lettuce and bland tomato sauce.
The beauty of vegetable-forward pasta is that it doesn’t require compromise. You’re not “settling” for a meatless option—you’re discovering combinations that are genuinely craveable, deeply flavorful, and often faster to prepare than their meat-containing cousins. From creamy, umami-packed mushroom ragùs to bright herb-forward preparations that taste like summer in a bowl, these ten vegetarian pastas prove that meatless doesn’t mean flavor-less. Each one comes together with everyday ingredients and straightforward techniques, yet they feel special enough to serve to anyone at your table.
The key to making vegetarian pasta truly satisfying is understanding how to build flavor without relying on meat stocks and rendered fat. That means developing deepness through caramelization (slowly cooked onions, roasted garlic, pan-seared mushrooms), using umami-rich ingredients (aged cheeses, tomato paste, miso, nutritional yeast), incorporating good olive oil, and balancing textures so that every bite feels complete. You’ll notice these ten recipes lean heavily on these principles—transforming humble vegetables into sauces that are complex, craveable, and completely satisfying.
1. Pasta Primavera
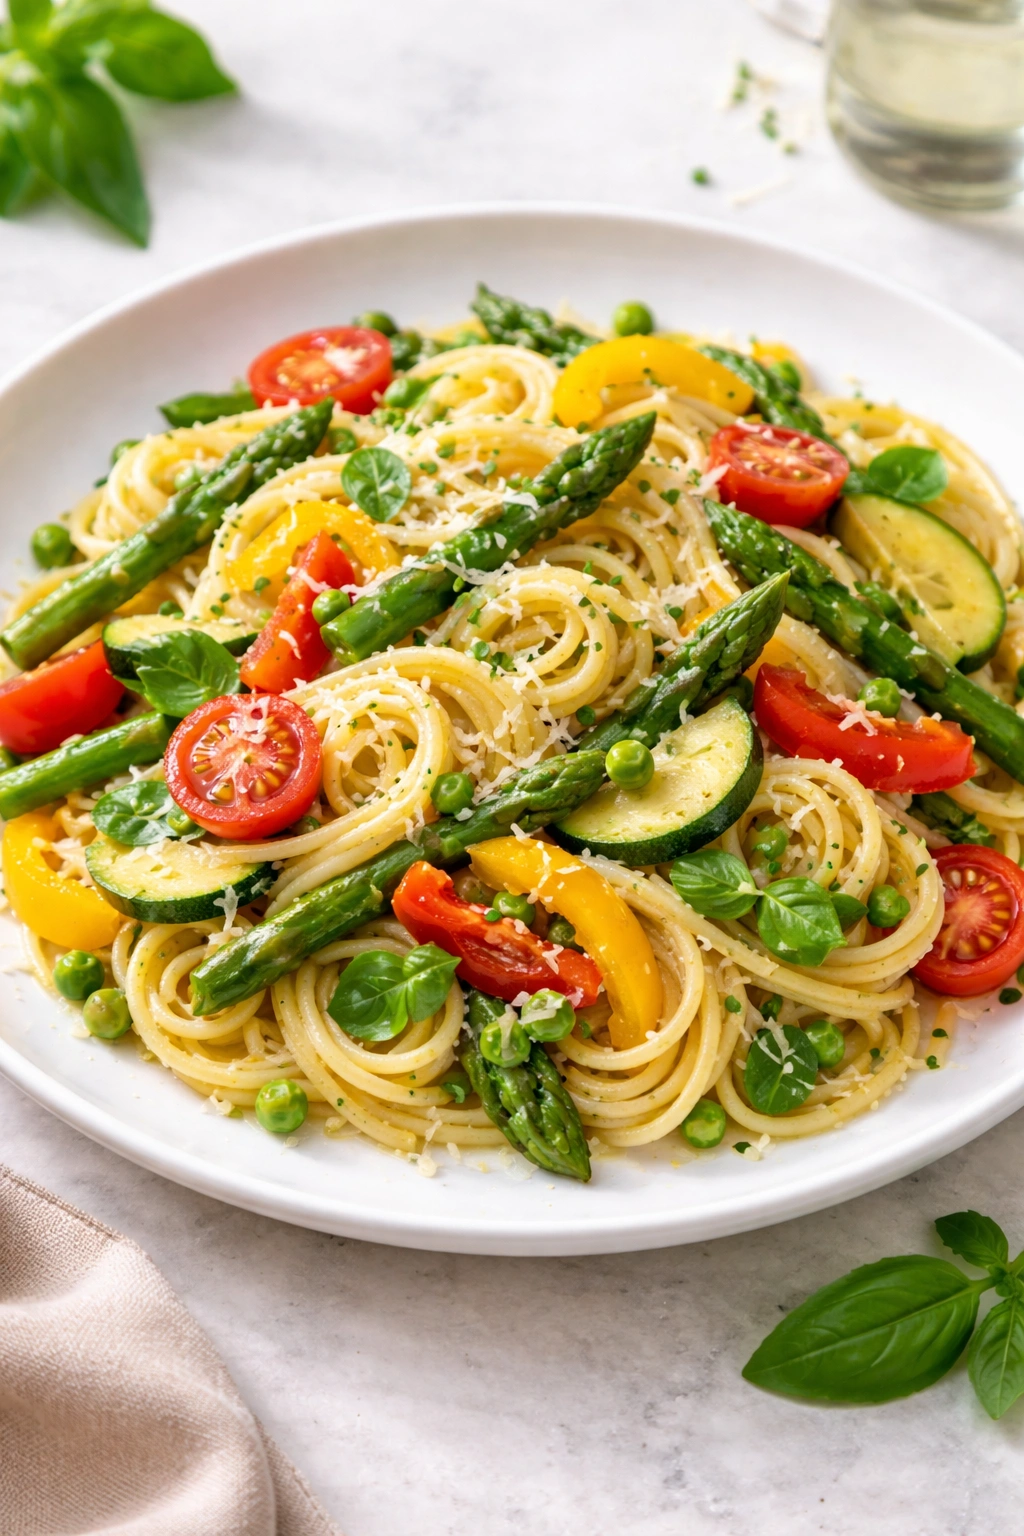
Pasta primavera sits at the heart of Italian-American cooking, and when done right, it’s a masterclass in letting vegetables shine without hiding behind heavy cream or complicated techniques. This is springtime on a plate—fresh, bright, and alive with the natural sweetness of peak-season vegetables tossed with silky pasta and barely kissed with good olive oil.
The secret to excellent primavera isn’t in adding more cream or more butter; it’s in cooking each vegetable properly so it maintains its texture and character. Zucchini should be just tender, broccoli should have a slight bite, snap peas should stay crisp, and fresh herbs should arrive at the table looking vibrant rather than wilted into oblivion. The sauce is essentially a light glaze made from pasta water, garlic, and premium olive oil—letting the vegetables speak for themselves while the starchy pasta water creates just enough body to coat the noodles evenly.
The Art of Cooking Multiple Vegetables at Once
The biggest challenge with primavera is timing—how to get everything done at once without some vegetables turning to mush while others stay raw. The solution is a careful sequence: start with what takes longest (carrots, broccoli), add vegetables with medium cook times in the middle (zucchini, asparagus), and save quick-cooking items for the end (peas, fresh herbs, cherry tomatoes).
- Use vegetables cut to similar size so they cook evenly—aim for bite-sized pieces that finish in roughly the same timeframe
- Cook in stages rather than all at once: start hardy vegetables in a wide skillet with olive oil and salt, adding quicker-cooking items as earlier ones become nearly tender
- Reserve pasta water before draining—you’ll need 1 cup of starchy water to create the light, clingy sauce that coats the noodles
- Fresh herbs (basil, parsley, dill, mint) go in at the very end, just tossed through the warm pasta so they stay bright and fragrant
Pro tip: If you’re using delicate vegetables like spinach, peas, or fresh herbs, add them after you’ve finished cooking, letting the residual heat wilt them gently rather than cooking them down into submission.
Make-Ahead and Variations
Prepare all vegetables and cut them into bite-sized pieces up to 8 hours ahead, storing them in separate containers in the refrigerator so they don’t release excess moisture. You can also cook the vegetables completely several hours in advance and reheat them gently with the pasta just before serving.
For seasonal variations, swap vegetables based on what’s at peak flavor: cherry tomatoes and basil in summer, roasted Brussels sprouts and sage in fall, winter squash and thyme in cold months. A drizzle of aged balsamic, a handful of toasted pine nuts, or shavings of Parmesan transform the dish while keeping the basic formula intact.
2. Creamy Mushroom Pasta
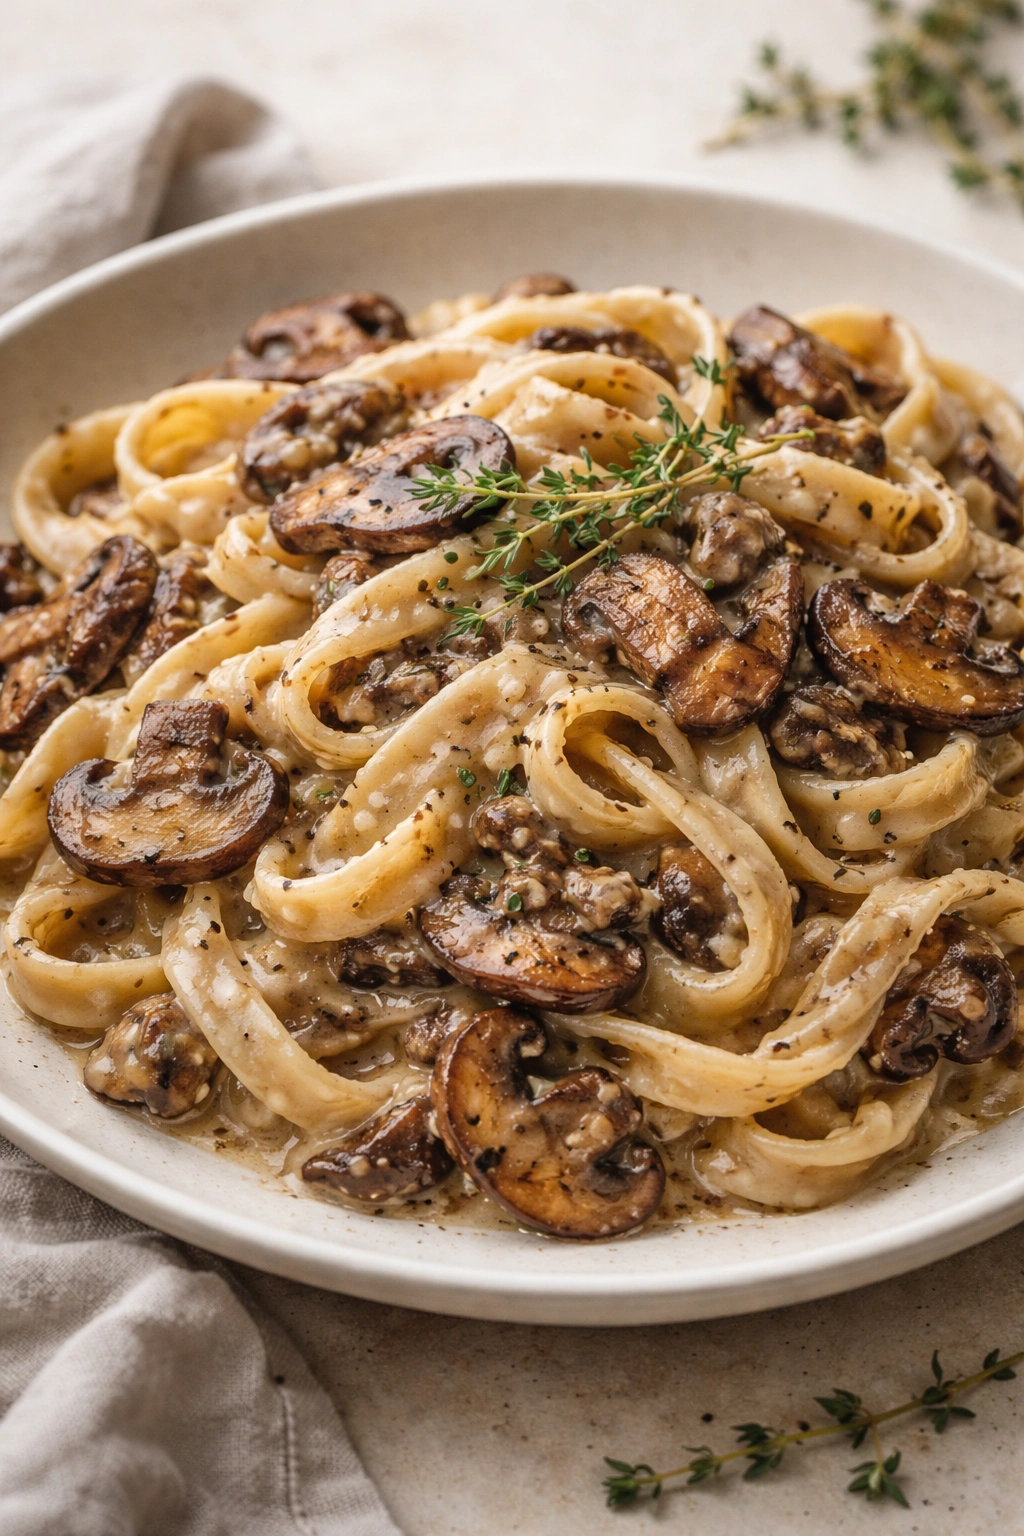
A proper mushroom pasta has the deep, almost meaty complexity that satisfies even the most devoted carnivores—and here’s the secret: it’s not actually that creamy. Instead, it relies on mushrooms that have been cooked long enough to release their moisture, concentrate their flavors, and break down slightly, creating a naturally luscious sauce that tastes far richer than the ingredient list suggests.
The technique is straightforward but requires patience. Mushrooms are sautéed in stages over medium-high heat, releasing their liquid in the first phase and then developing deep brown color and caramelized edges in the second. What emerges is a intensely flavored base with a jammy consistency that clings gorgeously to pasta. A modest splash of cream or butter comes in at the very end, enriching without overwhelming, while fresh thyme, garlic, and a squeeze of lemon juice bring brightness to balance the earthiness.
Building Depth Through Proper Mushroom Cooking
The way mushrooms are cooked determines whether the sauce tastes fresh or flat. Starting with high heat in a dry pan allows them to release moisture quickly; once that liquid evaporates, you reduce heat to medium and let them color slowly and develop flavor. This two-phase approach transforms raw mushrooms into something complex and craveable.
- Use a mix of mushroom varieties (cremini, shiitake, oyster, porcini) for layered umami flavor rather than just button mushrooms
- Don’t crowd the pan—mushrooms need space to brown rather than steam, so work in batches if using a standard skillet
- Add minced garlic only after mushrooms have released their water and started browning, otherwise garlic will burn in the released liquid
- Finish with a splash of dry sherry, wine, or even a tablespoon of soy sauce to amplify the savory, umami quality
Worth knowing: A small amount of miso paste (1 tablespoon dissolved into the sauce) adds serious umami depth and makes the mushroom flavor feel almost meat-like in its complexity. It’s invisible flavor-wise but shifts the entire character of the dish.
Cream Amount and Dietary Flexibility
A full cup of heavy cream makes this more stroganoff than pasta sauce. Instead, aim for ¼ to ½ cup of cream added at the very end—just enough to round the edges without masking the mushroom flavor. If you prefer to skip cream entirely, use the pasta water (reserved when draining) to create a lighter sauce, or add a splash of whole milk or plant-based cream if you want some richness.
Store cooled sauce in an airtight container for up to 4 days in the fridge. It reheats beautifully with a splash of pasta water or vegetable broth to restore the silky consistency. Freeze for up to 3 months before the pasta meal itself—cook fresh pasta just before serving rather than storing everything together.
3. Spinach and Ricotta Pasta
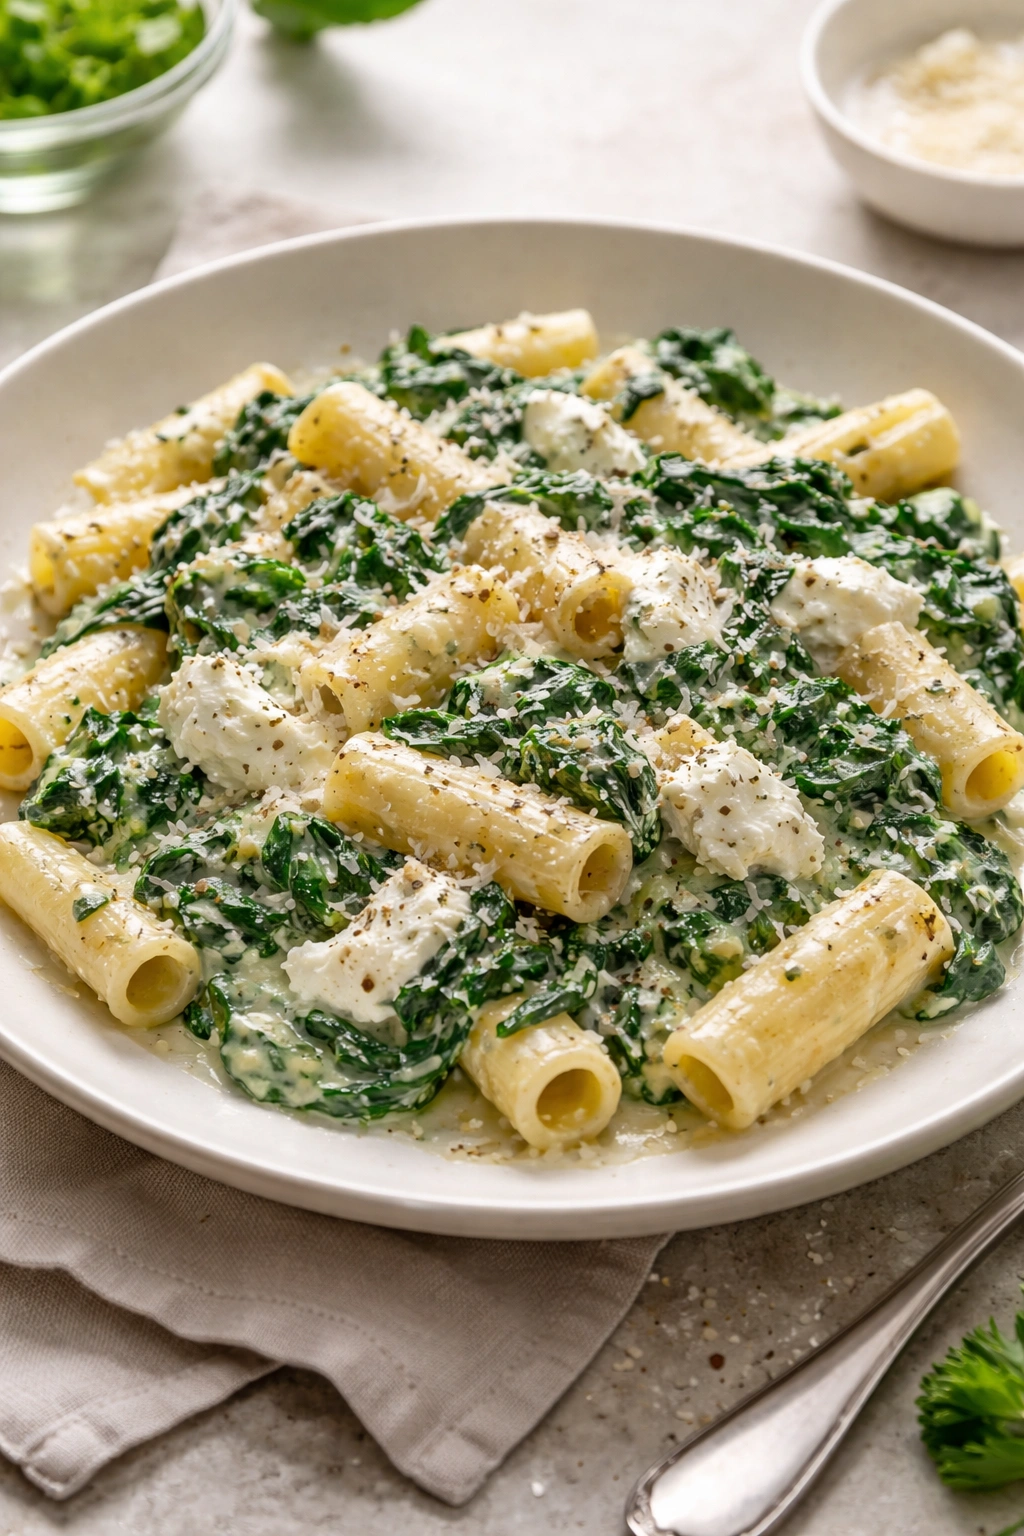
This is the pasta equivalent of a warm hug—creamy, comforting, and packed with a subtle blend of spinach and cheese that feels indulgent while sneaking in an entire serving of greens. The magic happens when you combine ricotta’s gentle sweetness with garlic’s sharp edge, weave in wilted spinach for color and nutrition, and tie it all together with butter, pasta water, and a fistful of Parmesan.
The sauce is more of a gentle coating than a chunky ragù—each strand of pasta gets a light, creamy layer infused with flecks of spinach and little pockets of cheese flavor. It comes together quickly, which means you can have dinner on the table in less than 25 minutes from start to finish. This is the perfect weeknight pasta when you want something that feels restaurant-quality but doesn’t demand advanced technique.
The Ricotta Mixture: Texture and Flavor Balance
The key to smooth, silky spinach and ricotta sauce is understanding how ricotta behaves when heated. Large curds of ricotta can look grainy or lumpy if you’re not careful, so the goal is to either pass it through a fine-mesh strainer before using it, or heat it very gently, stirring constantly to distribute it evenly throughout the sauce.
- Start with whole-milk ricotta rather than part-skim—it has better flavor and smoother texture
- Pass ricotta through a fine strainer if it looks grainy, breaking it up with the back of a spoon
- Wilt fresh spinach completely and squeeze out excess moisture in a clean kitchen towel—this prevents the sauce from becoming watery
- Combine ricotta, spinach, grated nutmeg (⅛ teaspoon is enough), salt, and pepper in a bowl before adding to the hot pasta, so flavors are already balanced
Quick fact: Frozen spinach actually works beautifully here—thawed and squeezed dry, it’s equally convenient and cooks faster than fresh, without losing nutrition or flavor.
Variations and Add-In Ideas
This base is incredibly flexible. A handful of diced sun-dried tomatoes adds brightness. Toasted pine nuts or crispy sage leaves scattered on top add textural contrast. A pinch of red pepper flakes brings heat. For a richer version, mix a little fontina or Gruyère in with the ricotta. Lemon zest stirred in at the end brings unexpected freshness.
The sauce keeps well in the refrigerator for 3 days and can be gently reheated over low heat with a splash of milk or pasta water. You can also freeze the ricotta-spinach mixture alone (before combining with hot pasta water and butter) for up to 2 months, then thaw and warm it gently when you’re ready to cook pasta.
4. Roasted Garlic and Olive Oil Pasta
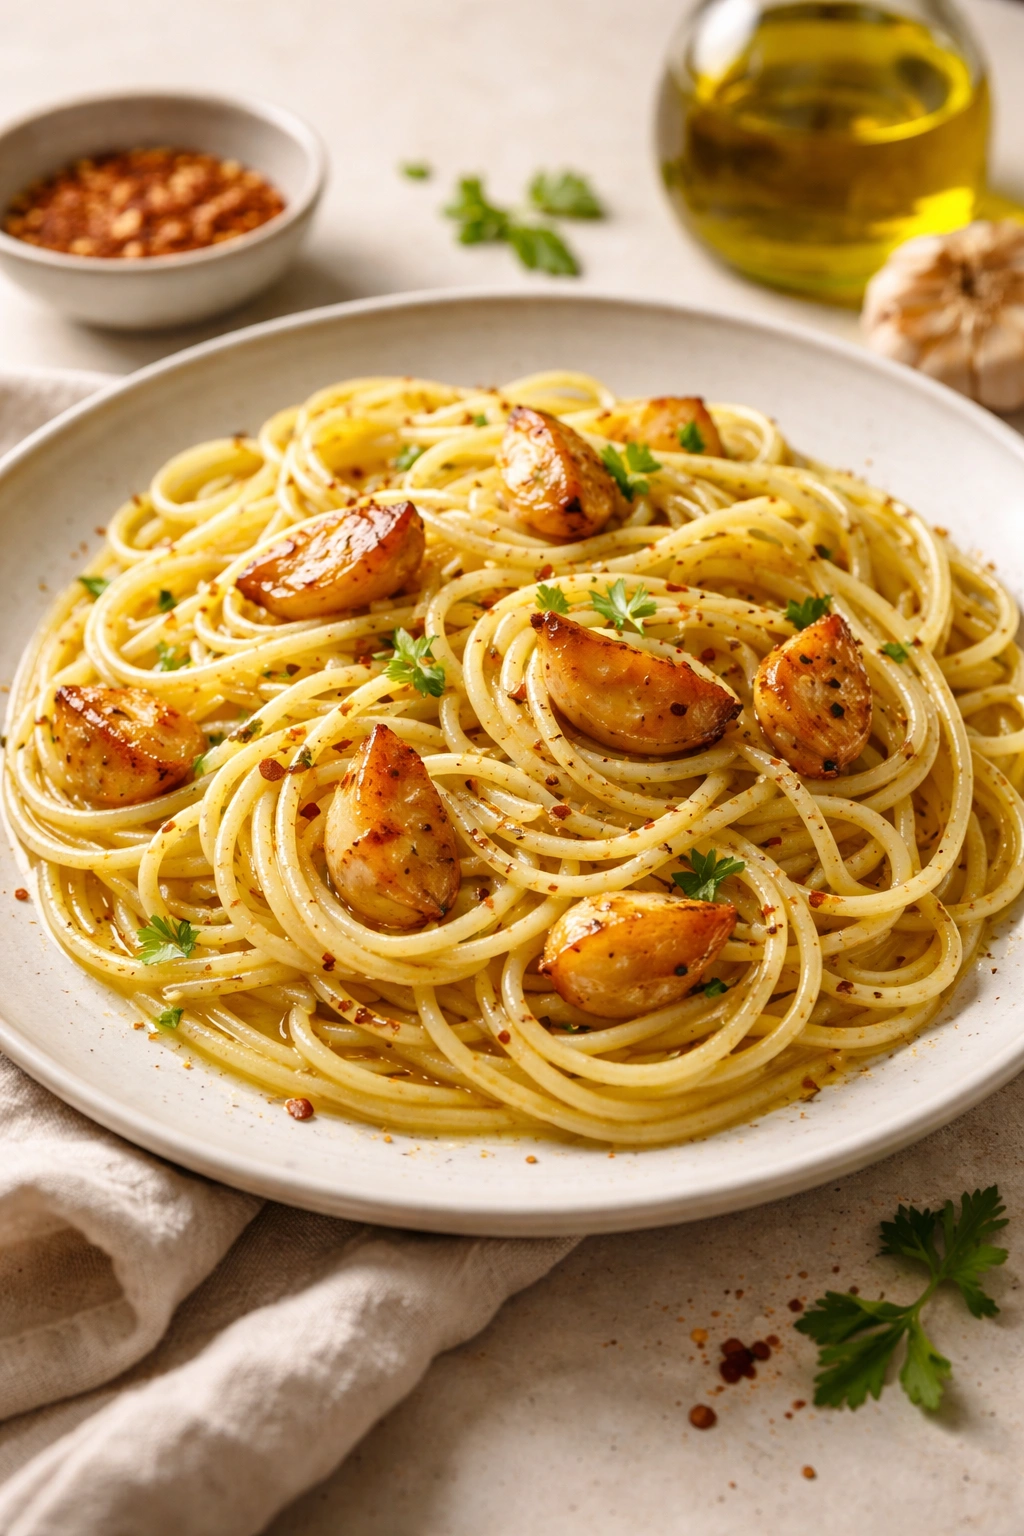
This is the most minimalist pasta in this collection, and it’s revolutionary in its simplicity: roasted garlic becomes sweet and deeply savory instead of sharp and pungent, infuses olive oil with its subtle flavor, and transforms into a silky sauce with barely any ingredients at all. It proves that you don’t need a long ingredient list or complicated technique to make something absolutely craveable.
The entire sauce comes from just a few things: garlic roasted until golden and creamy, good olive oil, red pepper flakes for heat, fresh parsley, and the starchy water from your pasta. That’s it. What emerges is a pasta that tastes warm, comforting, and deeply satisfying—it’s what Italians might call aglio e olio, elevated with roasted garlic’s sweeter, deeper notes instead of the sharp bite of raw or lightly cooked garlic.
Roasting Garlic to Creamy Perfection
Roasted garlic tastes nothing like raw garlic—instead of sharp and biting, it becomes sweet, gentle, and almost spreadable. The transformation happens in the oven at moderate temperature, where the cloves soften gradually and their sugars caramelize just slightly. Once roasted and cooled, you can squeeze the cloves right out of their papery skins and they practically melt into the olive oil.
- Whole garlic bulbs need about 35-40 minutes at 400°F (200°C)—slice the top off the bulb, drizzle with olive oil and salt, wrap in foil, and roast until the cloves are completely soft and lightly golden
- Alternatively, separate cloves, peel them, toss with olive oil and salt, and roast them on a small baking sheet for 25-30 minutes until tender and just barely beginning to caramelize around the edges
- The garlic should be fully soft and easy to mash with a fork—if it’s still firm in the center, roast a few minutes longer
- Store roasted garlic cloves in olive oil in the refrigerator for up to 2 weeks; this also flavors your oil for future cooking
Pro tip: Make a big batch of roasted garlic on the weekend. It’s wonderful mashed on toast, spread into soups, stirred into mayonnaise, or whisked into salad dressings throughout the week.
Elevating the Basics
While garlic and olive oil are the stars, thoughtful additions transform this from simple to special. Fresh herbs matter enormously—flat-leaf parsley is traditional, but torn basil, chives, or oregano each bring their own character. A tiny pinch of Aleppo pepper or fruity red pepper flakes adds subtle heat without overwhelming. A squeeze of fresh lemon juice at the very end brightens everything. Some cooks add a handful of toasted breadcrumbs tossed with the pasta, creating a crispy-creamy contrast.
This pasta is best served immediately after combining the hot pasta with the warm garlic-oil mixture. It doesn’t keep well because the pasta continues absorbing oil and becomes heavy after a few hours. Make it fresh for each meal rather than trying to store it.
5. Tomato Basil Pasta with Fresh Mozzarella
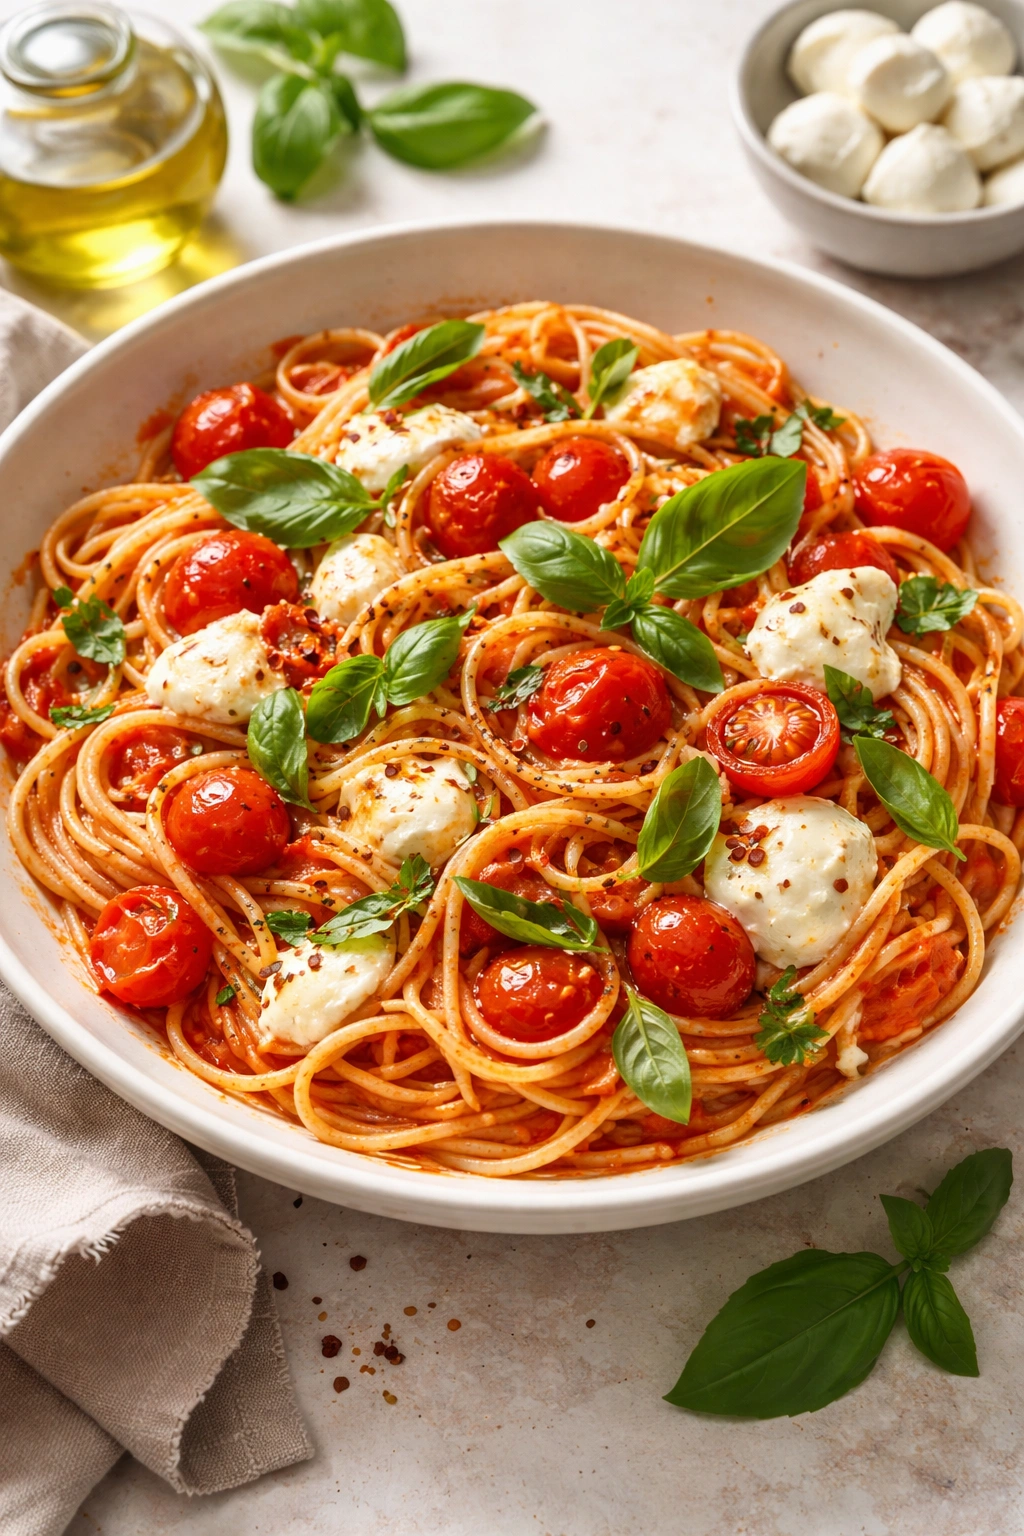
This tastes like the best summer tomato moment captured in a bowl—vibrant, fresh, and alive with basil’s peppery sweetness and the subtle milky richness of fresh mozzarella. The trick to making this genuinely great rather than boring is respecting the tomatoes enough not to cook them to death, using fresh mozzarella that’s actually fresh (not the pre-shredded stuff), and assembling everything with care so that textures and temperatures stay interesting.
The sauce isn’t a long-simmered ragù but rather a quick-cooked tomato base that highlights the fruit rather than darkening it into submission. Garlic, a can of high-quality tomatoes (San Marzano if you can get them), and a handful of fresh basil create a bright, fresh sauce in about 10 minutes. The mozzarella goes in at the very end—it softens and melts into pockets throughout the pasta rather than completely dissolving into the sauce, giving you bites of cool, creamy cheese among hot pasta and warm sauce.
Choosing and Handling Fresh Mozzarella
The difference between real fresh mozzarella (the kind packed in water, found in the refrigerated section) and low-moisture mozzarella (the kind used for pizza, which is shelf-stable) is enormous. Fresh mozzarella is delicate, milky, and slightly warm-toned in flavor; low-moisture mozzarella is stringy and more neutral. For this pasta, always use true fresh mozzarella—it’s usually called buffalo mozzarella, ciliegine (small balls), or just fresh mozzarella, and it comes packed in water.
- Drain mozzarella from its liquid 30 minutes before eating—this prevents excess water from making the sauce watery
- Tear mozzarella into bite-sized pieces rather than cutting it; tearing creates a more interesting texture
- Scatter mozzarella over the hot pasta just before serving so it softens slightly but doesn’t completely melt into the sauce
- If you’re making this ahead, keep mozzarella separate and add it fresh right before eating rather than storing everything together
Worth knowing: For a heartier version, add a layer of toasted breadcrumbs, crispy croutons, or shaved Parmesan on top. This adds textural contrast and makes the dish feel more complete.
Tomato Selection Matters
Canned San Marzano tomatoes are worth seeking out—they’re sweeter and less acidic than other canned varieties, with fewer seeds, which means less liquid and more flavor concentrated in the fruit. If you can’t find them, whole peeled tomatoes (any quality) are better than crushed or diced, since you’ll break them up as they cook anyway. During peak tomato season, this pasta is incredible with fresh tomatoes—blanch and peel them, remove seeds, chop them roughly, and skip the cooking step since fresh tomatoes need very little heat.
This pasta is best served immediately. If you need to make it ahead, cook the tomato sauce and refrigerate it separately from the pasta and mozzarella. Reheat the sauce gently before tossing with fresh hot pasta and adding mozzarella at serving.
6. Butternut Squash Pasta
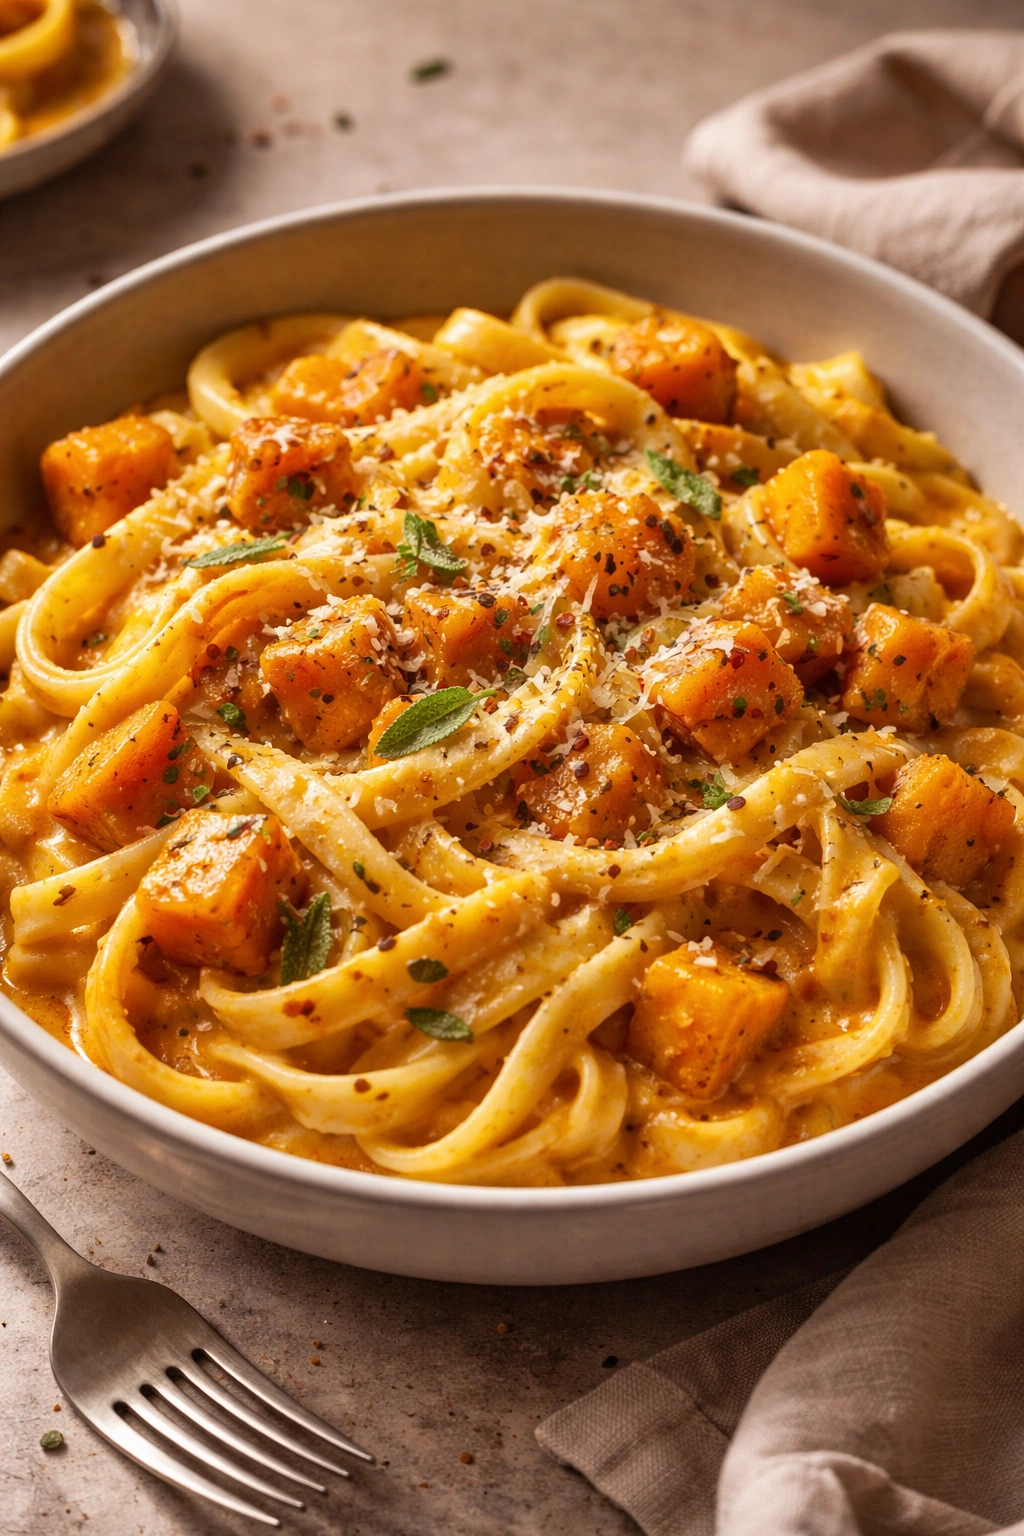
Butternut squash transforms into a naturally creamy, velvety sauce that feels luxurious without demanding heavy cream—the squash purée itself has the right texture and richness. Roasted until caramelized at the edges, butternut squash develops complex, nutty sweetness and deepness that surprised me the first time I experienced it. This is warm, comforting, and absolutely vegan-friendly, yet it tastes more elegant and restaurant-like than you’d expect.
The sauce comes together by roasting squash until tender, then blending it with vegetable broth, aromatics, and whatever spices speak to you (sage and nutmeg are classic, but thyme, rosemary, and even a tiny pinch of cinnamon are gorgeous). The texture should be pourable but not thin—creamy enough to coat pasta beautifully without seeming insubstantial.
Achieving True Caramelization
Roasted squash has two distinct phases: first it becomes tender, then (if you keep roasting) the edges caramelize and develop deep, almost nutty flavor that tastes nothing like raw squash. Most recipes stop too early, at the soft stage. Push through to caramelization, where some edges turn golden-brown and parts start to crisp slightly—this is where the depth and complexity come from.
- Cut squash into ½-inch cubes or half-moon slices so pieces cook evenly and expose maximum surface area for caramelization
- Toss with olive oil and salt, spread in a single layer on a sheet pan, and roast at 425°F (220°C) for 25-35 minutes, stirring halfway through
- Look for golden-brown edges and caramelized spots—some pieces will look almost burnt, which is exactly right
- The squash should be completely tender (a fork breaks it easily) with deeply colored, crispy-edged pieces mixed with softer ones
Pro tip: Reserve some roasted squash pieces to scatter on top of the finished pasta for textural contrast—you get creamy sauce beneath with chunks of caramelized squash for bite.
Spices and Sweetness Balance
Too much sweetness turns this into dessert pasta. The right amount of spice and salt balances the squash’s natural sugar. Toast whole spices (nutmeg seed, sage, cinnamon stick) very briefly in a dry pan, then crush them—the flavor is infinitely more complex than pre-ground spices. A squeeze of lemon juice or splash of white wine at the end cuts sweetness and brings brightness. For richness without dairy, stir in a tablespoon of nut butter (tahini, almond, or peanut) into the blended sauce.
This sauce keeps beautifully in the refrigerator for 4-5 days and reheats gently over low heat with a splash of broth or pasta water to restore the silky consistency. It also freezes excellently for up to 3 months.
7. Eggplant Parmesan Pasta
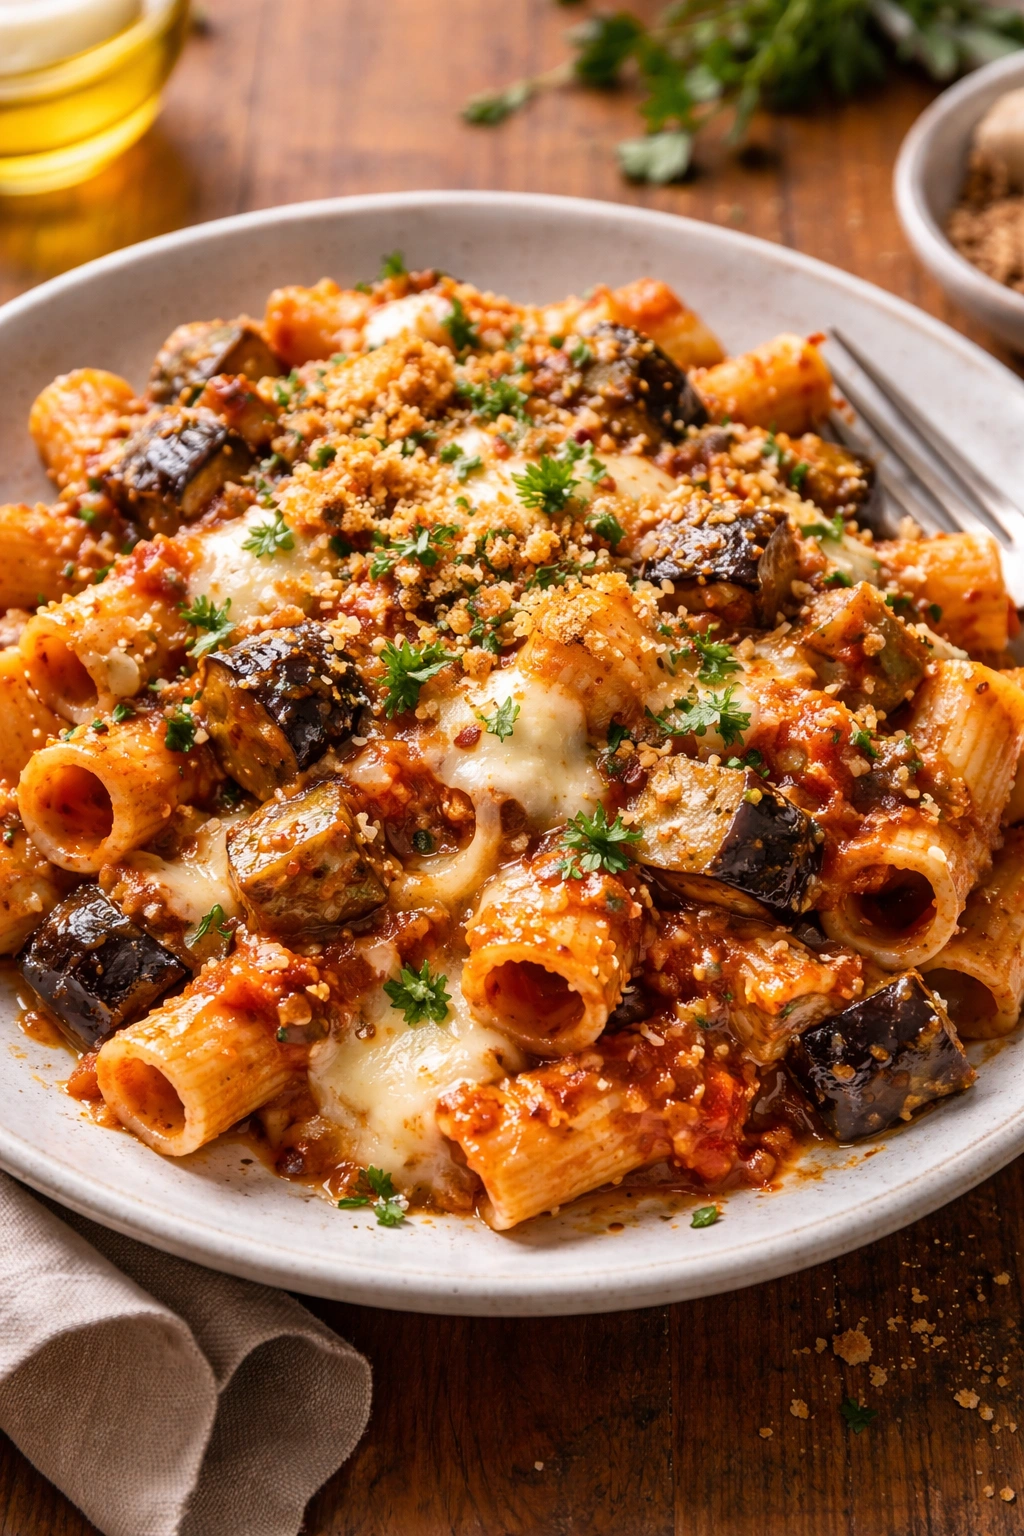
Why have eggplant Parmesan as a separate dish when you can layer those same flavors directly into pasta? This version combines the creaminess of a creamy tomato sauce with roasted eggplant’s silky, almost meat-like texture, melted mozzarella, and crispy breadcrumbs that stay somewhat crunchy even when tossed with hot pasta. It’s indulgent without feeling heavy.
The key difference from traditional eggplant Parmesan is that the eggplant cubes are roasted until they’re nearly falling apart rather than breaded and fried—this keeps the dish lighter while achieving the same savory, deep eggplant flavor. They meld into the tomato sauce, creating a chunky, hearty base, while fresh mozzarella stirred in at the end provides creamy richness without the heaviness of a baked dish.
Preparing Eggplant for Perfect Texture
Raw eggplant is bitter and spongy, absorbing whatever it’s cooked in. The goal is to render the eggplant tender and remove much of the water and bitterness before it hits the sauce. Roasting accomplishes this beautifully—cut into cubes, tossed with salt and olive oil, and roasted hard until the edges are dark and caramelized, eggplant becomes silky, sweet, and completely delicious.
- Cube eggplant into ½-inch pieces and toss generously with salt in a colander—let sit 20 minutes to draw out moisture, then pat dry with paper towels
- Toss with olive oil (eggplant absorbs lots of oil, so be generous), spread on a sheet pan, and roast at 425°F (220°C) for 25-30 minutes, stirring halfway through
- The eggplant should be deeply browned and almost falling apart—some pieces will look almost burnt and crispy at the edges, others will be creamy and tender inside
- Add roasted eggplant to the tomato sauce (which should be rich and well-flavored) in the last few minutes of cooking so the flavors marry
Worth knowing: If you want the dish to feel even more like eggplant Parmesan, toss the roasted eggplant with Panko breadcrumbs and Parmesan before roasting, rather than plain olive oil and salt. This creates crispy-edged pieces that stay somewhat textured even when mixed with hot pasta.
Layering Flavors and Toppings
Make the tomato sauce more interesting by adding depth—cook it with a handful of fresh basil, a splash of balsamic vinegar, fresh oregano, and garlic. Tear fresh mozzarella into the hot pasta at the very end so it softens but doesn’t completely dissolve. Top with crispy breadcrumbs, fresh basil, and grated Parmesan just before serving. Some people add a tiny drizzle of aged balsamic to the finished dish for complexity.
The sauce (eggplant and tomato components combined) keeps for 4 days in the refrigerator. Add the fresh mozzarella and breadcrumb topping just before serving, as both change texture after sitting with the warm pasta. The sauce freezes beautifully for up to 3 months.
8. Lentil Bolognese Pasta
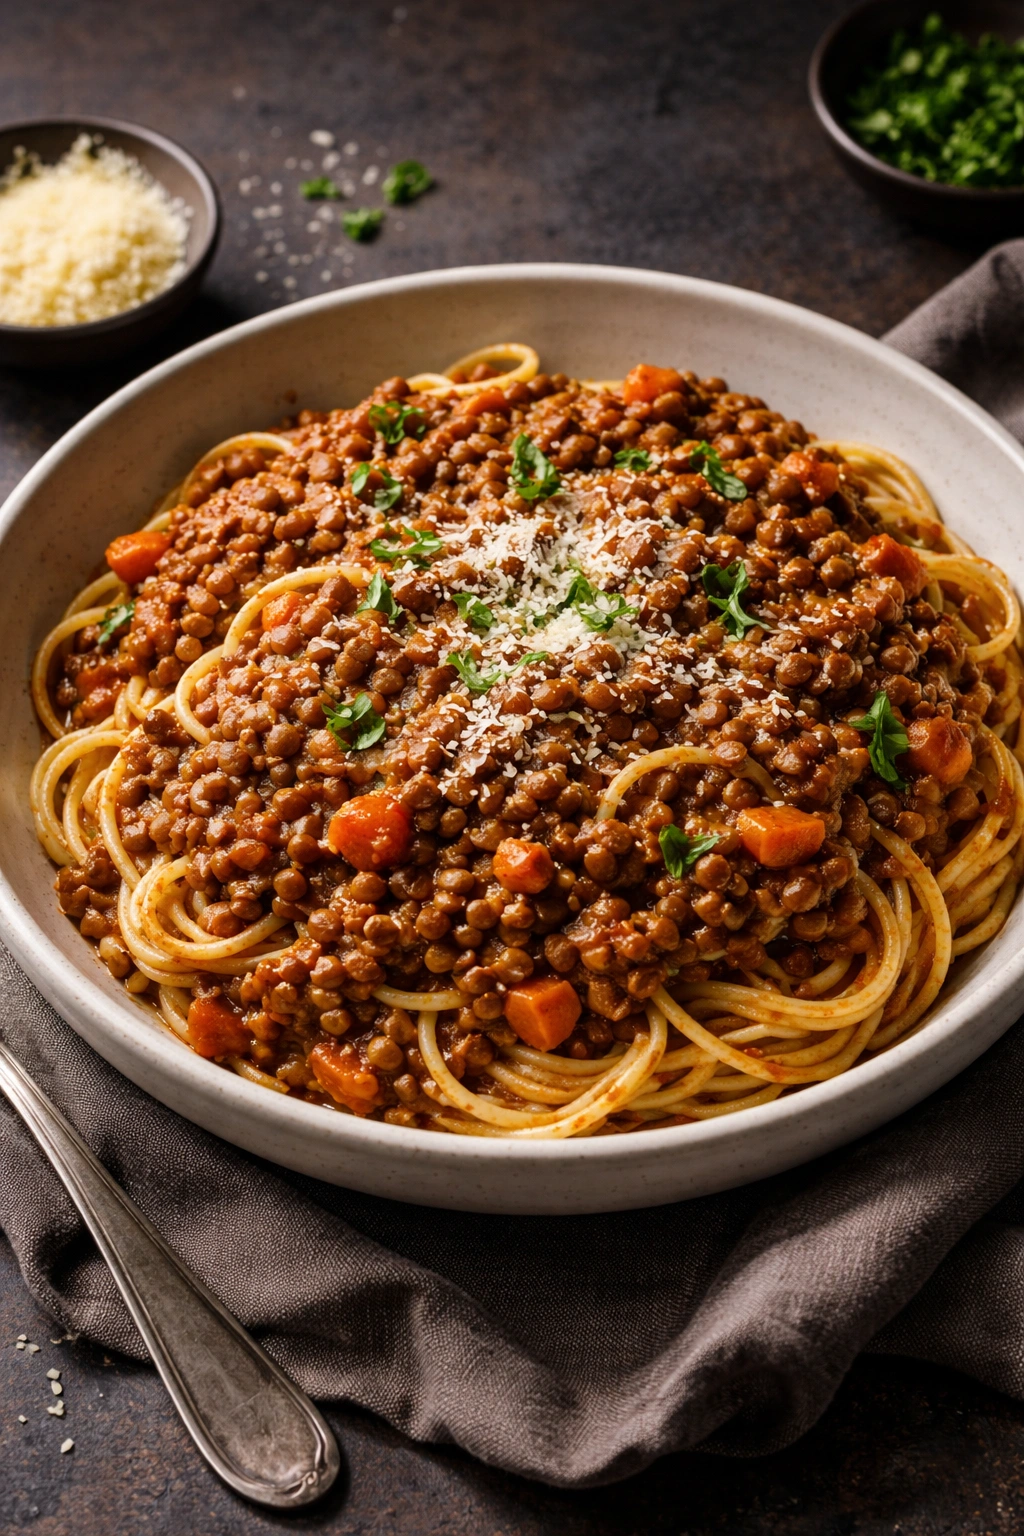
A proper plant-based Bolognese doesn’t try to taste exactly like meat sauce—that’s a losing game. Instead, it leans into lentils’ nutty, earthy depth and builds layered umami flavor through careful cooking, aromatic vegetables, tomato paste, and seasonings that create something deeply satisfying and craveable on its own terms. This version is hearty enough to feel like a complete meal, complex enough to be genuinely interesting, and somehow even better than meat-based Bolognese when made with care.
The technique mirrors traditional Bolognese: slowly cook aromatic vegetables (onion, carrot, celery) until they’re caramelized and deeply flavored, add tomato paste and cook it briefly to deepen the flavor, add cooked lentils, canned tomatoes, and broth, then let everything simmer together for 30-45 minutes while flavors meld and the liquid reduces to a thick, cling-to-pasta consistency.
Building Umami Depth Without Meat
Umami—that savory, mouth-filling sensation—comes from several sources when you’re cooking vegetarian. Cooked lentils have inherent umami. Tomato paste (cooked briefly in the hot pan before adding liquid) concentrates flavor and adds umami. Soy sauce or tamari (1 tablespoon) adds savory depth invisibly. A small spoonful of miso paste amplifies everything. Use vegetable broth rather than water—flavor matters.
- Cook lentils completely before adding them to the sauce—they should be tender enough to break with a fork but not mushy
- Use a mix of lentil varieties if possible (brown, green, red) for more complex flavor and texture
- Toast lentils briefly in a dry pan with the aromatics before adding liquid, which deepens their nutty quality
- Add red wine or a splash of balsamic vinegar during simmering to add complexity and slight acidity
Pro tip: A tablespoon of soy sauce or tamari stirred in near the end is invisible but transforms the sauce into something complex and deeply savory. You won’t detect the soy flavor—you’ll just notice the Bolognese tastes richer and more interesting.
Cooking Time and Thickness
Let the sauce simmer uncovered for at least 30 minutes, preferably 45 minutes, so excess liquid evaporates and flavors concentrate. The finished sauce should be thick enough to cling to a spoon without immediately sliding off—this is what makes it coat pasta beautifully. If it’s too thin after cooking, simmer longer. If you’ve cooked it too long and it’s too thick, whisk in a splash of broth or pasta water to loosen it slightly.
This sauce actually improves after a day or two in the refrigerator as flavors continue to marry and deepen. Store in an airtight container for up to 5 days. It freezes magnificently for up to 3 months, and you can reheat it gently (it doesn’t need any special treatment) right from frozen.
9. Caramelized Onion and Goat Cheese Pasta
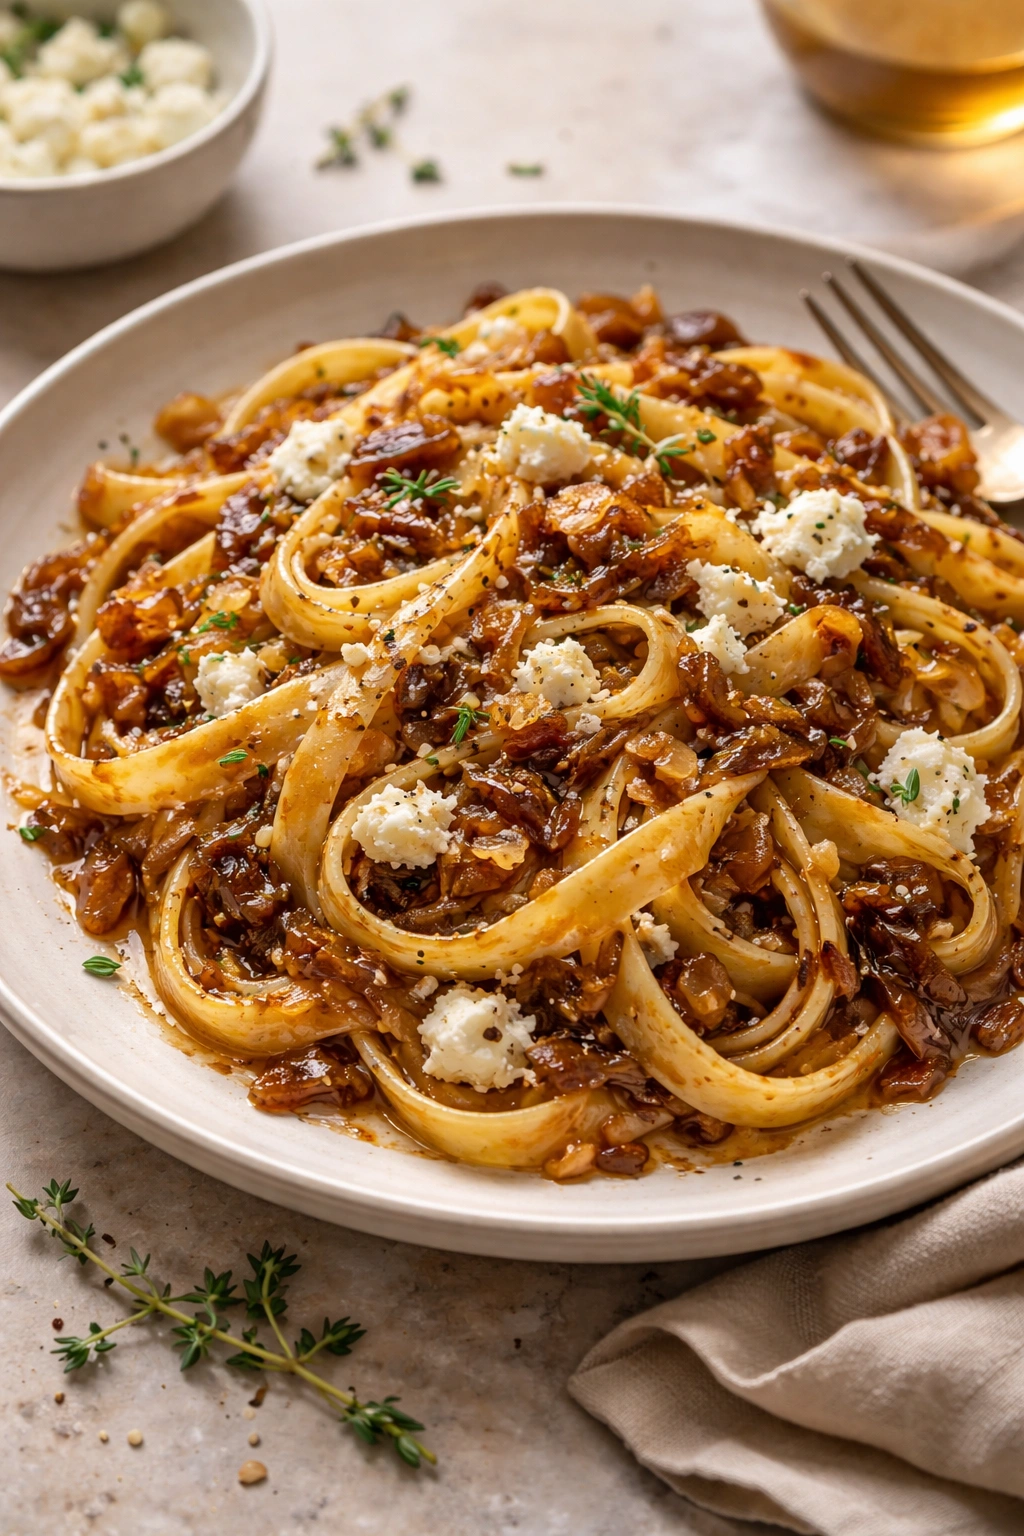
Caramelized onions are one of cooking’s greatest secrets—start with a pile of sliced onions that seems impossibly large, cook them slowly over low heat, and they collapse into something sweet, jammy, and utterly addictive that tastes nothing like raw onion. Combined with tangy, creamy goat cheese, fresh thyme, and just a touch of balsamic vinegar, they become the basis for a sophisticated pasta that somehow feels both simple and restaurant-quality.
The sauce is loose and glossy rather than thick—the caramelized onions mixed with a little pasta water create a light coating that clings to noodles while goat cheese melts into warm pockets of creaminess. This is the kind of pasta you might find in a small French bistro, elegant and understated but deeply flavorful.
The Art of Proper Caramelization
Caramelizing onions is a lesson in patience. The process takes 30-40 minutes, and you cannot rush it without sacrificing flavor. Start with sliced onions in a cold pan with butter and a pinch of salt—the salt helps draw out moisture. Cook over medium heat, stirring occasionally, until the onions release their liquid and begin to break down. Then reduce heat to medium-low and keep cooking, stirring more frequently as time goes on, until they become a deep golden-brown, jammy mass.
- Use at least 2 pounds of onions (they collapse down tremendously) for visible onion pieces in the finished sauce
- Add a pinch of salt from the beginning—this helps draw out moisture and speeds the process slightly
- Cook over medium-low heat for the majority of time, stirring every few minutes so onions color evenly without burning
- Once they’re deeply golden (dark amber, not pale), add fresh thyme, a splash of balsamic vinegar, and ground black pepper—these seasonings bloom against the sweet onions
Worth knowing: If onions are sticking to the pan or browning too quickly, add a splash of water or broth to deglaze and continue cooking. This is not cheating; it’s keeping the temperature controlled so caramelization happens gently rather than burning.
Goat Cheese and Other Additions
Crumbled goat cheese is stirred into the hot pasta just before serving—it melts into creamy pockets and contributes tangy complexity that plays beautifully against the sweet onions. Use high-quality goat cheese if possible; cheaper versions are grainier and less flavorful. Whole fresh thyme leaves (not dried) stirred in at the end provide fresh herbal notes. A tiny squeeze of fresh lemon juice brightens everything. For nuttiness and crunch, scatter toasted walnuts or pecans on top.
Store caramelized onions in an airtight container in the refrigerator for up to 5 days, or freeze for up to 3 months. They’re wonderful on toast, piled into sandwiches, or layered into gratins throughout the week. Make this pasta fresh just before serving, as goat cheese doesn’t store well mixed with warm pasta and onions.
10. Mediterranean Chickpea Pasta
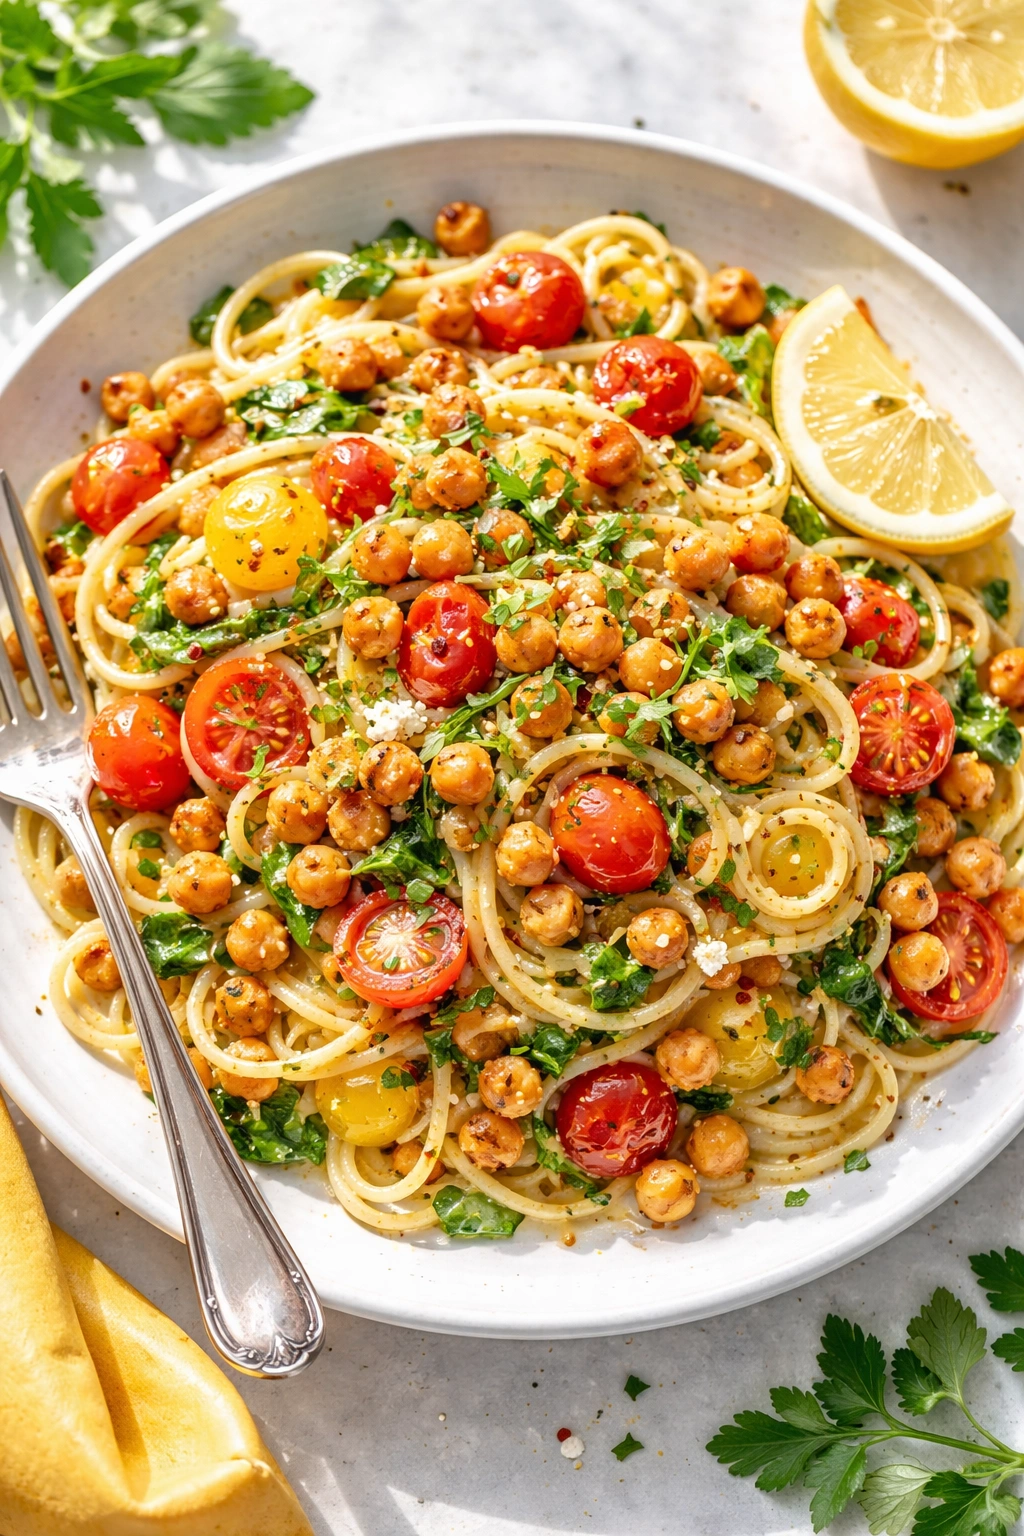
This is bright, lemony, herbaceous pasta that tastes like the Mediterranean coast—crispy chickpeas that stay crunchy even when tossed with hot pasta, fresh herbs that arrive at the table still smelling alive, tomatoes that taste like tomatoes, and enough garlic to make everything taste more like itself. It’s hearty enough to be satisfying despite being completely plant-based, and it comes together in less than 20 minutes from start to finish.
The chickpeas are crisped up in a hot skillet with olive oil, garlic, and lemon until their skins crackle slightly and their insides stay creamy—this gives them texture and makes them interesting in pasta rather than mushy and forgettable. Cherry tomatoes go in at the end so they’re barely warm but haven’t released all their liquid into the sauce, and fresh herbs (parsley, dill, basil, mint) scattered on top provide brightness and freshness that elevates the entire dish.
Crisping Chickpeas to Perfection
Canned chickpeas, drained and dried thoroughly, transform in a hot skillet into something crunchy and delicious. The key is to not move them around constantly—let them sit still on the hot pan for a minute or two so the bottoms get crispy and golden, then shake the pan and repeat. You’re building texture, not just heating them through.
- Drain canned chickpeas well and spread them on a clean kitchen towel to dry—excess moisture prevents crisping
- Heat olive oil in a wide skillet over medium-high heat until shimmering, then add chickpeas in a single layer
- Let them sit undisturbed for 1-2 minutes so the bottoms brown, then shake the pan and cook 1-2 minutes more, repeating until many pieces are golden and crispy (about 5-7 minutes total)
- Add minced garlic and lemon zest in the last minute—don’t let the garlic burn, just toast it gently until fragrant
Pro tip: A pinch of smoked paprika or sumac stirred into the chickpeas adds complexity and a hint of smokiness without overpowering the fresh vegetable flavors.
Finishing with Fresh Herbs and Brightness
This pasta relies heavily on fresh herbs for its character—a mix of flat-leaf parsley, fresh dill, and torn basil scattered over the finished dish brings brightness and freshness that you simply cannot get from dried herbs. Fresh lemon juice squeezed at the table (each person controls the amount) adds zing and ties everything together. A handful of pitted Kalamata or Castelvetrano olives adds briny depth. Crumbled feta or shaved Parmesan adds creaminess and richness without heaviness.
This pasta is best served immediately after assembly, while the chickpeas are still crispy and the herbs are still fragrant. You can prepare components ahead—crisp the chickpeas and store in an airtight container for a few hours, prepare cherry tomatoes, chop herbs and hold them in a damp paper towel—then assemble everything fresh right before serving.
Final Thoughts

What ties these ten pastas together isn’t that they’re all vegetarian, though they are—it’s that they understand something fundamental about how to make food delicious without relying on a single ingredient or technique. They build flavor through caramelization and patience, they layer umami and richness through smart ingredient choices, and they respect vegetables enough to let them shine rather than burying them under fussy technique or excessive sauce.
The beauty of a well-made vegetarian pasta is that it doesn’t feel like you’re missing anything. These aren’t dishes that say “here’s meat-less pasta”—they’re dishes that recognize what makes pasta satisfying: silky sauce, interesting texture contrasts, bright fresh components, and enough depth that every bite feels intentional and craveable. Once you’ve made a few of these, you’ll find yourself returning to them again and again, tweaking them slightly with whatever vegetables are at their peak, playing with herbs you’ve recently discovered, or adding textures based on what sounds good.
The ingredient list for any of these pastas is short and likely includes things you already have or can grab on a regular grocery run. None of them require special equipment or advanced cooking skills, though they do reward patience and attention—taking time to properly caramelize onions rather than rushing, letting mushrooms brown thoroughly rather than steaming them, allowing lentils to simmer until flavors meld rather than serving them immediately.
Start with whichever one speaks to you most strongly, or pair your choice to what’s in your pantry and what vegetables look best at the market. These are pastas that improve your life, not add stress to it. They’re dinners that make your kitchen smell incredible, that feel special enough for guests yet easy enough for a Tuesday night, and that prove vegetarian eating is never, ever boring.