Chia pudding might just be the most forgiving breakfast you’ll ever make. It requires no cooking, no special equipment, and almost no skill—yet it tastes indulgent enough to feel like you’re actually treating yourself. The magic happens overnight in your refrigerator: tiny chia seeds absorb liquid and transform into a creamy, satisfying pudding that you can customize in endless ways. Whether you’re a meal-prep devotee who wants five identical breakfasts ready to grab, or someone who craves variety across the week, chia pudding is the solution.
The real genius of chia pudding for meal prep is the time-shifting magic it offers. You spend five minutes stirring together ingredients one evening, and you’ve created three to five breakfasts that are ready to eat without any morning effort. No blending, no heating, no excuses—just pull a jar from the fridge and eat. If you’ve ever struggled to eat breakfast because mornings feel chaotic, or you’ve bought expensive grab-and-go breakfast items because homemade felt too complicated, chia pudding changes the game.
Beyond the convenience factor, what makes chia pudding so valuable for meal prep is how stable and reliable it is. Unlike smoothie bowls that turn mushy or granola that gets soggy, chia pudding actually improves overnight as the flavors meld. It stores beautifully in the refrigerator for up to five days, and you can batch-make multiple flavors in one sitting. You’re not locked into eating the same thing every morning—you can have four completely different breakfasts waiting for you, each one ready to eat as-is or topped with whatever you have on hand.
Why Chia Pudding Is Perfect for Meal Prep
Chia seeds are nutritional powerhouses that deliver far more than their tiny size suggests. They’re packed with fiber, protein, omega-3 fatty acids, and minerals like calcium and manganese. When chia seeds absorb liquid—whether it’s milk, yogurt, or a combination—they swell to about ten times their original size and develop a mild, slightly nutty flavor that blends beautifully with sweet or savory additions.
The beauty of using chia pudding for meal prep is the speed and consistency. You’re not making five separate breakfasts; you’re mixing a base liquid with chia seeds and toppings, pouring into jars, and stepping away. Everything happens passively in your refrigerator overnight. No timing required, no temperature to monitor, no way to really mess it up.
Chia pudding also travels well and keeps safely at room temperature for a few hours if you need to grab a jar and take it with you. That makes it ideal for busy mornings, work lunches, or anyone who doesn’t want to think about breakfast during the hectic weekday rush. You’ve already decided what you’re eating, you’ve already prepared it, and it’s exactly as satisfying at 8 AM as it was at midnight when you made it.
The Basic Chia Pudding Ratio and How to Customize It
The foundation of every chia pudding is wonderfully simple: a one-to-four ratio of chia seeds to liquid, plus sweetener and optional flavorings. That means one part chia seeds to four parts liquid creates the classic pudding texture—creamy, spoonable, with just a hint of the seeds’ natural texture.
Most chia pudding recipes use dairy or plant-based milk as the base, but you can also use Greek yogurt, coconut cream, or a blend of milk and yogurt for extra creaminess and protein. The liquid you choose becomes the dominant flavor note, so don’t pick milk casually. Whole milk creates the richest, most indulgent pudding. Unsweetened almond milk keeps things light and lets other flavors shine. Coconut milk adds tropical sweetness. Oat milk provides subtle, creamy depth.
Sweetener is where you can get creative without making anything complicated. You can use honey, maple syrup, agave, vanilla, or simply the natural sweetness of ripe bananas, dates, or vanilla extract. Some people sweeten at the moment of assembly; others prefer to sweeten individual servings so they can control sweetness levels throughout the week.
The one-to-four ratio works at any scale. Making one serving? One tablespoon chia seeds plus four tablespoons milk. Making five servings? One-quarter cup chia seeds plus one cup milk. The math stays consistent, and the results stay reliable.
Choosing the Right Containers for Storage
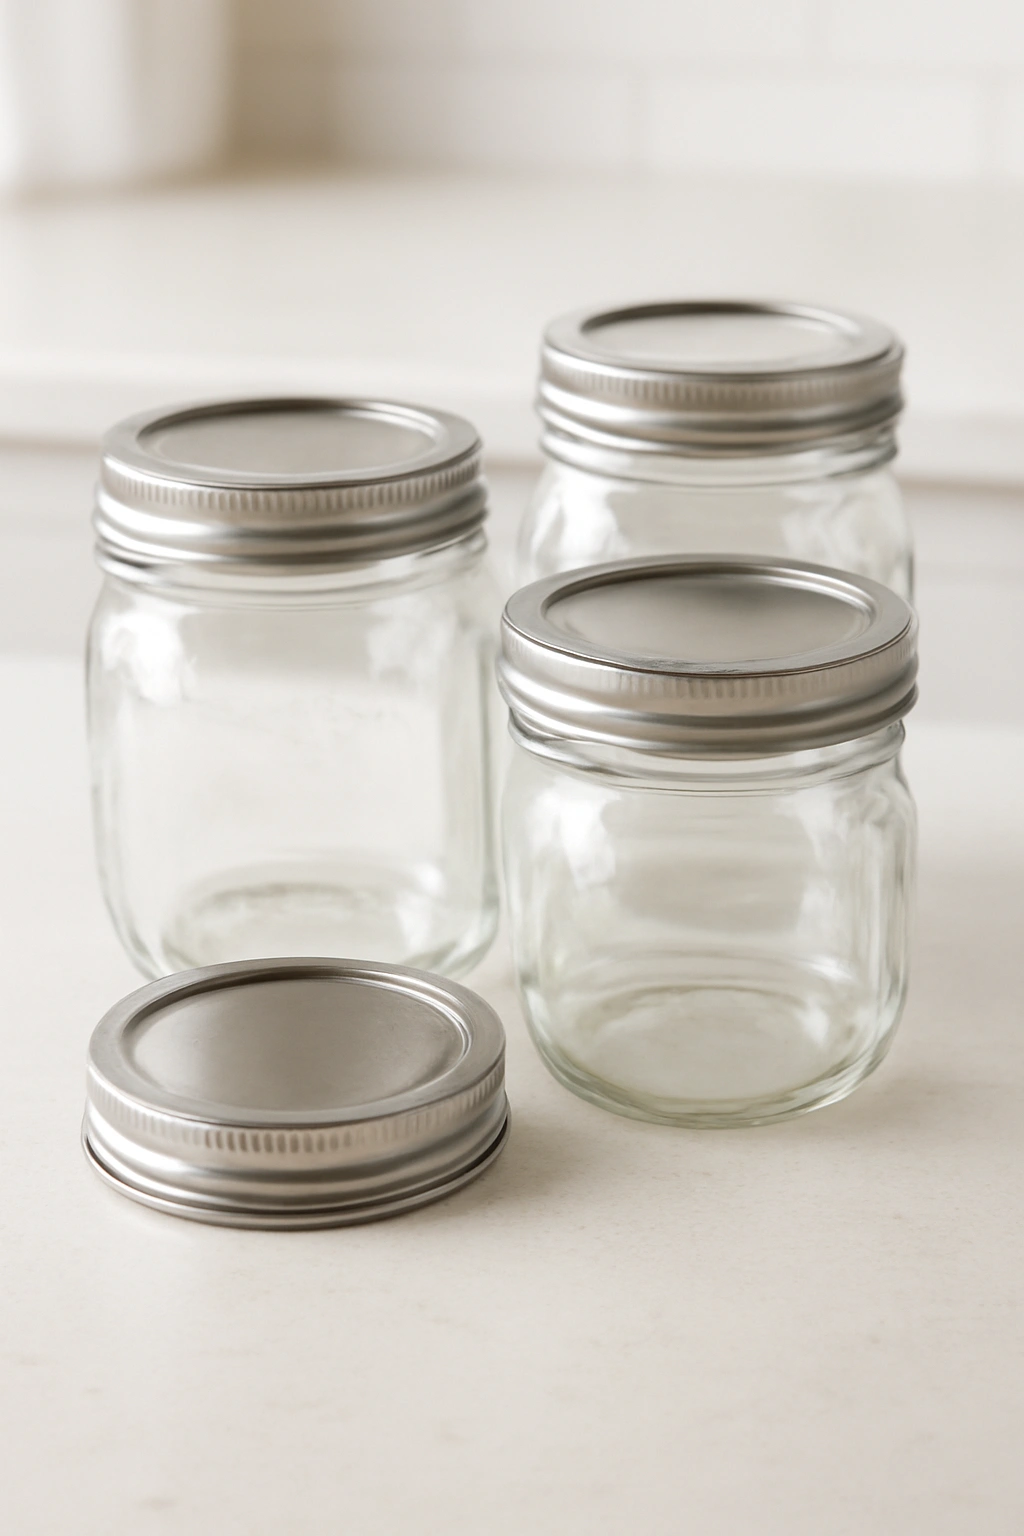
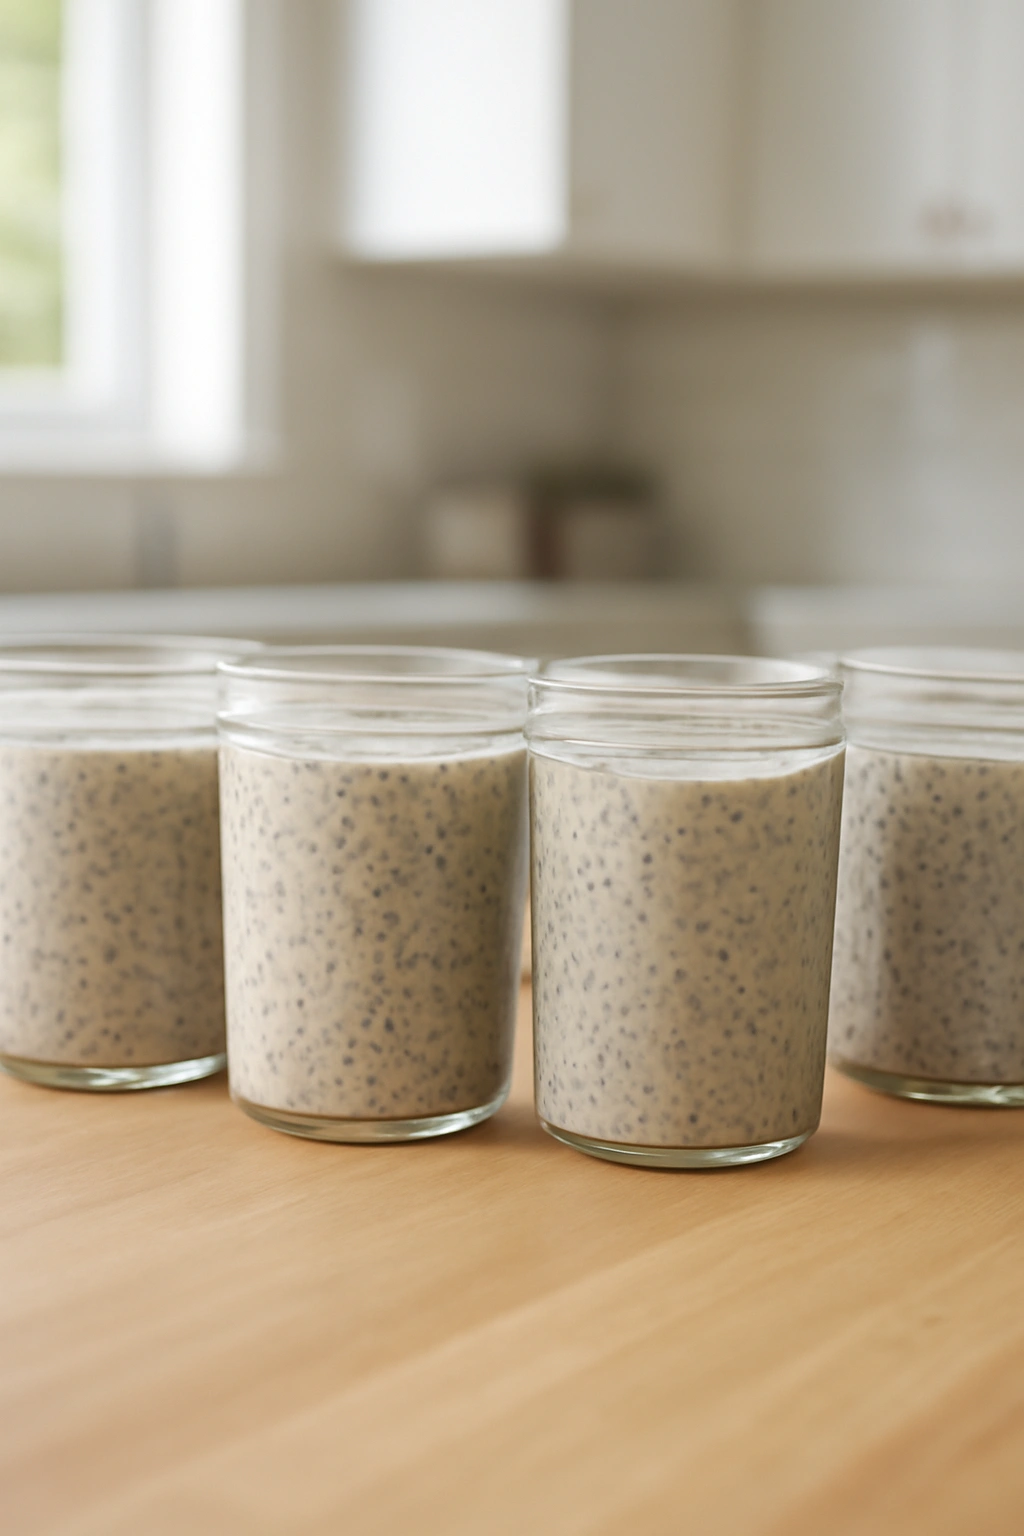
Your container choice affects both how enjoyable your chia pudding is to eat and how well it keeps. Glass jars with tight-fitting lids are ideal—they preserve freshness longer than plastic, they don’t retain flavors or odors the way plastic does, and you can see what you’re eating without opening the jar. Mason jars in quart or pint sizes are perfect.
If you use smaller jars, you can make five individual servings and grab one each morning. If you use larger containers, you can store the pudding in bulk and portion it into bowls as you eat throughout the week. There’s no wrong approach—it depends on whether you prefer consistency (grab the same jar every day) or variety (mix and match different bases throughout the week).
Plastic containers work fine if that’s what you have, but glass genuinely does keep chia pudding fresher for longer and tastes better when eating directly from the jar. If you’re making this a regular habit, investing in four or five quality glass containers pays for itself quickly in convenience alone.
The Make-Ahead Strategy That Actually Works
The simplest approach is to make all four recipes on the same day—typically a Sunday or whenever you have thirty minutes of free time. You’ll need four bowls or four jars, a spoon for mixing, your chia seeds, and your liquid ingredients. There’s almost no cleanup because you’re just stirring, not cooking.
Start by assembling all ingredients in one spot. Pour your base liquid into each container, add sweetener if you’re using it, stir to combine, then add chia seeds. Stir thoroughly for about thirty seconds to break up any clumps, then cover and refrigerate. That’s genuinely it. Within two to three hours, the pudding will thicken noticeably. After a full overnight rest, it reaches the perfect texture—creamy and spoonable, never watery or too thick.
The actual time commitment is about five to eight minutes of active mixing across all four recipes. After that, your refrigerator does the work. You can add toppings at the moment of assembly (if you want them to stay crunchy, which they generally won’t over several days) or wait and add them fresh each morning as you eat (the better approach for maximum texture contrast).
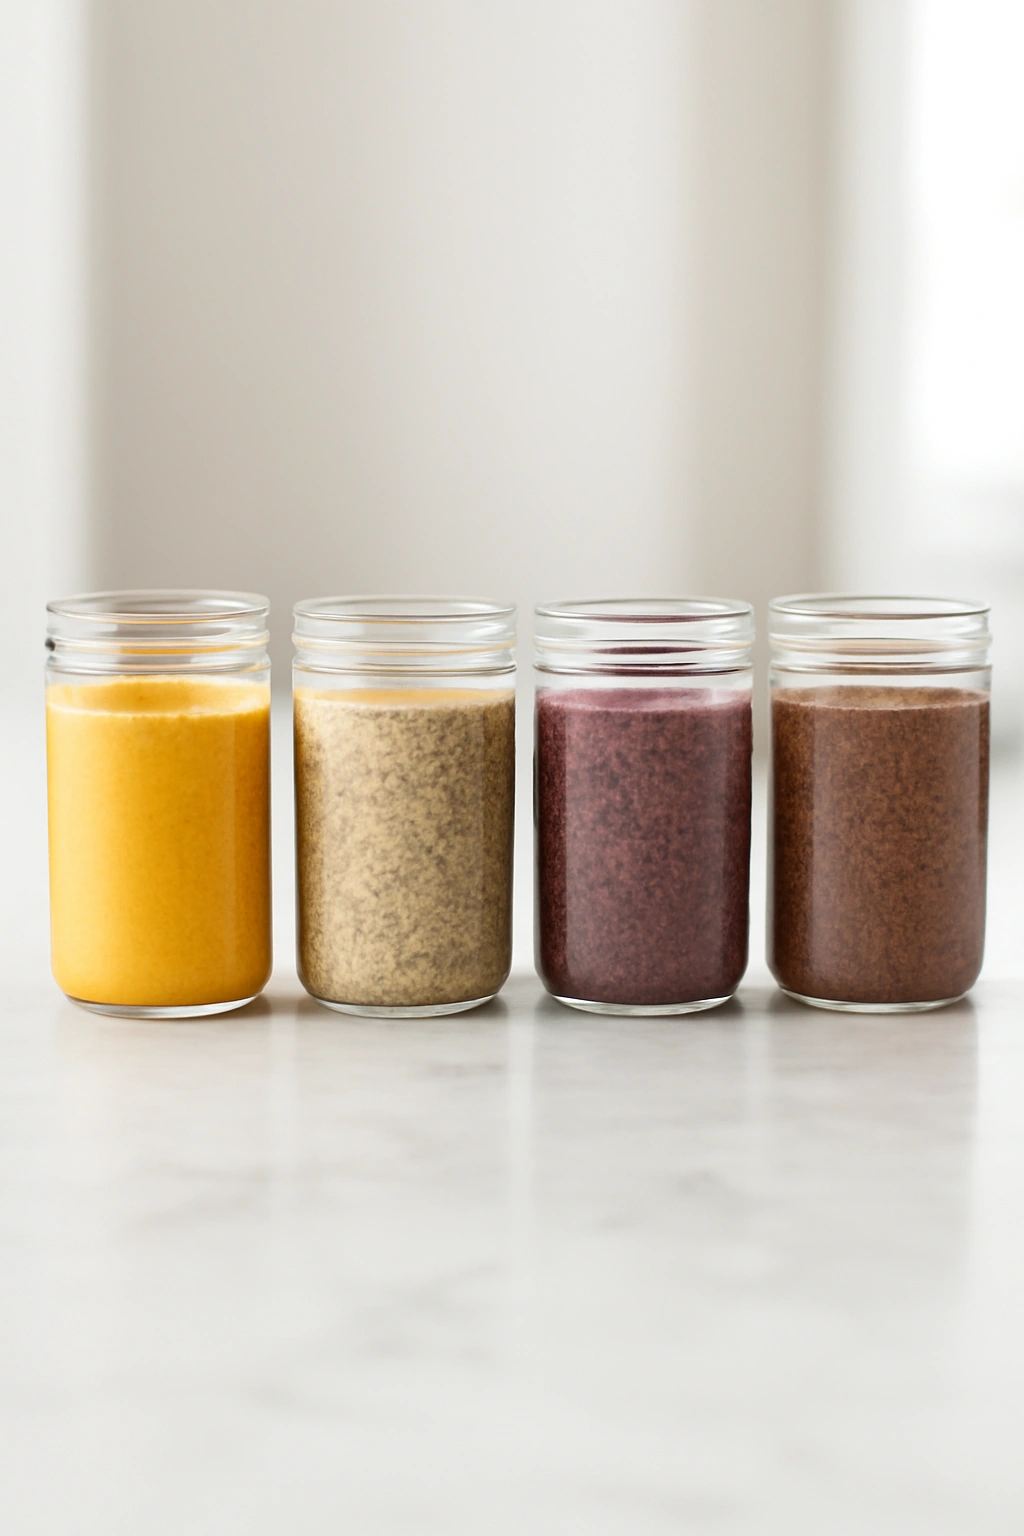
1. Tropical Mango Coconut Chia Pudding
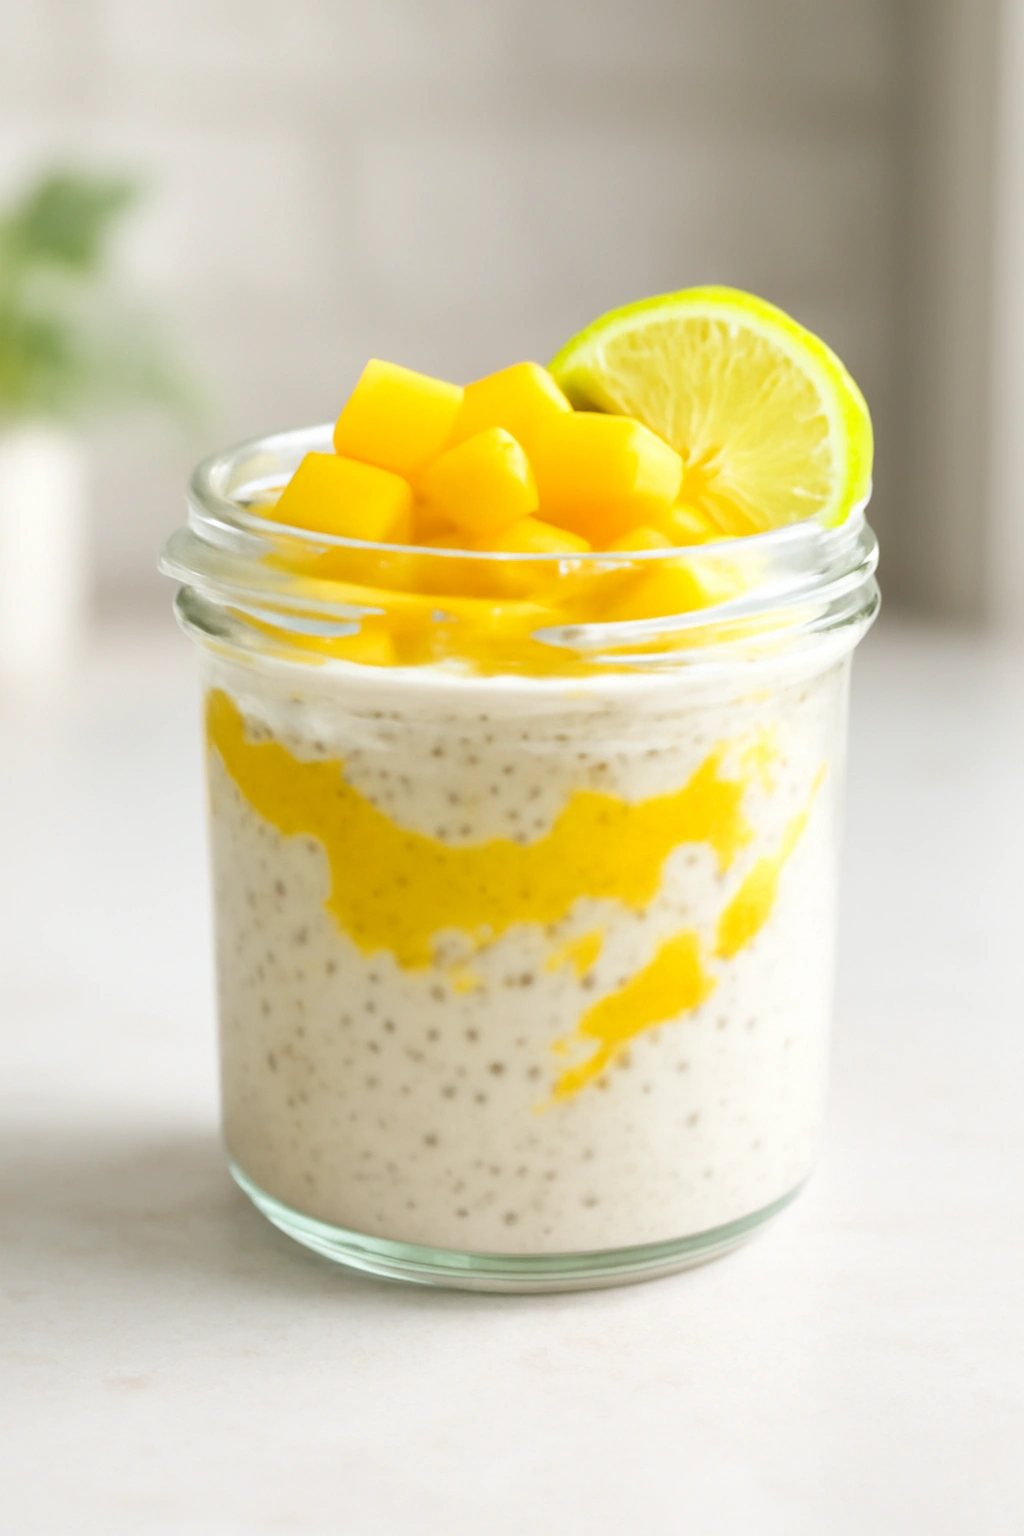
This version tastes like a vacation in a jar. The combination of coconut milk, fresh mango, and lime creates a pudding that feels indulgent but is actually just fruit, seeds, and milk. It’s bright, refreshing, and works equally well as an early-morning breakfast or a lighter lunch option. If you’re tired of berry-based chia puddings, this tropical angle gives you something genuinely different.
Yield: Serves 4 | Makes four 8-ounce servings
Prep Time: 8 minutes (hands-on mixing time only)
Chill Time: 4 hours minimum, or overnight for ideal texture
Total Time: 4 hours + overnight | Best served cold, directly from the refrigerator
Difficulty: Beginner — no cooking required, just stirring and chilling in the refrigerator
For the Pudding Base:
- 1 can (13.5 ounces) full-fat coconut milk, shaken well to distribute the cream
- ¾ cup unsweetened almond milk
- 1 cup fresh mango puree (from about 2 medium ripe mangoes, peeled and blended until smooth; see note below)
- ¼ cup chia seeds
- 3 tablespoons honey or agave nectar (or 2 tablespoons if your mangoes are very sweet)
- Juice of 1 lime (about 2 tablespoons)
- ½ teaspoon vanilla extract
For Topping:
- ½ cup fresh diced mango (add fresh each morning, not overnight)
- ¼ cup raw unsweetened coconut flakes, toasted (toast in a dry skillet over medium heat for 2-3 minutes until fragrant and golden)
- 2 tablespoons chopped macadamia nuts or almonds, optional
- Small pinch of sea salt, to enhance coconut and fruit flavors
Making the Pudding Base
This pudding is easier if you use fresh mango puree rather than trying to blend frozen mango, which can be watery or icy. Choose mangoes that yield slightly to pressure when squeezed but aren’t mushy—they should smell sweet and fragrant at the narrow end. If fresh mangoes aren’t available, high-quality frozen mango that you thaw and puree works perfectly well.
Divide the coconut milk and almond milk evenly among four 8-ounce glass jars. The coconut milk should be well-shaken before opening so the thick cream mixes with the liquid—don’t pour off just the liquid and waste the nutrient-dense fat. Stir each jar gently to combine the two milks, then add the mango puree. The mixture will look slightly separated initially, which is fine.
Add chia seeds to each jar—one tablespoon per jar if you’re distributing them evenly. Stir vigorously for about 30 seconds, breaking up any clumps of chia seeds that try to form in the bottom. The stirring prevents the seeds from settling into a dense layer. Add lime juice, honey, and vanilla extract to each jar, stir again, and cover tightly.
Refrigerate for at least four hours, though overnight is better. The pudding will thicken significantly as the chia seeds absorb the liquid. In the morning, you may see a thin liquid layer on top—this is normal and simply means you can stir it back in, or you can pour it off if you prefer a thicker texture. Either way is completely fine.
Topping and Eating Your Pudding
Don’t add fresh mango and toasted coconut the night before—they lose their textural contrast after sitting in the refrigerator overnight. Instead, add them fresh each morning right before eating. The cold mango pieces and crunchy coconut against the creamy, spoonable pudding create exactly the contrast that makes this breakfast feel luxurious rather than monotonous.
The lime juice is subtle in the final pudding but essential—it brightens the coconut and mango and prevents the pudding from tasting flat or overly sweet. If you like more citrus intensity, add an extra half teaspoon of lime juice at the moment of eating rather than in the base, so you control the strength.
Macadamia nuts are the luxury choice here and pair beautifully with tropical flavors, but almonds, cashews, or even pistachios work if that’s what you have. The nuts add protein and healthy fat that extends satiety through the morning.
Storage and Make-Ahead Notes
This pudding keeps for five days in the refrigerator. The flavor actually improves slightly on day two and three as the coconut milk fully infuses with the mango and lime. If you’re making this on Sunday for the whole week, it tastes just as good on Thursday as it does on Monday morning.
You can make the base without mango and freeze the jars if you want to extend their shelf life even further. The chia seeds will thaw perfectly, and you can add fresh mango when you’re ready to eat. This is useful if you batch-make several puddings but don’t want to eat mango pudding five days in a row.
Variations to Try
Pineapple Coconut: Swap mango for pineapple puree (canned, drained and blended, or fresh pineapple). Use lime juice as directed. Add a tiny pinch of cayenne pepper to the base for subtle heat that complements the fruit.
Mango Cardamom: Add ¼ teaspoon ground cardamom and a pinch of ginger to the pudding base. This creates a more sophisticated, warm spice profile that feels less obviously tropical.
Creamy Coconut (Simpler Version): If mango isn’t available, use just coconut milk plus almond milk and a teaspoon of vanilla extract, sweetened with honey. Top with toasted coconut, fresh berries, and granola. It’s simpler but equally satisfying.
2. Vanilla Chai Spiced Chia Pudding with Dates
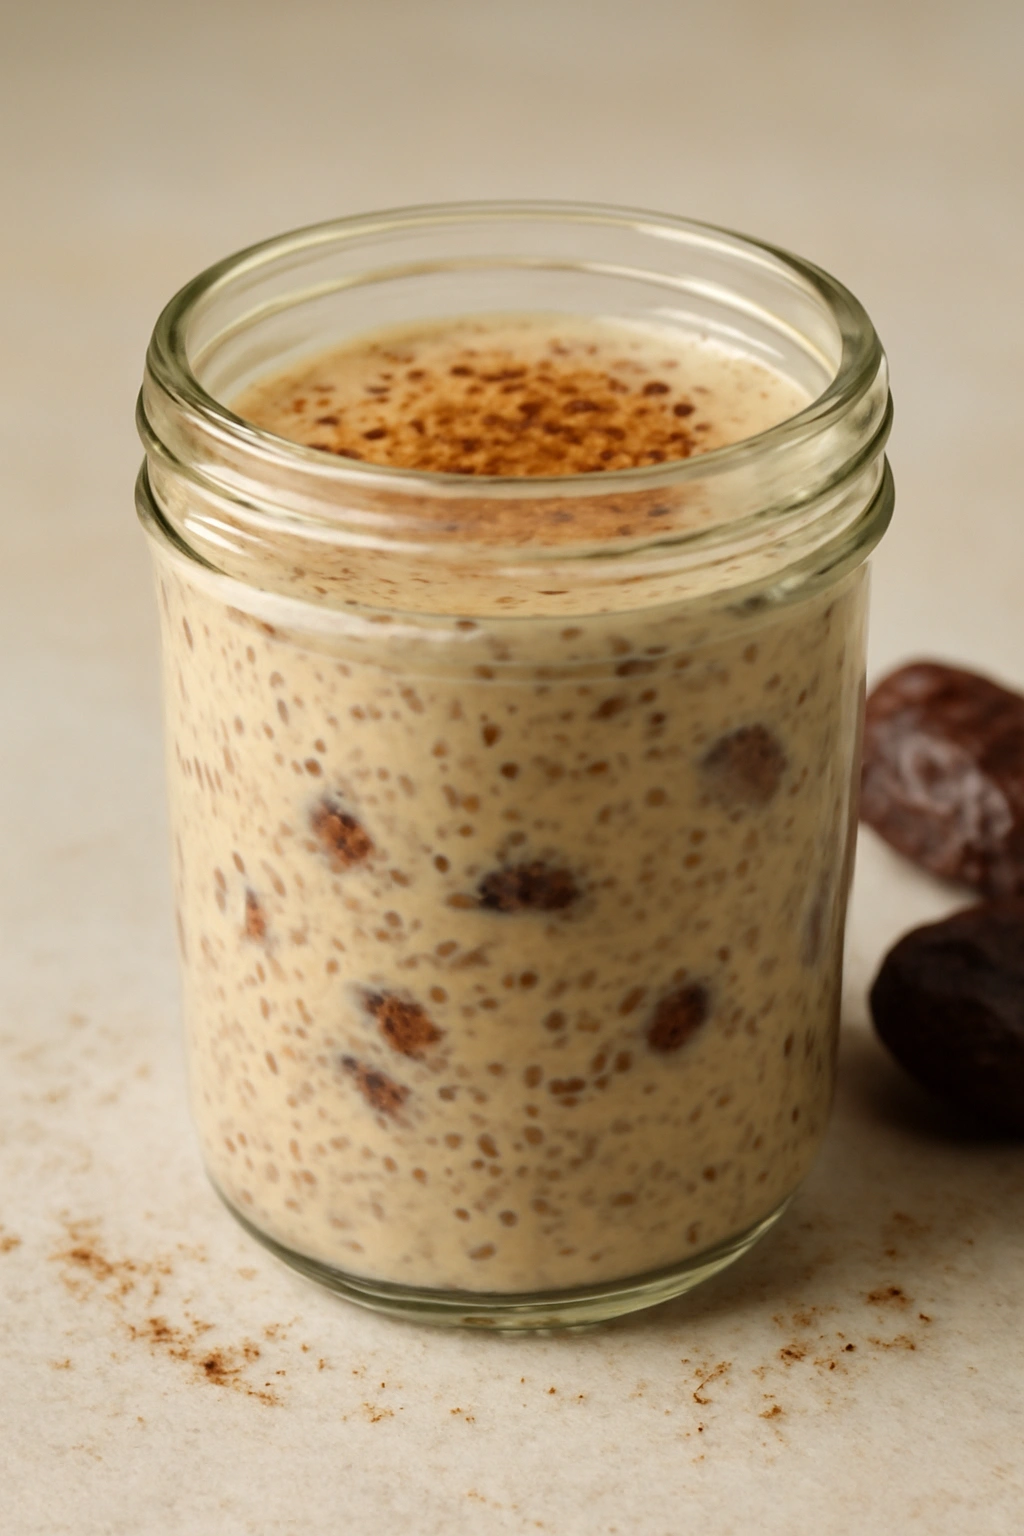
This pudding tastes like a warm chai latte, but it’s cool, creamy, and ready to eat cold. The warm spices—cinnamon, ginger, cardamom, and black pepper—bring depth and complexity, while dates provide natural sweetness and a subtle caramel flavor. It’s perfect if you love fall spices year-round or want a pudding that tastes like a comforting beverage reimagined as breakfast.
Yield: Serves 4 | Makes four 8-ounce servings
Prep Time: 10 minutes (includes soaking dates if needed)
Chill Time: 4 hours minimum, or overnight for ideal texture
Total Time: 4 hours + overnight | Best served cold, though it’s equally good at room temperature
Difficulty: Beginner — no cooking required; dates are blended into the pudding, creating natural sweetness
For the Pudding Base:
- 2 cups whole milk or 2% milk (or unsweetened oat milk for a plant-based version)
- ½ cup full-fat Greek yogurt (use plain, unsweetened)
- ½ cup pitted Medjool dates (about 8 dates; soak in hot water for 5 minutes if they’re very dry, then drain well)
- ¼ cup chia seeds
- ½ teaspoon vanilla extract
- ½ teaspoon ground cinnamon
- ¼ teaspoon ground ginger
- ⅛ teaspoon ground cardamom (not optional—this is what makes it taste like chai)
- Pinch of freshly ground black pepper
- Pinch of sea salt
For Topping:
- ¼ cup raw almonds or walnuts, chopped (adds texture and protein)
- Drizzle of honey or maple syrup (optional, only if you want it sweeter)
- A few more pinches of ground cinnamon, for visual appeal and flavor boost
- Optional: a small handful of fresh raspberries or blackberries
Making the Pudding Base
The secret to this pudding is blending the dates directly into the milk and yogurt. This creates natural sweetness without granulated sugar and gives the pudding a silky texture. If your dates are very soft (which they should be if they’re fresh Medjools), you don’t need to soak them. If they’ve been sitting in your pantry for a while and feel hard, soak them in hot water for five minutes, then drain them completely before blending.
Pour milk and Greek yogurt into a blender. Add soaked dates, vanilla extract, cinnamon, ginger, cardamom, black pepper, and salt. Blend on high speed for 45 seconds until completely smooth—you want zero visible date pieces and a uniform, creamy color. The mixture should be pale tan and completely homogeneous.
Divide the blended mixture evenly among four jars. Add one tablespoon of chia seeds to each jar. Stir vigorously for 30 seconds to prevent seeds from clumping. Cover and refrigerate for at least four hours, though overnight is ideal.
Why This Tastes Like Chai Without Any Brewing
The magic of this pudding is that you’re getting all the flavor of chai spices without steeping tea or simmering spices in milk. The warm spices infuse directly into the pudding as it chills, and by morning, the flavor has developed and mellowed into something that tastes complex but not harsh. The cardamom is essential—don’t skip it or substitute it—because it’s what creates that authentic chai flavor profile that people recognize and love.
The black pepper seems counterintuitive in a sweet pudding, but it actually enhances the spices and prevents the pudding from tasting one-dimensional or overly sweet. You won’t taste it as heat; you’ll taste it as depth.
Topping and Eating Your Pudding
Unlike the tropical pudding, this one benefits from mixed nuts and a drizzle of honey in the morning. The nuts add crunch and protein, and the honey intensifies the spice-sweetness combination. A light sprinkle of cinnamon on top right before eating brings the spice flavor to the forefront and makes the pudding look intentional and finished.
If you have fresh berries on hand, raspberries or blackberries create a tart contrast that offsets the warm spices beautifully. They’re not necessary, but they transform this from a simple pudding into a more complete breakfast.
Storage and Make-Ahead Notes
This pudding is stable for five days in the refrigerator. The spice flavors actually become more pronounced over a couple of days, so day three tastes noticeably more “chai-forward” than day one. If you like subtle spice, eat this pudding fresh. If you love strong chai flavor, it improves slightly as it sits.
You can also freeze this pudding for up to two weeks. Thaw it overnight in the refrigerator, stir well, and eat as normal. The texture remains completely unchanged because the chia seeds don’t crystallize when frozen. This is useful if you want to make a double batch and stretch it further into the future.
Variations to Try
Chocolate Chai: Stir two tablespoons of unsweetened cocoa powder into the blended mixture before adding chia seeds. The chocolate softens the spices and creates a completely different (but equally delicious) flavor profile.
Chai with Almond Butter: Blend one tablespoon of natural almond butter into the base. This adds richness, protein, and a subtle nuttiness that complements the warm spices beautifully. You might reduce honey slightly since almond butter brings natural sweetness.
Cold Chai Latte Version: Use only one tablespoon of chia seeds instead of a quarter cup, and blend in two tablespoons of unsweetened cocoa powder if desired. Serve with a splash of milk poured over the top at eating time, so it’s more like a pourable pudding or thick drink. It’s less traditional, but it’s delicious and different.
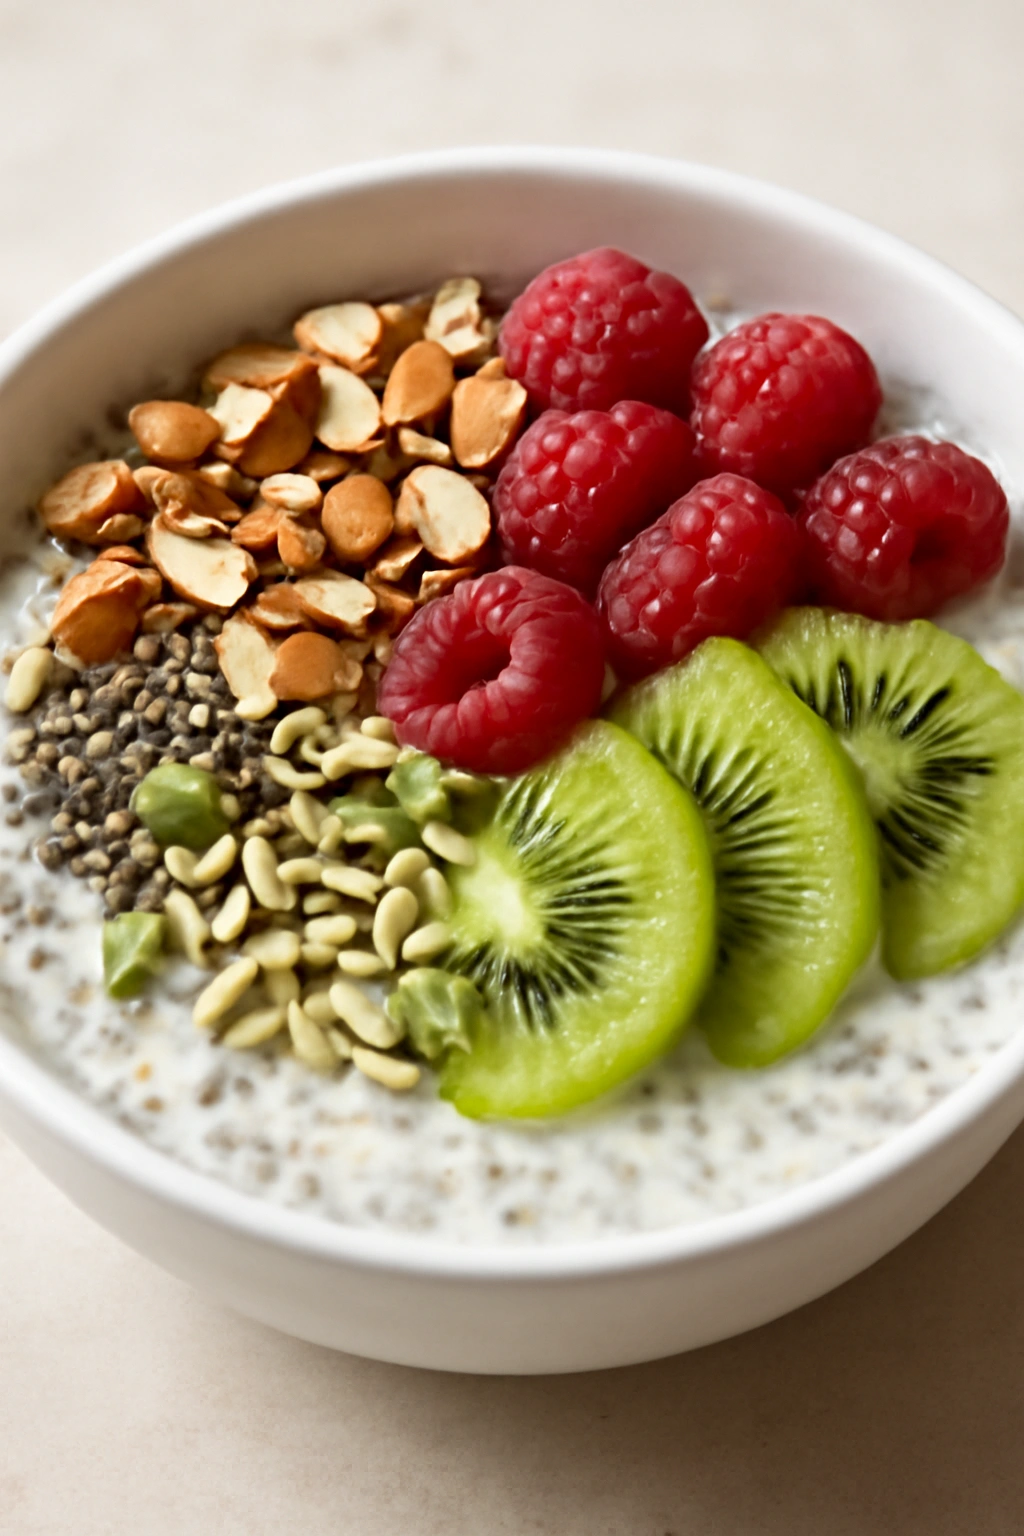
3. Berry Lemon Yogurt Chia Pudding with Granola Swirl

This pudding is bright, tangy, and tastes like summer in every spoonful. Fresh lemon juice brings acidity that wakes up your palate, mixed berries add natural sweetness and antioxidants, and Greek yogurt creates a thick, protein-rich base that keeps you satisfied for hours. It’s the most “breakfast” of all breakfast puddings—comforting but also fresh and light. If you love yogurt parfaits but want something that doesn’t require assembly in the morning, this is your answer.
Yield: Serves 4 | Makes four 8-ounce servings
Prep Time: 10 minutes (includes gentle blending or mashing berries)
Chill Time: 4 hours minimum, or overnight for ideal texture
Total Time: 4 hours + overnight | Best served cold, directly from the refrigerator
Difficulty: Beginner — no cooking required; berries are partially mashed into the pudding base
For the Pudding Base:
- 1½ cups full-fat Greek yogurt (plain, unsweetened—the thickness is essential to texture)
- ¾ cup whole milk
- 1½ cups fresh mixed berries (blueberries, raspberries, blackberries, and/or strawberries; if using strawberries, dice them small)
- Juice of 2 medium lemons (about 4 tablespoons fresh juice—never use bottled)
- Zest of 1 lemon (about 1 tablespoon; use a microplane for fine zest)
- ¼ cup chia seeds
- 2 tablespoons honey or maple syrup
- ½ teaspoon vanilla extract
- Pinch of sea salt
For Topping:
- ½ cup good-quality granola (a mix of oats, nuts, and seeds works best)
- Extra fresh berries (add fresh each morning, not overnight)
- Optional: a drizzle of honey and a thin dusting of lemon zest
Making the Pudding Base
Greek yogurt is non-negotiable for this pudding—regular yogurt is too thin and creates a different texture. Use the thickest, fullest-fat version you can find. The tanginess of Greek yogurt plays perfectly with lemon and berries and creates a pudding that tastes balanced rather than overly sweet.
In a large bowl, whisk Greek yogurt and milk together until smooth and well combined. Some yogurt is very thick and resists mixing—take your time and whisk gently, or you’ll create lumps. Once combined, the mixture should be the consistency of thick cream.
Place berries in a separate bowl. Using a fork, gently mash about half of the berries, leaving some pieces whole. This creates a berry-studded pudding rather than a perfectly smooth one, and it looks more interesting. Fold the mashed and whole berries into the yogurt mixture, then fold in lemon juice and zest.
Add honey, vanilla extract, salt, and chia seeds. Fold everything together gently but thoroughly, making sure chia seeds are distributed throughout and not clumping in the bottom. Divide evenly among four jars, cover, and refrigerate for at least four hours.
Why Fresh Lemon Juice Matters Here
This pudding tastes completely different depending on whether you use fresh lemon juice or the bottled version. Fresh lemon juice has bright, clean acidity. Bottled lemon juice tastes flat and slightly bitter by comparison. Since this pudding depends entirely on that citrus brightness—it’s only a handful of ingredients—spend the thirty seconds to juice fresh lemons. It’s the difference between a pudding that tastes okay and one that tastes restaurant-quality.
The lemon zest adds complexity and brings lemon flavor to the forefront without adding more acid (which could make the pudding taste too sharp). It’s worth taking the time to zest properly using a microplane or the fine side of a box grater.
Topping and Eating Your Pudding
Add fresh berries and granola in the morning, not the night before. Granola left sitting in the pudding overnight becomes soggy and loses all textural appeal. Fresh granola adds crunch and contrast that makes this pudding feel like a luxury breakfast rather than just a simple mixture.
If your granola is very large or chunky, break some pieces into smaller bits before sprinkling on top. This makes every spoonful contain a mix of pudding, berries, and granola rather than having crunchy pieces that are too large to integrate.
A light drizzle of honey on top—even though the pudding is already sweetened—adds a visual element and deepens the sweetness just slightly. It’s optional, but it takes the presentation from simple to intentional.
Storage and Make-Ahead Notes
This pudding is at its best within three days of making. The berries soften after day three, and the lemon flavor mellows slightly. It’s still perfectly edible through day five, but the texture and brightness are most pronounced in the first few days. If you’re making this for a week, consider making a batch of two or three servings mid-week and a fresh batch for days four and five.
You can prep the pudding base without berries and freeze it for two weeks. When you’re ready to eat, thaw it overnight and add fresh berries and granola in the morning. This is useful if you want the flavor combination but want berries to taste as fresh as possible.
Variations to Try
Mixed Citrus Version: Use a combination of lemon and lime juice instead of lemon alone. Add orange zest as well. This creates a more complex citrus flavor that feels sophisticated and different.
Berry and Coconut: Keep the lemon and berries, but replace some of the milk with coconut milk and top with toasted coconut flakes instead of granola. It’s less traditional but equally delicious.
Blackberry Lavender: Use primarily blackberries, add ¼ teaspoon of culinary lavender to the pudding base, and keep the lemon. This creates a more floral, refined flavor profile that tastes less obviously breakfast-like and more like dessert.
Simple Lemon Without Berries: If fresh berries are expensive or hard to find, skip them and make a clean lemon pudding with just yogurt, milk, lemon juice and zest. Top with granola, honey, and a few blueberries in the morning. It’s lighter and equally good.
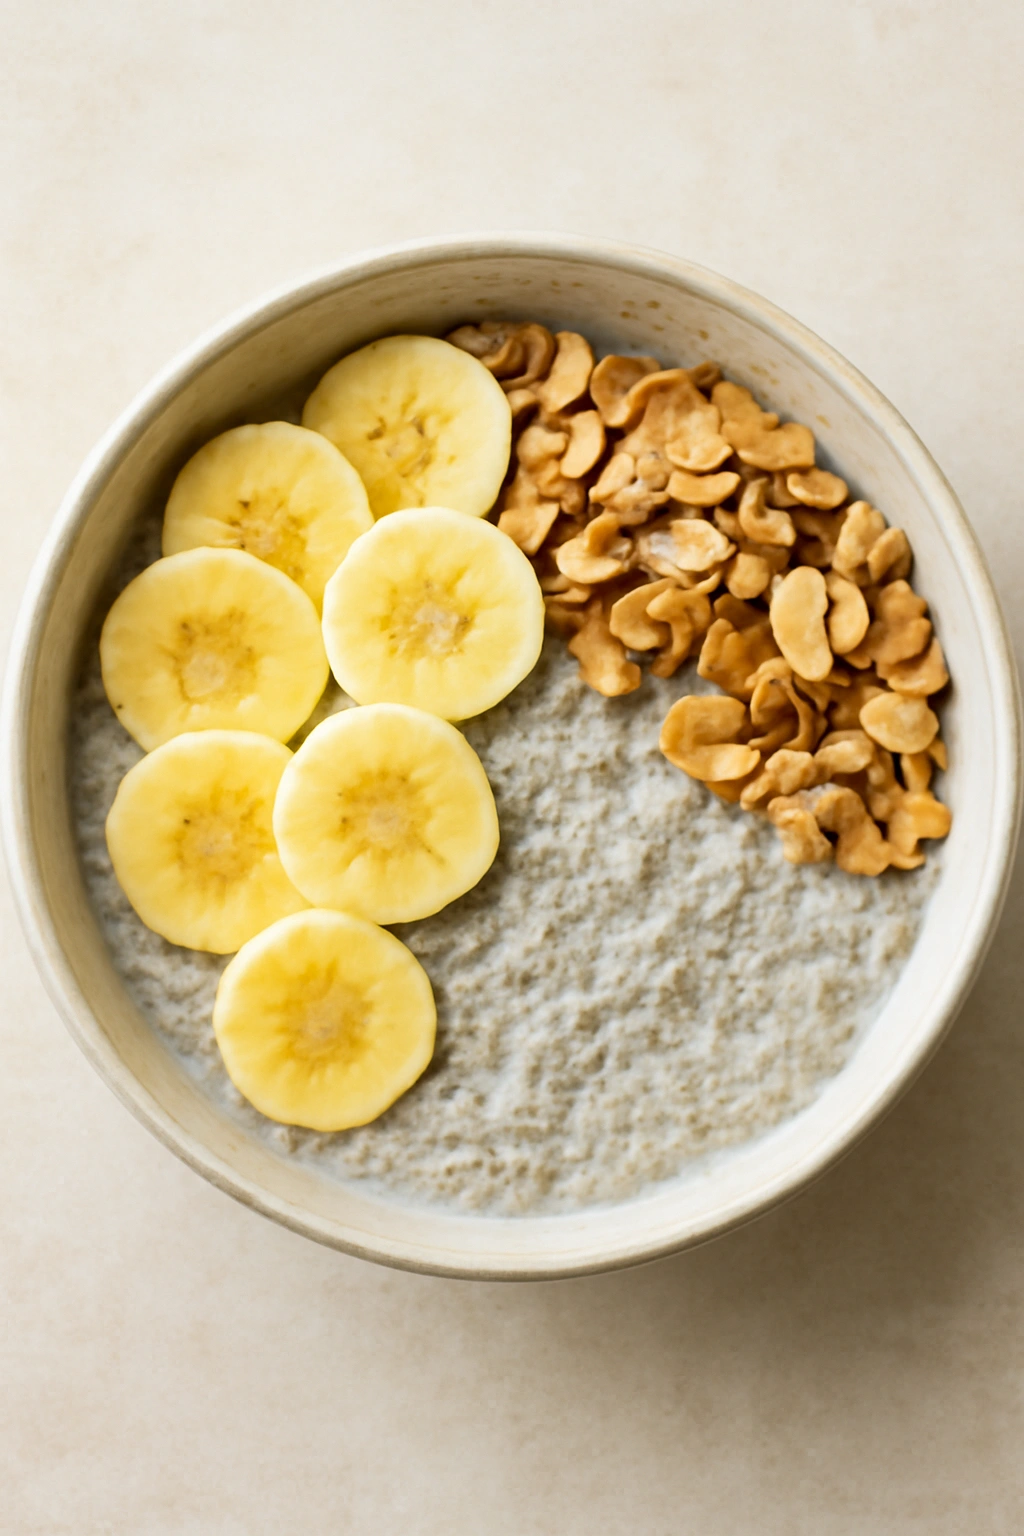
4. Peanut Butter Banana Chia Pudding with Dark Chocolate
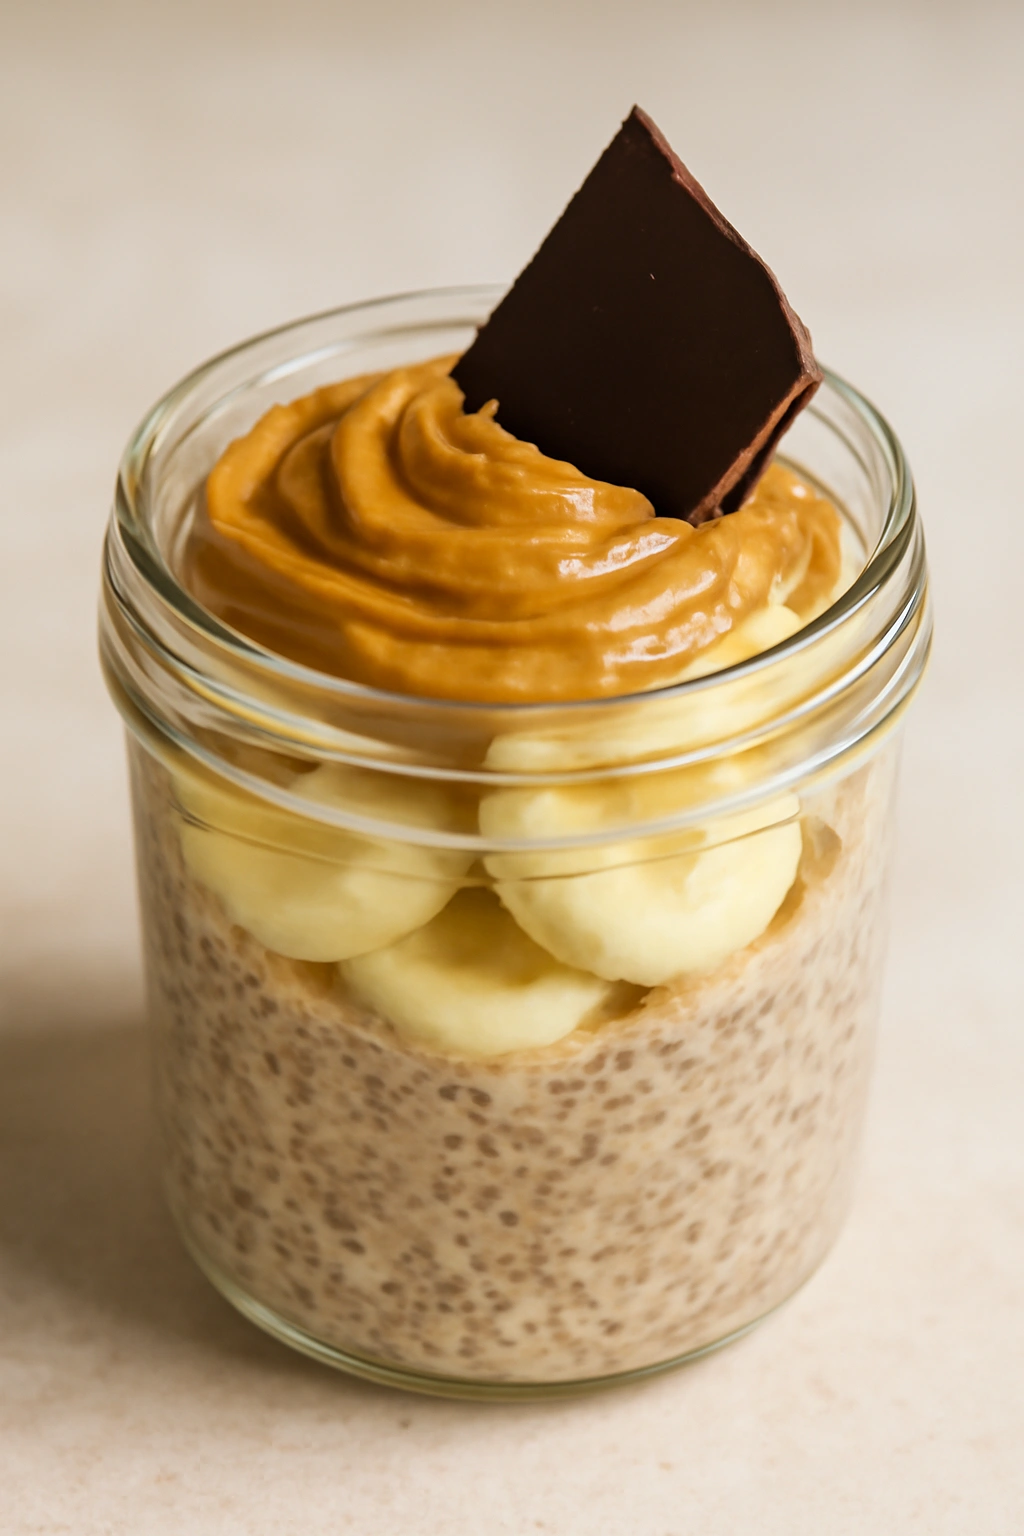
This pudding tastes like a peanut butter and banana sandwich became breakfast. It’s rich, satisfying, and packed with protein from peanut butter, banana, and chia seeds. If you love desserts that happen to be nutritious, or you need a breakfast that feels indulgent enough to look forward to on a Monday morning, this is it. It’s also the most filling of the four puddings, making it perfect if you want breakfast to genuinely last until lunch.
Yield: Serves 4 | Makes four 8-ounce servings
Prep Time: 10 minutes (includes blending banana into the base)
Chill Time: 4 hours minimum, or overnight for ideal texture
Total Time: 4 hours + overnight | Best served cold, directly from the refrigerator
Difficulty: Beginner — no cooking required; banana is blended directly into the pudding base
For the Pudding Base:
- 1¾ cups whole milk or unsweetened oat milk
- ½ cup full-fat Greek yogurt
- 2 medium ripe bananas (they should be soft and fragrant, with a few brown spots—this ensures maximum sweetness and creaminess)
- ⅓ cup natural peanut butter (or almond butter if you prefer; must be creamy, not chunky; use the kind with just peanuts and salt, no added sugars or oils)
- ¼ cup chia seeds
- 2 tablespoons unsweetened cocoa powder (not Dutch process; regular cocoa powder has more cocoa flavor)
- 1 tablespoon honey or maple syrup (optional; depends on how sweet your bananas are)
- ½ teaspoon vanilla extract
- Pinch of sea salt
For Topping:
- ¼ cup dark chocolate chips (60% cacao or higher; the darker the better for contrast with the sweet pudding)
- ¼ cup roasted unsalted peanuts or crushed peanut butter granola
- Optional: a drizzle of honey or a small dollop of peanut butter
- Optional: a tiny pinch of sea salt to enhance chocolate flavor
Making the Pudding Base
The foundation of this pudding is a blended banana and peanut butter mixture that creates creaminess and natural sweetness. This approach is infinitely better than trying to stir whole peanut butter into milk, which creates clumps that never fully incorporate.
Peel ripe bananas and break them into chunks. Add to a blender with milk, Greek yogurt, peanut butter, cocoa powder, vanilla extract, and salt. Blend on high speed for about one minute until completely smooth and uniform. The mixture should be pale brown and completely free of any peanut butter lumps or banana chunks. This might take longer than you expect—keep blending until you’re certain everything is incorporated.
Pour the blended mixture evenly into four jars. Add one tablespoon of chia seeds to each jar. Stir vigorously for about 30 seconds, making sure seeds don’t settle to the bottom. Cover and refrigerate for at least four hours, though overnight is ideal.
The Cocoa Powder Difference
This pudding includes two tablespoons of unsweetened cocoa powder, which sounds like a small amount but creates a noticeable chocolate flavor without making the pudding taste like chocolate pudding. It works as a flavor complement that deepens the peanut butter and adds sophistication. If you skip the cocoa powder, you’ll have a good pudding. If you include it, you’ll have a great pudding that tastes more like a finished dessert.
Use regular unsweetened cocoa powder, not Dutch-process cocoa. Dutch-process cocoa is treated to reduce acidity and creates a different, slightly less intense chocolate flavor. Regular cocoa powder has brighter cocoa flavor and mixes more smoothly into cold liquid.
Topping and Eating Your Pudding
Don’t add chocolate chips the night before—they soften slightly in the cold pudding and lose their distinct texture. Instead, add them fresh in the morning along with peanuts or peanut butter granola. The cold chocolate pieces against the creamy, room-temperature pudding create textural contrast that makes every spoonful interesting.
A tiny pinch of sea salt sprinkled on top right before eating brings out the chocolate flavor and prevents the pudding from tasting overly sweet. This is a restaurant trick that works beautifully here.
If you want extra richness, drizzle a tiny bit of additional peanut butter on top or add a small dollop of honey. Both work, but peanut butter is the more luxurious choice if you’re going for it.
Storage and Make-Ahead Notes
This pudding is stable for five days in the refrigerator. The peanut butter flavor becomes slightly more pronounced on day two and three as it fully infuses with the banana and cocoa. Like all the other puddings, it can be frozen for up to two weeks if you want to make extra and stretch it further.
The base can be made without cocoa powder and frozen, then cocoa powder can be stirred in when you thaw it. This is useful if you want flexibility—you could thaw several jars and make some with cocoa and some without.
Variations to Try
Chocolate Peanut Butter Banana Smoothie Style: Use only two tablespoons of chia seeds instead of a quarter cup, and blend in an extra half cup of milk. Eat it with a spoon like a pourable pudding or pour it into a glass and drink it. It’s less traditional but equally delicious and feels more like a drinkable breakfast.
Almond Butter Version: Swap peanut butter for almond butter and reduce cocoa powder to one tablespoon. This creates a lighter, more delicate flavor that’s less dessert-like and more breakfast-appropriate.
Peanut Butter Cup Pudding: Skip the cocoa powder entirely and instead stir in one tablespoon of chocolate chips (melted gently in the blender with the peanut butter) and one tablespoon of cocoa powder. This tastes distinctly like a peanut butter cup, which is both delicious and dangerously dessert-like.
Maple Peanut Butter: Replace honey with maple syrup and use maple syrup in the base instead. Top with crushed candied pecans and a drizzle of maple syrup. It feels more sophisticated and seasonal.
Storage, Shelf Life, and Food Safety
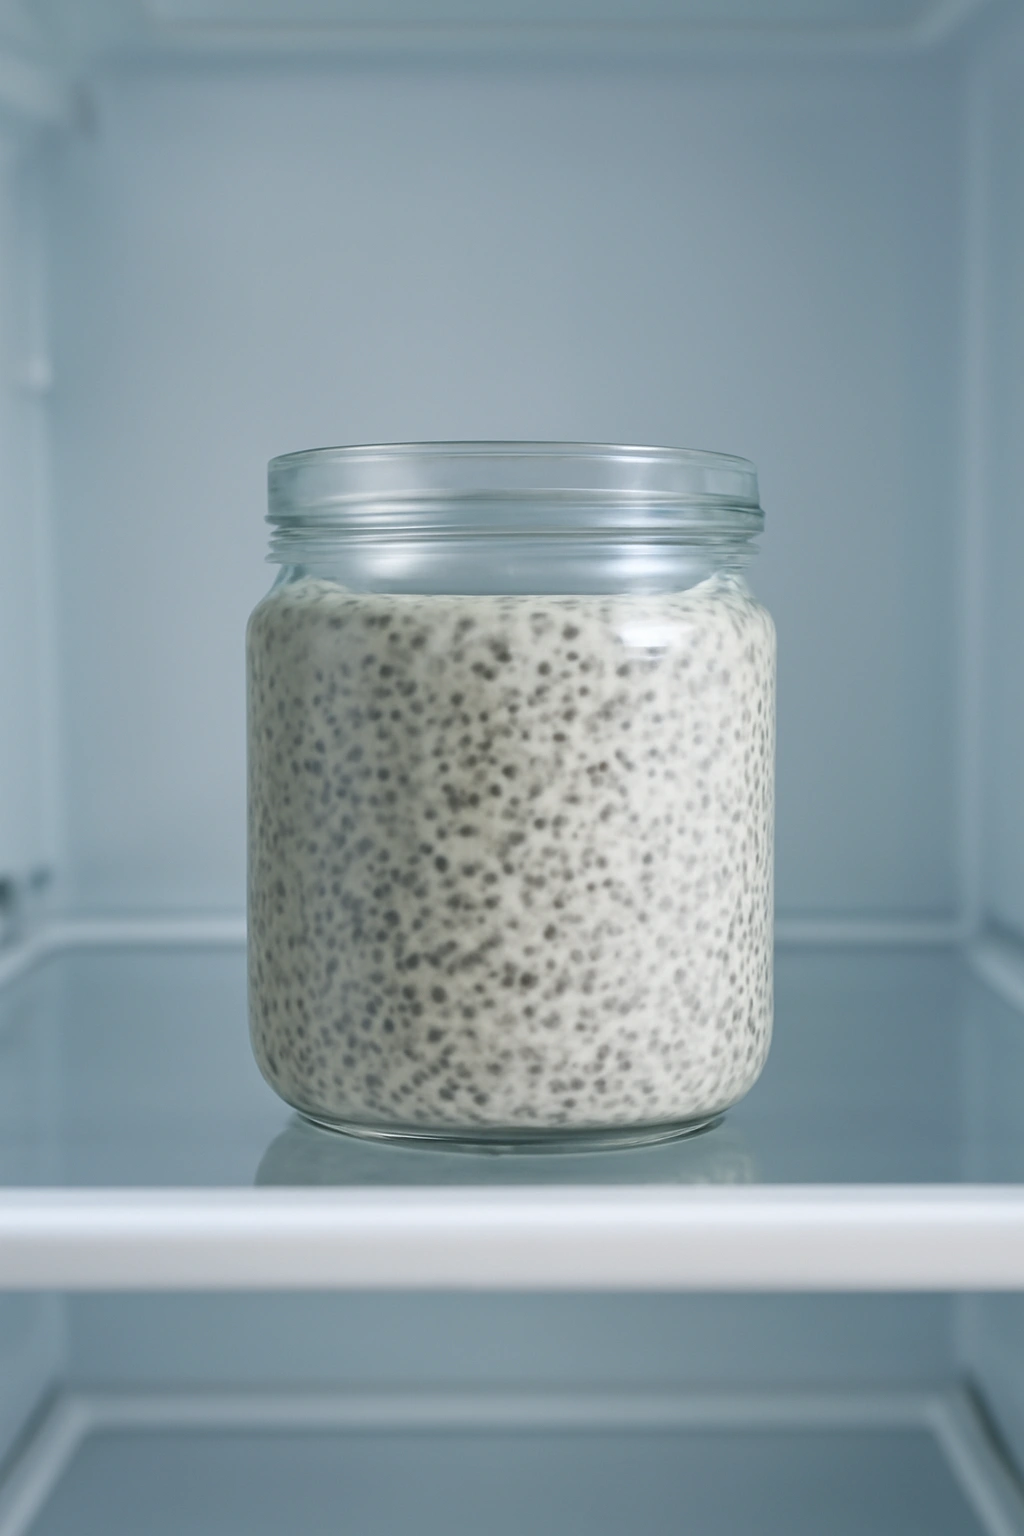
All chia puddings keep safely in the refrigerator for up to five days in airtight glass containers. The chia seeds act as preservatives because of their omega-3 fatty acid content, and the base liquid slows bacterial growth naturally. You’ll know pudding has gone bad if it smells off, tastes sour, or develops visible mold—any of these signs mean discard it.
The ideal serving temperature is cold, directly from the refrigerator. You can eat chia pudding at room temperature if you’ve left it out for up to two hours (like taking a jar to work), but it tastes best cold. Don’t eat pudding that’s been left sitting at room temperature for more than four hours, especially if it contains dairy products.
All four pudding varieties can be frozen in airtight containers for up to two weeks. Thaw overnight in the refrigerator, stir well to recombine any separated liquid, and eat as normal. Freezing doesn’t affect the texture of chia pudding because chia seeds don’t crystallize. This is useful if you batch-make several puddings and want to extend how long you can eat them.
Smart Toppings and Mix-Ins That Boost Nutrition
Beyond the specific toppings suggested with each recipe, there are dozens of simple additions that make chia pudding even more nutritious and interesting. The key is understanding which toppings complement the base flavor and which add genuine nutritional value.
Nuts and seeds add protein, healthy fats, and satiety that extends the breakfast window. Almonds, walnuts, pistachios, pecans, and macadamia nuts all work. Pumpkin seeds, sunflower seeds, and hemp seeds add different flavors and textures. A quarter cup of nuts or seeds is enough to make a noticeable difference without overwhelming the pudding.
Fresh fruit beyond what’s already in the pudding adds fiber, vitamins, and natural sweetness. Sliced fresh peaches, fresh figs, diced apple, fresh pineapple, and citrus segments all work beautifully. Add fruit in the morning to keep it fresh and prevent the pudding from becoming watery.
Granola, cereal, and crunchy toppings provide textural contrast that makes the eating experience more interesting. Granola is the classic choice, but you can also use crushed graham crackers, crushed cookies, toasted coconut flakes, or even crushed pretzels for a sweet-salty combination. Add in the morning so crunch is preserved.
Nut butters drizzled on top add richness and protein. Tahini, almond butter, sunflower seed butter, or even regular peanut butter all work. A small drizzle—less than a tablespoon—is enough to make an impact without making the pudding excessively rich.
A drizzle of honey, maple syrup, or agave nectar sweetens the pudding slightly and adds visual appeal. This is optional and depends on how sweet you like breakfast, but a small amount transforms pudding from simple to intentional-looking.
Spices beyond those in the base recipes add complexity without adding calories. A pinch of ground ginger, cinnamon, nutmeg, or allspice can be sprinkled on top right before eating. A small pinch of cayenne or chili powder creates unexpected heat that works beautifully with chocolate or fruit.
Common Chia Pudding Mistakes and How to Prevent Them
The most common mistake is using the wrong ratio of chia seeds to liquid. Too many seeds and the pudding becomes thick and gelatinous; too few and it stays thin and runny. Stick to the one-to-four ratio unless you have a specific texture preference, and if you deviate, adjust by small increments on your next batch.
The second most common mistake is not stirring the pudding when you first mix it. Chia seeds clump together if they sit for even thirty seconds without stirring. That’s why vigorous stirring for at least 30 seconds right after adding seeds is non-negotiable. It prevents a dense, seedy layer at the bottom and ensures even distribution throughout.
Another common problem is using chia seeds that are old or stored incorrectly. Chia seeds last a long time, but they should be stored in an airtight container away from heat, light, and moisture. If your chia seeds smell off or taste rancid, replace them. Old seeds won’t thicken properly and may taste bitter.
Many people over-sweeten chia pudding, then are surprised when it tastes more like dessert than breakfast. Start with less sweetener than you think you need. You can always add more honey or syrup to your individual bowl in the morning if you want it sweeter. The fruit and nut butters already in the pudding provide natural sweetness that’s easy to forget about.
Finally, people often add toppings the night before, expecting them to stay fresh. Granola gets soggy, nuts get soft, and fresh fruit weeps into the pudding. Save toppings for the morning and add them right before eating. This ten-second step changes the texture and eating experience dramatically.
Customizing Pudding for Dietary Preferences
If you’re vegan, replace Greek yogurt with a thick plant-based yogurt (cashew or coconut yogurt work best) and use plant-based milk. The pudding will be slightly less rich than a dairy version, but it’s completely delicious. Avoid thin nut milks like almond milk alone—they don’t create a creamy enough texture.
For a lower-sugar pudding, reduce sweetener by half or eliminate it entirely, and rely on the natural sweetness of fruit or dates. The pudding will taste less sweet, but it’s still satisfying, especially if you add sweet toppings in the morning.
If you have a nut allergy, skip nut butters and instead use tahini, sunflower seed butter, or even canned pumpkin as the rich base ingredient. Toppings can focus on seeds and coconut flakes instead of nuts. All four pudding recipes can be modified to work around nut allergies.
For gluten-free needs, chia pudding is naturally gluten-free as long as your toppings (granola, nuts, seeds) are certified gluten-free. Check labels on packaged granola and any added mix-ins.
For a higher-protein pudding, use Greek yogurt as a substantial portion of the base liquid rather than milk alone. You can also add a scoop of vanilla or neutral-flavored protein powder to any pudding base and blend it in.
Final Thoughts
Chia pudding is one of those rare breakfasts that’s simultaneously effortless and impressive. You spend ten minutes mixing ingredients on Sunday, and you’ve created four distinct breakfasts that require zero morning effort. No thinking, no cooking, no excuses—just pull a jar from the fridge and eat something genuinely nutritious and satisfying.
The beauty of these four recipes is that they represent completely different flavor profiles. You’re not eating the same thing all week; you’re sampling tropical mango on Monday, warm chai spices on Tuesday, bright berries and lemon on Wednesday, and indulgent peanut butter chocolate on Thursday. That variety is what keeps meal prep from feeling monotonous and what makes this approach actually sustainable.
The only real barrier to making chia pudding regularly is believing it’s worth the minimal effort. Once you realize how much time and decision-making it saves, and how much better it tastes than any grab-and-go breakfast alternative, it becomes a permanent part of your routine. Start with whichever recipe appeals to you most, make it once, and then expand from there. You’ll quickly develop your own favorite variations and discover which toppings make each pudding feel exactly right to you.