There’s something almost magical about homemade cheesecake—that creamy, tangy, indulgent slice that seems like it should come only from a professional bakery. But here’s what most people don’t realize: cheesecake is actually one of the most forgiving desserts to make at home, even for someone who’s never baked before. The ingredient list is short. The technique is straightforward. And the margin for error is surprisingly generous.
If you’ve been intimidated by cheesecake, thinking it requires pastry school credentials or mysterious baking wisdom, you’re about to discover that couldn’t be further from the truth. The six cheesecake recipes in this guide are specifically chosen because they skip the unnecessary complexity and focus on what actually matters—good cream cheese, the right ratio of ingredients, and following a few simple steps. Some use a water bath, some skip it entirely. Some require baking, some don’t. All of them deliver that silky, rich flavor that makes people ask for the recipe.
The recipes that follow range from a classic New York-style cheesecake (the gold standard) to no-bake versions that are ready in hours instead of days. There’s a chocolate option for when you need to impress, a simple sour cream variety that’s nearly impossible to mess up, and a few unexpected twists that feel elegant without being complicated. Each one has been designed with beginners in mind—clear instructions, practical tips to prevent the most common mistakes, and reassurance that you can absolutely do this.
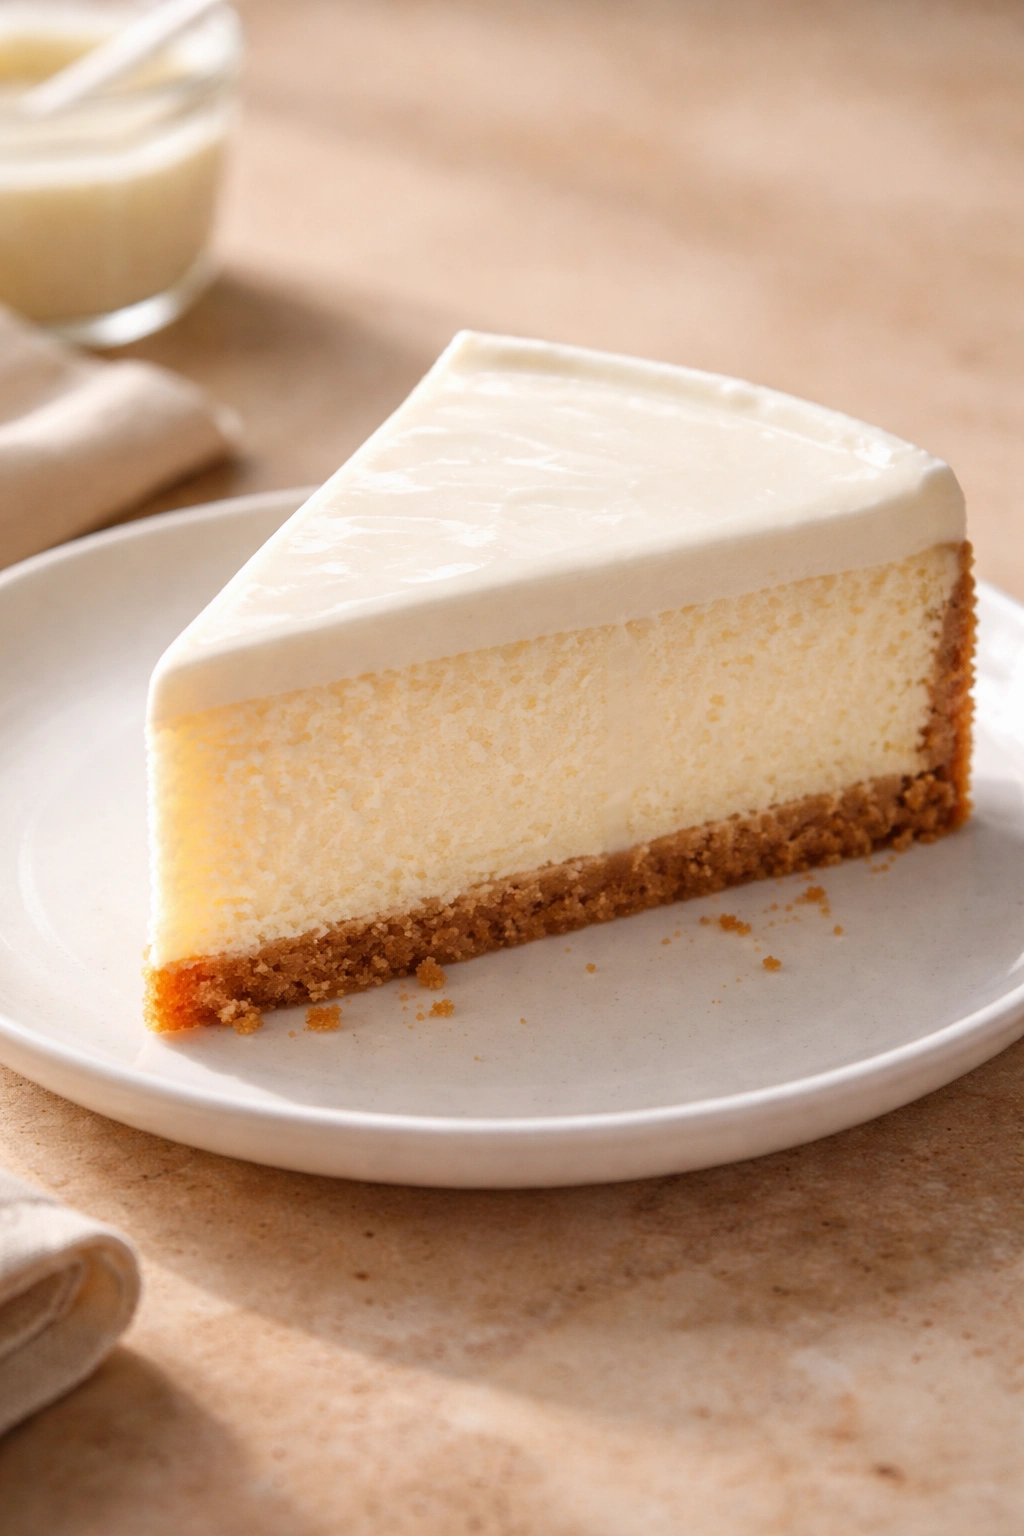
1. Classic New York Cheesecake
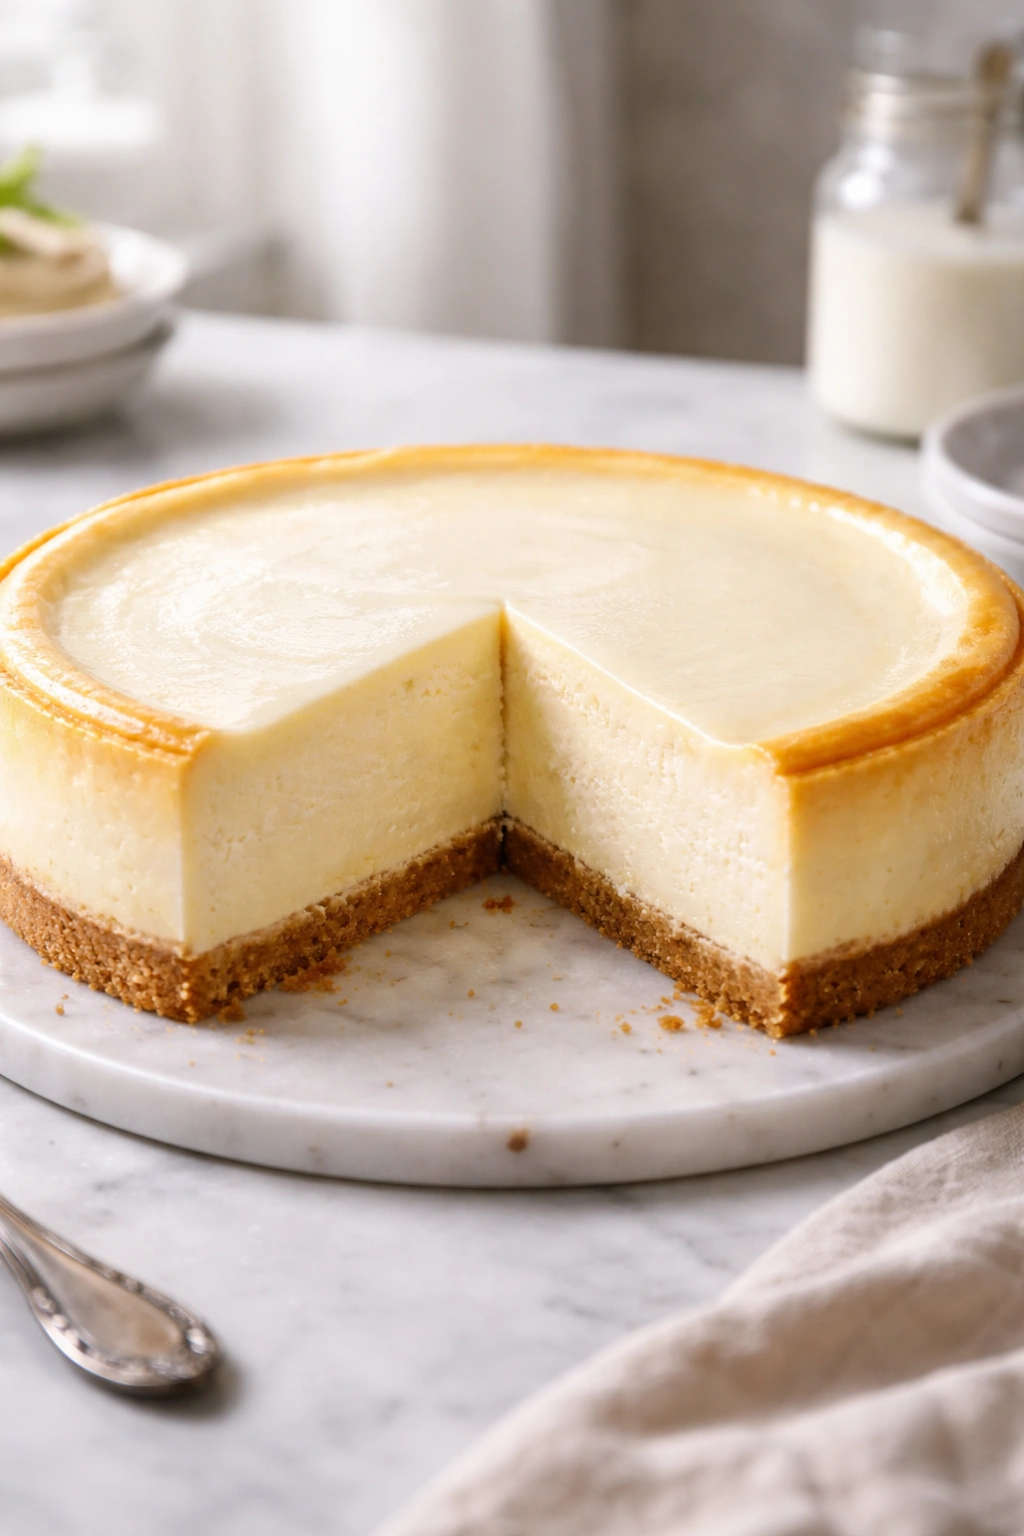
This is the cheesecake that set the standard for everything that came after. A thick, creamy center with just enough tang from sour cream to balance the richness, sitting on a buttery graham cracker crust and baked to that perfect point where it’s still slightly jiggly in the absolute center but set everywhere else. This version is completely reliable—even first-time bakers succeed with it, and the result tastes exactly like what you’d order at a proper deli.
Yield: Serves 12 to 14 | Makes one 9-inch round cheesecake Prep Time: 20 minutes Cook Time: 55 minutes Total Time: 1 hour 15 minutes active + 6 hours chilling (overnight recommended) Difficulty: Beginner — The steps are straightforward, and the water bath protects the cheesecake from cracking. Even if a few small cracks appear, the sour cream topping will hide them.
For the Crust:
- 2 cups graham cracker crumbs (about 14 full crackers, crushed fine)
- ¼ cup granulated sugar
- 5 tablespoons unsalted butter, melted
For the Filling:
- 32 oz (four 8-oz packages) cream cheese, softened to room temperature (this is non-negotiable — cold cream cheese creates lumps)
- 1 cup granulated sugar
- ¼ cup cornstarch (this prevents cracks and gives a smooth texture)
- 1 teaspoon pure vanilla extract
- ½ teaspoon fine sea salt
- 4 large eggs, room temperature
- ¼ cup fresh lemon juice
- 1 cup sour cream
For the Topping:
- 1 cup sour cream
- 2 tablespoons granulated sugar
- ½ teaspoon pure vanilla extract
Prepare the Pan:
- Preheat your oven to 325°F (163°C) and position the rack in the lower third of the oven—this ensures the bottom crust bakes through without the top browning too quickly.
- Wrap the outside of a 9-inch springform pan with two layers of heavy-duty aluminum foil, pressing it firmly around the sides and bottom. This prevents water from seeping into the pan during the water bath. If you don’t have foil, place the springform inside a larger roasting pan and seal the gap with foil.
- In a small bowl, combine the graham cracker crumbs, sugar, and melted butter, stirring until the mixture resembles wet sand. Press it firmly into the bottom of the prepared springform pan using the bottom of a measuring cup, creating an even, compact layer. Bake for 8 minutes, then remove and set aside.
Make the Filling: 4. In the bowl of a stand mixer fitted with the paddle attachment, beat the softened cream cheese on low speed for about 1 minute, until it’s smooth and creamy but not whipped. Stop and scrape down the sides of the bowl — lumpy cream cheese ruins the texture, so smooth is essential here. 5. In a small bowl, whisk together the sugar and cornstarch — the cornstarch prevents cracks and creates that signature smooth, dense texture. Add this mixture to the cream cheese and beat on low speed for about 1 minute, just until combined. Do not overmix at any point; overbeating incorporates too much air, which causes the cheesecake to puff up and then crack as it cools. 6. Add the vanilla extract and salt, mixing on low for just 10 seconds. Add the eggs one at a time, beating on low speed for about 15 seconds after each addition and scraping down the bowl after the second egg. The batter should look smooth and slightly glossy, with no visible egg white streaks. 7. Add the lemon juice and mix on low for just 10 seconds — this brightness cuts the richness. Finally, add the sour cream and mix on low until just combined. The batter is now ready; do not overwork it. 8. Pour the filling into the prepared crust and spread it into an even layer with an offset spatula or the back of a spoon.
Bake with a Water Bath: 9. Place the foil-wrapped springform pan inside a larger roasting pan. Fill the roasting pan with hot water until it reaches halfway up the sides of the springform pan. The water bath provides gentle, even heat that prevents the edges from cooking faster than the center, which is the main cause of cracks. If you don’t have a roasting pan large enough, use any large baking dish. 10. Bake for 50 to 55 minutes. The cheesecake is done when the edges are set and slightly puffed but the center 2-inch diameter area jiggles very slightly when you gently nudge the pan. Do not bake until the center feels completely firm — that means it’s overbaked, and the texture will be grainy and dry. If the top is browning too quickly, cover the pan loosely with foil during the final 15 minutes.
Add the Sour Cream Topping: 11. While the cheesecake is still hot, whisk together the sour cream, sugar, and vanilla extract in a small bowl. Spread this topping evenly over the hot cheesecake. Bake for an additional 5 minutes, just until the topping sets slightly — it should look smooth and creamy, not wet but not completely dry. 12. Turn off the oven and crack the door open about 2 inches. Leave the cheesecake in the oven for 1 hour. This slow cooling prevents the dramatic temperature change that causes cracks. After 1 hour, remove the pan from the oven and water bath and set it on a wire cooling rack.
Chill Completely: 13. Run a thin, sharp knife around the inside edge of the springform pan, cutting through just the cheesecake filling (not the crust). Do not remove the springform ring yet — this step simply loosens the cheesecake so it can contract evenly as it cools, preventing cracks from forming as it shrinks away from the sides. Let it cool to room temperature on the rack (about 1 more hour), then refrigerate for at least 6 hours, preferably overnight. The cheesecake firms up completely in the fridge and develops better flavor after sitting overnight.
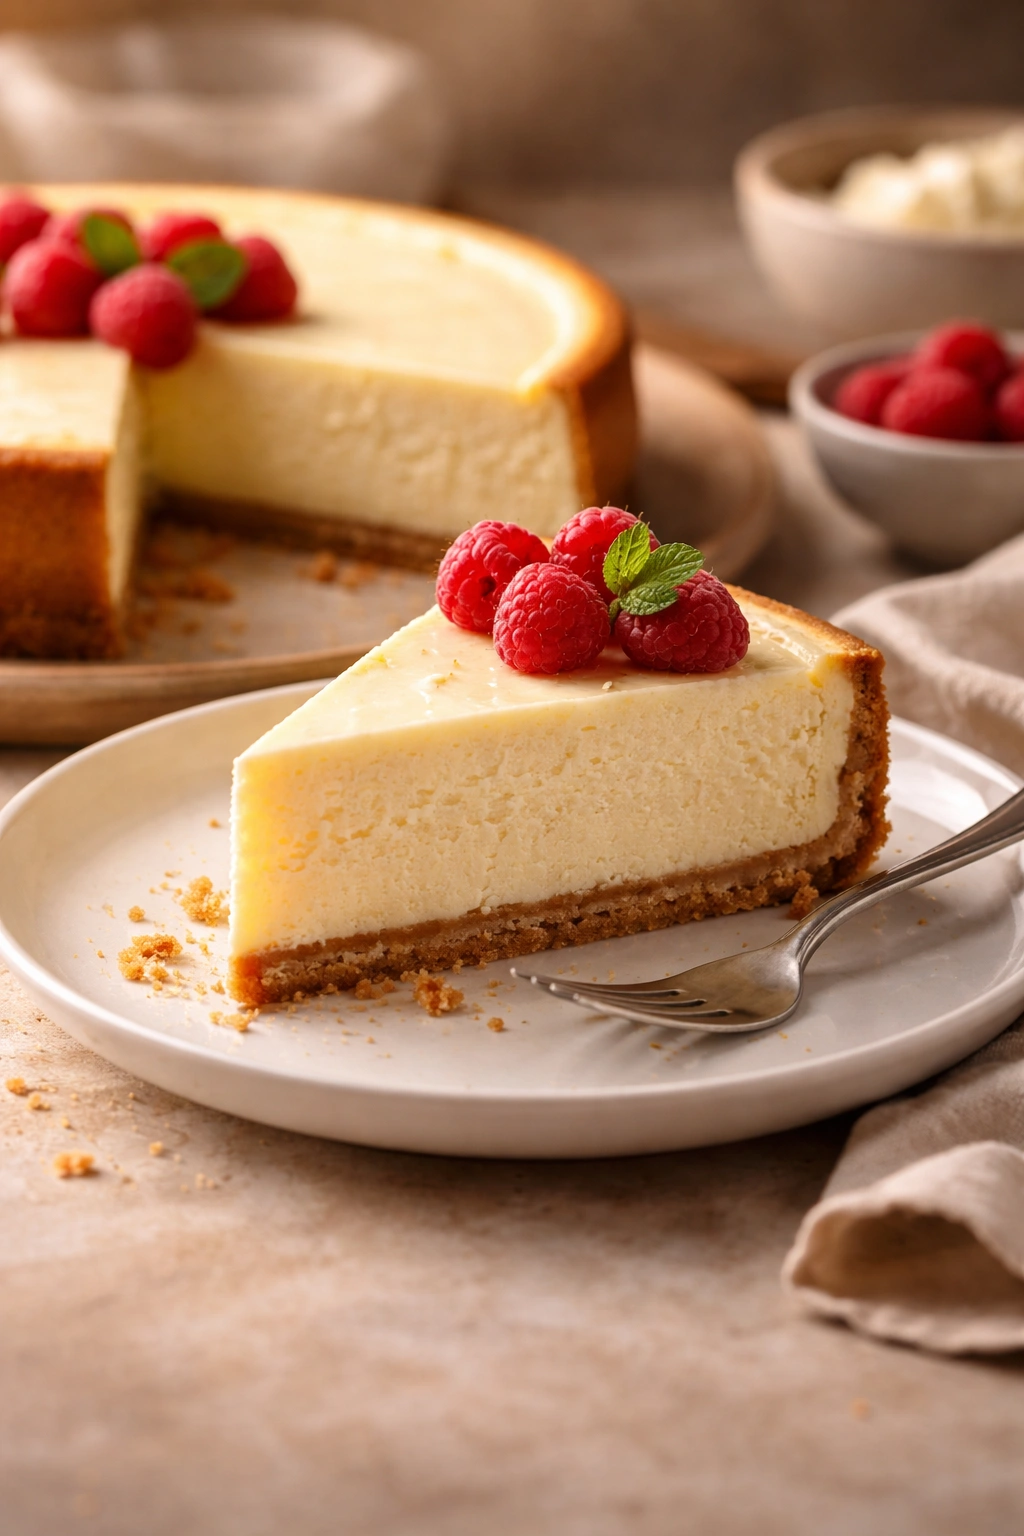
Best Served: Chilled, straight from the refrigerator, with fresh berries or a simple fruit compote on the side. The contrast between the cold, creamy cheesecake and warm fruit is magnificent. You can also serve thin slices at room temperature if you prefer a slightly softer texture.
Pro Cheesecake Tips for Success
Room temperature is everything. Cream cheese straight from the fridge has cold pockets that don’t mix in smoothly, creating lumps in the filling. Set it on the counter for 30 minutes before using—it should give slightly when you press it. Same goes for eggs; cold eggs don’t blend smoothly into the batter.
The jiggle test is real. A perfectly baked cheesecake has a center about the size of a quarter that jiggles very slightly when you nudge the pan. Think of it like the wobble of set jello, not the slosh of liquid. This jiggly center continues to cook from residual heat as the cheesecake cools, becoming perfectly set by the time it reaches room temperature. If the entire cheesecake is firm in the oven, it’s overcooked and will be dry.
Small cracks happen, and they’re easier to hide than you’d think. If cracks do form (and even pros get them sometimes), a generous topping of fresh berries, whipped cream, fruit compote, or chocolate ganache makes them completely invisible. The cheesecake tastes just as good with a small crack.
Use an oven thermometer. Ovens vary, and even 25°F off changes how the cheesecake bakes. If your oven runs hot, it could bake 5 minutes faster; if it runs cold, it could take 10 minutes longer. An inexpensive oven thermometer takes the guesswork out.
Cooling it slowly is just as important as baking it well. The 1-hour cooling-in-the-oven step isn’t just tradition—it prevents thermal shock, which causes the structure to contract too quickly and crack. Don’t skip it.
2. No-Bake Cheesecake
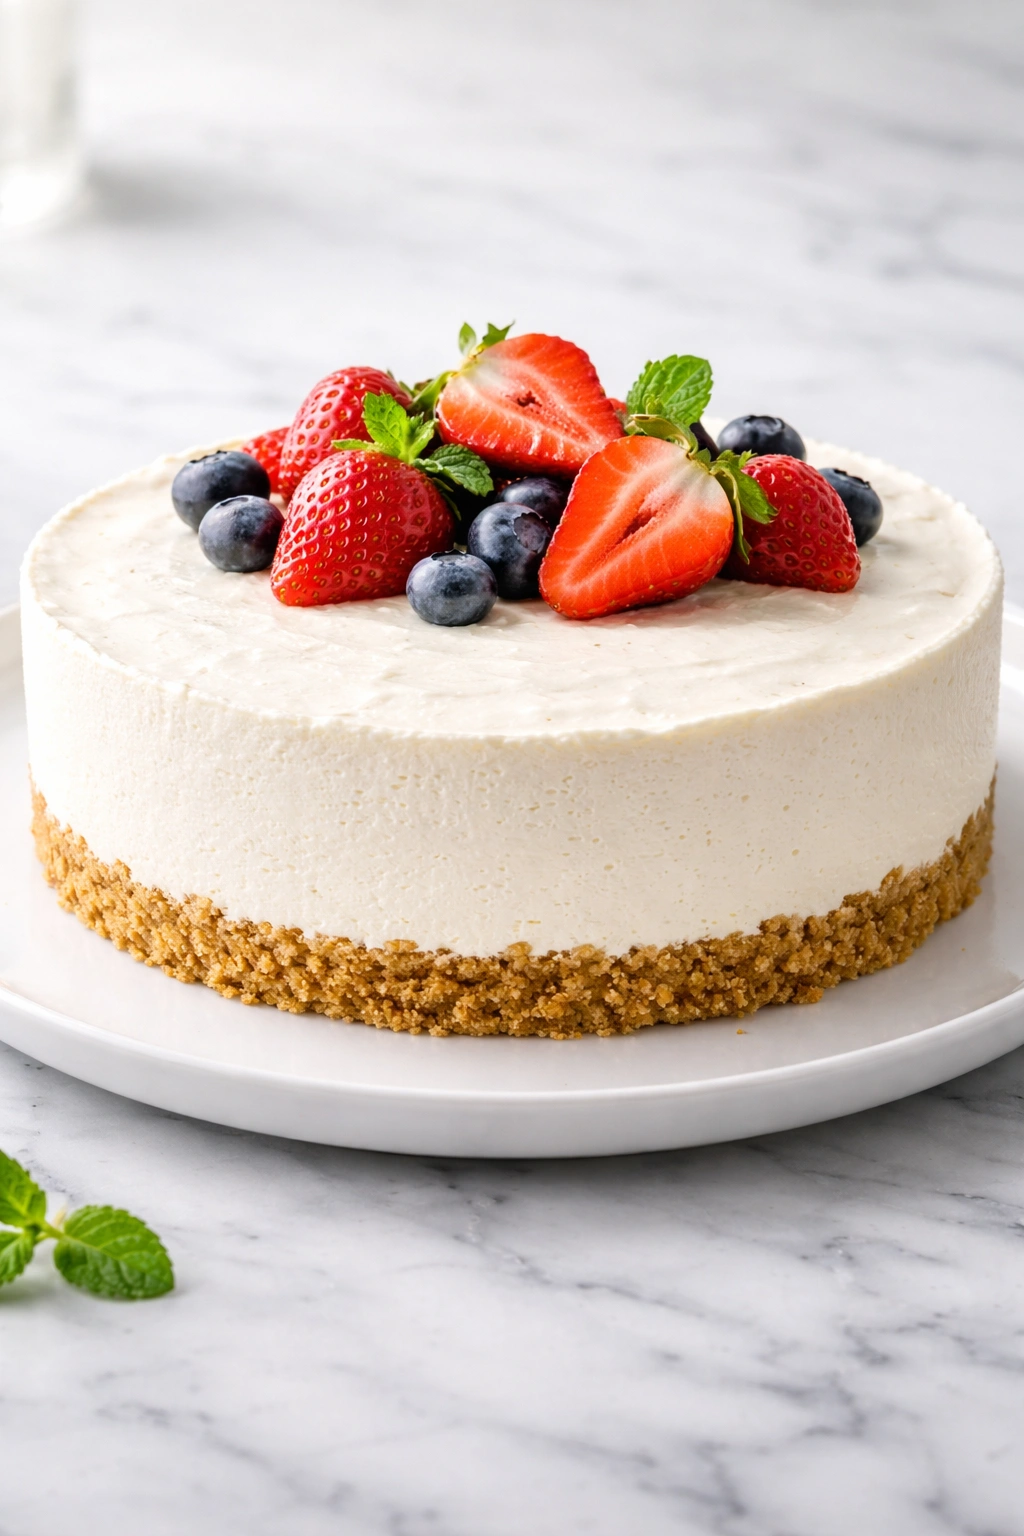
If you’re nervous about baking cheesecake, this recipe is your safety net. There’s no oven involved, no water bath, no jiggle test, no finicky temperature reading. The filling comes together in a mixer, you fold in whipped cream, pour it into a crust, and refrigerate until it’s set. The result is lighter and fluffier than a traditional baked cheesecake—more mousse-like—but still satisfying and completely delicious. This one is genuinely foolproof.
Yield: Serves 10 to 12 | Makes one 9-inch round cheesecake Prep Time: 25 minutes Chilling Time: 4 hours minimum (overnight is better) Total Time: 25 minutes active + 4 hours chilling Difficulty: Beginner — No baking required, and the steps are simple mixing and folding. The only risk is overwhipping the cream, but even that is hard to do.
For the Crust:
- 2 cups graham cracker crumbs
- ¼ cup granulated sugar
- 5 tablespoons unsalted butter, melted
For the Filling:
- 24 oz (three 8-oz packages) cream cheese, softened to room temperature
- ¾ cup granulated sugar
- 1 teaspoon pure vanilla extract
- ½ teaspoon fine sea salt
- 1 tablespoon fresh lemon juice
- 1½ cups heavy whipping cream, cold
- 2 tablespoons powdered sugar
Prepare the Crust:
- In a bowl, combine the graham cracker crumbs, sugar, and melted butter and mix until it resembles wet sand. Press firmly into a 9-inch springform pan, creating an even layer on the bottom. Unlike the baked version, this crust will not be baked—press it extra firmly so it holds together when sliced. Refrigerate while you make the filling.
Make the Filling: 2. In the bowl of a stand mixer fitted with the paddle attachment, beat the softened cream cheese on low speed for 1 minute, until smooth. Add the granulated sugar, vanilla extract, salt, and lemon juice, and mix on low for about 1 minute until combined. Scrape down the sides and make sure there are no lumps of cream cheese visible.
-
In a separate bowl (it must be clean and dry), whip the cold heavy cream and powdered sugar together using an electric mixer on medium-high speed. Start with the mixer on medium, and after about 1 minute, increase to medium-high. Whip for 2 to 3 minutes total, just until stiff peaks form—when you lift the beaters, the cream should stand straight up. Be careful not to overwhip; if you see visible grains or the cream starts to separate, you’ve whipped it into butter. Stop immediately and use it anyway—it will still work, just be slightly less fluffy.
-
Gently fold one-third of the whipped cream into the cream cheese mixture using a rubber spatula, stirring just until combined. The batter will lighten noticeably. Fold in the remaining whipped cream in two additions, folding gently just until no white streaks remain. Do not overmix or you’ll deflate the whipped cream and lose the light texture that makes this version special. The filling should look airy and pale.
-
Pour the filling into the prepared crust and spread it into an even layer. Smooth the top with an offset spatula.
Chill: 6. Refrigerate for at least 4 hours, or preferably overnight. The cheesecake will firm up as it chills. You’ll know it’s ready when the surface feels slightly set to the touch and the center has minimal jiggle.
Best Served: Straight from the refrigerator, topped with fresh berries, a berry compote, or a drizzle of chocolate ganache. The cold, fluffy texture is the whole point.
What Makes No-Bake Different (And Why It’s Actually Great)
This version is lighter and airier than a traditional baked cheesecake because it relies on whipped cream for structure instead of eggs. That means it’s less dense, less rich, and honestly feels less heavy on your stomach—especially if you’re serving it after a big meal or in warm weather. The trade-off is that it has a slightly shorter fridge life (about 3 days compared to 5 days for baked), and it can’t be frozen as successfully. But for immediate enjoyment, it’s absolutely lovely.
The lack of baking also means there’s no stress about temperature or timing or whether it’s done. Your only real variable is how much you whip the cream, and overwhipping is almost impossible if you’re paying attention. This is the cheesecake to make when you want something gorgeous without the anxiety.
3. Mini Cheesecake Cups
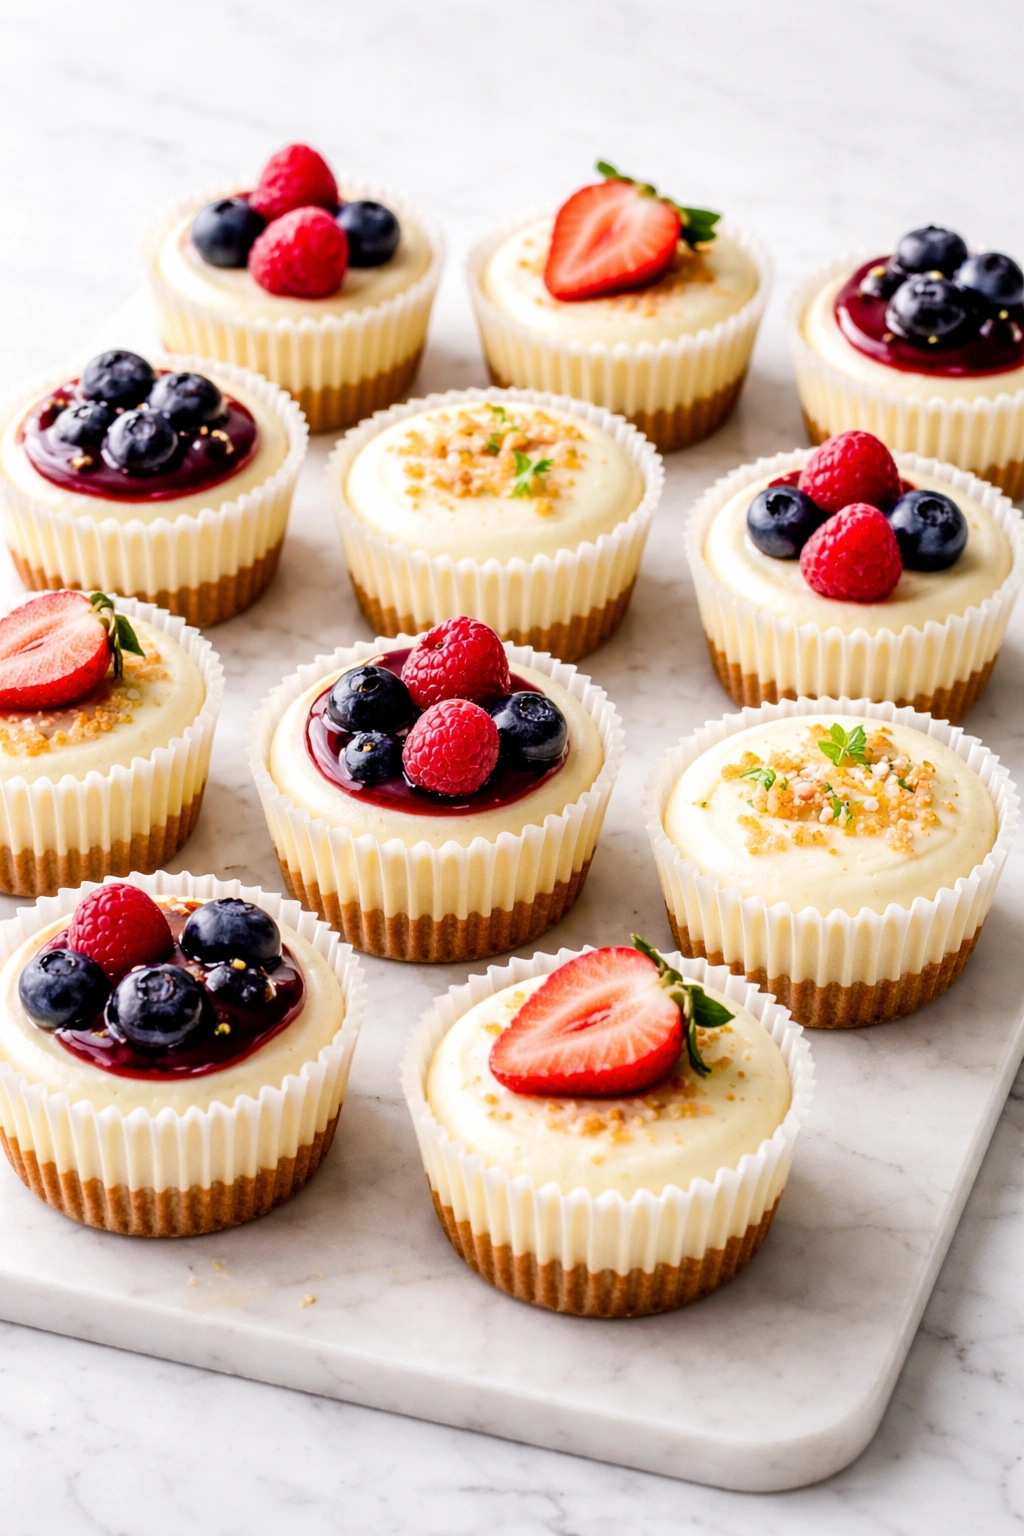
These are individual cheesecakes baked in a muffin tin—perfect for portion control, easy to customize, and genuinely fun to eat. Each one is a complete cheesecake experience in a small package: crispy crust, creamy filling, smooth sour cream top. You can make a whole batch, refrigerate them, and you have single-serving desserts ready to go for days. They’re also the ultimate crowd-pleaser because everyone gets their own perfect portion without you having to slice.
Yield: Makes 12 mini cheesecakes Prep Time: 20 minutes Cook Time: 18 minutes Total Time: 38 minutes active + 4 hours chilling Difficulty: Beginner — The steps are the same as a regular cheesecake, just smaller and faster. The muffin-tin format actually makes them harder to overcook because they’re smaller.
For the Crusts:
- 1½ cups graham cracker crumbs
- 3 tablespoons granulated sugar
- 3 tablespoons unsalted butter, melted
For the Filling:
- 16 oz (two 8-oz packages) cream cheese, softened to room temperature
- ½ cup granulated sugar
- 2 tablespoons cornstarch
- ½ teaspoon pure vanilla extract
- ¼ teaspoon fine sea salt
- 2 large eggs, room temperature
- 2 tablespoons fresh lemon juice
- ½ cup sour cream (this goes in the filling for this version)
Prepare the Pan:
-
Preheat your oven to 325°F (163°C). Line a 12-cup muffin tin with paper liners or silicone muffin cups. (The liners prevent sticking and make removal easier, though the cups will hold together fine without them.)
-
In a small bowl, combine the graham cracker crumbs, sugar, and melted butter. Divide this mixture evenly among the 12 cups (about 2 tablespoons per cup) and press firmly into the bottom of each. Bake for 5 minutes, then remove from the oven.
Make the Filling: 3. In a medium bowl, beat the softened cream cheese with an electric mixer on low speed for 1 minute, until smooth. Add the sugar, cornstarch, vanilla, and salt, and beat on low for about 1 minute until combined. Add the eggs one at a time, beating on low for 15 seconds after each and scraping down the sides after the second egg.
-
Add the lemon juice and sour cream, beating on low just until combined. The batter should be smooth and creamy.
-
Using a ¼-cup measure or an ice cream scoop, divide the batter evenly among the 12 cups, filling each about three-quarters full. The filling will rise slightly as it bakes.
Bake: 6. Bake for 12 to 15 minutes. The cheesecakes are done when the edges are set and the centers jiggle very slightly. Because they’re small, they’ll look less done than a full-size cheesecake, and that’s correct. Do not overbake—mini cheesecakes cook faster and dry out quickly if left in the oven too long.
- Remove from the oven and let cool in the pan for 10 minutes, then transfer the entire muffin tin to a wire cooling rack and let cool to room temperature (about 30 more minutes).
Chill: 8. Once cooled, remove the cheesecakes from the muffin tin (they may need a gentle nudge with a small spatula). Refrigerate in an airtight container for at least 4 hours or overnight.
Best Served: Chilled, with a small dollop of whipped cream and a single berry on top, or a small drizzle of chocolate or fruit topping. The presentation is charming and guests always love having their own cheesecake.
Why Mini Cheesecakes Are a Game-Changer
The muffin-tin format bakes significantly faster than a full cheesecake—15 minutes instead of 55. There’s no water bath needed because the smaller volume cooks through evenly without the edges overcooking. They’re also forgiving to the point of being nearly impossible to fail: even if one looks a little odd, you still have 11 perfect ones. And practically speaking, if you’re only eating one cheesecake at a time, refrigerating a whole cake means you’re tempted to eat it before it’s done its job feeding a household. With mini cups, you grab one, enjoy it, and the rest stays perfectly fresh.
4. Chocolate Cheesecake
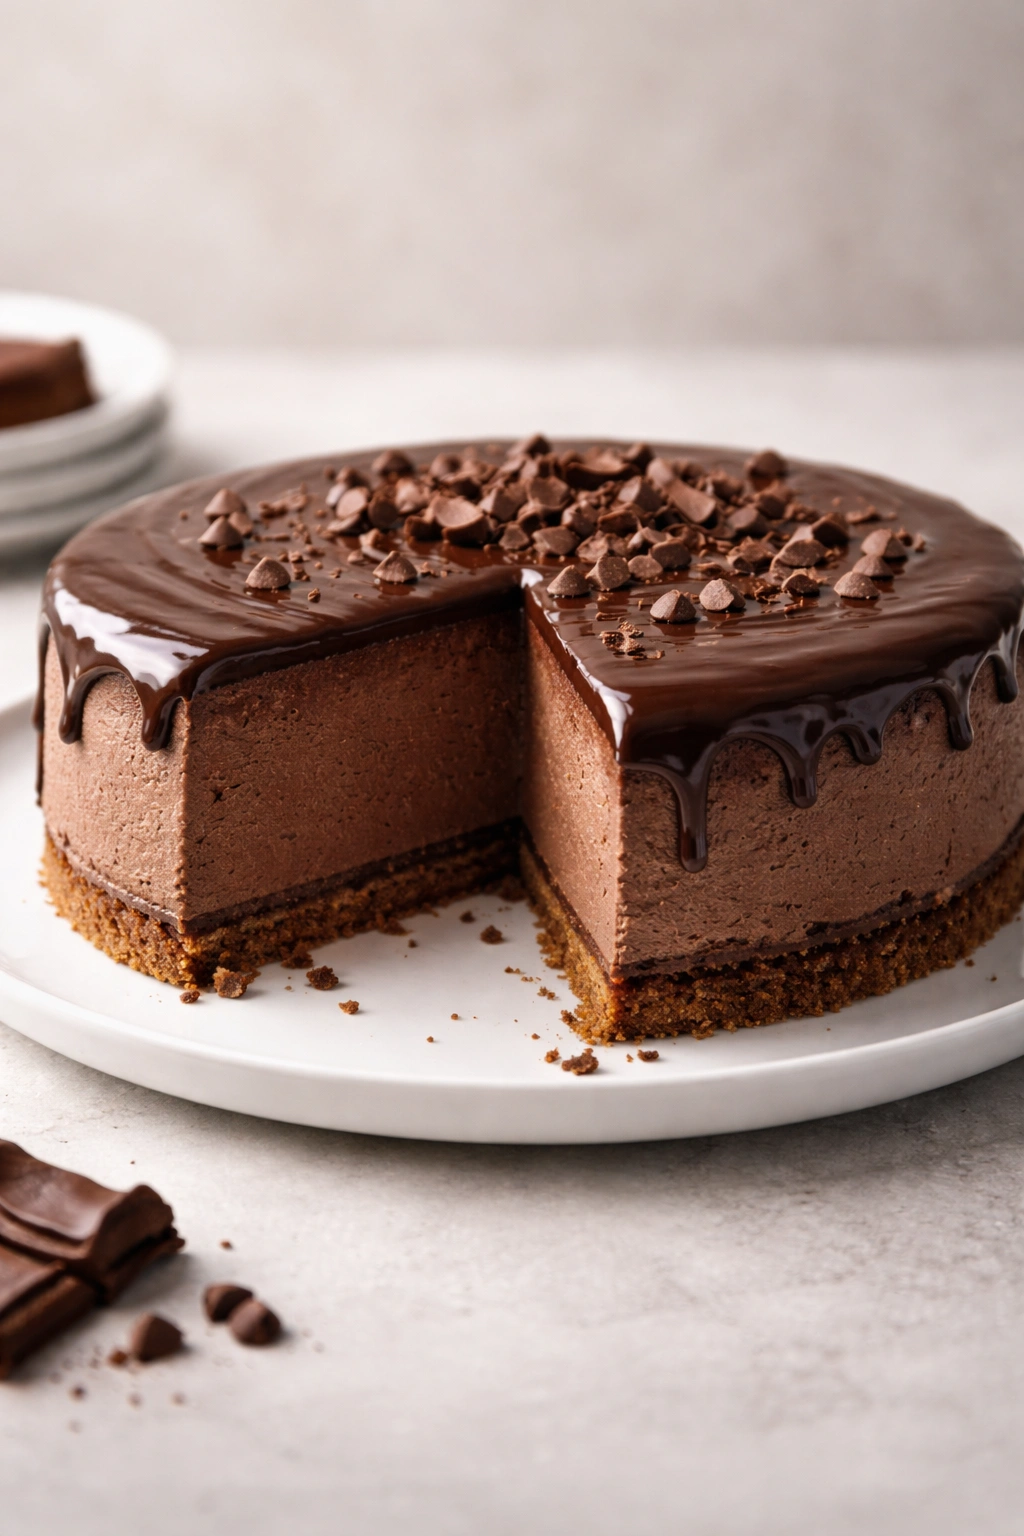
This is for anyone who loves chocolate but wants the cheesecake. A rich, dark chocolate filling sits on that familiar graham cracker base, and optionally gets topped with a glossy chocolate ganache for serious chocolate-lover appeal. It’s less delicate than a plain cheesecake and somehow feels more indulgent, but it’s not harder to make at all—you’re just adding chocolate to the filling.
Yield: Serves 12 to 14 | Makes one 9-inch round cheesecake Prep Time: 20 minutes Cook Time: 50 minutes Total Time: 1 hour 10 minutes active + 6 hours chilling (overnight recommended) Difficulty: Beginner — Identical method to classic cheesecake, just with chocolate folded in. Chocolate is very forgiving and actually helps mask any tiny imperfections.
For the Crust:
- 2 cups graham cracker crumbs
- ¼ cup granulated sugar
- 5 tablespoons unsalted butter, melted
For the Filling:
- 6 oz dark chocolate (60% to 70% cacao), finely chopped
- ¼ cup unsweetened cocoa powder
- 32 oz (four 8-oz packages) cream cheese, softened to room temperature
- 1 cup granulated sugar
- ¼ cup cornstarch
- ½ teaspoon fine sea salt
- 1 teaspoon pure vanilla extract
- 4 large eggs, room temperature
- ½ cup sour cream
For the Ganache Topping (Optional):
- 4 oz dark chocolate, chopped
- ½ cup heavy cream
- 1 tablespoon unsalted butter
Prepare the Pan:
- Preheat your oven to 325°F (163°C) and position the rack in the lower third. Wrap a 9-inch springform pan with foil. Combine the graham cracker crumbs, sugar, and melted butter, press into the bottom of the pan, and bake for 8 minutes. Set aside.
Make the Filling: 2. Place the chopped chocolate in a heatproof bowl and set it over a pot of gently simmering water (a double boiler setup). Stir occasionally until the chocolate is melted and smooth, about 2 minutes. Remove from heat and let cool slightly—it should be warm to the touch but not hot.
-
Whisk the cocoa powder into the melted chocolate until completely smooth and lump-free. Set aside to cool to just warm.
-
In the bowl of a stand mixer fitted with the paddle attachment, beat the cream cheese on low speed for 1 minute until smooth. Add the sugar, cornstarch, and salt, and beat on low for about 1 minute. Add the vanilla and eggs one at a time, beating on low for 15 seconds after each addition and scraping the bowl after the second egg.
-
Add the sour cream and beat on low just until combined. Remove the bowl from the mixer and gently fold in the cooled chocolate mixture using a rubber spatula, folding just until no streaks of chocolate remain. Do not overmix—you just want the chocolate distributed evenly; overmixing can toughen the batter.
-
Pour into the prepared crust.
Bake: 7. Follow the same water bath baking procedure as the classic cheesecake. Place the foil-wrapped springform inside a larger roasting pan and fill with hot water halfway up the sides. Bake for 45 to 50 minutes. The cheesecake is done when the edges are set but the center has a very slight jiggle about 2 inches wide.
- Turn off the oven and crack the door open 2 inches. Leave the cheesecake in the oven for 1 hour for slow cooling. Remove from the oven and water bath, and let cool on a rack. Once cooled to room temperature, run a knife around the edge (without removing the springform ring) and refrigerate for at least 6 hours or overnight.
Make the Ganache (Optional): 9. If using ganache, combine the chopped chocolate and butter in a heatproof bowl. Heat the cream until it’s steaming, then pour it over the chocolate and butter. Let it sit for 1 minute, then stir gently until smooth and glossy. Let it cool to room temperature (about 10 minutes), then pour it evenly over the top of the chilled cheesecake, tilting gently to spread. Refrigerate for at least 30 minutes before serving so the ganache sets.
Best Served: Chilled, with a small dollop of whipped cream and maybe a fresh strawberry or raspberry on top. The ganache adds a professional restaurant appearance.
Chocolate-Specific Tips
Quality chocolate matters here because there’s nowhere to hide. Use chocolate that actually tastes good to you—if you’re not a huge chocolate fan, 60% cacao is pleasant; if you love dark chocolate, 70% or even higher is wonderful. Melting chocolate over water (not directly over heat) prevents scorching, which can make it taste harsh or grainy. If your chocolate seizes (looks grainy or thick), add a tablespoon of coconut oil or butter and stir gently to recover it.
Chocolate is quite forgiving in baking because its strong flavor covers minor issues. Small cracks? Coat them with ganache. Slightly dry texture? Chocolate is still delicious. This version is actually one of the most beginner-friendly because chocolate masks imperfections beautifully.
5. Sour Cream Cheesecake (The Tangiest Version)
This is for people who actually love the tang of cheesecake—not people who tolerate it, but people who chose cheesecake specifically because they want that yogurt-like sharpness. This version uses more sour cream than usual, both in the filling and as the top layer, creating a cheese-forward flavor that’s bright, a tiny bit funky in the best way, and completely addictive. It’s also surprisingly simple because there are fewer moving parts.
Yield: Serves 12 to 14 | Makes one 9-inch round cheesecake Prep Time: 18 minutes Cook Time: 45 minutes Total Time: 1 hour 3 minutes active + 6 hours chilling (overnight recommended) Difficulty: Beginner — Fewer ingredients mean fewer ways to go wrong. The high sour cream content actually makes it harder to overbake because there’s more moisture in the filling.
For the Crust:
- 2 cups graham cracker crumbs
- ¼ cup granulated sugar
- 5 tablespoons unsalted butter, melted
For the Filling:
- 32 oz (four 8-oz packages) cream cheese, softened to room temperature
- 1 cup granulated sugar
- ¼ cup cornstarch
- ½ teaspoon fine sea salt
- 1 teaspoon pure vanilla extract
- 4 large eggs, room temperature
- 1¼ cups sour cream (this is more than the classic version)
For the Topping:
- 1½ cups sour cream
- 3 tablespoons granulated sugar
- 1 teaspoon pure vanilla extract
Prepare the Pan:
- Preheat your oven to 325°F (163°C). Wrap a 9-inch springform pan with foil. Combine the graham cracker crumbs, sugar, and melted butter, press firmly into the bottom, and bake for 8 minutes. Set aside.
Make the Filling: 2. In a stand mixer fitted with the paddle attachment, beat the cream cheese on low speed for 1 minute until smooth. Add the sugar, cornstarch, salt, and vanilla, and beat on low for about 1 minute until combined. Add the eggs one at a time, beating on low for 15 seconds after each addition and scraping the bowl after the second egg.
-
Add the sour cream in two additions, beating on low just until combined after each. The batter should be smooth and creamy.
-
Pour into the prepared crust.
Bake: 5. Set the foil-wrapped springform in a larger roasting pan and add hot water halfway up the sides. Bake for 40 to 45 minutes. The cheesecake is done when the edges are set and the center jiggles very slightly.
- While it’s still in the oven, whisk together the sour cream, sugar, and vanilla for the topping. Once the cheesecake looks done, remove it from the water bath (leave it in the oven). Spread the topping evenly over the hot cheesecake and bake for an additional 5 minutes. Turn off the oven and crack the door open 2 inches. Leave the cheesecake in the oven for 1 hour. Remove and cool on a rack to room temperature, then run a knife around the edge (don’t remove the springform ring yet) and refrigerate for at least 6 hours or overnight.
Best Served: Chilled, with fresh berries on top or alongside. The brightness of berries complements the tanginess of the cheesecake perfectly.
Why More Sour Cream Is Actually Better Here
Extra sour cream doesn’t make the cheesecake taste “sour” in a bad way—it makes it taste more complex and cheese-forward. There’s a point in baking where fat and acid balance out to create flavor complexity, and this version leans into that. If you’re someone who eats plain cheesecake and thinks “yeah, this is nice,” you might not be excited about this version. But if you’re someone who eats cheesecake and wishes it were tangier, this version is your answer. The high sour cream content also makes it nearly impossible to overbake because there’s so much moisture that it stays creamy even if it bakes a few minutes longer than planned.
6. Eggnog Cheesecake (Seasonal-Adjacent, Always Available)
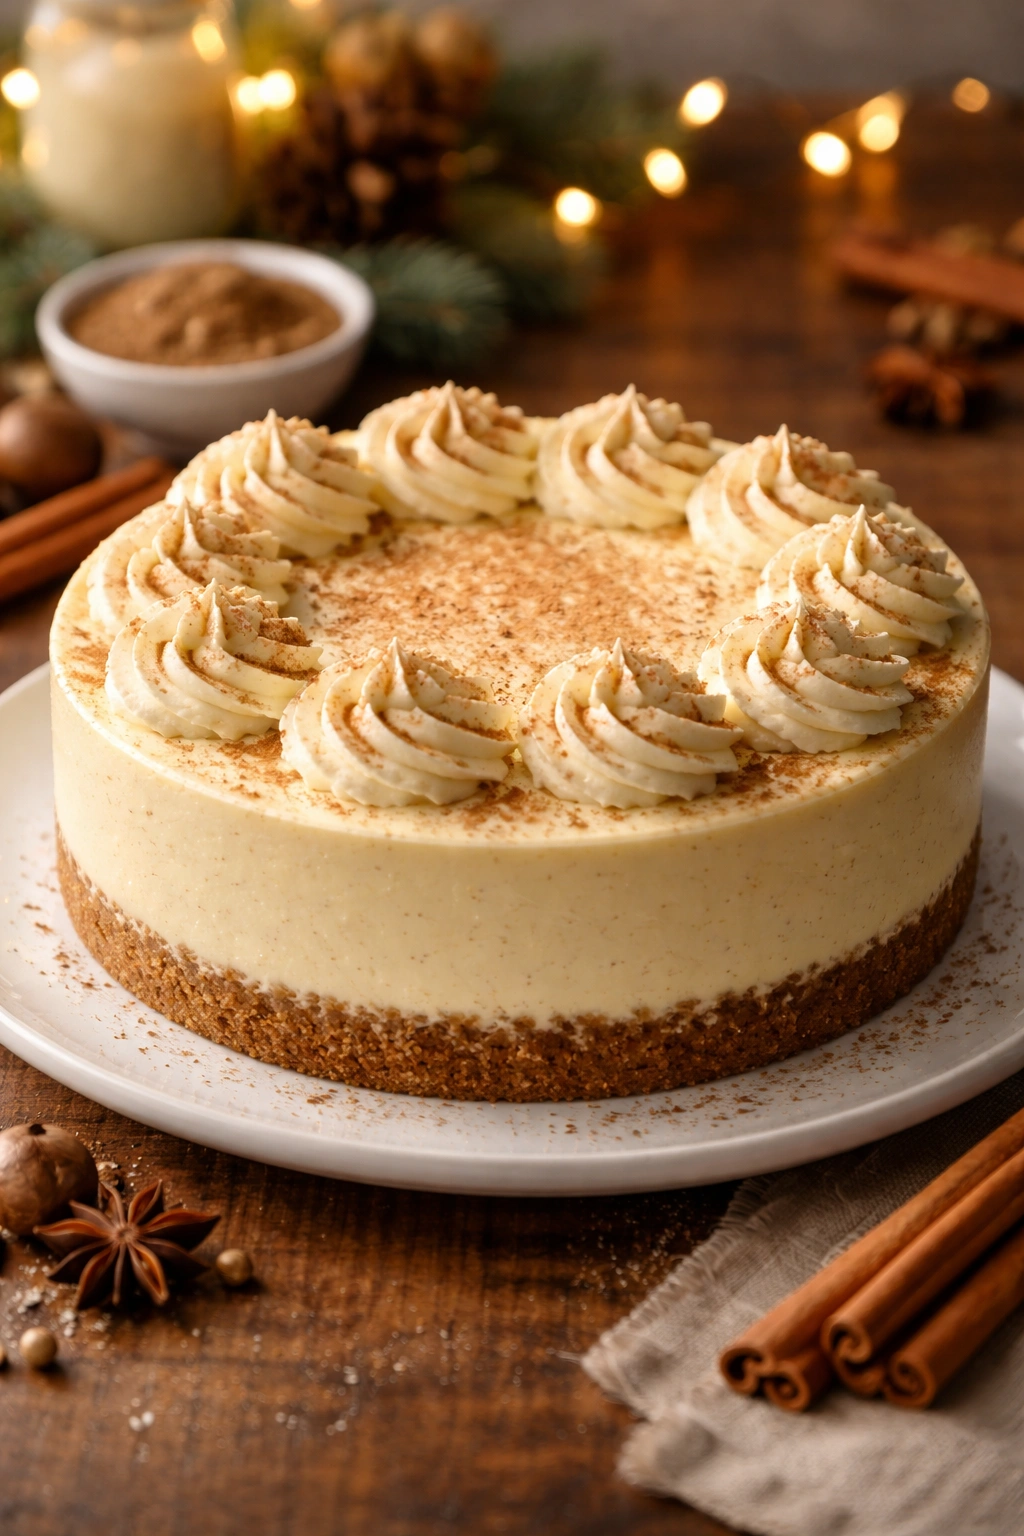
This one bridges the gap between traditional cheesecake and dessert flavoring—using eggnog (or a homemade eggnog filling) to create something that feels festive and special without requiring any unusual ingredients. It’s a gorgeous option for serving during colder months or anytime you want something with warm, spiced notes. Some people buy eggnog specifically for this; others use this recipe year-round with the simple eggnog flavoring it provides (nutmeg, cinnamon, vanilla, rum extract).
Yield: Serves 12 to 14 | Makes one 9-inch round cheesecake Prep Time: 20 minutes Cook Time: 50 minutes Total Time: 1 hour 10 minutes active + 6 hours chilling (overnight recommended) Difficulty: Beginner — It’s just a classic cheesecake with eggnog and spices substituted in. No extra steps, no extra complexity.
For the Crust:
- 2 cups graham cracker crumbs
- ¼ cup granulated sugar
- 5 tablespoons unsalted butter, melted
For the Filling:
- 32 oz (four 8-oz packages) cream cheese, softened to room temperature
- 1 cup granulated sugar
- ¼ cup cornstarch
- ½ teaspoon fine sea salt
- 1 teaspoon pure vanilla extract
- ½ teaspoon ground nutmeg
- ¼ teaspoon ground cinnamon
- Pinch of ground cloves (optional but lovely)
- ¼ teaspoon rum extract (or 1 tablespoon dark rum if you prefer)
- 4 large eggs, room temperature
- ¾ cup eggnog (or heavy cream if you don’t have eggnog)
- 2 tablespoons fresh lemon juice
For the Topping:
- 1 cup sour cream
- 2 tablespoons granulated sugar
- ½ teaspoon pure vanilla extract
- Tiny pinch of ground nutmeg for garnish
Prepare the Pan:
- Preheat your oven to 325°F (163°C). Wrap a 9-inch springform pan with foil. Combine the graham cracker crumbs, sugar, and melted butter, press firmly into the bottom, and bake for 8 minutes. Set aside.
Make the Filling: 2. In a stand mixer fitted with the paddle attachment, beat the cream cheese on low speed for 1 minute until smooth. Add the sugar, cornstarch, salt, vanilla, nutmeg, cinnamon, cloves, and rum extract, and beat on low for about 1 minute until combined and the spices are evenly distributed.
-
Add the eggs one at a time, beating on low for 15 seconds after each addition and scraping the bowl after the second egg. Add the eggnog and lemon juice, beating on low just until combined. The batter should be smooth and fragrant.
-
Pour into the prepared crust.
Bake: 5. Set the foil-wrapped springform in a larger roasting pan and add hot water halfway up the sides. Bake for 45 to 50 minutes. The cheesecake is done when the edges are set and the center jiggles very slightly.
- Whisk together the sour cream, sugar, and vanilla for the topping. Once the cheesecake looks done, spread the topping evenly over the hot cheesecake and bake for an additional 5 minutes. Turn off the oven and crack the door open 2 inches. Leave the cheesecake in the oven for 1 hour. Remove and cool on a rack to room temperature, run a knife around the edge, and refrigerate for at least 6 hours or overnight. Just before serving, dust the top very lightly with additional nutmeg.
Best Served: Chilled, exactly as is or with a small dollop of whipped cream on the side. The spices are the star here, so simple is perfect.
Understanding the Eggnog Flavor
Real eggnog contains eggs, cream, milk, and spices—that’s what creates its distinctive flavor. This recipe uses the actual spice profile of eggnog (nutmeg, cinnamon, vanilla, a hint of rum) rather than relying on bottled eggnog, which can be watery and overly sweet. If you do use actual eggnog in the recipe, choose one that’s thick and rich (the better brands have cream and egg yolks in them), and reduce the amount of sour cream in the filling to compensate for the extra liquid. The beauty of this version is it tastes eggnog-adjacent whether you use eggnog or not—the spices carry the flavor entirely.
Storage, Chilling, and Make-Ahead Tips
All six of these cheesecakes follow similar rules for storage and advance preparation, so treat this section as universal guidance.
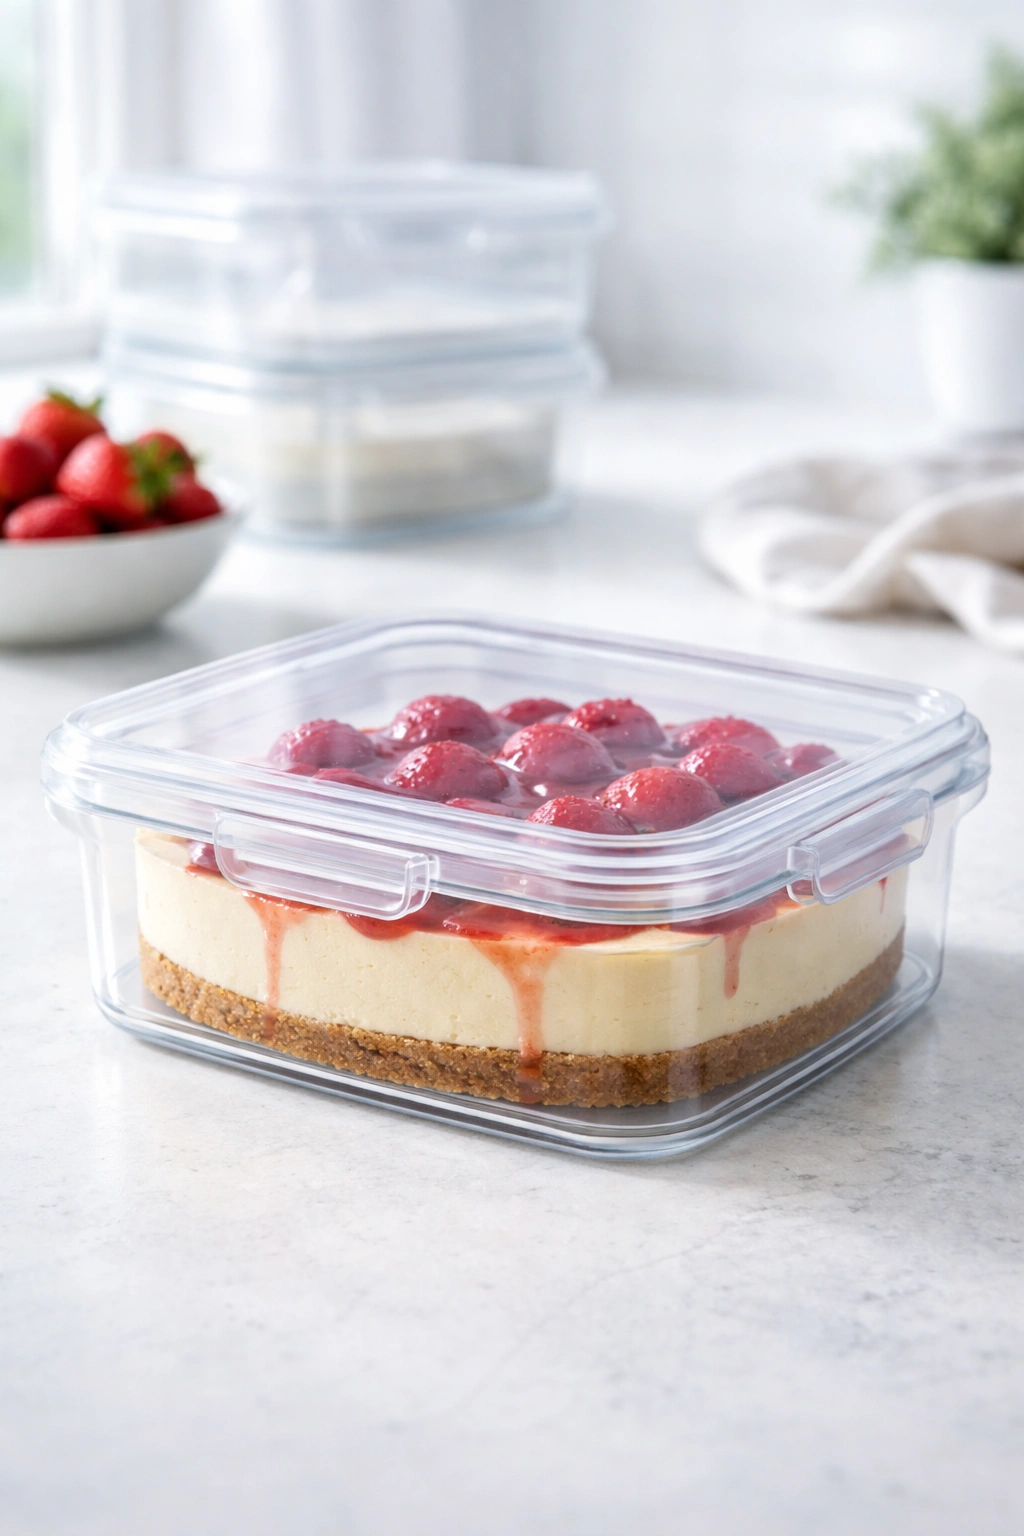
Refrigerator Storage: Cheesecake keeps beautifully in the fridge for up to 5 days, covered loosely with plastic wrap or stored in an airtight container. The texture actually improves after the first day as the flavors meld and the filling becomes silkier. Don’t serve directly from the fridge in the first 4 hours—even though you’re serving it chilled, it needs time to set properly.
Freezing: All six of these cheesecakes (except the no-bake version, which doesn’t freeze well) can be frozen for up to 2 months. Freeze the whole cheesecake unwrapped on a baking sheet for 2 hours until solid, then wrap it tightly in plastic wrap and then foil, and store in a freezer-safe container. Thaw in the refrigerator overnight before serving. The texture will be perfectly fine after thawing—cheesecake doesn’t actually break down in the freezer the way some desserts do.
Make-Ahead: All baked versions can be made up to 3 days in advance. The no-bake version can be made up to 2 days in advance (the whipped cream component gradually breaks down over time). Individual components can also be prepped in advance: crusts can be made a full day ahead and kept covered in the springform pan or muffin tin; filling can be mixed up to 4 hours before baking as long as you keep the egg-containing mixture chilled. The sour cream topping should be applied either just before baking or immediately after removing from the oven—don’t make it ahead and wait.
Serving Chilled vs. Room Temperature: Cheesecake is universally better served cold, but if someone prefers it less cold, you can pull it out of the fridge 15 to 20 minutes before serving. Never serve it at actual room temperature or warm—the texture becomes unpleasantly soft.
Presentation: Slice cheesecake with a hot, wet knife (dip it in hot water and wipe it dry between each slice). This prevents the slice from cracking and gives you clean, beautiful cuts. A cake server or long, thin spatula helps you move the slice onto the plate without tearing.
Final Thoughts
Cheesecake is one of those desserts that feels fancy and impressive but asks very little of you in return. None of these six recipes requires special equipment, unusual ingredients, professional skills, or blind faith that something mysterious will happen in the oven. They ask only that you follow clear steps and trust the process—which, if you’re reading this, you now know you can absolutely do.
The classic New York version is the gold standard for good reason; it’s reliable, delicious, and completely forgiving. But the no-bake version exists for when you want something quicker or lighter. The chocolate version proves cheesecake can be indulgent and rich. The mini version makes portioning and serving genuinely easy. The high-sour-cream version chases tang if that’s your preference. And the eggnog version shows that cheesecake is a canvas for whatever flavors you want to explore.
Choose whichever one calls to you right now. Make it exactly as written the first time. Notice the small things that work—how the water bath protects the filling, how the sour cream topping sets, how the center jiggles at exactly the right moment. Then, once you’ve made one, you’ll know the rhythm well enough to make any of the others with actual confidence, not just hope. That’s when cheesecake stops being something you eat from a bakery and becomes something you make at home, and suddenly, dessert feels entirely different.