Egg muffin cups might be the closest thing to a breakfast hack that actually delivers on the promise. Pop them in the oven on Sunday afternoon, and you’ve got grab-and-go protein-packed breakfasts waiting for you every single morning for the next five days. No scrambling, no deciding what to eat while half-asleep, no reaching for whatever’s convenient and regrettable. They’re not fancy — they’re just eggs, some vegetables, maybe cheese or meat, baked in muffin tins until they set into portable, reheatable little packages of breakfast freedom.
The best part isn’t even the time-saving (though that’s real). It’s that you can load these with whatever vegetables, proteins, and flavors you actually want to eat, then customize batches throughout the month as your cravings shift. One week it’s a Mediterranean version with spinach and feta. The next week, it’s breakfast-burrito flavored with chorizo and peppers. You control every ingredient, you know exactly what went into them, and they taste infinitely better than most store-bought breakfast convenience foods. They also freeze beautifully, which means you’re not locked into eating the same breakfast every single day if you don’t want to — you can make a double batch one week and have options for a month.
This is the kind of meal prep that doesn’t feel like deprivation. These aren’t sad diet food. They’re actually delicious, they satisfy you for hours, and best of all, they’re one of the simplest things you can cook. If you can whisk eggs and chop vegetables, you can make egg muffin cups. Let’s break down exactly how to make them foolproof, which combinations actually taste good, and how to keep them fresh without they drying out or spoiling before you finish them.
Why Egg Muffin Cups Are Perfect for Meal Prep
Egg muffin cups solve a real problem that nobody talks about: breakfast boredom. You can eat the same oatmeal or cereal so many mornings before you stop packing yourself a lunch and reach for drive-through instead. With egg muffin cups, the structure is the same (they’re always eggs baked in a muffin tin), but the flavor combination changes enough each time that you actually look forward to reaching for one.
They’re also genuinely economical. A dozen eggs, a handful of vegetables, maybe some cheese or bacon — all in, you’re spending less than two dollars per muffin cup. Compare that to a grabbed breakfast sandwich or a protein bar, and the math gets obvious fast. You’re not just saving time; you’re saving money without sacrificing taste or nutrition.
The texture is another reason they work so well as a grab-and-go breakfast. Unlike scrambled eggs that dry out by the time lunch rolls around, egg muffins have a slightly creamy, tender crumb because they’re baked rather than stirred constantly. They’re substantial enough to keep you satisfied until lunch without feeling heavy. The edges get slightly caramelized where they touch the muffin tin, which adds a tiny bit of depth to the flavor.
The Meal-Prep Advantage Over Making Breakfast Daily
When you’re rushing out the door, an egg muffin cup needs literally ten seconds to grab from the fridge. With a piece of toast or a couple of whole-grain crackers on the side, you have a complete breakfast you didn’t have to think about or prepare. Compare that to the mental load of deciding what to eat, then actually cooking something — and you’ve basically bought yourself half an hour of extra time on five mornings a week.
They also keep you from making impulsive breakfast choices when you’re hungry and tired. If there’s nothing ready to eat, your brain defaults to whatever’s fastest and easiest — and that’s rarely the choice you’re proud of. Having egg muffin cups sitting in the fridge removes that decision-making friction entirely. You just grab and go, and you’ve already won the breakfast battle before your day even starts.
What You Need to Know Before You Start
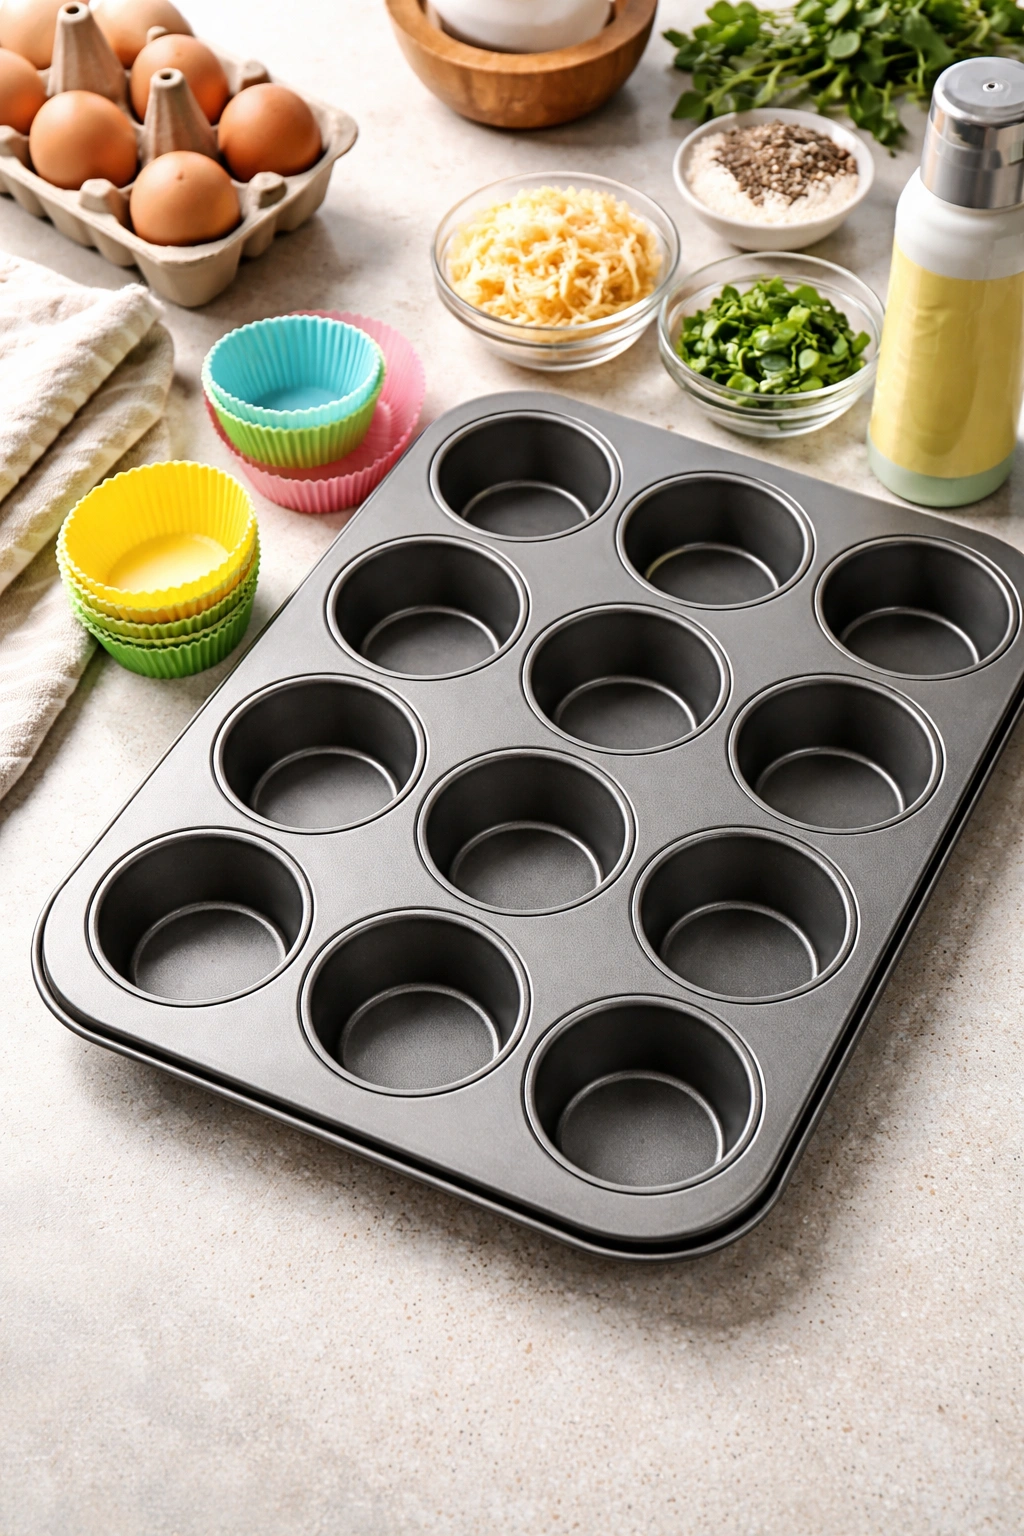
You’ll want a muffin tin — standard 12-cup is perfect, though jumbo 6-cup muffin tins also work beautifully if you want bigger portions and faster cooking times. Silicone muffin liners or simple muffin-tin liners (the paper kind) make removal easier and cleanup faster, but they’re not strictly necessary if you butter or grease your tin well. Non-stick spray works great, though I prefer a small brush and butter because the edges brown a bit more evenly.
The core recipe is incredibly forgiving. The basic formula is simple: one egg per muffin cup, a couple of tablespoons of cream or milk to add richness and moisture, salt, pepper, then about a quarter cup of mix-ins per cup (vegetables, meat, cheese, or a combination). That’s it. The eggs puff up slightly as they bake, the proteins set, and you’ve got a finished product that reheats without much drama.
One important note: you’re baking these at a moderate temperature — usually around 350°F (175°C) — which is cooler than you might expect. This slower bake means the eggs set gently without the outsides getting rubbery before the insides finish cooking. Higher heat tends to cause them to dome up at the top and get a slightly tough texture. Patience here actually pays off.
Equipment You Actually Need
A muffin tin is essential, but beyond that, you can keep it minimal. A mixing bowl, a whisk, maybe a cutting board and knife for prepping vegetables. Muffin-tin liners (either paper or silicone) make your life much easier, but aren’t required. Some people use a small ice-cream scoop to portion the mixture evenly into each cup — that’s genuinely helpful if you want every muffin to cook at exactly the same rate and look consistent.
A food processor can speed up vegetable prep if you’re making a big batch. It turns a 10-minute vegetable-chopping job into about two minutes. Just pulse your vegetables until they’re finely diced but not mushy — you want texture, not vegetable paste.
Choosing Your Mix-In Ingredients
This is where the flexibility of egg muffin cups becomes obvious. You’re not limited to any particular flavor profile or set of ingredients. The structure is consistent; everything else is completely up to you.
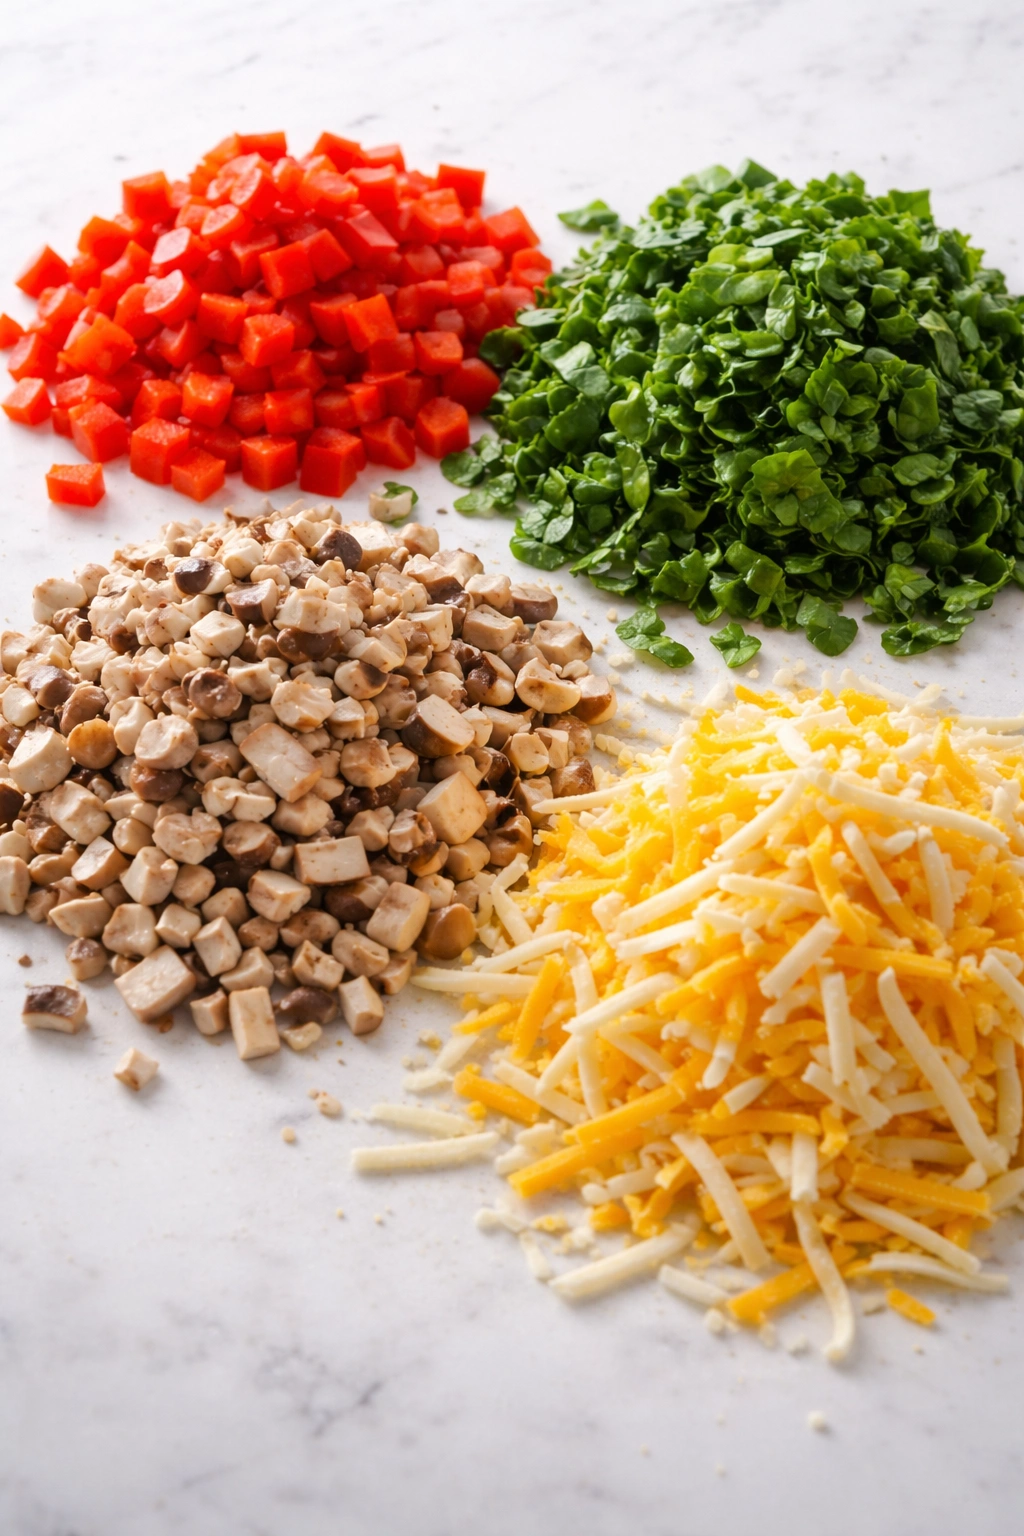
Vegetables are the foundation of most egg muffin cups because they add moisture, nutrients, and flavor without adding calories or heaviness. Bell peppers are reliable — they’re sweet enough to taste good, they don’t turn bitter when cooked, and they break down into tender pieces. Spinach is another staple because it wilts down massively during cooking, so you can pack a huge amount of nutrition into each cup without it tasting overly vegetal. Mushrooms add an earthy flavor and a slightly meaty texture. Onions (especially caramelized or finely diced so they cook through) add a savory sweetness.
Broccoli, asparagus, zucchini, and tomatoes all work too — just keep the pieces small so they cook all the way through in the time the eggs take. Avoid very watery vegetables like raw tomatoes in huge quantities (the excess moisture will make your muffins more fragile), and avoid vegetables that stay tough when cooked, like whole peas or uncooked corn kernels (grate them or use corn that’s already been cooked).
Proteins beyond the egg itself are optional but strongly recommended. Cooked bacon, sausage, diced ham, or ground beef all complement eggs beautifully and add satiety. Use fully cooked meat — raw meat introduces food-safety questions and cooks unevenly in the center of a muffin cup. Leftover cooked chicken works. Canned tuna or salmon, drained well, adds a completely different flavor profile.
Cheese is a favorite add-in because it adds richness and flavor without needing much. A sharp cheddar, feta, goat cheese, or fresh mozzarella all work. You’ll use about a tablespoon per muffin cup, so a little goes a long way. Some people include cheese in the egg mixture itself; others sprinkle it on top before baking so it gets slightly melted and toasted.
Building a Flavor Combination That Works
The trick to combinations that actually taste good is balance. You don’t want four competing flavors fighting for attention. Instead, pick a direction — Mediterranean, Mexican-inspired, Italian, breakfast-breakfast (bacon and cheddar), or whatever — and then let that direction guide your ingredient choices.
Mediterranean, for example: spinach, feta, sun-dried tomatoes, maybe some olives if you like them, and fresh herbs like dill or oregano if you have them. Mexican-inspired: chorizo, peppers, onions, cilantro, jalapeño, maybe a bit of cotija cheese. Breakfast-burrito style: chorizo, peppers, onions, cheddar, maybe some diced potatoes mixed in. The ingredients work together rather than feel like random additions.
Don’t overthink it. The eggs are the star. One protein, one or two vegetables, maybe some cheese, and you’re done. If you’re using strong flavors like feta or sun-dried tomatoes, you probably don’t need to add much else. If you’re using milder ingredients like plain spinach and mushrooms, cheese or bacon helps round out the flavor.
Classic Herb and Vegetable Egg Muffin Cups

Yield: Makes 12 muffin cups | Serves 4 to 6
Prep Time: 20 minutes
Cook Time: 20 to 25 minutes
Total Time: 45 minutes
Difficulty: Beginner — No special skills needed; the steps are straightforward and very forgiving.
This recipe serves as a template you can easily adapt. The vegetable and herb combination is bright and fresh without being heavy, and the proportions are tested enough that you’ll get perfectly cooked, tender muffin cups every single time.
For the Muffin Cups:
- 12 large eggs, room temperature
- ¼ cup whole milk or heavy cream
- ½ teaspoon fine sea salt
- ¼ teaspoon freshly ground black pepper
- ¼ teaspoon garlic powder
- 1 cup fresh spinach, roughly chopped
- ½ cup diced bell pepper (any color)
- ¼ cup diced onion
- ¼ cup diced mushrooms
- ½ cup shredded sharp cheddar cheese
- 2 tablespoons fresh parsley, finely chopped
- 1 tablespoon fresh dill or chives (optional, but it’s worth it)
- Butter for greasing the muffin tin
Preparing Your Muffin Tins for Easy Removal
Start with a standard 12-cup muffin tin. Grease it generously with butter, or line each cup with a muffin-tin liner (silicone liners are reusable; paper liners are disposable — both work beautifully). If you use liners, you still want to lightly grease them because even non-stick liners benefit from a tiny bit of butter to prevent sticking. An alternative that works surprisingly well is a light coat of non-stick cooking spray.
Position your oven rack in the center of the oven and preheat to 350°F (175°C). This slow, moderate heat is key to getting tender, evenly cooked muffins without tough, overcooked edges. Avoid the temptation to crank the temperature higher thinking you’ll speed things up — you’ll just end up with muffins that dome up at the top and turn rubbery.
Why Greasing Matters More Than You Think
Even if you use liners, the sides of the muffin tin can cause sticking if they’re not well-greased. Egg proteins bond to ungreased metal, especially on the outer edges where the heat is most direct. A light brush of melted butter takes thirty seconds and saves you the frustration of trying to pry out a partially stuck muffin that tears in the process. This is not a step to skip.
Making the Egg Mixture

Crack all 12 eggs into a large mixing bowl. You want them at room temperature (or close to it) because they’ll whisk together more smoothly and cook more evenly than cold eggs. If yours are straight from the fridge, let them sit on the counter while you prep your vegetables — fifteen or twenty minutes makes a noticeable difference.
Whisk the eggs together with the milk, salt, pepper, and garlic powder until everything is well combined and slightly frothy. Don’t over-whisk — you’re not making scrambled eggs here — but do make sure the eggs and milk are fully integrated. A fork works fine, but a whisk gives you better control and takes less than a minute.
The Importance of Consistent Mixing
Under-mixed egg and milk separates slightly as it sits before baking, which can lead to some muffin cups being richer (more yolk) and others being watery (more white and milk). A quick minute of whisking ensures every cup ends up with balanced, tender texture. You’re looking for a uniform, pale yellow mixture with tiny bubbles on top — that’s the sign you’ve mixed enough.
Add your chopped spinach, diced bell pepper, diced onion, diced mushrooms, cheese, and fresh herbs to the egg mixture. Fold everything together gently until the vegetables are distributed evenly throughout. This is where a silicone spatula becomes your friend — fold gently to combine without deflating all the air you just whisked in.
Filling and Baking

Use a small ice-cream scoop or a quarter-cup measure to portion the egg mixture evenly into each prepared muffin cup. This step matters because even-filling means even cooking. If some cups are filled to the brim and others are only three-quarters full, the fuller ones will still be setting when the partial ones are already done. Fill each cup until it’s about three-quarters full — the eggs will puff slightly as they bake, and you don’t want them overflowing.
Baking the Muffin Cups:
- Place the muffin tin in the preheated 350°F (175°C) oven on the center rack.
- Bake for 20 to 25 minutes, rotating the tin halfway through (about 12 minutes in). The rotation ensures even cooking from all sides.
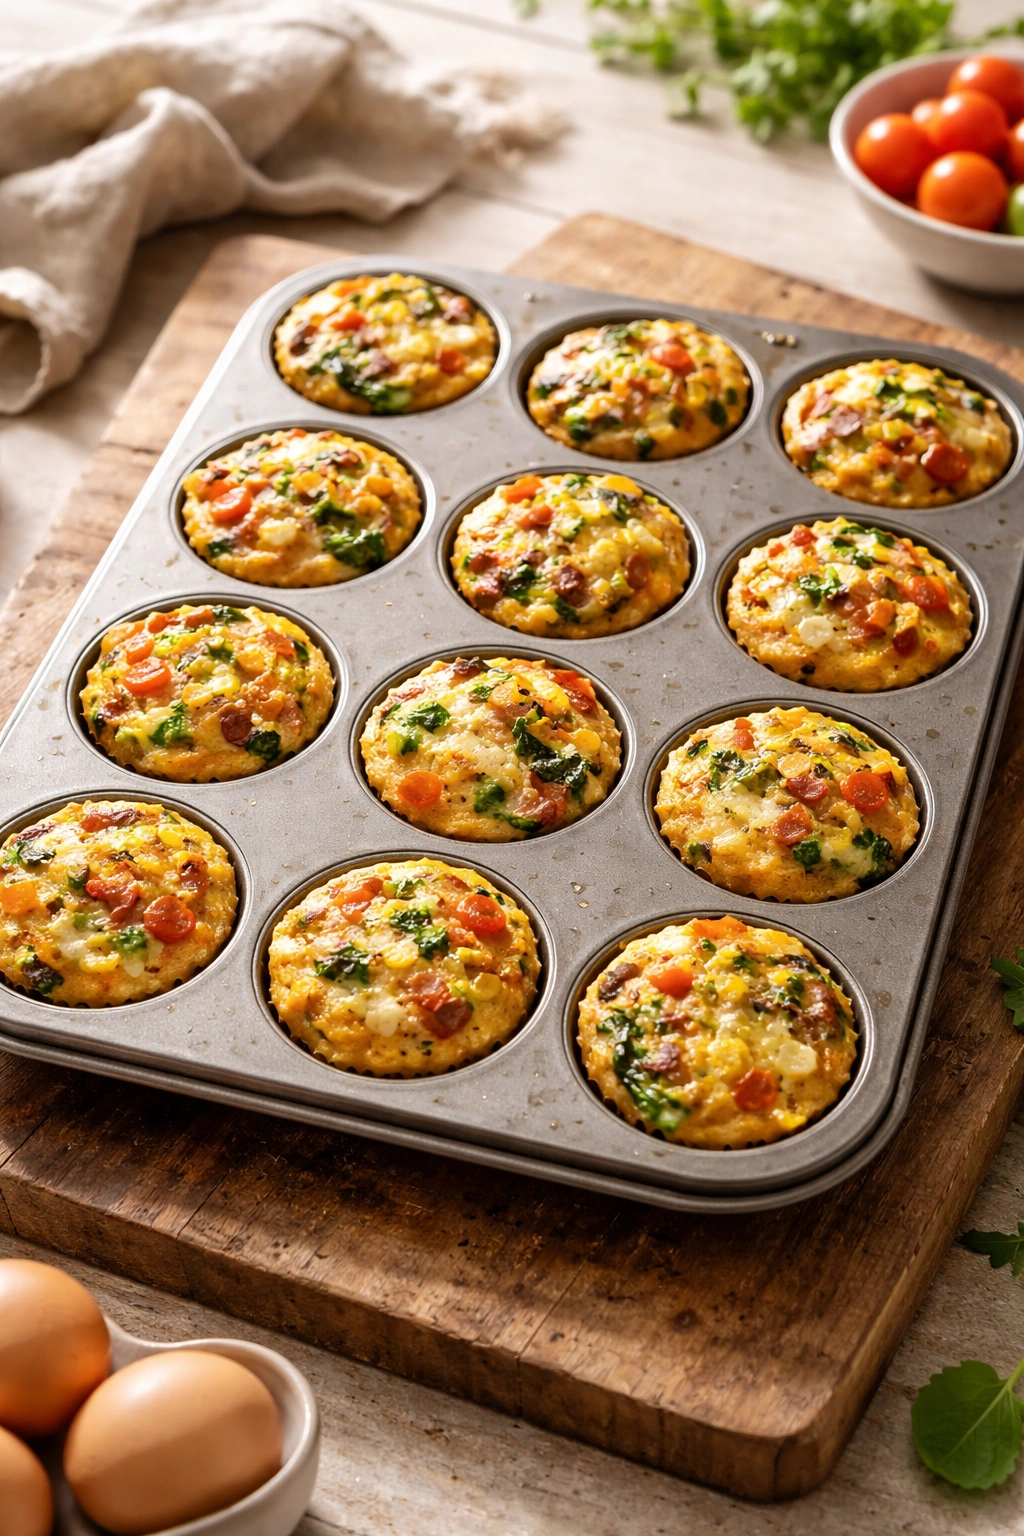
- The muffins are done when the centers are set — press one gently with a fingertip and it should spring back immediately, with no jiggle in the center. A toothpick inserted in the middle of a muffin should come out clean.
- Don’t overbake. Eggs continue to cook slightly even after you remove them from the oven (carryover cooking), so pulling them out when they’re still very slightly soft in the absolute center is better than waiting until they look perfectly set. Overcooked eggs are the enemy here.
- Remove the tin from the oven and set it on a wire cooling rack. Let the muffins cool for about 5 minutes in the tin before removing them — this makes them much easier to pop out cleanly.
Once they’ve cooled slightly in the tin, gently run a small knife around the edge of each cup (even if you used liners) and pop them out onto a plate. If you used silicone liners, the muffins will slide right out. If you used paper liners, let them cool a bit more in the tin if they’re sticking — another minute or two usually does it.
Common Mistakes That Lead to Rubbery or Ruined Cups

The most common error is overbaking. Egg proteins tighten and become rubbery the longer they cook, and there’s a surprisingly narrow window between “set but tender” and “overcooked and tough.” This is why the thermometer trick helps — 160°F (71°C) in the center is your target temperature, which indicates fully set but still slightly moist eggs.
Another frequent mistake is adding too much liquid. Some people think adding more milk will make them creamier, but too much liquid means they stay custardy and don’t set properly, or they separate during storage. Stick to the quarter-cup ratio. Similarly, some people stuff them so full of vegetables that the eggs can’t bind everything together, and they fall apart when you try to reheat them.
Under-cooking is actually the second most common mistake. People pull them out too early because they look set on the top, not realizing the insides are still slightly liquid. The test is simple: the muffin should be firm when you press it, and a toothpick should come out clean, not wet. If it looks wet and shiny when you stick the toothpick in, it needs another minute or two.
Dealing With Muffins That Stick or Tear
If a muffin tears when you’re removing it, let it cool a few more minutes. The longer they sit in the tin after cooking, the more they set and the more easily they release. Cold muffins pop out almost instantly; warm ones stick. Always prioritize cooling time in the tin over speed.
If you’re consistently getting sticking issues, upgrade your greasing technique. Use melted butter and a silicone brush to really coat every surface of the tin, including up the sides, or invest in good silicone muffin liners. Even non-stick tins benefit from greasing when you’re dealing with eggs.
Storage Methods That Keep Them Fresh All Week

Once the muffins have cooled completely, transfer them to an airtight container and refrigerate immediately. Properly stored, they’ll keep for five to six days in the fridge without any quality loss. The eggs will actually become slightly more tender after a day in the fridge as they continue to set and the flavors meld together.
For longer storage, freeze them. Place the cooled muffins in a single layer on a baking sheet and freeze until solid (about two hours), then transfer them to a freezer bag, label it with the date, and freeze for up to two months. Freezing in a single layer first prevents them from sticking together and makes it easy to grab just one or two whenever you want them.
The Container Question
Any airtight container works fine — a glass container with a snap-on lid, a plastic container with a secure seal, or even a good freezer bag. The key is keeping air out. Exposed eggs dry out faster because moisture evaporates from the surface. A sealed container keeps them moist and fresh-tasting for the full five to six days in the fridge.
Label your container with the date you made them, especially if you’re freezing them. You might think you’ll remember when Tuesday’s batch was made, but a week into this routine, three different batches in the freezer all look identical. A simple date marker saves confusion.
How to Reheat Without Drying Them Out
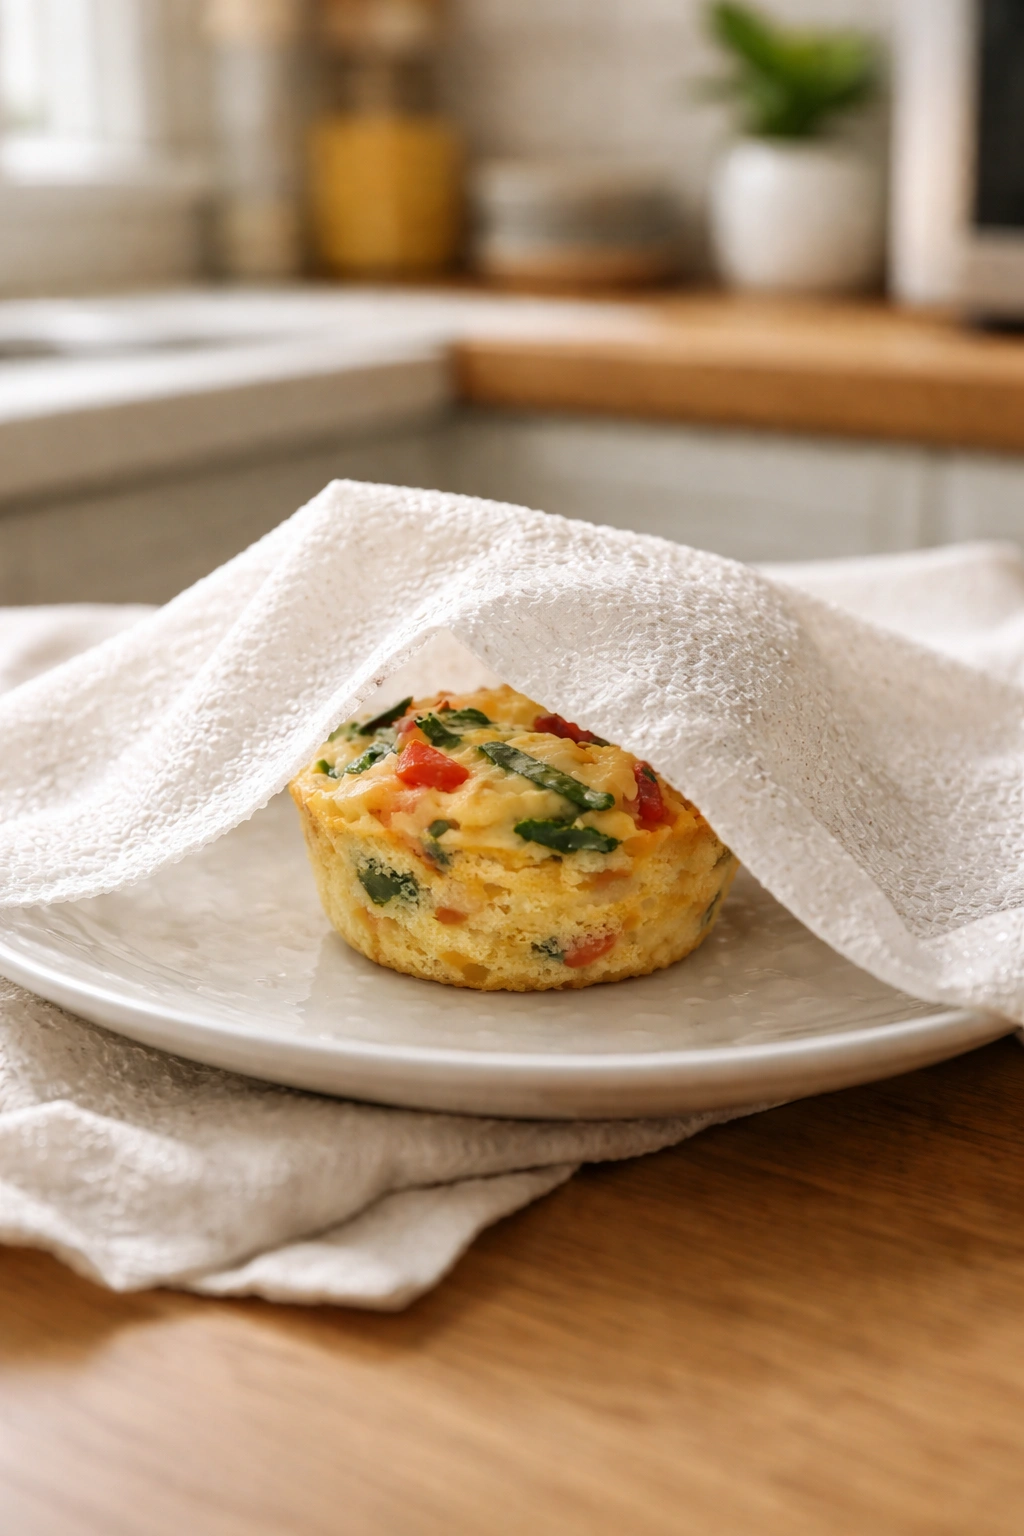
The microwave is the fastest way: wrap one muffin loosely in a damp paper towel, place it on a microwave-safe plate, and microwave for 60 to 90 seconds on medium power (50% power). The damp paper towel creates a little steam that keeps the egg moist while reheating. Check it at the 60-second mark — you just want it warm throughout, not hot.
If you have a bit more time, the oven is actually better. Preheat your oven to 350°F (175°C), place the muffins on a baking sheet, cover them loosely with foil so they don’t dry out, and warm them for about eight to ten minutes. They come out slightly more tender this way because the heating is gentler and more even. This is especially good for frozen muffins — let them thaw in the fridge overnight, then reheat using this method.
The stovetop works too, if you don’t mind dirtying a pan. Place a muffin in a small skillet over medium-low heat, cover the pan with a lid, and warm it for about three minutes, turning once halfway through. This gives you a muffin that’s warm throughout and slightly crisped on the outside — some people prefer this texture.
A Note on Cold Consumption
Here’s something most people don’t realize: egg muffins taste perfectly fine straight from the fridge without reheating. If you’re eating one while prepping for work or packing it in a lunch bag, room-temperature or cold muffins are completely fine. They’re still tender, the flavors are still good, and they require zero reheating time. Some people actually prefer them this way.
Flavor Combinations to Rotate Throughout the Week
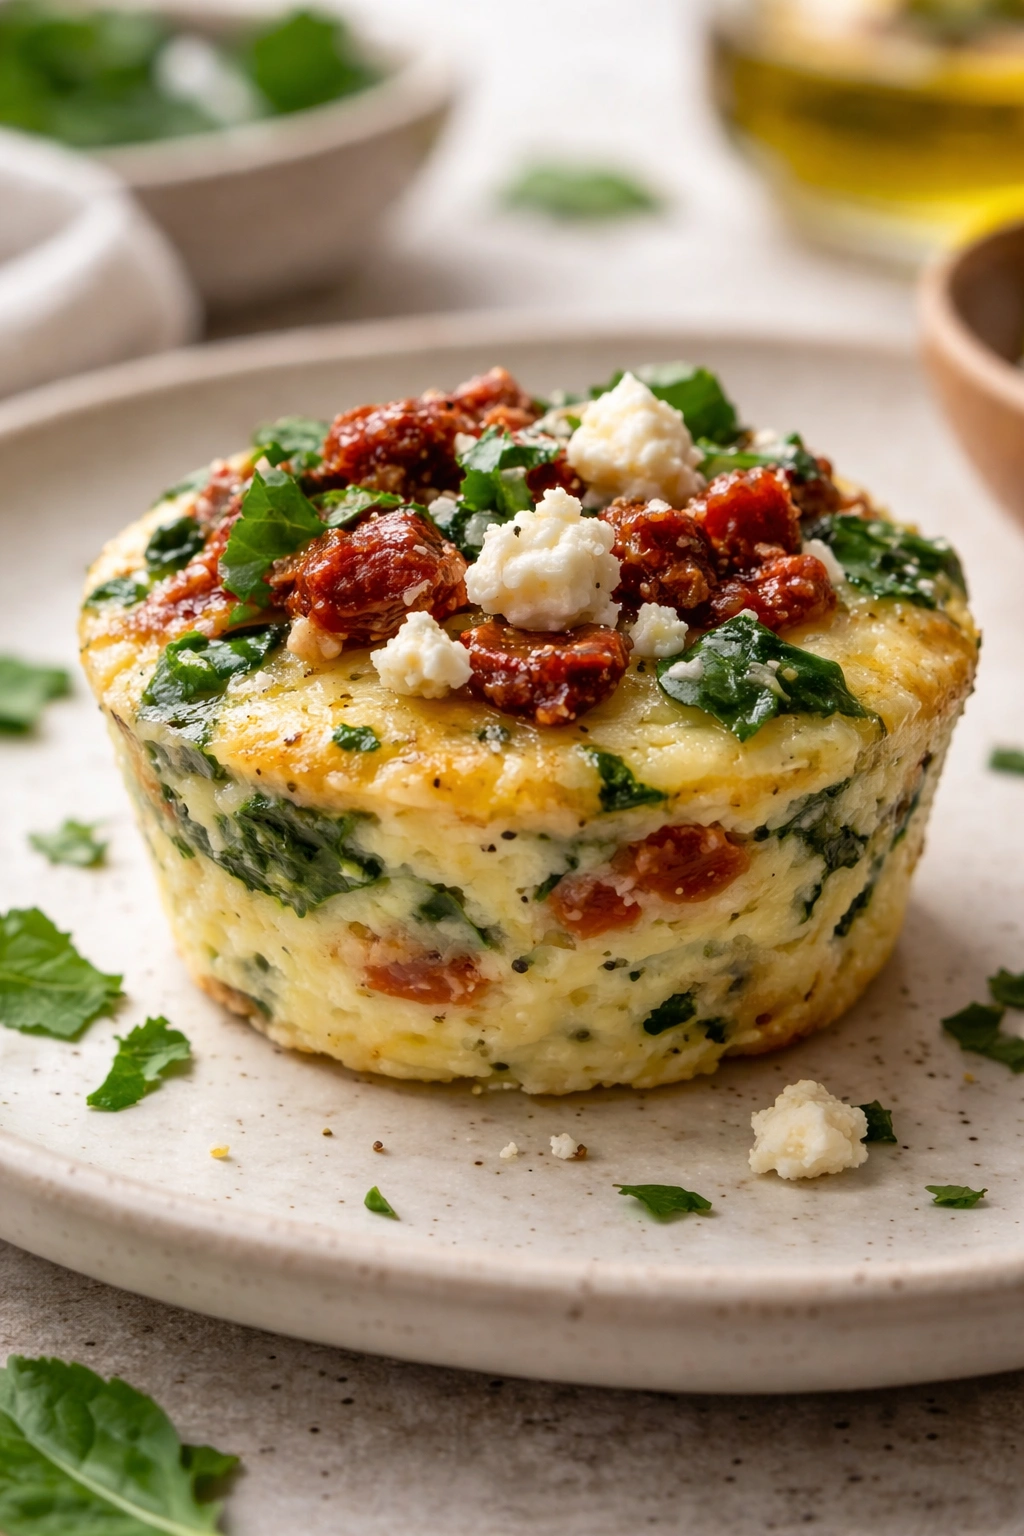
The Mediterranean version is beautiful: replace the spinach with fresh spinach and add diced sun-dried tomatoes, crumbled feta cheese, and a bit of oregano or dill. Skip the cheddar. It’s bright, tangy, and feels a bit fancy for a weekday breakfast.
Southwest style works with chorizo, diced bell peppers (especially poblano if you can find it), diced onion, fresh cilantro, and a Monterey Jack or sharp cheddar cheese. It’s spicy, savory, and keeps you full for hours.
Italian breakfast style: diced prosciutto or pancetta, roasted red peppers, fresh mozzarella (add it in the last few minutes of baking so it doesn’t completely melt), fresh basil if you have it, and maybe a tiny pinch of Italian seasoning. It feels almost gourmet.
Breakfast pizza flavor: omit the fresh herbs in the base recipe and instead add crumbled sausage, diced onion, bell peppers, and a mix of mozzarella and cheddar. It’s nostalgic and satisfying.
Mushroom and goat cheese is a combo that shouldn’t work but absolutely does: use more mushrooms (maybe up to a full cup), skip the cheddar, and add about a quarter cup of crumbled goat cheese mixed into the egg base. It’s creamy, earthy, and completely different from the others.
Planning Your Rotation
If you want variety throughout the month, make one batch of each combination. Label your containers clearly so you know what you’re grabbing. You can prep three or four different batches on the same Sunday — they all bake at the same temperature, just in separate tins. It takes an extra thirty minutes of prep to make four times the volume, but you end up with a month’s worth of different-tasting breakfasts.
Adapting Egg Muffin Cups for Your Dietary Preferences

If you’re dairy-free, skip the cheese and replace the milk with unsweetened almond milk or oat milk. The eggs will set just fine without cheese, though I’d recommend adding a tiny bit of extra salt to compensate for the flavor punch you’re losing. The muffins will be slightly less rich without the cream, but they’ll still be perfectly good.
Vegetarian is easy — just skip the meat and load up on vegetables and cheese. Everything else stays the same. Most people find that cheese plus eggs plus vegetables is plenty satisfying, even without meat.
For a keto or very-low-carb version, avoid vegetables that are starchy (like potatoes or corn), stick with non-starchy vegetables like spinach, mushrooms, bell peppers, and zucchini, use full-fat dairy, and add butter or bacon fat for extra fat and flavor. They’re already naturally lower-carb than most breakfast foods, but this tweak brings them even lower.
Gluten-free is completely automatic — eggs, vegetables, and cheese have no gluten. If you want to add something with whole grains for other people, skip it for yourself or prepare your portions separately. The base recipe is gluten-free without modification.
Make-Ahead Components
You can prep the vegetables a day or two in advance. Dice everything, store it in separate containers in the fridge, and then assemble the egg mixture the morning you’re going to bake. This speeds up the process significantly and means you can be more strategic about which vegetables you use throughout the week.
You can also bake the muffins the night before you want to start eating them and get them into the fridge. They’re ready to eat (cold or reheated) first thing in the morning, or grab and go if you’re rushing.
Wrapping Up

Egg muffin cups are genuinely the breakfast hack that delivers. They’re simple enough that you can’t really fail at them, flexible enough that you never get bored, and practical enough to save you real time and money throughout the week. Once you’ve made your first batch, you’ll probably find yourself defaulting to them over and over.
The key isn’t any fancy technique or special equipment. It’s just giving yourself permission to prep breakfast in bulk the same way you might prep lunch or dinner, and then actually using what you’ve made instead of letting it sit in the fridge untouched. A few minutes of prep on a Sunday or weeknight, and you’ve essentially removed breakfast decision-making from your life for the next five days. That’s worth far more than the few minutes it takes.
Start with the basic recipe, figure out which combination speaks to you, then customize from there. Within a few batches, you’ll have your own version that’s perfect for your taste and your schedule. That’s when the real magic happens — when you’re reaching for something you genuinely want to eat because you built it exactly the way you like it.