There’s something magical about a family gathered around a table, forks twirling pasta and satisfied smiles as they taste something genuinely delicious. Italian dinners have a way of bringing families together in the most natural way—they’re inherently about sharing, savoring, and creating memories over food. The beauty of Italian cooking is that it doesn’t demand culinary expertise or hours hunched over a stove. What it does ask for is respect for simple, quality ingredients and the patience to let flavors develop without unnecessary fuss.
If you’re looking to transform an ordinary weeknight into something special, Italian cuisine offers endless possibilities that kids and adults actually enjoy eating. These aren’t complicated restaurant dishes that require specialty equipment or hard-to-find ingredients. Instead, they’re the kinds of meals Italian families have been making for generations—recipes built on the foundation of technique, good ingredients, and the understanding that the best meals aren’t always the most complicated.
This collection of eight Italian dinner ideas covers everything from the beloved classics that kids ask for by name to dishes that feel impressive enough for casual entertaining, yet simple enough to pull together on a Tuesday after work. Each one comes together in a reasonable timeframe, requires ingredient lists that won’t send you on a treasure hunt through specialty shops, and delivers the kind of comfort that makes people want to linger at the table just a bit longer.
1. Spaghetti and Meatballs with Homemade Marinara
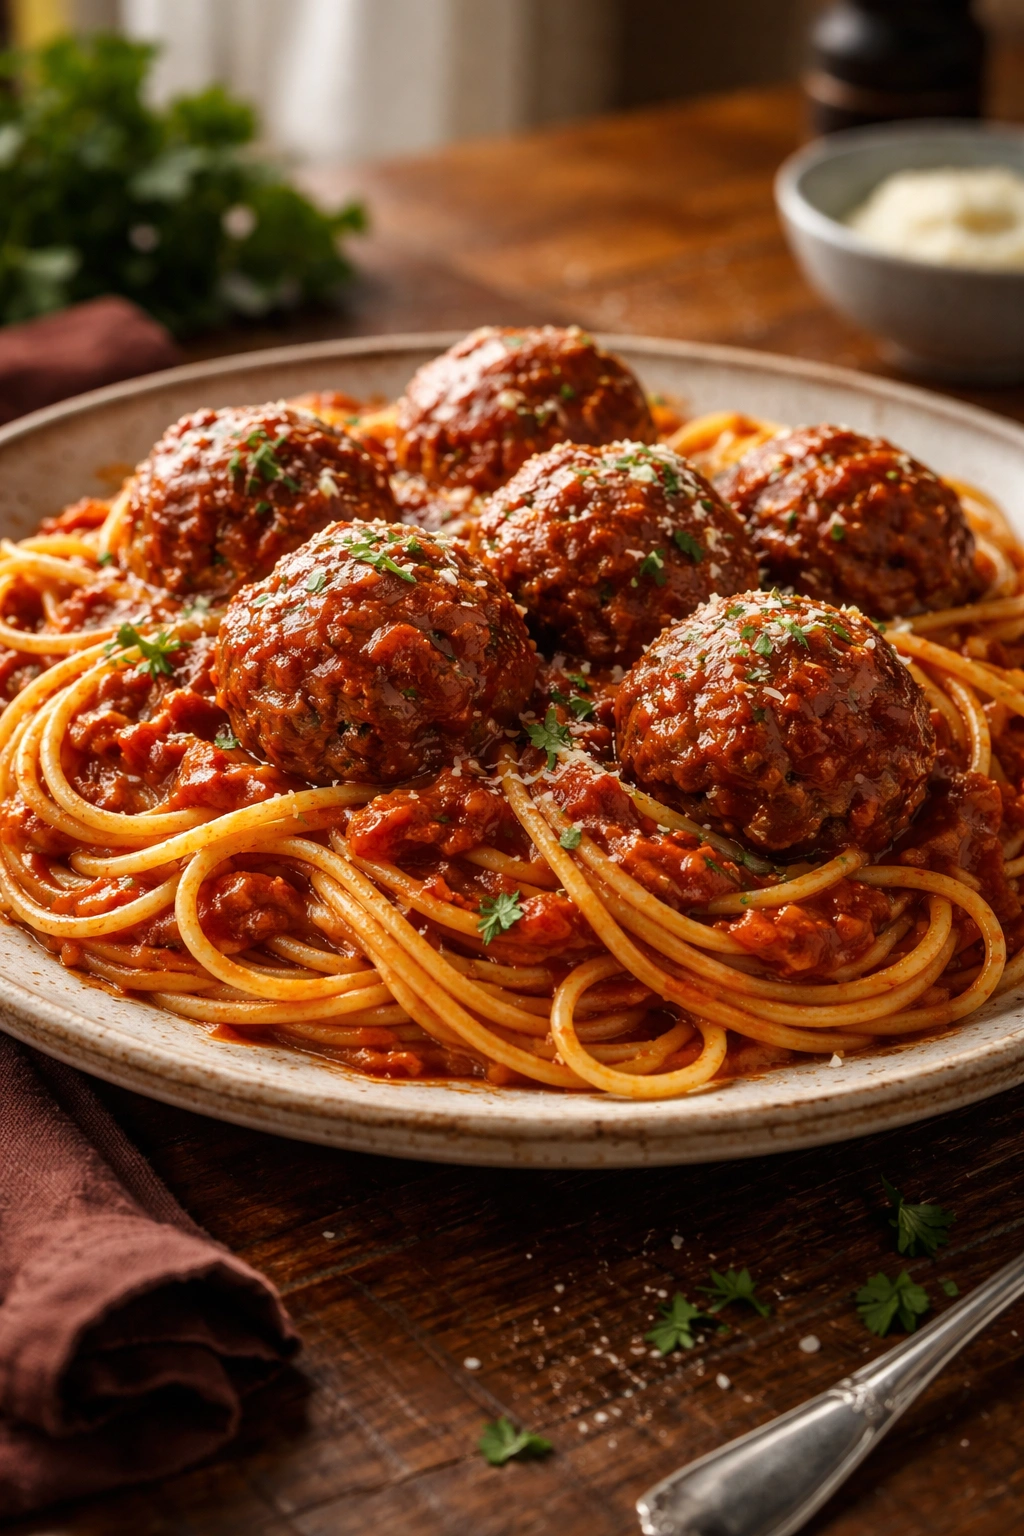
Spaghetti and meatballs is the Italian-American classic that transcends generations—it’s the dish that children who claim they don’t like “fancy food” will eat enthusiastically, and it’s also genuinely delicious when made with care. Despite what purists might say, there’s nothing wrong with this pairing, especially when you understand it as Italian-American cuisine rather than trying to pass it off as authentically Italian. What matters is that the meatballs are tender and flavorful, the sauce is rich and properly cooked, and the pasta is cooked to the right texture.
Why It Works for Family Dinners
Meatballs are inherently fun to eat—there’s something satisfying about rolling them on your fork, and kids love the tactile experience. Beyond that, meatballs are incredibly forgiving to make. Unlike chicken cutlets or fish where timing matters intensely, meatballs are actually harder to overcook, which takes pressure off the home cook. They braise gently in sauce, becoming more tender and flavorful the longer they simmer.
Making the Best Meatballs
The secret to tender, flavorful meatballs is using a combination of ground meats—typically a blend of beef and pork—rather than beef alone. The pork adds moisture and a subtle sweetness that prevents the finished meatballs from tasting dense or tough. Use about two parts beef to one part pork for the best balance. Fresh breadcrumbs soaked in milk (this mixture is called a panade) are essential—they act like tiny moisture reservoirs throughout the meat, keeping everything tender and juicy even if they cook a touch longer than intended.
Mix your meatball ingredients gently, using your hands but resisting the urge to overwork the mixture. Overhandling develops the gluten in the breadcrumbs, which leads to a rubbery, compact texture. You’re looking for a loose, almost shaggy mixture that barely holds together. Once formed, you can either pan-fry and then braise in sauce, or skip the pan-frying step entirely and add them raw directly to simmering sauce—they’ll cook through perfectly and save you a pan to wash.
Making the Sauce from Scratch
A homemade marinara that simmers for 30 to 40 minutes tastes incomparably better than a hastily assembled quick sauce. Start with good quality canned San Marzano tomatoes (these tend to be sweeter and less acidic than other varieties), sauté some garlic in olive oil until fragrant, add the tomatoes, and let everything bubble gently. A pinch of sugar balances the acidity without making the sauce taste sweet. Fresh basil goes in at the very end, just before serving, so it retains its bright, peppery flavor.
Family-Friendly Variations
Transform this dish for different preferences and dietary needs with simple swaps. Skip the meat entirely and make vegetarian “meatballs” by combining cooked lentils, cooked rice, breadcrumbs, grated Parmesan, and egg—these are surprisingly good and surprisingly popular even with meat-eating family members. Make them mini for younger children, or stuff them with cheese (a small cube of mozzarella wrapped in the meat) for an exciting surprise. If your family prefers whole grain pasta, swap it in easily—just follow the package cooking time to get it to al dente.
2. Baked Lasagna with Homemade Sauce and Bechamel
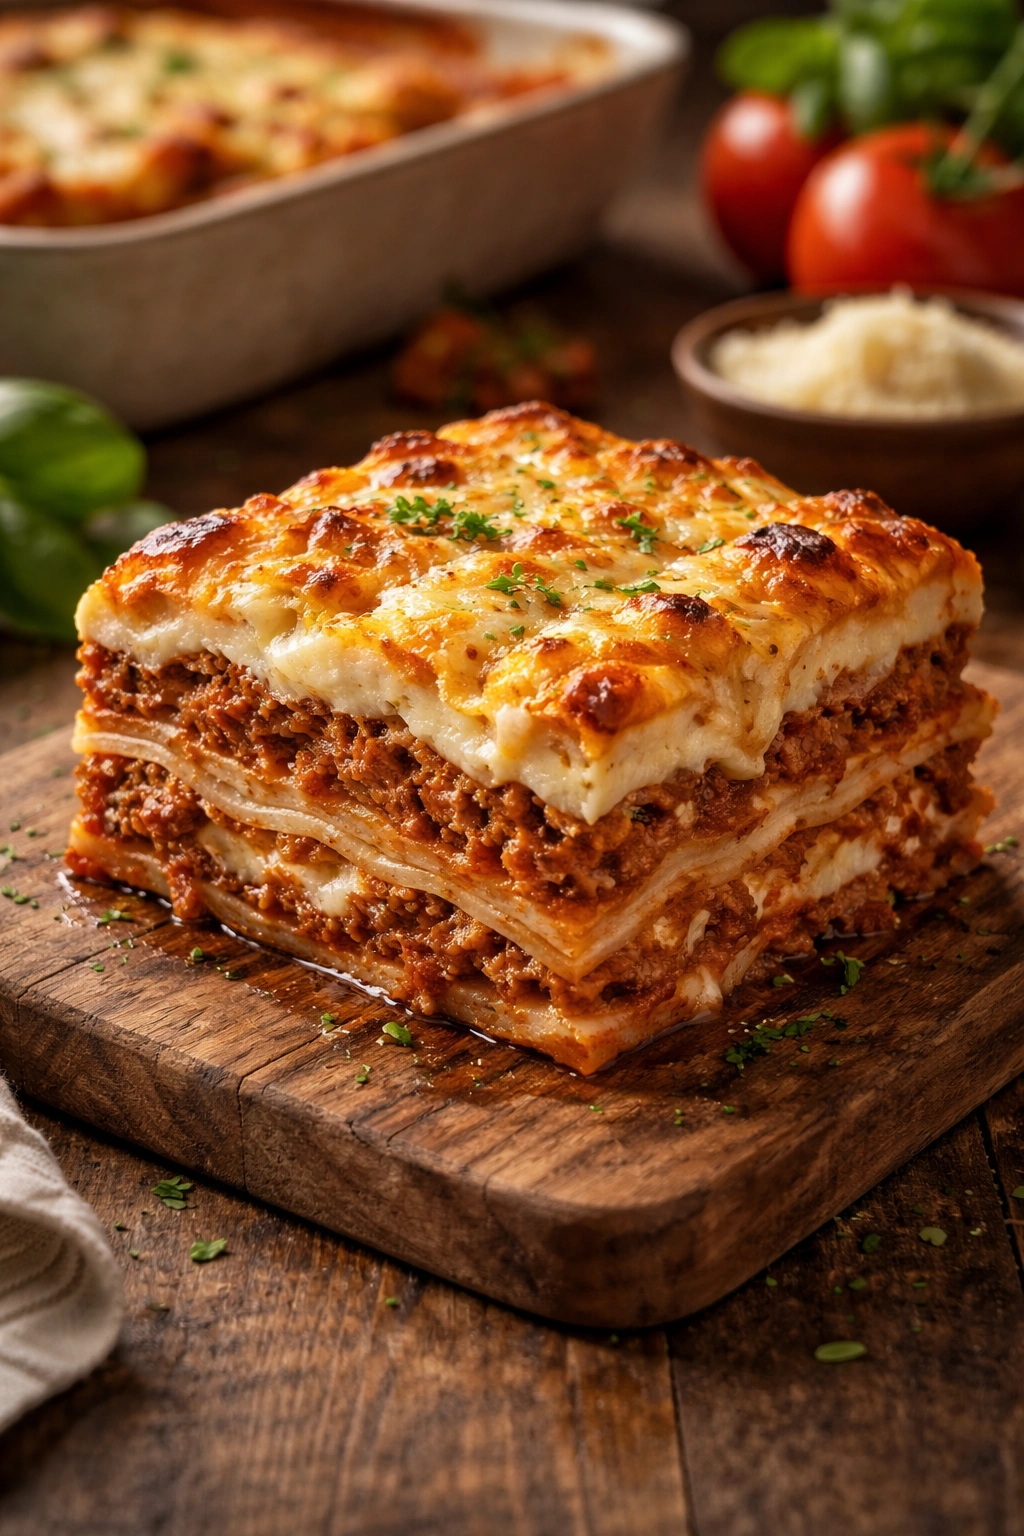
Lasagna is the ultimate comfort food that also happens to be impressive enough that family members feel genuinely special when you serve it. Unlike the quick-assembly lasagnas that rely on jarred sauce and no-boil noodles (which aren’t bad, but lack depth), a lasagna made with a proper meat sauce and silky bechamel sauce tastes like someone spent their whole day thinking about dinner. The good news? With the right technique, it doesn’t actually take hours.
Building the Foundation with Meat Sauce
The foundation of exceptional lasagna is a rich meat sauce that simmers low and slow to develop deep, complex flavors. Start with a soffritto—equal parts finely minced onion, carrot, and celery sautéed gently in olive oil until softened. This vegetable base adds sweetness and body that jarred sauces simply can’t match. Add ground beef (and optionally some ground pork), breaking it up as it browns, then add tomato paste and let it caramelize slightly in the pan—this step concentrates the tomato flavor dramatically.
Deglaze the pan with red wine, letting it reduce until nearly evaporated, then add crushed tomatoes and let everything simmer for at least 45 minutes, preferably an hour. The longer it simmers, the more the flavors marry and the more complex the sauce becomes. Season gently with salt, pepper, and a pinch of sugar to balance acidity. Fresh basil goes in at the end, but remember that it’s primarily for freshness—the bulk of the sauce’s character comes from the slow cooking.
Making Creamy Bechamel
Bechamel is simply butter, flour, and milk whisked together into a smooth, luxurious sauce. Melt butter in a saucepan, whisk in flour to create a light paste (called a roux), cook it for a couple minutes to lose the raw flour taste, then gradually add milk, whisking constantly to prevent lumps. Season with salt, white pepper, and just a whisper of nutmeg—that nutmeg makes people say “what’s the secret ingredient?” even if they can’t place it.
Assembling and Baking
Spread a thin layer of meat sauce on the bottom of your baking dish, then layer noodles (if you’re using regular boil-able noodles, cook them just shy of fully tender—they’ll finish cooking in the oven), then meat sauce, then bechamel, then a scattering of cheese (a combination of mozzarella and Parmesan works beautifully). Repeat these layers until you end with bechamel and a generous topping of cheese. Bake covered at 375°F for about 30 minutes, then uncover and bake another 10 to 15 minutes until the top is golden and bubbly and the edges are slightly caramelized.
Make-Ahead Magic
Lasagna is one of those rare dishes that actually improves overnight as the sauce absorbs into the noodles and everything melds together. Assemble it completely, cover tightly, refrigerate for up to two days, then bake when ready (it might need an extra 10 to 15 minutes from cold). You can also freeze assembled lasagna before baking—defrost it in the refrigerator overnight, then bake as usual. This makes it a perfect candidate for cooking on a weekend and serving during a hectic weeknight.
3. Chicken Parmesan with Crispy Breading and Fresh Sauce
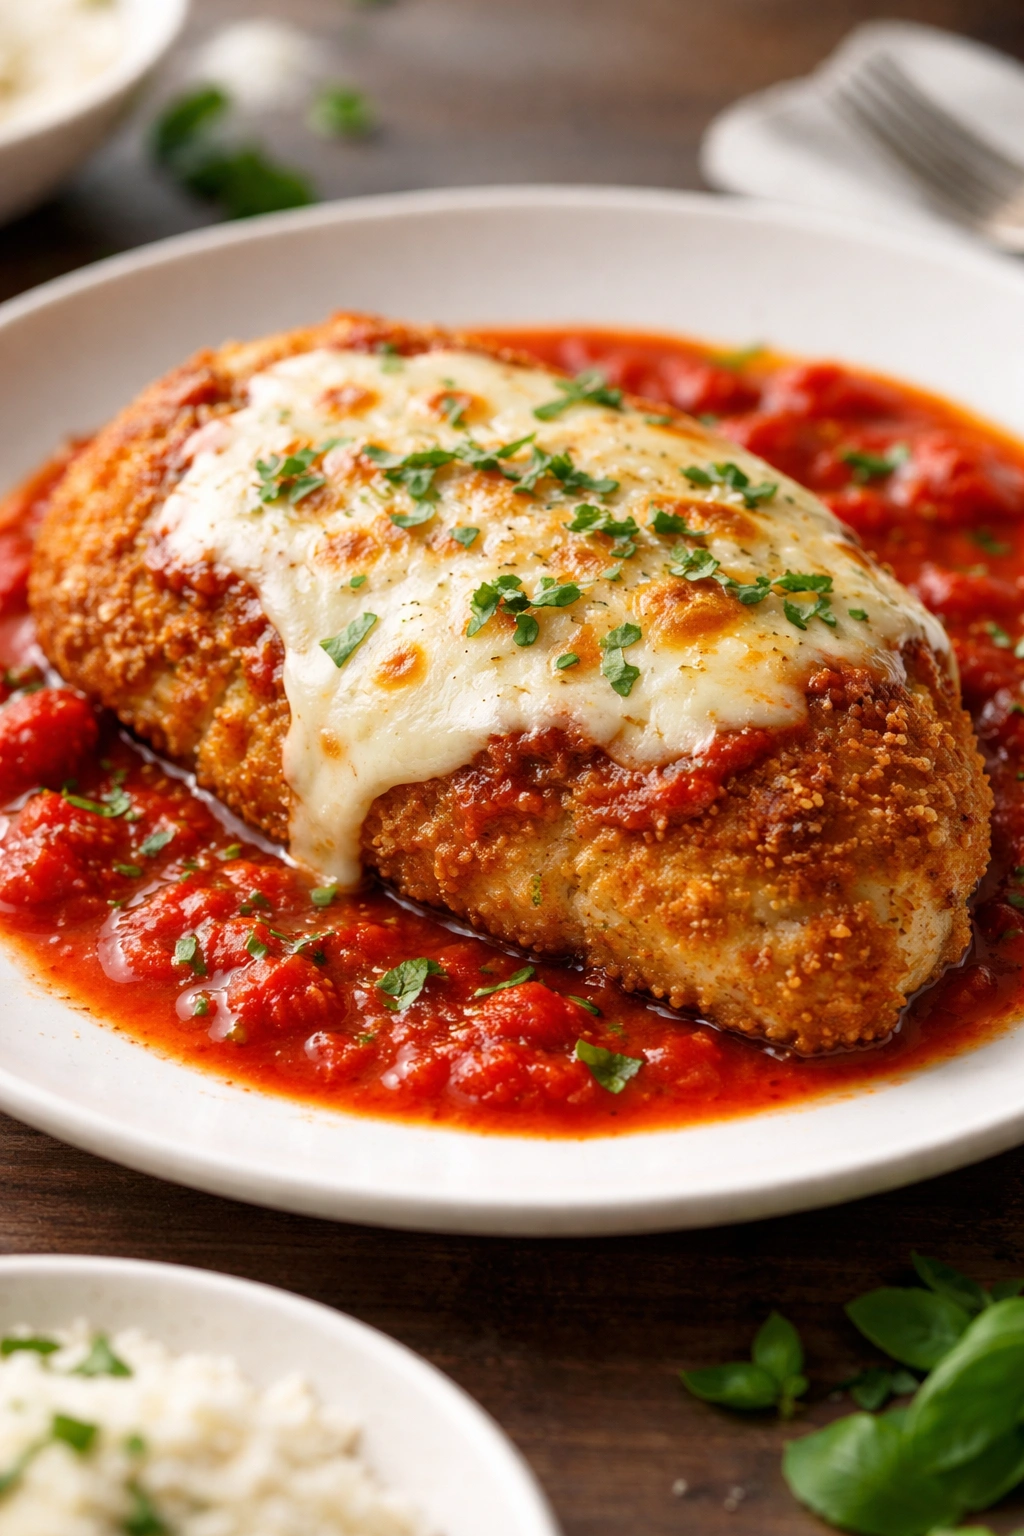
Chicken Parmesan is beloved for good reason—it hits all the comfort food notes with its crispy exterior, tender chicken, and melted cheese, yet it feels special enough for guests. The trick to preventing it from becoming heavy or greasy is proper technique: using thin cutlets, not breading too far in advance, and being judicious with the oil.
Butterflying and Pounding the Chicken
Start with chicken breasts, then butterfly them horizontally (imagine slicing them in half parallel to the cutting board) to create thinner pieces. If your knife skills feel shaky, you can just buy chicken cutlets already cut thin, which saves time. Once halved, pound the chicken gently between two pieces of plastic wrap or parchment paper until it’s a uniform quarter-inch thickness. This matters more than people realize—even thickness means everything cooks at the same rate, preventing some parts from being dry while others remain slightly undercooked.
The Breading Technique
Pat your chicken completely dry—moisture is the enemy of crispy breading. Set up three shallow bowls: one with flour mixed with salt and pepper, one with beaten egg, and one with breadcrumbs mixed with grated Parmesan and fresh or dried oregano. Coat each piece in flour, shaking off excess, then dip in egg, then press into breadcrumbs, making sure they stick to both sides. At this point, let the breaded chicken rest on a plate for 5 to 10 minutes—this sets the coating so it stays put during cooking rather than sliding off.
Cooking to Crispy Perfection
Heat olive oil in a large skillet to medium-high heat. The oil should shimmer but not smoke. Add the breaded chicken pieces without crowding the pan—work in batches if necessary. Cook for 3 to 4 minutes until golden and crispy on the bottom, then flip and cook another 3 to 4 minutes on the second side until the internal temperature reaches 165°F and the coating is golden throughout. Resist the urge to flip multiple times or peek constantly; let them cook undisturbed so the coating can crisp properly.
Finishing with Sauce and Cheese
Once the chicken is cooked through and crispy, spoon fresh marinara sauce over each piece, then top with fresh mozzarella (or a combination of mozzarella and Parmesan), and bake in a 400°F oven for 5 to 10 minutes until the cheese is melted and bubbly. Finish with a scattering of fresh basil. Serve over spaghetti or with a simple arugula salad dressed with lemon and olive oil.
Lighter Preparations
If you’re watching calories but don’t want to sacrifice the crispy-breaded chicken experience, bake the breaded cutlets on oiled parchment paper at 400°F for about 15 minutes until they’re golden and crispy—they won’t be quite as crispy as pan-fried, but they’re still very good and significantly lighter. You can also use panko breadcrumbs instead of regular breadcrumbs for an extra-crispy texture with less oil needed.
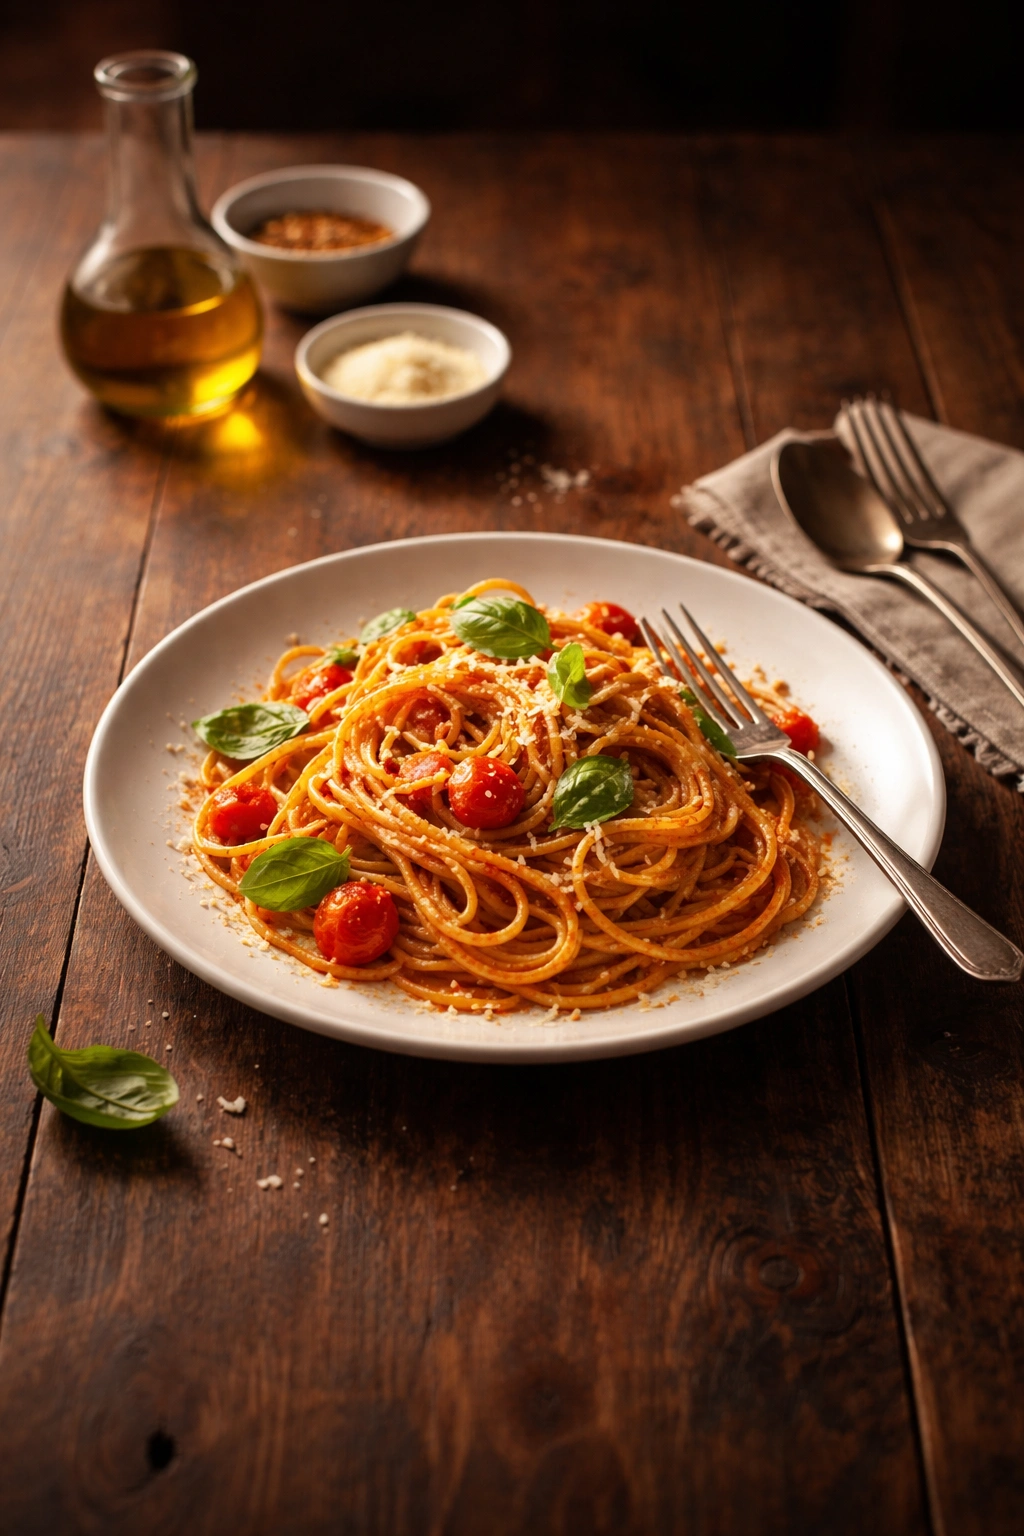
4. Penne alla Vodka with Silky Cream Sauce
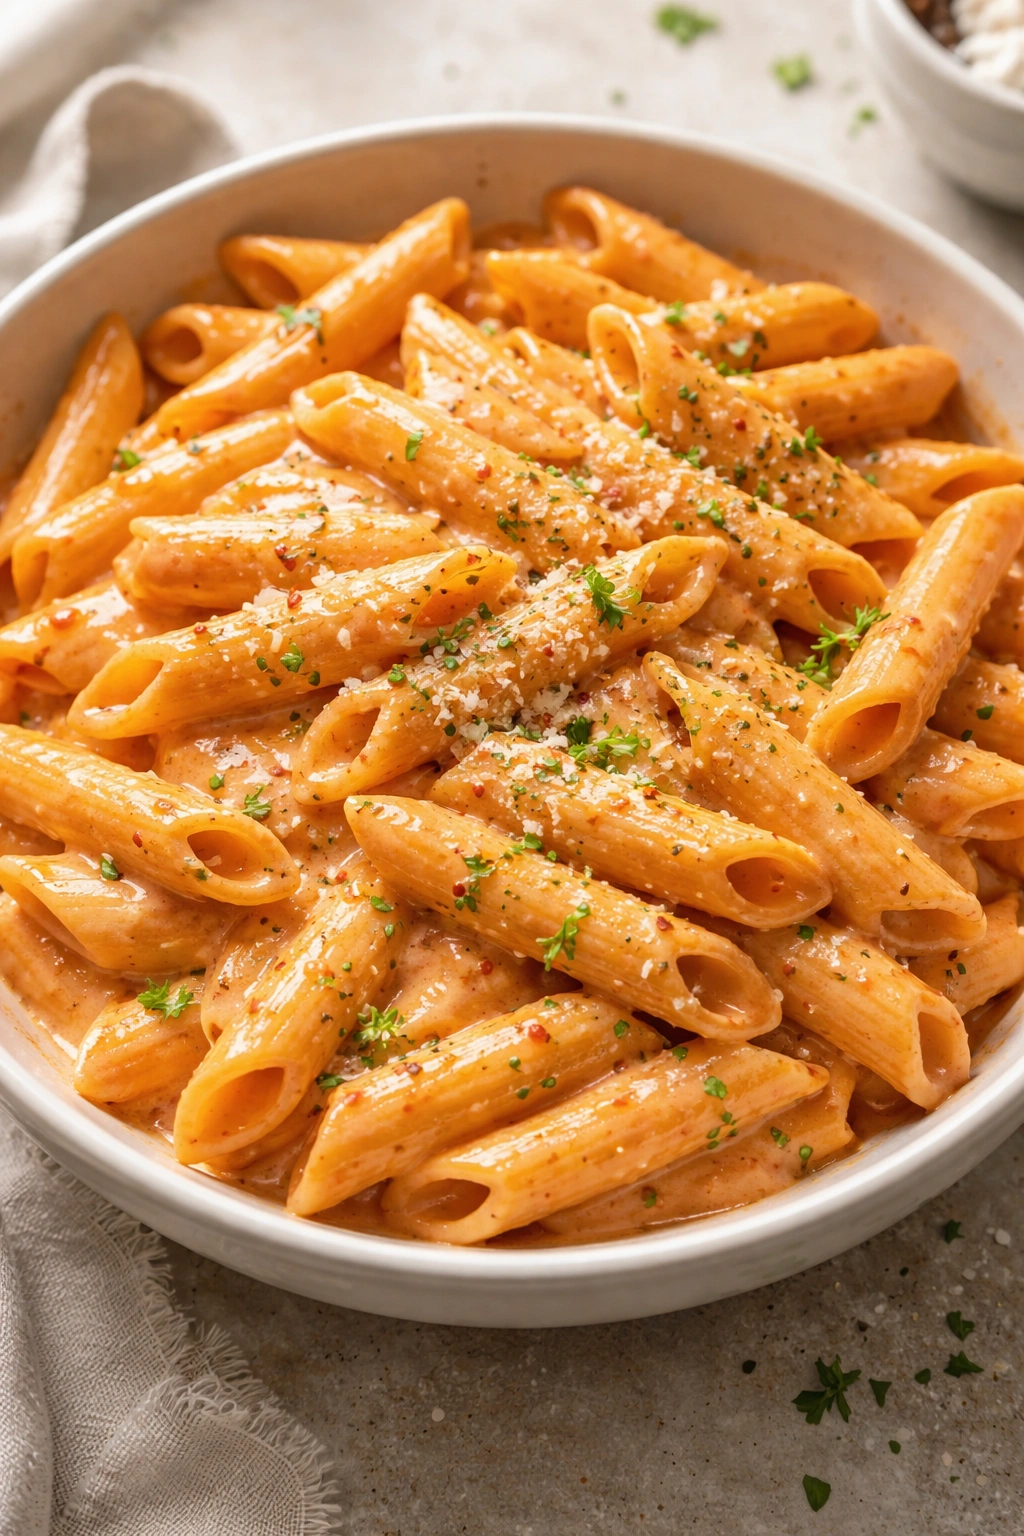
Penne alla vodka sounds fancy, but it’s actually one of those dishes where the complexity comes from a surprisingly short ingredient list and proper technique rather than lots of steps. The vodka itself isn’t about getting anyone tipsy—most of it cooks off, but what remains is a chemical component that carries and intensifies tomato flavors in a way nothing else quite does.
Building the Sauce with Aromatics
Start the sauce with minced garlic sautéed in butter until fragrant (using butter instead of just oil adds richness), then add tomato paste and let it cook for a minute or two, stirring constantly. This step, called “blooming,” toasts the tomato paste and concentrates its flavor dramatically. Add crushed tomatoes and let them bubble for 10 to 15 minutes, then pour in vodka and let it simmer for 2 to 3 minutes so the alcohol cooks off but the flavor compounds remain.
Creating the Silky Finish
Here’s where people often stop too early: once the sauce has cooked down slightly, whisk in heavy cream and let everything meld together into something luxurious and silky. It should be thick enough to coat the pasta but still pourable. Finish with plenty of fresh basil, a squeeze of lemon juice (which brightens everything), grated Parmesan, and salt and pepper to taste.
Pairing with Pasta and Timing
Penne works perfectly because the tube shape captures the sauce inside and out, but any short pasta works beautifully—rigatoni, fusilli, or even spaghetti if that’s what’s in your pantry. The key is timing the pasta so it finishes cooking right around when your sauce is ready. Reserve a cup of pasta water before draining the pasta, then toss everything together, adding pasta water a splash at a time until you reach a consistency where the sauce clings to the pasta without pooling in the bottom of the bowl.
Unexpected Additions
Crispy pancetta or prosciutto adds a salty, umami richness that makes people ask for your secret. Sautéed mushrooms or sun-dried tomatoes add body and complexity. Even a handful of fresh spinach stirred in at the end adds color and nutrition without changing the flavor profile. The beauty of this dish is its flexibility—make it your own while respecting the foundation.
5. Pasta Carbonara the Right Way

Carbonara is deceptively simple—just eggs, cheese, guanciale (or pancetta if guanciale isn’t available), pasta, and black pepper—yet it trips up experienced cooks who haven’t mastered the technique. The key is understanding that you’re creating a sauce from the starch in the pasta water, the fat from the meat, and the emulsion of egg and cheese. There’s no cream in authentic carbonara; the creaminess comes from the eggs themselves, which is even better.
Sourcing Quality Ingredients
Guanciale is cured pork jowl and it’s essential to the flavor profile of true carbonara—it has a different fat composition than pancetta and adds a specific porky, rich flavor that defines the dish. If you can’t find guanciale, pancetta is an acceptable substitute, though the flavor won’t be quite the same. Look for it at Italian delis or quality butcher shops, or order it online. Pecorino Romano cheese is traditional (not Parmigiano-Reggiano, which is what many people default to), and its sharp, salty character is what makes carbonara taste the way it’s supposed to.
Preparing the Egg Mixture
Whisk together egg yolks with whole eggs (the ratio is about 3 yolks plus 2 whole eggs per pound of pasta), along with grated Pecorino Romano and lots of freshly cracked black pepper. This is your sauce base, and you want to prepare it while the pasta cooks so everything comes together at the right temperature.
The Critical Final Step
Cook your pasta (spaghetti is traditional, but any long pasta works) until just shy of al dente—it should still have a slight resistance when you bite it. Reserve at least two cups of pasta water, then drain the pasta. Cut your guanciale or pancetta into small pieces and cook until crispy. At this point, everything needs to happen quickly: remove the pan with the crispy meat from heat, add the hot pasta to the warm (not hot) pan with the meat, toss gently to combine, then pour in the egg mixture while tossing constantly and adding pasta water a splash at a time.
The key to achieving the creamy sauce is keeping the temperature moderate—the pasta’s residual heat plus the pasta water gently warms the eggs without scrambling them. If your first attempt ends up with scrambled eggs, you cooked it too hot; next time, remove the pan from heat sooner and add cooler pasta water. It takes practice, but once you get the feel for it, it’s one of the quickest, most satisfying dinners you can make.
Understanding the Science
The starch from the pasta water acts as an emulsifier, helping the egg and cheese create a smooth, creamy sauce rather than scrambling. This is why the pasta water is so crucial—you’re not adding it haphazardly, you’re using it as a tool to achieve the right texture and temperature. Finish with more black pepper (carbonara should be peppery) and serve immediately while the dish is warm and creamy.
6. Eggplant Parmesan with Layers of Richness
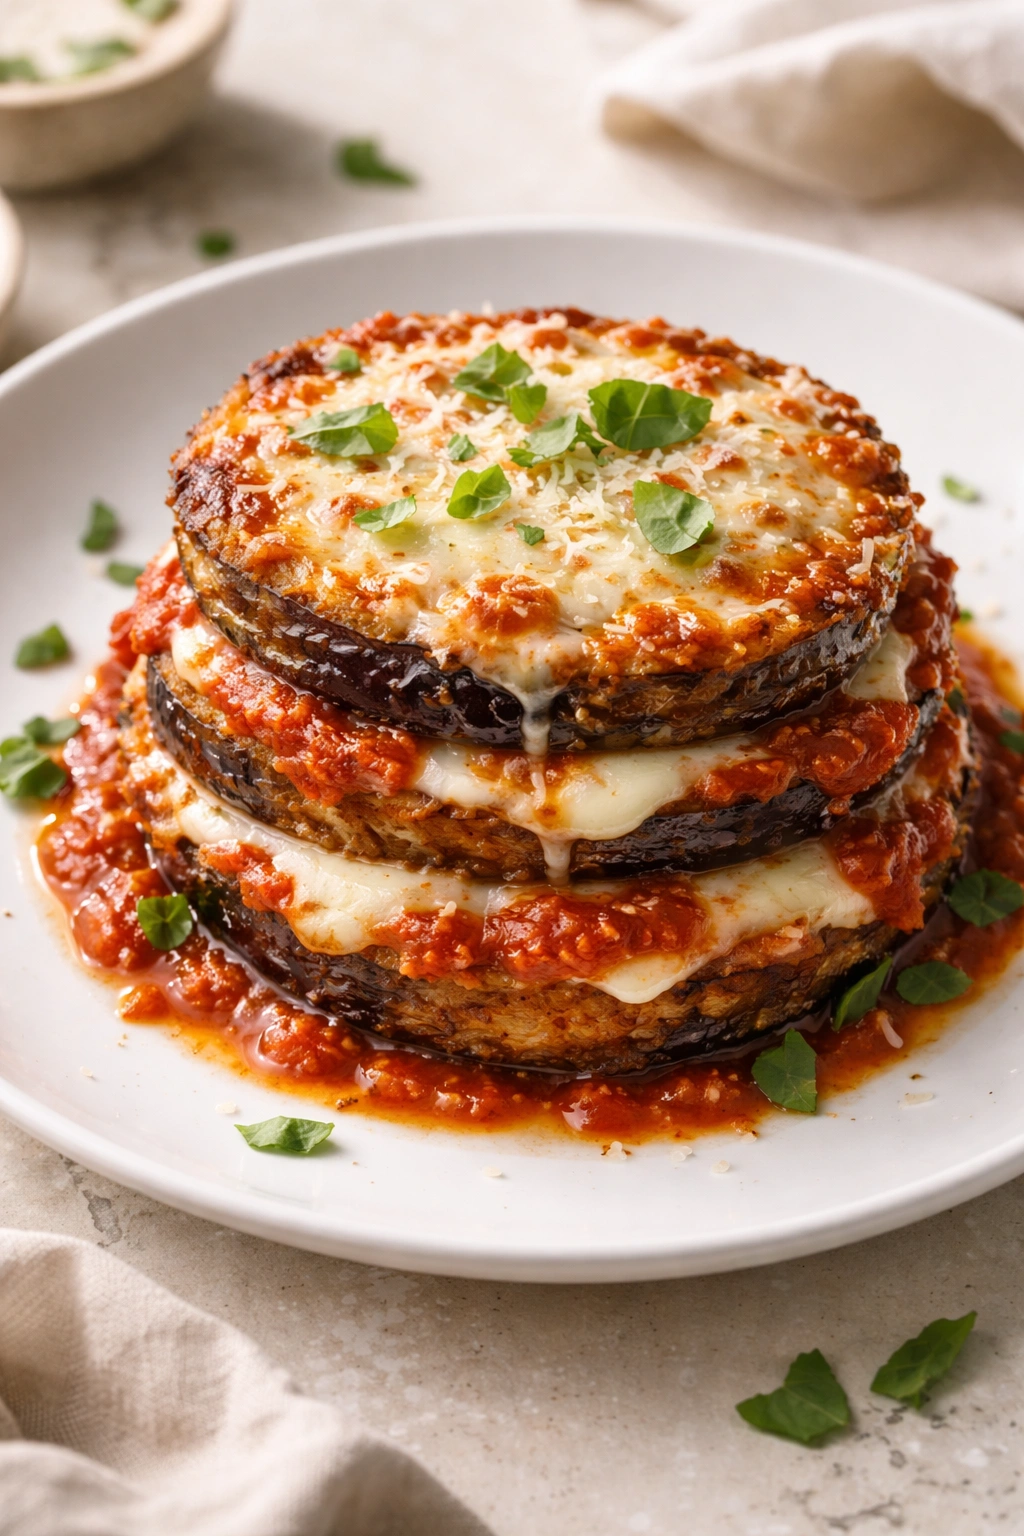
Eggplant Parmesan is a vegetarian centerpiece that satisfies everyone at the table, including meat eaters who might not even realize they’re eating a vegetarian dish. It has the same comforting, layered quality as lasagna but with a different textural interest that makes it feel fresh and exciting.
Preparing Eggplant for Maximum Flavor
The biggest mistake people make with eggplant Parmesan is ending up with soggy eggplant. Slice your eggplant lengthwise into quarter-inch slices (thinner than that and they get too fragile; thicker and they won’t cook through properly). Salt both sides generously and let them sit in a colander for 30 minutes—this draws out excess moisture that would otherwise make your finished dish watery. Pat completely dry before breading.
Choosing Your Cooking Method
The traditional method is pan-frying in olive oil until golden on both sides, which creates maximum flavor and texture. If you want to reduce fat, bake the breaded slices on oiled parchment paper at 400°F until they’re golden and tender. Either method works, though pan-fried eggplant has a more luxurious, deep flavor. Alternatively, you can grill eggplant slices (no breading needed) and layer them with tomato sauce and cheese—this is lighter and still delicious.
Building the Layers
Follow the same breading technique as with chicken—flour, egg, breadcrumbs—then either pan-fry or bake until tender and golden. Spread a thin layer of marinara in the bottom of your baking dish, then layer eggplant slices, marinara sauce, fresh mozzarella, and grated Parmesan. Continue layering until everything is used, finishing with sauce and cheese on top.
Baking to Golden Perfection
Bake at 375°F covered with foil for about 25 minutes, then remove the foil and bake another 10 to 15 minutes until the cheese is melted and bubbly and the edges are slightly browned. Let it rest for 5 minutes before serving—this allows everything to set so you can cut clean portions. Finish with fresh basil just before serving.
Seasonal and Dietary Variations
Make this dish lighter by using ricotta instead of mozzarella, or by mixing ricotta with the mozzarella for a combination that’s creamy but less heavy. In summer when tomatoes are at their peak, use fresh tomato sauce rather than canned. For a vegan version, skip the cheese or use dairy-free alternatives that melt reasonably well.
7. Creamy Risotto with Seasonal Variations
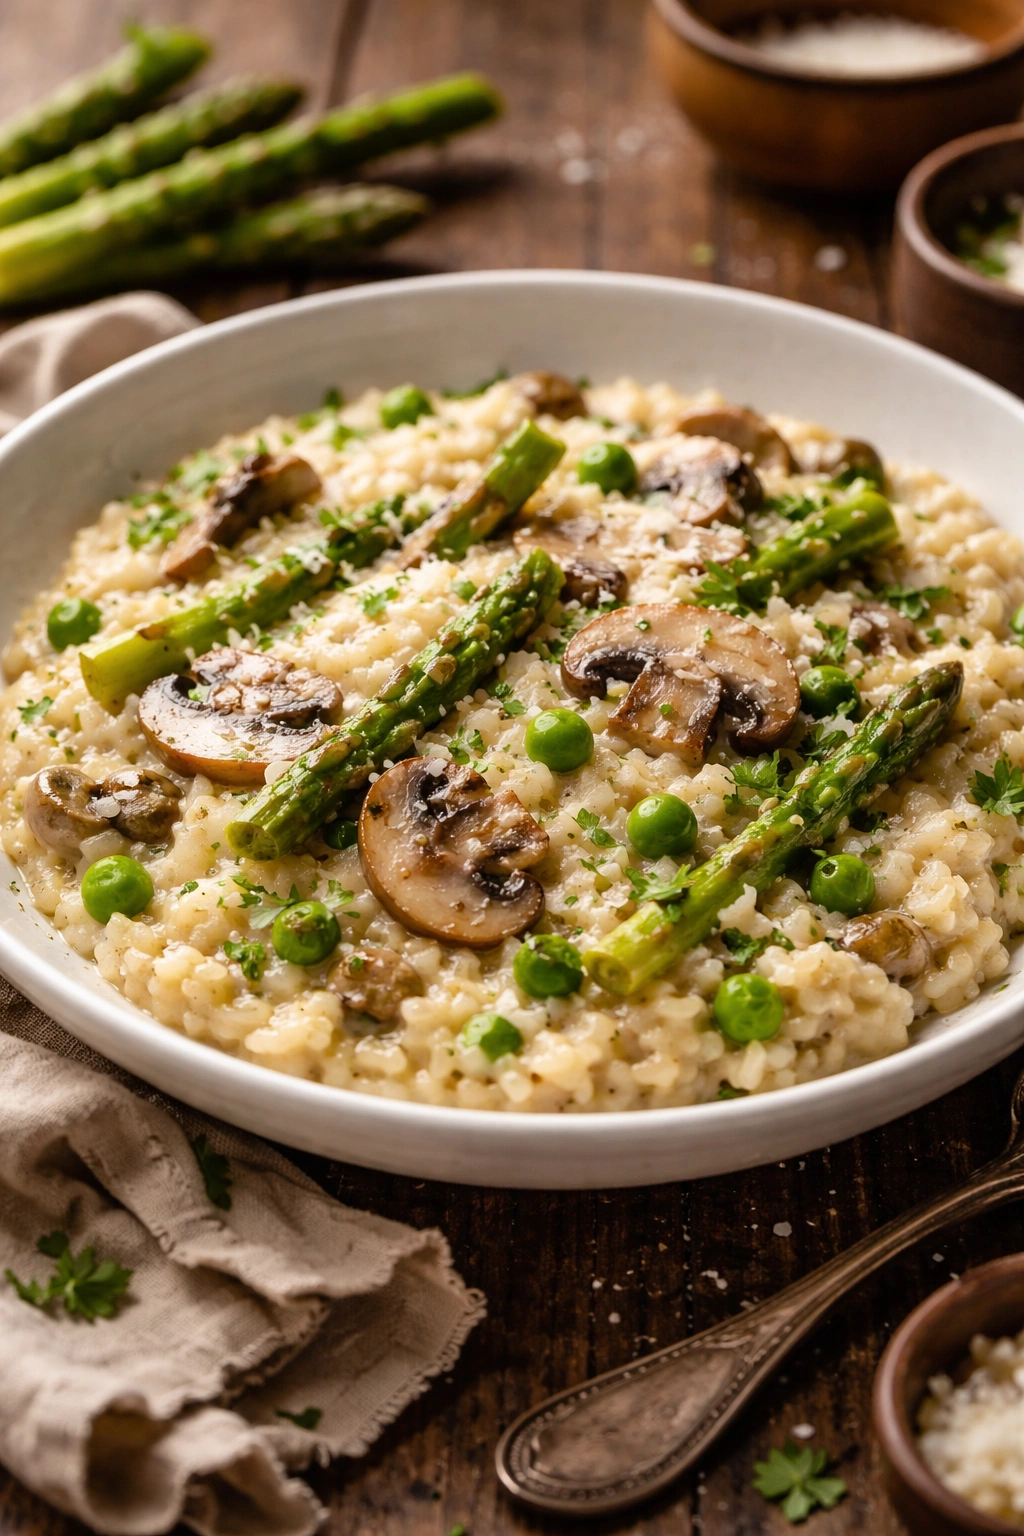
Risotto seems intimidating to people who’ve never made it, yet it’s actually one of the most forgiving dishes once you understand the basic technique. The constant stirring isn’t busywork—it encourages the rice to release its natural starches, which thicken the cooking liquid into a silky sauce that coats each grain.
Understanding Risotto Rice
Risotto requires short-grained rice varieties that have a starch content high enough to create the characteristic creamy texture. Arborio and Carnaroli are the most common varieties—both work beautifully, though Carnaroli has slightly larger, more defined grains. Don’t use long-grain or jasmine rice; they won’t release enough starch and you’ll end up with soupy rice instead of creamy risotto.
The Basic Technique
Start with a soffritto of finely minced onion sautéed in butter until soft, then add your rice and toast it in the butter for a minute or two, stirring constantly. This step coats each grain with fat and prevents them from sticking together. Then you begin adding warm broth one ladle-full at a time, stirring frequently and adding more broth only when the previous addition has been mostly absorbed. The whole process takes about 18 to 20 minutes.
Finishing with Finesse
Risotto is done when the grains are tender with just a slight firmness in the center (what Italians call “al dente”), and the overall texture is creamy and pourable but not soupy. At this point, remove from heat and stir in butter and freshly grated Parmesan—this is called “mantecatura” and it’s what elevates risotto from good to silky and luxurious. The finished risotto should move slowly across a tilted plate like lava; if it sits in a stiff mound, you need more broth.
Seasonal Variations Worth Making
Spring risotto shines with asparagus, peas, and fresh herbs. Summer risotto sings with zucchini, tomatoes, and basil. Autumn and winter versions feature mushrooms, butternut squash, or truffles. You can also make risotto with seafood (adding shrimp or scallops toward the end), or keep it vegetarian and vary the broth you use—vegetable broth, mushroom broth (made from dried mushrooms), or even light chicken broth all work beautifully.
Common Mistakes and How to Avoid Them
Adding all the broth at once results in mushy, overcooked rice. Adding broth too slowly means you’re stirring for 30 minutes instead of 18. Using cold broth instead of warm broth drops the temperature of the rice and extends cooking time. Rushing the process and not stirring frequently enough prevents the starches from releasing properly. Take your time, trust the process, and you’ll have restaurant-quality risotto.
8. Homemade Pizza Night with Dough and Toppings

Pizza night is less of a meal and more of a family event—everyone gets involved, makes their own version, and the whole thing feels like a celebration. Homemade pizza tastes so much better than delivery because you control every element, from the dough’s crispness to the sauce’s flavor to exactly how much cheese you prefer.
Making Pizza Dough from Scratch
Quality pizza dough requires just five ingredients: flour, water, yeast, salt, and a touch of olive oil. The dough benefits enormously from a slow rise (8 to 24 hours in the refrigerator) because it develops flavor and becomes easier to stretch. If you’re short on time, a 2 to 3 hour rise at room temperature works, though the flavor won’t be quite as complex.
Mix your ingredients, knead briefly until the dough comes together, then let it rest. After the initial rise, divide into portions (how many depends on how big you want your pizzas—two generous portions or four smaller individual pizzas from a standard recipe), shape loosely into balls, and let them proof again for 30 minutes to an hour before stretching.
Stretching and Topping
About 30 minutes before you’re ready to bake, take your dough ball out of the refrigerator so it comes closer to room temperature and becomes more pliable. Gently stretch it by holding it up and letting gravity help, or lay it on a pizza peel and stretch it with your fingertips, working from the center outward. You’re aiming for a thickness of about quarter to half an inch, depending on whether you prefer thin and crispy or slightly puffy.
Brush with a small amount of olive oil, add your sauce (a thin layer, not thick), then toppings, then cheese. Less is more with pizza—every additional topping makes it harder for the bottom crust to crisp properly. Classic combinations include margherita (sauce, fresh mozzarella, basil), prosciutto and arugula (add the arugula after baking), or simple pepperoni and mozzarella.
Baking to Perfect Crispness
If you have a pizza stone, heat it in your oven at the highest temperature for at least 30 minutes. If not, use a baking sheet, preferably preheated. Slide your topped pizza onto the hot surface and bake for 10 to 15 minutes (depending on thickness and your oven) until the crust is golden and crispy and the cheese is melted and slightly browned. Some ovens cook hotter than others, so the first time you make pizza, keep an eye on it rather than walking away.
Making It a Family Affair
The beauty of pizza night is that everyone gets to make exactly what they want. Set out small bowls of sauce, cheese, and various toppings, then let family members top their own portions of dough and bake them. Kids especially love the autonomy and the tangible results of their efforts. You can have some family members making meat pizzas, others vegetarian versions, someone doing a white pizza with ricotta and spinach, and someone else adding truffle oil to theirs.
Prep-Ahead Strategies
Make your dough a day or two ahead and refrigerate it until you’re ready to use it—the flavor actually improves. You can even partially bake the crust (about 5 minutes) ahead of time, then top and finish baking just before serving. If you have a group coming over, set up an assembly line: guests stretch their own dough, add sauce and toppings, you pop them in the oven. It’s interactive, fun, and feels like everyone participated in dinner.
Final Thoughts
Italian dinners don’t need to be complicated or stressful—they just need to be made with a little thought and care. The eight dinners in this collection are the backbone of what makes Italian food so beloved: respect for ingredients, techniques that have been refined over generations, and food that brings people together without fuss. Pick one based on what sounds appealing this week, gather your ingredients, and remember that the best dinner is the one where everyone at the table is happy, fed, and genuinely looking forward to the next meal you’ll make together. The recipes will improve with practice, and the memories built around these tables last far longer than any single meal.