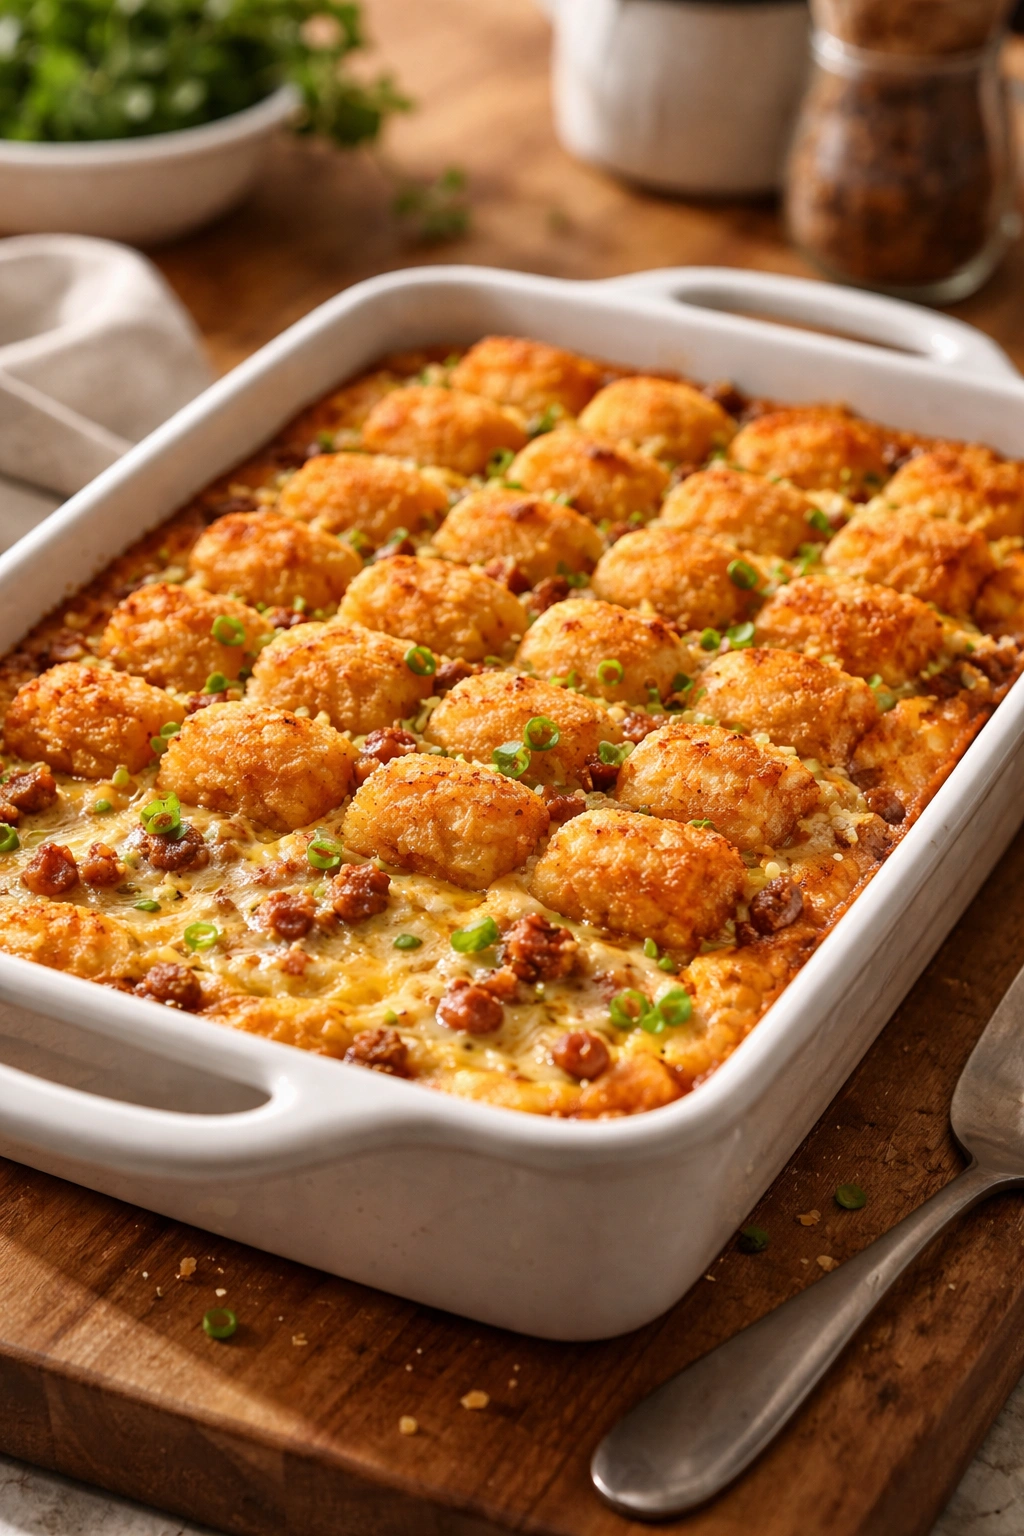
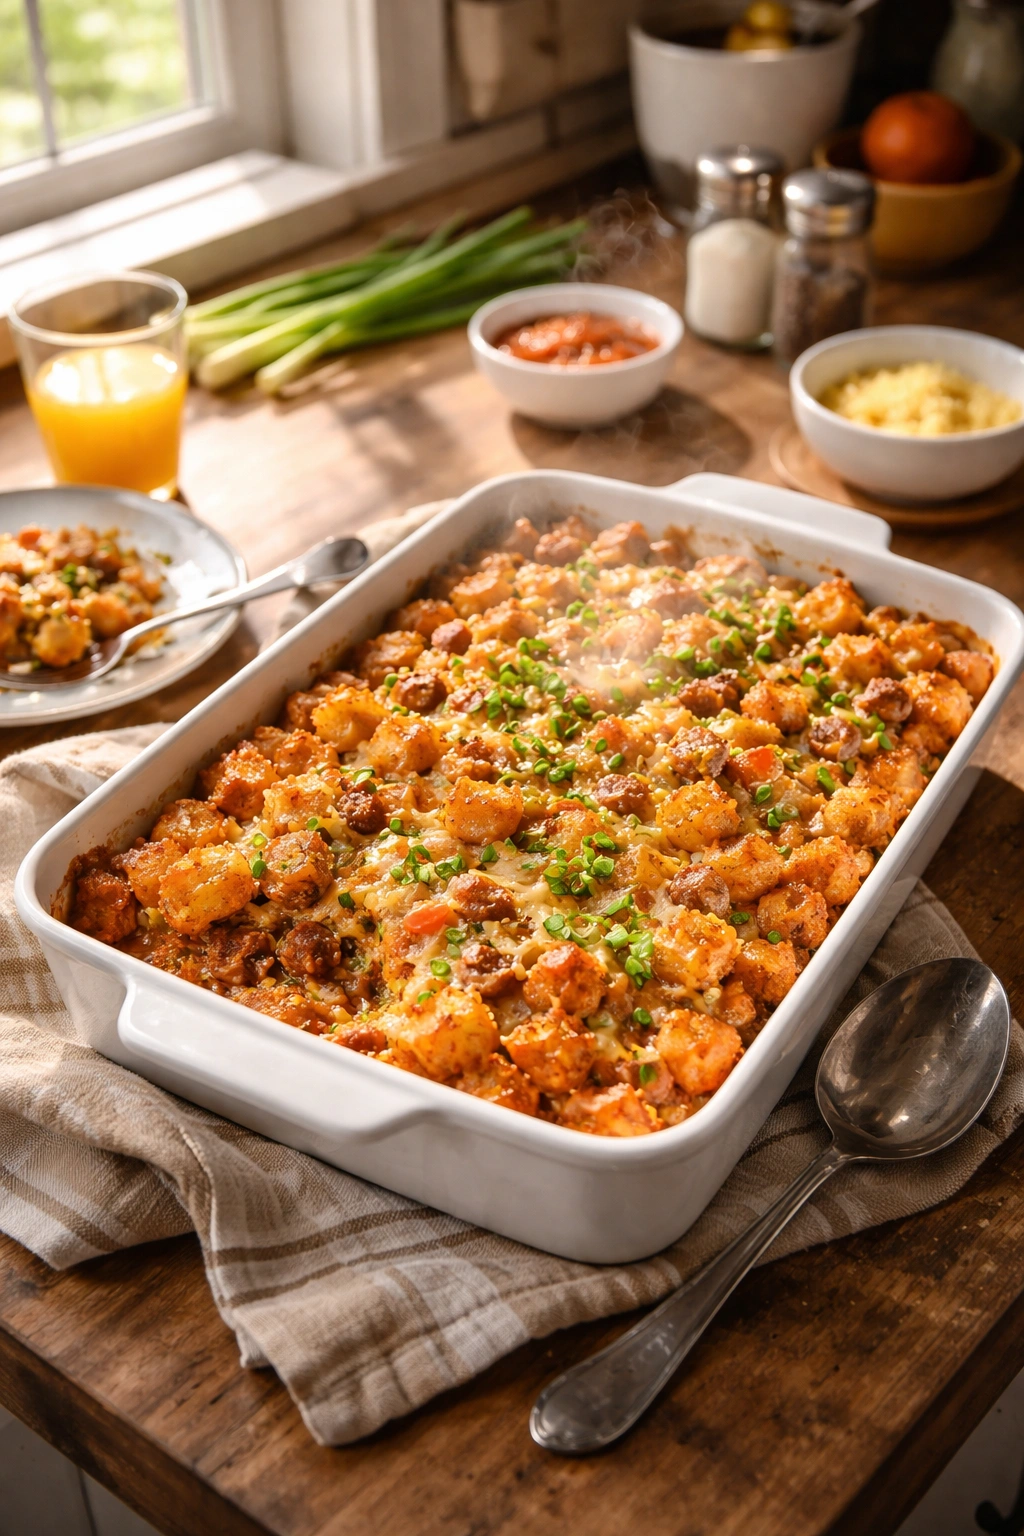
There’s something magical about pulling a bubbling, golden breakfast bake out of the oven on a weekend morning — the aroma alone is enough to get everyone out of bed without complaints. A tater tot breakfast bake delivers exactly that kind of morning magic, combining crispy potato base, savory eggs, melted cheese, and whatever proteins and vegetables your family actually loves. It’s comfort food elevated just enough to feel special, yet simple enough that even if you’ve never made a breakfast bake before, you’ll nail it on the first try.
What makes this particular bake a game-changer for family mornings is how forgiving it actually is. Unlike delicate quiches or finicky soufflés that fall flat if you breathe on them wrong, a tater tot bake has built-in insurance. The frozen tater tots create a sturdy base that won’t let you down, the eggs bind everything together beautifully, and the cheese adds richness that covers a multitude of small missteps. You can customize it based on what’s in your fridge, adjust the seasonings to match your family’s preferences, and even prep most of it the night before if mornings are chaotic.
This is the kind of recipe that lives in the rotation for a reason — it works every single time, feeds a crowd without drama, reheats beautifully throughout the week, and tastes just as good at dinner as it does at breakfast. Once you’ve made it once, you’ll find yourself making it again and again because it actually solves the “what’s for breakfast?” question in a way that satisfies everyone at the table.
The Science Behind Why Tater Tots Work Better Than Hash Browns
The genius of using frozen tater tots instead of shredded hash browns or sliced potatoes comes down to structure and texture. Tater tots are pre-cooked, which means they’re already partially broken down and ready to absorb the egg mixture while still maintaining their shape. They’re also naturally crisped on the outside from their initial frying, so when you bake them in this casserole, they stay structurally sound and deliver that satisfying potato flavor without turning soggy.
Shredded hash browns, by comparison, release moisture as they thaw and bake, which can turn your bottom layer into a dense, wet mush if you’re not careful. Regular sliced potatoes would need significant pre-cooking to become tender before the eggs set, extending your total cooking time unnecessarily.
Tater tots sit at the perfect intersection of convenience and reliability. They thaw slightly during prep, soften just enough to form a cohesive base as the eggs bake around them, and then crisp up again on the edges as the casserole finishes in the oven. You get structural integrity, textural contrast, and genuine potato flavor — all from a product that lives in your freezer and requires zero prep work.
What Makes This Bake So Flexible for Family Preferences
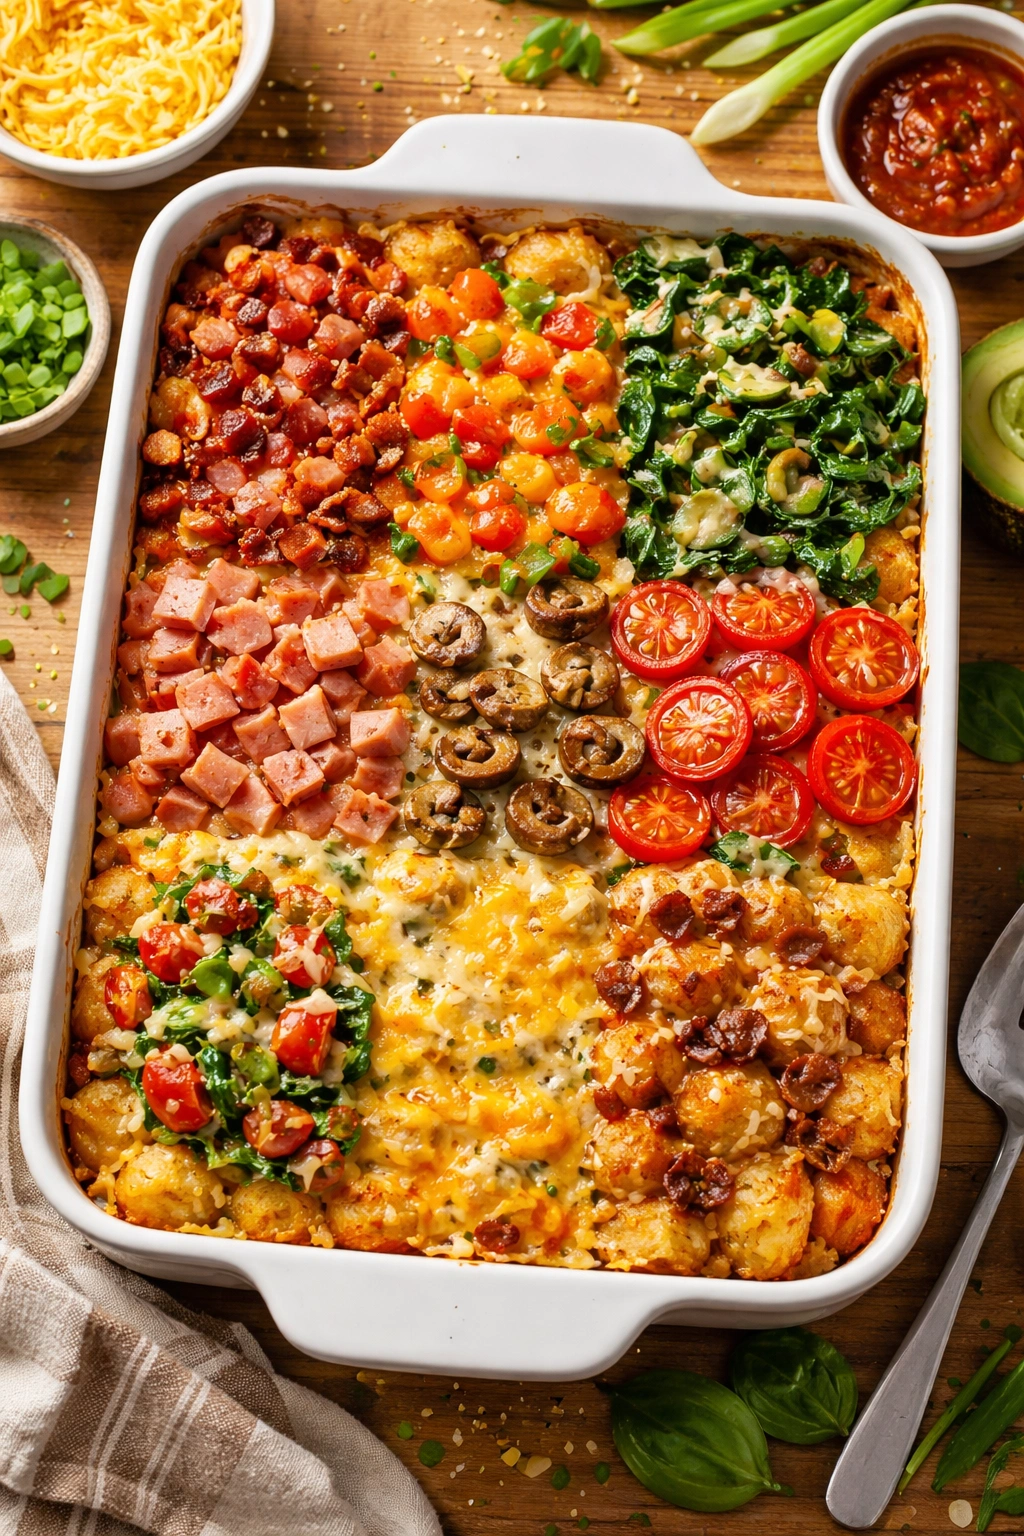
Every family comes to the breakfast table with different preferences, dietary needs, and flavor tolerances. A good breakfast bake needs to accommodate all of that without becoming complicated. This recipe does exactly that because the base — tater tots, eggs, cheese, milk — is genuinely neutral and welcoming to additions.
Kids who won’t eat anything remotely vegetable-forward often happily eat this casserole loaded with diced peppers, mushrooms, and spinach because the tater tots, eggs, and cheese make those vegetables feel like background flavors rather than the main attraction. Adults who want deeper savory notes can add crispy bacon, sausage, or both. People watching dairy intake can swap the milk and cheese without sacrificing the egg custard structure that holds everything together.
The beauty is that you can make one casserole for the whole family without requiring three different versions. Load it with everyone’s favorite add-ins, and suddenly it’s not a compromise breakfast — it’s a breakfast that tastes customized for each person, even though it came out of the same pan.
Equipment You’ll Actually Need
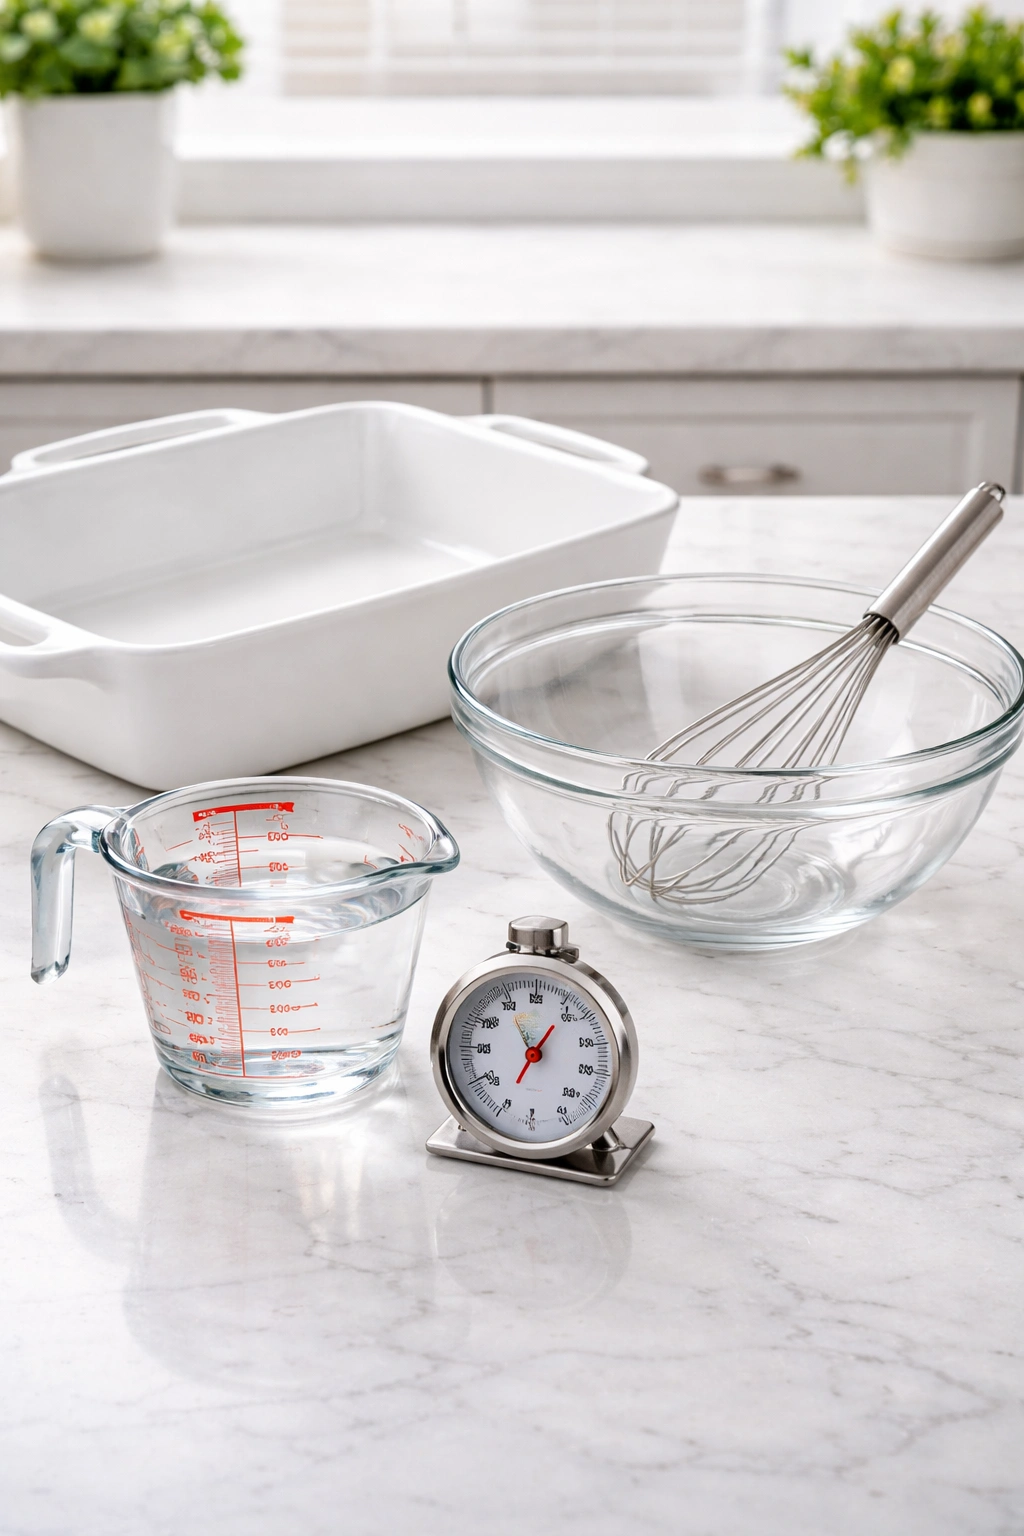
You don’t need fancy kitchen gadgets to pull this off, but a few specific items make the process smoother. A 9×13-inch baking dish is the right size for feeding 6–8 people without overcrowding — you want enough depth for the eggs to set properly while the tater tots stay crisp on the edges.
A large mixing bowl (at least 3-quart capacity) gives you enough room to whisk the eggs and milk together without splashing. If you don’t have a whisk, a fork works fine, though a whisk incorporates air into the egg mixture, which helps it set up lighter and fluffier.
A measuring cup for the milk and a simple kitchen scale for weighing cheese (optional, but helpful if you want consistency between batches) round out your needs. An oven thermometer is genuinely useful here — it ensures your oven temperature is accurate, which matters for even baking. If you’ve noticed your oven tends to run hot or cold, take two minutes to check this before you bake.
Yield, Timing, and Difficulty
Yield: Serves 6 to 8 people | Makes one 9×13-inch casserole with 8 generous servings or 12 smaller portions
Prep Time: 15 minutes (hands-on active time only — chopping vegetables and mixing the egg mixture)
Cook Time: 45 to 50 minutes (from cold oven start to golden, set casserole)
Total Time: 60 to 65 minutes active + up to 12 hours chilling (if made ahead)
Difficulty: Beginner — No special cooking techniques required, no precise temperature control needed for ingredients, and the steps are completely straightforward even for someone making their first breakfast bake. The frozen tater tots eliminate prep work, and the egg mixture is literally just whisking and pouring. This is genuinely foolproof.
Best Served: Warm from the oven, or reheated the next day at 350°F (175°C) for about 15 minutes until warmed through. Tastes equally excellent at breakfast, brunch, lunch, or casual dinner.
Complete Ingredient List
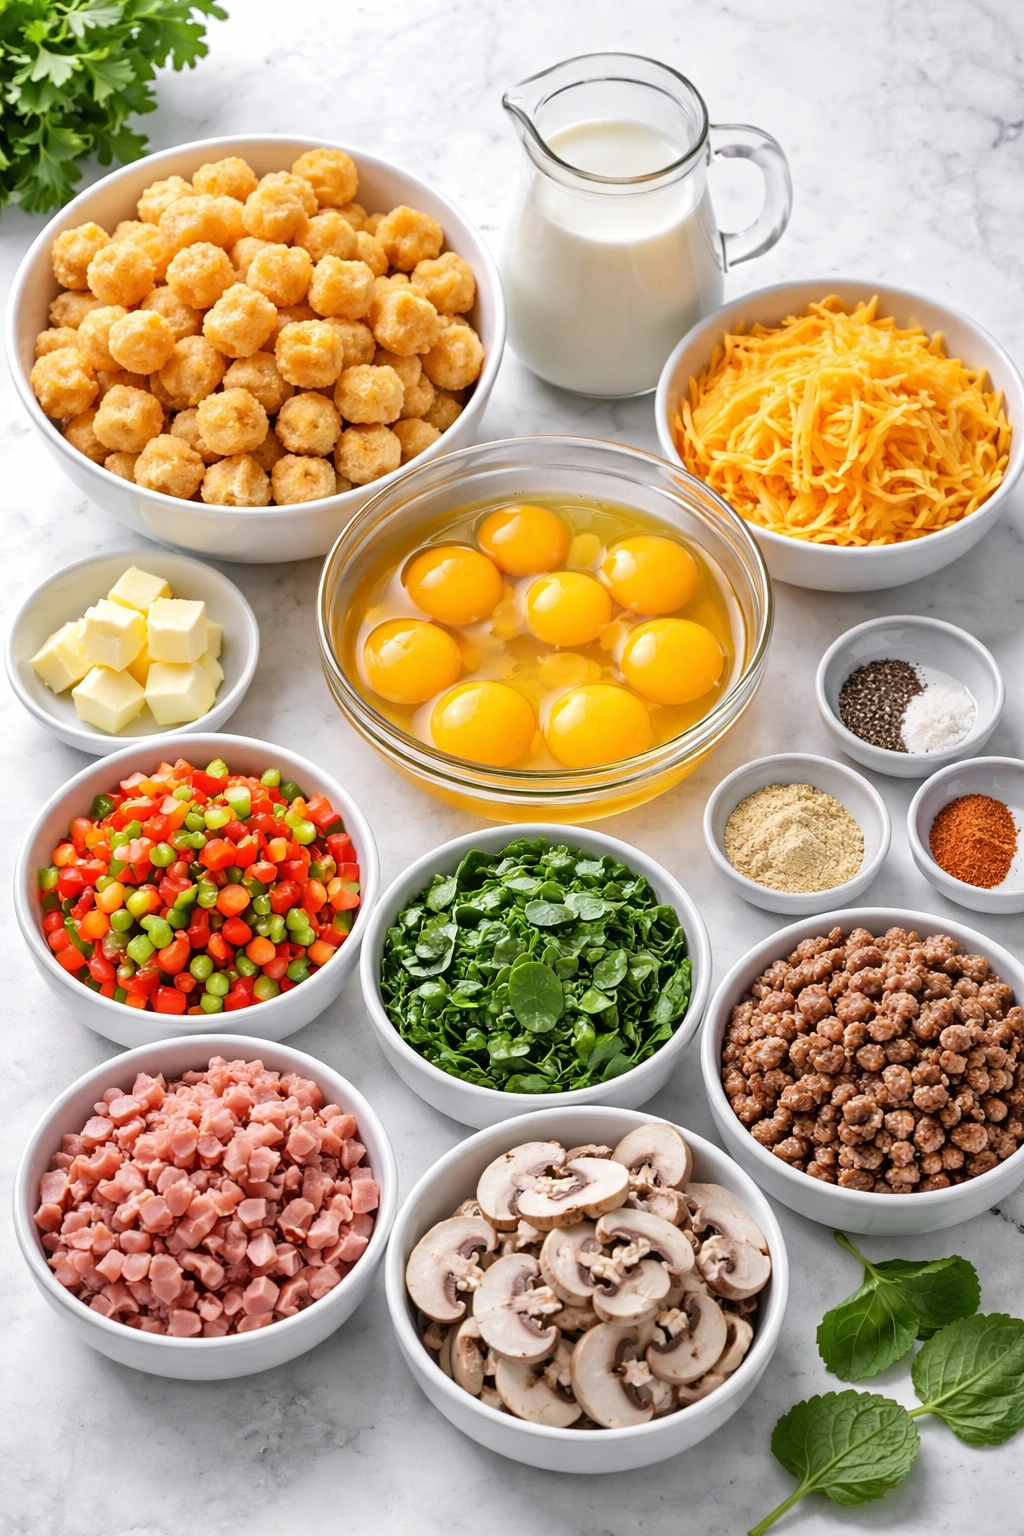
For the Base:
- One 32-ounce bag frozen tater tots (about 4½ cups), no need to thaw
- 8 large eggs, room temperature
- 1 cup whole milk (or half-and-half for richer texture, or unsweetened plant-based milk if dairy-free)
- 2 cups shredded sharp cheddar cheese (or a mix of cheddar and gruyere for deeper flavor)
- 1 teaspoon fine sea salt
- ½ teaspoon freshly ground black pepper
- ¼ teaspoon garlic powder
- Pinch of cayenne pepper (optional but recommended — it adds subtle heat without making the dish spicy)
- 1 tablespoon softened butter or cooking spray (for greasing the baking dish)
Flavor Add-Ins — Choose Your Own Adventure:
- 6 ounces breakfast sausage, browned and crumbled, or 8 slices bacon, cooked and chopped
- 1 cup diced bell peppers (red, yellow, or orange work best — they’re sweeter than green)
- 1 cup fresh mushrooms, finely chopped (cremini or baby bella)
- 2 cups loosely packed fresh spinach, roughly chopped, or 1 cup frozen spinach (thawed and squeezed dry)
- ¾ cup diced sweet onion (Vidalia or similar), or 4 green onions, sliced (white and light green parts for flavor, green tops for garnish)
- ½ cup diced fresh tomatoes or sun-dried tomatoes
- 4 ounces cream cheese, cut into small cubes (adds richness and a slight tang)
- ½ cup crumbled fresh goat cheese or feta (for tang and creaminess)
- Fresh herbs: 2 tablespoons chopped fresh dill, chives, or flat-leaf parsley mixed into the egg custard
Optional for Topping:
- ½ cup crushed tater tots (mixed with ¼ teaspoon melted butter, optional — creates extra crispy edges)
- Fresh herbs or green onion tops for garnish
Step-by-Step Instructions
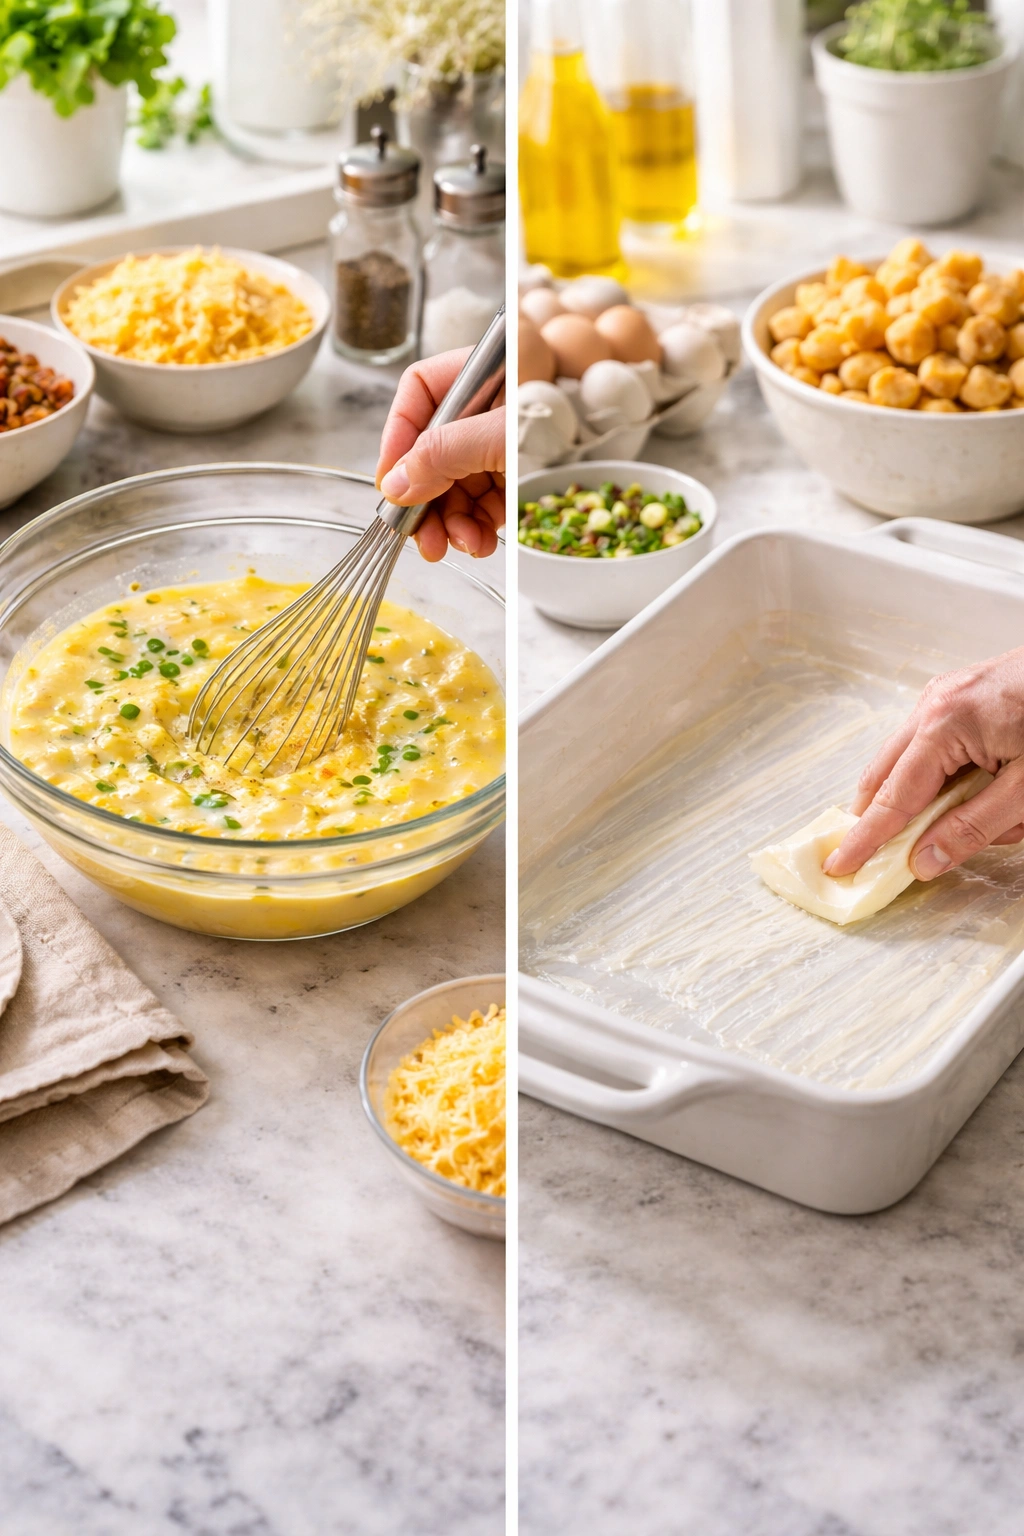
Prepare the Pan and Oven:
-
Preheat your oven to 350°F (175°C) and position the rack in the center of the oven. This temperature gives the custard time to set gently without the edges browning before the center cooks through.
-
Grease a 9×13-inch baking dish thoroughly with softened butter or cooking spray, paying special attention to the corners and edges. A properly greased dish makes unmolding or serving directly from the pan infinitely easier.
Make the Egg Custard:
-
Crack the 8 eggs into a large mixing bowl and add the milk. Do not add the salt yet — it can break down the egg proteins if added too early. Whisk vigorously for about 30 seconds, until the mixture is pale, slightly frothy, and completely combined. The eggs should be fully incorporated with no white streaks visible.
-
Add the salt, black pepper, garlic powder, and cayenne pepper to the whisked eggs and milk, then whisk again for 10 seconds to distribute the seasonings evenly. Taste a tiny drop of the mixture if you’re unsure about seasoning — it should taste slightly salty and well-seasoned. Remember that the cheese, any meat you’re using, and the tater tots themselves all add salt, so don’t oversalt at this stage.
-
Stir in the shredded cheddar cheese (and any other cheese you’re using) until it’s evenly distributed. The mixture should look creamy and studded with cheese.
Prepare Add-Ins (If Using):
-
If using fresh vegetables, prepare them now: dice peppers into small pieces (about ⅓-inch), chop mushrooms finely so they cook through, squeeze excess moisture from fresh spinach, and dice the onion. Keep everything separate for now — you’ll layer it into the bake.
Advertisements -
If using meat, brown it in a skillet over medium-high heat, breaking it apart as it cooks, until fully cooked through with no pink remaining. If using bacon, cook until crispy, then chop into bite-sized pieces. Drain any excess grease and let cool slightly before adding to the bake.
Assemble the Casserole:
-
Spread the frozen tater tots evenly across the bottom of the prepared baking dish, breaking them apart slightly as you distribute them so they form a relatively even base layer. The tater tots don’t need to cover every single millimeter of the pan, but aim for good distribution without huge gaps. Do not thaw the tater tots first — they’ll release too much moisture and become mushy.
-
Scatter your chosen add-in vegetables and any meat evenly over the tater tots. If using both meat and vegetables, distribute them in layers: meat on the tater tots, then vegetables on top of the meat, so everything gets exposure to the egg custard.
-
Pour the egg and cheese mixture slowly and carefully over the tater tots and add-ins, tilting the pan slightly as you pour to ensure the custard flows into all the gaps and doesn’t pool in one area. The mixture should just about reach the top of the pan — if it seems like too much, you’ve likely made the layer of tater tots thicker than intended (not a problem, just means some tater tots might peek above the custard, which is fine).
-
Let the assembled casserole sit for 2–3 minutes, then give the whole pan a gentle shake. This redistributes the tater tots and allows the custard to settle, ensuring more even cooking. Optional: If you like extra-crispy edges, sprinkle the crushed tater tot mixture over the top at this point.
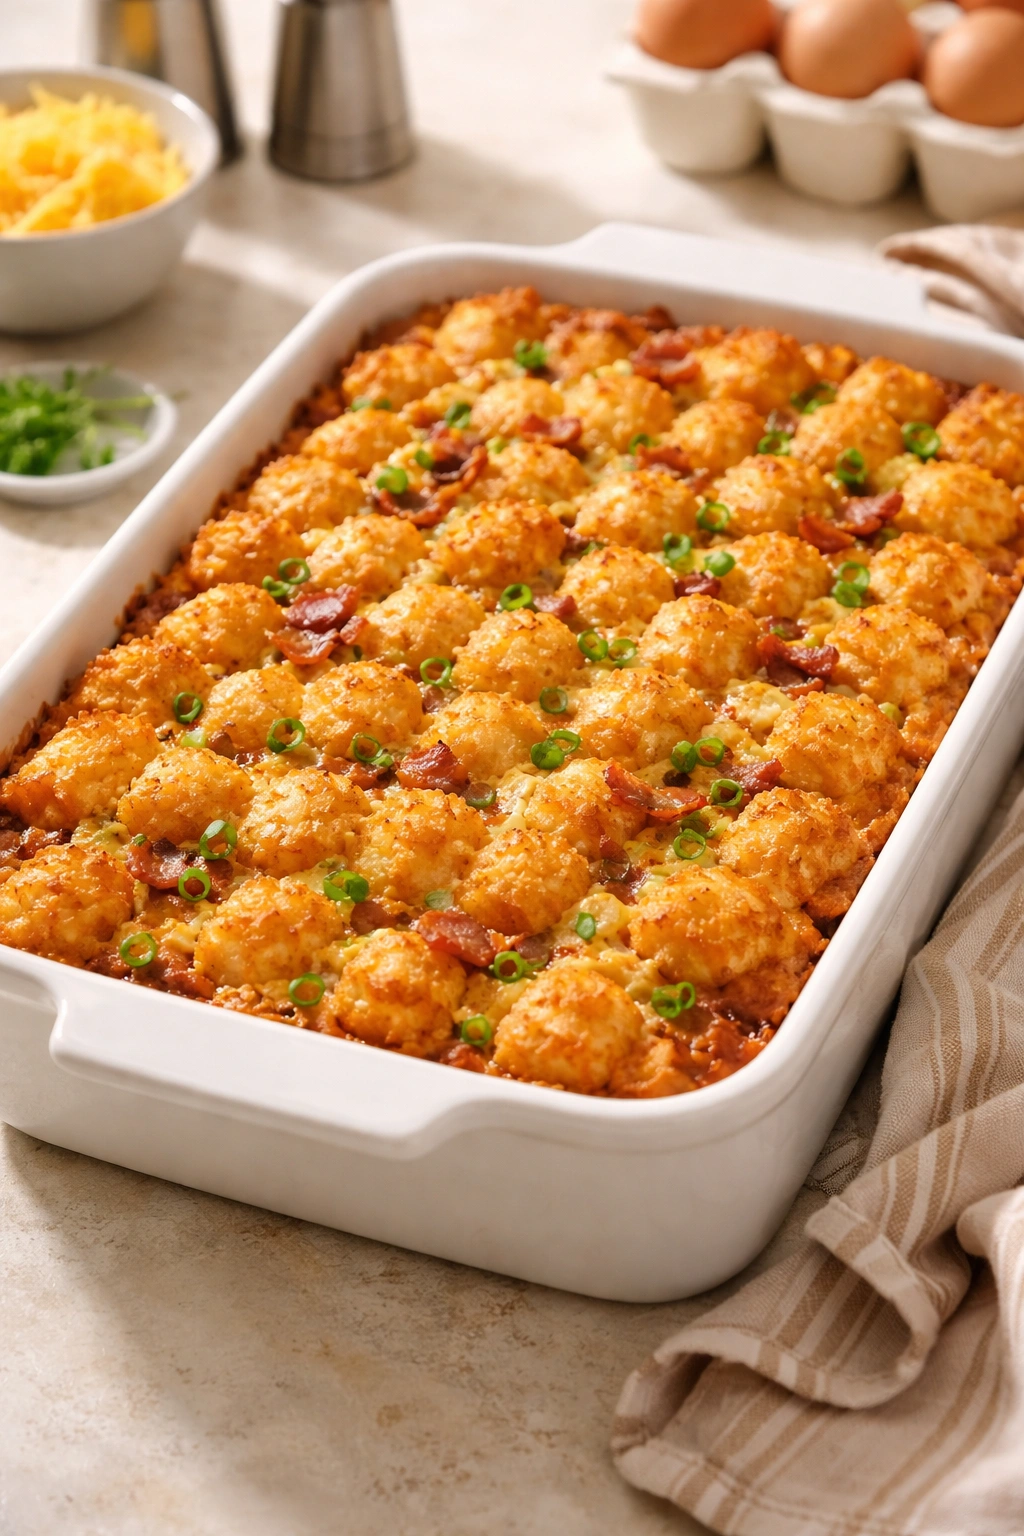
Bake:
-
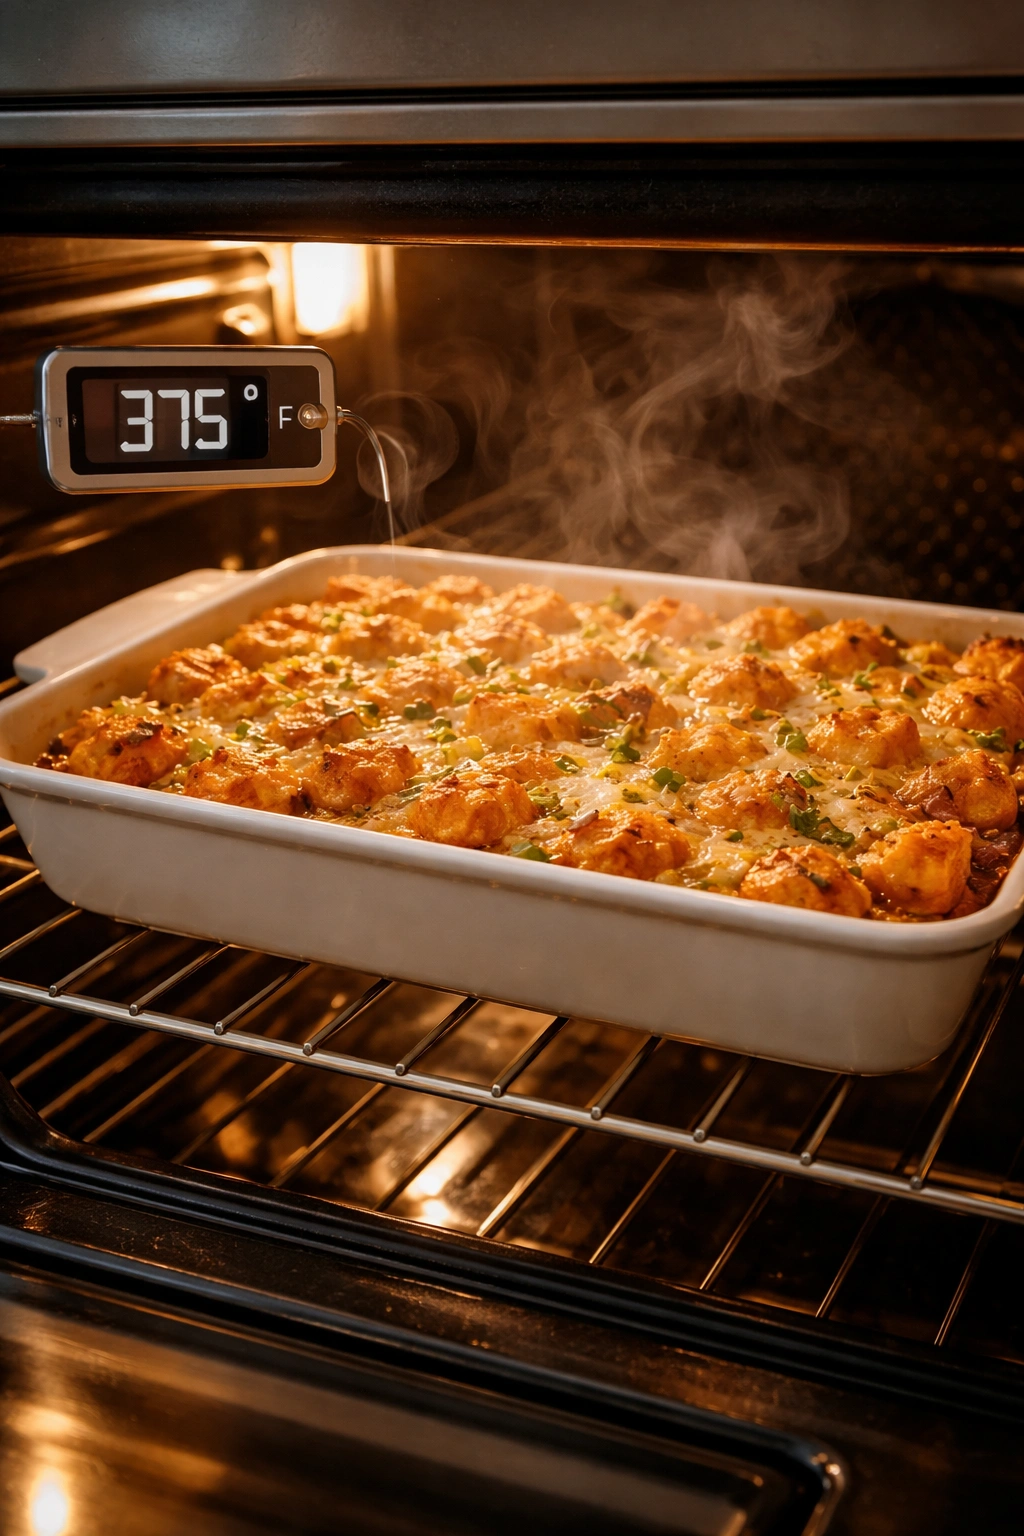
Place the baking dish in the preheated 350°F (175°C) oven and bake for 45 to 50 minutes, rotating the pan halfway through (at about 22–25 minutes) for even browning. The casserole is done when the top is golden brown and the custard no longer jiggles noticeably when you gently shake the pan — it should feel mostly set but still have a slight wobble in the very center. A toothpick inserted into the egg portion (avoiding a tater tot) should come out clean or with just a few creamy residue particles, not wet egg.
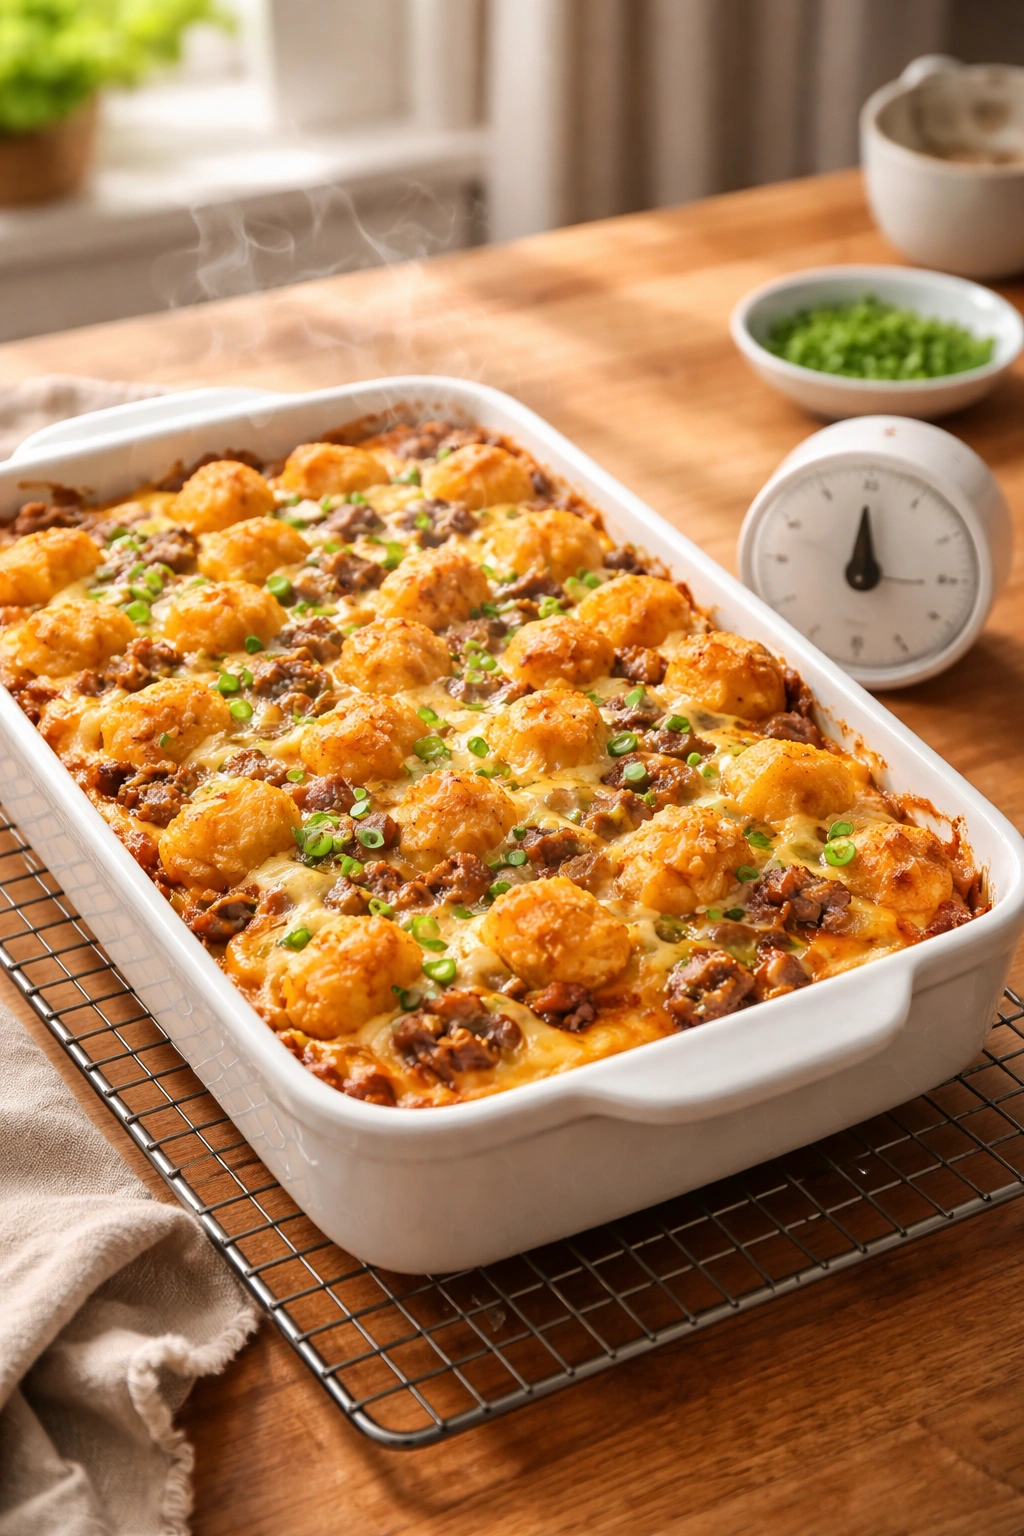
-
Remove the baking dish from the oven and set it on a wire cooling rack or trivet. Let it rest for 5 minutes before serving — this allows the custard to firm up just slightly, making serving much cleaner. If you cut into it immediately, it’ll be slightly custardy and may be harder to portion neatly (though it’ll still taste amazing).
Make-Ahead Magic and Strategic Timing

The absolute best part of this recipe is how far ahead you can prepare it. You can build the entire casserole the night before, cover it tightly with plastic wrap, and refrigerate it. In the morning, let it sit on the counter for about 20 minutes while the oven preheats, then bake it exactly as written — the baking time won’t change meaningfully, though you might need to add 2–3 minutes if it goes straight from the fridge into the oven.
Making it ahead actually improves the result slightly because the egg custard has time to fully absorb into the tater tots and vegetables overnight, creating a more cohesive final texture. The flavors also meld beautifully over several hours of sitting in the fridge.
If you want to prep the components separately, you can cook and chop the meat the night before, prep and chop the vegetables the afternoon before, and whisk the egg mixture just before assembling. Store everything in separate containers, then assemble fresh the morning of baking if you prefer maximum texture on the tater tots.
You can also freeze this casserole after baking and cooling completely. Wrap it tightly in plastic wrap and then foil, and it’ll keep frozen for up to 3 months. Thaw overnight in the fridge, then reheat at 350°F (175°C) for about 20 minutes, covered with foil to prevent over-browning. It won’t be quite as crispy as the day you baked it, but it’ll still taste delicious.
Why This Recipe Never Disappoints (And How to Prevent Common Mistakes)
The reason this bake works so reliably comes down to the forgiving nature of eggs and the built-in texture that tater tots provide. Eggs are incredibly hard to truly ruin — they need high heat or significant overcooking to become rubbery or unpleasant. At 350°F (175°C), with tater tots and vegetables insulating the custard and slowing its cooking, you get a window of about 10–15 minutes where the casserole is perfectly set without being overdone. That’s a huge comfort zone.
The most common mistake is underbaking. If the center still jiggles dramatically when you shake the pan, it needs more time. Give it another 3–5 minutes and check again — it’s nearly impossible to overbake this at 350°F, so don’t worry about that. A slightly jiggly center will continue to set as it cools and will become firmer as it cools and sits.
Another mistake is not distributing the tater tots evenly. If you have huge gaps of egg custard with nothing underneath, those spots won’t brown properly and the texture will be off. Spend 30 seconds making sure they’re reasonably spread out.
Using vegetables with too much moisture can sometimes create watery pockets. If you’re using fresh mushrooms or tomatoes, chop them small and don’t overload the pan. If using frozen spinach, absolutely squeeze out as much moisture as possible with your hands or a clean kitchen towel.
Finally, don’t skip rotating the pan halfway through baking. Every oven has hot spots. Rotation ensures even browning and even cooking throughout.
Flavor Variations and Add-In Combinations

The base recipe works beautifully with countless flavor profiles. Here are combinations that work together harmoniously rather than fighting for attention.
Southwestern Style: Brown 8 ounces chorizo sausage and drain well, add 1 diced bell pepper (preferably poblano or anaheim), ¾ cup diced sweet onion, ½ cup corn (fresh or frozen), and replace ½ cup of the cheddar with queso fresco. Add ½ teaspoon cumin to the egg mixture and ¼ teaspoon smoked paprika. Serve with salsa, sour cream, and cilantro.
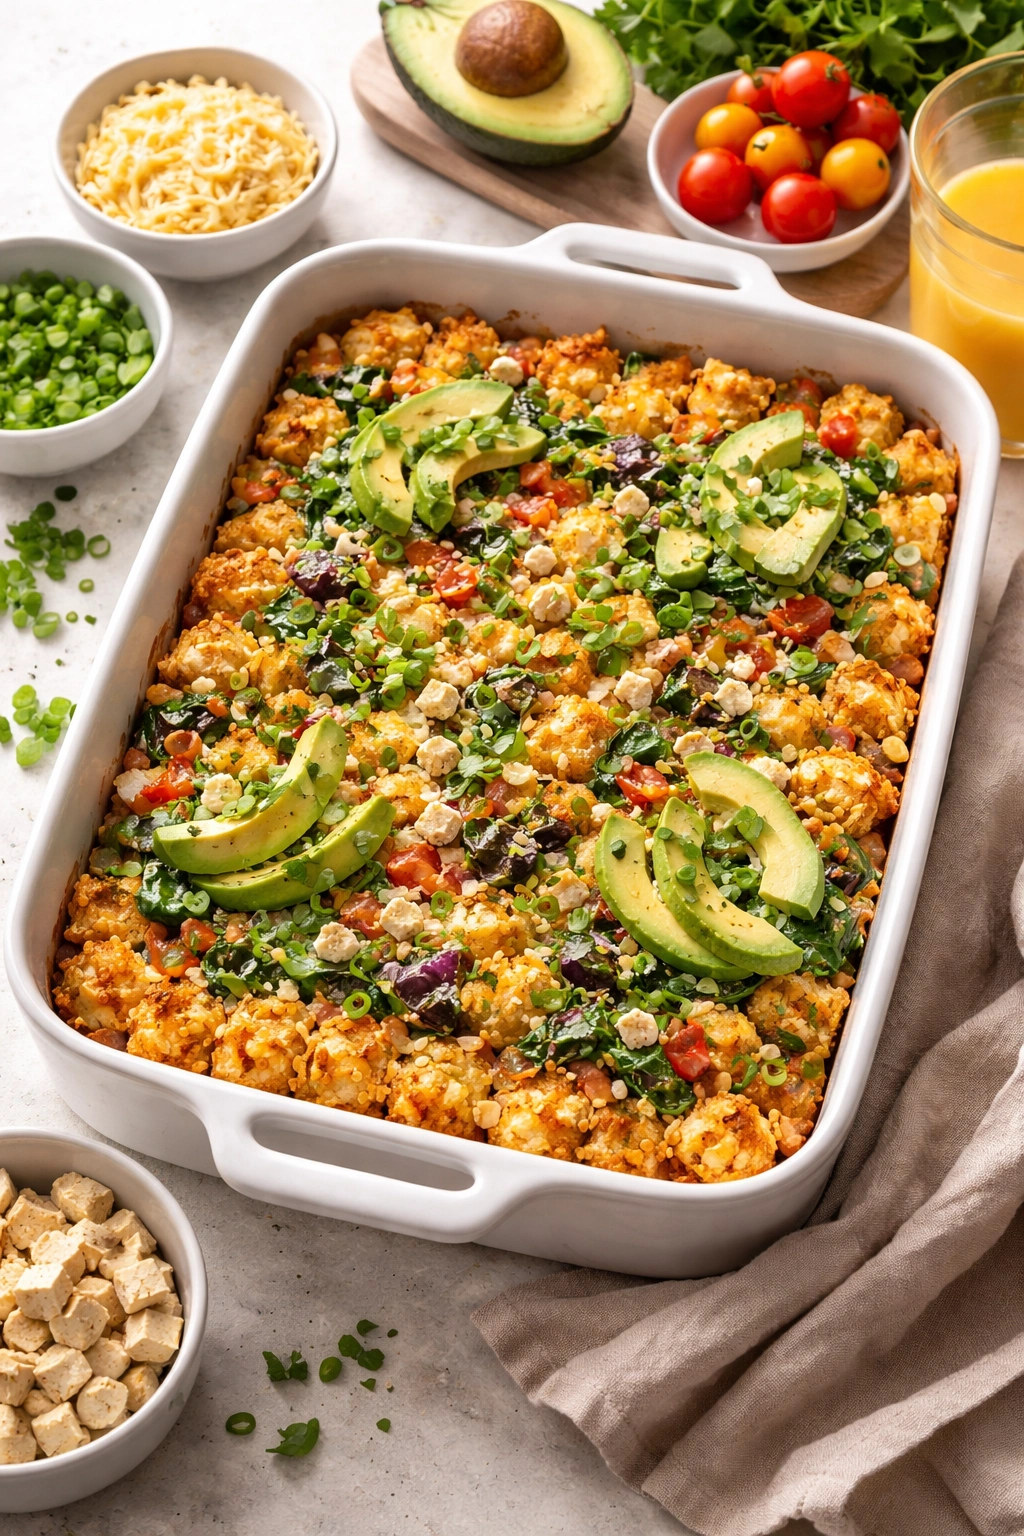
Farmers Market Fresh: Skip the meat, load it with 1 cup chopped mushrooms, 1 cup fresh spinach, ¾ cup diced bell peppers, ½ cup diced zucchini, and a handful of fresh herb mix (dill, chives, or parsley). Use half cheddar and half gruyere for deeper flavor. This is lighter and vegetable-forward but still completely satisfying.
Breakfast Club Classic: This is the most conservative version — 8 ounces bacon (cooked, crumbled), 1 cup diced onion, fresh cracked black pepper. Stick with sharp cheddar and nothing fancy. It’s familiar comfort in casserole form.
Cottage Breakfast (Summer Version): Use zucchini, fresh tomatoes, basil, and fresh mozzarella. This is lighter and works beautifully when summer vegetables are actually in season and genuinely delicious.
Rich and Loaded: Crispy bacon (8 slices), sautéed mushrooms (1 cup), caramelized onions (¾ cup — yes, this takes longer but it’s worth it), and use a mix of sharp cheddar and gruyere. Add a 4-ounce cube of cream cheese to the egg mixture for ultra-richness.
Dietary Modifications That Work Beautifully
Gluten-free families can make this without changes at all — most frozen tater tots are naturally gluten-free, but check your brand’s label to be sure. Everything else is naturally without gluten. Serve with gluten-free toast if you want a side.
Dairy-free versions require more intention but work completely. Use unsweetened plant-based milk (oat or cashew work best), nutritional yeast instead of cheddar cheese (use about ½ cup for a similar amount of umami), and a dairy-free cheese like Violife or Kite Hill (about 1½ cups because dairy-free cheeses are less dense). The nutritional yeast adds savory depth that makes up for missing sharp cheddar.
Lower-fat or lighter versions simply reduce the egg yolks. Use 6 whole eggs plus 2 egg whites instead of 8 whole eggs — this cuts fat significantly without losing the custard structure or texture. The finished casserole will be slightly less rich but genuinely delicious.
Vegetarian versions skip meat entirely and double down on vegetable volume and variety. 2–3 cups of mixed vegetables (mushrooms, peppers, onions, spinach, zucchini) works beautifully.
For people avoiding nightshades (peppers and tomatoes), replace those with mushrooms, zucchini, asparagus, or broccoli.
Storage, Reheating, and Preservation

A freshly baked casserole keeps covered in the fridge for up to 4 days, making it one of the best options for week-long breakfasts or meal prep. Cover it with plastic wrap or transfer individual portions to glass containers with lids.
To reheat, use 350°F (175°C) for 12–15 minutes if you’re reheating the whole casserole covered with foil (this prevents the edges from over-browning), or 1–2 minutes in the microwave for individual portions. Microwave reheating isn’t ideal because it can make the texture slightly rubbery if overdone, but it works fine for quick mornings. Cover the microwave-safe plate with a damp paper towel to prevent drying out.
Freezing works beautifully. Cool the casserole completely, wrap it tightly in plastic wrap, then wrap again with heavy-duty foil (the double wrap prevents freezer burn), and label it with the date. It’ll keep for up to 3 months. Thaw overnight in the fridge, then reheat as above.
You can also freeze individual portions in glass containers or wrapped in foil. Thaw overnight and reheat for about 10 minutes at 350°F (175°C).
Perfect Pairings and Serving Suggestions
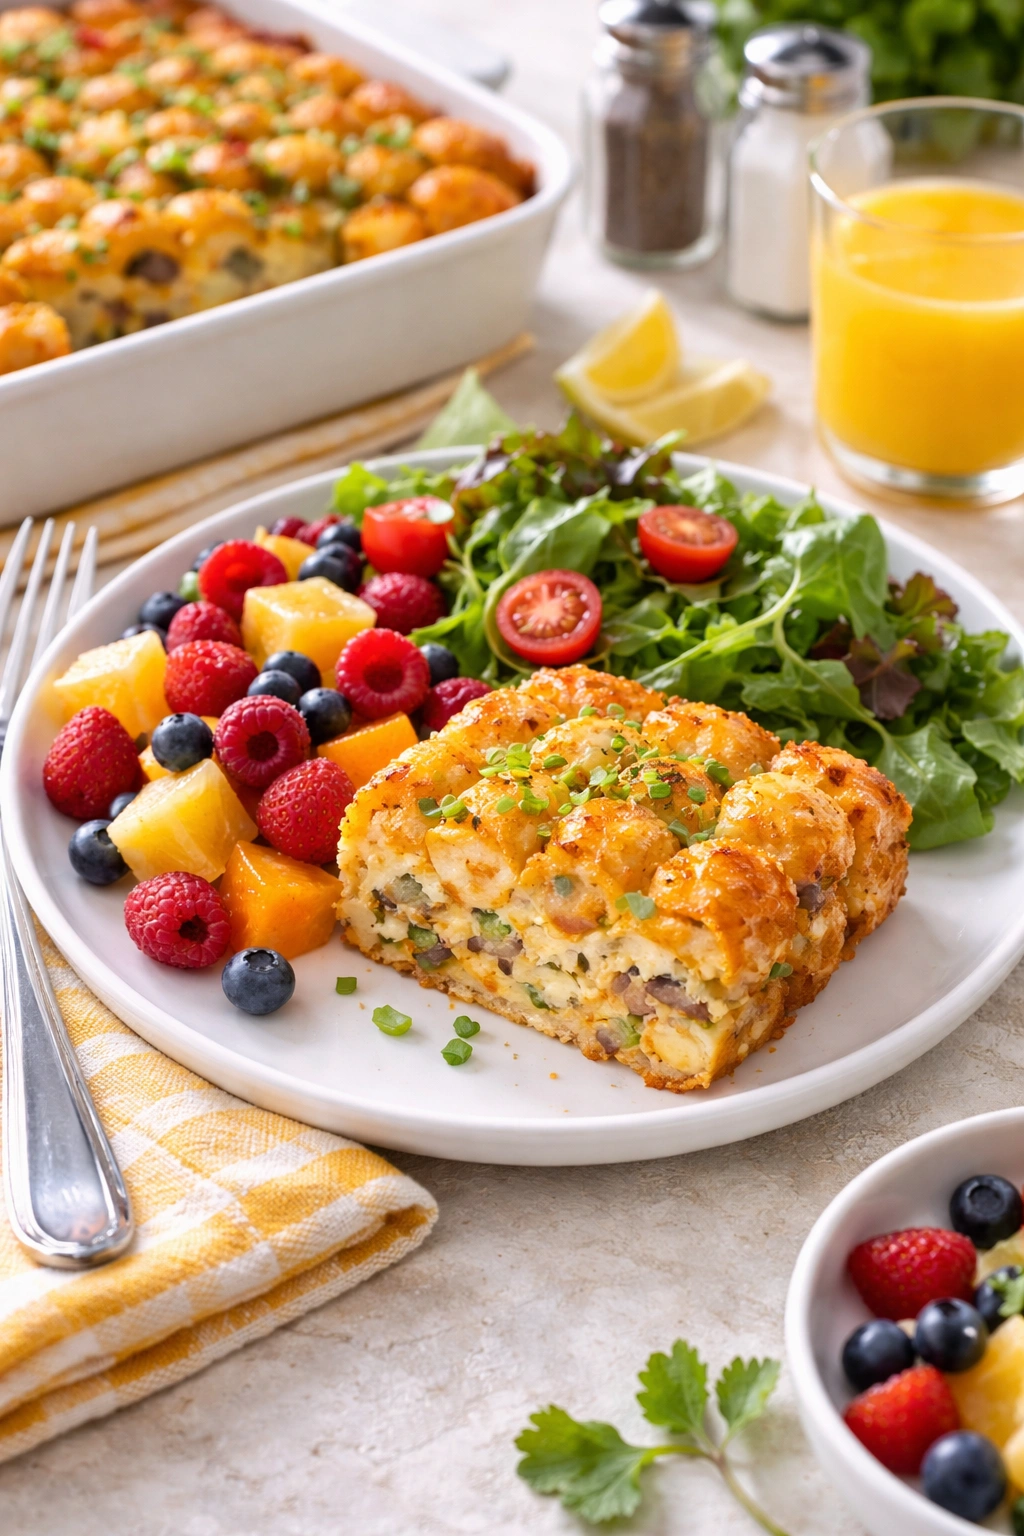
This casserole doesn’t need much on the side, but a few complementary dishes round out the meal beautifully. Fresh fruit — sliced strawberries, blueberries, or cantaloupe — provides brightness and acidity that cuts through the richness perfectly. A simple green salad with a light vinaigrette works for lunch or dinner servings.
Toast is always welcome. Serve with butter and jam, or with fresh salsa if you’re going the southwestern route. If anyone in your family adores hot sauce, set out a bottle on the table — the eggs and cheese actually benefit from heat and acid.
Sour cream or plain Greek yogurt on the side is genuinely excellent — let people dollop it on as they like. For southwestern versions, serve with guacamole, fresh salsa, and cilantro as toppings.
Breakfast beverages matter. This pairs wonderfully with fresh-squeezed orange juice, strong coffee, or tea. For brunch crowds, a simple mimosa or bloody mary situation works, though this is equally nice with just good coffee.
Troubleshooting When Things Go Slightly Off
If your casserole still looks very wet after the recommended baking time but the edges seem done, your oven might run cool. Increase the temperature to 375°F (190°C) and bake for another 5–10 minutes, checking frequently. This is exactly why an oven thermometer is genuinely useful.
If the edges are very brown but the center is still quite jiggly, you likely have a hot oven or the oven rack position is too high. Check the rack position (center is correct), verify your oven temperature with a thermometer, and if it’s running hot, adjust down by 25°F next time.
If the top seems to be browning too quickly while the center remains underdone, tent the top loosely with aluminum foil after about 30 minutes of baking. This slows browning while the center finishes cooking.
If it comes out overcooked and edges are rubbery, you’ve learned your oven runs hot — note that for next time and reduce the temperature by 25°F. Overcooked leftovers still taste fine reheated, though the texture is firmer.
If the center never quite sets completely and remains custardy even after extended baking, your eggs might have been too cold at the start (always bring them to room temperature), or your oven temperature might be running cool. The casserole will firm up as it cools, but if you prefer it firmer, try starting with room-temperature eggs and verifying your oven temperature next time.
Final Thoughts
This tater tot breakfast bake exists in that sweet spot where it’s simple enough for weeknight dinners yet special enough for lazy weekend brunches. It requires minimal skill, forgiving technique, and maximum flexibility for your family’s specific preferences. You can make it exactly the same way every time or reinvent it based on what’s in your kitchen — both approaches work beautifully.
The best part is watching people come back for seconds without any prompting, or asking for the recipe because it tastes so much better than the sum of its simple parts. Something about that combination of crispy tater tots, creamy eggs, melted cheese, and whatever vegetables and meat you’ve tucked in there just works. It feels homemade and special without requiring anything that actually feels difficult.
Once you’ve made this once, it becomes part of your regular rotation, the recipe you suggest when someone asks what’s for breakfast, and the dish you volunteer to bring to casual family gatherings. It’s that rare recipe that genuinely deserves its place on your table — not because it’s trendy or complicated, but because it actually solves the breakfast puzzle for real families in real mornings.