Why spend money waiting for delivery when you can have restaurant-quality BBQ chicken pizza on your table in less time than it takes for a driver to arrive? The truth about delivery pizza is that it sits in a box, gets soggy, costs twice what homemade costs, and honestly, tastes like it’s been sitting in a box. Making your own BBQ chicken pizza at home is faster, cheaper, and infinitely better—and this guide will show you exactly how to do it.
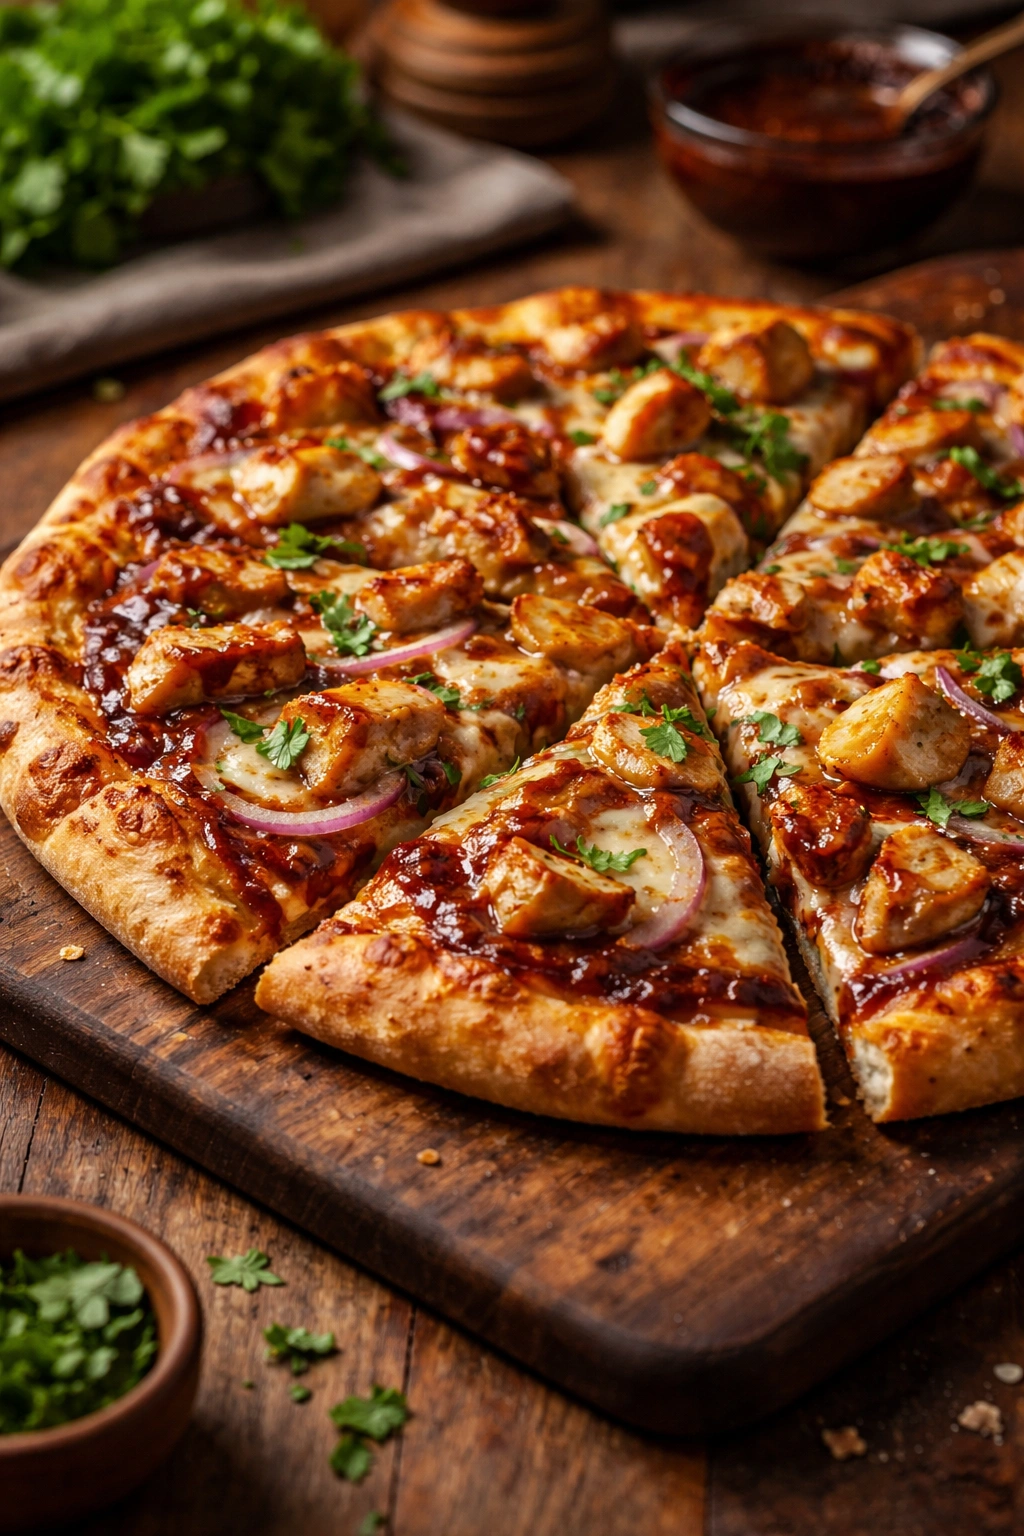
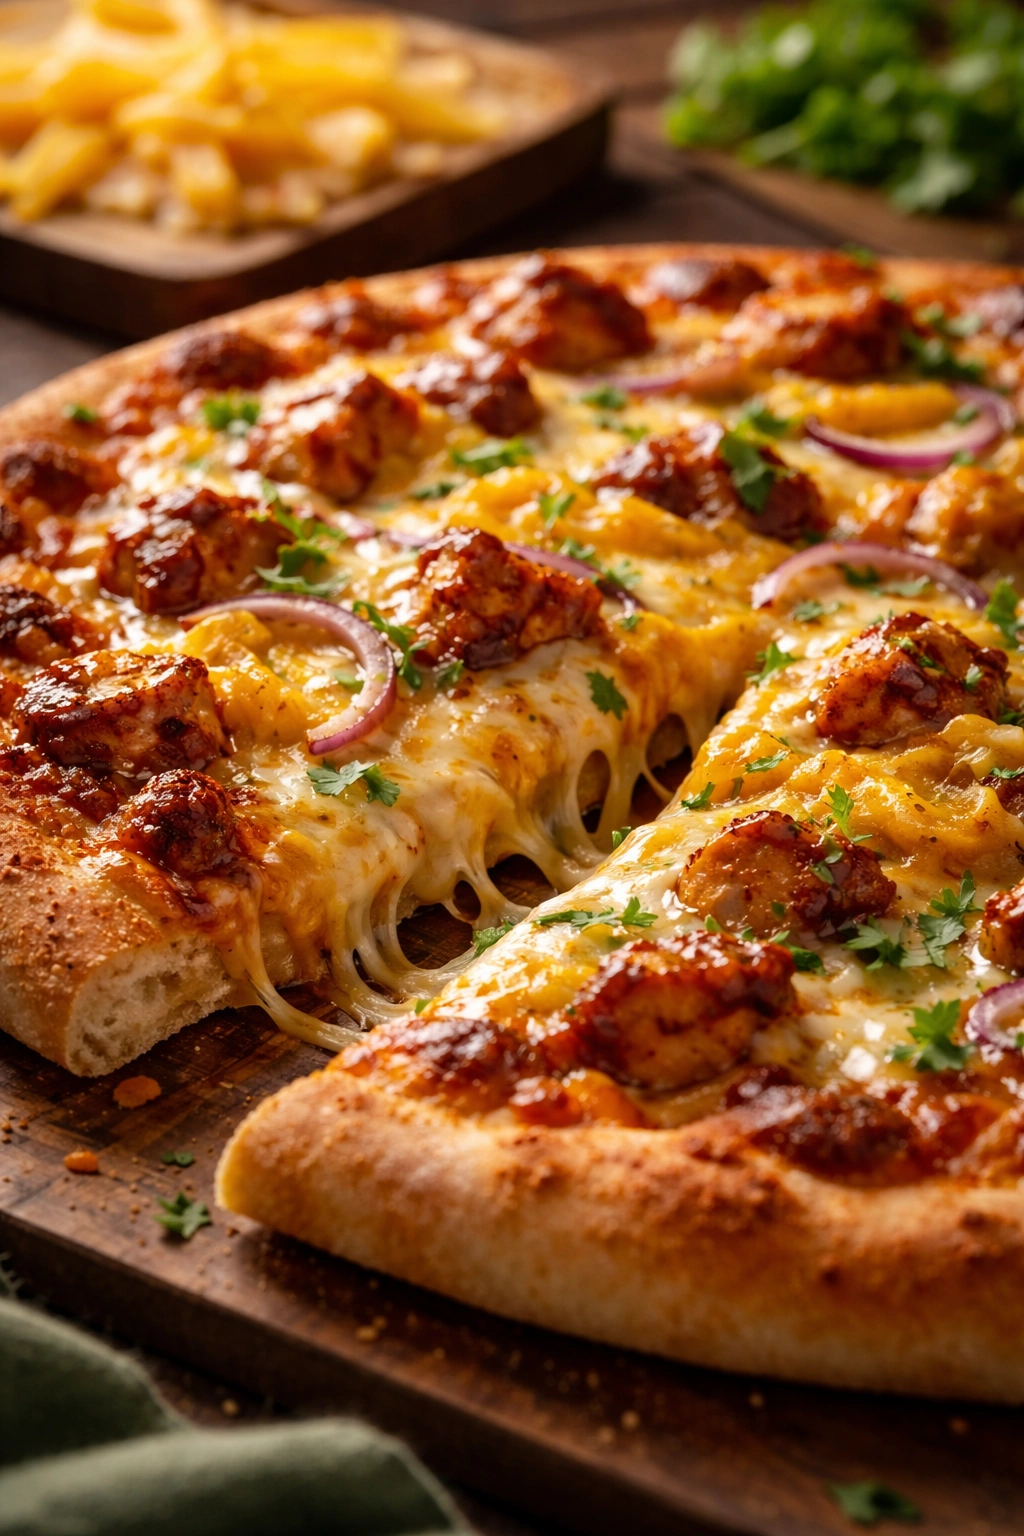
The beauty of a great BBQ chicken pizza lies in its balance: smoky sauce, tender chicken, melted cheese, and the crispy-chewy contrast of a well-cooked crust. When you control each element yourself, you can dial in exactly what you want. Too much sauce? You decide. Want extra cheese? Go for it. Prefer grilled chicken over shredded? You’re in charge. This isn’t just about following a recipe—it’s about understanding the fundamentals so you can make this pizza your way, every single time.
The Story Behind BBQ Chicken Pizza
This pizza legend owes its existence to Ed LaDou, an acclaimed pizza chef who worked at Wolfgang Puck’s iconic Spago restaurant in Los Angeles. LaDou didn’t follow the traditional pepperoni playbook; instead, he experimented boldly with unconventional toppings and flavor combinations that challenged what pizza could be. His vision debuted on the menu at California Pizza Kitchen, and BBQ chicken pizza became an instant classic. What made this creation revolutionary was its refusal to be bound by tradition—it proved that pizza could embrace bold barbecue flavors alongside the fundamentals of cheese and crust.
This pizza represents a turning point in American food culture, showing that experimentation within a beloved format could create something that resonates with millions. It’s been replicated, adapted, and reimagined countless times, but the core formula remains unchanged: barbecue sauce, grilled or shredded chicken, cheese, and crispy crust. The fact that you can now find variations of this pizza everywhere—from casual pizzerias to delivery chains—speaks to its staying power and universal appeal.
Making your own version means you’re participating in a tradition of customization that goes back to Ed LaDou’s original vision. You’re not just cooking dinner; you’re making a choice to control quality and flavor in a way that mass-produced pizza simply cannot match.
Why Homemade Beats Delivery Every Single Time
The economics of pizza delivery are brutal when you really look at them. A single large pizza costs anywhere from $18 to $25 depending on your location, not counting the delivery fee. You can make an identical pizza at home for $6 to $8 in ingredient costs. The time difference is negligible too—while you’re waiting 30 to 45 minutes for delivery, you could have a homemade pizza cooling on your counter.
But beyond the numbers, there’s the quality issue. Delivery pizza is built to survive transit, which means thicker crusts, heavier sauces, and more cheese than a pizza truly needs. The box traps steam, making crusts soggy. Toppings have time to release moisture. Cheese loses its optimal melting texture by the time it reaches you. When you bake a pizza at home, you eat it at peak texture—still warm, cheese at its absolute best, crust still crispy on the outside and tender inside.
Then there’s the flavor control. Store-bought BBQ sauces vary wildly in quality, sweetness, and balance. When you make your own—or modify a store-bought sauce with honey, spices, and fresh ingredients—you’re creating something custom-built for what you actually like. Maybe you want it spicier. Maybe you prefer it sweeter. Maybe you want that tangy Carolina-style bite instead of the sweet Kansas City profile. You make it happen.
Choosing Your Crust: The Foundation of Excellence
The crust is where your pizza either shines or stumbles. You have several options, and understanding the pros and cons of each matters.
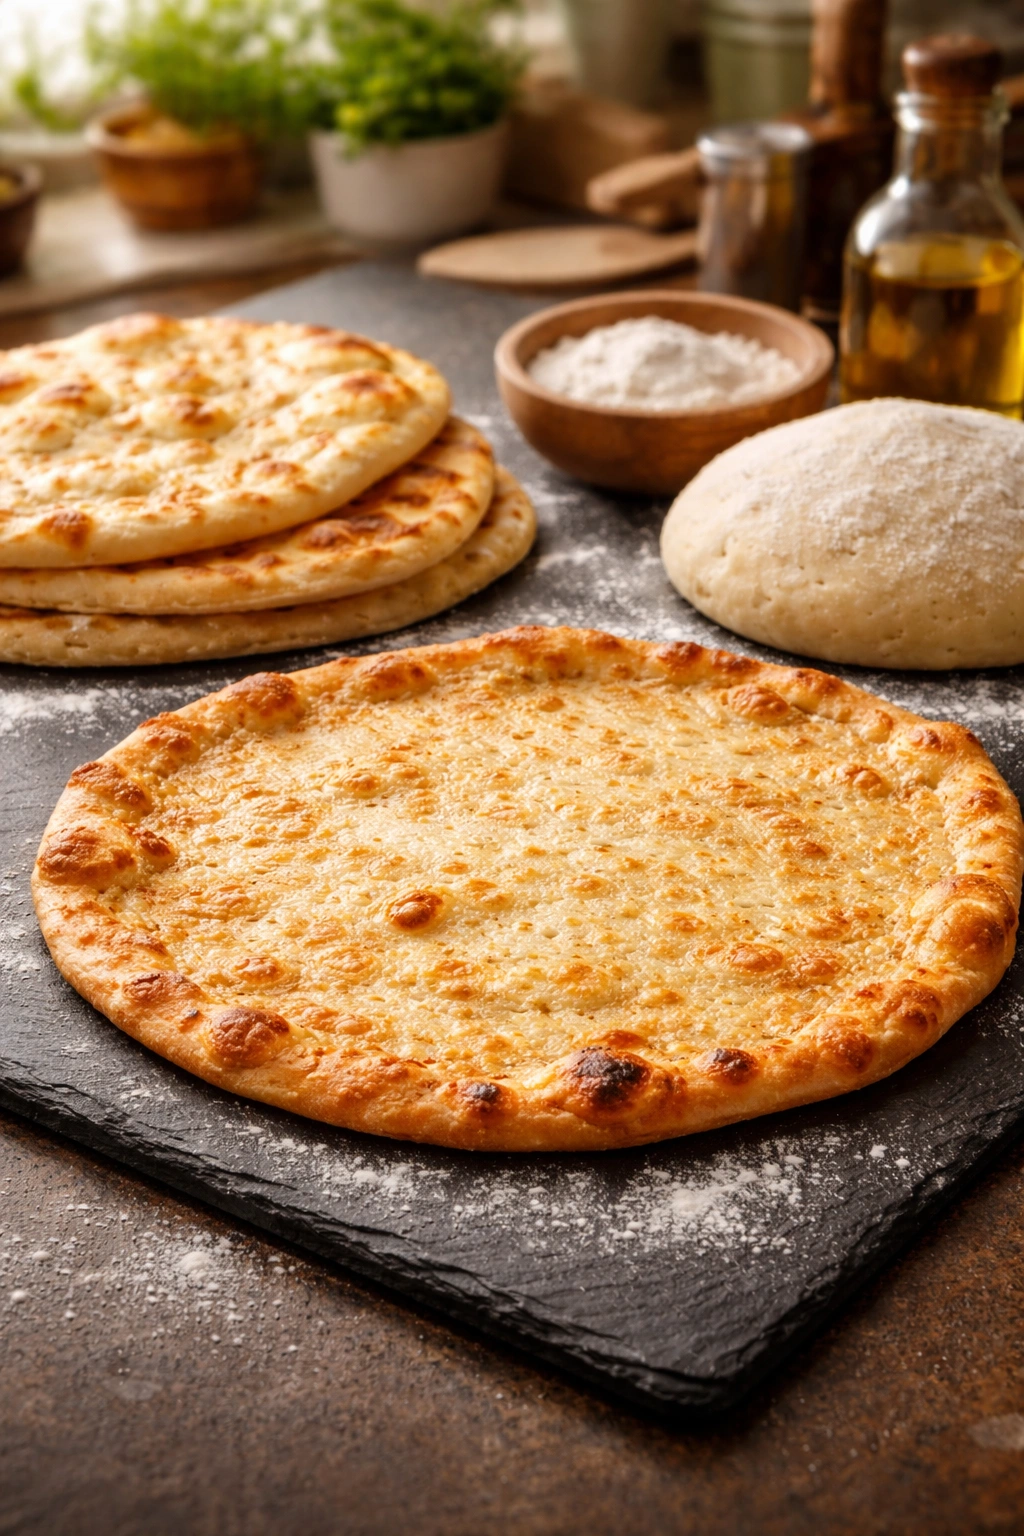
Store-bought pre-made crusts are the fastest path to pizza night. Brands like Stonefire Artisan Thin Crust, Golden Home Ultra Thin Crust, and similar options are widely available and genuinely good. They bake up crispy, brown beautifully, and take the guesswork out of crust-building. For a weeknight dinner when you have 30 minutes, these are honest shortcuts that work. A thin crust will crisp faster and let your toppings shine without overwhelming you with dough.
Naan bread or flatbread rounds offer an underrated alternative that’s even quicker than traditional crusts. These start soft, so they won’t brown as dramatically, but they’ll crisp up in the oven and create a lighter base that works beautifully with BBQ sauce. The texture ends up being somewhere between flatbread pizza and traditional pizza—thinner and crispier than you’d expect, but with less structural heft than a proper dough.
Homemade pizza dough is the gold standard if you have time to plan ahead. The advantage here is flavor and texture you simply cannot buy. Dough you’ve let rise develops complexity and chewiness that pre-made crusts can’t match. The downside is planning—you need to mix dough at least a few hours ahead (or the night before). But here’s the real productivity tip: make a batch and freeze half of it. You can use frozen dough for pizza night anytime in the following month. Defrost it while you preheat the oven and you’re cooking with the advantages of homemade dough without the time investment.
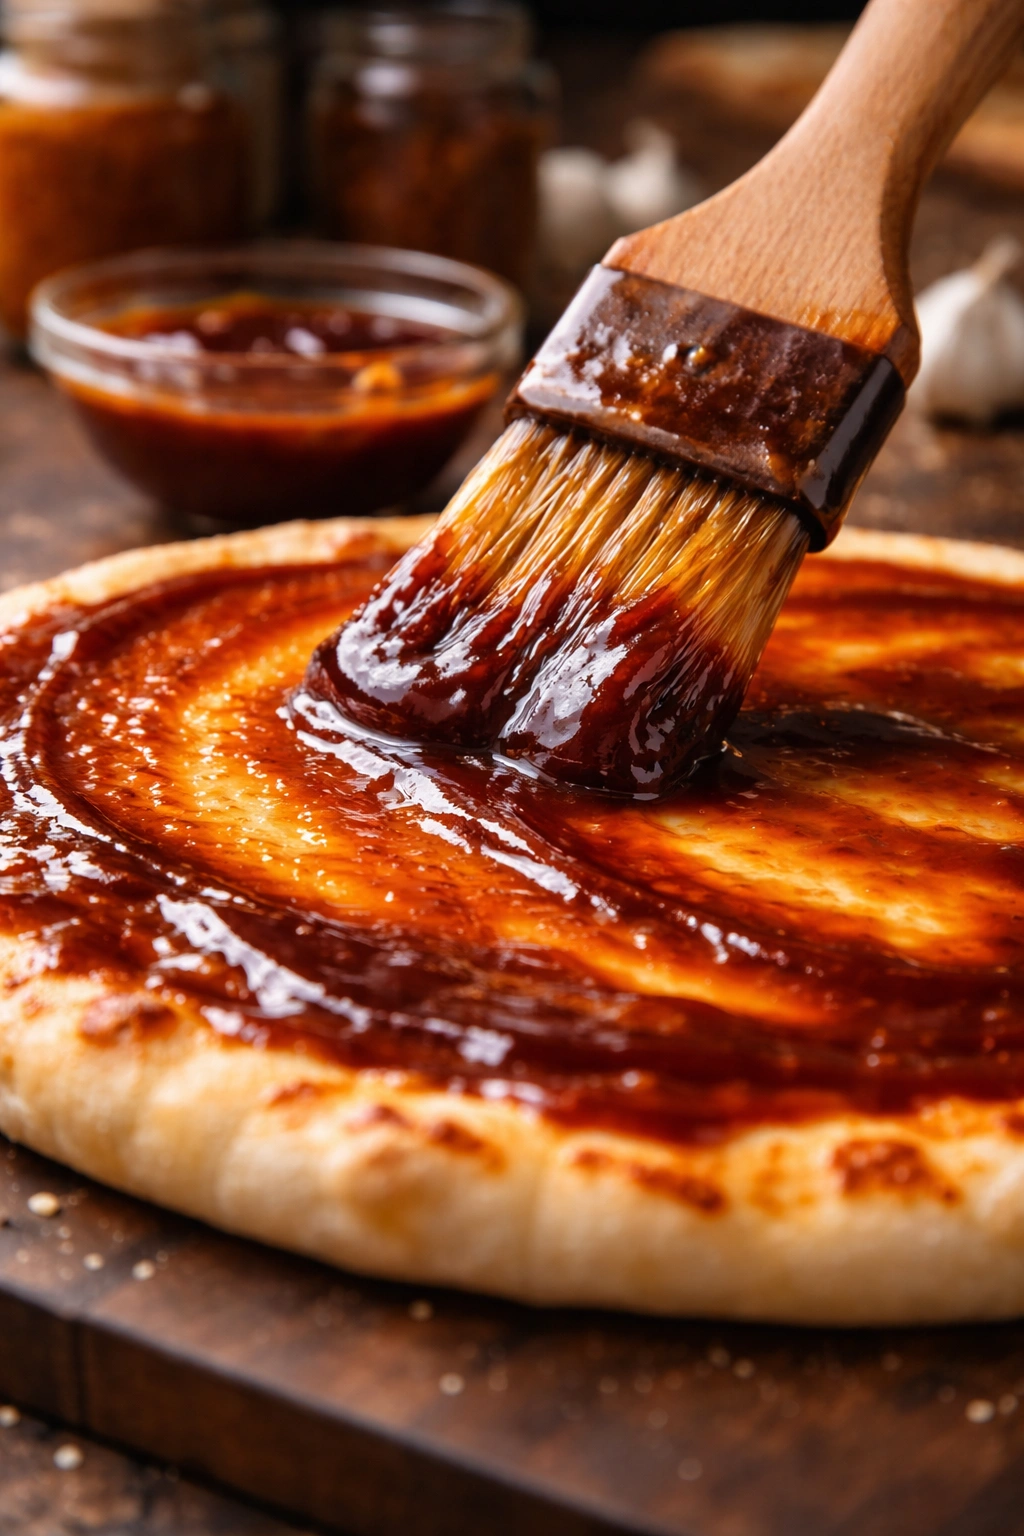
Whichever crust you choose, here’s a critical step most people skip: brush the raw crust lightly with olive oil before adding toppings. This acts as a moisture barrier and helps the crust crisp rather than absorb sauce and steam. It’s the difference between a crispy-bottomed pizza and one that feels a bit soggy.
Mastering the BBQ Sauce That Changes Everything
The sauce is your pizza’s flavor foundation, so this matters more than you might think. You have two paths: create it from scratch or upgrade a store-bought sauce. Both work beautifully.
For a three-ingredient homemade sauce, combine one tablespoon of sweet BBQ sauce (store-bought is fine as a base), two teaspoons of tomato paste, and half a teaspoon of Worcestershire sauce in a small bowl. Whisk until completely smooth. The tomato paste adds depth and richness, while the Worcestershire brings saltiness and umami that makes the whole thing taste more sophisticated. This sauce tastes like you put real effort into it, but honestly takes ninety seconds.
For a from-scratch version, mix together one-third cup of ketchup, two tablespoons of honey, one tablespoon of soy sauce, one tablespoon of brown sugar, and one teaspoon of garlic powder. Heat it gently in the microwave (stopping to stir every 30 seconds) until everything is smooth and incorporated. This sauce is sweeter than the three-ingredient version and has more personality—it’s the sauce you’d get at a restaurant, made in your kitchen. The honey brings natural sweetness, the soy sauce adds depth, and the brown sugar creates that caramelized note you get from traditional BBQ.
Whichever sauce you choose, don’t use it all at once. Spread only about two to three tablespoons directly on the crust. Toss the remaining sauce with your cooked chicken separately. This two-stage approach prevents soggy crust while still delivering bold BBQ flavor in every bite.
Preparing Your Chicken: Three Approaches That All Work
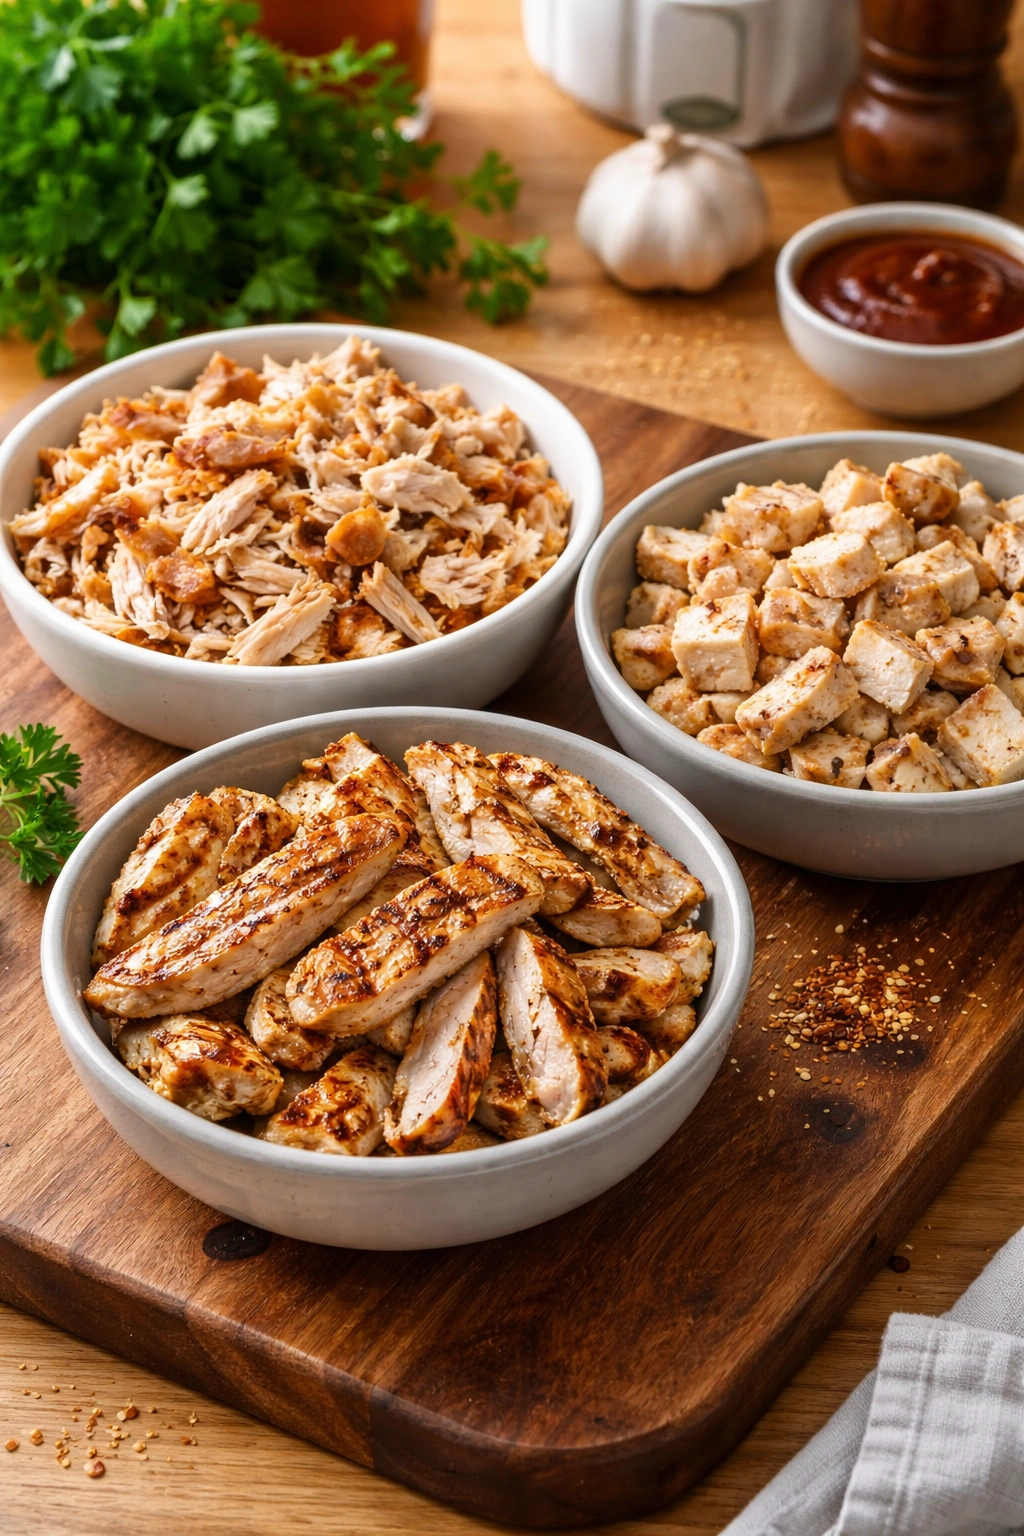
The chicken is your pizza’s protein centerpiece, and you have flexibility here. Pick whichever method fits your schedule.
Rotisserie chicken is the speed champion. Grab one from the grocery store, shred it by hand, and you’re done. It’s already cooked, seasoned, and flavorful. Most rotisserie chickens weigh around three to four pounds, which gives you plenty of meat for multiple pizzas or generous portions on one. The skin falls off as you shred, and the meat is tender from the slow cooking. This is the move when you want dinner in 30 minutes flat.
Leftover cooked chicken from last night’s dinner is perfect too. Shred it, dice it, or leave it in larger pieces depending on your preference. The advantage here is zero waste and using what you already have on hand. This is why I always cook extra chicken—it becomes pizza topping, salad component, quesadilla filling, and lunch the next day.
Grilled chicken breasts give you the most control over flavor and texture. Pound boneless, skinless breasts to three-quarter-inch thickness so they cook evenly. Season with salt and pepper, then grill over medium-high heat for six to seven minutes per side until the internal temperature reaches 165°F. Let them rest for five minutes, then slice or dice into bite-sized pieces. The slight char marks from grilling add visual appeal and smoky flavor that plays beautifully with BBQ sauce. Brush the raw chicken with BBQ sauce during the last two minutes of cooking, and you get caramelized edges that taste restaurant-quality.
Whichever chicken you use, the key step is tossing it with additional BBQ sauce after it’s cooked. Don’t just pile plain chicken on the pizza. Mix it with sauce so every piece gets coated, every bite carries that bold flavor.
The Cheese Formula That Delivers Maximum Flavor
Cheese makes or breaks a pizza, and using two types is the secret that professional pizza makers know.
Mozzarella is your base. Use whole-milk mozzarella (usually labeled as “whole milk” rather than “part skim”) because it melts more smoothly and browns more beautifully. Pre-shredded works fine, though freshly shredded melts more evenly. Most pizzas use one and a half to two cups of mozzarella for a 12-inch pie.
Add a second cheese for complexity. Smoked gouda is the classic pairing for BBQ chicken pizza—its smokiness echoes the barbecue flavor and adds richness that straight mozzarella can’t match. Sharp cheddar works too, bringing tanginess that balances the sweet sauce. Even a mild Mexican blend or a small amount of fontina adds interest. Use about half a cup to three-quarters cup of the secondary cheese.
Here’s the layering trick that professionals use: spread half of the mozzarella directly onto the sauce first. Then add your toppings. Then finish with the remaining mozzarella and all of the secondary cheese on top. This ensures that cheese contacts both the base (for crispness) and the toppings (for adhesion), preventing toppings from sliding around once the pizza is done.
Don’t skimp on cheese. It’s one of the cheapest ingredients and makes the biggest visual and flavor difference. A pizza that looks like a mountain range of melted cheese is a pizza that people will actually be excited to eat.
Toppings and the Art of Restraint

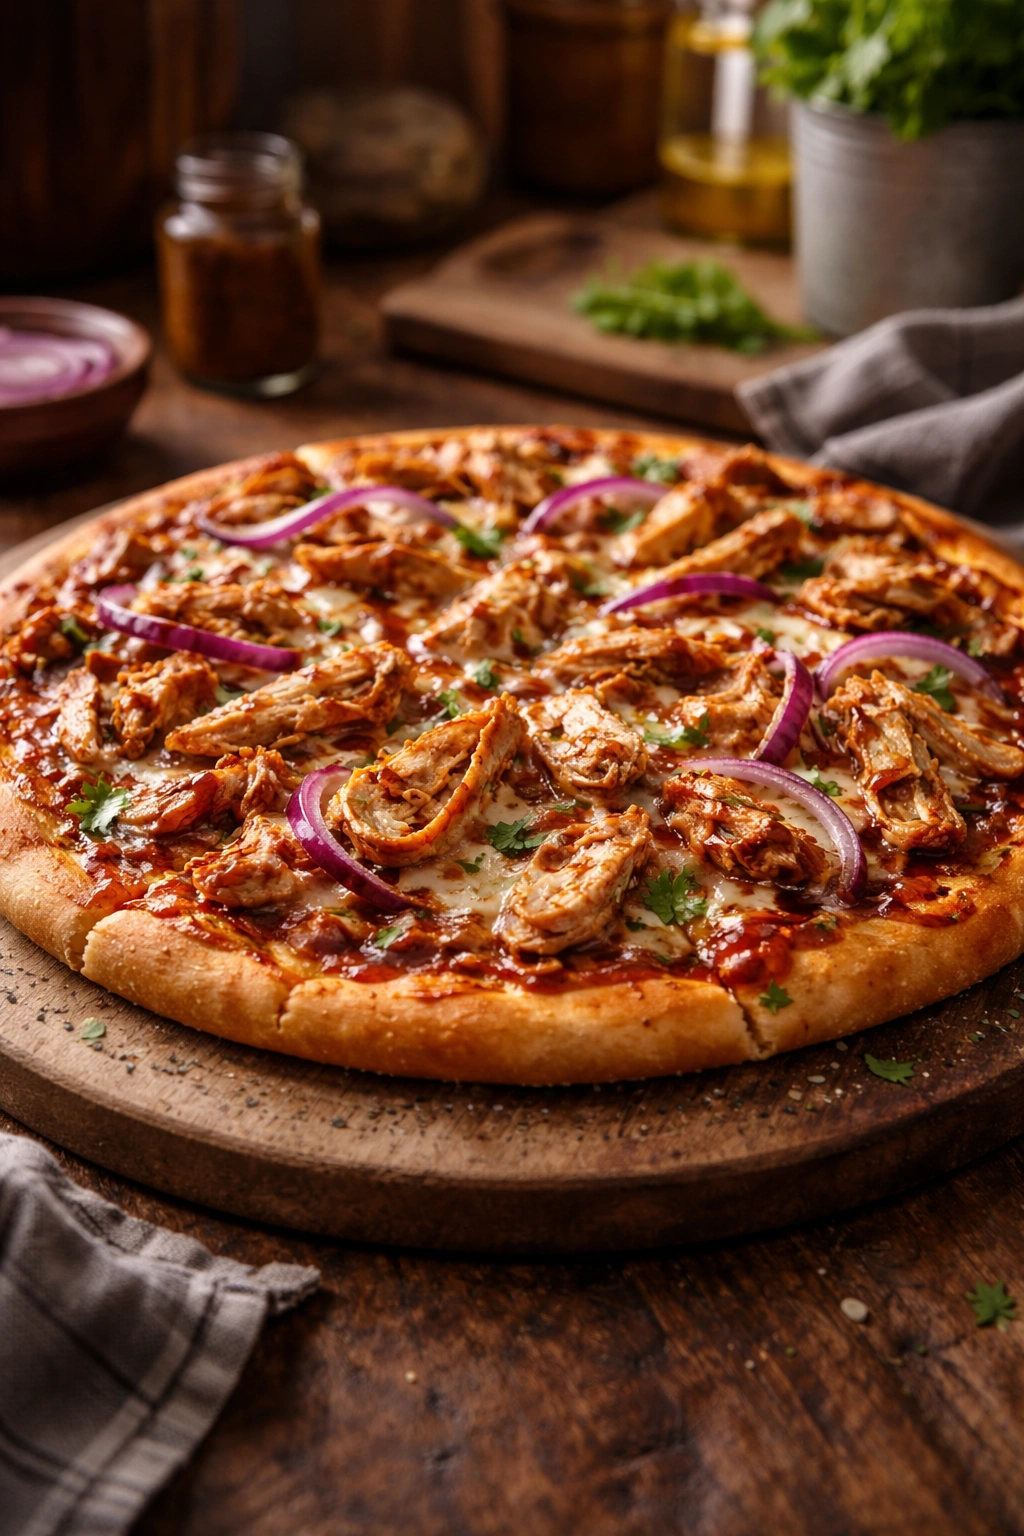
The magic of great pizza is knowing when to stop adding toppings. BBQ chicken pizza doesn’t need seventeen different things competing for attention. The core team is chicken, cheese, and red onion, and that foundation is honestly enough.
Red onions are non-negotiable. Slice them thinly—about one-eighth inch—so they soften and mellow during baking. They’ll taste nothing like raw onion by the time the pizza comes out of the oven; instead, they’ll be sweet and slightly caramelized. The color contrast against the golden cheese and brown sauce also makes the pizza look restaurant-quality.
Fresh cilantro is the finishing touch. Add it after the pizza comes out of the oven so it stays bright and aromatic rather than wilting or burning. A quarter cup scattered over the top before serving adds fresh flavor that cuts through the richness beautifully.
Beyond these essentials, optional additions that work beautifully include crispy bacon (a little goes a long way), jalapeño slices for heat, diced pineapple if you want Hawaiian-style sweetness, corn kernels for texture, or even a drizzle of ranch dressing after baking. The rule is: add one optional topping, maximum two. More than that and you lose the clarity of the BBQ chicken flavor.
The Assembly: A Step-by-Step System That Never Fails
Organization matters here. Have everything prepped and ready before your pizza goes in the oven because once it’s baking, you’re committed.
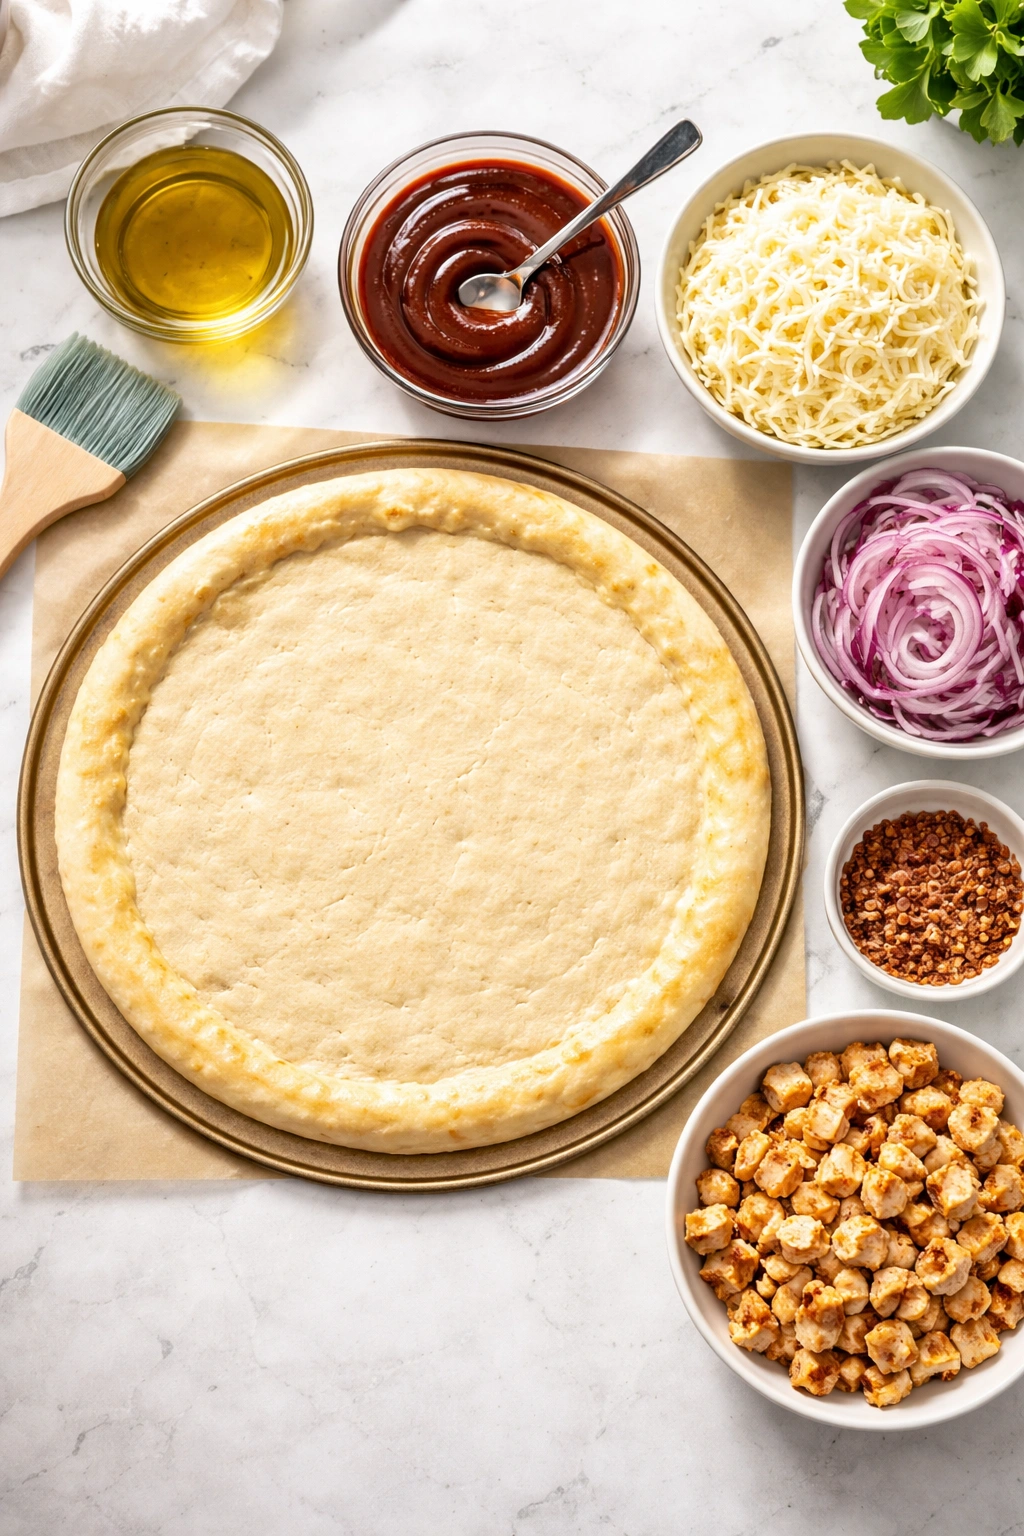
Start with your oven preheated to 425°F to 450°F (check your crust package for the exact temperature it prefers). Place your crust on a pizza stone if you have one, or a regular baking sheet if you don’t. Brush the raw crust lightly with olive oil, leaving about a half-inch border around the edge that won’t get oil—that border is your crust’s edge, and you want it to brown without being oily.
Spread your BBQ sauce in an even layer, using about two to three tablespoons and leaving that half-inch border. Use the back of a spoon or a small ladle to spread it evenly. The goal is coverage without oversaturation—you should still see the crust peeking through slightly in spots.
Sprinkle down about two-thirds of your combined cheeses in an even layer. This layer sits directly on the sauce and acts as a moisture barrier while also creating a base for everything else.
Distribute your toppings next: red onion slices, then your BBQ chicken, then any other additions. Don’t pile high—a single even layer is all you need. The pizza will cook more evenly and taste better than one that’s piled like a mountain.
Finish with your remaining cheese, making sure to get coverage all the way to the edges. The top cheese layer browns, bubbles, and creates those beautiful caramelized spots.
Baking to Perfection: Temperature, Timing, and Texture

This is where homemade pizza shows its advantage. You’re baking it fresh, and you control the outcome entirely.
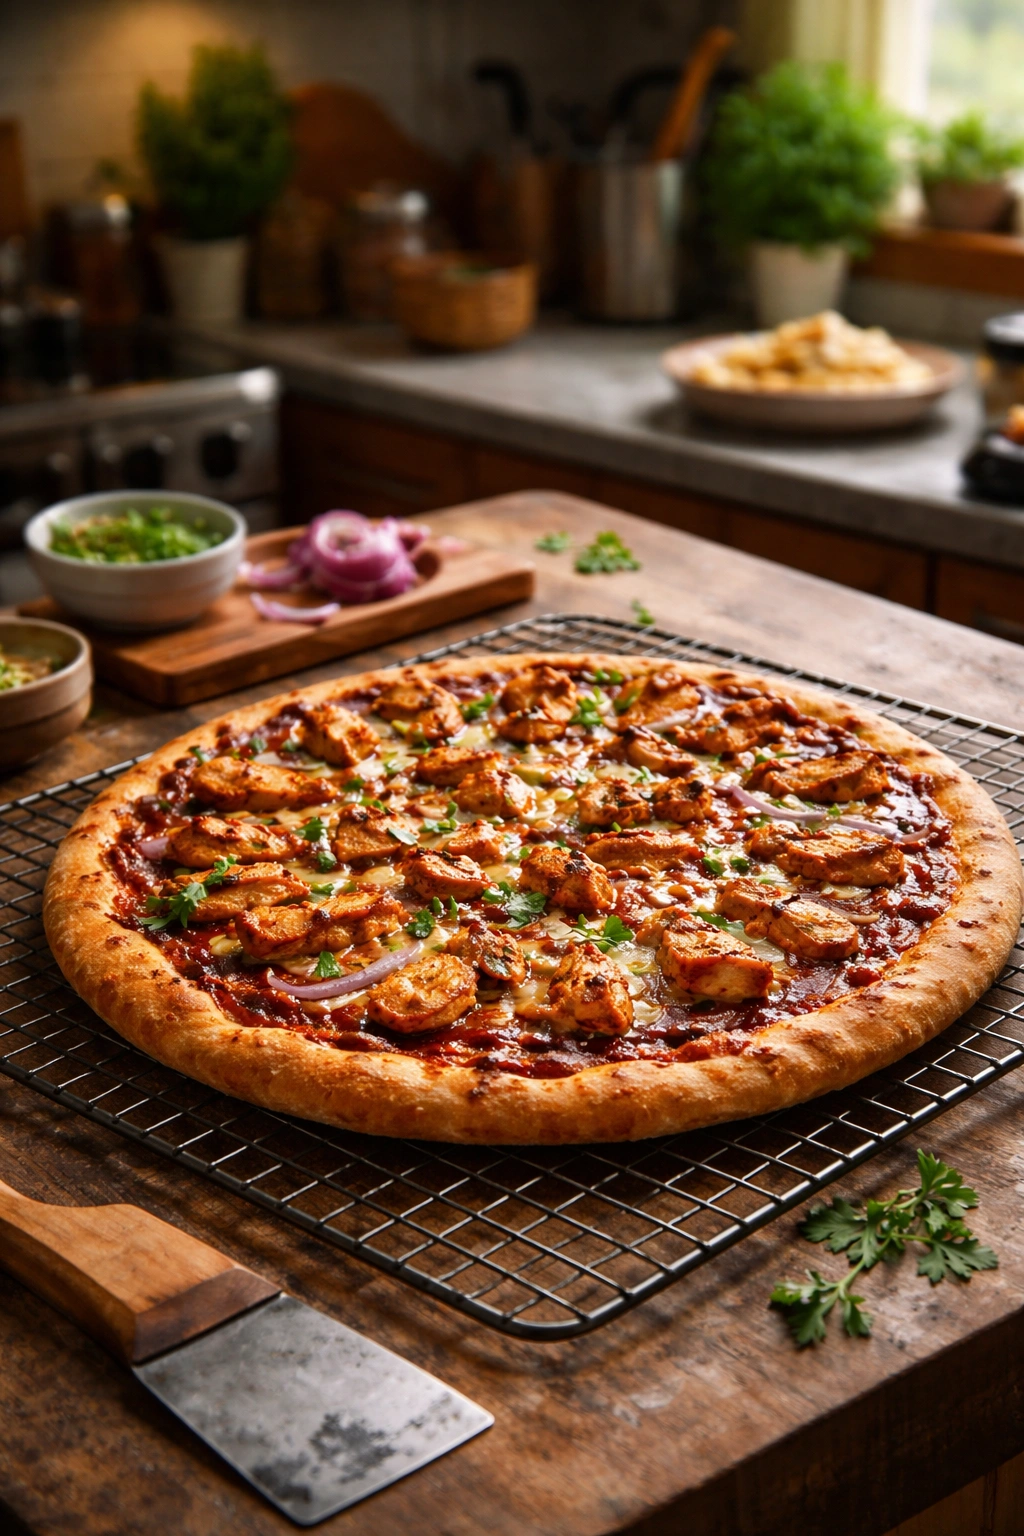
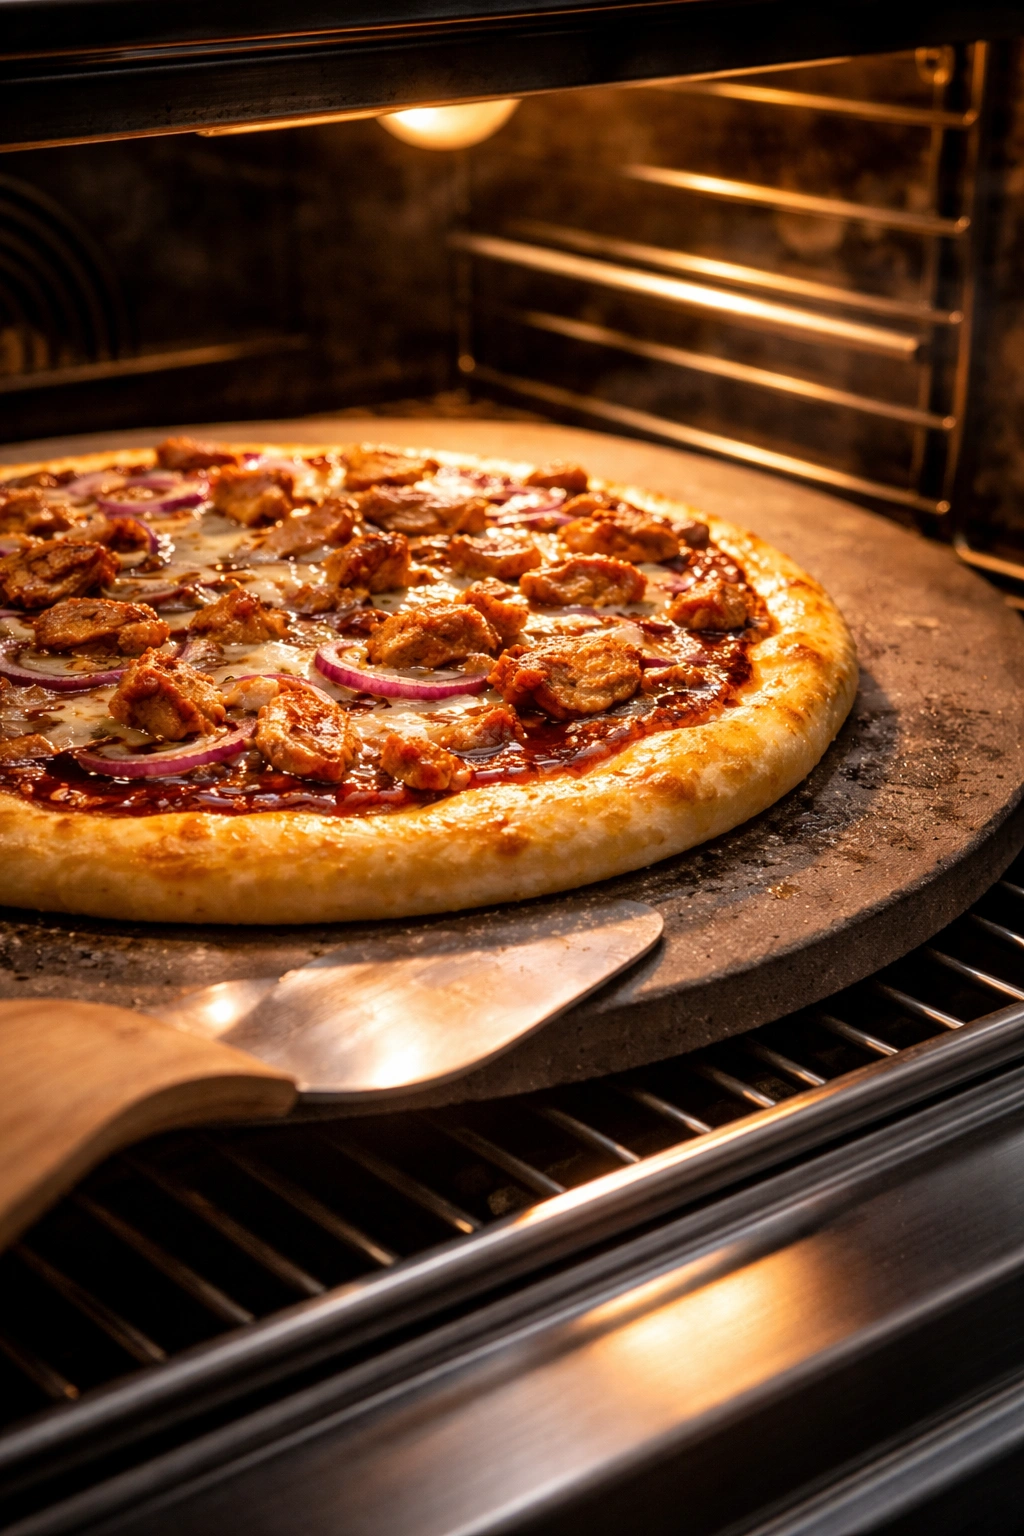
Most pizzas bake for 10 to 15 minutes, depending on your oven’s personality and how thick your crust is. Start checking at the 8-minute mark. You’re looking for two things: cheese that’s melted and just beginning to brown, and a crust that’s golden on the bottom and edges. The top should be bubbly and caramelized in spots.
Here’s a pro move: if your oven has a broiler, use it for the last minute. Turn the broiler on high, move the pizza to the upper rack, and watch it carefully. This crisps the top, browns the cheese dramatically, and creates that restaurant-quality finish. Just don’t step away—the broiler is fast and can go from golden to burned in 30 seconds. Stay right there and pull it out the moment the cheese looks perfect.
If your oven bakes unevenly (and many home ovens do), rotate the pizza halfway through. This ensures even browning and cooking.
Remove the pizza when the cheese is melted, bubbly, and beginning to brown, and the crust is golden. It will continue cooking slightly from residual heat, so don’t wait for it to be dark brown. That’s the difference between perfectly cooked and slightly overdone.
Storage and Reheating: Making Leftovers Better
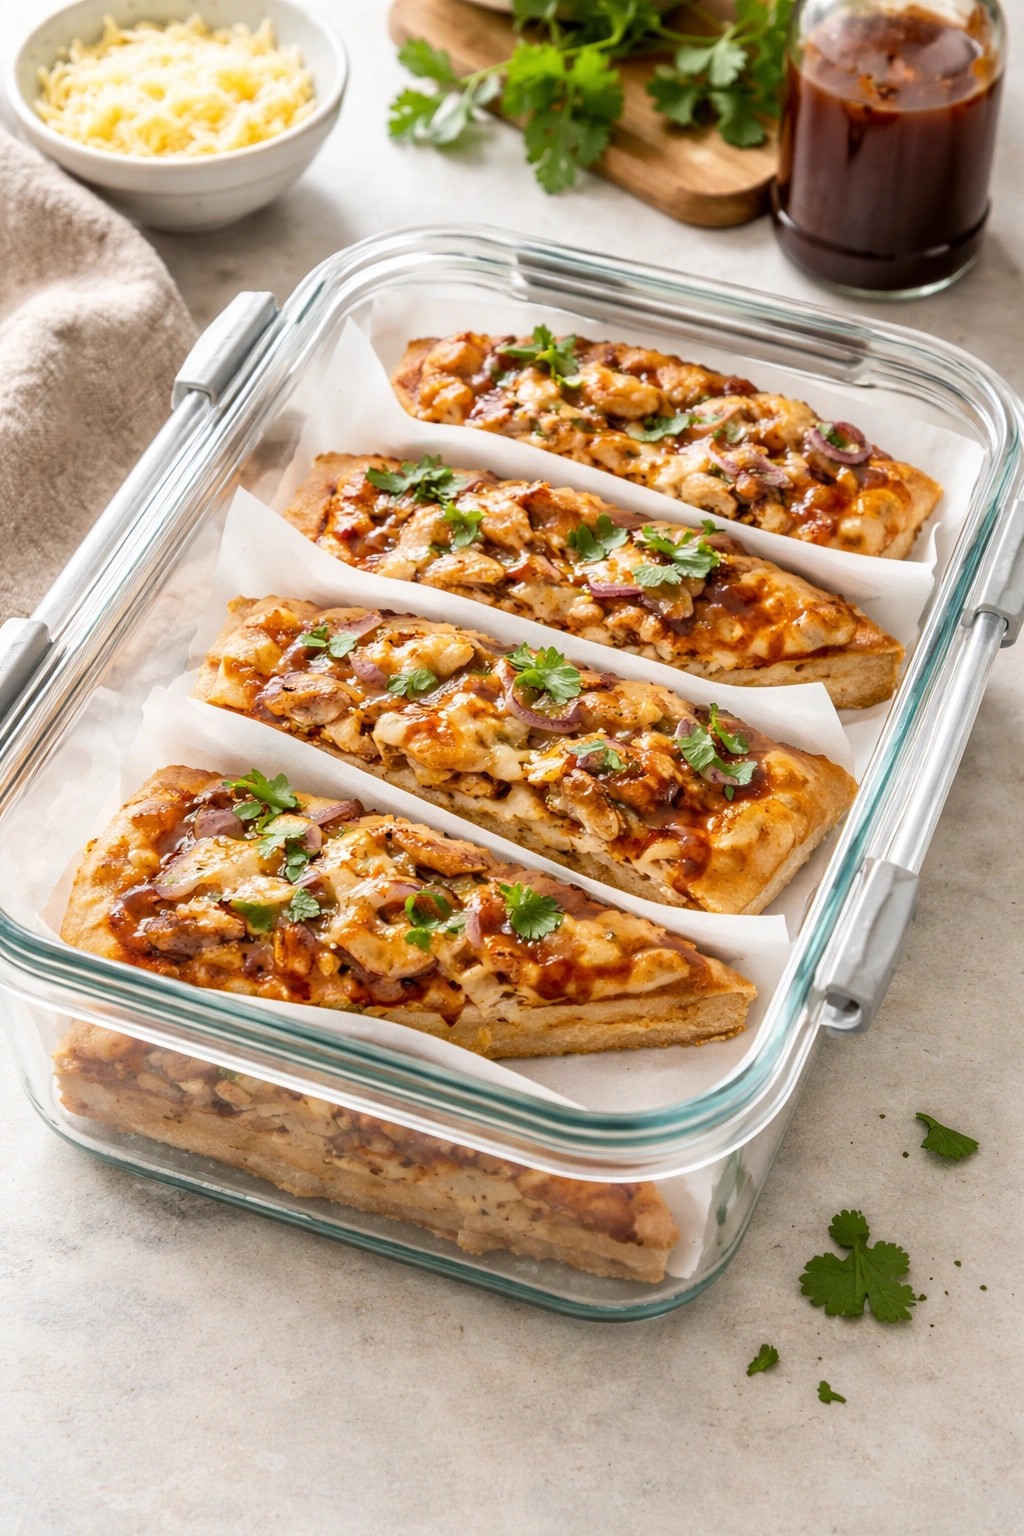
Let the pizza cool for a minute or two before slicing. This gives the cheese time to set slightly so it doesn’t all slide off when you cut and lift a slice.
Store leftover slices in an airtight container in the refrigerator for up to four days. Layer pieces with parchment paper between them to prevent sticking and cheese transfer.
For reheating, your oven is better than your microwave. Preheat to 375°F, place slices on a baking sheet, cover loosely with aluminum foil, and bake for five to ten minutes until warmed through. The foil traps some moisture while still allowing the crust to re-crisp. Remove the foil for the last minute if you want extra crispness.
Freezing also works beautifully. You can freeze unbaked pizzas (assemble, freeze solid, then wrap in plastic and aluminum foil), or freeze baked slices. Unbaked pizzas take about 15 to 20 minutes to bake from frozen. Baked slices reheat in 8 to 10 minutes from frozen using the oven method above.
The Recipe: BBQ Chicken Pizza Made Easy
Yield: One 12-inch pizza, serves 2 to 3 as a main course or 4 as part of a larger meal
Prep Time: 15 minutes
Cook Time: 12–15 minutes
Total Time: 27–30 minutes
Difficulty: Beginner — Most of the work involves preparation and assembly rather than cooking techniques. If you use a store-bought crust and pre-cooked chicken, this comes together quickly with zero fuss.
For the BBQ Pizza Sauce:
- 1 tablespoon sweet barbecue sauce (store-bought is fine)
- 2 teaspoons tomato paste
- ½ teaspoon Worcestershire sauce
For the Pizza Base:
- 1 tablespoon olive oil (for brushing crust)
- 1 (12-inch) pizza crust (store-bought, pre-made, or homemade — see note)
- 1½ cups shredded whole-milk mozzarella cheese (divided: 1 cup for base layer, ½ cup for top)
- ¾ cup shredded smoked gouda cheese (or sharp cheddar as alternative)
For the Toppings:
- 2 cups shredded or diced cooked chicken (rotisserie chicken, leftover chicken, or grilled chicken breast)
- 4 tablespoons additional barbecue sauce (for tossing with chicken)
- 1 medium red onion, thinly sliced (about ¼ inch)
- ¼ cup fresh cilantro, chopped (for garnish after baking)
- Optional: jalapeño slices, crispy bacon pieces, pineapple chunks
Instructions:
Prepare the Oven and Crust:
-
Preheat your oven to 425°F (or follow the temperature instructions on your pizza crust packaging). If using a pizza stone, place it in the oven to heat.
-
Remove your pizza crust from packaging and place it on a pizza stone (if using one) or a standard baking sheet. If your crust is dough that needs shaping, use your hands or a rolling pin to stretch or shape it into a 12-inch round. Let it rest for two to three minutes.
-
Use a pastry brush to lightly coat the entire surface of the crust with olive oil, including the edges but leaving approximately a half-inch border around the very edge uncoated. This oil acts as a moisture barrier and helps the crust crisp rather than absorb sauce.
Prepare the BBQ Sauce:
- In a small bowl, combine the barbecue sauce, tomato paste, and Worcestershire sauce. Whisk together with a small fork until completely smooth with no lumps. Set aside.
Build Your Pizza:
-
Pour the prepared BBQ sauce onto the center of the oiled crust. Using the back of a spoon or a small ladle, spread the sauce in an even layer across the entire crust, leaving that same half-inch border around the edges. You should use approximately all of the sauce; aim for coverage that lets just a hint of crust peek through.
-
Sprinkle approximately one cup of the shredded mozzarella cheese evenly over the sauce in a single layer. This base layer of cheese will contact the sauce directly and help prevent the crust from absorbing excess moisture.
-
In a separate bowl, combine the cooked chicken with the four tablespoons of additional barbecue sauce, stirring until every piece of chicken is coated. This tossing step ensures bold barbecue flavor in every bite.
Advertisements -
Distribute the barbecue-coated chicken evenly across the cheese layer. Don’t pile high; instead, create a single, even layer of chicken across the entire surface.
-
Scatter the sliced red onion over the chicken, distributing evenly. The onions will look like a lot in their raw state, but they’ll soften and caramelize in the oven, losing their sharp bite and becoming sweet and tender.
-
Add any optional toppings at this stage (jalapeños, bacon, pineapple), if using. Remember: one or two optional additions maximum. Restraint here keeps the BBQ chicken flavor as the star.
-
Finish by sprinkling the remaining half cup of mozzarella across the entire surface, then top with all of the smoked gouda. The cheese should cover the pizza all the way to the edges, creating a golden frame.
Bake the Pizza:
-
Carefully transfer the pizza to the oven (if using a stone, slide the pizza from the baking sheet directly onto the preheated stone). Bake for 10 to 12 minutes, until the cheese is melted and beginning to bubble. The crust should be light golden on the edges and bottom.
-
For extra browning and crispness, turn your oven’s broiler to high and move the pizza to the upper rack for the final 1 to 2 minutes. Watch constantly — the broiler works fast and can brown the cheese beautifully or burn it in just a few seconds. You’re looking for light golden-brown spots on the cheese surface and slightly darker edges. Remove immediately once this happens.
-
Remove the pizza from the oven using a pizza peel or the edge of a baking sheet (use oven mitts—the equipment will be extremely hot). Place it on a heat-safe surface and let it cool for two to three minutes. This cooling allows the cheese to set slightly so it won’t slide off when you slice.
Finish and Serve:
-
Using a sharp pizza cutter or sharp chef’s knife, slice the pizza into six or eight slices depending on how large you want each slice.
Advertisements -
Scatter the fresh cilantro over the entire pizza immediately before serving. The fresh herb adds brightness that cuts through the richness of cheese and sauce beautifully.
-
Serve while still warm, with napkins nearby for the inevitable cheese pull when you lift slices.
Pro Tips That Make the Difference
Preventing soggy bottoms is the number-one complaint with homemade pizza. The oil-brush step and the base cheese layer both help tremendously. Additionally, make sure your oven is fully preheated before the pizza goes in—at least 20 minutes. A preheated pizza stone especially matters here because it conducts heat from below, crisping the bottom aggressively.
The cheese pull test is how you know your pizza is done. When you lift a slice and the melted cheese creates a satisfying stretch between the slice and the pizza, you’re there. The cheese won’t pull if it’s not hot enough; it’ll just tear.
Don’t refrigerate raw dough at room temperature. If you’re using homemade dough that’s been sitting out, you have about 30 minutes of usable time before it starts over-proofing and becoming too elastic to work with. Prep it right before you bake, or keep it in the refrigerator until baking time.
Taste your sauce before committing. If it seems too tangy, add a pinch of honey. If it’s too sweet, add a quarter teaspoon more Worcestershire sauce. These small adjustments take 10 seconds and prevent a sauce that doesn’t match your preferences.
Pre-cooking chicken is the time-saver most people overlook. If you’re planning pizza night, cook or buy rotisserie chicken in the morning. Shred it and store it in the refrigerator. When dinner comes around, you’re 15 minutes away from eating instead of 45 minutes away.
Variations That Let You Make This Completely Your Own
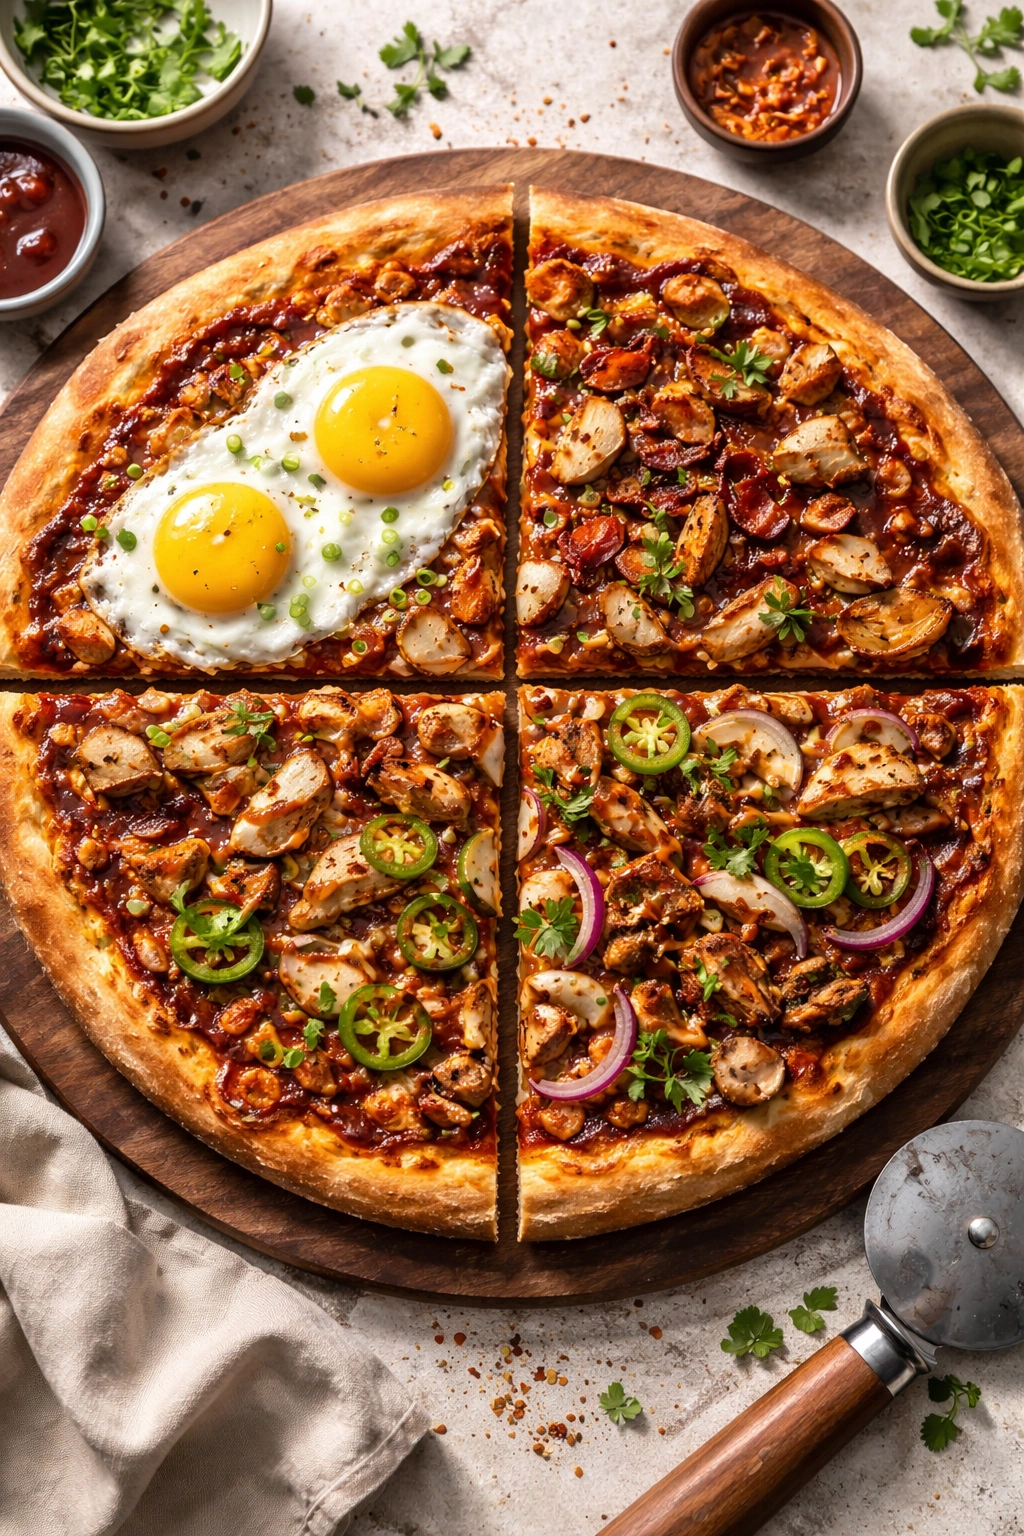
The breakfast BBQ chicken pizza is a weekend winner. Top your pizza with BBQ sauce, chicken, and cheese, then crack two eggs directly onto the pizza in the last three minutes of baking so the yolks stay runny. Serve with crispy bacon and fresh herbs. The runny yolk becomes your sauce.
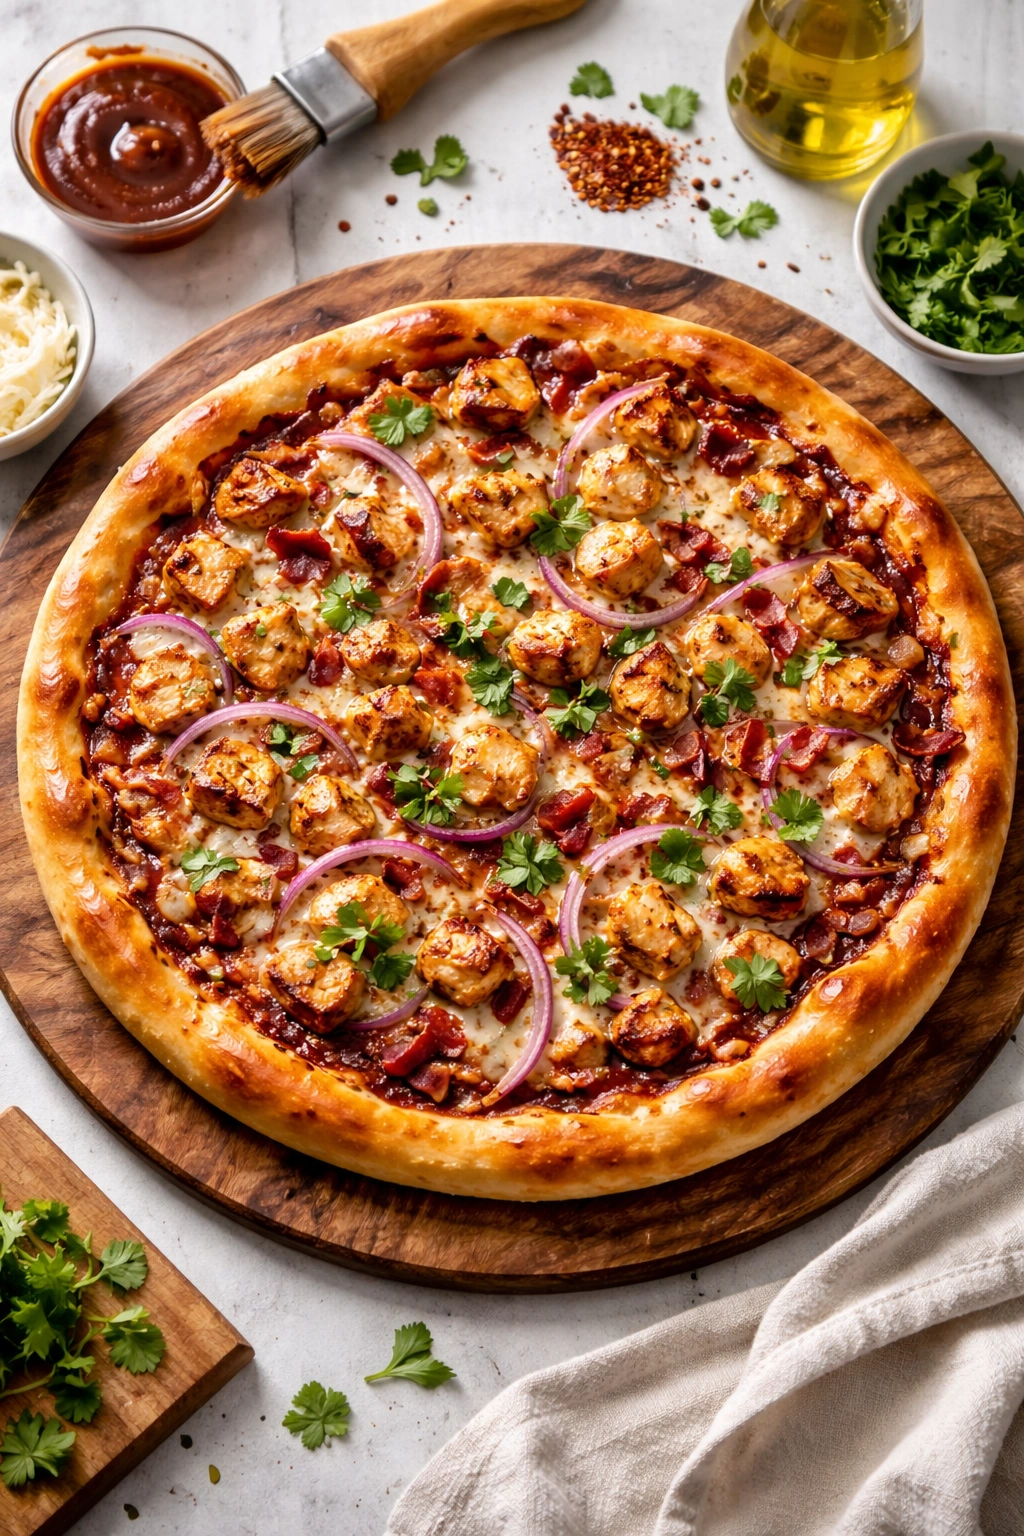
The loaded “loaded” version adds multiple proteins. Use half chicken and half crispy bacon to create a surf-and-turf effect. Add caramelized onions in addition to raw red onion for layered flavor. Finish with a drizzle of ranch dressing after baking for a California-pizza-kitchen vibe.
The spicy kick version includes diced jalapeños on top and swaps the base sauce for a chipotle BBQ sauce (if your store sells it) or creates your own by mixing regular BBQ sauce with a teaspoon of adobo sauce and a quarter teaspoon of smoked paprika.
The vegetarian interpretation replaces chicken with pulled jackfruit (which shreds similarly and takes on the BBQ sauce beautifully) or extra caramelized onions and mushrooms. Use the same sauce, cheese, and toppings approach. It’s genuinely as satisfying as the chicken version.
The make-ahead freezer version is perfect for busy weeks. Assemble your pizza on a baking sheet without sauce (so it doesn’t get soggy), freeze solid for two hours, then wrap tightly in plastic and aluminum foil. When you’re ready to eat, thaw for 20 minutes, add your sauce and toppings, and bake as directed. You can also freeze completely-baked slices and reheat them whenever you want.
Avoiding the Mistakes That Ruin Pizza
Too much sauce is the most common error. Resist the urge to pour the sauce bottle onto your pizza. Sauce is wet, and wet sauce makes soggy crust. Stick to two to three tablespoons spread thin.
Overloading with toppings means uneven cooking and toppings that slide around or brown before the pizza is done. One layer of toppings is ideal. Two layers is the absolute maximum.
Skipping the olive oil brush might seem like saving calories, but it’s actually what prevents sogginess. That oil barrier really matters.
Using pre-shredded cheese that has anti-caking agents instead of freshly shredded. Pre-shredded is convenient, but the anticaking powder prevents smooth melting. If you use pre-shredded, get the highest quality you can find. Or shred your own block cheese—it takes two minutes and makes a visible difference in melt quality.
Not letting the dough rest before topping it. If you’re using homemade dough, let it sit at room temperature for at least 10 to 15 minutes after shaping. This relaxes the gluten and prevents the dough from shrinking back as it bakes, which means a thinner, crispier crust.
Pulling the pizza out too early because it doesn’t look quite done. Trust the timer and trust what the recipe says. Cheese needs those extra minutes to brown and create that essential caramelization. Pale, non-browned cheese is a sign you weren’t patient enough.
Final Thoughts
The reason homemade BBQ chicken pizza beats delivery isn’t complicated. You control every single ingredient. You watch it bake. You eat it at peak temperature and texture. You spend a fraction of the money and get something objectively better. Once you make this pizza once and taste the difference, you’ll never go back to waiting for delivery.
The recipe above is just a starting point—a formula that works beautifully but invites your personal touch. Adjust the sauce spice level. Try different cheeses. Experiment with toppings. That’s the whole point. You’re not locked into anyone else’s vision of what this pizza should be.
Keep store-bought crusts in your freezer and rotisserie chicken in your fridge, and you’re never more than 30 minutes away from this pizza. That’s faster than delivery. That’s better than delivery. That’s the whole game right here.