If you’ve ever spent $20 on a tiny container of butter chicken from your favorite Indian restaurant, only to finish it in three bites, you already know the truth: homemade butter chicken can be cheaper, fresher, and honestly, often better than what you’re ordering for delivery. The magic isn’t in some mysterious restaurant technique or hard-to-find ingredients — it’s in understanding what actually makes this dish work, then executing it with intention. Once you’ve mastered this recipe, takeout menus will start collecting dust.
Butter chicken, or murgh makhani as it’s known in India, has become one of the most beloved Indian dishes worldwide, and for good reason. The combination of tender, marinated chicken in a silky, aromatic cream sauce strikes that perfect balance between comfort and sophistication. Yet most home cooks approach it with trepidation, imagining it requires either hours of preparation or a cabinet full of obscure spices. Neither is true. What you actually need is technique over complexity — knowing which steps matter, which ingredients do the heavy lifting, and exactly when to trust the process.
This recipe cuts through the noise and gives you the essentials. It’s been refined through testing different marinating times, spice ratios, cooking methods, and sauce bases to create something that genuinely rivals restaurant versions. Better yet, you can have it on the table in under an hour, making it completely realistic for weeknight dinners while maintaining that sense of occasion that makes takeout feel special.
Why Butter Chicken Became a Global Favorite
The origin story of butter chicken is almost as delicious as the dish itself. The dish was accidentally invented in the 1950s at Moti Mahal, a famous Delhi restaurant, when the chef faced a problem many restaurant kitchens understand: leftover tandoori chicken that had dried out during service. Rather than waste it, the chef combined that dried chicken with a sauce made from butter, heavy cream, and tomato to create an entirely new dish. That happy accident transformed into one of the most ordered curries on every Indian restaurant menu worldwide.
What makes butter chicken special — and different from other Indian curries like tikka masala or korma — is its specific balance of richness and brightness. The butter and cream create an enveloping sauce that feels luxurious, but it’s balanced by the acidity of tomatoes and the complexity of warming spices like garam masala and cumin. Unlike tikka masala, which tends toward spice and tang, butter chicken is inherently mild and approachable, which explains its universal appeal. It’s the perfect gateway curry for people new to Indian food, yet sophisticated enough to satisfy serious curry enthusiasts.
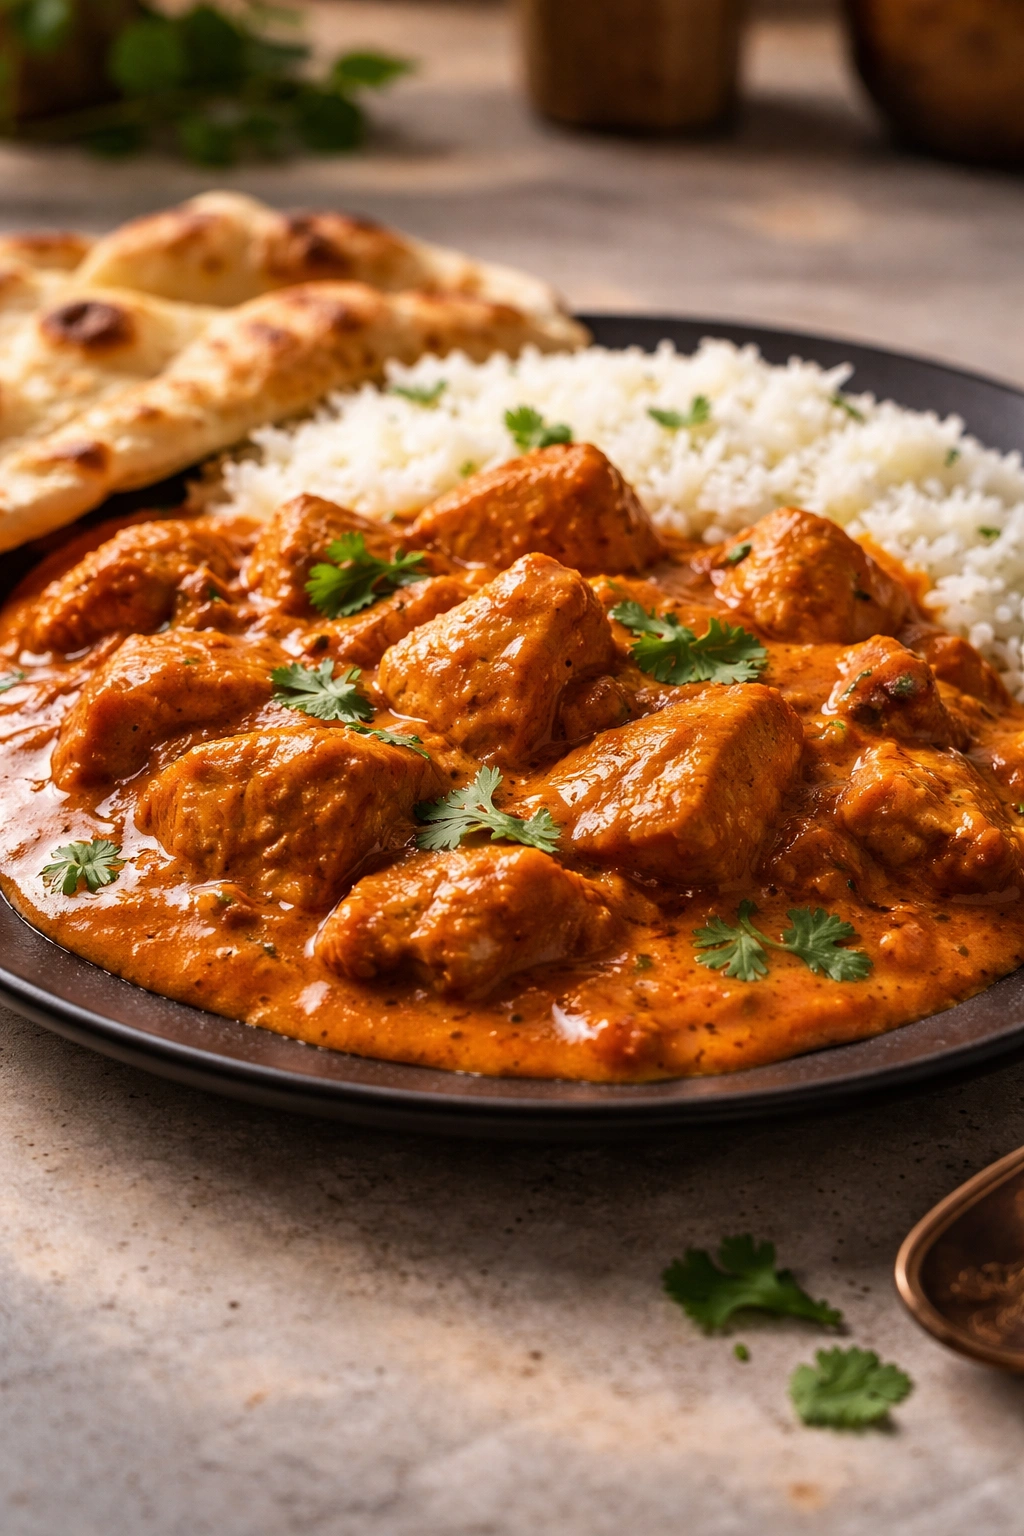
The dish earned global recognition because it solved a real problem for diners: it’s rich without being heavy, creamy without being cloying, and flavorful without requiring advanced heat tolerance. You can eat it slowly to savor each bite, or demolish an entire bowl without apology. It pairs beautifully with rice, soaks into naan bread, and tastes just as good as leftovers the next day (often better, actually, as the flavors have time to settle and intensify).
What Actually Makes Butter Chicken “Better” Than Takeout
Most home cooks assume that restaurant butter chicken tastes better because restaurants use secret techniques or premium ingredients that aren’t available at regular grocery stores. In reality, the difference comes down to freshness, intention, and understanding the role of each ingredient. When you make butter chicken at home, every component is made for that specific batch, not batch-cooked in a giant pot hours before service and held under heat lamps.
Restaurant advantage number one is volume — they make curry in quantities that let flavors develop deeply through long cooking times. You can replicate this by using proper browning techniques, letting your spice bloom in fat, and allowing the sauce to simmer long enough for the spices and tomatoes to meld completely. Your home kitchen can absolutely achieve this, often in less time, because you’re working with smaller quantities that heat and reduce more efficiently.
Restaurant advantage number two is quality control — they use good ingredients and consistent technique. Most restaurant butter chicken isn’t made with exotic, hard-to-find components. It’s made with good butter, quality cream, fresh garlic and ginger, and properly stored spices. Those same ingredients are available at any ordinary grocery store. The difference is that home cooks often skip critical steps (like truly caramelizing onions, or properly searing the chicken for color and depth), then try to compensate by adding more salt or extra spices.
The final factor is confidence. Restaurants make this dish so frequently that the cook knows exactly when the sauce has reduced to the right consistency, exactly how long to simmer the chicken, and exactly when the flavors have come together. This article will give you that same knowledge so you can cook with authority rather than anxiety.
Selecting the Right Chicken Cut for Maximum Tenderness
The choice between chicken breasts and chicken thighs matters more than most recipes acknowledge. Chicken thighs are the superior choice for butter chicken because they contain significantly more fat, which keeps them tender even if cooking times vary slightly. Thighs have a higher moisture content and can handle extended simmering without drying out. Their flavor is also richer and more savory, which complements the creamy sauce beautifully.
That said, boneless, skinless chicken breasts absolutely work if that’s what you have on hand. The key is not to overcook them — they finish cooking in the sauce, so searing them for just 2–3 minutes on the outside (not cooking them through) is all you need before the braising happens. If you choose breasts, consider cutting them on the bias into slightly thinner pieces, which helps them cook faster and more evenly without the meat becoming tough and stringy.
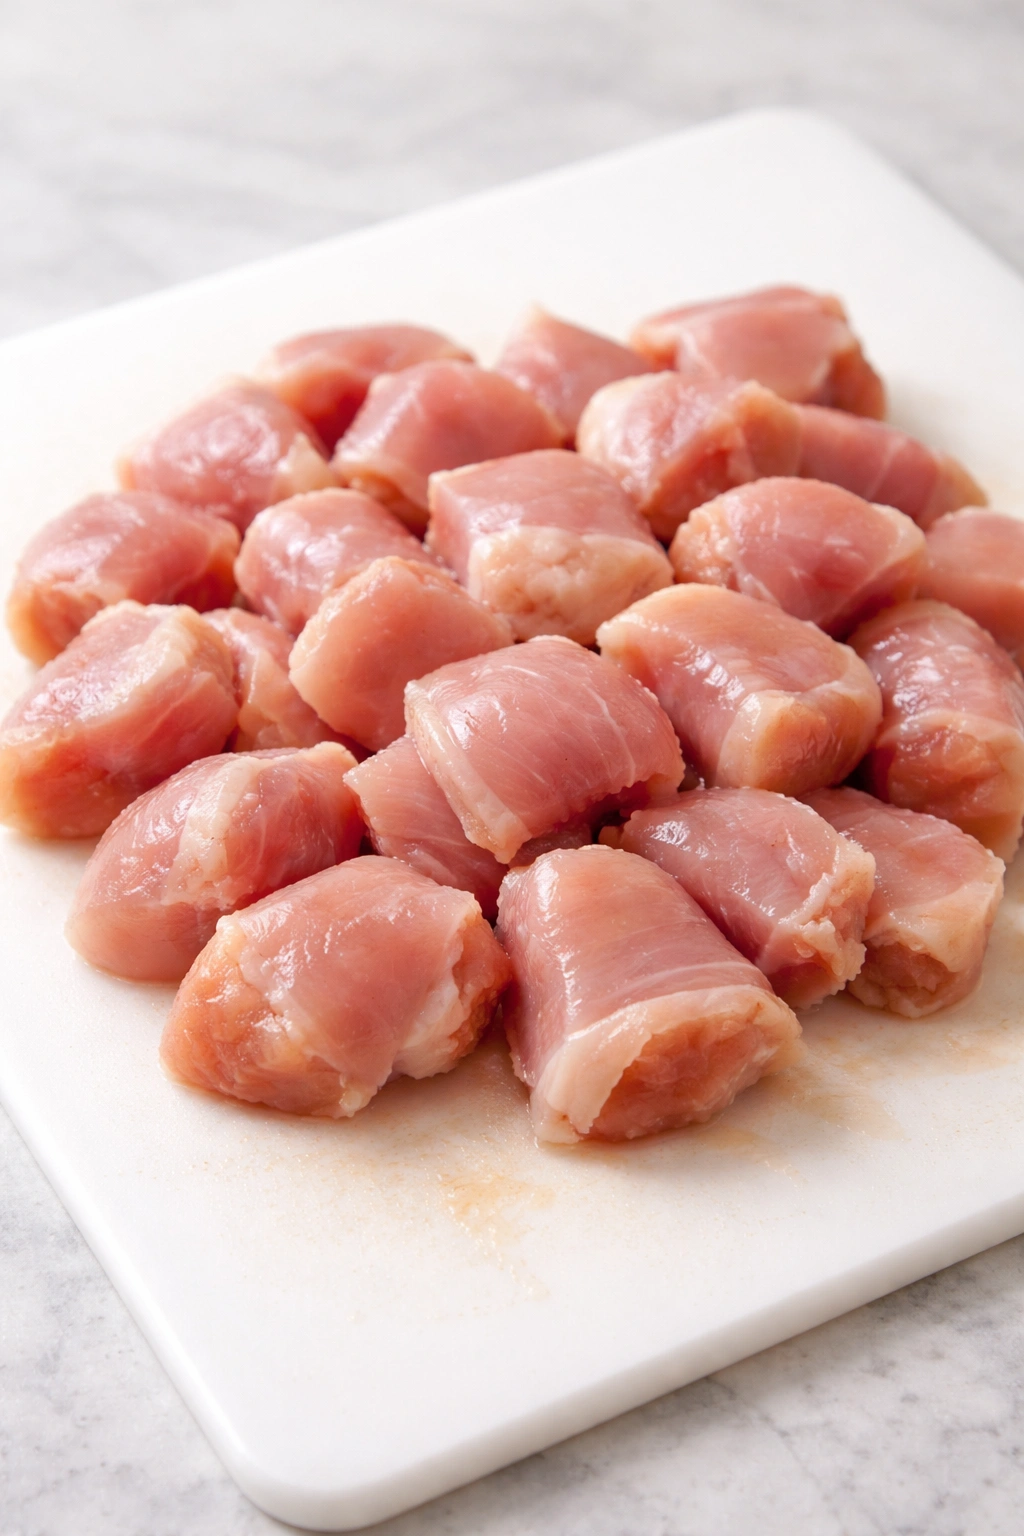
Size matters too. Cut your chicken into bite-sized pieces, roughly ¾ to 1 inch — they should be small enough to eat comfortably with rice, but large enough that they don’t completely disappear into the sauce or break apart during cooking. Inconsistent sizes lead to some pieces overcooking while others remain raw, so take a moment to cut them all similarly. Trim any excess fat from around the edges, but don’t remove it entirely; that fat renders out and adds flavor to the sauce.
The Yogurt Marinade: Secret to Restaurant-Quality Texture
The yogurt marinade does two things that transformed homemade butter chicken from tough and rubbery to genuinely tender: it tenderizes the meat and it infuses flavor from the spices directly into each piece. The lactic acid and calcium in yogurt work gently on the chicken’s protein structure, breaking it down just enough to increase moisture retention without creating that mushy texture that over-marinated chicken develops.
Greek yogurt works beautifully, as does regular yogurt — full-fat versions are ideal because the fat helps with both tenderization and sauce richness. The minimum marinating time is 30 minutes, but overnight in the refrigerator is honestly better. Plan ahead: coat your chicken in the marinade while watching TV the night before, and most of the active work is already done when you’re ready to cook.
The marinade itself is simple: plain yogurt, crushed or minced garlic, grated fresh ginger, lemon juice, and the spice blend. Don’t skip the lemon juice — the acidity accelerates the tenderizing process and brightens the overall flavor. Use freshly grated ginger, not the jarred stuff; fresh ginger brings a sharpness and liveliness that pre-minced versions can’t match. Crushed garlic (made by pressing it through a garlic press or mincing it finely with salt) distributes more evenly than chunky minced garlic and flavors the meat more consistently.
Building Flavor: The Spice Foundation and Bloom
The spice blend for butter chicken is actually quite straightforward: garam masala as the star, with supporting roles from cumin, turmeric, paprika, and a touch of chili powder. Garam masala is itself a blend of warm spices (typically black pepper, cloves, cinnamon, cardamom, bay leaf, and others), so it does much of the heavy lifting. If your garam masala has been sitting in your cabinet for two years, throw it out and buy fresh — stale spices taste dusty and faint, and they’ll ruin the dish.
The technique of blooming spices is where amateurs often stumble. After you’ve sautéed your onions and added butter, ginger, and garlic, you add your spices to that fat and let them cook for just 30 seconds to 1 minute until you can smell them intensely. This brief cooking releases the essential oils in the spices and distributes them throughout the fat, which then carries those flavors into every component of the sauce. Don’t skip this step or rush it — that’s where the difference between “tastes like a recipe” and “tastes like a real curry” lives.
Once your spices are bloomed, immediately add your tomatoes and tomato paste before the spices burn. Burning them (which happens surprisingly fast if you’re distracted) creates a bitter flavor that’s nearly impossible to fix. The tomatoes and cream cool everything down, and what was a concentrated spice mixture becomes a balanced sauce base.
Creating the Signature Creamy Tomato Sauce
The sauce is the soul of this dish, so it deserves respect. Start with good-quality tomatoes — either crushed canned tomatoes (San Marzano if you can find them), tomato purée, or passata (sieved tomato sauce). Avoid tomato sauce marketed for pasta, which often contains salt, sugar, and oil already. You want plain tomatoes so you can control the seasoning.
The tomato base cooks down before the cream is added, concentrating its flavor and allowing the bright red color to deepen into a richer, more complex brick-red hue. This takes about 15 minutes of simmering, during which you’ll see oil beginning to separate around the edges of the sauce — that’s a sign that the tomato has cooked down enough. Stirring occasionally prevents scorching on the bottom of the pan.
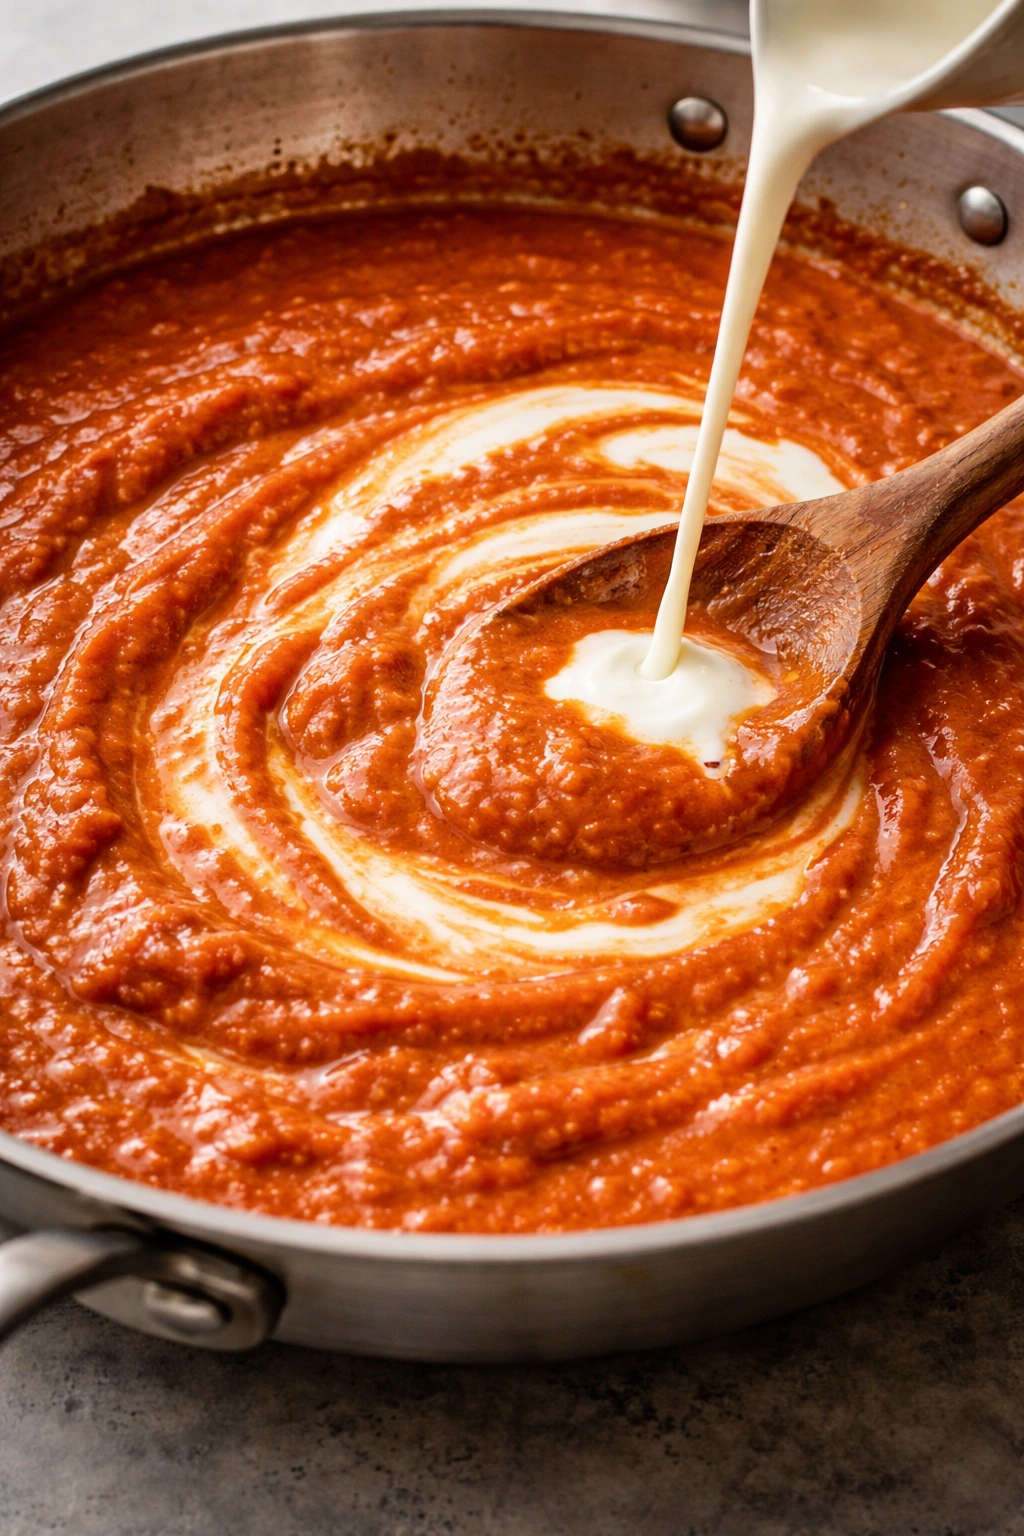
Heavy cream or whipping cream is non-negotiable here; substitutes like half-and-half or milk simply don’t create the same silky, luxurious texture. When you add cold cream to a hot sauce, there’s a risk of it breaking or separating, which creates that curdled, unappetizing appearance. To prevent this, reduce the heat to low before adding the cream, and stir constantly as you incorporate it. Some cooks temper the cream first by ladling some hot sauce into it and stirring, then adding the mixture back — this technique works but isn’t strictly necessary if you’re careful with heat and stirring.
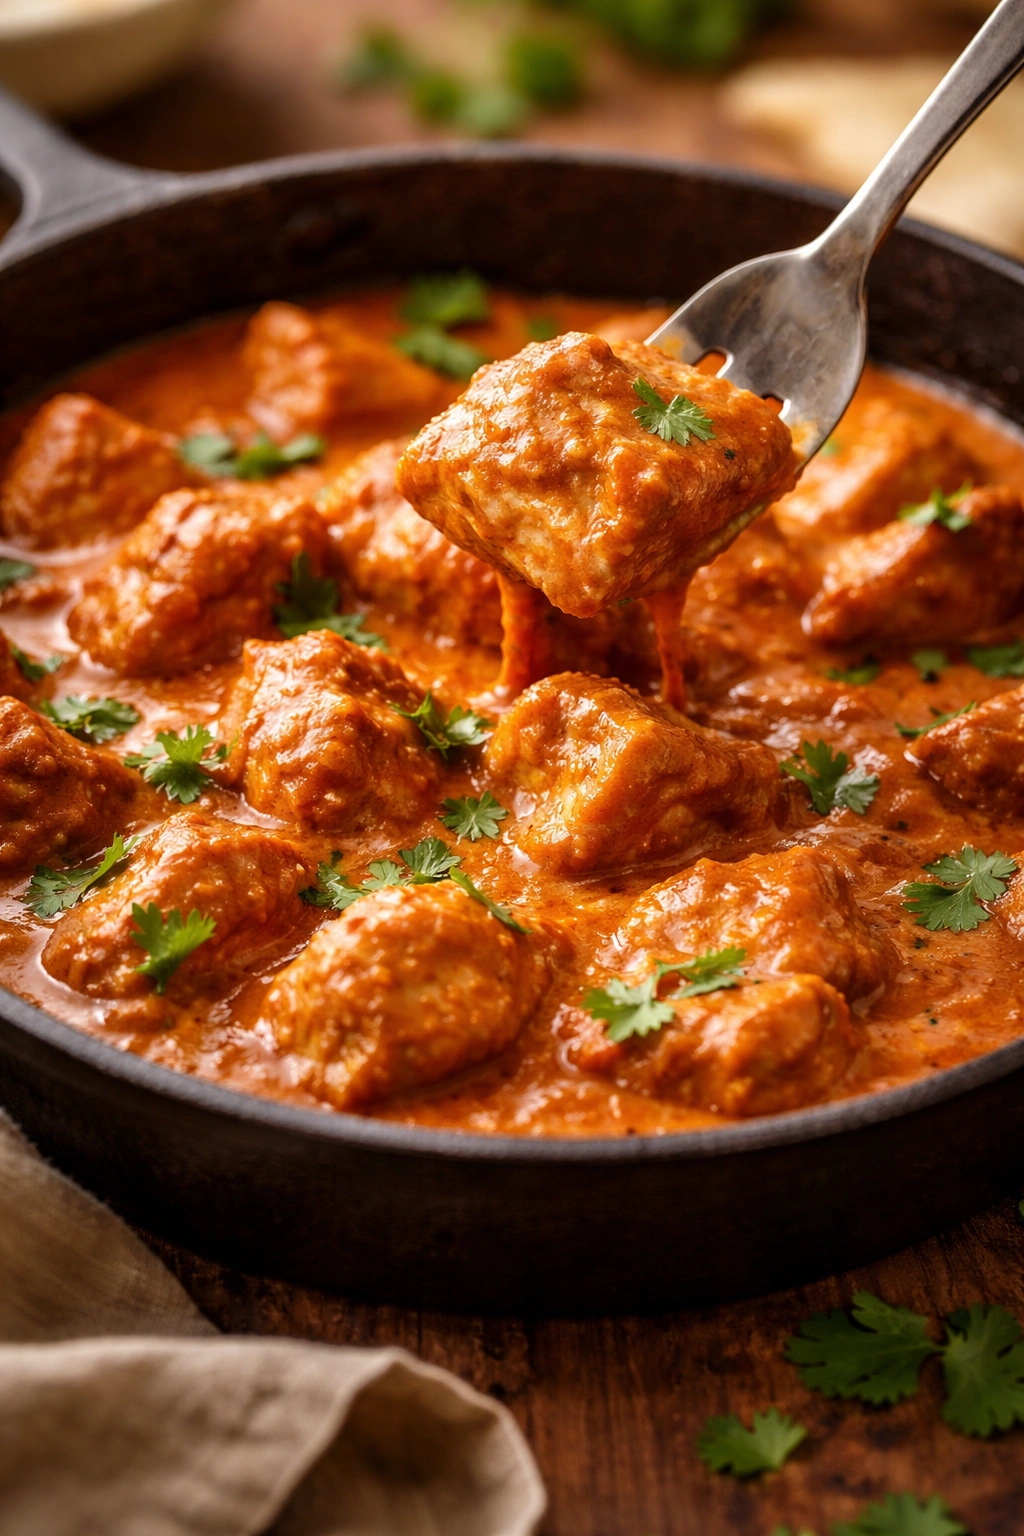
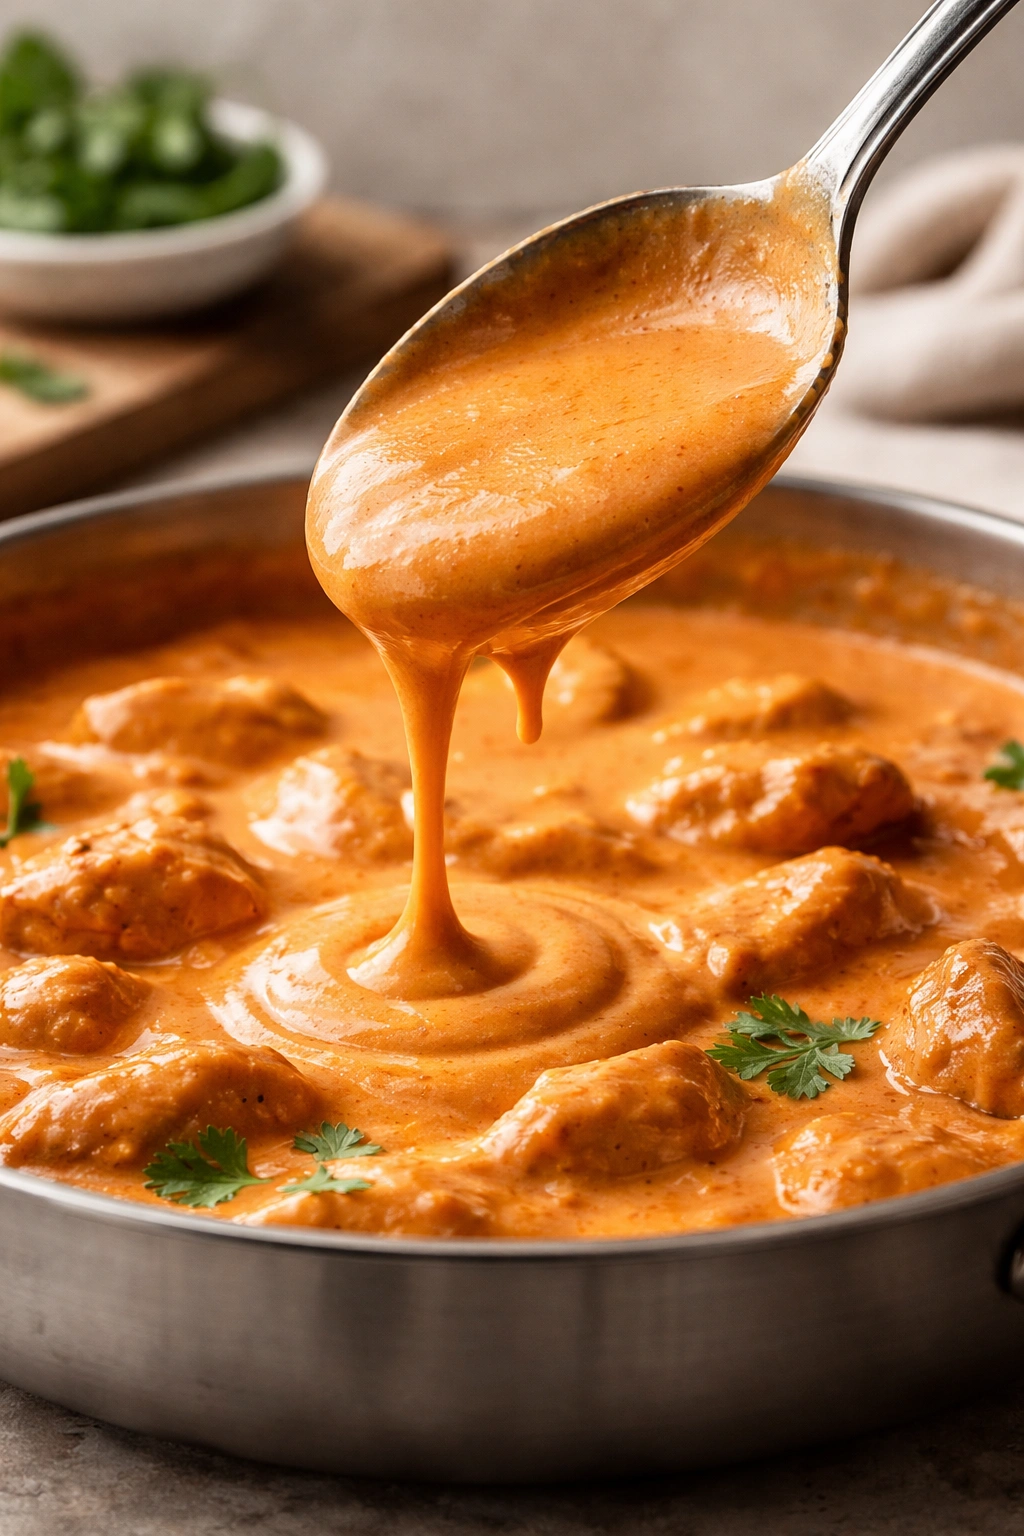
The finished sauce should coat the back of a spoon but still be pourable, not thick and gluggy. It thickens further as it cools, so account for that when judging consistency. If it gets too thick during cooking, add a splash of water; if it’s too thin, let it simmer longer to reduce further.
Yield: Serves 4 to 6 people Prep Time: 15 minutes (not including marinating time) Cook Time: 30 minutes Total Time: 45 minutes active + 30 minutes to overnight marinating time Difficulty: Beginner to Intermediate — The technique is straightforward, but success depends on understanding when each step is properly done (when spices smell fragrant, when tomatoes have reduced, when cream shouldn’t break). First-time success is highly achievable if you follow timing and heat levels closely.
For the Marinade:
- 2 pounds boneless, skinless chicken thighs (or breasts), cut into bite-sized pieces
- ¾ cup plain Greek yogurt, full-fat
- 2 tablespoons fresh lemon juice
- 4 cloves garlic, crushed or minced very fine
- 1 tablespoon fresh ginger, grated on a microplane grater
- 2 teaspoons ground cumin
- 2 teaspoons garam masala
- ½ teaspoon ground turmeric
- ½ teaspoon fine sea salt
- ¼ teaspoon cayenne pepper (optional, for heat)
For the Sauce:
- 3 tablespoons unsalted butter
- 1 tablespoon high heat neutral oil (vegetable, canola, or sunflower)
- 1 medium yellow onion, diced into small, uniform pieces
- 1 tablespoon fresh ginger, grated
- 4 cloves garlic, minced fine
- 2 teaspoons garam masala
- 1½ teaspoons ground cumin
- ½ teaspoon ground turmeric
- ¼ teaspoon paprika
- ¼ teaspoon cayenne pepper (optional, adjust for spice preference)
- ¾ teaspoon fine sea salt (adjust to taste at the end)
- 1 (15-ounce) can crushed tomatoes or 1¾ cups tomato purée
- 2 tablespoons tomato paste
- 1 cup heavy cream, room temperature if possible
- 1 tablespoon fresh lemon juice
- 1 teaspoon sugar (optional, to balance acidity)
- 2 tablespoons fresh cilantro, chopped, for garnish
- Cooked basmati rice or warm naan for serving
Prepare the Marinade:
-
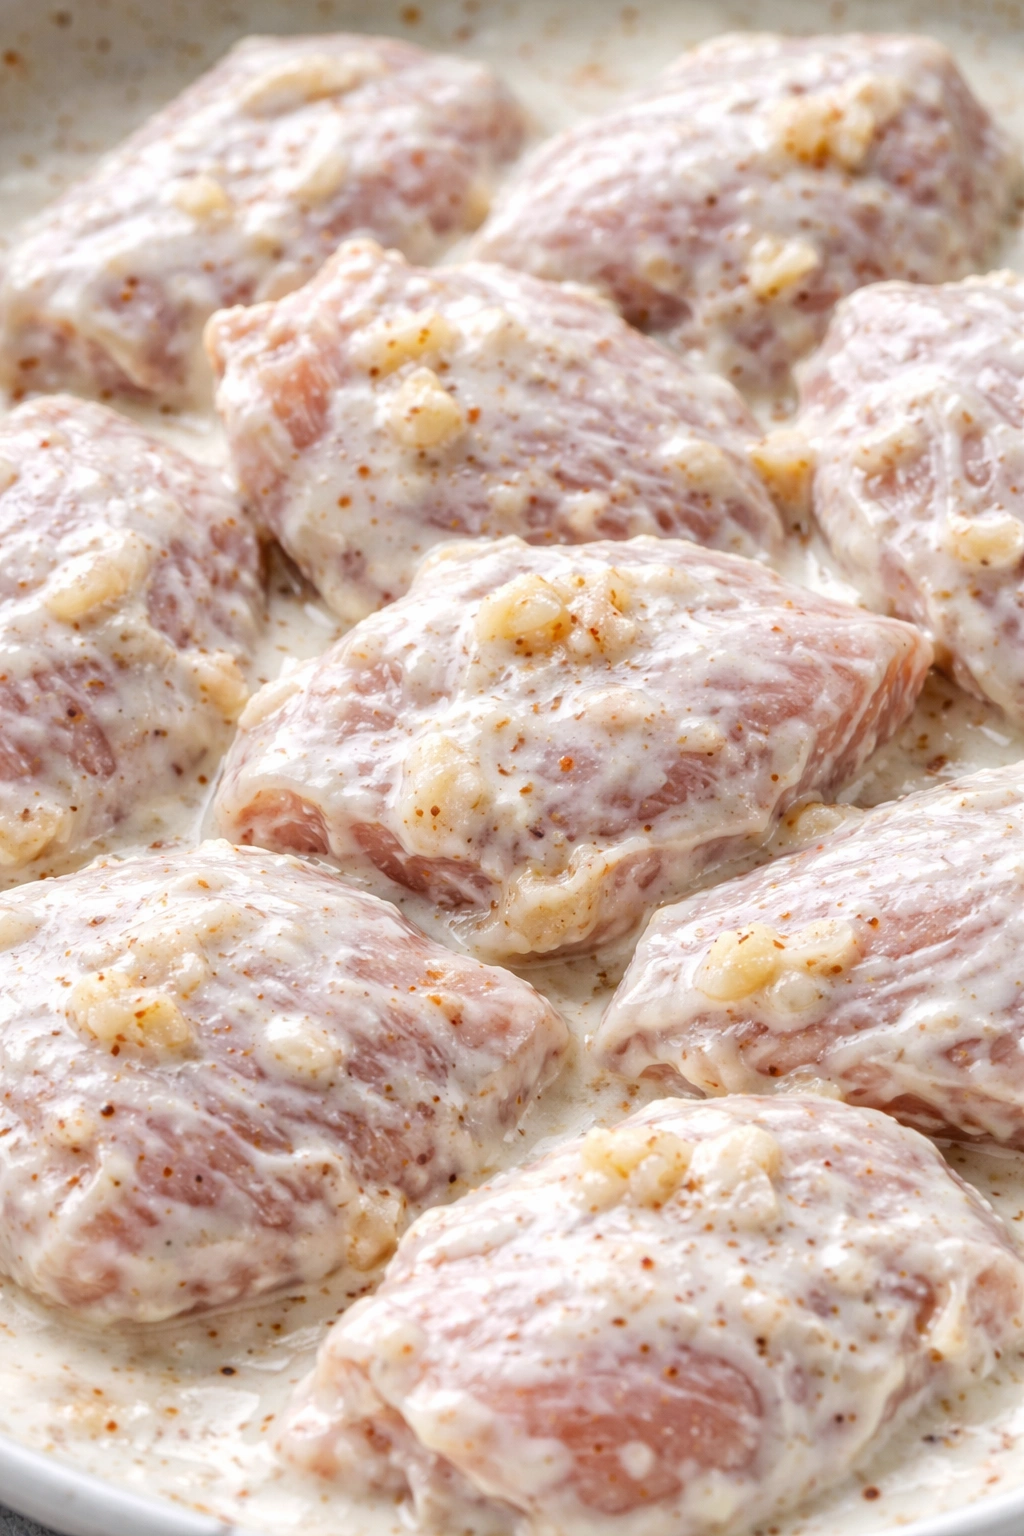
In a large bowl or a gallon-sized zip-top bag, combine the crushed garlic, grated ginger, cumin, garam masala, turmeric, salt, and cayenne pepper (if using). Stir together until you have a fragrant spice mixture.
-
Add the plain Greek yogurt to the spices and stir until completely combined, breaking up any lumps. The mixture should look like a thick, rust-colored paste.
-
Add the chicken pieces to the marinade and fold gently until every single piece is coated on all sides. Use a spoon or spatula to turn the pieces, ensuring no bare chicken is visible. If using a zip-top bag, seal it and massage the marinade into the chicken by hand — this ensures even coating.
Advertisements -
Cover the bowl tightly or seal the bag, then refrigerate for at least 30 minutes. Overnight is ideal (up to 24 hours), as this gives the yogurt time to tenderize the meat and the spices time to penetrate fully. Do not skip this step or rush it — the marinade is what creates that restaurant-quality tenderness.
Cook the Chicken and Build the Sauce:
-
Heat the neutral oil in a large, heavy-bottomed skillet (at least 12 inches wide) over medium-high heat. When the oil is hot enough that a piece of onion immediately sizzles when it hits the pan, you’re ready.
-
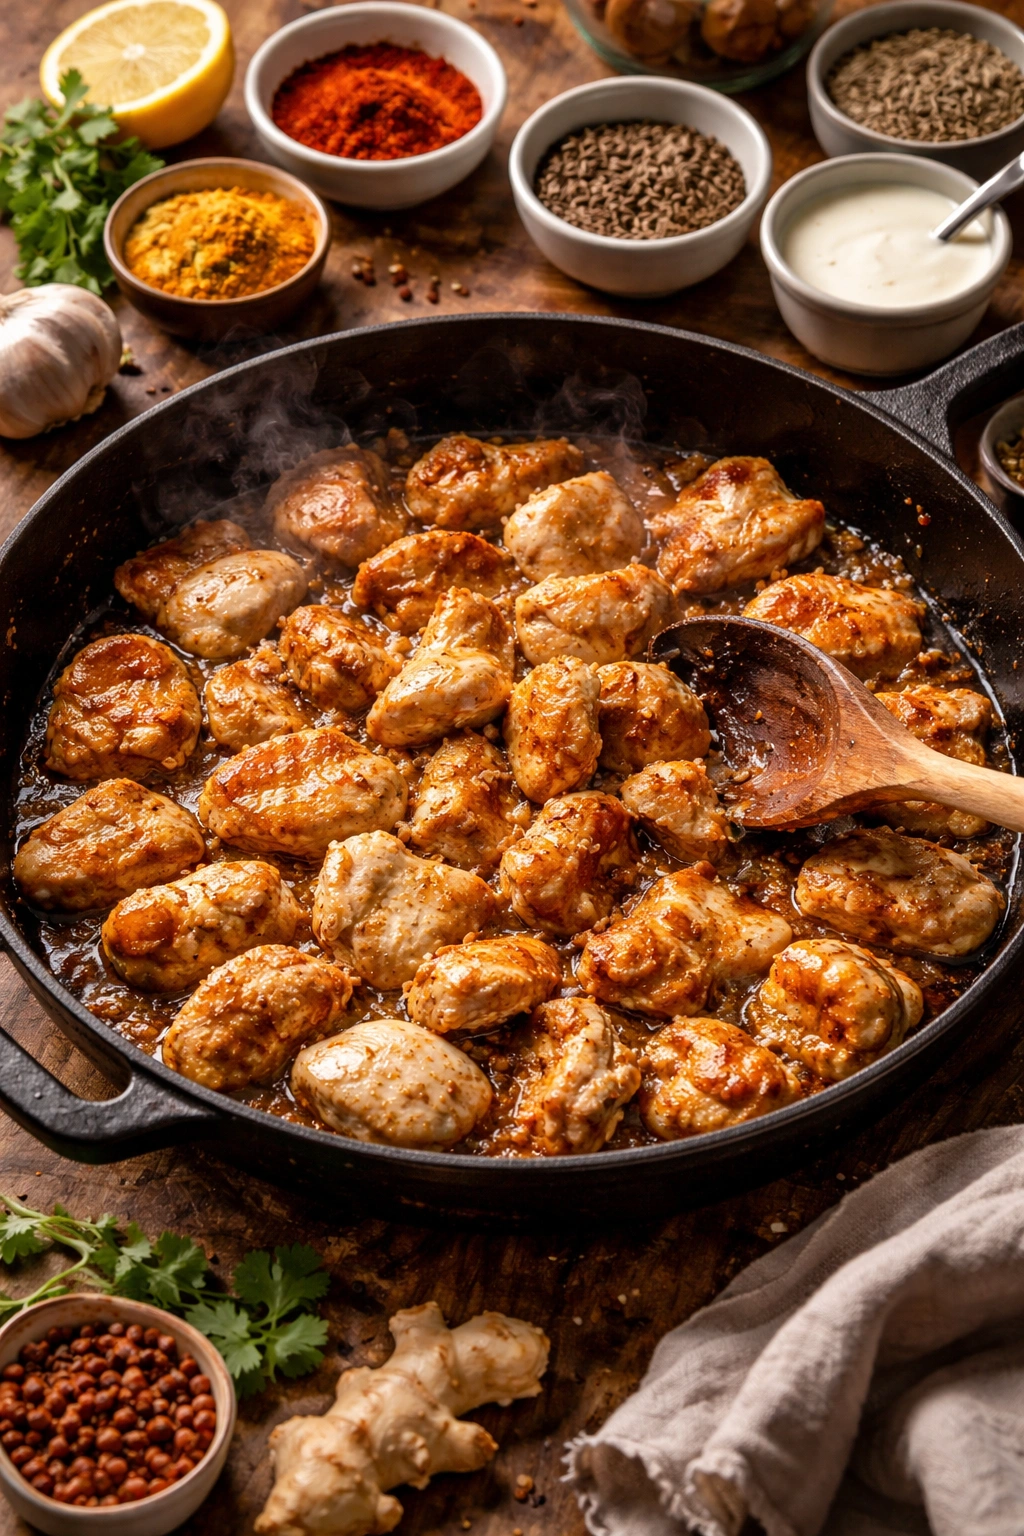
Working in batches so you don’t overcrowd the pan, add the marinated chicken pieces in a single layer. Do not stir for the first 2–3 minutes — let them sit undisturbed so they develop a golden-brown sear on the bottom. This browning creates depth of flavor that’s impossible to achieve any other way.
-
After 2–3 minutes, stir the chicken and cook for another 1–2 minutes, turning the pieces so the other sides get some color. The chicken does not need to be cooked through at this point — it will finish cooking in the sauce. Remove the cooked batch to a clean plate and repeat with remaining chicken. Pour any accumulated juices from the plate back into the pan.
Build the Sauce Base:
-
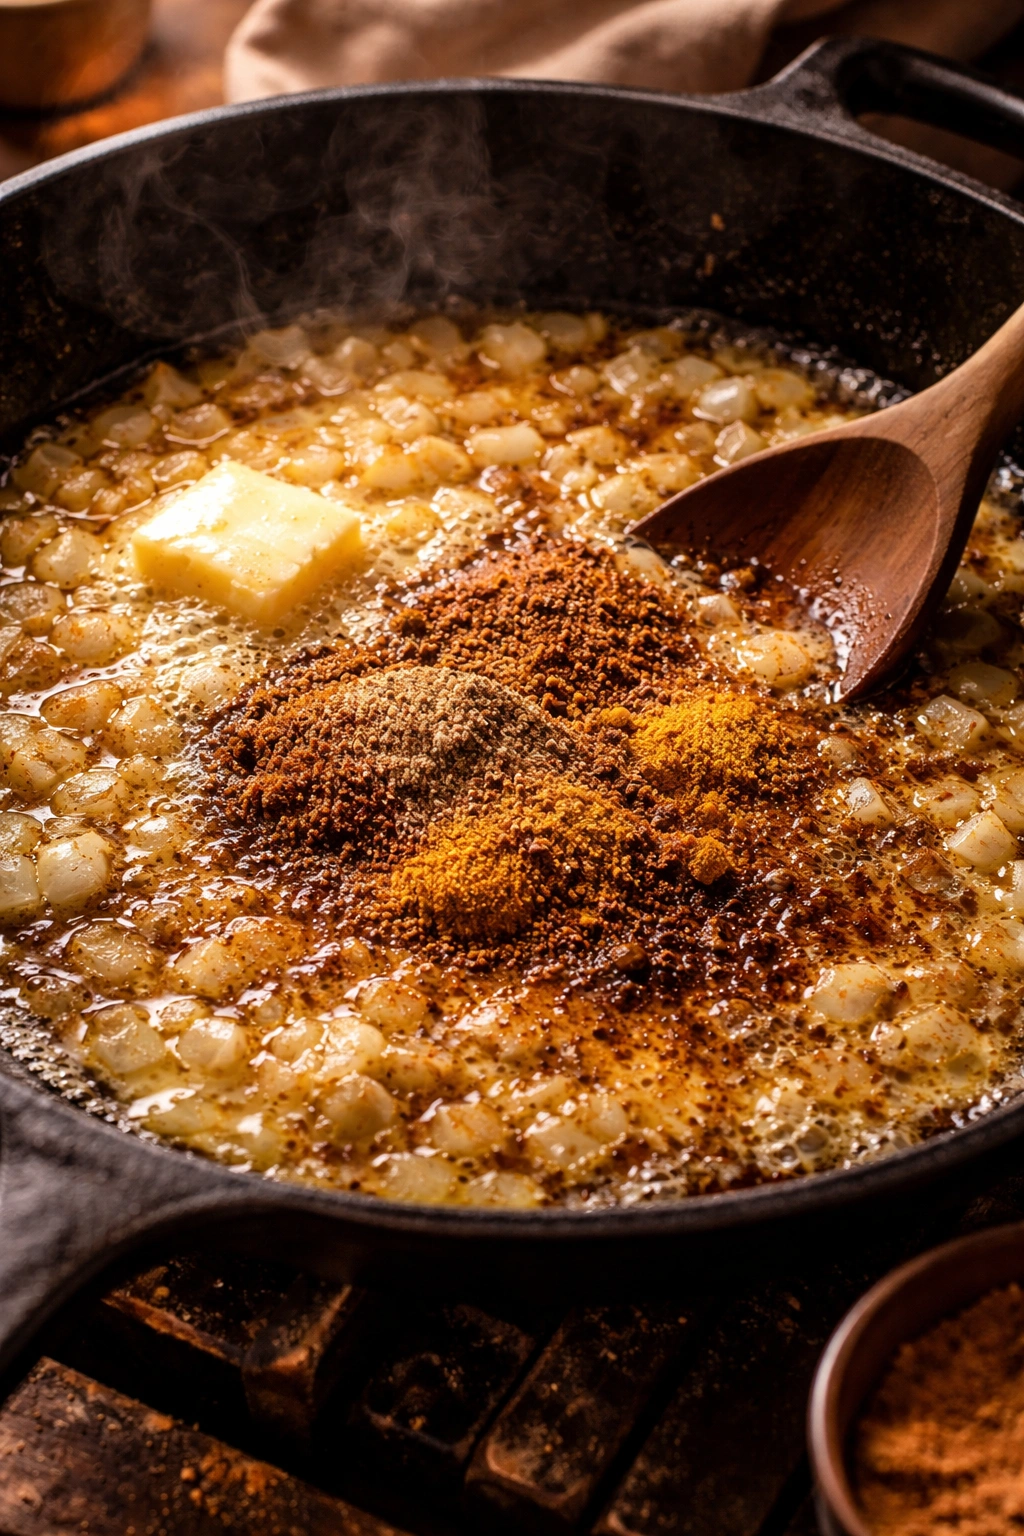
In the same skillet (do not wash it — those browned bits are pure flavor), melt 3 tablespoons of butter over medium heat. Add the diced onion and cook, stirring occasionally, for 7–10 minutes until the onions are completely soft, translucent, and beginning to caramelize at the edges. This slower cooking of onions is not optional — it builds a sweet, savory foundation for the sauce. Reduce heat if the onions are browning too fast and threatening to burn.
-
Add the minced garlic and grated ginger to the softened onions and stir constantly for about 30 seconds until fragrant — you should smell the ginger and garlic immediately. This is just enough time to cook off the raw edge without burning them.
-
Add the garam masala, cumin, turmeric, paprika, and cayenne pepper (if using) to the pan. Stir constantly for about 45 seconds to 1 minute until the spices are fragrant and you can smell them intensely. The spices will deepen slightly in color and release their essential oils into the butter. Be attentive during this step — overcooked spices taste burnt and bitter, which ruins the entire sauce.
-
Immediately add the tomato paste to the pan and stir for about 1–2 minutes, letting it cook with the spices. The tomato paste will deepen in color and concentrate in flavor.
Advertisements -
Pour in the crushed tomatoes (or tomato purée) and stir thoroughly until everything is combined. Scrape up any browned bits stuck to the bottom of the pan — these add incredible depth.
-
Bring the sauce to a gentle simmer and let it cook, stirring occasionally, for about 12–15 minutes. During this time, the sauce will thicken slightly, the bright red color will deepen to a richer brick-red, and oil will begin to separate around the edges. The longer you let it simmer here, the more developed and complex the tomato flavor becomes. Do not rush this step.
Add the Cream and Finish:
-
Reduce the heat to low — this is critical to prevent the cream from breaking. Slowly pour the heavy cream into the sauce while stirring constantly. The sauce will lighten in color and become noticeably silkier. Stir for about 2–3 minutes to fully incorporate the cream.
-
Add the browned chicken pieces back to the pan, including any accumulated juices on the plate. Stir gently to distribute the chicken throughout the sauce.
-
Squeeze in the fresh lemon juice and taste the sauce. Add salt if needed — most people need ¼ to ½ teaspoon more than what was added during cooking, but taste as you go. If the sauce tastes too acidic or bright, dissolve the optional teaspoon of sugar in a tiny bit of water and stir it in. This small amount of sugar doesn’t make the dish sweet; it balances the tomato acidity without adding noticeable sweetness.
-
Let everything simmer very gently for 5–7 minutes, just until the chicken is cooked through (165°F if you have a thermometer) and the flavors have melded together. The sauce should gently bubble around the edges, not boil aggressively.
-
Remove from heat. Let the finished butter chicken rest off the heat for 3–5 minutes before serving — this settling period allows the flavors to integrate even further. It sounds like a small thing, but it makes a noticeable difference.
-
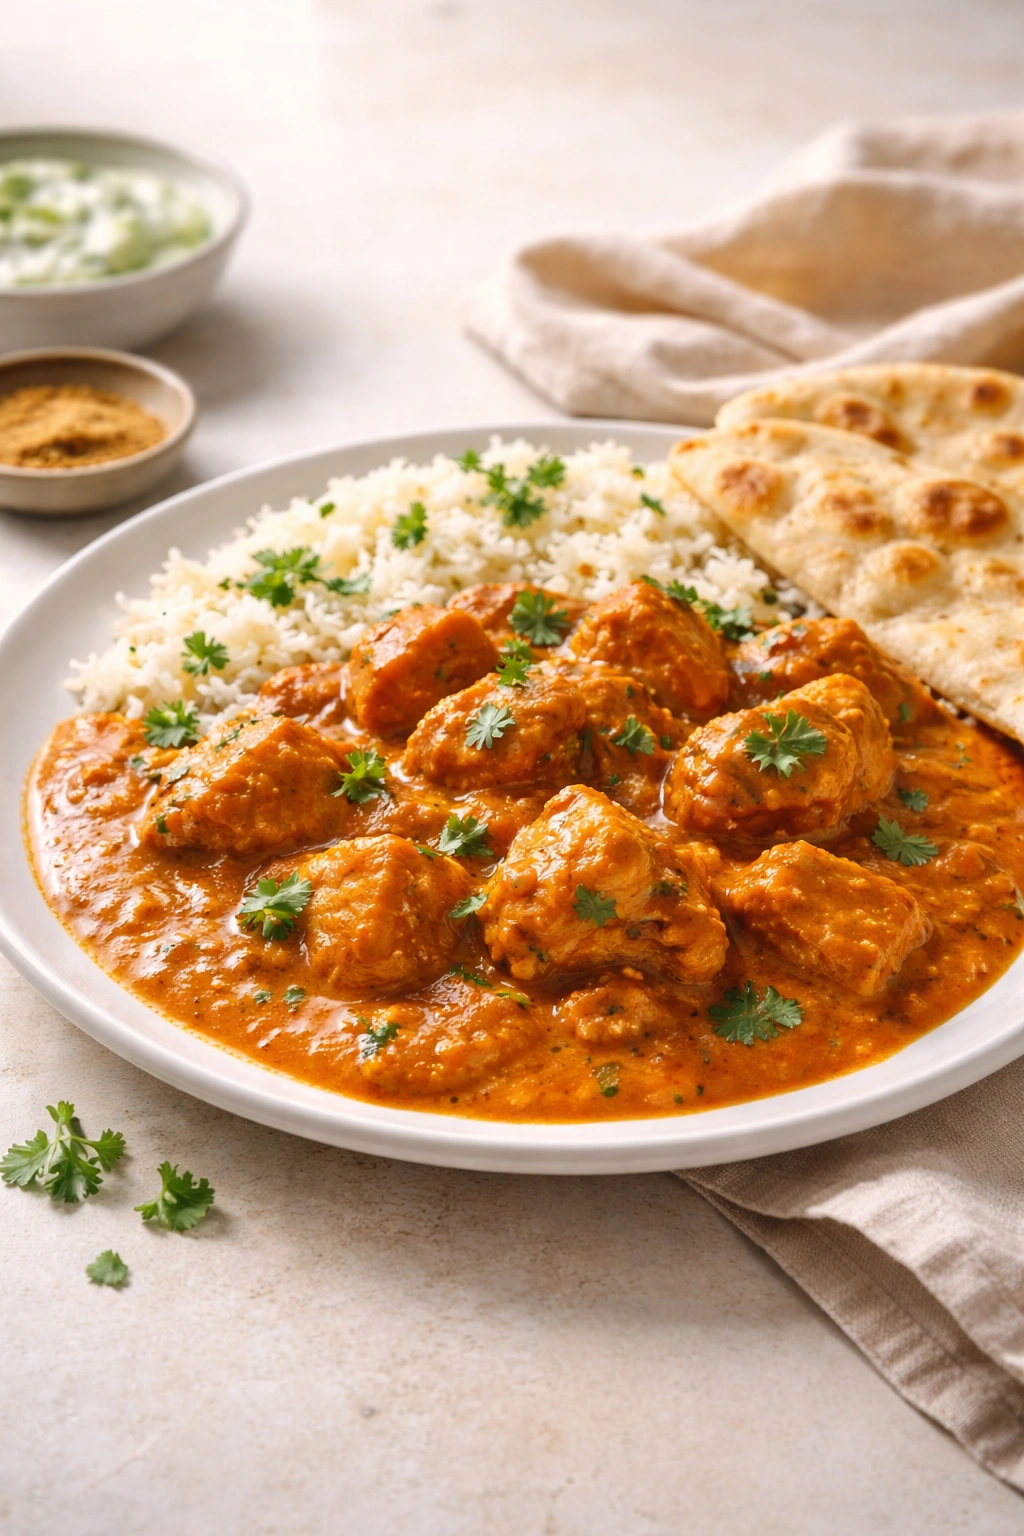
Ladle into shallow bowls, sprinkle with fresh cilantro, and serve immediately over fluffy basmati rice, with warm naan bread for scooping up sauce.
Tips for Nailing the Sauce Consistency Every Time
The sauce texture is where most home cooks struggle. It should be creamy, silky, and pourable — imagine heavy cream that coats the back of a spoon but still flows off easily. If your sauce ends up too thin and soupy, it means either the tomatoes didn’t reduce enough before the cream was added, or the final simmer was too short. Next time, let the tomato base reduce for the full 15 minutes and keep the simmer going for the full 7 minutes after adding the cream.
If your sauce is too thick and pasty, you either reduced it too much or the cream broke. Breaking happens when cream is added to a sauce that’s too hot or that continues boiling violently. The fat in the cream separates and curdles, creating a grainy texture that looks like curdled milk. To fix it immediately, take it off the heat and whisk in a few tablespoons of cool cream or a splash of water while whisking vigorously. Prevention is easier: keep the heat at low when adding cream and stir constantly.
The sauce continues to thicken as it cools, so account for that. What looks perfectly pourable right after cooking will be slightly thicker once it sits, and noticeably thicker as leftovers. When reheating, add a splash of cream or water to loosen it back up.
Common Mistakes That Ruin the Dish (and How to Avoid Them)
Using old, stale spices creates a dusty, faint sauce instead of the complex, aromatic sauce you’re aiming for. If you can’t remember when you bought your garam masala, it’s too old. Buy fresh, smell it before cooking (it should smell warm and complex, not muted), and store it in an airtight container away from light and heat.
Skipping the marinade or rushing it means missing the tenderizing benefit and the flavor infusion that makes each piece taste seasoned all the way through, not just on the surface. Thirty minutes is the bare minimum; overnight is genuinely better.
Overcrowding the pan when searing the chicken steams the chicken instead of browning it. That golden sear is where deep flavor comes from. Cook in two batches if needed — a few extra minutes of active cooking time is worth the improvement in flavor.
Not caramelizing the onions results in a sauce that tastes flat and one-dimensional. Rushed onions are still onions; caramelized onions are sweet, complex, and deeply savory. Give them 7–10 minutes.
Adding the cream to sauce that’s too hot breaks the cream and creates an unappetizing curdled appearance. Reduce the heat to low before adding cream, and stir constantly.
Burning the bloomed spices creates bitterness that poisons the entire dish. Have your tomato paste and tomatoes ready to go before you add the spices, so you can add them immediately after blooming.
Using half-and-half or milk instead of heavy cream creates a thinner, less luxurious sauce that’s hard to distinguish from other curries. Heavy cream is crucial to the texture and flavor profile.
Cooking the chicken all the way through before the sauce results in overcooked, tough chicken by the time the sauce is ready. Sear it for color, then let it finish gently in the sauce.
Storage and Make-Ahead Strategies
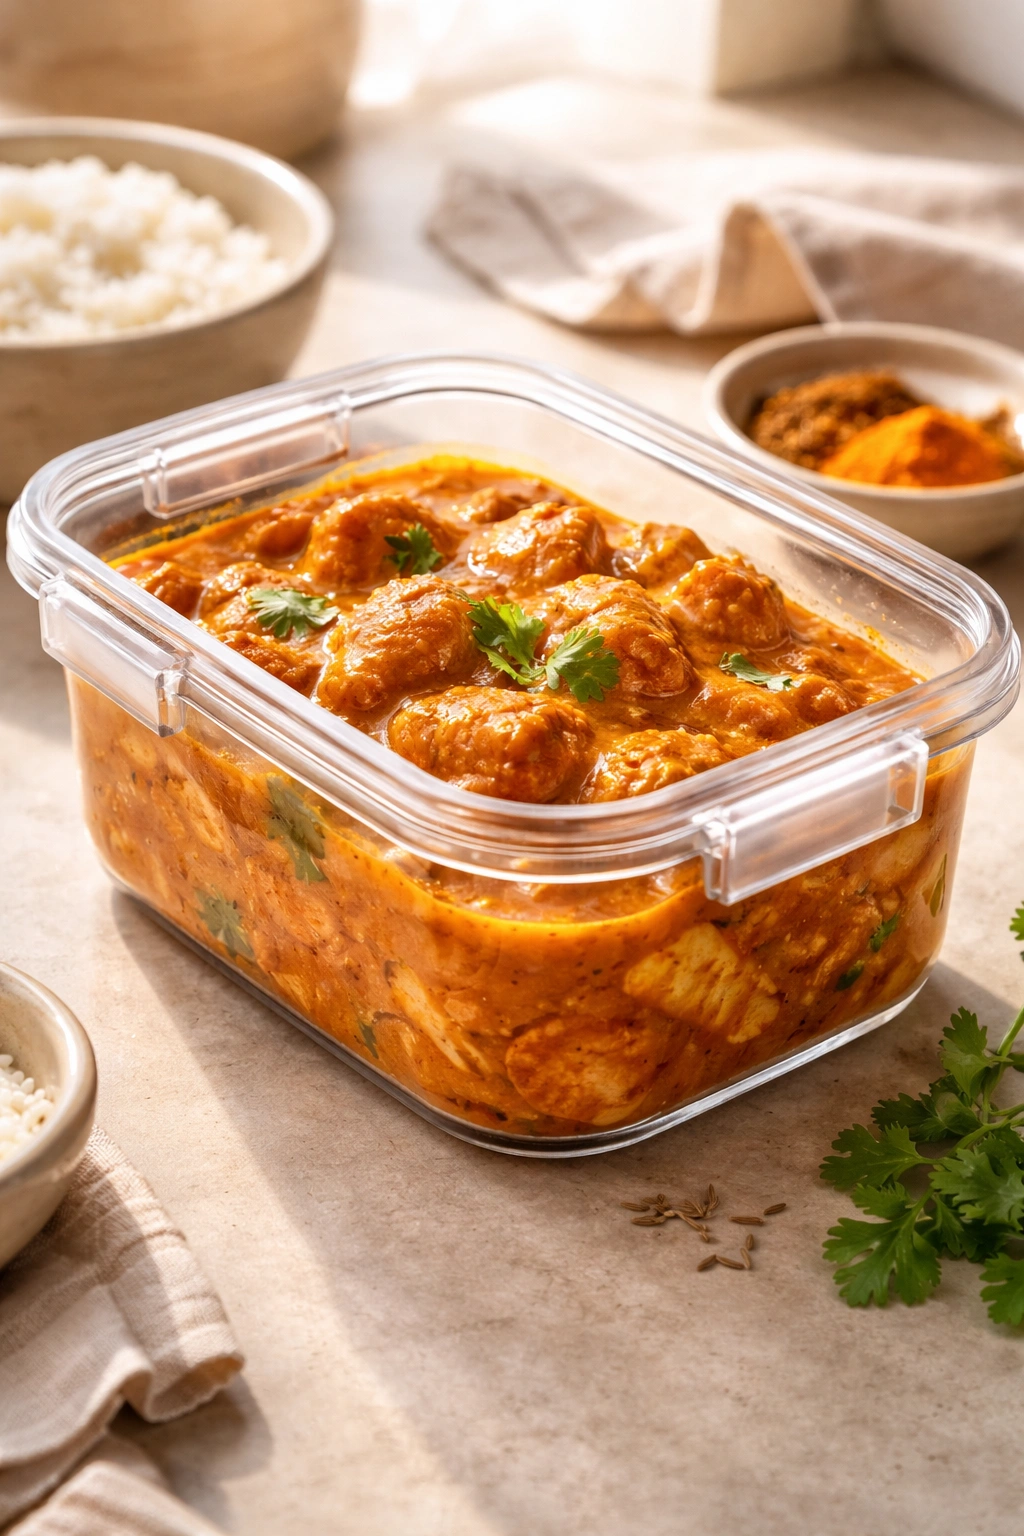
Butter chicken actually improves after a day in the refrigerator, as the flavors have time to deepen and meld together. Store it in an airtight container for up to 4 days. Reheat gently on the stovetop over low heat, stirring occasionally and adding a splash of cream or water if the sauce has thickened too much.
The microwave works for reheating, but use low to medium power and stir every 30–60 seconds to prevent the sauce from breaking or overheating in spots. Microwaving on high is almost guaranteed to separate the cream.
For freezing, let the butter chicken cool completely, then transfer to freezer-safe containers or bags, removing as much air as possible. It freezes beautifully for up to 3 months. Thaw overnight in the refrigerator (not at room temperature), then reheat gently on the stovetop. Some people report the sauce is slightly thinner after freezing — add a bit more cream when reheating to restore the silky texture.
Make-ahead option: You can marinate the chicken and make the sauce base (up through the tomato reduction step) earlier in the day, then finish the dish at dinnertime. When ready to cook, reheat the sauce base gently, add the cream, and follow from step 15 forward. This cuts actual cooking time to about 15 minutes.
Serving Suggestions and Perfect Pairings
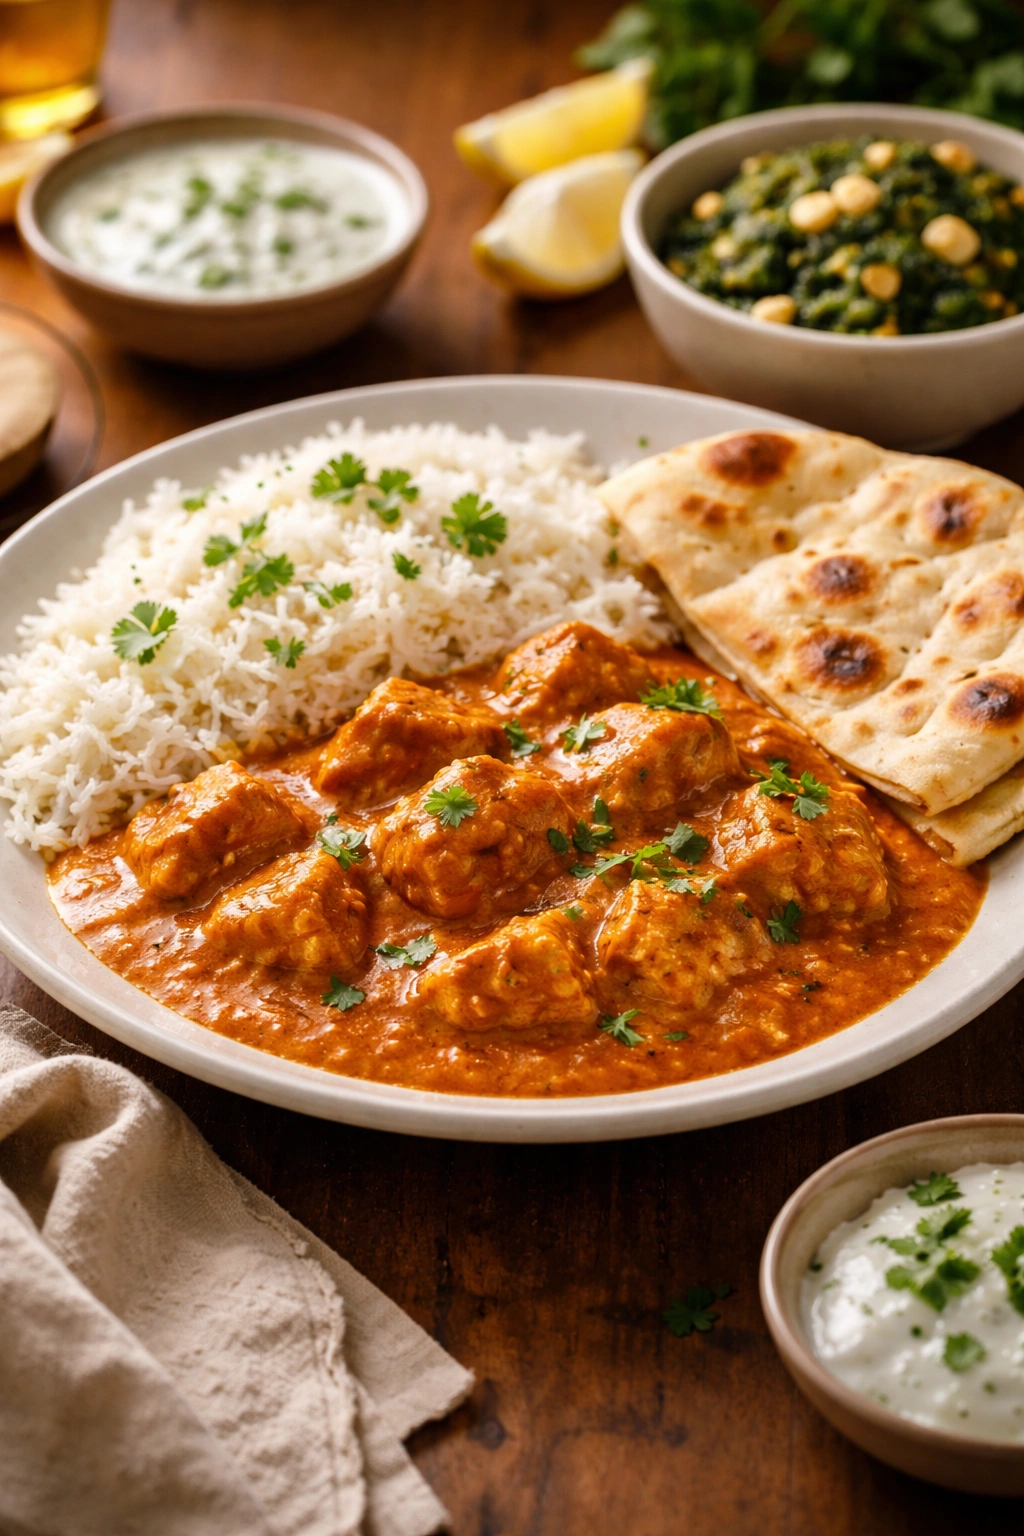
Basmati rice is the classic, traditional pairing because its fluffy, separate grains soak up the sauce without becoming mushy. Cook it using the absorption method: rinse the rice, toast it briefly in a dry pan, then simmer in salted water until tender. Jasmine rice or even simple white rice work beautifully too.
Naan bread is essential — warm pieces of naan are perfect for scooping up sauce and making it into eating experience rather than just a meal. If you don’t have access to good naan, warm pita bread or even simple flatbread serves the same purpose. The goal is something starchy and chewy that contrasts with the creamy sauce.
For a lighter option or lower-carb version, serve over cauliflower rice or even roasted cauliflower florets. The textures and temperatures contrast nicely.
Raita (a cooling yogurt sauce with cucumber and cumin) is the traditional side dish that balances the richness of the butter chicken. Grate a cucumber, salt it lightly and let it sit for 5 minutes to release water, then squeeze dry. Combine with plain yogurt, a pinch of cumin, and salt.
Sautéed spinach with garlic complements the butter chicken beautifully, as does a simple green salad. The fresh, slightly bitter greens balance the richness perfectly.
Variations to Make This Recipe Your Own
For extra spice and heat: Increase the cayenne pepper to ½ teaspoon, or add a fresh chopped serrano or jalapeño pepper to the sauce. Start with less and taste as you go — it’s easier to make something spicier than to cool it down.
For a lighter version: Substitute half the heavy cream with Greek yogurt stirred in at the end, or use a combination of cream and full-fat coconut milk. The flavor changes slightly but remains delicious, and you cut calories and fat significantly.
For a completely dairy-free version: Use full-fat coconut milk instead of heavy cream (stirred in at the same point), and substitute coconut yogurt in the marinade. Use oil instead of butter for cooking.
To add vegetables: Stir in diced bell peppers or frozen peas in the last 5 minutes of cooking. Fresh spinach can be stirred in at the very end — it wilts instantly and adds nutrition and color. Avoid adding wet vegetables like tomatoes or squash that would release water into the sauce.
For a smoky twist: Add ½ teaspoon smoked paprika along with the other spices, or include a cinnamon stick and a couple of cardamom pods that you fish out before serving.
For a richer, deeper version: Add an extra tablespoon of butter to the sauce just before serving, or stir in a tablespoon of cream at the very end — small additions that add noticeable richness without making the dish feel heavy.
Final Thoughts
Homemade butter chicken isn’t just achievable — it’s actually better than takeout when you understand what makes it work. The ingredients are simple and straightforward, available at any grocery store. The technique is learnable and repeatable. What separates good homemade butter chicken from restaurant versions isn’t magic or secret methods; it’s intention at each step, proper timing, and respecting the process.
Once you’ve made this recipe once and seen how straightforward it actually is, you’ll understand why it’s worth ordering occasionally but makes infinitely more sense to master at home. You’ll save money, eat fresher food, and develop the confidence to adjust seasonings and heat levels to your exact preferences. That’s when cooking stops being following instructions and starts being creative and fun.
Start with the basic recipe as written. Learn how the sauce should smell, how the chicken should feel, what thickness looks like when it’s right. After a few times, you’ll have the rhythm down so completely that you can make it without thinking much about it — the exact point where you know you’ve truly learned a dish. That’s the goal here: not just a recipe, but a skill you’ll use forever.