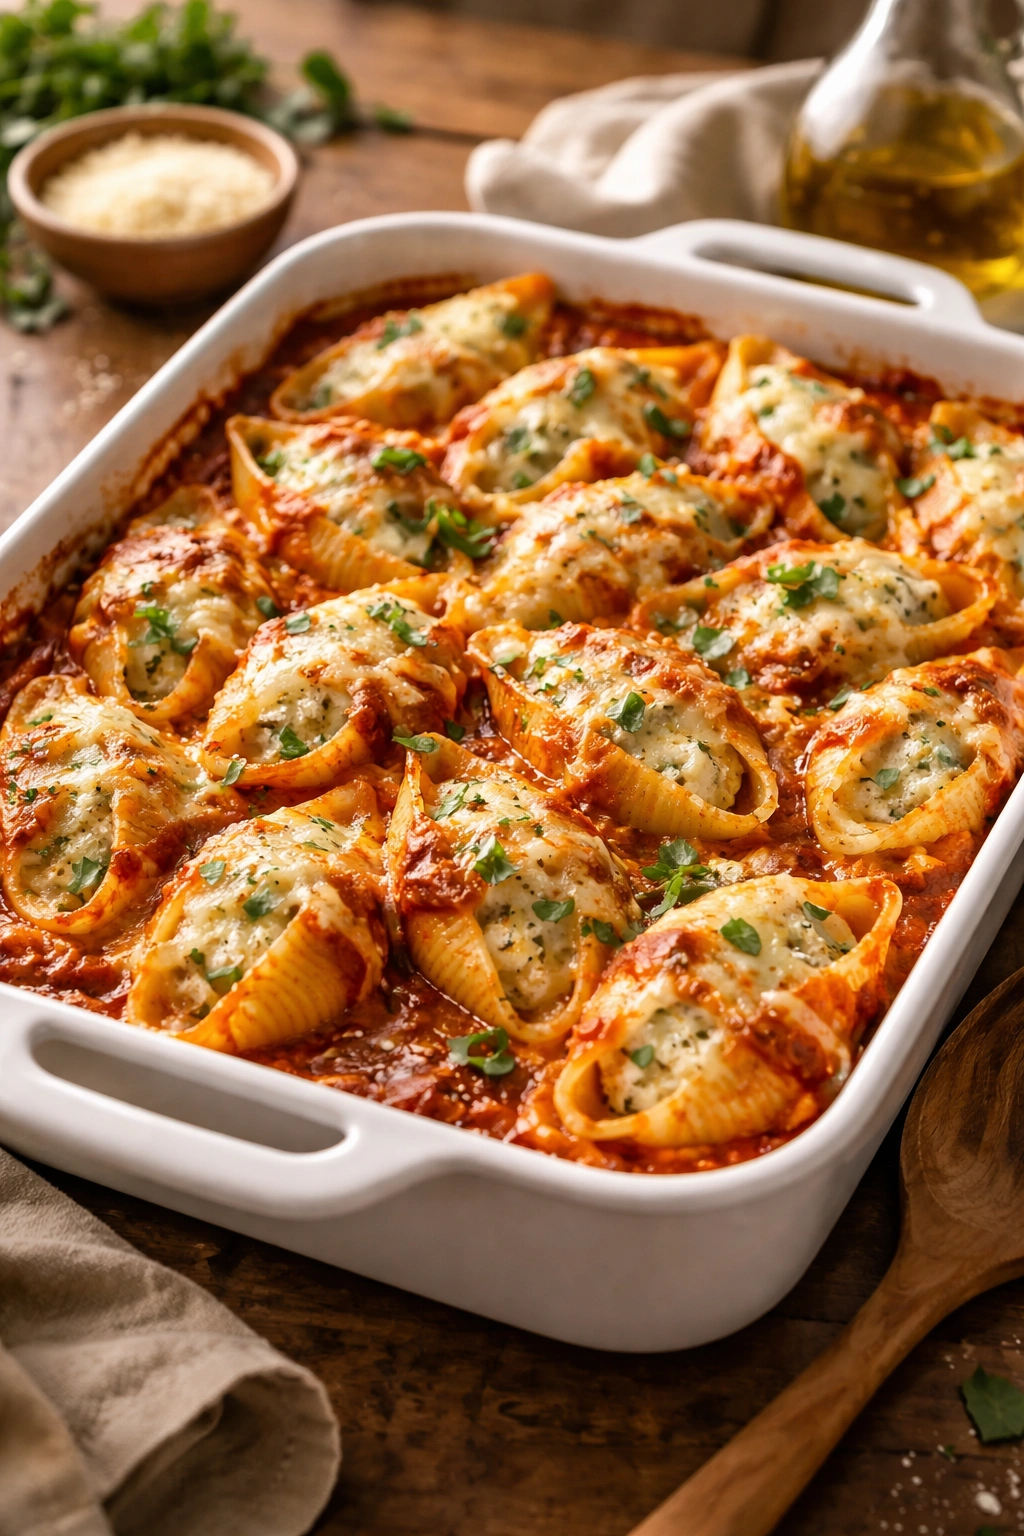
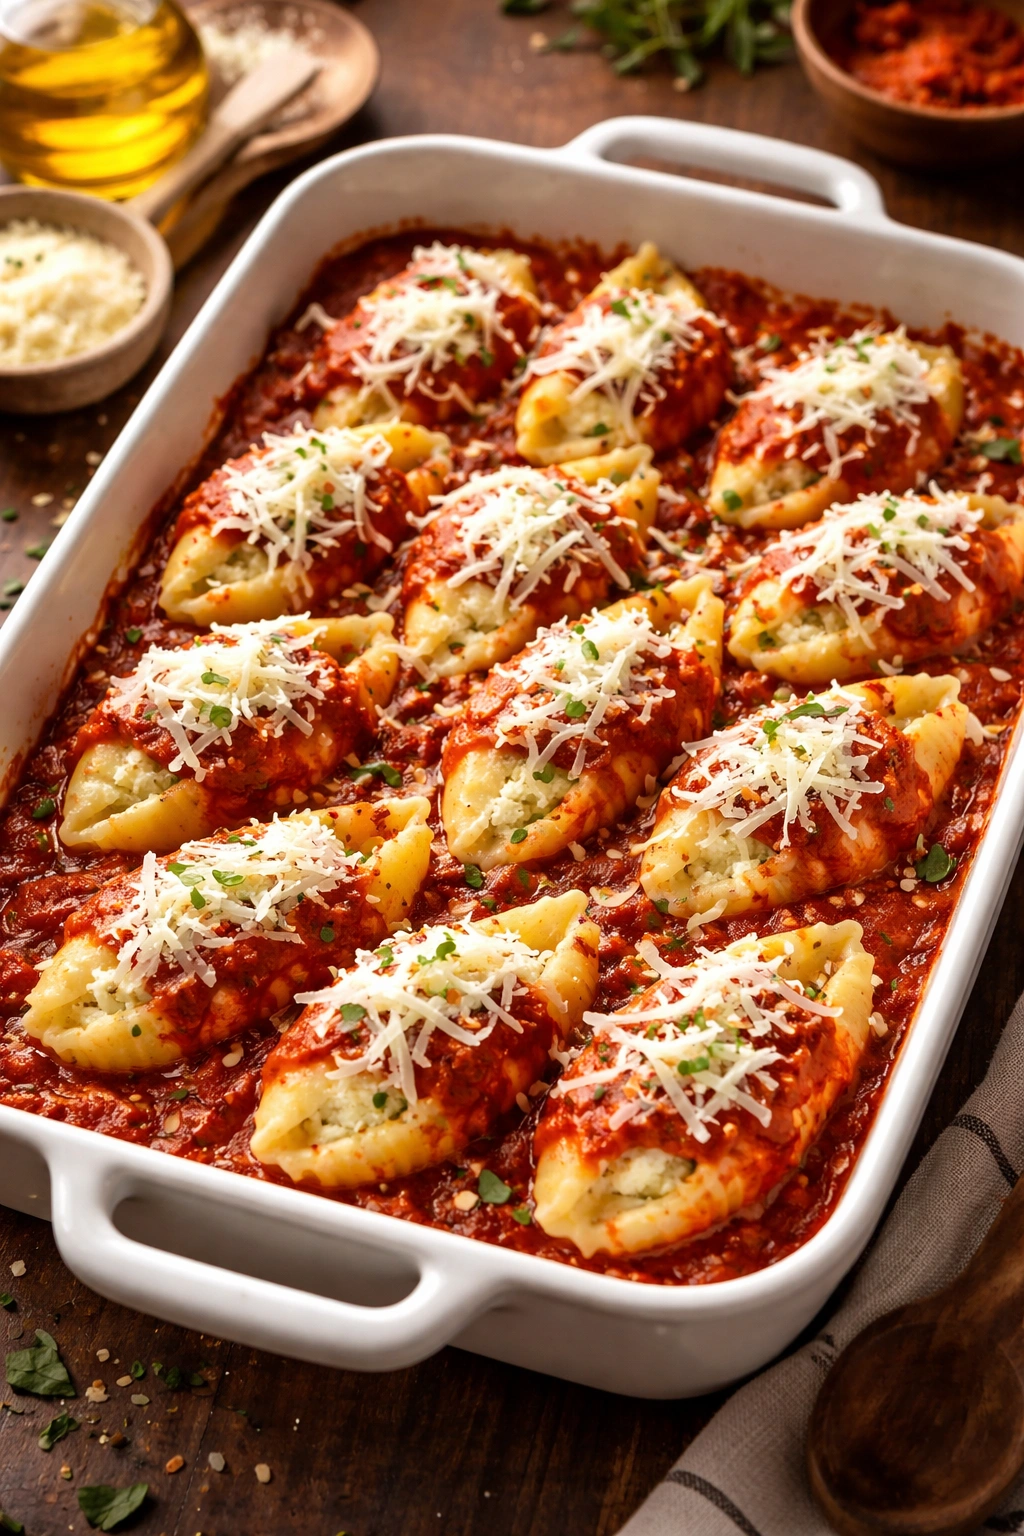
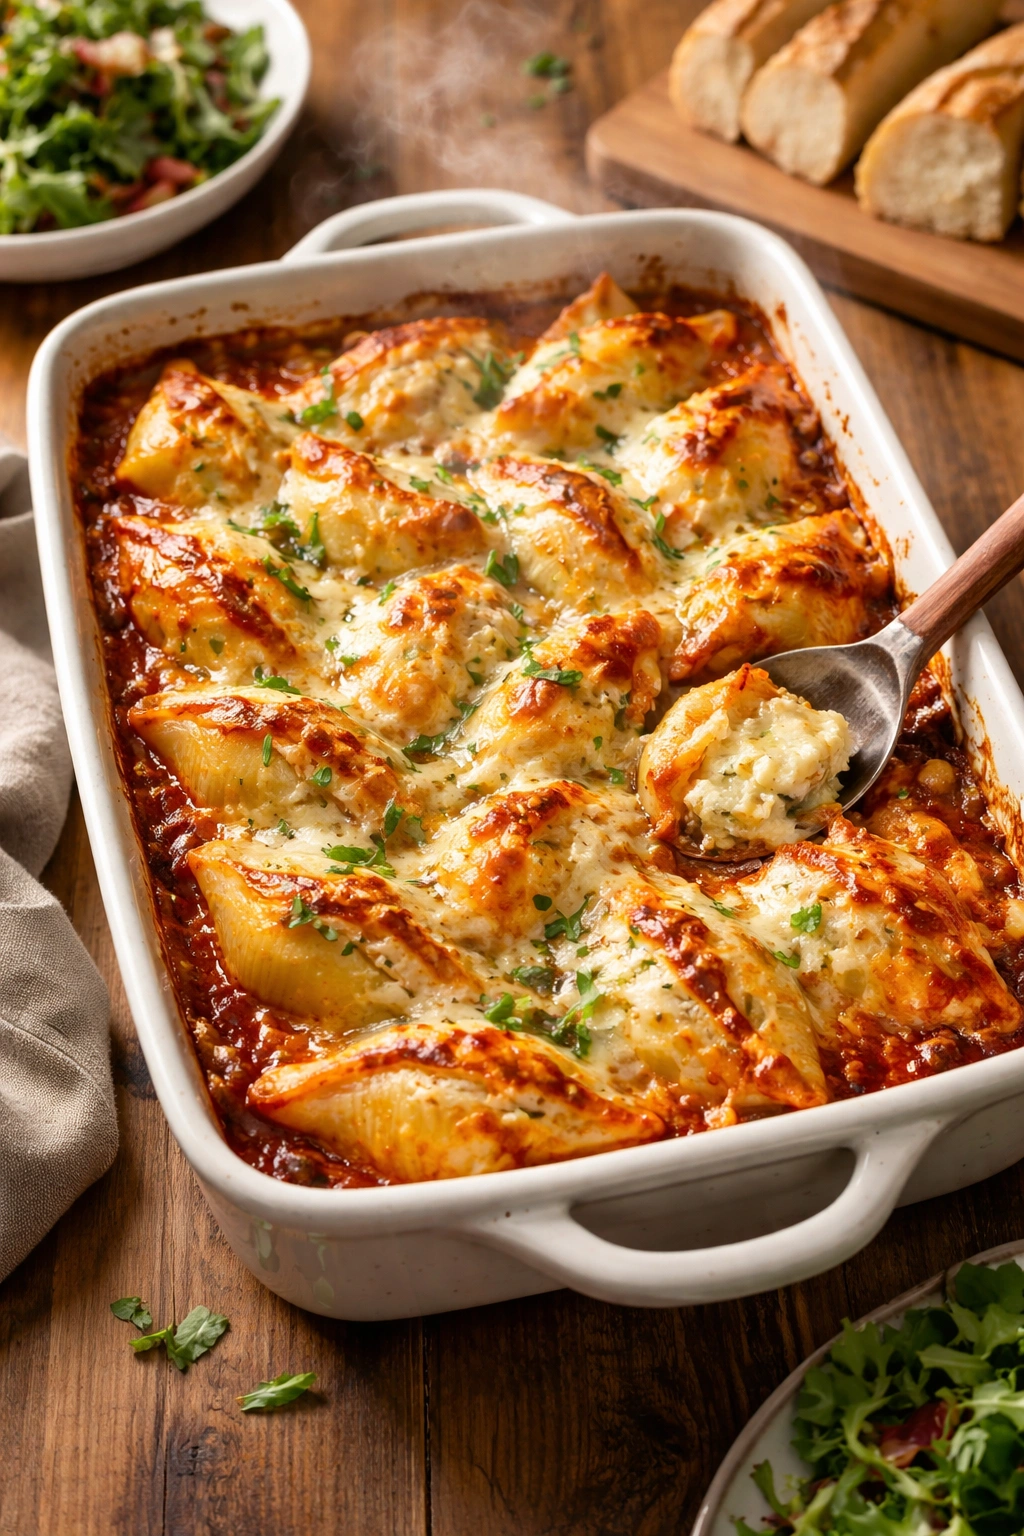
There’s something almost magical about bringing a bubbling casserole dish to the table and watching everyone’s eyes light up. Cheese-stuffed shells do that—they deliver restaurant-quality sophistication without the fuss, all while feeding a table full of hungry people without breaking a sweat. Whether you’re hosting a dinner party, bringing a meal to new neighbors, or simply trying to feed your family something that feels special, these shells are your answer.
The beauty of this dish lies in its elegant simplicity. Giant pasta shells become edible vessels for a luscious, creamy filling of three cheeses. Once baked in a blanket of marinara sauce and topped with more melted cheese, they transform into something that looks far more complicated than it actually is. I’ve been making these for years, and I still get asked for the recipe every single time—even from people who thought they didn’t love pasta that much.
What makes this version different is how it’s specifically designed to feed a crowd without you spending all day in the kitchen. Everything can be prepped in advance, assembled hours ahead of baking, or even frozen for weeks until you need it. The yield is generous, the flavors are deeply satisfying, and there’s something about the combination of ricotta’s creamy softness, mozzarella’s meltiness, and Parmesan’s sharp bite that just works every single time.
Let me walk you through exactly how to make these shells, share the tricks I’ve learned from countless batches, and show you how to adapt them to whatever you have on hand or whoever you’re feeding.
Why These Shells Are Perfect for Feeding a Group
This recipe isn’t just delicious—it’s practically built for crowds. A single 9×13-inch baking dish yields enough for six generous servings, and because the shells are so naturally portion-controlled, nobody ends up with a confusing pile of pasta to navigate. You’re essentially giving each person three or four complete, self-contained portions of comfort food.
The dish is also forgiving in ways that many other pasta bakes simply aren’t. If you slightly undercook the shells, they finish beautifully in the oven. If you slightly overcook them, they’re usually still fine, though a bit softer. The creamy cheese filling cushions the pasta on all sides, preventing that dried-out edge you sometimes get with other casseroles.
Beyond the practical appeal, there’s the psychological factor: stuffed shells look impressive. They sound fancy when you mention them to guests. Yet they’re genuinely easy enough that a home cook with zero pasta experience can pull them off perfectly. That combination—sophistication with simplicity—is a powerful one when you’re trying to impress people without stressing yourself out.
The Three-Cheese Formula That Works Every Time
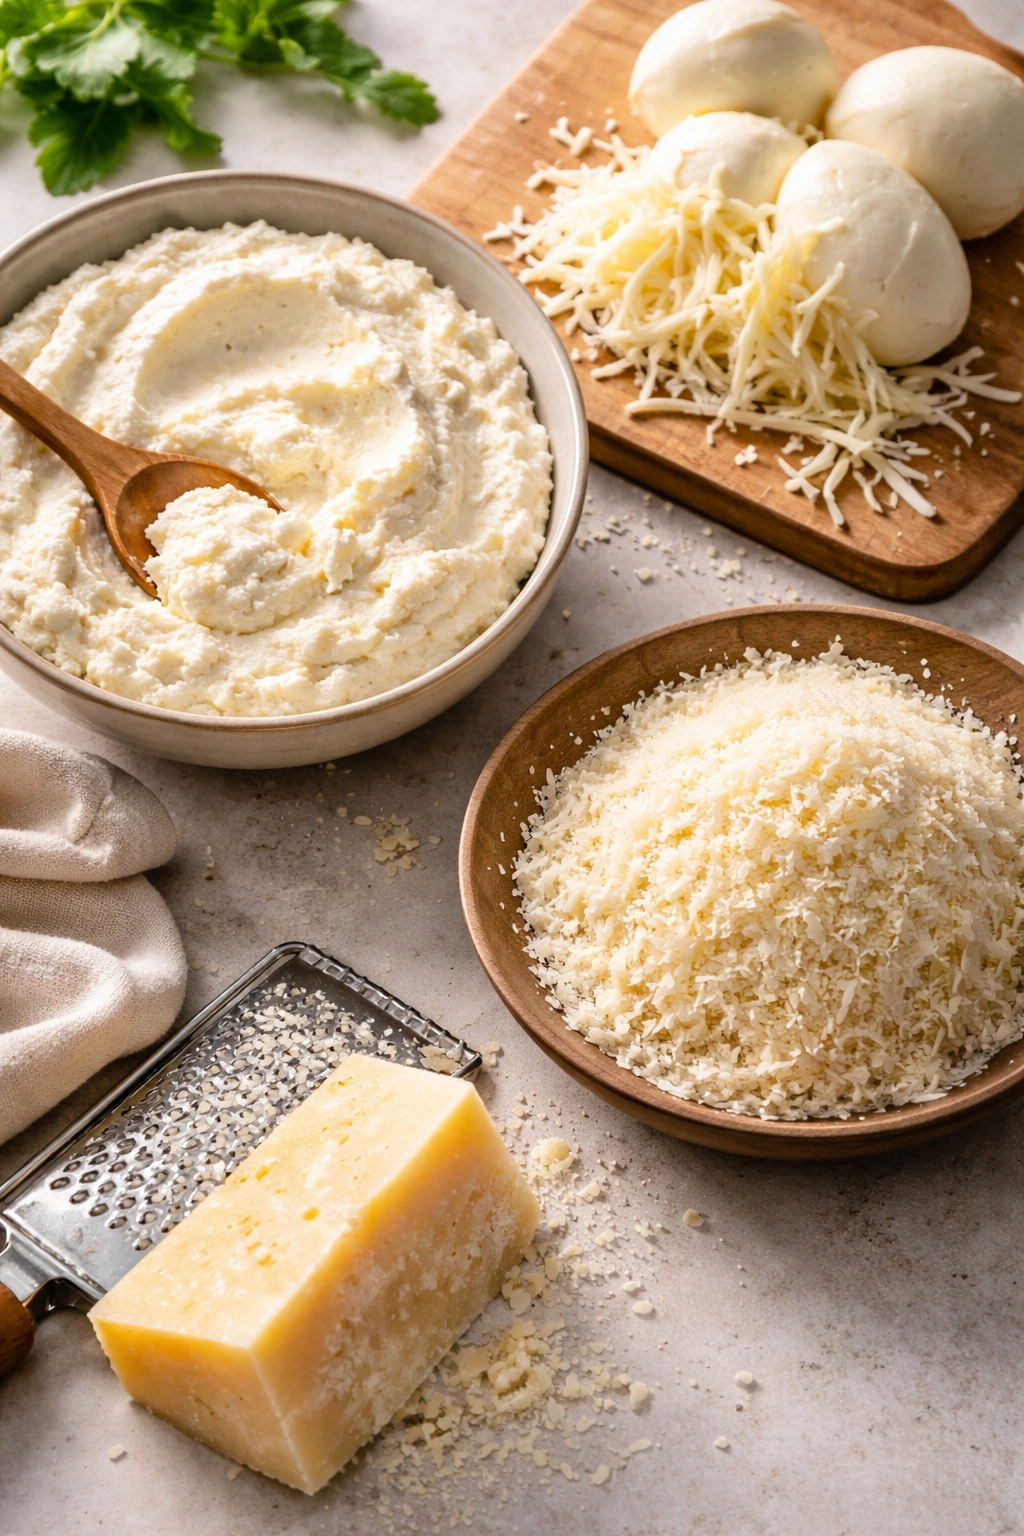
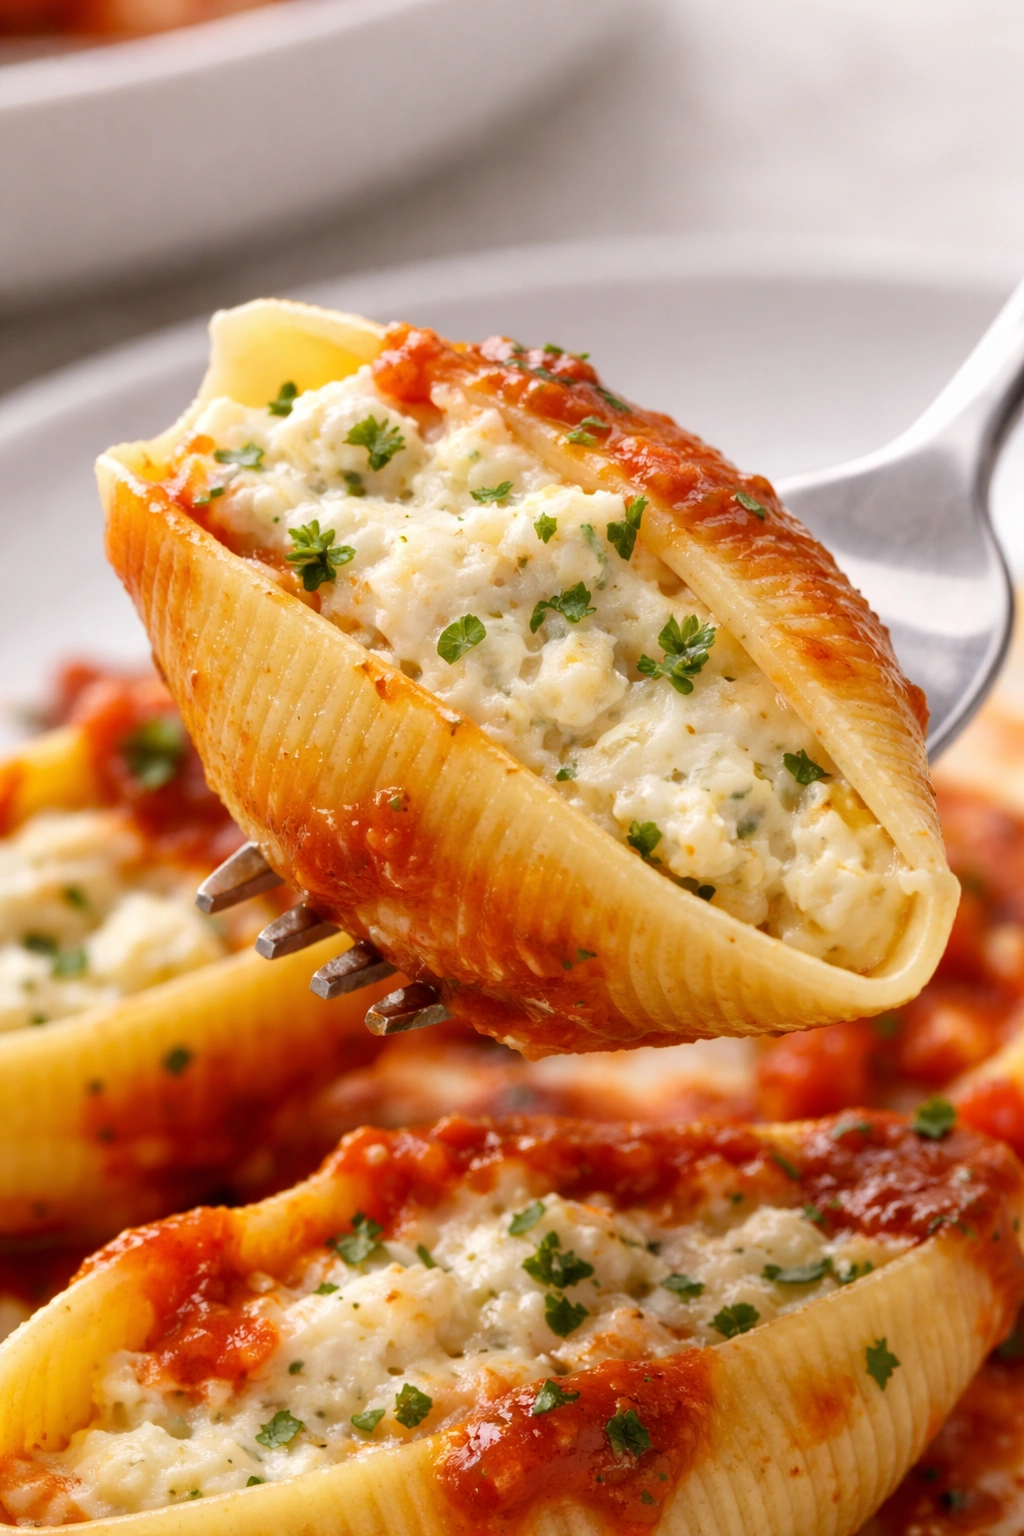
The magic of these stuffed shells comes from three complementary cheeses, each playing a distinct role. Ricotta cheese is the creamy foundation—it’s mild, smooth, and acts almost like a binder. Mozzarella cheese is the melt champion, providing that gorgeous stretch and mouthfeel. Parmesan cheese brings the sharpness and complexity that keeps the filling from tasting one-dimensional.
The proportions matter, though not in a rigid, fussy way. Generally, you’re looking at roughly equal parts ricotta and mozzarella (around 15 ounces of ricotta to 2-3 cups of shredded mozzarella), with about half a cup to three-quarters cup of Parmesan for depth. The ratio works because ricotta and mozzarella balance each other texture-wise, while Parmesan adds a savory punch that makes you sit up and notice.
What’s equally important is the quality of what you buy. This is genuinely a dish where better cheese makes a measurable difference. Whole milk ricotta outperforms part-skim every time—it’s creamier and holds together better during baking. For mozzarella, freshly shredded is preferable to pre-shredded bags because those bags are coated in anti-caking agents that actually interfere with melting. If you’ve only ever used bagged mozzarella, you’ll be genuinely surprised at how much smoother and silkier the sauce becomes with freshly shredded cheese.
Choosing and Cooking the Pasta Shells Correctly
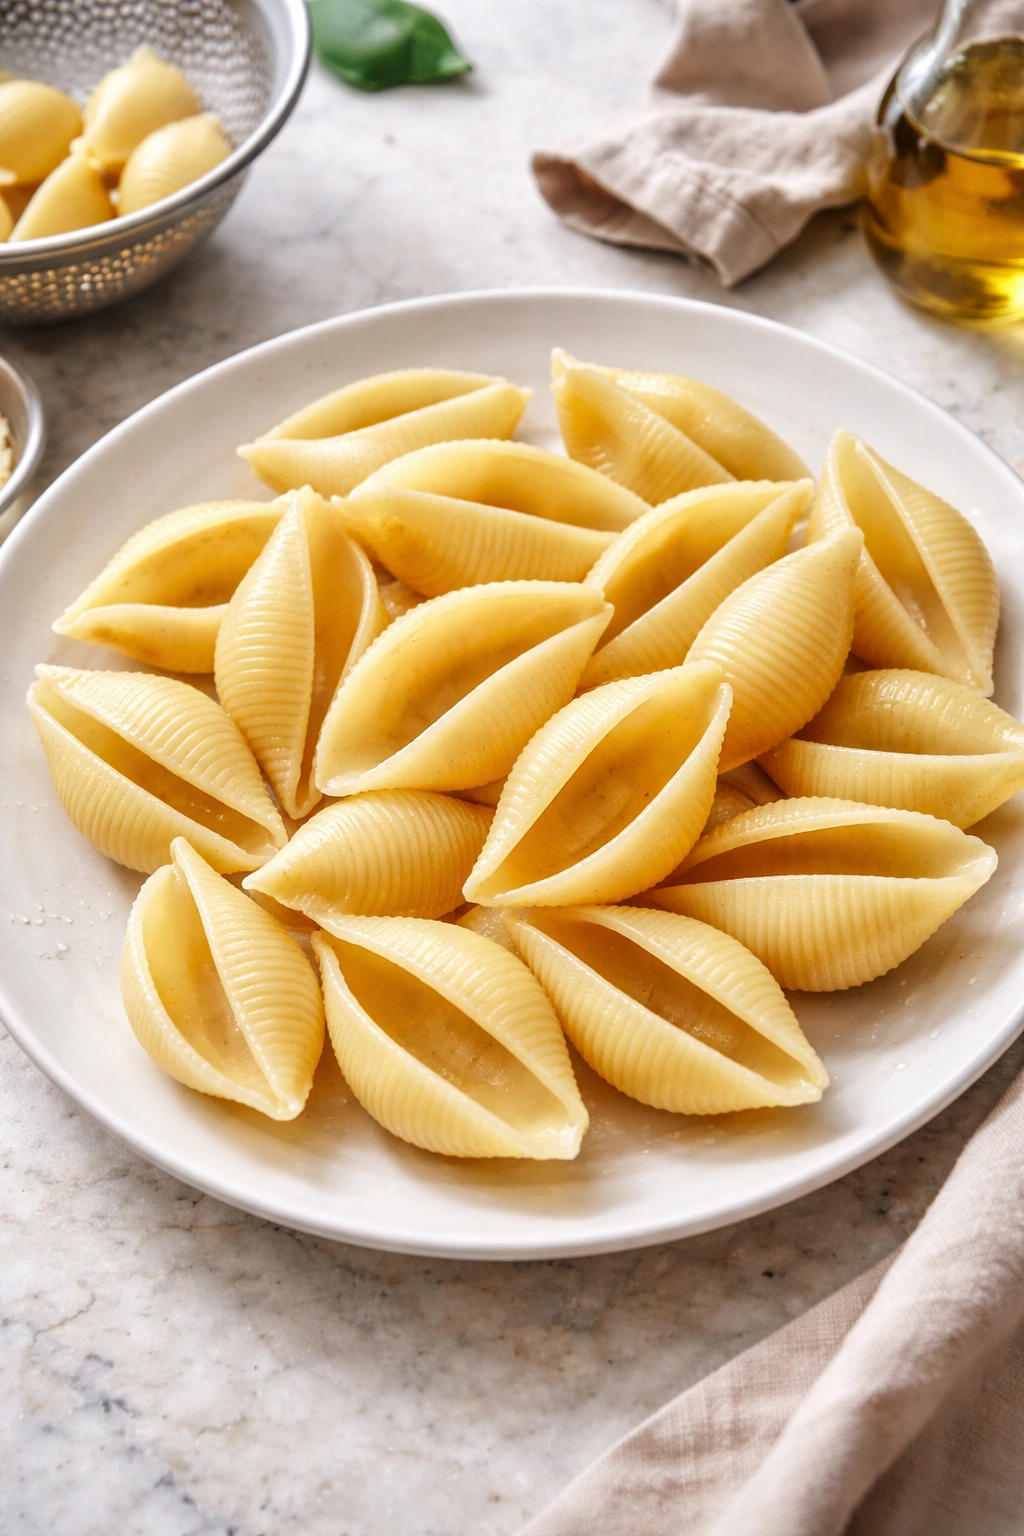
Finding the right pasta shells is your first step, and it’s simpler than you might think. You’re looking for jumbo shells, sometimes labeled as “conchiglioni” if you’re shopping at a store with an Italian foods section. One standard 12-ounce box yields roughly 24-26 shells, which is exactly what you need for a standard 9×13-inch baking dish.
The cooking technique here is subtle but crucial: undercook your shells by about 1-2 minutes. If the package says cook for 12 minutes, you’re going for 10-11. The shells should feel slightly more firm than al dente when you bite into one. This matters because the pasta will continue cooking in the oven, absorbing moisture from the sauce. If you cook them fully before baking, they’ll turn mushy by the time the cheese melts and the casserole is done.
Stir the shells gently and frequently while they’re boiling—those large, ridged pasta pieces can stick together and crack if you ignore them. Once they’re drained, rinse them with cool water to stop the cooking process and make them easier to handle. Some people lay them out on a clean kitchen towel for a minute or two, which prevents them from clumping together and makes stuffing much less frustrating.
Creating a Filling That Stays Creamy, Not Grainy
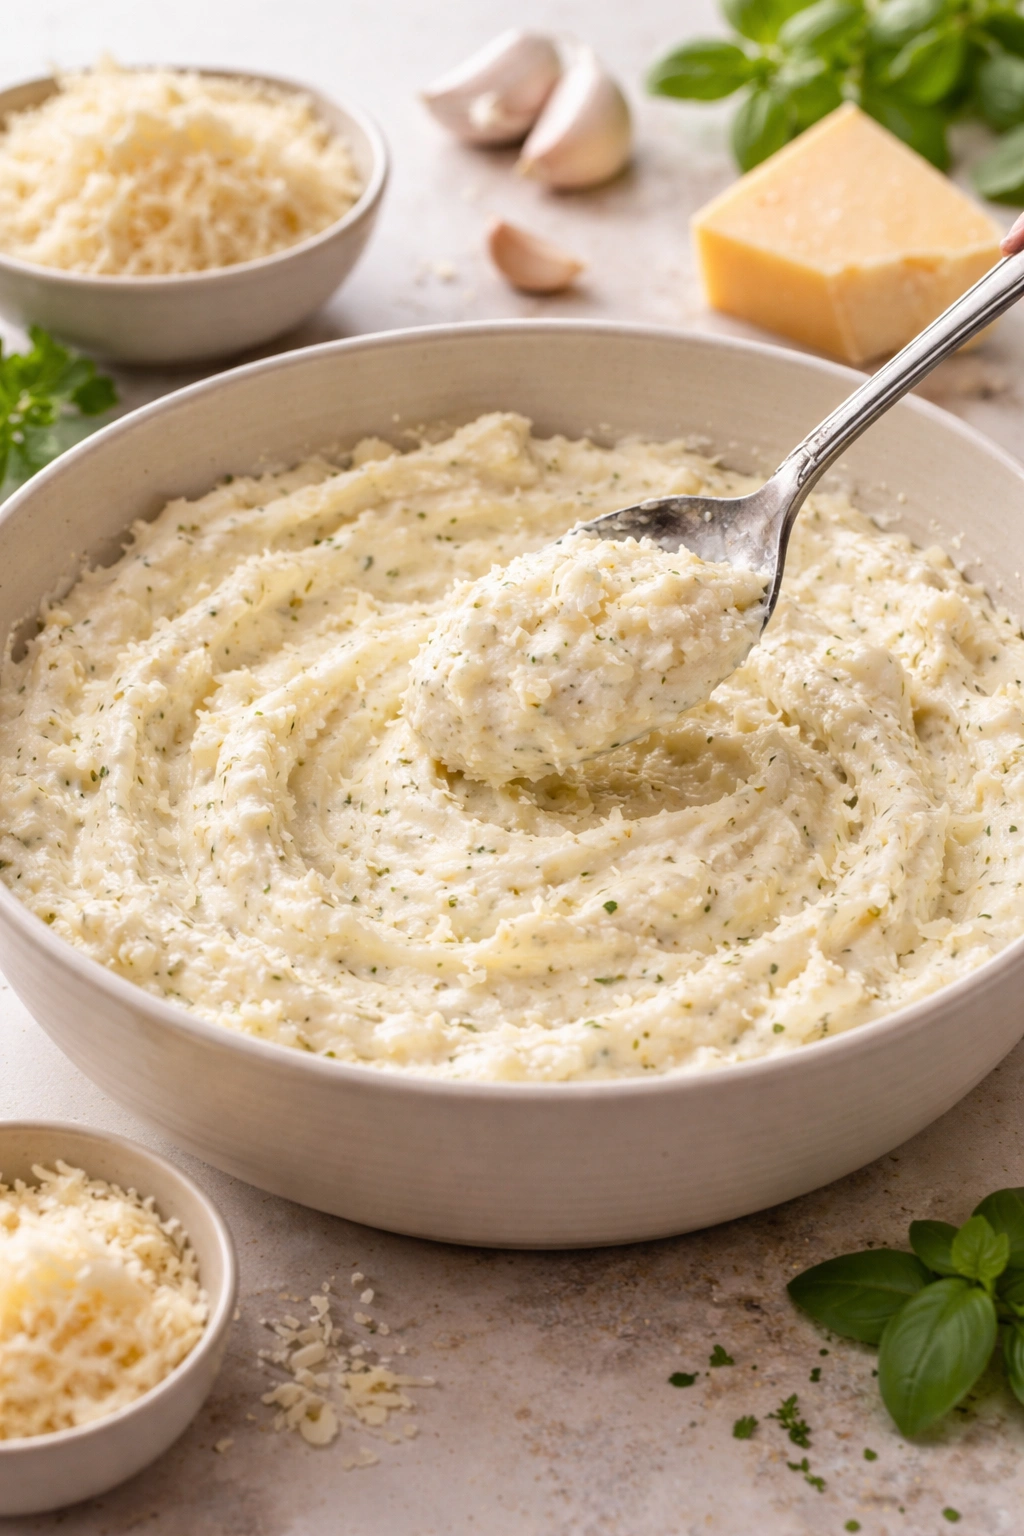
The cheese filling is where things come together, and there’s a reason this method works so consistently. Start by combining your ricotta, shredded mozzarella, and grated Parmesan in a large bowl. Add one whole egg (this acts as a binder and helps everything hold together), then season generously with salt and freshly ground black pepper.
Here’s where patience pays off: stir this mixture thoroughly until completely combined. What you’re doing is distributing the egg throughout the ricotta so that it acts as a binder rather than creating a scrambled-egg texture. Once everything is combined, you should have a thick, creamy paste that holds together.
Some people add fresh herbs to this filling—chopped fresh parsley, a small amount of fresh basil, or even a whisper of garlic powder. I keep mine simple because the sauce provides plenty of flavor, but there’s no wrong way here. If you want to add a teaspoon of Italian seasoning or a small pinch of red pepper flakes, absolutely go for it.
One common mistake is making the filling too thick. If you find that your mixture feels stiff or grainy rather than creamy, it might mean your ricotta was particularly dense, or you’re not using whole milk ricotta. A simple fix: stir in a tablespoon or two of milk or even some of your marinara sauce to loosen things up. The filling should be spoonable but hold its shape when you fill the shells.
Assembling Your Shells for Maximum Impact
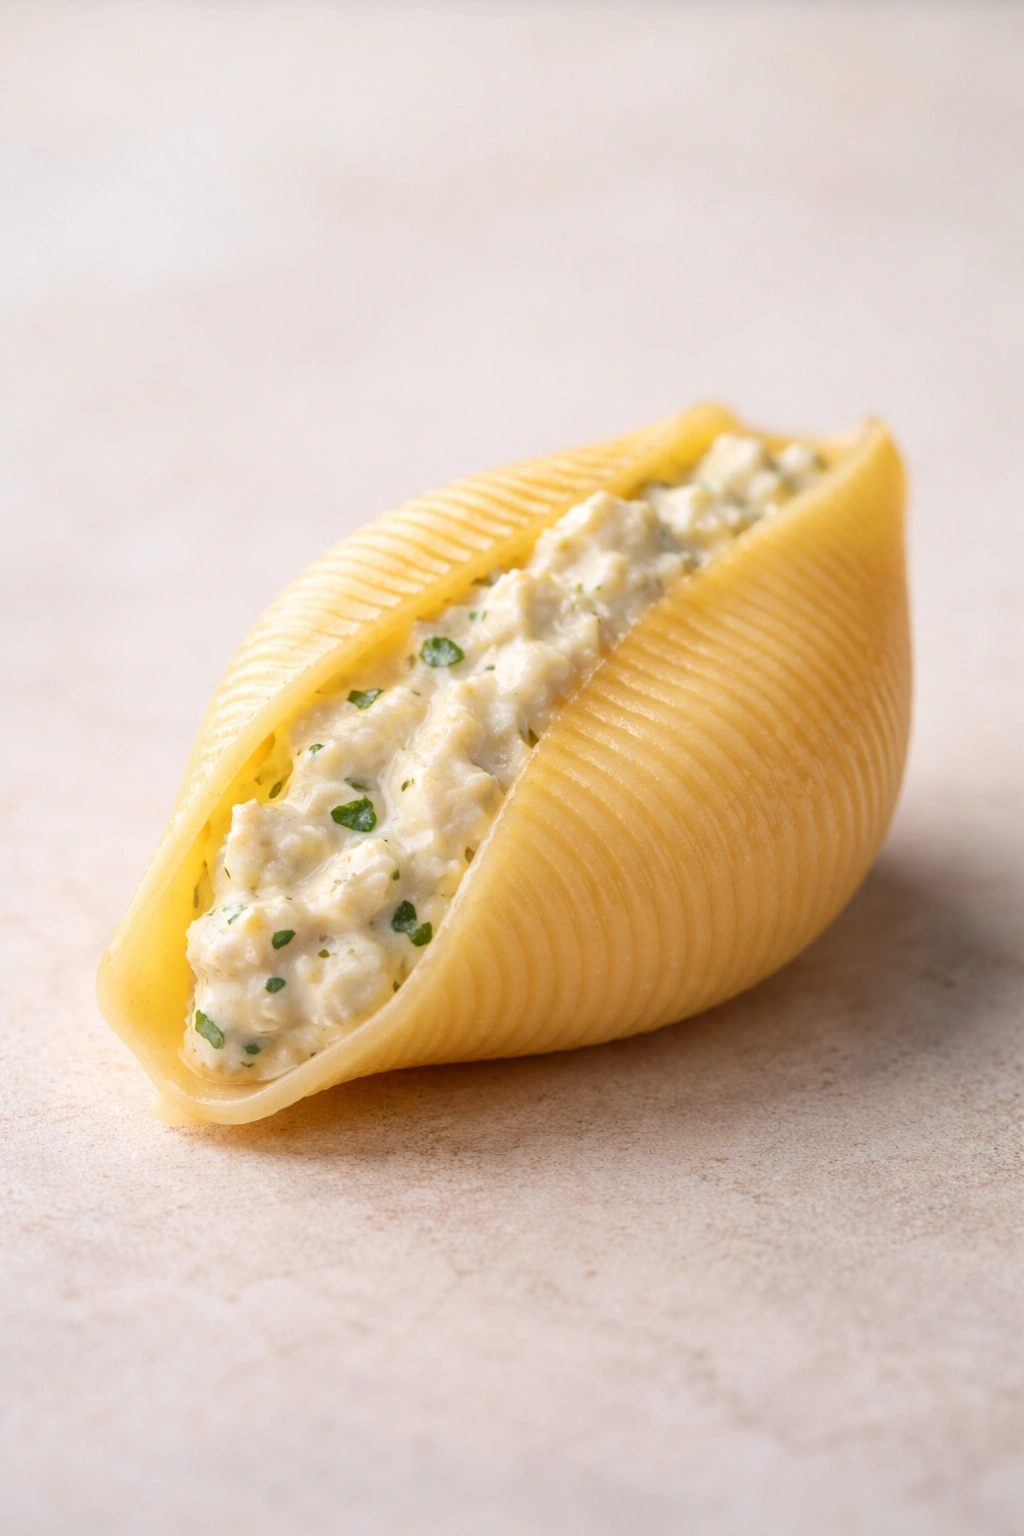
Now comes the fun—and yes, slightly messy—part of stuffing each shell. The easiest method is using a small dessert spoon or a small ice cream scoop (the kind with a trigger release). Fill each shell with roughly 2-3 tablespoons of the cheese mixture, which usually means filling the scoop about three-quarters full.
The trick to not tearing the shells is handling them gently, but honestly, a few tears happen to everyone and they’re absolutely fine once they’re in the sauce. Just place a torn shell in the dish with the crack facing down, and the sauce will seal it during baking.
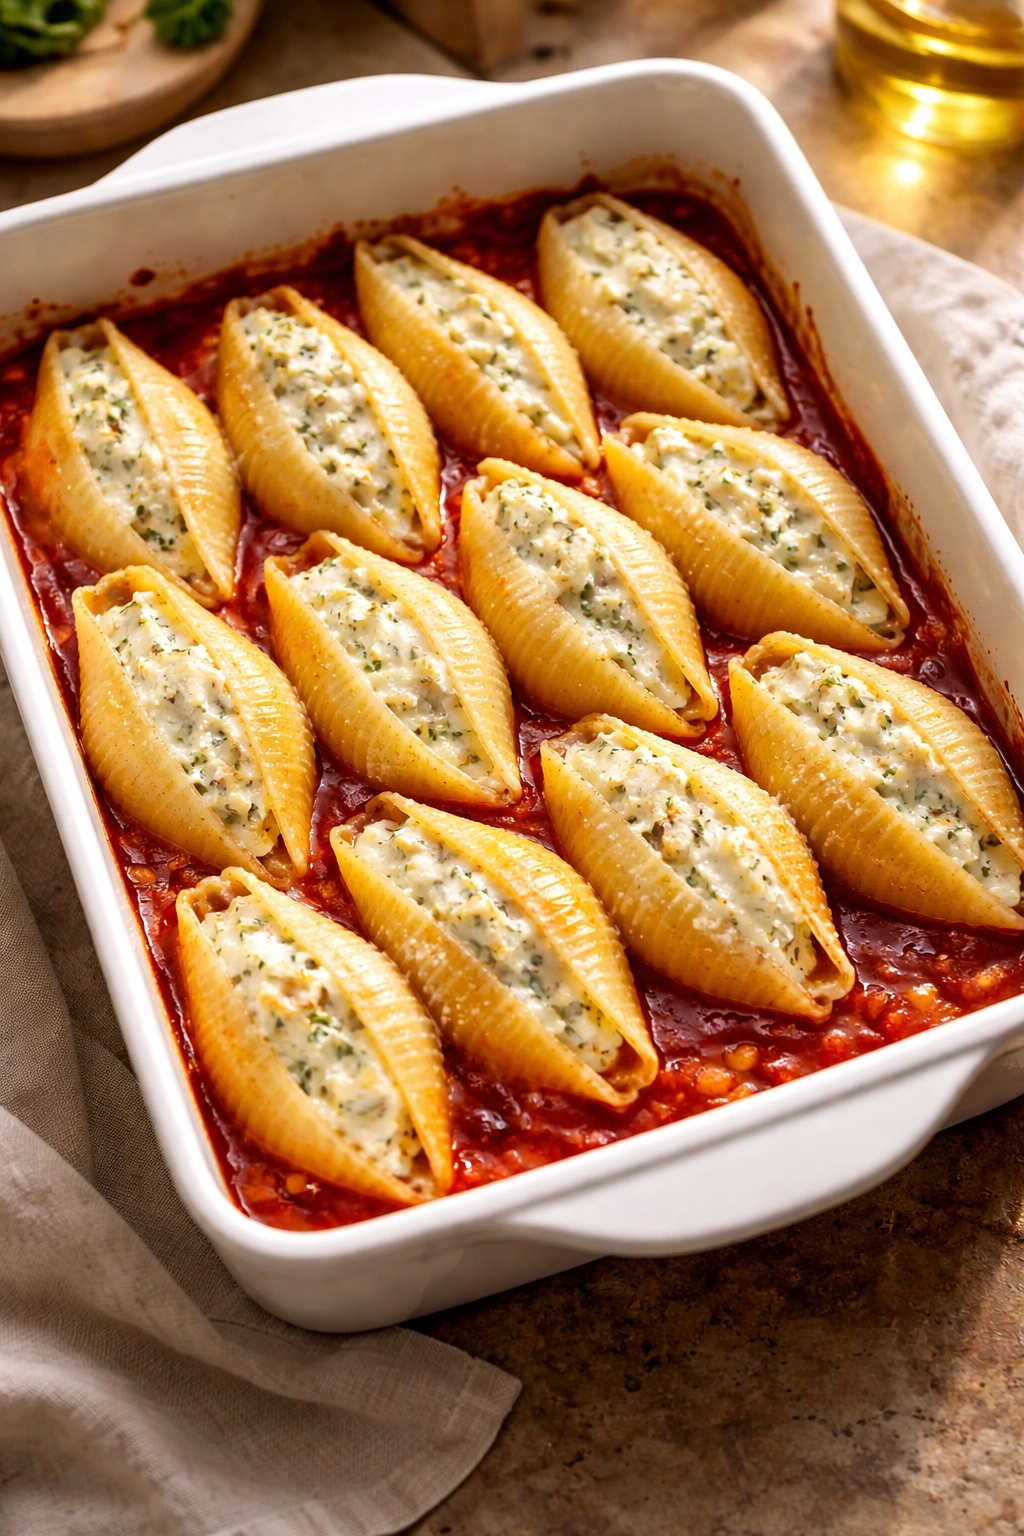
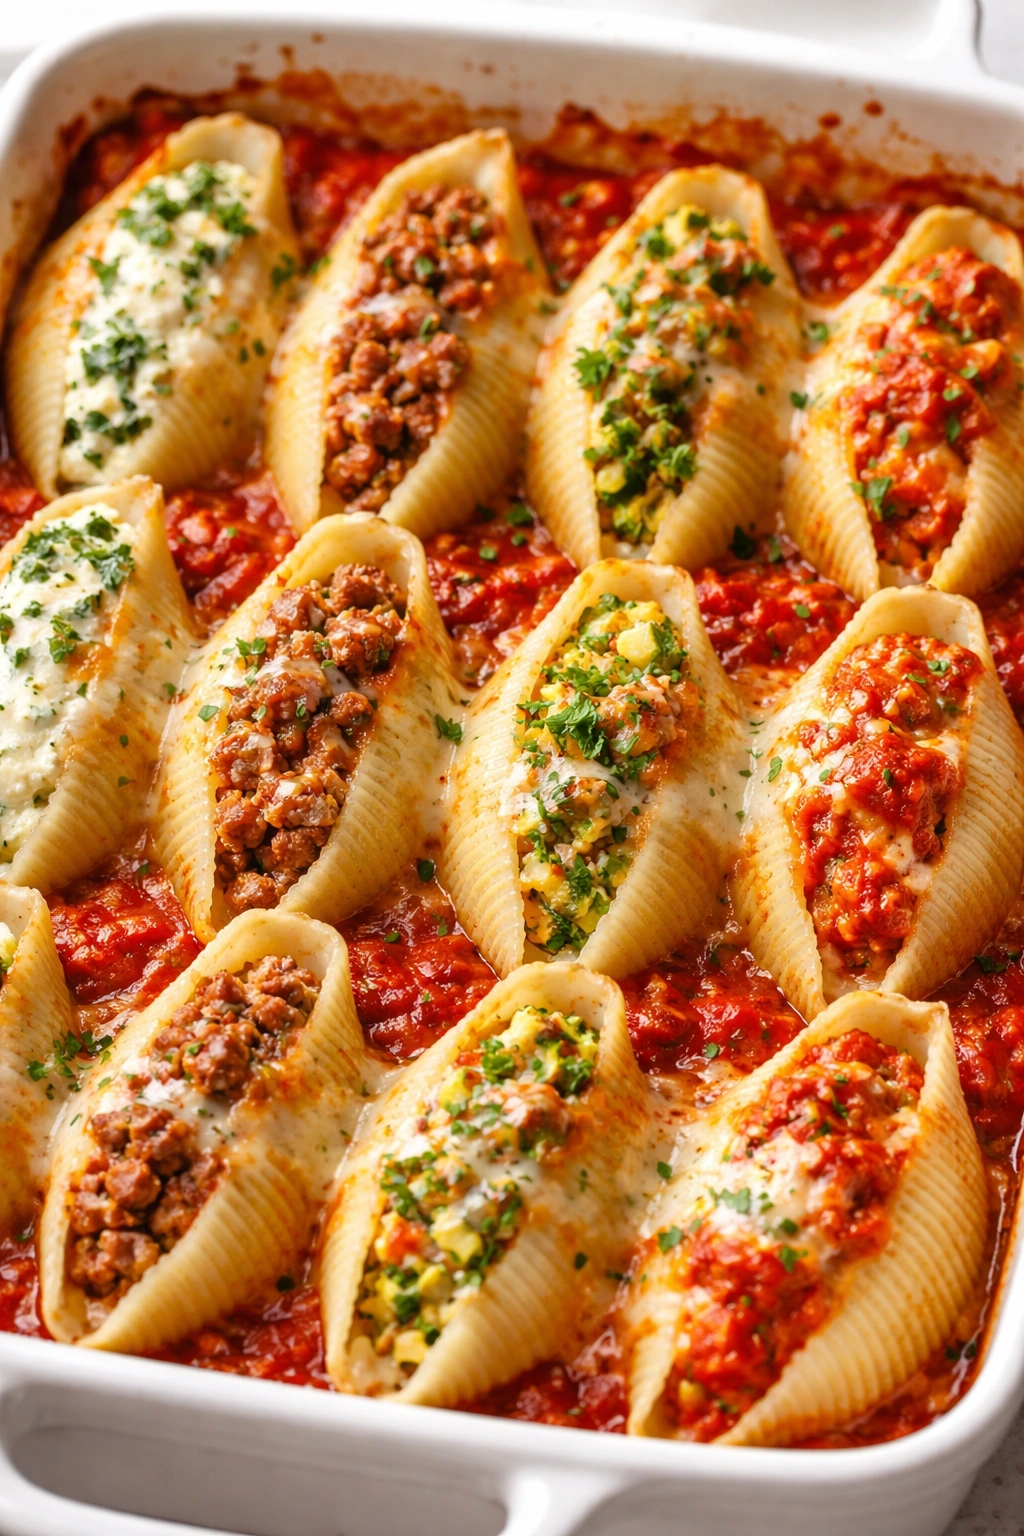
As you fill each shell, place it in your baking dish that’s already been coated with a thin layer of marinara sauce on the bottom. Work methodically—fill a few, arrange them, then fill a few more. This prevents shells from drying out while you’re working. Arrange them in a single layer, nestled together snugly but not packed so tightly that they can’t cook evenly.
Once all your shells are stuffed and arranged, pour the remaining marinara sauce over them, making sure each one gets some coverage. This is also where you sprinkle the reserved mozzarella cheese over the top, and perhaps a bit more Parmesan if you want extra golden-brown crispiness.
Yield: Serves 6 to 8 | Makes one 9×13-inch casserole
Prep Time: 25 minutes
Cook Time: 35 minutes
Total Time: 60 minutes
Difficulty: Beginner — no special equipment required and the steps are straightforward even for someone who’s never made a baked pasta dish before.
Ingredient List for Classic Three-Cheese Stuffed Shells
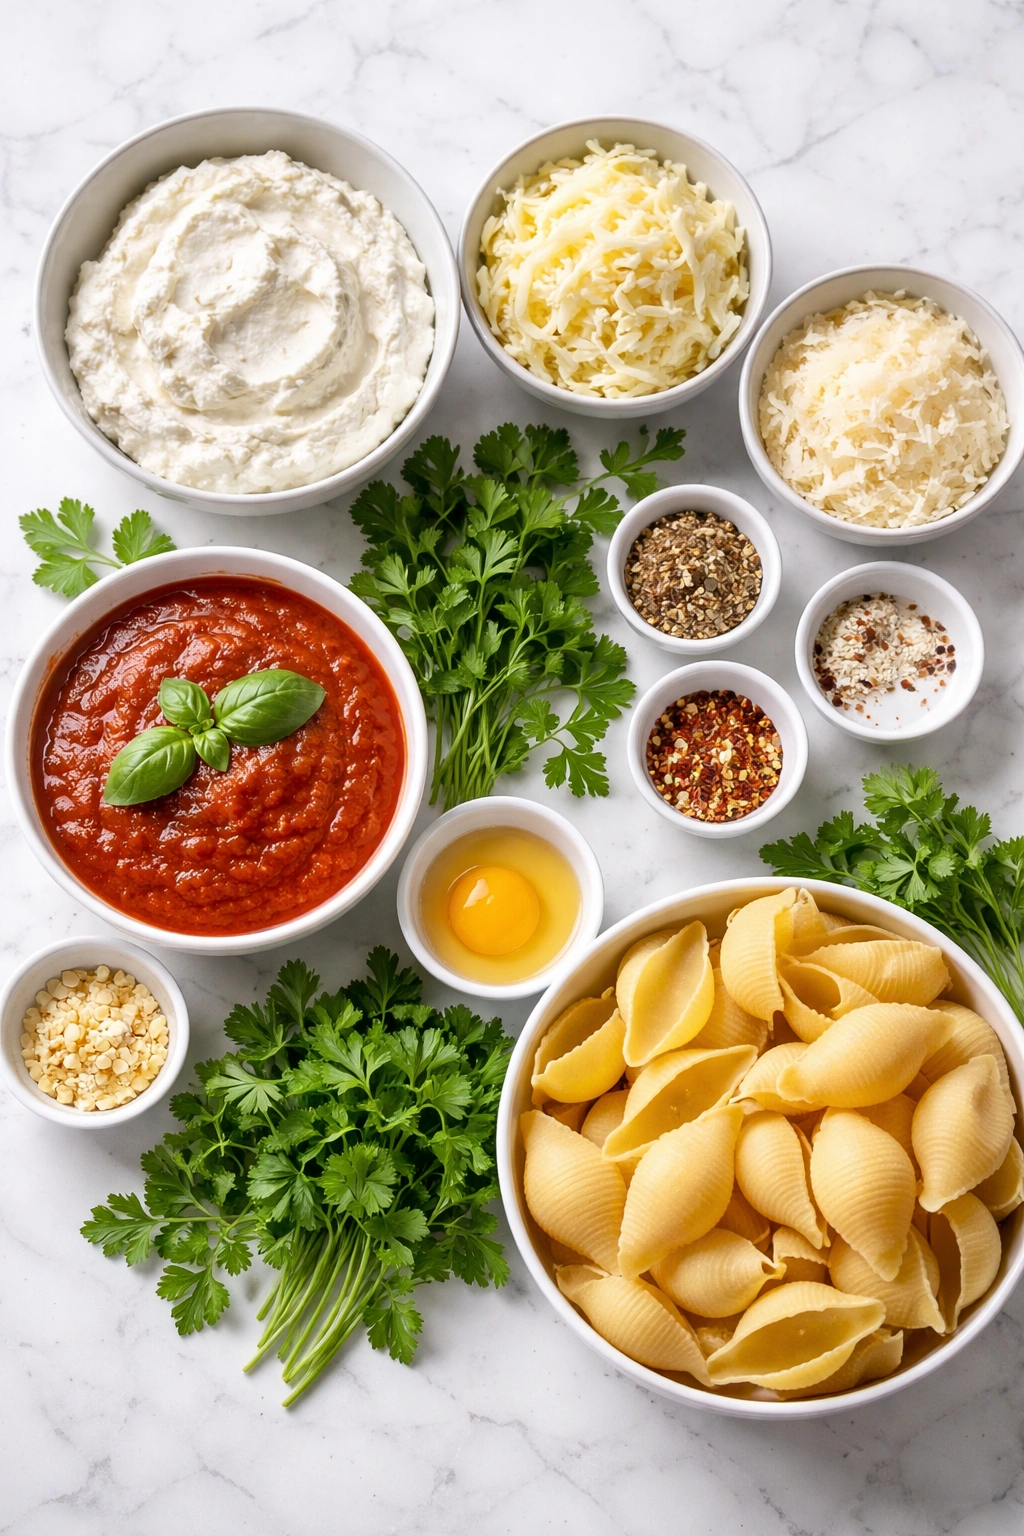
For the Shells and Assembly:
- 1 (12-ounce) box jumbo pasta shells (approximately 24-26 shells)
- 3 cups marinara sauce, divided use
- 2 tablespoons extra virgin olive oil or cooking spray
For the Cheese Filling:
- 15 ounces whole milk ricotta cheese, room temperature
- 3 cups shredded mozzarella cheese, divided use (about 2 cups in filling, 1 cup for topping)
- 1/2 cup freshly grated Parmesan cheese
- 1 large egg, lightly beaten
- 1/2 teaspoon kosher salt
- 1/4 teaspoon freshly ground black pepper
- 2 tablespoons fresh parsley, finely chopped (optional but recommended)
- 1/4 teaspoon garlic powder (optional)
For Serving and Garnish:
- Fresh basil leaves (optional)
- Additional Parmesan for garnish (optional)
Step-by-Step Instructions for Perfect Stuffed Shells
Prepare Your Oven and Pan:
-
Preheat your oven to 375°F (190°C) and position the rack in the center of the oven.
-
Lightly coat a 9×13-inch baking dish with olive oil or cooking spray, rubbing it evenly across the bottom and sides to prevent sticking.
-
Pour about 1 cup of marinara sauce into the bottom of the prepared baking dish, spreading it in a thin, even layer with the back of a spoon. This base layer prevents sticking and adds flavor to the shells as they cook.
Cook the Pasta Shells:
-
Bring a large pot of salted water to a rolling boil—the water should taste like the sea. Add the jumbo shells carefully, a few at a time, to prevent them from sticking together.
-
Stir gently but frequently with a wooden spoon throughout cooking to keep the shells from clumping. Boil for 1-2 minutes less than the package directions recommend (if the package says 12 minutes, cook for 10-11 minutes). You want the shells to be just slightly under al dente—they should feel just a touch firm when you bite into one, not completely soft.
-
Drain the cooked shells in a colander and immediately rinse them under cool running water, stirring gently with your fingers to separate any that are clumped together. Set them aside on a clean kitchen towel if you have the time—this helps them drain and prevents them from sticking to each other.
Make the Cheese Filling:
-
While the pasta cooks (or while it cools), place the room-temperature ricotta cheese in a large mixing bowl. Room temperature ricotta blends more smoothly than cold ricotta straight from the refrigerator.
-
Add 2 cups of the shredded mozzarella cheese, the Parmesan cheese, the lightly beaten egg, salt, pepper, parsley, and garlic powder (if using) to the bowl.
Advertisements -
Stir the mixture thoroughly with a wooden spoon or a sturdy spatula until everything is completely combined and you have a thick, creamy paste. The mixture should look uniform and smooth, with no streaks of white ricotta or distinct patches of cheese. This usually takes about 1-2 minutes of steady stirring.
Stuff and Arrange the Shells:
-
Using a small dessert spoon or a small ice cream scoop with a trigger release, fill each cooked shell with approximately 2-3 tablespoons of the cheese mixture. The shells should be noticeably full but not so overstuffed that filling spills out when you place them in the dish. If the filling feels stiff or grainy, stir in a tablespoon or two of milk or marinara sauce to loosen it slightly.
-
Gently place each stuffed shell into the prepared baking dish, arranging them in a single layer. Nestle them snugly together so they support each other and cook evenly, but don’t pack them so tightly that steam can’t circulate around them. They should be touching but not squished.
-
Once all the shells are arranged in the dish, pour the remaining 2 cups of marinara sauce evenly over the top, making sure each shell is covered with at least a thin layer of sauce. The sauce should pool slightly around the shells.
Add the Final Cheese Layer and Bake:
-
Sprinkle the reserved 1 cup of shredded mozzarella cheese evenly over the top of the shells. You can also add a light sprinkle of additional Parmesan if you want extra crust browning.
-
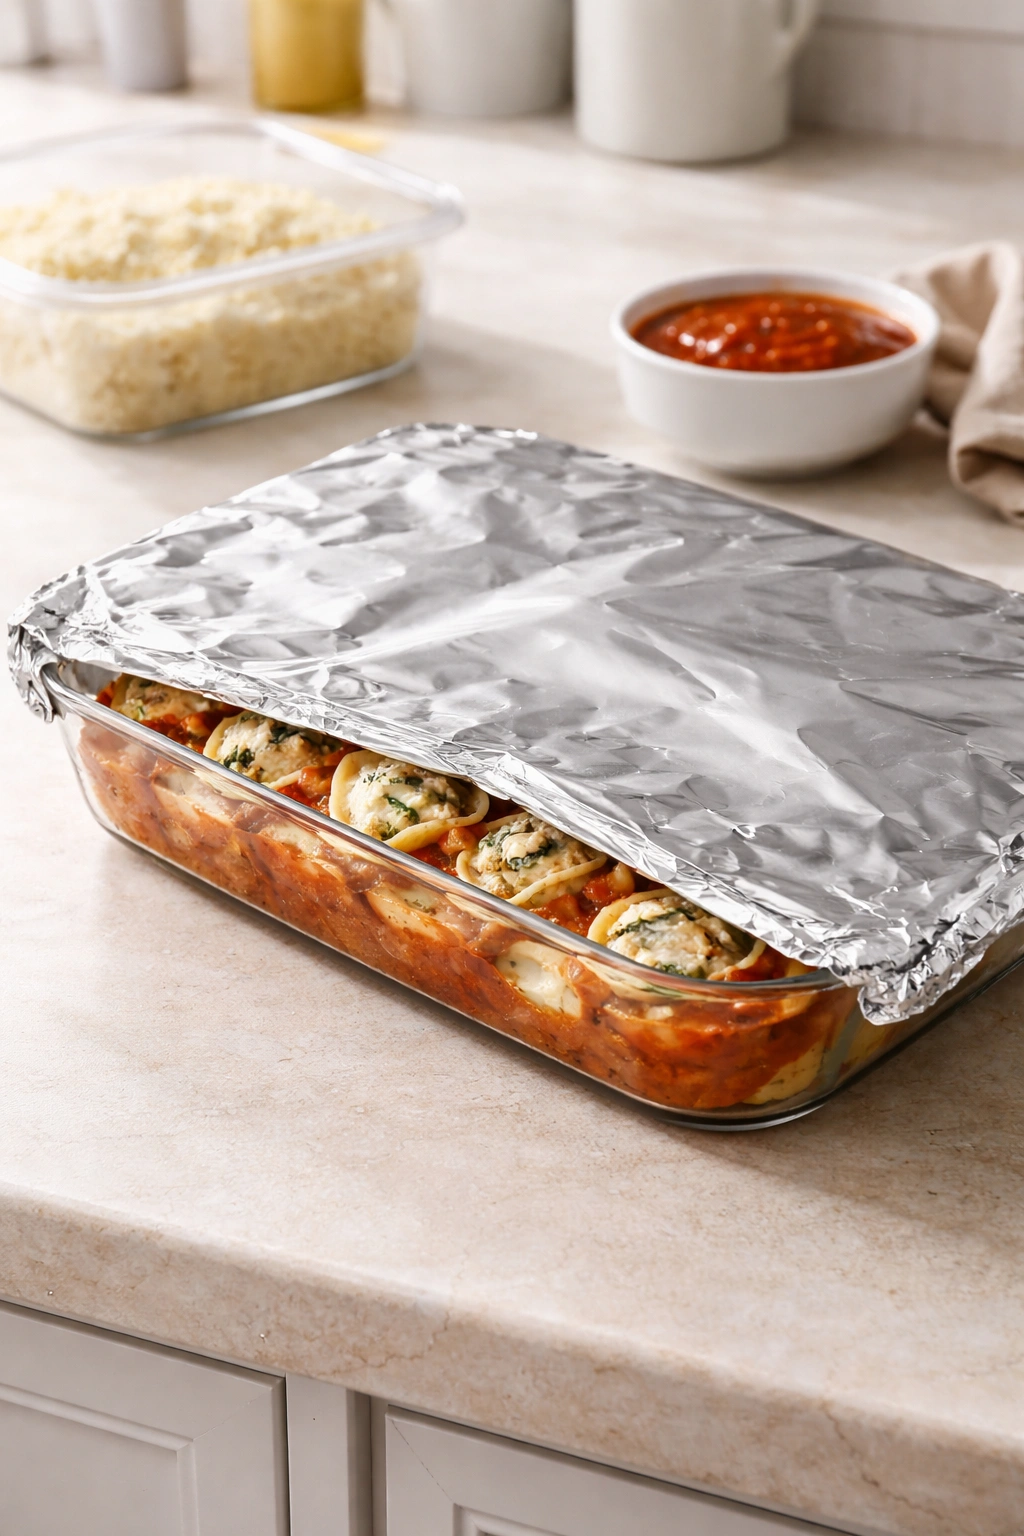
Cover the entire baking dish tightly with aluminum foil, pressing the foil gently against the edges to create a seal. This cover traps steam and ensures the shells cook through evenly without the edges drying out. Do not skip this step—covering makes a significant difference in texture.
-
Bake for 25-30 minutes covered, until the sauce is bubbling along the edges of the dish and you can see heat rising from underneath the foil. The cheese inside should be hot and just beginning to melt.
-
Carefully remove the foil (watch out for the steam!) and bake for an additional 8-12 minutes, until the cheese on top is melted, golden, and just beginning to brown slightly at the edges. The pasta should smell deeply savory and cheesy at this point. If the cheese is browning too fast before everything is heated through, loosely replace the foil and continue baking until the interior is hot.
Advertisements -
Remove from the oven and let rest for 5 minutes before serving. This resting time allows the filling to set slightly and makes the shells much easier to portion without everything sliding around the plate. The dish will stay hot enough during this brief rest, and you’ll have a far better eating experience.
Pro Tips From Years of Making These
Buy whole milk ricotta and don’t compromise on this. Part-skim ricotta works, but whole milk versions are noticeably creamier and create a filling that feels luxurious rather than dense. Brands like Bellwether Farms or Calabro are worth seeking out if your store carries them.
Freshly shred your own mozzarella instead of using pre-shredded bags. This is the single biggest quality upgrade you can make. Pre-shredded cheese contains anti-caking agents that actually prevent smooth melting, leaving you with a grainy, separated sauce instead of that gorgeous, silky texture. Yes, it takes five extra minutes, but the difference is enormous.
Don’t cook the shells all the way. This is the most common mistake I see. People cook them until they’re soft and easy to handle, then wonder why the finished dish is mushy. The shells need to have some structure to maintain their shape through baking. Undercooking them is the fix.
Make sure your ricotta is room temperature before mixing. Cold ricotta is much harder to blend smoothly with the other cheeses. Pull it out of the fridge 10 minutes before you start combining ingredients, or run your hands over the outside of the container until it feels slightly less cold.
Don’t skip the foil cover during the initial bake. Covering traps steam and ensures the shells cook through before the edges dry out. I know you might be tempted to leave it off so the cheese browns immediately, but trust the process. You’ll uncover it partway through anyway.
Use a small spoon or trigger-release ice cream scoop for stuffing. These tools give you consistency from shell to shell and prevent you from overstuffing some and underfilling others. Overstuffed shells tend to burst during cooking.
Variations and Customizations for Different Preferences
Adding Meat for Protein: Brown 8 ounces of ground beef, Italian sausage, or ground turkey in a skillet over medium-high heat, breaking it up as it cooks until it’s completely done (about 5-7 minutes). Drain off excess fat, let it cool briefly, then stir it into the cheese filling before stuffing the shells. This transforms the dish from vegetarian comfort food to a heartier meal that feels more substantial.
Incorporating Vegetables: Finely chop and add up to 1 cup of vegetables to the cheese mixture. Spinach is classic—thaw frozen spinach, squeeze out excess moisture, and roughly chop it before stirring in. Mushrooms, finely diced zucchini, red bell peppers, or broccoli also work beautifully. If using raw vegetables, sauté them briefly first to remove moisture, which prevents the filling from becoming watery.
Switching the Sauce: If you want something different from marinara, try a creamy Alfredo sauce, a hearty bolognese, or even a combination. Some people make a white sauce base, which creates an entirely different (and equally delicious) dish. The mechanics stay exactly the same—the sauce choice just changes the flavor profile.
Experimenting with Cheese Combinations: While the three-cheese blend is classic for good reason, you can absolutely substitute. Fontina, provolone, asiago, and pecorino Romano all work beautifully here. You could even use a combination of ricotta and cottage cheese (drained and mixed with a fork to break up the curds). The key is maintaining a balance of creamy, melty, and sharp.
Adding Fresh Herbs: Beyond the optional parsley in the filling, consider stirring in fresh basil, oregano, or thyme. Or garnish the finished dish with fresh basil leaves right before serving for brightness and visual appeal.
Making It Spicy: Add a pinch of red pepper flakes to the filling, or garnish with a light sprinkle before serving. You could also use hot Italian sausage instead of mild.
Make-Ahead and Storage Strategies
This is one of the great strengths of stuffed shells—they’re genuinely set-it-and-forget-it food that adapts beautifully to your schedule.
Refrigerating Unbaked Shells: Assemble the complete dish, cover it tightly with foil, and refrigerate for up to 2 days before baking. When you’re ready to bake, add about 5 minutes to the covered baking time since the dish starts cold. Everything else stays exactly the same.
Freezing for Future Meals: Assemble the entire casserole without baking it, cover tightly with foil and then wrap with plastic wrap for extra protection against freezer burn. These keep beautifully for up to 3 months in the freezer. To bake from frozen, do not thaw—just bake covered at 375°F for 45-55 minutes, then uncover and bake an additional 10-12 minutes until the cheese is melted and golden. The extra time is necessary because you’re starting from a frozen state.
Refrigerating Cooked Shells: You can also bake the shells completely, let them cool to room temperature, then cover and refrigerate for up to 4 days. Reheat gently in a 350°F oven, covered with foil, for about 15-20 minutes until heated through, or microwave individual portions in 90-second intervals until steaming.
Portioning for Individual Freezing: If you want to freeze individual servings, let the cooked casserole cool completely, cut it into portions, and wrap each one in plastic wrap then foil. These individual portions reheat beautifully and are perfect for quick weeknight dinners.
A Note on Moisture: Ricotta can sometimes release liquid as it sits, especially if it’s not whole milk. If you notice excessive liquid in your baking dish either before or after baking, simply drain it off. This doesn’t mean anything went wrong—it’s just ricotta being ricotta. You can prevent excess liquid by draining your ricotta in a fine-mesh strainer for 5-10 minutes before mixing it with the other cheeses.
Serving Suggestions and Complementary Sides
These stuffed shells are genuinely rich and satisfying on their own, but a few thoughtful pairings elevate the entire meal.
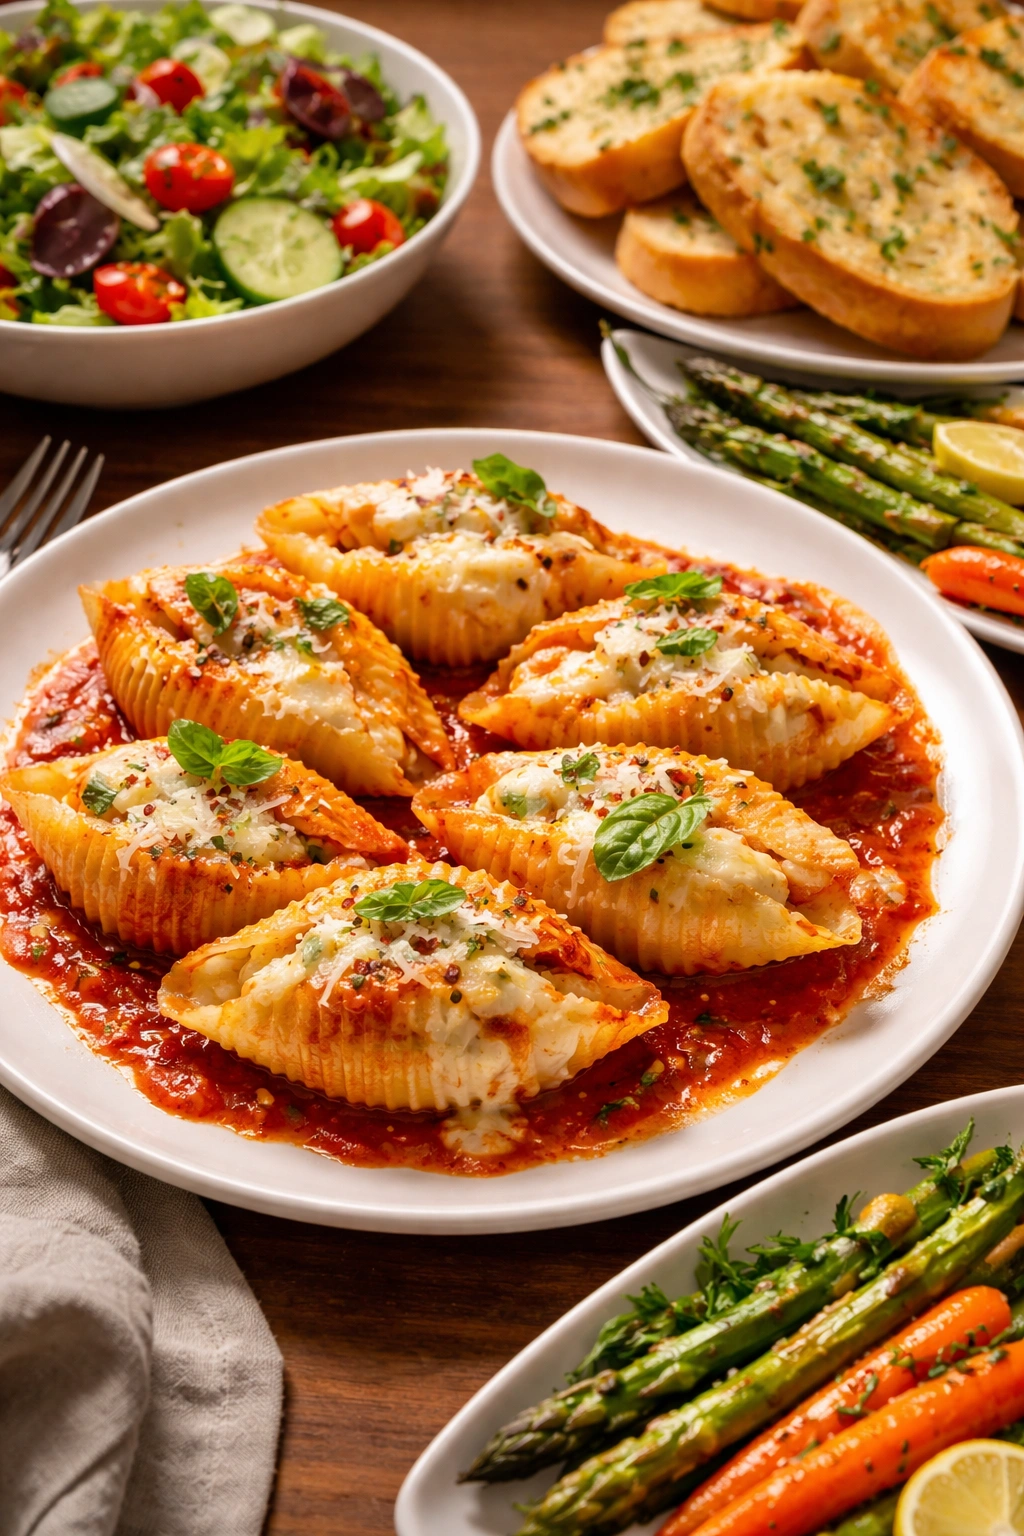
Light Salads: Because the shells are creamy and substantial, a bright, acidic salad is the perfect counterpoint. A simple arugula salad with lemon vinaigrette, a crisp Caesar salad, or even a mixed green salad with balsamic dressing all work beautifully. The sharpness cuts through the richness perfectly.
Garlic Bread: This is the classic pairing for a reason. Brush sliced baguette with olive oil mixed with minced garlic and broil until golden, or make garlic knots if you’re feeling ambitious. The bread is perfect for soaking up any extra sauce on the plate.
Steamed Vegetables: Roasted broccoli, steamed asparagus, or sautéed spinach all provide a fresh, vegetable-forward element that keeps the meal from feeling one-note.
Wine Pairing: If you’re serving wine, a medium-bodied red like a Chianti or a Barbera complements the richness beautifully. A crisp white Pinot Grigio also works if you prefer white wine.
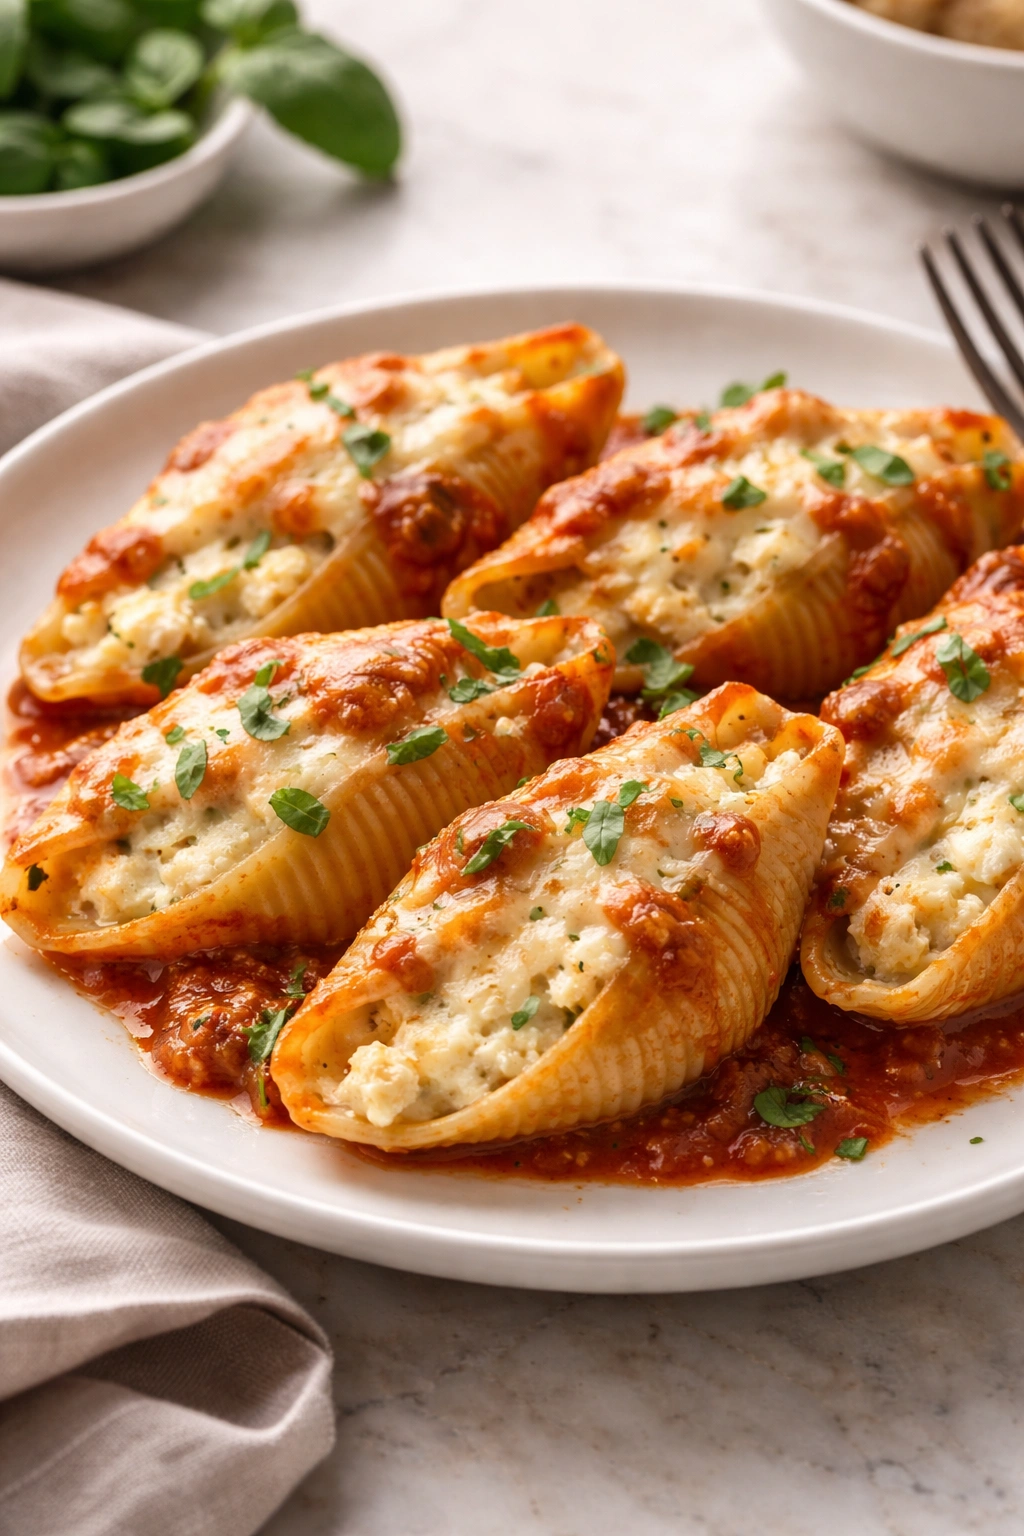
Plating for Visual Appeal: When serving, use a wide spoon or spatula and lift each shell carefully, making sure it has some sauce clinging to it. Place the shell on the plate with the open side facing up or slightly to the side so people can see the creamy filling inside. A small sprinkle of fresh basil or parsley on top adds color and a hint of freshness.
Troubleshooting Common Issues
Shells are falling apart or tearing easily: This means they were overcooked before baking. Next time, subtract 2-3 minutes from the package cooking time instead of just 1-2. The shells should feel quite firm when you bite into one.
Filling tastes grainy or separated: Your ricotta might have been cold, or you used part-skim ricotta instead of whole milk. Next time, bring ricotta to room temperature and use whole milk versions. You can also prevent this by ensuring you stir the filling thoroughly so the egg is completely distributed.
Too much liquid pooling in the bottom: Ricotta releases moisture over time, especially if it’s not whole milk. Drain your ricotta in a fine-mesh strainer for 5-10 minutes before mixing. If liquid appears in the baking dish before cooking, drain it off—this doesn’t affect the final result.
Shells are soft or mushy in the finished dish: You cooked them too long initially. Next time, reduce the cooking time by 2-3 minutes from the package directions. Alternatively, you might be baking them uncovered for too long. Keep them covered for most of the baking time.
Cheese on top is browning too fast before the shells are hot: Move the dish to a lower oven rack, or loosely tent it with foil while it finishes cooking. Oven temperatures vary, so adjust based on what you see.
The filling leaks out during cooking: You either overstuffed the shells or handled them too roughly. Use a slightly smaller amount of filling per shell next time, and place them gently in the dish with the open side facing down slightly so the filling stays inside.
Why This Dish Brings People Together
There’s something about a generously portioned, deeply satisfying meal that makes people linger at the table longer and enjoy each other’s company more. Stuffed shells do that. They’re substantial enough to feel like real dinner, special enough to feel like you made an effort, and delicious enough that people actually want the recipe when they leave.
Whether you’re feeding your immediate family, hosting neighbors, bringing a meal to someone in need, or feeding a crowd at a potluck, these shells deliver every single time. They look elegant and taste impressive, yet they’re forgiving enough that even a complete beginner to cooking can execute them perfectly.
Make them ahead on a busy day, pull them from the freezer on a night when you don’t want to cook, or assemble them the morning of a dinner party and simply bake them when guests arrive. The flexibility alone makes them worth mastering, but the genuine deliciousness is what keeps people asking for the recipe.
Final Thoughts
The magic of cheese-stuffed shells isn’t actually complicated or secret. It’s the combination of quality ingredients (real whole milk ricotta, freshly shredded cheese), proper technique (slightly undercooking the shells, covering them while baking), and respect for the timing (letting them rest before serving). Get those basics right and you’ll have a dish that not only feeds a crowd but creates the kind of meal people remember and talk about.
Start with the classic three-cheese version, master the technique, and then feel free to play with variations once you understand how the components work together. Add meat if you want more protein, incorporate vegetables if you want more nutrition, or stick with the simple, elegant original version. The dish is genuinely forgiving and genuinely delicious no matter which direction you take it.
The next time you need a meal that will please everyone, that can be made ahead, that scales beautifully for a crowd, and that tastes like you spent hours on it when you really didn’t—remember these stuffed shells. They’re your answer.