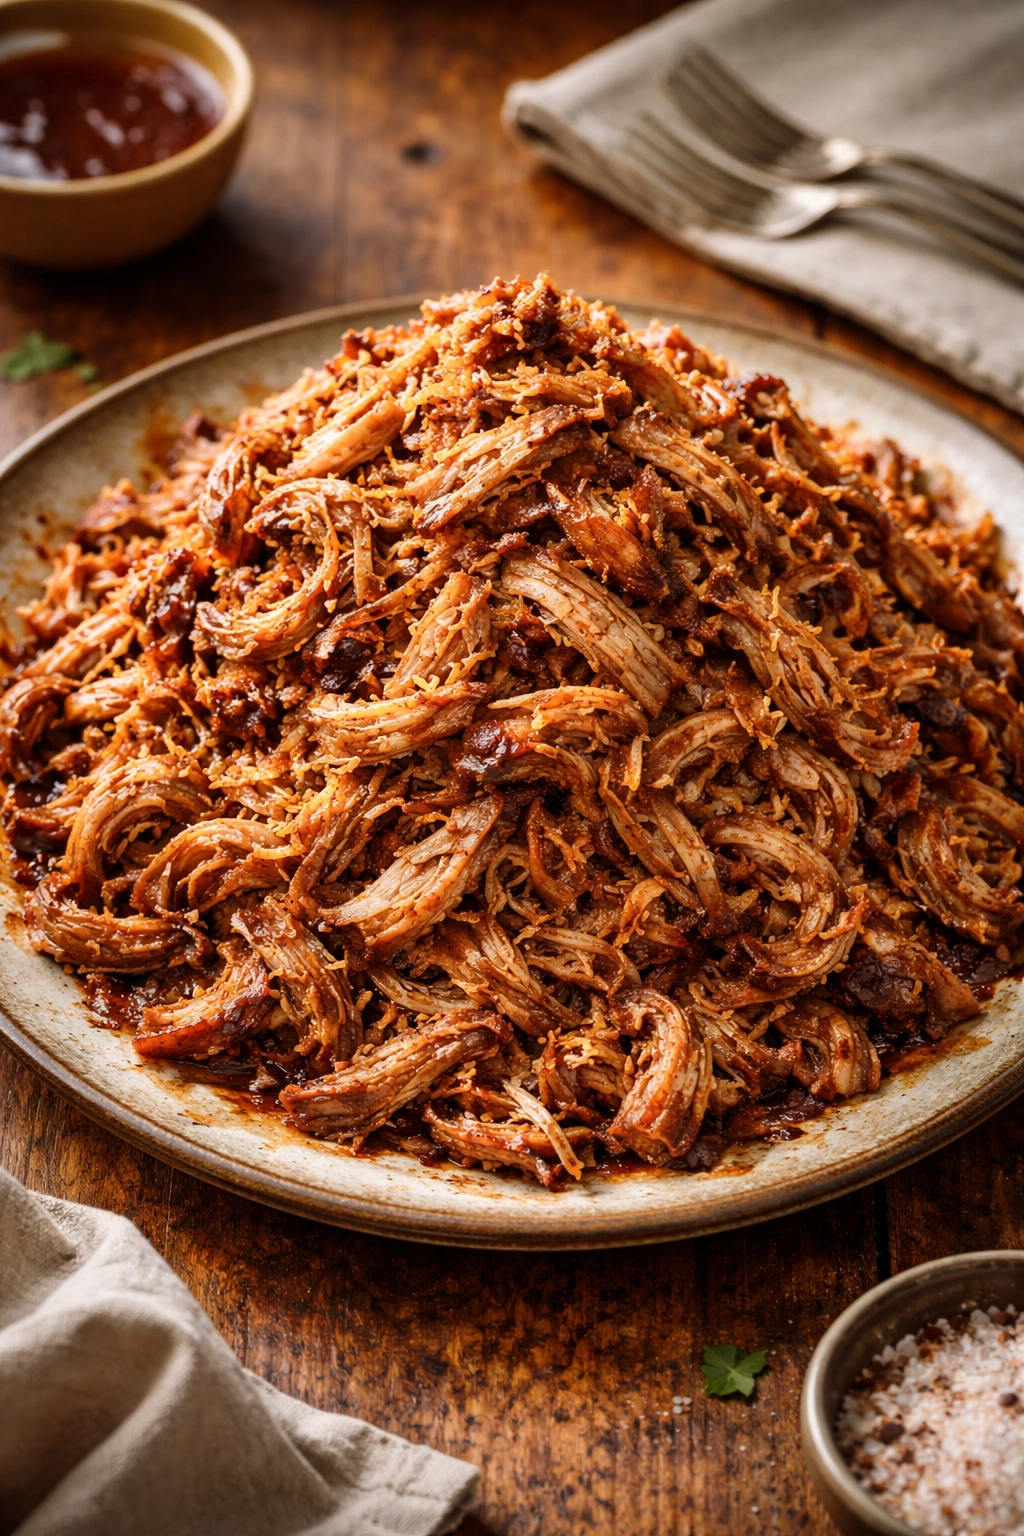
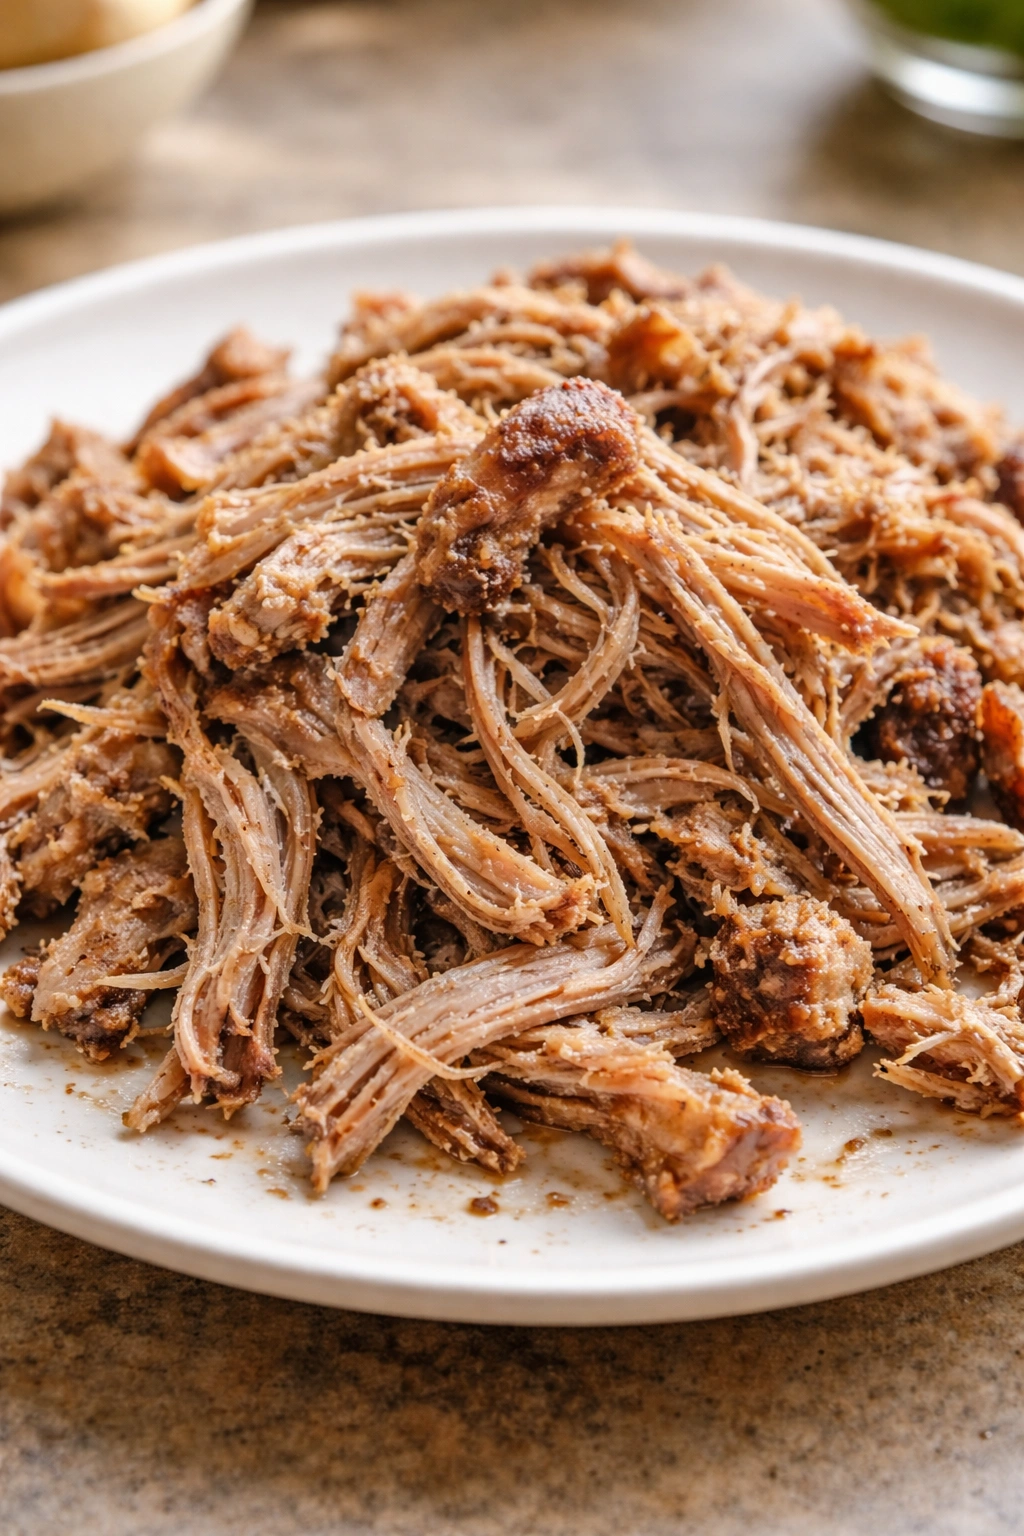
There’s something almost magical about the moment you pull shredded pork apart with just two forks and watch it fall into perfect, tender strands. That aroma filling your kitchen—smoky, deeply savory, slightly sweet—is the smell of something genuinely impressive happening, yet the truth is almost deceptively simple: great pulled pork requires minimal active work and almost no special skill, just time and the right approach. What makes pulled pork sandwiches different from other sandwich fillings is how completely they transform into something greater than the sum of their parts; a hunk of tough, inexpensive meat becomes lunch that tastes like someone spent hours in actual preparation when you mostly just let heat do the work.
Pulled pork piled high on a bun represents some of the best eating available to home cooks. It’s forgiving, scalable, and delivers that satisfying heartiness that makes you feel genuinely fed. Whether you’re cooking for four people or twenty, whether you’ve got six hours or twelve, pulled pork adapts to your situation and still comes out phenomenal. The meat stays moist and flavorful, soaks up sauce generously, and actually improves the longer it sits—which means you can make it days ahead and genuinely have an easier time on the day you’re serving it.
This guide covers everything from selecting the right cut of meat through assembly technique, common pitfalls, sauce variations, and storage. More importantly, it explains why these steps matter so you can adjust confidently based on your equipment and timeline. You’ll understand which methods work best for your situation and how to execute pulled pork that tastes restaurant-quality but comes from your own kitchen.
Choosing the Right Cut of Meat
Not every pork cut becomes pulled pork, and picking the wrong one explains most home cook failures. The cut matters more than people realize because you’re relying on connective tissue to break down during cooking and transform the meat into something shredable and incredibly tender.
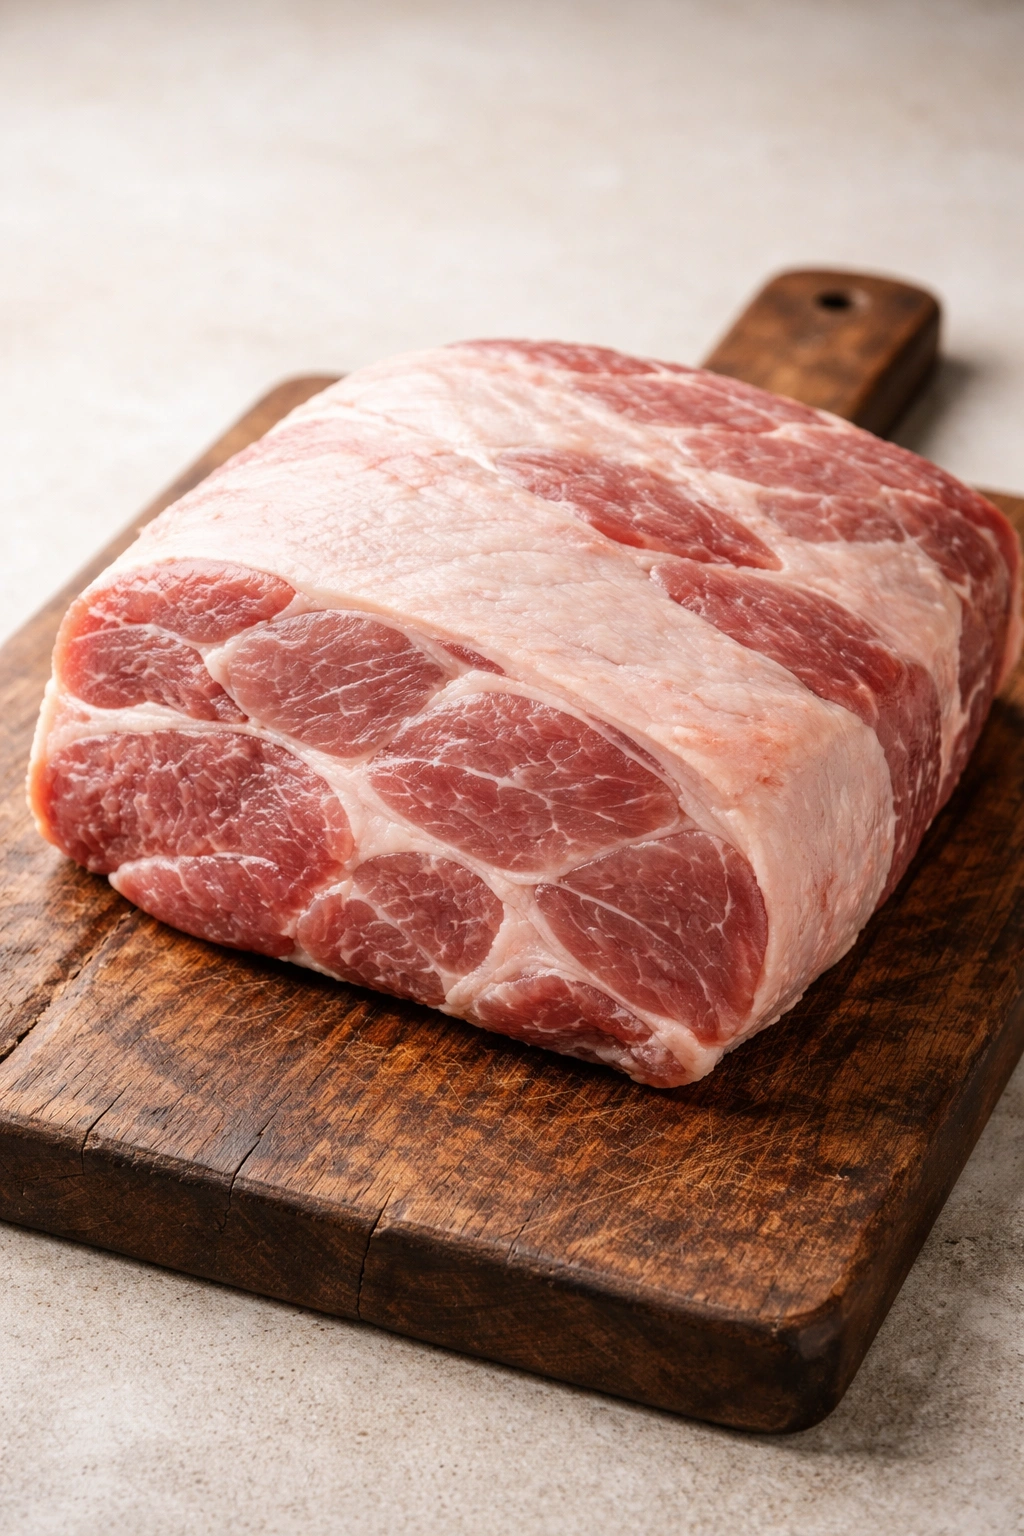
The pork shoulder (also labeled Boston butt, despite containing zero actual butt meat) is the gold standard for pulled pork. This cut comes from the upper front leg and contains just enough fat marbling and connective tissue to stay moist through long, slow cooking without drying out. A typical pork shoulder weighs 6-10 pounds with a good fat cap on top, which protects the meat during cooking and renders into flavor.
The picnic shoulder is the lower portion of the front leg and works identically to Boston butt, though it’s slightly leaner and occasionally contains a bone. Both shoulder cuts have the right muscle structure and fat content for shredding. If your butcher has one but not the other, either works beautifully.
Pork butt is the common retail name for Boston butt, and there’s zero reason to choose a different cut if this is what’s available at your market. The nomenclature confuses people unnecessarily; this cut is perfect for pulled pork regardless of what it’s called.
Size matters practically speaking. A shoulder under 5 pounds will finish cooking quickly but won’t yield enough meat for significant portions or leftovers. A 6-8 pound shoulder hits the sweet spot—it cooks in 8-10 hours on low heat, yields abundant meat with shrinkage factored in, and works for 8-12 people depending on how much you pile on each sandwich.
Avoid the pork loin—it’s lean, cooks quickly, and dries out rapidly because it lacks the fat and connective tissue that makes pulled pork forgiving. Skip anything labeled “lean pork shoulder”; you want the fat because it’s literally what keeps the meat tender and flavorful. Fat is your ally in pulled pork, not something to fear.
Why This Cut Works for Sandwiches

The magic of pulled pork comes down to collagen and myofibril breakdown under gentle, extended heat. When you cook a pork shoulder to around 190-205°F internal temperature, the collagen in connective tissue converts to gelatin, which essentially lubricates the meat fibers and makes them easy to shred apart. This happens slowly—hence the long cooking time—but once it’s complete, you’ve got meat that falls into perfect strands with minimal effort.
This transformation creates texture that’s impossible to achieve any other way. You can’t roast a shoulder at high heat and get pulled pork; you’ll just get firm, difficult-to-shred meat. You can’t simmer it in liquid for forty minutes; the collagen hasn’t had time to convert. The slow, moist heat over many hours is what converts a tough, economical cut into something tender and luxurious.
Why Long, Slow Cooking Changes Everything
Collagen is a fibrous protein that starts breaking down around 140°F but reaches optimal conversion somewhere between 190-205°F. Below that temperature range, you’ve got partially converted collagen—some gelatin, some still fibrous—which creates texture that’s neither quite tender nor quite shredable. Above that range, you’re not really gaining anything; the meat has already achieved maximum tenderness and you risk over-cooking it dry.
The long cooking timeline also allows time for smoke or spice rubs to penetrate deep into the meat, seasoning it throughout rather than just on the surface. The low temperature and moist environment (whether from steam, injected liquid, or the meat’s own moisture) keeps the surface from drying while the interior reaches the target temperature.
Essential Equipment You’ll Need
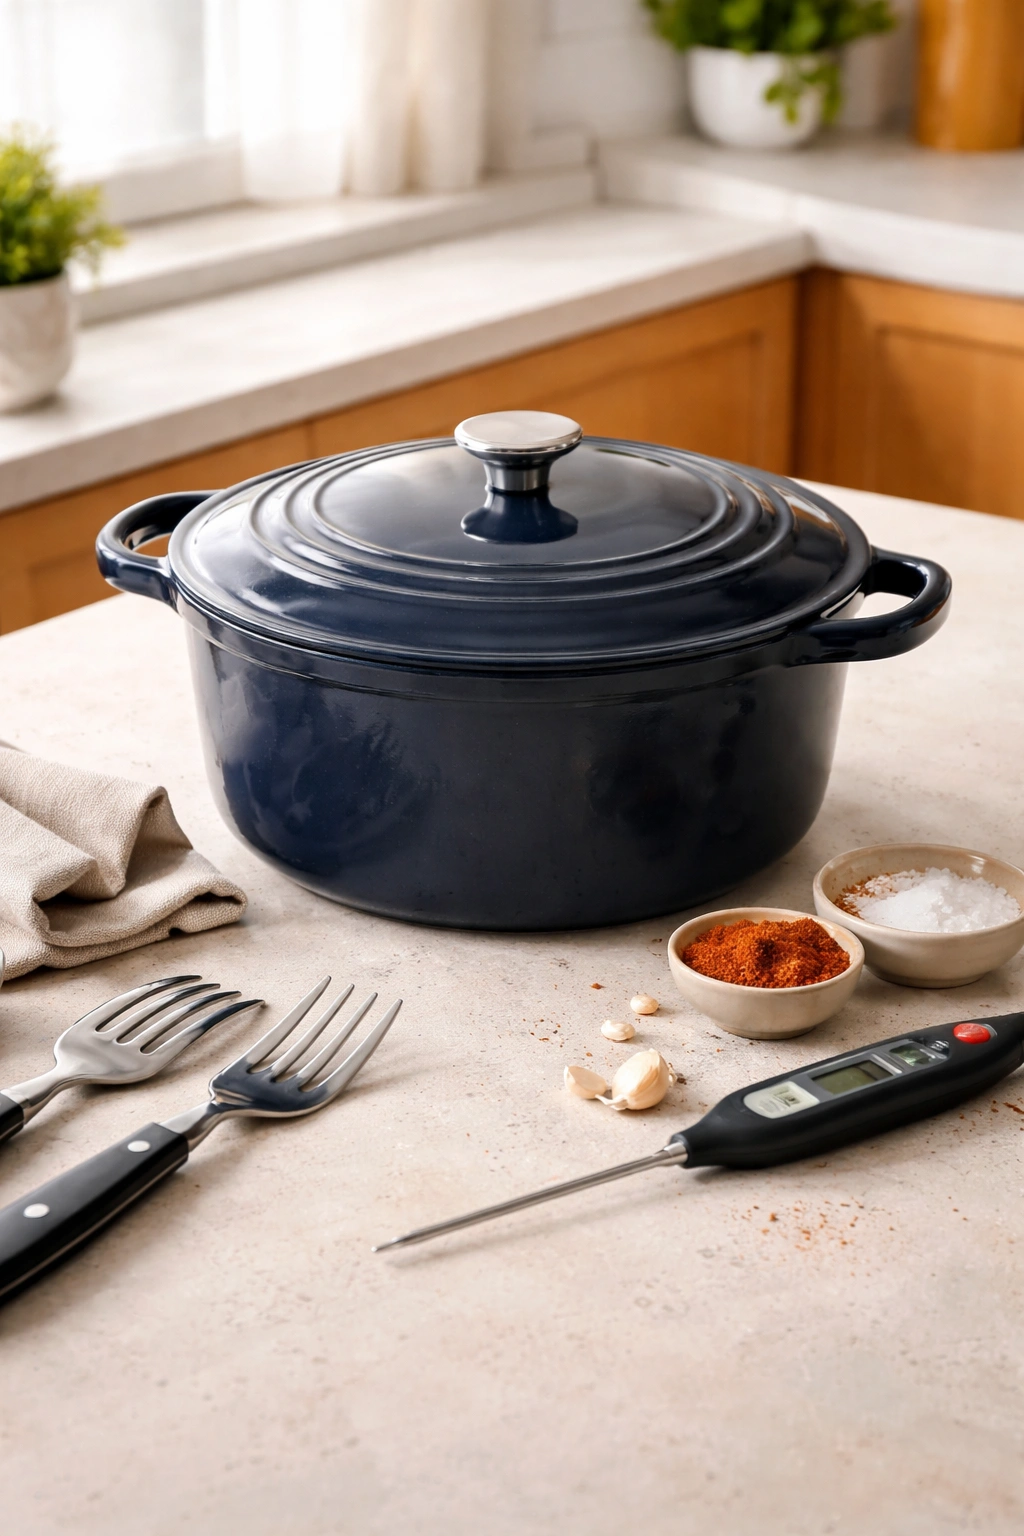
You need surprisingly little to make excellent pulled pork, though certain equipment makes the job easier. The absolute minimum is a heavy-bottomed pot or Dutch oven with a tight-fitting lid, an oven or heat source, and a meat thermometer.
A reliable meat thermometer is non-negotiable. Digital instant-read thermometers are inexpensive and eliminate guessing about doneness. You’ll insert it into the thickest part of the meat (avoiding bone if there is one) to confirm the shoulder has reached 190-205°F, which is the target temperature where collagen converts to gelatin and the meat becomes shredable.
A Dutch oven or heavy enameled cast-iron pot with a lid works beautifully for oven cooking. The heavy metal distributes heat evenly, the lid traps steam that keeps the meat moist, and it transitions easily from stovetop to oven. This equipment lasts indefinitely and serves countless purposes beyond pulled pork.
A slow cooker or Instant Pot makes hands-off cooking possible and requires zero oven space, which matters if you’re cooking for a crowd and need your oven for other dishes. Slow cookers take 8-10 hours on low; Instant Pots reduce that to 45-60 minutes but require initial sautéing and venting time.
Two sturdy forks or meat shredders are essential for pulling the cooked meat apart. You can use two forks if you have patience; dedicated meat shredders (handheld or stand-mixer attachments) make the work faster and less tiresome. This is the one point where you genuinely save effort with proper equipment.
Serving platters and tongs matter for transport and serving, particularly if you’re making pulled pork for guests. Having proper serving equipment keeps things organized and makes the meal feel intentional.
Yield: Serves 8-12 | Makes approximately 4-5 cups shredded pork
Prep Time: 15 minutes (trim and season the shoulder)
Cook Time: 8-10 hours on low (slow cooker or oven) | 50 minutes (Instant Pot)
Total Time: 8-10 hours active + up to 1 hour resting (oven method) | 1 hour total (Instant Pot method)
Difficulty: Beginner — The actual active work is minimal; this is mostly passive cooking while you handle other tasks. The low-and-slow nature of the process forgives timing variations and minor technique differences.
Special Notes: This recipe scales beautifully. Use two shoulders for 20+ people; the cooking time remains essentially the same since both fit together in one large pot or cooker. Make it ahead—pulled pork actually improves after refrigeration as flavors meld overnight.
Ingredients for the Pulled Pork
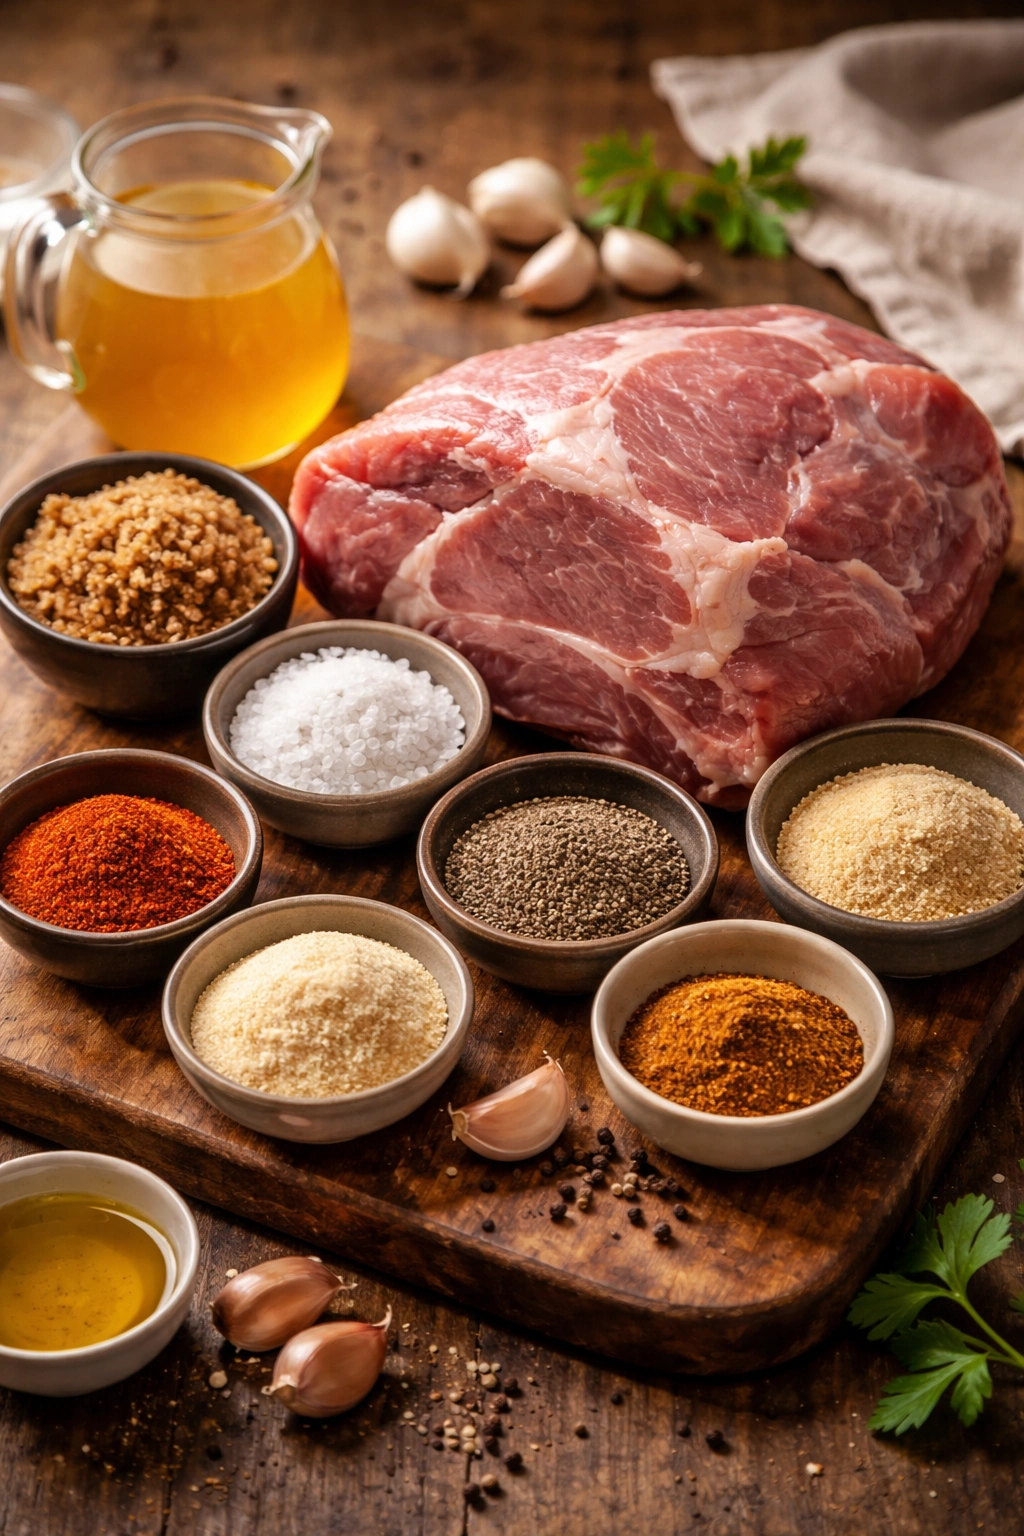
For the Pork and Basic Seasoning:
- One 7-8 pound pork shoulder (bone-in or boneless; either works)
- 3 tablespoons brown sugar, packed
- 2 tablespoons paprika (smoked paprika adds deeper flavor if available)
- 1½ tablespoons fine sea salt or kosher salt
- 1 tablespoon black pepper, freshly ground
- 2 teaspoons garlic powder
- 2 teaspoons onion powder
- 1 teaspoon cayenne pepper (optional, omit if you prefer mild heat)
- ½ teaspoon dry mustard powder
- ¼ teaspoon ground cinnamon
- 1 cup beef or chicken broth (or apple juice or apple cider vinegar for tangier flavor)
For Serving:
- 8-12 soft hamburger buns or soft rolls
- Your choice of barbecue sauce (homemade or store-bought)
- Coleslaw for topping (optional but recommended)
- Pickles, onion slices, or jalapeños for garnish (optional)
The Perfect Rub Builds Flavor From the Inside Out
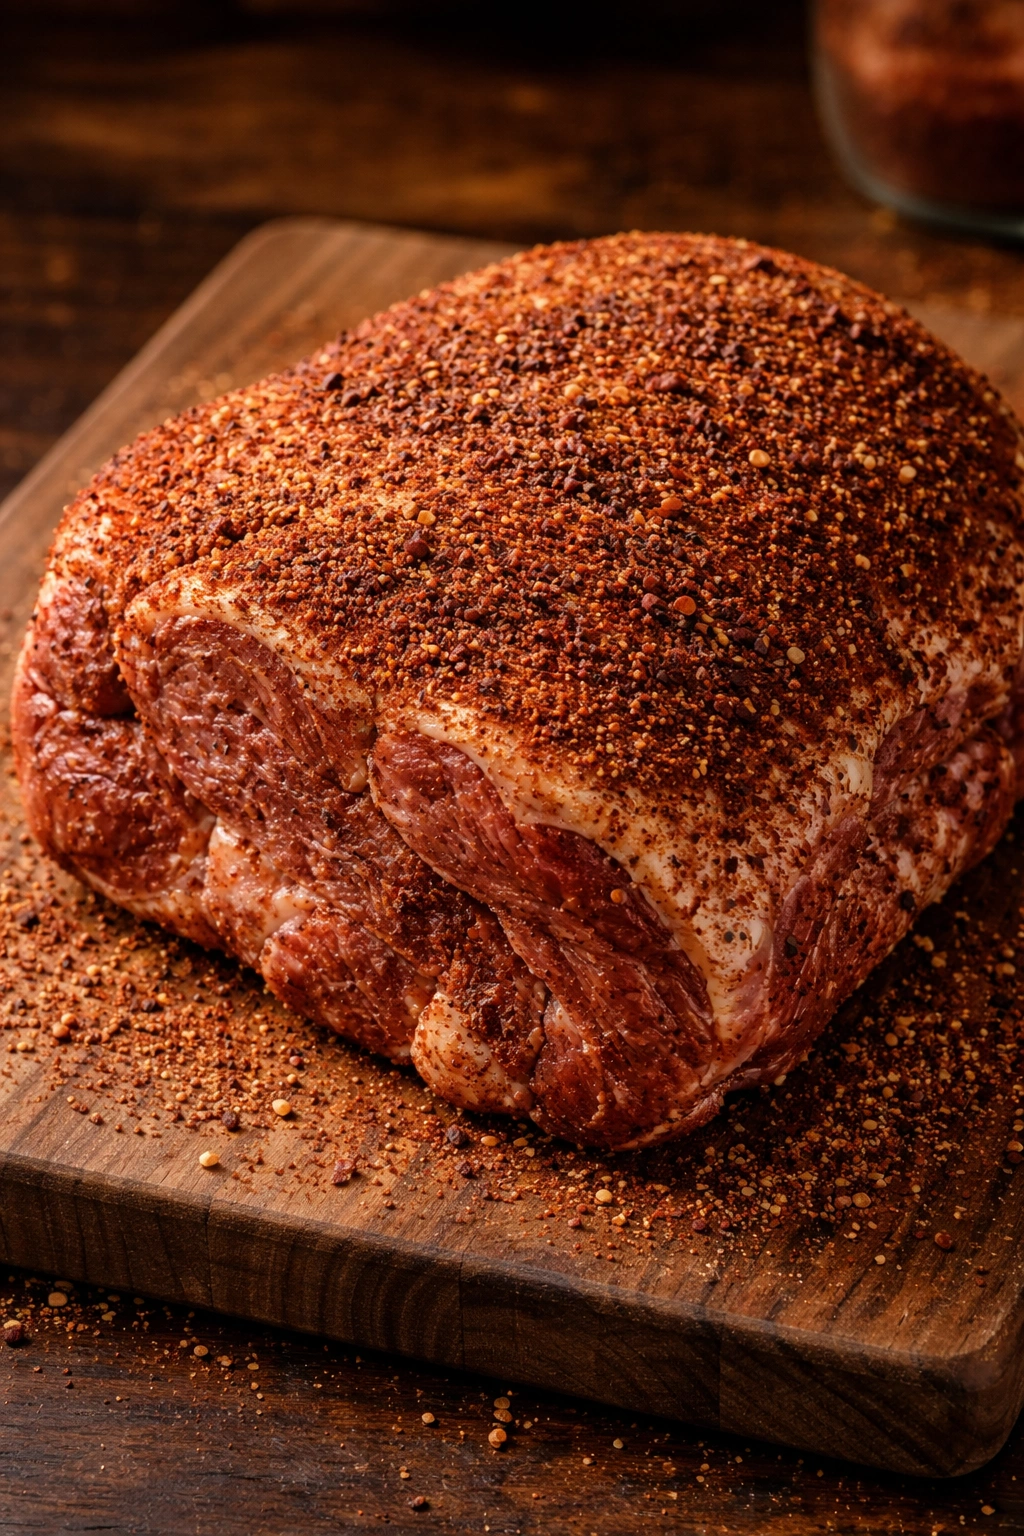
A spice rub does far more than season the surface; during long, slow cooking, the dry spices penetrate deep into the meat and create layered, complex flavor throughout. This is why pulled pork made with a rub tastes so much better than meat seasoned after cooking.
The foundation of the rub combines brown sugar, paprika, salt, and pepper—these are non-negotiable. Brown sugar adds slight sweetness that caramelizes during cooking and balances savory and smoky notes. Paprika (especially smoked paprika) provides that authentic barbecue flavor and warm color. Salt and pepper are the base.
Garlic powder and onion powder add savory depth that gets distributed throughout the meat. These powdered forms work better than fresh garlic or onion because fresh versions can scorch or burn during long cooking, while powders distribute evenly and develop smoothly. Cayenne brings heat without harshness if you want it; omit it if you’re cooking for people who prefer mild flavors.
The small additions—dry mustard powder and cinnamon—create the complexity that separates good pulled pork from mediocre. Mustard powder adds subtle tang and sharpness that brightens all the other flavors. A quarter teaspoon of cinnamon sounds odd but creates depth and warmth that people taste without identifying it as cinnamon. These tiny amounts are the secret to restaurant-quality seasoning.
Trimming and Preparing the Shoulder
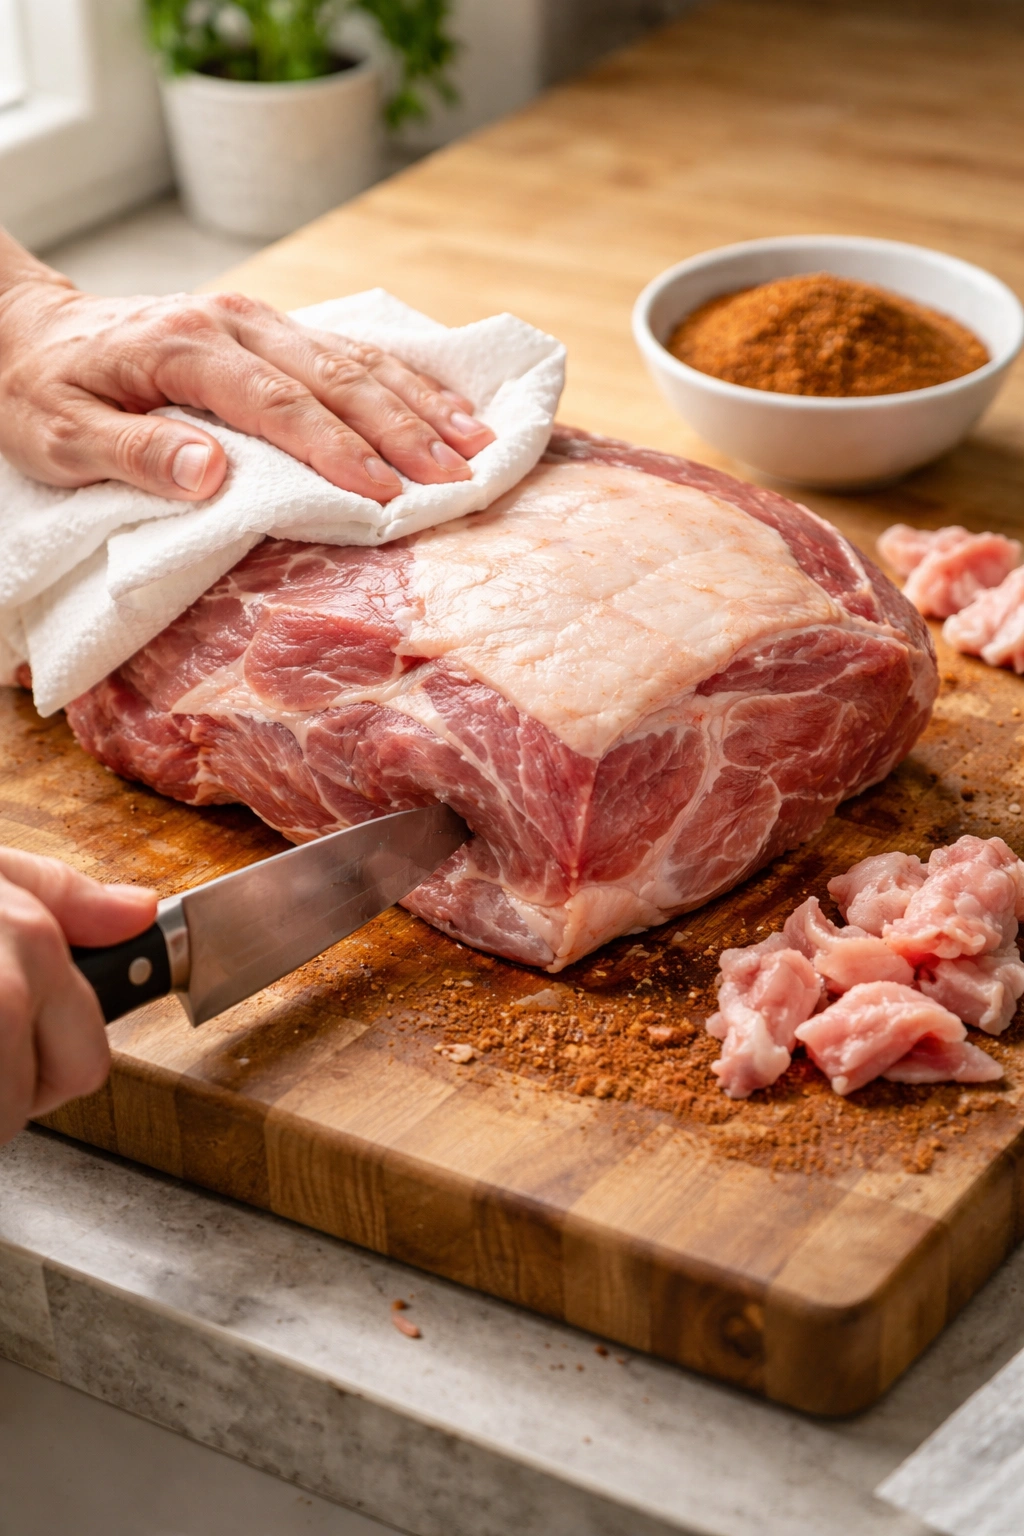
Pat the pork shoulder completely dry with paper towels; moisture on the surface prevents the spices from adhering evenly and sticks rather than coating the meat. Using a sharp knife, trim excess exterior fat, leaving about a quarter-inch of fat on the surface. This fat cap protects the meat during cooking and renders into incredible tenderness, but excessive thick fat becomes unappetizing, so light trimming improves the final product.
Combine all the dry spices in a small bowl and stir well so the ingredients are evenly distributed. Rub the mixture generously all over the pork shoulder, pressing it onto the meat so it adheres. Get into crevices and between the fat and meat. You want it thoroughly coated, not just dusted. This is also where you can inject flavorful liquid directly into the meat using a meat injector if you have one—it’s optional but adds moisture and flavor penetration. If you do inject, place injections throughout the shoulder, about 2-3 inches apart, using about ¼ cup of broth or apple juice.
Slow-Cooker Method (Easiest for Most Home Cooks)
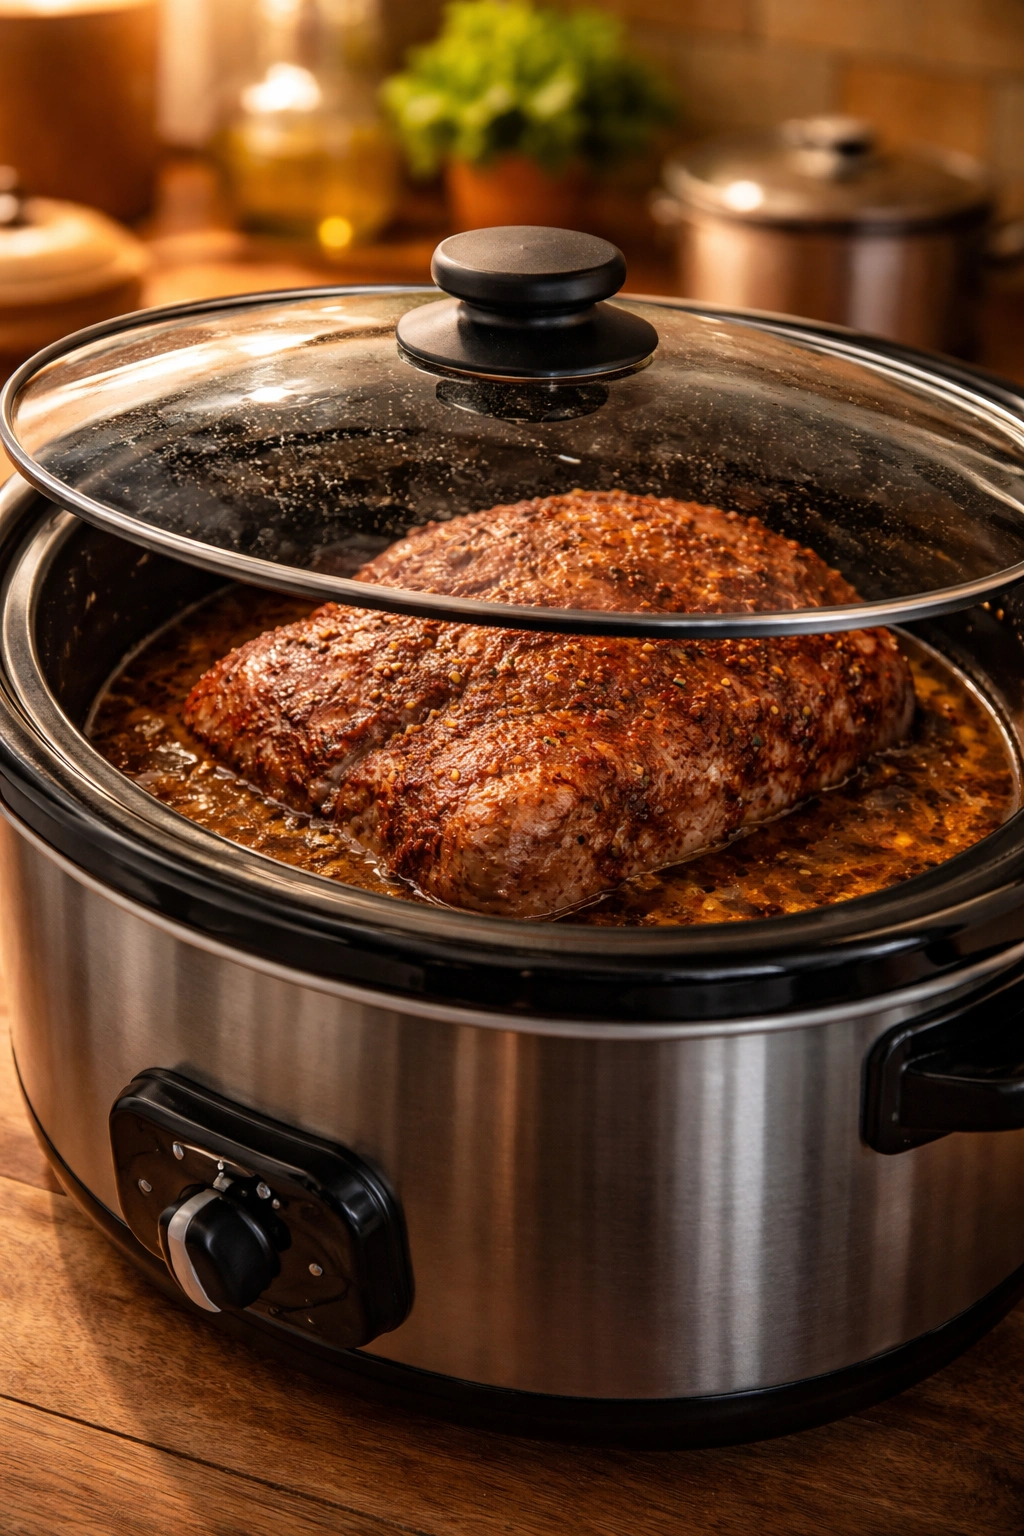
Add the broth or apple juice to the bottom of a slow cooker. Place the seasoned pork shoulder on top, fat-side up. Cover with the lid and cook on the low setting for 8-10 hours. The exact time depends on your slow cooker’s intensity and the shoulder’s size, but between 8-10 hours on low, you’ll reach the target temperature.
Around the 7-hour mark, insert your meat thermometer into the thickest part of the shoulder (avoiding bone). You’re looking for an internal temperature of 190-205°F. At 190°F, the meat will shred; at 200-205°F, it’ll be slightly more tender. Once it hits 190°F, it’s done. Cooking past 210°F doesn’t improve it further.
Carefully remove the shoulder from the slow cooker and place it on a cutting board. Let it rest for 15 minutes—this resets the fibers slightly and makes shredding easier. Reserve the liquid in the slow cooker; this is precious braising liquid that you’ll use to keep the pulled pork moist and flavored.
Using two sturdy forks or a meat shredder, pull the cooked pork apart into bite-sized strands. Work along the grain where possible; the meat will naturally separate into strands if it’s cooked properly. Discard any chunks of fat that don’t shred easily. Stir the shredded pork back into the slow cooker with the braising liquid so it stays moist and warm until serving.
Oven Method (More Controlled, Better for Multiple Shoulders)

Preheat your oven to 325°F. Heat a large Dutch oven or heavy-bottomed pot over medium-high heat on the stovetop until it’s hot. Carefully place the seasoned pork shoulder fat-side down in the hot pot—it should sizzle. Sear it for 3-4 minutes to develop a flavorful crust, then flip it and sear the other side for another 3-4 minutes. This searing step is optional but creates deeper flavor.
Pour the broth around the pork (not over it, so the crust stays intact). Place the lid on the pot and transfer it to the preheated 325°F oven. Cook for 4-5 hours, then check the temperature. Most shoulders reach 190°F in about 6-7 hours total oven time, though very large shoulders may need 8-9 hours.
Once the shoulder reaches 190°F, remove the pot from the oven and carefully transfer the pork to a cutting board. Reserve the braising liquid. Let the meat rest for 20 minutes, then shred it using two forks or a meat shredder. Stir the shredded pork back into the braising liquid to keep it moist.
Instant Pot Method (Fastest Option)
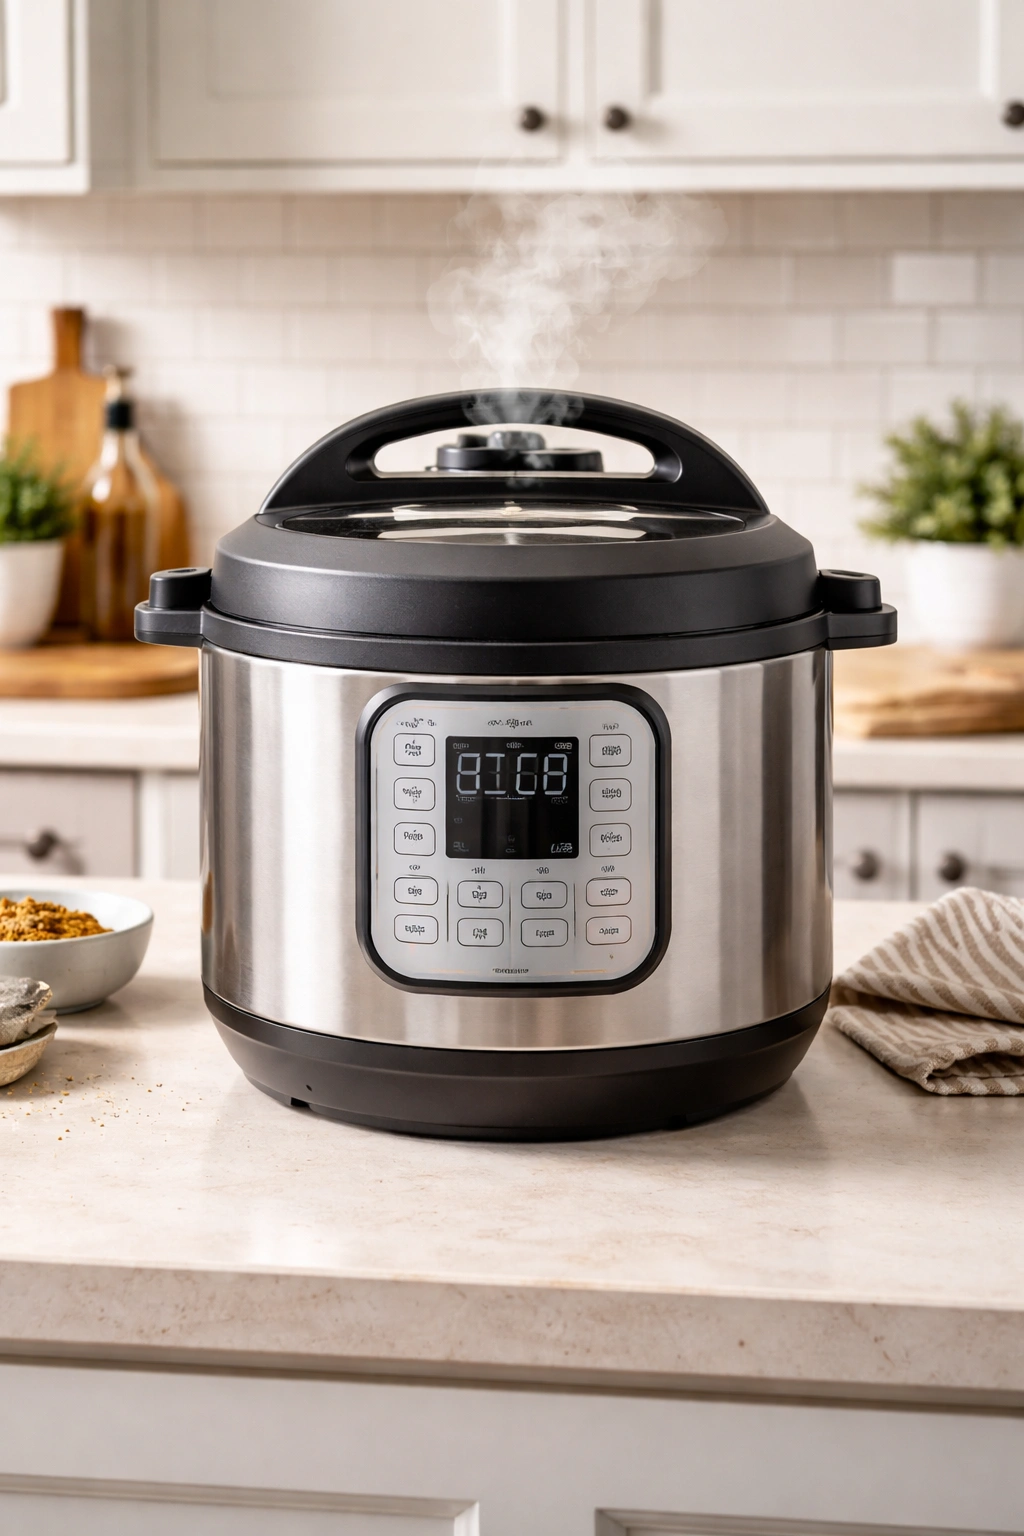
Set an Instant Pot to high sauté mode. Add a splash of the broth to prevent sticking, then place the seasoned pork shoulder in the pot. Sear it for 2-3 minutes on each side to develop crust. Add the remaining broth around the meat.
Seal the lid and set the pot to high pressure for 45 minutes. Allow it to build pressure naturally (don’t use quick release). Once the timer sounds, let the pressure release naturally for at least 15 minutes before opening the lid. Check the internal temperature; it should be 190-205°F. If not quite there, seal again and cook for another 5-10 minutes.
Remove the shoulder to a cutting board and let it rest for 10-15 minutes. Shred using forks or a meat shredder. The Instant Pot liquid is incredibly flavorful from the high-pressure steam environment; reserve all of it to mix back with the shredded pork.
Seasoning Blends That Work Best
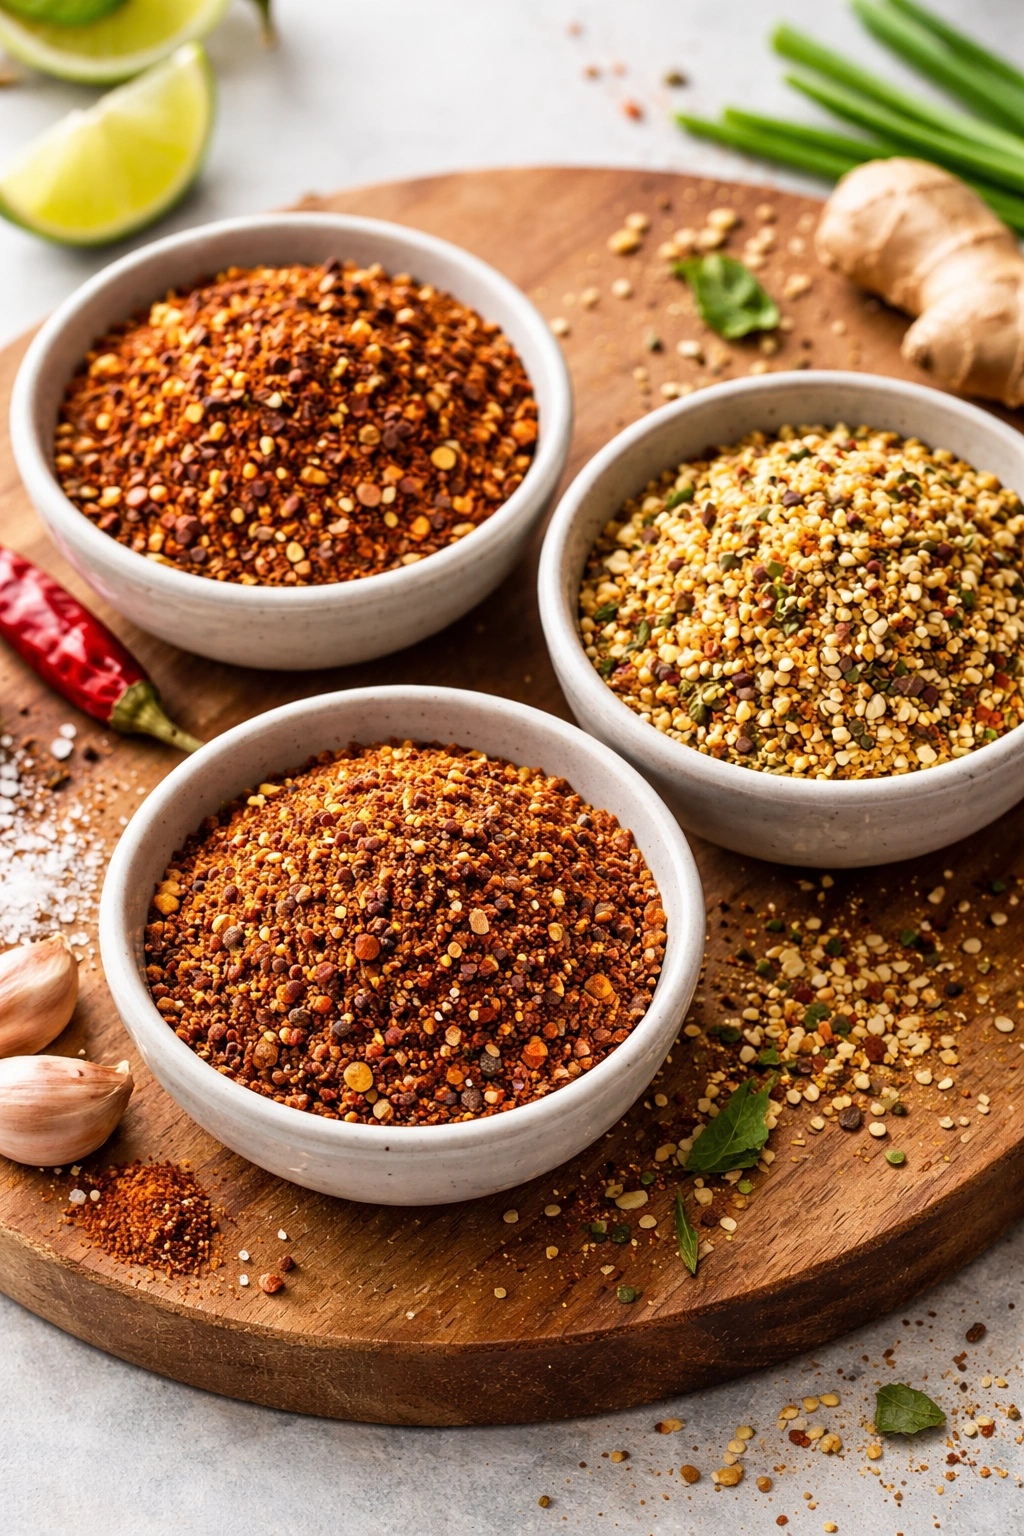
The rub above is classic and reliable, but pulled pork works beautifully with many flavor profiles. The key is always to balance salt, sweetness, and savory depth so no single flavor overwhelms the tender, naturally mild pork.
Spicy Southwestern Rub
Increase the cayenne to 1½ teaspoons, add 1 teaspoon cumin and ½ teaspoon chili powder, and reduce the cinnamon. This creates heat with earthy depth that pairs beautifully with lime juice added to the final pulled pork and served on cilantro-lime slaw.
Sweet and Smoky (Competition-Style)
Use smoked paprika exclusively, increase brown sugar to ¼ cup, add 1 tablespoon coffee powder (yes, actual espresso powder), and add ½ teaspoon allspice. This mimics competition barbecue that’s won awards—complex, with multiple flavor layers that reveal themselves as you eat.
Asian-Inspired Rub
Reduce paprika to 1 tablespoon, add 1 tablespoon five-spice powder, add 1 teaspoon ground ginger, and add 1 tablespoon white sugar instead of brown. Use rice vinegar in the braising liquid instead of plain broth. This creates pulled pork that works beautifully on toasted buns with pickled vegetables and sriracha mayo.
Each rub still requires the salt and pepper base and benefits from some sweetness, but these variations showcase how adaptable pulled pork is to different flavor directions. Mix the rub of your choice fresh each time rather than pre-mixing batches; the spices stay fresher and maintain their potency.
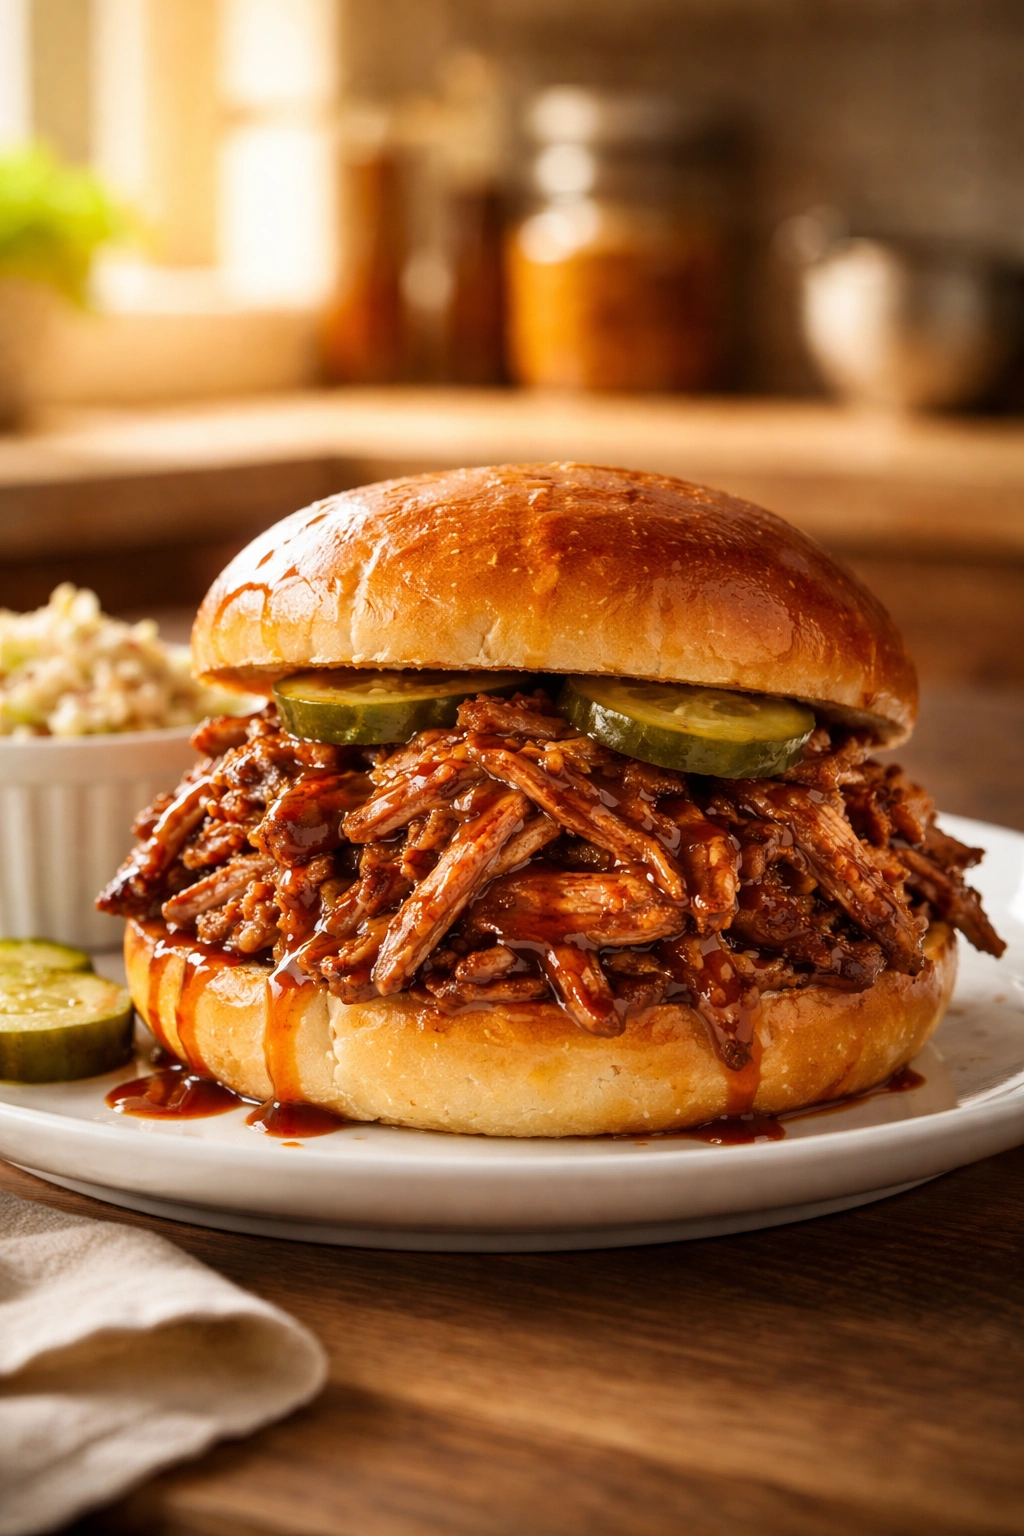
The Perfect Sandwich Assembly Technique

Pulled pork sandwiches succeed or fail partly on execution. Even phenomenal pork can disappear into a badly assembled sandwich, while good technique makes every element shine.
Start with the right bread. Soft hamburger buns are standard and work well because they’re sturdy enough to hold generous pork without falling apart but soft enough to bite through easily. Brioche buns add richness and elegance. Potato buns offer chew and structural integrity. Avoid thin, delicate buns that shred when you bite them, and avoid dense, tough buns that fight your teeth. Toast the buns lightly if they’re fresh and soft—this gives them slight structure and helps them stand up to moisture from the pork and sauce.
Apply sauce to the pork before building the sandwich, not to the bread. This prevents the bread from becoming soggy while ensuring the meat is evenly coated and flavorful in every bite. Toss 2-3 cups of shredded pork with ¾ to 1 cup of sauce, depending on how saucy you like it. Some people prefer barely dressing the meat; others want it slicked throughout. This is personal preference. Start conservatively and add more sauce if you want it wetter.
Pile generously. The whole point of pulled pork is abundance. A thin layer of pork on a bun is underselling yourself. Use enough that the sandwich requires some commitment to eat—roughly a heaping cup of pork per sandwich for that truly piled-high appearance. The bread should barely contain it; the meat should be visible from all sides.
Add textural contrast. Slaw adds crucial crunch and acidity that balances rich, tender pork. Traditional coleslaw (shredded cabbage with creamy dressing) is classic, but vinegar-based slaw adds brightness. Place slaw directly on top of the pork so it stays crispy rather than getting lost under the top bun.
Pickles or fresh onion slices complete the package. A few crispy pickle chips or raw onion slices add brightness and cut through the richness. Pickled jalapeños work beautifully if you want heat. These additions take fifteen seconds but transform the sandwich from good to memorable.
Slow Cooker vs Instant Pot vs Oven Methods
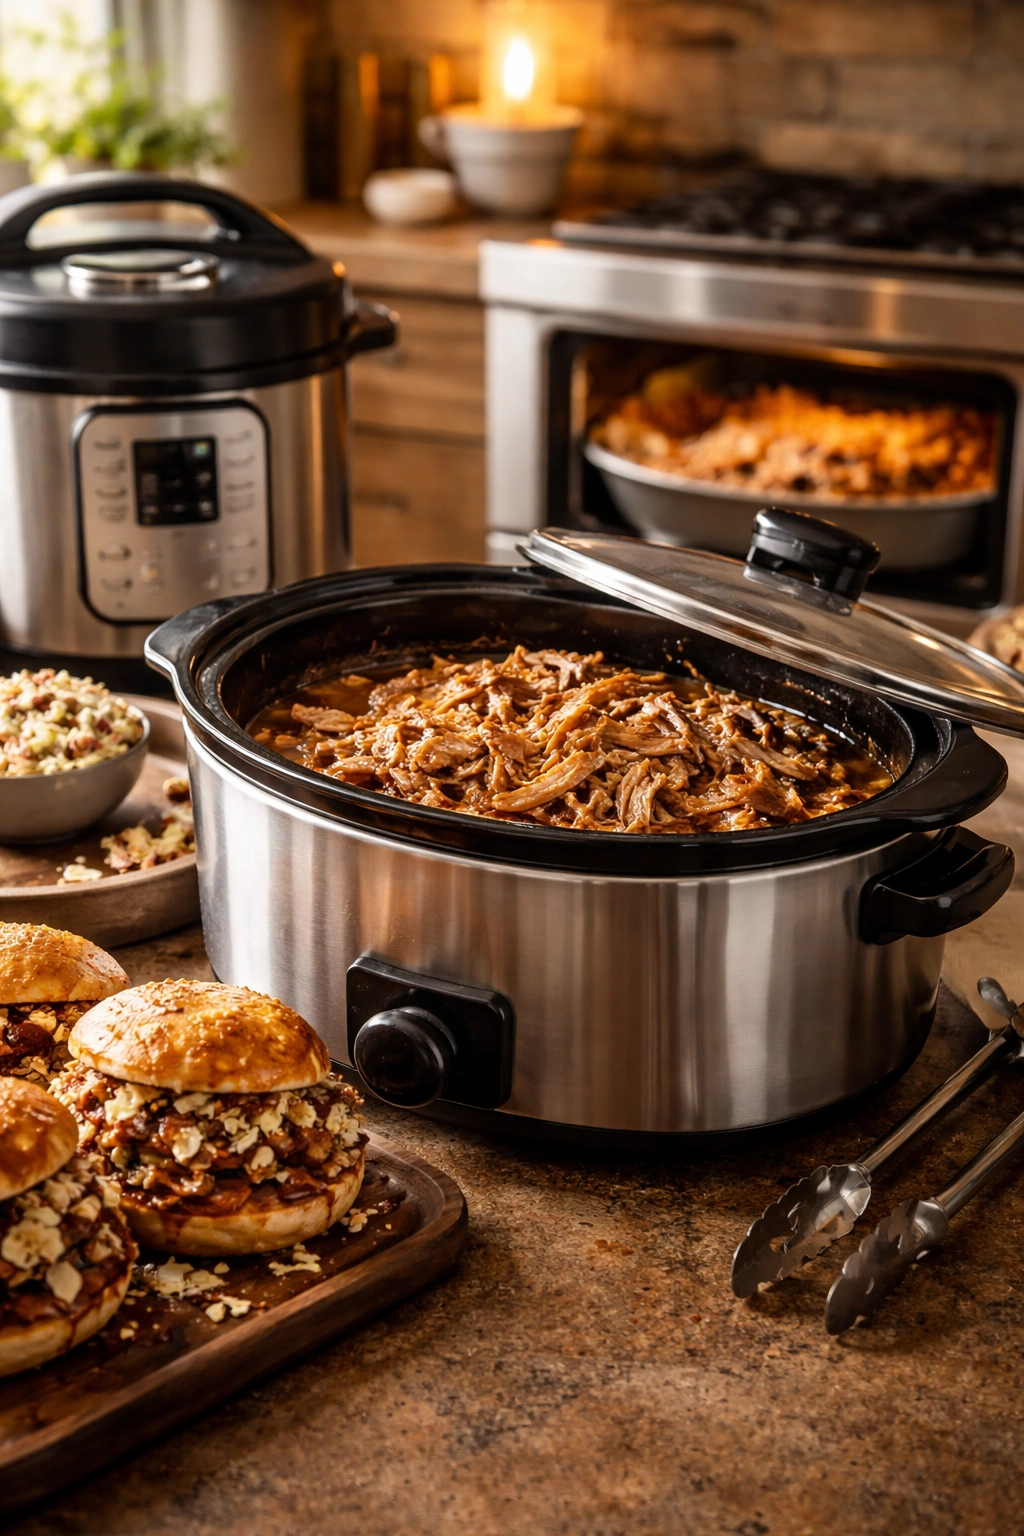
Each cooking method produces phenomenal pulled pork, but they differ in practical considerations. The best choice depends on your timeline, kitchen setup, and how you like to work.
Slow Cooker Advantages
The slow cooker requires zero attention once you season the meat and add liquid. Set it in the morning and you’ve got dinner ready by evening. There’s no heat building in your kitchen and no pots to monitor. The method is nearly impossible to mess up—overcooking doesn’t really harm the meat; it just gets softer. The braising liquid stays right there in the pot, so you can serve directly from the cooker, which keeps the meat warm during serving and makes transport to a party easy.
Slow cookers work best when you can cook for 8-10 hours uninterrupted. If you need dinner in 3 hours, slow cooking won’t work. The low, consistent heat is gentle and forgiving but takes time.
Instant Pot Advantages
The Instant Pot finishes everything in about 50 minutes from start to finish. This matters immensely if you’re on a time crunch or forgot to plan ahead. The high-pressure environment actually breaks down collagen more rapidly and thoroughly, sometimes creating texture that’s slightly softer than slow-cooked versions.
The downside is that high-pressure cooking requires monitoring and venting. Some people are uncomfortable with pressure cookers initially (though modern Instant Pots are very safe). The liquid in an Instant Pot reduces more than in a slow cooker, so you need to account for that when adjusting recipes. And you need counter space for the device itself.
Choose the Instant Pot if you’re cooking today for tonight and don’t have 8-10 hours available.
Oven Method Advantages
The oven method offers the most control over the cooking environment. You can adjust temperature if you realize the shoulder is cooking too fast, add liquid if it looks dry, or extend the time without any specific equipment limitations. The oven holds temperature very consistently, which some cooks prefer.
The downsides are that oven cooking heats your kitchen (problematic in warm months), consumes oven space during the long cooking time, and requires checking the meat periodically. But if you love having control and don’t mind the heat output, oven cooking produces deeply flavorful results and feels like the most “classic” method.
The oven method works beautifully when you have time and want to make multiple shoulders simultaneously. Two shoulders fit side-by-side in the oven with no increase in cooking time.
Common Mistakes to Avoid
Most pulled pork failures come from a handful of repeated mistakes. Knowing what goes wrong helps you avoid these pitfalls entirely.
Stopping the cooking too early is the number one problem. If you remove the shoulder at 160-170°F internal temperature, the collagen hasn’t converted to gelatin and you’ll have meat that’s difficult to shred, with a mealy texture and tough fibers. Patience matters here. If your meat won’t shred easily even after pulling hard with forks, it wasn’t cooked to the proper temperature. The target of 190-205°F isn’t a suggestion; it’s the temperature where the magic happens.
Cooking with too little liquid results in dry meat that shreds into small pieces rather than long, tender strands. The braising liquid keeps the meat moist during the long cooking, seasons it from the outside in, and creates the jus that keeps everything tender. A typical shoulder needs 1 cup of liquid for slow cooker or oven methods. Don’t think you can skip the liquid because the meat’s pork fat provides moisture; you actually can’t.
Choosing the wrong cut of meat leads to disappointment. A pork loin or center-cut pork chop will never produce pulled pork—these cuts lack the fat and connective tissue that transforms during cooking. Always use pork shoulder, regardless of what your recipe calls it (Boston butt, picnic shoulder, pork butt).
Using too much liquid in high-pressure cooking can result in bland meat because the Instant Pot’s sealed environment prevents reduction and concentration of flavors. Use about ¾ cup liquid in an Instant Pot rather than the full cup. The liquid won’t evaporate as much, so less is actually better here.
Overseasoning with salt creates meat that’s inedible at the end. The rub above is designed to be generous, but if you double it or add salt-heavy ingredients like soy sauce, the final pulled pork becomes unpalatably salty. Taste a small piece of the finished pulled pork before serving; if it tastes very salty, add more unseasoned shredded pork to dilute it.
Shredding before the meat is fully cooled causes burns and makes the meat fall apart into small pieces rather than strands. Let the shoulder rest for at least 15 minutes after cooking before you start shredding. The residual heat is still plenty to keep your hands warm; patience here produces better texture.
Storage and Make-Ahead Guidance
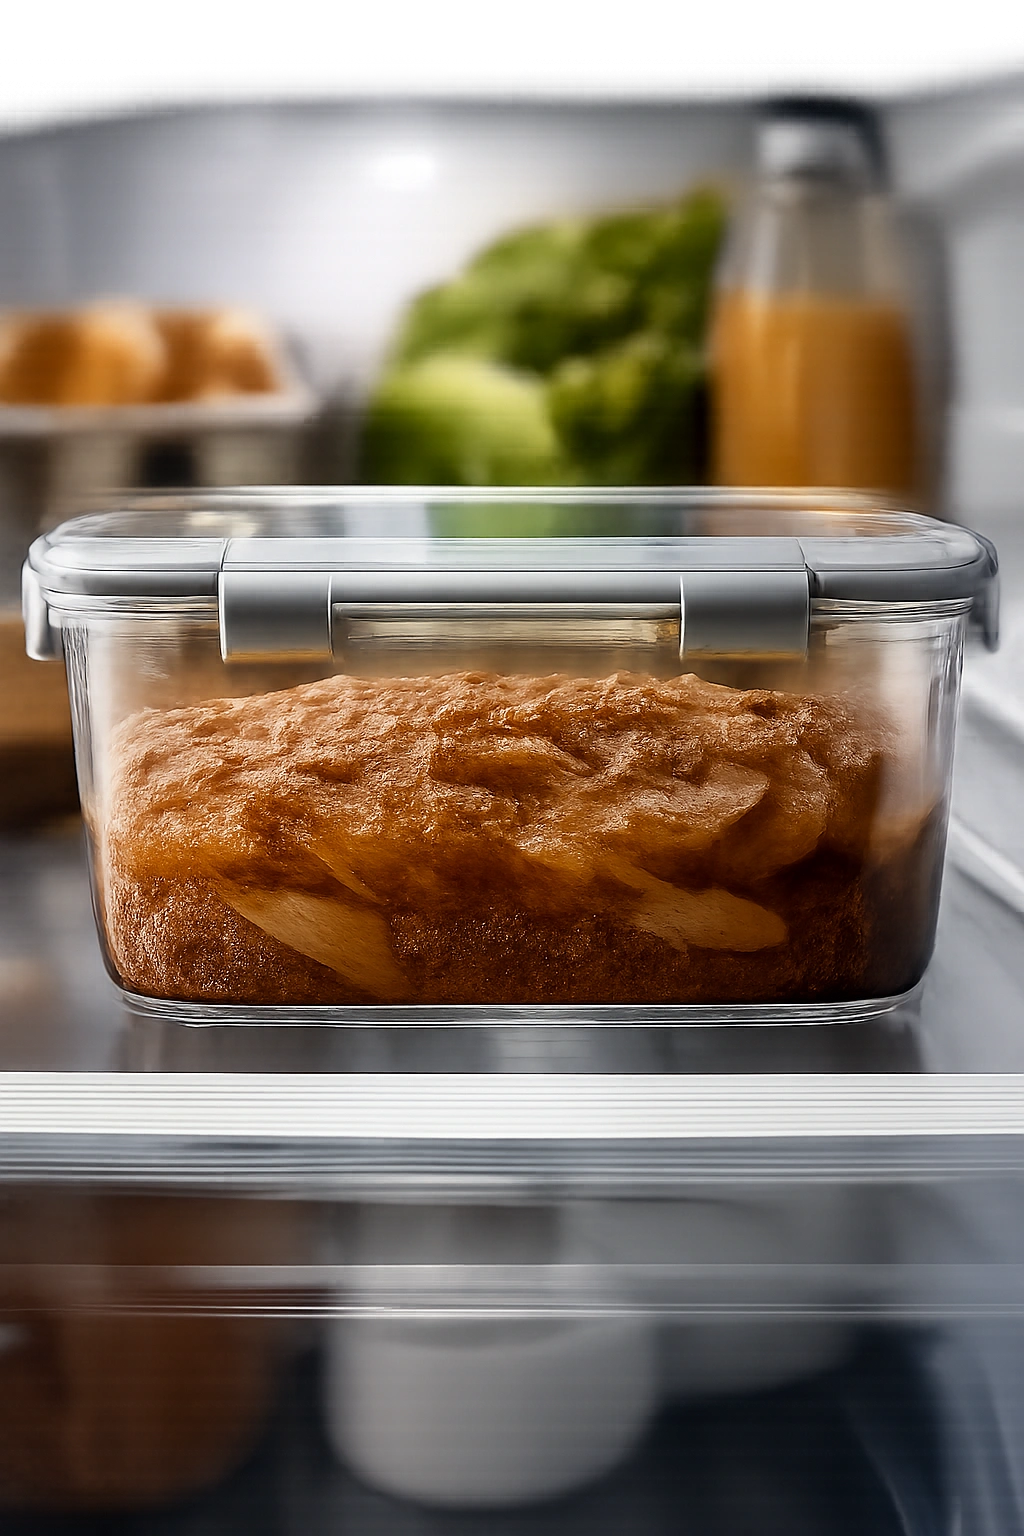
Pulled pork is one of the most make-ahead-friendly dinner components available. In fact, it improves with age as flavors meld overnight.
Refrigeration: Store cooled pulled pork in an airtight container with its braising liquid for up to 4 days. The liquid prevents drying during storage. The pork actually tastes better the day after cooking; flavors develop and settle overnight.
Freezing: Pulled pork freezes beautifully for up to 3 months. Cool completely, transfer to a freezer bag or airtight container with some braising liquid included, and freeze. This liquid prevents freezer burn and keeps the meat tender when thawed. Thaw slowly in the refrigerator overnight before reheating.
Reheating: The gentlest reheating method is low and slow. Place frozen or refrigerated pulled pork in a heavy-bottomed pot or slow cooker over low heat until heated through (about 30 minutes from fridge temperature, 1-2 hours from frozen). Adding a splash of broth or water prevents drying. You can also reheat in a 325°F oven covered loosely with foil for about 45 minutes from fridge temperature.
Avoid microwaving, which can dry the meat and heat unevenly. The low, slow reheat truly does preserve texture better than any quick method.
Advance Prep: Make the seasoned but uncooked shoulder the day before if you want. Cover it tightly and refrigerate. Bring it to room temperature for 30 minutes before cooking; this helps it cook more evenly. Cooking the pork 1-2 days ahead and reheating for serving saves time on the actual meal day.
Sauce Variations That Elevate Your Sandwiches
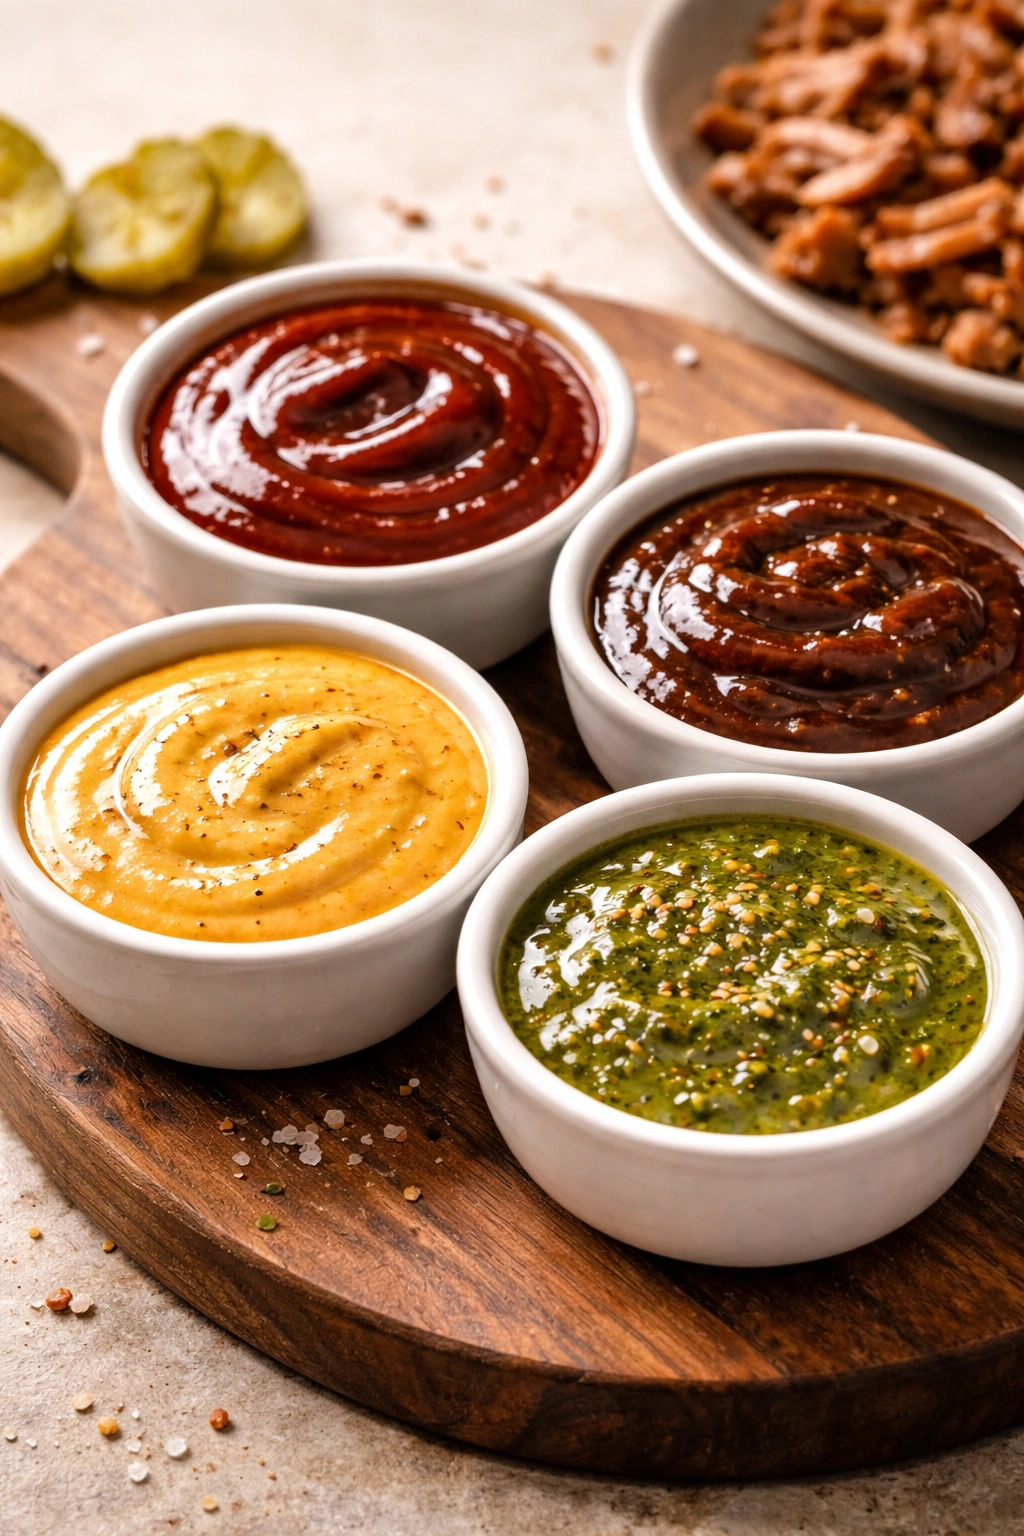
Barbecue sauce is crucial because it provides moisture, flavor, and that glossy finish that makes pulled pork visually appealing. Pulled pork can be served with any sauce, and switching sauces completely changes the eating experience.
Classic Tomato-Based Barbecue Sauce
Combine 1 cup ketchup, 1/4 cup apple cider vinegar, 3 tablespoons brown sugar, 1 tablespoon Worcestershire sauce, 1 teaspoon smoked paprika, 1/2 teaspoon garlic powder, and 1/2 teaspoon black pepper in a saucepan. Simmer over low heat for 10 minutes, stirring occasionally. This produces a sauce that’s balanced between sweet and tangy with depth from the paprika. It’s versatile, works with any pork preparation, and tastes more interesting than bottled sauce.
Vinegar-Based Carolina-Style Sauce
Whisk together 1 cup apple cider vinegar, 2 tablespoons brown sugar, 1 tablespoon hot sauce, 1 teaspoon salt, and 1/2 teaspoon black pepper. This creates a thin, spicy, bright sauce that’s less about sweetness and more about tang. It’s perfect if you want to taste the pork’s natural flavor rather than having sauce dominate. Popular in the Carolinas for good reason.
Mustard-Based Sauce
Combine 3/4 cup yellow mustard, 1/4 cup apple cider vinegar, 2 tablespoons brown sugar, 1 tablespoon Worcestershire sauce, and 1/2 teaspoon cayenne pepper. This creates a mustardy, slightly spicy, complex sauce that’s less sweet than tomato-based versions. It’s excellent with spicy-rubbed pork.
Simple Butter and Hot Sauce
Just whisk together 4 tablespoons melted butter with 1/2 cup your favorite hot sauce and a tablespoon of honey. This keeps things minimal and lets the pork shine while adding heat and richness. It’s quick if you’re short on time.
Each sauce changes how the pork tastes. Make pulled pork once with three different sauces and notice how completely different it seems, even though the base meat is identical. This is why sauce matters.
Serving Suggestions and Pairings

Pulled pork sandwiches aren’t a complete meal on their own—they need sides and accompaniments to feel balanced and satisfying.
Coleslaw is non-negotiable. Creamy coleslaw with mayo-based dressing or vinegar-based slaw with no mayo both work beautifully. The cold crunch and acidity balance warm, rich pork. Make slaw the day before; it actually improves as flavors meld, and it’s one fewer thing to do on serving day.
Cornbread or biscuits work as alternative serving vessels if you’re baking and have oven space, or as additional starch alongside sandwiches. Warm cornbread with honey butter is genuinely excellent with pulled pork.
Baked beans are traditional for a reason—the sweet-savory beans echo pulled pork’s flavor notes and add substance. Make them from scratch if you have time (dried beans cooked with brown sugar, mustard, and bacon), or elevate canned beans by simmering them with additional brown sugar, vinegar, and crispy bacon.
Pickled vegetables brighten the richness. Pickled onions, jalapeños, or a quick-pickled cucumber salad all work. The acidity cuts through richness and prevents the meal from feeling heavy.
Grilled corn or corn salad works beautifully in warmer months, adding sweetness and texture contrast.
Chips or potato salad are comfort food standards. Use good quality chips (actual potato chips, not fried snacks) or homemade potato salad if you’re feeling ambitious.
Iced tea or lemonade pairs perfectly with pulled pork as beverage options. Beer (especially lighter lagers or wheat beers) works well if you’re serving adults. Sweet iced tea is traditional for barbecue contexts.
The meal should feel complete and satisfying. Two sides beyond the sandwich and slaw is usually the right balance—one starch or vegetable and one beverage.
Final Thoughts
Pulled pork succeeds because it forgives timing variation, scales beautifully, improves with advance preparation, and delivers on flavor and satisfaction simultaneously. The actual hands-on work is minimal; you’re mostly just allowing time and temperature to do what they do naturally. Whether you have eight hours or fifty minutes, you can execute pulled pork that tastes authentically delicious.
The real secret isn’t technique or ingredients—most home cooks have access to everything they need. It’s understanding that pulled pork is fundamentally about patience and respecting the process. That pork shoulder needs to reach the proper temperature, and rushing it defeats the purpose. Conversely, once it reaches that temperature, you can hold it warm for hours without degradation. This flexibility is what makes pulled pork so genuinely practical for real-world cooking.
Build your own signature version by experimenting with different rubs, sauces, and slaw combinations. Make it twice the same way, then change one element the third time and notice what shifts. Over a few cooking cycles, you’ll develop strong opinions about how you prefer your pulled pork, and that personal version will taste even better than any recipe because it’s exactly what you love. That’s when pulled pork stops being a recipe and becomes your go-to dinner that people request by name.