Crispy, golden-brown chicken wings without a single drop of hot oil or the lingering smell of deep frying—it sounds like a cooking myth, but it’s absolutely real. For years, home cooks accepted soggy, pale oven-baked wings as the price of avoiding the mess and hassle of a deep fryer. Then science and smart technique stepped in. The result is a method that delivers wings with shatteringly crisp, blistered skin and juicy meat inside, all from your regular kitchen oven. No special equipment. No oil splatters. No vat of spent fat to deal with. Just perfectly crunchy wings that rival anything you’d order from a restaurant.
The secret isn’t complicated—it relies on baking powder, strategic drying, and precise heat management. But the details matter enormously. Get them right, and you’ll make wings so good you’ll abandon the idea of deep-frying entirely. Miss them, and you’ll end up with something merely respectable. This guide walks you through every step so you nail it every time.
Why Baked Chicken Wings Beat Deep-Frying
Deep-frying wings is fast and effective—there’s no argument there. Hot oil crisps skin beautifully and cooks chicken efficiently. But do you actually want to deal with it at home? The practical reality of deep-frying involves heating a large pot of oil to 375°F, monitoring it constantly to prevent splattering, managing smoke and lingering kitchen odors that last for days, and then disposing of used oil responsibly. If you’re feeding a crowd, you’re also likely working in batches because most home setups can only crisp a limited number of wings at once.
Baked wings eliminate all of that friction. You can fit multiple full sheet pans in a standard oven, meaning you can make 60 wings or more simultaneously without touching them again once they go in. The oven does the work while you relax, set the table, or prep sides. There’s zero risk of oil burns, no smell problem, and cleanup is literally wiping a pan. For game day, parties, or just a weeknight dinner craving, baked wings are fundamentally more practical for most home cooks.
Beyond convenience, there’s a health angle too. Oven-baked wings contain significantly less fat and fewer calories than deep-fried versions because they’re not absorbing hot oil into the skin. Yet the crispy texture rivals deep-fried results when you use the right technique. You genuinely get the best of both worlds—indulgence without the guilt or the mess.
The Science Behind Crispy Oven-Baked Skin
Getting chicken skin crispy in an oven is harder than in a deep fryer because ovens are fundamentally less efficient at transferring heat. Hot oil surrounds the food and conducts heat instantly. Dry oven air moves more slowly and requires more time. To achieve crispness in an oven, three simultaneous processes must happen: moisture must evaporate from the skin, fat underneath must render (melt and separate), and browning reactions must begin—all without drying out the meat underneath.
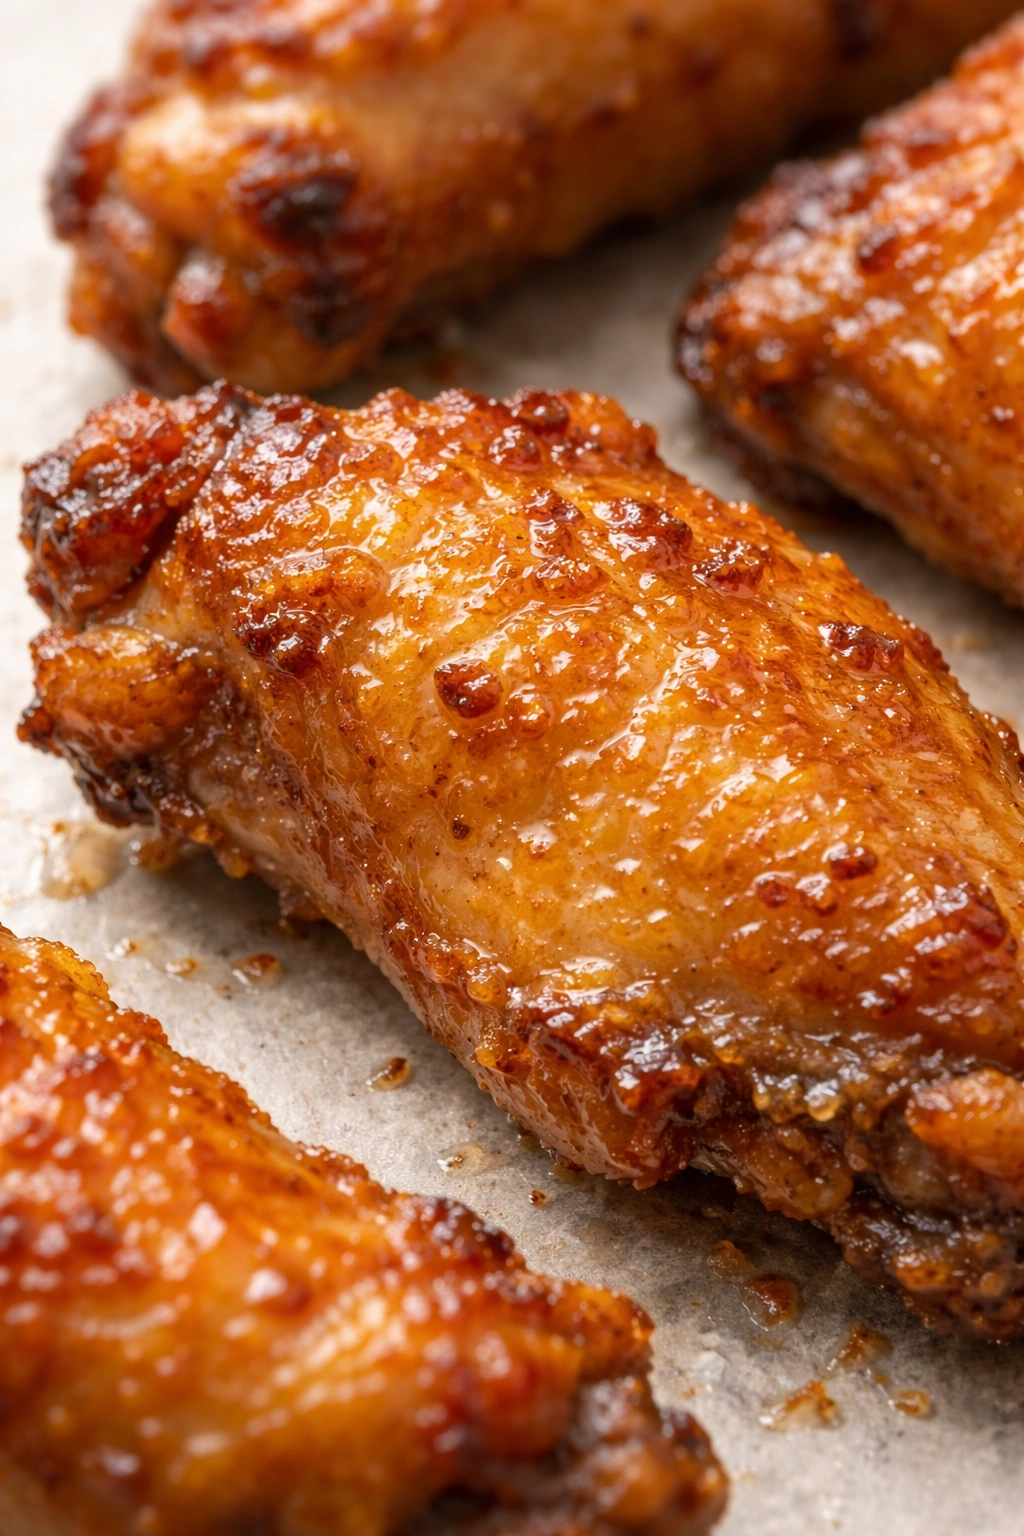
This is where chemistry becomes your greatest ally. The skin of a chicken is mostly protein, fat, and water. By raising the pH of that skin slightly, you can actually speed up browning reactions and weaken the protein bonds that normally tighten and turn leathery as chicken cooks. Additionally, raising the pH creates micro-bubbles within the skin as it heats—tiny pockets of gas that puff and harden as they cook, creating that craggy, blistered texture you associate with deep-fried wings.
The result is a skin that’s genuinely crispy and crunchy, not just dried out on the surface. That’s the crucial distinction. You’re not just evaporating water; you’re creating structural change in the skin itself. The texture actually holds up better to sauce because it’s reinforced by those internal bubbles and the altered protein structure. A sauced wing made this way will still crunch when you bite it, rather than immediately becoming soggy like conventionally baked wings.
Baking Powder: The Secret Ingredient That Changes Everything
Baking powder is the single most important ingredient in this entire process, and understanding why matters because it shows you’re not just following a recipe—you’re using science deliberately. Baking powder is a mixture of sodium bicarbonate (baking soda), cream of tartar (an acid), and often cornstarch. When you dust it on raw chicken and let it sit, the sodium bicarbonate raises the pH of the chicken skin.
That alkaline environment does two critical things: First, it weakens the bonds holding the proteins in the skin together, which allows the skin to brown much faster and more deeply than untreated chicken. You get darker, richer color with less cooking time. Second, as the wings heat in the oven, the baking powder reacts with the chicken’s natural juices and releases carbon dioxide gas. Those tiny gas bubbles create micro-blisters within the skin structure. As the wings continue to cook, these bubbles expand and harden, creating literally thousands of tiny crunchable surfaces. It’s the same effect you get from deep-frying—just achieved through chemistry instead of oil.
Critical note: You must use aluminum-free baking powder. Some brands contain sodium aluminum sulfate, which creates a bitter, metallic taste that some people can detect immediately. Rumford is a widely available aluminum-free brand. Check the ingredient list—if you see “sodium aluminum sulfate” listed, skip it and find a different brand. Never use baking soda alone; it’s far too strong and will taste terrible without the acid in baking powder to neutralize it.
Choosing and Preparing Your Chicken Wings
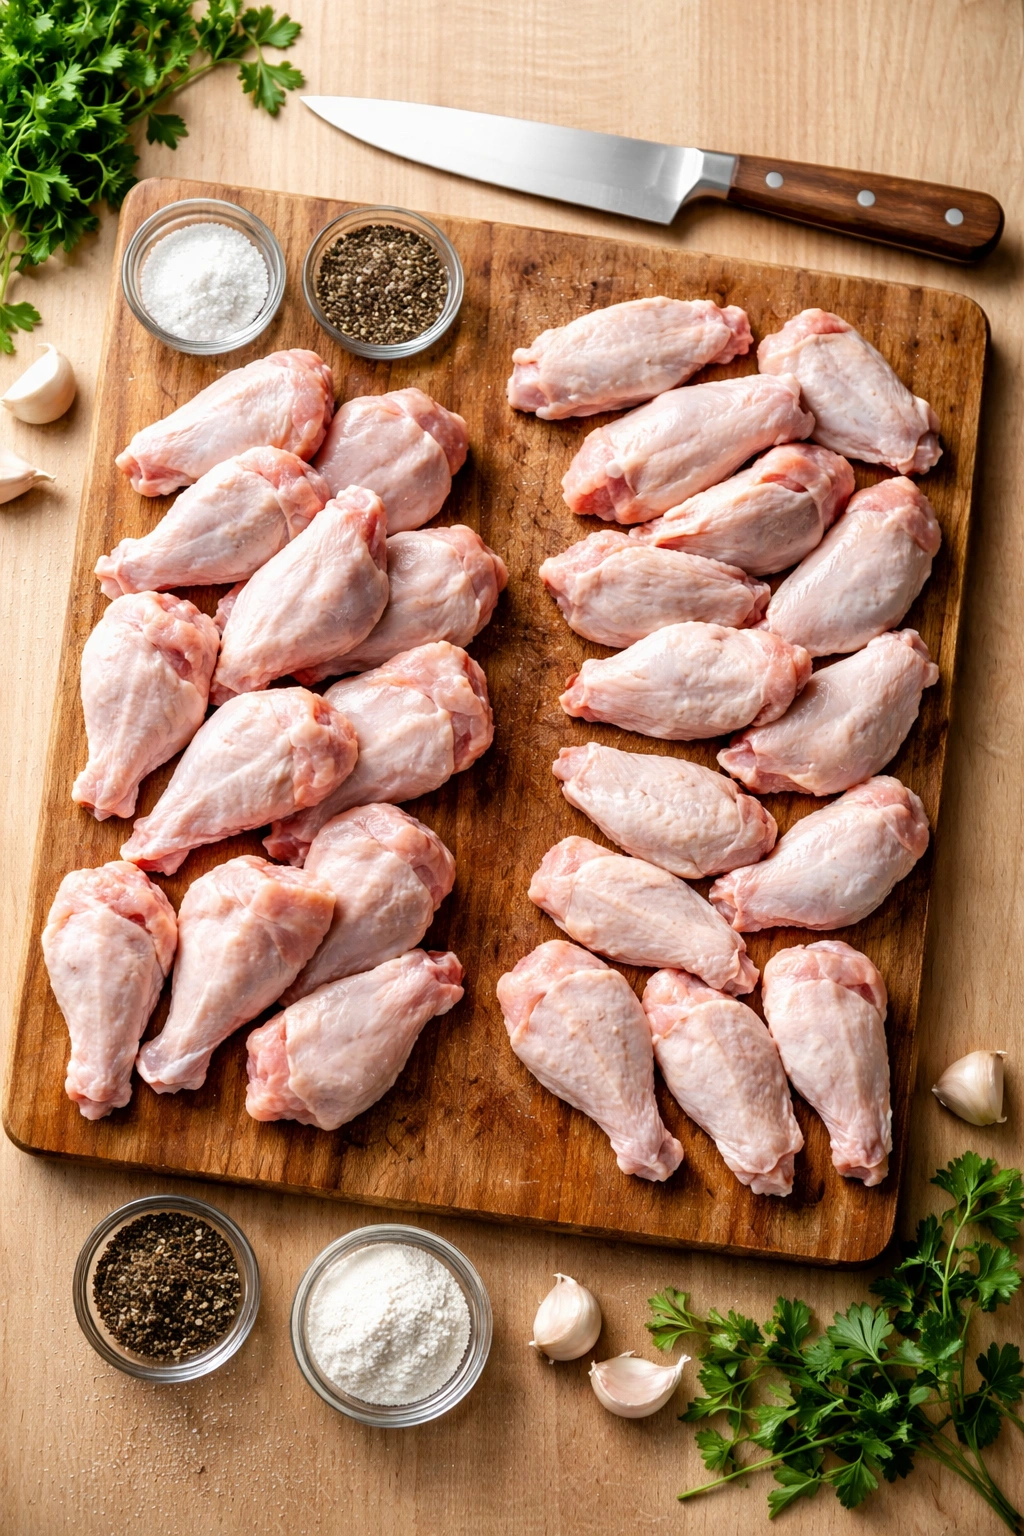
Start with the right chicken. Whole wings are more economical and usually fresher than pre-cut “party wings,” but they require cutting. If you choose whole wings, you’ll need to separate them at the joints into drumettes (the drum-shaped piece with the meaty part), flats (the two-bone piece), and tips (the tiny pointy bit). The tips have minimal meat and are best discarded or frozen for stock. When you cut ten whole wings, you get approximately 20 usable pieces (10 drumettes and 10 flats).
If convenience matters more than saving money, buy pre-cut “party wings”—they’re already separated and consistent in size, which matters for even cooking. Size consistency is genuinely important. If some pieces are significantly larger than others, the smaller ones will overcook before the larger pieces finish, leading to a mix of dry and underdone chicken. Pre-cut wings tend to be more uniform, which improves your odds of success.
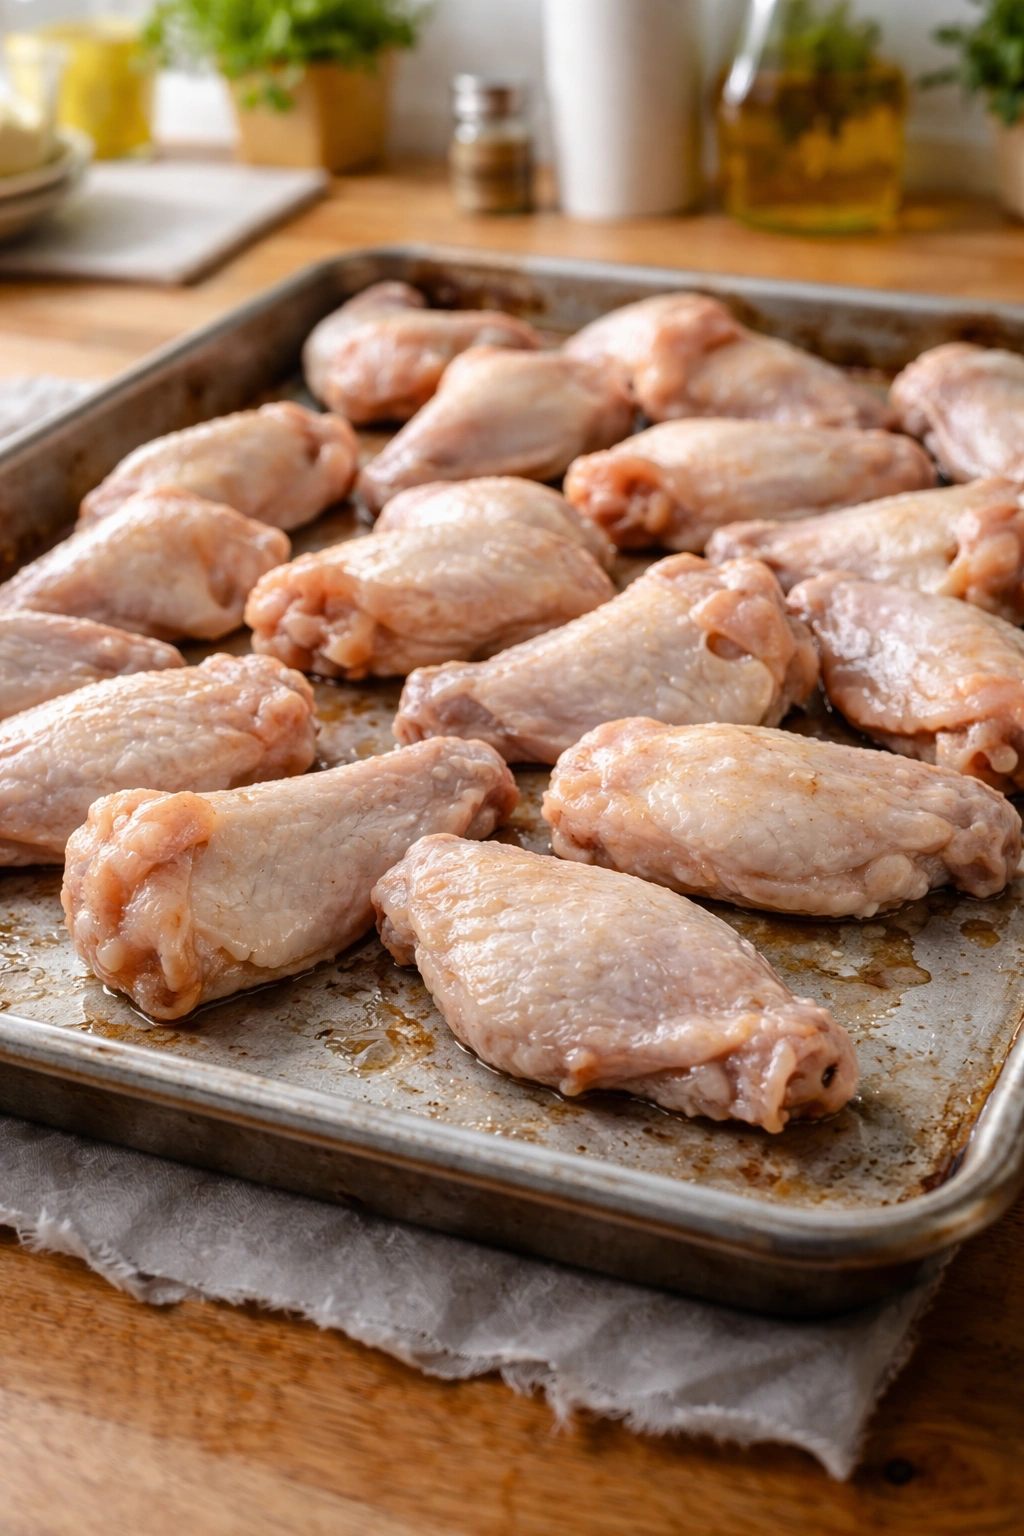
Pat the wings dry with paper towels before seasoning, but here’s a nuance: if you’re using the dry-brine method described below, you want them slightly damp because the salt and baking powder adhere better to moist skin. If you’re going straight to baking, make sure they’re completely dry because any surface moisture steams off in the oven rather than crisping. Moisture is genuinely the enemy of crispness—it’s what turns wings soggy.
Equipment You’ll Actually Need for Success

You don’t need anything fancy, but certain tools matter. A rimmed baking sheet (half-sheet pan) is essential—it provides sides to catch rendered fat and prevents drips in your oven. Line it with aluminum foil for easy cleanup. A wire rack set on top of the baking sheet is ideal because it elevates the wings, allowing air to circulate underneath and rendered fat to drip away. The wings don’t sit in their own grease, which keeps them crispier. If you don’t have a rack, you can bake wings directly on parchment paper, though the bottoms will be slightly less crispy due to contact with the hot pan.
An oven thermometer is genuinely worth owning. Many home ovens run 25-50 degrees hotter or cooler than the temperature displayed, which completely changes baking times. A $10-15 oven thermometer that sits inside your oven solves this problem permanently. You’ll also want a metal spatula or tongs that can get under wings without tearing the skin, and paper towels for initial drying.
For seasoning, if you’re mixing a dry rub, a small bowl works fine. Some people prefer a gallon-sized zipper-lock plastic bag for tossing wings in baking powder and seasoning—it distributes the coating more evenly and makes cleanup easier, though it’s absolutely optional.
The Two-Temperature Baking Method Explained
The genius of the two-temperature approach is that it accomplishes what high heat alone cannot. If you bake wings at 425°F the entire time, they brown on the outside before the interior reaches a safe temperature, or they cook through before crisping properly. The two-step method solves this by doing different work at each temperature.
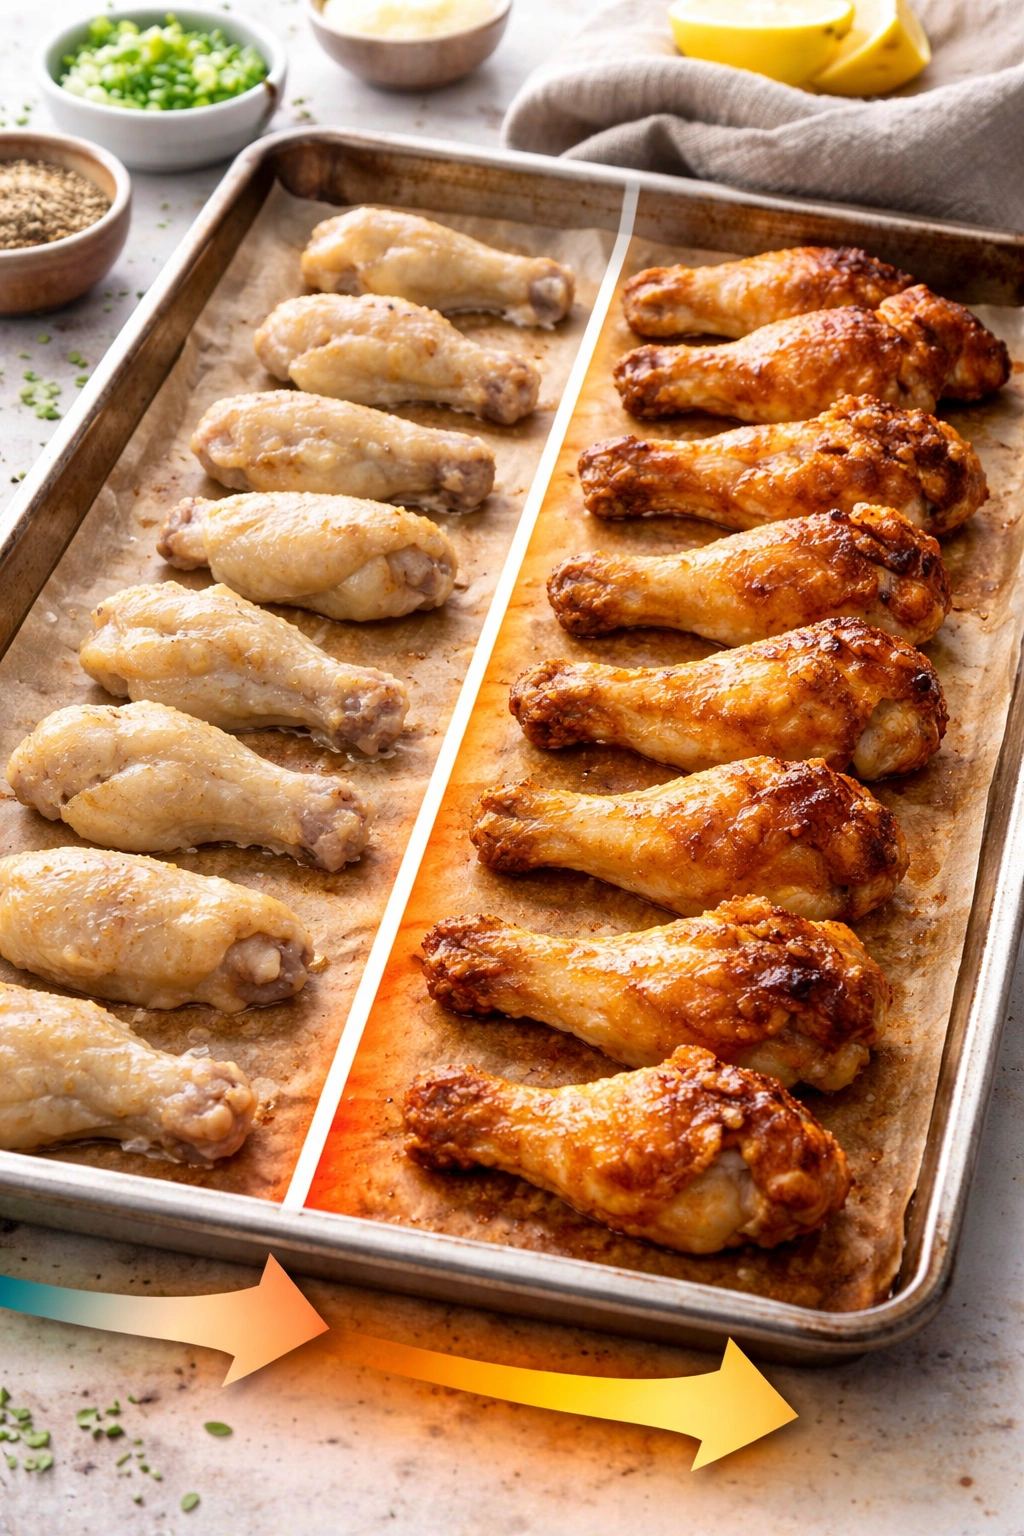
The low-temperature phase (250°F for 30 minutes) does the crucial drying work. At this temperature, the oven is drying the skin and beginning to render fat slowly without rapid browning. The baking powder is starting to work. The wings gain no color yet, which is fine—they look pale and unappetizing at this point. But underneath, important things are happening. Moisture is evaporating, creating the foundation for crispness.
Then, without removing the wings from the oven, you crank the heat to 425°F or higher and bake for another 30-50 minutes depending on wing size and your oven. This is where browning accelerates dramatically. The already-drying skin now browns deeply. The micro-bubbles created by the baking powder’s carbon dioxide harden and crisp. Fat renders completely. You go from pale to golden to mahogany in color, developing that craggy, textured surface.
The beauty of this method is that the first phase handles the tricky part (drying without drying out the meat), while the second phase finishes with browning and crisping. By the time they reach the high temperature, the wings are ready for it because most of their internal cooking is already done.
Drying and Seasoning Your Wings (Dry-Brine Option)
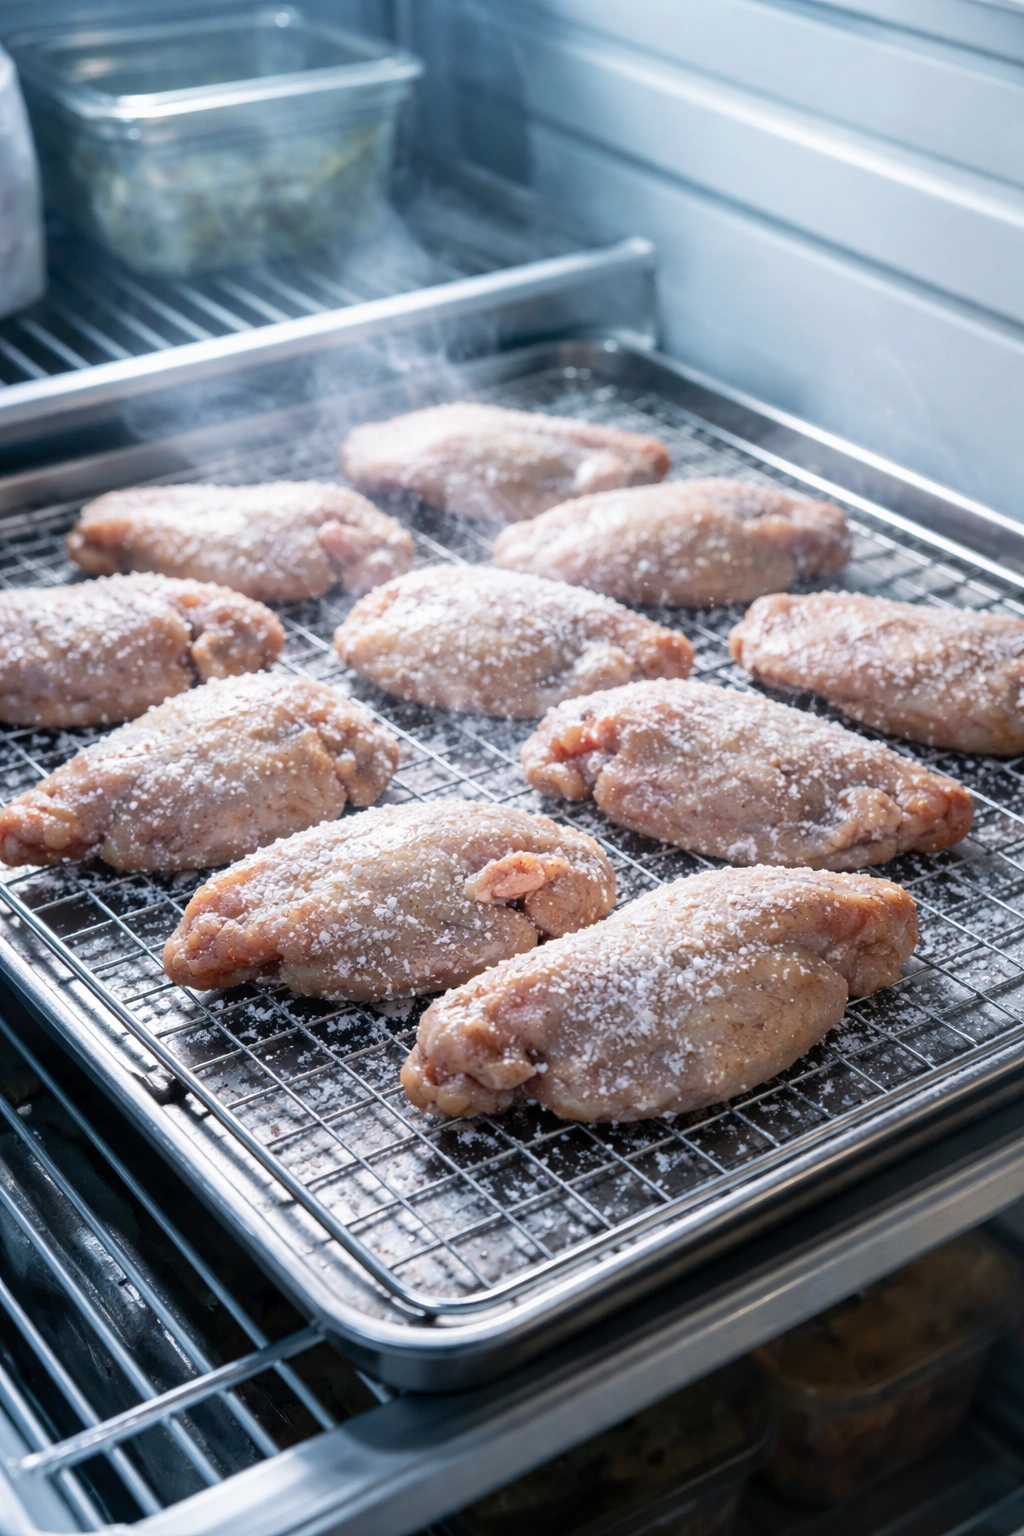
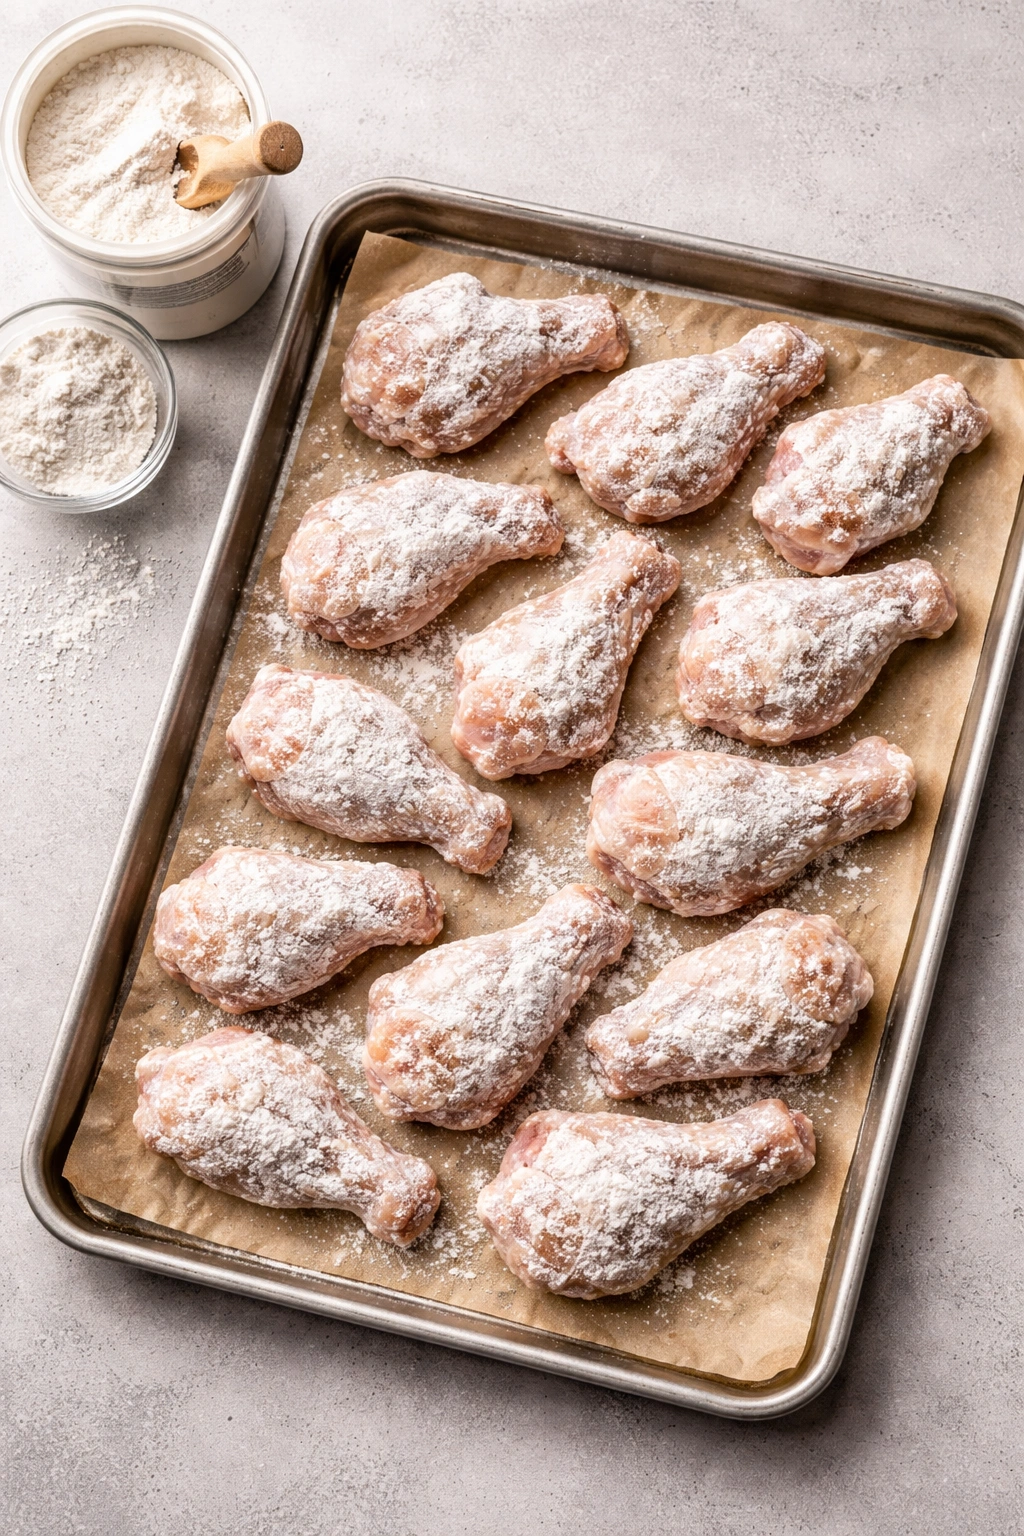
For maximum crispness and flavor, the dry-brine method is unbeatable. This isn’t actually a brine in the traditional sense—no liquid involved. Instead, you toss wings with salt and baking powder and let them rest uncovered in the refrigerator for at least 8 hours, ideally overnight or up to 24 hours.
Here’s what happens during that rest: The salt immediately begins pulling moisture from the skin. In the cold, dry environment of a refrigerator, that moisture evaporates rather than re-absorbing. You’ll literally see steam rising off the wings as they cool after being salted. Over hours, the skin dries out dramatically while the salt penetrates the meat, seasoning it deeply. The salt also helps the meat retain moisture during cooking—a counterintuitive but genuine effect that prevents drying out.
Simultaneously, the baking powder is getting to work on the skin. By the time the wings go into the oven, the skin is already significantly drier and the pH is already raised. This gives you a huge head start. The wings crisp faster and more profoundly than they would if you went straight from patting dry to baking.
To dry-brine: Pat wings dry with paper towels, place them in a large bowl or on a plate, sprinkle with salt and aluminum-free baking powder, and toss to coat evenly. Cover loosely (or don’t cover at all) and refrigerate. Before baking, arrange them on your prepared baking sheet and proceed with the two-temperature method. Don’t worry if they’re cold—just add 5-10 minutes to the total baking time to account for the chill.
Creating the Perfect Dry Rub
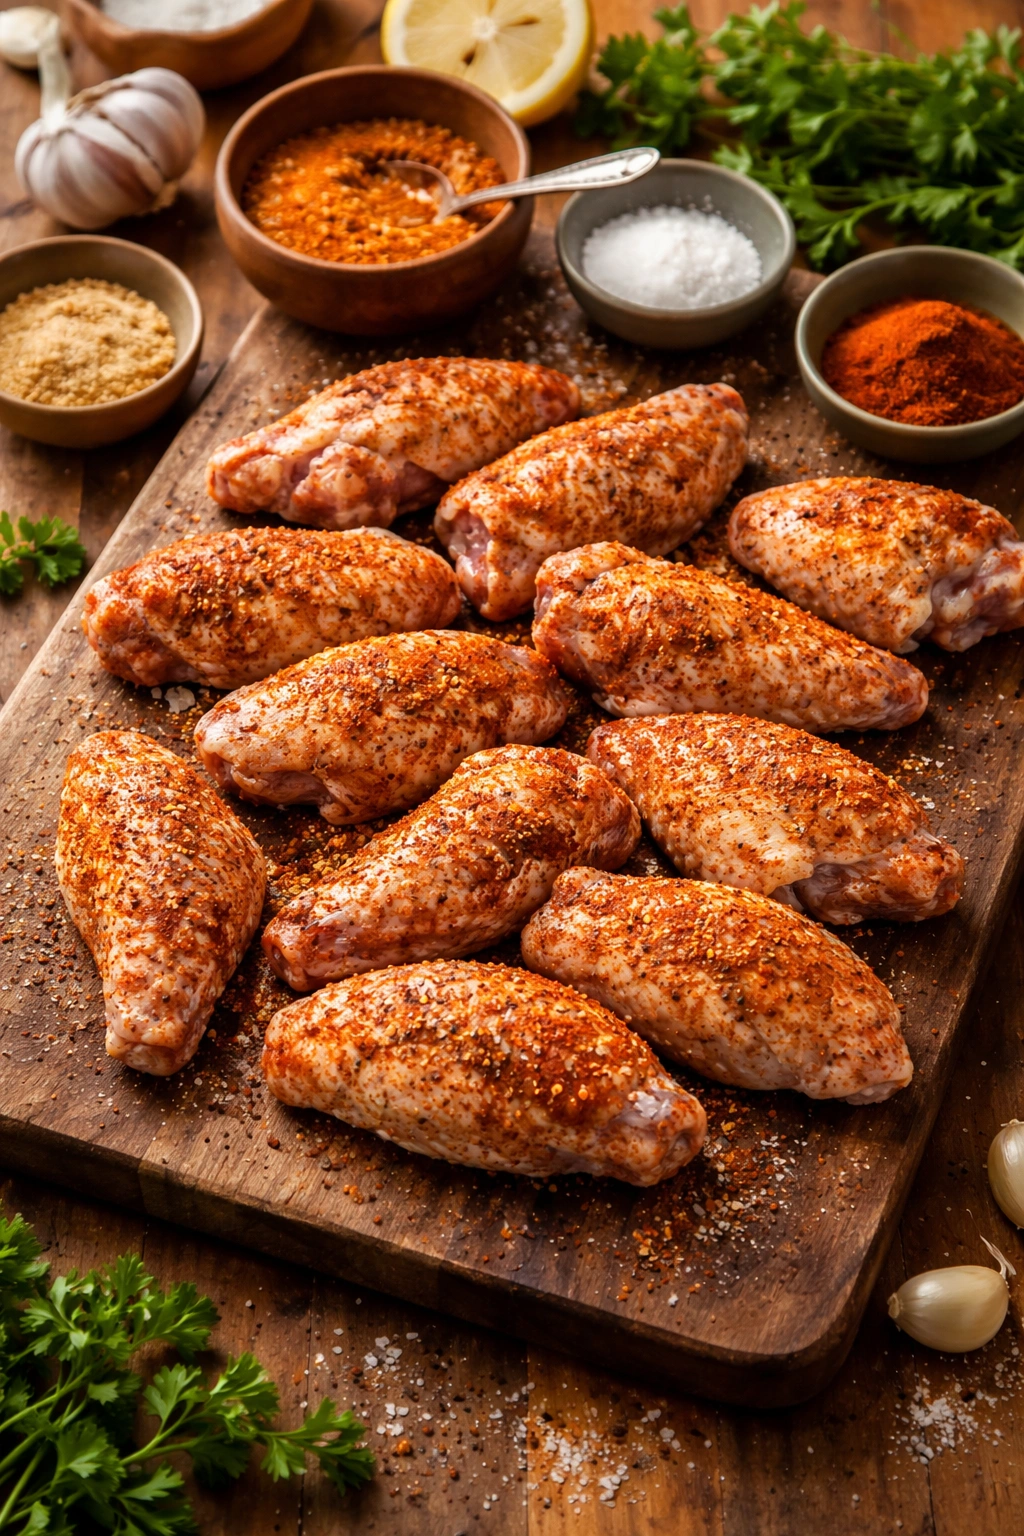
If you want to add flavor before baking rather than just serving with sauce afterward, a dry rub is perfect for crispy wings. The beauty of a rub is that it stays on the wings and cooks into them, rather than a wet sauce that risks softening the crust. A basic winning rub combines salt, black pepper, garlic powder, onion powder, and paprika. Beyond that foundation, you can customize endlessly.
For a more complex rub that’s genuinely spicy and deeply flavored, combine the base ingredients with smoked paprika for depth, cayenne or crushed red pepper for heat, chipotle powder for smokiness, ground cumin for earthiness, and ground ginger for a subtle warmth. Ancho chile powder adds fruity heat without overwhelming spice. Dried herbs like thyme or basil work too, though they can scorch slightly at high temperature, so if you use them, apply them mid-bake rather than at the start.
The amounts matter less than the proportions. For roughly 2 pounds of wings, you want about 1 tablespoon of baking powder mixed with enough other seasonings that the mixture looks evenly speckled and has some color—it should look like a light rust-colored powder, not pure white. Mix all dry components thoroughly before tossing with wings.
One approach: Combine all dry seasonings in a small bowl, then toss wings in baking powder first, then add the seasoning mix and toss again for even distribution. Or use a gallon-sized zipper-lock bag—place wings inside, sprinkle seasonings over them, seal, and shake vigorously until every wing is evenly coated.
The Recipe
Yield: Serves 4 as a main course, 6-8 as an appetizer | Makes approximately 20 pieces
Prep Time: 10 minutes (not including optional dry-brining)
Cook Time: 75 minutes (30 minutes at 250°F + 45 minutes at 425°F)
Total Time: 85 minutes active baking (plus 8-24 hours optional dry-brining in advance)
Difficulty: Beginner — The process is straightforward with just a few key steps. If you can arrange wings on a pan and manage oven temperature, you’ll succeed. The biggest thing to remember is simply not opening the oven door unnecessarily.
For the Crispy Baked Wings:
- 2 pounds chicken wings, separated at joints into drumettes and flats (wing tips removed and reserved for stock), or pre-cut party wings
- 1 tablespoon aluminum-free baking powder
- 1 teaspoon kosher salt (Diamond Crystal brand recommended; use half as much if using table salt, which is denser)
- ½ teaspoon freshly ground black pepper
- 1 teaspoon garlic powder
- 1 teaspoon paprika (smoked paprika preferred, but regular works)
- ½ teaspoon onion powder
For the Simple Buffalo Sauce (optional):
- ½ cup Frank’s RedHot sauce (or your preferred hot sauce)
- 4 tablespoons unsalted butter
- 2 cloves garlic, minced very fine
- ⅛ teaspoon Worcestershire sauce (optional, adds depth)
- Pinch of salt to taste
For Serving:
- Blue cheese dressing or ranch dressing
- Fresh celery sticks
- Fresh carrot sticks
- Additional salt, pepper, and dried herbs for garnish if desired
Prepare the Wings:
-
If using whole wings, cut them at the joints into drumettes and flats. Discard or freeze the wing tips for stock. Pat the wings dry with paper towels, pressing gently to remove surface moisture—the drier they are, the crispier the final result.
-
Place the wings in a large bowl. In a small bowl, combine the baking powder, salt, black pepper, garlic powder, paprika, and onion powder. Stir until completely combined and the mixture looks evenly speckled with color.
Advertisements -
Sprinkle the seasoning mixture over the wings and toss until every piece is evenly coated. Use your hands if needed to ensure thorough coverage—some wings inevitably have less seasoning if you just stir with a spoon.
-
Optional dry-brine step (highly recommended): Transfer the seasoned wings to a plate or baking sheet, leaving them uncovered, and refrigerate for at least 8 hours and up to 24 hours. This dries the skin further and allows salt to penetrate the meat, resulting in more crispy skin and more flavorful meat. If you skip this step, proceed immediately to baking.
Prepare the Oven and Baking Sheet:
-
Remove the oven rack from your oven if using a wire cooling rack, or keep the rack in place if baking directly on parchment paper. Preheat the oven to 250°F and position the rack in the center of the oven.
-
Line a rimmed baking sheet with aluminum foil for easy cleanup. If using a wire rack, place it on top of the foil-lined sheet and spray lightly with cooking spray or rub with a thin coat of oil to prevent sticking.
-
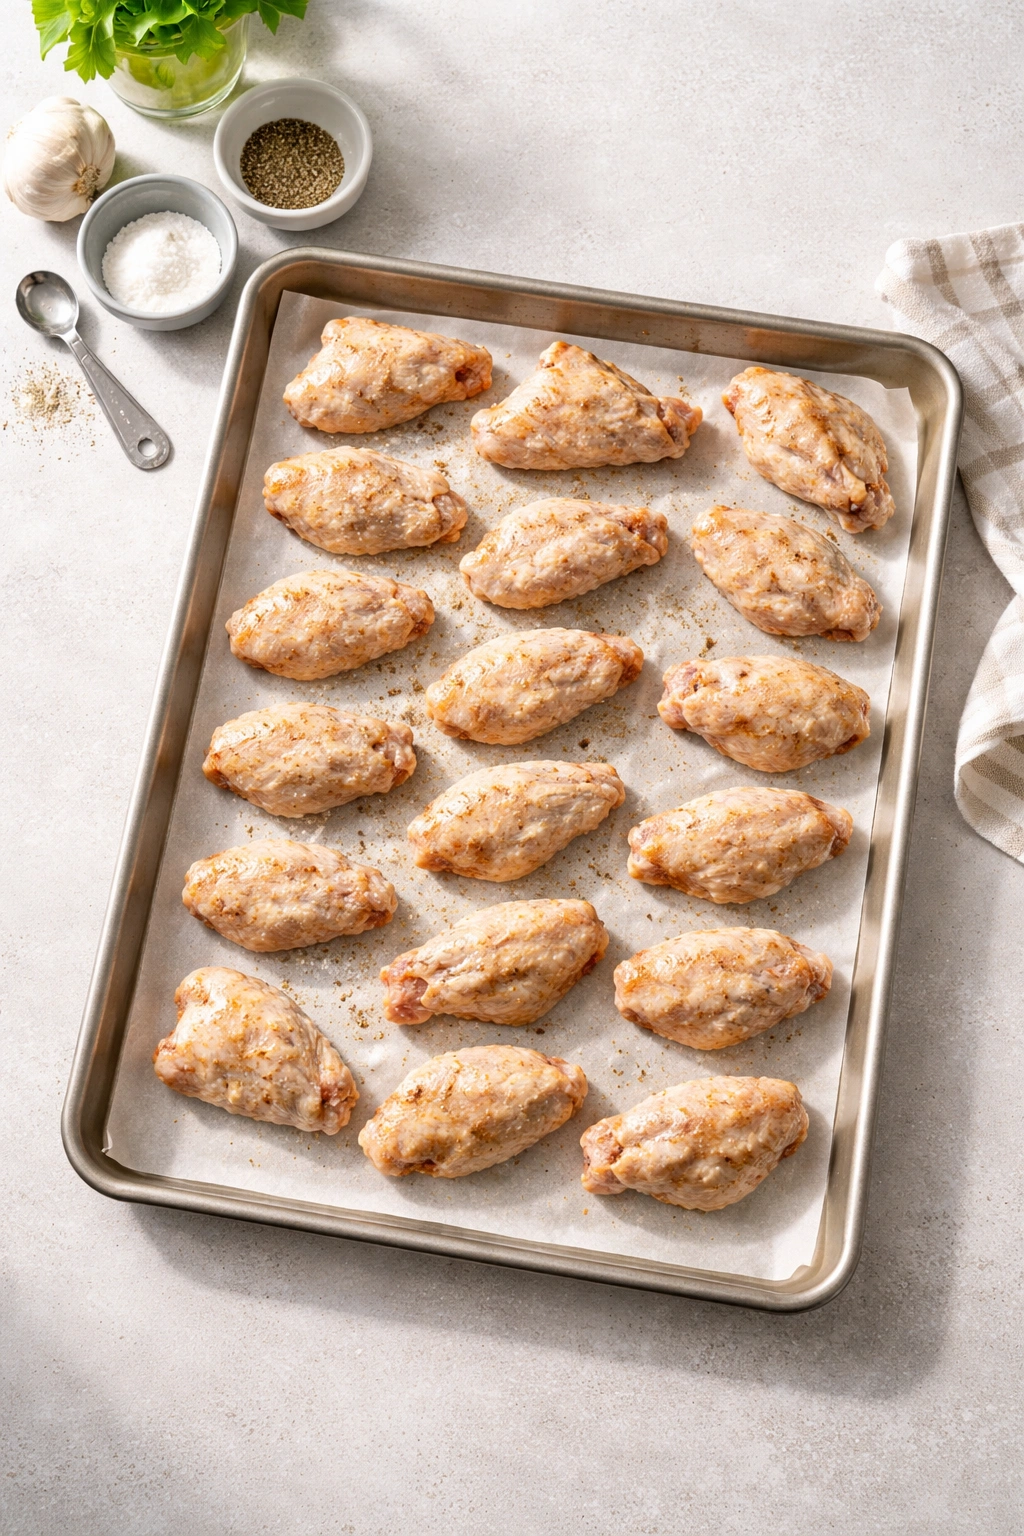
Arrange the wings on the rack (or directly on parchment paper if not using a rack) in a single layer, leaving a small amount of space between each piece so hot air can circulate. They can touch slightly but shouldn’t be crowded.
First Bake at Low Temperature:
- Place the baking sheet in the preheated 250°F oven. Bake for exactly 30 minutes without opening the door. During this phase, the wings will begin to render fat and the skin will start to dry out. They will appear pale and unappetizing—this is completely normal and expected. Do not remove them thinking something is wrong.
Second Bake at High Temperature:
-
After 30 minutes, carefully remove the baking sheet from the oven. Without removing the wings, increase the oven temperature to 425°F. Important: If your oven tends to run cool (check with an oven thermometer), increase the temperature to 450°F instead for better browning.
-
Return the baking sheet to the oven and bake for an additional 40 to 50 minutes, depending on wing size and your oven. Wings are finished when the skin is deeply golden-brown with some darker, crisped edges, and the wings sound crunchy when tapped with a metal spatula. Do not skip this audible test. You should hear a distinct crackle.
Advertisements -
If your wings don’t look sufficiently browned after 40 minutes at 425°F, bump the temperature to 450°F or 475°F for the final 5-10 minutes. Every oven is different, and you want good color development.
-
The internal temperature should register 165°F on an instant-read thermometer inserted into the thickest part of a drumette without touching bone. If temperature is below 165°F but the skin looks golden and crisp, continue baking until it reaches 165°F.
Rest and Finish:
-
Remove the baking sheet from the oven and let the wings rest on the pan for 3 to 5 minutes. This allows the crust to firm up and helps preserve crispiness. Transfer to a serving platter.
-
If serving with sauce, toss wings in the desired sauce while they’re still warm—the heat helps the sauce adhere. Otherwise, serve dry with just the seasonings they already have, accompanied by dipping sauces on the side.
How to Make Simple Buffalo Sauce:
If you’re making sauce, the classic homemade version is genuinely simple. Melt butter in a small saucepan over medium heat. Add minced garlic and let it cook for about 30 seconds—just until fragrant, before it browns. Add the hot sauce, Worcestershire sauce if using, and a pinch of salt. Stir to combine and taste for heat and salt level. Remove from heat and let it cool for a minute before tossing with wings. Alternatively, combine butter and hot sauce in a bowl and whisk together—you don’t even need to cook it; it’ll combine just fine at room temperature.
Sauce and Flavor Variations Beyond Buffalo
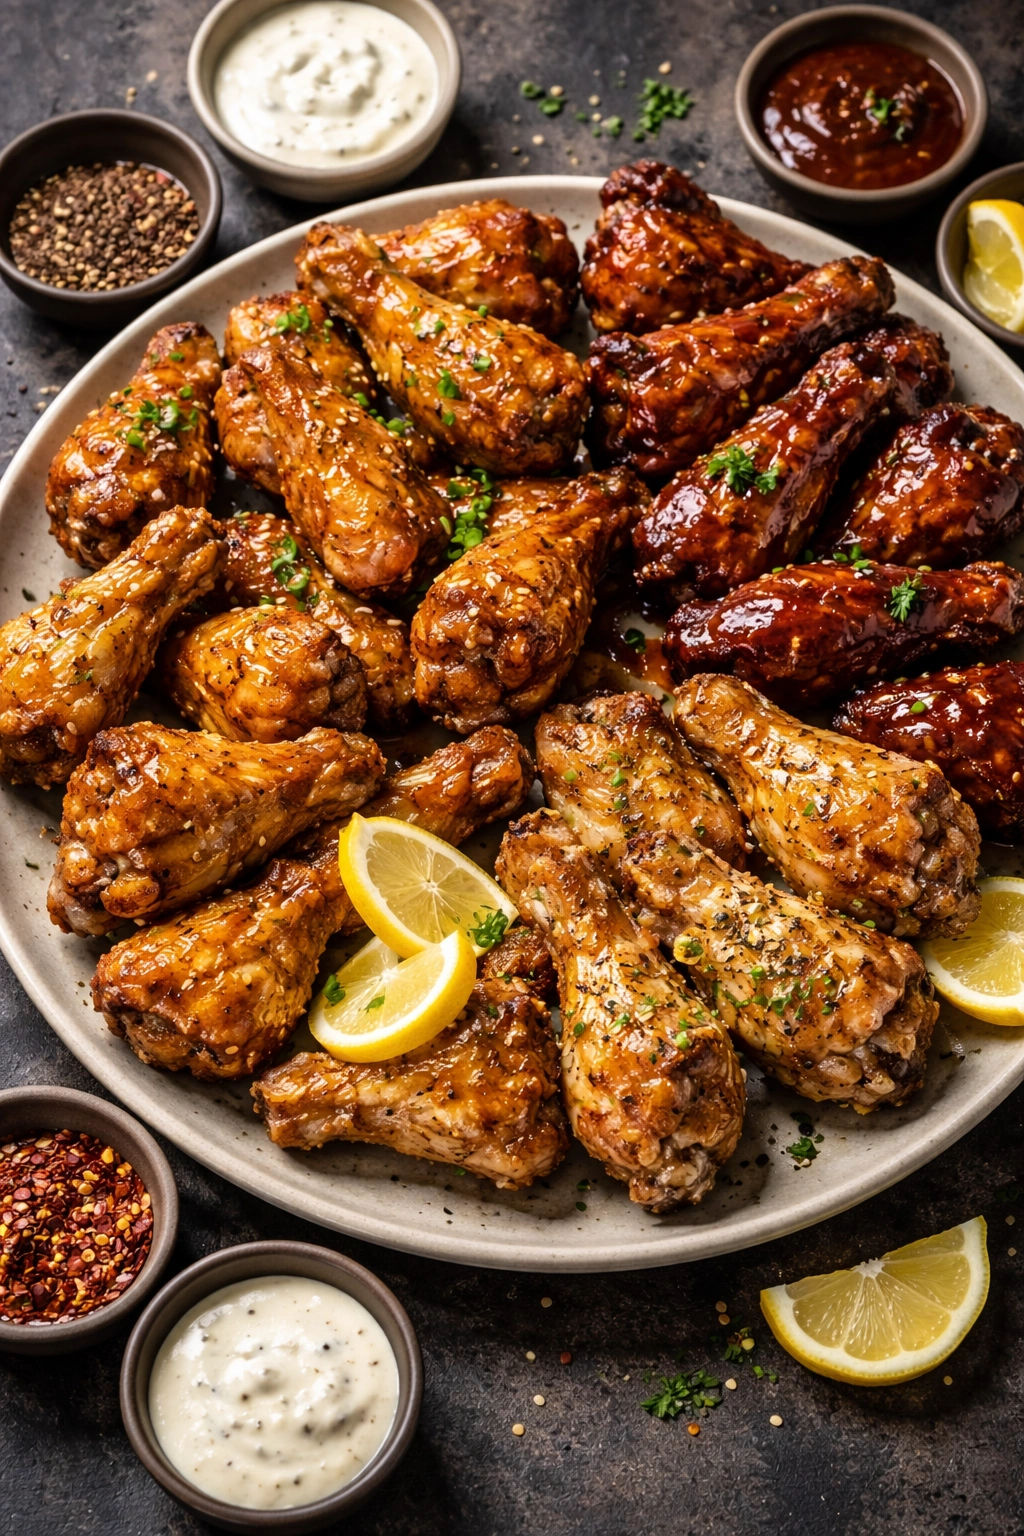
Buffalo is classic for a reason, but crispy baked wings are truly a blank canvas. The crispy exterior holds up beautifully to any flavor profile you want to add, and because the wings aren’t coated in deep-fry oil, lighter sauces work beautifully too.
Honey Garlic: Melt 3 tablespoons butter with 4 minced garlic cloves, add ¼ cup honey and 2 tablespoons soy sauce, reduce by simmering for 2 minutes, and toss with wings. The sweetness balances the savory soy and the garlic depth is incredible.
Lemon Pepper: Skip sauce entirely. Instead, toss hot wings with fresh lemon zest, cracked black pepper, grated Parmesan cheese, and fleur de sel. Fresh, bright, completely different energy from buffalo.
BBQ Glaze: Combine ¾ cup your favorite BBQ sauce with 2 tablespoons honey and 1 tablespoon apple cider vinegar. The honey caramelizes slightly on the hot wings, creating depth.
Asian-Inspired: Mix ¼ cup soy sauce, 3 tablespoons rice vinegar, 2 tablespoons honey, 2 cloves minced garlic, and 1 teaspoon grated ginger. This creates a glaze that’s tangy, sweet, and deeply savory without being heavy.
Dry Rub Route: If you want maximum crispness preservation, forget sauce entirely and serve wings dry with just their seasoning rub plus a final shower of fleur de sel and fresh cracked pepper. Many people find this superior because every bite stays crunchy.
Common Mistakes That Make Wings Soggy or Tough
The most frequent problem is insufficient drying before baking. If wings have any surface moisture, that moisture steams off in the oven instead of crisping the skin. Pat them completely dry with paper towels before seasoning. If you go the dry-brine route and add sauce afterward, also let the finished wings rest for 5 minutes before saucing—this firms up the crust and helps it withstand the moisture from sauce.
Never crowd the pan. Wings need space for air circulation. If they’re touching or overlapping, the sides touching each other won’t crisp. Generally, fit no more than 16 wing pieces on a single half-sheet pan.
Using regular baking soda instead of baking powder is a disaster that shows up in the comments regularly. Baking soda alone tastes bitter and metallic. You must use baking powder. Similarly, using baking powder that contains sodium aluminum sulfate creates a metallic taste for some people. Buy aluminum-free brands.
Skipping the low-temperature phase wastes the advantages of that step. If you bake at 425°F the whole time, you’ll eventually get somewhat crispy wings, but not nearly as crispy as the two-step method produces. The low-temperature phase is doing crucial drying work.
Not using a wire rack (or at least elevated surface) means wings sit in rendered fat, which keeps the bottoms from crisping. If you don’t have a rack, bake on parchment paper or use crumpled foil to create elevation.
Overcooking results in dry meat inside and leather-like skin. Watch for color development and use the visual cues in the recipe. If interior temperature reaches 165°F before the skin is golden, your oven might run cool—invest in an oven thermometer.
Storage, Reheating, and Make-Ahead Tips
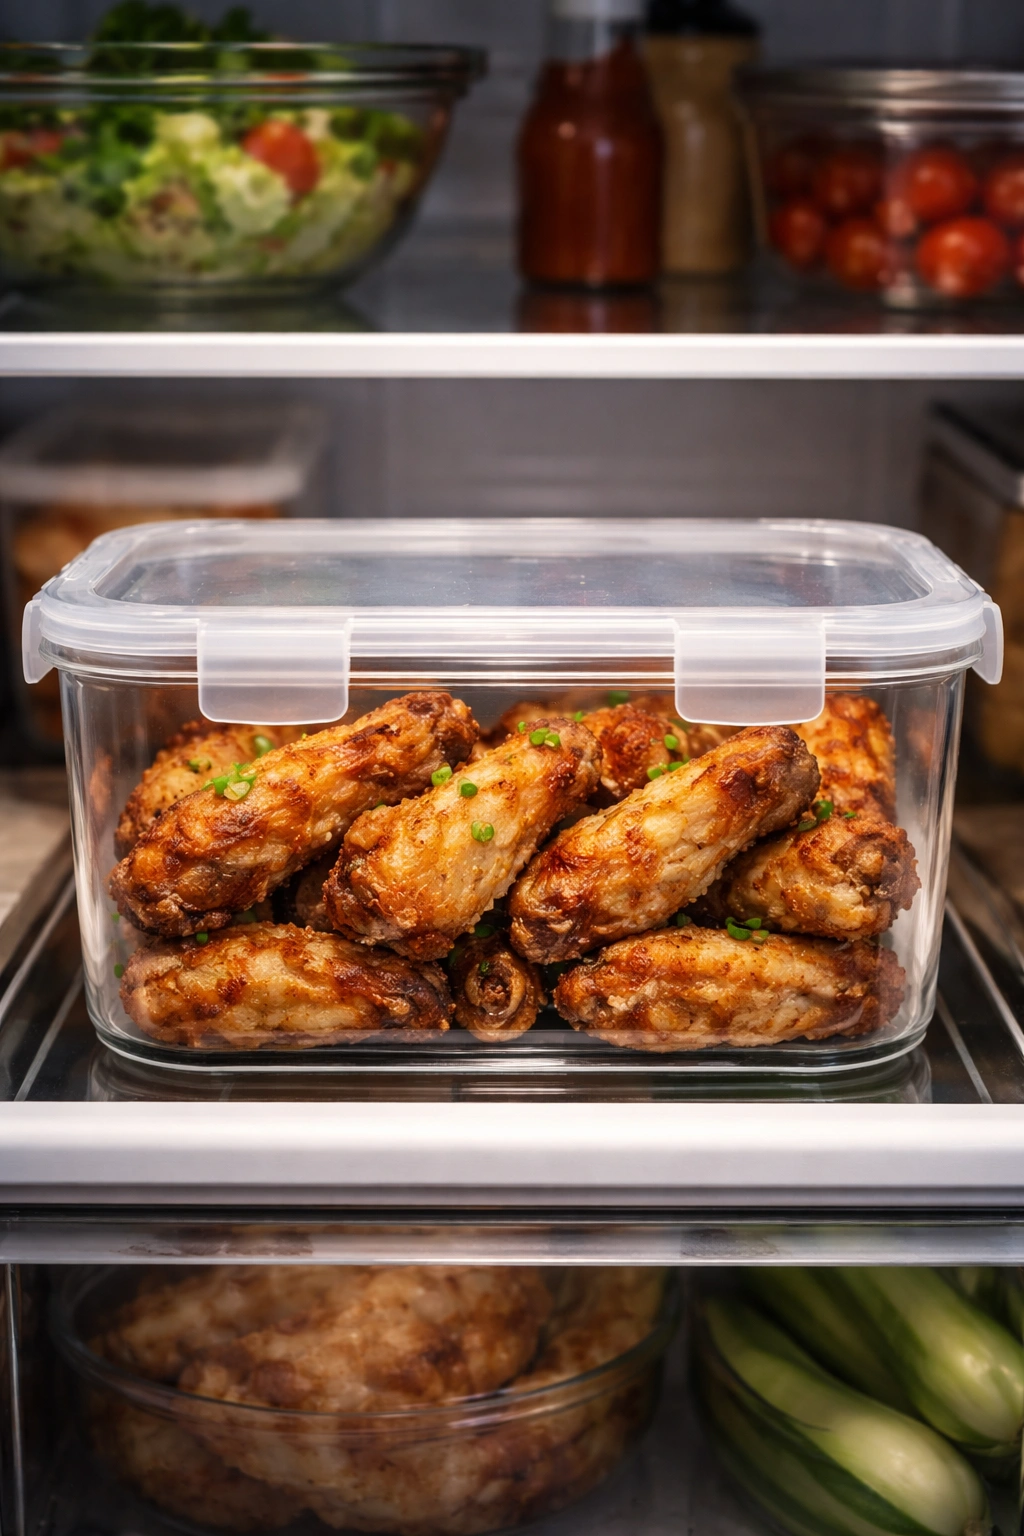
Leftover crispy baked wings keep well in an airtight container in the refrigerator for 3 to 5 days. The skin will soften slightly as they sit, which is why reheating method matters enormously.
Never reheat wings in a microwave. Microwave heat will turn the skin soggy and rubbery—essentially destroying the entire point of having made them crispy. Instead, preheat your oven to 400°F and spread the wings on a parchment-lined baking sheet in a single layer. Bake for 10 to 15 minutes, flipping halfway through, until the wings are heated through and the skin re-crisps. They’ll come back remarkably close to their original texture.
If you have an air fryer, use it. Set the temperature to 375°F and reheat for 5 to 8 minutes until heated through and crispy again. Air fryer reheating actually produces superior results to oven reheating because the circulating hot air re-crisps the skin even faster.
For freezing, let wings cool completely first. Store them in an airtight freezer container or vacuum-sealed bag for up to 2 to 3 months. Thaw overnight in the refrigerator before reheating using the oven method above. The texture will be slightly less crispy than fresh, but still satisfying.
Make-ahead strategy: You can parboil wings (simmer them for 7 minutes in heavily salted water) and dry them completely, then refrigerate uncovered for up to 24 hours. When you’re ready to serve, brush them with a tiny bit of oil, season, and follow the two-temperature baking method starting from scratch. This is excellent for parties because you compress the prep work into the day before and just bake fresh on game day.
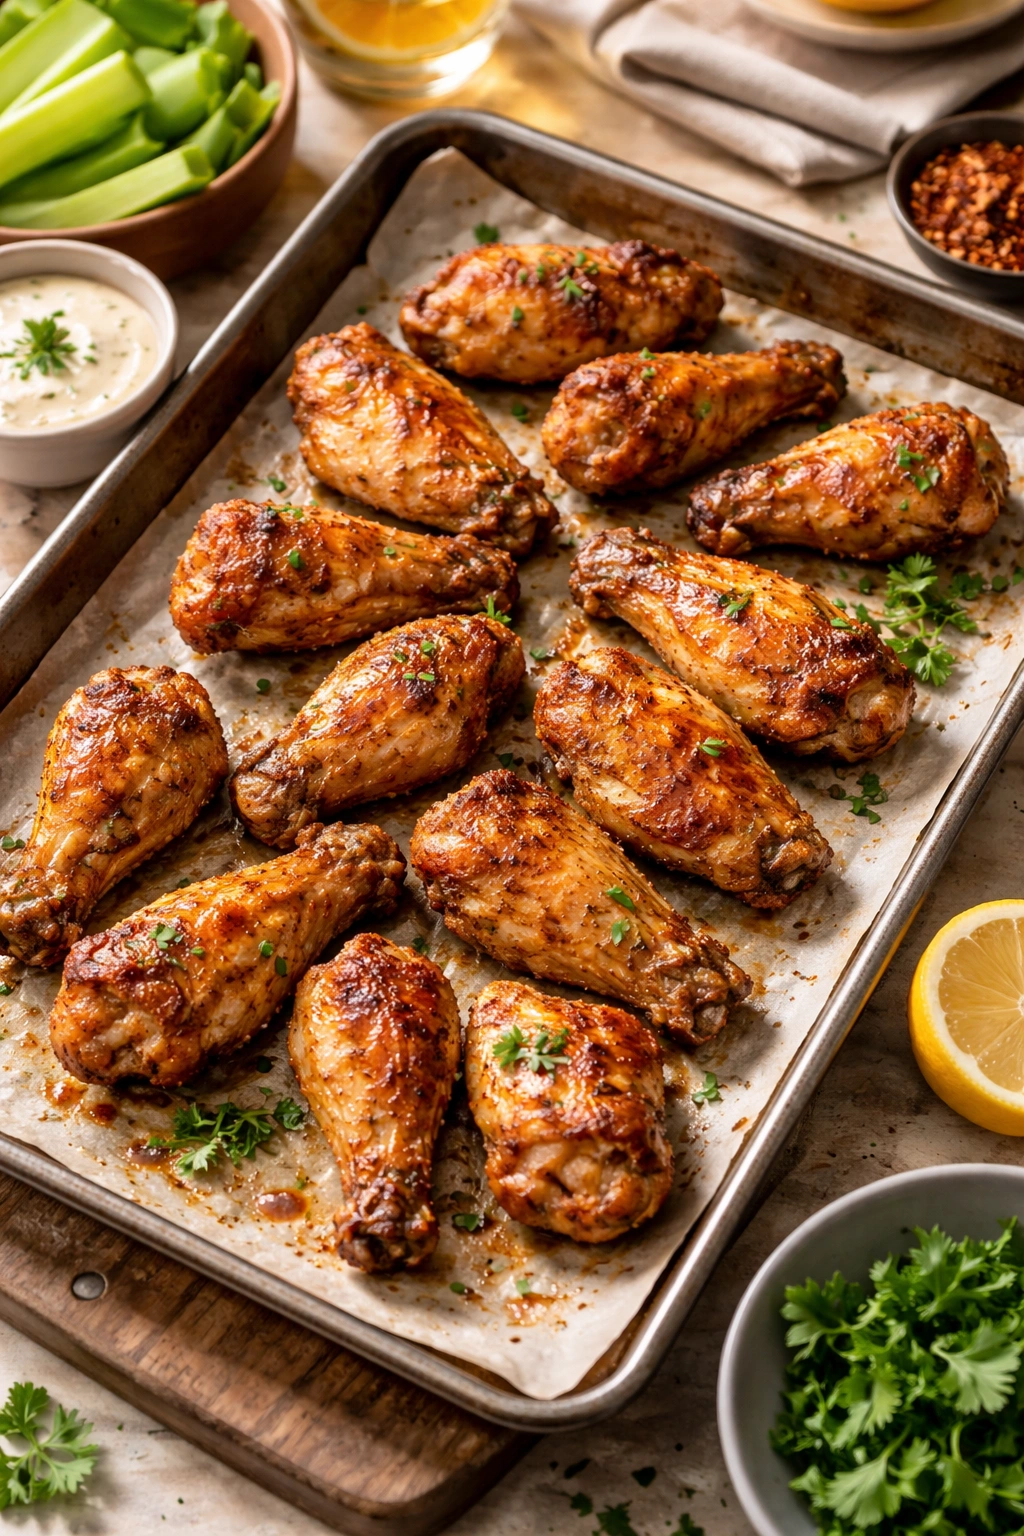
Serving Suggestions and Game-Day Pairings
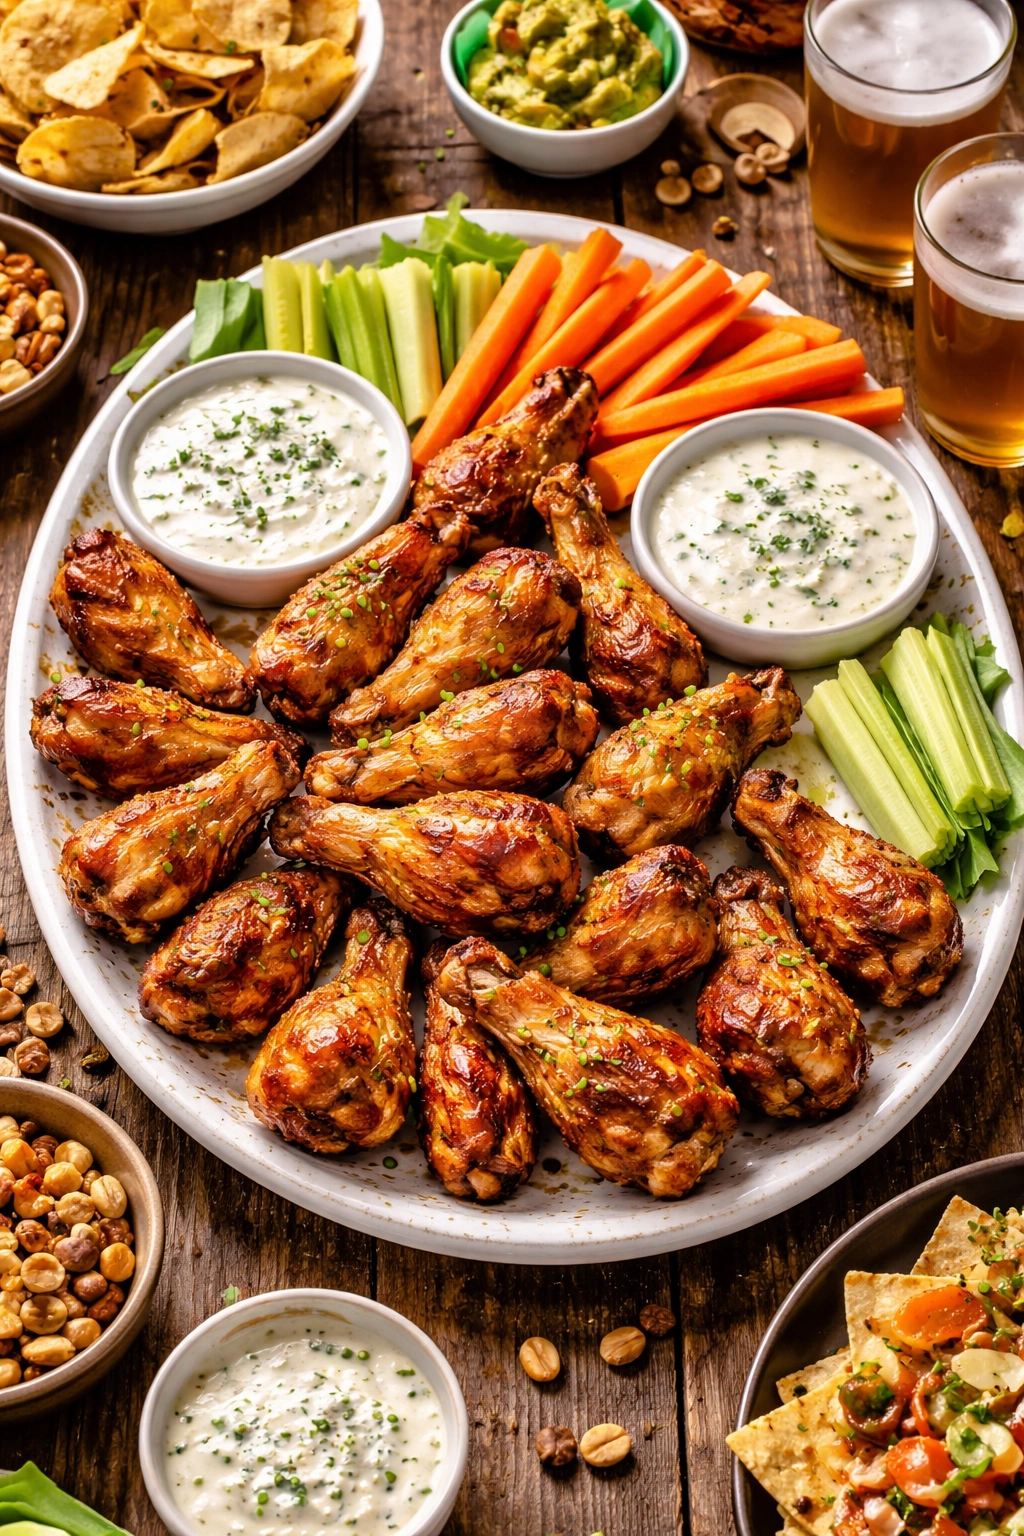
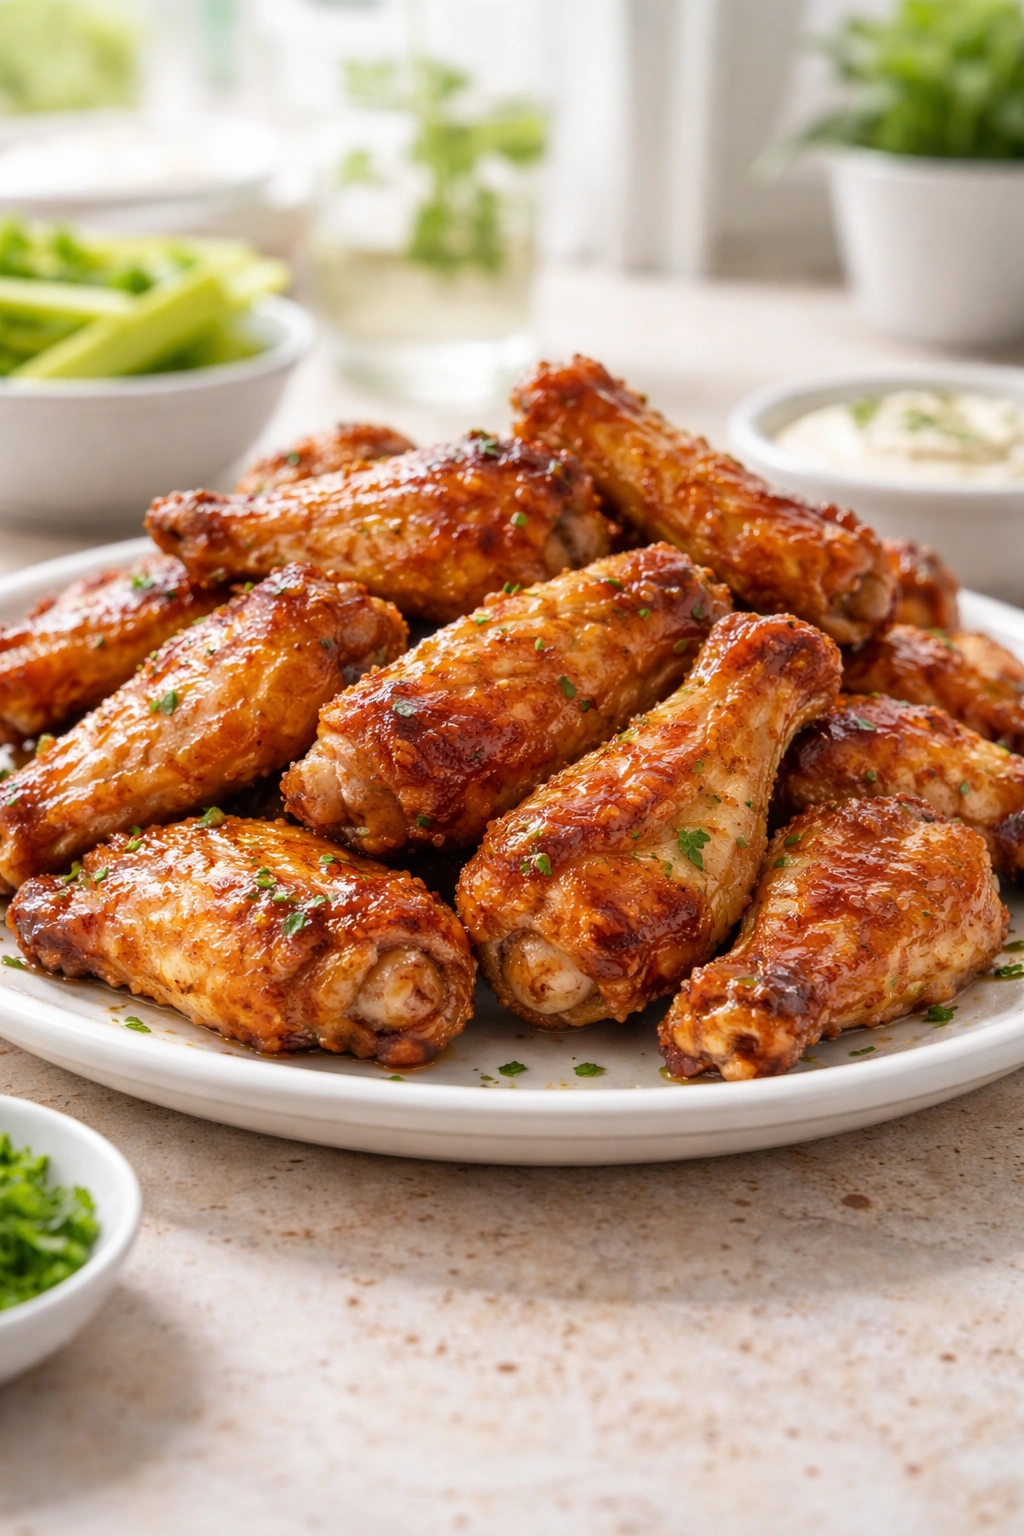
Crispy baked wings are inherently a finger food and social dish. Serve them on a large platter with plenty of napkins (people will need them) surrounded by celery and carrot sticks. Blue cheese dressing is the traditional accompaniment—the tangy, creamy dip cuts through rich wings beautifully. Ranch also works, though blue cheese has more personality.
For a more complete spread, pair wings with other finger foods that don’t require utensils: loaded potato skins, crispy baked mozzarella sticks, or buffalo chicken dip for double-dipping. Mini corn bread muffins or jalapeño cornbread provides substance and balances heat.
Consider the sauce direction when choosing sides. Spicy wings pair well with something creamy—ranch, blue cheese, or a cooling dip with yogurt and herbs. Sweeter glazes like honey garlic or BBQ work alongside something slightly acidic, like coleslaw with vinegar-based dressing, to prevent flavor fatigue.
For beverages, cold beer is the obvious choice, but crispy wings also work beautifully with iced tea (especially if the wings have some heat), lemonade for contrast, or even light citrus sodas. Avoid hot beverages with spicy wings—it just intensifies the heat without providing relief.
If serving wings as a main course rather than appetizer, add substantial sides: baked beans, corn on the cob, potato salad, or a simple green salad. Wings alone, while satisfying, feel slightly incomplete as a full dinner for most people.
Final Thoughts
Making crispy baked chicken wings at home isn’t a compromise—it’s genuinely superior to deep-frying for most home cooks. You get better texture preservation when sauced, complete control over flavor and heat, none of the mess or smell, and the ability to make massive quantities without breaking a sweat. The two-step baking method with baking powder produces wings that sound and taste deep-fried, but without the downsides.
The technique is simple enough for a beginner but sophisticated enough in its science that you’ll appreciate it more the second or third time you make it. Your first batch might be slightly underbaked or overbaked—that’s fine. By the third batch, you’ll have your oven’s personality figured out and will make perfect wings consistently.
Keep the basics in mind: dry wings thoroughly, use aluminum-free baking powder, don’t crowd the pan, do the two-temperature bake, and don’t skip the rest period before saucing. Nail those points and you’re essentially guaranteed success. The rest is just deciding whether you want buffalo, BBQ, garlic, or something entirely your own invention. Make these wings for game day, parties, weeknight dinners, or whenever you want something crunchy and satisfying without the work traditional frying demands. Once you nail the technique, you’ll never look back.