You’re staring at a craving for crispy chicken tenders, but the thought of heating a vat of oil and dealing with splattering grease makes you wince. There’s a better way — and it turns out that perfectly golden, genuinely crunchy baked chicken tenders are completely achievable without ever stepping foot into deep-frying territory. The secret isn’t expensive equipment or complicated techniques. It’s about understanding a few simple principles of heat, texture, and the right breading method, then putting them to work in your standard home oven.
Most people give up on baked chicken tenders because they’ve tried a batch that came out pale, soggy, or disappointingly bland. But that’s usually because the technique being used doesn’t account for what actually makes fried chicken crunchy. You can’t just coat chicken, spray it lightly, and hope for the best. There’s real science here — and once you understand it, you’ll never reach for frozen tenders again.
Understanding the Science Behind Crispy Baked Chicken
When you bite into truly crispy fried chicken, what you’re experiencing is a chemical reaction called the Maillard reaction, where protein and sugars brown together at high heat to create that golden crust and complex flavor. That same reaction can happen in an oven, but it requires the right conditions. The coating needs direct, dry heat to crisp. It also needs fat to brown properly. And the whole process has to happen quickly so the chicken inside doesn’t dry out before the outside crisps.
This is where most home bakers make their first mistake — they think a light spray of cooking oil is enough. It isn’t. The breading needs sufficient fat contact to brown evenly and achieve that crunchy texture. Without it, you’ll get a pale, chalky coating that flakes off. The oven temperature also matters tremendously. A preheated oven set to at least 400°F (200°C) is essential. Lower temperatures give the moisture inside time to escape through the coating, leaving you with dense, tough chicken instead of juicy, tender meat wrapped in a crunchy shell.
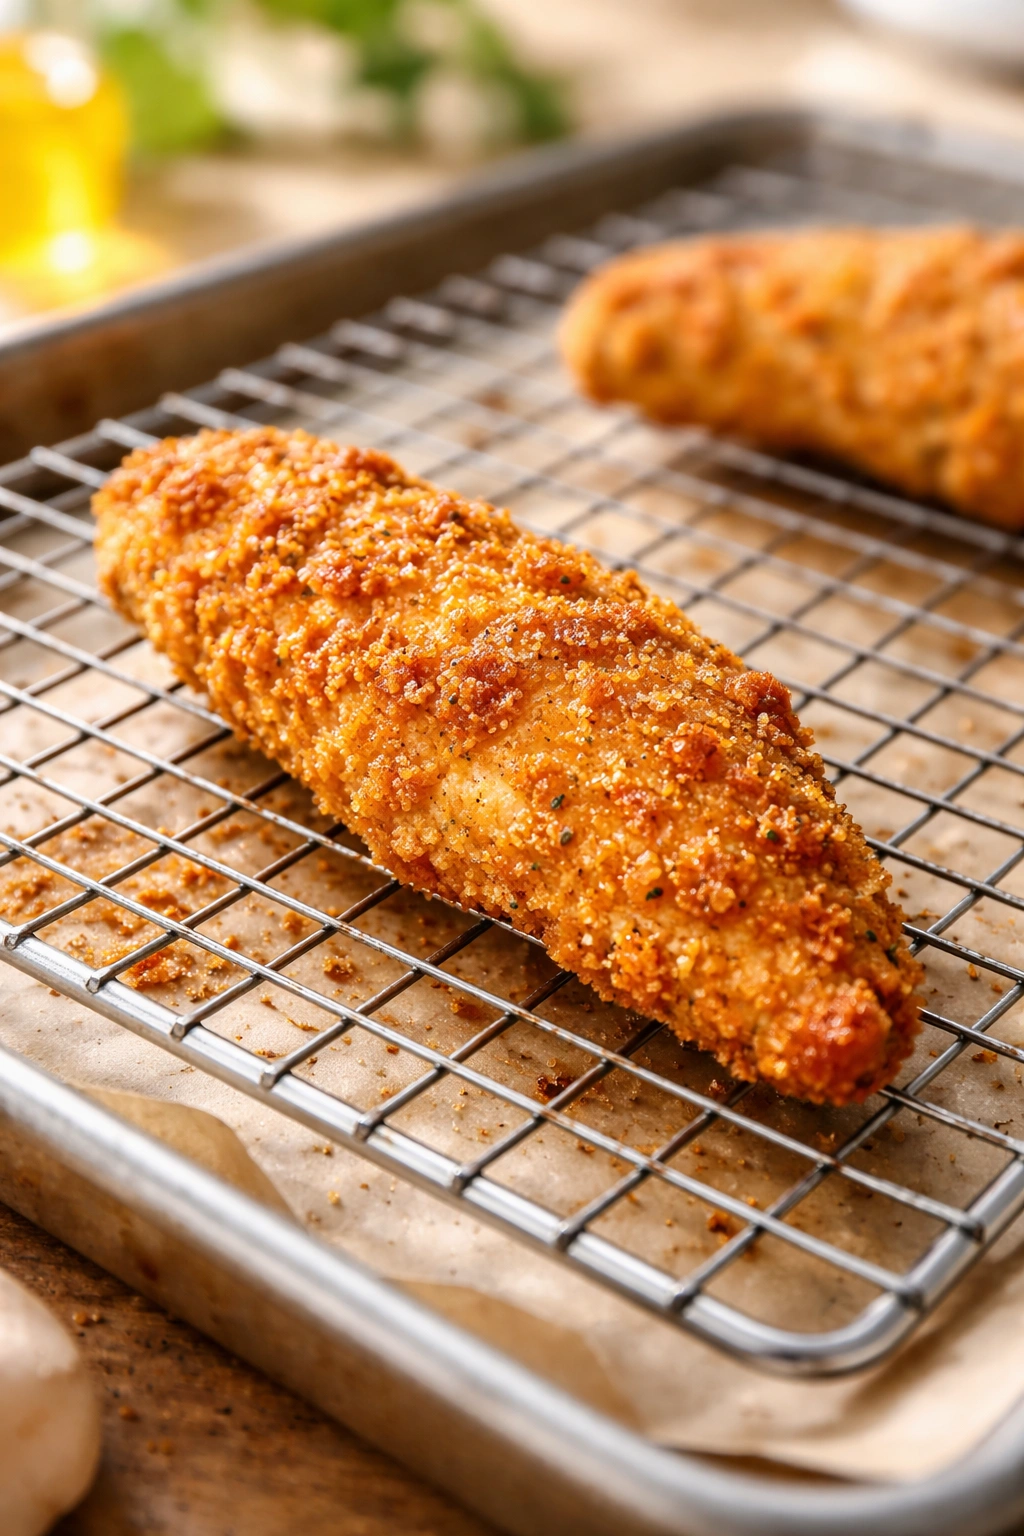
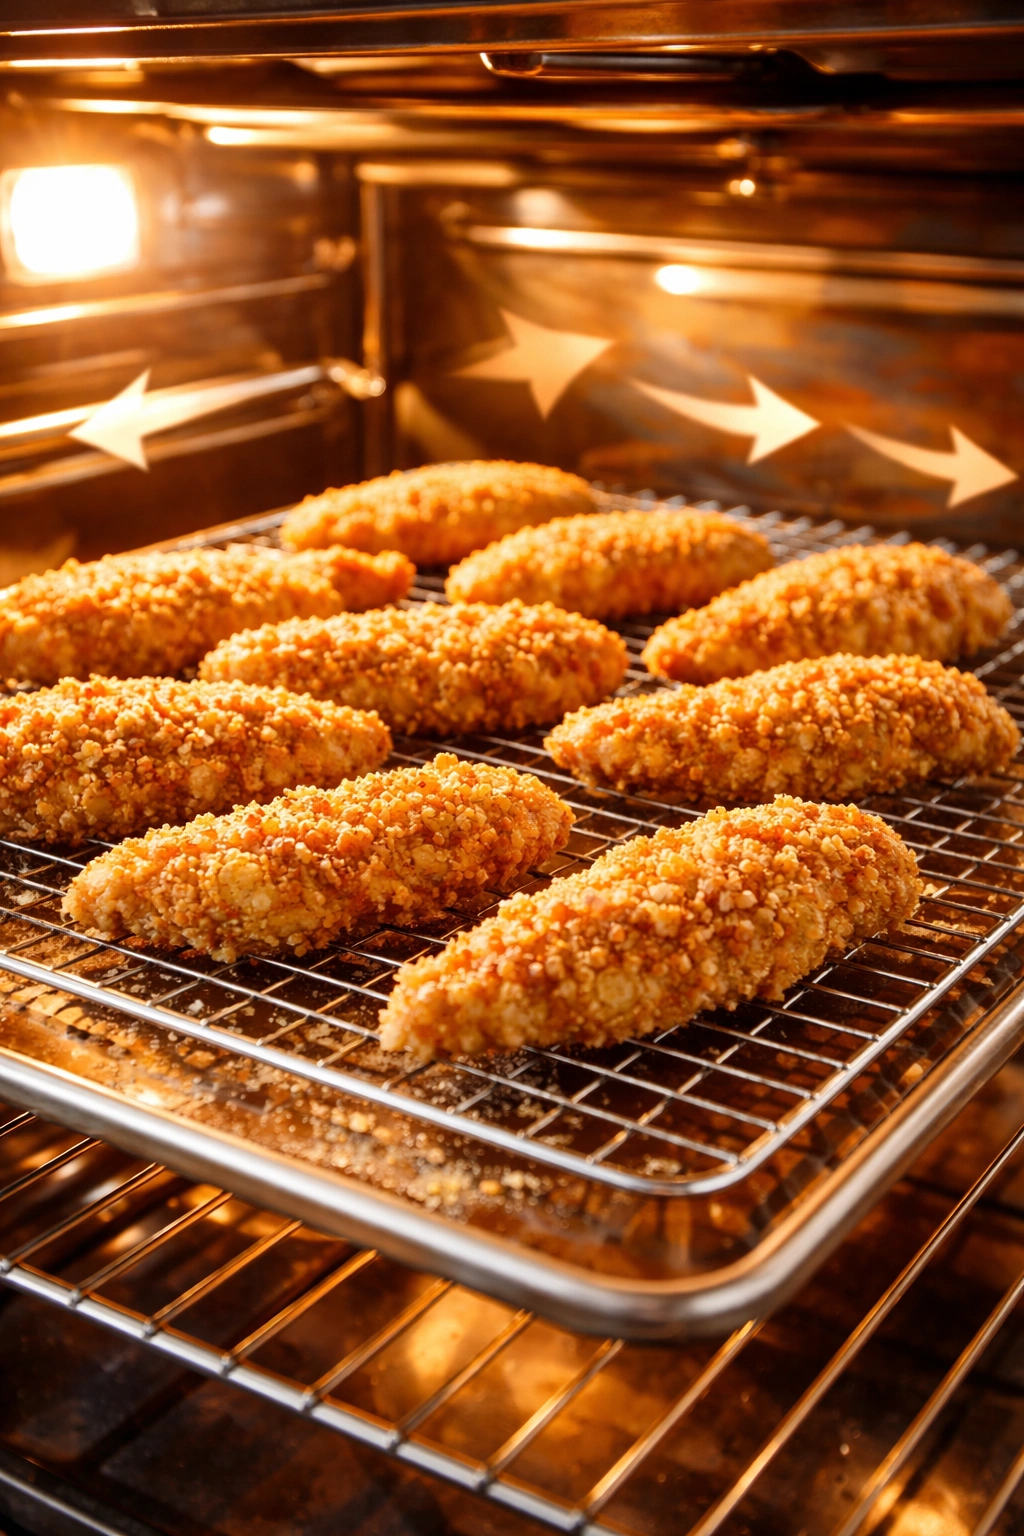
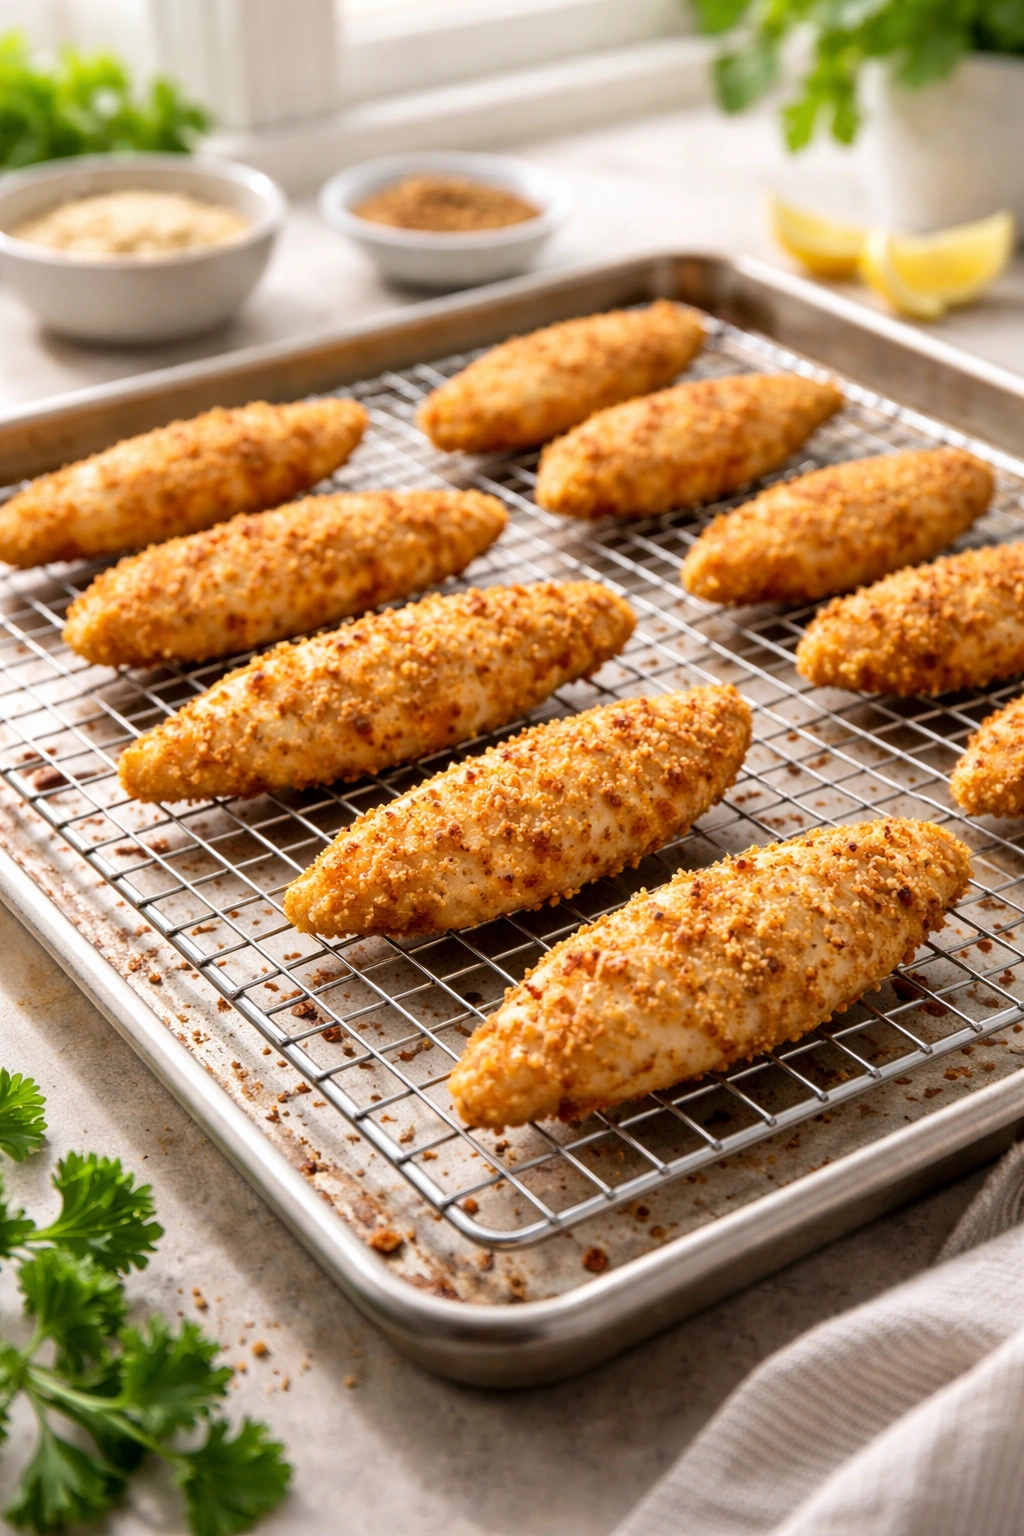
The air flow in your oven is equally important. If the chicken sits directly on a hot baking sheet with no air circulation underneath, the bottom steams instead of crisps. This is why professional cooks use wire racks, and why you should too. The hot air moving above and below the chicken allows the entire coating to dry and crisp evenly, creating that restaurant-quality texture at home.
Why Traditional Frying Doesn’t Work Well for Home Cooks
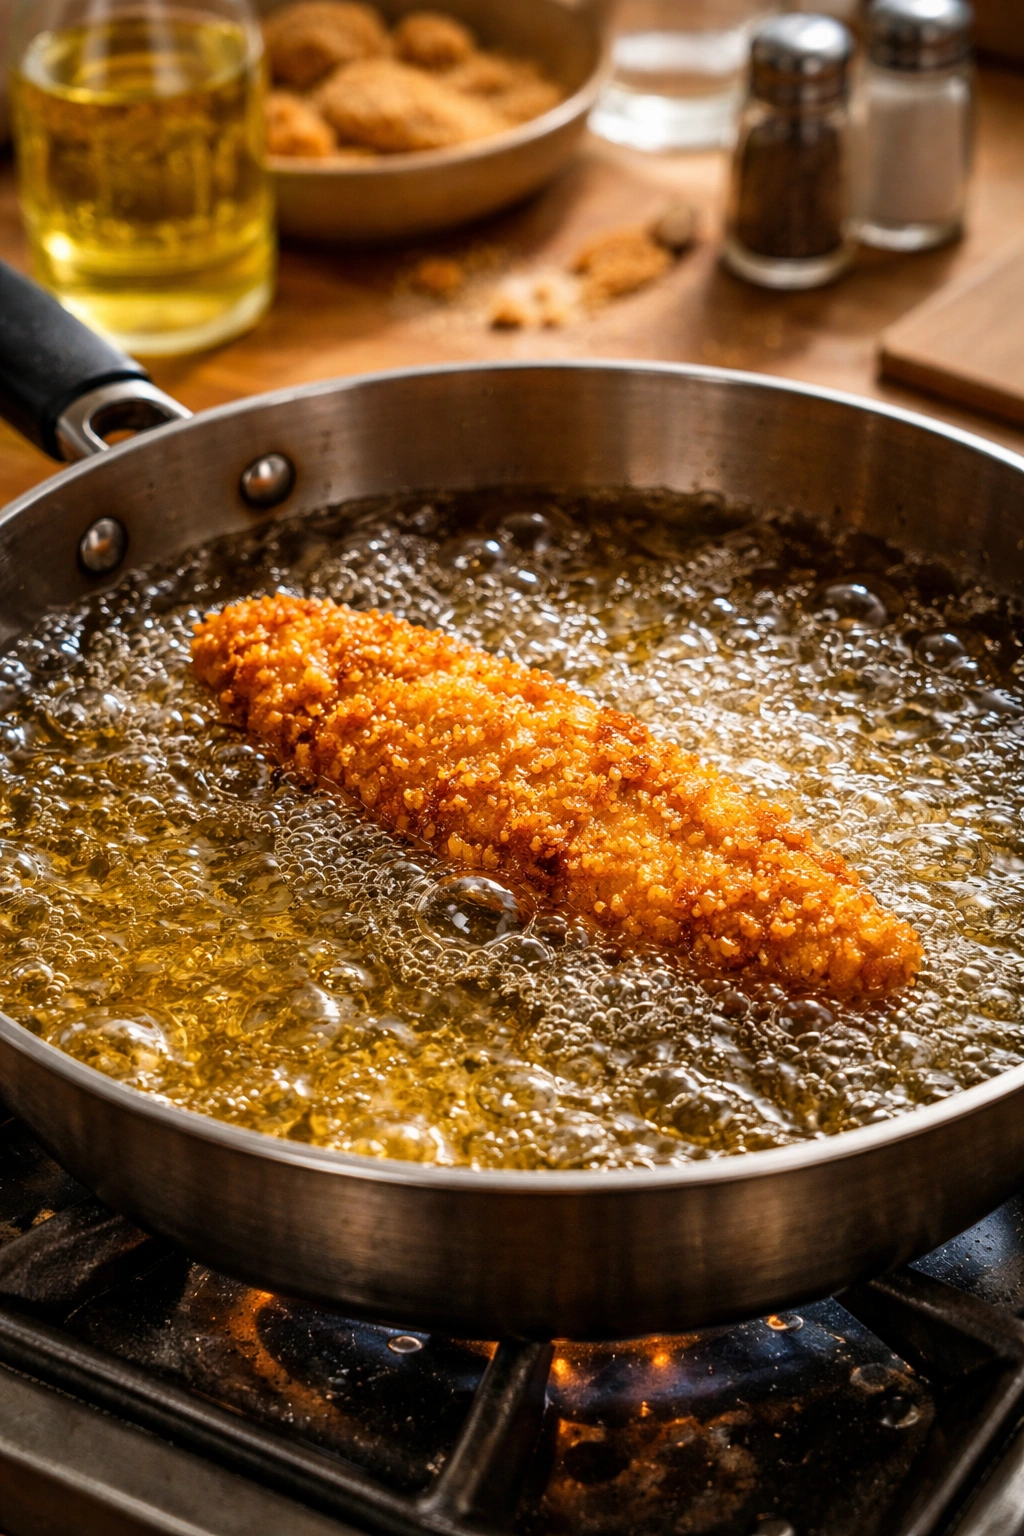
Deep frying works beautifully in commercial kitchens with professional equipment, large batches, and people who do it multiple times a day. In a home kitchen, it’s a different story entirely. You’re dealing with a pot or Dutch oven filled with oil heated to 350°F, which means burns are a real risk. You’ve got splattering oil, a greasy stovetop that takes forever to clean, and lingering cooking odors that cling to your clothes and curtains for days.
Beyond the safety and cleanliness concerns, most home cooks don’t actually want to deep fry very often. It’s wasteful — you use a cup or more of oil to cook a small batch of chicken, then you have to dispose of it responsibly. You can’t pour used frying oil down the drain. Letting it cool and solidify in the trash isn’t ideal either. The cost adds up, especially if you’re making these tenders regularly for your family.
Here’s what’s interesting: baked chicken tenders that are done correctly actually taste nearly identical to their fried counterparts. The texture is there. The golden color is there. The crunch is definitely there. You’re not making a sacrifice in flavor or satisfaction — you’re actually gaining convenience, cleanliness, and peace of mind. Plus, you’re using far less fat overall, making these tenders a genuinely healthier option without tasting like a diet food.
The Secret Ingredient: Panko Breadcrumbs
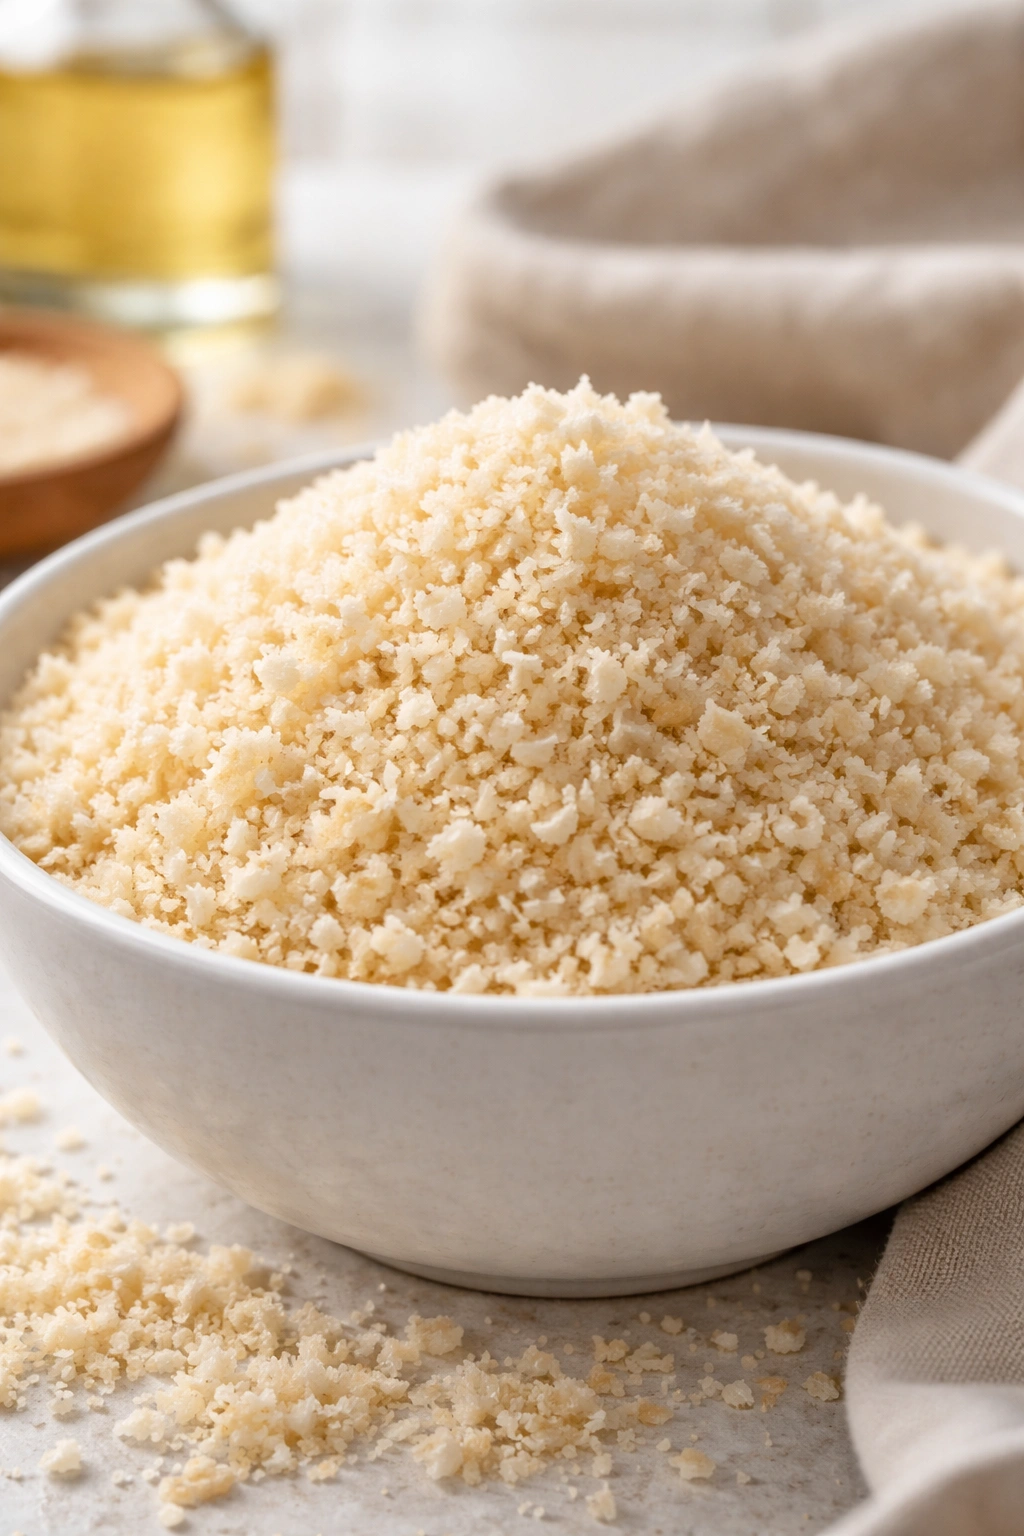
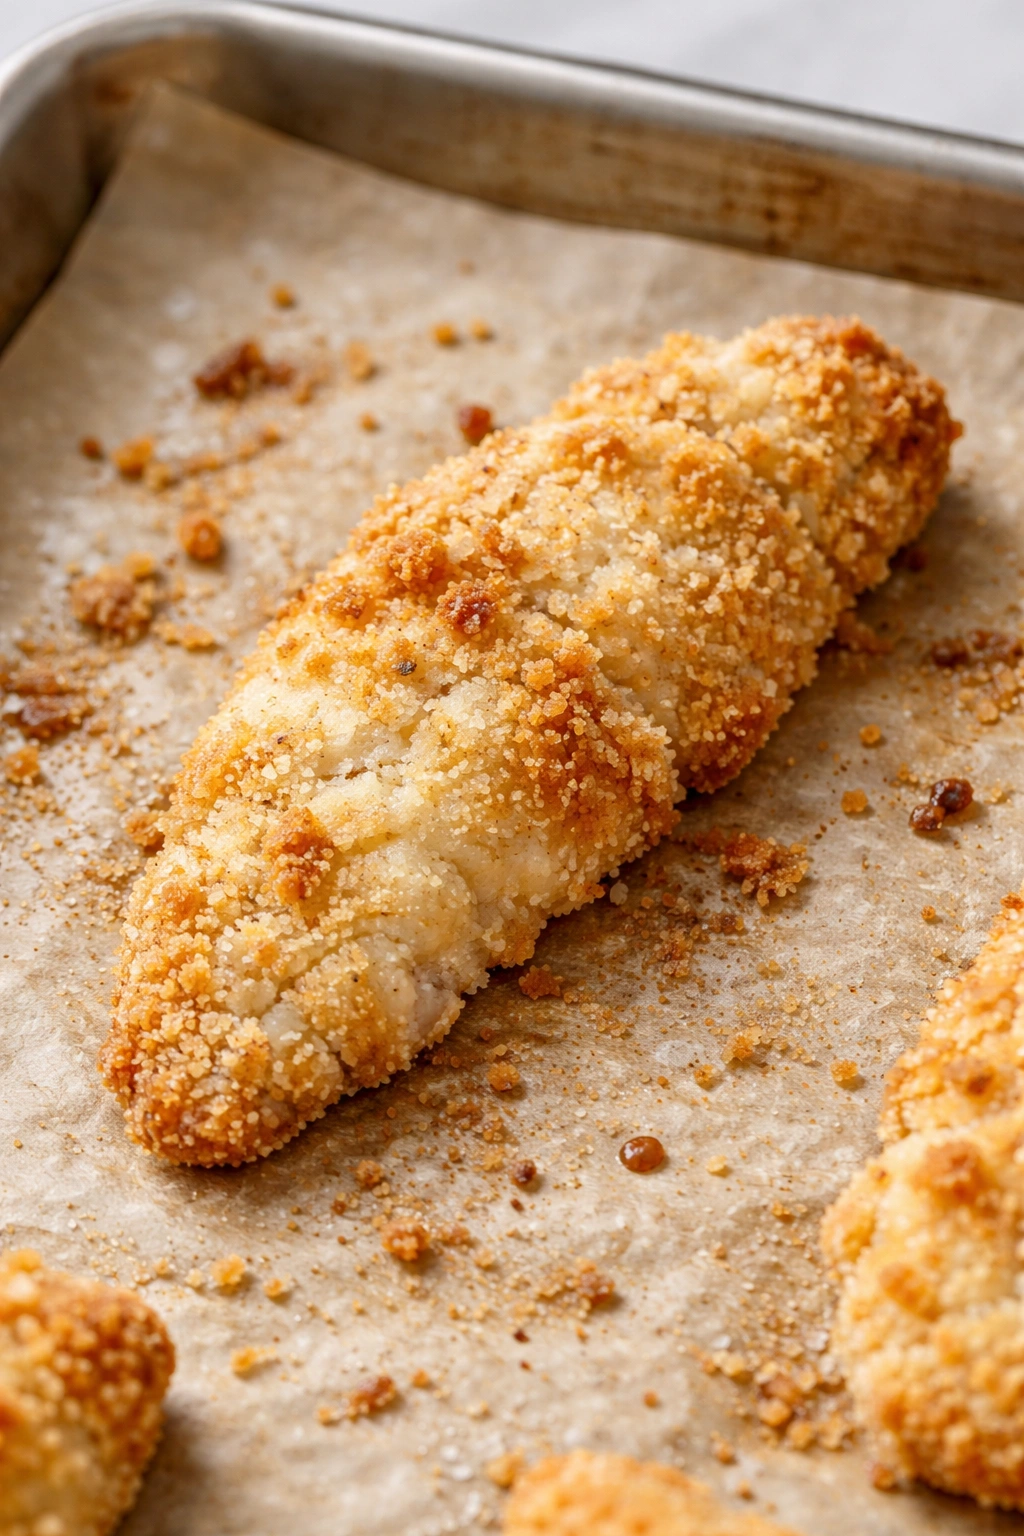
If you’re going to make one upgrade to your breading game, let it be this: ditch regular breadcrumbs and commit to panko. These Japanese-style breadcrumbs aren’t just marketing hype. They’re actually made from a different type of bread that’s baked instead of dried, resulting in larger, irregular crumbs that stay crunchier much longer.
When panko breadcrumbs hit dry, hot air in the oven, they toast rather than soften. Regular fine breadcrumbs pack too tightly together and tend to absorb moisture, turning them dense and chewy. Panko crumbs, with their larger size and airier structure, maintain that crispy bite even as they brown. They’re now available in every major supermarket, usually in the international aisle, and they cost just a fraction more than standard breadcrumbs.
You can find flavored varieties if you’d like, but unseasoned panko gives you complete control over the seasoning. You’ll add your own garlic powder, paprika, and salt right into the mixture, ensuring every bite is seasoned throughout. Some cooks swear by toasting the panko in a dry skillet before using it to create even more texture and color, and this technique genuinely works — though it’s optional if you’re in a hurry.
Setting Up Your Breading Station
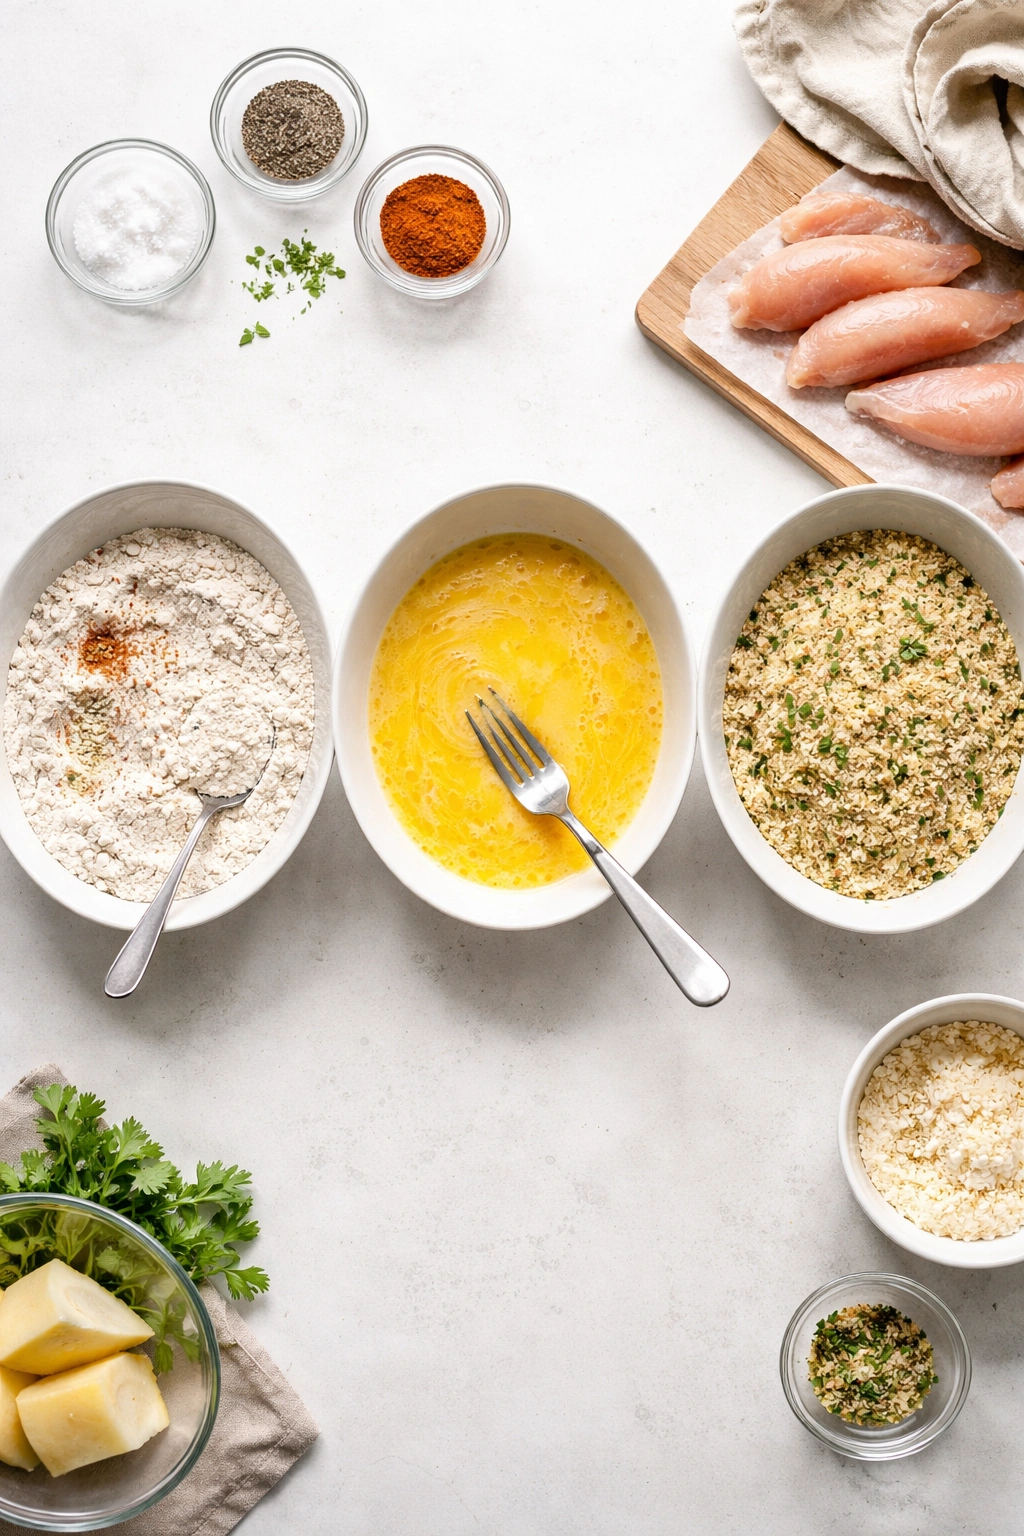
The difference between ending up with breaded hands and a clean kitchen lies entirely in setup. You’re about to work with three different textures: dry flour, wet egg, and dry breadcrumbs. If you mix them haphazardly, you’ll end up wearing most of the breading.
Arrange three shallow bowls in a row. The first holds your flour mixture — all-purpose flour combined with salt, pepper, garlic powder, and any other seasonings you’re using. The second bowl contains your binding liquid, which is typically a beaten egg (or egg mixed with a bit of mustard or mayo for extra flavor and insurance). The third holds your seasoned panko breadcrumbs.
Here’s the critical part: designate one hand as your “wet” hand and one as your “dry” hand. Your wet hand goes in the egg. Your dry hand goes in the flour and breadcrumbs. This prevents the situation where both your hands become completely encased in a sticky, crunchy mess. When you finish coating each tender, wipe your hands on a damp paper towel before the next one. It sounds simple, but this single technique transforms the whole process from frustrating to manageable.
Why Oven Temperature and Rack Placement Matter
Not all 400°F settings are created equal. Some home ovens run hot, others run cool. If you don’t already own one, investing in an inexpensive oven thermometer is absolutely worth it. Knowing that your oven is actually hitting the temperature you think you’re setting is the difference between perfectly crispy tenders and ones that come out pale or overdone.
When the oven is properly preheated to 400-425°F and you place those breaded tenders inside on a wire rack, what happens is this: the intense, dry heat immediately begins toasting the outer coating. Within the first five minutes, the panko starts to brown. The egg underneath sets and forms a seal, locking in the chicken’s moisture. The fat in the egg or whatever binding agent you used provides the medium through which the Maillard reaction happens, creating that golden color and complex, savory flavor.
If your oven temperature is too low, the coating dries before it browns, and you end up with a pale, hard shell instead of a golden, crispy one. If the temperature is too high, the outside browns so fast that the chicken inside doesn’t have time to cook through properly. The sweet spot is usually 400-425°F, with the chicken baking for somewhere between 15-25 minutes depending on thickness. A wire rack elevated above your baking sheet is non-negotiable here. It allows heat to circulate completely around the chicken, ensuring even crispiness on all sides.
The Three-Step Breading Technique Explained
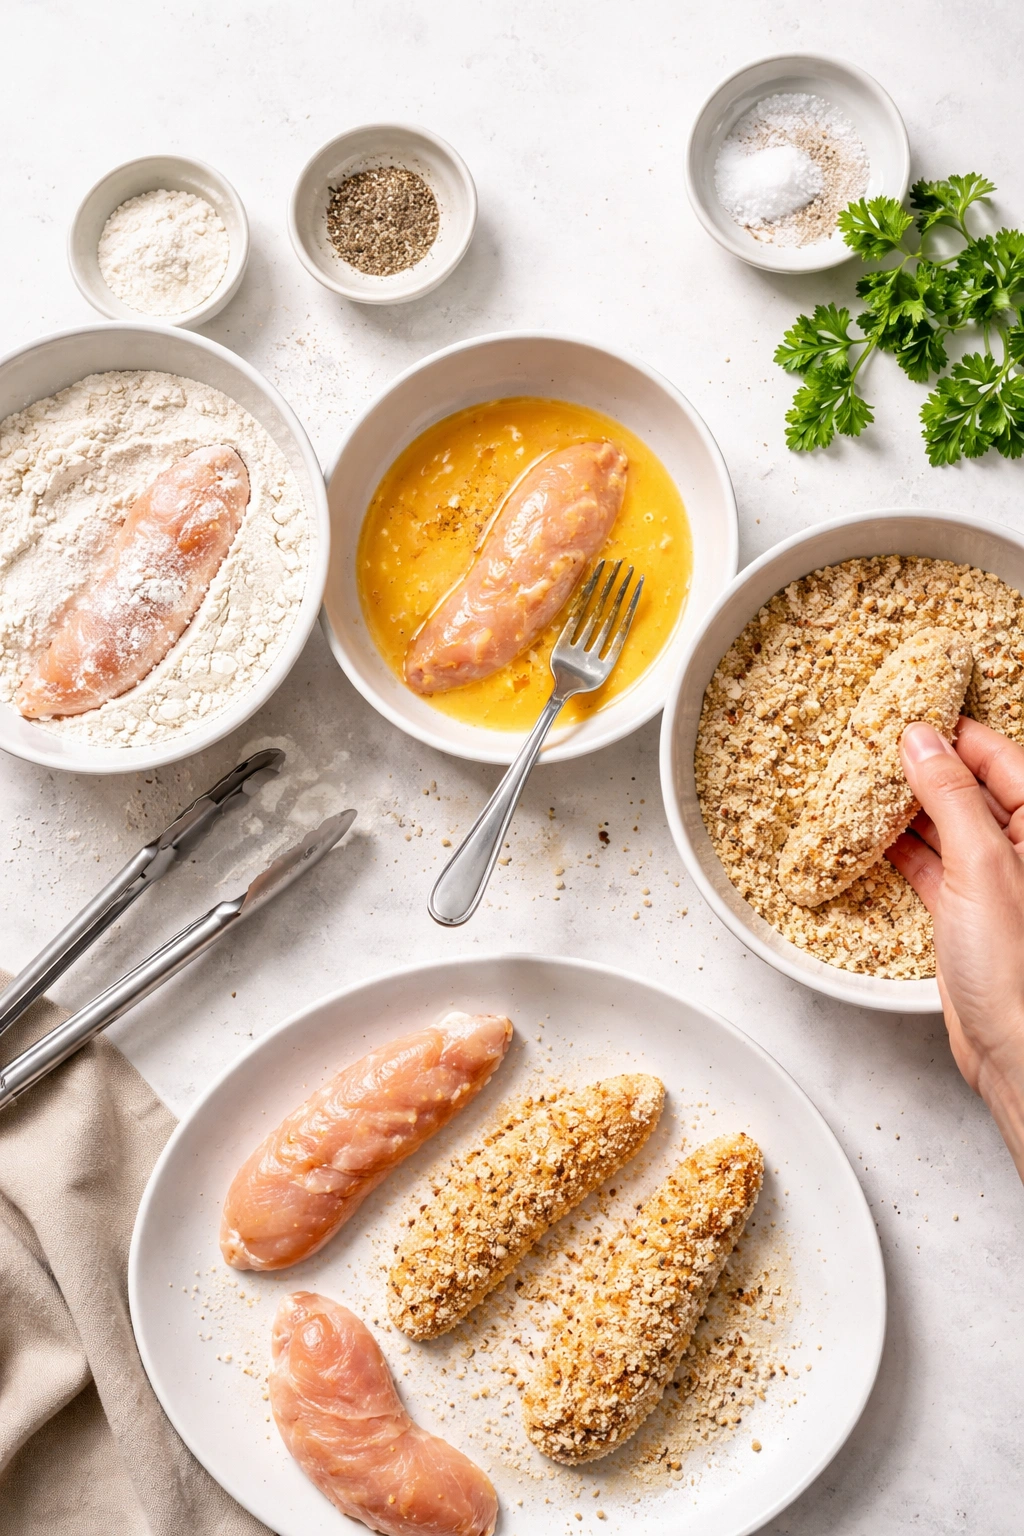
The traditional breading method — flour, then egg, then breadcrumbs — has been perfected because it actually works. The flour creates a dry base that helps the egg adhere. The egg acts as glue, and the breadcrumbs create the crunchy exterior. Don’t skip the flour step thinking you’ll speed things up. Without it, the egg sometimes slides off the chicken, and the breadcrumbs don’t stick as reliably.
Start with your chicken. Pat each piece completely dry with paper towels. Any surface moisture is the enemy of crispiness, so don’t skip this step. Dredge the dry chicken in the flour mixture, making sure every surface is lightly coated. Tap off any excess flour — you want a thin, even coating, not a thick layer that looks powdery.
Next, dip the floured chicken into your egg mixture. You only need to submerge it for a second or two. Just enough so that the egg clings to the flour. Let any excess egg drip back into the bowl. This is where people often make mistakes — they use too much egg, creating a thick, gluey coating that results in tough, heavy breading. A thin, even layer is all you need.
Finally, press the chicken into your breadcrumb mixture. The panko should stick to the damp egg, coating all surfaces. Gently press the breadcrumbs so they adhere firmly. You’re not smooshing the chicken, just making sure those crumbs won’t fall off during baking. Immediately transfer each breaded tender to your wire rack. Don’t let them sit and get soggy — the sooner they hit the heat, the better your results will be.
Pre-Toasting Your Breadcrumbs for Maximum Crunch
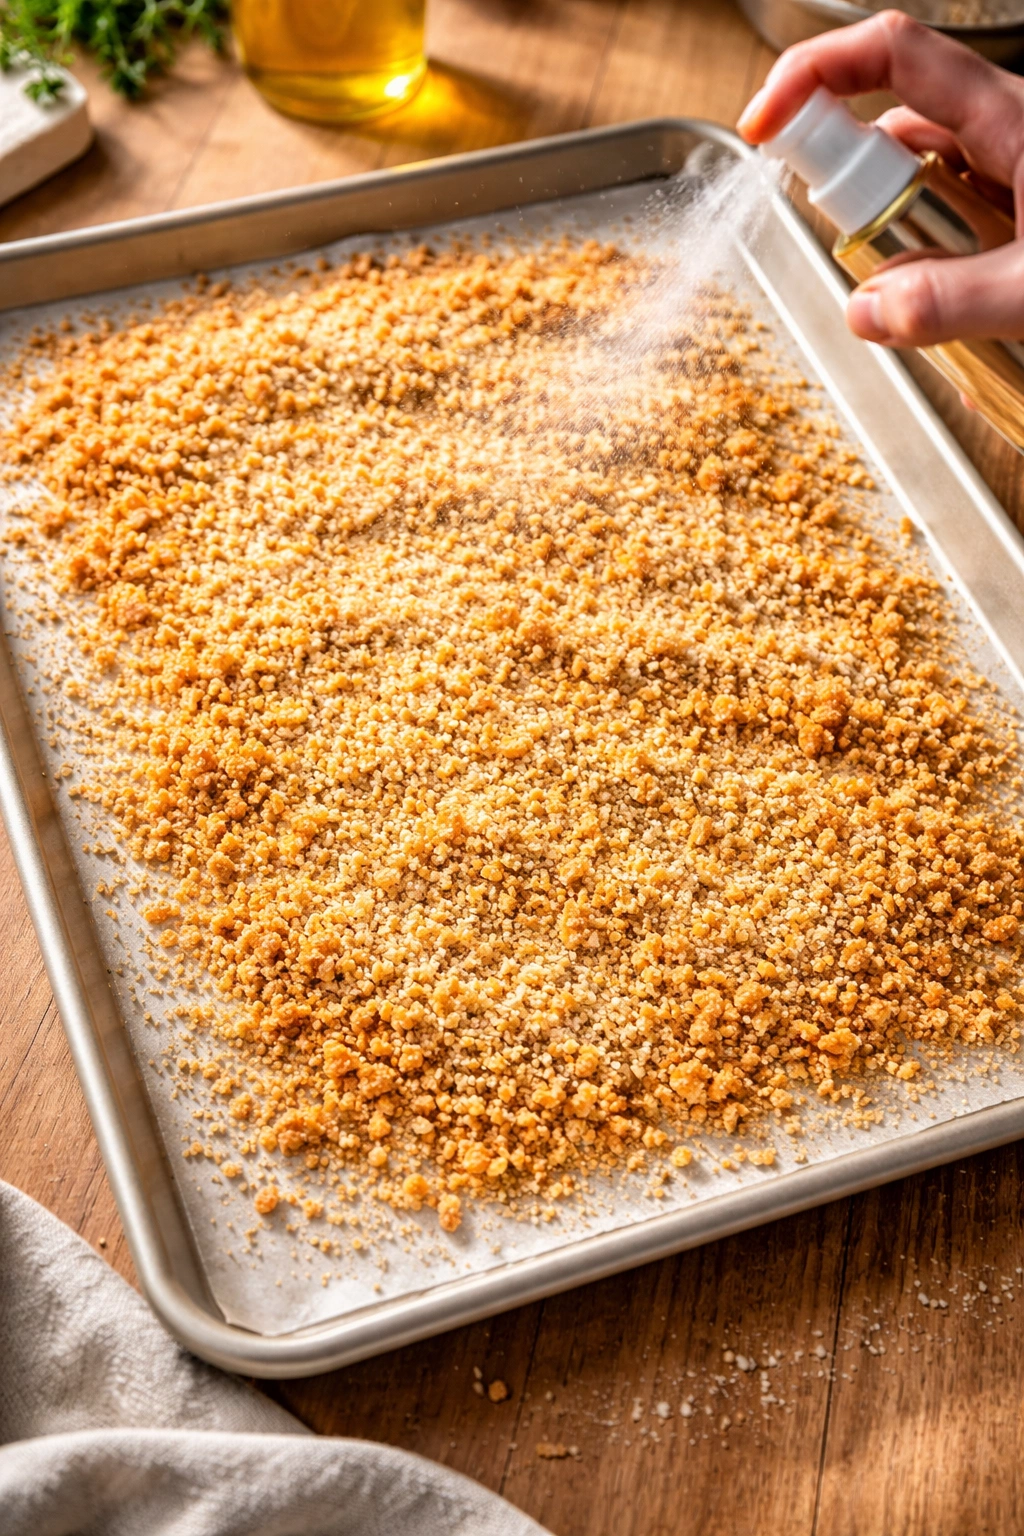
This is a pro-level technique that genuinely delivers results, and it’s completely optional — but if you want maximum, almost-fried-level crispiness, it’s worth knowing about. Spread your panko breadcrumbs on a baking sheet, lightly spray them with cooking oil (vertical spraying prevents them from blowing all over), and bake them at 375°F for 3-5 minutes until they’re just barely golden.
This toasting step does two things. First, it dries out the breadcrumbs even more, so they’re primed to crisp rather than soften. Second, it starts the Maillard reaction early, giving you deeper color and more toasted flavor even before the chicken hits the oven. The breadcrumbs go from pale tan to light golden, and that color continues deepening as the chicken bakes. The difference in crunchiness and color is noticeable, and once you’ve tried it, you’ll probably do it every time.
Yield: Serves 3 to 4 | Makes about 16 tenders
Prep Time: 20 minutes
Cook Time: 18 minutes
Total Time: 38 minutes
Difficulty: Beginner — The breading technique is straightforward, and you don’t need any special equipment beyond a wire rack and basic bowls.
Complete Ingredients List
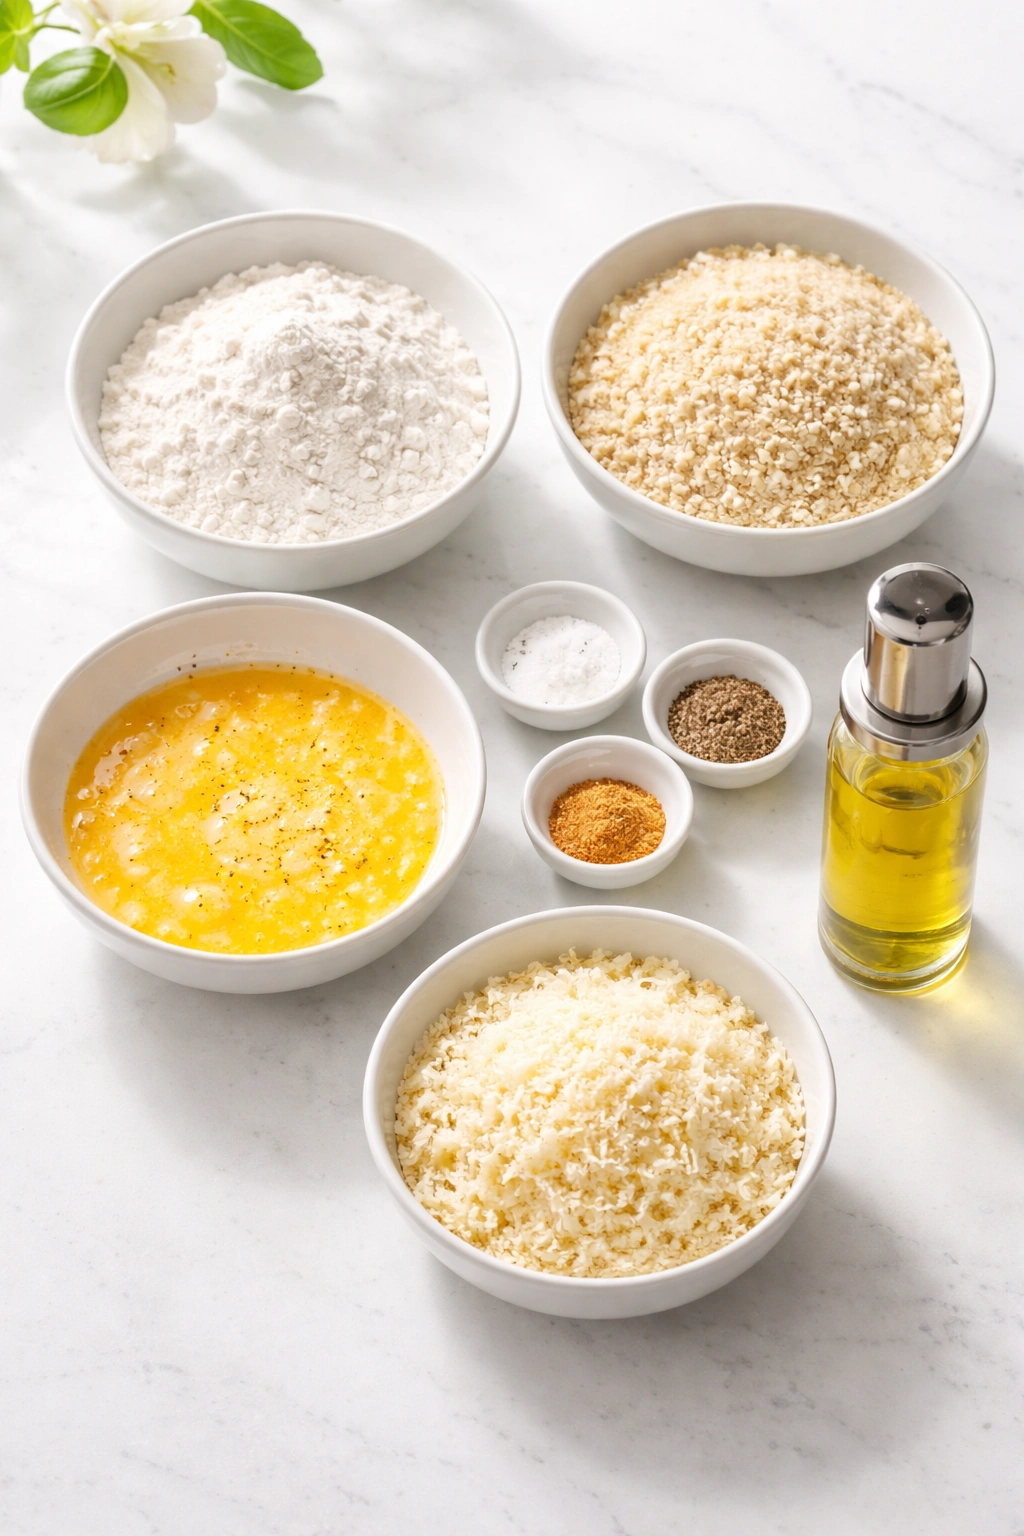
For the Breading Station:
- 1/2 cup all-purpose flour
- 1 teaspoon salt
- 1/2 teaspoon black pepper
- 1 teaspoon garlic powder
- 1/2 teaspoon onion powder (optional but recommended)
- 1/4 teaspoon smoked paprika (adds color and mild flavor)
- 2 large eggs, beaten
- 1 1/2 cups panko breadcrumbs (plain, unseasoned)
- 2 tablespoons grated Parmesan cheese (optional but adds savory depth)
- Cooking oil spray (avocado oil, olive oil, or neutral oil)
For the Chicken:
- 1 1/2 pounds chicken tenderloins (or boneless, skinless chicken breasts sliced into 1/2-inch-thick strips lengthwise)
- Salt and pepper for seasoning
Step-by-Step Instructions

Set Up and Prep:
-
Preheat your oven to 425°F (220°C) and position the rack in the center. Line a baking sheet with aluminum foil or parchment paper for easy cleanup, then place a wire rack on top. If you don’t have a wire rack, use the baking sheet directly and plan to flip the tenders halfway through baking — the bottom won’t be quite as crispy, but it’ll still be very good.
-
Pat each chicken tender completely dry with paper towels. Moisture is the enemy of crispiness, so take your time here and make sure every surface is dry.
-
Arrange your three shallow bowls in a row, setting up your breading station. In the first bowl, combine the flour, salt, pepper, garlic powder, onion powder, paprika, and Parmesan cheese. Whisk this mixture together with a fork and set it aside. In the second bowl, beat the eggs together with a fork until they’re completely uniform. In the third bowl, combine the panko breadcrumbs with a small pinch of salt. Give it a stir.
The Breading Process:
-
Working with one chicken tender at a time, dredge it in the flour mixture, making sure every surface is lightly coated. Tap off any excess flour — the goal is a thin, even coating that clings to the chicken without looking powdery or thick.
-
Immediately dip the floured tender into the beaten egg, submerging it for just a second or two and making sure all surfaces touch the egg. Let any excess egg drip back into the bowl — you don’t want a thick, gluey coating.
-
Press the chicken into the panko breadcrumb mixture, turning it gently to coat all sides. Use your fingers to lightly press the breadcrumbs so they adhere firmly to the egg underneath. Do not skip this pressing step — it keeps the breading from falling off during baking and ensures maximum crunchiness.
-
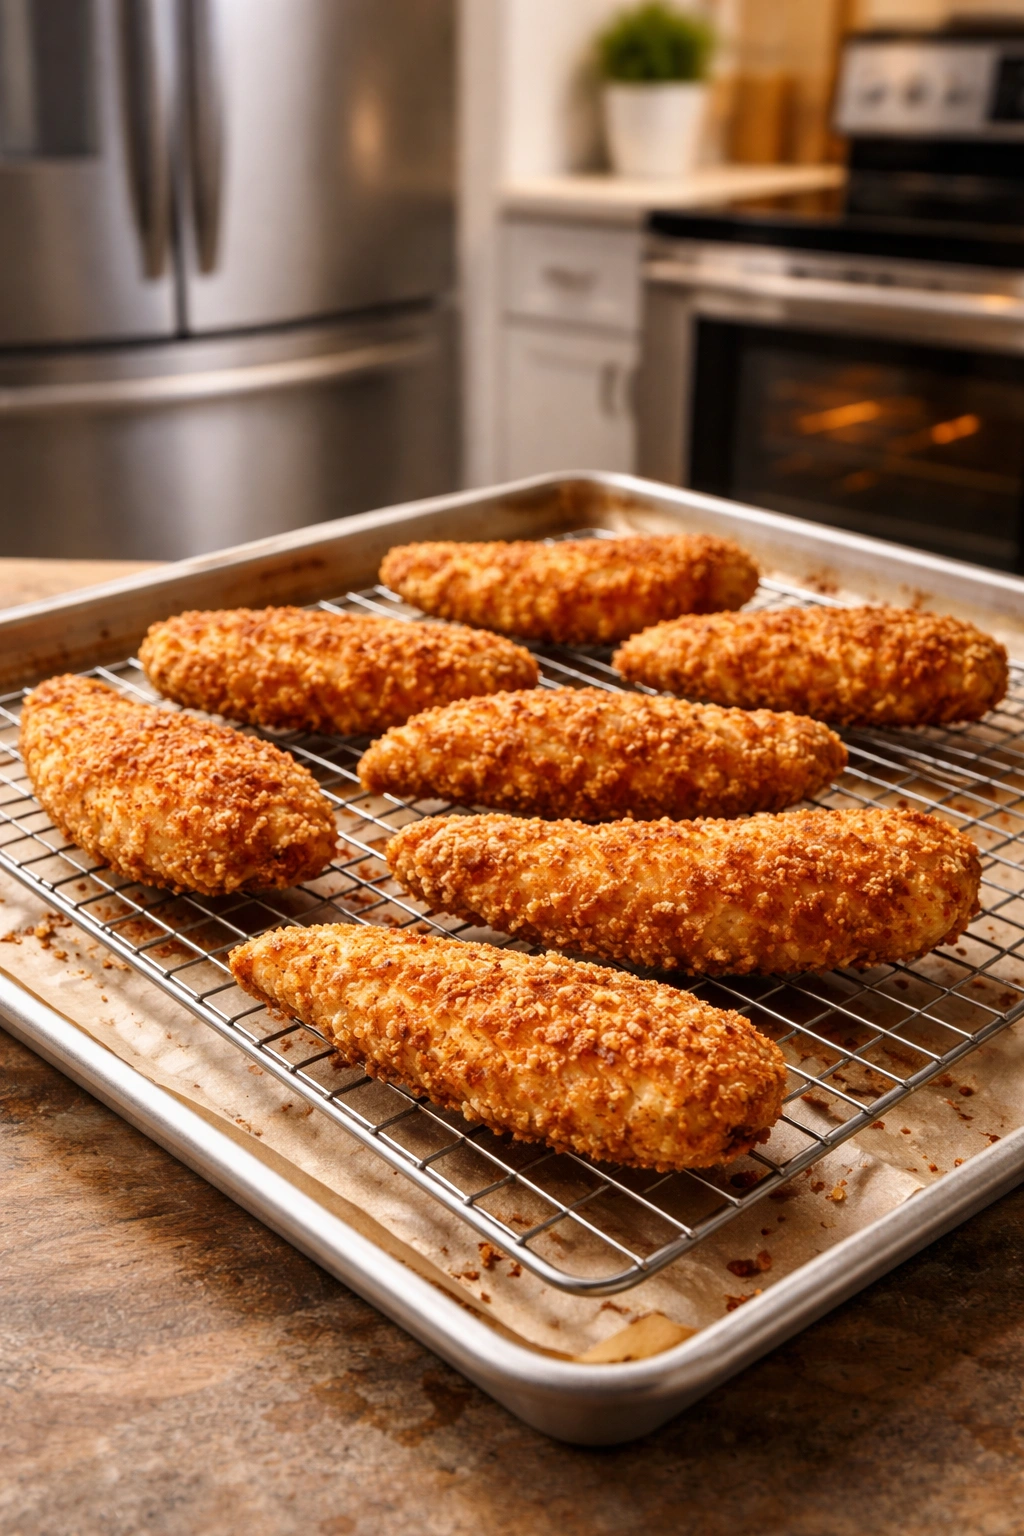
Immediately place the breaded tender on your prepared wire rack, leaving a little space between each piece so air can circulate freely underneath. Repeat the breading process with the remaining chicken tenders. Arrange them in a single layer with none of them touching each other.
The Critical Spray and Bake:
-
Lightly spray the top surface of each breaded tender with cooking oil spray. This is what allows the breading to brown and crisp in the oven. Do not skip this step. Bake without oil and you’ll get pale, hard breading instead of golden, crispy coating. Spray generously but briefly — you want a light coating of oil on the surface, not a puddle.
-
Place the baking sheet in your preheated oven and bake for 15 minutes. The tenders should be turning golden at this point.
-
Remove the sheet from the oven and carefully flip each tender over so the other side browns evenly. Spray the newly exposed top with another light coat of cooking oil.
-
Return to the oven and bake for another 3-5 minutes, until the second side is golden brown and crispy and an instant-read thermometer inserted into the thickest part of a tender reads 165°F (74°C) internally.
-
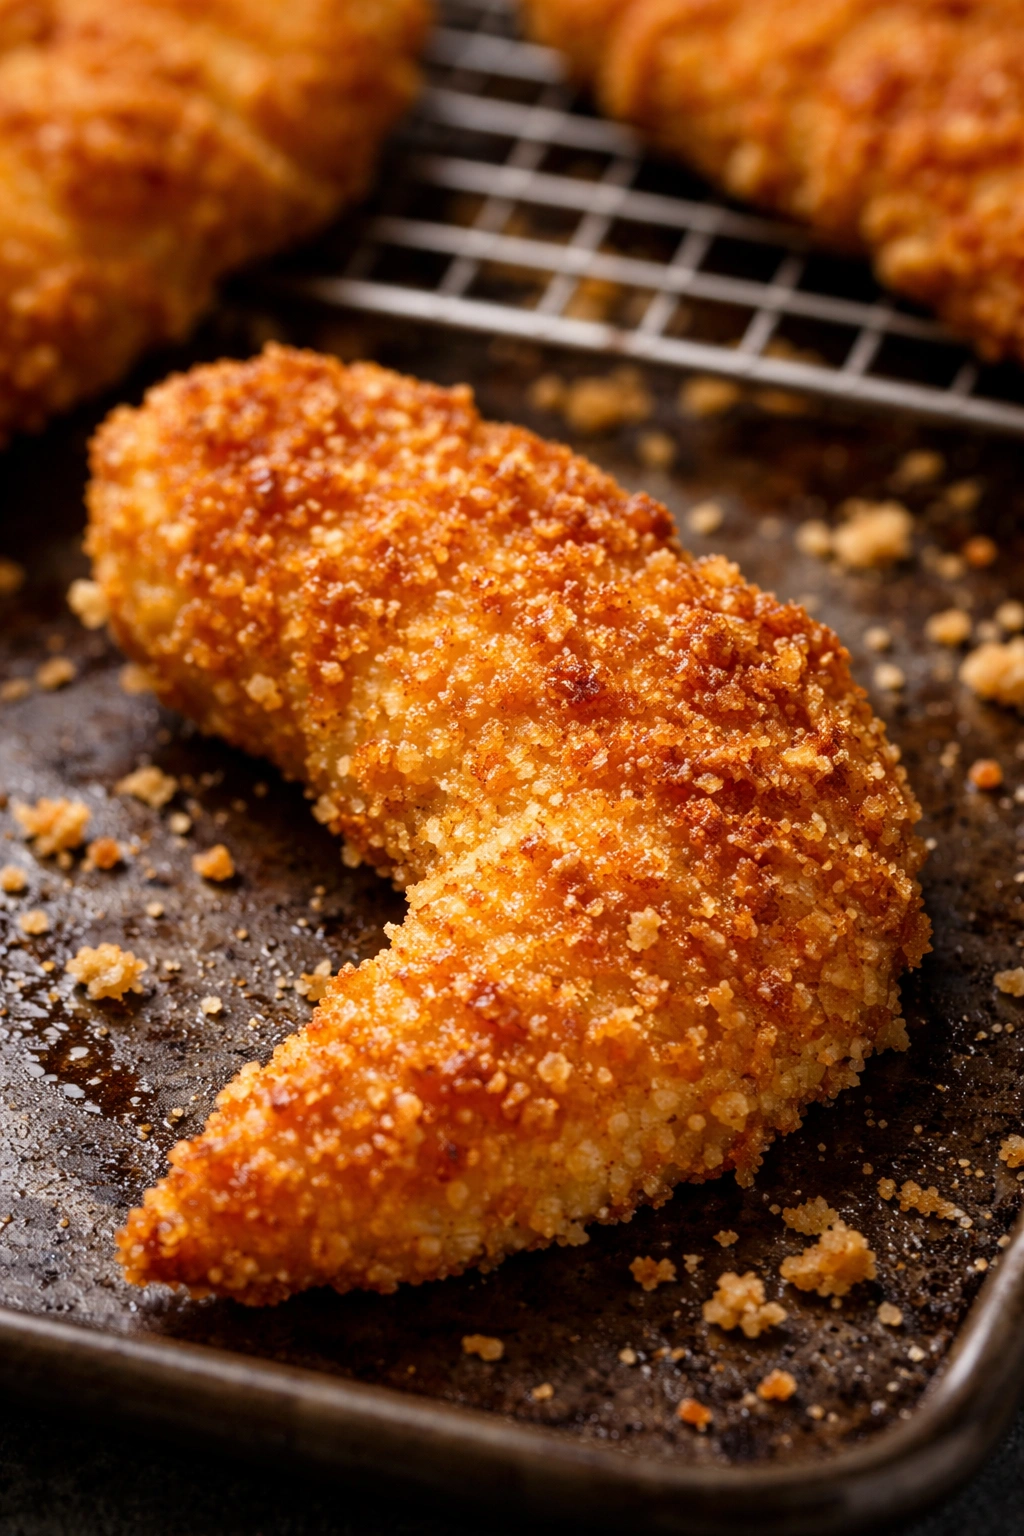
Remove from the oven and let the tenders rest on the rack for 2-3 minutes. This allows the exterior to set and the interior to finish cooking slightly if needed. Serve immediately while the coating is at peak crispiness, with your choice of dipping sauce.
Pro Tips for Perfect Results Every Time
Consistency is your friend. If you’re slicing your own chicken breasts into strips, try to make each piece roughly the same thickness — around 1/2 to 3/4 inch. Uniform pieces cook at the same rate, meaning no dry edges and no undercooked centers. Chicken tenderloins are already uniform in size, which is why they’re such a great choice for this recipe.
Room temperature matters. Take your chicken out of the refrigerator about 15 minutes before breading. Chicken that starts at room temperature cooks more evenly than cold chicken, which can have a cold center by the time the outside is golden. It’s a small detail, but it matters.
Don’t crowd the pan. If you’re making a larger batch, resist the urge to squeeze more tenders onto the same baking sheet. Crowding prevents air from circulating, which means the bottoms steam instead of crisp. Make them in batches if you need to. Your first batch will be done and ready to serve while you’re cooking the second.
Invest in an instant-read thermometer. The best way to know when chicken is safely cooked is to check the internal temperature, not guess based on appearance. Once it hits 165°F, you’re done. You don’t need to cook it any longer, and cooking it longer only dries it out. A simple digital thermometer costs less than ten dollars and takes the guesswork out entirely.
The oven thermometer is worth it too. Many home ovens run hotter or cooler than they claim, especially older ones. An oven thermometer lets you verify that you’re actually baking at 425°F and not 400°F or 450°F. The difference is noticeable in the final product.
Breading can be done ahead. If you want to do prep work in the morning and cook in the evening, you can bread the chicken tenders, arrange them on a baking sheet, cover them loosely with plastic wrap, and refrigerate for several hours. Just before baking, give them that crucial oil spray and bake as directed. The breading actually sticks better if it’s had time to set in the fridge.
Common Mistakes That Ruin Crispiness
Too little oil. This is the number-one reason baked chicken tenders come out disappointing. Without enough fat, the breading can’t brown properly. It dries instead of crisps. The coating may turn hard and pale rather than golden and crispy. Even if you’re trying to reduce fat intake, don’t skip the oil spray — you’re using a tiny amount, and it makes all the difference.
Skipping the flour step. Some recipes try to simplify the process by going straight from chicken to egg to breadcrumbs. Don’t do this. The flour layer creates better adhesion. Without it, the breadcrumbs sometimes slide right off during baking, leaving you with bare chicken surrounded by loose panko crumbs.
Wet chicken. If your chicken isn’t completely dry before breading, the moisture makes the egg mixture too wet, which prevents proper crumb adhesion and results in soggy breading. Paper towels are your friend here.
Wrong temperature. Baking at 375°F instead of 425°F is a common mistake. The lower temperature gives moisture time to escape through the coating, leaving you with dry chicken. The higher temperature sears the outside quickly, sealing in the moisture. 400-425°F is the sweet spot.
No wire rack. The difference between tenders baked on a rack versus directly on a sheet is dramatic. The rack allows air to circulate underneath, creating even crispiness on all sides. Without it, the bottom steams, and you end up with a crispy top and a chewy bottom.
Overcrowding. Packing tenders too close together traps steam and prevents proper browning. Give each piece breathing room.
Flavor Variations You Can Try
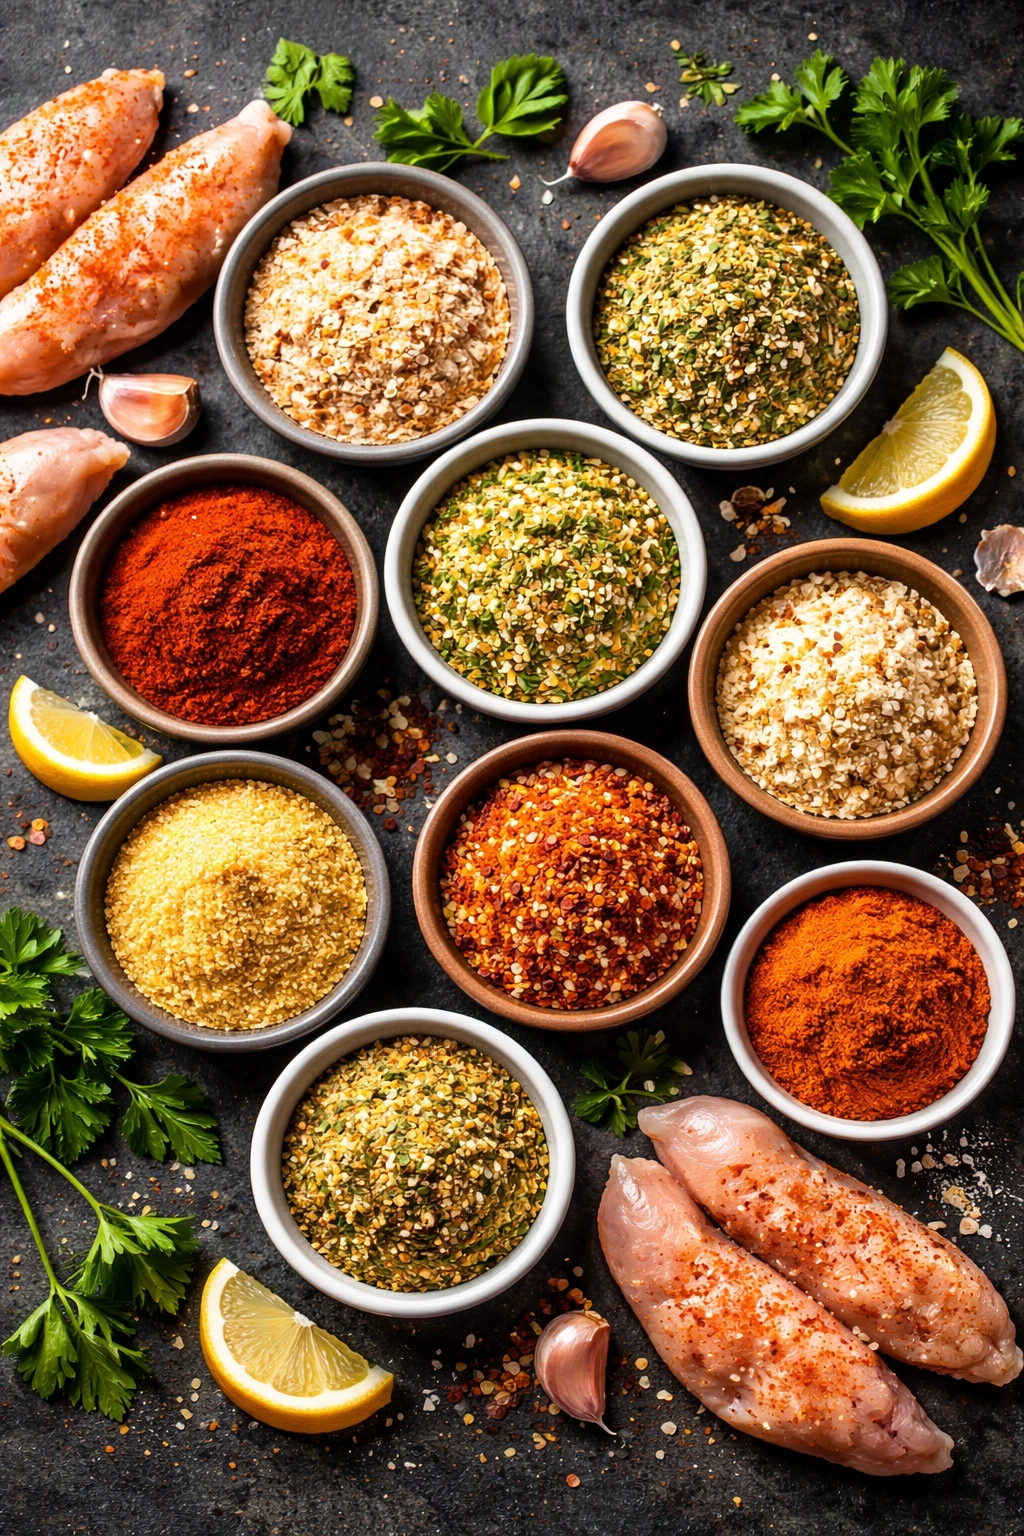
Once you’ve mastered the classic version, you can play around with the seasoning blend to match whatever you’re in the mood for. The possibilities are genuinely endless.
Italian-style: Add 1/2 teaspoon of Italian seasoning and 1/4 teaspoon of dried oregano to your flour mixture. Use 1/4 cup grated Parmesan and 1/4 cup finely grated mozzarella mixed into your panko. Serve with marinara sauce and fresh mozzarella slices melted on top if you want to get fancy.
Spicy cayenne: Add 1/4 teaspoon of cayenne pepper and 1/8 teaspoon of white pepper to your flour mixture for a gentle heat that builds as you eat. Serve with ranch or cooling tzatziki sauce to balance the spice.
Smoky paprika with brown sugar: Increase the smoked paprika to 1 full teaspoon and add 1 teaspoon of brown sugar to your flour mixture. The brown sugar creates a deeper caramelization and subtle sweetness that’s genuinely craveable.
Garlic and herb: Use 2 teaspoons of garlic powder instead of 1, add 1/2 teaspoon each of dried thyme and dried rosemary, and mix in 1/4 teaspoon of dried sage. This feels almost like chicken schnitzel from a European bistro.
Ranch seasoning: Combine 1 teaspoon garlic powder, 1/2 teaspoon onion powder, 1/2 teaspoon dried dill, 1/2 teaspoon dried chives (or parsley if you can’t find chives), and a pinch of dried thyme in your flour mixture. It tastes like classic ranch dressing in crispy form.
Lemon parmesan: Add the zest of 1 fresh lemon and 1/2 teaspoon of dried thyme to your flour. Mix 1/3 cup grated Parmesan into your panko. The lemon zest creates brightness that cuts through the richness beautifully.
Cereal crust: If you have Chex cereal, crushed cornflakes, or even saltines on hand, you can substitute up to 1/2 cup of the panko with crushed cereal for extra crunch and texture. The cereal creates larger, more dramatic crumb pieces that feel incredibly satisfying to bite through.
Storage and Reheating Instructions
Refrigerator: Let cooked tenders cool completely on the wire rack — this prevents them from steaming and losing crispiness. Transfer them to an airtight container and refrigerate for up to 4 days. They’ll stay fresh and safe, though the coating will gradually soften over that time.
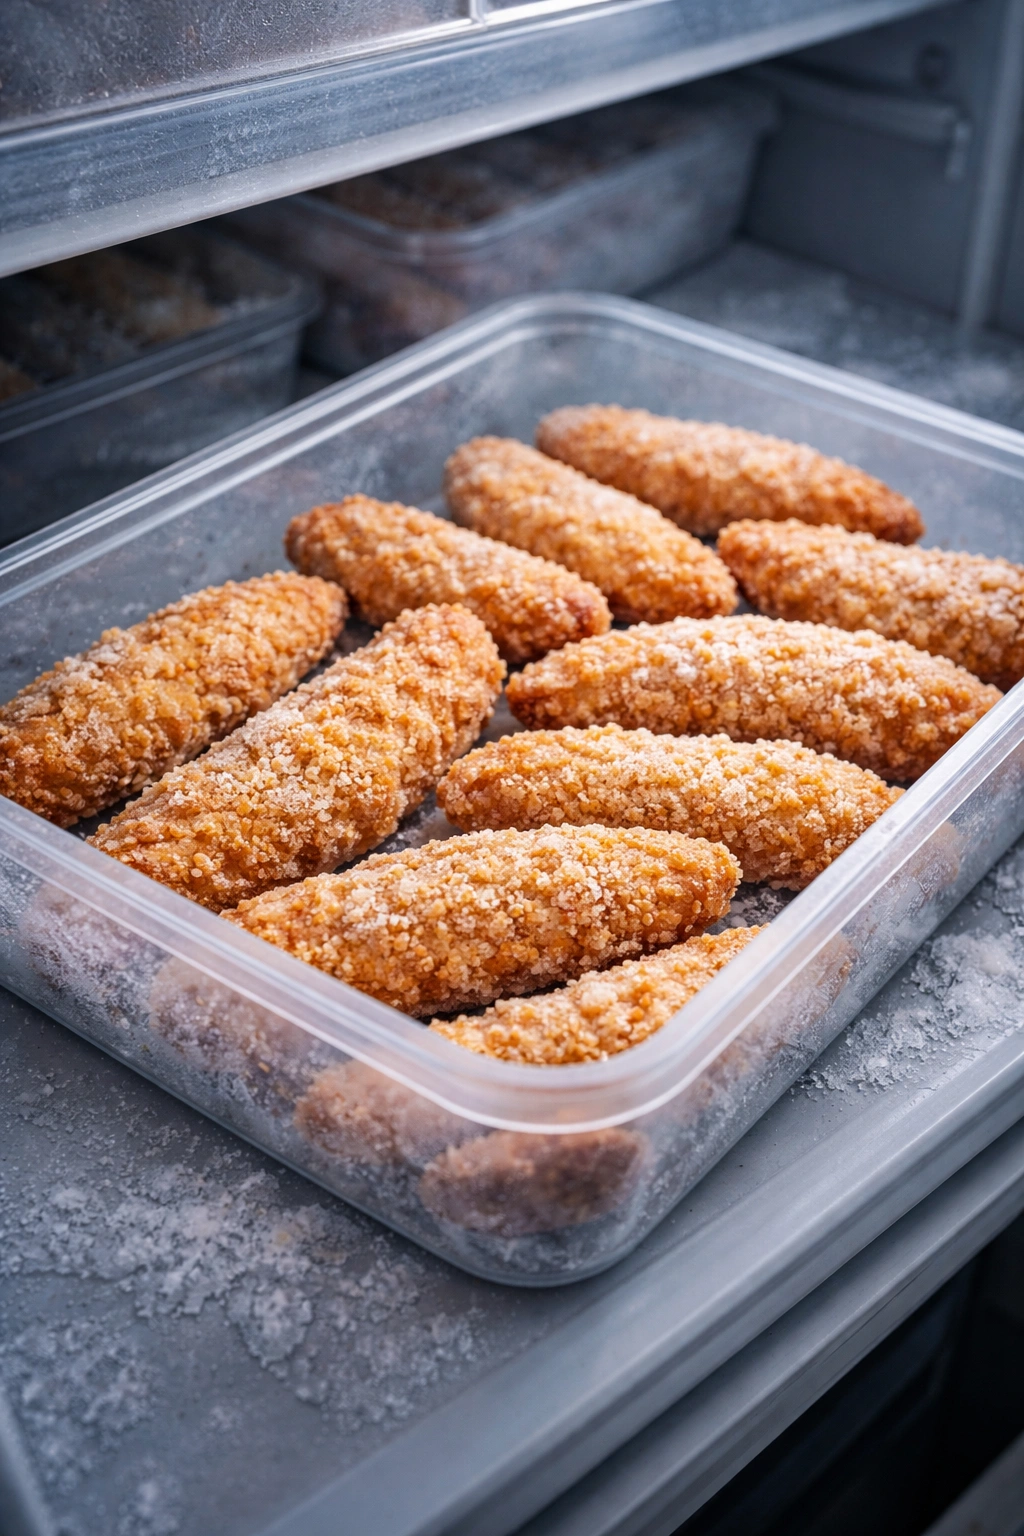
Freezer: Cool the tenders completely, then wrap each one individually in foil or store them in a single layer in a freezer-safe container. They’ll keep for up to 3 months. Do not freeze them before baking — testing this has shown that raw breaded tenders don’t cook as evenly from frozen and often end up with dry exteriors and undercooked centers. It’s much better to bake them fresh, then freeze the cooked tenders.
Reheating for maximum crispiness: This is important: never, ever microwave leftover baked chicken tenders if you want to maintain crispiness. Microwaves steam food, which makes the coating soft and chewy. Instead, preheat your oven to 350°F, place the tenders on a wire rack, and bake for 5-8 minutes until they’re warmed through and the coating has re-crisped. You can also use an air fryer at 375°F for 4-5 minutes, which actually re-crisps the breading beautifully. If you have a toaster oven, that works too — just don’t use a microwave.
Serving Ideas and Pairing Suggestions
The beauty of homemade baked chicken tenders is their versatility. They work equally well as a standalone dinner with sides, chopped into salads, or nestled into sandwiches.
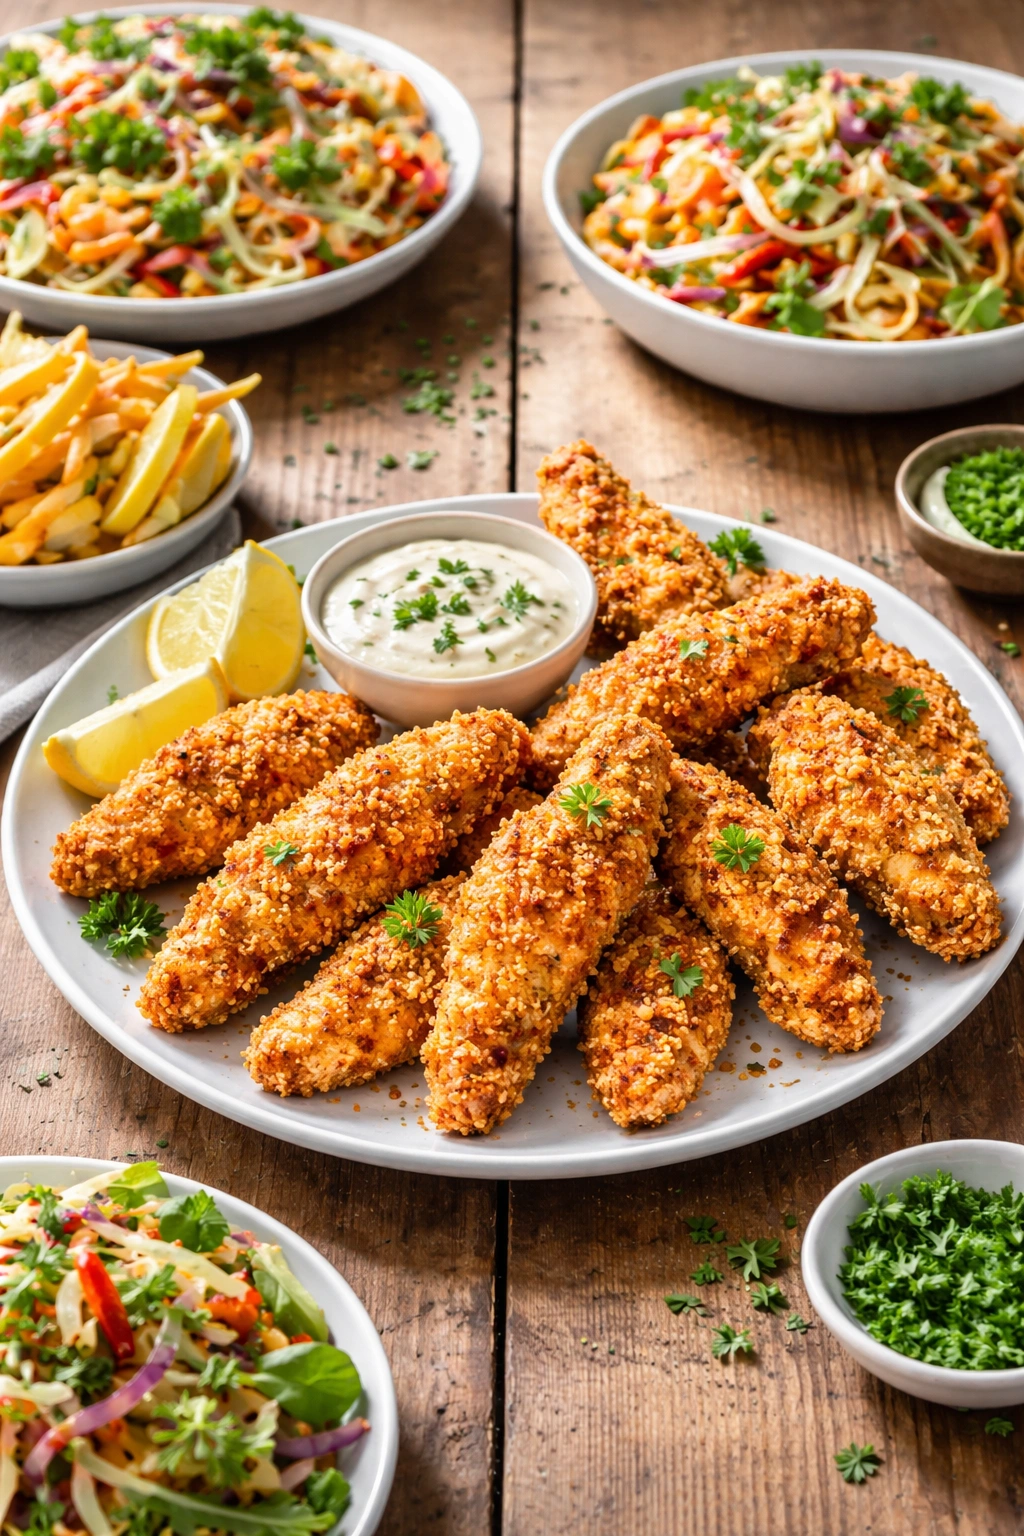
The classic pairing: Serve with crispy baked fries or sweet potato wedges and your choice of dipping sauce. A simple coleslaw on the side adds freshness and texture contrast that feels restaurant-quality.
In wraps and sandwiches: Slice the tenders and toss them into a whole-wheat wrap with lettuce, tomato, avocado, and a spread of mayo or mustard. Or serve them on slider buns with a drizzle of hot honey and crispy bacon for something genuinely special.
Chopped over salads: Cut cooled tenders into bite-sized pieces and scatter them over a green salad with ranch dressing, or a warm grain bowl with roasted vegetables and a tangy vinaigrette. They add protein and crunch to any bowl.
With pasta: Serve the tenders alongside buttered noodles or tossed into a creamy tomato sauce with fresh basil and mozzarella for a quick, homemade version of chicken parm. Much faster than the breaded version, with similar satisfaction.
With rice and vegetables: Arrange tenders around a bed of brown rice or quinoa with roasted broccoli and a simple lemon-garlic sauce. Genuinely balanced and satisfying.
As appetizers: Cut tenders into thirds before breading and baking — you’ll get chicken nuggets instead of full-length tenders. Serve on a platter with an array of dipping sauces at parties or gatherings. They disappear fast.
Make-Ahead and Freezing Strategies
If you want to maximize convenience, you have a few good options.
Prep ahead approach: Bread the chicken tenders in the morning and refrigerate them until dinner. Brush them with oil spray right before baking. This works beautifully because the breading has had time to set, and the tenders bake more evenly than freshly breaded ones.
Batch baking: Make a full recipe when you’re already using the oven for something else. Bake the tenders while whatever else you’re cooking finishes up. Cool them completely, then freeze in a single layer in a freezer-safe container. When you want dinner in minutes, reheat them from frozen at 350°F for 8-10 minutes until they’re warmed through and crispy again.
Breading and freezing (the controversial approach): Some cooks swear by freezing raw, breaded tenders, then baking them without thawing. This does work, but testing shows the results are less consistent than baking fresh or reheating cooked frozen tenders. If you go this route, add 5-10 minutes to the baking time and use an instant-read thermometer to check doneness carefully.
Sunday meal prep: Make a big batch on your day off, portion them out into containers with different dipping sauces, and grab them throughout the week for quick lunches or dinners. They’re perfect for this kind of prep work.
Key Takeaways
Making crispy baked chicken tenders at home isn’t about following a complicated recipe with special equipment. It’s about understanding why each step matters: the panko breadcrumbs for maximum crunch, the three-step breading process for adherence, the wire rack for even cooking, the proper oven temperature for browning, and the crucial oil spray for achieving that golden exterior that tastes like it came from a deep fryer.
You’re getting restaurant-quality results without the mess, the oil disposal problem, or the safety concerns of deep frying. These tenders reheat well, freeze beautifully, come together quickly, and taste genuinely delicious — not like a healthy compromise, but like the real thing. Once you’ve made them this way, you’ll understand why so many cooks have abandoned frozen versions entirely. The homemade version is faster, cleaner, and infinitely more satisfying.