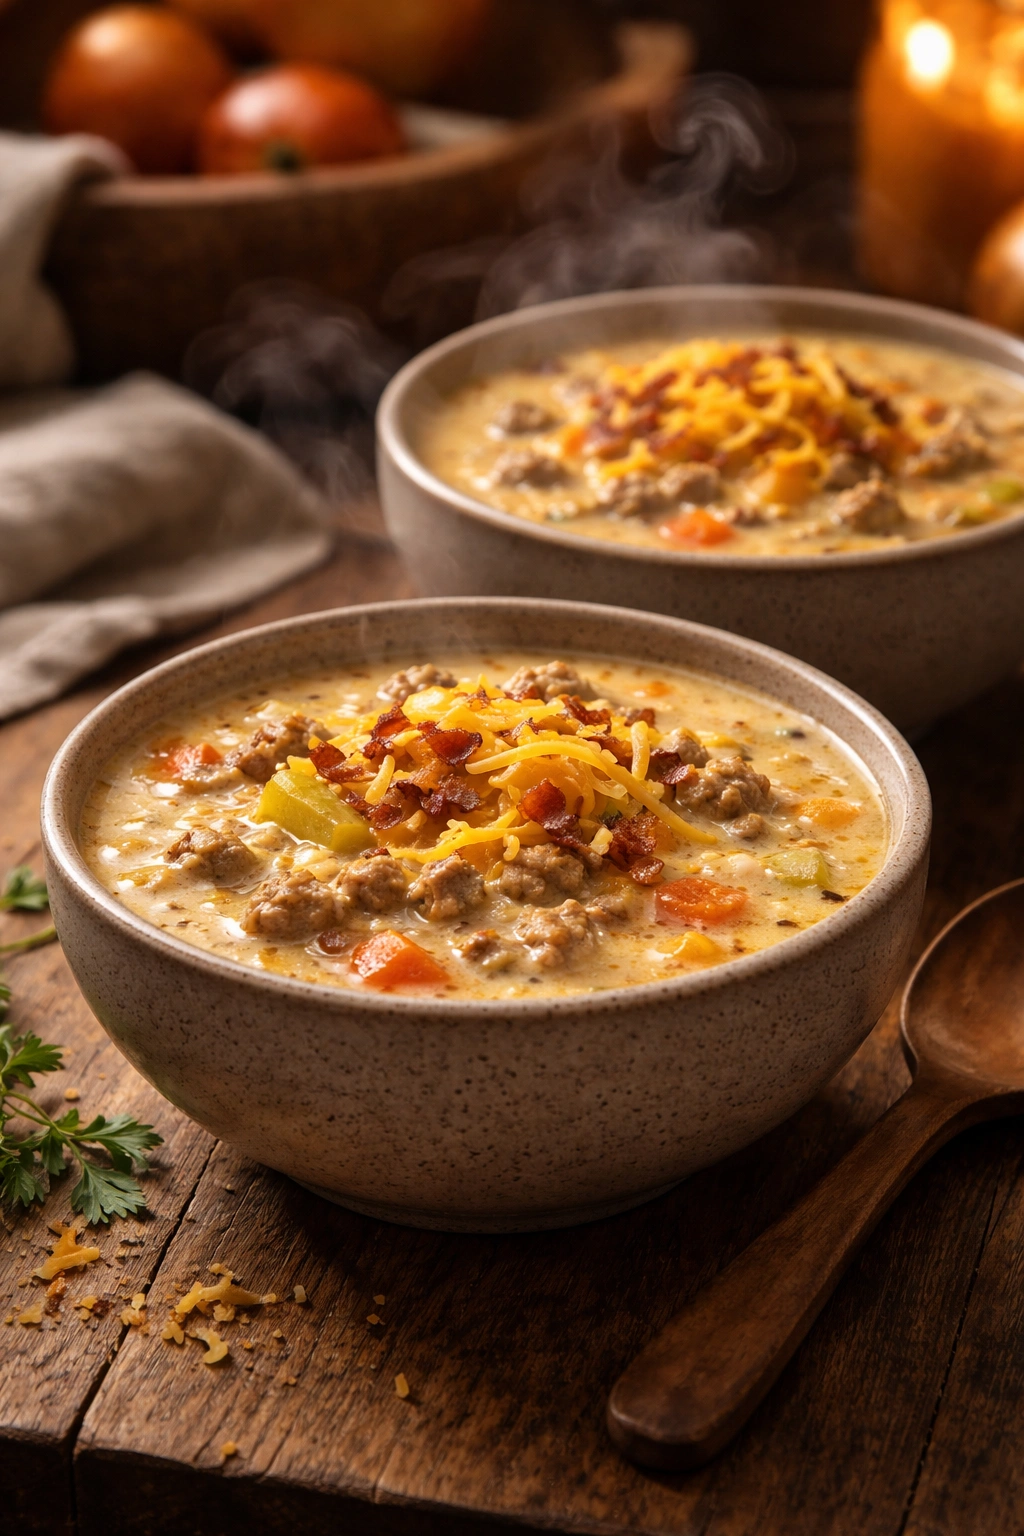
There’s something magical about a bowl of cheeseburger soup that makes everyone at the table smile—kids who normally pick at their vegetables dive in without hesitation, and adults get that nostalgic comfort food satisfaction without having to fire up the grill. This recipe captures everything you love about a classic diner cheeseburger: the savory ground beef, sharp cheddar cheese, crispy bacon undertones, and even optional pickles for that authentic burger bite. But instead of a sandwich, it’s a rich, creamy, warming soup that comes together in under an hour with pantry staples you probably already have on hand.
What makes this particular version special is how it balances indulgence with accessibility. You’re not dealing with fancy equipment or hard-to-find ingredients. The technique is straightforward enough for a weeknight when you’re tired but want something that tastes like you actually spent time on it. The soup has a naturally creamy base from melted cheddar and just a touch of milk or cream, so it doesn’t taste like it’s missing anything even though it’s lighter than you’d expect. Most importantly, it’s the kind of dish that tastes even better the next day as the flavors meld together, which makes it perfect for meal prep or feeding a crowd.
Whether you’re looking for an easy dinner solution that your whole family will actually request, a make-ahead option for busy weeks, or a crowd-pleasing soup to bring to a potluck, this recipe delivers. It’s the kind of comfort food that becomes a regular rotation in your kitchen, something you’ll make over and over because it just works. Let’s walk through exactly how to make it, plus all the tricks and adaptations that make it truly foolproof.
Why This Soup Becomes a Family Favorite
There’s psychology behind why this soup wins over even the pickiest eaters. Kids recognize the “burger” connection immediately—there’s something about the name that makes them curious instead of suspicious. Adults appreciate that it tastes indulgent without the afternoon slump that comes from a heavy cheeseburger. The soup sits somewhere between comfort food and actual nutrition, which means you’re not apologizing for what you’re serving.
The texture is another key to its popularity. It’s creamy and hearty without feeling heavy or greasy. Unlike soups that are mostly broth with scattered ingredients, this one has enough body from the potatoes and cheese that it feels substantial and satisfying. A single bowl often feels like a complete meal, which is exactly what you want on a cold evening when you need something warming and filling.
The flavor profile is instantly familiar yet interesting enough to keep people coming back. You get savory beef, tangy cheese, sweet undertones from the vegetables, and optional pickles or bacon adding layers of complexity. It’s not a soup that tries to be something fancy—it’s honest comfort food done really, really well. That authenticity is what makes it work across age groups and preferences.
What Makes This Cheeseburger Soup Different
This isn’t a thick, gloppy cheese soup with random chunks. Instead, it’s built with proper technique and balanced ingredients that create something elegant in its simplicity. The secret starts with how you thicken the soup: most recipes use a traditional roux made separately in a skillet, which gets whisked into the broth to create a smooth, velvety base. This approach prevents lumps and gives you much better control over the final consistency than just stirring flour directly into the pot.
The cheese choice matters more than you might think. While some recipes use Velveeta (which does melt incredibly smoothly), using freshly grated real cheddar cheese—preferably a sharp variety—creates deeper flavor and a more sophisticated taste. Real cheddar melts beautifully when you follow the right steps, and it’s worth the small extra effort. The key is adding it off the heat so it doesn’t separate or become grainy.
This version also includes the little touches that separate a good soup from a great one: a splash of sour cream stirred in at the end for tanginess and creaminess, optional crispy bacon for textural contrast, and even pickles as a garnish that echoes the burger experience. These aren’t fancy additions—they’re the same toppings you’d pile on an actual cheeseburger, just adapted for soup form. That’s what makes it feel authentic rather than like a gimmick.
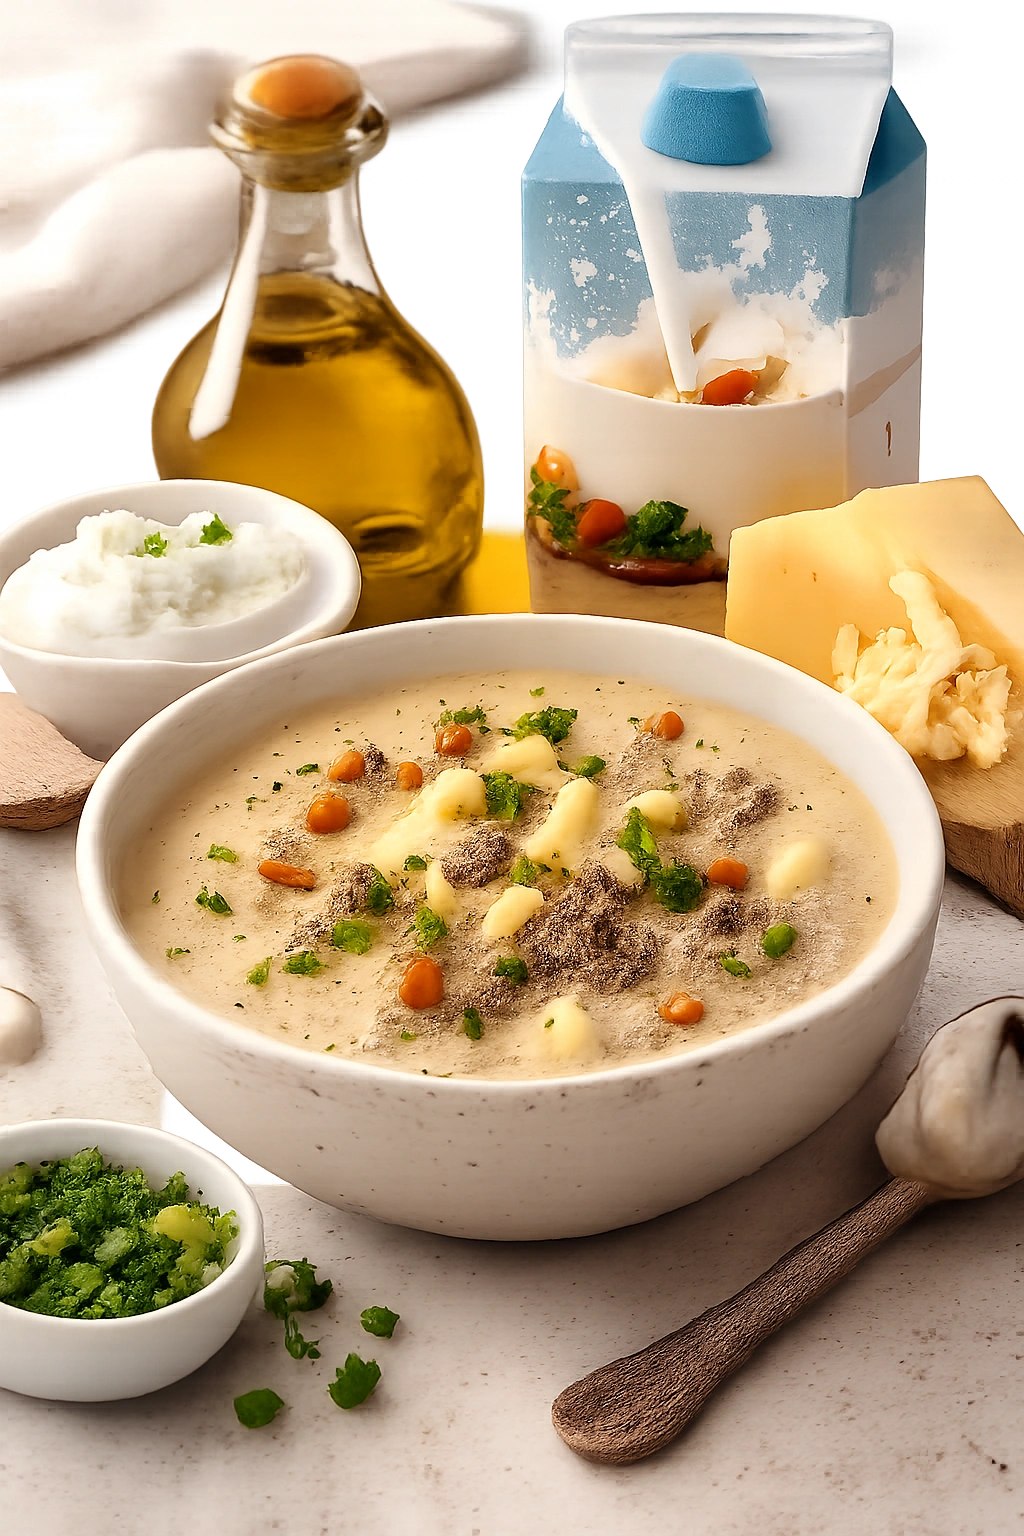
The Essential Ingredients Explained
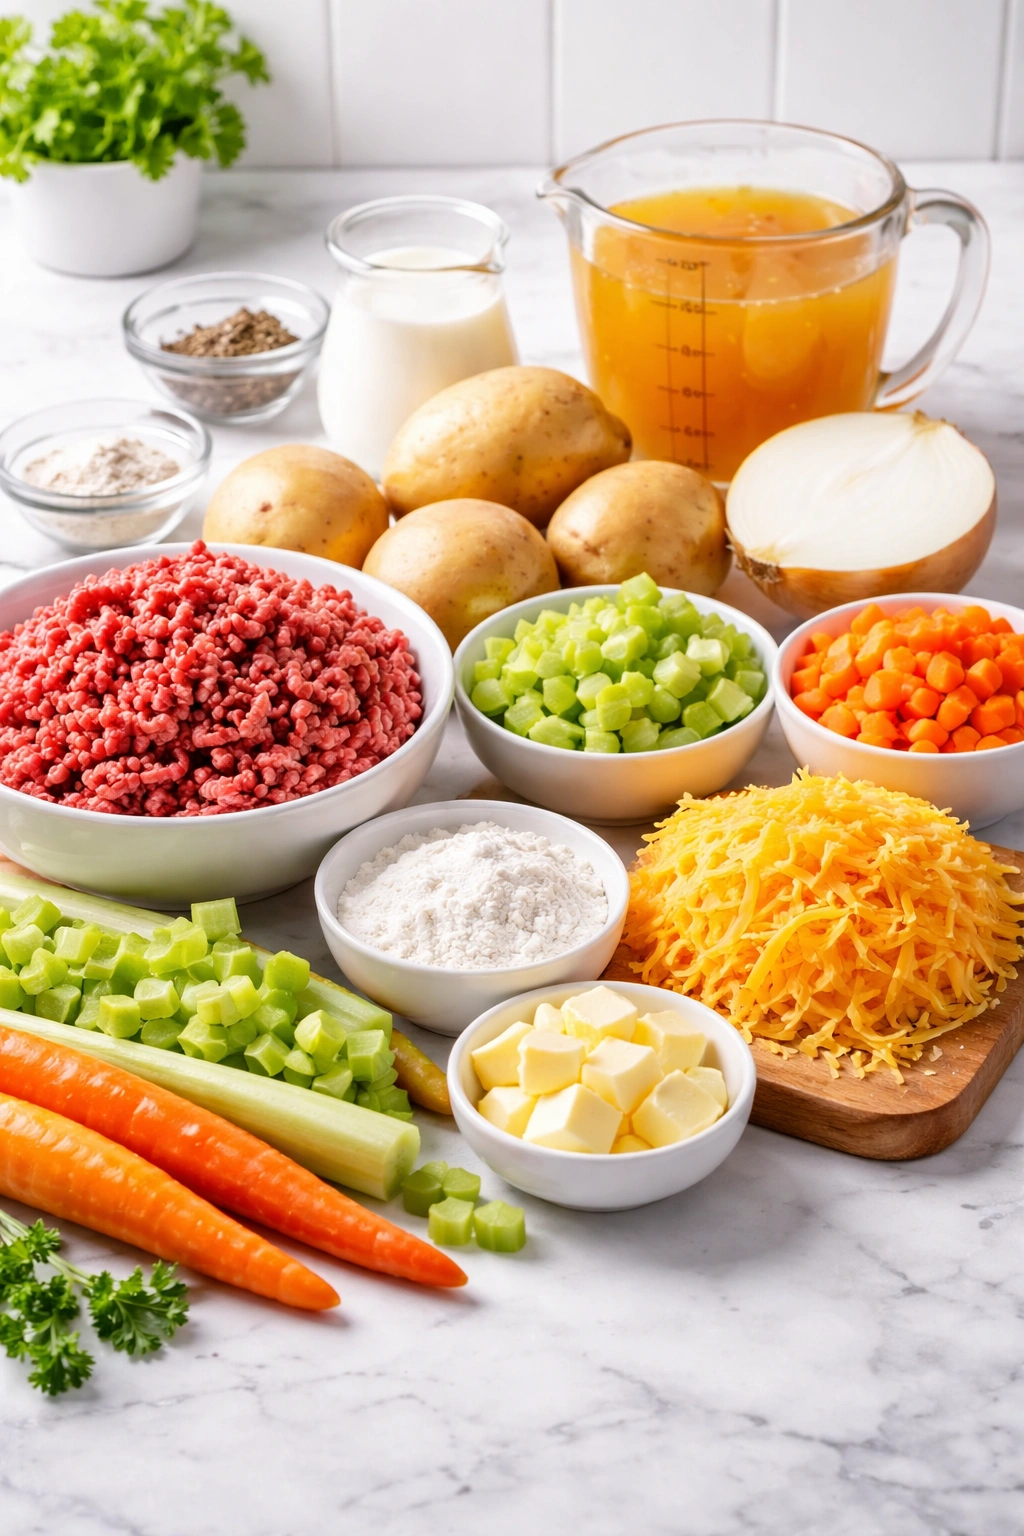
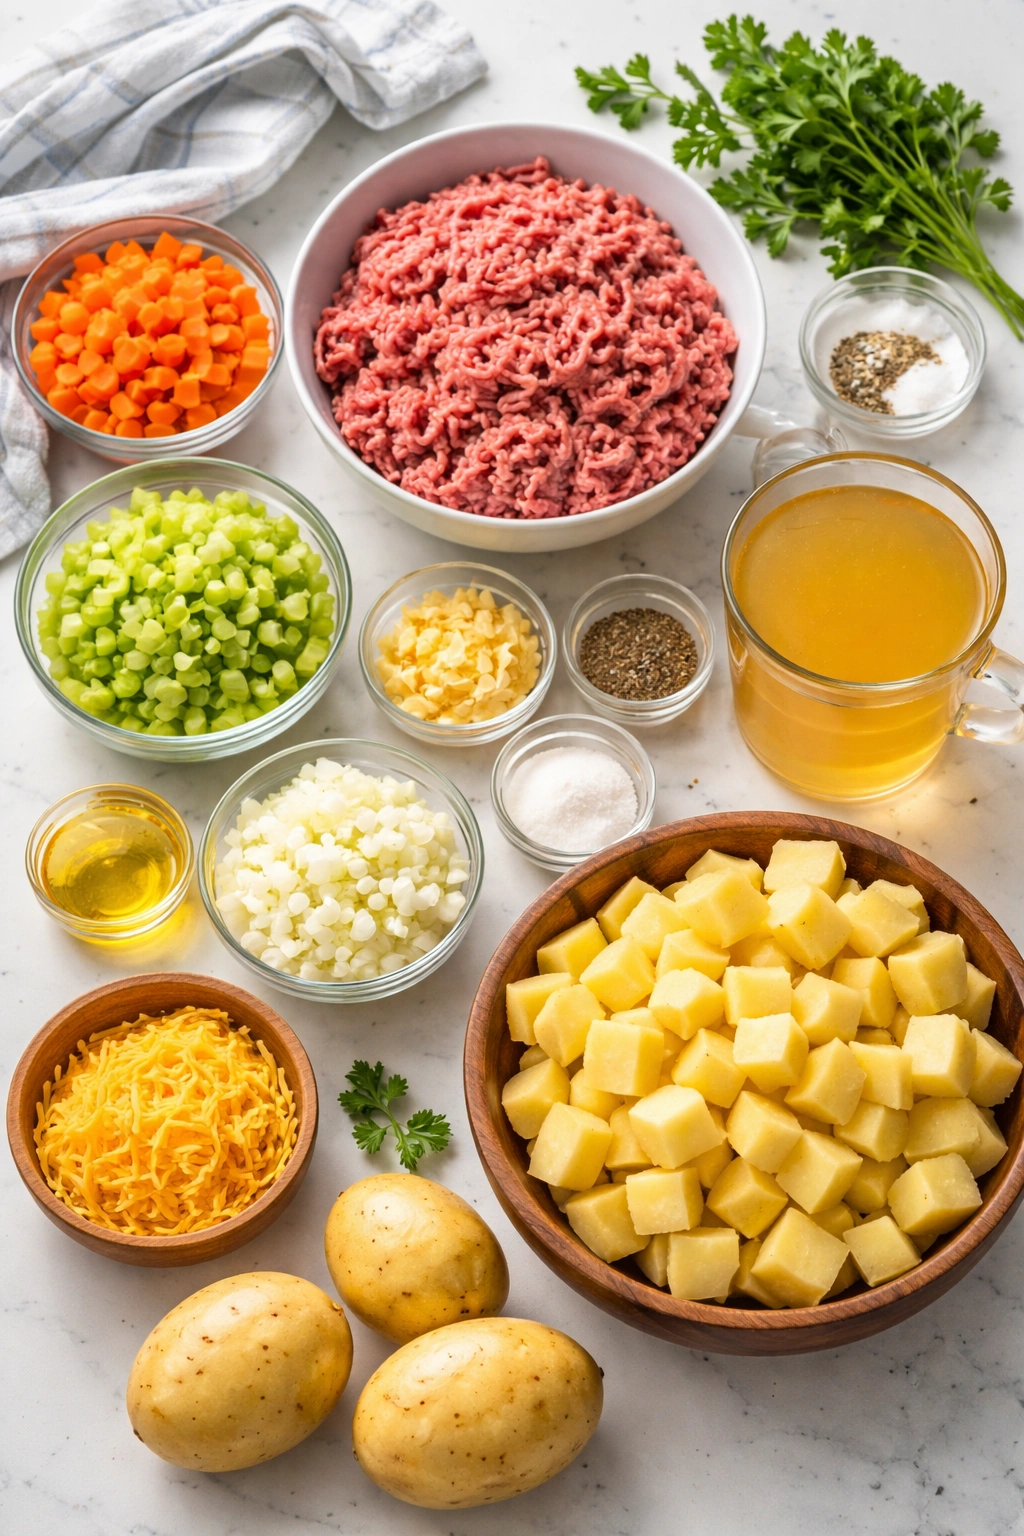
Before you start cooking, understanding what each ingredient brings to the pot helps you make smart substitutions and appreciate why the recipe works. The ground beef provides the savory foundation—lean ground beef is ideal because it won’t leave excess fat floating in your soup, but don’t feel bad about using 80/20 ground beef if that’s what you have; just drain it thoroughly. The vegetables (onion, celery, and carrots) build aromatic flavor depth that seems simple but creates surprising complexity when sautéed properly.
Yukon Gold or all-purpose potatoes are your best choice because they hold their shape better than russets while still absorbing flavor and getting creamy as the soup simmers. Chicken broth is the standard, though beef broth works beautifully too if you prefer a richer taste. The roux (butter and flour mixture) acts as the thickening agent that gives the soup its body without making it starchy. Heavy cream or milk adds richness—you need just enough to make the soup feel luxurious without overpowering the other flavors.
The star ingredient is the cheese. Sharp cheddar gives you that distinctive burger flavor that mild cheddar just can’t match. If you use pre-shredded cheese from a bag, it contains anti-caking agents that can prevent it from melting smoothly, so freshly shredded from a block is really worth the extra 30 seconds. Sour cream at the end provides both creaminess and a slight tang that elevates the whole soup. Finally, optional toppings like bacon, pickles, and green onions let everyone customize their bowl exactly how they like it.
Yield: Serves 6 to 8 | Makes about 2½ quarts
Prep Time: 15 minutes
Cook Time: 35 minutes
Total Time: 50 minutes
Difficulty: Beginner — All ingredients are pantry staples, the steps are straightforward, and there’s nothing tricky about the technique. Even if you’ve never made a roux before, the instructions walk you through it clearly.
For the Soup:
- 1 tablespoon olive oil or butter
- 1 medium yellow onion, finely diced
- 3 celery stalks, diced small (about ¾ cup)
- 2 medium carrots, shredded or diced small (about ¾ cup)
- 1 pound lean ground beef (93/7 or 90/10 blend works best)
- 3 cups low-sodium chicken broth
- 1 pound Yukon Gold potatoes (about 4 medium), peeled and diced into ½-inch cubes
- 1 teaspoon dried basil
- 1 teaspoon dried parsley flakes
- ½ teaspoon garlic powder
- ¾ teaspoon kosher salt (plus more to taste)
- ¼ teaspoon freshly ground black pepper
For the Roux (Thickening Agent):
- 4 tablespoons unsalted butter, divided (1 tablespoon for vegetables, 3 tablespoons for roux)
- ¼ cup all-purpose flour
For the Creamy Finish:

- 8 to 10 ounces sharp cheddar cheese, freshly grated from a block (about 2 to 2½ cups)
- 1 cup whole milk or heavy cream (use cream if you want it richer)
- ½ cup sour cream, at room temperature
- Additional salt and pepper to taste
Optional Toppings and Garnishes:
- 4 to 6 slices bacon, cooked crispy and crumbled
- ¼ cup diced dill pickles or pickle relish
- 2 green onions, thinly sliced
- Shredded cheddar cheese
- Crispy fried onions or croutons
- A dollop of sour cream
- Fresh chives
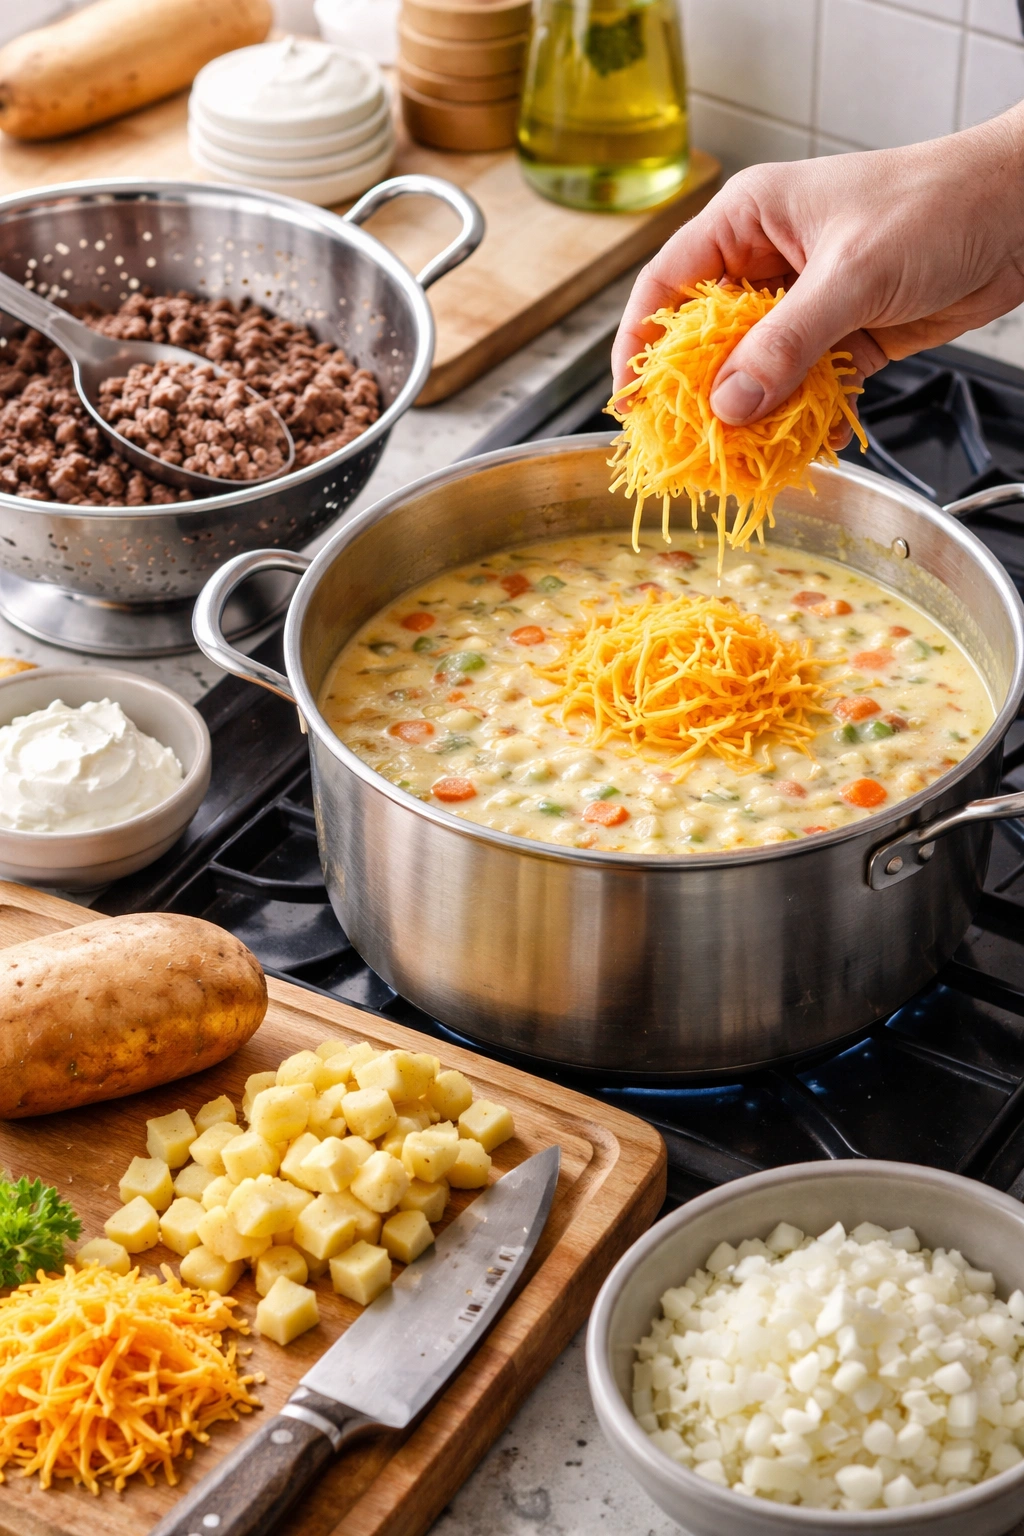
Prepare Your Ingredients:
-
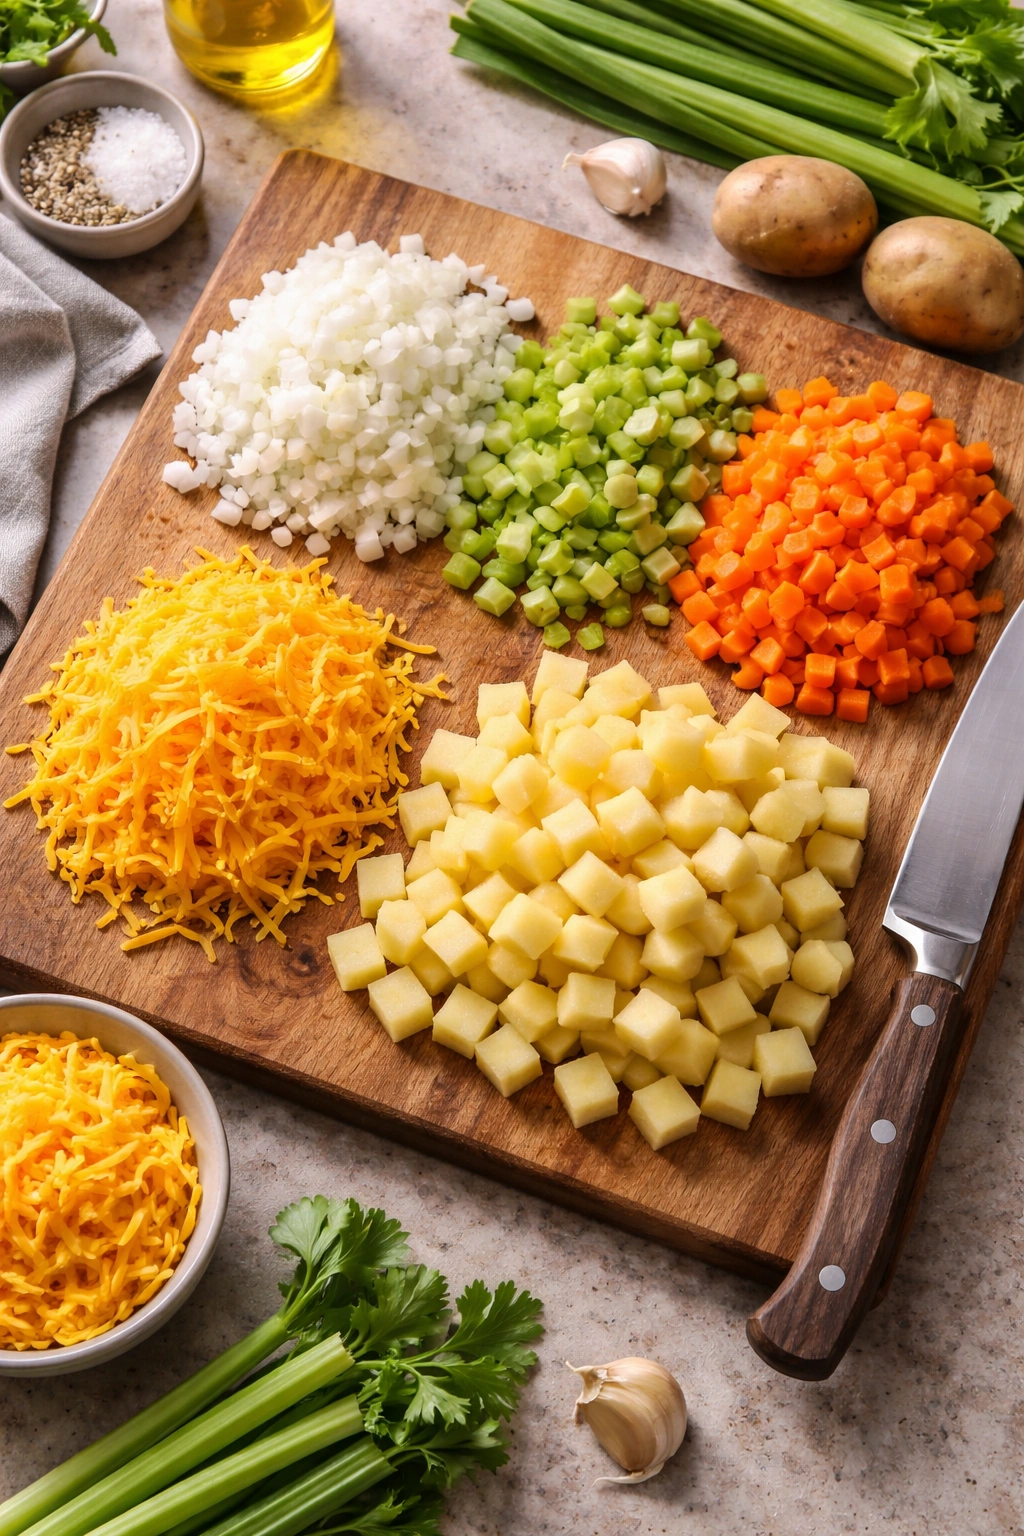
Dice the onion, celery, and carrots into small, even pieces so they cook uniformly and distribute throughout the soup nicely. Shred the cheddar cheese freshly from a block using the large holes of a box grater—don’t use pre-shredded cheese here.
-
Peel the potatoes and cut them into ½-inch cubes. You want them uniform in size so they cook at the same rate; smaller cubes cook faster but might get mushier, while larger pieces stay firmer but take longer. ½-inch is the sweet spot.
-
If using bacon, cook it in a skillet over medium heat until crispy (about 8 to 10 minutes), then drain on paper towels and crumble it. You can do this while you’re prepping other ingredients to save time.
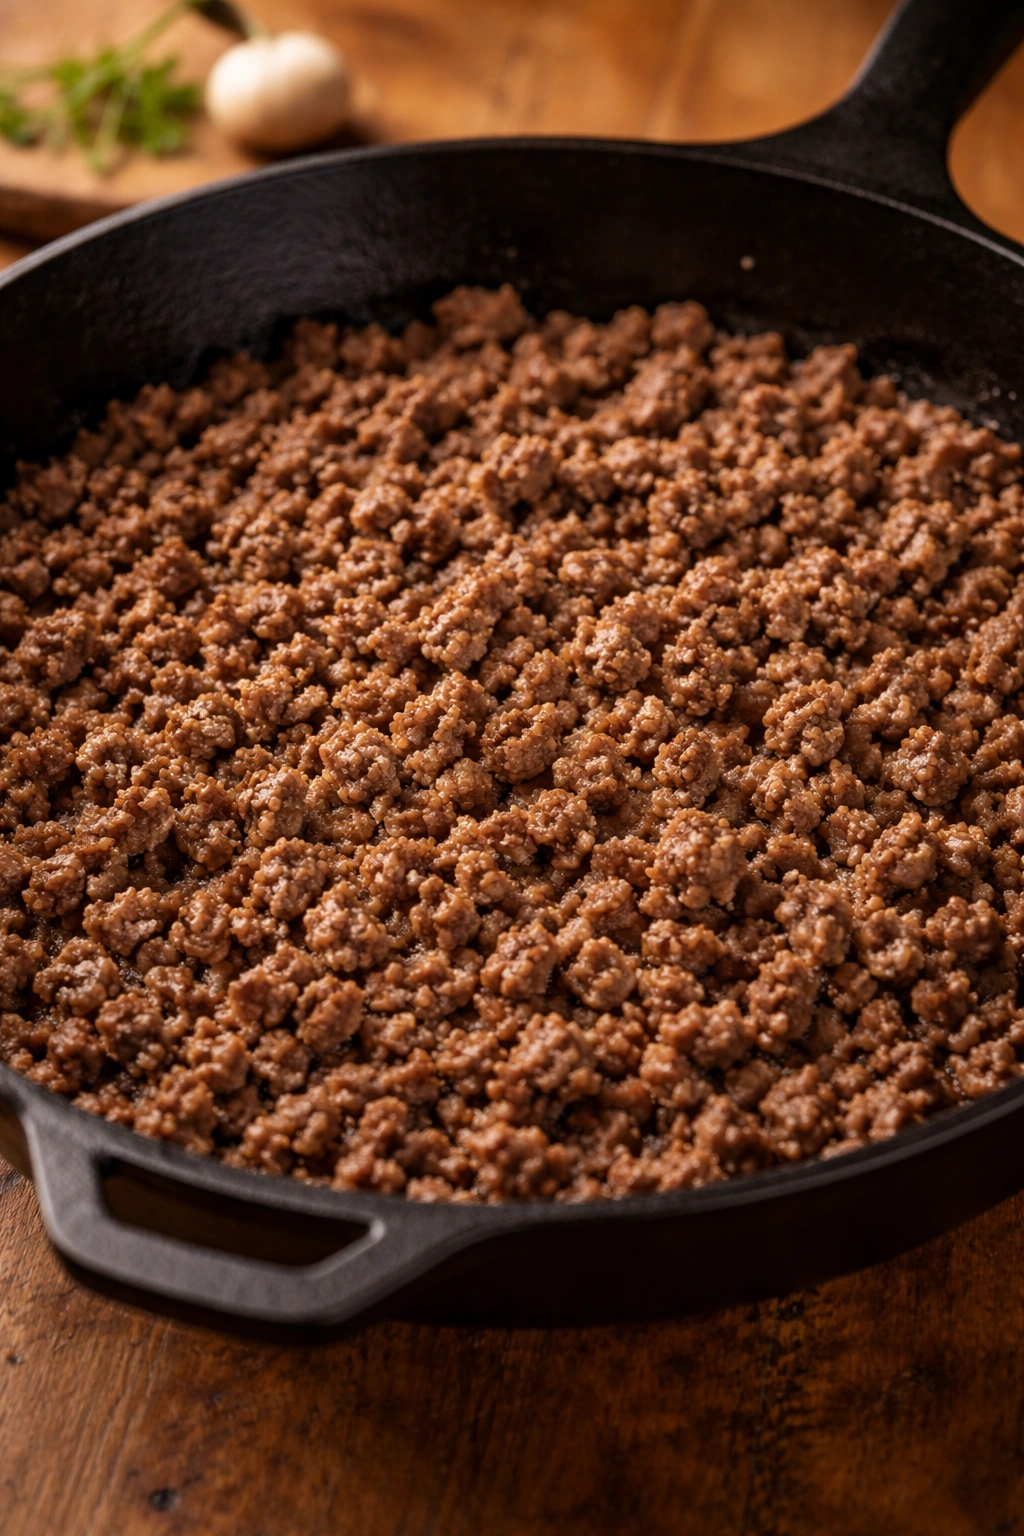
Brown the Ground Beef:
-
Heat the 1 tablespoon of butter or olive oil in a large heavy-bottomed pot (5-quart capacity or larger) over medium-high heat. Once the butter is foaming or the oil shimmers, add the ground beef.
Advertisements -
Cook the beef, breaking it up with a wooden spoon or meat chopper, for 5 to 6 minutes until no pink remains. The meat should be in small crumbles, not large clumps. Drain all excess fat carefully by tilting the pot over a colander or using a slotted spoon to transfer the meat to a plate—this step is crucial because excess fat will make the finished soup greasy.
-
Return the drained beef to the pot or set aside on a clean plate while you make the next step.
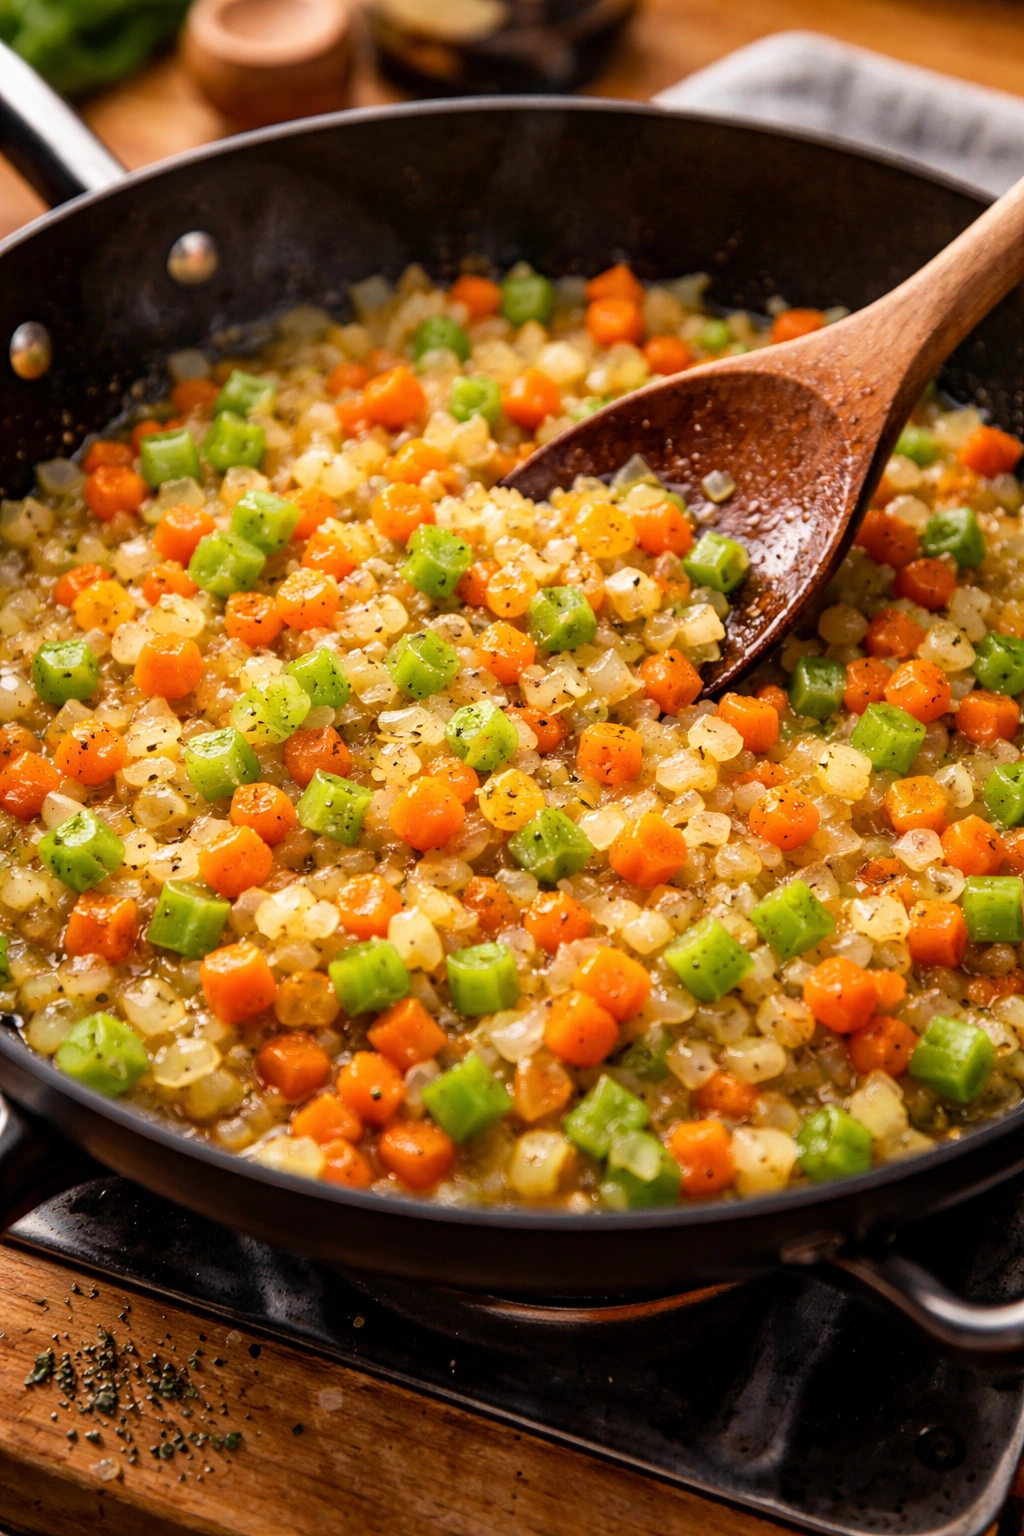
Sauté the Vegetables:
-
In the same pot with the beef still in it (or empty, depending on your preference—I like leaving the browned bits in for extra flavor), add the remaining 1 tablespoon of butter over medium heat. Once it’s melted, add the diced onion, celery, and carrots with a big pinch of salt and pepper.
-
Sauté, stirring often, for 5 to 6 minutes until the vegetables are soft and the onion is completely translucent and just starting to turn golden at the edges. This is important—don’t rush this step. The vegetables release natural sugars as they cook, which adds sweetness and depth to the soup.
-
Stir in the garlic powder, dried basil, and dried parsley flakes. Cook for another 30 seconds until fragrant.
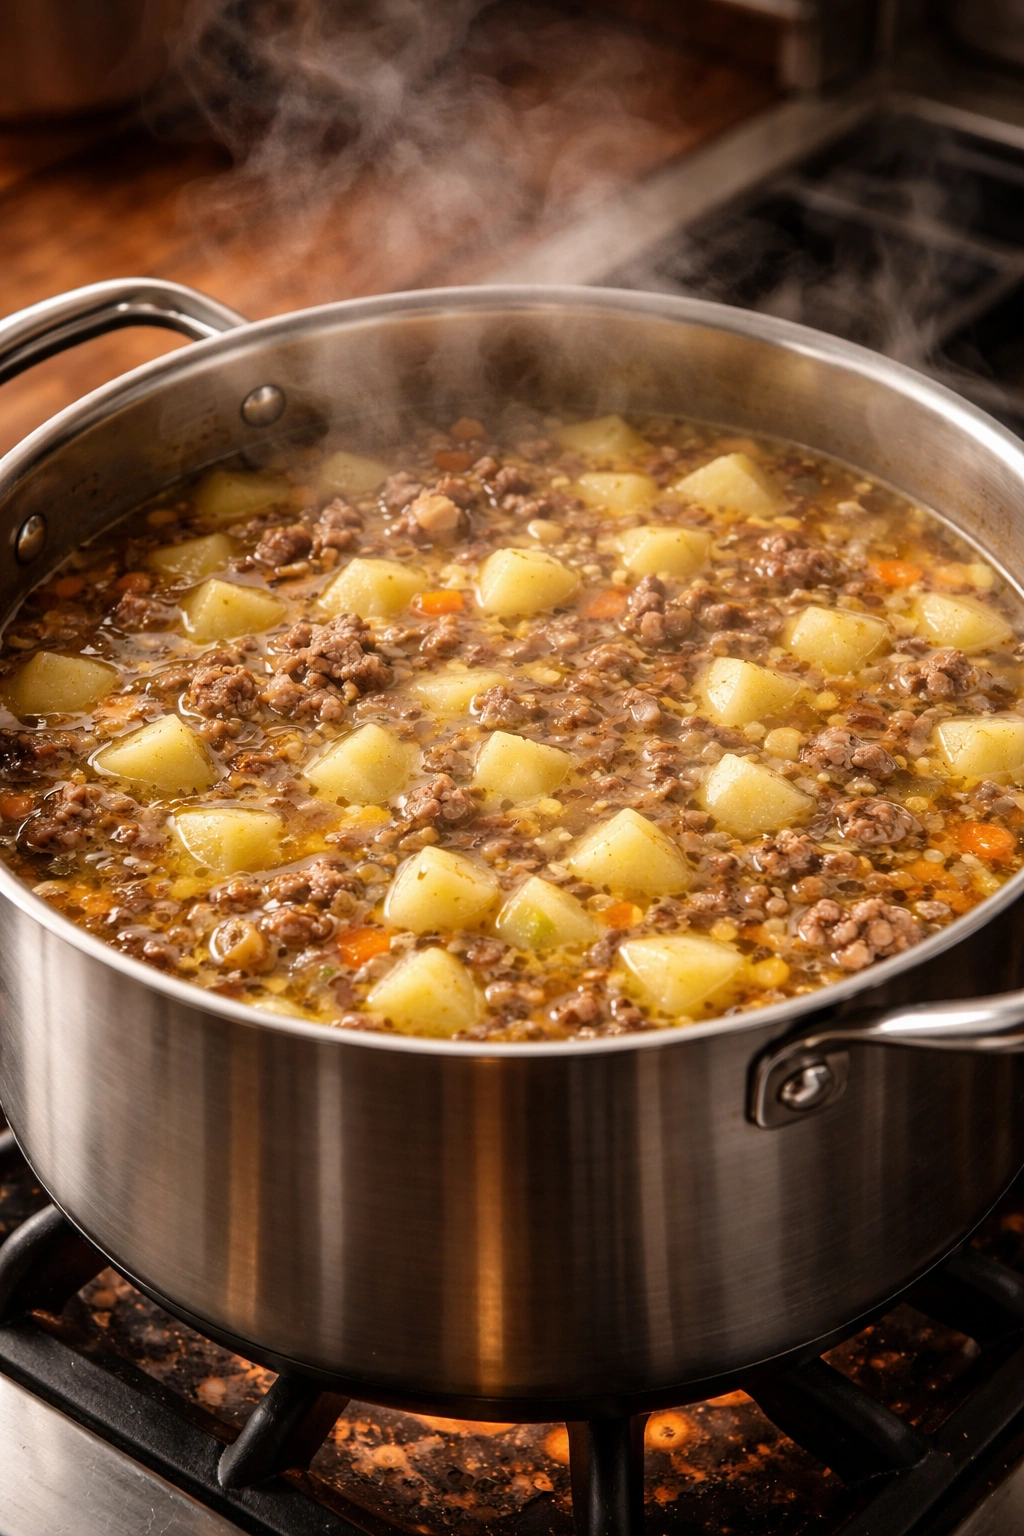
Add the Broth and Potatoes:
-
Pour in the chicken broth, scraping the bottom of the pot with your wooden spoon to release any browned bits stuck to the bottom (that’s pure flavor). Add the diced potatoes and the cooked ground beef, stirring to combine.
-
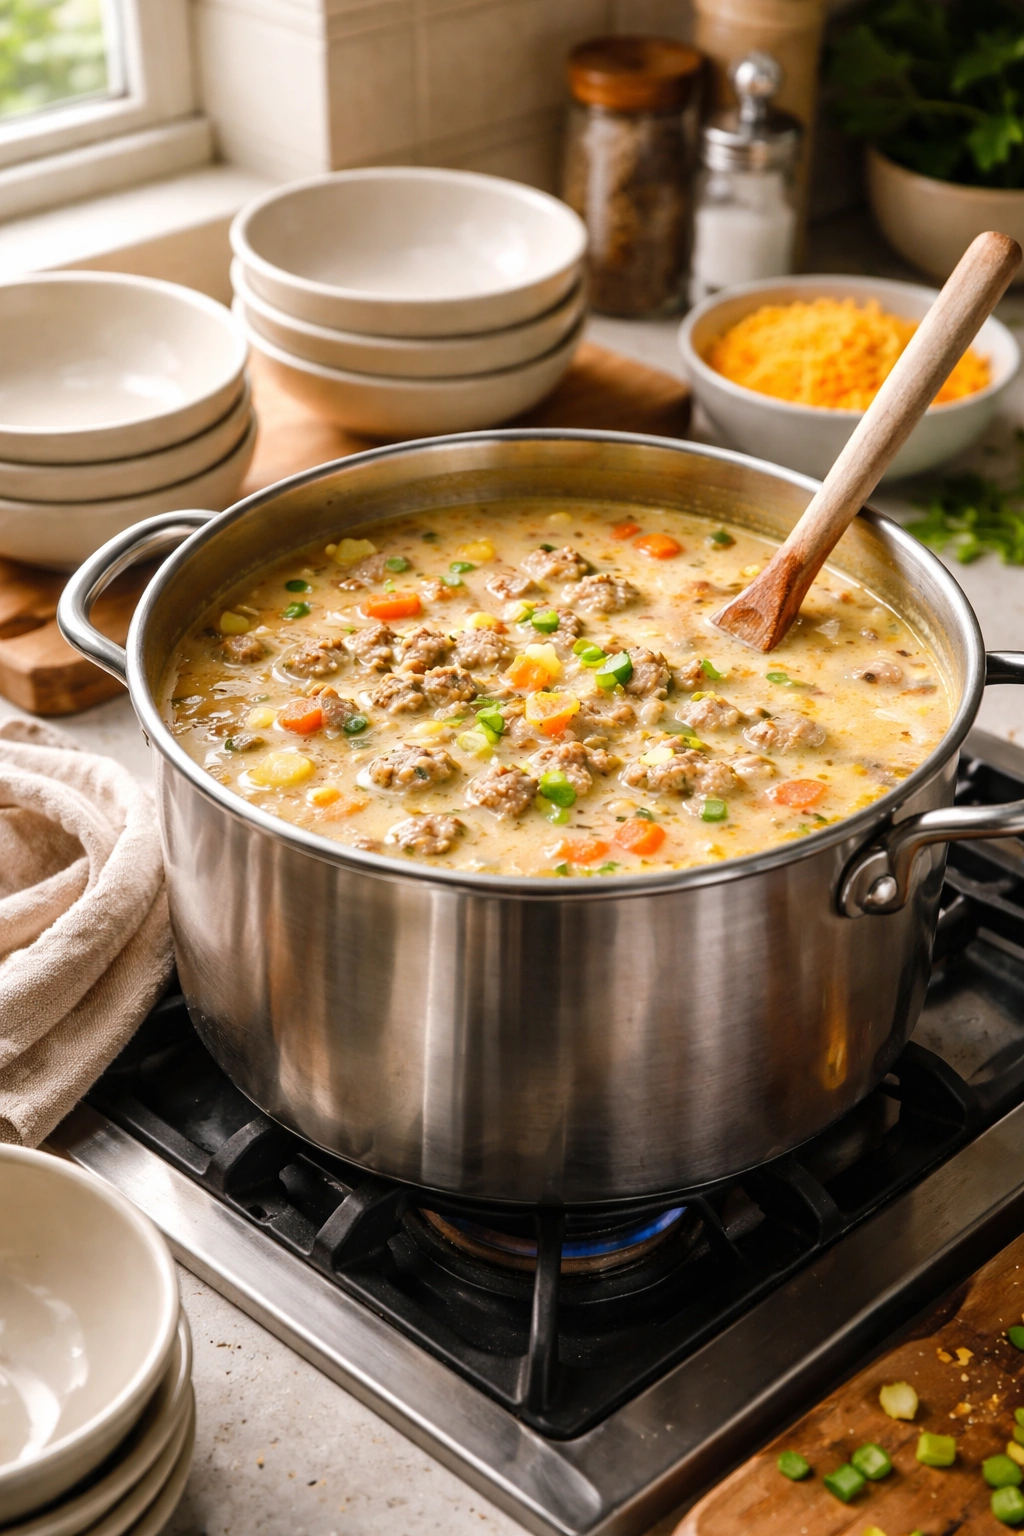
Increase the heat to medium-high and bring the mixture to a boil—you’ll see steam rising and big bubbles breaking the surface. Once it reaches a boil, immediately reduce the heat to medium-low and cover with a lid, leaving a crack for steam to escape.
-
Simmer gently for 12 to 15 minutes, until the potatoes are completely fork-tender. You should be able to cut a potato cube in half with just the edge of a wooden spoon. Do not overcook the potatoes or they’ll turn mushy and the soup will become starchy and thick—you want them soft but still holding their shape.
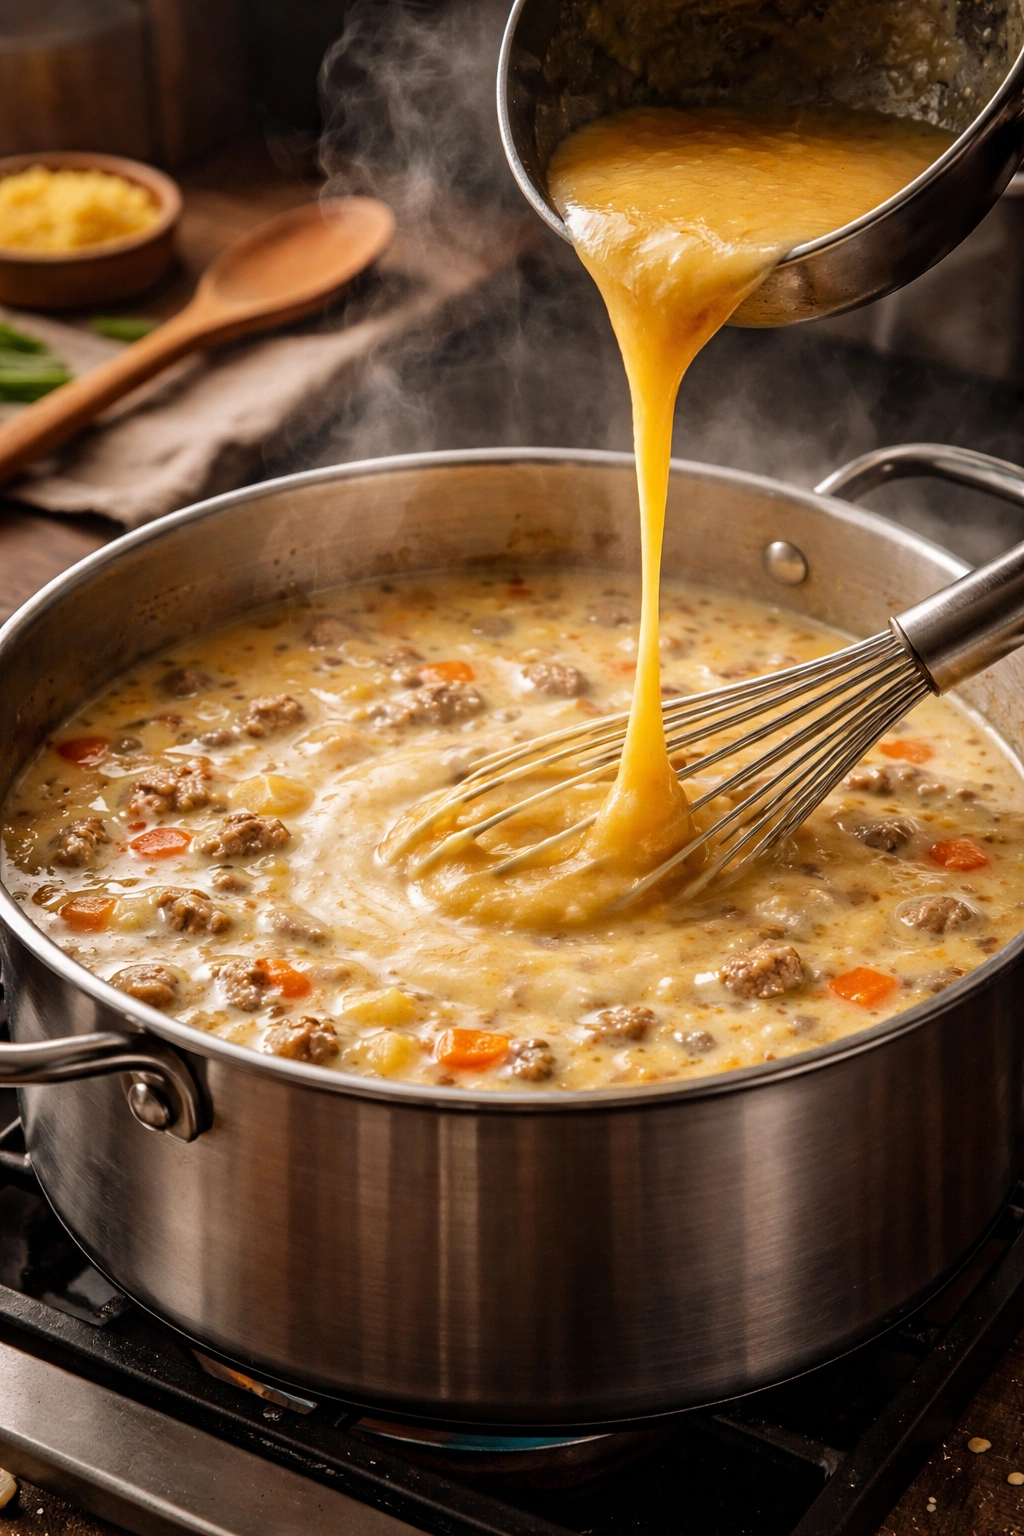
Make the Roux:

-
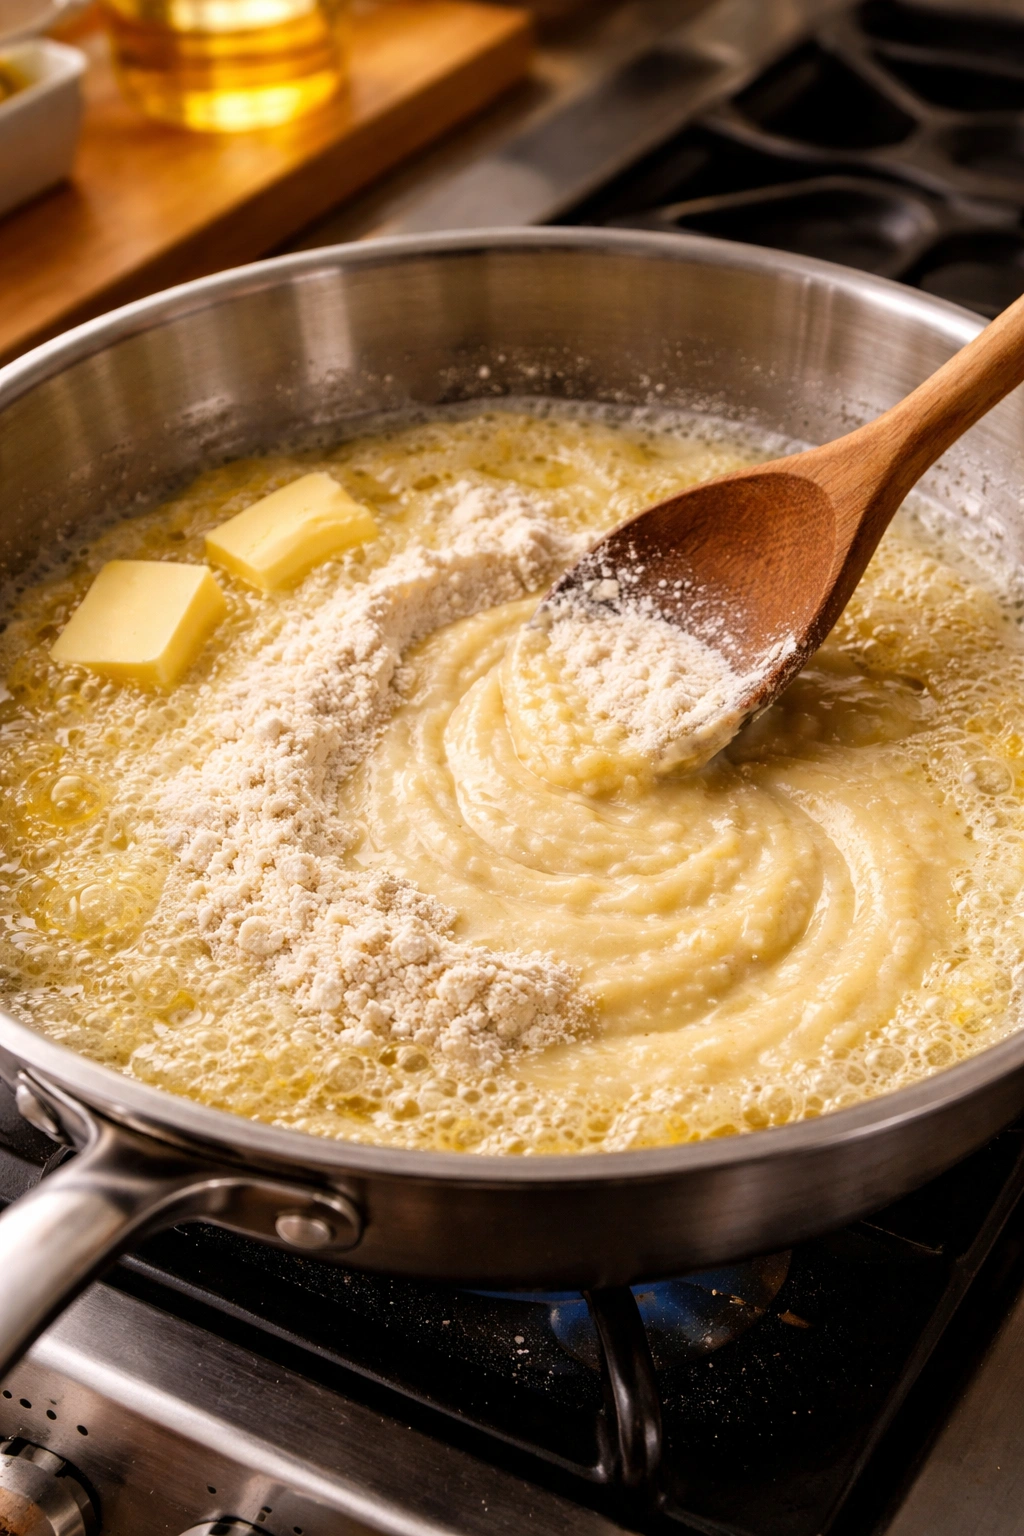
While the potatoes are simmering, prepare the roux (thickening agent) in a separate small skillet. Melt the remaining 3 tablespoons of butter over medium heat.
-
Once the butter is completely melted and foaming, whisk in the ¼ cup all-purpose flour. Stir constantly with a whisk for 2 to 3 minutes until the mixture is smooth, bubbling, and has turned a light golden brown color. You’re cooking out the raw flour taste, so don’t skip this step or rush it—the roux should smell nutty and pleasant when ready.
Advertisements
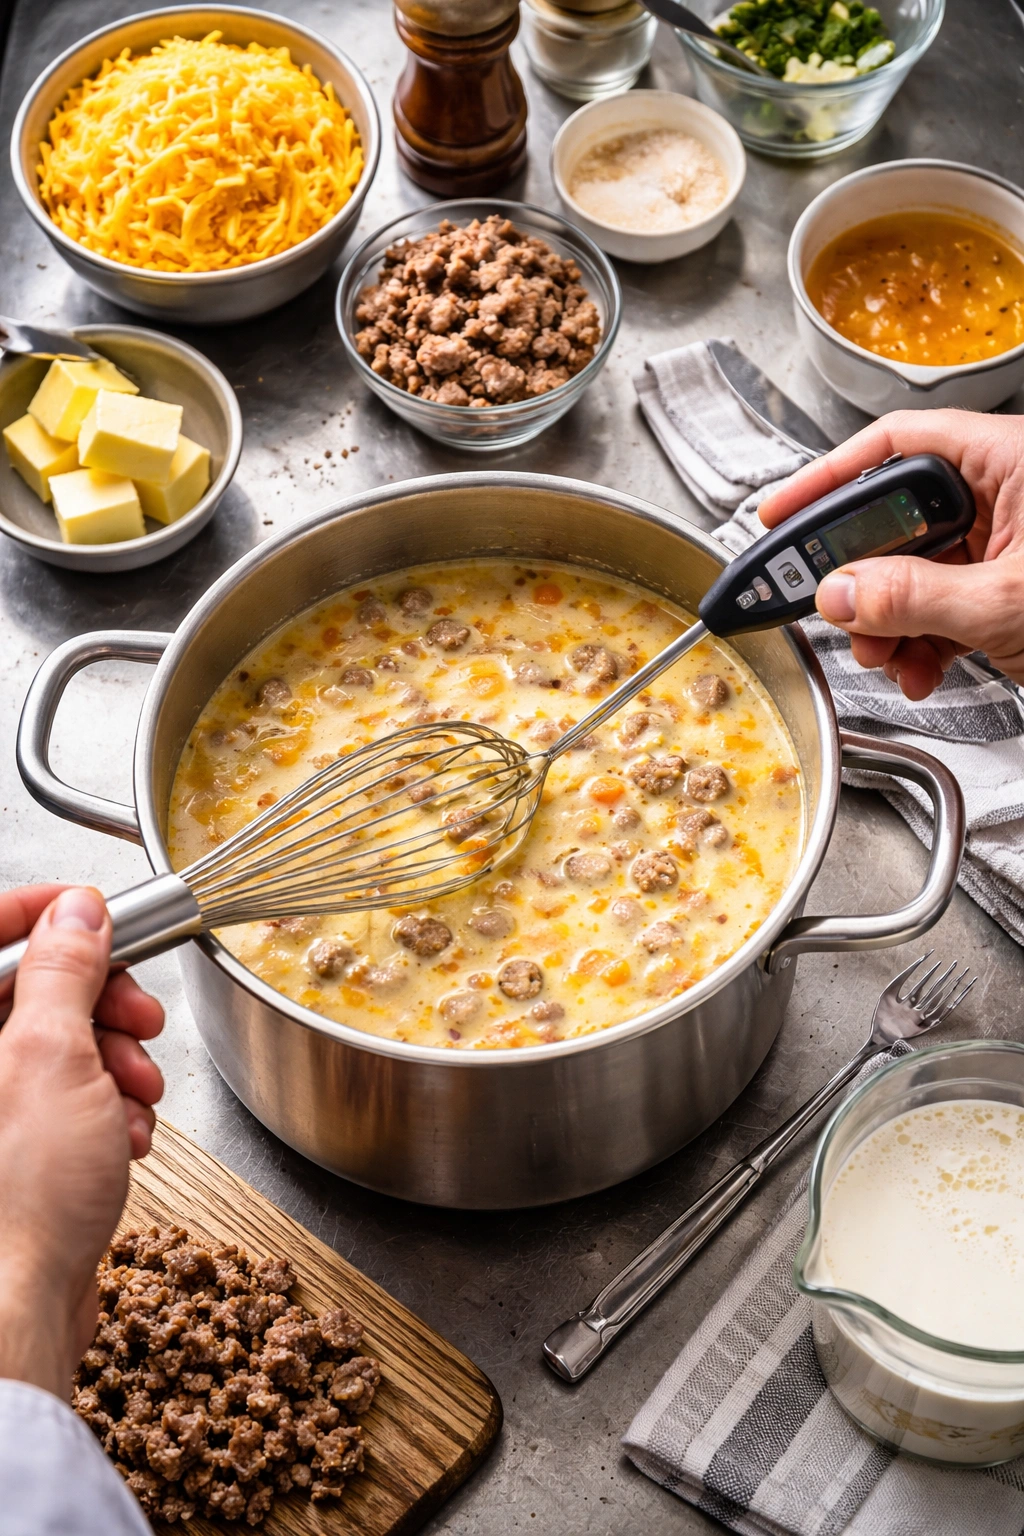
Thicken the Soup:
-
Once the potatoes are tender, pour the golden roux directly into the simmering soup while whisking constantly. Whisk vigorously for the first minute to break up any lumps—the soup will thicken almost immediately, which is exactly what you want.
-
Increase the heat back to medium-high and bring the soup to a boil, still stirring frequently. Boil for 1 to 2 minutes, stirring constantly, to fully activate the thickening power of the flour.
-
Reduce the heat back to medium-low and taste the broth. Add the ¾ teaspoon of salt and ¼ teaspoon of pepper now if you haven’t already. The soup should taste savory and well-seasoned.
Add the Cheese:
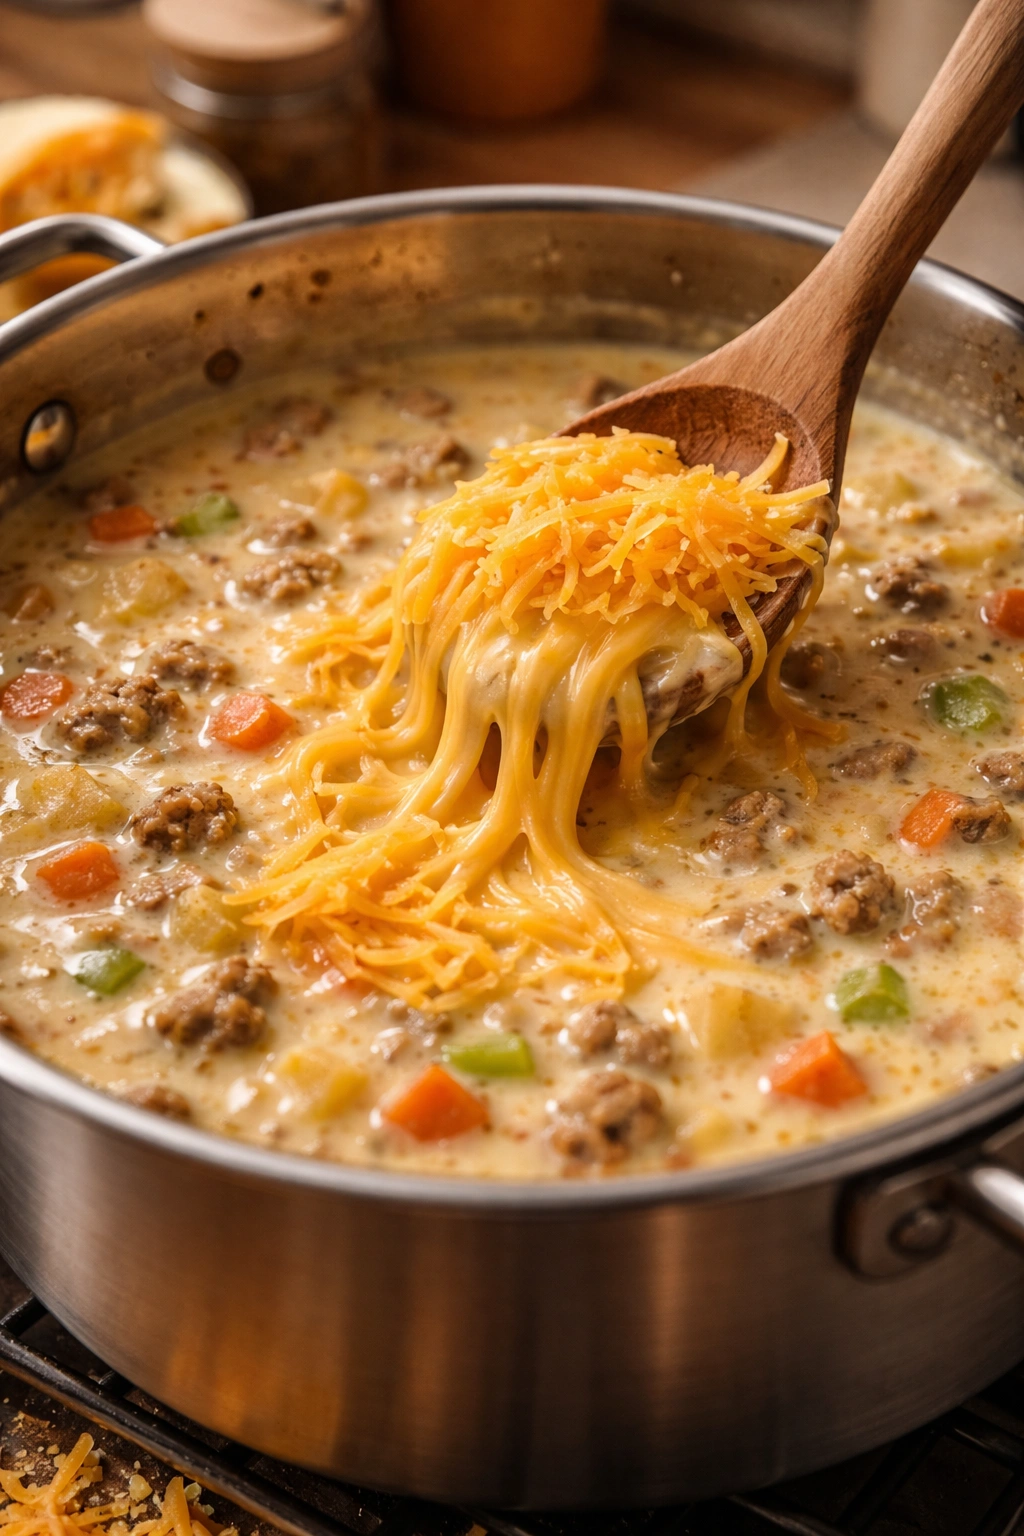
-
Turn off the heat completely before adding the cheese—this is the most important step for preventing the cheese from becoming grainy or separating. This seems counterintuitive, but a hot pot will cause real cheddar to break.
-
Add the freshly grated cheddar cheese to the pot in three batches, stirring gently but thoroughly after each addition until the cheese is completely melted before adding the next batch. This patience prevents lumps and ensures smooth, creamy results.
-
Once all the cheese is melted and incorporated, stir in the 1 cup of milk or heavy cream. Taste and adjust seasoning—add more salt if needed. The soup should taste rich and cheesy without being overwhelming.
Finish with Sour Cream:
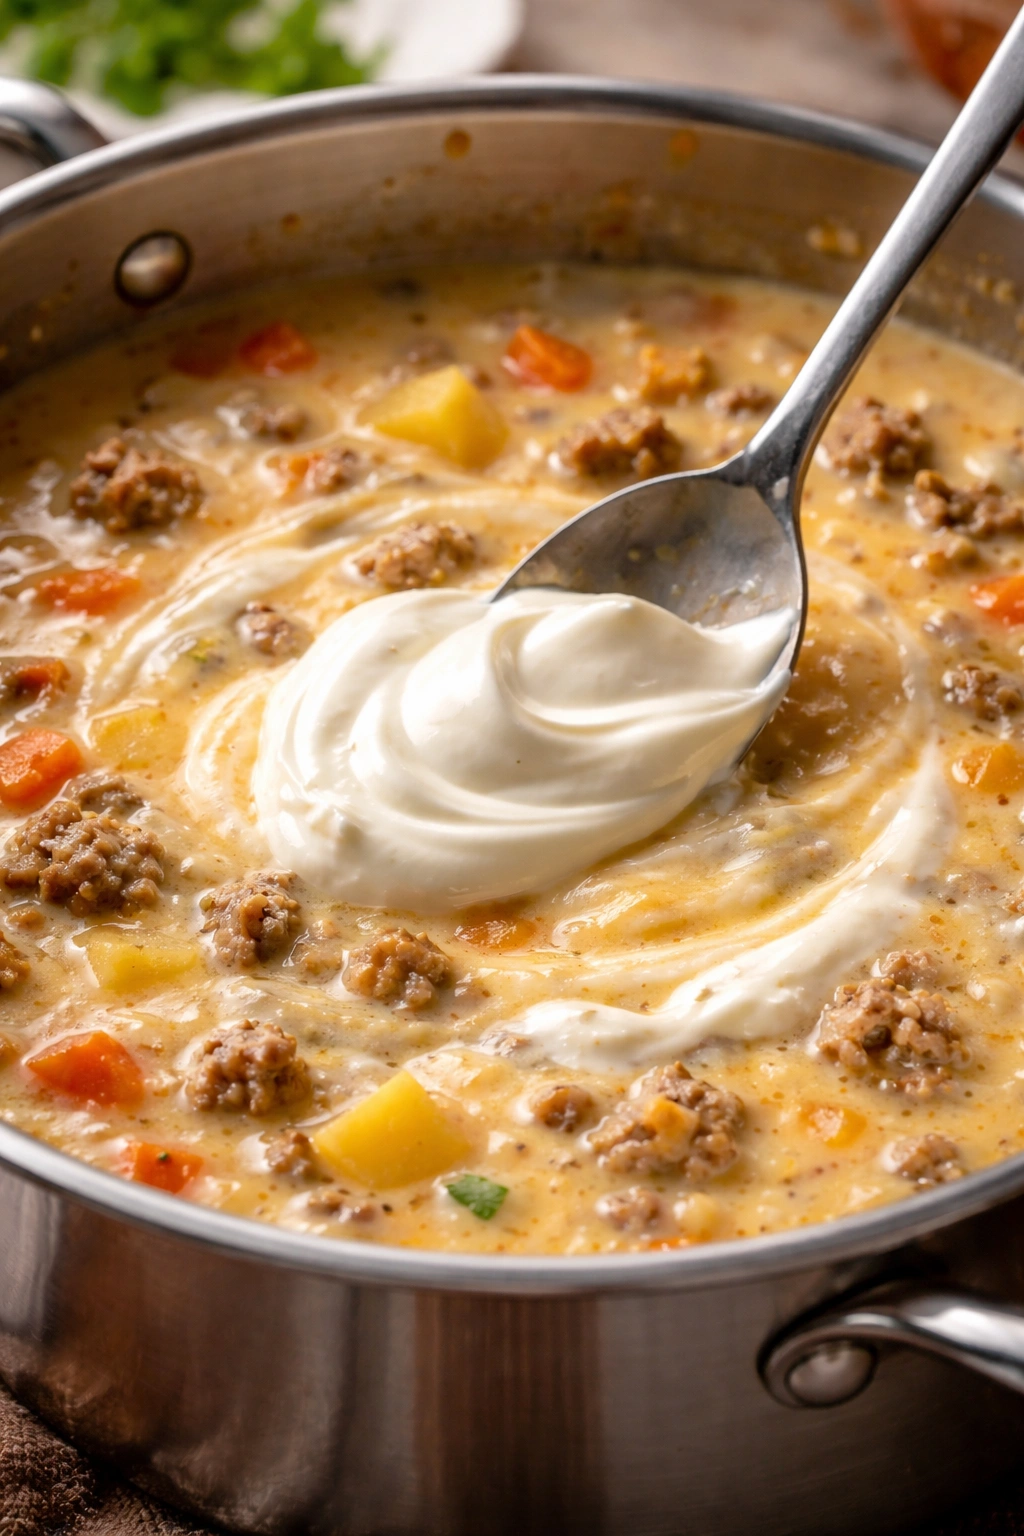
- Make sure the heat is still off, then stir in the ½ cup of sour cream until completely combined and smooth. The sour cream adds both creaminess and a subtle tang that balances all the rich cheese. The soup is now ready to serve.
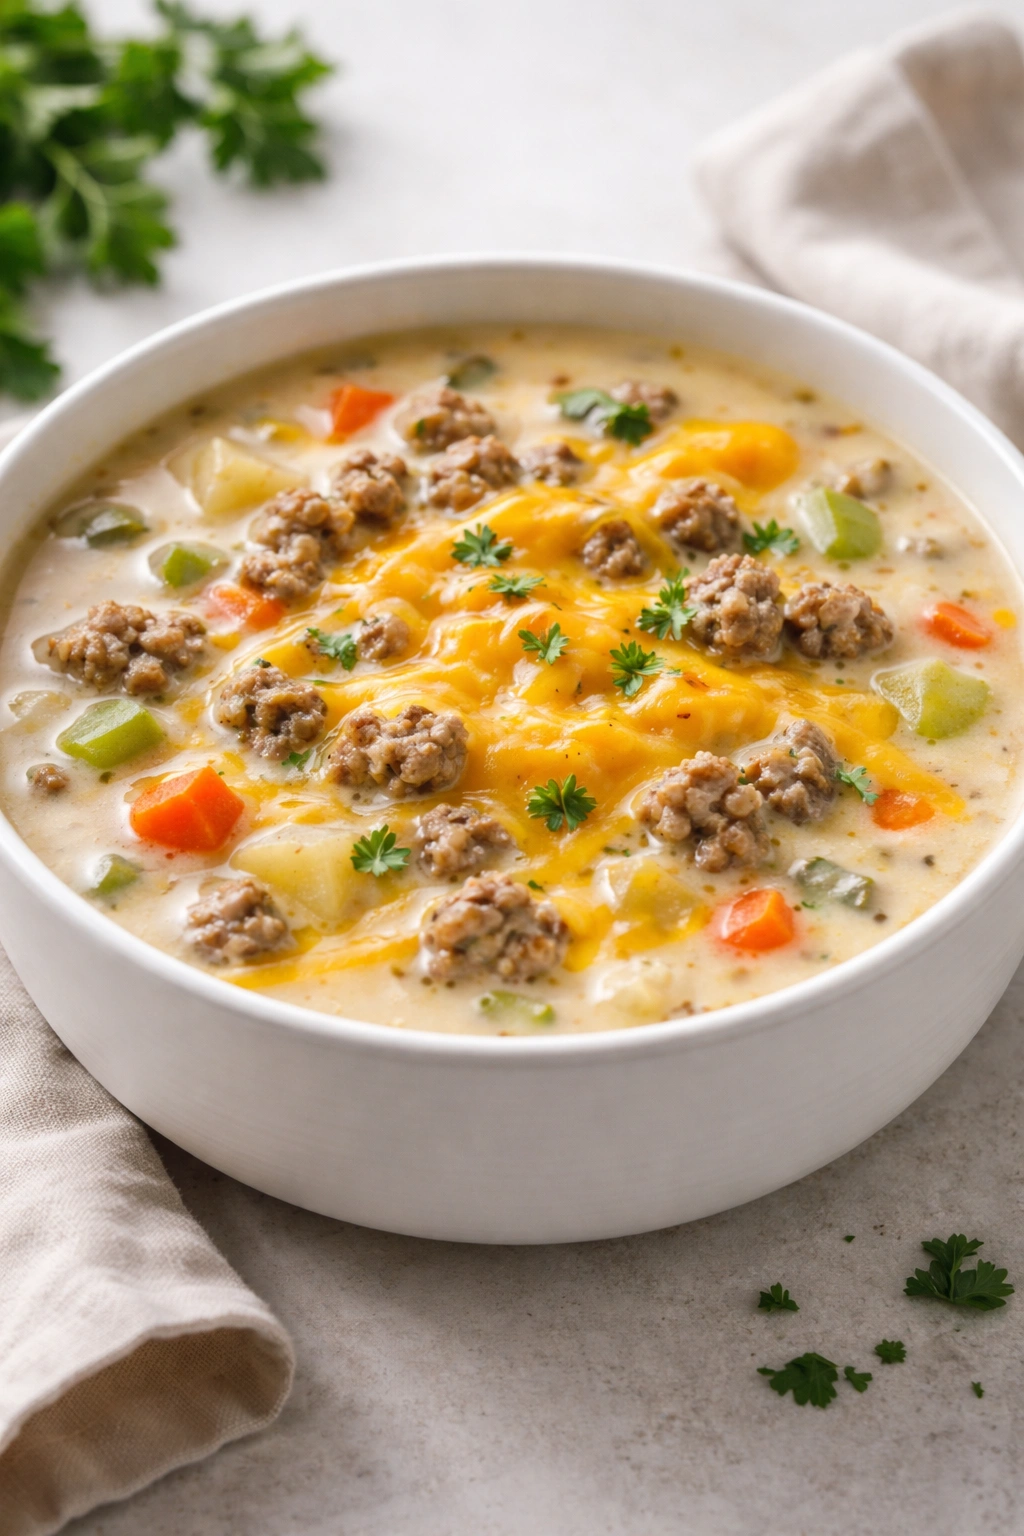
Serve:

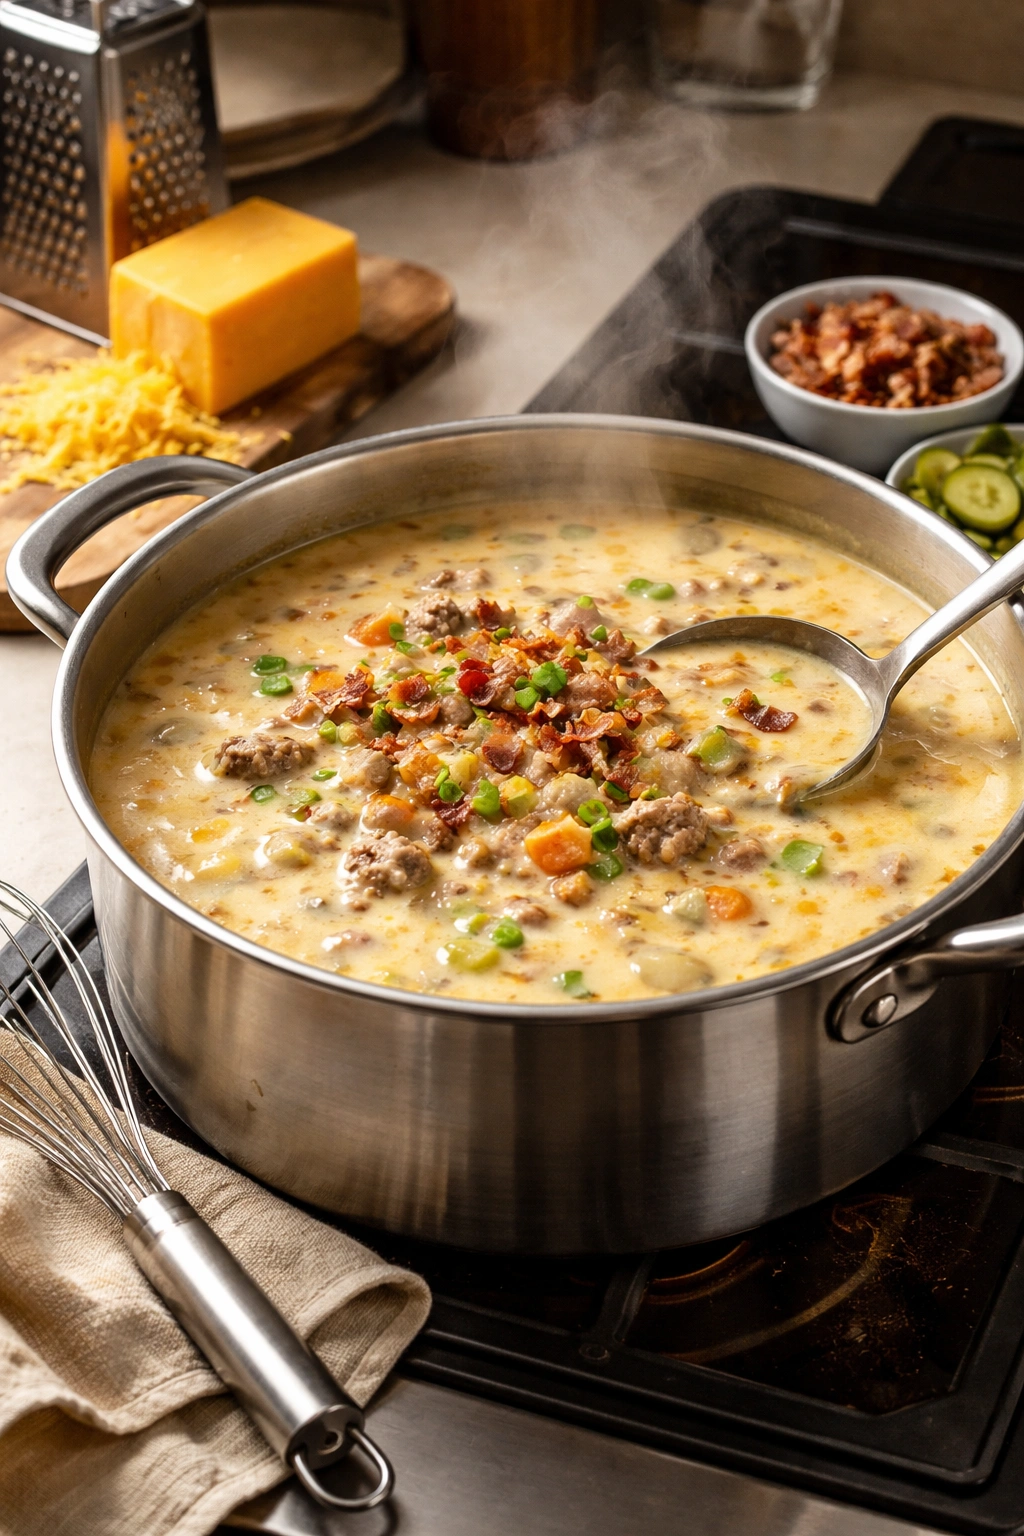
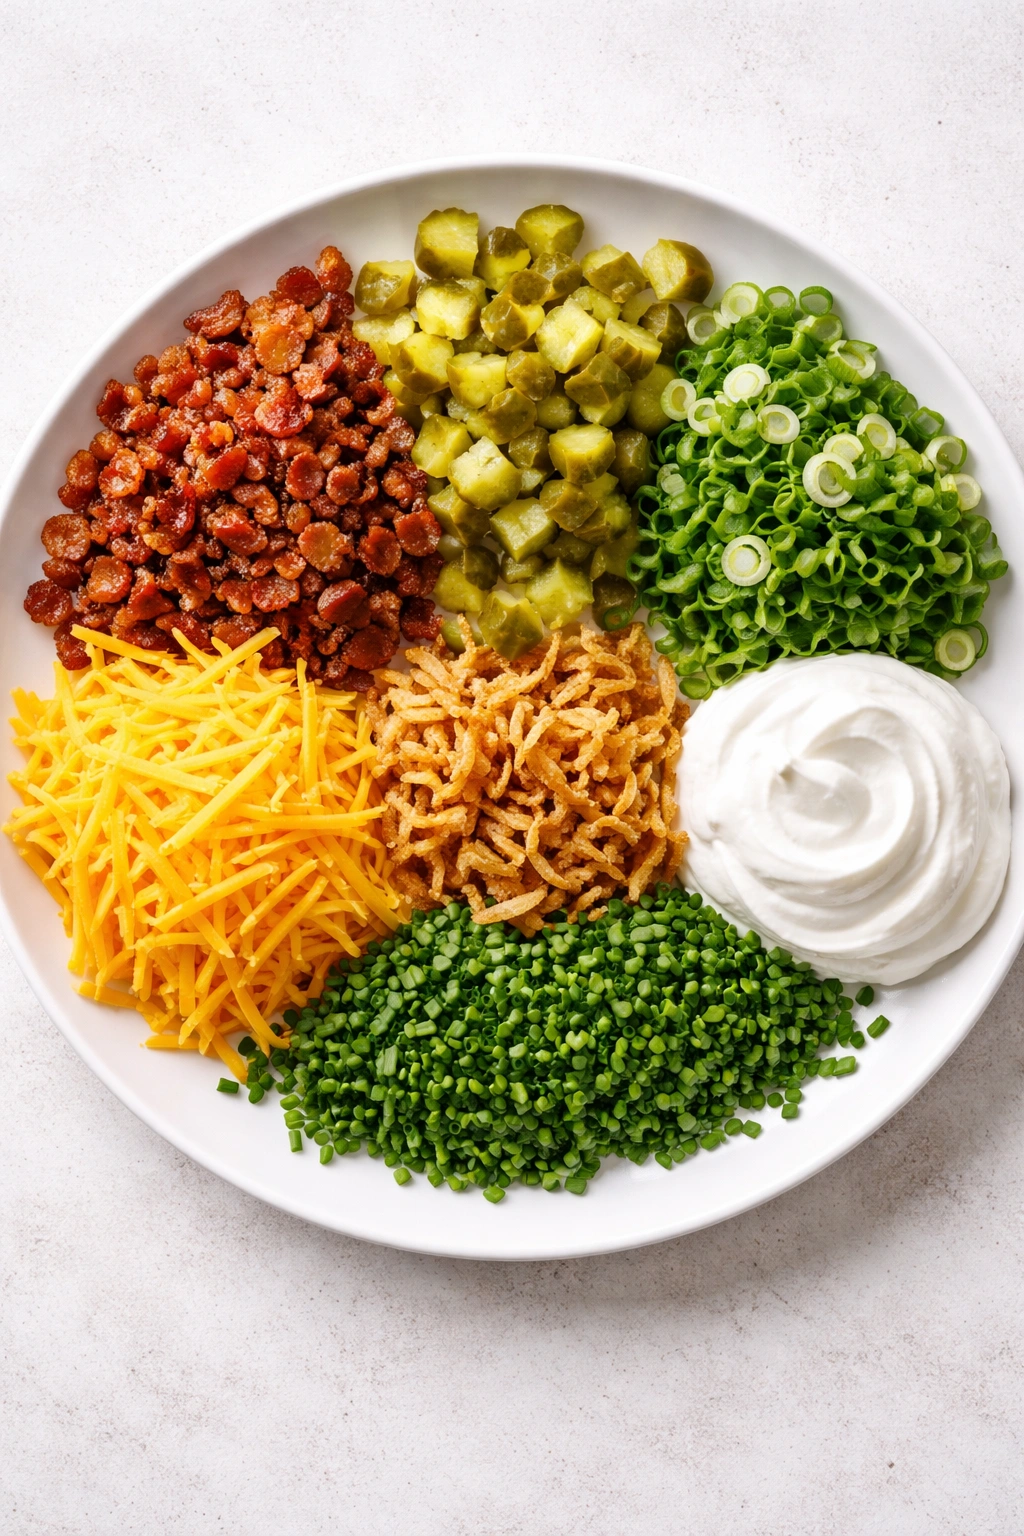
- Ladle the soup into bowls and top with your choice of garnishes: crumbled bacon, diced pickles, sliced green onions, extra cheddar, crispy onions, or a small dollop of sour cream. The fun of this soup is letting everyone customize their bowl exactly how they like it.
Pro Tips for Perfect Results
Don’t skip the roux step. This is the professional technique that separates a perfectly smooth, velvety soup from one that’s thin and disappointing. Some recipes skip it entirely, but making a proper roux in a separate skillet gives you complete control over thickness and prevents lumps. It’s worth the extra skillet and five minutes.
Use freshly shredded cheese, not pre-shredded. Pre-shredded cheese has anti-caking agents that prevent it from melting smoothly into the soup. You’ll end up with grainy, separated cheese sauce instead of a silky, creamy texture. A box grater and one minute of work makes a huge difference.
Add the cheese off the heat. This is non-negotiable. A boiling pot will cause cheddar cheese to break and separate, giving you a grainy texture instead of a creamy one. Turn off the heat, add the cheese in batches while stirring gently, and wait until it’s completely melted before adding the next batch.
Drain the ground beef thoroughly. Excess fat sitting on top of your soup is unappetizing and changes the flavor. Use a colander or tilt the pot over a bowl. This extra 30 seconds of attention makes a noticeable difference in the final result.
Let the vegetables soften completely. Don’t rush the sautéing step. When the onion is completely translucent and starting to turn golden, it has released its natural sugars and sweetness, which add complexity to the soup. This is what separates a “fine” soup from a truly delicious one.
Taste and adjust at the end. Everyone’s salt tolerance is different, and your broth might be saltier or less salty than expected. Taste the soup before serving and add more salt if needed. You can always add more, but you can’t take it back.
Make it ahead and reheat gently. This soup actually tastes even better the next day as flavors meld. Store it in the refrigerator and reheat gently over medium-low heat on the stovetop, stirring occasionally. Avoid high heat, which can cause the cheese and sour cream to separate.
Common Mistakes to Avoid
Adding the cheese to a boiling pot is the most common mistake. When cheese hits boiling liquid, the proteins break and separate, creating a grainy, oil-slicked texture. This can’t be fixed once it happens, which is why it’s so important to turn off the heat first. If you do accidentally add cheese to boiling soup, let it cool for a few minutes before trying to stir it in.
Not draining the ground beef well enough leaves you with greasy soup. Ground beef releases moisture and fat as it cooks, and all of that excess needs to come out. Use a colander and let it drain for at least 30 seconds. This is especially important if you’re using higher-fat ground beef like 80/20.
Overcooking the potatoes makes them mushy and releases too much starch, thickening the soup unnaturally and making it mealy. Check the potatoes at the 12-minute mark by poking one with a fork. They should be tender but not falling apart.
Using pre-shredded cheddar almost guarantees a grainy, separated cheese sauce. Those anti-caking agents are fine in other applications, but they really show in a creamy soup. Take 60 seconds to shred a block of cheese and you’ll taste the difference immediately.
Skipping the roux step in favor of adding cornstarch or flour directly to the soup often results in lumps and uneven thickening. The roux method is a classic technique for good reason—it works reliably every single time.
Not seasoning enough. Soups need more salt than you might think because salt disperses throughout the entire liquid. Taste it before serving and don’t be shy about adding more. You should taste savory beef and cheese, not blandness.
Flavor Variations to Try

Bacon Cheeseburger Soup: Increase the bacon to ½ pound, cook it until crispy, crumble it, and add half of it to the soup in the final step. Garnish with the remaining bacon and a dollop of sour cream. This version is decadent and incredibly popular with adults.
Spicy Cheeseburger Soup: Add ½ teaspoon of cayenne pepper, ¼ teaspoon of crushed red pepper flakes, or 1 to 2 diced jalapeños in the sautéing step. You can also switch the cheddar to pepper jack cheese for a natural heat boost. This works beautifully for people who like a little kick.
Cheeseburger Soup with Tomatoes: Add one 14.5-ounce can of diced tomatoes (drained, so you get just the solids) along with the potatoes. The tomato adds brightness and makes the soup taste even more burger-like. Some people also add a tablespoon of tomato paste for deeper flavor.
Pickle-Forward Version: Some people love a soup that tastes intensely like a burger topped with pickles. Add ¼ cup of diced dill pickles or pickle relish directly to the soup along with 1 tablespoon of pickle juice. Add it in the final step so the pickle flavor stays bright.
Mushroom and Swiss Variation: Replace the cheddar with Swiss cheese (using the same amount), and add 8 ounces of sautéed mushrooms (cremini or button mushrooms work great) in the vegetable sautéing step. This creates a more sophisticated, umami-rich version.
Smashed Burger Version: Make the soup with fewer potatoes (just 2 pounds instead of 4), and add ¼ cup of ketchup and 2 tablespoons of yellow mustard to the soup when you add the vegetables. This makes it taste intensely like the classic burger condiment combination.
Cheddar Jalapeño Popper Soup: Use pepper jack cheese instead of sharp cheddar, add 2 to 3 diced jalapeños in the vegetable step, and include 2 ounces of cream cheese along with the sour cream at the end. Top with crispy bacon and sliced green onions.
Dairy-Free and Dietary Swaps
Dairy-Free Version: This one requires a few adjustments, but it’s absolutely doable. Use olive oil instead of butter for the initial sauté, then substitute vegan butter for the 3 tablespoons used in the roux. Use a high-quality dairy-free milk alternative (unsweetened oat milk or cashew milk work best—avoid coconut milk as it’s too heavy). Replace the cheddar with a dairy-free cheddar alternative and use dairy-free sour cream in the final step. The soup won’t taste identical to the original, but it will still be creamy, satisfying, and delicious.
Gluten-Free Version: Substitute all-purpose flour with a gluten-free 1-to-1 flour blend or cornstarch when making the roux. Use the same amount and follow the same technique. Bob’s Red Mill 1-to-1 Gluten-Free Blend works particularly well for this soup. Everything else stays the same.
Lower-Calorie Version: Use ground turkey instead of beef (which is naturally leaner), reduce the cheese to 1 cup, use half-and-half instead of heavy cream, and use Greek yogurt instead of sour cream. The soup will still be satisfying and creamy but significantly lighter. You’ll want to taste and adjust seasonings since the flavors are lighter overall.
Keto/Low-Carb Version: Replace the potatoes with an equal amount of diced cauliflower (fresh or frozen). The soup will be lower in carbs while maintaining the creamy, hearty feel. Some people even replace half the cauliflower with diced mushrooms for extra umami and texture variation.
Higher-Protein Version: Double the amount of ground beef (use 2 pounds instead of 1), and add 4 ounces of crumbled cooked bacon. This makes it a truly protein-packed meal that’s perfect for people building muscle or on a higher-protein diet.
Storage, Reheating, and Make-Ahead Guide

Storing in the Refrigerator: Let the soup cool completely to room temperature before storing—never put hot soup directly into the fridge as it raises the temperature of everything inside. Transfer to airtight containers and refrigerate for up to 4 days. The soup actually tastes better on day two after flavors have melded together overnight.
Freezing Considerations: This soup is tricky to freeze because the potatoes can become mushy and the dairy can separate when thawed. If you do freeze it, let the soup cool completely, transfer it to freezer-safe containers, and freeze for up to 2 to 3 months. Thaw overnight in the refrigerator before reheating. The potatoes will have a slightly different texture, but the flavor will still be good. Some people prefer to freeze just the beef and vegetable mixture without the cheese and cream, then add those components fresh when reheating.
Reheating on the Stovetop: This is the best method for maintaining texture and preventing the cheese from separating. Pour the soup into a saucepan and warm over medium-low heat, stirring occasionally, until steaming. If it seems too thick after sitting overnight (soups often thicken in the fridge), thin it with a splash of milk, cream, or additional broth, stirring it in gradually until you reach the desired consistency.
Reheating in the Microwave: Transfer to a microwave-safe bowl and heat in 1-minute intervals at 50% power (medium), stirring between intervals, until heated through. Don’t use full power as this can cause the cheese to break or the sour cream to separate. This method is less ideal than stovetop reheating but works in a pinch.
Make-Ahead for Batch Cooking: You can prep all the ingredients the night before—dice the vegetables, shred the cheese, measure the broth and seasonings, and cook the bacon. Keep the raw ground beef separate in the fridge. The next day, everything comes together in about 45 minutes. This strategy is perfect if you’re meal prepping for the week.
Do Not Freeze the Completed Soup with Cheese and Cream: The dairy will separate and the texture will be grainy when thawed. If you want to freeze, either freeze before adding the final cheese and cream step, or accept that the texture will change slightly and use the thawed soup in applications where texture is less critical (like using it as a filling for pot pies or reheated and served over rice).
Serving Suggestions and Toppings

Classic Burger Toppings: This is the most obvious choice and incredibly popular. Top with crispy bacon crumbles, diced dill pickles, sliced green onions, shredded cheddar cheese, and a small dollop of sour cream. Let everyone build their own bowl exactly how they like it.
Fancy French Onion Style: Top with crispy fried onions (the kind you’d use on a green bean casserole), a sprinkle of fresh thyme, and a small dollop of sour cream. This elevates the comfort food vibe into something a little more sophisticated.
Loaded Baked Potato Style: Top with crispy bacon, cheddar cheese, sour cream, and sliced green onions. You’re basically turning the soup into the toppings from a loaded baked potato, which works surprisingly well.
Crouton Route: Make or buy crispy croutons and pile them on top, along with cheddar cheese and sliced green onions. For maximum burger flair, make croutons from cubed burger buns toasted with a little butter and garlic powder. Dip the croutons into each spoonful.
Chip and Dip Version: Serve the soup in a mug or small bowl with crispy tortilla chips, potato chips, or Fritos on the side for dipping. This is surprisingly popular with kids and makes it fun and interactive.
Bread Pairing: Serve alongside crusty garlic bread, buttery dinner rolls, or a grilled cheese sandwich (which can be dunked or torn up into the soup). A warm, buttery bread is the perfect complement for soaking up every last bit.
Salad Balance: Serve a small side salad with a vinaigrette to balance the richness of the soup. A simple green salad with lemon vinaigrette, coleslaw, or a tomato and cucumber salad all work perfectly.
Appetizer Portions: Serve the soup in mugs or small cups as an appetizer at a gathering, topped with crispy bacon and a sprinkle of cheese. This makes it easy to eat while mingling and becomes an impressive, unexpected starter.
Slow Cooker Adaptation
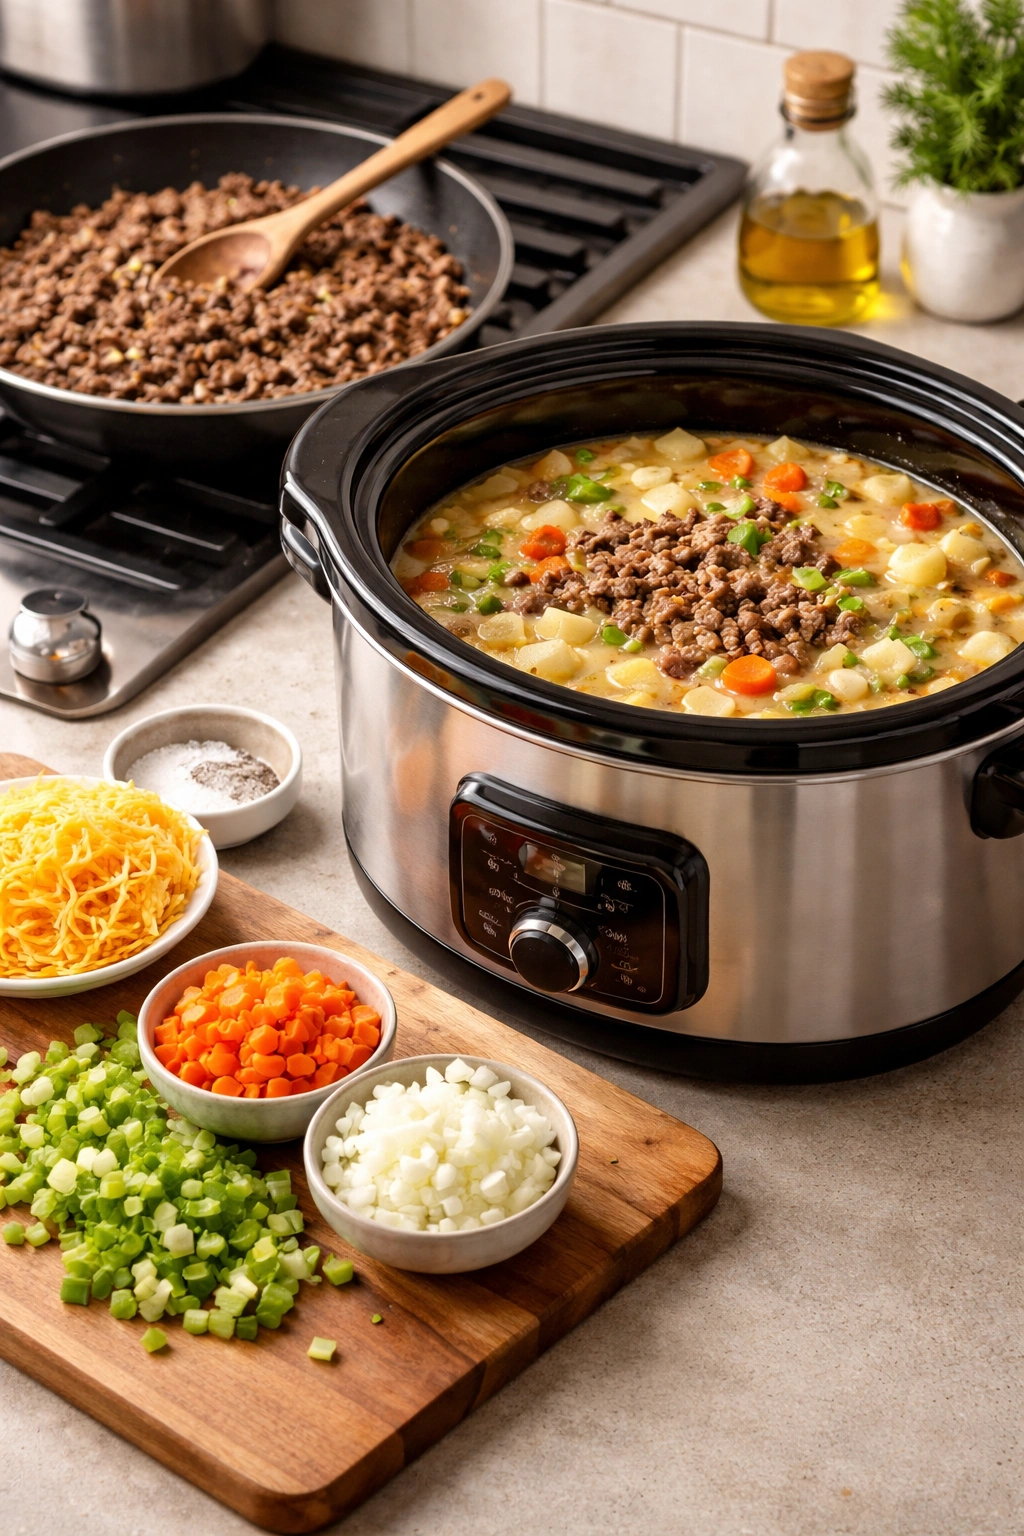
Yes, you absolutely can make this soup in a slow cooker, and it’s perfect for busy days when you want everything ready when you get home. Here’s how to adapt it: Brown the ground beef in a skillet on the stovetop and drain thoroughly. Sauté the diced onion, celery, and carrots in the same skillet for 3 to 4 minutes until they start to soften. Transfer the beef and vegetables to a 6-quart slow cooker along with the diced potatoes, chicken broth, basil, parsley, garlic powder, salt, and pepper.
Cover and cook on low for 5 to 6 hours or on high for 2.5 to 3 hours, until the potatoes are very tender. About 30 minutes before serving, make the roux in a small skillet (melt the butter, whisk in the flour, cook until golden). Turn the slow cooker to the highest setting, whisk the roux into the hot soup, and cook for 10 minutes to thicken. Turn off the heat, add the cheese in batches, stirring until melted, then stir in the milk and sour cream.
The slow cooker version works beautifully and requires no stirring until you add the cheese at the end. The only downside is the longer cook time, so it’s ideal for days when you’re home but need hands-off cooking.
Instant Pot and Pressure Cooker Version
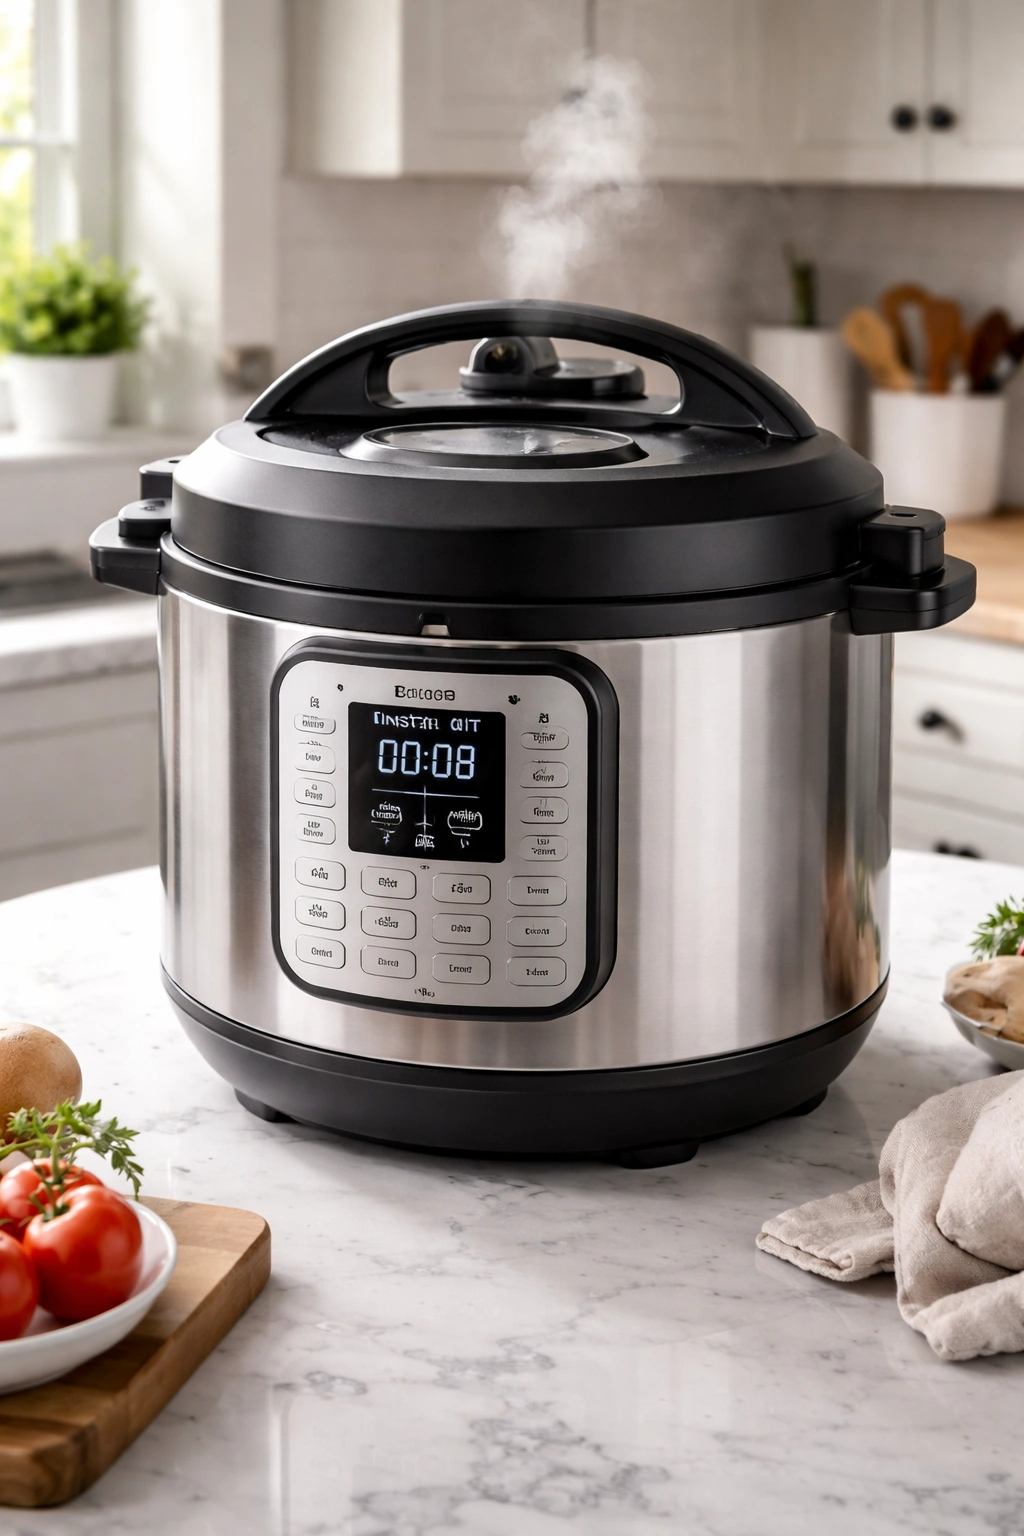
Pressure cookers drastically cut the cooking time, making this soup ready in under 30 minutes from start to finish. Brown the ground beef using the sauté function on high, then drain and set aside. Use the same sauté function to cook the onion, celery, and carrots for 3 minutes. Add the diced potatoes, chicken broth, basil, parsley, garlic powder, salt, and pepper, plus the cooked ground beef.
Close the lid and set to high pressure for 5 minutes. Use the quick release method to release pressure immediately. Switch to sauté mode again, make your roux in a separate skillet while that’s heating up, then whisk the roux into the pot. Let it cook on sauté for 2 to 3 minutes until thickened. Turn off the pressure cooker, add the cheese in batches, stir in the milk and sour cream, and serve immediately.
The pressure cooker version is incredibly convenient and cuts about 25 minutes off the total cooking time. The potatoes will be slightly softer than the stovetop version, but the flavor is identical.
Common Questions About This Soup
Can I use ground turkey instead of ground beef? Absolutely. Ground turkey is leaner and creates a lighter version of the soup. Use the same amount and follow the same cooking process. Some people find that turkey-based cheeseburger soup benefits from an extra tablespoon of Worcestershire sauce or a pinch of garlic powder to compensate for the milder flavor of turkey.
What if I don’t have heavy cream—can I use milk instead? Yes, you can use all milk instead of cream, but the soup will be slightly thinner and less rich. If you want it creamy with all milk, you could add an extra tablespoon of butter to the roux or use whole milk instead of lower-fat milk. The soup will still taste great, just not quite as decadent.
Can I add other vegetables like mushrooms or bell peppers? Absolutely. Sauté them along with the onion, celery, and carrots. Mushrooms add earthiness, bell peppers add sweetness and color, and both work wonderfully with the burger flavors. Just keep the total amount of vegetables roughly the same so the soup proportions stay balanced.
My cheese didn’t melt smoothly—what went wrong? This typically means the pot was still hot when you added the cheese. Remember to turn off the heat completely before adding the cheese. If it already happened, remove the pot from heat and let it cool for 5 minutes, then try stirring again. The cheese might not fully recover, but it will improve. Next time, definitely turn off the heat first.
Is this soup healthy? It’s a comfort food, so it’s naturally indulgent with cheese, cream, and beef. That said, it contains protein from the beef, vitamins and minerals from the vegetables and potatoes, and calcium from the cheese. It’s not a light salad, but it’s also not unhealthy if eaten in reasonable portions. If you want a lighter version, use ground turkey, reduce the cheese, and use milk instead of cream.
How long does it take to make from start to finish? About 50 minutes from the moment you start prepping to when you’re serving. About 15 minutes of that is prep work (chopping vegetables, shredding cheese), and 35 minutes is actual cooking. If you prep ingredients ahead, the cooking part can be done while you’re doing other things.
Can I add beans or pasta to make it more filling? Yes, though it changes the character slightly. White beans or cannellini beans work well and add fiber and protein. For pasta, add cooked noodles just before serving—don’t cook them in the soup as they’ll get mushy. Some people use diced macaroni and serve it like a deconstructed cheeseburger mac and cheese.
What’s the best potato for this recipe? Yukon Gold or all-purpose potatoes are ideal because they hold their shape while still becoming creamy. Russets work but are starchier and can make the soup thicker. Red potatoes are too waxy and stay firm, which isn’t ideal. If you only have one type, use what you have—the soup will still be delicious.
Final Thoughts
This easy cheeseburger soup represents everything great about comfort food done right: it’s genuinely delicious, genuinely easy to make, and genuinely loved by everyone who eats it. There’s no pretense here, no complicated techniques you need to master, just honest flavors built from pantry staples and a few key cooking principles. The combination of savory beef, sharp cheddar, creamy potatoes, and optional toppings creates something that tastes indulgent without being apologetic about what it is.
What makes this recipe special in your rotation isn’t just that it tastes amazing—it’s that you can make it on a Tuesday night after work, have dinner on the table in 50 minutes, and still have everyone asking for seconds. It’s the kind of dish that brings families together, makes picky eaters happy, and earns its place as a regular feature on your weeknight menu. And because it tastes even better the next day, you can make a big batch and feel relieved knowing you have easy lunches covered for days.
Whether you’re cooking for a crowd, feeding your family, meal prepping for the week, or just need something warm and satisfying, this soup delivers every single time. Make it once, and you’ll understand why it’s become a beloved favorite across so many kitchens.