When life gets hectic, there’s something deeply reassuring about a warm, creamy chicken casserole hitting the table. No complicated techniques. No fussy plating. Just honest, satisfying comfort food that comes together quickly and feeds your family without drama. If you’ve ever stared at your calendar wondering what to cook tonight, this is exactly what you’ve been looking for—a dish that requires minimal hands-on effort but delivers maximum flavor and contentment. A good chicken casserole is the secret weapon of home cooks who refuse to sacrifice quality for convenience.
The magic of casseroles lies in their simplicity. Everything goes into one dish, the oven does most of the work, and cleanup is refreshingly minimal. For busy families juggling work, school, activities, and life’s endless to-do lists, a chicken casserole means you can spend less time in the kitchen and more time actually enjoying dinner together. Better yet, most of the prep happens before the oven is even preheated, leaving you free to handle other tasks while it bakes.
What makes a chicken casserole truly brilliant for hectic evenings is how forgiving it is. Need to swap in ingredients you already have? Go ahead. Want to throw in leftover vegetables? Perfect. Running late and need dinner 10 minutes sooner? You can adjust the oven temperature slightly. This is flexible, real-world cooking that adapts to your actual life, not some idealized version of it.
Why Chicken Casserole Is Perfect for Busy Nights
Chicken casseroles have earned their place as a staple on busy family tables for good reason. The time investment is remarkably small—most of the hands-on work happens in the first 10 to 15 minutes. You’re simply layering ingredients, stirring a few things together, and sliding the dish into the oven. While it bakes, you’re completely free to handle other responsibilities, help with homework, answer emails, or just decompress for a few minutes.
The cost-efficiency is another massive advantage. You’re building an entire meal from a handful of affordable ingredients: cooked chicken (which you can buy pre-shredded or rotisserie to save time), condensed cream soup, cheese, and a simple topping. These ingredients work together to create a dish that feels rich and indulgent but doesn’t strain your grocery budget.
Nutrition-wise, a well-made chicken casserole delivers real protein, calcium from the cheese, and vegetables if you choose to include them. Unlike processed convenience foods, you control exactly what goes into it. You know precisely where each ingredient comes from, which matters when you’re feeding your family.
The most underrated benefit? It actually tastes better as leftovers. The flavors meld together, the casserole absorbs moisture evenly, and a quick oven reheat restores the texture beautifully. Many cooks report that their chicken casserole is even more delicious the next day, which means you’re essentially getting two dinners from one cooking session.
The Beauty of One-Dish Weeknight Dinners
One-dish meals represent the pinnacle of practical home cooking. There’s a reason casseroles have remained popular for generations—they work. A single baking dish contains your entire meal, which means fewer pots to wash, less kitchen mess to manage, and dramatically simplified cooking logic. This matters more than you might think when you’re already exhausted from the day.
Psychologically, having everything in one place also reduces decision fatigue. You’re not standing in front of your stove wondering what to cook with your main dish or whether you remembered to prepare a side. The casserole is the meal. This clarity is genuinely valuable when your mental energy is already stretched thin.
From a food safety perspective, one-dish meals also make temperature management easier. You’re not juggling multiple pots at different stages of doneness. Everything cooks through together, and you know it’s done when the filling bubbles and the topping browns. It’s straightforward and reliable.
The batch-cooking potential is enormous. A standard casserole serves 6 to 8 people comfortably, which means a single baking session can cover multiple meals if you have a smaller household, or provide enough for a second dinner night with minimal additional effort. Some cooks freeze portions, creating a backup dinner for genuinely desperate evenings.
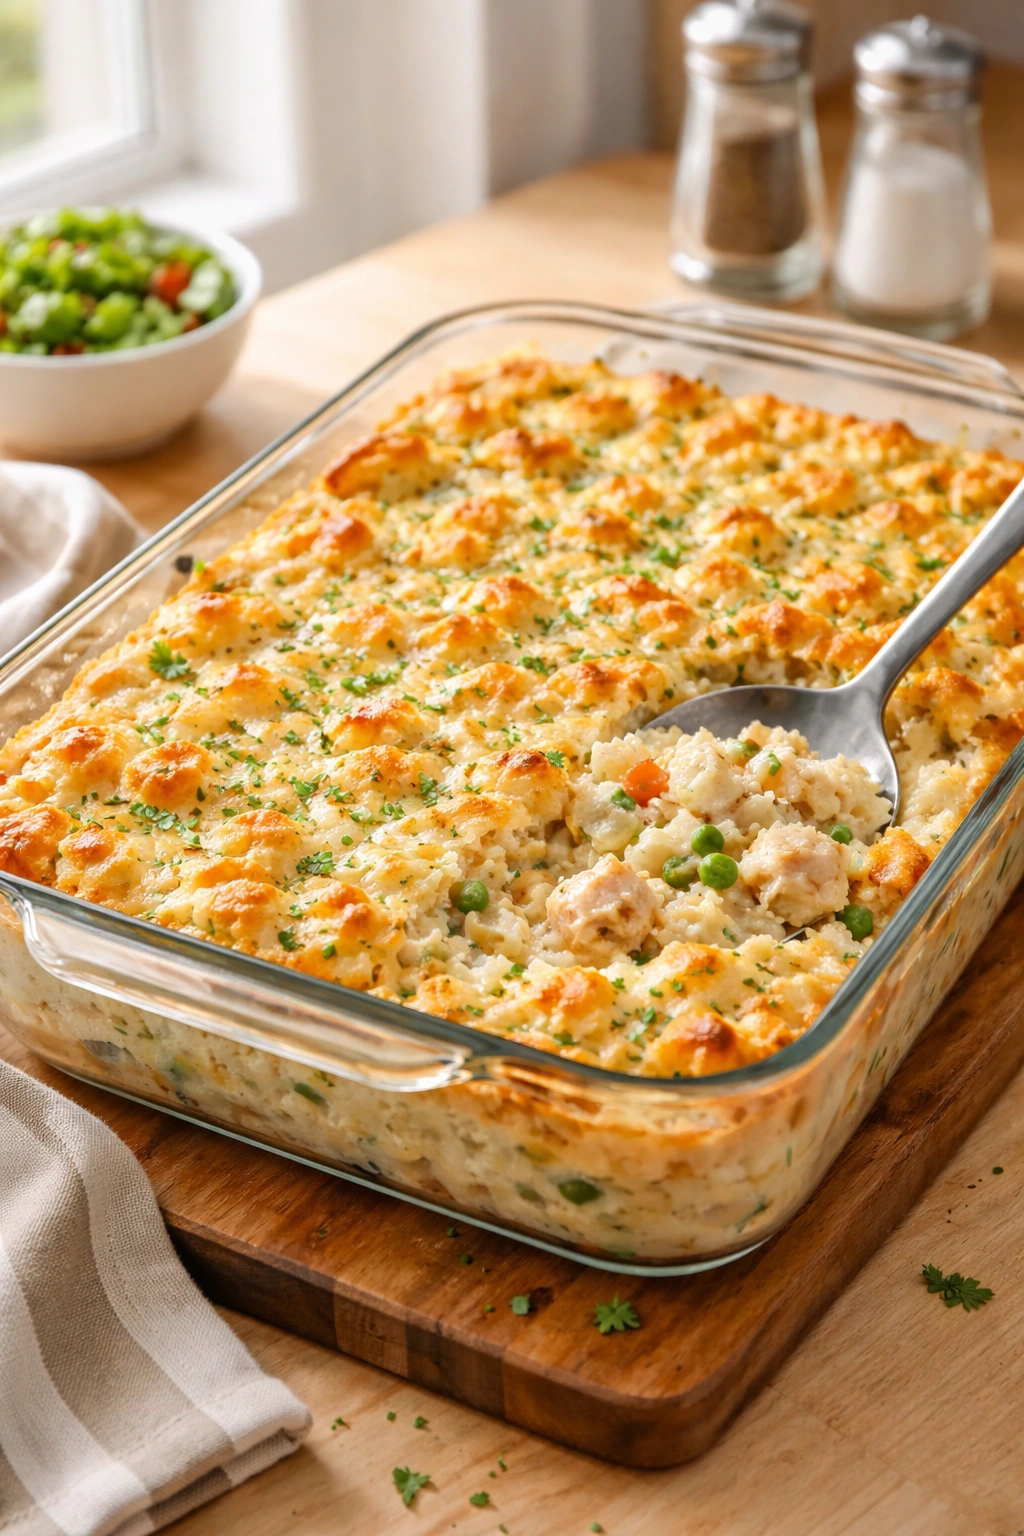
Classic Creamy Chicken Casserole
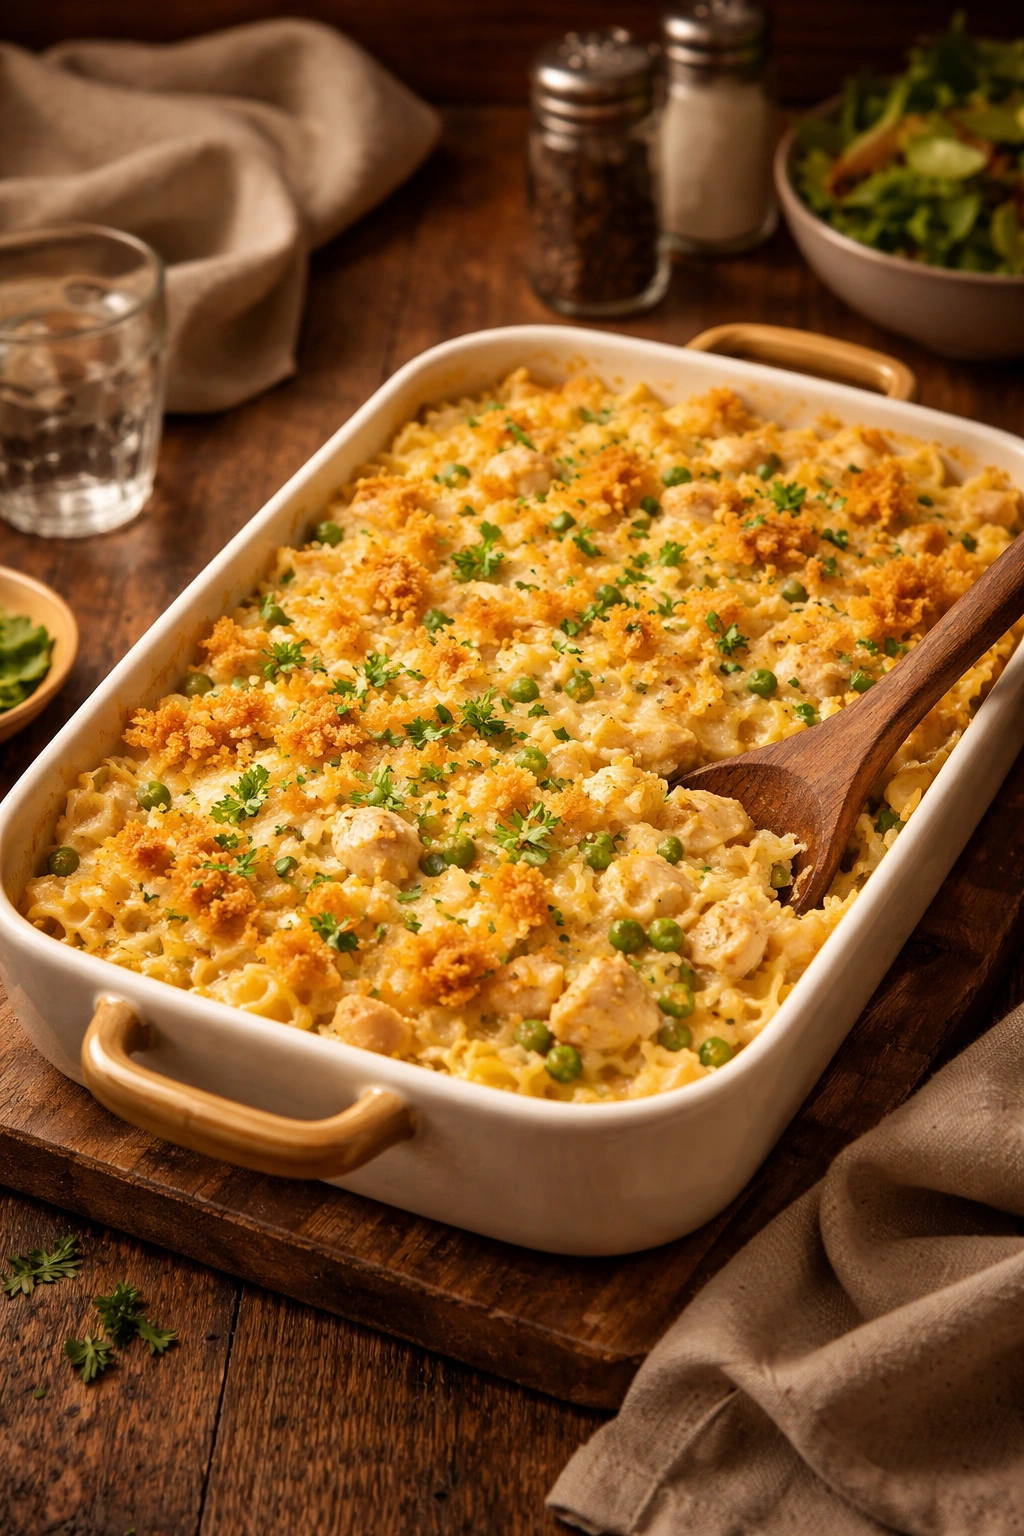
This is the foundational recipe—the one you’ll return to again and again because it works flawlessly every single time. It’s approachable enough for a beginner but perfectly satisfying for experienced cooks. The flavor is mild and accessible without being bland, the texture is creamy without being heavy, and the topping delivers genuine crunch that contrasts beautifully with the soft filling underneath.
Yield: Serves 6 to 8 | Prep Time: 10 minutes | Cook Time: 35 minutes | Total Time: 45 minutes | Difficulty: Beginner — The recipe requires no special techniques, just simple assembly and baking.
For the Casserole:
- 3 cups cooked shredded chicken (about 1 rotisserie chicken, or 1 pound boneless chicken breasts, cooked and shredded)
- 2 cans (10.5 ounces each) condensed cream of chicken soup, undiluted
- 1 cup sour cream, room temperature
- 2 cups shredded sharp cheddar cheese, divided (about 8 ounces)
- 1 teaspoon onion powder
- 1 teaspoon garlic powder
- ½ teaspoon kosher salt (adjust based on your broth and rotisserie chicken saltiness)
- ¼ teaspoon black pepper
For the Topping:
- 2½ cups panko bread crumbs (lightly crushed if using large pieces)
- 4 tablespoons unsalted butter, melted
- ¼ teaspoon kosher salt
- Pinch of black pepper
Preparing the Dish
Preheat your oven to 350°F (175°C). Position the rack in the center of the oven so the casserole receives even heat circulation from all sides.
Lightly spray a 9×13-inch baking dish (or any 3-quart baking dish) with cooking spray, or rub it with a small amount of butter. This prevents sticking and makes cleanup easier later.
Making the Filling
Step 1: In a large mixing bowl, combine the cream of chicken soup and sour cream. Whisk these together until completely smooth with no lumps. The sour cream adds subtle tang and richness that balances the saltiness of the condensed soup.
Step 2: Stir in the onion powder, garlic powder, salt, and black pepper. Taste a small spoonful and adjust seasoning if needed—remember that the cheese will add additional salt, so season conservatively.
Step 3: Fold in the cooked chicken gently, along with 1½ cups of the shredded cheddar cheese. Use a rubber spatula and fold rather than stir aggressively to keep the chicken pieces intact and prevent overworking the mixture. The chicken should be evenly distributed throughout the creamy filling.
Step 4: Transfer the entire mixture to your prepared baking dish and spread it into an even layer using a spatula. At this point, you can pause if needed—cover the dish with plastic wrap and refrigerate for up to 2 days before proceeding to the topping and baking steps.
Preparing the Topping
Step 5: While the filling rests, prepare the topping. Place the panko bread crumbs in a medium bowl. Pour the melted butter over the crumbs and stir until every piece is coated with butter. The crumbs should look slightly darkened and moist. Add the salt and pepper and toss once more.
Step 6: Sprinkle the remaining ½ cup of cheddar cheese evenly over the casserole filling. Then distribute the buttered bread crumb mixture evenly across the top, making sure to cover the entire surface. Don’t press down too hard—you want the topping to stay light and crispy, not compacted into a dense crust.
Baking and Serving
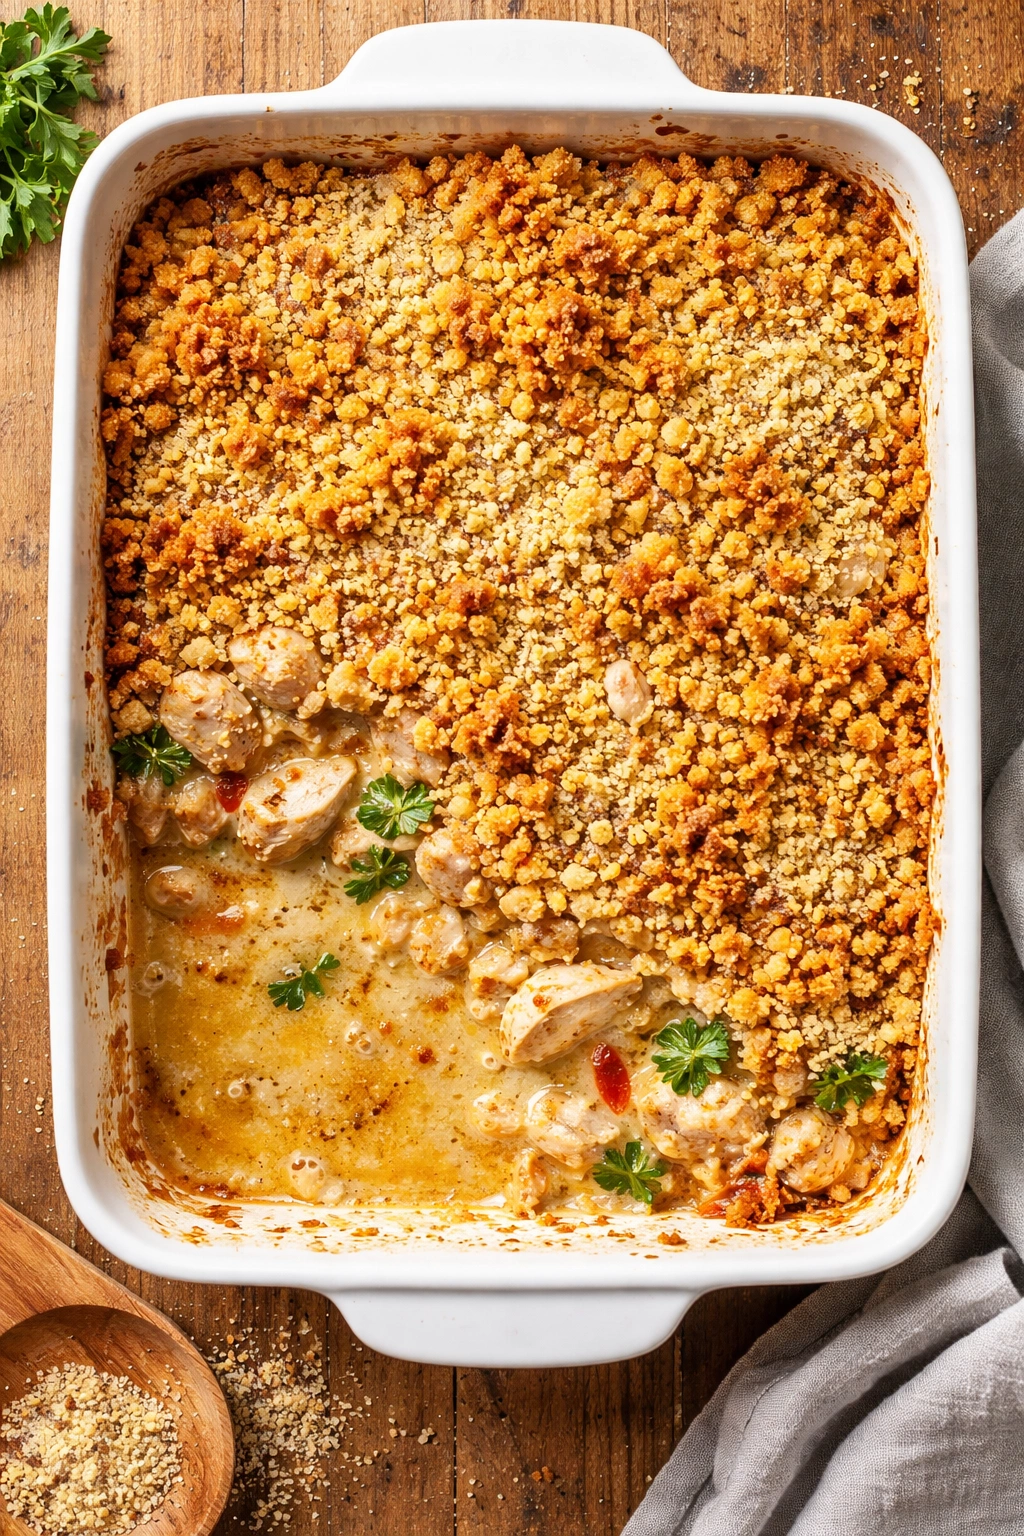
Step 7: Bake uncovered for 35 to 40 minutes, until the filling is visibly bubbling around the edges of the dish and the bread crumb topping is golden brown. You’re looking for the topping to have color—not pale, but also not deeply browned.
Step 8: Remove the casserole from the oven and set it on a wire cooling rack. Let it rest for 10 to 15 minutes before serving. This is crucial and worth the wait. The filling needs time to set slightly, which means when you scoop a portion onto a plate, it will hold together nicely instead of collapsing into a puddle. While the casserole rests, you can put finishing touches on any side dishes, set the table, or simply take a breath.
Essential Tips for Casserole Success
Cooked chicken quality matters. Use a good-quality rotisserie chicken if you’re taking the convenience route—the flavor difference is noticeable. If you’re cooking chicken yourself, a quick poach in broth takes about 12 to 15 minutes and adds subtle flavor to the finished dish. Shredded chicken also cooks more quickly than whole breasts.
Don’t skip the sour cream. The condensed soup alone creates a filling, but sour cream adds body, slight tang, and a creaminess that feels intentional rather than one-dimensional. If you don’t have sour cream, Greek yogurt works reasonably well in a pinch, though the flavor will be slightly different.
Panko makes a real difference. Regular bread crumbs pack down during baking and become dense and tough. Panko crumbs are flakier and larger, so they stay lighter and crunchier even with butter and heat. This contrast between crispy topping and creamy filling is essential to casserole appeal.
Cheese choice matters more than you think. Sharp cheddar has more pronounced flavor than mild, which means you need less of it to achieve the same satisfaction. Pre-shredded cheese contains anti-caking agents that interfere with melting—shred your own cheese from a block for noticeably better texture in the finished dish.
Watch your seasoning carefully. Rotisserie chicken is already quite salty, as are condensed soups. Taste before you assemble, and season conservatively. You can always add more salt later, but you can’t take it out. Start with about ½ teaspoon and adjust upward if needed.
Temperature control prevents overbaking. Some ovens run hot, others run cool. Check your casserole at 30 minutes by looking at the filling around the edges—it should be starting to bubble gently. The bread crumbs should be light golden by 35 minutes. If your oven tends to brown things quickly, you might reduce the temperature to 325°F and add a few minutes to the baking time.
Smart Variations to Keep Things Fresh
The base recipe is perfect, but variety keeps this dish from becoming monotonous if you’re serving it regularly. Each variation changes the personality of the dish while maintaining its fundamental ease.
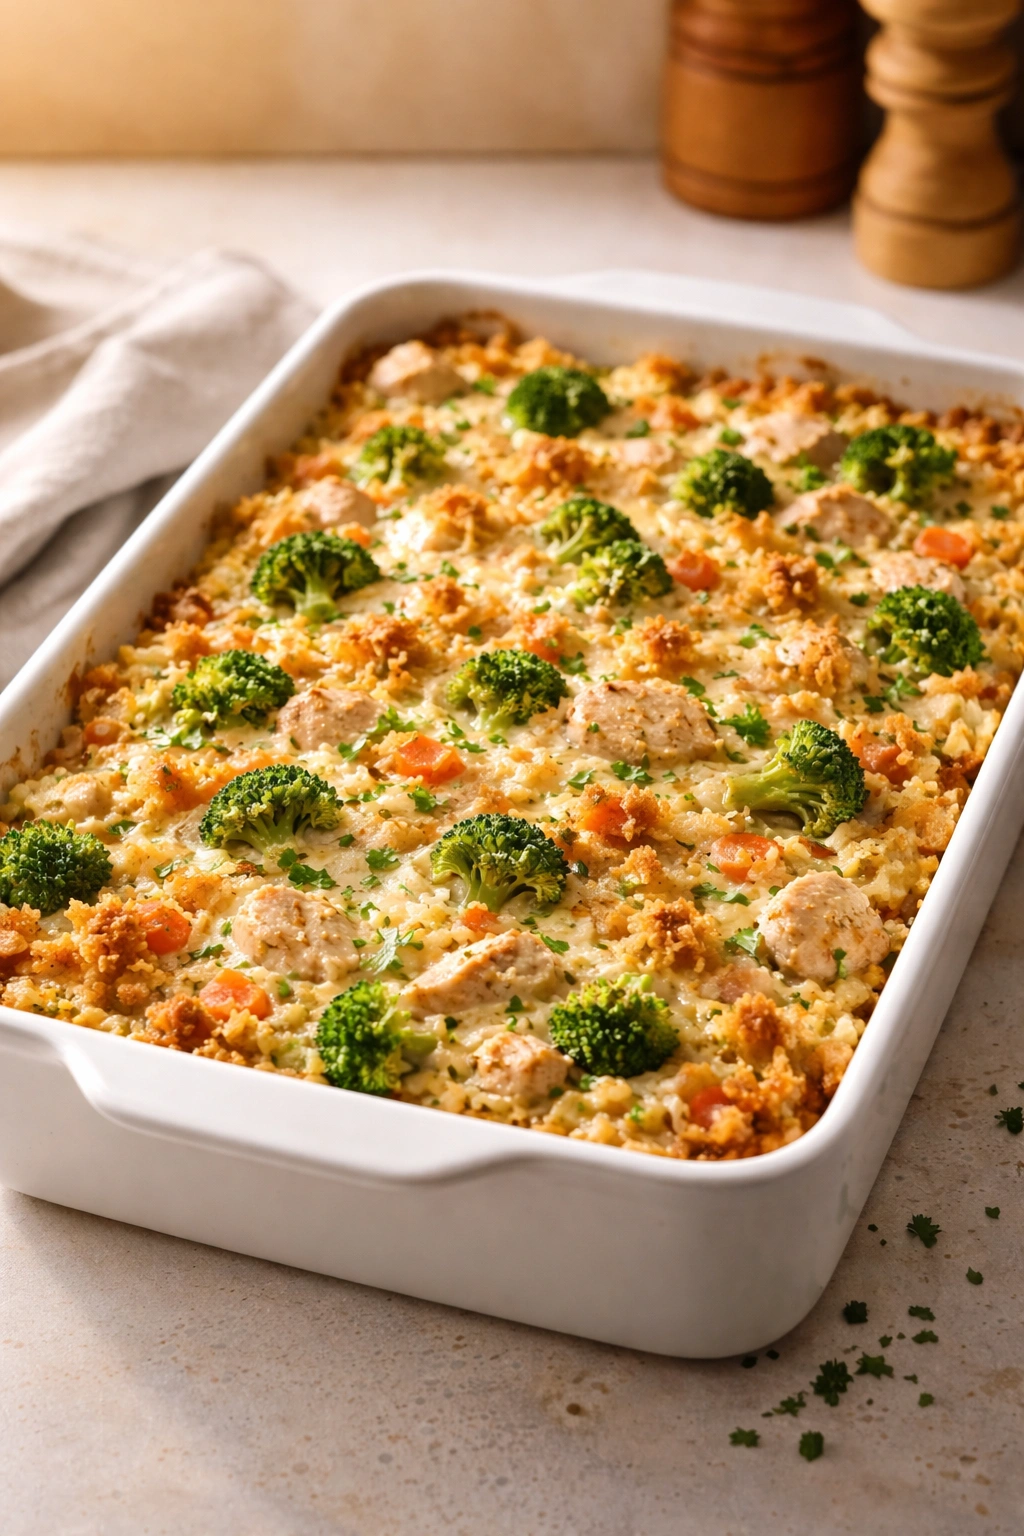
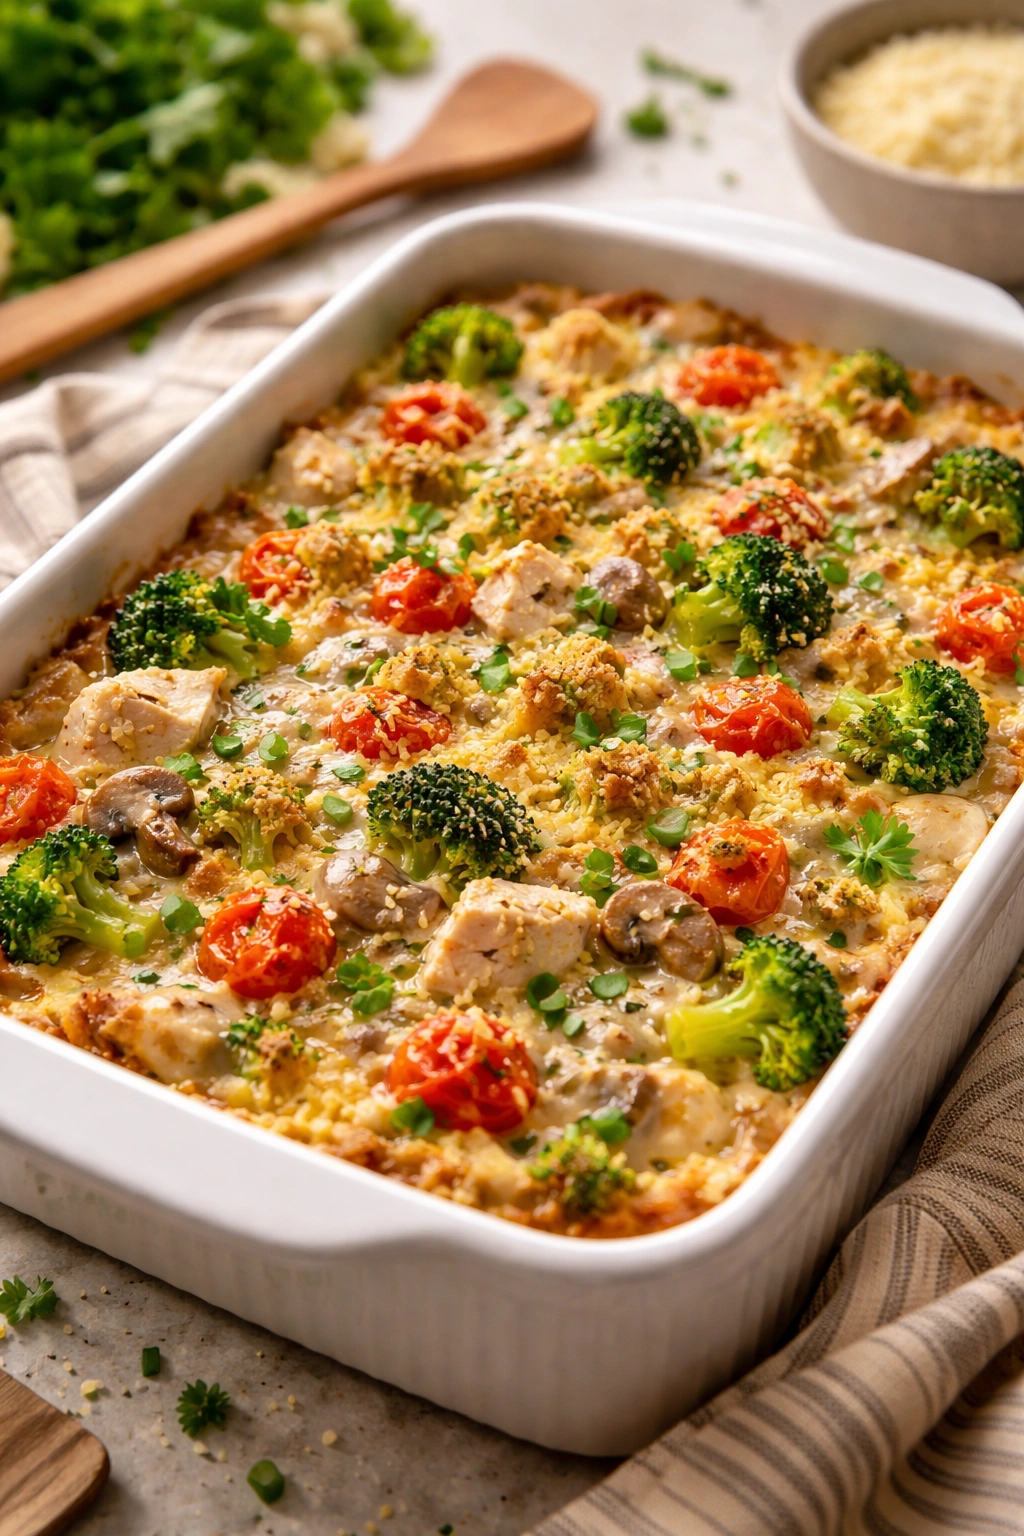
Vegetable-Loaded Version
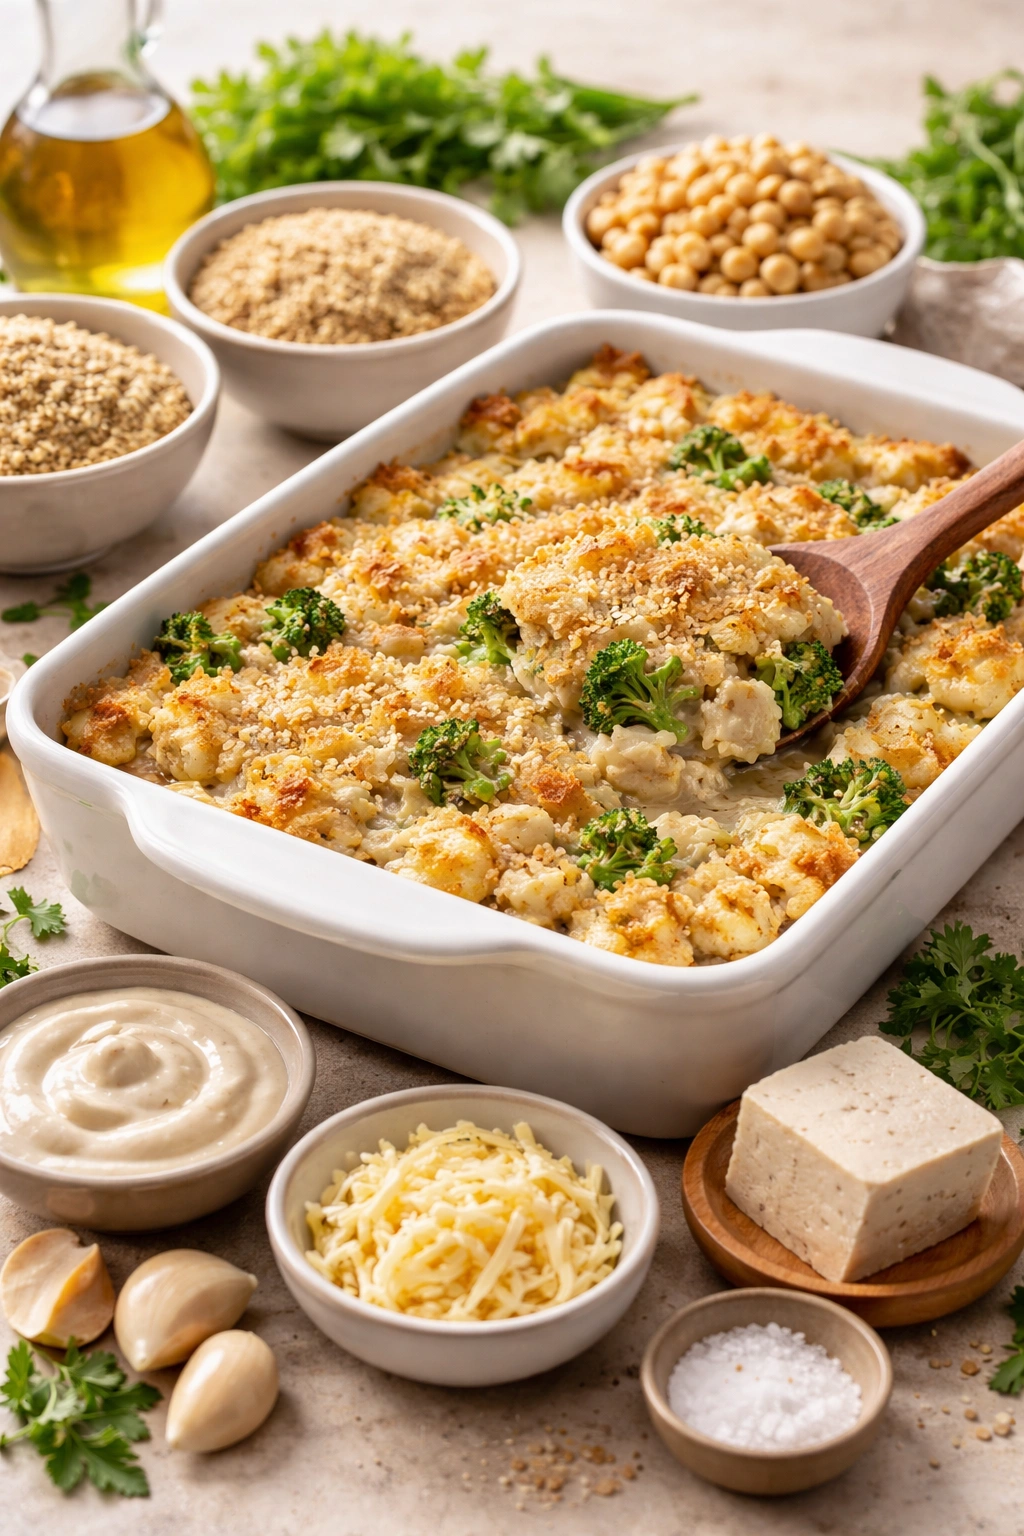
Add 1 to 1½ cups of cooked vegetables to the filling before baking. Lightly steamed broccoli florets work wonderfully, as do blanched green beans, frozen peas (thawed), sautéed mushrooms, or roasted asparagus pieces. If using raw vegetables like fresh mushrooms, sauté them first with a little butter to remove excess moisture, which prevents the casserole from becoming watery.
Herbed Variation
Replace the onion and garlic powder with fresh herbs for a more sophisticated flavor profile. Chop 2 tablespoons of fresh thyme, sage, or a combination of herbs and stir them into the filling. Fresh herbs add brightness that complements the richness of the cream sauce.
Southwestern-Inspired Version
Use cream of chicken soup with roasted green chiles or cream of poblano soup if you can find it. Add ½ cup of salsa, 1 teaspoon of cumin, and ½ teaspoon of chili powder to the filling. Substitute half of the cheddar with Monterey Jack cheese. Top with crushed tortilla chips instead of bread crumbs for a completely different texture.
Wild Rice and Mushroom Upgrade
Replace half of the cream of chicken soup with cream of mushroom soup. Add ¾ cup of cooked wild rice to the filling. Sauté 8 ounces of sliced mushrooms in butter before adding them to the casserole. This version feels distinctly more elegant and slightly earthy.
Light and Healthy Version
Swap half of the sour cream for plain Greek yogurt to reduce fat without sacrificing creaminess. Use low-sodium condensed soup or make your own cream sauce from scratch using butter, flour, and chicken broth. Add plenty of vegetables—this version can handle up to 2 cups of mixed vegetables without becoming watery.
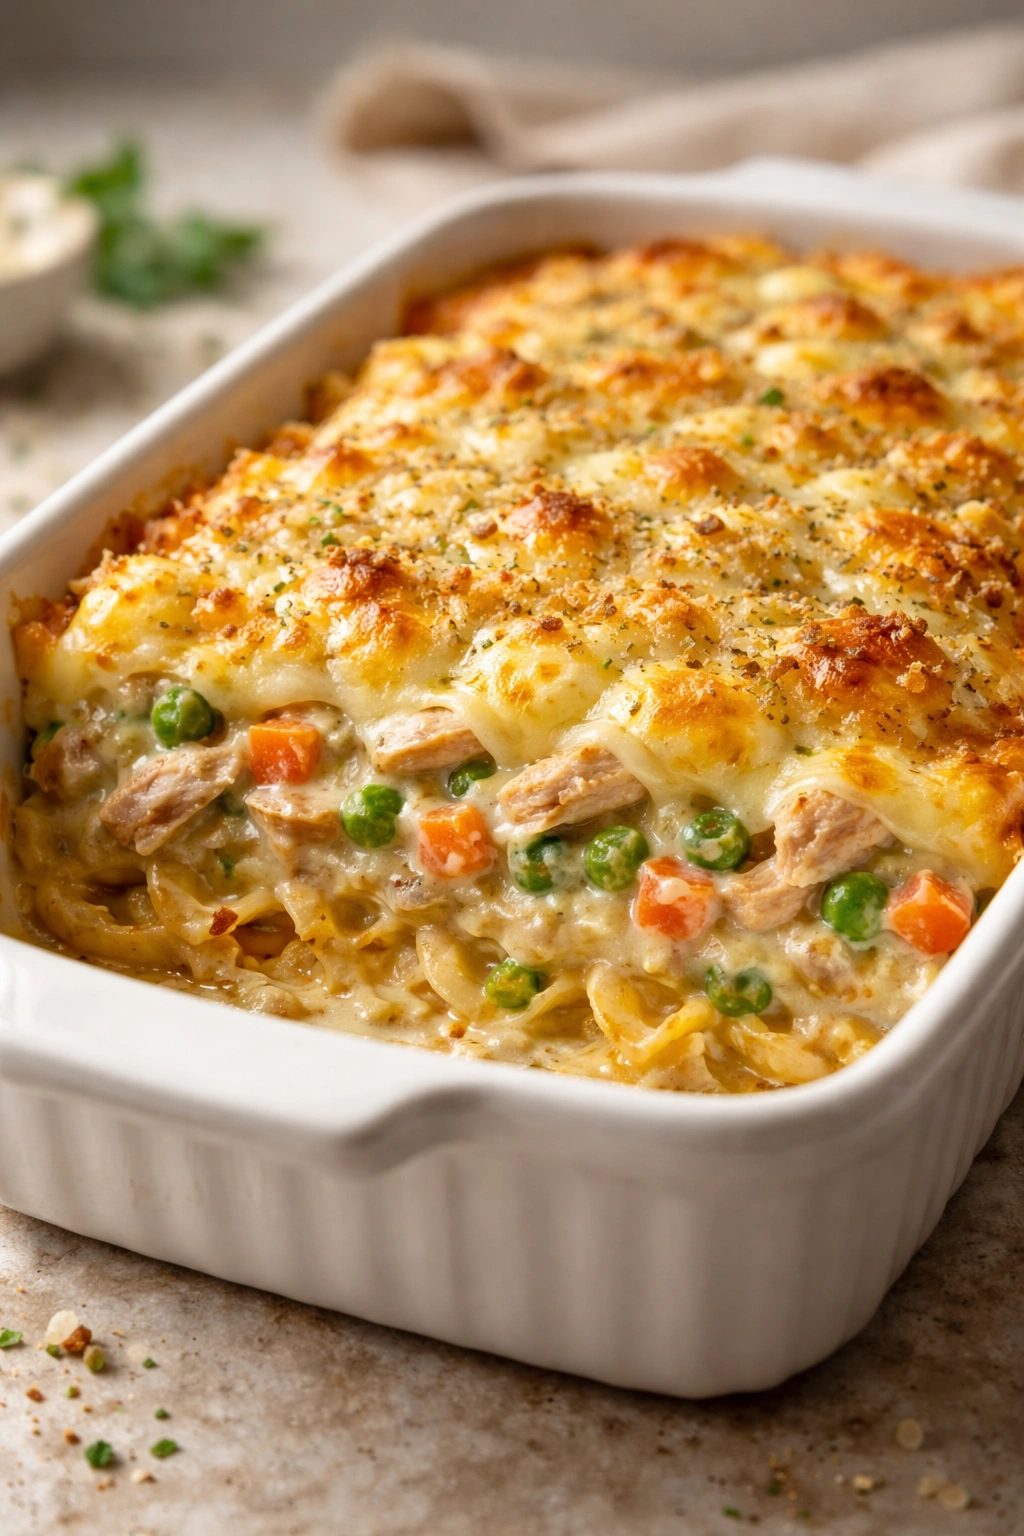
Leftover Turkey Transformation
This recipe works flawlessly with cooked turkey instead of chicken, making it perfect for the day after Thanksgiving or any time you have leftover poultry. Use the same proportions and cooking instructions. The flavor is slightly milder and equally delicious.
Time-Saving Shortcuts That Actually Work

Real-world cooking demands actual shortcuts, not just suggestions. These modifications genuinely save time without compromising the final dish.
Buy a rotisserie chicken. This is the single biggest time-saver. A quality rotisserie chicken is already cooked, seasoned, and ready to shred. You’ll spend maybe 3 minutes pulling the meat off the bones compared to 20 minutes cooking and cooling chicken breasts. The flavor is excellent, and most grocery stores have them available throughout the day.
Use quality condensed soup. Yes, this is convenience food, and that’s completely fine. The cream of chicken soup from reputable brands creates a flavorful base that works beautifully in this context. There’s no shame in using it—it’s designed for exactly this purpose.
Prep everything the night before. Mix your filling and prepare your topping in separate containers the evening before. In the morning or the next evening, simply layer everything into your baking dish and pop it in the oven. You’ve essentially moved the work to a time when you had mental space for it.
Double the recipe and freeze half. If you’re assembling one casserole, assembling two takes barely any additional effort. Freeze the second one unbaked in a disposable aluminum container. When you need a quick dinner, you can bake it directly from frozen—just add 10 to 15 minutes to the baking time.
Use pre-shredded cheese if you’re truly desperate. While freshly shredded melts better, pre-shredded cheese still works and saves several minutes of prep. This is the kind of compromise that matters when you’re genuinely stretched thin.
Make-Ahead and Freezing Strategies
The real magic of casseroles shows up in their flexibility with timing. You can prepare a casserole hours in advance, freeze it for weeks, or bake it immediately—it adapts to your schedule rather than demanding you adapt to it.
Refrigerator Storage (Unbaked): Assemble the casserole completely—filling and topping—and cover it tightly with plastic wrap. It keeps safely for up to 2 days in the refrigerator. If your topping sits in the refrigerator for more than a few hours, it may absorb some moisture from the filling and become slightly soggy. For the crispiest topping, assemble the filling ahead but add the bread crumb topping no more than 2 to 3 hours before baking. If you’ve already mixed the topping with butter, store it separately in an airtight container and add it right before the casserole goes into the oven.
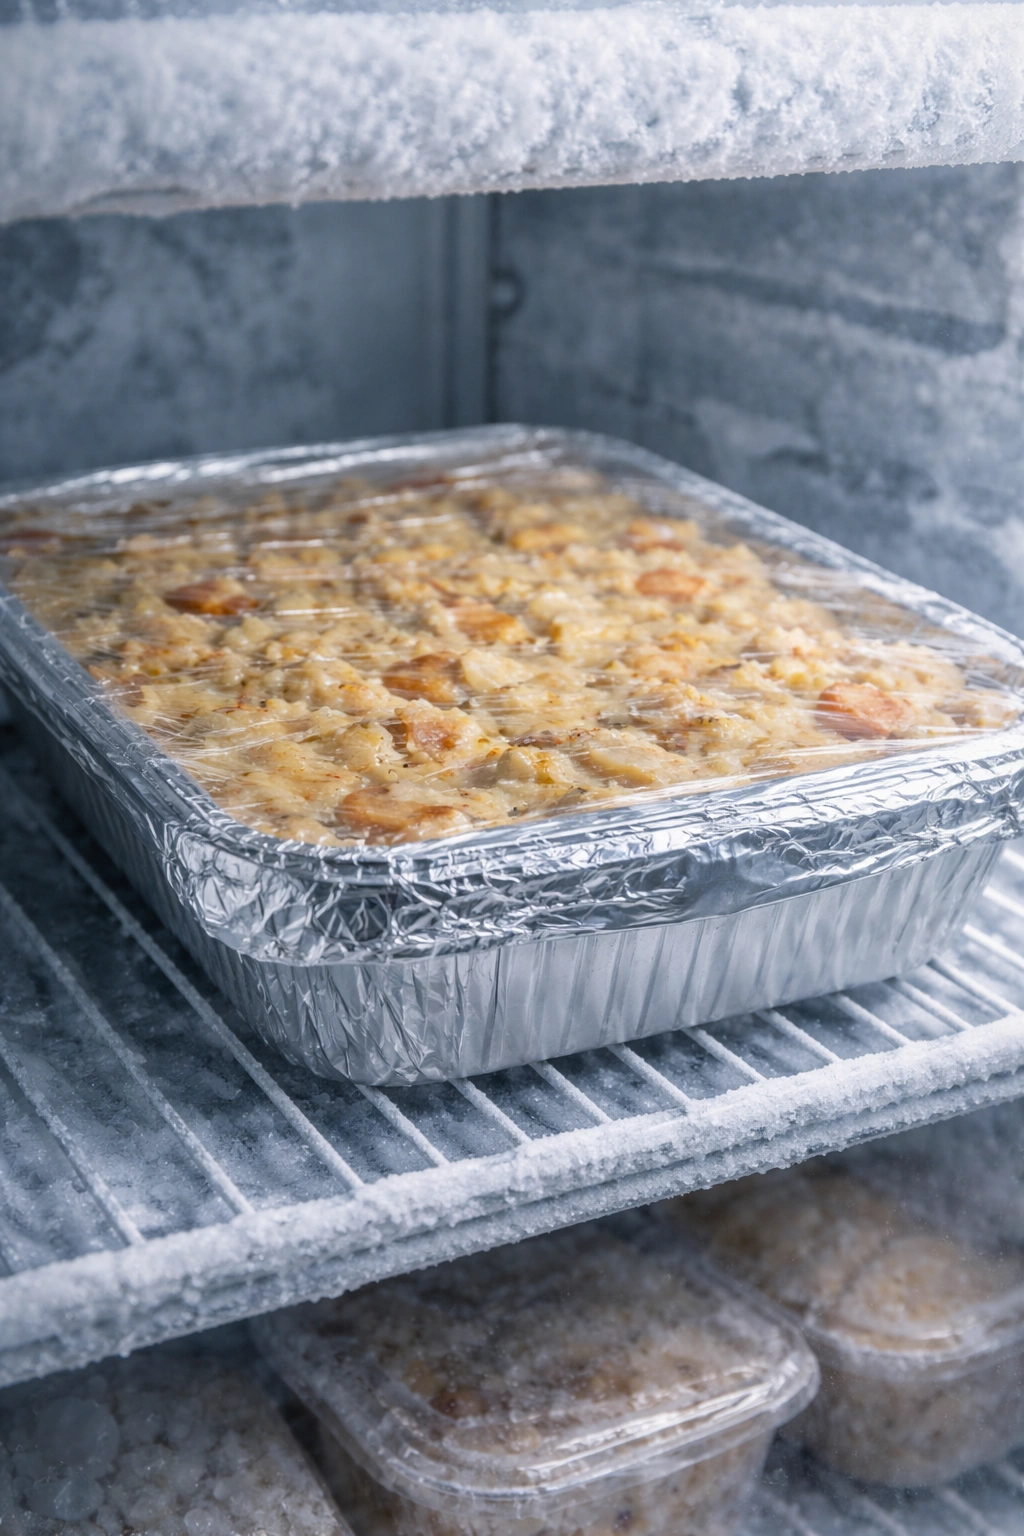
Freezing (Unbaked): This is where casseroles truly shine for busy cooks. Assemble everything in a disposable aluminum baking dish or a freezer-safe baking dish. Cover tightly with plastic wrap, then add a layer of aluminum foil for extra protection against freezer burn. Label it with the date and contents. It keeps frozen for up to 3 months, though it’s best used within 6 weeks.
Baking from Frozen: You have two options. Thaw the casserole overnight in the refrigerator, then bake according to the standard recipe. Alternatively, bake directly from frozen—increase the oven temperature to 375°F and bake for 50 to 60 minutes, until the filling is bubbling and the topping is golden brown. The casserole may take slightly longer to heat through when frozen, so check for visible bubbling around the edges as your main indicator of doneness.
Freezing (Baked): Cool the baked casserole completely, then cover it with plastic wrap and foil. It freezes well for up to 2 months. Reheat in a 350°F oven, covered, for about 20 to 25 minutes until heated through. Uncover it for the last few minutes if you want to recrisp the topping slightly.
Storage and Reheating Guide

Leftover casserole is genuinely one of life’s pleasant surprises—most versions taste even better the next day as flavors meld and the filling becomes evenly infused with cream and cheese.
Refrigerator Storage: Cool the baked casserole to room temperature, then transfer any leftovers to an airtight container. It keeps safely for up to 4 days. Don’t leave it sitting at room temperature for longer than 2 hours, as the creamy filling can develop unwanted bacteria.
Oven Reheating (Best Method): Transfer leftovers to an oven-safe dish and cover loosely with foil. Bake at 350°F for 15 to 20 minutes, until heated through. Remove the foil for the last 2 to 3 minutes if you want to recrisp the topping. This method restores the original texture most faithfully.
Microwave Reheating (Quick Option): Place a single serving on a microwave-safe plate and cover it loosely with a damp paper towel. Microwave on 50% power for 2 to 3 minutes, stirring halfway through, until heated through. The topping will soften slightly in the microwave, but the filling reheats evenly.
Stovetop Reheating: You can also gently reheat leftovers in a skillet over medium heat, stirring occasionally, until the mixture is heated through. This works well if you’re planning to serve it over rice or noodles rather than standalone.
Serving Suggestions and Pairings
A casserole is technically a complete meal, but thoughtful sides elevate it from dinner to a genuinely memorable evening.
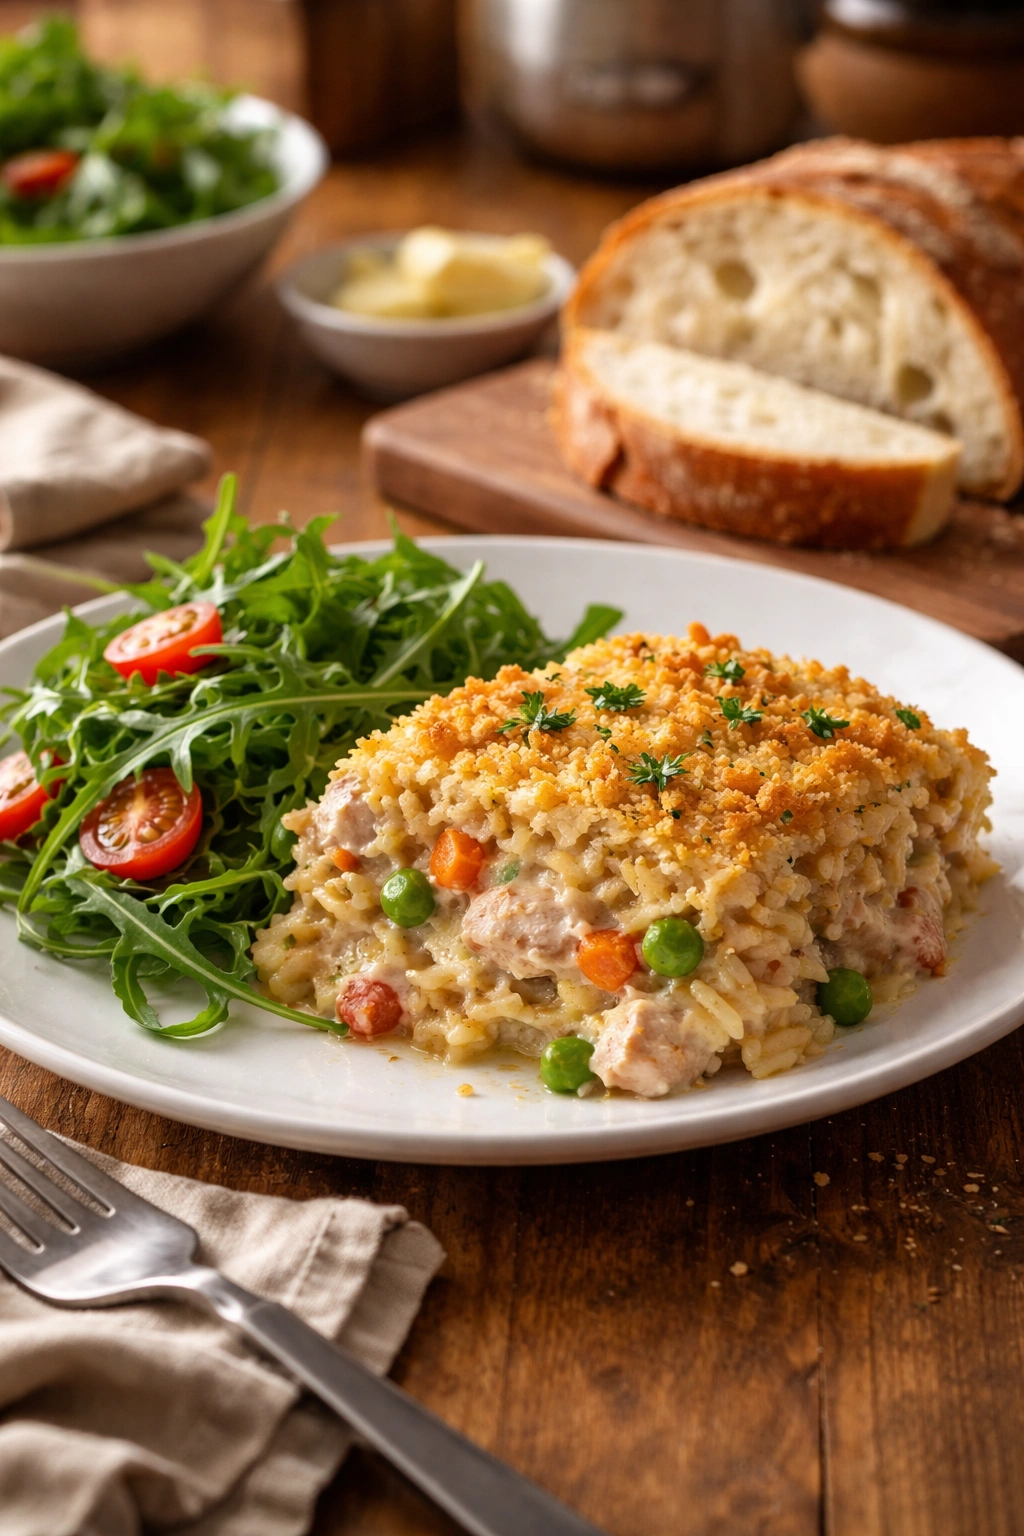
Green vegetables provide the best contrast. A simple arugula salad with lemon vinaigrette, roasted asparagus with garlic, steamed broccoli with olive oil, or sautéed green beans all work beautifully. The brightness and slight bitterness or pepperness of greens balance the richness of the casserole.
Bread is nearly mandatory. Crusty dinner rolls, buttered cornbread, garlic bread, or warm biscuits give everyone something to use for soaking up extra sauce. A basket of bread also takes pressure off the casserole to be “enough”—it’s a shared component of the meal rather than the sole focal point.
A simple salad with assertive flavors works wonderfully. Try mixed greens with sharpness (arugula, radicchio, or endive) dressed with a tangy vinaigrette. The acidity cuts through the cream and cheese beautifully.
Fresh herbs as garnish add color and brightness. Chopped fresh parsley, chives, or thyme scattered over the top just before serving adds visual appeal and a final layer of flavor.
Wine pairings are surprisingly relevant. A crisp white wine—perhaps a Sauvignon Blanc or Pinot Grigio—complements the creaminess without clashing with it. The acidity in the wine refreshes your palate between bites.
Common Mistakes to Avoid
Even straightforward recipes have pitfalls. Knowing what can go wrong helps you avoid these missteps and keep your casserole perfect every time.
Overstuffing the dish with vegetables. While vegetables are wonderful, too many release water as they cook, making the casserole watery and loose. Limit additions to about 1½ cups, and if you’re adding high-water-content vegetables like mushrooms, sauté them first to remove excess moisture.
Skipping the resting period. The urge to scoop immediately after removing from the oven is real, but resist it. Those 10 to 15 minutes allow the filling to set and the casserole to hold together when plated. Without resting, you’ll get a delicious but soupy result that looks sloppy on the plate.
Compacting the bread crumb topping. Pressing the crumbs down into the filling makes them dense and heavy rather than crispy. Distribute them gently and let them sit on top of the filling without pressing.
Using watery ingredients. Canned cream soups vary in thickness. Some are noticeably thinner than others. If your casserole seems particularly wet before baking, you can reduce the sour cream slightly or drain some liquid from any added vegetables.
Baking at the wrong temperature. Too hot and the edges brown before the center heats through. Too cool and the casserole takes too long and the topping never crisps. Stick with 350°F unless your oven runs noticeably hot or cool.
Not adjusting for saltiness. Different rotisserie chickens and brands of soup have varying salt levels. Always taste the filling before baking and adjust salt conservatively. You can add salt after baking if needed, but you can’t remove it.
Customizing for Dietary Preferences
One of casseroles’ greatest strengths is their adaptability to different dietary needs. The basic formula works across numerous restrictions and preferences.
Gluten-Free Version: Use gluten-free bread crumbs or crushed gluten-free crackers for the topping. Verify that your cream of chicken soup is gluten-free (most mainstream brands are, but read the label). Everything else in the recipe is naturally gluten-free. The result is identical to the standard version.
Dairy-Free Adaptation: This requires more substitution. Use dairy-free sour cream (available at most grocery stores), dairy-free butter, and dairy-free cheese. The texture will be slightly different, and you may need to add a bit more liquid since some dairy-free products are drier. The flavor will be milder than the traditional version but still satisfying.
Lower-Sodium Version: Use low-sodium condensed cream of chicken soup and cook your own chicken in unsalted broth rather than using rotisserie chicken. Skip the salt in the filling entirely and taste before adding any. Use low-sodium cheese if available. This version is noticeably less salty but still delicious if you’re accustomed to reduced-sodium cooking.
Vegetarian/Vegan Adaptation: Substitute the chicken with 3 cups of cooked and seasoned plant-based protein, crumbled tofu, or hearty vegetables like roasted cauliflower or mushroom pieces. Use vegetable broth-based cream soup instead of chicken soup. Follow the rest of the recipe as written, using dairy-free substitutes as noted above. The result will have a different flavor profile but can be genuinely delicious.
Lower-Fat Version: Use low-fat sour cream (though it’s slightly less rich), low-fat cheese, and significantly reduce the butter in the topping (or use a cooking spray on regular bread crumbs instead). This version delivers fewer calories while maintaining much of the comfort-food appeal.
Final Thoughts
A chicken casserole for busy nights isn’t about shortcuts or corners cut on quality—it’s about recognizing that good food doesn’t require hours in the kitchen or a complicated list of techniques. Some of the most satisfying meals come from understanding how to layer simple, quality ingredients and let the oven do the work while you do everything else demanding your attention that evening.
Keep this recipe close. Make it when you’re genuinely overwhelmed and need something reliable. Experiment with variations when you want to keep things interesting. Freeze a batch when you have a calm moment, knowing it’s there for the inevitably chaotic evening when you have zero mental space for cooking. This is what practical home cooking actually looks like—flexible enough to fit your real life, delicious enough to satisfy everyone at the table, and straightforward enough that you’ll actually want to make it regularly. That’s the casserole that becomes a true family favorite.