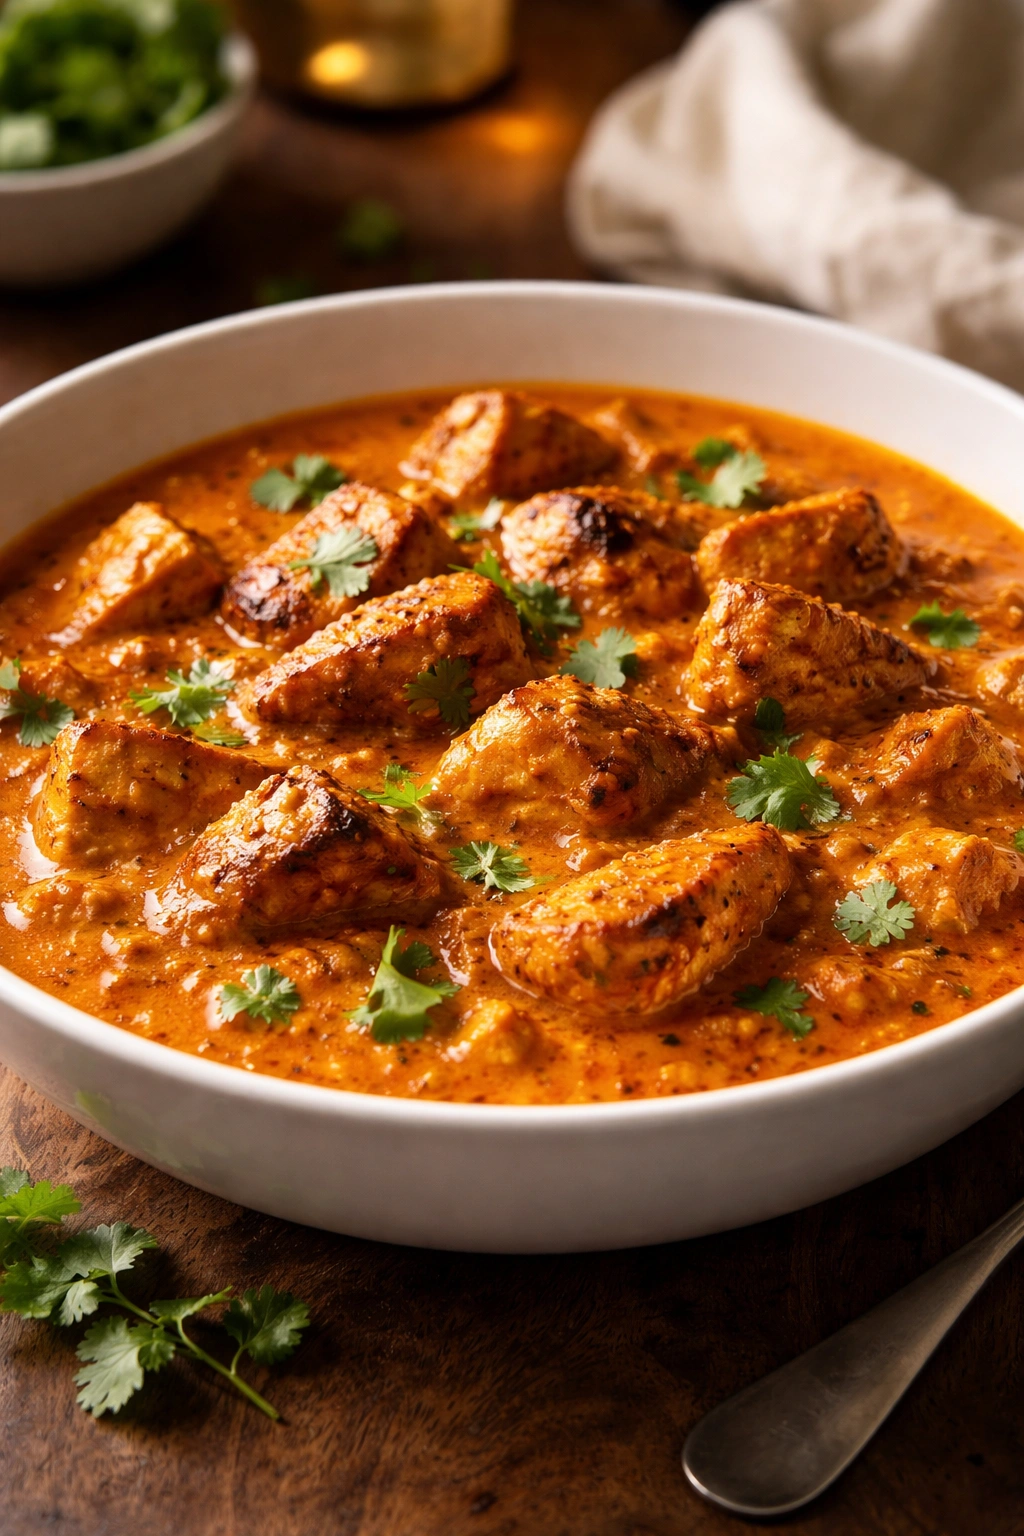
Chicken tikka masala is one of those rare dishes that manages to feel both restaurant-fancy and genuinely easy to pull off at home. The moment that creamy, spiced tomato sauce hits the table, swimming with tender pieces of charred chicken, your whole kitchen smells like an upscale Indian restaurant—and everyone at the table immediately understands why this dish has become a global favorite. The beautiful part? You don’t need special equipment, culinary training, or hours of careful attention to create it. This is the kind of dinner that feels like a celebration but comes together on a regular weeknight, usually in under an hour.
What makes chicken tikka masala so irresistible is the contrast between the smoky, lightly charred chicken and the luxuriously creamy sauce built on a foundation of warm spices. The chicken gets a quick bath in spiced yogurt, which does the heavy lifting of tenderizing the meat while infusing it with flavor. Then comes the sauce—an aromatic combination of caramelized onions, ginger, garlic, and a carefully balanced blend of cumin, coriander, garam masala, and turmeric, all melted together with crushed tomatoes and cream into something that tastes like it’s been simmering for hours. In reality, you’re looking at about 20 minutes of actual cooking time once you’ve got everything prepped.
This is the kind of dinner that transforms a regular Tuesday into something memorable, yet requires no more skill or time investment than most weeknight staples. Whether you’re cooking for your family, impressing guests, or just craving takeout-quality food without the takeout price tag, this recipe delivers every single time. The best part is how forgiving it is—you can adjust the heat level to your preference, swap cream for coconut milk if you want a lighter version, or marinate the chicken for anywhere from 15 minutes to overnight depending on your schedule.
What Exactly Is Chicken Tikka Masala?
Chicken tikka masala is fundamentally two things that come together beautifully on one plate. The first component is “tikka”—which simply means a small chunk or piece. The chicken gets cut into bite-sized pieces, marinated in a spiced yogurt mixture, and then cooked until it develops a charred, smoky exterior while staying juicy on the inside. Traditionally, this happens in a tandoor, a cylindrical clay oven that reaches nearly 900 degrees Fahrenheit and imparts an incredible depth of flavor through high heat and smoke.
The second component is “masala,” which is a Hindi word meaning a blend of spices, but in the context of this dish it refers to the sauce itself. This is where the magic really happens—a rich, creamy, deeply flavorful sauce built on caramelized onions, fresh ginger and garlic, and a symphony of warm spices that work together to create something greater than any single ingredient. The sauce pulls together crushed tomatoes, heavy cream or coconut milk, and the rendered spices into something luxurious and comforting.
The color and depth of tikka masala comes primarily from garam masala, a spice blend that typically contains cinnamon, cloves, cardamom, black pepper, and coriander. This isn’t one-dimensional heat—it’s a warm, slightly sweet, deeply aromatic backdrop that lets all the other flavors shine. While chicken tikka masala is often associated with Indian cuisine and does draw from authentic Indian cooking techniques, it’s widely believed to have evolved as a fusion dish, particularly popularized in British Indian restaurants where chefs adapted traditional tandoori techniques and sauces to appeal to local palates. Regardless of its origin story, it’s become beloved worldwide, and for good reason—it tastes extraordinary and feels special enough for company while being simple enough for a regular dinner.
Why Homemade Beats Restaurant Takeout Every Time
There’s something deeply satisfying about recreating your favorite restaurant dish at home, and chicken tikka masala is one of the most rewarding candidates for this. When you make it yourself, you control every element—the spice level, the richness of the sauce, the doneness of the chicken, the quality of every ingredient. Restaurant versions are often loaded with excess salt, far more cream than necessary, and sometimes a shortcut ingredient or two that saves them time but costs you in flavor complexity.
Homemade tikka masala also costs roughly a third of what you’d pay for takeout, and you end up with better leftovers. This dish actually improves overnight as the spices continue to develop and meld together, something that rarely happens with restaurant food. The chicken stays incredibly tender because you control the cooking process, and you can make exactly the right amount for your household instead of getting a massive container you’ll be eating from for days.
Beyond the practical advantages, there’s genuine pleasure in understanding how the dish works. You’ll taste exactly how the yogurt marinade tenderizes the chicken, how the caramelized onions and spices form the flavor base of the sauce, how the tomatoes add brightness and body, and how the cream brings everything into balance. Once you’ve made it once, you’ll understand the dish so completely that you can adjust it confidently—less cream for lighter versions, more spice for heat, coconut milk for dairy-free options. That kind of knowledge and confidence is something no restaurant meal can give you.
Understanding the Spice Blend and Its Role
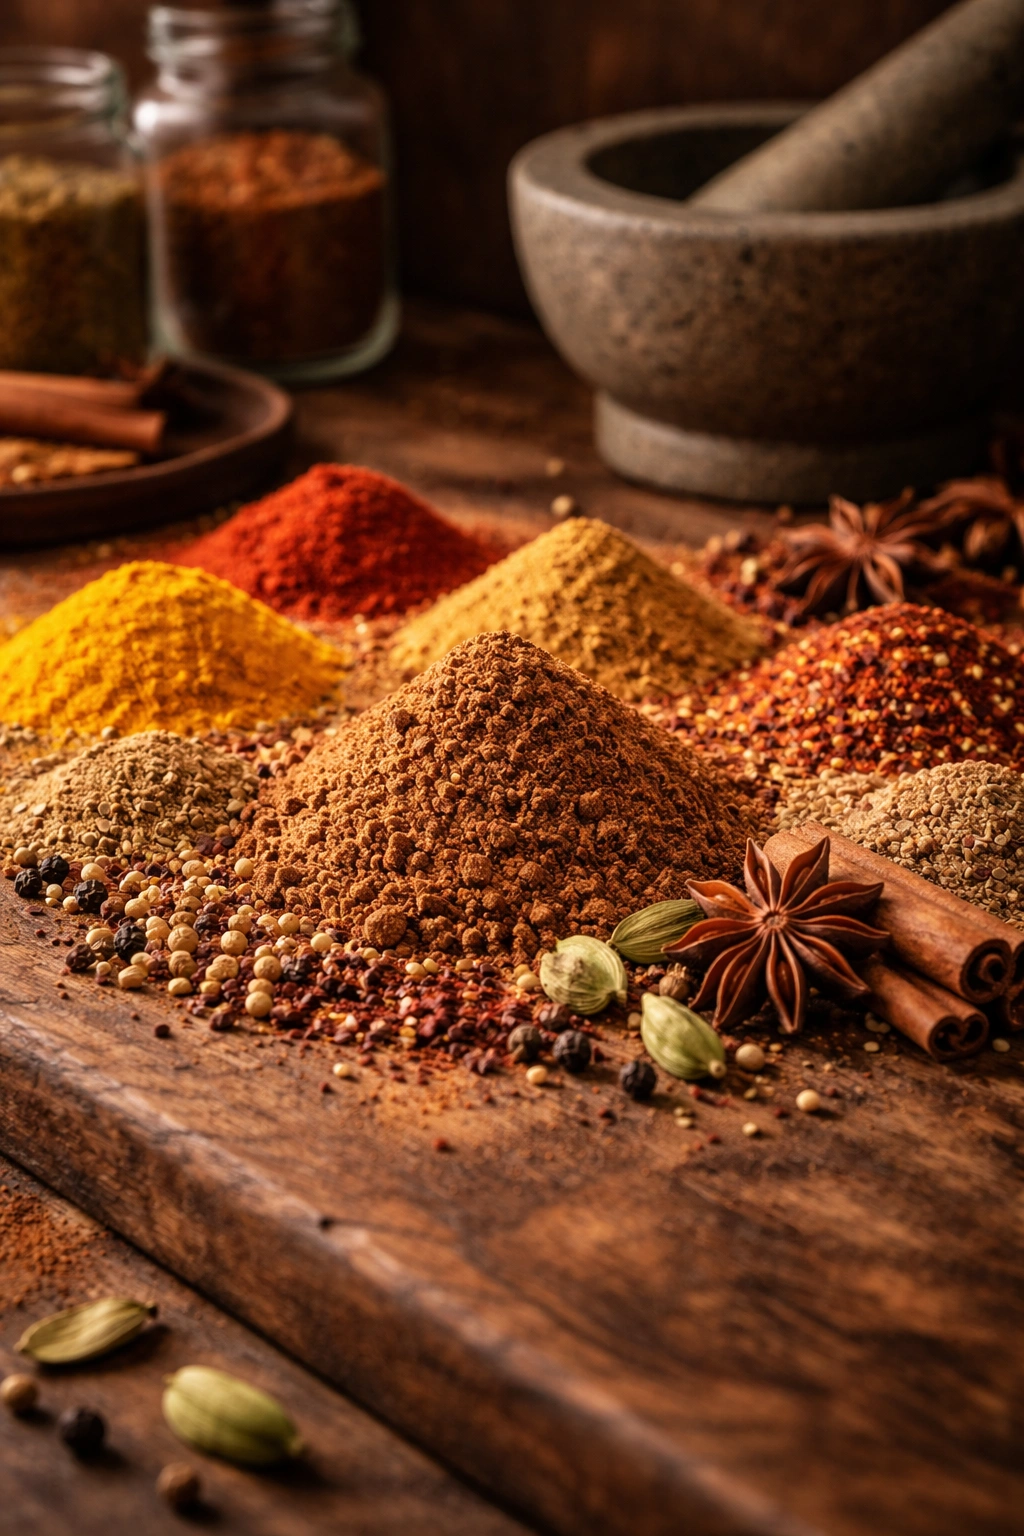
The spices in chicken tikka masala aren’t decorative—they’re the entire flavor profile, and understanding what each one brings helps you appreciate why the dish tastes so good. Garam masala is the star, a warming blend of cinnamon, cloves, cardamom, and black pepper that tastes slightly sweet and deeply aromatic without being spicy. This is what gives the dish its signature warm, cozy flavor that makes it feel like comfort food rather than a hot, aggressive curry.
Cumin brings an earthy, nutty depth that anchors the sauce. Coriander (the ground seed, not fresh cilantro) adds a slightly citrusy, floral note that lifts the whole dish and prevents it from feeling heavy. Turmeric contributes color, a subtle peppery taste, and anti-inflammatory benefits that have made it a staple in Indian cooking for centuries. Ground ginger and fresh ginger-garlic paste work together to add warmth and pungency that cuts through the richness of the cream and adds complexity to the sauce.
If you want extra heat, cayenne pepper or red chili powder adds exactly that—a sharp, direct spice that builds on the back of the palate. The beauty of this particular combination is that none of these spices is trying to overpower the others. Instead, they layer together, creating something aromatic and warm rather than harsh or one-dimensional. If you’re new to spiced cooking, this is actually a surprisingly forgiving introduction because garam masala is designed to be a balanced, complete spice blend that works without needing constant adjustment.
Choosing Your Chicken and Preparation Methods
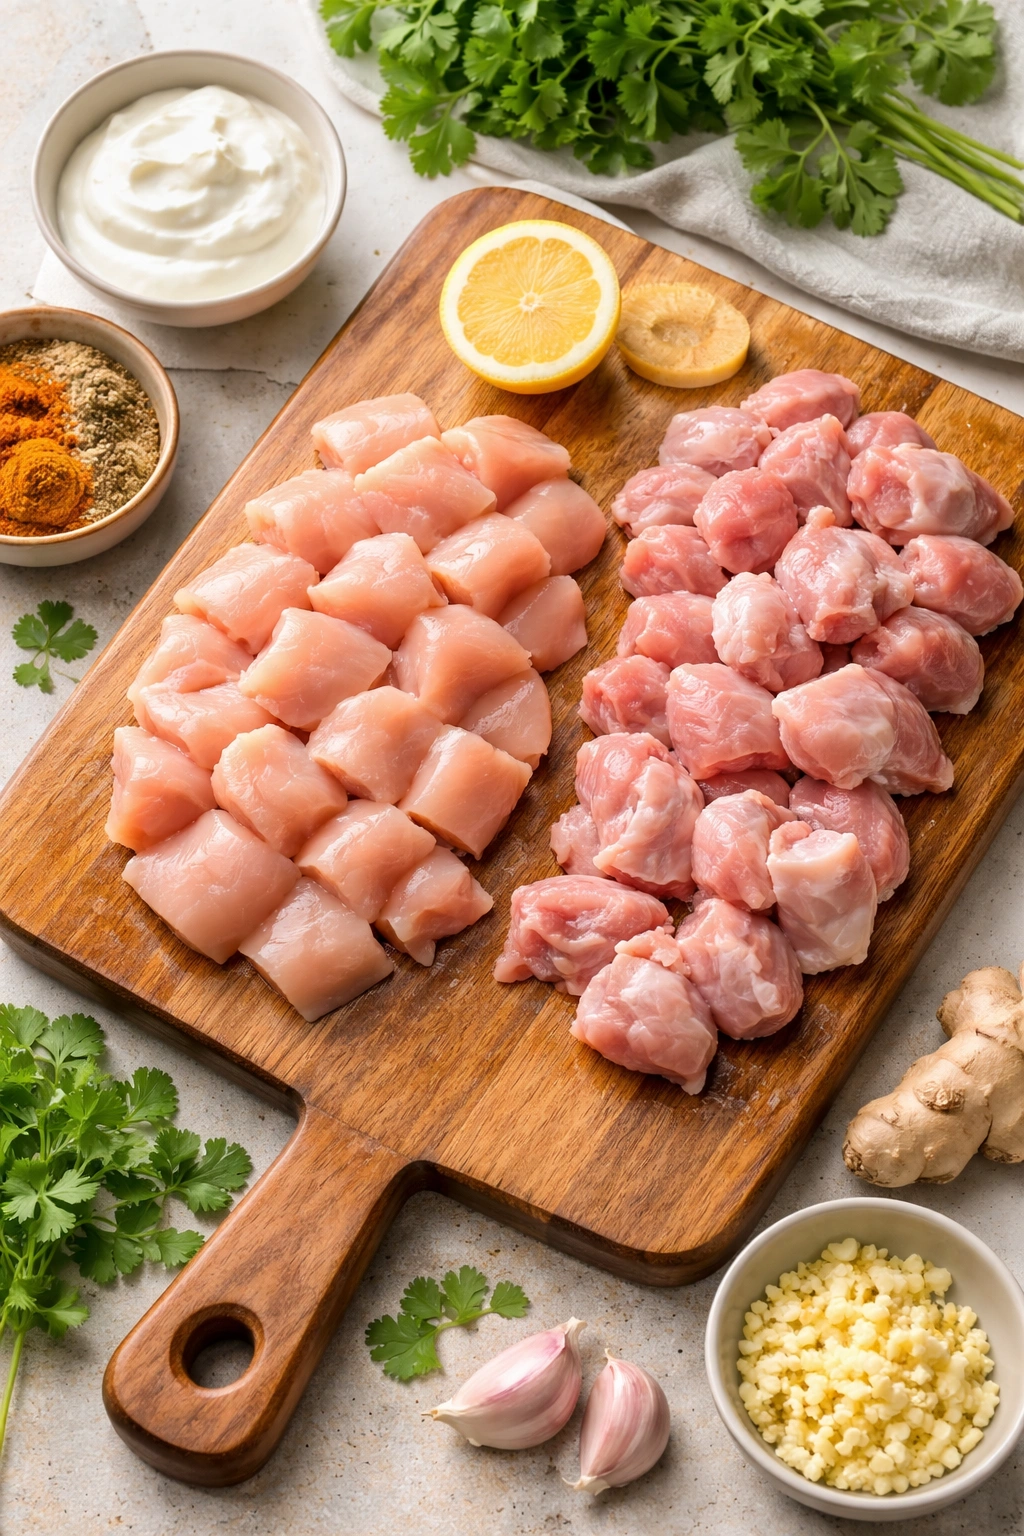
The choice between chicken breasts and thighs matters more than you might think, and understanding the trade-offs helps you make the best decision for your needs. Chicken breasts are leaner and cook quickly, making them ideal if you’re watching calories or prefer lighter meat. They also marinate faster because they have less fat to penetrate. The downside is that they can dry out slightly if overcooked, and because they’re less fatty, they don’t have quite as much inherent flavor or juiciness.
Chicken thighs are the secret weapon for supremely tender, flavorful results. Dark meat contains more fat and connective tissue, which means it stays juicy even if you cook it a bit longer, and the fat carries flavor beautifully. Thighs also benefit more from marinating because the spices and yogurt penetrate more deeply into the meat. If you use thighs, you can marinate them for as little as 15 minutes and still get great results, whereas breasts really benefit from at least an hour. The real secret is that a mixture of both works perfectly—you get some of the leanness of breasts with the juiciness of thighs.
Beyond the choice of cut, how you cook the chicken affects the final dish. While a traditional tandoor oven gives incredible smoky char, you can achieve excellent results using your oven broiler, a cast-iron skillet over high heat, an air fryer, or even a grill. The key is high, dry heat that browns the exterior quickly while the interior stays juicy. Don’t crowd the pan or skillet—if the chicken pieces touch, they’ll steam instead of sear, and you’ll lose that golden exterior that adds so much visual appeal and textural contrast to the finished dish.
The Yogurt Marinade: Why Timing Matters
The yogurt marinade is where the whole process starts, and it’s actually doing three crucial things simultaneously: tenderizing the chicken, infusing it with spice and flavor, and creating a creamy coating that will help the sauce cling to the meat. Yogurt contains lactic acid, which breaks down the proteins in chicken, making the meat incredibly tender. This isn’t a gentle process—even 15 minutes of marinating creates a noticeable difference in texture.
The question of how long to marinate is more flexible than you might think. If you’re in a genuine time crunch, even 15 to 20 minutes makes a meaningful difference. If you have an hour, you’ll notice a marked improvement in both tenderness and flavor absorption. Overnight marinating (up to 12 hours) is the gold standard—the chicken becomes almost impossibly tender, and every spice has had time to penetrate deeply. The honest truth is that anything between 30 minutes and overnight works beautifully. Choose based on your schedule rather than stressing about hitting a perfect window.
One thing to watch: don’t marinate for extremely long periods (say, more than 24 hours) if your yogurt is quite acidic, because eventually the acids can break down the proteins so much that the texture becomes mushy rather than tender. Using full-fat plain yogurt rather than Greek yogurt or low-fat varieties makes a real difference here—the higher fat content creates a richer coating and is less likely to separate when you heat it. If you only have Greek yogurt on hand, thin it slightly with whole milk to get it to the right consistency.
Yield: Serves 4 to 6 | Makes about 4 cups total
Prep Time: 15 minutes (plus marinating time)
Cook Time: 30 minutes
Total Time: 45 minutes active + at least 30 minutes to overnight for marinating
Difficulty: Beginner — The steps are straightforward, the technique is forgiving, and you only need one or two pans. No special equipment required beyond what most home kitchens have.
The Complete Ingredient List
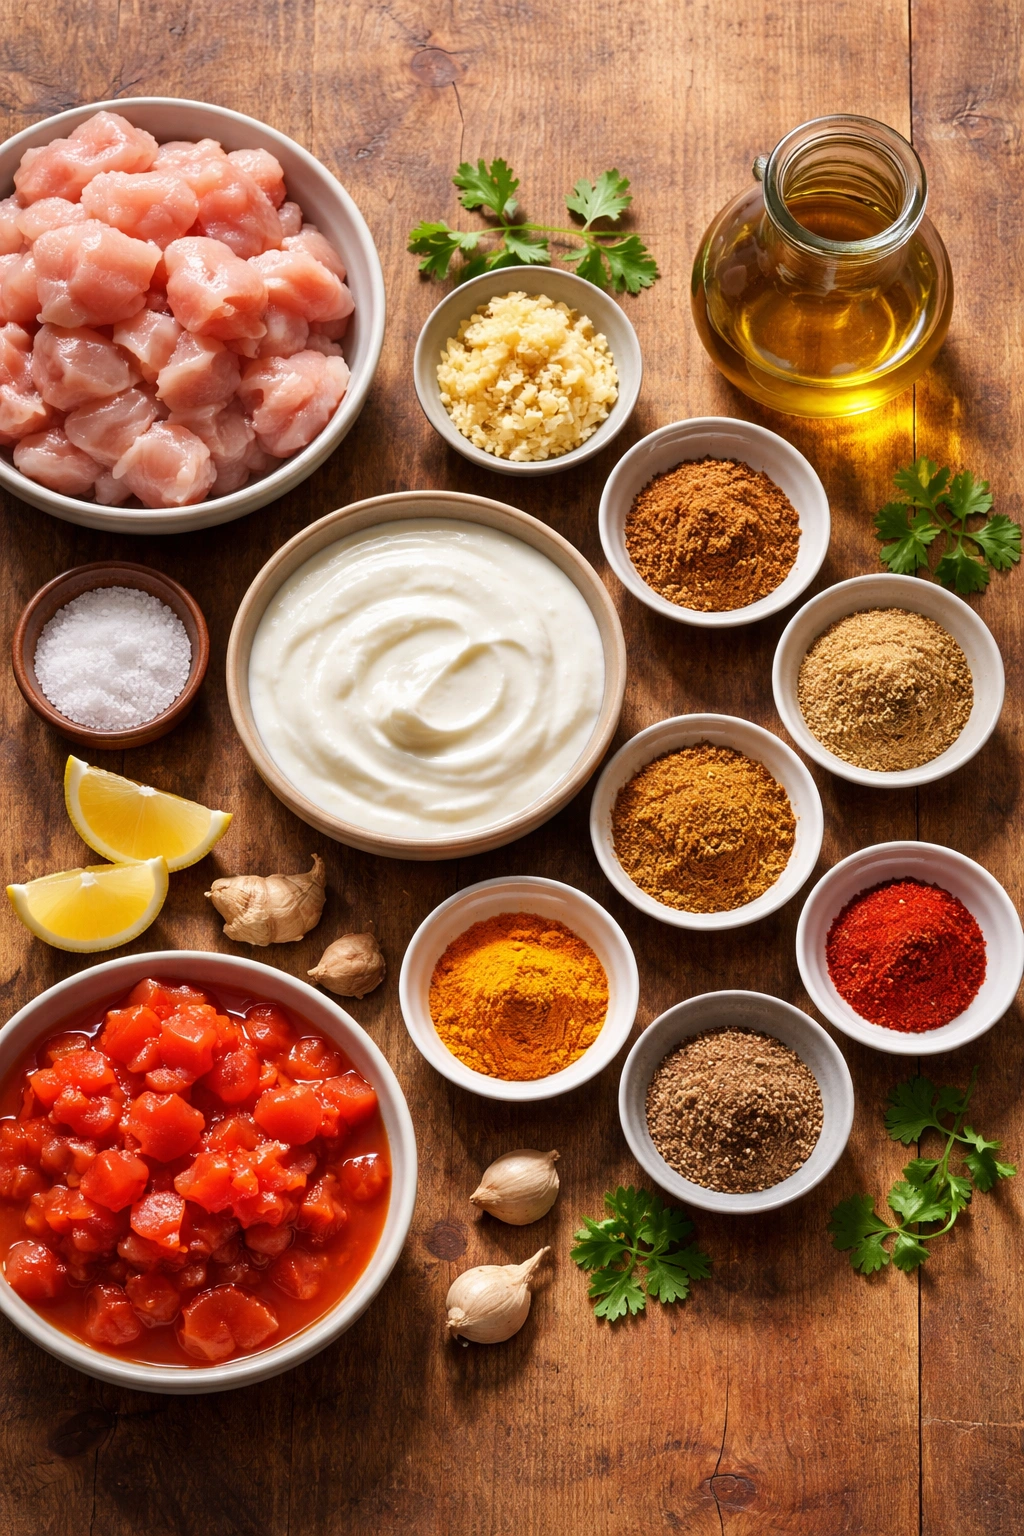
For the Chicken Marinade:
- 1½ to 2 pounds boneless, skinless chicken breasts or thighs (or a mix), cut into bite-sized pieces (about 1 to 1½ inches)
- 1 cup plain full-fat yogurt (Greek yogurt can work but thin it with a bit of whole milk if needed)
- 3 cloves garlic, minced or grated
- 1 tablespoon freshly grated ginger (or 1½ teaspoons ginger paste)
- 1½ teaspoons garam masala
- 1 teaspoon ground cumin
- 1 teaspoon ground coriander
- ¾ teaspoon ground turmeric
- ½ teaspoon kosher salt
- ¼ teaspoon cayenne pepper (increase to ½ teaspoon if you like more heat)
- 1 tablespoon fresh lemon or lime juice
- 1 tablespoon vegetable oil
For the Tikka Masala Sauce:
- 2 tablespoons vegetable oil or ghee (clarified butter)
- 1 tablespoon unsalted butter
- 1 large yellow or sweet onion, finely diced (about 1½ cups)
- 1 tablespoon freshly grated ginger (or 1½ teaspoons ginger paste)
- 3 to 4 cloves garlic, minced
- 1 tablespoon tomato paste
- 1½ teaspoons garam masala
- 1 teaspoon ground cumin
- 1 teaspoon ground coriander
- ¾ teaspoon ground turmeric
- ½ teaspoon red chili powder or paprika (adjust based on how spicy you like it)
- 1 (15-ounce) can crushed fire-roasted tomatoes (or regular crushed tomatoes)
- 1 cup chicken stock or vegetable stock (or water if you don’t have stock)
- ¾ to 1 cup heavy cream, room temperature (or full-fat coconut milk for a dairy-free version)
- ½ teaspoon kosher salt
- ½ teaspoon sugar (optional, helps balance acidity)
- ¼ teaspoon freshly ground black pepper
For Serving:
- Fresh cilantro, chopped
- Cooked basmati rice
- Warm naan bread, butter, or flatbread of your choice
- Lime wedges
Marinating the Chicken: Setting Up for Success
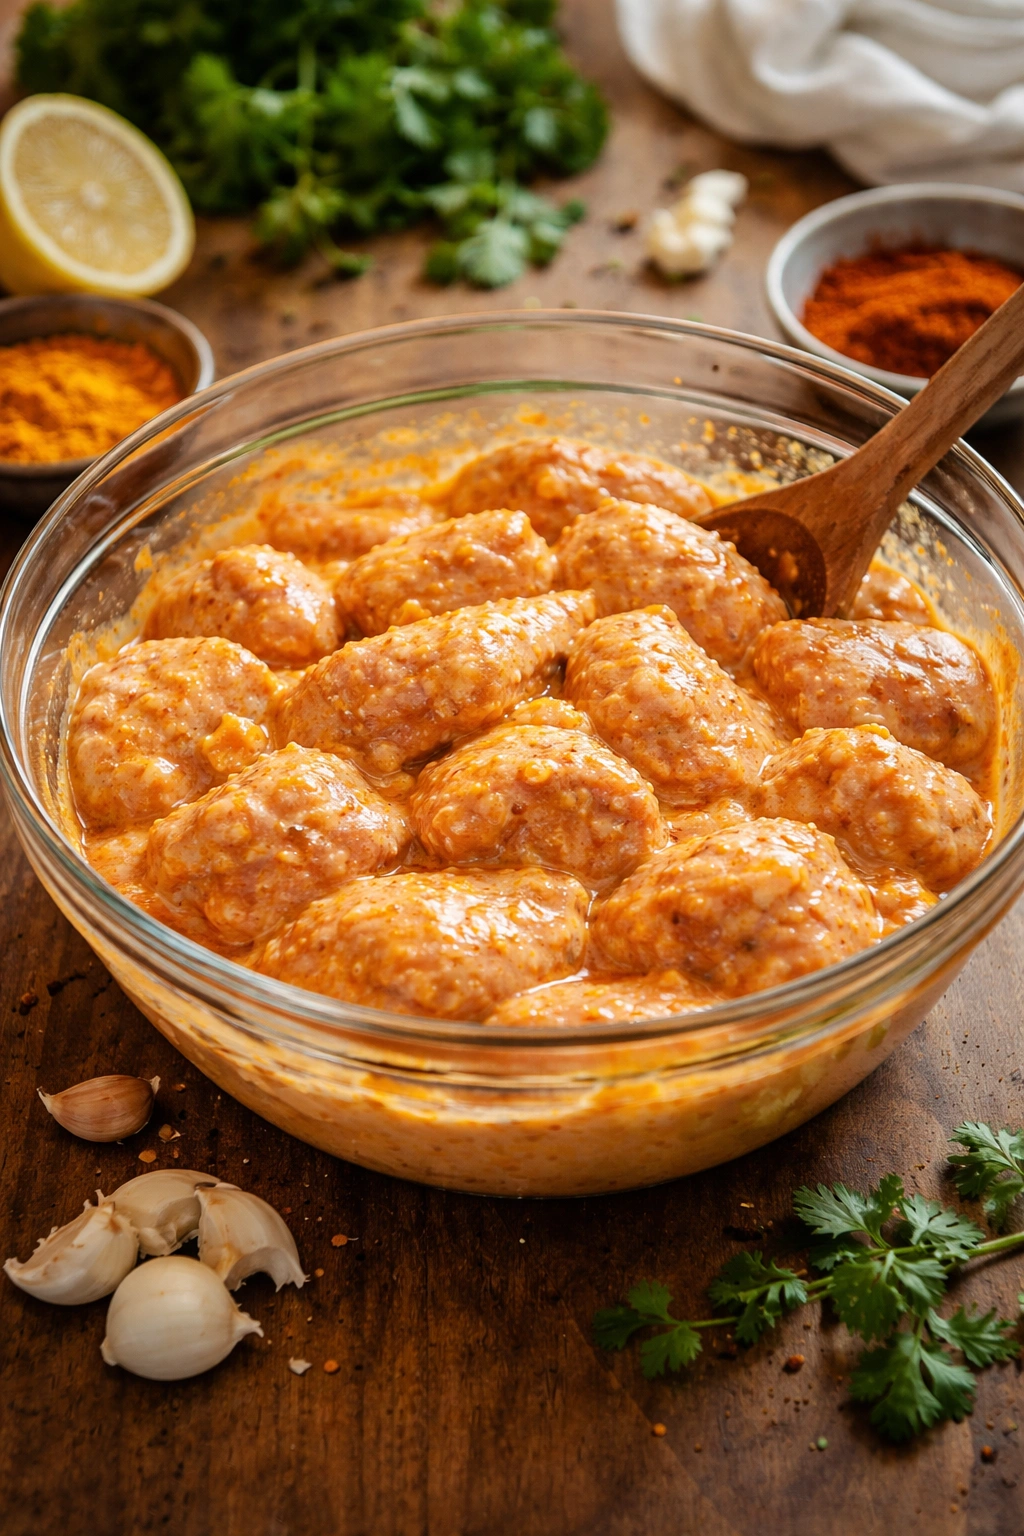
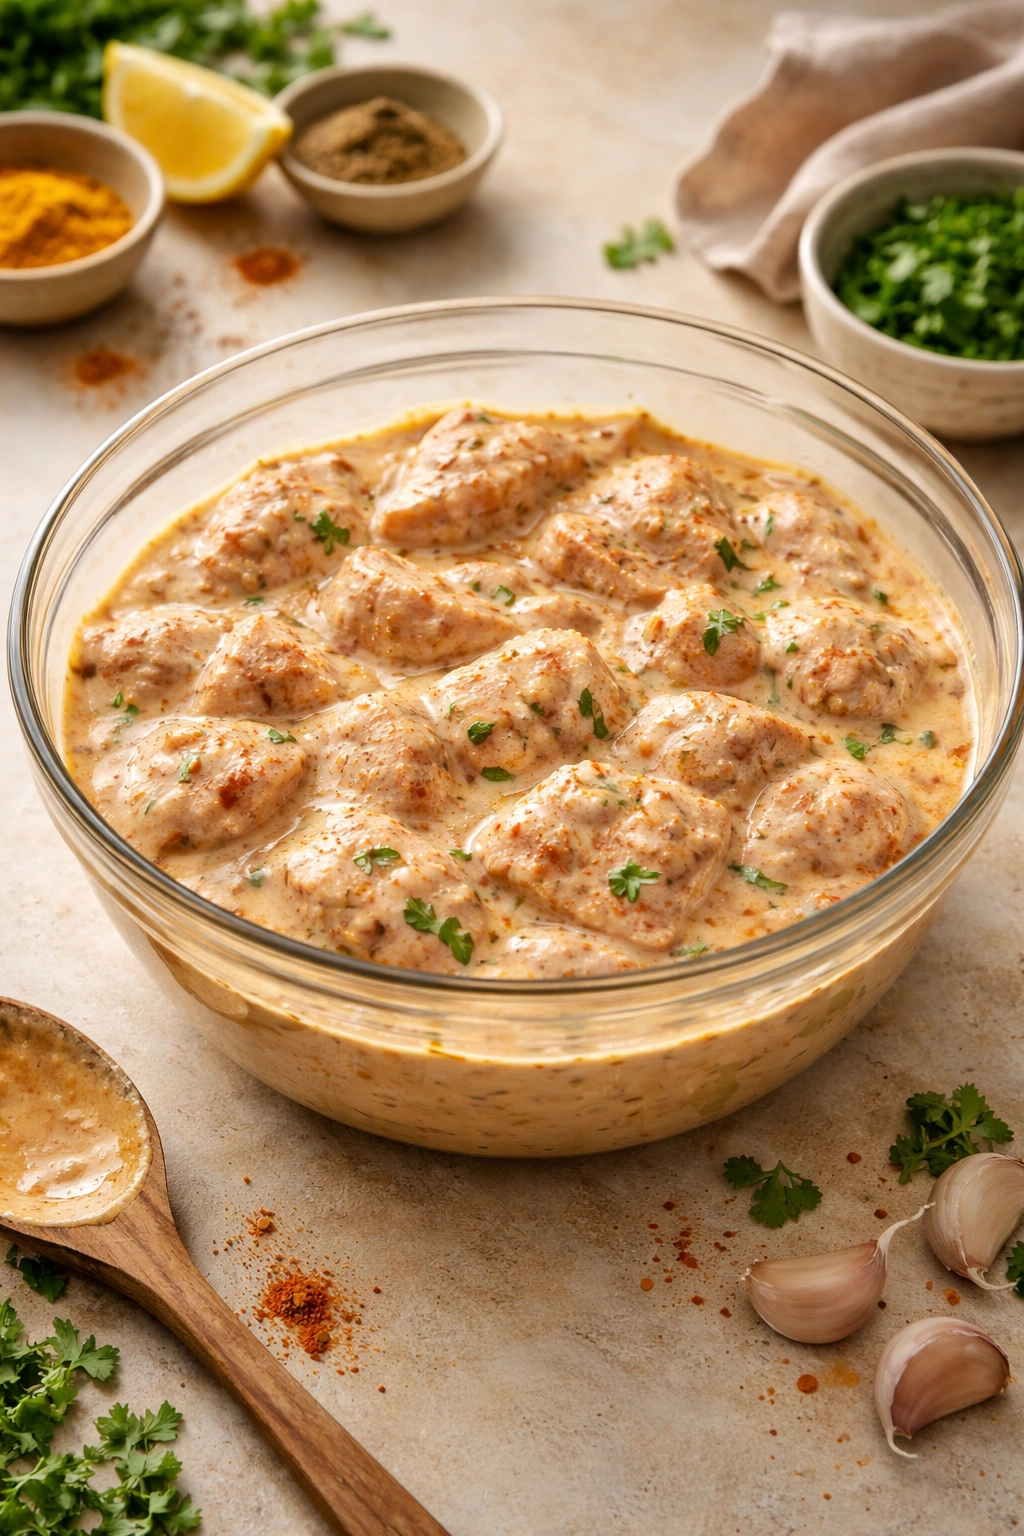
In a medium bowl, whisk together the yogurt, minced garlic, grated ginger, garam masala, cumin, coriander, turmeric, salt, cayenne pepper, and lemon juice until smooth and well combined. The mixture should smell incredibly aromatic—if you’re not getting that warm, complex spice aroma, you haven’t added enough spices or they might be old. Add your cut chicken pieces to the bowl and stir with your hands or a spoon until every piece is evenly coated with the yogurt mixture. The marinade should look creamy and orange-tinted from the turmeric.
Cover the bowl with plastic wrap and refrigerate for at least 30 minutes, though ideally overnight or up to 12 hours. If you’re marinating overnight, you can prep everything the morning of and have the actual cooking done by dinnertime. The yogurt will coat the chicken completely, and the spices will gradually penetrate the meat. Even if you’re short on time, don’t skip the marinating step entirely—those 30 minutes genuinely matter for both flavor and texture.
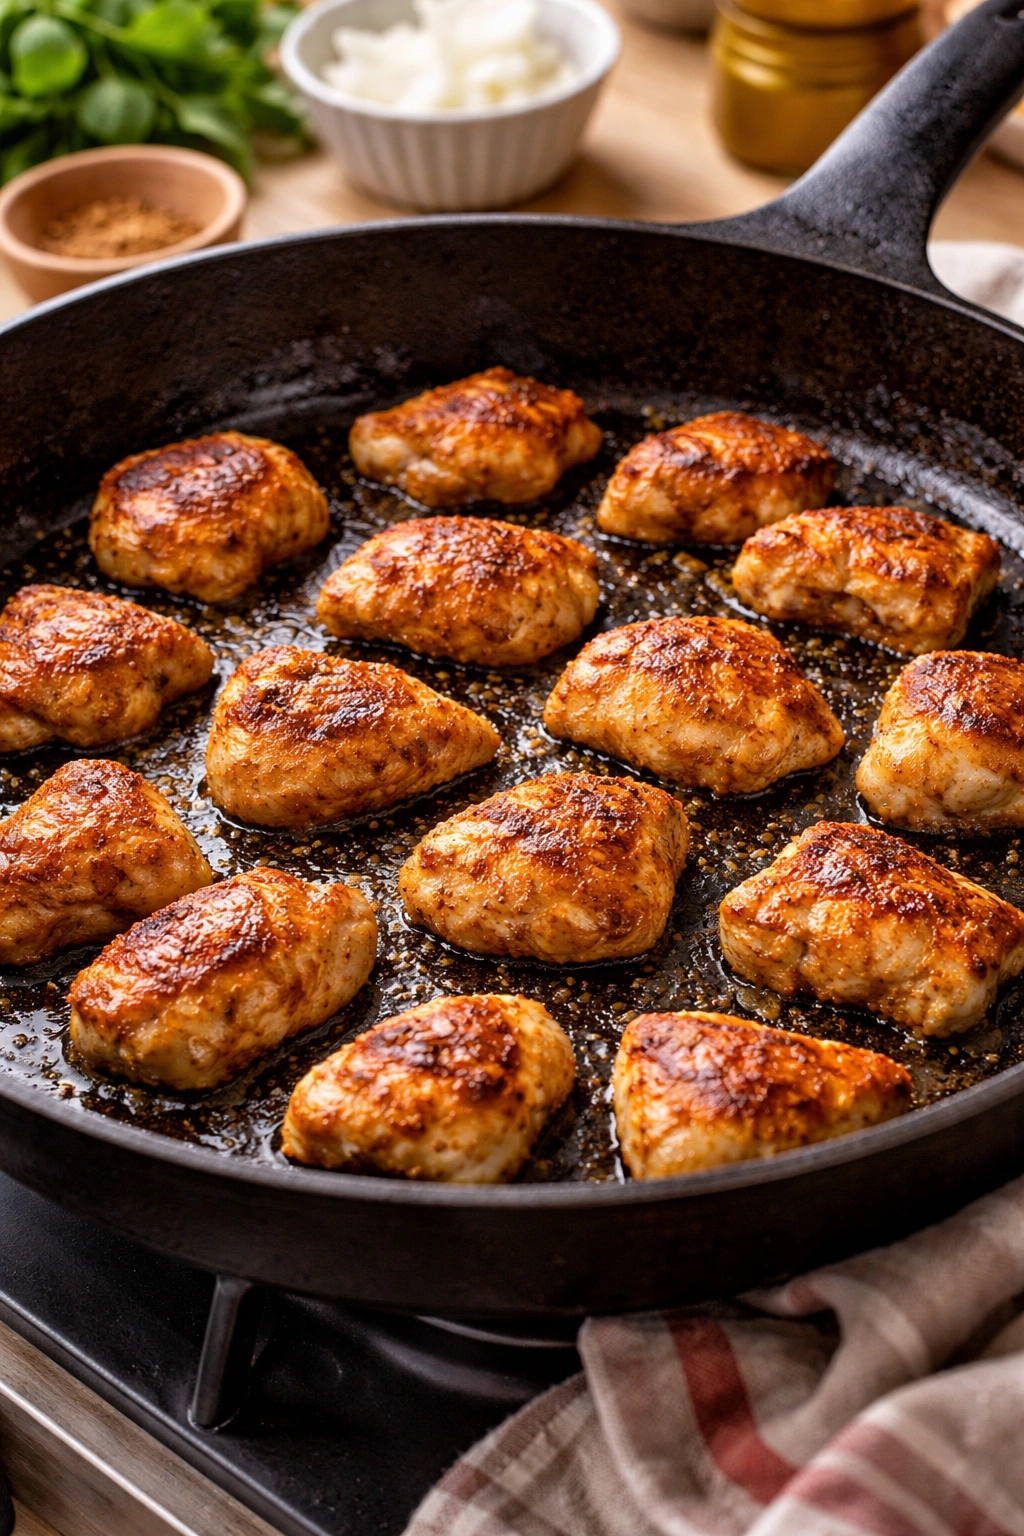
Cooking the Chicken: Getting That Perfect Char
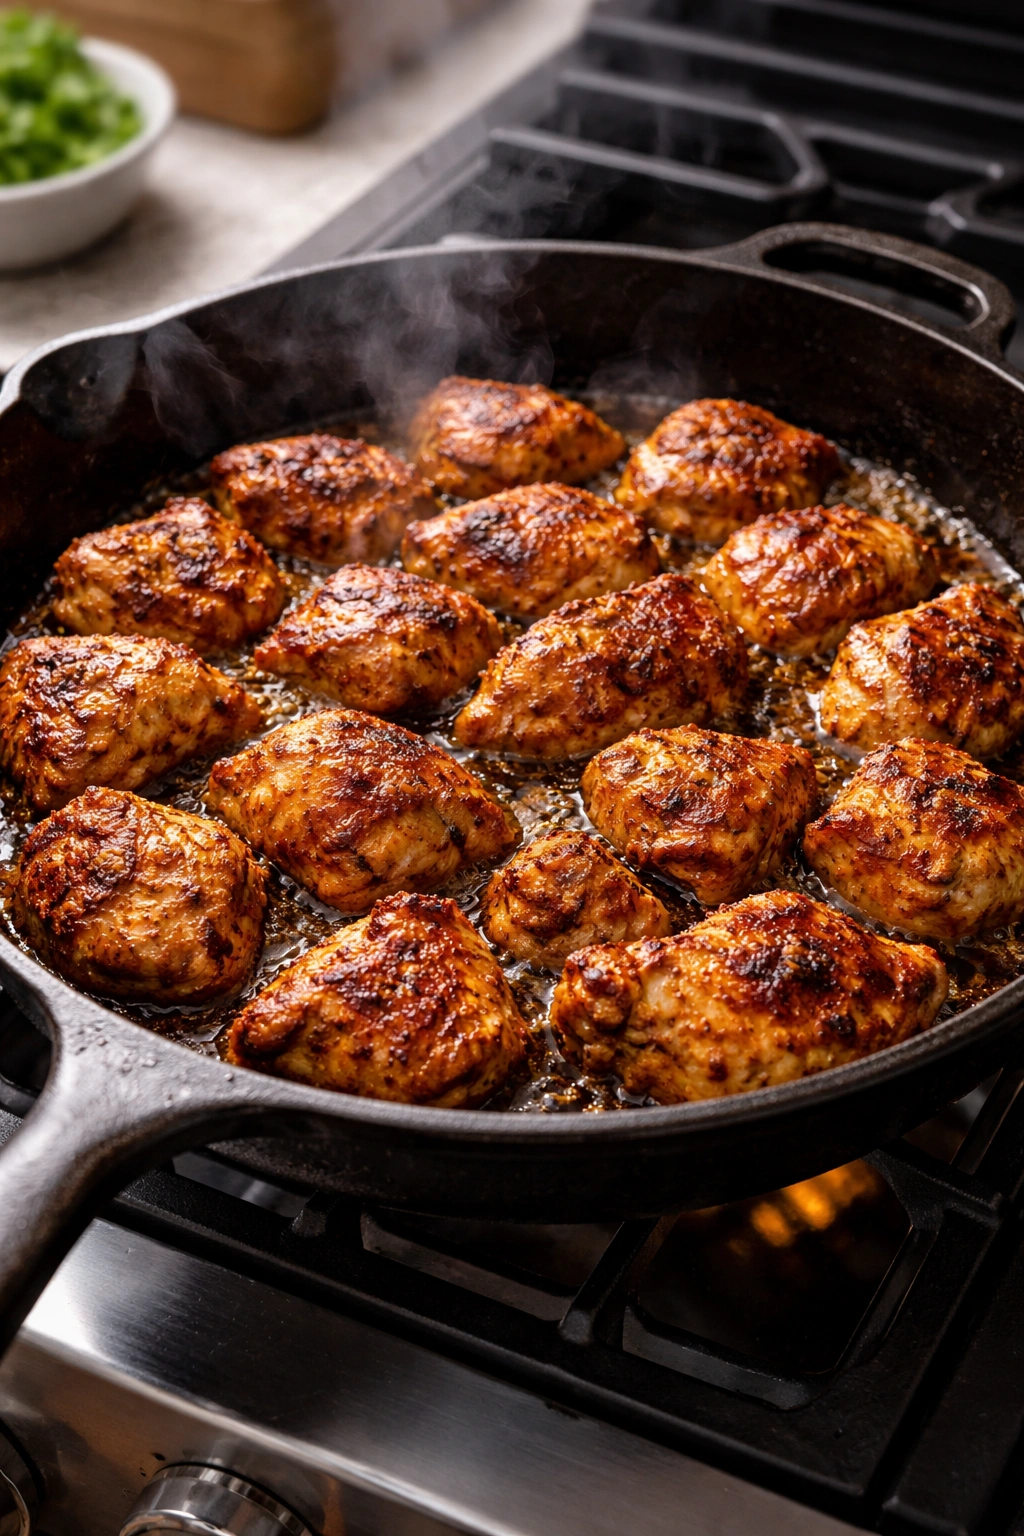
While the chicken marinates, you can prep your other ingredients, which keeps the actual cooking process moving quickly once you start. Heat 1½ tablespoons of vegetable oil in a large cast-iron skillet or heavy-bottomed pan over medium-high heat until the oil shimmers. Once it’s hot, add the chicken pieces in a single layer, being careful not to crowd the pan. If your chicken pieces are touching, cook them in batches—overcrowding causes steaming rather than searing, and you’ll lose that gorgeous golden-brown exterior.
Let each batch cook undisturbed for 1 to 2 minutes to develop a crust, then stir and continue cooking for another 3 to 5 minutes until the chicken is nicely browned on most sides. The chicken doesn’t need to be cooked all the way through at this stage—it’ll finish cooking when you add it to the sauce later. What you’re doing now is developing color and flavor through the Maillard reaction, a process where the spices, yogurt, and chicken proteins create complex new flavors through high heat. Transfer the cooked chicken to a plate and set aside. Don’t worry about leftover yogurt coating in the pan—leave it there, as it’ll add incredible flavor to your sauce.
Building the Sauce: Where Magic Happens
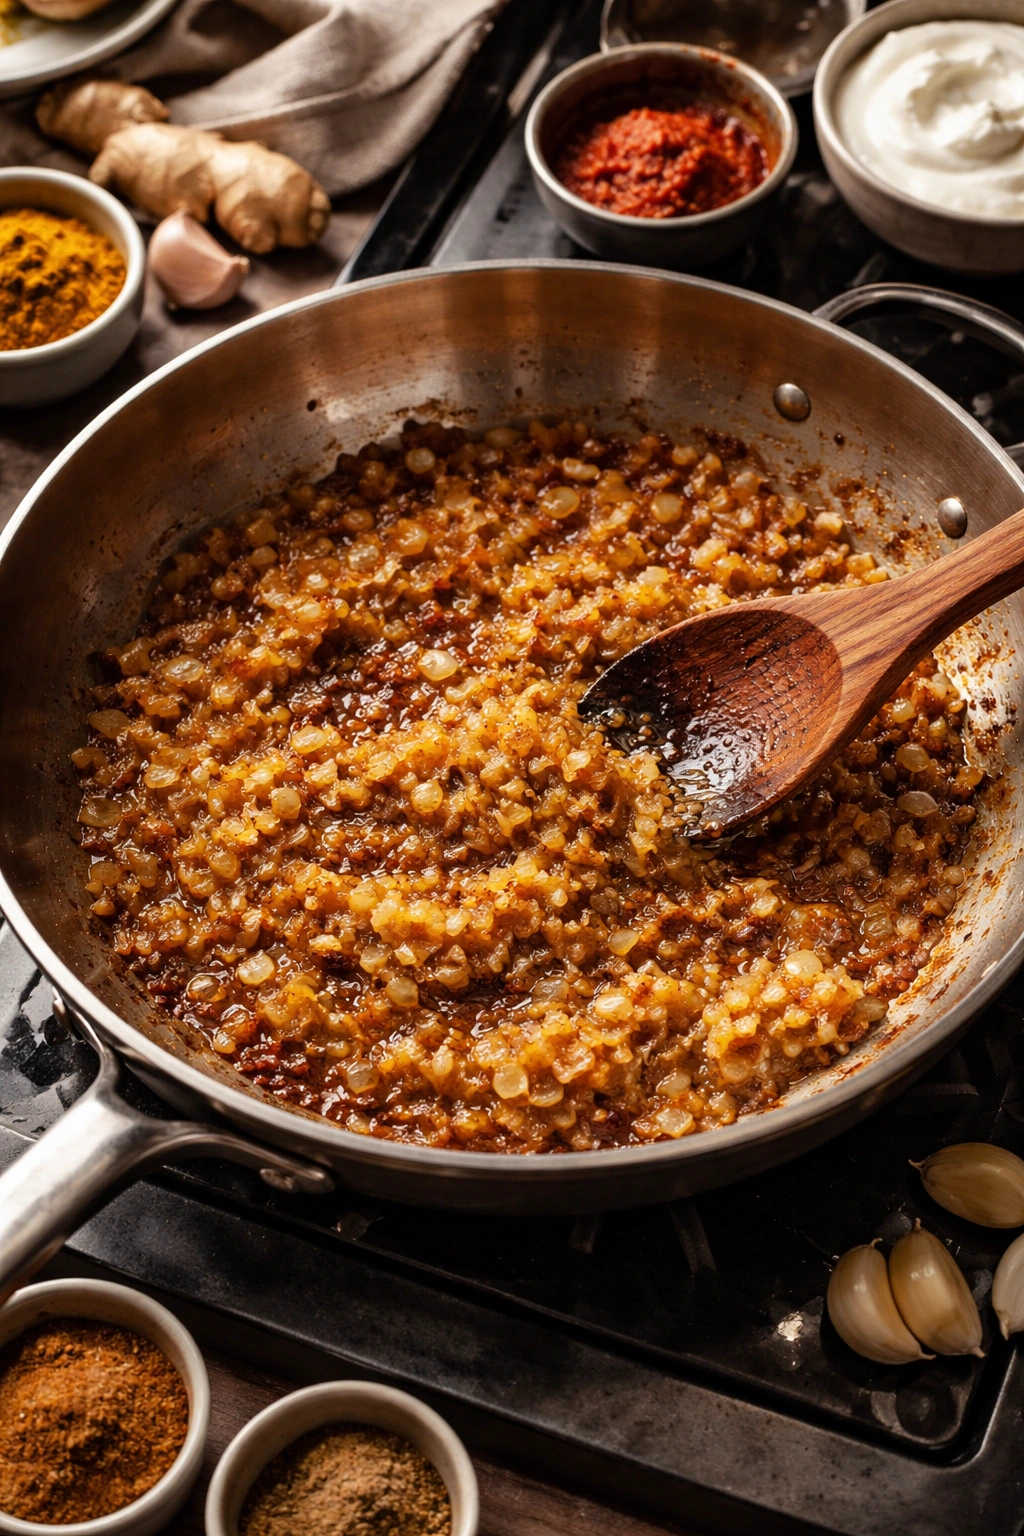
This is the most important part of the process, so don’t rush it. In the same pan you used to cook the chicken (don’t clean it—those browned bits are liquid gold), melt the butter over medium heat. Add your diced onions and a pinch of salt, and cook, stirring occasionally, for 7 to 10 minutes until the onions are deeply golden and soft. This isn’t just about softening them—you’re caramelizing them, which brings out natural sweetness and creates complex, layered flavors that form the foundation of your sauce.
Once the onions are golden, add your minced garlic and grated ginger, stirring constantly for about 30 seconds to 1 minute—just until the raw smell disappears and you catch the aroma of cooked garlic and ginger. This is the point where you add your spices: the garam masala, cumin, coriander, turmeric, and red chili powder. Stir quickly and continuously for about 30 seconds; you want the spices to toast slightly and release their essential oils, but you’re trying to avoid burning them, which would make them taste bitter instead of aromatic.
Immediately add your tomato paste and stir it into the spice mixture for about 1 minute, allowing it to darken slightly and caramelize. Then pour in your crushed tomatoes and chicken stock, scraping the bottom of the pan with a wooden spoon to release all the browned bits from the chicken and yogurt marinade—this is called deglazing, and it transfers all those flavorful browned bits into your sauce. Bring the sauce to a boil, then reduce the heat to medium-low and let it simmer, uncovered, for about 10 to 15 minutes, stirring occasionally. The sauce should thicken noticeably and deepen in color as the tomatoes break down and the liquid reduces slightly.
Taste the sauce before adding your cream and adjust the seasoning—add a bit more salt if needed, or a pinch of sugar if it tastes too acidic or sharp. The sauce should taste deeply flavored and aromatic, with warm spice notes and savory richness from the caramelized onions.
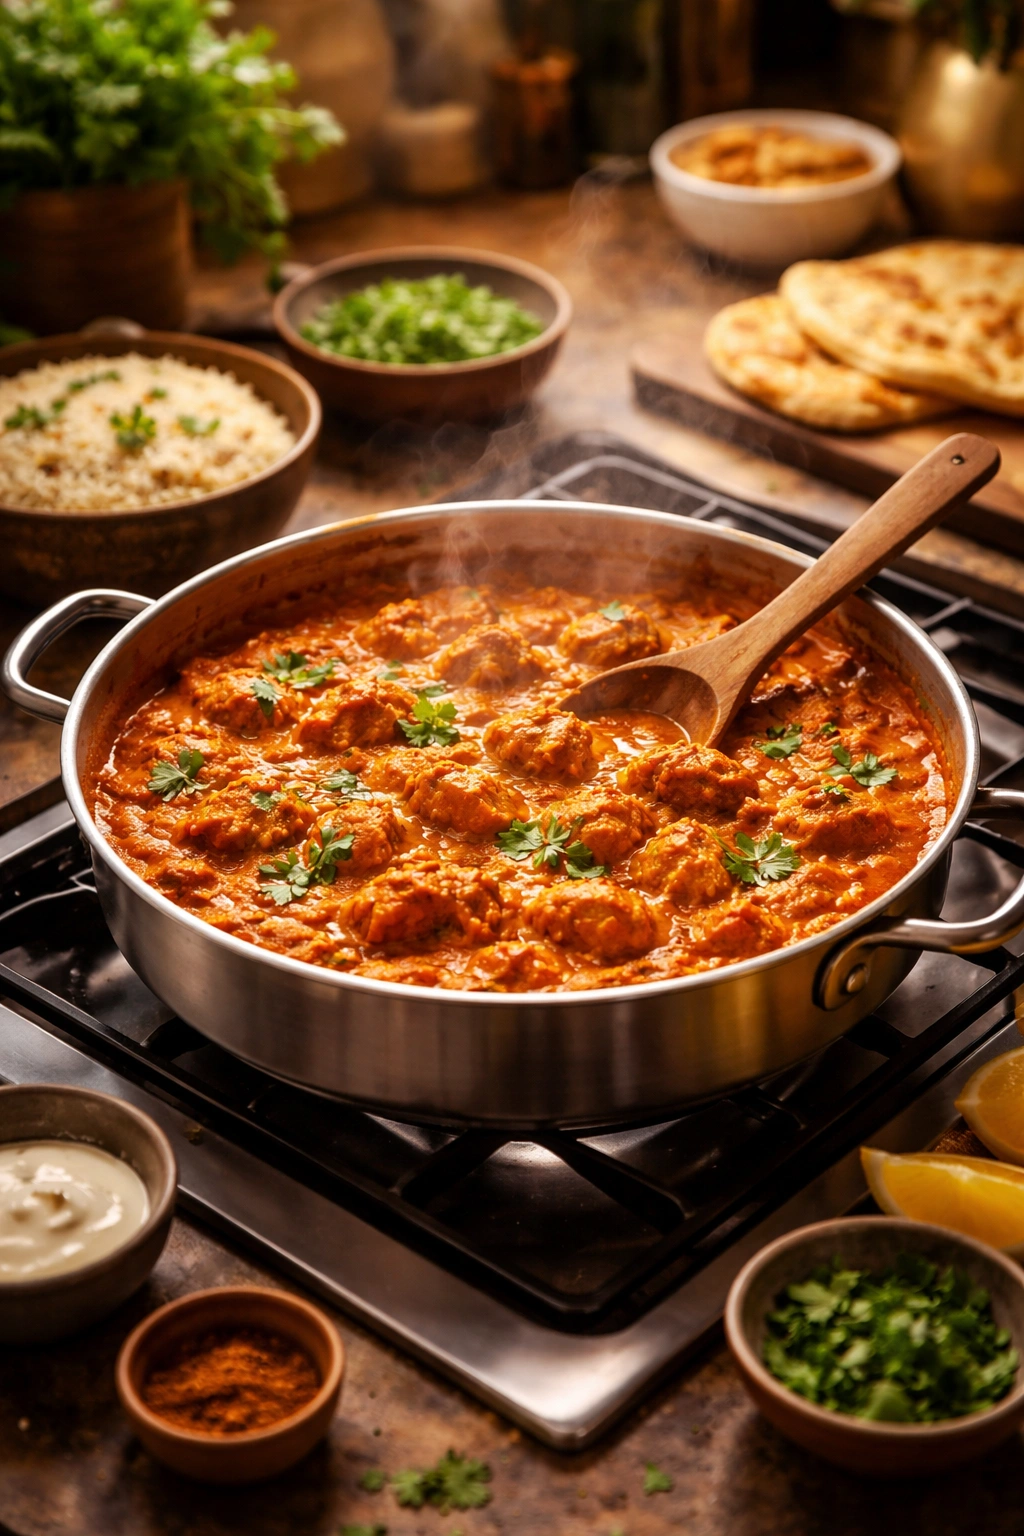
Bringing It All Together: The Final Simmer
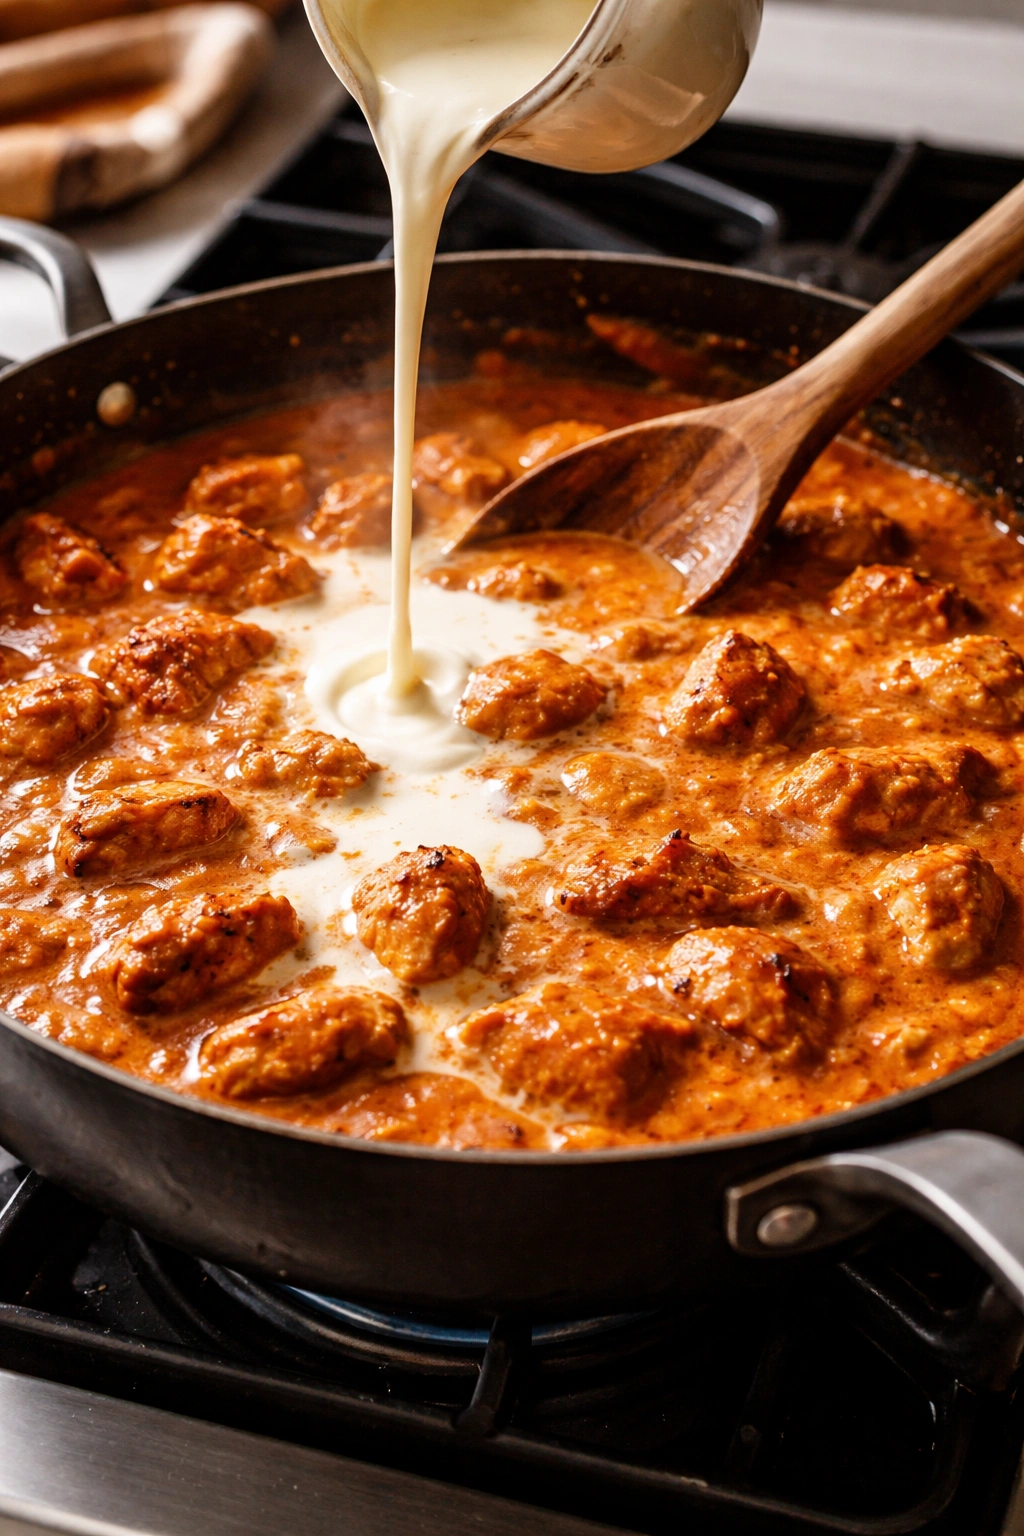
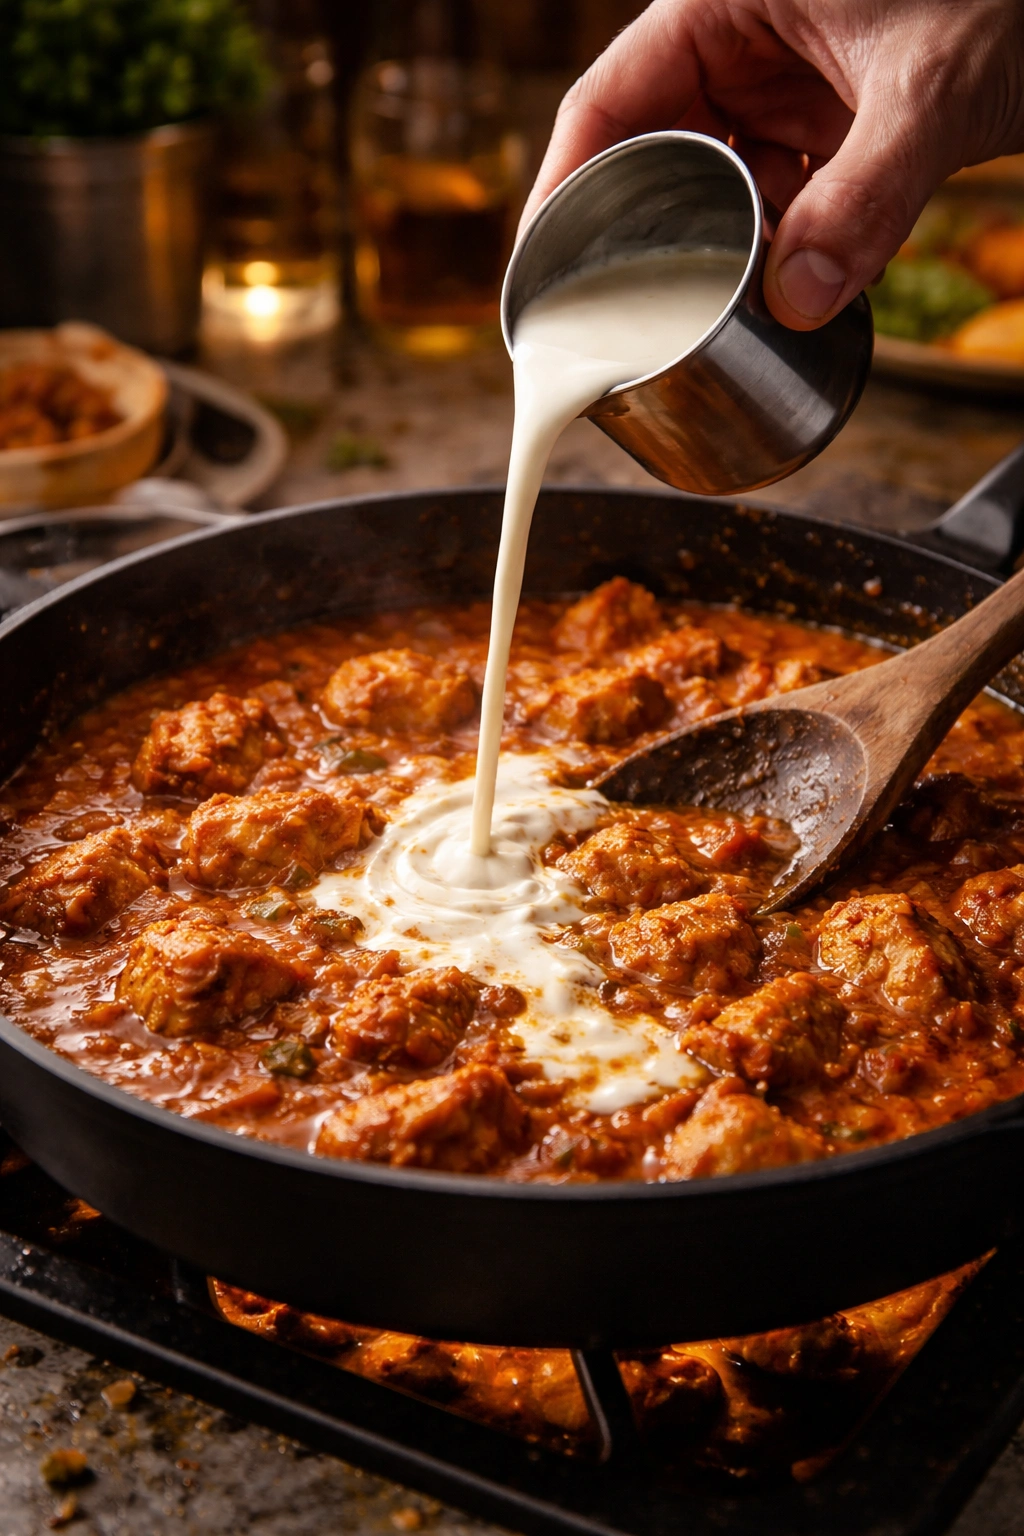
Once your sauce is where you want it, reduce the heat to low and slowly pour in your heavy cream, stirring constantly. Adding the cream slowly rather than dumping it all in at once helps prevent any curdling or separation. Stir until the cream is completely incorporated and the sauce looks silky and uniformly colored. If you’re using coconut milk instead, the process is the same—pour slowly, stir well.
Add the cooked chicken pieces back to the sauce along with any juices that accumulated on the plate. Gently stir everything together, making sure each piece of chicken gets coated with sauce. Let the whole thing simmer together on low heat for 5 to 10 minutes, stirring occasionally, just until the chicken is heated through and the flavors have a chance to meld. This is also where you can add that final touch of lime juice or lemon juice to brighten the sauce—squeeze a wedge over the top and stir it in.
The finished dish should smell absolutely incredible, with warm spices, caramelized onion, and creamy richness. The sauce should be silky and coat a spoon smoothly, and the chicken should be so tender it nearly falls apart with the gentlest stir.
Master Tips for Absolutely Perfect Results
Don’t skip the caramelization step for onions. This step is where probably 40% of the dish’s flavor comes from, so spend the full time getting them truly golden brown, not just soft. You’ll notice the sauce tastes dramatically deeper and more restaurant-quality because of this. If you rush this and cook the onions for only 3 minutes, the finished sauce will taste thin and one-dimensional by comparison.
Always add cream or coconut milk slowly and off heat or on low. High heat can cause dairy to separate and break, creating a broken, curdled appearance. If you do get some separation, don’t panic—a gentle simmer on very low heat often brings it back together, or you can blend a small portion of the sauce to add creaminess back into the whole pot.
Keep your spices fresh. Ground spices lose potency over time, typically staying flavorful for about a year from purchase. If your spices are older than that, you might need to use slightly more than the recipe calls for. Old turmeric or cumin just won’t give you that incredible aroma and depth.
Taste as you go. Everyone’s tolerance for heat is different, and every brand of tomato product and spice blend varies slightly. After you add the tomatoes, taste the sauce. If it’s too acidic, add a pinch of sugar. If it’s too thin, let it simmer longer to concentrate. If you want more heat, add a touch more cayenne. This flexibility is one of the beauties of making it at home.
Don’t overcook the chicken the second time around. Once you add it back to the sauce, it only needs 5 to 10 minutes to heat through. Any longer and it might start becoming dry, especially if you’re using chicken breast.
Variations to Make It Your Own
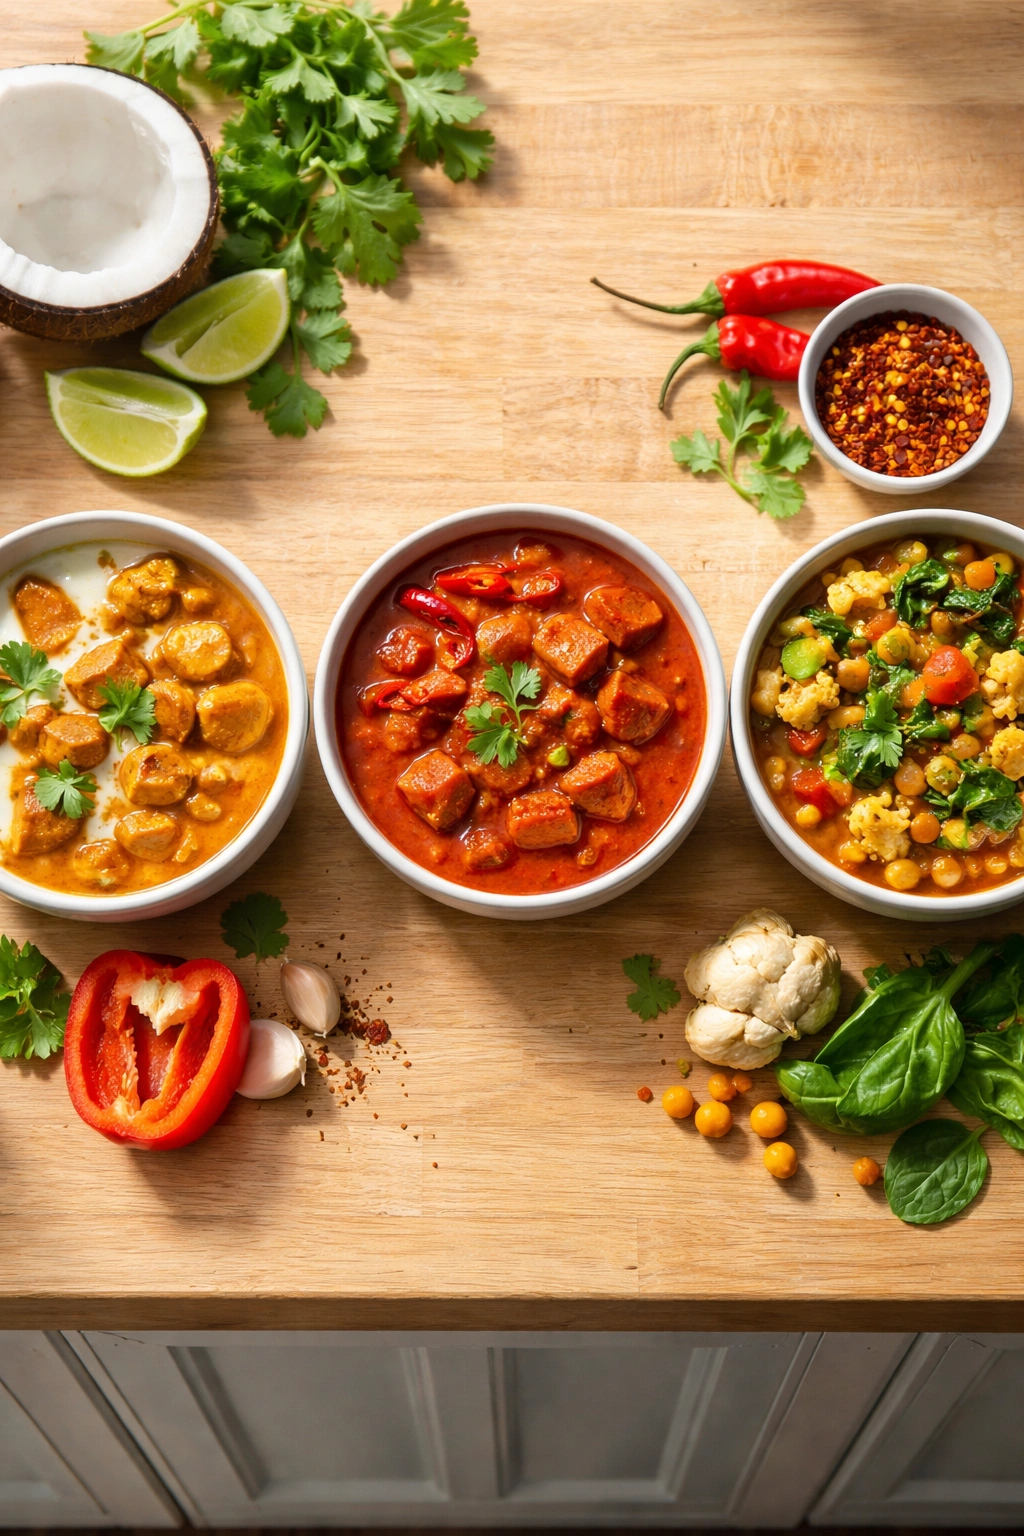
Once you’ve made this recipe once or twice and understand how it works, you can confidently make adjustments based on what you have on hand or what you’re craving. For a lighter, dairy-free version, substitute the heavy cream with full-fat coconut milk in equal amounts. The sauce becomes slightly less rich but gains a subtle coconut sweetness that pairs beautifully with the spices. Many people prefer this version and don’t miss the dairy at all.
To make it spicier, simply increase the cayenne pepper or red chili powder. Start with ½ teaspoon if you like genuine heat, or go up to ¾ teaspoon if you want something that really has a kick. You can also add fresh diced green chili peppers when you cook the onions, or serve with hot sauce on the side for people to customize their own heat level.
For a vegetarian or vegan version, replace the chicken with firm tofu cut into chunks, or hearty vegetables like cauliflower florets, mushrooms, or sweet potato. Follow the same cooking method—marinate your protein in the yogurt mixture (or use a plant-based yogurt alternative), cook it in the pan to get some color, then proceed with the sauce. The cooking time might be slightly different depending on what you choose, so adjust accordingly.
To add vegetables, chop bell peppers, mushrooms, peas, or spinach and either cook them with the onions at the beginning or stir them in with the chicken at the end. This doesn’t change the cooking time significantly and adds nutrition and texture. Some people even add a handful of fresh spinach right at the very end, letting it wilt into the hot sauce for a pop of color.
To make it in a slow cooker or Instant Pot, marinate the chicken as directed, then add everything (chicken, sauce ingredients except the cream) to your slow cooker on low for 4 to 6 hours or high for 2 to 3 hours. For an Instant Pot, sauté the onions and spices on the sauté setting, add everything else including the chicken, pressure cook on high for 5 minutes, then stir in the cream at the end. This is a great option if you want to come home to dinner that’s already made.
Storage, Make-Ahead, and Reheating
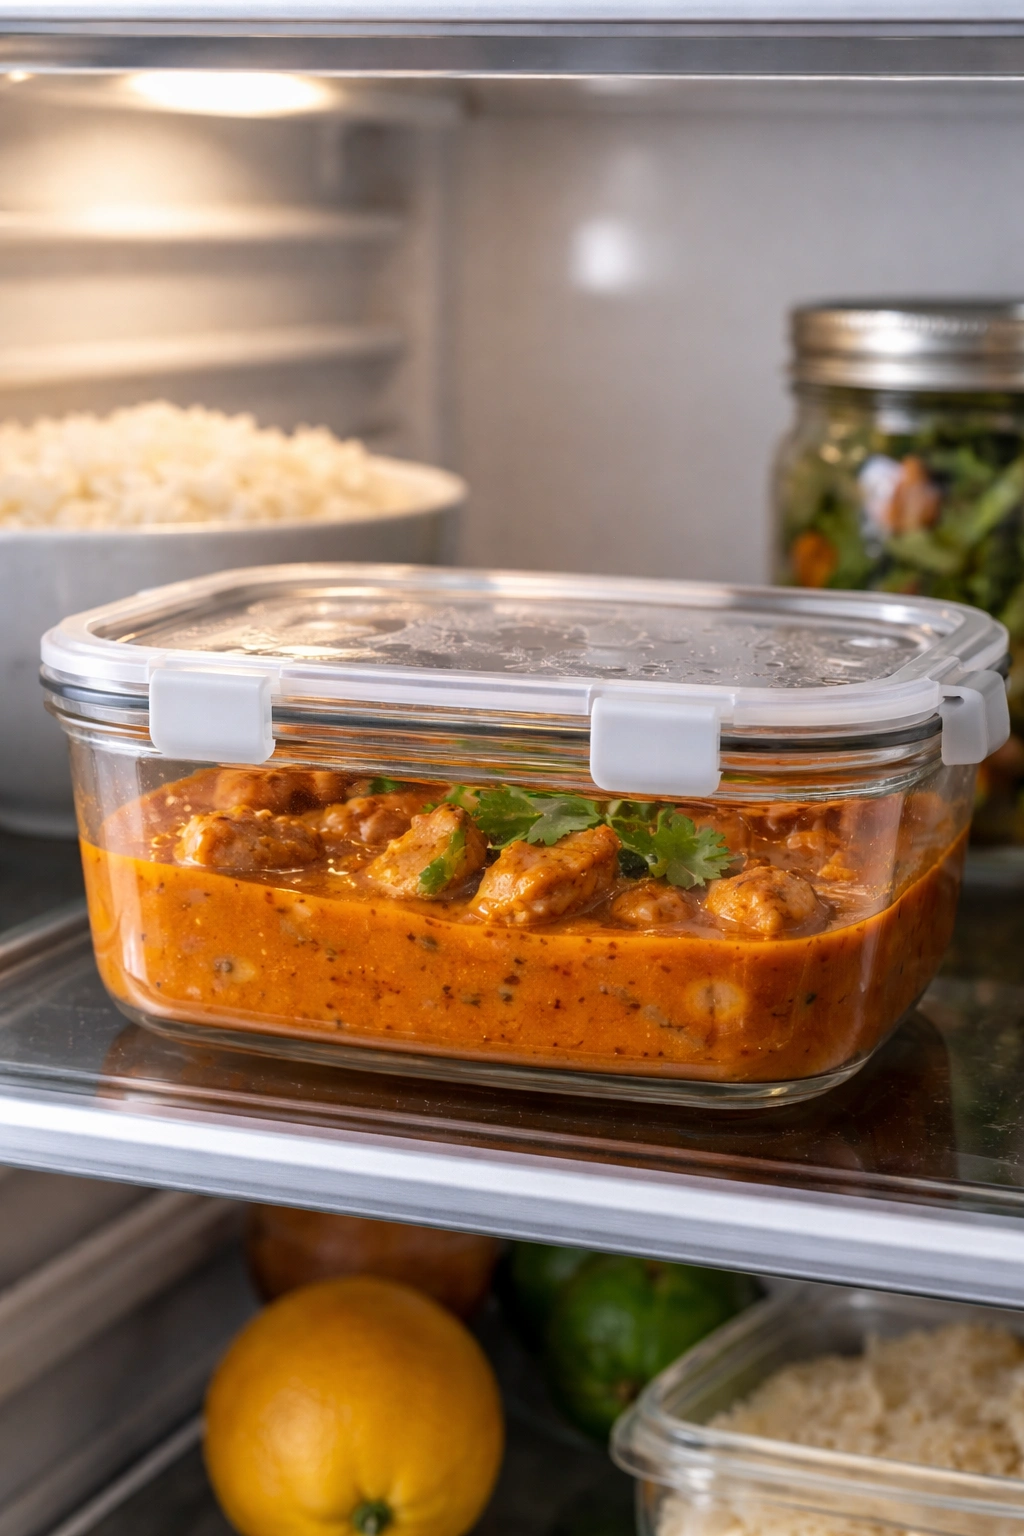
One of the best things about chicken tikka masala is that it tastes even better the next day—the flavors continue to deepen and meld together overnight, making it worth making an extra batch. Store leftovers in an airtight container in the refrigerator for up to 3 to 4 days. The sauce will thicken slightly as it cools, which is completely normal and actually makes it easier to portion.
To reheat, gently warm it on the stovetop over medium-low heat, stirring occasionally and adding a splash of water or cream if the sauce has become too thick. You can also reheat in the microwave in 30-second increments, stirring between each, until heated through. Don’t let it come to a rolling boil while reheating, as this can cause the cream to separate.
This dish freezes fairly well, though the sauce may separate slightly during thawing. To freeze, let the curry cool completely, then transfer it to a freezer-safe container or bag, removing as much air as possible. It’ll keep for up to 2 months. Thaw overnight in the refrigerator before reheating on the stovetop, and stir well. If the sauce looks separated, warm it gently while stirring, and it usually comes back together beautifully.
For make-ahead convenience, you can prep everything the night before: marinate the chicken overnight, chop all your vegetables, measure out your spices. In the morning, you can even cook the chicken and make the sauce, then reheat the whole thing gently before serving. This turns a 45-minute dinner into a simple reheating situation, which is perfect for busy weeknights.
Serving Suggestions and Pairing Ideas
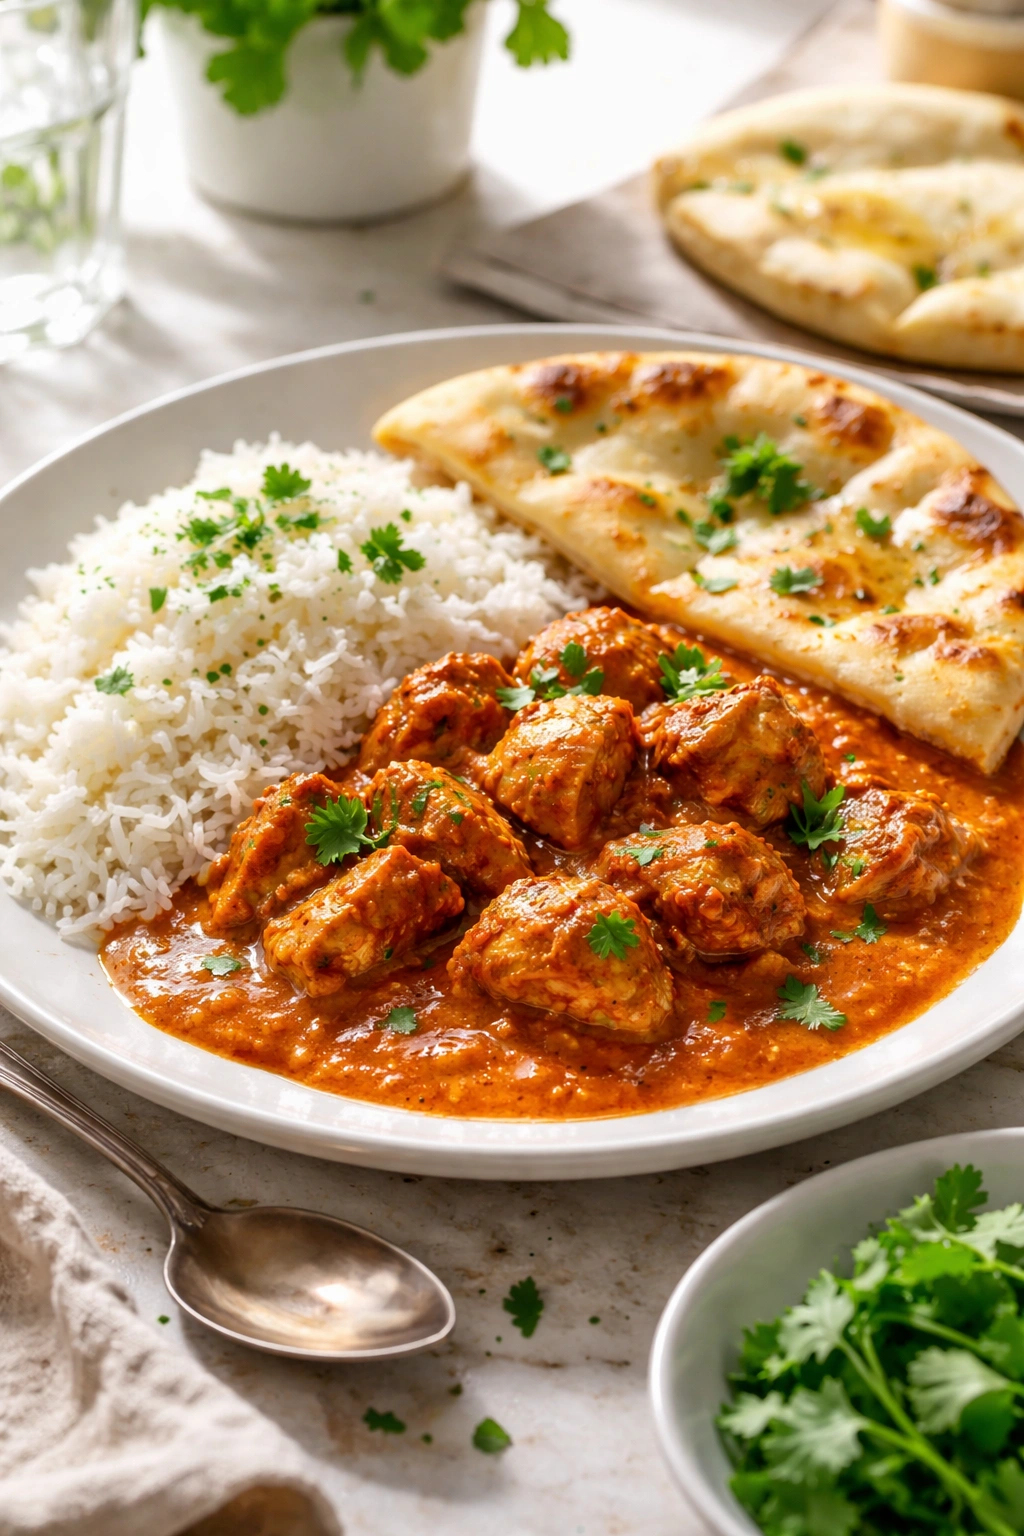
The way you serve chicken tikka masala sets the tone for the entire meal. Fluffy basmati rice is the classic pairing—cook it according to package directions and serve each person a generous scoop alongside the curry. The rice soaks up all that incredible sauce, and the mild flavor of basmati acts as a perfect canvas for the warm spices. If you have time, make your rice a little fancier by cooking it in chicken stock instead of water, or stirring in a cinnamon stick and a few cardamom pods while it cooks.
Warm naan bread is essential for soaking up sauce. Buy pre-made naan from the grocery store if you’re short on time—just warm it in a dry skillet or directly over a gas flame—or make your own using a simple recipe if you’re feeling ambitious. The combination of fluffy rice, saucy curry, and chewy naan is what makes this meal feel so special and satisfying.
Beyond the carbs, consider adding a fresh, cooling element to balance the spices. A simple cucumber raita (yogurt mixed with grated cucumber, cumin, and salt) is traditional and delicious. A chopped salad of tomatoes, red onion, and fresh cilantro with lime juice adds brightness. Even just a side of cool, sliced cucumber or a wedge of lime to squeeze over the top helps refresh your palate between bites.
Garnish generously with fresh cilantro—this isn’t optional. The fresh, herbaceous cilantro is essential for cutting through the richness of the cream and adding visual appeal. A squeeze of fresh lime juice at the table lets people adjust the brightness to their preference. Some people like serving this with a side of mango lassi (a yogurt-based drink) or cold white wine to complement the warm spices.
Common Mistakes and How to Avoid Them
Crowding the pan when searing the chicken is probably the most common mistake. When pieces are packed tightly together, they release moisture and steam instead of browning. Cook in batches if needed—it takes five extra minutes but makes a huge difference in the final texture and appearance.
Using old spices results in a sauce that smells and tastes flat instead of aromatic and vibrant. If your garam masala or other ground spices are more than a year old, replace them. Good spices should smell strong and fragrant—if you open the container and barely detect an aroma, they’ve lost their potency.
Cooking the sauce too fast prevents the flavors from developing properly. You’re not trying to get dinner on the table in 15 minutes—let the sauce simmer gently for the full recommended time. This allows the tomatoes to break down, the spices to infuse, and the flavors to deepen.
Adding cold cream straight from the refrigerator can cause separation or curdling. Let your cream sit on the counter for 10 minutes to come closer to room temperature before adding it, or add it very slowly while the sauce is on low heat.
Using low-fat or Greek yogurt for the marinade results in a sauce that doesn’t have the same richness and might separate more easily. Stick with full-fat plain yogurt for the best results.
Final Thoughts
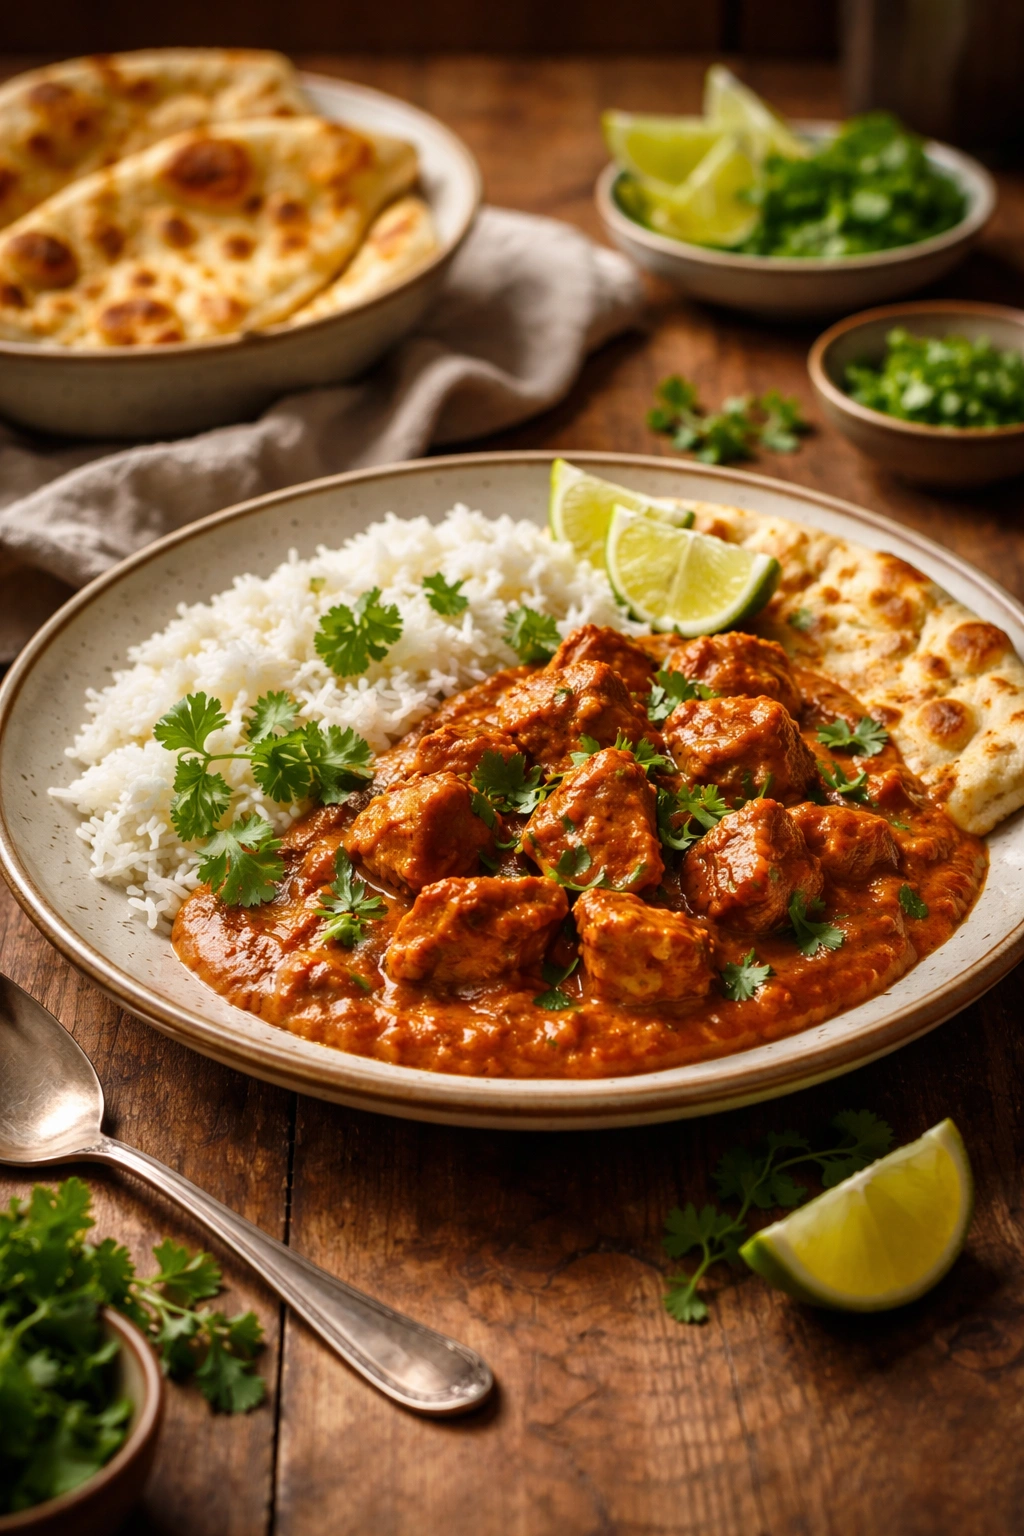
There’s something deeply satisfying about mastering a dish that feels restaurant-quality but comes together in your own kitchen. Chicken tikka masala hits that perfect intersection of impressive and approachable—it looks like you spent all day cooking when you actually spent 45 minutes, and it tastes infinitely better than takeout because you controlled every element. The warm spices, the silky cream sauce, the tender chicken, the fresh cilantro garnish—every component works together to create something that’s become beloved worldwide for very good reason.
Once you’ve made this once, you’ll feel confident enough to adjust it to your preferences, experiment with variations, and make it again and again. This is the kind of dish that doesn’t demand perfection—even if your sauce breaks slightly or your onions don’t caramelize as deeply as you hoped, it still tastes delicious. That’s the real magic of this recipe: it’s forgiving enough for beginners but sophisticated enough to impress experienced cooks.
Serve it over rice with warm naan, a squeeze of lime, and fresh cilantro, and watch people’s faces light up with the first bite. This is comfort food that happens to be Indian-inspired, warm and cozy and completely worth adding to your regular dinner rotation.