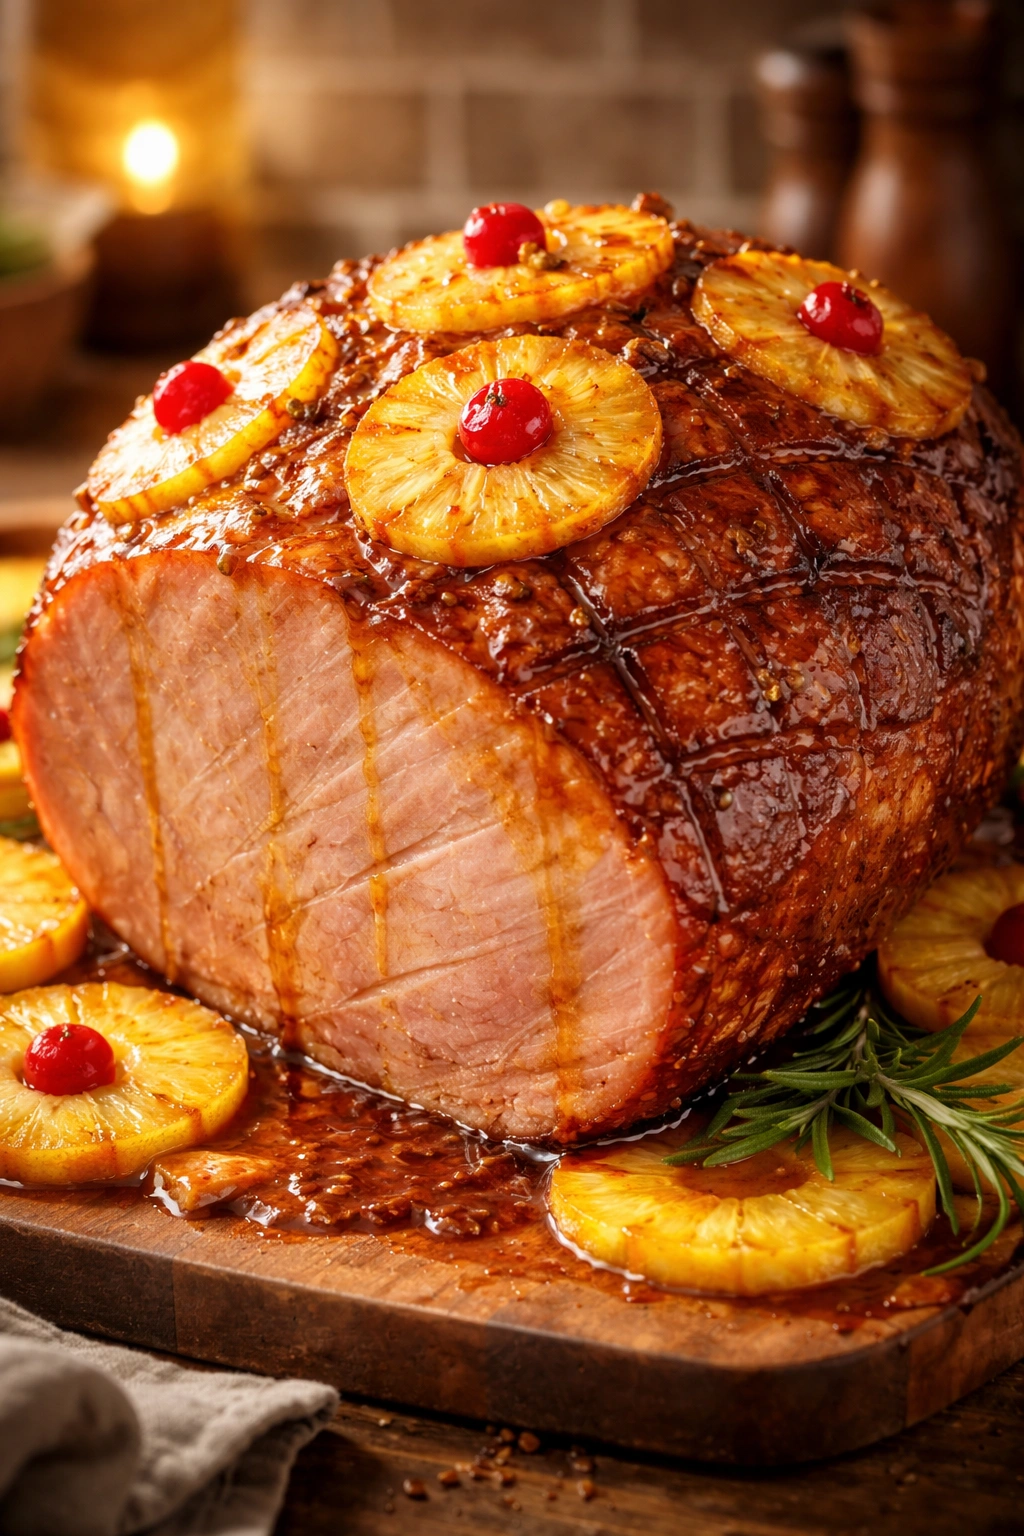
When your guests take the first bite of a glazed ham with caramelized brown sugar and sweet pineapple, they’ll assume you spent the entire day in the kitchen. Here’s the secret: you didn’t. A beautiful, show-stopping pineapple ham that earns compliments all around the table takes just 10-15 minutes of actual hands-on work. The oven does the heavy lifting, transforming simple, humble ingredients into something that looks like it came from a professional caterer’s kitchen.
The magic lies in understanding a few key principles: scoring your ham correctly so the seasonings penetrate deep into the meat, knowing the difference between a ham that stays juicy and one that turns into a dried-out sponge, and timing your glazing perfectly so the brown sugar caramelizes into a glossy, savory-sweet coating. This isn’t complicated cooking—it’s straightforward technique combined with patience. Even if you’ve never made a whole ham before, the process is forgiving enough that you’ll get a beautiful result on your very first try.
What makes this approach so reliable is that ham arrives at the grocery store already fully cooked and cured. Your job isn’t to cook it from scratch; it’s to warm it through while infusing it with irresistible flavor and creating that crucial caramelized exterior that makes people reach for seconds. With the right guidance about ham selection, timing, and the science behind what makes the glaze stick and shine, you’re about to master one of the easiest and most impressive dishes you can bring to your holiday table.
Why This Ham Recipe Works Every Single Time
The beauty of this ham recipe is that it forgives small mistakes and delivers results that feel far more impressive than the effort requires. Pre-cooked, smoked ham is already tender and seasoned—you’re just enhancing what’s already there. This fundamental fact changes everything about ham cookery. Unlike roasting a raw chicken or beef brisket where timing must be precise and temperature must be exact, ham is essentially impossible to overcook because it arrives at your kitchen fully ready to eat.
What you’re actually doing is reheating the ham to bring it to an ideal serving temperature (around 140°F internal temperature), while simultaneously infusing it with brown sugar, pineapple juice, and warm spices that penetrate the meat through the scoring cuts. The low, slow oven temperature of 325°F ensures even heating that warms the ham through without drying out the exterior, while the sugar-based glaze creates a protective coating that keeps moisture locked inside.
Home cooks often worry that they’ll mess something up. The reality? This recipe is nearly foolproof. Your ham will come out tender, juicy, and delicious whether you’re cooking a 6-pound boneless ham or a 15-pound bone-in version. The basic ratio of 15-18 minutes per pound at 325°F works across sizes, and as long as you don’t skip the glazing and basting steps, you’re already ahead of most home cooks.
How to Choose the Perfect Ham for Easy Success
Standing in front of the grocery store ham selection can feel overwhelming—there are bone-in hams, boneless hams, spiral-cut hams, city hams, country hams, and fresh hams, all with different cooking times and characteristics. The choice you make here determines not just flavor, but also texture and ease of slicing.
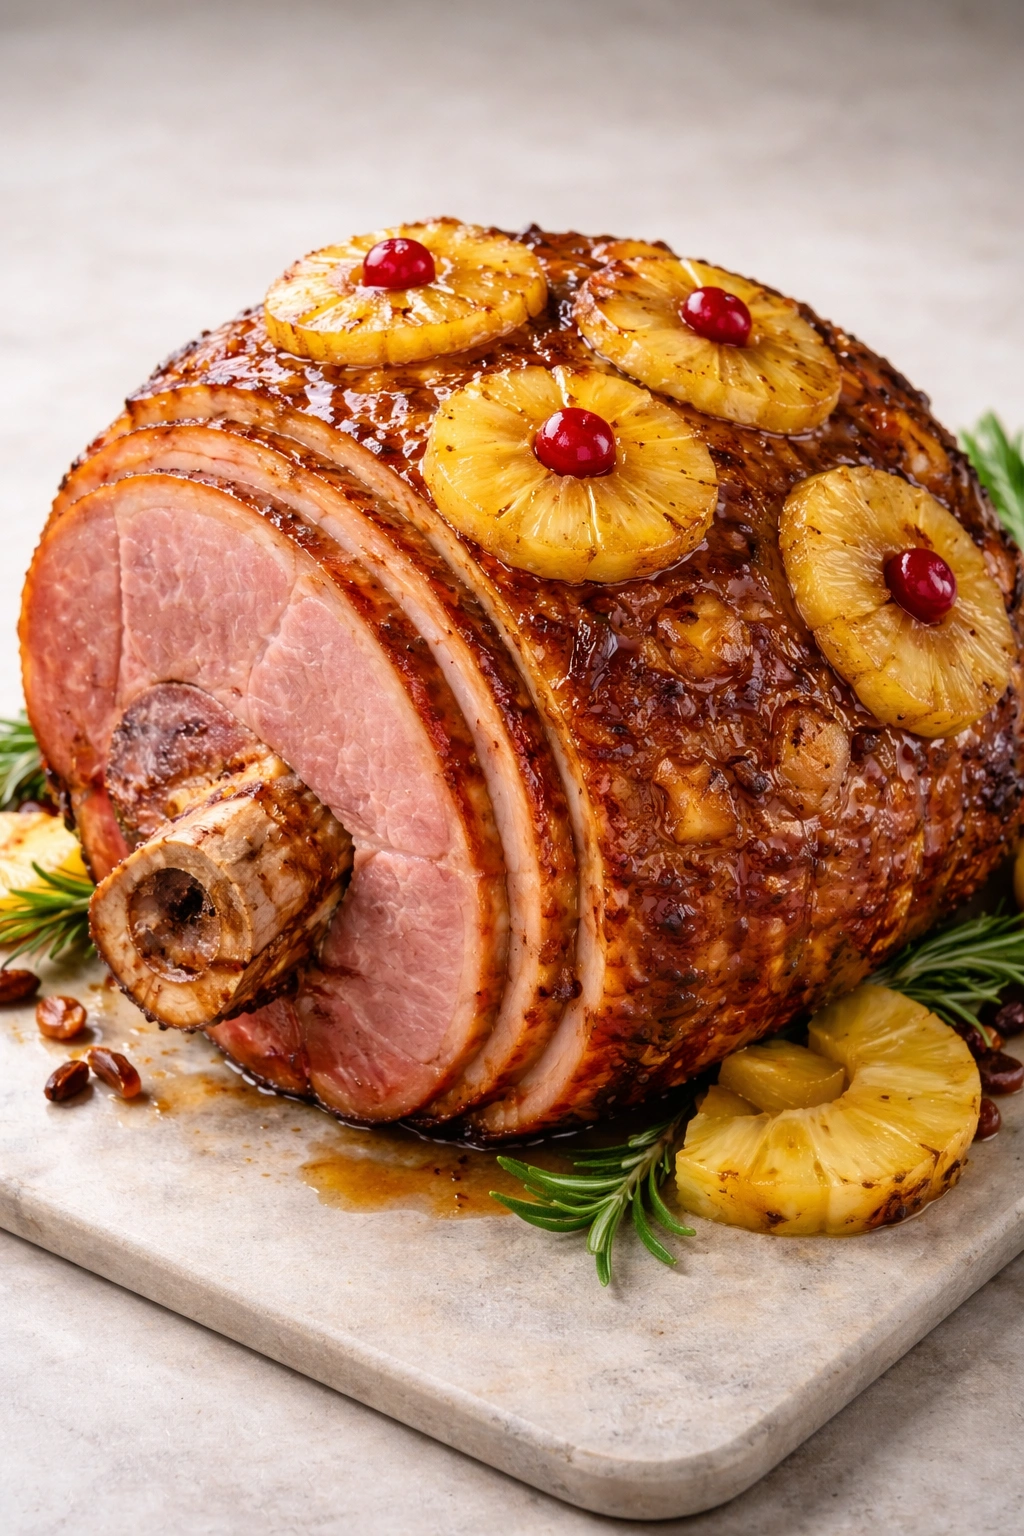
Bone-in hams are genuinely superior to boneless options. They taste better because the bone adds flavor to the meat as it heats, and they tend to stay moister during the baking process. The bone also makes for a spectacular presentation when you slice around it at the table. The downside is that bone-in hams take longer to cook, and obviously you’re paying for weight that you can’t eat. However, bone-in hams are worth the trade-off for both flavor and the fact that you can use the bone to make a rich stock or ham-and-bean soup afterward.
Spiral-cut hams present a different equation. They arrive already sliced, which saves you work at the end, and they cook faster than bone-in versions. The USDA recommends eating spiral-cut ham cold rather than reheating it, because heating already-sliced meat can cause it to dry out. That said, this recipe basks the ham in glaze throughout cooking, which protects the exposed cut surfaces from drying. Many home cooks have great success with spiral-cut hams in pineapple glazes specifically because the glaze creates a moisture barrier.
For sizing, estimate about 3/4 pound per person if you want leftovers. A 10-pound bone-in ham serves about 12-15 people with nice portions remaining for sandwiches and soups afterward. Smaller households can find 4-6 pound boneless hams that feed 6-8 people adequately. Read the package label carefully—it will state whether the ham is pre-cooked (ready-to-eat, just needing reheating) or needs full cooking. Almost all supermarket hams are pre-cooked, which simplifies your life considerably.
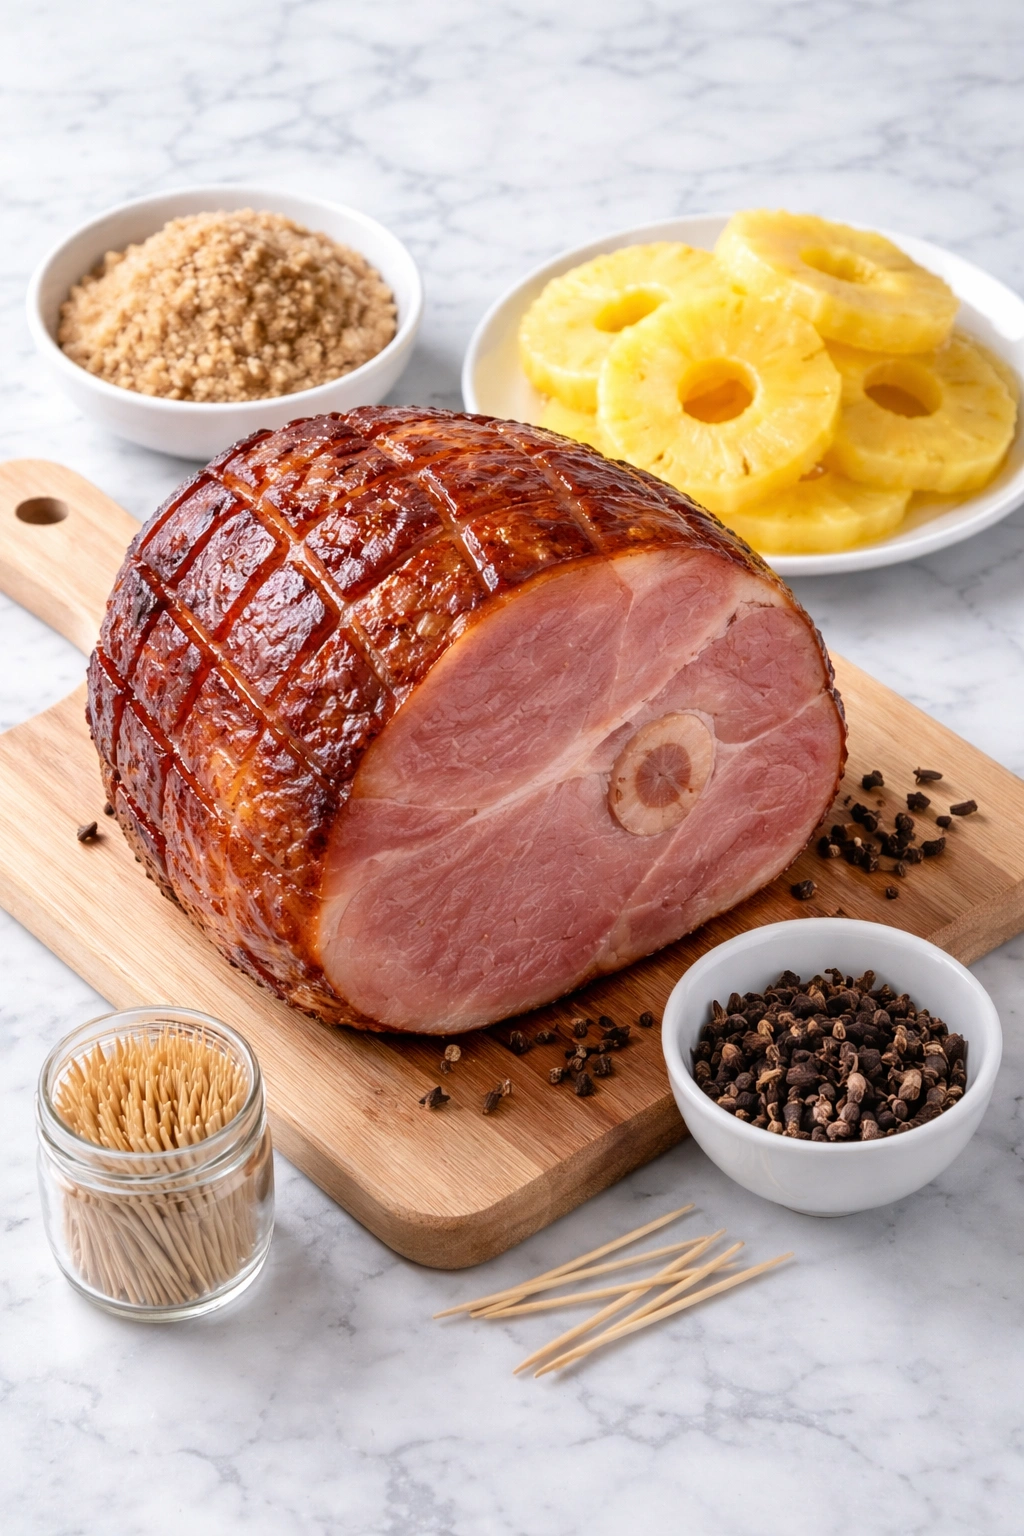
The Importance of Scoring Your Ham Correctly
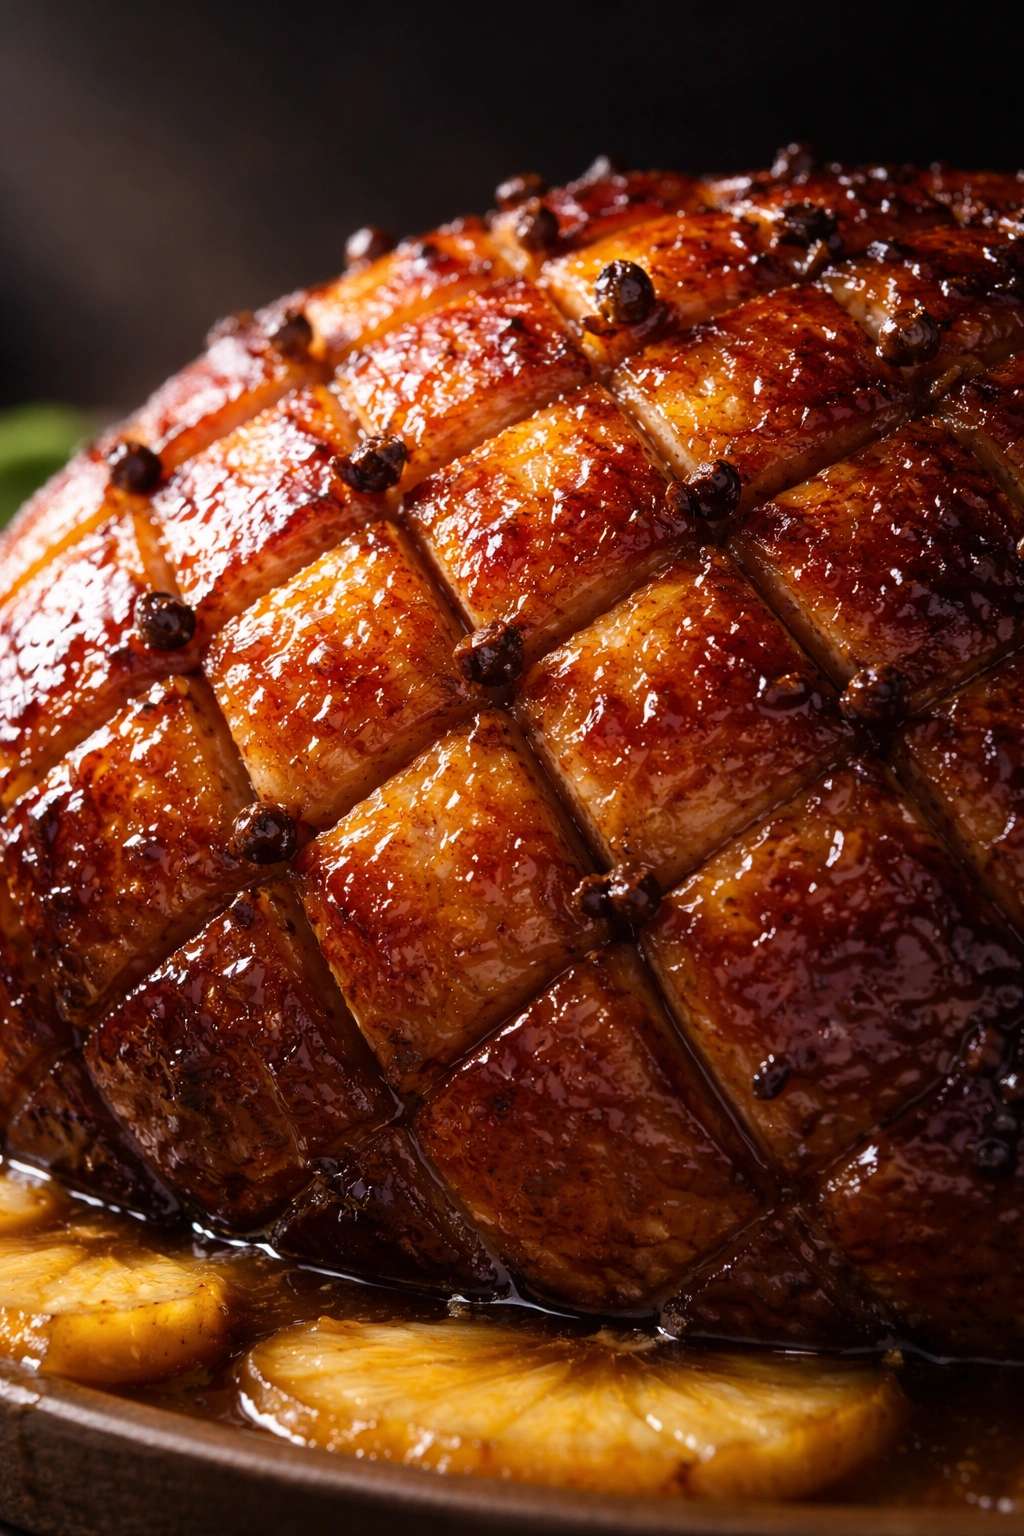
Scoring sounds technical, but it’s genuinely one of the simplest yet most important steps. Scoring creates shallow cuts in the ham’s surface in a diamond pattern, and these cuts serve a crucial purpose: they allow the brown sugar rub and glaze to penetrate into the meat rather than sitting on the surface.
Using a sharp chef’s knife, cut very shallow diagonal lines across the ham’s surface, making each slice roughly 1/4-inch deep and spacing them about 1 inch apart. Then repeat the pattern across the original slices at an angle, creating diamonds. The key word here is shallow—you’re cutting through the fatty outer layer only, not deep into the meat itself. Deep cuts look dramatic but can cause the ham to dry out, and they make carving more difficult.
The diamond pattern isn’t just for show (though it does photograph beautifully when you present the finished ham). The diamond creates multiple pathways for the brown sugar and glaze to seep downward, spreading flavor throughout the upper layers of meat. Without proper scoring, the glaze sits on the exterior and you lose that flavor distribution. With scoring, every slice you cut will taste like it absorbed the sweet, spiced coating throughout cooking.
If scoring while the ham is in your roasting pan feels awkward, transfer the ham to a cutting board to score it, then return it to the pan. Many cooks find this easier, and it gives you better leverage and control with your knife. Some people even use a small knife or decorative cuts, making crosshatch patterns or different designs—there’s room for creativity here as long as you maintain that 1/4-inch depth and roughly 1-inch spacing.
The Brown Sugar Rub: Building Flavor From the Start
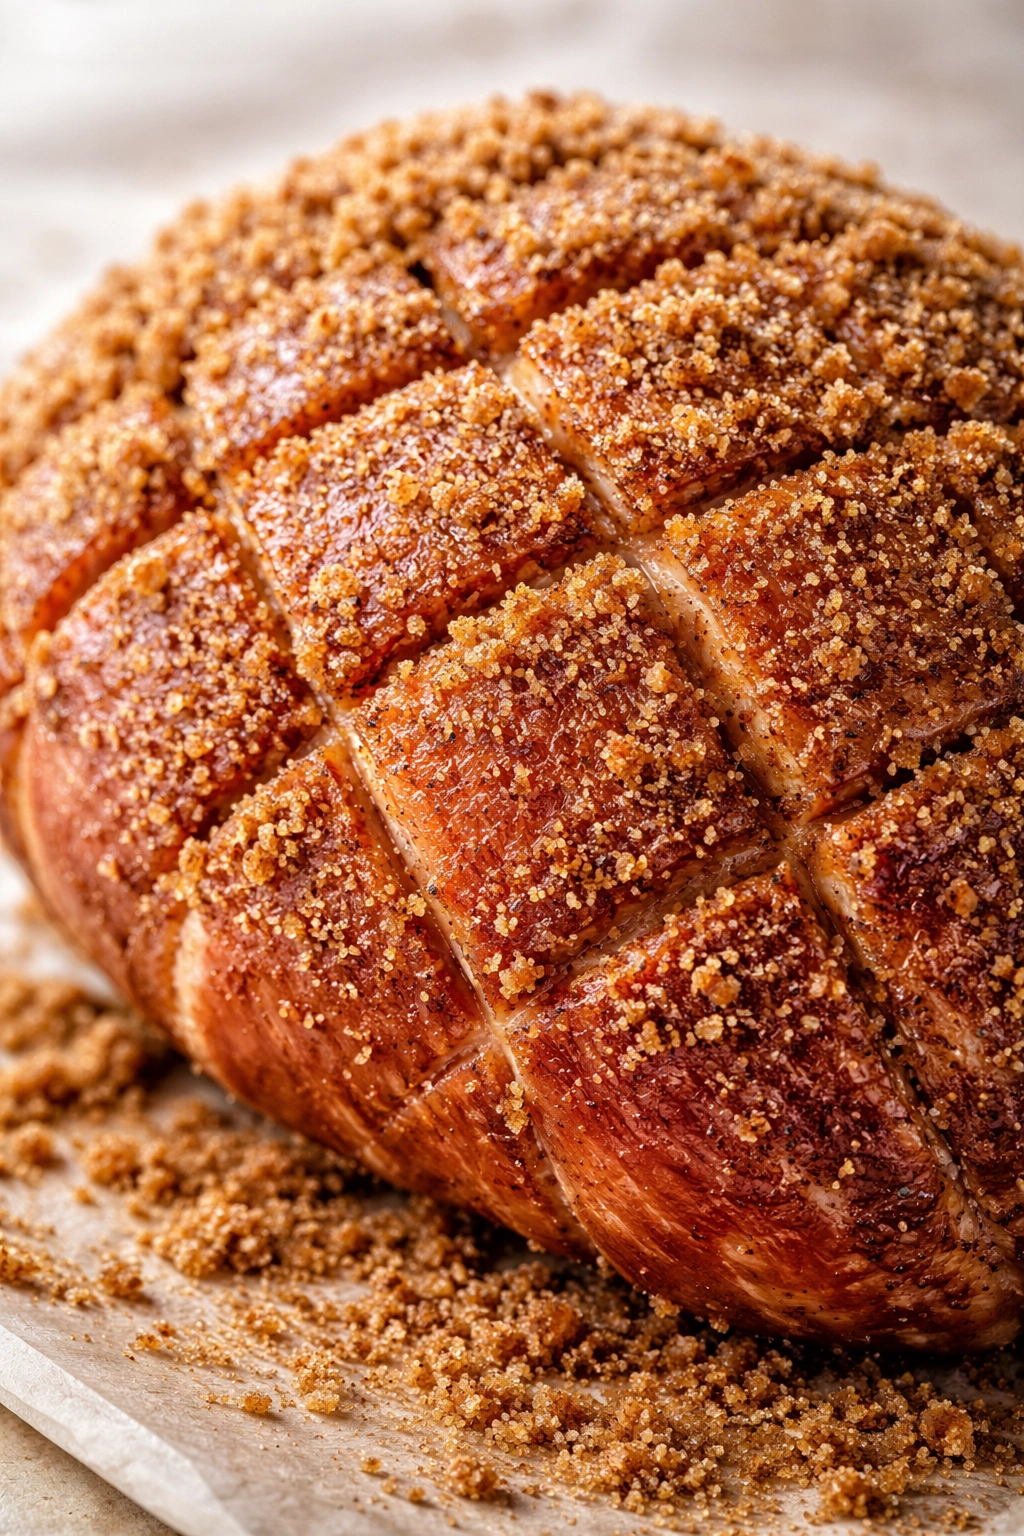
Before your ham ever goes into the oven, you’ll massage a generous brown sugar mixture directly into the meat. This isn’t a glaze that gets applied at the end; it’s a rub that begins curing the ham before cooking even starts. This two-step approach—rub first, glaze later—is what distinguishes a truly flavorful ham from one that tastes one-dimensional.
The classic ratio is about 2 cups of packed brown sugar to 1/2 teaspoon of ground cloves, though you can adjust the cloves up to 1 full teaspoon if you love warm spice flavors. Combine the brown sugar and cloves (or any other warm spices you enjoy—cinnamon, nutmeg, and ginger all work beautifully) in a small bowl. The mixture will be dry and granular at this stage.
Now comes the important part: really rub this sugar mixture all over the ham. Use your hands to massage it into every surface, pushing the sugar into the scored cuts and especially working it into the cut-side flat surface of the ham. As you rub, the saltiness of the ham’s outer curing layer begins to dissolve the sugar slightly, turning it into a paste-like coating. This is exactly what you want—it means the sugar is beginning to dissolve and will draw out the ham’s natural juices. Any sugar that drops into the roasting pan should be scooped back up and rubbed into the meat; none should be wasted in the bottom of the pan at this stage.
If you have time, cover the rubbed ham and refrigerate it overnight before cooking. This resting period is optional but genuinely transformative. The saltiness of the ham gradually draws the sugar and spices into the meat, creating a more integrated flavor and a more tender result. If overnight isn’t possible, even 8 hours makes a difference. If you must cook the ham immediately after rubbing it, you’ll still get excellent results—the oven-baking will infuse the flavors—but you’ll miss out on that extra depth that extended resting provides.
Pineapple: Fresh vs. Canned (and Why It Matters)
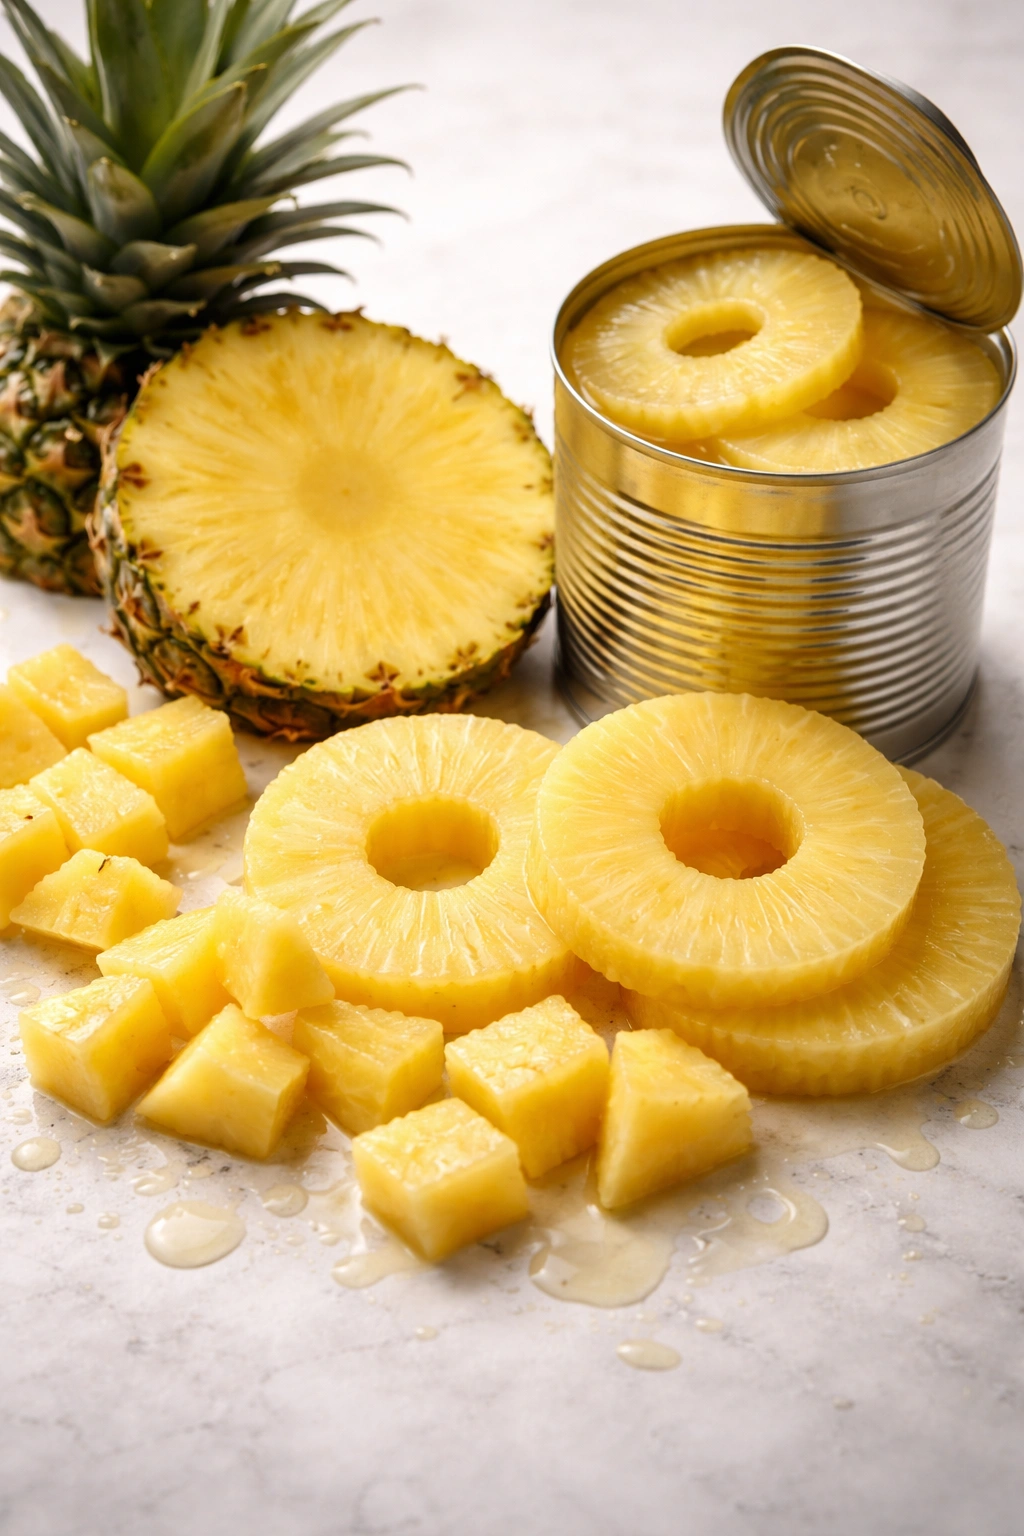
Canned pineapple is genuinely the right choice for baked ham. This seems counterintuitive—surely fresh is always better?—but fresh pineapple contains an enzyme called bromelain that breaks down protein. Cooking fresh pineapple at high temperatures or for extended periods can actually turn the ham into mush. Canned pineapple has been processed and heated, which deactivates this enzyme, making it safe and reliable for ham recipes.
Look for canned pineapple rings or chunks packed in 100% juice rather than heavy syrup. The juice is precious—you’ll use it as the base of your glaze, so its flavor matters. If you can only find pineapple in heavy syrup, drain it well and supplement with fresh lemon juice or additional pineapple juice if you can find it separately. The goal is a glaze that’s sweet but not cloying, and heavy syrup alone will be too sugar-forward.
One standard 20-ounce can of pineapple rings is typically enough to decorate a 10-15-pound ham, with juice left over for your glaze. Some recipes call for crushed pineapple rather than rings—crushed pineapple distributes more evenly across the ham and creates a more rustic appearance, while rings are more formal and photogenic. Both work equally well flavor-wise; choose based on the presentation you prefer. If using rings, secure them with wooden toothpicks so they stay in place during baking and don’t shift around in the pan.
Reserve all the pineapple juice that drains from the can. A standard can yields roughly 3/4 to 1 cup of juice, which forms the sweet-tart backbone of your baking glaze. If you’re making a more elaborate glaze with additional ingredients (mustard, honey, spices), you’ll pour some of this juice into the glaze mixture and reserve the rest to baste with during baking.
The Glazing Technique That Keeps Ham Juicy
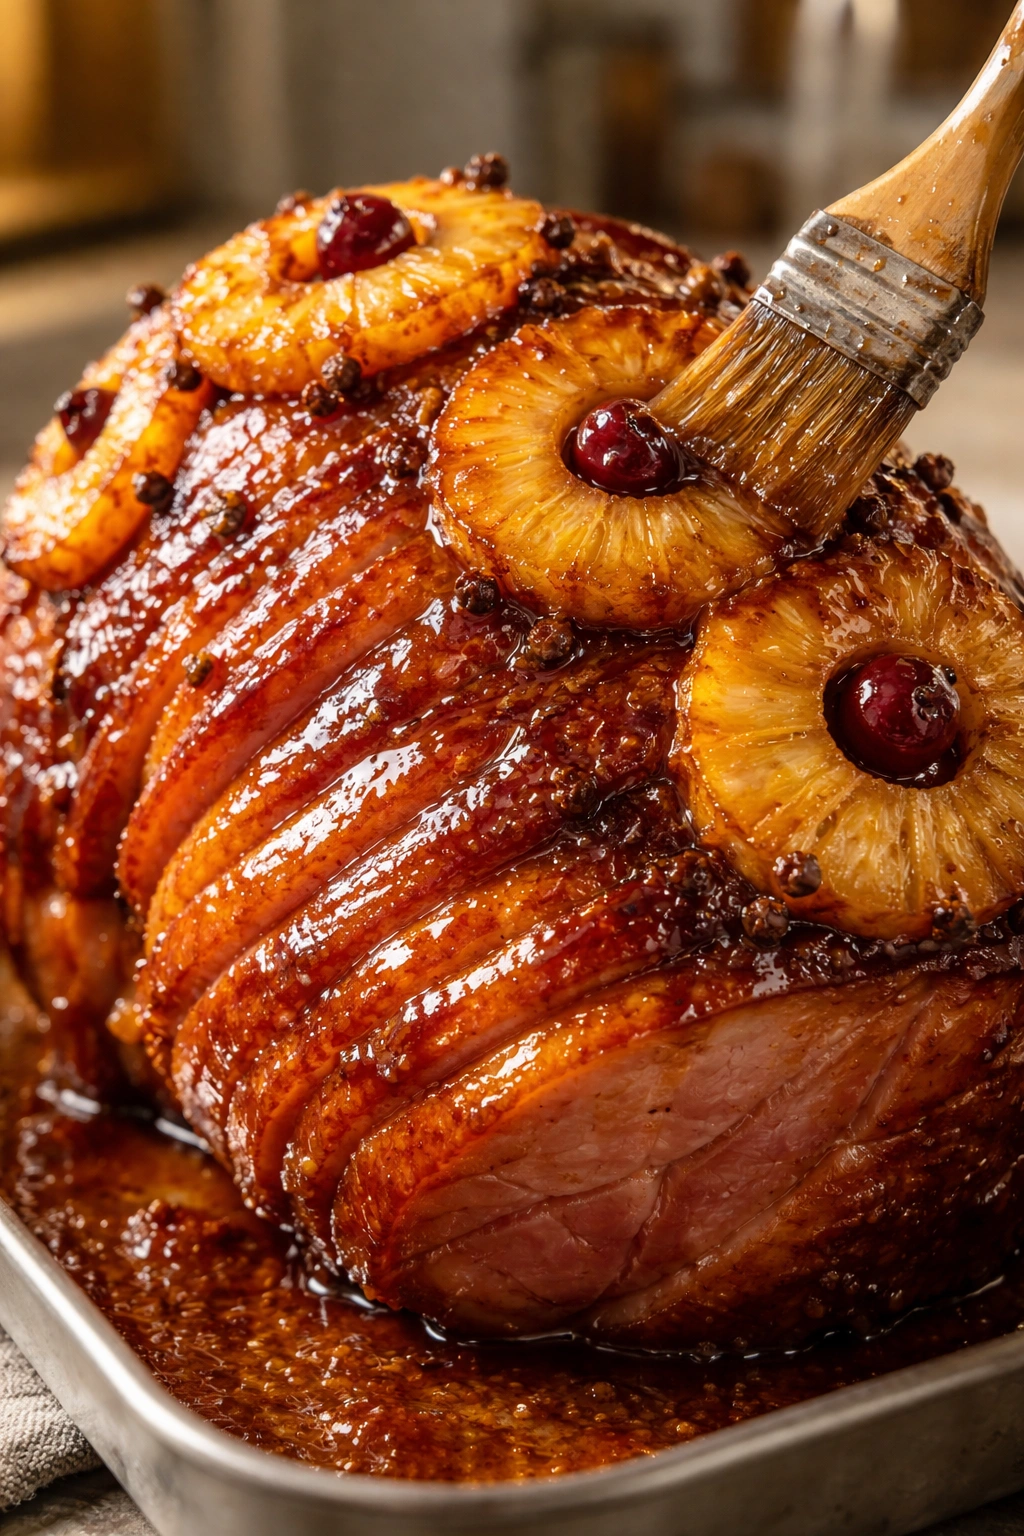
The difference between a damp, delicious ham and a dry one often comes down to glazing technique. Glazing serves two purposes: it adds flavor, and it creates a protective moisture barrier on the ham’s exterior. Understanding how to apply it at the right time is what separates an okay ham from an exceptional one.
Most recipes call for an initial glaze application halfway through baking, followed by basting every 15-20 minutes with pan juices and additional glaze. This frequent basting is essential. As the ham heats, moisture naturally evaporates from the surface. Each time you baste, you’re adding a fresh layer of flavorful liquid that creates a glossy coating and keeps the exterior moist. Without this basting, the outside of the ham begins to dry out even while the interior remains moist.
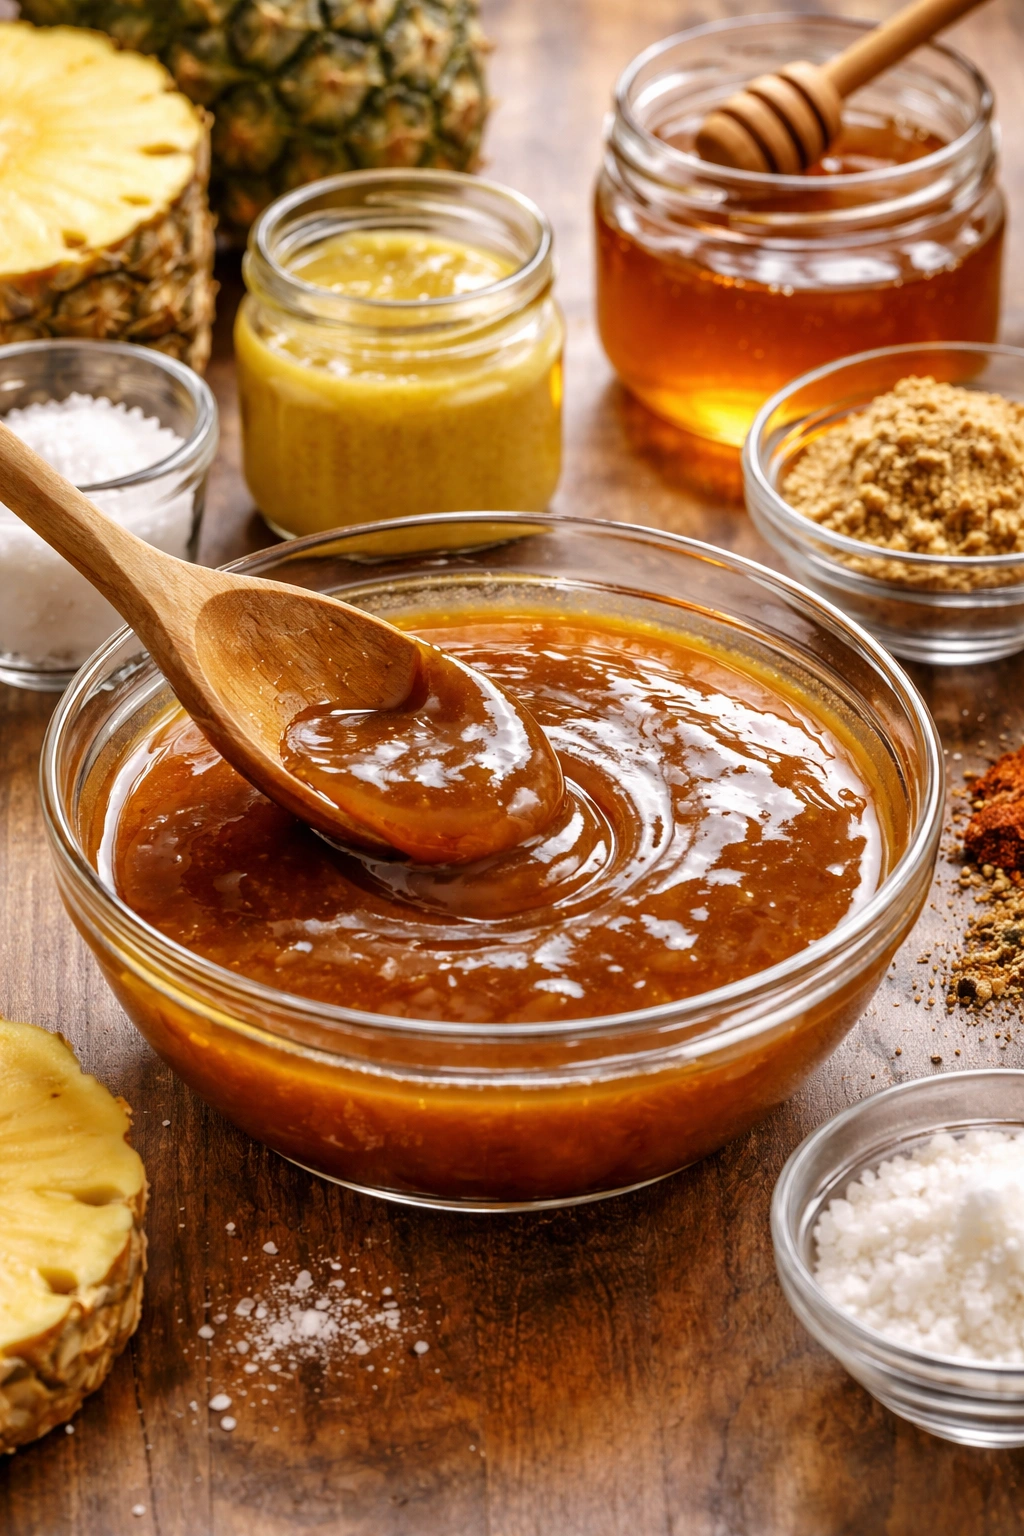
A simple glaze can be as easy as combining the reserved pineapple juice with brown sugar, mustard, and spices, then simmering it on the stovetop until it thickens slightly into a syrup-like consistency. You want it thick enough to coat the back of a spoon, but still pourable. If your glaze is too thin, it will slide off the ham and pool in the bottom of the pan. If it’s too thick, it won’t distribute evenly. A brief simmer over medium heat for 20-30 minutes thickens it naturally as liquid reduces.
The timing of glaze application matters. If you apply glaze too early, it can burn before the ham finishes cooking. If you wait too long, you miss the chance for that beautiful caramelized appearance. The sweet spot is to start glazing about halfway through the total baking time. If your ham bakes for 3 hours total, begin glazing at the 1.5-hour mark. Apply the glaze, return the ham to the oven uncovered (covering would trap steam and prevent caramelization), and baste every 15-20 minutes afterward.
Temperature Timing and Oven Temperatures Explained
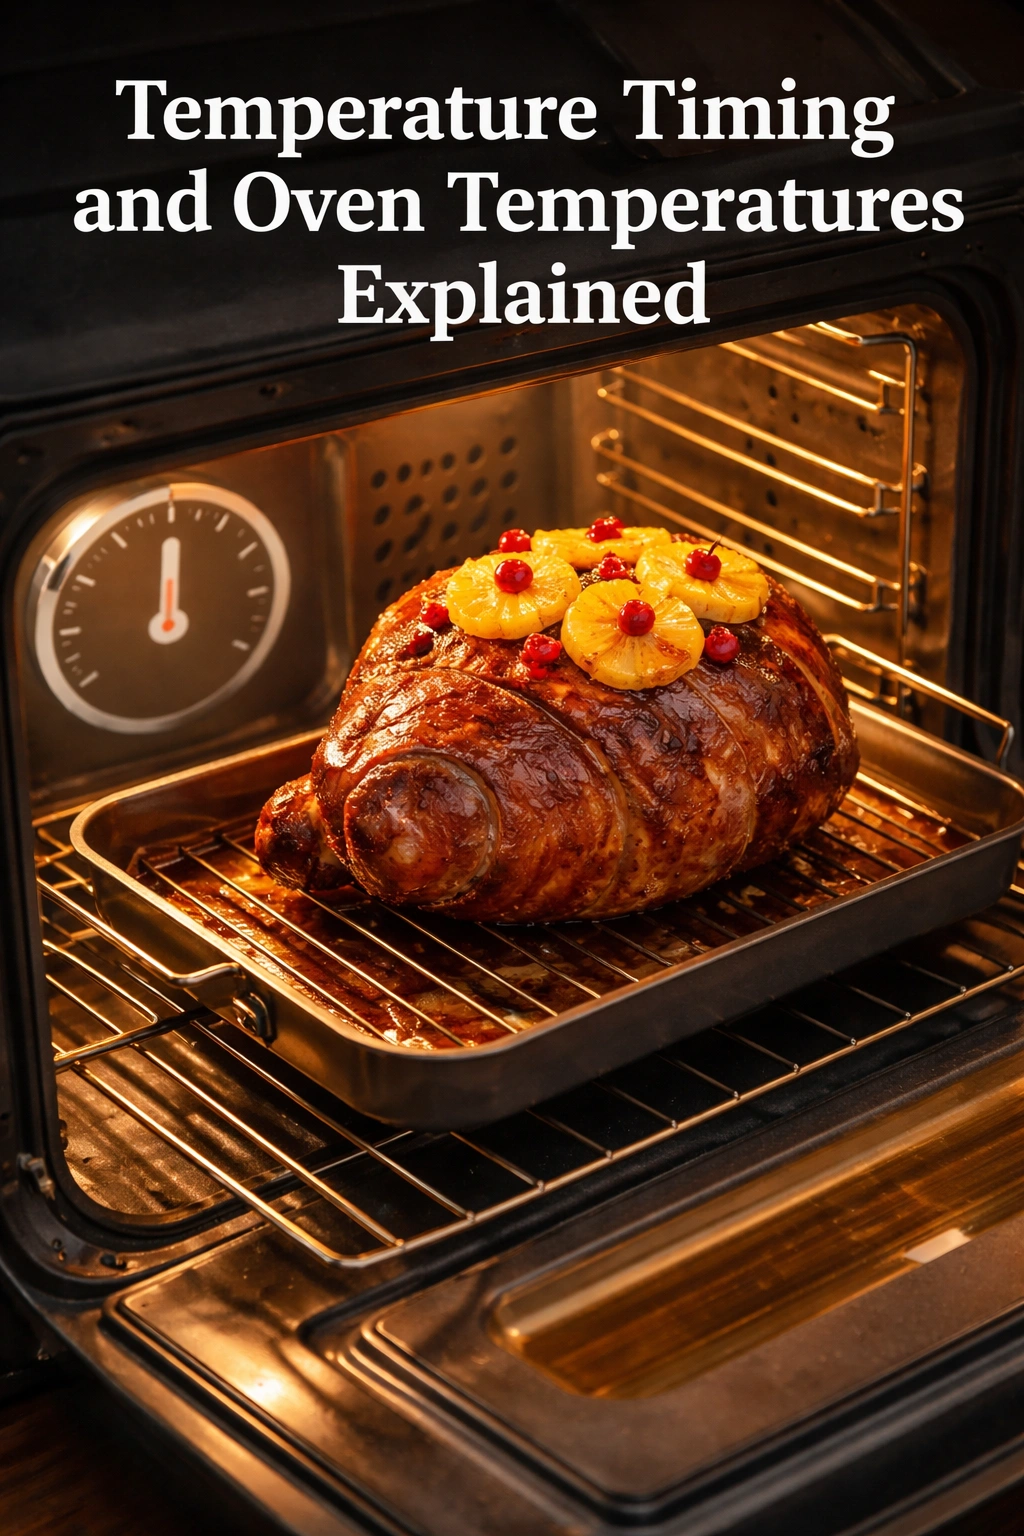
The standard formula for ham is simple: 325°F for 15-18 minutes per pound for bone-in ham, or 10-15 minutes per pound for boneless. This low, gentle temperature ensures even heating throughout the ham without drying out the exterior. Higher temperatures cook the outside too quickly while the inside lags behind.
Translating this to real time: a 10-pound bone-in ham needs roughly 2.5 to 3 hours at 325°F. A 15-pound ham needs 3.75 to 4.5 hours. These times assume the ham is already at room temperature when it goes into the oven. If your ham is still partially frozen or very cold from the refrigerator, add 30 minutes to the total time and check the internal temperature toward the end.
The finished ham should register 140°F on an instant-read meat thermometer inserted into the thickest part of the meat, being careful not to touch the bone. If you’re not sure when it’s done, start checking at the lower end of your estimated time range. A ham slightly past 140°F is still moist and tender. One that reaches 160°F is still safe and edible but trending toward the drier end of the spectrum.
Here’s a practical timing strategy: cover the ham with foil for the first half of baking to prevent the exterior from browning too quickly. Remove the foil, begin glazing, and bake uncovered for the second half. This ensures the interior heats through evenly while allowing the glaze to caramelize on the exterior. If the exterior begins browning too deeply before the ham reaches temperature, you can tent it loosely with foil for the final 20-30 minutes while continuing to baste.
Common Mistakes That Dry Out Ham (and How to Avoid Them)
Dry ham almost always results from one of three specific mistakes, all of which are easily preventable once you understand what causes them. The most common error is skipping or skimping on basting. If you only apply glaze twice during baking and don’t baste with pan juices in between, the ham’s exterior begins losing moisture despite the glaze. Commit to basting every 15-20 minutes once you remove the foil and start glazing. It takes 30 seconds per basting and makes an enormous difference.
The second common mistake is cooking at too high a temperature. Some people want to speed up baking time and crank the oven to 375°F or 400°F. This is tempting when oven space is limited or you’re running behind on timing. Resist the urge. High heat browns the exterior quickly while leaving the interior cold, then dries out the outer layers while the inside finishes cooking. The low-and-slow method is slower but results in a ham that’s evenly heated and uniformly moist throughout.
The third mistake is using spiral-cut ham but cooking it exactly the same way as a whole bone-in ham would cook. Spiral-cut hams are thinner and have more exposed surface area than whole hams, which means they cook faster and can dry out quicker. If using spiral-cut ham, reduce the cooking time slightly (check temperature at the lower end of the estimated range) and consider covering it more of the way through baking to protect the cut surfaces.
Some people also make the mistake of removing the ham from the oven the moment it reaches 140°F, then slicing immediately while it’s screaming hot. Resist this too. Let the ham rest, covered with foil, for 15 minutes after coming out of the oven. This resting period allows the internal temperature to stabilize and the juices to redistribute throughout the meat, resulting in juicier slices. Slicing immediately while hot causes those juices to run out onto the carving board instead of staying in the meat.
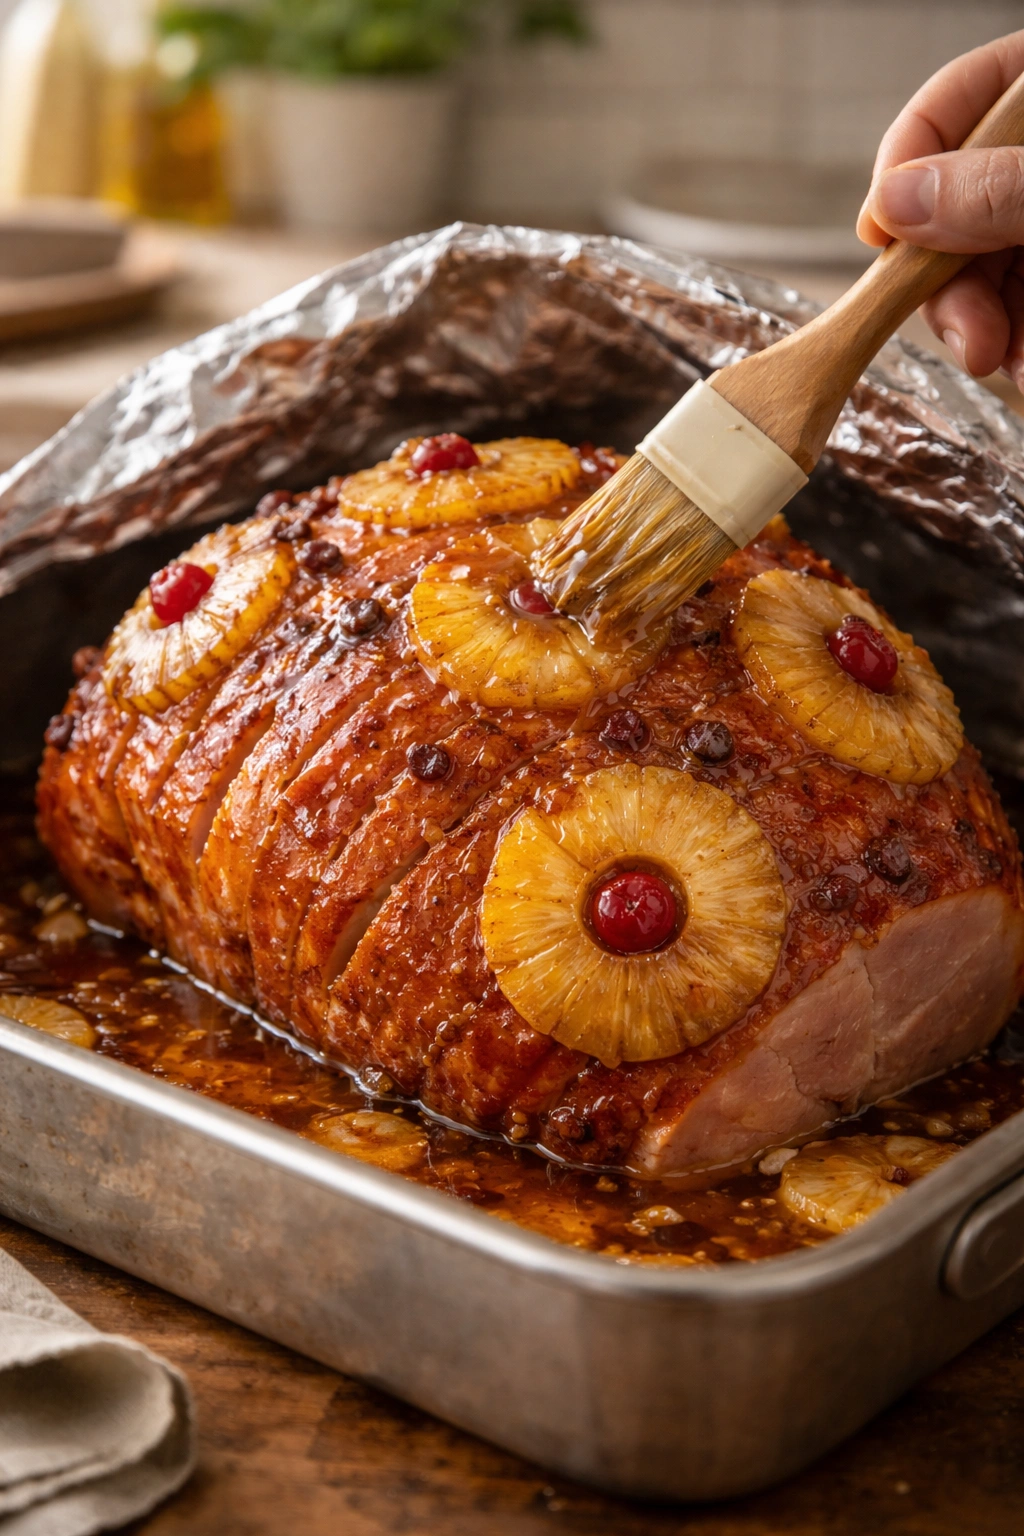
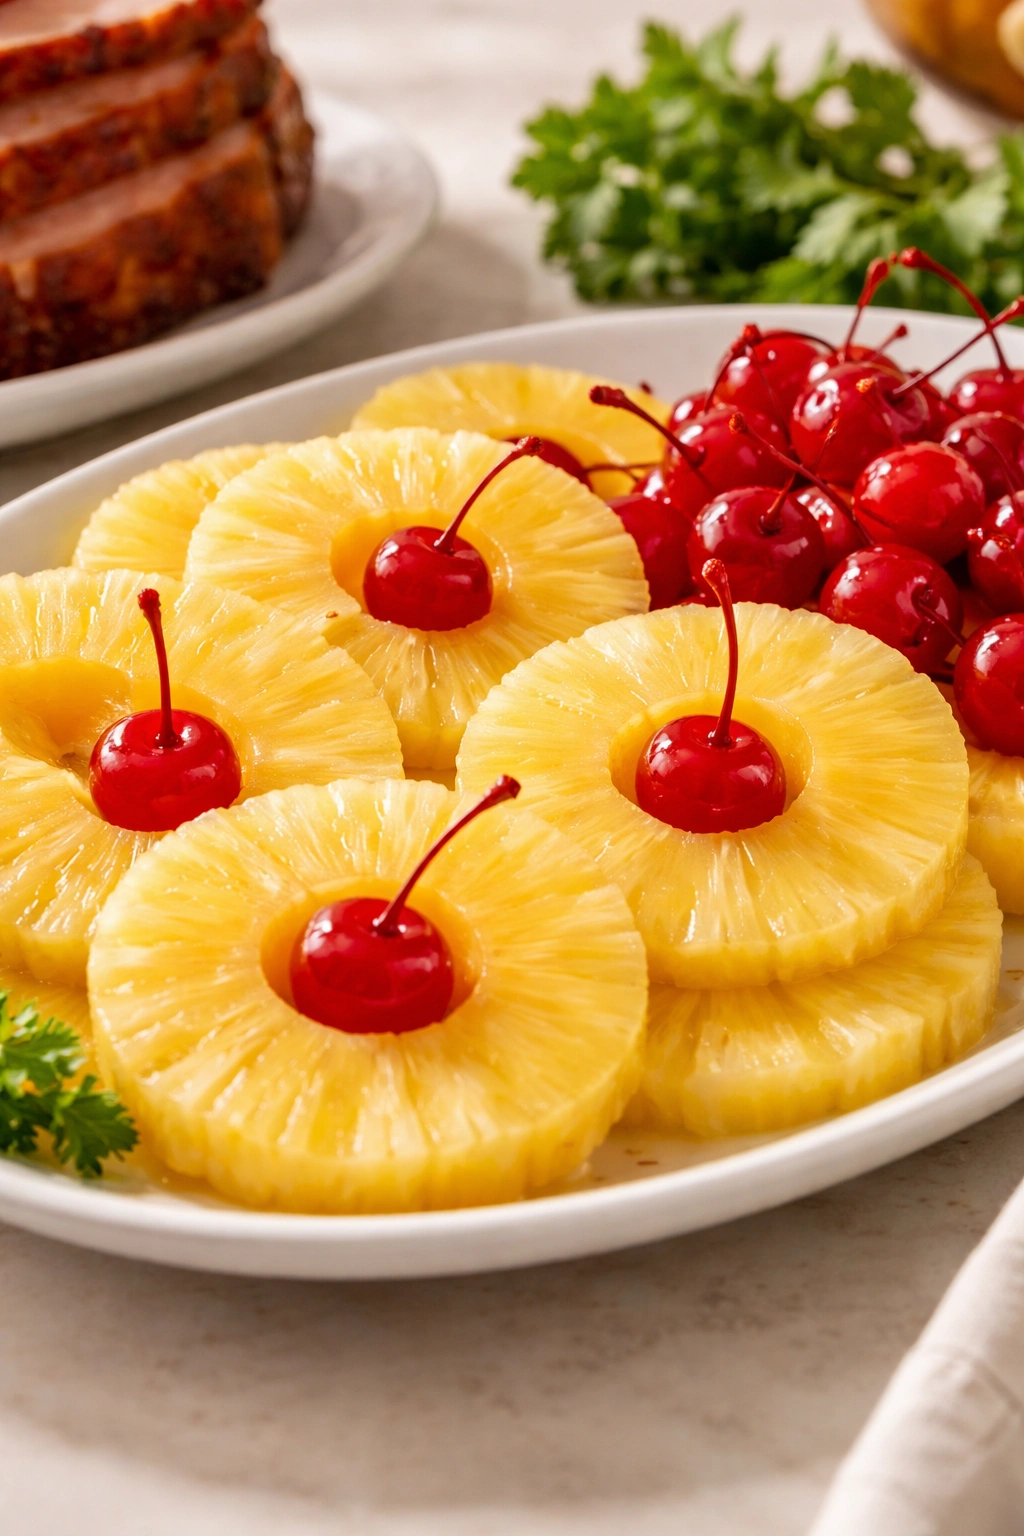
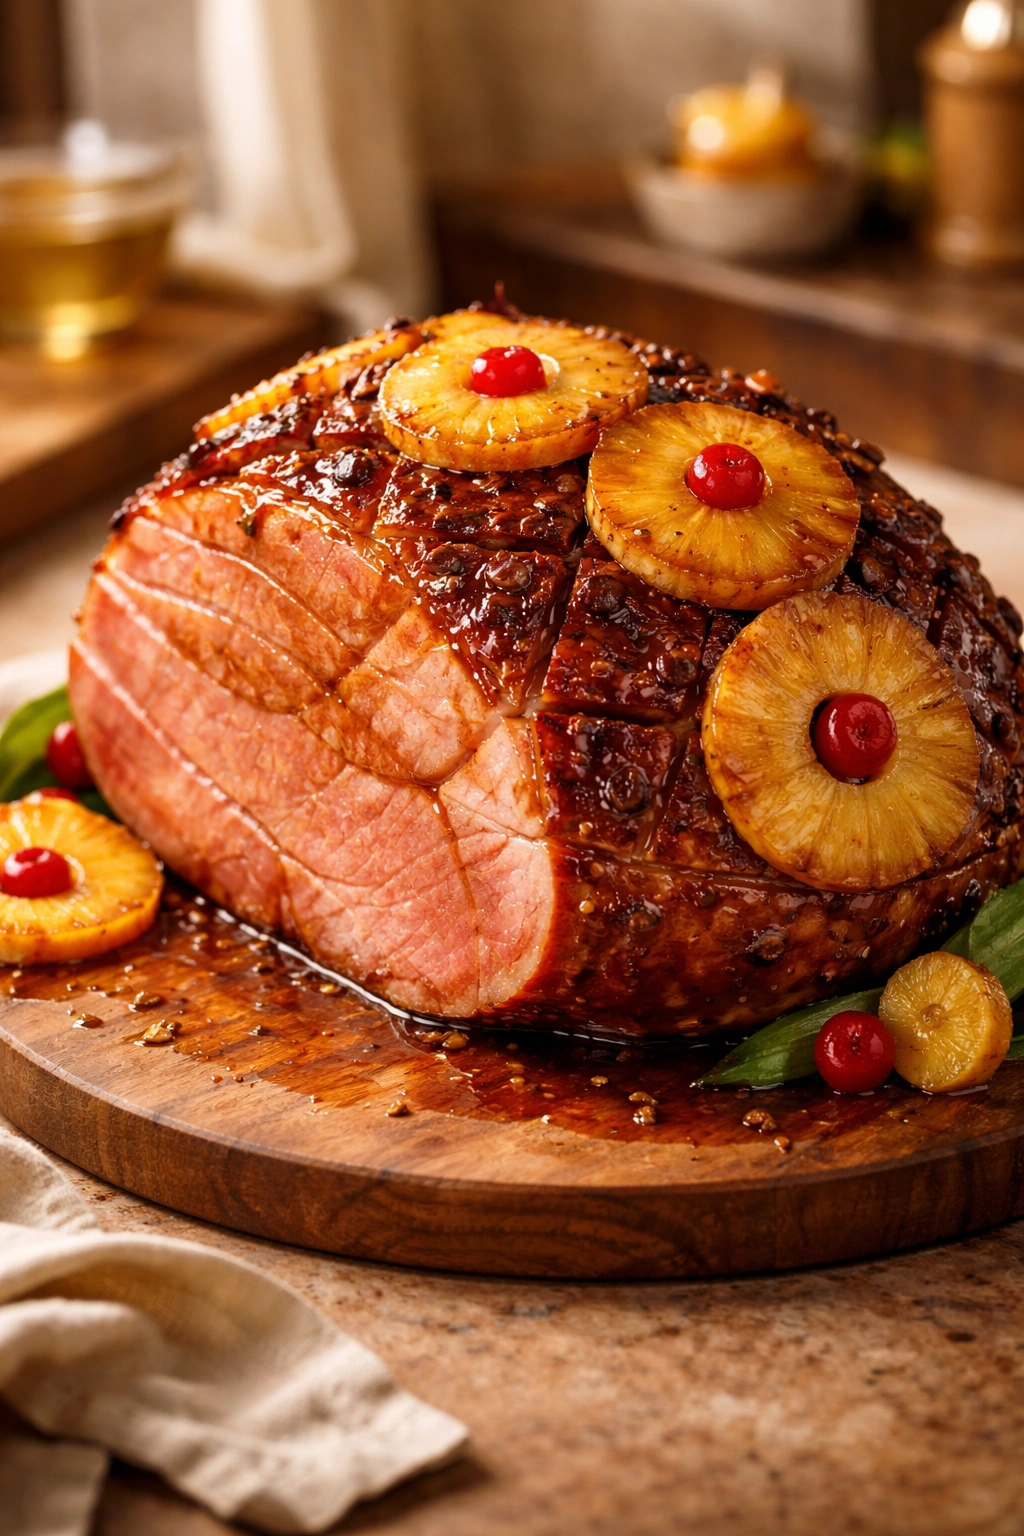
Creating a Beautiful Presentation with Pineapple Rings

A glazed ham studded with pineapple rings and garnished with maraschino cherries isn’t just delicious—it’s visually striking in a way that makes guests immediately understand why you’re serving it as the centerpiece. The presentation work takes perhaps 10 minutes total and makes an enormous visual impact.
Drain the pineapple rings thoroughly, reserving all the juice. Arrange the rings across the surface of the ham so they overlap slightly, covering the top and sides. Secure each ring with a wooden toothpick poked through the center. Some people place a single maraschino cherry in the center of each pineapple ring, held in place by the same toothpick—this creates a jewel-like appearance that photographs beautifully.
Alternatively, arrange the rings more sparsely across the ham in a formal pattern, leaving some surface visible for the brown sugar coating to show through. There’s no single “correct” way—this is where you can make it your own. Some cooks prefer a heavily decorated ham that’s mostly covered in fruit; others prefer a sparser arrangement that shows the caramelized brown sugar underneath.
One clever touch is to soak the wooden toothpicks in water for 15 minutes before using them. This prevents them from charring in the oven, which keeps them from breaking off when you try to remove them later. When the ham is finished cooking, remove all the toothpicks before slicing. Transfer the pineapple rings to a serving platter alongside the sliced ham—they’re delicious alongside ham slices, and they can even be briefly pan-fried in a hot skillet to caramelize them further if you’re feeling fancy.
Leftover Ham: Creative Ways to Use Extras

One of the best things about ham is that it’s equally delicious hot or cold, whole or sliced, and it transforms beautifully into secondary dishes. If you have leftover ham, consider it a gift rather than something you need to use up quickly.
Sandwiches are the obvious application. Split fresh rolls, stack them with sliced ham, add a layer of cheese, and finish with spicy brown mustard or whole-grain mustard. These sandwiches can be eaten cold straight from the fridge, or wrapped in foil and warmed gently in a 300°F oven for 10 minutes to let the cheese soften and flavors meld. Leftover ham also partners beautifully with scrambled eggs for breakfast or brunch—dice the ham and fold it into a cheese omelet or breakfast scramble for protein and flavor that carries through every bite.
Bean and ham soup is a classic that’s genuinely worth making. Simmer diced ham with white beans, diced onions, celery, and carrot in a flavorful broth, then add a splash of apple cider vinegar and a pinch of brown sugar for balance. The ham contributes salty, smoky depth to what becomes a warming, filling meal. Similarly, ham pairs beautifully with scalloped potatoes or creamy potato au gratin—layer diced ham with sliced potatoes, cheese, and cream sauce, then bake until bubbly.
Fried rice is another excellent application, especially for leftover ham that’s diced small. Stir-fry day-old cooked rice with peas, diced carrots, corn, ham, and scrambled eggs, finishing with soy sauce and sesame oil. The ham’s sweetness balances the savory elements, creating something that feels like restaurant-quality takeout but costs a fraction of delivery.
Yield: Serves 10-12 | Leftovers for 3-4 additional meals
Prep Time: 15 minutes
Cook Time: 3 hours (for a 15-pound ham)
Total Time: 3 hours 15 minutes active + overnight resting (optional but recommended)
Difficulty: Beginner — No special skills required; ham is pre-cooked, and the steps are straightforward and forgiving.
For the Ham:
- 1 (10-15 pound) bone-in smoked ham, fully cooked
- 2 cups packed brown sugar
- 1/2 to 1 teaspoon ground cloves
- 1 (20-ounce) can pineapple rings in 100% juice
- Wooden toothpicks (soaked in water 15 minutes before using)
For the Glaze:
- 3/4 cup reserved pineapple juice (from the can)
- 1/2 cup packed brown sugar
- 2 tablespoons spicy brown mustard or Dijon mustard
- 1/4 cup honey
- 1/4 teaspoon ground cinnamon
- 1/4 teaspoon ground ginger
- 1/4 teaspoon ground nutmeg
- 1 tablespoon cornstarch
- 1/4 teaspoon kosher salt
Optional Garnish:
- 12-16 maraschino cherries
- Fresh pineapple slices or additional canned rings for serving
Prepare the Ham and Season:
-
Remove the ham from its packaging and place it on a cutting board or in your roasting pan. Allow it to sit at room temperature for 30 minutes to 1 hour if your kitchen is cool—this helps it heat more evenly during baking, though this step is optional.
-
In a small bowl, combine the 2 cups of packed brown sugar with the ground cloves, stirring until evenly mixed.
Advertisements -
Using your hands, rub the brown sugar and clove mixture all over the surface of the ham, working it into every crevice and pushing it firmly into the meat. Don’t be gentle—massage it in. Pay special attention to the cut-side surface, rubbing the sugar mixture thoroughly into that flat area. It’s normal for the sugar to begin turning into a wet paste as the ham’s salt dissolves it; this is exactly what you want.
-
Transfer the ham to your roasting pan with the cut side down. If the ham has a rind, position it so the rind faces up. At this point, you can cover the ham with foil, refrigerate it overnight or up to 24 hours, allowing the sugar and spices to cure into the meat. This step is optional but will deepen the flavor significantly. If you must cook the ham right away, proceed to the next step.
Score the Ham:
-
Using a sharp chef’s knife, cut shallow lines (approximately 1/4-inch deep) across the ham’s surface at a diagonal angle, spacing the cuts roughly 1 inch apart. Cut only through the fat layer, not deep into the meat itself.
-
Rotate the ham 60 degrees and repeat the diagonal cuts across the first set of slices, creating a diamond pattern across the entire surface. The diamonds don’t need to be perfectly uniform—slight variation adds to the rustic charm. Each diamond should be roughly 1 inch across.
-
Drain the pineapple rings, reserving all the juice in a measuring cup (you need 3/4 cup for the glaze). Arrange the pineapple rings across the surface of the ham in whatever pattern appeals to you—completely covering it for a formal look, or spacing them more sparsely for a rustic appearance. Secure each ring with a wooden toothpick.
-
If desired, place a maraschino cherry in the center of each pineapple ring, held in place by the same toothpick.
Make the Glaze:
-
In a medium saucepan, combine the reserved pineapple juice, 1/2 cup brown sugar, mustard, honey, cinnamon, ginger, nutmeg, and kosher salt. Whisk until the brown sugar begins to dissolve.
-
Sprinkle the cornstarch over the mixture and whisk until no lumps remain. The cornstarch will thicken the glaze as it cooks, giving it a syrupy consistency that clings to the ham rather than sliding off.
Advertisements -
Bring the glaze to a boil over medium-high heat, whisking occasionally. Once it reaches a boil, it will thicken visibly—this should happen within 3-5 minutes. Reduce the heat to low and simmer for 1 minute longer, stirring occasionally. Remove from heat and set aside.
Bake the Ham:
-
Preheat your oven to 325°F. Position the oven rack so there’s clearance above the roasting pan—you need at least 3 inches of space to prevent the ham from touching the oven ceiling.
-
Pour 1/2 cup of water into the bottom of the roasting pan (this keeps the ham from sticking and creates steam that keeps the meat moist). Cover the pan tightly with aluminum foil, sealing the edges.
-
Bake, covered, for approximately half the estimated cooking time. For a 15-pound ham, this is roughly 1.5 to 2 hours. For a 10-pound ham, roughly 1.5 hours. The ham is done when it reaches an internal temperature of 140°F on an instant-read thermometer inserted into the thickest part, avoiding the bone.
Glaze and Finish Baking:
-
Remove the ham from the oven and carefully peel back the foil. Using a spoon or basting brush, brush half of the prepared glaze evenly over the ham’s surface, making sure to distribute it across the pineapple rings and into the scored cuts.
-
Return the ham to the oven, uncovered, for the remaining cooking time. Begin checking the internal temperature at the lower end of your estimated time range.
-
Every 15-20 minutes, remove the ham from the oven and baste it with the pan juices and remaining glaze. This frequent basting is what keeps the ham moist and creates that beautiful caramelized exterior. Continue basting until you’ve used all of the glaze, then continue basting with just the pan juices until the ham reaches 140°F internal temperature.
-
Once the ham reaches the proper temperature, remove it from the oven. If the exterior is browning too rapidly before the ham reaches temperature, tent it loosely with foil and continue basting with pan juices only until it’s done.
Advertisements
Rest and Serve:
-
Transfer the ham to a carving board and tent it loosely with clean foil. Allow it to rest for 15 minutes before slicing. This resting period allows the internal temperature to equilibrate and the juices to redistribute throughout the meat, resulting in juicier slices.
-
Remove and discard all toothpicks. Using a sharp carving knife, slice the ham into thin to medium slices, working around the bone. As you slice, transfer each slice to a warm serving platter and spoon some of the pan juices over the top.
-
Transfer any remaining glaze and pan juices to a gravy boat or small pitcher for serving alongside the ham. Serve the pineapple rings on the side or arrange them alongside the ham slices on the platter.
Storage and Freezing Your Baked Ham

Properly stored ham stays delicious for days and freezes beautifully for months, making it one of the most practical dishes to have on hand. Once the ham has cooled to room temperature, transfer any slices you won’t serve immediately to an airtight container. Pat them dry with paper towels first—this prevents excess moisture from making them soggy over time.
Sliced ham keeps in the refrigerator for 3-4 days. For maximum freshness, pour any leftover pan juices or glaze over the ham before storing it; this keeps the meat moist and adds flavor every time you reheat it. If you want to keep ham longer, freezing is your friend. Divide the sliced ham into meal-sized portions, wrap each portion in plastic wrap, then place the wrapped portions in a freezer-safe resealable bag. Label with the date—ham keeps for 2-3 months in the freezer before the quality begins declining.
To reheat frozen ham, thaw it in the refrigerator overnight, then warm it gently in a 325°F oven, covered, for 10-15 minutes until heated through. Add a splash of water or broth to the pan to create steam that keeps the meat moist. Never microwave ham if you can avoid it—the microwaves heat the meat unevenly and can dry it out. Stovetop reheating in a skillet with a splash of water is also excellent for smaller portions, creating a quick hot meal ready in minutes.
The ham bone is far too valuable to discard. Freeze it in a freezer bag, and when you’re ready, simmer it with diced onions, carrots, celery, and white beans in low-sodium broth for 2-3 hours to create a deeply flavorful ham and bean soup that tastes like it simmered all day.
Serving Suggestions and Side Dish Pairings
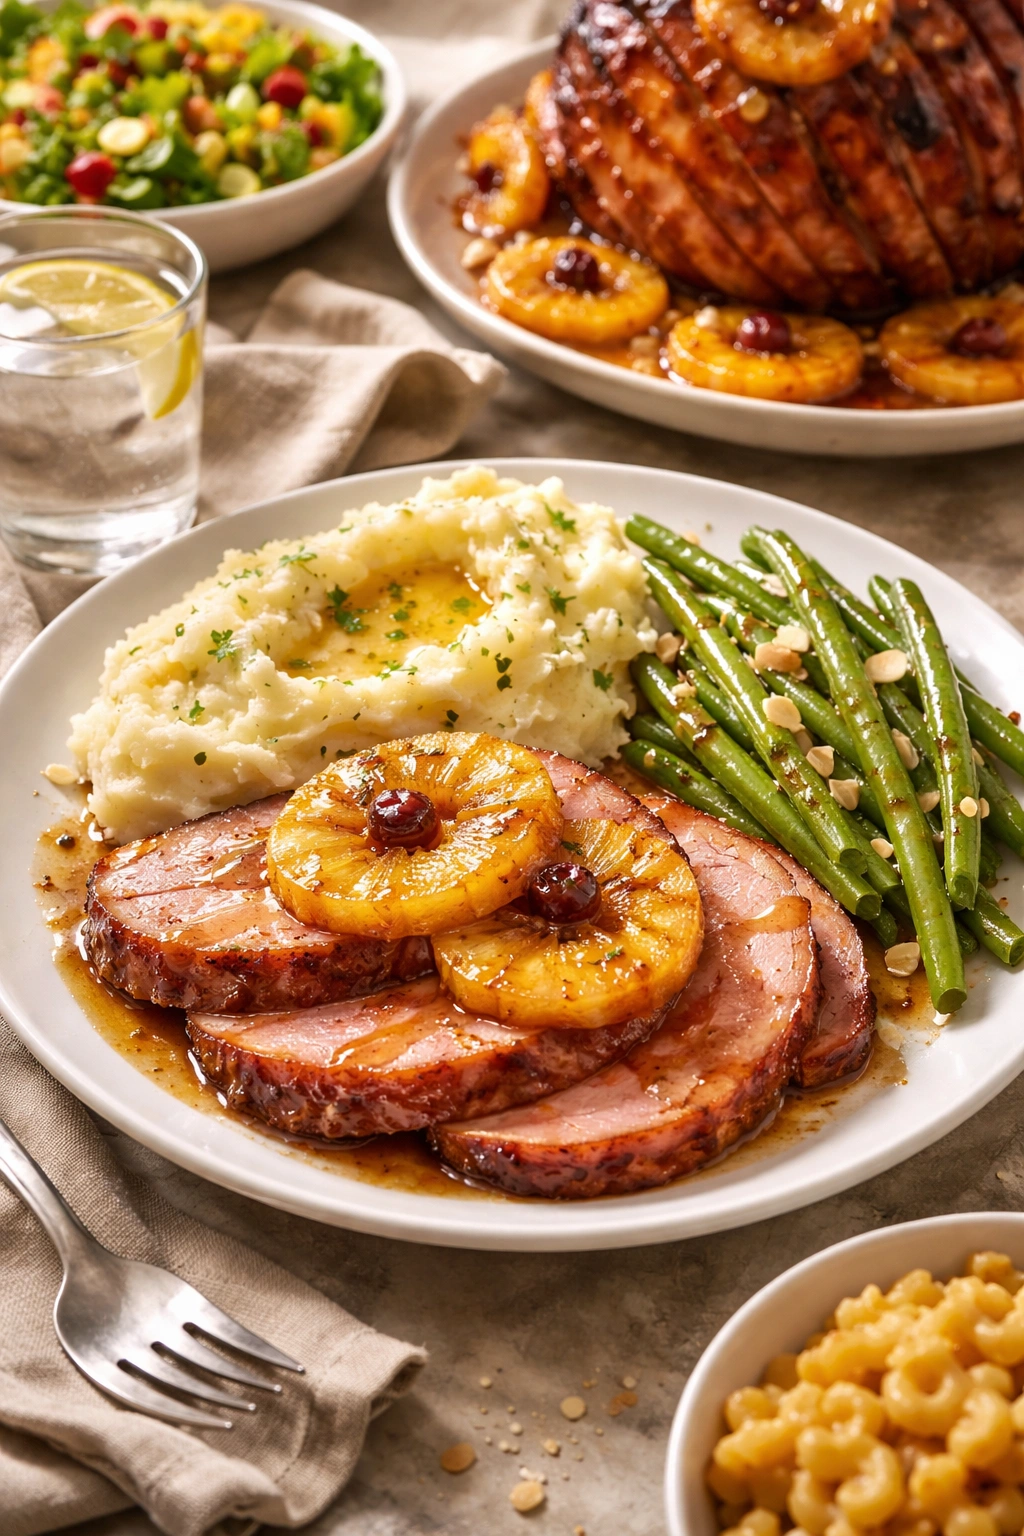
Pineapple ham is sweet and rich, so it pairs beautifully with sides that offer contrasting flavors and textures. Creamy potato dishes—mashed potatoes, scalloped potatoes, or potato au gratin—provide a luxurious base that balances the ham’s sweetness without competing for attention. The potato’s mild flavor acts as a canvas, letting the ham shine while the buttery, cheesy sauce adds richness.
Green vegetable sides are equally important. Roasted green beans with garlic and butter, steamed broccoli with lemon, or sautéed asparagus provide brightness and cut through the richness of the ham. These vegetables’ slight bitterness or earthiness offers a textural and flavor contrast that makes every bite feel fresh rather than one-note.
Bread is non-negotiable. Soft dinner rolls, Parker House rolls, or a simple buttered cornbread give guests something to build small sandwiches with, capturing any pan juices or glaze on the plate. A basket of warm rolls signals hospitality and abundance in a way that nothing else quite does.
For a vegetable-forward side, consider a bright coleslaw dressed with apple cider vinegar and a touch of sugar. The cabbage’s slight crunch and the vinegar’s tang provide relief from the ham’s sweetness and richness. Similarly, a simple green salad with a vinaigrette (emphasizing vinegar or lemon) cleanses the palate between bites.
Don’t overlook something as simple as roasted root vegetables—carrots, sweet potatoes, parsnips—glazed with butter and a pinch of salt. Their natural sweetness echoes the ham’s sweetness without being repetitive, and their earthy undertones add complexity to the plate. Mac and cheese, while perhaps obvious, is genuinely delicious alongside pineapple ham and appeals to every age group at the table.
For dessert, something citrus-forward or chocolate-based works best. Lemon bars, key lime pie, or flourless chocolate cake all provide the contrast in flavor profile that feels necessary after a rich, sweet ham dinner.
Final Thoughts
This ham recipe demonstrates that show-stopping dishes don’t require complicated techniques or exotic ingredients. A bone-in smoked ham, brown sugar, pineapple, and a willingness to baste every 15 minutes transforms into something that earns genuine admiration from everyone who tastes it.
The fundamental lesson isn’t just about ham—it’s that some of the most impressive dishes in cooking rely on time and attention rather than technical difficulty. Your oven handles the heavy lifting; your job is simply to show up every 15-20 minutes with a spoon and baste. Even if you’ve never made a whole ham before, this method is forgiving enough that you’ll succeed. And once you’ve done it once, the confidence you’ll have to make it again and again will only grow.
Start by choosing your ham, rubbing it with brown sugar and spices, and letting it rest overnight if timing allows. Score it properly, glaze it faithfully, baste it frequently, and watch as your kitchen fills with the aroma of caramelized sugar and pineapple. That’s the moment you’ll understand why this dish is requested again and again for holiday tables. Your guests aren’t coming for complicated techniques—they’re coming for the combination of sweetness, salty ham, and the care that you’ve taken to create something beautiful for them.