If you’ve been intimidated by the thought of cooking pork chops at home, the 30-minute baked method is about to change everything. Forget the stereotype of dry, rubbery meat that sits sad on your plate—properly baked pork chops are juicy, fork-tender, and ready faster than you’d think possible. The oven does most of the work for you while you prep sides or set the table, and the results are remarkably consistent once you understand a few key principles about temperature, thickness, and timing.
Baked pork chops have become my go-to weeknight protein because they’re genuinely foolproof when you follow the right approach. Unlike chicken breasts that can dry out in minutes or steaks that demand expensive cuts, pork chops deliver restaurant-quality results with ingredients you probably already have at home. The gentle, even heat of the oven creates a golden exterior while keeping the inside moist and slightly pink at the center—which is exactly what you want. This isn’t about cooking pork to death until it’s completely gray; it’s about hitting the sweet spot where it’s fully safe to eat but still tender enough to cut with just a fork.
The real magic of the 30-minute timeline is that you’re not just throwing chops in a hot oven and hoping for the best. You’re building flavor through a quick seasoning, developing a crust through a quick oven sear, and using precise temperature control to guarantee that the inside cooks through perfectly every single time. Once you master this basic technique, you’ll start experimenting with glazes, toppings, and flavor combinations that make these chops feel anything but ordinary.
Why Baked Pork Chops Are the Perfect Quick Weeknight Dinner
There’s a reason baked pork chops have earned a permanent spot in my regular cooking rotation: they’re reliable, affordable, and genuinely delicious without requiring any special skills. Pork chops are naturally forgiving compared to other proteins because they’re thicker than most poultry cuts and have enough fat content to stay moist even if you’re slightly off on timing. The oven’s dry heat doesn’t require constant attention like stovetop cooking does, which means you can prepare vegetables, mix a sauce, or set the table while everything bakes.
The speed is genuine, not oversold. From the moment you pull a pork chop from the refrigerator to the point when it’s ready to eat is legitimately around 30 minutes total, with most of that being hands-off baking time. That’s significantly faster than braising or slow-cooking methods, and it doesn’t require the stovetop management that pan-searing demands. You can prep your chops in about 5 minutes, slide them into the oven for 15-18 minutes of baking, and have a restaurant-quality dinner on the table.
The texture you get from baking is different from pan-searing in a way that’s consistently better for the average home cook. The dry heat surrounds the chops from all sides, creating an even, golden crust while the interior stays moist and slightly pink near the bone. You don’t have to worry about the outside cooking faster than the inside, and you don’t have to flip multiple times to achieve even browning. It’s the method that eliminates the most variables, which is why it’s the best choice for reliability.
Choosing and Preparing Your Pork Chops
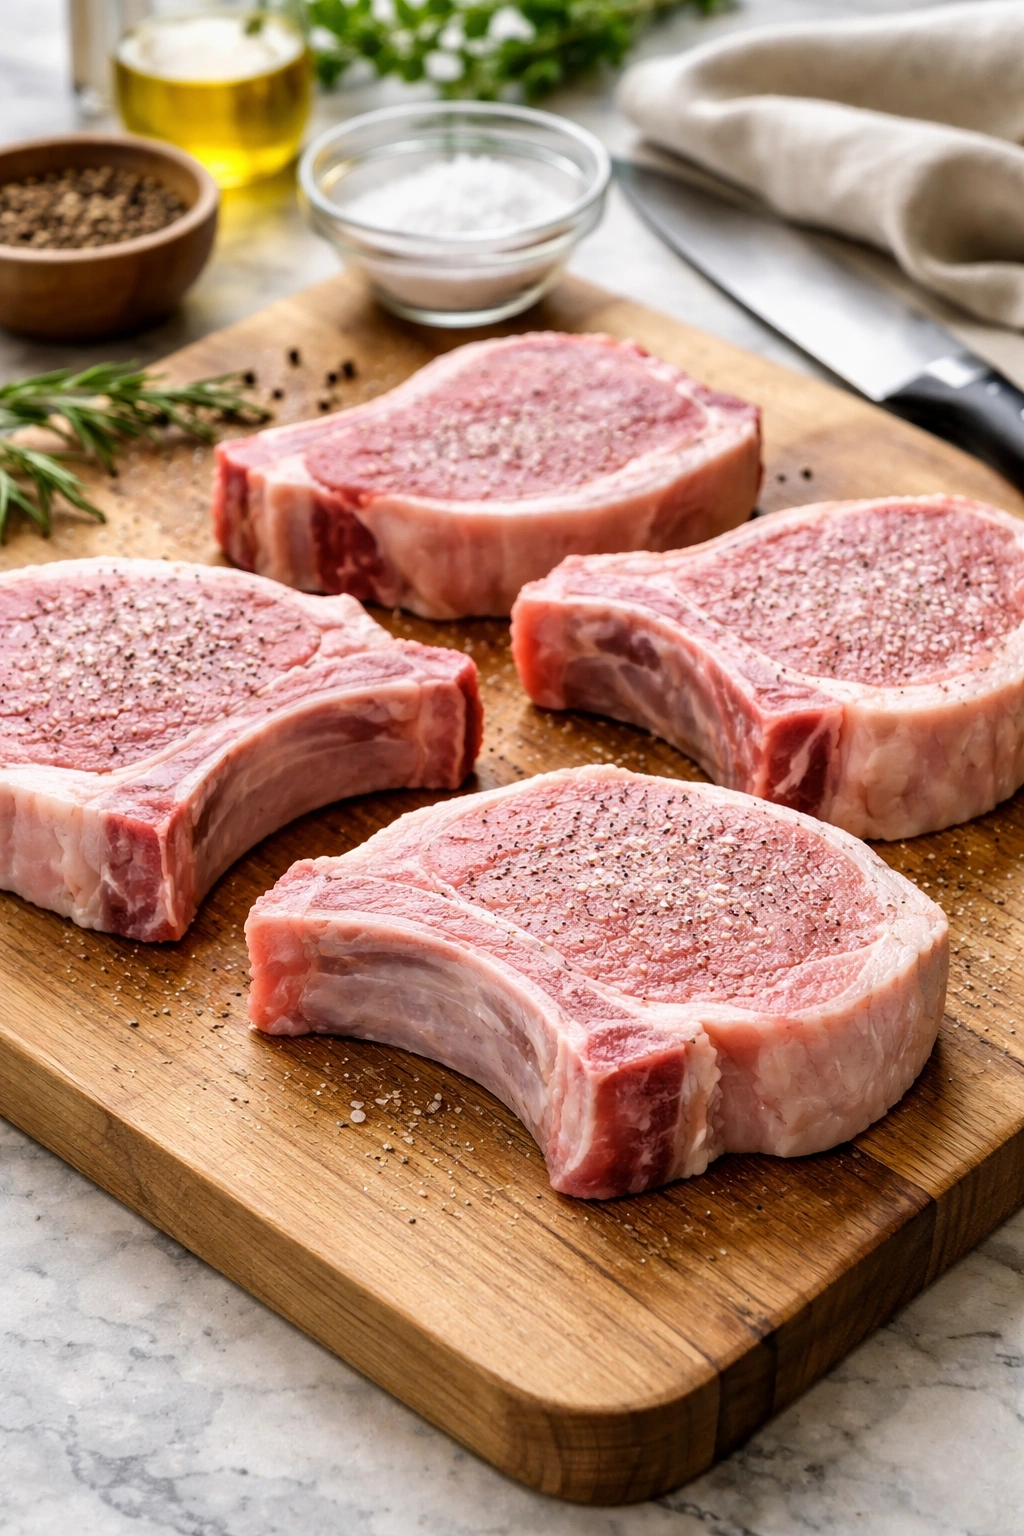
The quality of your finished dish starts with the pork chops themselves, and here’s what actually matters when you’re shopping. Look for chops that are at least 1 to 1¼ inches thick—anything thinner and they’ll cook too quickly and risk drying out; anything thicker and they’ll need longer than 30 minutes. The bone-in versus boneless question is entirely personal; bone-in chops have slightly more flavor and help the meat stay juicier because the bone conducts heat more evenly, but boneless chops cook a bit faster and are easier to eat. I prefer bone-in most of the time, but both work perfectly with this method.
The color matters more than you’d think. Look for pork chops that have a pale pink color, not pure white (which indicates the meat’s too young and hasn’t developed much flavor) and definitely not gray or discolored (which means it’s old). The meat should look firm and feel slightly bouncy when you press it, not mushy or soft. If you’re buying from a quality butcher counter, ask for center-cut chops if available—they’re cut from the loin and have better texture than shoulder or rib chops, though honestly all types work fine with this method.
Pat your pork chops completely dry with paper towels before seasoning or cooking. This is non-negotiable if you want that golden crust. Any moisture on the surface will steam rather than brown, and you’ll end up with pale, soft chops instead of the beautiful caramelized exterior you’re after. Take the extra 30 seconds to thoroughly dry them—seriously, this single step makes a noticeable difference in the final result.
The Best Seasonings for Perfectly Flavored Chops
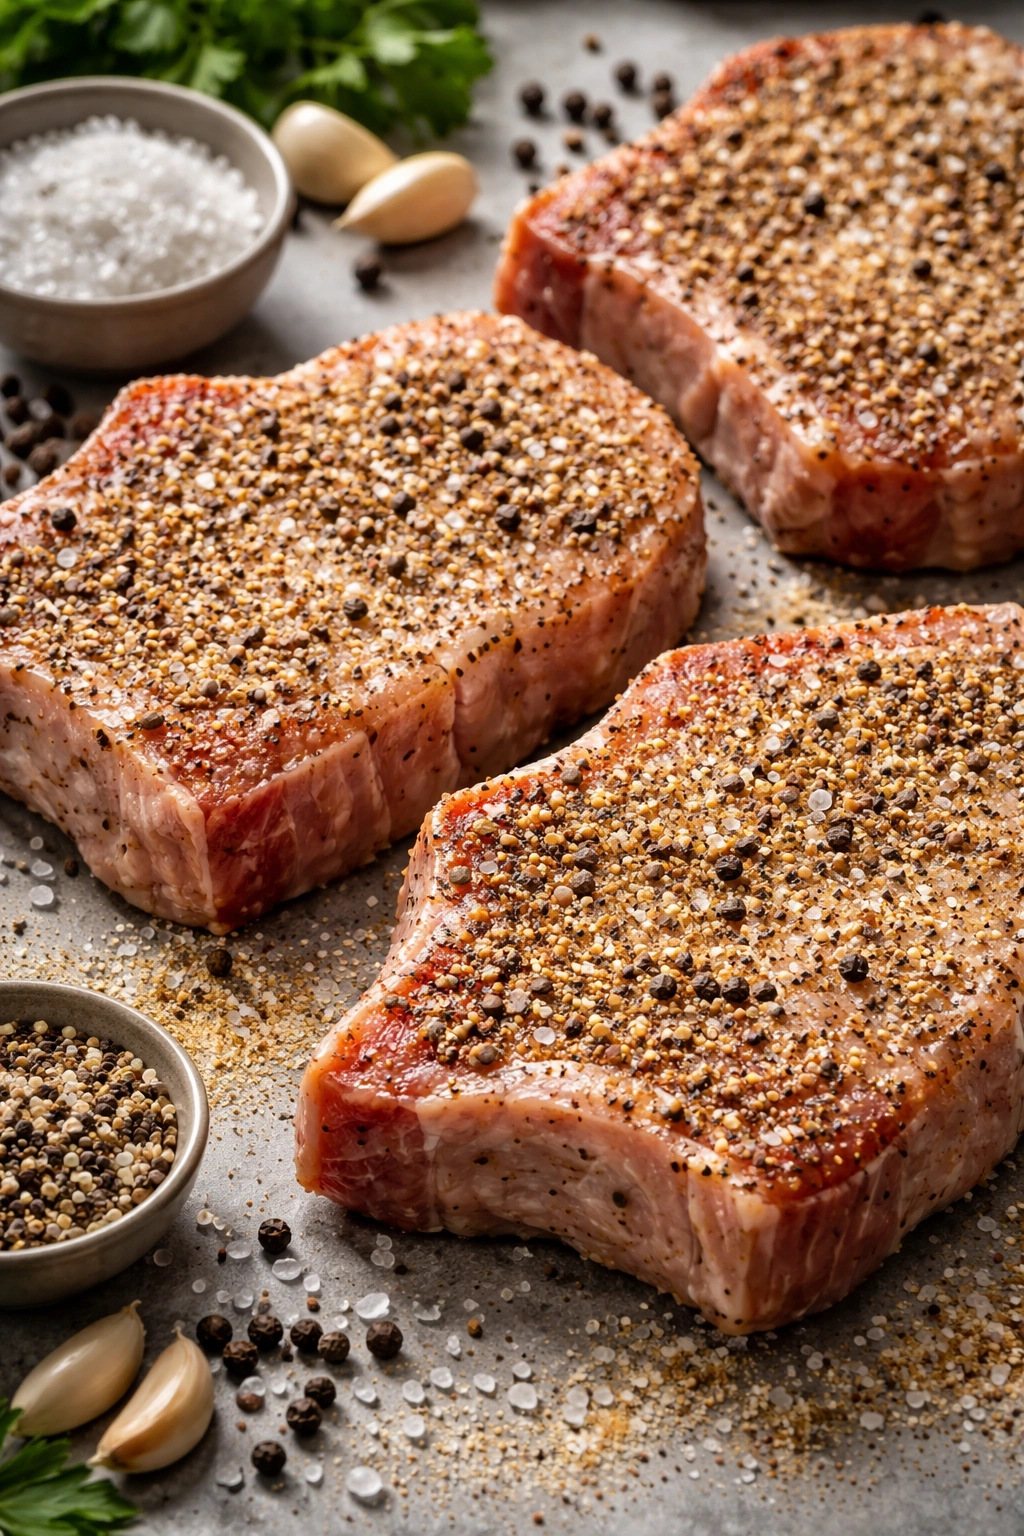
Pork’s subtle flavor actually benefits from bold seasoning, and the good news is you don’t need anything fancy or hard to find. A basic combination of salt, pepper, and garlic powder works beautifully and lets the pork’s natural taste shine through. The salt is the most critical element because it seasons the meat all the way through (applied far enough in advance) and helps create that crust; fine sea salt or kosher salt both work, but avoid table salt if you can because it dissolves differently and can make the exterior too salty. Use a generous hand with the salt—more than you might initially feel comfortable with, but not so much that every bite tastes salty.
Black pepper adds a subtle bite and complexity without overwhelming the chops. Freshly cracked pepper is noticeably better than pre-ground, but either works if that’s what you have. Garlic powder (not garlic salt, which would be redundant) adds savory depth that makes the chops taste like they came from a restaurant kitchen. Some people shy away from garlic powder thinking it’s inferior to fresh garlic, but the concentrated flavor works perfectly here and distributes evenly across the chops.
Beyond that basic seasoning, some of my favorite additions are smoked paprika (which adds a subtle smokiness and color), dried thyme (earthy and traditional with pork), dried oregano (Mediterranean-inspired), and a tiny pinch of cayenne pepper if you want just a whisper of heat. You could also use Italian seasoning, Cajun spice blends, or any dry rub you love. The key is applying seasonings to both sides of the chops and letting them sit for at least 5-10 minutes before cooking so the salt has time to penetrate the meat. If you’re short on time, even 2-3 minutes of resting helps, but longer is always better.
How to Build an Incredible Crust Without a Skillet
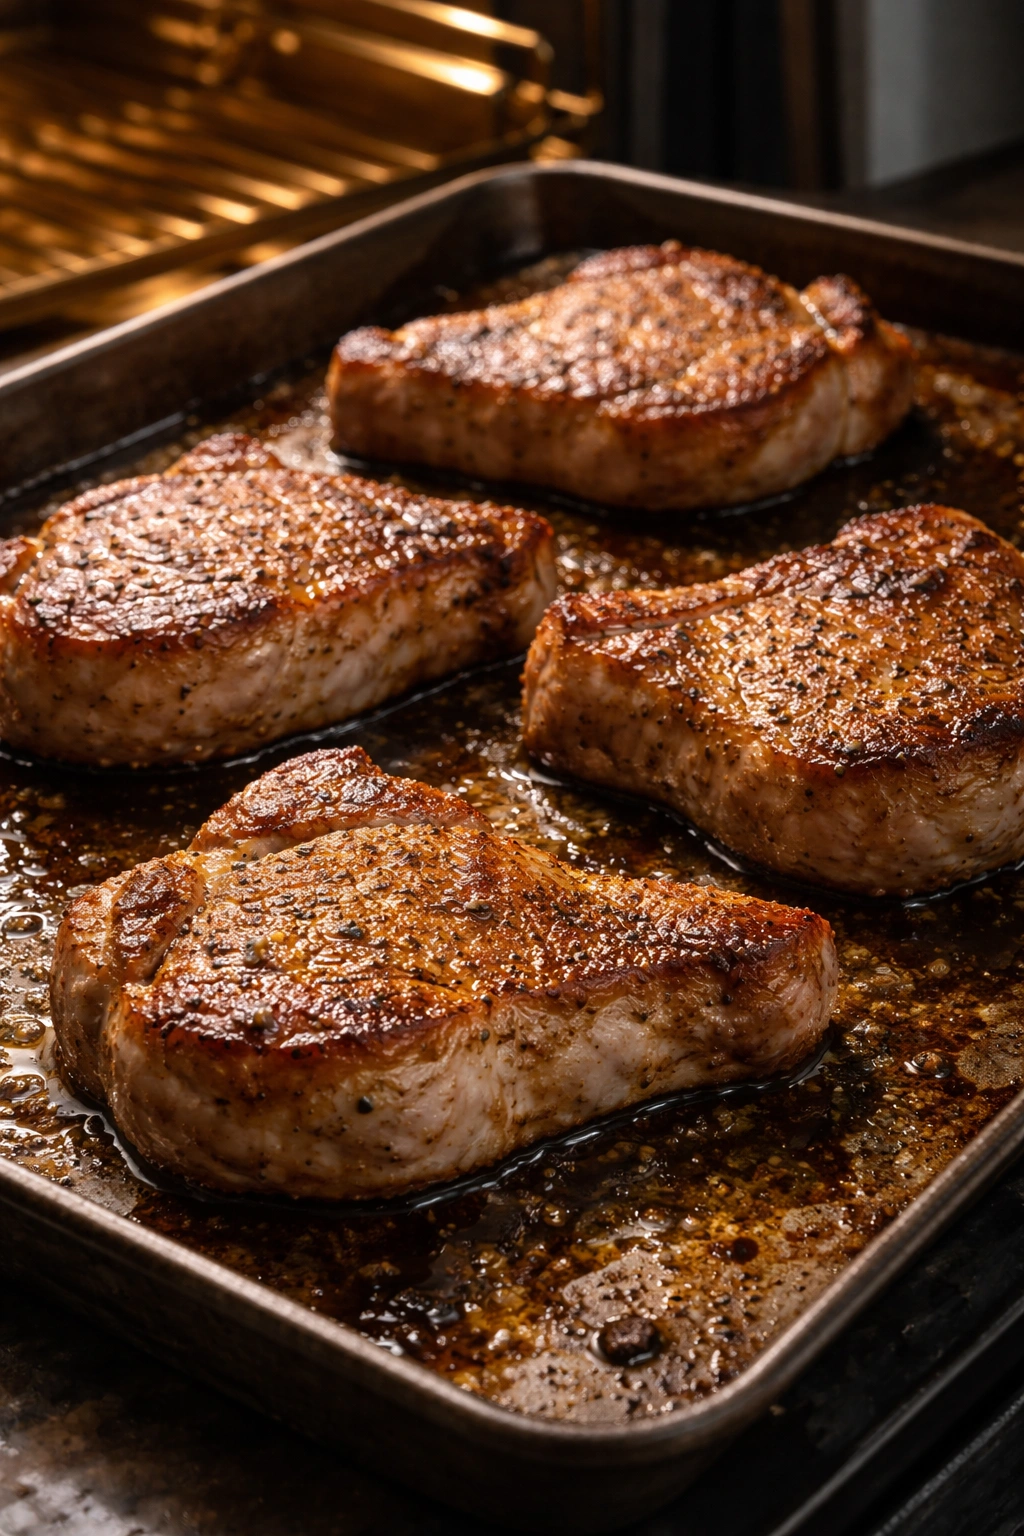
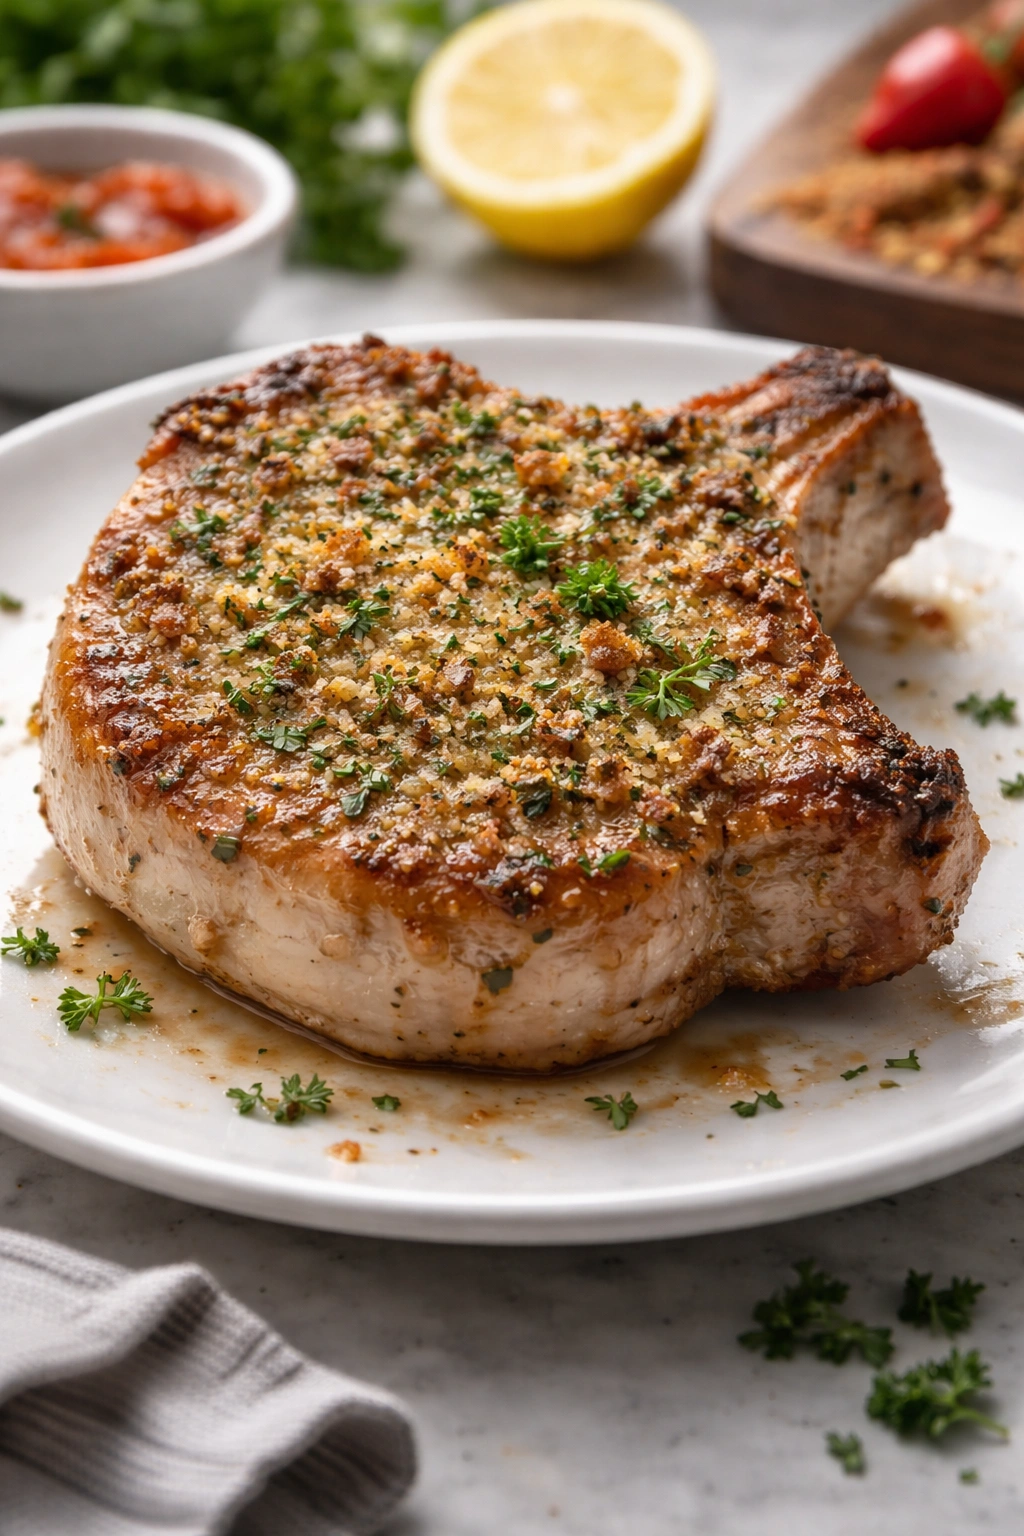
Here’s what surprised me when I first tested this method: you can get a gorgeous golden crust in the oven without ever touching a stovetop skillet. The trick is preheating your baking sheet and using a thin coating of oil to help the exterior brown properly. A standard 9×13-inch baking sheet or a smaller half-sheet pan works perfectly. Preheat it in the oven for about 3-4 minutes while you’re finishing your prep work. You want the sheet hot enough that when you place a pork chop on it, you hear a gentle sizzle immediately—but not so hot that your kitchen fills with smoke.
A light coating of olive oil on both sides of the pork chops helps them brown beautifully and prevents sticking. This isn’t deep-frying; you’re using just enough oil to create contact between the meat and the hot pan so the Maillard reaction (the chemical process that creates browning and flavor) can happen. About ½ teaspoon per chop is plenty. You can brush it on or use your hands to coat them lightly. Avoid cooking spray here because it doesn’t provide quite enough oil for proper browning.
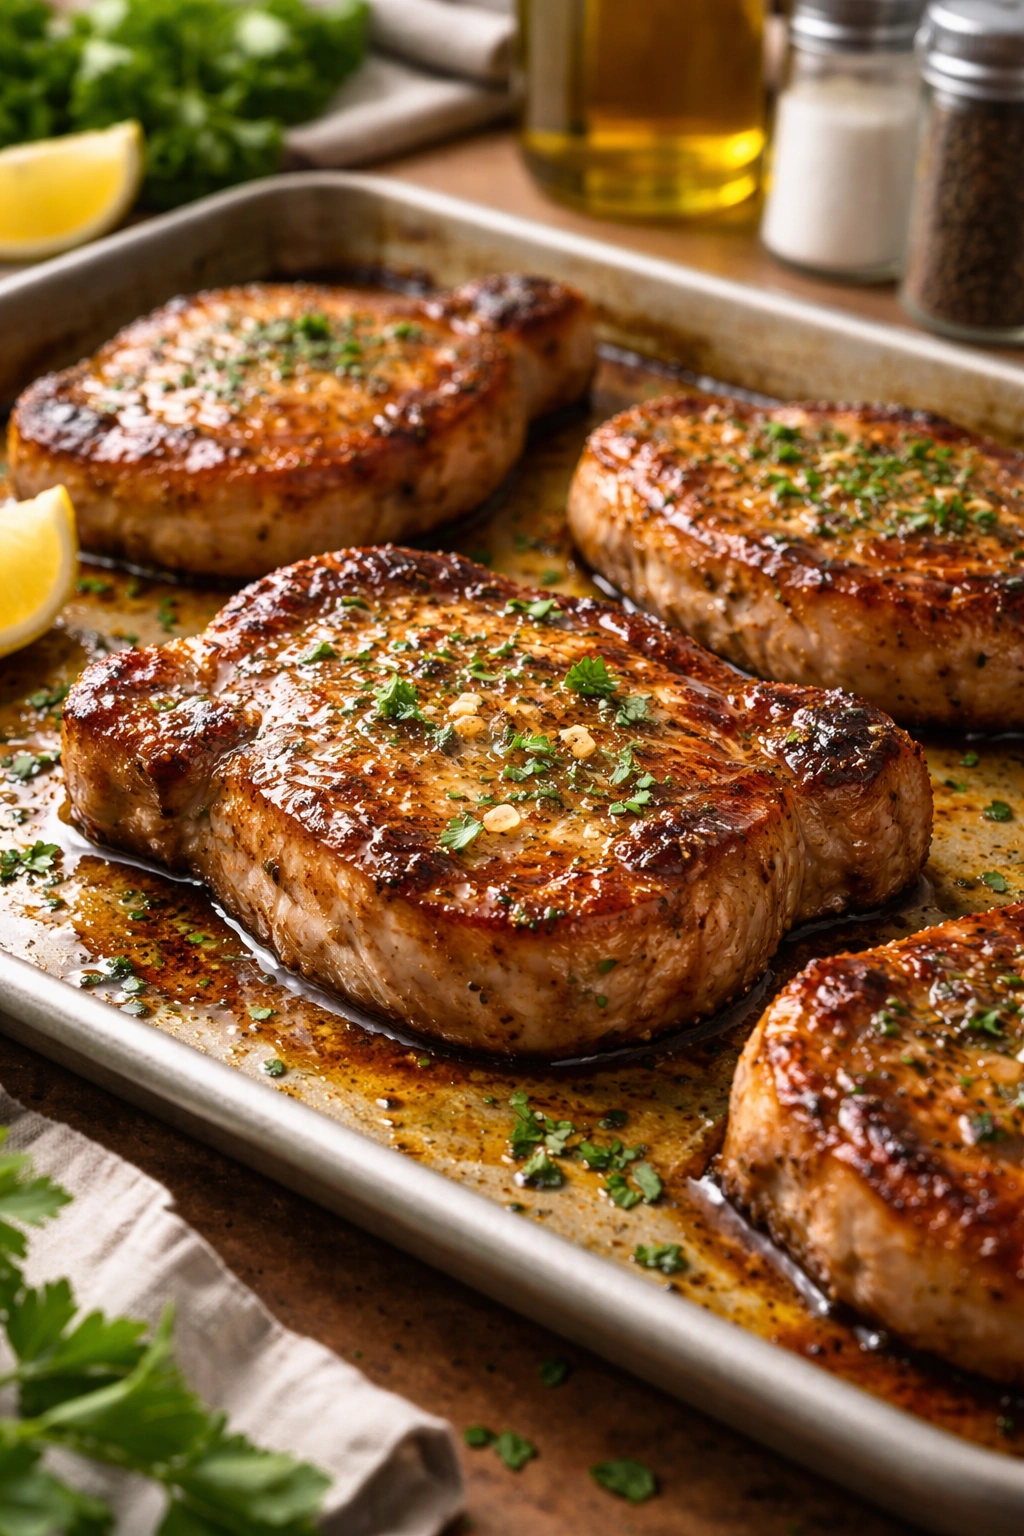
When you place the seasoned chops on the hot baking sheet, they should make immediate contact and brown on the underside. Don’t move them around or fuss with them—let them sit in place for about 5 minutes so they can develop that initial crust. You’ll actually see the exterior change color as the proteins brown and caramelize. This initial contact with the hot pan is what creates the textural contrast between the golden, crispy outside and the tender inside, and it’s honestly the difference between mediocre and magnificent baked pork chops.
Temperature Guide: Getting Pork Chops Done Right Every Time
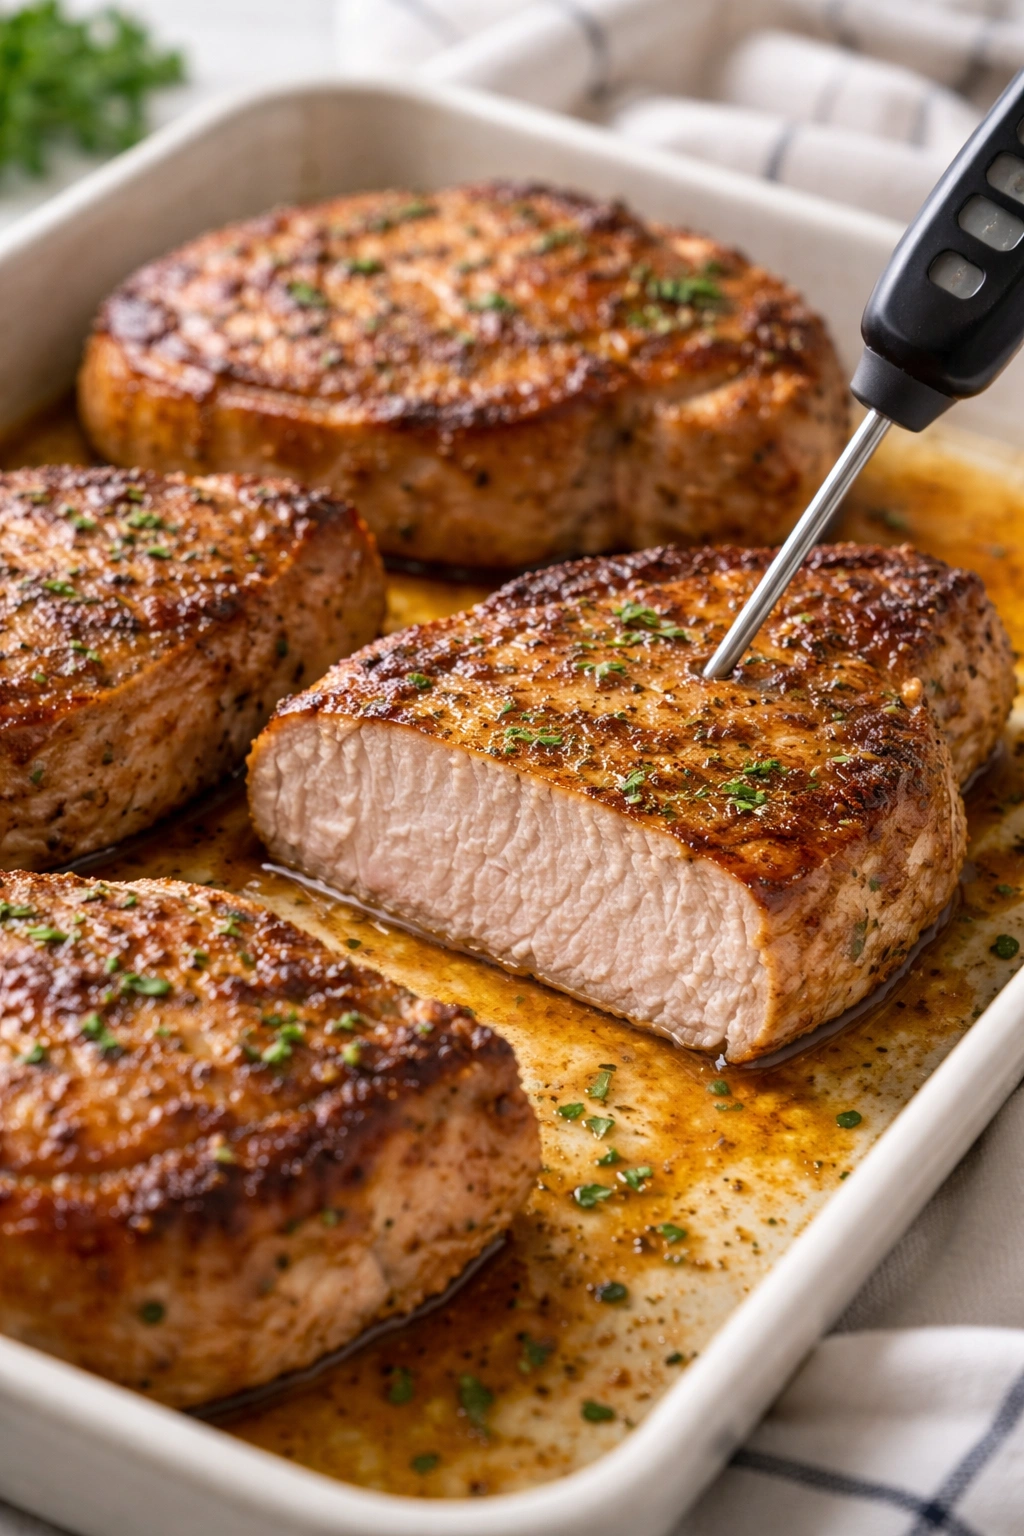
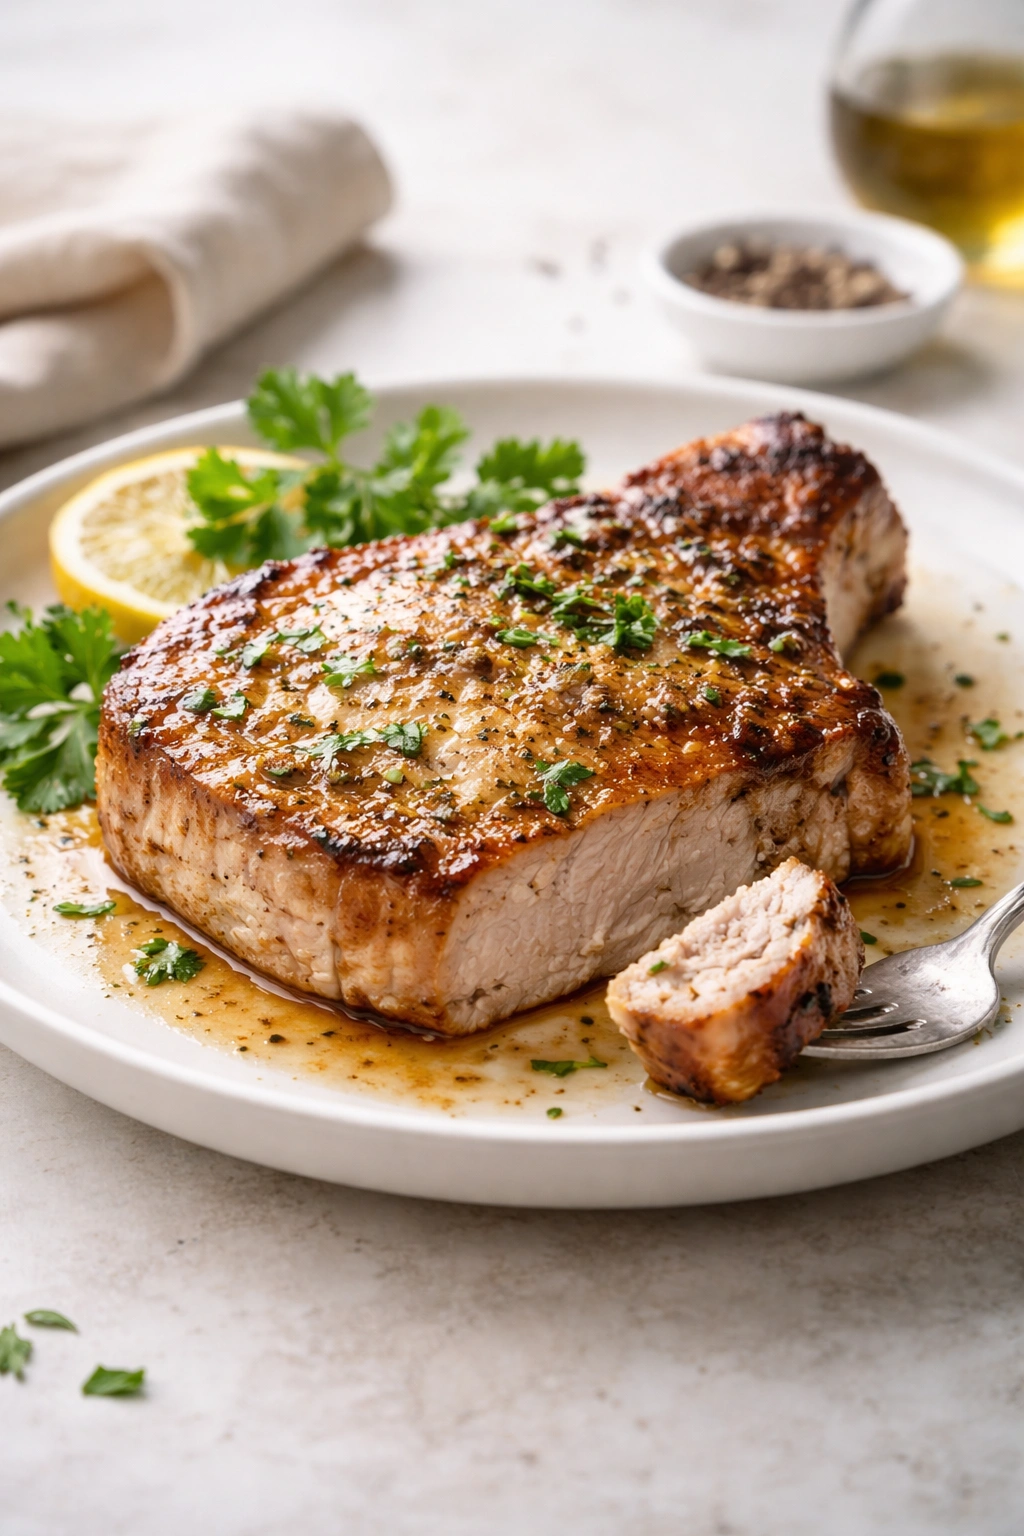
This is the part where I stop you from overcooking pork, which has been the standard American approach for decades and creates dry, flavorless meat. Modern food safety guidelines say pork is safe to eat at an internal temperature of 145°F (63°C), which is significantly lower than the old “cook it until it’s gray throughout” method. At 145°F, pork chops will still have a slight pink color near the center and bone, and they’ll be noticeably more tender and juicy than fully cooked versions.
Use an instant-read meat thermometer to check your chops and take out the guesswork. Insert it horizontally into the thickest part of the chop without touching the bone (if there is one), and read the temperature at the thickest point. This is the last part to cook, so if it’s at 145°F, the rest of the chop is definitely safe. Some people prefer pork slightly more cooked at 150-155°F if they’re not comfortable with the slight pink, and that’s completely fine—your chops will still be tender and juicy at that temperature. Just don’t push it much beyond 160°F unless you like your meat on the drier side.
The baking time varies depending on the thickness of your chops. For 1-inch-thick chops, you’re looking at 12-15 minutes of baking time after the initial sear. For slightly thicker 1¼-inch chops, add 2-3 more minutes. Since all ovens run slightly differently and pork chops vary in size, the thermometer is really your best friend here. It takes 5 seconds to check, and it guarantees perfect results every time. Let your chops rest for a few minutes after they come out of the oven—this allows the juices to redistribute, keeping them moist when you cut into them.
The Complete Baked Pork Chops Recipe
Yield: Serves 4 | Makes 4 pork chops
Prep Time: 10 minutes
Cook Time: 20 minutes
Total Time: 30 minutes
Difficulty: Beginner — This recipe has only a few simple steps, minimal ingredients, and no special equipment required beyond a baking sheet and instant-read thermometer.
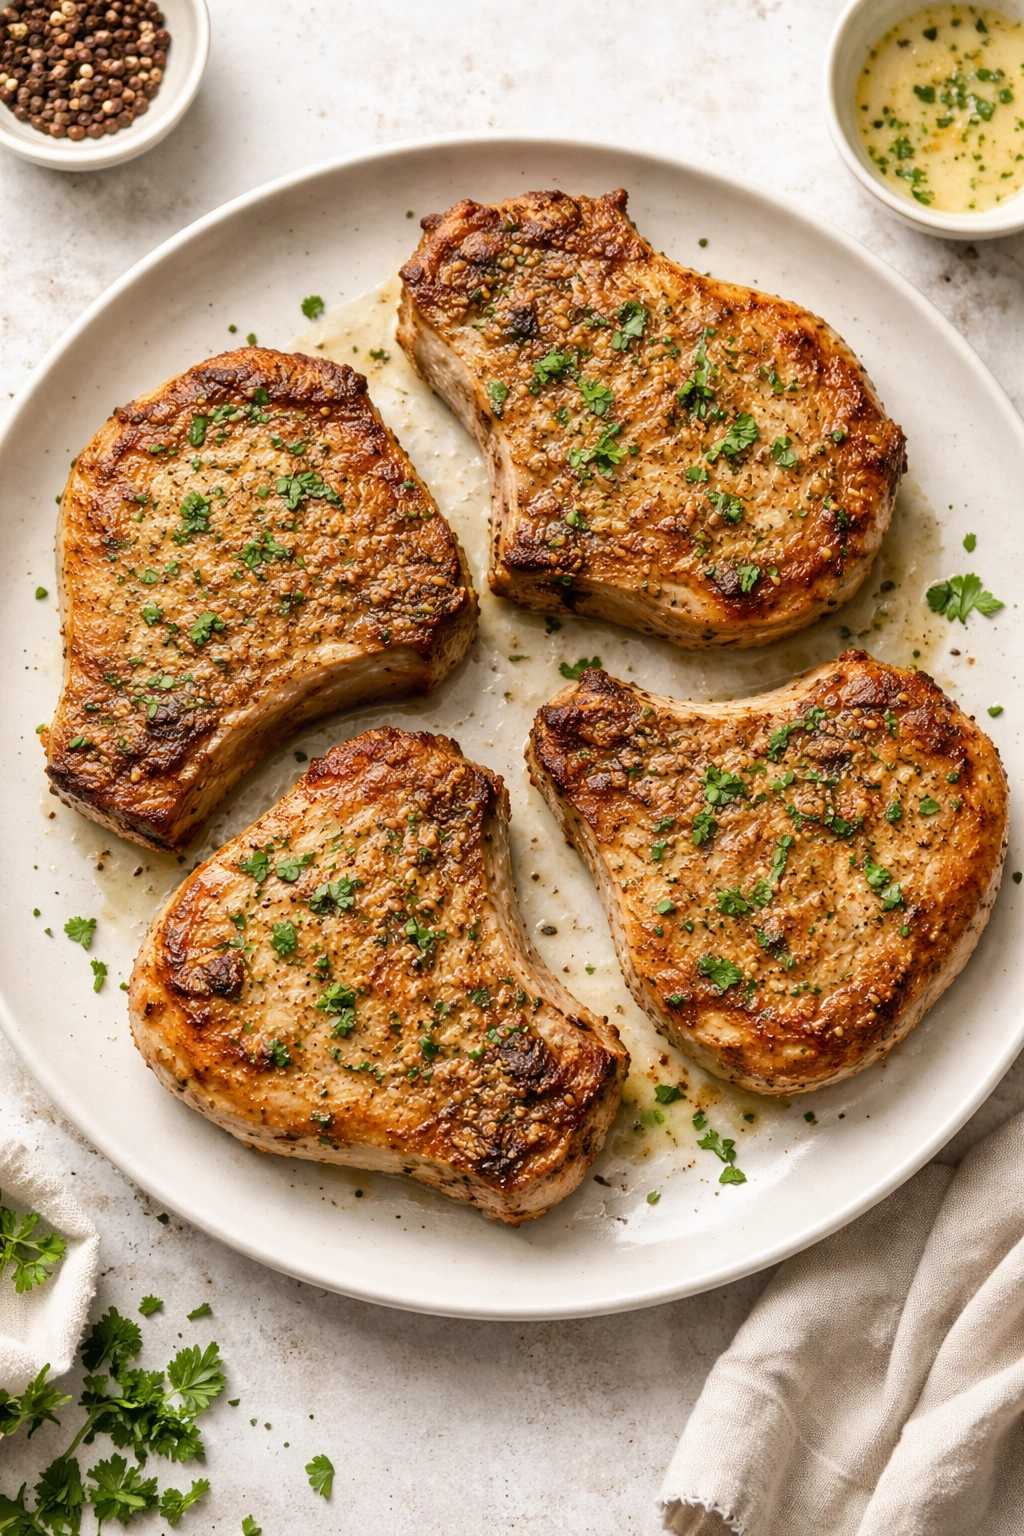
Best Served: Immediately while warm, with fresh sides and your favorite sauce or glaze.
Ingredients
For the Pork Chops:
- 4 boneless or bone-in pork chops (1 to 1¼ inches thick, about 6-8 ounces each)
- 2 tablespoons olive oil
- 1½ teaspoons fine sea salt or kosher salt
- ¾ teaspoon freshly cracked black pepper
- ½ teaspoon garlic powder
- ¼ teaspoon smoked paprika (optional but recommended)
- ¼ teaspoon dried thyme or Italian seasoning (optional)
Instructions
Prepare and Preheat:
- Preheat your oven to 400°F (200°C) and position a 9×13-inch baking sheet on the middle rack to preheat.
- Remove your pork chops from the refrigerator and pat them completely dry on both sides using paper towels. Any surface moisture will prevent proper browning, so don’t skip this step.
- In a small bowl, combine the salt, pepper, garlic powder, smoked paprika (if using), and dried thyme. Set aside.
Season the Chops:
- Place the pork chops on a cutting board and sprinkle the seasoning mixture evenly on both sides of each chop. Use your fingers to press the seasonings gently into the meat so they adhere well.
- Drizzle about ½ teaspoon of olive oil on each side of the chops and rub it in lightly with your fingers until the surface is evenly coated. The oil helps them brown properly and prevents sticking.
- Let the seasoned chops rest at room temperature for 5-10 minutes. This allows the salt to begin penetrating the meat and ensures more even cooking.
Sear and Bake:
- Carefully remove the hot baking sheet from the oven using an oven mitt. Place each pork chop on the sheet—you should hear a gentle sizzle as they make contact with the hot pan.
- Return the baking sheet to the oven immediately and bake for 12-15 minutes for 1-inch-thick chops, or 15-18 minutes for slightly thicker chops.
- Check the internal temperature with an instant-read thermometer inserted horizontally into the thickest part of a chop (avoiding the bone if present). The chop is ready when it reaches 145°F (63°C), which may still have a slight pink color near the center. Do not overcook beyond 160°F, or the chops will become tough and dry.
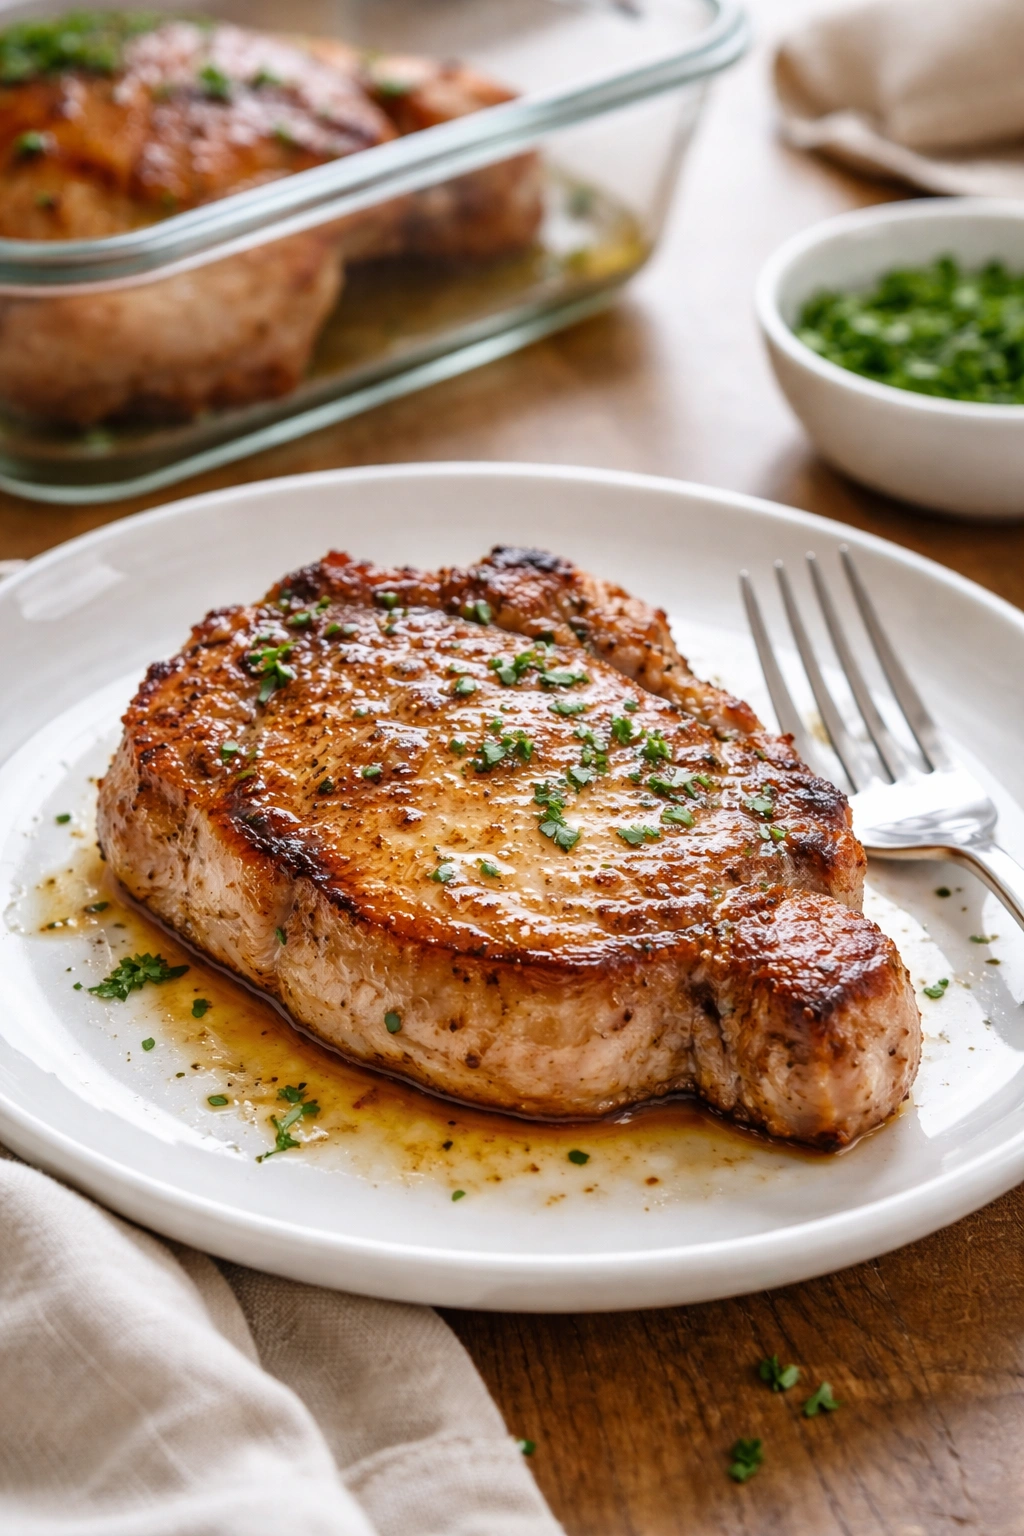
- Remove the baking sheet from the oven and transfer the pork chops to a plate. Let them rest for 3-5 minutes before serving—this allows the juices to redistribute and keeps them moist when you cut into them.
Common Mistakes That Lead to Dry or Undercooked Chops

The most frequent mistake people make with baked pork chops is starting with chops that are too thin. Anything thinner than ¾ inch will cook in about 8-10 minutes, which doesn’t give you enough time to develop a proper crust, and they often end up overcooked and tough. If your store only has thin-cut chops, you can pound them slightly to even out the thickness, but honestly, asking the butcher for thicker cuts is the better solution.
Another common error is cooking directly from the refrigerator without allowing the chops to come to room temperature or at least sit out for 10-15 minutes. Cold meat cooks unevenly—the outside can overcook while the inside is still cold in the center. Taking them out of the fridge at least 15 minutes before cooking helps ensure even temperature distribution from edge to edge.
Overcooking is the biggest flavor killer, and it happens because people are worried about food safety. Remember that 145°F is the official safe temperature—you don’t need to cook pork chops until they’re completely gray and shriveled. That slight pink at the center is fine and actually indicates perfectly cooked, juicy meat. Use your thermometer, trust the temperature, and don’t judge doneness by color alone.
Skipping the pat-dry step or the initial sear will result in steamed, pale chops rather than beautifully browned ones. The dry heat and the hot pan are essential for developing that golden crust that makes the dish restaurant-quality. If you skip these steps, you’ll still have safe, edible pork chops, but they won’t have the textural contrast and flavor development that makes this method special.
How to Add Glazes and Toppings for Extra Flavor
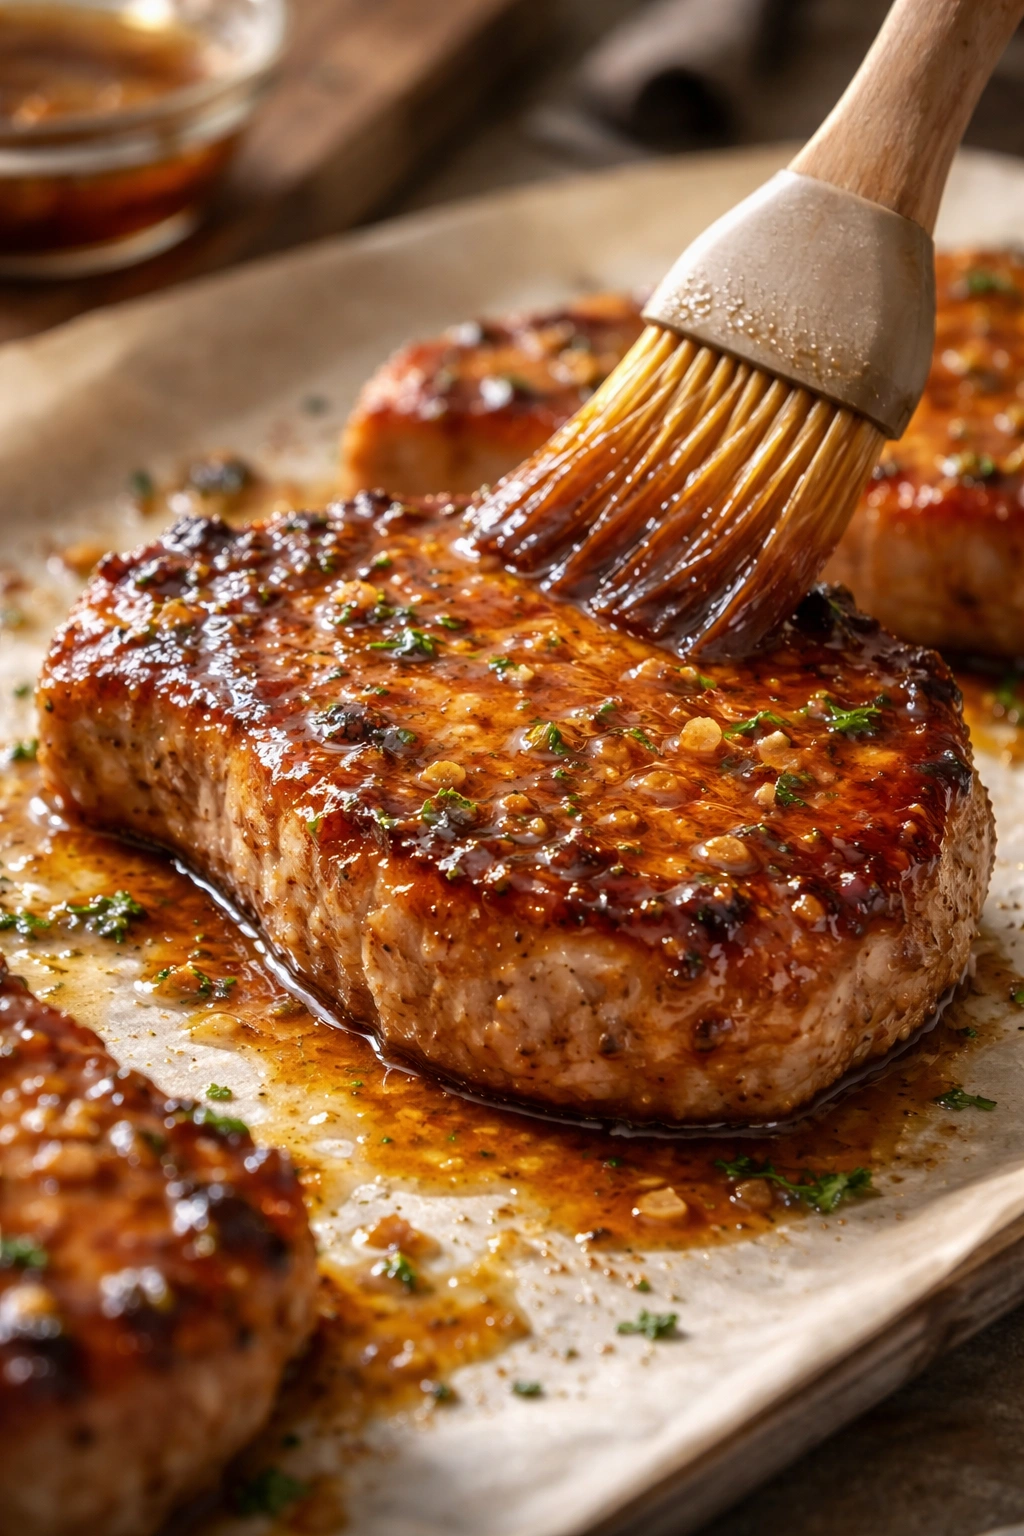
The plain seasoned baked chop is delicious on its own, but it’s incredibly easy to transform them into something more special by adding a glaze or topping. A simple honey mustard glaze takes about 2 minutes to mix: combine ¼ cup Dijon mustard, 2 tablespoons honey, 1 tablespoon soy sauce, and 1 minced garlic clove. Brush this on the chops during the last 5 minutes of baking, and they’ll come out glossy, sweet, and savory with a delicious caramelized exterior.
An apple cider glaze works beautifully with pork and plays up its subtle sweetness. Combine ½ cup apple cider with 2 tablespoons Dijon mustard, 1 tablespoon maple syrup, and 1 teaspoon apple cider vinegar. Reduce it on the stovetop for about 3-4 minutes until it thickens slightly, then brush it on the chops during the last few minutes of baking. The result is a sophisticated, balanced glaze that feels fancy but takes almost no effort.
A brown butter and herb topping adds richness and depth without any complicated steps. After the chops finish baking, drizzle them with melted brown butter (3 tablespoons) that you’ve finished with fresh thyme, sage, or parsley. The warmth of the chops will melt the butter into every crevice, and the herbs will release their aromatics. It’s simple, elegant, and tastes impressive without being complicated.
Toppings like crispy breadcrumbs, toasted nuts, or a panko crust can be added before baking for extra texture. Combine ½ cup panko breadcrumbs with 2 tablespoons melted butter, ½ teaspoon garlic powder, and salt and pepper. Press this mixture firmly onto the top of each chop before baking—the crust will brown beautifully and add a wonderful crunch that contrasts with the tender meat underneath.
Variations on the Basic Recipe
Once you’ve mastered the basic method, playing with different flavor profiles keeps things interesting. An Italian-inspired version uses dried oregano and Italian seasoning in place of the thyme, and you finish the baked chops with a quick tomato sauce, fresh basil, and a sprinkle of parmesan. The tangy sauce brightens the rich pork beautifully, and it all comes together in under 30 minutes.
A Cajun variation swaps the simple seasonings for a spice blend: ½ teaspoon each of paprika, garlic powder, and onion powder, plus ¼ teaspoon each of cayenne pepper and dried thyme, with a pinch of black pepper. This creates a slightly spicy crust that’s deeply flavorful without being overwhelming. Serve these with creole rice and sautéed peppers and onions for a complete meal.
An Asian-inspired version uses ginger, soy sauce, and sesame oil to transform the chops completely. Marinate the chops for 10-15 minutes in a mixture of 3 tablespoons soy sauce, 1 tablespoon sesame oil, 1 tablespoon rice vinegar, 1 teaspoon grated fresh ginger, and 2 minced garlic cloves. Bake as usual, and serve with steamed bok choy and jasmine rice. The umami-rich marinade seasons the meat deeply, and you’ll have a restaurant-quality Asian dinner at home.
For a Mediterranean version, coat the chops with a mix of lemon zest, garlic, oregano, and fresh rosemary. During the last minute of baking, squeeze fresh lemon juice over them and add a handful of kalamata olives to the pan around the chops. The brightness of the lemon cuts through the richness of the pork, and the olives add a briny punch that makes the whole dish feel like a coastal vacation.
What to Serve Alongside Your Baked Pork Chops

Pork chops pair beautifully with crispy roasted vegetables that can cook alongside them if you plan ahead. Toss baby potatoes, broccoli, or Brussels sprouts with olive oil, salt, and pepper, and place them on the same baking sheet around the chops. They’ll roast at the same temperature and be ready at the same time, giving you a complete one-pan meal. The vegetables benefit from the fat that renders from the chops, creating deeper flavor throughout.
Creamy sides balance the richness of the pork wonderfully. Mashed cauliflower, buttered egg noodles, or creamed spinach all complement baked chops without overwhelming the dish. A simple mashed potato with roasted garlic and fresh herbs is comfort food at its finest, and it rounds out a weeknight dinner into something that feels special.
Grain-based sides work equally well if you want something lighter. Quinoa pilaf with roasted vegetables, cilantro-lime rice, or farro salad with fresh herbs and lemon all provide substance without heaviness. These sides are easy to make while the chops bake, and they add nutritional balance to the meal.
Green sides brighten everything on the plate and cleanse the palate. A simple arugula salad with lemon vinaigrette, roasted or steamed broccoli with garlic, or sautéed green beans with toasted almonds are all quick enough to prepare during the few minutes it takes the chops to bake. These sides add freshness and prevent the meal from feeling too heavy or one-note.
Storing and Reheating Leftover Pork Chops
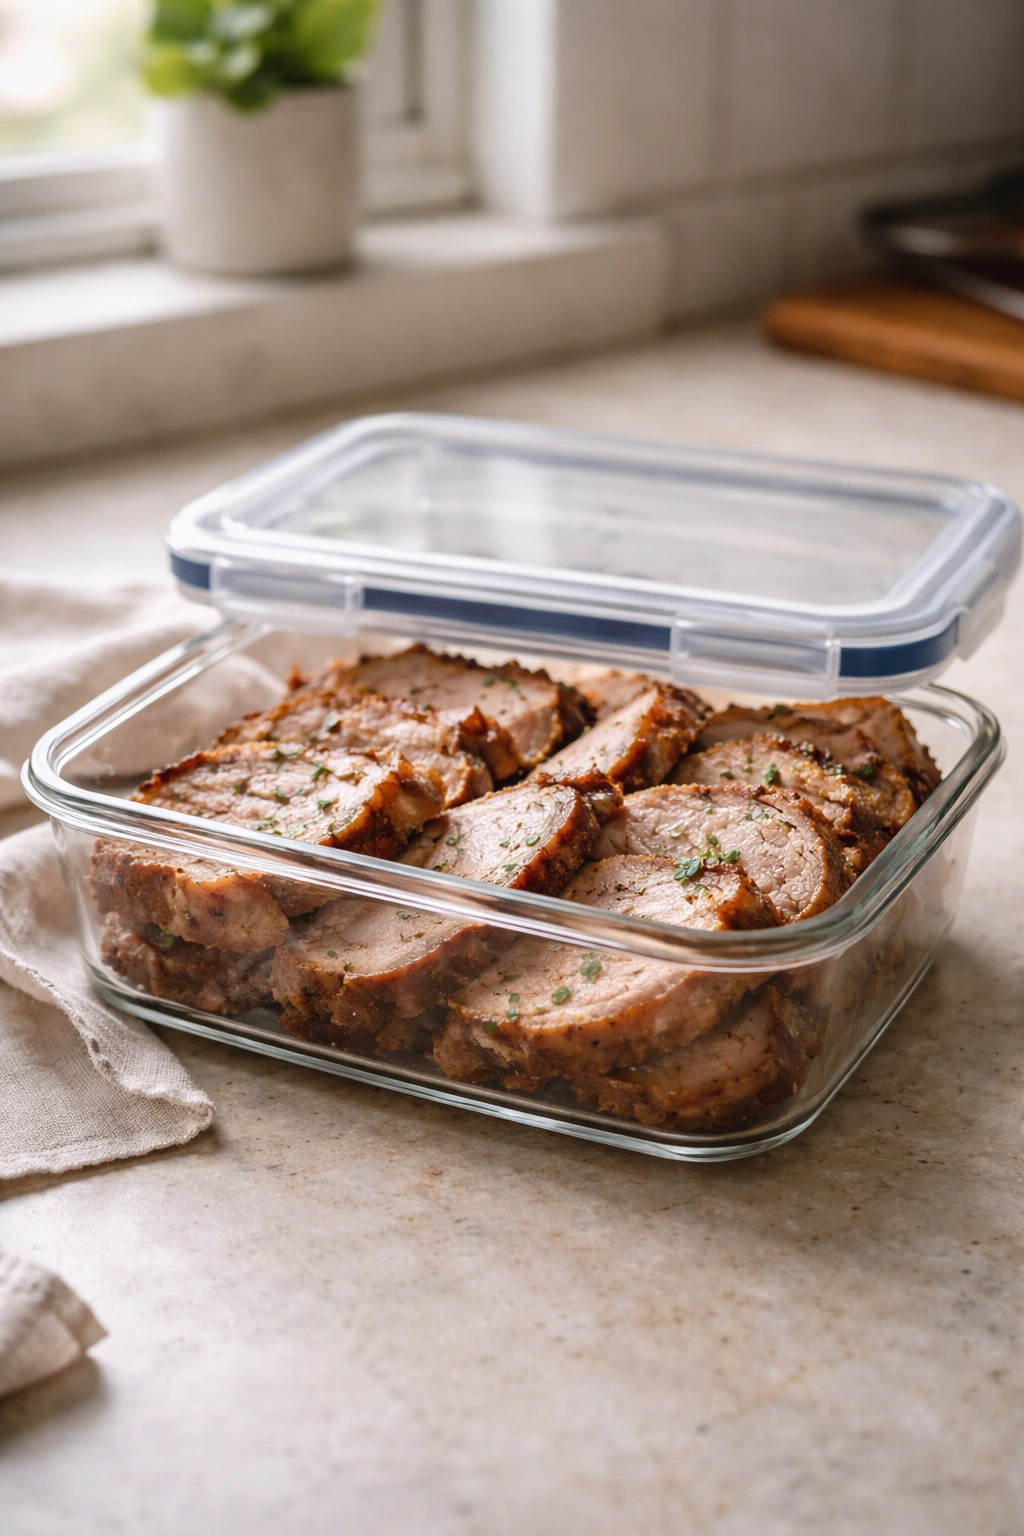
Leftover baked pork chops keep beautifully in the refrigerator for up to 4 days when stored in an airtight container. Let them cool to room temperature first before refrigerating, and make sure they’re completely dry on the outside so they don’t get soggy. If you know you’ll have leftovers, slightly undercook them by about 2-3 minutes since they’ll continue cooking slightly as they cool and may cook a bit more during reheating.
Reheating is simple and only takes a few minutes. The best method is to warm them gently in a 350°F oven for about 5-8 minutes, covered loosely with foil to prevent them from drying out further. Check them at the 5-minute mark—you want them warm all the way through but still moist. Avoid the microwave if possible because it tends to make the exterior tough and the edges overcooked, though it works in a pinch if you use the lowest power setting and check frequently.
Leftover pork chops are fantastic in a variety of dishes beyond simply reheating and serving. Shred or chop them and add them to fried rice, grain bowls, salads, or tacos. Mix them into scrambled eggs for a protein-rich breakfast. Slice them thinly and layer them into sandwiches with mustard, pickles, and fresh greens. These creative uses mean your leftovers never feel boring or repetitive.
Freezing is an excellent option if you want to extend their life to 2-3 months. Cool the chops completely, wrap each one individually in plastic wrap, then place them all in a freezer bag with the date labeled. When you’re ready to use them, thaw them overnight in the refrigerator and reheat using the oven method. Frozen and reheated pork chops won’t be quite as tender as freshly cooked ones because freezing breaks down some of the cell structure, but they’re still absolutely delicious and a valuable shortcut for busy weeks.
Final Thoughts
The 30-minute baked pork chop method earns its place in your regular rotation because it consistently delivers juicy, flavorful meat without stress or complicated techniques. The beauty of this approach is that once you’ve made it a couple of times and understand how your specific oven behaves, you’ll do it on autopilot. It becomes one of those dishes you can throw together when you’re tired or busy, knowing that dinner will still be restaurant-quality.
The thing that makes this method foolproof is the combination of three simple steps working together: dry the meat so it browns, season it boldly so it tastes amazing, and use temperature control so it comes out perfect every time. None of these requires special equipment or advanced cooking knowledge. An instant-read thermometer is your best friend here because it removes the guessing about whether the chops are done, and that single tool is worth its modest cost for the peace of mind alone.
Don’t be afraid to experiment with glazes, seasonings, and toppings once you’ve got the basic technique down. Pork chops are a blank canvas for flavor, and you can take them in completely different directions depending on what you pair them with. One night they’re Italian with herbs and tomato, the next night they’re Asian with ginger and soy sauce, and the night after that they’re topped with a honey mustard glaze. That versatility keeps dinner interesting without requiring you to master five different cooking methods.
Your next baked pork chop dinner is just 30 minutes away, and it’s going to be genuinely delicious. Start with quality chops at least 1 inch thick, pat them dry, season them generously, and trust the thermometer. That’s all it takes to become the person who serves restaurant-quality pork chops on a weeknight, every single time.