Sugar cookies are one of those desserts that feel fancy and impressive until you realize how genuinely simple they are to make. If you’ve been intimidated by baking before, sugar cookies might be exactly the project to change your mind — they require just a few pantry staples, a basic technique, and maybe 20 minutes of hands-on time. What you get in return is a cookie that’s soft in the center, slightly crisp at the edges, and absolutely perfect as-is or decorated however your imagination takes you.
The best part about making sugar cookies from scratch is the control. Store-bought versions are either cakey, dense, and disappointing, or they’re loaded with preservatives and taste faintly of chemicals. When you make them at home, you decide how thick they are, exactly how sweet they should taste, whether you prefer crispy edges or a completely tender bite, and what flavors go into the dough. A touch of almond extract? Absolutely. Vanilla bean instead of extract? You’ve got it. Lemon zest mixed through the dough? Go for it. That flexibility is one reason homemade sugar cookies deserve a spot in your regular rotation.
These cookies also freeze beautifully, both as dough and after baking, which means you can make a batch on a quiet weekend and have fresh, just-baked cookies ready for the next three weeks. Or you can chill the dough, cut it into shapes, and freeze the cut cookies before baking so you can bake just a few at a time. They’re perfect for cookie exchanges, bring-to-potluck situations, or just something satisfying to have on the counter alongside your morning coffee. The recipe here is straightforward enough that kids can help with most of the steps, but it’s also refined enough that the results taste genuinely impressive.
Why Homemade Sugar Cookies Beat Everything Else
When you make sugar cookies from scratch, the flavor is the first thing that strikes people. You’re tasting real butter, real vanilla, and just the right amount of sweetness — not the slight chemical aftertaste that lingers with mass-produced cookies. The texture matters too. These cookies have a tender crumb and a slight snap when you bite into them, something you simply can’t replicate with a box mix or a pre-made dough.
Beyond flavor and texture, there’s something deeply satisfying about the process itself. Sugar cookie dough comes together in one bowl without any special equipment. No stand mixer required, though one certainly helps. You cream butter and sugar until fluffy (which sounds fancy but is genuinely just beating two ingredients together), add an egg and vanilla, then mix in flour. Five minutes later, you have a dough. There’s a real sense of accomplishment in that simplicity — you made something delicious from basics.
The decorating potential is where things get really fun. Once you have baked sugar cookies, you can leave them plain and simple, dust them with cinnamon sugar, frost them with royal icing and create intricate designs, or coat them in sprinkles. They’re a perfect blank canvas for whatever celebration or season is happening. December? Cut them into snowflakes and ornaments. Valentine’s Day? Cut them into hearts. Birthday party? Use a basic round cutter and cover them in colorful frosting. The cookie itself stays the same, but the presentation possibilities are endless.
The Real Advantage of Making Sugar Cookies at Home

Store-bought dough often contains sodium bicarbonate and sodium acid pyrophosphate, leavening agents that can create a slightly bitter, cardboard-like taste if not perfectly balanced. When you control the ingredients, you avoid that entirely. You use just baking soda or baking powder (depending on your preference), and in the exact amount your dough needs for the right rise and texture.
The texture difference is maybe even more important than the flavor. Homemade sugar cookies baked until just barely golden have a tender center that stays fresh for days without becoming stale and hard. The edges develop a subtle caramelization from the butter and sugar, creating a gentle contrast to the soft center. This is genuinely difficult to achieve with industrial manufacturing and long shelf lives — cookies need to be shipped, stored in warehouses, and survive retail shelves, so they’re always over-baked slightly to ensure they don’t go stale before they’re purchased.
Another advantage: you eliminate the guesswork about ingredients. If you’re baking for someone with dairy-free needs, you can use vegan butter and coconut milk (more on that in the variations section). If you want them gluten-free, you can swap the flour. If you want to use organic cane sugar, unbleached flour, or pasture-raised eggs because those matter to you, you’re in complete control. That flexibility is something no store-bought option offers.
Easy Sugar Cookies — Complete Recipe
Yield: Makes about 24 cookies (depending on cutter size) | Can easily be doubled Prep Time: 20 minutes (includes chilling) Cook Time: 10 to 12 minutes per batch Total Time: 45 minutes active + 30 minutes chilling (or up to 24 hours refrigeration before baking) Difficulty: Beginner — The dough comes together quickly with just a mixing bowl, and the steps are straightforward even if you’ve never baked before. You’ll have beautiful cookies on the first try.
What You’ll Need for Basic Sugar Cookies
For the Cookie Dough:
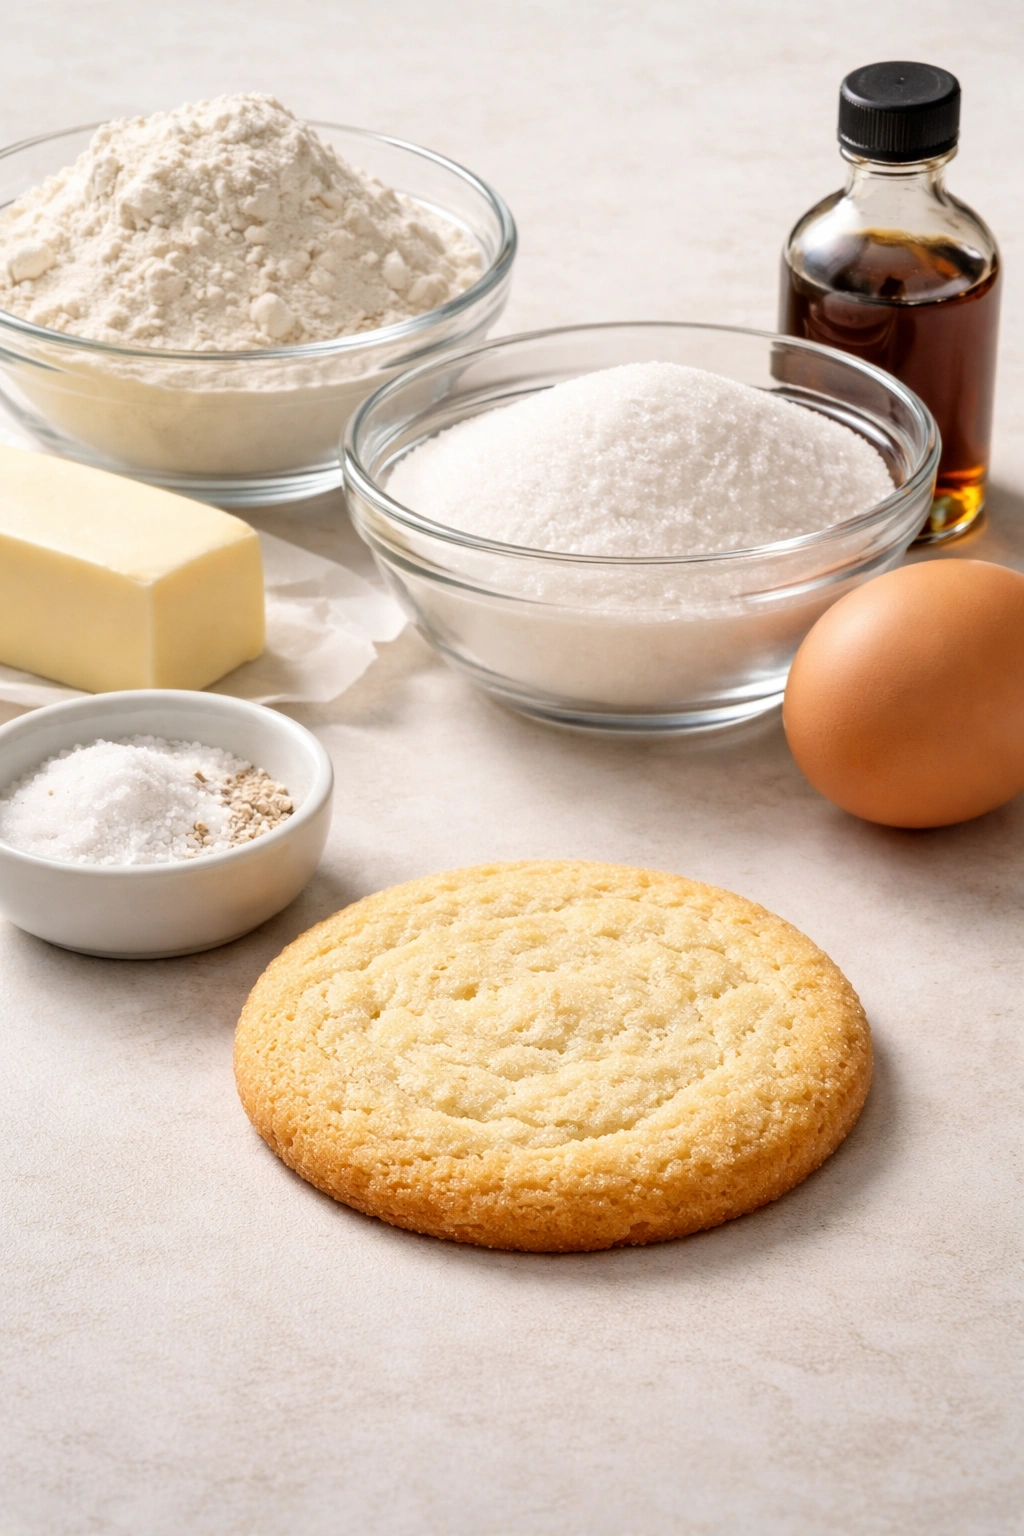
- 2¾ cups all-purpose flour (spooned and leveled, not packed)
- ½ teaspoon baking soda
- ½ teaspoon fine sea salt
- 1 cup (2 sticks) unsalted butter, softened to room temperature
- 1¼ cups granulated sugar
- 1 large egg, room temperature
- 1½ teaspoons pure vanilla extract
- Optional: ¼ teaspoon almond extract (adds subtle complexity — highly recommended) or ½ teaspoon lemon zest (finely grated)
Step-by-Step Instructions for Perfect Sugar Cookies
Prepare Your Ingredients:
-
Let your butter sit on the counter for 20 to 30 minutes until it’s soft enough that your finger leaves a slight indentation when you press it, but it still holds its shape — not melted or greasy. Room-temperature butter is crucial for creaming properly.
-
Measure your flour by spooning it into a dry measuring cup and leveling it off with a butter knife, rather than dipping the cup directly into the flour bag. Dipping compacts the flour and can lead to dense, cakey cookies. If you have a kitchen scale, 330 grams of flour is even more precise.
-
Have your egg at room temperature as well — this sounds minor, but cold eggs won’t incorporate smoothly into the butter and sugar, which can lead to grainy texture. If you forgot to take it out, set it in warm water for 5 minutes.
Make the Dough:
-
In a medium bowl, whisk together the flour, baking soda, and salt. Set this aside. Whisking the dry ingredients ensures the leavening is evenly distributed throughout the dough, which gives you a more consistent rise and texture.
-
In a large bowl, add the softened butter and sugar. Using a hand mixer on medium speed (or a wooden spoon and some elbow grease), beat for 3 to 4 minutes until the mixture is pale, noticeably fluffy, and increased in volume — it should look almost like the texture of wet sand that holds a shape when squeezed, but lighter. This creaming step is where structure develops and air gets incorporated into the dough, giving the cookies a tender crumb.
-
Add the egg to the butter-sugar mixture and beat for about 1 minute until fully combined. The mixture may look slightly curdled or separated — this is completely normal and will smooth out with the next addition.
-
Pour in the vanilla extract (and almond extract or lemon zest, if using) and beat for another 30 seconds until the mixture is smooth and well combined. Stop and scrape down the sides of the bowl with a spatula.
Advertisements -
Add the flour mixture to the wet ingredients in three additions, mixing on low speed. Add one-third of the flour, mix until just combined, then add the second third, mix, then add the final third. Do not overmix. Stop mixing as soon as the flour disappears into the dough. Overmixing develops the gluten in the flour, which creates tough, dense cookies instead of tender ones.
-
The dough should be soft, smooth, and slightly sticky to the touch — not stiff or crumbly. If it looks a bit sticky, that’s correct. If it’s very wet and won’t hold together, you may have accidentally packed the flour when measuring; let the dough rest in the fridge for 15 minutes and it will firm up.
Chill the Dough:
- Shape the dough into a thick disk, wrap it tightly in plastic wrap, and refrigerate for at least 30 minutes, but ideally 1 to 2 hours. Cold dough is easier to work with because it doesn’t spread as much when you cut and transfer the cookies. If you need to chill overnight, that’s fine — this dough keeps refrigerated for up to 3 days.
Bake the Cookies:
-
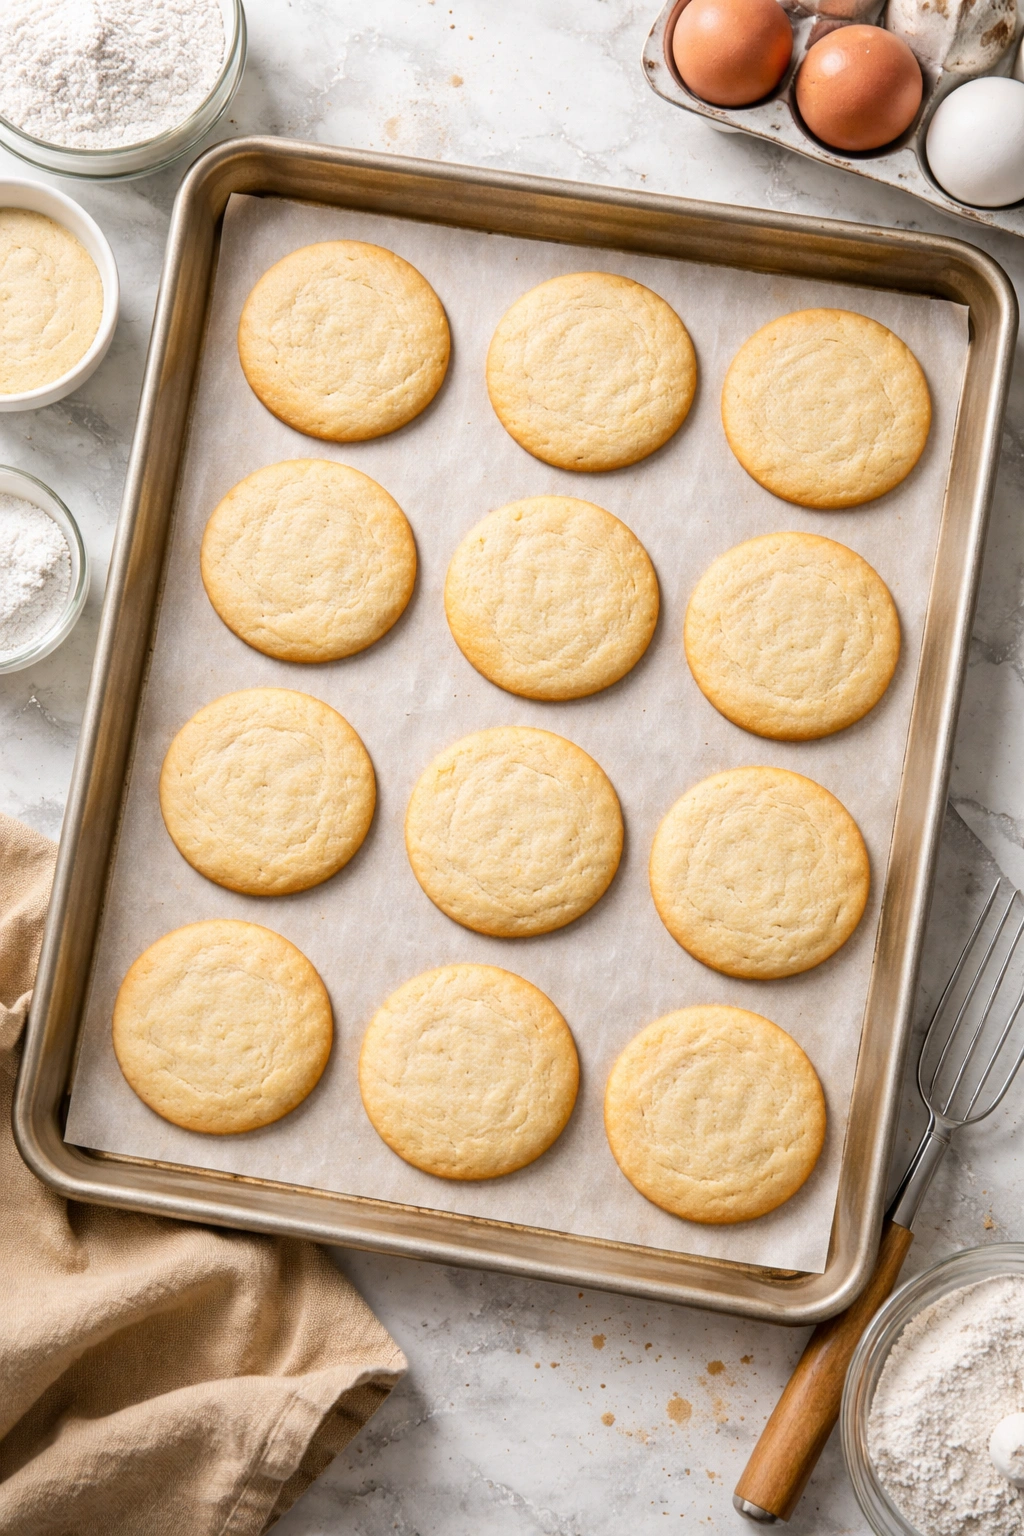
Preheat your oven to 350°F (175°C) and position the rack in the center. Line two baking sheets with parchment paper — this prevents sticking and ensures even browning on the bottom of the cookies.
-
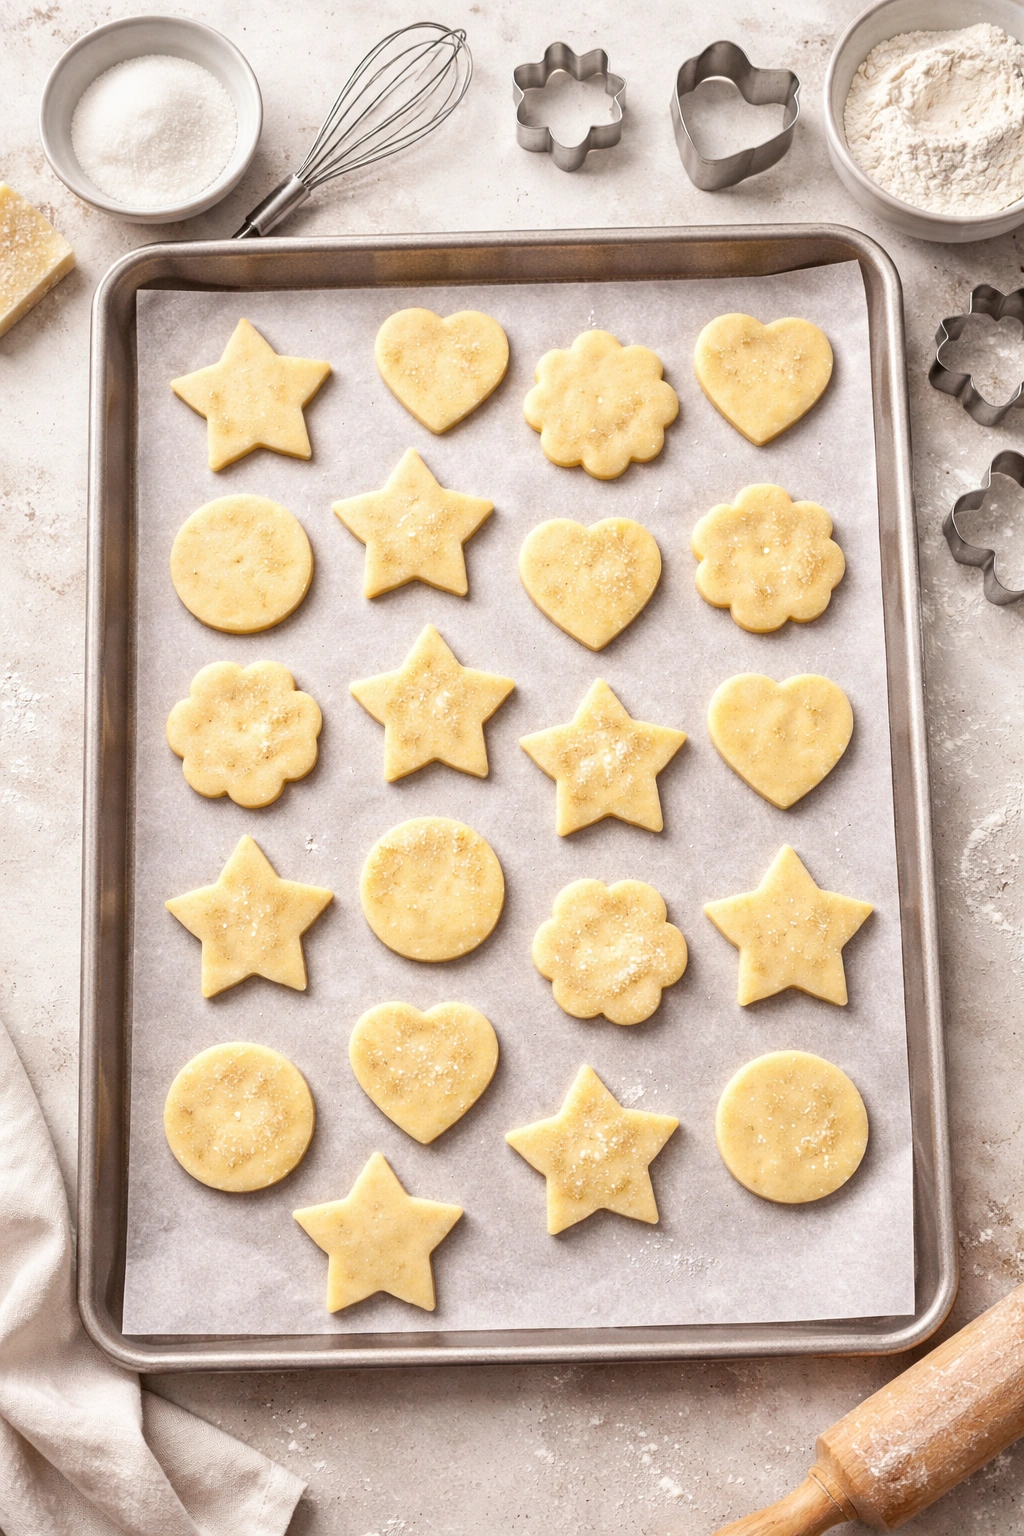
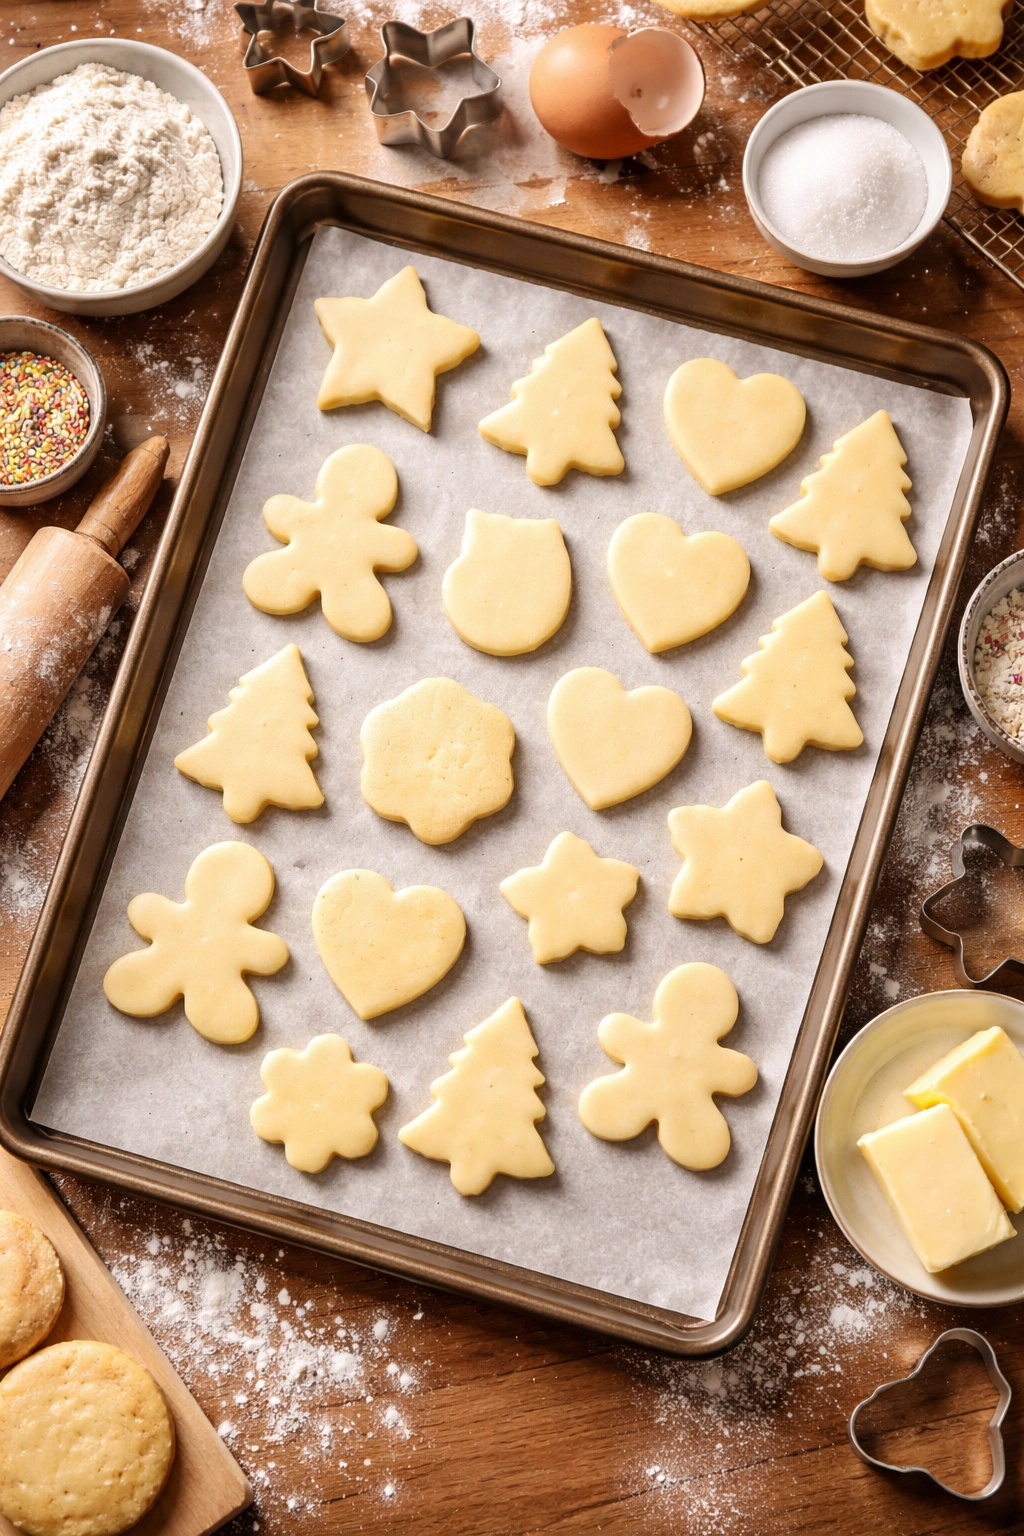
Working with one portion of dough at a time (you can keep the other portion in the fridge while you work), lightly flour your work surface and a rolling pin. Place the dough disk on the surface and roll it out to about ¼-inch thickness. The thickness is important. Too thin (less than ¼ inch) and your cookies will bake too quickly and become crispy all the way through. Too thick (more than ½ inch) and they’ll take longer to bake and the edges will brown before the center is done.
-
Using cookie cutters of any shape, cut shapes from the dough. If you don’t have cookie cutters, a drinking glass works perfectly for round cookies — just dip the rim in flour before each cut so it doesn’t stick. Transfer the cut cookies to your prepared baking sheets, spacing them about 2 inches apart.
-
Gather any dough scraps, press them gently back together, wrap in plastic, refrigerate for 5 minutes, and re-roll. Continue cutting until all dough is used.
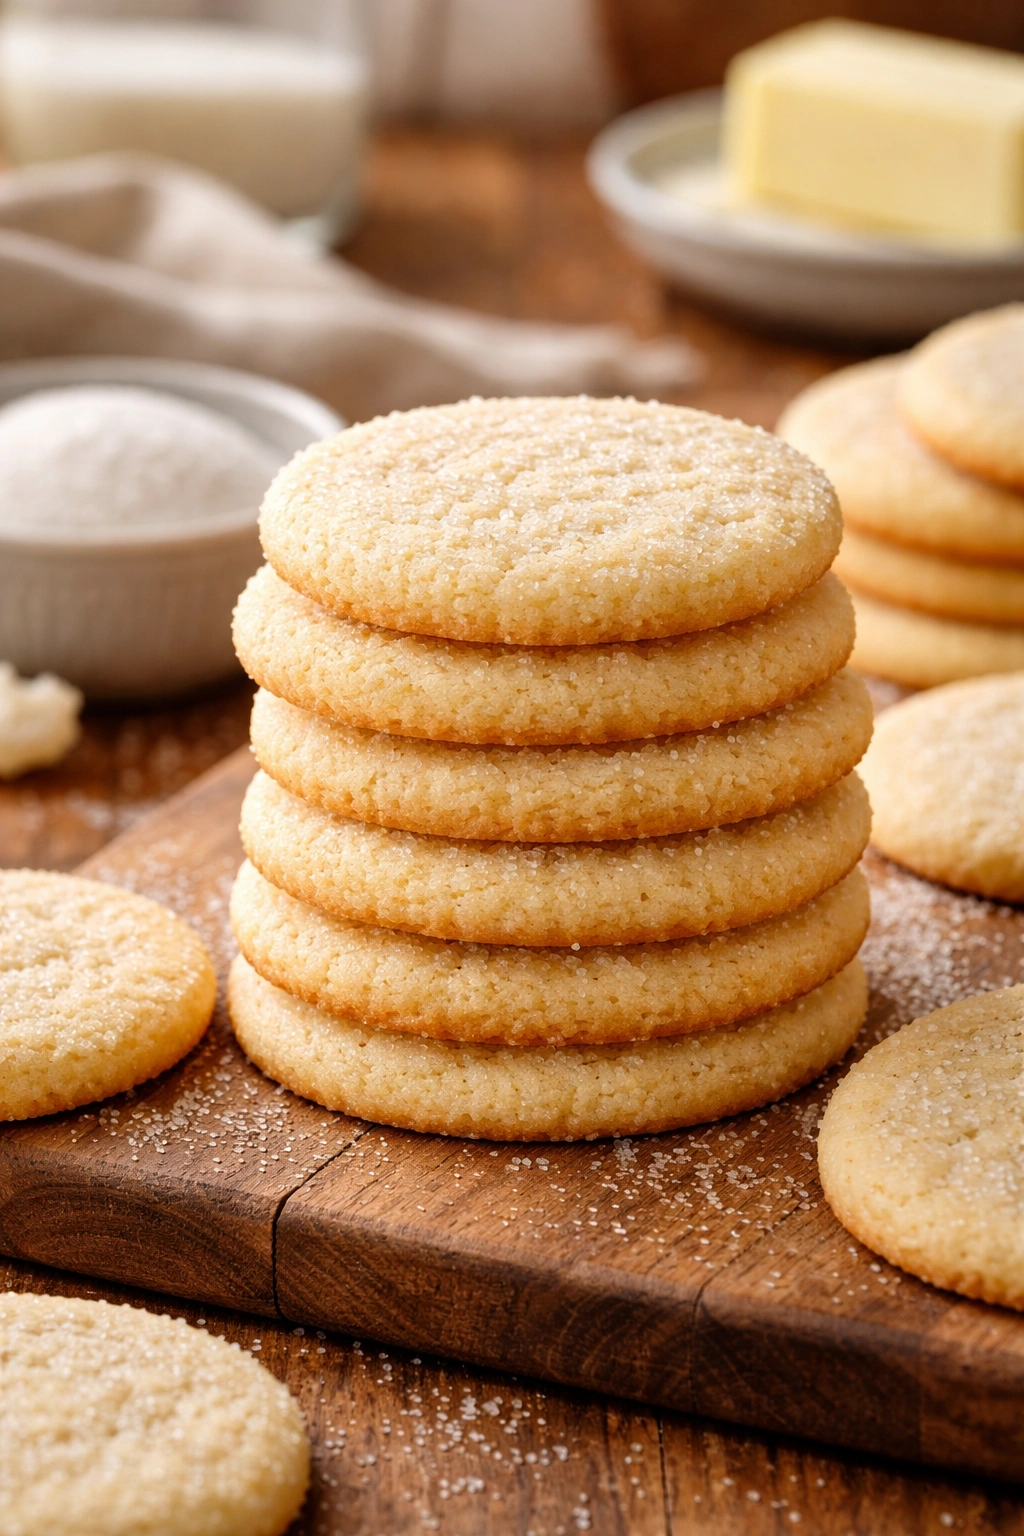
-
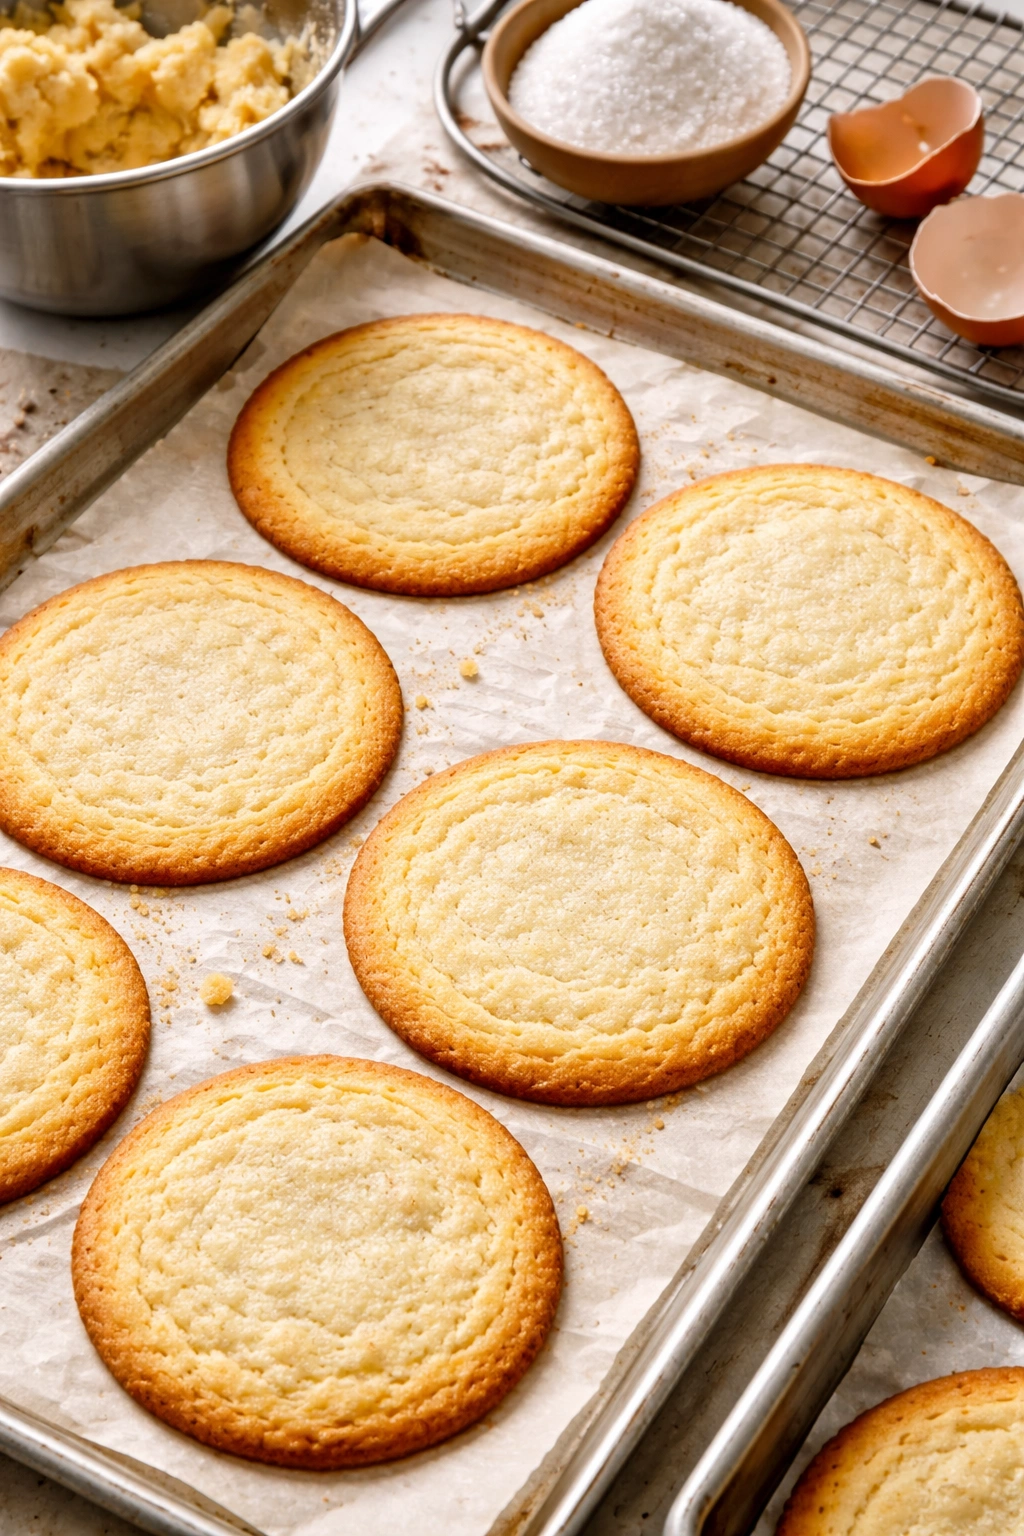
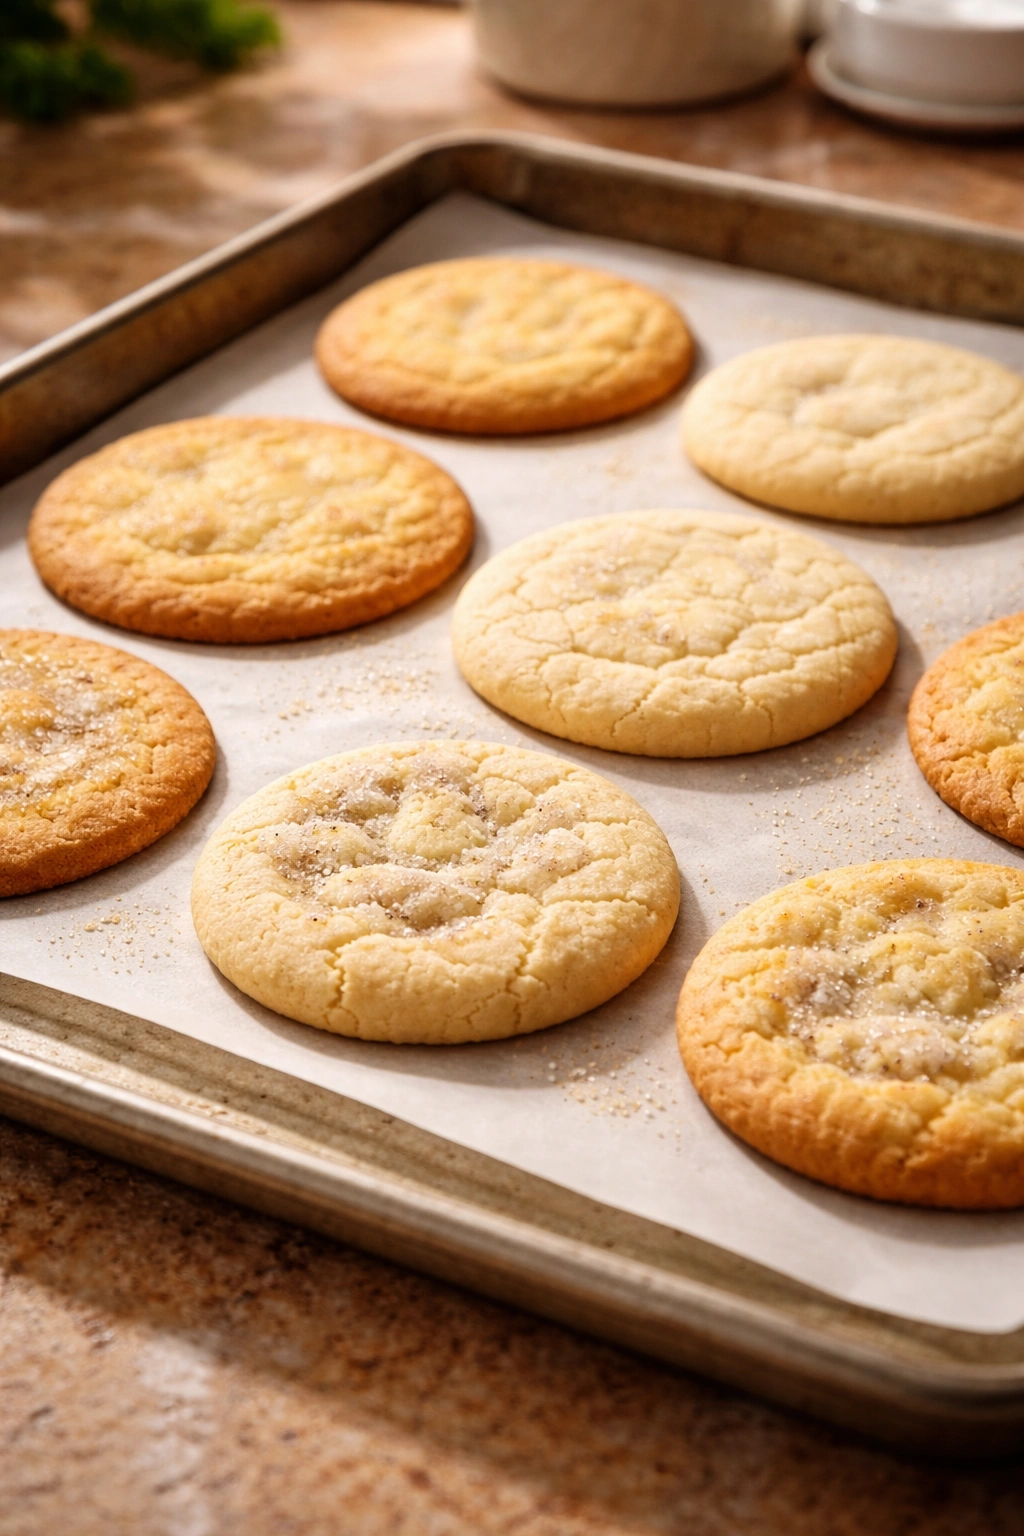
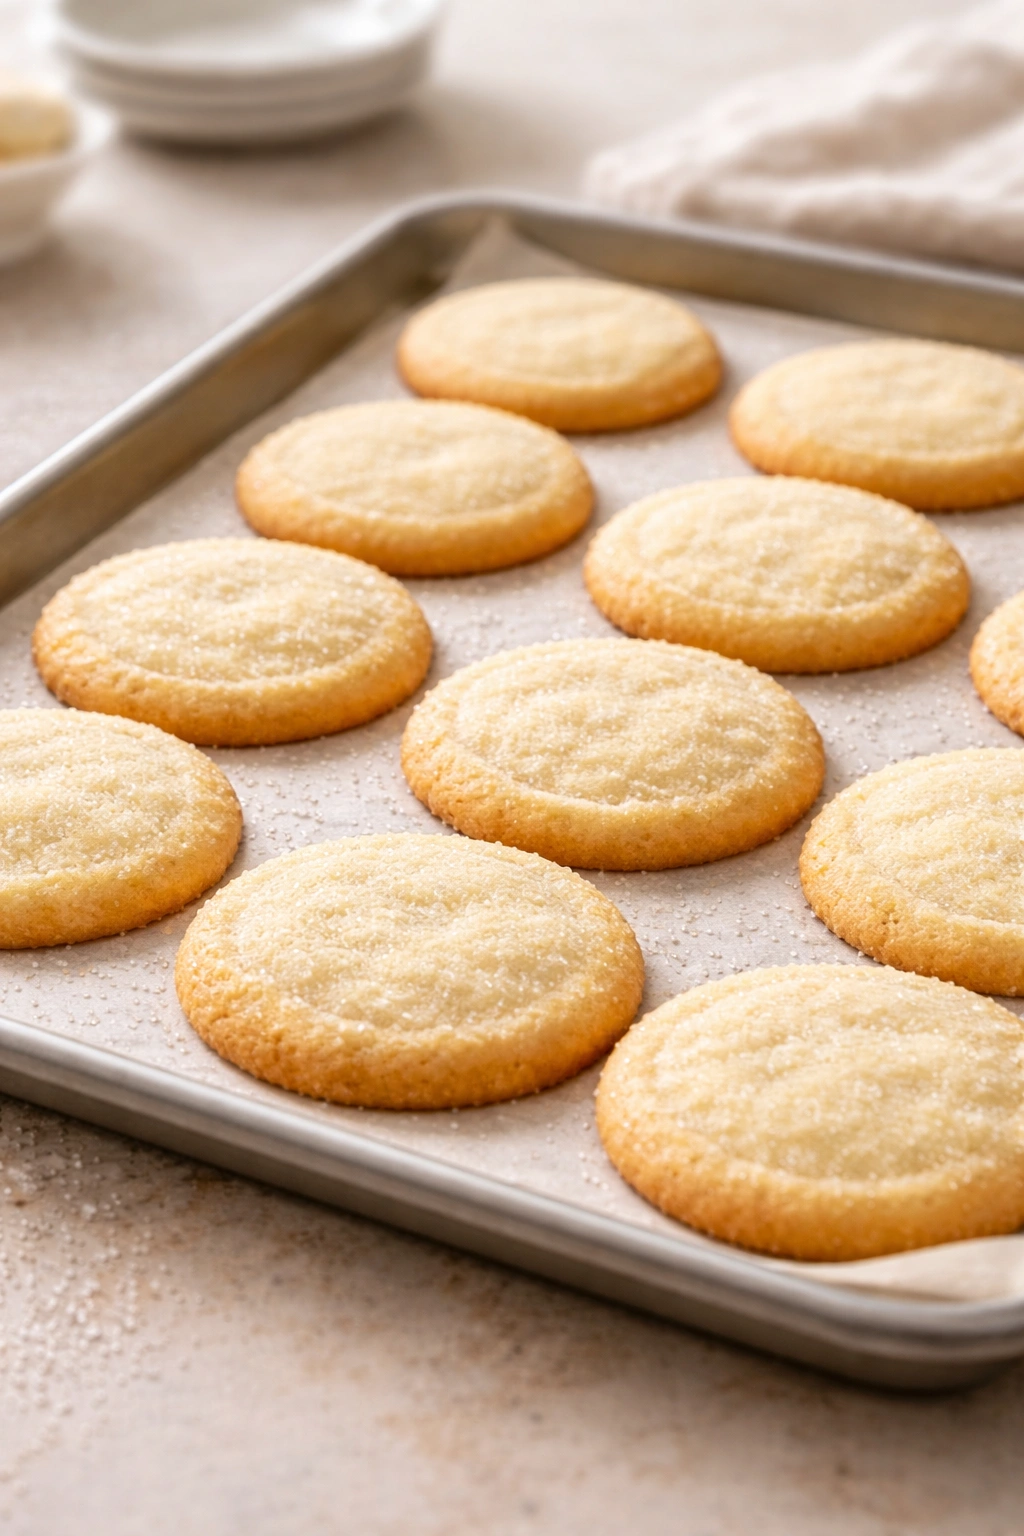
Bake for 10 to 12 minutes, until the edges are very lightly golden but the centers still look slightly underbaked and pale. This is the secret. Cookies continue to bake on the hot pan after you remove them from the oven, so if the centers look done, they’ll be overbaked and hard once they cool. The edges should be just barely set and golden, and the centers should look like they could use another minute — but they don’t.
-
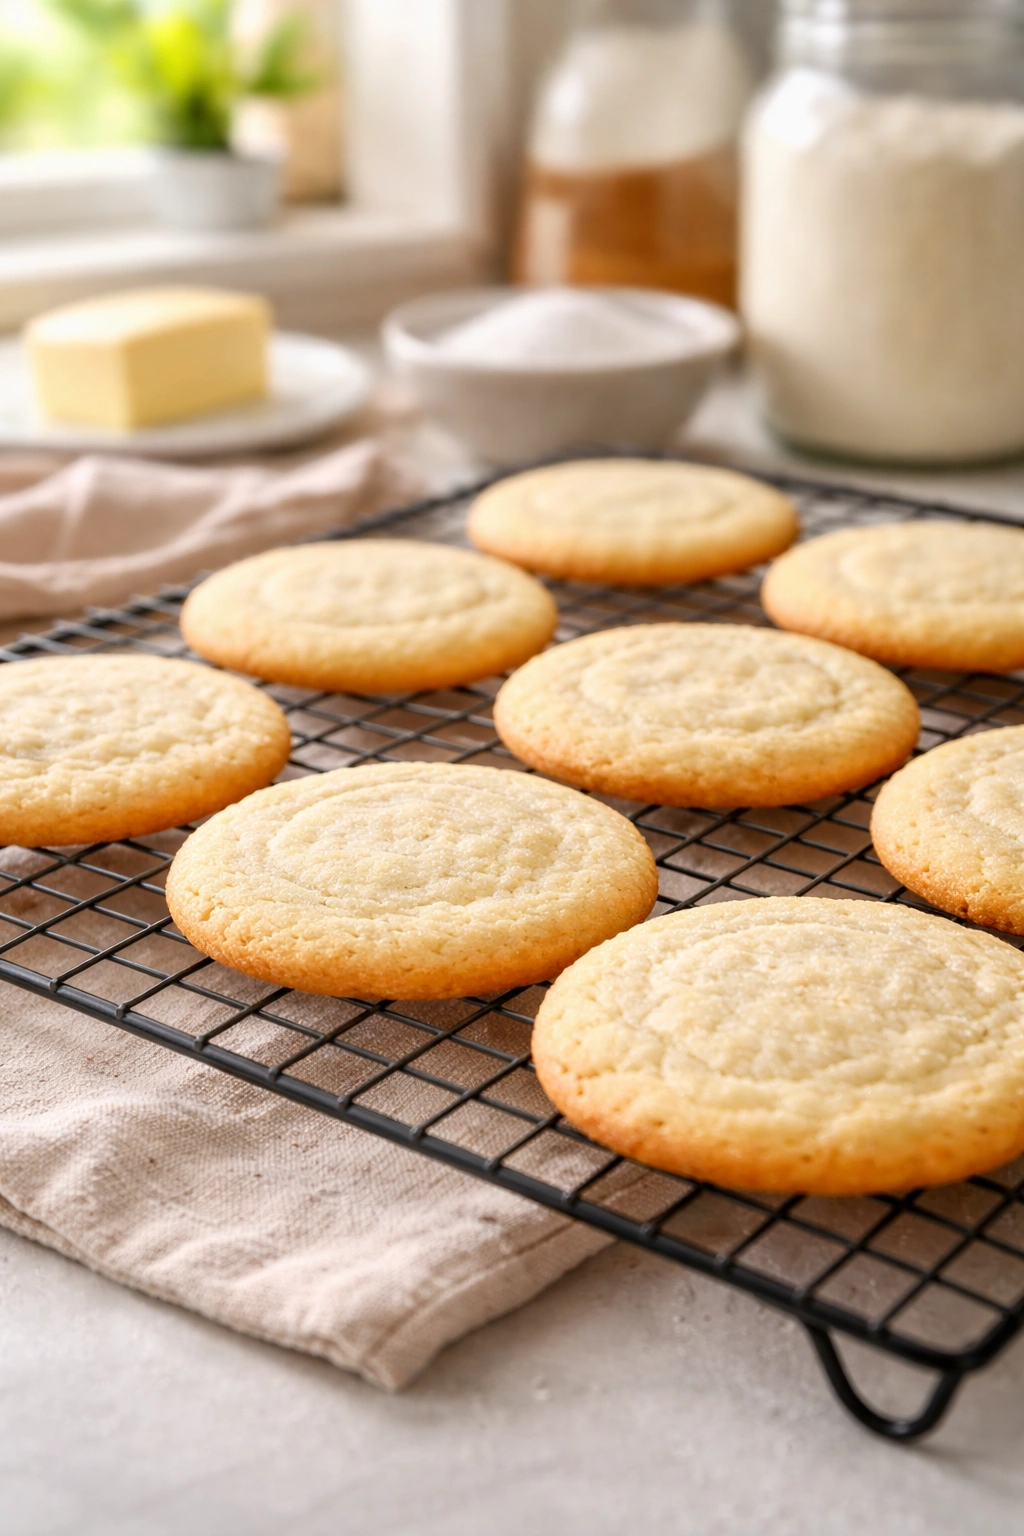
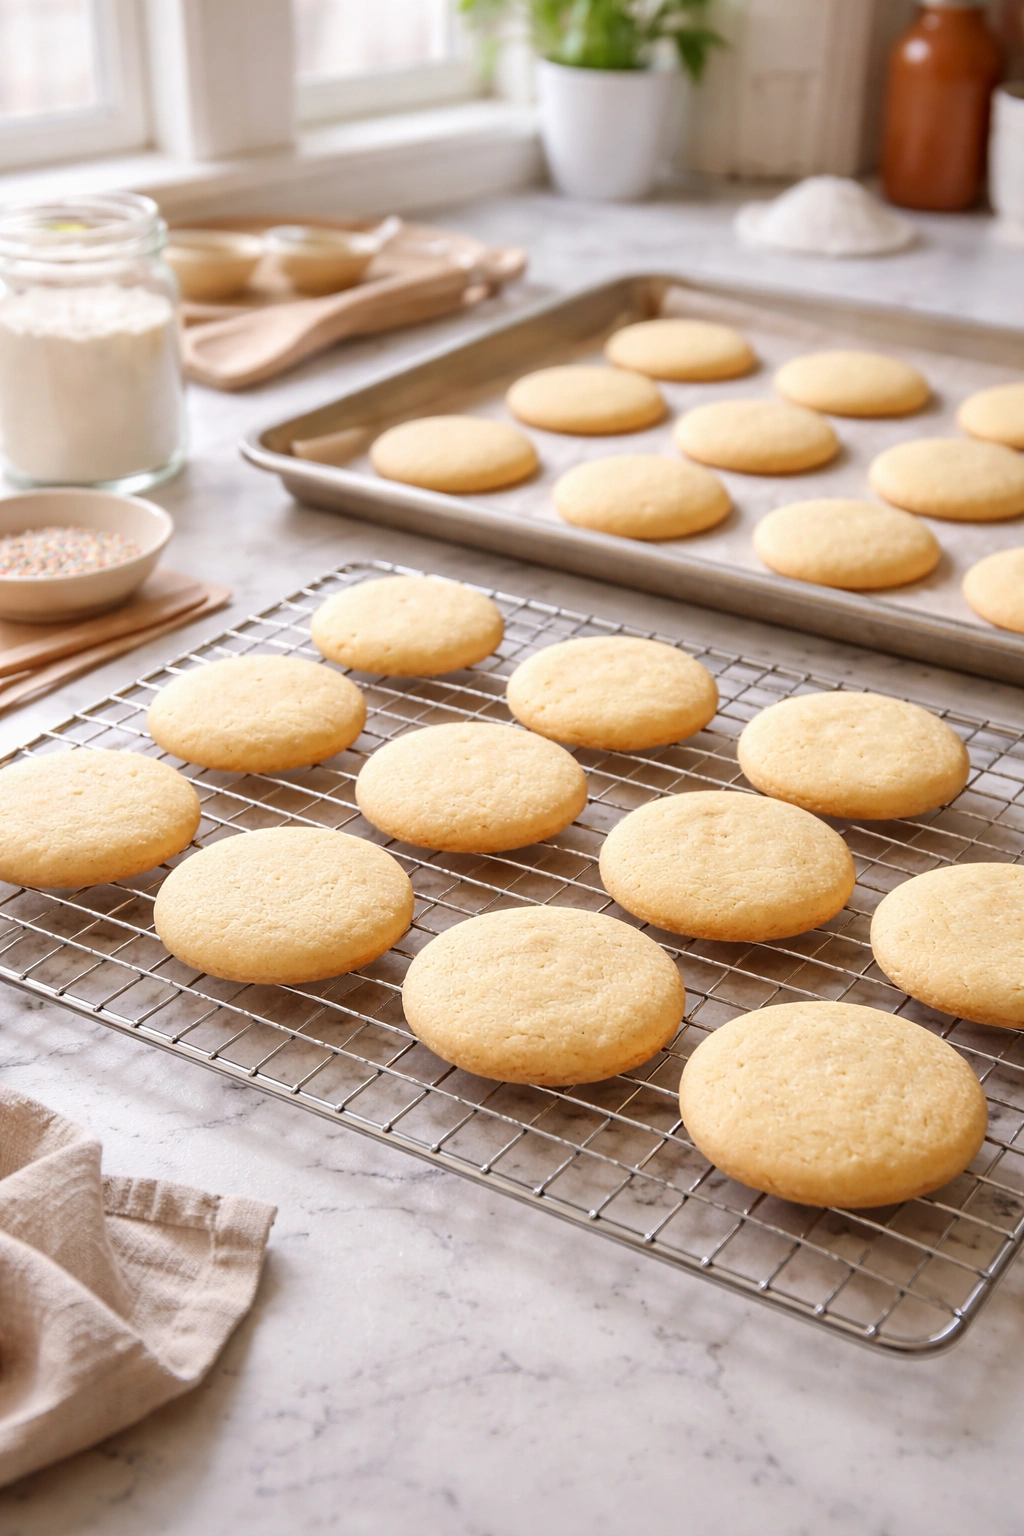
Remove the baking sheets from the oven and let the cookies sit on the hot pan for 2 minutes — this is important because they’ll be quite fragile at this point and will break if you move them too soon. After 2 minutes, transfer the cookies to a wire cooling rack using a thin spatula, sliding it underneath each cookie gently.
Advertisements -
Once the baking sheets have cooled, line them with fresh parchment and repeat with the remaining dough. The cookies need to cool completely on the rack before decorating or storing — about 30 to 45 minutes at room temperature.
The Critical Details That Make the Difference
The single most important step in baking perfect sugar cookies is removing them from the oven while the centers still look slightly underbaked. This feels counterintuitive — you’ve been trained by decades of baking wisdom to bake things until they look done. But sugar cookies are delicate, and the carryover heat from the hot pan continues to set the dough for a minute or two after they come out of the oven. If you wait until the centers look truly set and baked, by the time they cool completely, they’ll be hard and crispy throughout.
The second crucial detail is making sure your butter is truly at room temperature before creaming. If it’s too cold, it won’t beat into fluffy peaks even with a mixer running for five minutes. If it’s too warm (closer to melted), the sugar won’t have anything to grab onto for creaming, and you’ll end up with a dense, greasy dough. The sweet spot is soft enough that your finger leaves an indentation, but firm enough that the butter still holds its shape.
Flour measurement matters more than most bakers realize. One cup of flour can vary by 30 or 40 grams depending on whether you pack it into the measuring cup, dip the cup into a flour bag and tap it, or spoon it gently. This recipe assumes you spoon the flour and level it off with a knife — which is the most standard method. If you pack it, you’ll have way too much flour and the cookies will be dry and cakey. If you have a kitchen scale (and you don’t need an expensive one), weighing flour eliminates all this guesswork. This dough is 330 grams of flour.
The type of mixer you use doesn’t matter. A stand mixer, a hand mixer, or a wooden spoon and determination all work perfectly well. If using a wooden spoon, the creaming step will take longer (maybe 5 to 7 minutes of vigorous beating), but the result will be identical. What matters is creaming long enough that the mixture becomes pale and fluffy. This incorporates air and develops the structure of the dough.
Why This Cookie Recipe Works Every Time
The ratio of butter to sugar to flour in this recipe creates a dough that’s tender but structured. Too much butter and the cookies spread thin and become greasy. Too little butter and they’re dry and crumbly. This balance means the cookies hold their shape while they bake but still end up tender and slightly chewy when they cool.
The inclusion of baking soda (rather than only baking powder) helps create that slight caramelization around the edges. The soda reacts with the acidic component of vanilla extract and the slight acidity of the egg, creating carbon dioxide that helps the cookies rise slightly and develop color quickly. This is why the edges brown while the center stays pale — it’s not a mistake, it’s the intended texture.
The salt in the dough isn’t just there to intensify the vanilla or balance sweetness (though it does both). Salt also strengthens the gluten network in the dough and helps extend the shelf life by slowing staling. The amount here (½ teaspoon) is enough to make a noticeable difference without making the cookies taste salty.
One large egg is the magic amount for this flour-to-butter ratio. The egg provides moisture, helps bind the ingredients, and contributes to the tender crumb. Two eggs would make the dough too soft to chill and cut properly. Half an egg would make the dough dry and crumbly. One egg lands in exactly the right place.
Tips and Tricks From Experienced Sugar Cookie Bakers
Invest in a good cookie sheet (not a baking pan). The difference between baking sheets and cake pans might sound minor, but it’s genuinely important. Baking sheets have low or no sides, which allows heat to circulate evenly around the cookies. Cake pans have high sides that trap heat and create hot spots. If you only have cake pans, your cookies on the edges will brown too much while those in the middle stay pale. Rimmed baking sheets work fine as long as you put the parchment on top of the rim and let the cookies bake on the flat part.
Rotate your baking sheets halfway through baking. Even with good baking sheets, most home ovens have hot spots and temperature fluctuations. Rotating the sheets halfway through ensures more even browning, especially if you’re baking two sheets at once.
Let the cookies cool completely before decorating. If you frost or decorate warm cookies, the frosting will melt or slide right off. Cool cookies provide a stable surface for decorations to adhere to. This is also why it’s important to use wire cooling racks rather than cooling the cookies on the baking sheet — the rack allows air to circulate underneath and the cookies cool faster and more evenly.
Use parchment paper, not greased baking sheets. Parchment is non-stick, prevents over-browning on the bottom of the cookies, and makes cleanup dramatically easier. Greasing sheets with butter or cooking spray can actually cause more browning on the bottom and sometimes leads to cookies sticking anyway. Parchment is cheap and reusable for multiple batches — just shake off any crumbs and flip it over.
Keep a notebook of your bake times. Every oven is different. If your oven runs hot, your cookies might be done in 9 minutes instead of 11 to 12. If it runs cool, they might need 13 or 14 minutes. After the first batch, note your actual bake time and use it for all subsequent batches. This small step eliminates the guesswork and leads to consistent results.
Room temperature really does matter. Ingredients mix more smoothly, incorporate more evenly, and create better texture when they’re all close to the same temperature. Cold dough will take longer to bake and won’t bake as evenly. There’s a reason professional bakers fuss about ingredient temperatures — it actually makes a measurable difference.
Common Mistakes That Sabotage Sugar Cookies
Overmixing the dough. This is probably the most common mistake, and it’s usually well-intentioned. Bakers worry the dough isn’t fully combined and keep mixing to make sure. But mixing after the flour is incorporated develops gluten, which creates a chewy, tough texture instead of tender. Mix until the flour just disappears. A few little streaks of flour are fine and will come together as you handle the dough.
Baking the cookies until they look done. This needs repeating because it’s so counterintuitive. Sugar cookies should come out of the oven looking slightly underbaked in the center. The pale, soft-looking center will set up as they cool. If they look truly done in the oven, they’ll be hard and brittle when cool. Trust the bake time and use visual cues (golden edges, pale center) rather than appearance.
Using cold dough and not chilling between batches. Warm dough spreads much more than cold dough, leading to thin, flat cookies. After you cut cookies and lay them on the baking sheet, if the dough is still warm from your hands, stick the sheet in the freezer for 10 minutes before baking. Similarly, if you’re rolling out multiple batches and the remaining dough is warming up, wrap it and refrigerate it between batches.
Packing the flour when measuring. Dipping the measuring cup directly into the flour bag and tapping it down will compact the flour, leading to too much in the recipe. Always spoon flour into the measuring cup and level off the top with a knife. Or, better yet, weigh it.
Not letting cookies cool completely on the rack. Warm cookies are fragile and will break when you move them. They also continue to bake slightly from residual heat, so moving them too soon can make them overbaked. Two minutes on the hot pan, then transfer to a cool rack, and let them rest for at least 20 minutes before decorating or stacking.
Using butter straight from the fridge. Cold butter won’t cream properly no matter how long you beat it. Take it out 20 to 30 minutes before you start baking so it reaches room temperature. If you forget, cut it into small cubes — it’ll reach room temperature faster that way.
Using old baking soda or baking powder. Leavening agents lose potency over time. If your baking soda or baking powder is more than a year old, it might not work effectively, leading to flat cookies that don’t rise properly. Baking soda is cheap — buy a fresh box if you’re unsure.
How to Decorate Your Sugar Cookies

Plain sugar cookies are delicious, but decorated ones are genuinely magical. There are several approaches depending on your skill level and how much time you want to spend.
The simplest option: cinnamon sugar. While the baked cookies are still warm (but not hot), brush them lightly with a little milk or egg wash, then sprinkle immediately with cinnamon mixed into granulated sugar. The sugar sticks to the wet surface and creates a crispy, sweet coating. This takes 30 seconds per batch and looks beautifully rustic.
Royal icing for intricate designs. Royal icing is made from powdered sugar, egg whites (or meringue powder for a safer option), and a little water. When it’s thick, you use it to outline cookies. When it’s thin, you flood the interior. It dries hard and stays in place perfectly. Royal icing is the medium of cookie decorators everywhere, and while it takes practice to master piping fine details, even basic flooding with solid colors looks professional and beautiful. If you’re new to royal icing, plenty of tutorials exist online — it’s worth learning if you plan to decorate cookies regularly.
Simple frosting and sprinkles. A basic frosting made from butter, powdered sugar, and milk is faster than royal icing. Spread it on the cooled cookies, sprinkle with nonpareils, sprinkles, or sanding sugar, and you have beautiful decorated cookies in minutes. This is perfect for kids helping in the kitchen or for situations where speed matters more than intricacy.
Chocolate dipping. Melt dark or white chocolate (temper it if you want a shiny finish, or just melt it gently if you want a matte finish), dip half or most of each cookie into the chocolate, place on parchment, and let it set. Sprinkle toppings onto the wet chocolate before it sets if you want texture.
Glazing. A simple glaze made from powdered sugar, milk, and a little vanilla can be drizzled over the cooled cookies for an elegant look with minimal effort. The glaze will be thick enough to stay put but fluid enough to create pretty drips.
The beauty of sugar cookies is that they provide a blank canvas. You can keep them plain, go simple, or go intricate. All approaches are delicious.
Variations and Flavor Twists

Almond sugar cookies. Add ½ teaspoon of almond extract to the dough (reduce vanilla to 1 teaspoon). The almond adds a subtle, sophisticated flavor that pairs beautifully with chocolate frosting or royal icing in pale colors.
Lemon sugar cookies. Add the zest of 1 medium lemon to the dough. You can also add 1 tablespoon of fresh lemon juice, but if you do, reduce the milk in any frosting by a tablespoon to compensate for the extra liquid. Lemon cookies are bright and refreshing, perfect for spring and summer occasions.
Brown butter sugar cookies. Brown the butter before creaming it with sugar. This adds a nutty depth that elevates the cookies significantly. Let the browned butter cool to room temperature before using. The rest of the recipe stays the same, but the flavor becomes more complex and sophisticated.
Eggnog sugar cookies (seasonal). Replace the milk in any frosting with eggnog, and add ⅛ teaspoon of nutmeg to the dough. Skip this if you’re avoiding raw eggs in the frosting.
Vanilla bean sugar cookies. Scrape the seeds from half a vanilla bean and add them to the dough instead of vanilla extract. You’ll see the tiny black specks throughout the cookies, and the flavor is more floral and intense. This is a lovely option if you want to impress people.
Brown sugar version. Replace half of the granulated sugar with packed brown sugar. This creates a slightly softer, chewier cookie with more complex flavor. You might need to bake them an extra minute since brown sugar adds moisture.
Cinnamon cookies. Add 1 teaspoon of ground cinnamon to the flour mixture. Bake as usual, then top with cinnamon sugar while warm. This creates a warm spice flavor that’s perfect for autumn.
Cardamom cookies. Add ½ teaspoon of ground cardamom to the flour mixture for an exotic, slightly floral flavor. Pair with light frosting in neutral colors.
Dairy-free sugar cookies. Replace the butter with vegan butter (use a 1:1 ratio) and replace the egg with ¼ cup of unsweetened applesauce mixed with 1 tablespoon of cornstarch. The texture will be slightly softer but still delicious.
Gluten-free sugar cookies. Replace the all-purpose flour with a high-quality gluten-free flour blend that includes xanthan gum (or add ½ teaspoon of xanthan gum to a regular gluten-free blend). The dough will be slightly more fragile, so handle it gently and make sure it’s well-chilled before cutting.
Storage, Make-Ahead, and Freezing
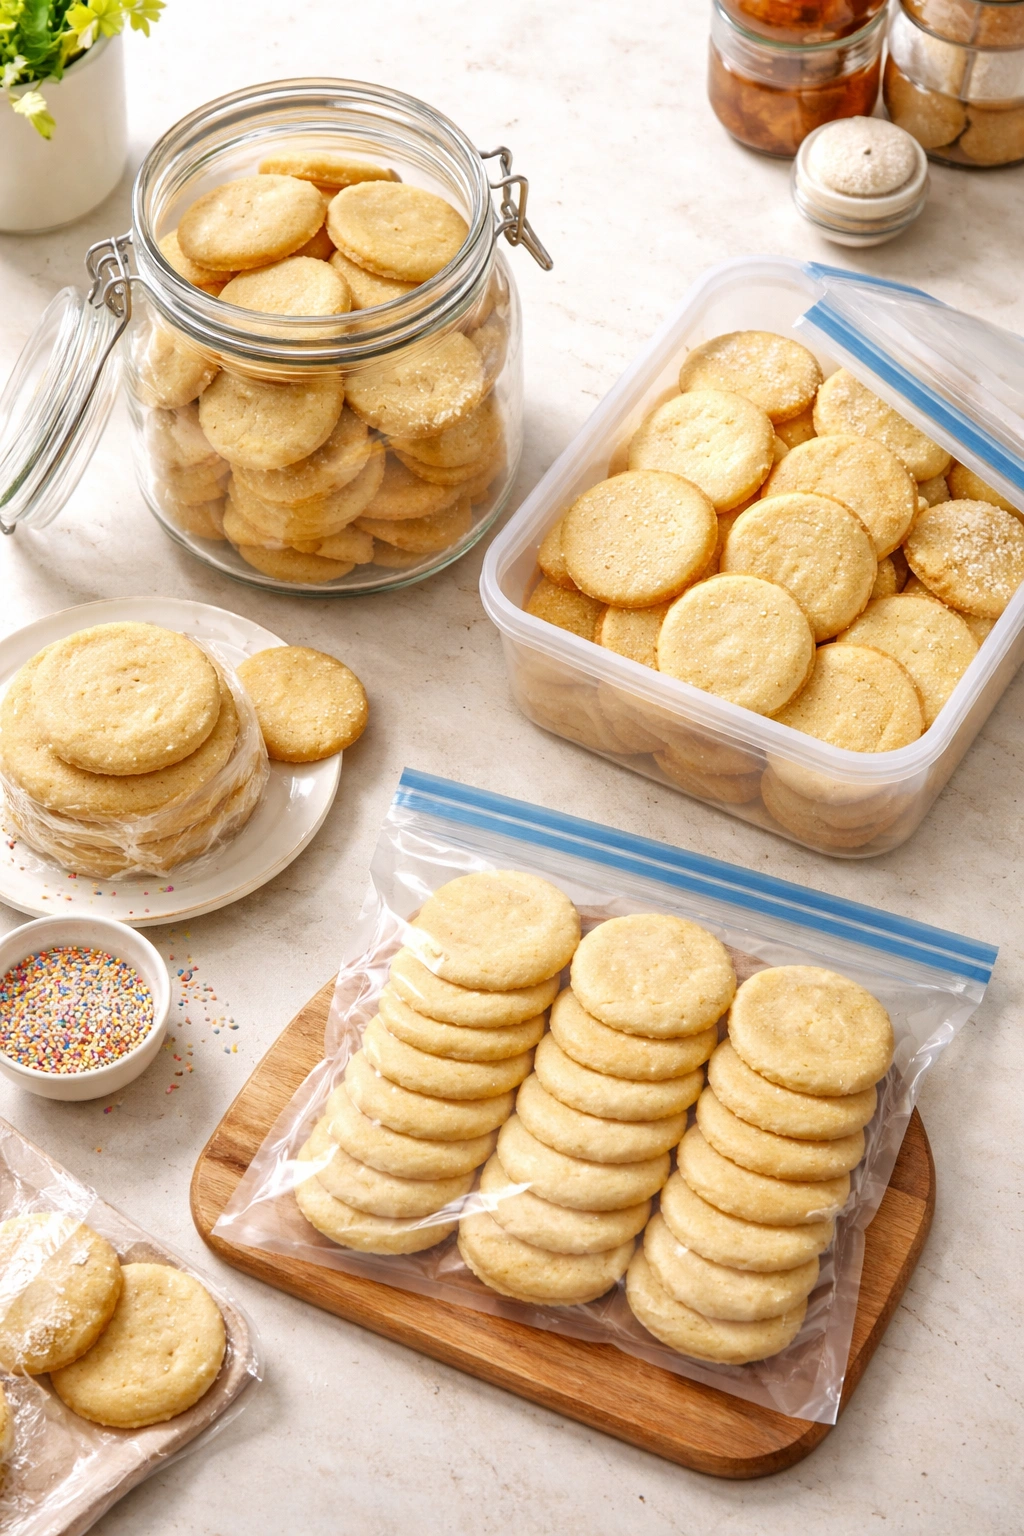
Room temperature storage. Baked sugar cookies stay fresh and soft at room temperature for 4 to 5 days when stored in an airtight container. Keep the container sealed — exposure to air dries them out quickly. If your cookies do go a bit stale, place a slice of bread or a piece of apple in the container for a few hours, and the cookies will absorb moisture and soften again.
Refrigerator storage. If you want cookies to last longer, store them in an airtight container in the fridge, where they’ll keep for up to 2 weeks. Cold storage slows the staling process.
Freezing baked cookies. Completely cooled, undecorated cookies freeze beautifully for up to 3 months in an airtight container or freezer bag. Thaw them at room temperature for about 30 minutes before serving. Decorated cookies with frosting or royal icing also freeze well, but the frosting can sometimes get slightly fragile during freezing and thawing. Pack them very carefully to prevent damage.
Freezing cookie dough. You can freeze the dough in several ways. Wrap the entire dough disk in plastic wrap and foil, and freeze for up to 3 months — thaw slightly (about 20 minutes at room temperature) before rolling and cutting. Or, cut the dough into shapes, lay the cut cookies on a baking sheet and freeze for 2 hours, then transfer to a freezer bag. You can bake these directly from frozen, though they might take 1 to 2 minutes longer.
Make-ahead strategy. Here’s a workflow that many cookie bakers use: Make the dough 1 to 2 days in advance, chill overnight. The next day, roll, cut, and freeze the shaped cookies. Then, on the day you want fresh cookies, bake them straight from frozen. This method gives you just-baked cookies with minimal last-minute effort.
Decorated cookies as gifts. If you’re giving decorated cookies as gifts, pack them in a single layer separated by parchment paper inside an airtight container. Soft cookies and hard cookies shouldn’t be stored together — the soft ones will absorb moisture and the hard ones will eventually soften, creating an inconsistent texture. Decorated cookies keep their appearance better if you wait to frost or ice them as close to serving as possible.
Serving Suggestions and Perfect Pairings
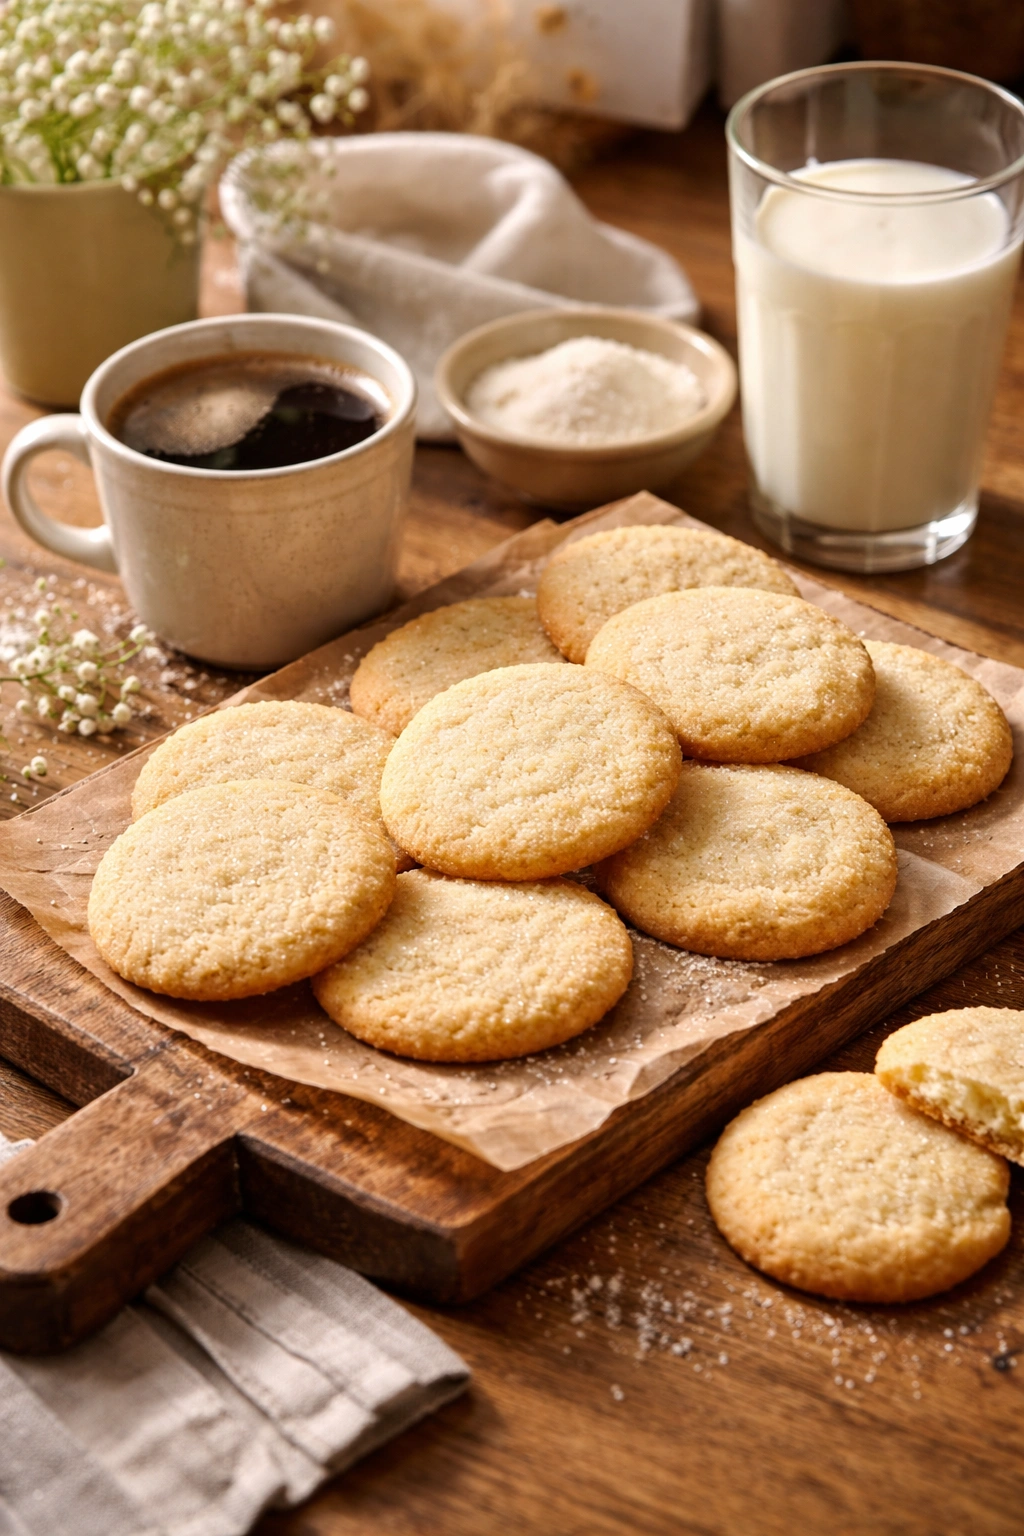
With coffee or tea. Sugar cookies are the classic companion to morning or afternoon coffee. The sweetness of the cookie and the slight bitterness of coffee balance each other beautifully. With tea, sugar cookies work especially well alongside lighter teas like chamomile, white tea, or Earl Grey.
With milk (the classic approach). There’s a reason sugar cookies and cold milk are a traditional pairing. Dunk a cookie halfway into cold milk for a few seconds — the outer edge gets soft while the inside stays structurally sound. It’s comfort in two items.
As part of a dessert spread. At parties, brunches, or casual gatherings, sugar cookies are perfect alongside other desserts. They’re not so rich that people can’t eat multiple cookies, and they work well next to cakes, brownies, or fruit-based desserts.
For holiday gift-giving. Decorated sugar cookies in festive shapes and colors are some of the most appreciated homemade gifts. Pack them in a nice box or container, and you’ve given something that took effort, tastes delicious, and shows genuine care.
For cookie swaps. Many communities have cookie swaps where people bake and exchange cookies. Sugar cookies are ideal for this because they’re universally loved, transport well, and freeze beautifully.
With cocktails or punch at parties. A simple sugar cookie or a decorated version is an elegant pairing with punch, sparkling wine, or other celebratory drinks.
Troubleshooting Issues With Your Sugar Cookies
Cookies spread too thin. The dough was probably too warm when you baked it, or the oven temperature might be running low. Make sure the dough is well-chilled (30 minutes to 2 hours) before baking. If cookies spread excessively, chill the cut cookies on the baking sheet in the freezer for 10 minutes before baking. Also, check your oven temperature with an oven thermometer — many home ovens run 25 degrees cooler than the dial indicates.
Cookies come out cakey and dry. You likely overmixed the dough or packed the flour when measuring. Overmixing develops gluten, which creates a tougher, drier texture. Next time, stop mixing as soon as the flour disappears. If measuring flour, spoon and level rather than pack. Also, make sure you’re not baking them too long — they should come out with pale centers.
Cookies are hard and brittle. You probably baked them too long, either in the oven initially or because you let them sit on the hot pan too long. Remember that cookies continue to bake from residual heat for a minute or two after you remove them. Take them out when the edges are golden but the centers still look slightly underbaked.
Cookies are too salty. Double-check the salt measurement — this recipe calls for ½ teaspoon. If you accidentally added a teaspoon, that would make them noticeably salty. Next batch, measure carefully using the spoon-and-level method.
Cookies didn’t rise at all. Your baking soda or baking powder might be old and inactive. Leavening agents lose potency over time. Buy a fresh box and try again. Also, make sure your dough isn’t too warm when it goes into the oven.
Cookies spread unevenly on the baking sheet. This usually indicates uneven oven temperature or hot spots. Use an oven thermometer to verify your temperature, and rotate the baking sheets halfway through baking so all cookies bake evenly. If you have a convection oven, make sure you’re not using convection for these cookies — convection can dry them out and cause uneven browning.
Frosting or icing won’t stick to the cookies. Make sure the cookies are completely cool before decorating. Warm cookies will melt frosting. If you’re using royal icing, make sure it’s the right consistency — it should be thick enough to hold shape but not so thick that it won’t flow slightly. Test on one cookie first.
Final Thoughts
Sugar cookies are one of those recipes that seems simple but rewards attention to detail. The ingredients are nothing fancy — butter, sugar, flour, egg, vanilla — but how you treat them makes all the difference. Room-temperature ingredients, not overmixing, proper chilling, and baking until the edges are golden but the centers are still pale — these small steps are what separate mediocre cookies from the kind that people actually want to eat.
What makes these cookies worth making repeatedly is the flexibility. You can bake a batch on Sunday and have fresh cookies for the entire week. You can make the dough ahead and bake cookies fresh whenever you want. You can keep them plain and simple or decorate them elaborately. You can twist the flavor profile in a dozen different directions. They’re appropriate for casual weekday snacking or fancy enough for special occasions.
Once you’ve made this recipe once and seen how straightforward it is, you’ll probably find yourself making it regularly. People will ask you how you have homemade cookies on hand, and you’ll realize it’s because you’ve figured out that they actually take less time and effort than you’d expect. That’s the real magic of a good sugar cookie recipe — it makes you look like a baker even if you’ve never been one before.