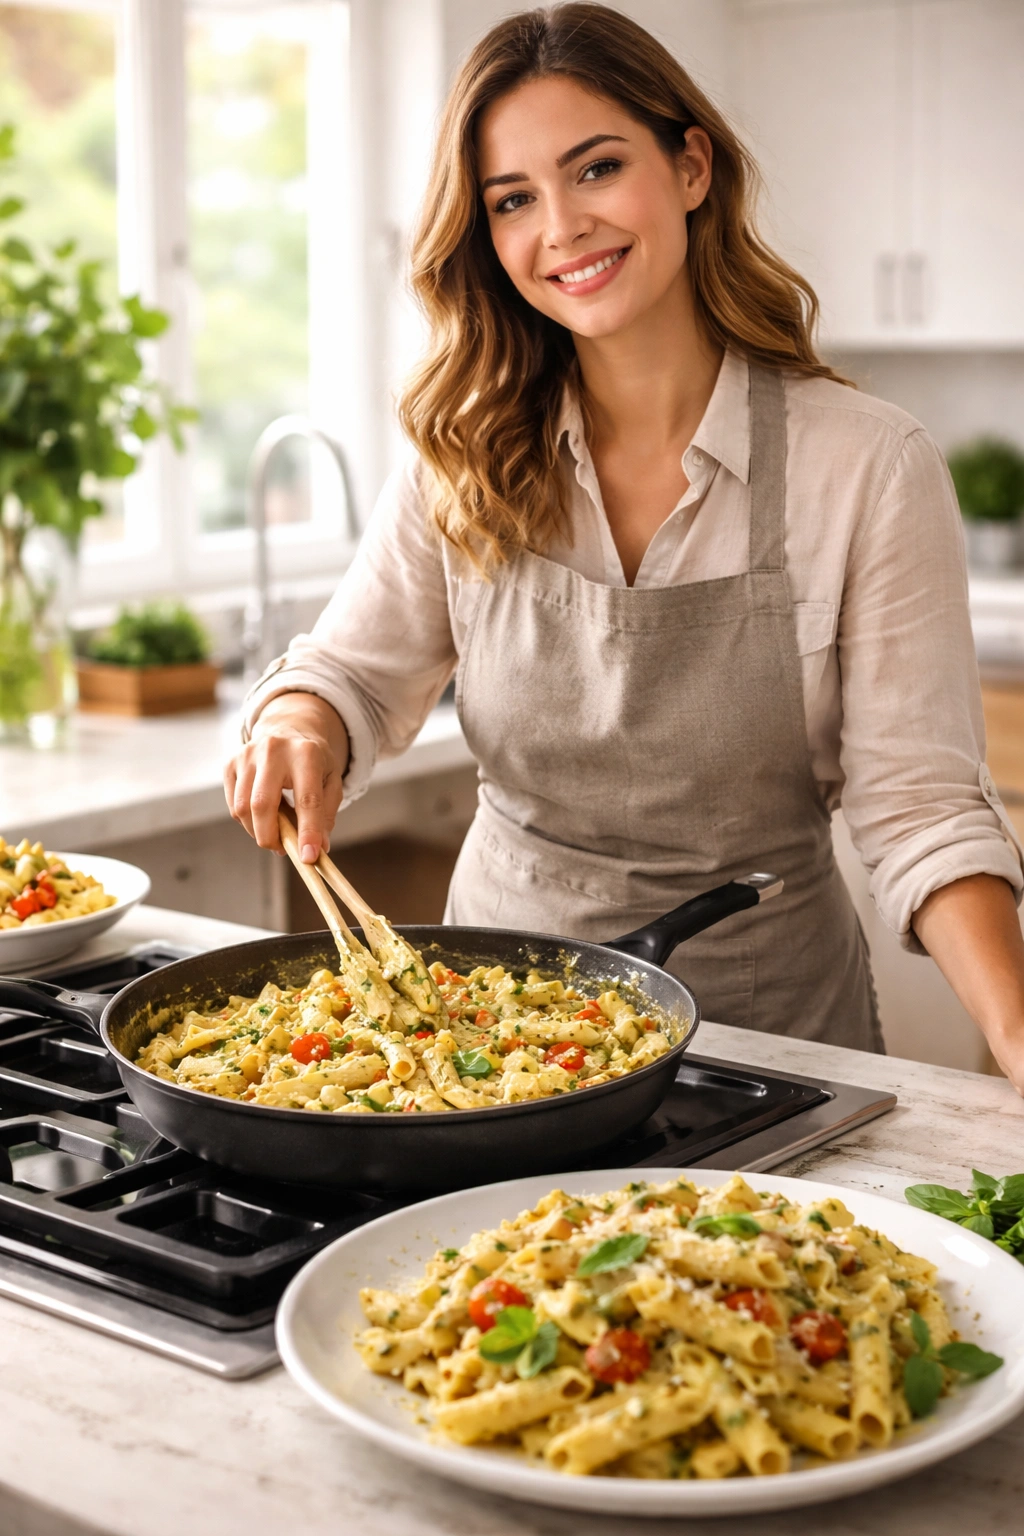
There’s something magical that happens when you bring together a skilled technique, the right ingredients, and just 20 minutes of your time. Creamy pesto chicken pasta has become the weeknight salvation for home cooks everywhere—not because it’s a shortcut that sacrifices quality, but because it genuinely tastes like something you’d order at a restaurant where someone spent hours perfecting the sauce. The difference is, you’re making it at home with minimal cleanup because everything happens in a single pan.
What makes this particular version work so beautifully is the method itself. Rather than cooking pasta in one pot, chicken in another, and sauce in a third, you’re layering flavors directly into one skillet. The chicken browns and builds a flavorful fond on the bottom of the pan. That fond becomes the foundation for your sauce. The pasta cooks directly in the broth, absorbing all that savory goodness as it softens. By the time everything comes together, you’ve created something cohesive and deeply flavored—not just a pile of ingredients mixed in a bowl.
This isn’t fancy cooking. It’s smart cooking. It’s understanding that constraints (limited time, one pan, simple ingredients) often force you to think more creatively and efficiently. And the results speak for themselves. You’ll find yourself making this dish repeatedly because it works, tastes incredible, and respects your evening.
Why One-Pan Meals Transform Weeknight Cooking

One-pan cooking isn’t trendy—it’s practical. When you consolidate your cooking into a single vessel, something interesting happens beyond just fewer dishes. The flavors actually intensify. As the chicken cooks and releases moisture, that liquid mingles with the butter and oil at the bottom of the pan. When you add garlic and tomatoes, they don’t just sit in their own little corner—they’re directly touching the surface where the chicken was browning. That’s where magic lives, in those browned bits called fond. Deglazing that pan with broth pulls all that concentrated flavor into your sauce.
The psychological benefit matters too. Standing over one pan feels manageable. You’re not dividing your attention between multiple cooking surfaces. You can actually pay attention to what’s happening, stir when it needs stirring, adjust the heat when necessary. This attention naturally results in better food.
The Architecture of Creamy Pesto Pasta Done Right
Understanding how this dish comes together step-by-step helps you internalize the technique so you can adapt it later. You’re not just following instructions; you’re learning why each step matters.
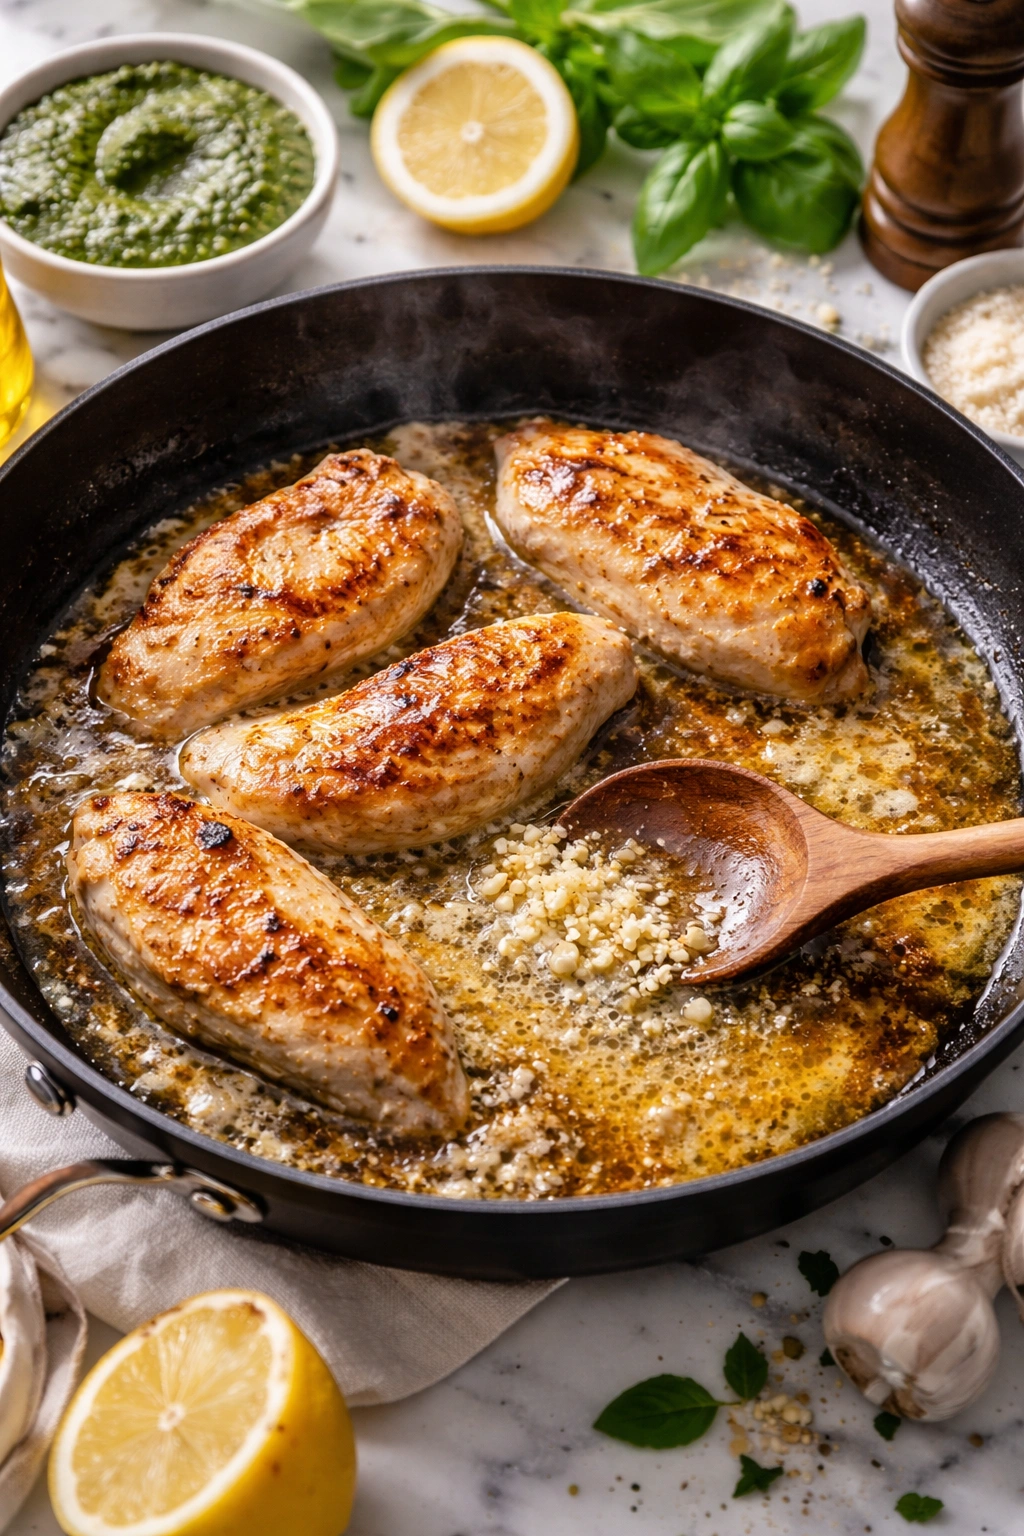
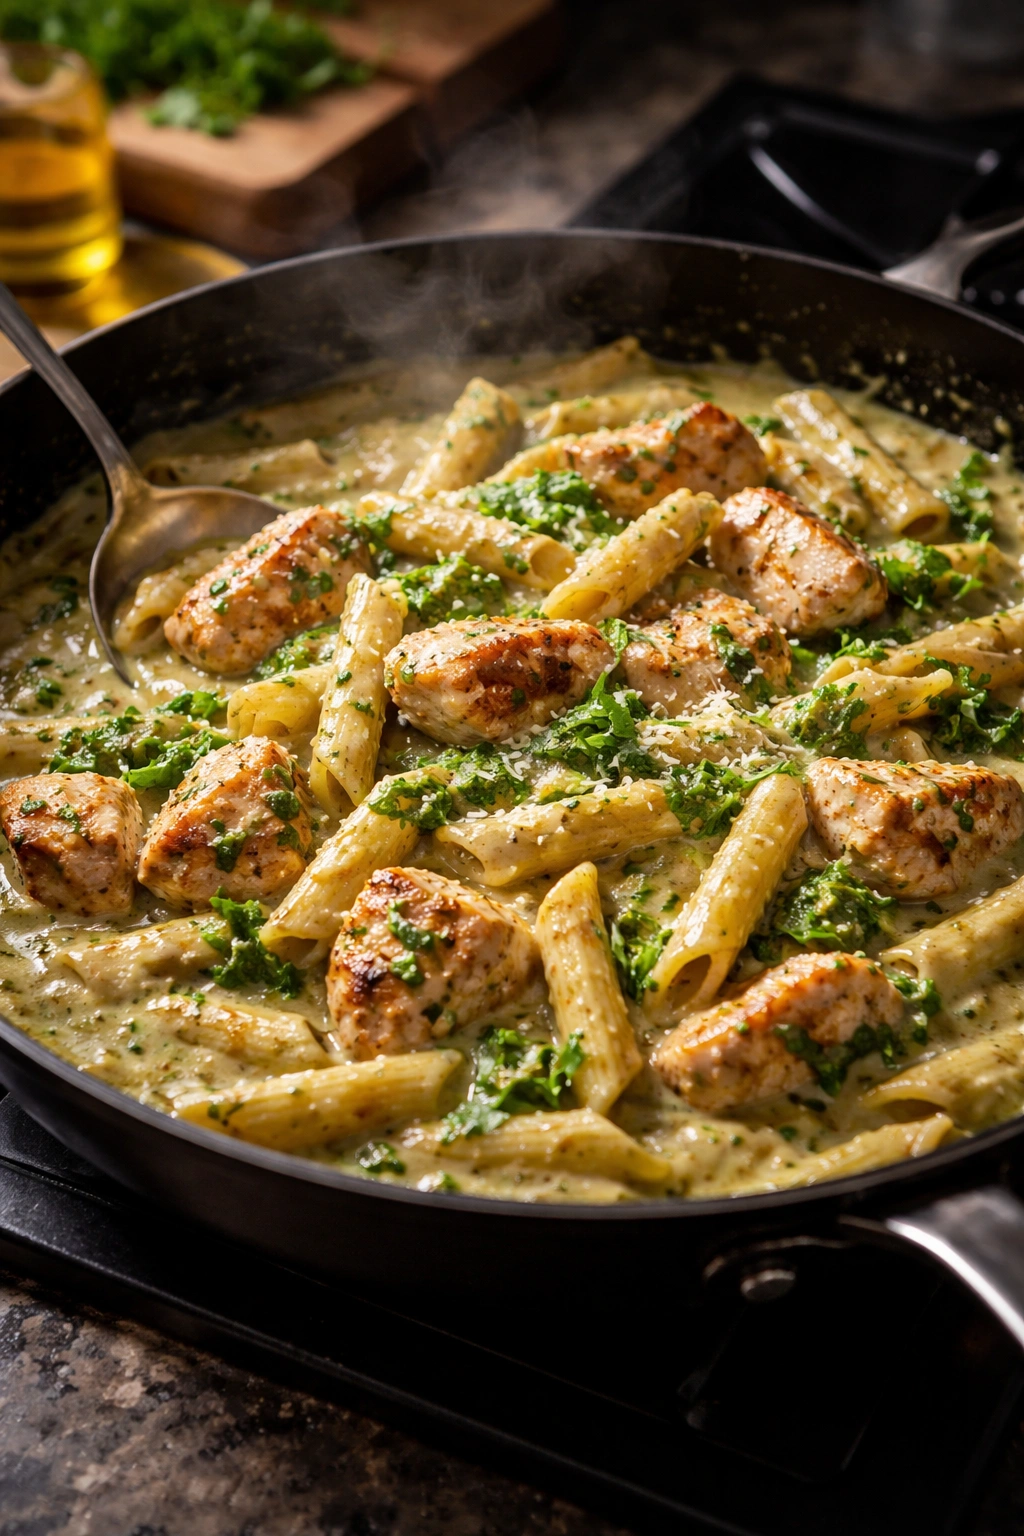
First comes the protein. You cut chicken breasts into bite-sized pieces—and yes, size matters here. Uniform pieces cook at the same rate, which means you avoid having some pieces dry and tough while others are still slightly pink. Those pieces brown in butter over medium-high heat. This is where you build your foundation. You’re not cooking the chicken through completely; you’re just developing color and texture on the outside. This takes about 5-6 minutes.
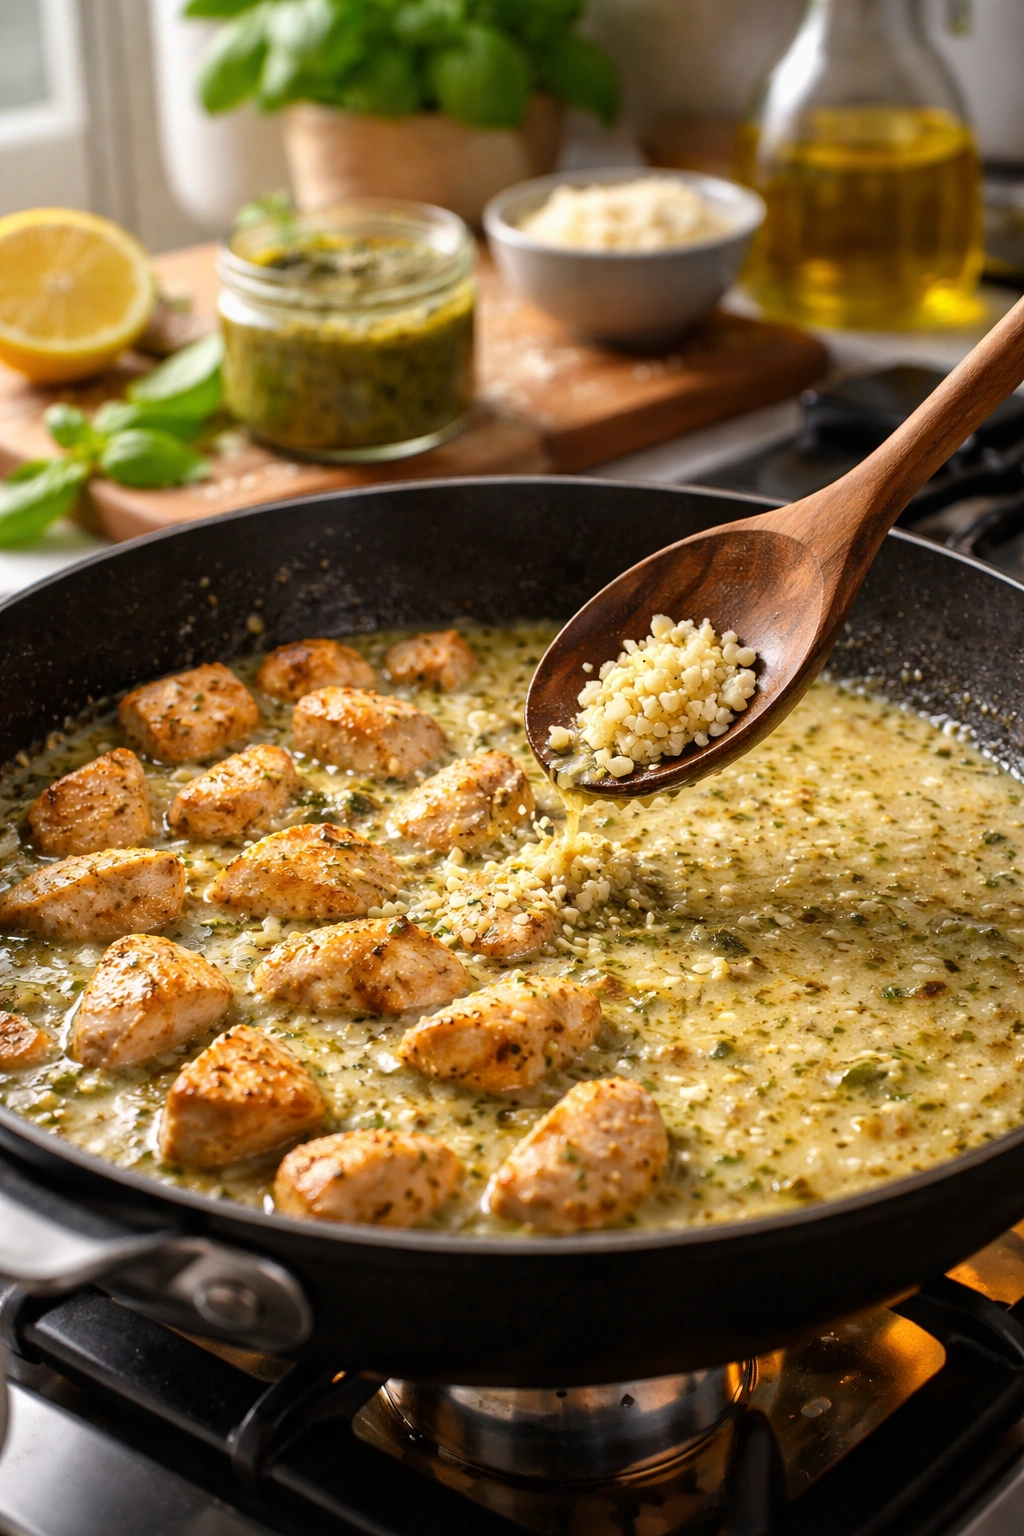
While the chicken develops color, you mince fresh garlic. Once the chicken has some color, that garlic goes into the same pan for just 60 seconds. Garlic can burn easily, and burnt garlic tastes acrid and unpleasant. That brief time is enough to release its aromatic compounds into the warm oil without crossing over into burnt territory.
Next, you add uncooked pasta directly to the pan along with chicken broth. This is the counterintuitive move that makes the whole method work. You’re not adding enough liquid to cover the pasta like traditional pasta cooking. You’re adding just enough that it will absorb slowly as the pasta softens, creating a shallow braise situation. The lid goes on. The heat climbs to medium-high until the broth boils vigorously, then immediately drops to medium-low for a gentle simmer.
For about 8 minutes, you stir every couple of minutes. This frequent stirring prevents the pasta from sticking to the bottom and ensures even cooking. You’ll watch the broth gradually absorb into the pasta. When there’s just a tiny bit of liquid left and the pasta is tender, that’s your signal to move to the creamy component.
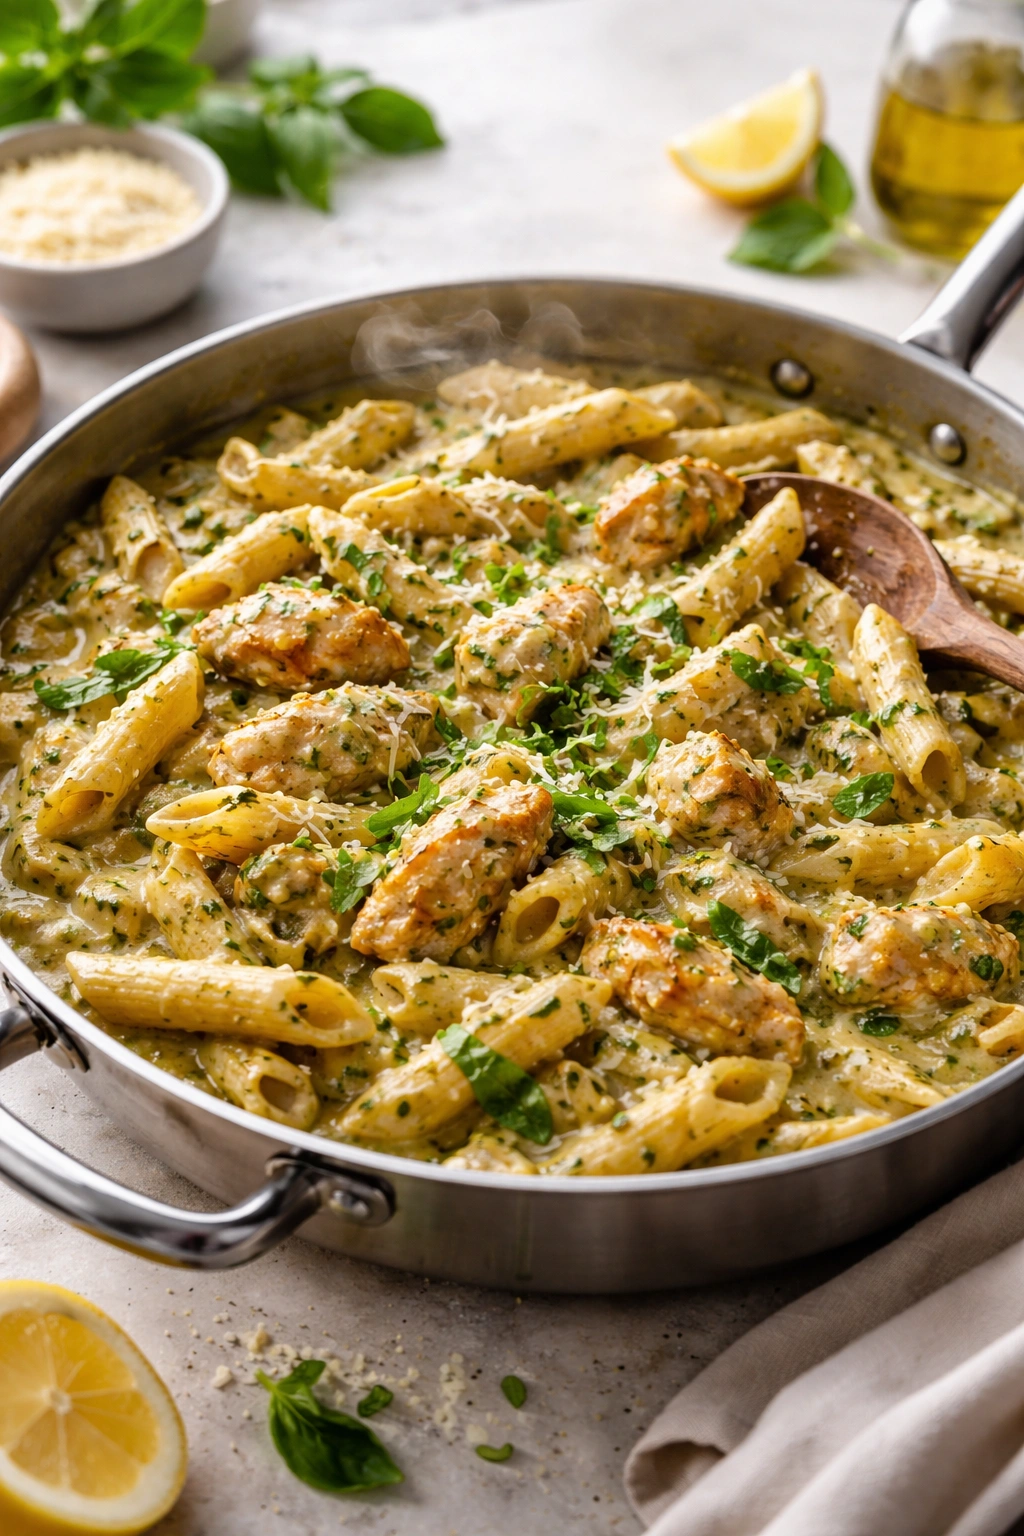
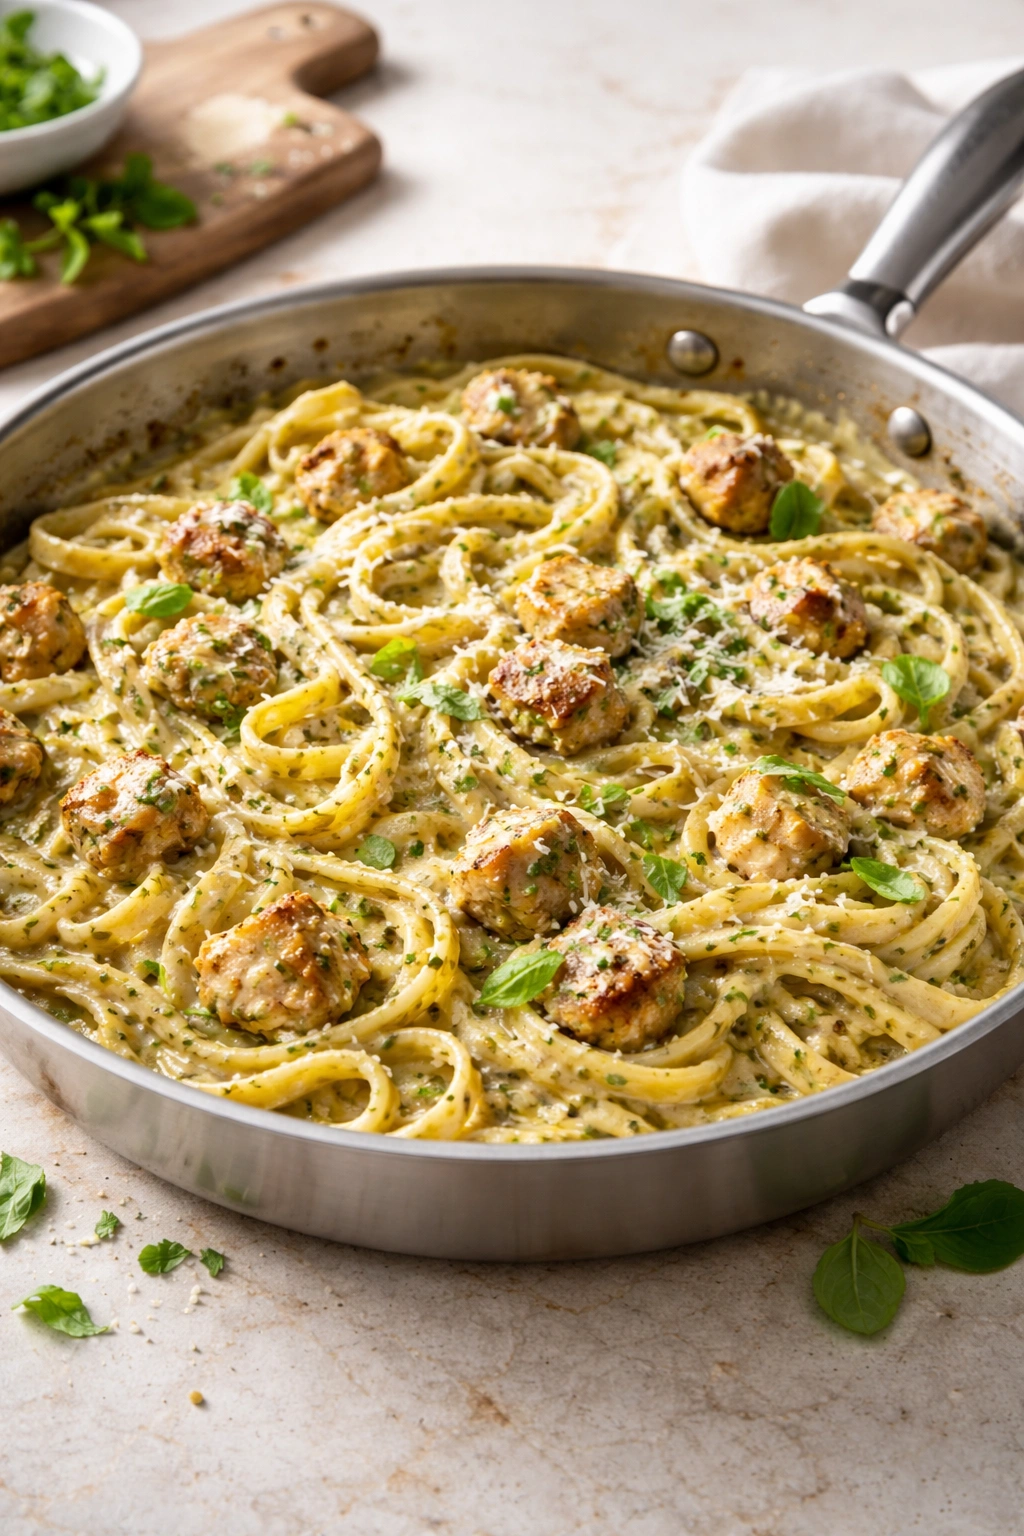
Milk and cream cheese go in next—not heavy cream alone, which can break if the temperature swings too dramatically. The cream cheese acts as an emulsifier, helping everything stay silky and smooth. That’s followed by the pesto, which you stir in gently to preserve its bright green color. Grated Parmesan finishes it all off, adding that savory depth that makes you close your eyes and nod involuntarily.
The Power of Quality Pesto
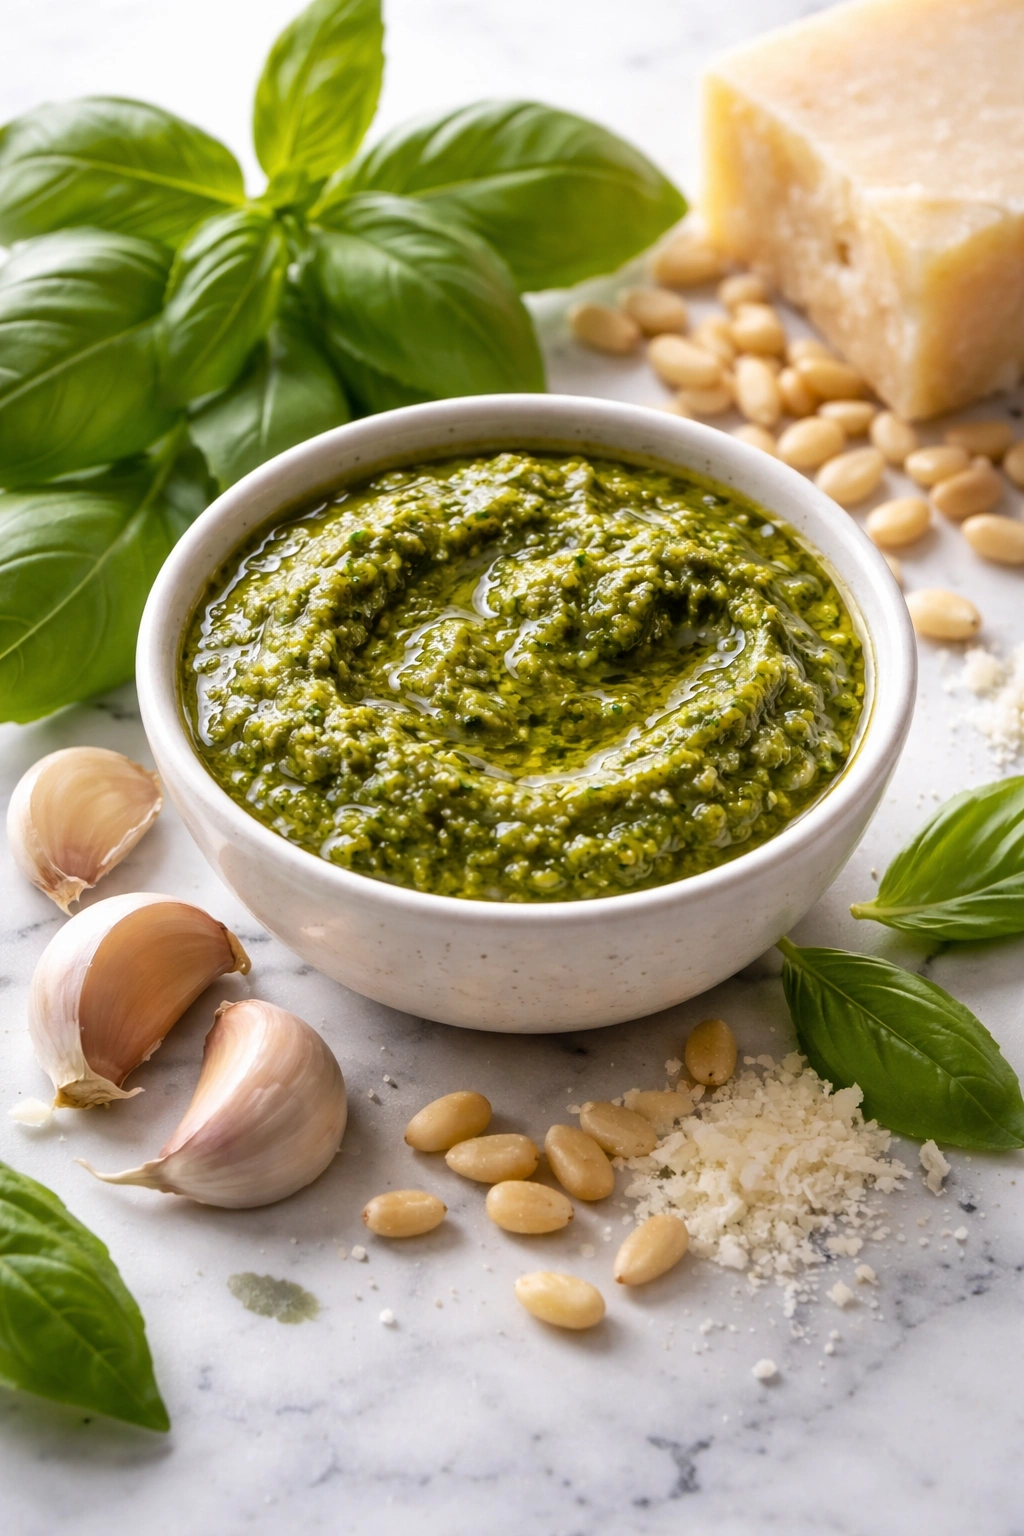
Pesto deserves its own discussion because it’s often the difference between “this is nice” and “this is incredible.” Store-bought pesto works fine—no judgment here. But the quality varies wildly between brands. Some grocery store pesto tastes thin and one-dimensional. Others are vibrant, herbaceous, and seem to contain actual basil rather than basil flavor.
If you have 10 minutes, homemade pesto is transformative. You need fresh basil leaves (not the woody stems), garlic, pine nuts, Parmesan cheese, high-quality olive oil, and salt. A food processor pulses these together into something aromatic and fresh. You can’t get that from a shelf-stable jar—the basil oxidizes over time, and the color browns. But if you’re grabbing what’s available, look for brands that list basil as the first ingredient, keep their pesto refrigerated in the store, and taste okay straight from the jar.
One trick that works beautifully: if you’re using store-bought pesto in this pasta, add a small handful of fresh basil leaves as a garnish right before serving. That fresh basil on top reminds your palate what basil really tastes like, and it brightens up the whole bowl. It takes 5 seconds and costs almost nothing.
Why This Timing Actually Works
The 20-minute claim isn’t marketing. It’s legitimate, assuming you’ve done a tiny bit of prep before the heat comes on. Here’s how the timeline actually shakes out:
Getting ingredients prepped—cutting chicken, mincing garlic, measuring pesto and broth—takes about 5 minutes if you’re organized. This is all done before you turn on the stove. Browning the chicken takes 5-6 minutes. Adding garlic and aromatics, then the pasta and broth, and bringing it to a boil takes maybe 2 minutes. The simmering phase where pasta actually cooks is about 8 minutes. The final step of stirring in cream, pesto, and Parmesan takes maybe 2 minutes. Total time from heat coming on to having food on the table: approximately 18-20 minutes.
The thing about cooking timing is that it compresses when you’re not panicking. Panic makes you move slowly and second-guess yourself. Confidence makes you move efficiently. Once you’ve made this dish two or three times, that 20-minute window feels natural. The first time, you might hit 25-27 minutes, which is still genuinely quick for something this delicious.
Building Layers of Flavor in a Minimal Time Frame
Traditional restaurant cooking builds flavor through long simmer times—letting flavors marry, developing depth through reduction. You don’t have that luxury in 20 minutes. So you compensate through intensity. Everything you add should be flavorful on its own.
The butter you use matters. Real butter carries fat-soluble flavor compounds that oil alone doesn’t. When you brown chicken in butter, those nutty notes from the browned milk solids become part of your foundational flavor. Use good butter. It’s not expensive, and the difference is noticeable.
The garlic should be fresh and minced fine, not pre-minced from a jar. Fresh garlic has a sharpness and pungency that jarred garlic has already lost. That sharpness is crucial in a quick dish because it reads as brightness and freshness even though you’ve done minimal work.
The pesto, as discussed, should be vibrant and herbaceous. The basil should taste like basil, not like a faint memory of basil.
The chicken broth shouldn’t be watered down or underseasoned. Low-sodium broth is fine—actually preferable since you’re adding salty Parmesan and pesto—but it should still taste distinctly of chicken. Taste it before you add it to your pan. If it tastes like warm water, your finished dish will suffer. You can’t make great pasta from mediocre broth.
The cream components—milk and cream cheese—should be quality. Real milk, not a substitute. Real cream cheese, not whipped cream cheese, which has air incorporated and won’t emulsify the same way. These are cheap insurance against the sauce breaking or becoming grainy.
The One-Pan Technique: Why It Concentrates Flavor
When you cook pasta in a single pan with its cooking liquid, you’re creating an environment where starch, fat, and seasonings emulsify together. That starch from the pasta is key. As pasta cooks, it releases starch into the cooking liquid. When you add cream, that starch helps stabilize the emulsion and thicken the sauce naturally. You need far less cream than you’d think because the pasta itself contributes to the sauce’s body.
This is also why you can’t just substitute an alternative pasta without adjusting other components. Whole wheat pasta, gluten-free pasta, and specialty pastas all absorb liquid differently than semolina pasta. They may require different cooking times. They release different amounts of starch. If the recipe calls for these specific amounts of broth and cream, changing the pasta type might result in a sauce that’s either too thick or too loose.
The one-pan method also means you’re not rinsing pasta after draining, which would wash away that starch. You’re transferring it directly from the broth to where it’ll finish cooking in the cream sauce. That’s why the finished dish has a silky texture rather than a separated, oily sauce.
Cream Cheese as an Emulsifier: The Secret Ingredient
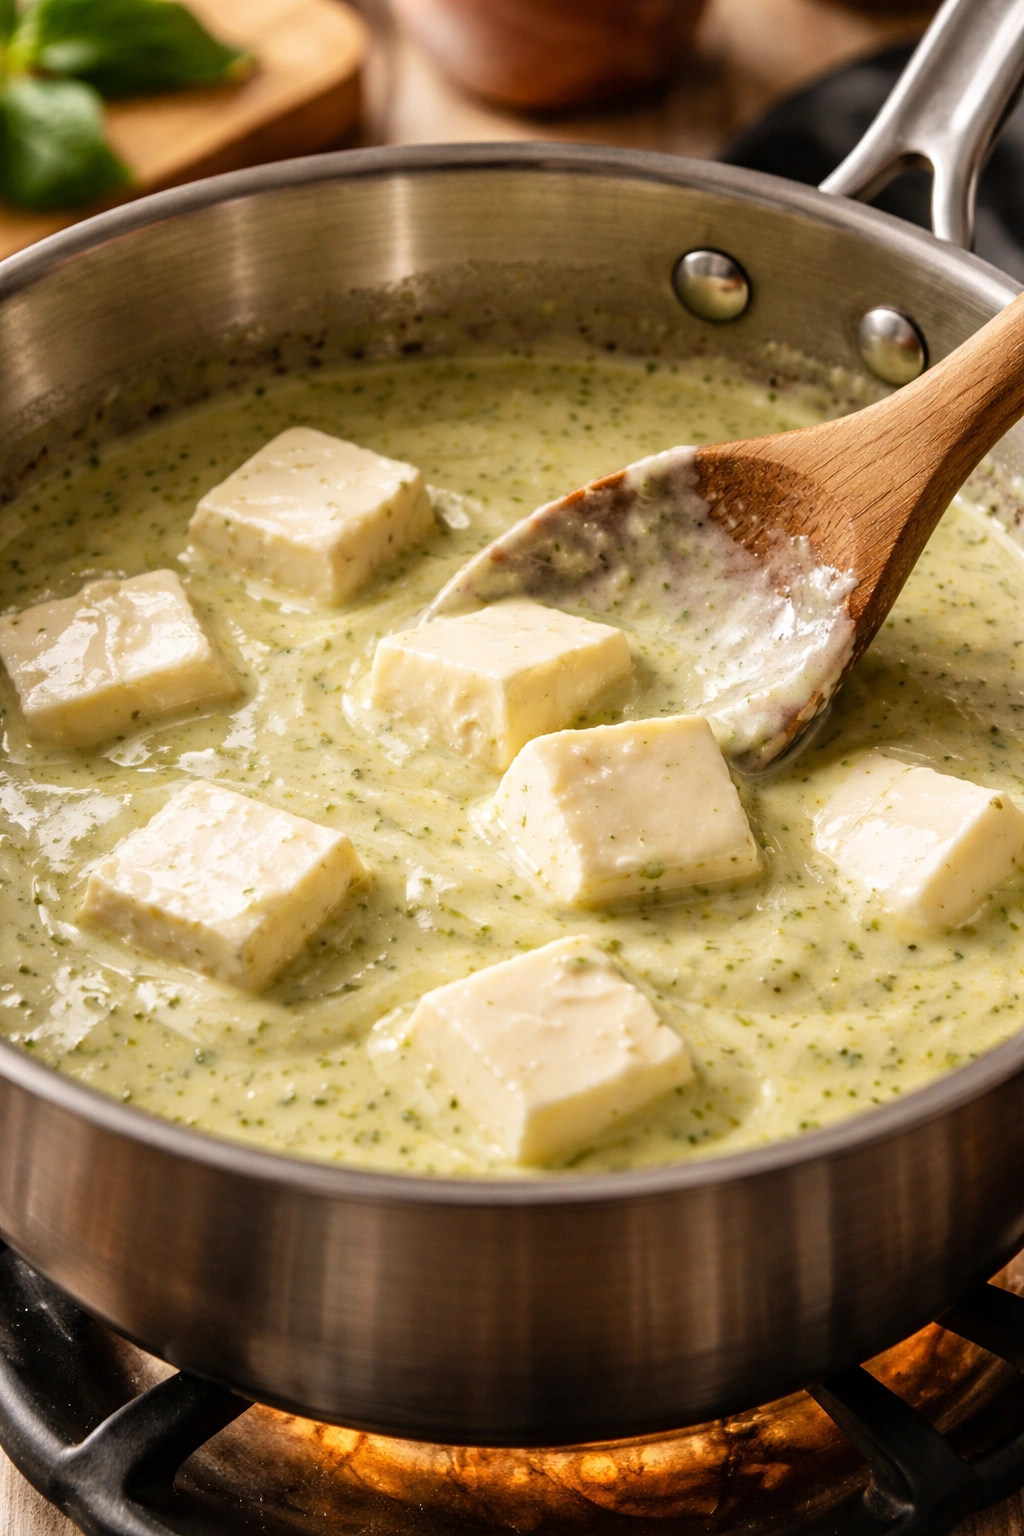
Many recipes suggest using heavy cream alone for creamy pasta sauces. Heavy cream works, but it requires careful temperature management because boiling cream breaks down the fat globules and causes curdling. Cream cheese—real cream cheese, which is about 33% fat and 55% water—acts as an emulsifier naturally.
When you add cream cheese to a warm sauce and stir, the heat softens it and the stirring incorporates it evenly. The dairy fats and proteins in cream cheese coat and stabilize fat droplets, preventing them from clumping together. This is why a cream cheese-based sauce stays smooth even if the temperature fluctuates a bit. It’s also why the sauce has a luxurious, silky mouthfeel without being heavy in the way a purely heavy-cream sauce can be.
Cutting the cream cheese into small chunks before adding it helps it melt and incorporate evenly. Don’t add it in one large block and expect it to magically dissolve. Chunks melt faster and distribute more uniformly.
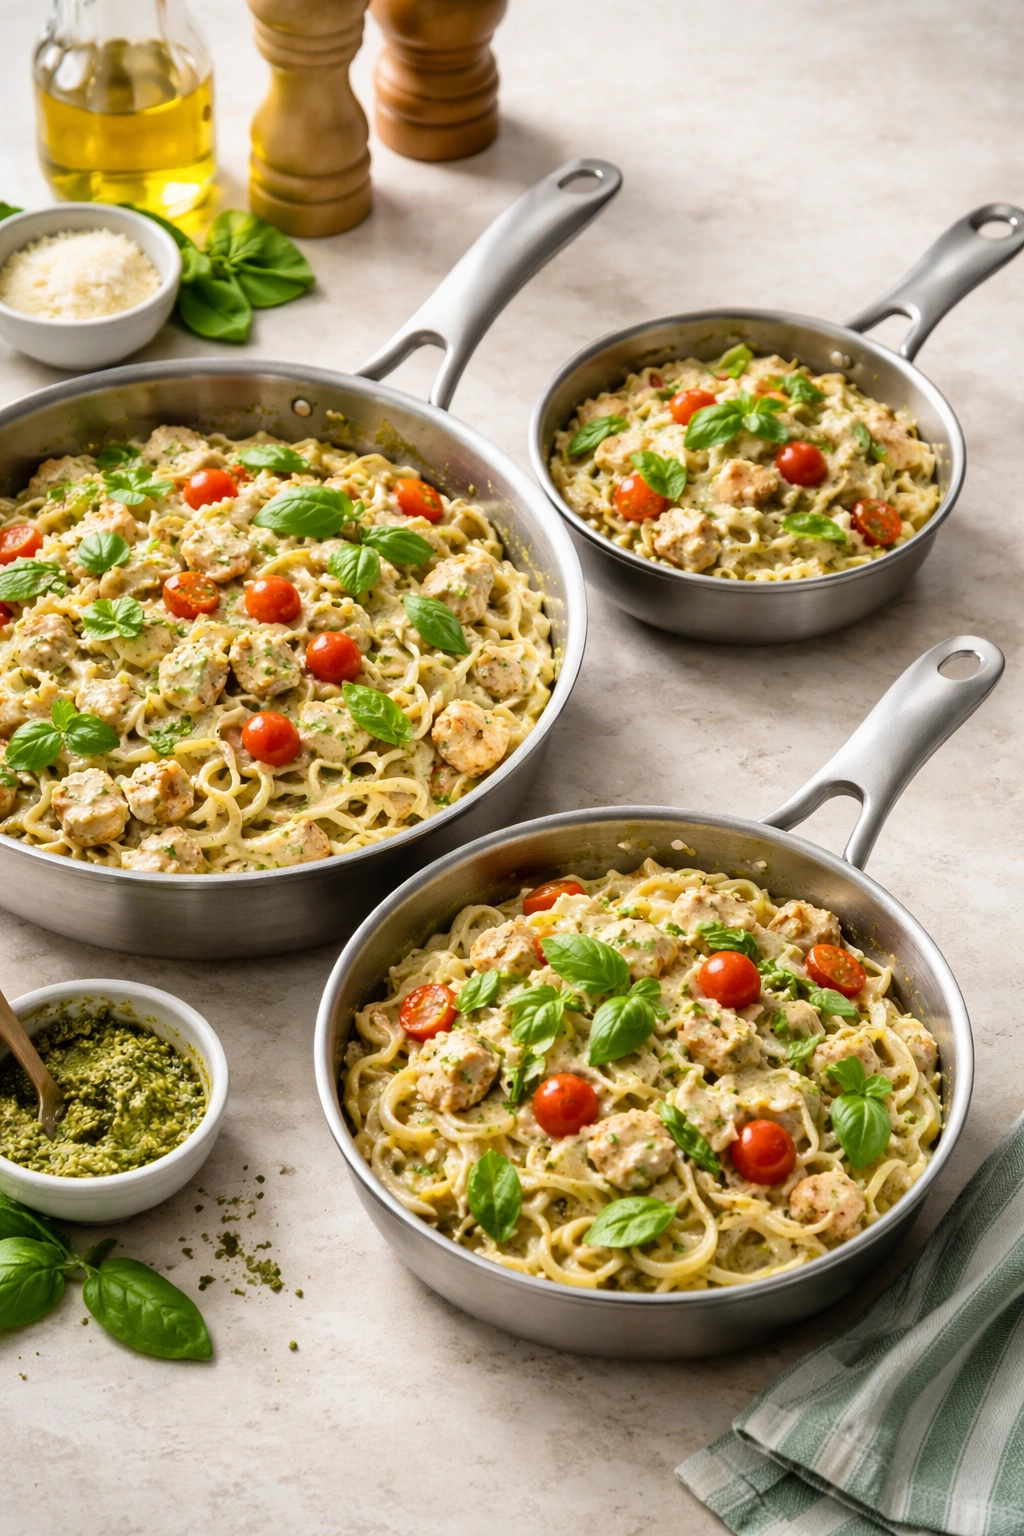
Variations: Making This Recipe Your Own
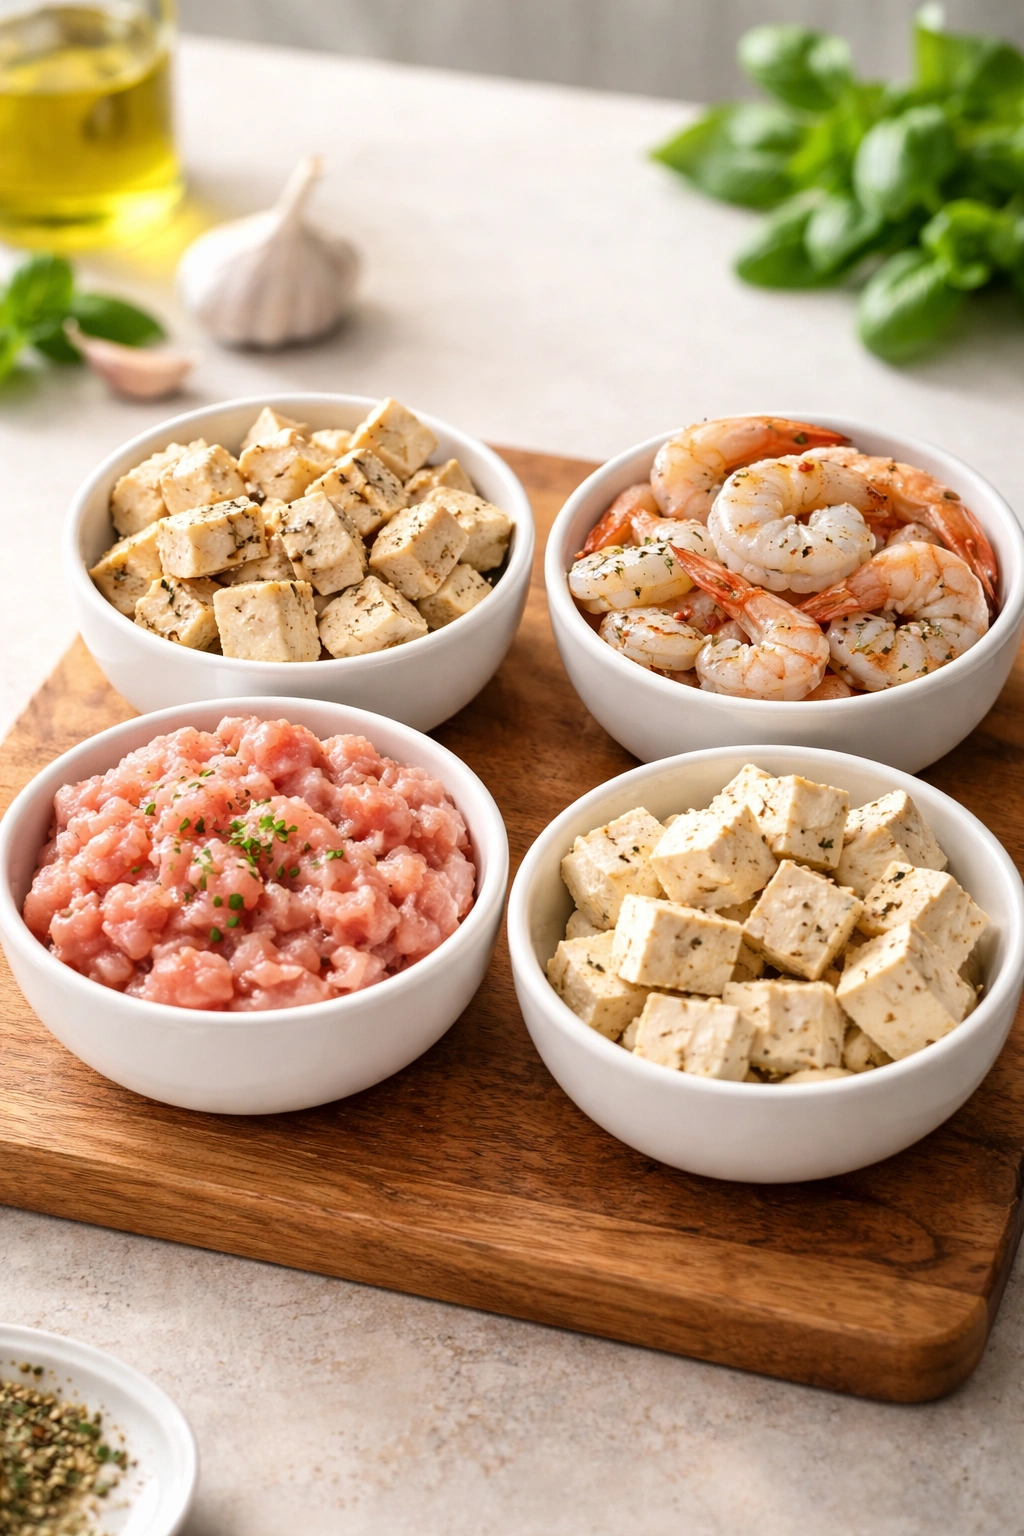
The beauty of this framework is how adaptable it is. You can swap the protein entirely. Shrimp cooks in about 3-4 minutes, so you’d reduce the initial cooking time. Turkey breast works. Even tofu, if you press it first and brown it well—it adds texture from the crispy exterior even if it doesn’t contribute its own flavor.
The vegetables are completely flexible. Spinach wilts right into the warm sauce at the end. Sun-dried tomatoes add sweetness and tang. Fresh broccoli can be blanched separately and stirred in. Mushrooms can sauté with the garlic and aromatics. Artichoke hearts add richness. Zucchini can be diced and cooked with the garlic. Red bell peppers bring sweetness. The only rule is that hard vegetables should be cooked before adding (blanched or sautéed), while tender vegetables can go in at the very end where they’ll wilt in the residual heat.
The pesto can be swapped too. Arugula pesto has a peppery kick. Cilantro pesto brings brightness and a different kind of herbal note. Sun-dried tomato pesto adds richness. Spinach pesto is slightly earthier. The sauce architecture stays the same; you’re just changing the flavor direction.
For a lighter version, you can reduce the cream cheese to 2 ounces and increase the milk to 1.5 cups, or use half-and-half instead of the cream cheese and milk combination. You’ll sacrifice a tiny bit of richness, but the pasta will still taste great. For a version with more body, add an extra ounce of cream cheese.
Storage and Make-Ahead Strategy

Creamy pasta is best eaten fresh. The sauce continues to thicken as it sits, and the pasta continues absorbing liquid. By the next day, you’ve got something that’s thicker and less creamy than the original.
That said, leftovers are real life. Store any remaining pasta in an airtight container in the refrigerator for up to 3 days. When you reheat it, do so gently over medium-low heat, adding a splash of milk or broth to loosen the sauce back to its original consistency. Stir frequently so it heats evenly without the bottom catching and burning.
Freezing creamy pasta is controversial. Cream-based sauces can separate or break when frozen and thawed. Some people swear you can do it; others say the texture suffers noticeably. If you’re going to freeze it, portion it into individual containers so you’re not repeatedly thawing and refreezing. Thaw in the refrigerator overnight, then reheat gently with added moisture.
A better make-ahead strategy: cook the components separately and assemble fresh. You can cook the pasta completely and keep it in an airtight container. You can cook and shred the chicken, storing it separately. You can even make the sauce base (the broth with garlic and sun-dried tomatoes) and keep that refrigerated. Then on a busy evening, you heat everything together and have a fresh-tasting pasta in 10 minutes instead of 20.
Serving Suggestions and Pairings
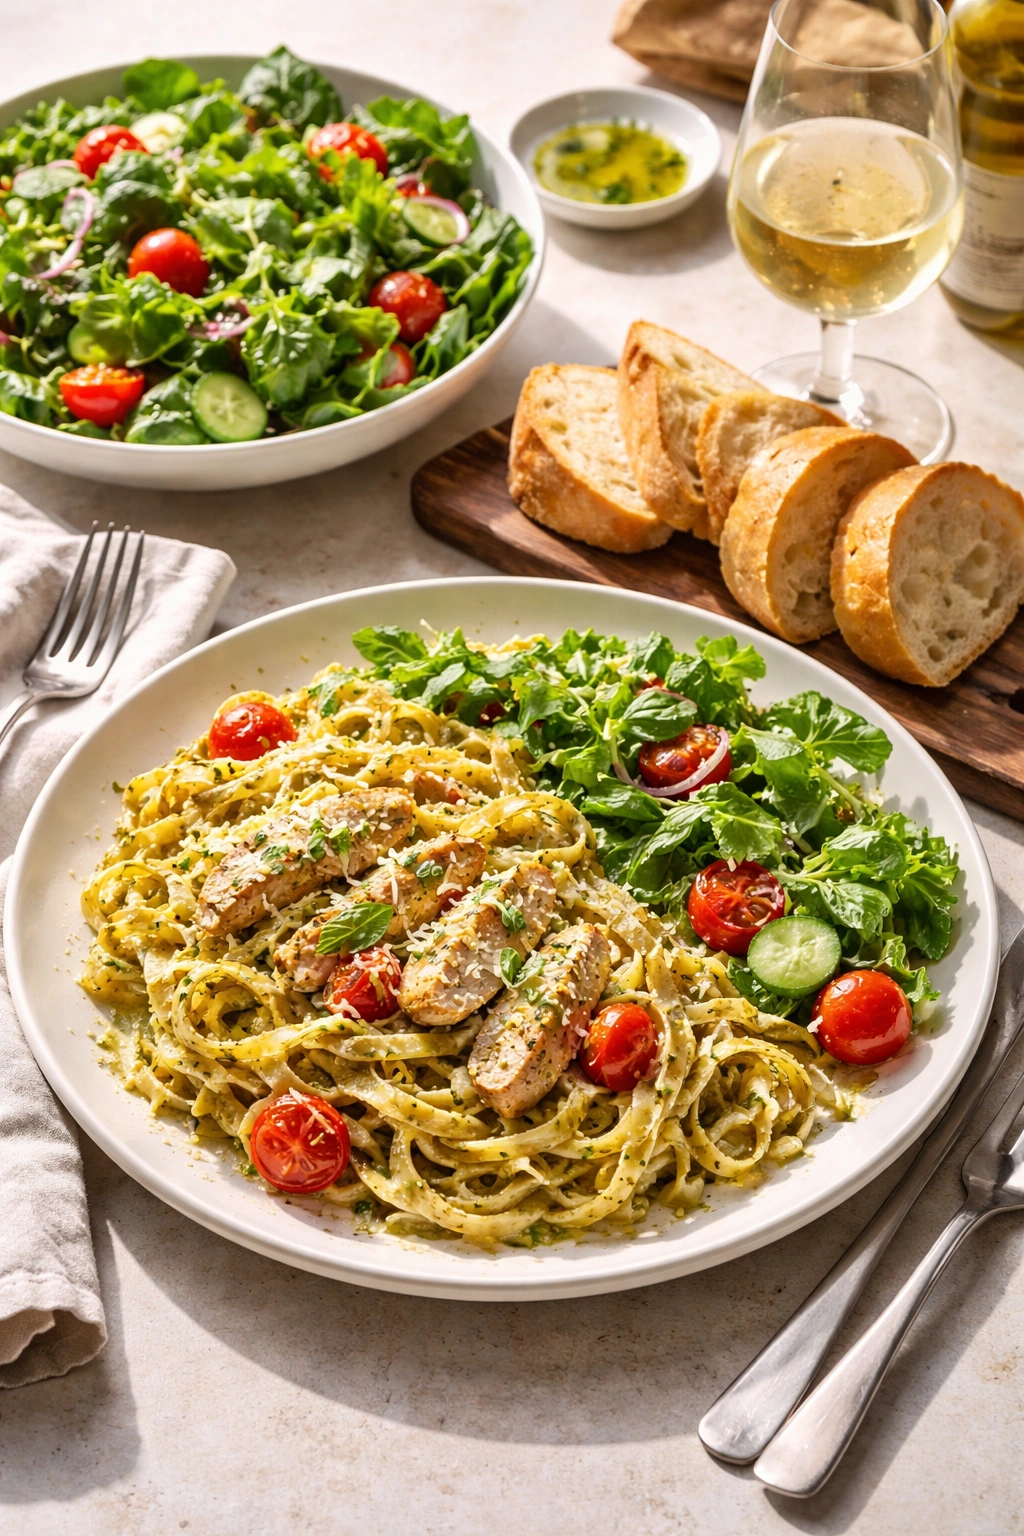
This pasta is substantial enough to be a complete meal. It has protein, starch, and if you add vegetables, produce. But the richness of the cream and cheese can make you feel like eating something bright and fresh alongside it.
A simple green salad dressed with lemon vinaigrette is classic for a reason. The acidity cuts through the richness. The bitterness of greens (if you use something like arugula or radicchio) provides contrast. A Caeser salad works too, though it’s more indulgent since you’re adding more cheese to an already creamy dish.
Garlic bread is never wrong. Slice a baguette lengthwise, brush it with olive oil infused with minced garlic and herbs, and toast it in the oven until golden. It’s perfect for soaking up any remaining sauce.
Roasted vegetables on the side can lighten the plate’s overall feel. Asparagus, green beans, broccoli, or Brussels sprouts roasted with olive oil and salt provide textural contrast and make you feel like you’re eating vegetables instead of just indulging.
A glass of white wine—Sauvignon Blanc, Pinot Grigio, or Vermentino—pairs beautifully. The acidity in the wine echoes the lemon notes that fresh basil can provide, and it’s a natural companion to pesto-forward dishes.
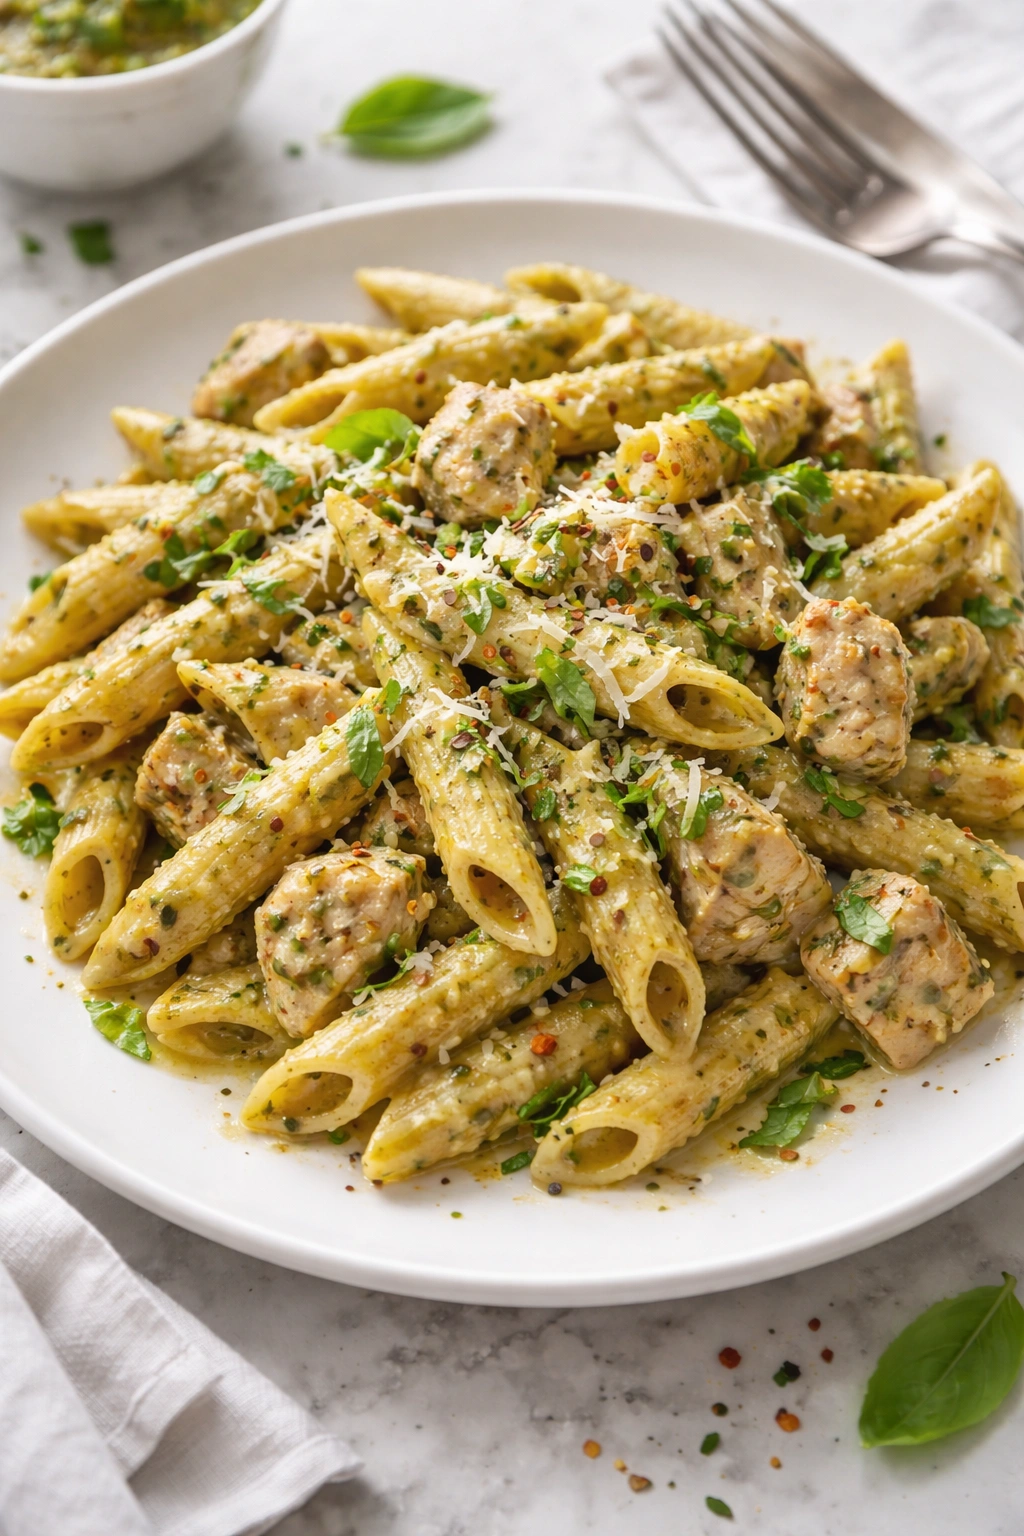
For a simple finish, serve the pasta in bowls rather than on plates. Top each serving with fresh cracked black pepper, a tiny pinch of red pepper flakes if you like heat, maybe a few torn basil leaves, and an extra grating of Parmesan. That little bit of effort transforms it from “weeknight dinner” to “I’m impressed I made this.”
Common Mistakes and How to Avoid Them
The most frequent error is adding the cream when the pan is too hot, causing the dairy to break. The solution is deliberately turning down the heat to medium-low before adding milk and cream cheese, stirring constantly, and staying patient. You don’t need the sauce to bubble vigorously. A gentle warmth is enough.
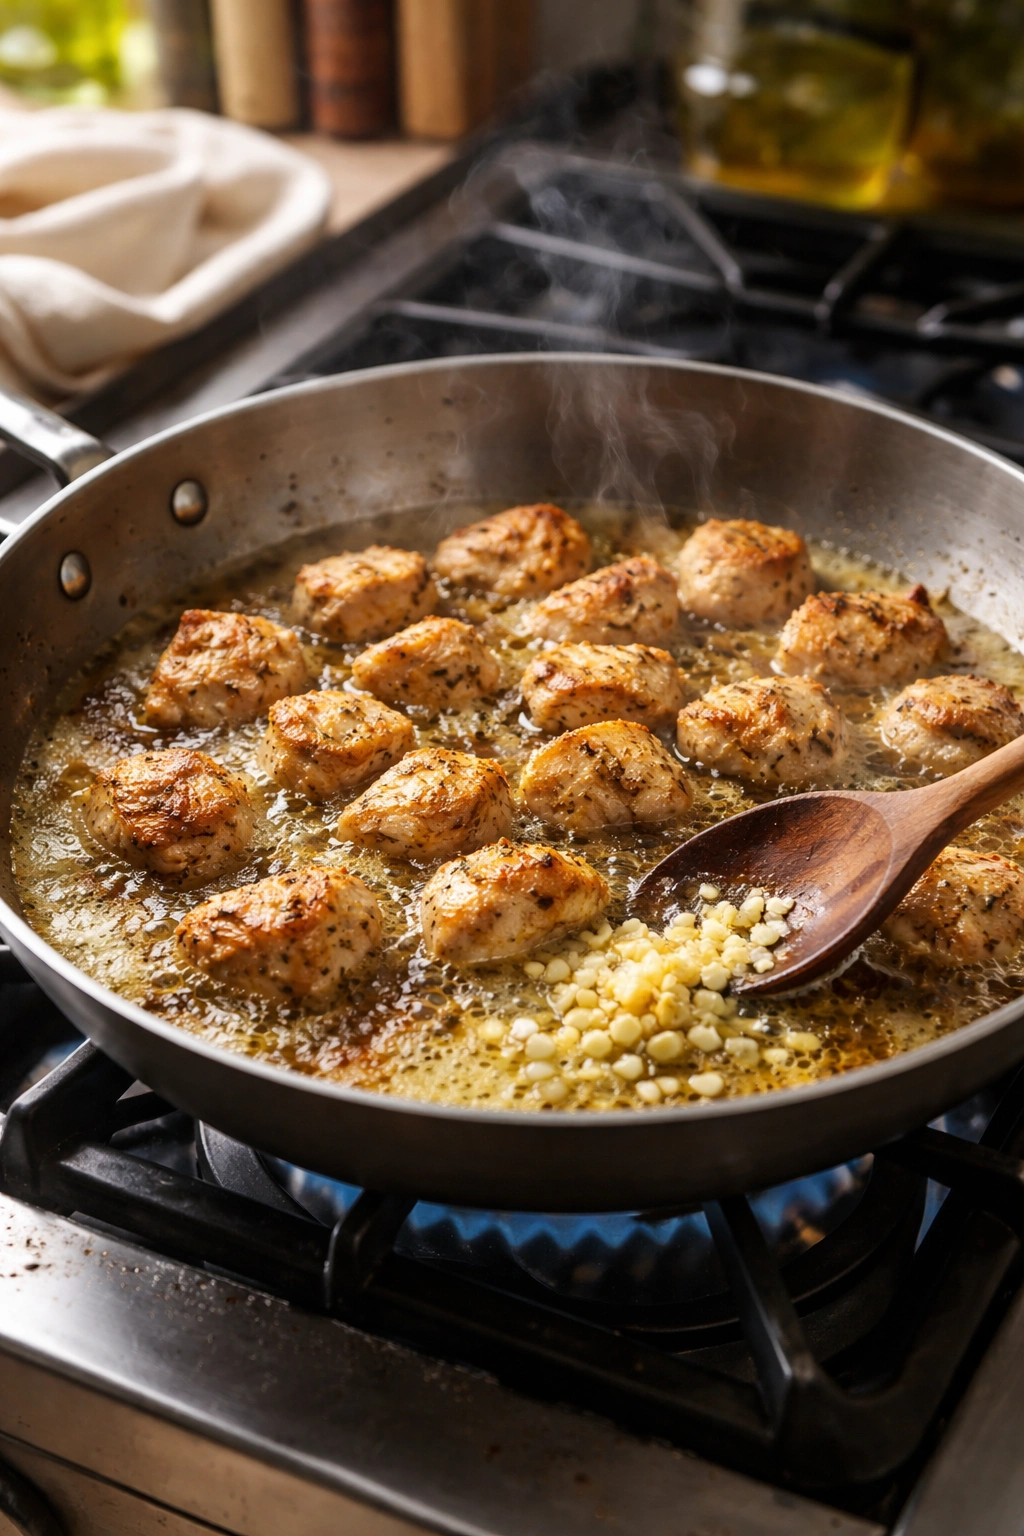
Another common issue is overcooking the chicken in the browning stage. You’re not trying to cook it through completely—just develop color. If you leave it in too long before adding the other ingredients, it continues cooking, and by the time the pasta is done, you’ve got dry chicken. Cut pieces into uniform sizes and watch carefully. Even browning should take 5-6 minutes, max.
People often don’t stir the pasta frequently enough while it’s simmering. The pasta wants to stick to the bottom of the pan, especially toward the end when most of the liquid has absorbed. Stir every couple of minutes. It takes 10 seconds and makes the difference between evenly cooked pasta and a burnt bottom.
Adding the pesto too early causes it to break down and turn a dull brownish-green instead of bright green. Always add it near the very end, right before or just after the Parmesan. It only needs to be stirred in until combined.
Using underseasoned broth, low-quality pesto, or skimping on the Parmesan results in a dish that tastes flat. You can’t make vibrant, full-flavored food from mediocre ingredients. These items are where you should splurge slightly.
Not reserving pasta water is a sneaky mistake. That starchy water is what adjusts the sauce consistency if it’s too thick. Keep a cup of it by the stove so you can add a splash if needed in those final minutes.
The Recipe: One-Pan Creamy Pesto Chicken Pasta
Yield: Serves 4 | 2-3 minutes prep, 20 minutes cooking
Prep Time: 5 minutes
Cook Time: 20 minutes
Total Time: 25 minutes
Difficulty: Beginner — no special equipment required, straightforward steps, and hard to mess up once you understand the method.
For the Pasta:
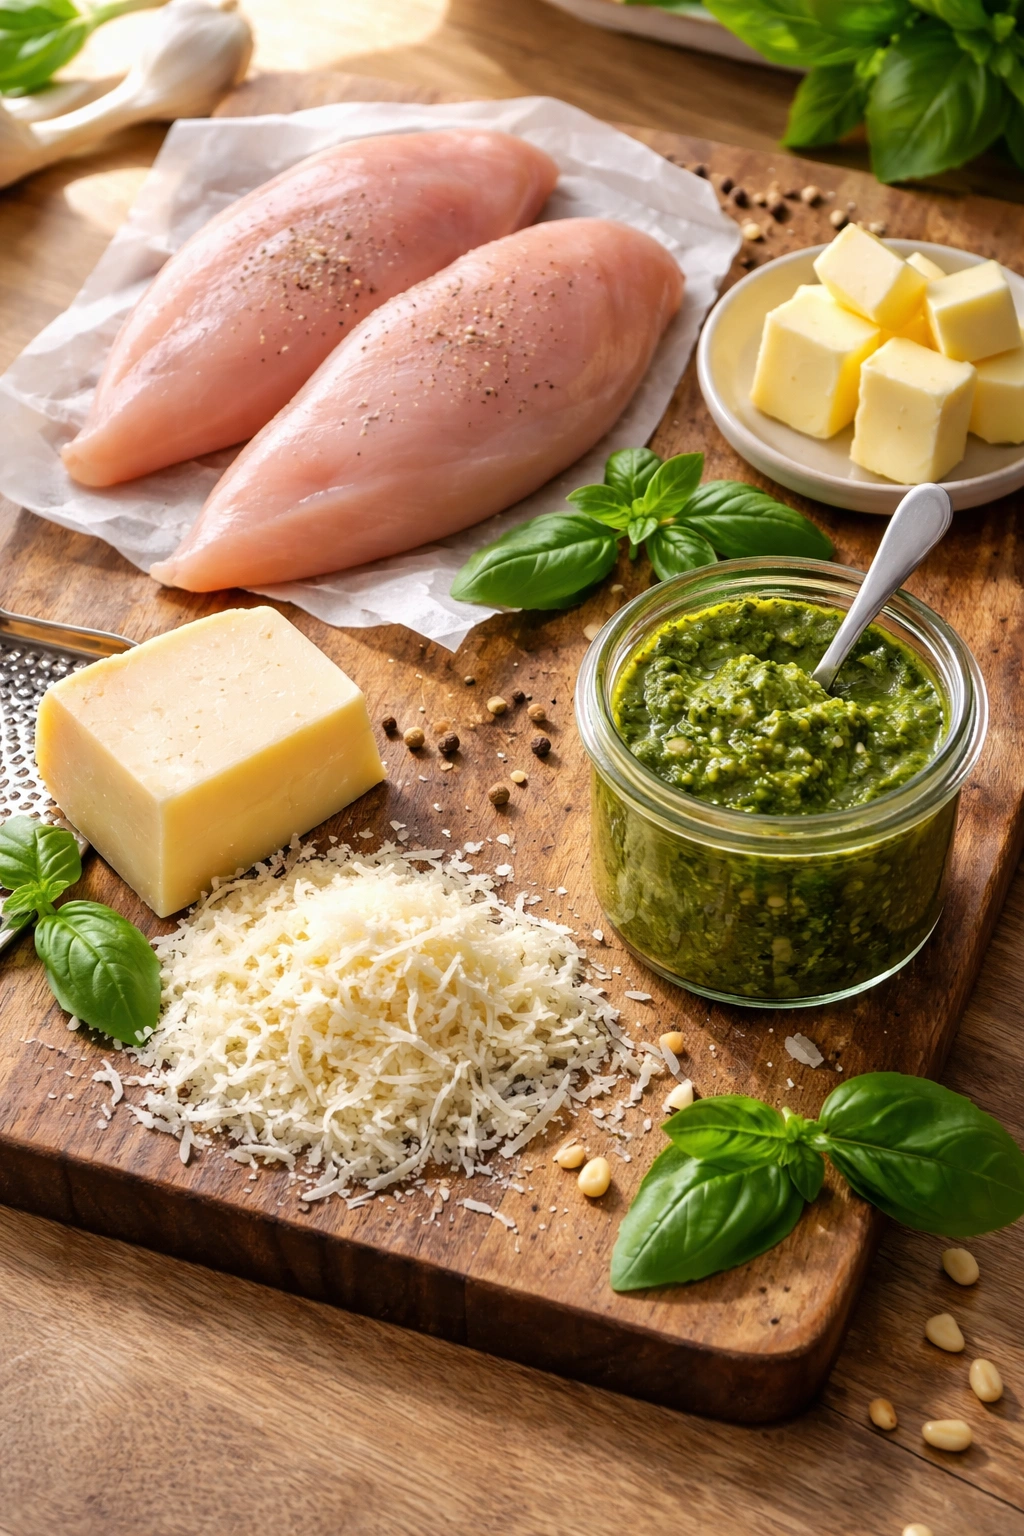
- 1 pound boneless, skinless chicken breasts, cut into 1-inch pieces
- 2 tablespoons unsalted butter
- 2 cloves fresh garlic, minced
- ½ pound dried penne pasta
- 1½ cups chicken broth (low-sodium is fine)
- 1 cup whole milk
- 3 ounces cream cheese, cut into chunks
- ⅓ cup basil pesto (homemade or quality store-bought)
- ¼ cup freshly grated Parmesan cheese
- ¼ teaspoon freshly cracked black pepper
- 1 pinch crushed red pepper flakes
- Salt to taste
Optional Add-Ins:
- 3 cups fresh baby spinach (adds color and nutrition)
- ¼ cup sliced sun-dried tomatoes (adds sweetness and tang)
Prepare Before You Cook:
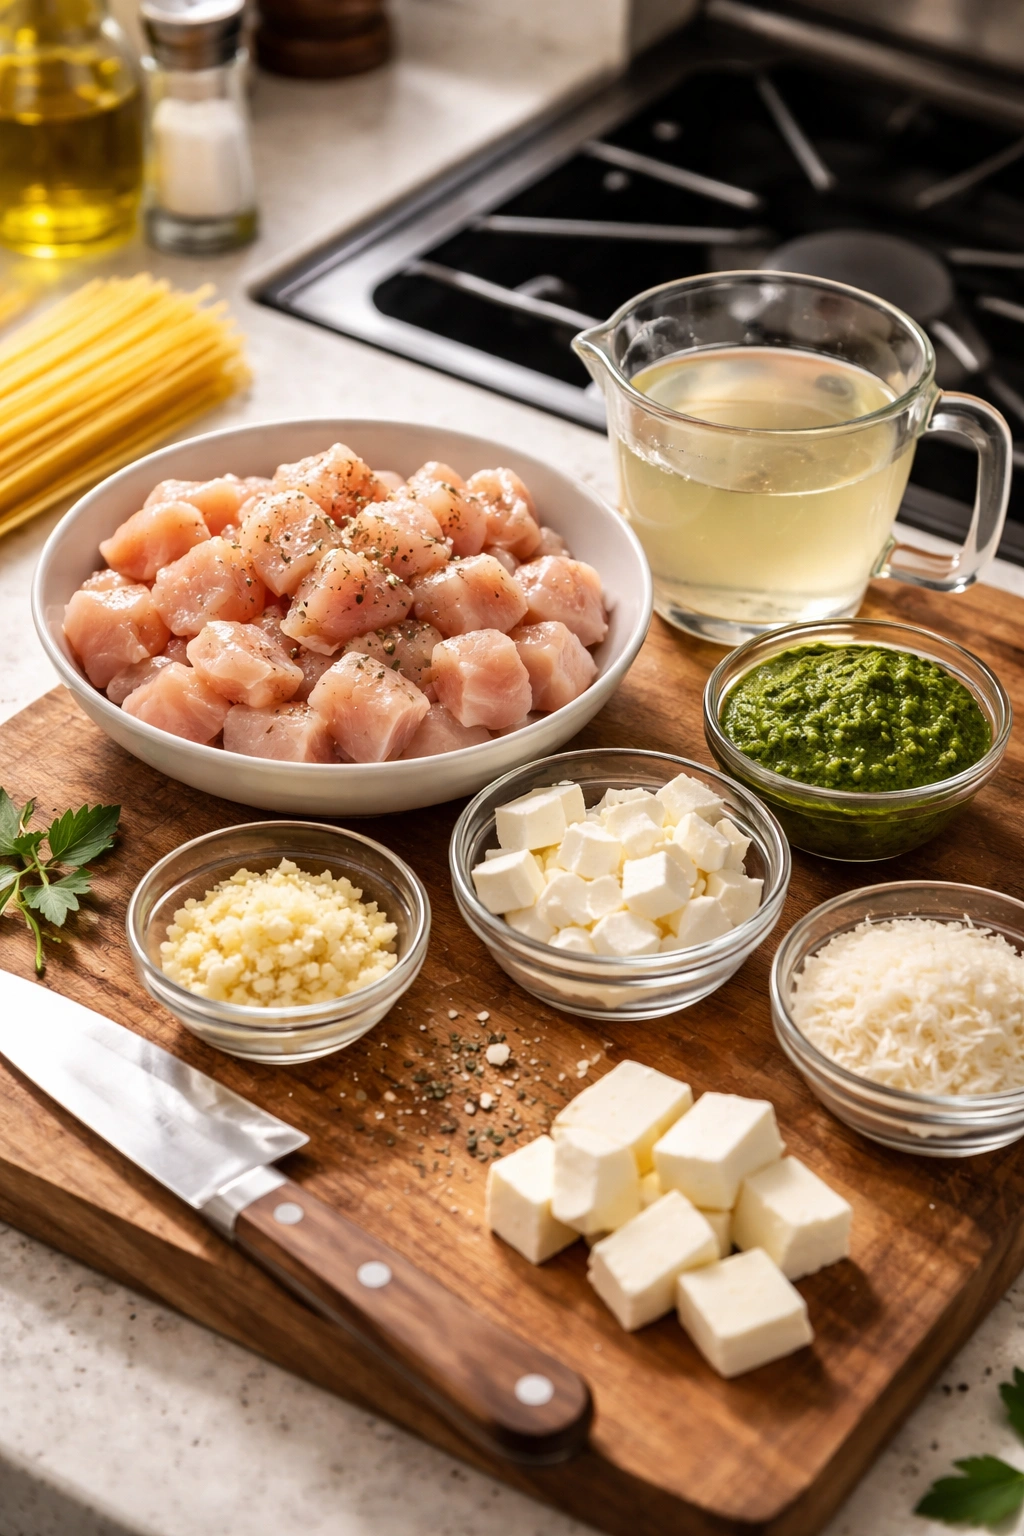
Measure out all ingredients and arrange them near your stove in the order you’ll use them. Cut the chicken into uniform 1-inch pieces. Mince the garlic finely. Cut the cream cheese into chunks approximately the size of dice. Have a cup of pasta water reserved even before you start cooking.
The Cooking Process:
Step 1: Melt 2 tablespoons butter in a large, deep skillet over medium-high heat. The butter should foam and smell nutty, about 30 seconds.
Step 2: Add the chicken pieces to the hot butter and cook for 5 to 6 minutes, stirring occasionally, until lightly browned on the outside. The chicken doesn’t need to be cooked through—you’re just developing color and flavor at this stage. Some pinkness inside is fine; it will finish cooking later.
Step 3: Add the minced garlic to the skillet and cook for exactly 1 minute, stirring constantly. You want the garlic fragrant and just beginning to change color, but not burnt. Burnt garlic tastes bitter and unpleasant.
Step 4: Add the uncooked pasta and the chicken broth directly to the skillet. Stir well, scraping the bottom of the pan with your wooden spoon to release any browned bits. These flavorful bits (called fond) will dissolve into the broth and season your pasta.
Step 5: Place a lid on the skillet, increase the heat to medium-high, and bring the broth to a full boil. This should take about 2-3 minutes.
Step 6: Once boiling vigorously, give the pasta a quick stir, replace the lid, and immediately reduce the heat to medium-low. The goal now is a gentle simmer, not a rolling boil. You’ll see steam escaping from the edges.
Step 7: Let the pasta simmer for about 8 minutes, stirring every 2 minutes or so. This frequent stirring prevents the pasta from sticking to the bottom and ensures even cooking. You’ll notice the broth gradually absorbing into the pasta. After about 8 minutes, the pasta should be tender and only a small amount of broth should remain in the bottom of the pan—maybe ¼ cup sloshing around.
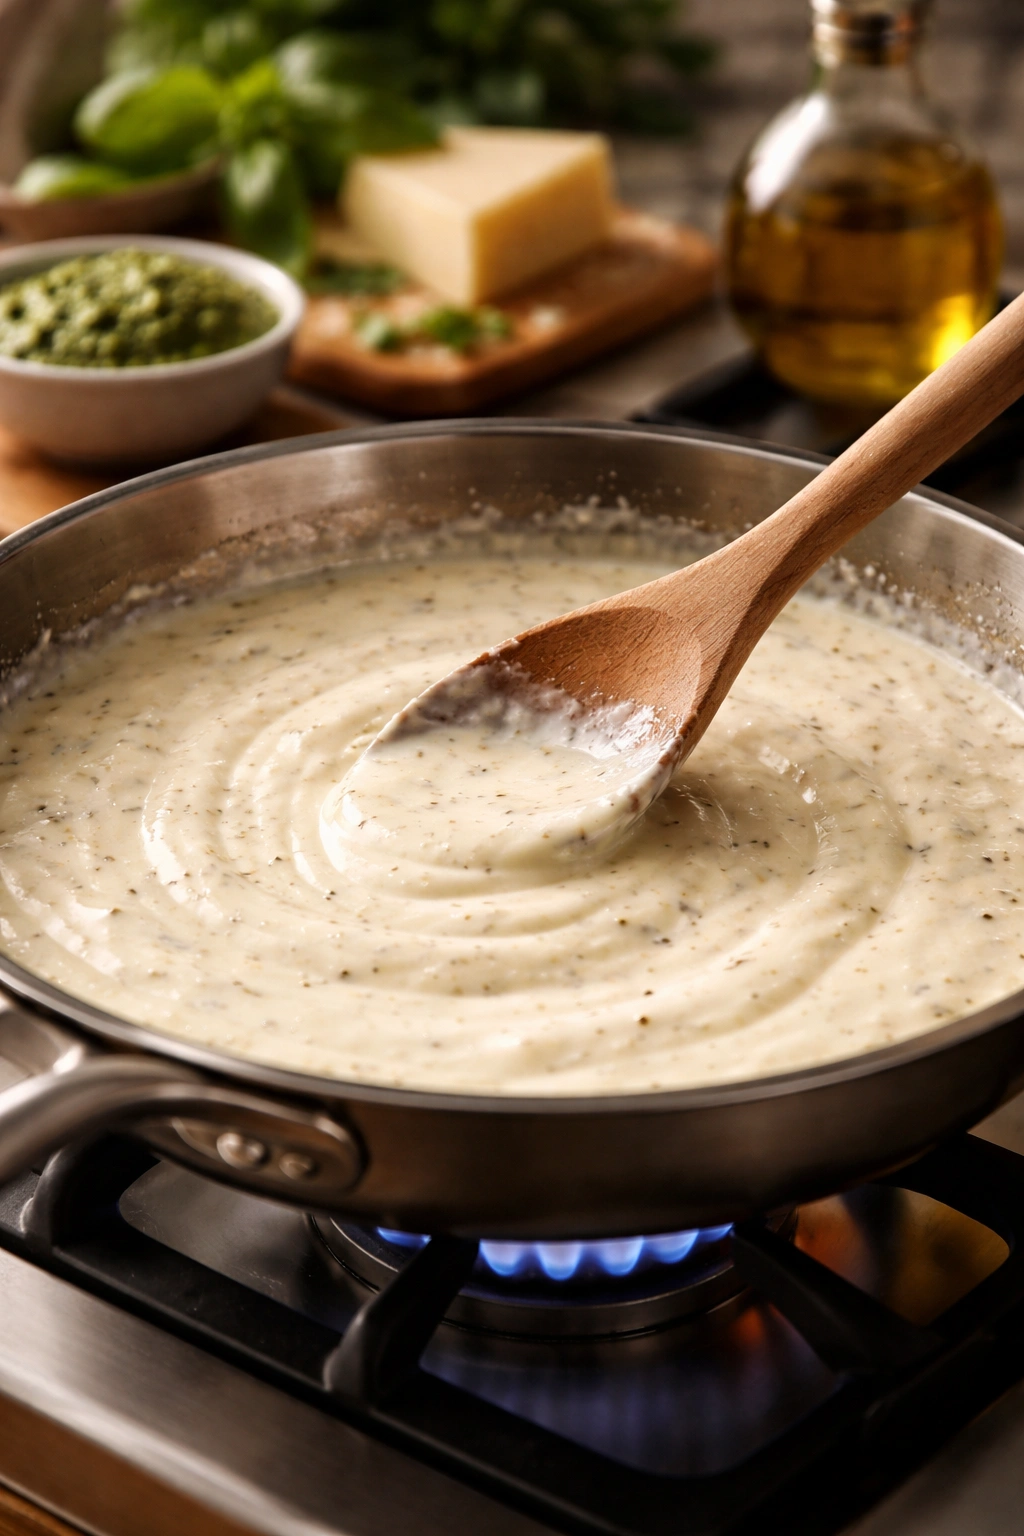
Step 8: Once the pasta is tender and most (but not all) of the broth has been absorbed, reduce the heat to medium-low. Add the milk and cream cheese chunks to the pan. Stir constantly for 2 to 3 minutes, until the cream cheese has completely melted and integrated into the sauce. The sauce should look smooth and creamy, not grainy or lumpy. If it looks grainy, keep stirring—cream cheese can take a minute to fully incorporate.
Step 9: Add the basil pesto and stir until thoroughly combined. The sauce will immediately smell like basil and herbs. This happens fast—don’t overcook the pesto.
Step 10: Finally, add the grated Parmesan cheese and stir until melted and combined. The sauce should taste savory and rich at this point.
Step 11: If you’re using the fresh spinach and sun-dried tomatoes, add them now. Stir gently until the spinach has just wilted—this takes maybe 30 seconds. Don’t overcook the spinach or it becomes mushy.
Step 12: Remove the skillet from the heat. Taste the pasta and add a small pinch of salt if needed. Remember that the Parmesan and pesto are already salty, so go easy.
Step 13: If the sauce looks too thick, add a splash of the reserved pasta water—a few tablespoons at a time—and stir until you reach your desired consistency. The pasta should look glossy and coated in sauce, not dry.
Step 14: Top each serving with freshly cracked black pepper and a pinch of crushed red pepper flakes. Finish with additional grated Parmesan and, if you like, a few fresh basil leaves.
Why This Recipe Produces Restaurant-Quality Results
The technique matters more than the ingredients here, though quality ingredients certainly help. You’re creating an environment where flavors develop quickly through intelligent sequencing. The chicken browns and develops fond. That fond becomes your sauce base. The pasta cooks in flavorful broth rather than plain water. The starch released from the pasta naturally thickens and emulsifies the cream. By the time you add the pesto, everything has already developed depth and complexity.
You’re not using any fancy techniques or specialized equipment. A large skillet with a lid is truly all you need. What you are doing is understanding the why behind each step, which allows you to adapt and adjust confidently.
Scaling and Adjusting the Recipe
If you need to feed 6 people instead of 4, multiply the chicken, pasta, and creamy components by 1.5. Use 1.5 pounds chicken, ¾ pound pasta, 1.5 cups milk, and 4.5 ounces cream cheese. The broth amount can stay roughly the same—1.5 to 2 cups is enough for the increased pasta amount.
If you’re cooking for 2, halve everything. The timing stays exactly the same because you’re not changing the cooking method, just the volume.
If your sauce turns out too thick, add milk or broth a tablespoon at a time until it reaches your preferred consistency. If it’s too thin, you can add a little more Parmesan cheese (which contributes salt and helps thicken) or a tiny pinch of cornstarch mixed with cold water (a cornstarch slurry), though this is rarely necessary if you’ve followed the steps correctly.
Ingredient Quality Details Worth Knowing
The chicken breast quality matters more than you’d think. Free-range or pastured chicken tastes noticeably better than conventional supermarket chicken, and if your budget allows, it’s worth seeking out. The difference in richness and actual chicken flavor is real. That said, this dish tastes good even with standard supermarket chicken.
The butter should be unsalted so you can control the salt level. Salted butter varies in how much salt it contains, and you don’t want surprises in your sauce.
The Parmesan should be freshly grated if possible. Pre-grated Parmesan contains anti-caking agents that prevent it from melting smoothly. Fresh grates melt beautifully and contribute more flavor per ounce.
The pesto determines a significant portion of the final dish’s flavor profile. If you buy store-bought, look for pesto that lists basil as the primary ingredient (not oil or water). Avoid pesto that looks brown; bright green indicates fresh herbs. Taste it straight from the jar—if it tastes thin and weak, it will taste weak in your pasta too. A good pesto tastes bright, herbaceous, and slightly peppery. It should make your mouth water.
The Satisfaction of Knowing How to Make This Well
There’s genuine pleasure in mastering a dish that seems simple but delivers impressive results. Once you understand the technique, you can make this pasta reliably, every single time. You can adapt it based on what’s in your refrigerator. You can scale it up for guests or down for yourself. You can explain to someone else how to make it—not just the steps, but the why behind each step.
This is how cooking skill develops. It’s not about mastering 100 recipes. It’s about understanding a few fundamental techniques so deeply that you can apply them flexibly.
Final Thoughts

A genuinely excellent weeknight dinner doesn’t require hours of prep or a degree in culinary arts. It requires understanding that great flavor comes from quality ingredients, proper technique, and knowing exactly when to add each component. This creamy pesto chicken pasta delivers on all three counts in just 20 minutes.
The next time you’re standing in your kitchen wondering what to make for dinner, remember that you can have something this delicious ready in less time than it takes to drive to a restaurant. That knowledge alone is worth having in your back pocket. Make this pasta once and understand the method, and you’ll find yourself returning to it regularly—not because you’re bored, but because it genuinely satisfies. And there’s nothing quite like that.