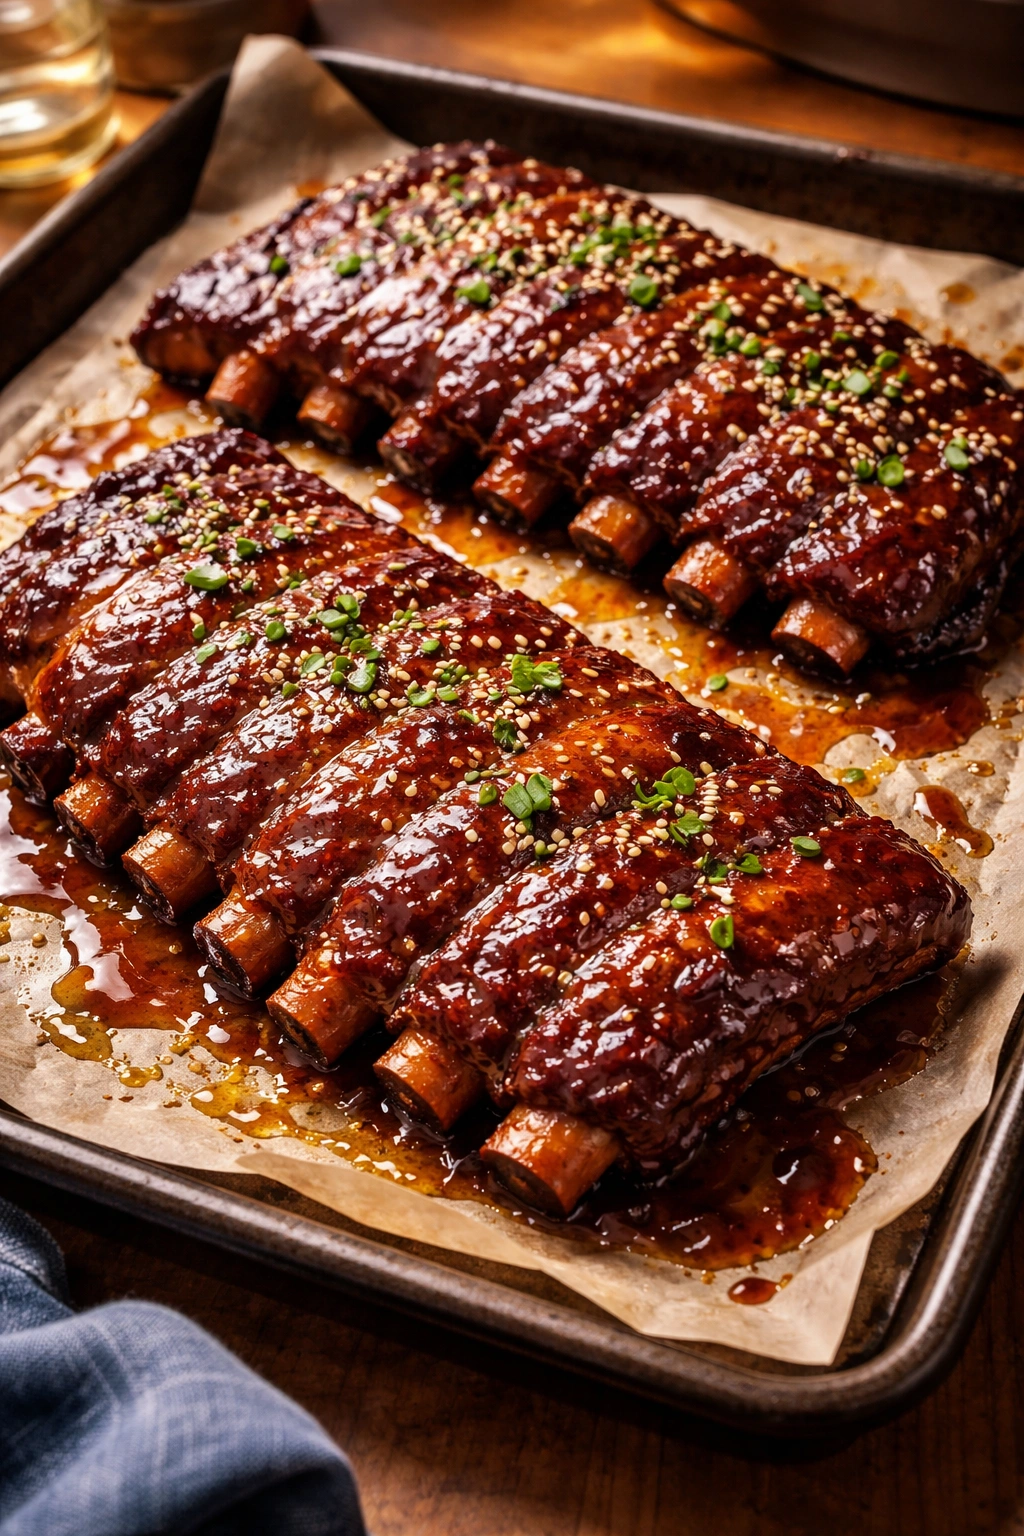
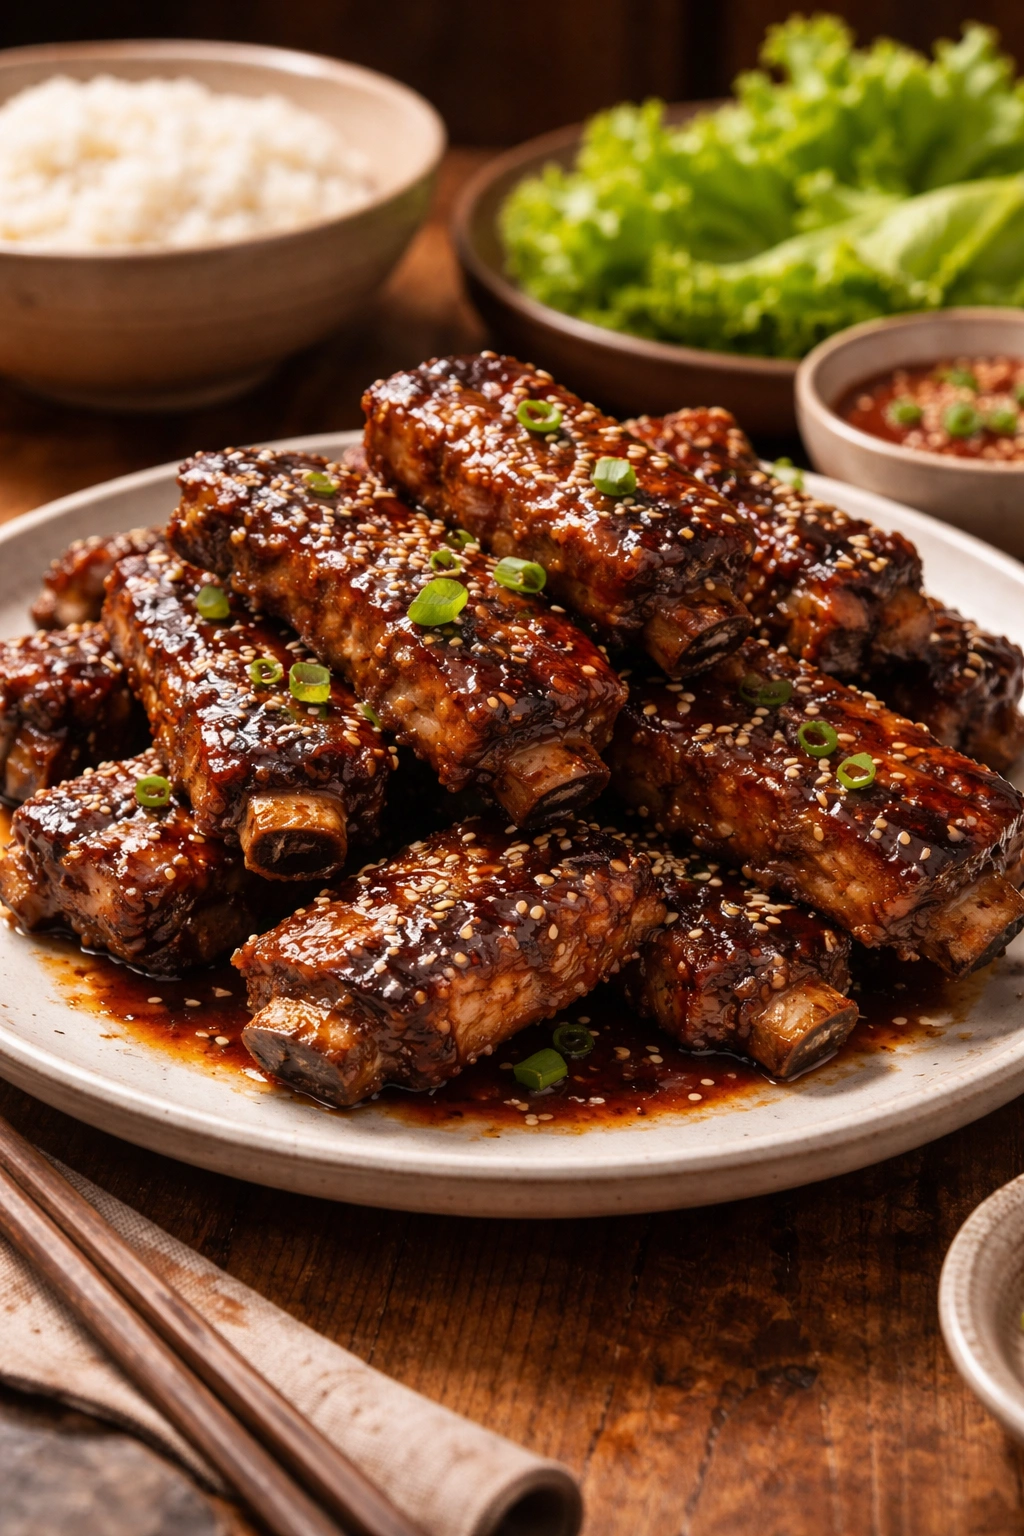
There’s a reason Korean BBQ restaurants pack out on weekends — Korean sticky ribs have a flavor and texture that feels almost indulgent, sweet and savory and deeply satisfying in a way that standard American barbecue just doesn’t quite achieve. The good news? You don’t need a Korean grill or a steaming charcoal table. You don’t even need to fire up the backyard grill and stand around in humid heat for hours. Instead, you can create restaurant-quality Korean sticky ribs right in your oven, where they’ll braise low and slow until the meat practically falls off the bone, then finish under the broiler for a caramelized, slightly charred exterior that locks in all those incredible flavors.
This method isn’t a shortcut or a compromise — it’s actually how many Korean home cooks handle ribs when they want something reliable and foolproof. The oven gives you consistent, even heat and a steamy environment that keeps the meat impossibly tender. The broiler at the end delivers that essential char and glaze-setting heat that makes you feel like you’ve accomplished something special. What you’ll end up with is meat so tender it melts on your tongue, glazed in a sticky sauce that balances sweet, salty, spicy, and umami all at once. This is the dish that makes people ask for seconds before they’ve finished their first piece.
Why Korean Sticky Ribs Are Worth Making
Korean ribs represent a completely different philosophy than the dry-rub-and-smoke approach of traditional American barbecue. Rather than relying on smoke and char alone, Korean ribs depend on a deeply flavorful marinade and glaze that permeates every layer of meat. The marinade typically combines soy sauce, brown sugar, sesame oil, ginger, garlic, and sometimes gochujang (a red chili paste) or fresh fruit like Asian pear to create a sauce that’s both sweet and savory, with layers of umami that keep developing as you eat.
The beauty of this approach is that you’re not fighting against time or wrestling with temperature control. You marinate overnight, the slow oven does the heavy lifting, and the broiler gives you that final professional touch. The result feels like you’ve spent all day tending to these ribs, when the actual hands-on time is maybe twenty minutes spread across two days.
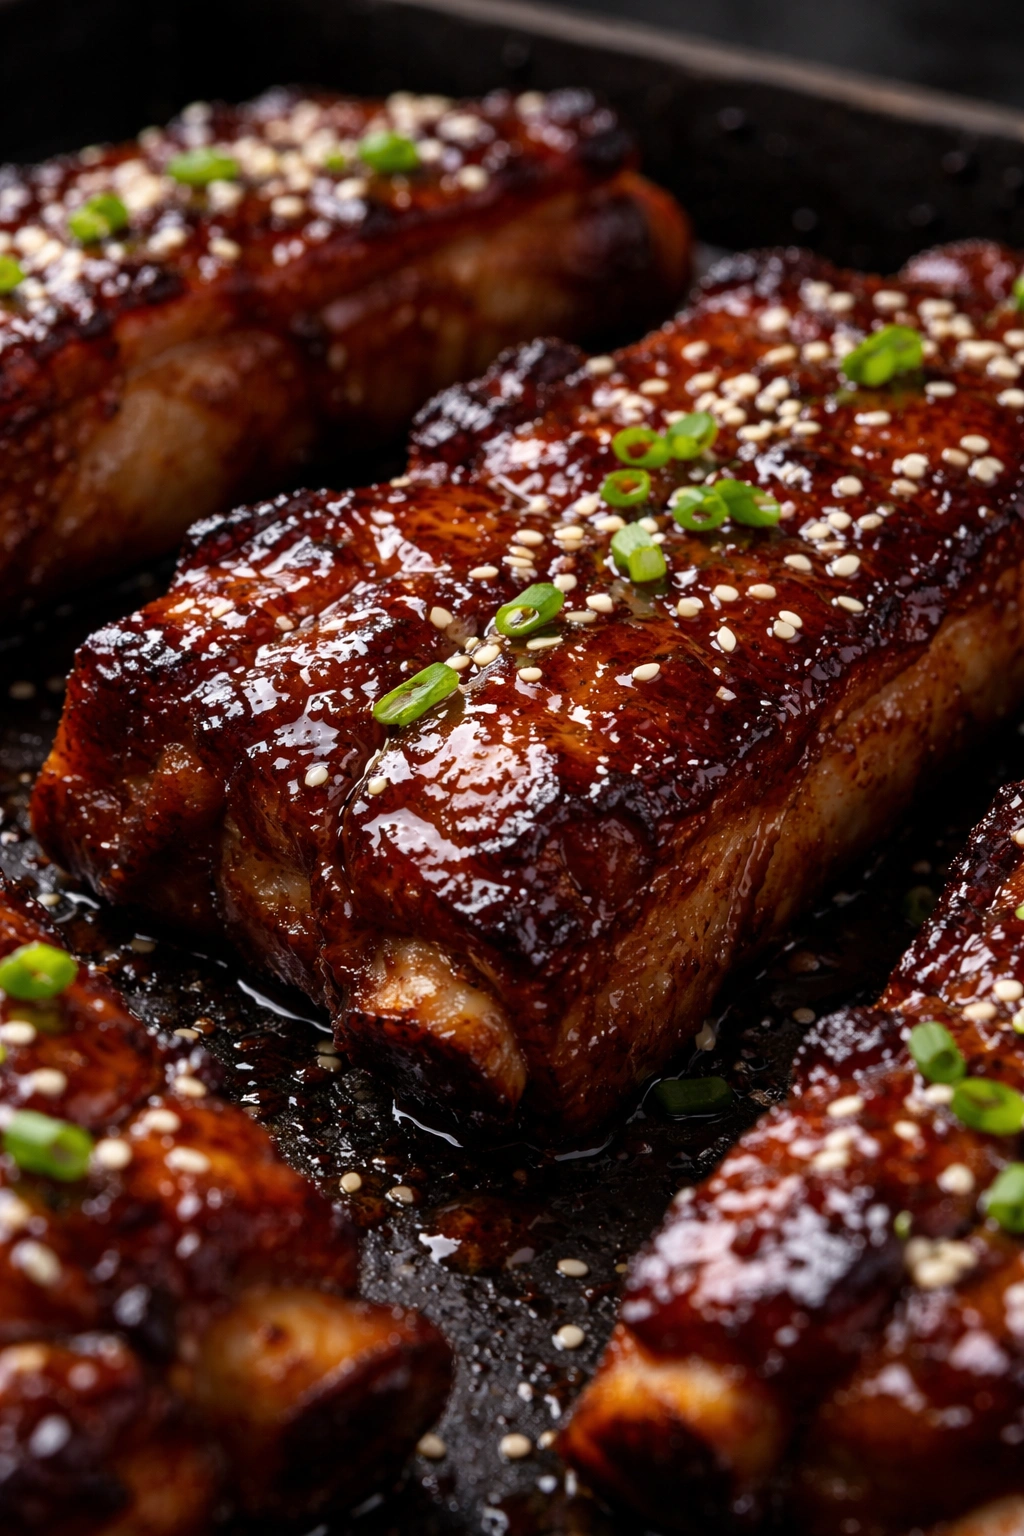
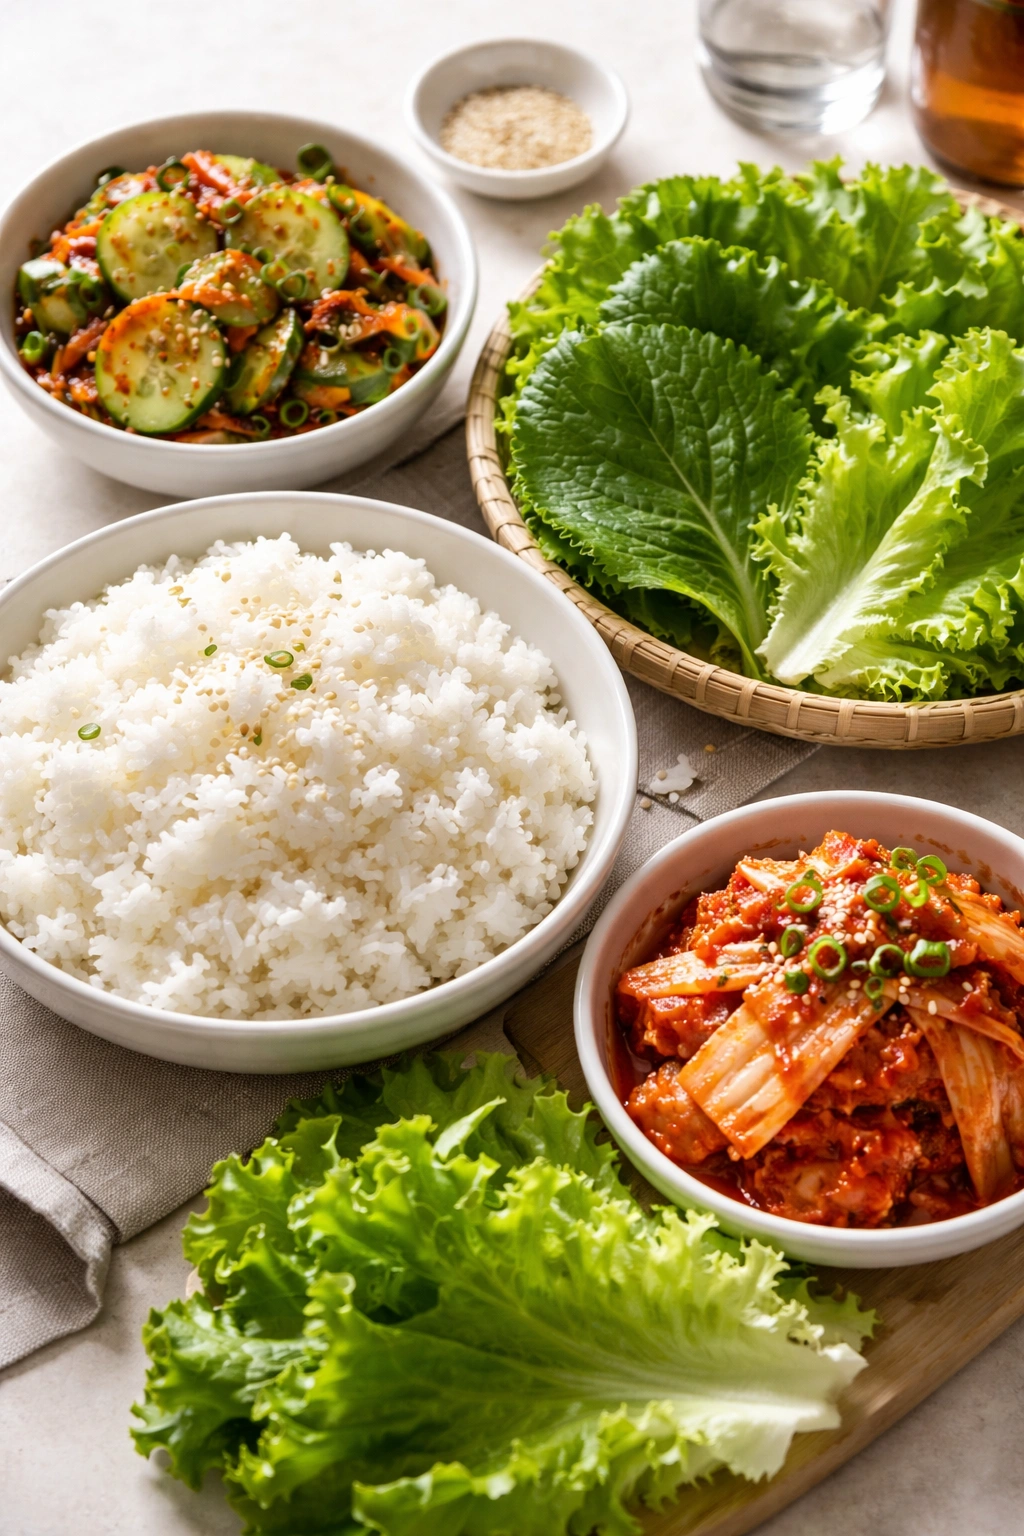
What makes these ribs sticky is the way the glaze reduces and concentrates during cooking, coating each rib in a glossy, caramelized layer. The sugars from the brown sugar and honey melt and caramelize, creating a texture that’s genuinely sticky — the kind that makes you want to lick your fingers between bites, which is exactly how Koreans eat them. Serve them with white rice, fresh lettuce leaves, and a spicy dipping sauce, and you’ve got a meal that feels restaurant-special but came entirely from your own kitchen.
What Makes Korean Ribs Different From BBQ Ribs
If you’ve made traditional barbecued ribs before, Korean ribs will taste like a completely different dish, even though they’re technically the same cut of meat. The difference comes down to seasoning approach, cooking method, and the entire flavor profile you’re aiming for.
Traditional American BBQ ribs rely heavily on dry rubs (salt, pepper, paprika, maybe some heat) and long smoking to develop flavor through smoke absorption and the bark that forms on the surface. The sauce, if used, is typically applied near the end and tends toward either sweet-and-tangy (like tomato-based sauces) or spicy and vinegary (like Carolina-style sauces). The primary flavors are usually smoke, heat, and a specific regional sauce character.
Korean ribs start with an entirely different base — a wet marinade loaded with umami-rich ingredients like soy sauce and sesame oil, sweetened with brown sugar or honey, and often including fresh fruit that adds subtle sweetness and helps tenderize the meat. Ginger and garlic are essential, not optional garnishes. The result is meat that tastes marinated all the way through, not just seasoned on the surface. The flavors are more complex, more savory, and more balanced between sweet and salty. There’s often a subtle heat from gochujang or ginger, and the sesame oil adds a toasty, nutty dimension that you simply don’t get in traditional American ribs.
The cooking method also differs significantly. While American BBQ relies on low-temperature smoking for hours, Korean ribs use moist-heat braising in the oven (which sounds less exciting but is actually incredibly efficient) followed by a quick broiler finish to caramelize the glaze. This method keeps the meat from drying out while still developing tender, fall-off-the-bone texture. The final broiler step gives you that caramelized, slightly charred exterior without the smokehouse commitment.
The cultural eating experience is different too. Korean ribs are traditionally served with lettuce leaves, fresh vegetables, and ssamjang (a Korean dipping sauce), meant to be wrapped up and eaten with your hands. American BBQ ribs are typically plated individually and eaten with a fork, though eating with your hands is certainly acceptable. Korean ribs encourage a more interactive, communal style of eating.
Understanding the Marinade: The Key to Korean Flavor
The marinade is where all the magic happens with Korean ribs, and understanding what each ingredient does will help you feel confident adapting this recipe to your tastes or making it your own.
Soy sauce is the foundation — it brings saltiness and umami, that savory depth that makes food taste more like itself. You’ll use quite a bit of it, which might seem like a lot, but remember that it’s being diluted across multiple pounds of meat over many hours. Low-sodium soy sauce works fine if you want to control the salt level more carefully; the difference in final flavor is minimal.
Brown sugar and honey provide sweetness, but they do different things. Brown sugar brings molasses notes that complement soy sauce beautifully, while honey adds floral sweetness and helps the glaze caramelize and stick to the meat during broiling. Together, they create a balanced sweetness that never feels cloying — it plays against the salty soy and the heat from ginger, so the final flavor is complex rather than dessert-like.
Sesame oil is the secret ingredient that makes Korean ribs taste unmistakably Korean. Use toasted sesame oil (it’s darker and more fragrant than regular sesame oil), and don’t skip it or substitute it. Just a few tablespoons adds a warm, nutty depth that elevates the entire marinade. This is umami in liquid form.
Fresh ginger and garlic aren’t optional — they’re load-bearing walls of this recipe. Fresh ginger brings both heat and a bright, slightly sweet note, while garlic adds pungent savory depth. Mincing them finely or grating them on a microplane ensures they distribute evenly through the marinade and penetrate the meat during the long marinating period.
Asian pear or apple (optional but traditional) serves a dual purpose. It adds subtle sweetness and a delicate fruity note that’s less obvious than you’d expect, but when combined with everything else, creates a more rounded flavor. More importantly, the natural enzymes in fresh fruit help break down proteins and tenderize the meat, meaning your ribs will come out even more tender without any special effort. If you can find Asian pear at your grocery store, use it; if not, a Bosc pear or Granny Smith apple works well.
Gochujang (optional, for a spicier version) is a fermented red chili paste that brings authentic Korean heat and complexity. It’s thick, concentrated, and salty, so if you add it, you might need to reduce the soy sauce slightly. Not every Korean rib recipe uses gochujang, so whether to include it depends on your heat preference and what flavor profile you’re going for.
The marinade is best made the day before and allowed to fully coat the ribs overnight (or up to 24 hours). This isn’t just about flavor — it’s about tenderizing. The salt and enzymes in the marinade break down the muscle fibers and connective tissue, which is why overnight-marinated ribs are noticeably more tender than ribs marinated for just four hours.
Choosing Your Ribs: Baby Back vs St. Louis vs Short Ribs
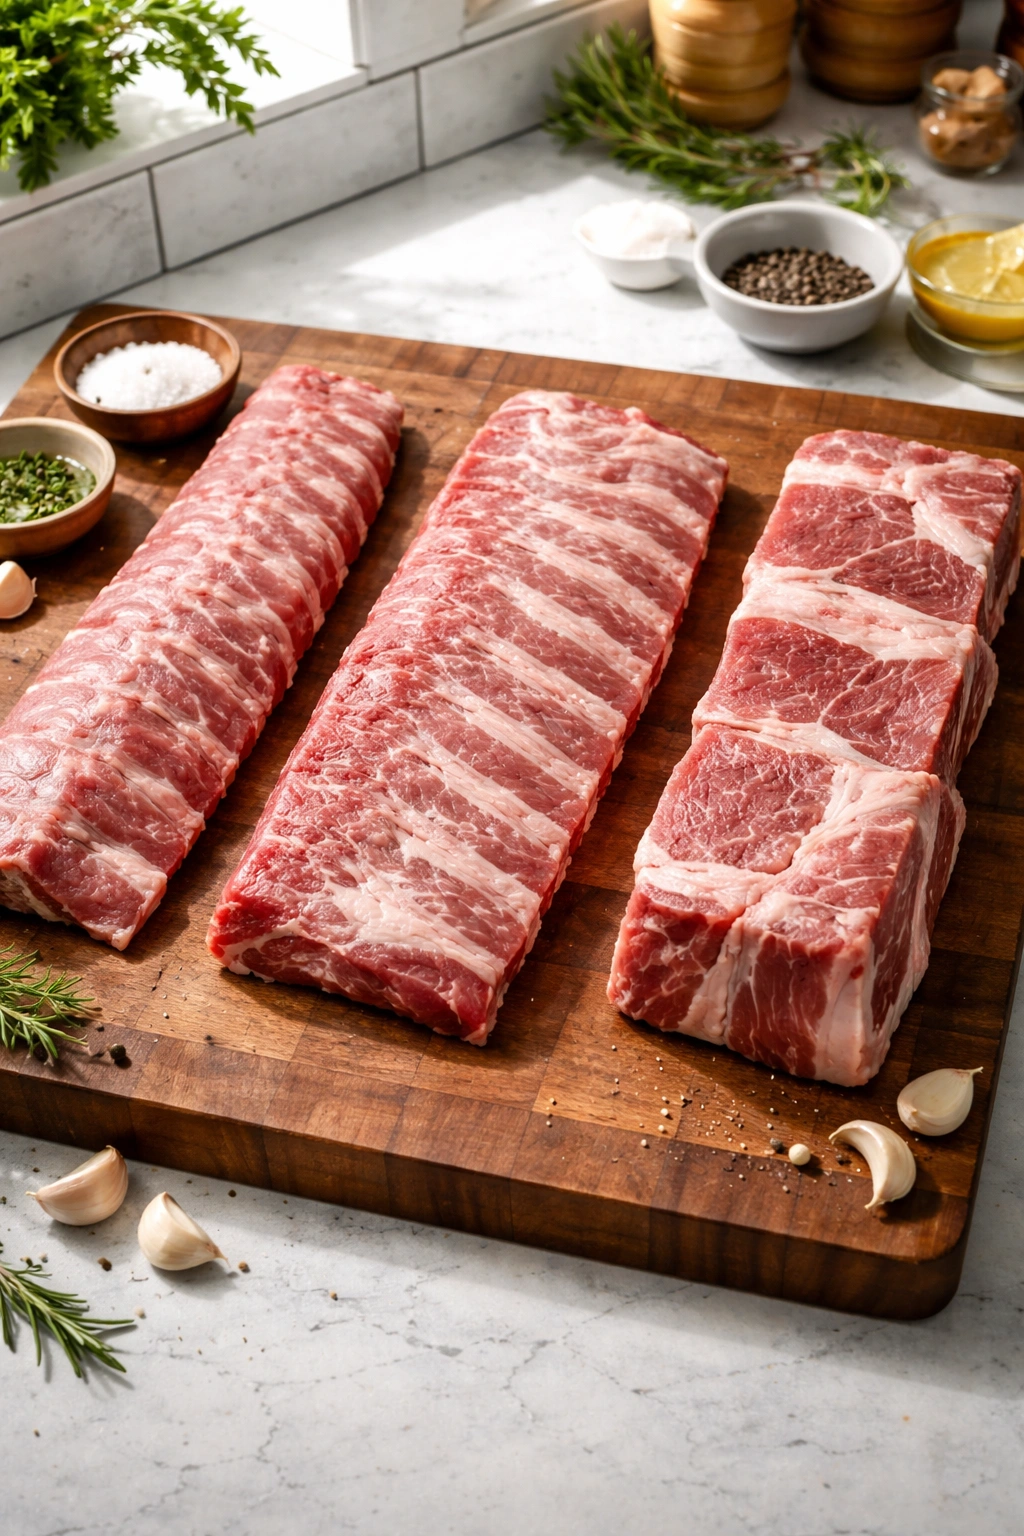
The type of rib you choose will affect both cooking time and the final texture, so it’s worth understanding your options.
Baby back ribs (also called pork loin ribs or back ribs) are the smallest and most tender option. They come from the rib section closest to where the ribs meet the spine, hence the name — they’re not from baby pigs, just the shorter ribs on an adult pig. Baby back ribs are lean, cook quickly (2 to 2.5 hours in a 300°F oven), and are widely available at any grocery store. They’re an excellent choice if you want a faster cooking time or prefer less meat per bone. A single slab of baby back ribs typically feeds 2 to 3 people.
St. Louis-style ribs (also called spare ribs) are cut from the meatier section of the rib cage, closer to the belly. They’re thicker and meatier than baby back ribs, with more fat content, which means more flavor and more richness. St. Louis ribs take slightly longer to cook (2.5 to 3 hours at 300°F) and benefit from the longer cooking time since the extra meat needs more time to become tender. They’re perfect if you want a more indulgent, meaty experience. One slab feeds 2 to 3 people, but guests will likely eat more of these than baby backs.
Beef short ribs (also called galbi when cut thin across the bone, or LA galbi for the flanken cut) are a completely different animal — literally. They’re meatier and thicker than pork ribs, with more connective tissue that requires longer cooking to break down. Beef short ribs take 2.5 to 3.5 hours at 300°F, and the meat is darker, richer, and more intensely flavored than pork. They’re stunning when done well but require more patience. If using beef short ribs, expect to spend closer to 3+ hours in the oven.
For first-time makers of this recipe, baby back ribs are the most forgiving choice — they cook quickly, are easy to find, and are hard to mess up. St. Louis ribs are the classic choice for larger gatherings and deliver the most impressive flavor. Beef short ribs are for when you really want to make a statement and don’t mind the extra time.
Whatever you choose, make sure the membrane (the thin, tough silvery skin on the back of the ribs) has been removed. Most ribs sold at grocery stores have already had the membrane removed, but if yours haven’t, loosen it with a paring knife and pull it off with your fingers — this takes about thirty seconds and makes a huge difference in texture and how well the marinade penetrates the meat.
Serving and Timing Block

Yield: Serves 4 to 6 people (2 full slabs of baby back or St. Louis ribs)
Prep Time: 20 minutes (mostly just mixing the marinade)
Marinating Time: Overnight, or at least 8 hours (ideally 24 hours for best flavor)
Cook Time: 2.5 to 3 hours in the oven, plus 3 to 5 minutes under the broiler
Total Time: 9 to 10 hours (mostly hands-off)
Difficulty: Beginner to Intermediate — The recipe is straightforward with no tricky techniques; the only real requirement is patience while the ribs braise in the oven. Even a first-time rib cook will have success with this method.
Ingredients for Korean Sticky Ribs

For the Ribs and Marinade:
- 2 full slabs (5 to 7 pounds total) baby back or St. Louis-style pork ribs, membrane removed
- ¾ cup soy sauce (low-sodium or regular, your choice)
- 6 tablespoons brown sugar, firmly packed
- ¼ cup honey
- 3 tablespoons toasted sesame oil
- 2 tablespoons rice vinegar (unseasoned or seasoned, either works)
- 1 medium Asian pear or Bosc pear, cored and coarsely chopped (or 1 medium Granny Smith apple, cored and coarsely chopped)
- 1 small to medium onion (about 4 ounces), coarsely chopped
- 6 to 8 cloves fresh garlic, peeled
- 1 tablespoon fresh ginger, sliced into thin coins (or 1 tablespoon minced if you prefer)
- ½ teaspoon freshly ground black pepper
- 1 tablespoon gochujang (optional, for extra depth and subtle heat; omit if you prefer a purely sweet-savory flavor)
For the Broiler Finish:
- 2 tablespoons additional brown sugar
- 1 tablespoon additional honey
- 1 tablespoon additional soy sauce
- 1 teaspoon sesame oil
For Garnish:
- 2 to 3 tablespoons sesame seeds, toasted
- 2 to 3 green onions (scallions), thinly sliced on an angle
- Optional: fresh cilantro, lime wedges, extra soy sauce for dipping
Making the Marinade and Preparing Your Ribs
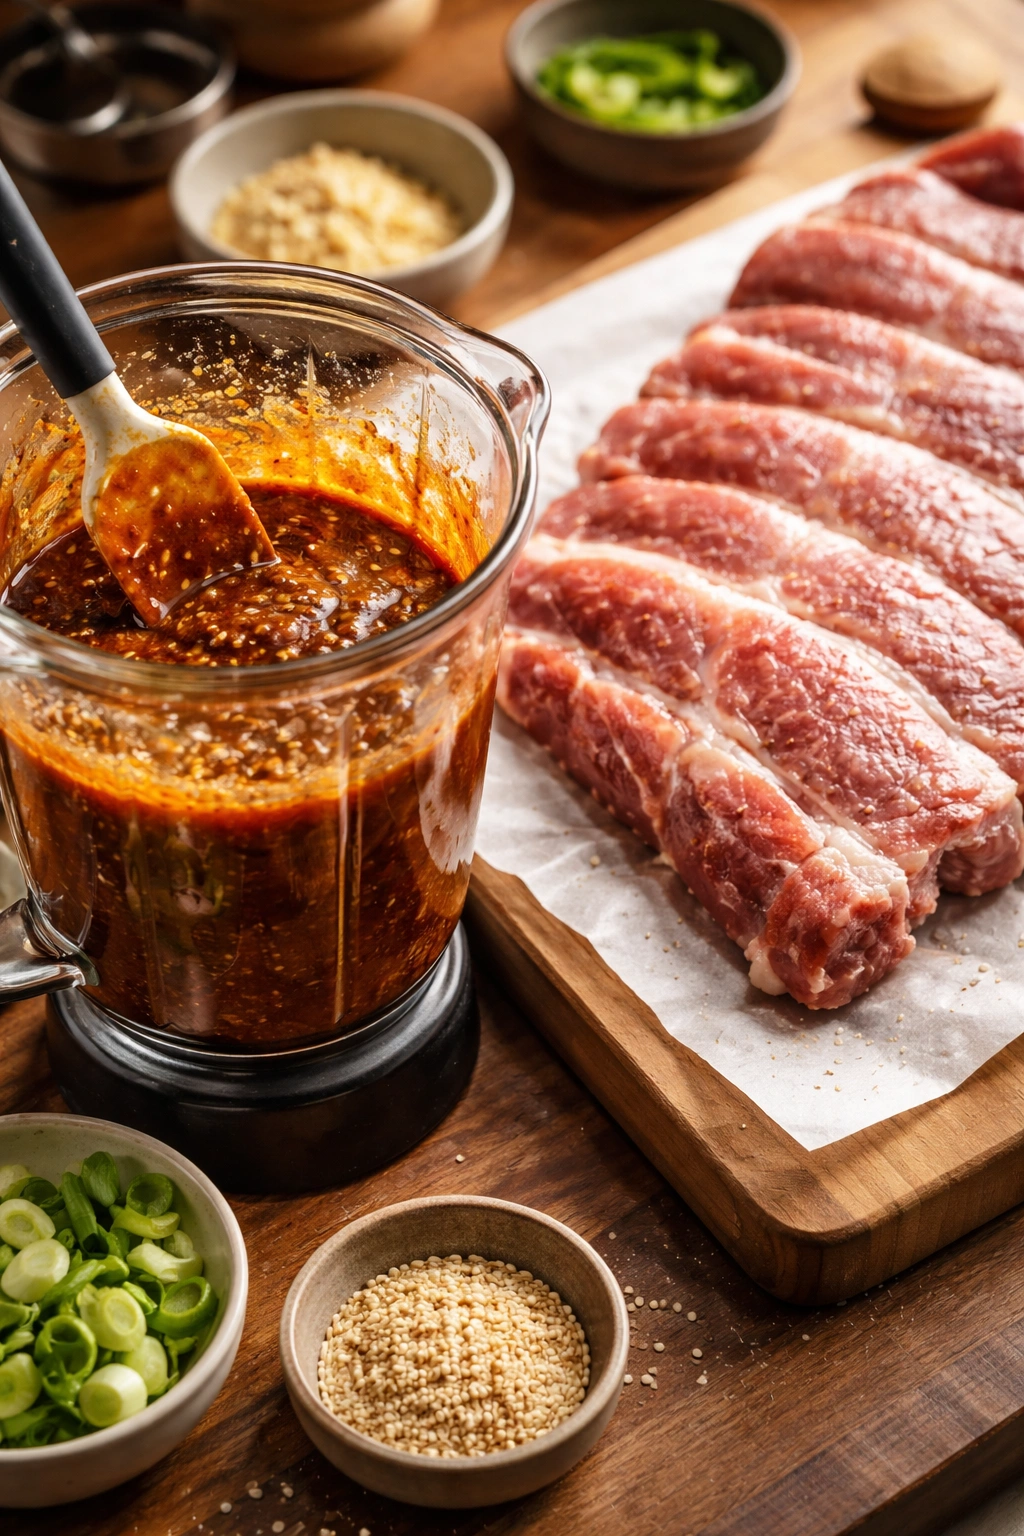
The marinade comes together easily in a blender or food processor, which is the preferred method because it creates a smooth paste that adheres to the ribs much better than a chunky version.
Step 1: Combine the Marinade Base
In a blender or food processor, combine the soy sauce, brown sugar, honey, toasted sesame oil, rice vinegar, coarsely chopped pear or apple, onion, garlic cloves, ginger, and black pepper. If using gochujang, add it now. Blend on high speed for 45 seconds to 1 minute, until the mixture is completely smooth and uniform. The goal is a thick, glossy paste with no visible chunks — smooth enough that it will coat the ribs evenly and penetrate the meat as it sits in the refrigerator.
Taste the blended marinade (just a tiny spoonful on a clean spoon — remember it’s raw) and adjust if needed. If it tastes too sweet, add another tablespoon of rice vinegar or a splash of soy sauce. If it tastes too salty, add a tablespoon of honey. The finished marinade should taste balanced between sweet and salty, with noticeable ginger warmth and a pleasant sesame aroma.
Step 2: Prepare the Ribs
Pat the ribs dry with paper towels — any excess surface moisture can prevent the marinade from adhering properly. Inspect the ribs carefully to make sure the membrane has been removed from the back (bony) side. If you feel any thin, silvery skin, use a paring knife to gently loosen a corner and pull it away by hand. This takes just a minute and makes a noticeable difference in the final texture.
If your ribs are in one long slab, you can marinate them whole, or you can cut them into smaller sections (2 or 3 pieces per slab) for easier handling. Smaller pieces fit better in storage bags and are easier to turn during marinating, but keeping them whole is fine if you prefer — just make sure to turn the bag or container halfway through the marinating time so both sides get exposed to the marinade evenly.
Step 3: Marinate the Ribs
Transfer the ribs to a large resealable plastic bag (a gallon-sized freezer bag works perfectly) or a nonreactive container. Pour the blended marinade over the ribs, making sure every surface is coated. Press out as much air as possible from the bag to help the marinade make contact with all sides of the meat. Seal the bag securely.
Place the bag on a rimmed baking sheet (in case of any leaks) and refrigerate for at least 8 hours, but ideally overnight or up to 24 hours. The longer the ribs marinate, the more flavorful and tender they’ll become. Halfway through the marinating time, gently turn or shake the bag so the ribs are exposed to fresh marinade on both sides.
Slow Roasting the Ribs Low and Slow
The oven method is what makes this recipe so reliable — no babysitting, no adjusting heat, no worrying about uneven cooking. Low, gentle heat with trapped steam creates the ideal environment for tough connective tissue to break down into gelatin, which makes the meat incredibly tender.
Step 1: Remove the Ribs From the Refrigerator
About 30 minutes before you plan to start cooking, remove the ribs from the refrigerator and let them sit on the counter. This brings them closer to room temperature, which means more even cooking in the oven. This step isn’t mandatory, but it does improve results slightly by ensuring the ribs cook through evenly rather than having cold spots in the center.
Step 2: Preheat the Oven
Preheat your oven to 300°F (150°C). Position an oven rack in the lower-middle section of the oven — not at the very bottom (you want some air circulation underneath) but low enough that there’s room for the ribs to cook comfortably without the top of the pan bumping the upper rack.
If your oven tends to run hot, or if you know from past experience that your oven doesn’t bake evenly, reduce the temperature to 275°F (135°C) — the ribs will just take an extra 20 to 30 minutes, but the lower heat will be more forgiving.
Step 3: Prepare the Baking Vessel
Line a large rimmed baking sheet or shallow roasting pan with aluminum foil (for easy cleanup). If you’re cooking the ribs whole (not cut into sections), you may need two baking sheets since the ribs are large. Arrange them meat-side up on the prepared sheet.
Step 4: Add the Cooking Liquid
Remove the ribs from the marinade bag and pour about one-third of the marinade directly onto the baking sheet, surrounding and partially covering the ribs. Reserve the remaining marinade in a small saucepan — you’ll use this for basting and as a finishing sauce. Don’t waste the marinade; it’s packed with flavor.
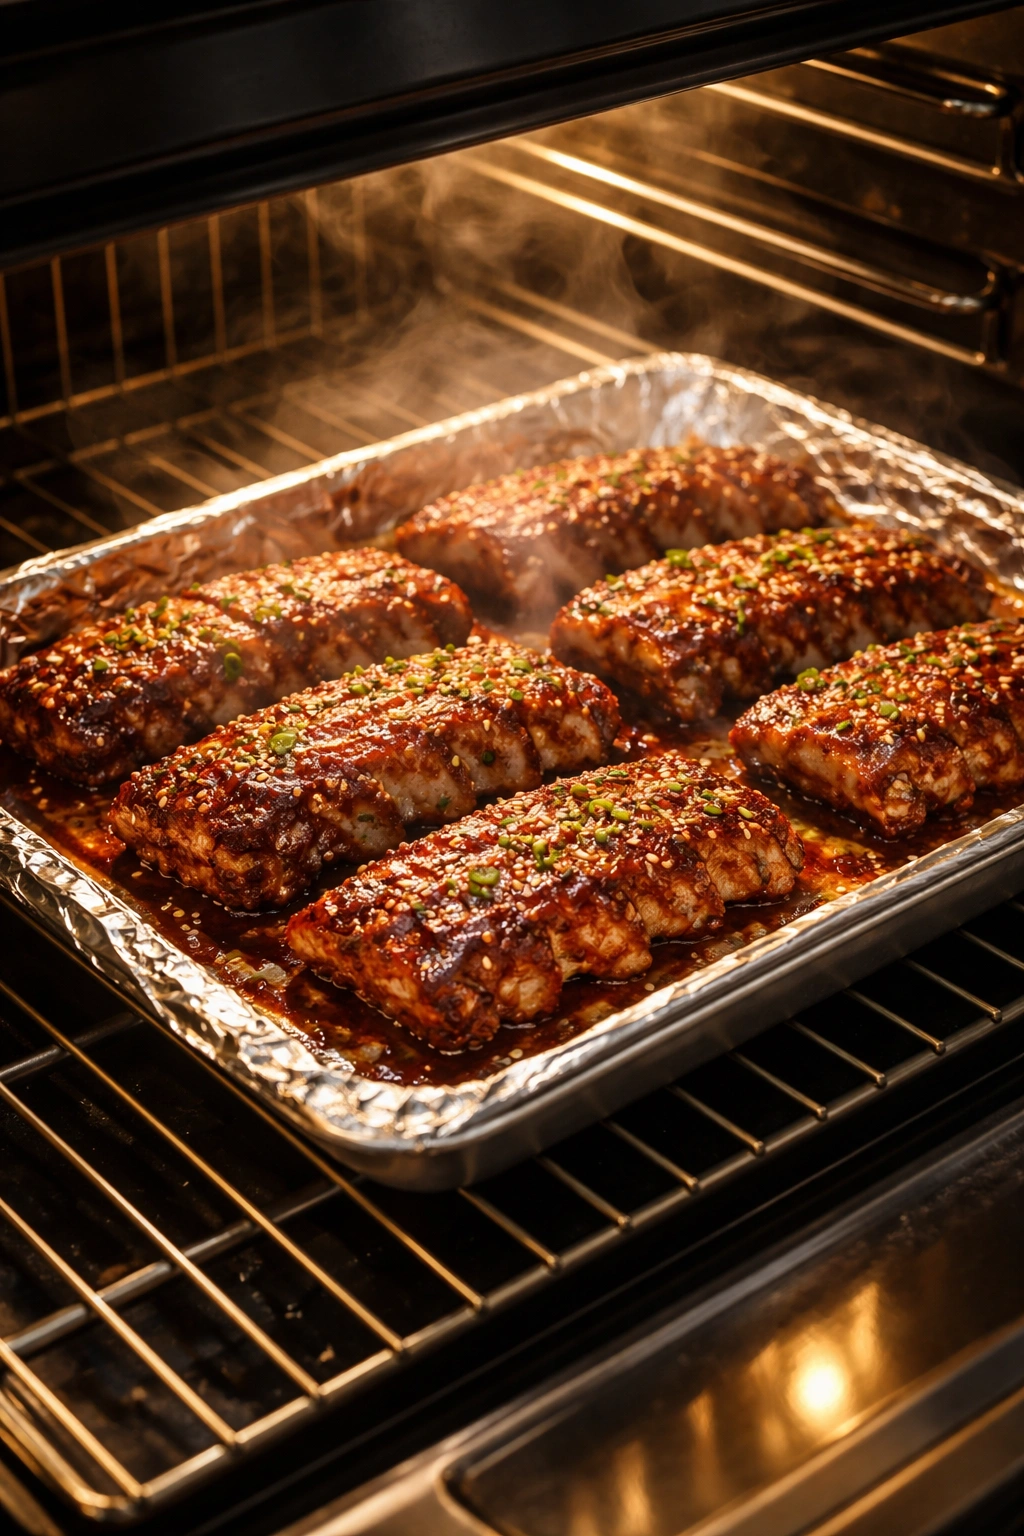
Step 5: Cover and Braise
Cover the baking sheet tightly with aluminum foil, making sure the foil seals well around the edges so steam stays trapped inside the pan. This trapped steam is essential — it keeps the air around the ribs moist, which prevents the meat from drying out during the long cook.
Place the covered baking sheet in the preheated oven. Set a timer for 1 hour 45 minutes to 2 hours (for baby back ribs) or 2 hours 15 minutes to 2.5 hours (for St. Louis or larger ribs). Don’t open the oven or peek at the ribs until the timer goes off — every time you open the door, you release steam and extend the cooking time.
Preparing the Sticky Glaze
While the ribs are braising, you’ll create the final glaze that gives these ribs their signature sticky, caramelized exterior. This is done separately from the braising liquid so you have control over how thick and glossy it becomes.
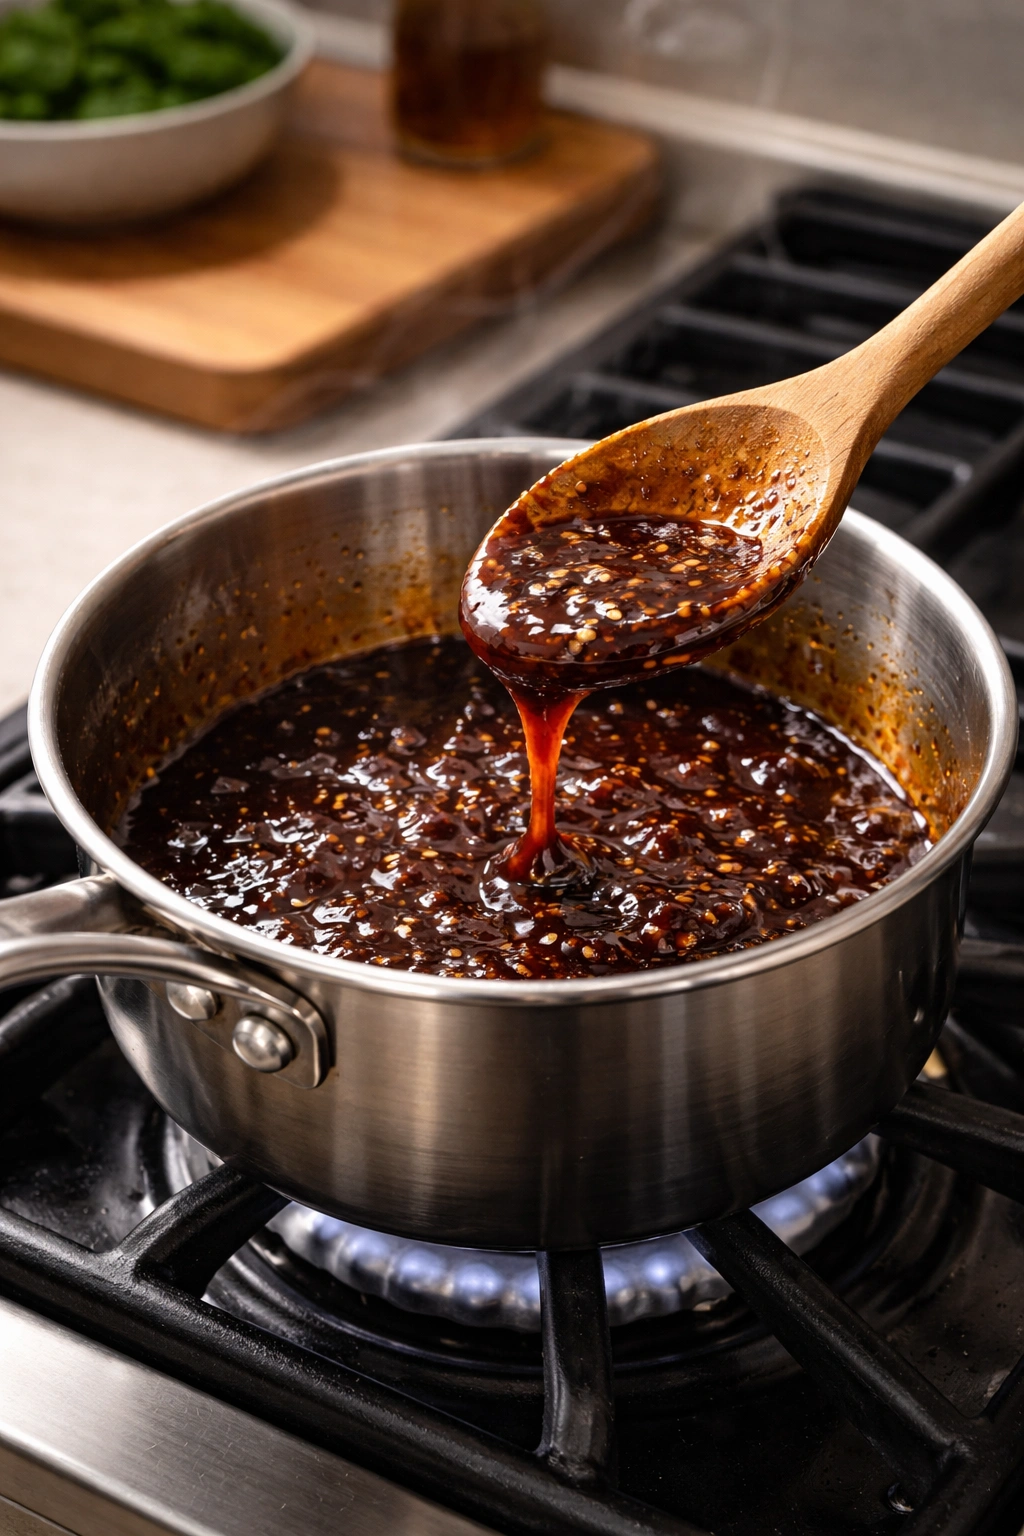
Step 1: Reduce the Reserved Marinade
Pour the reserved marinade (the portion you didn’t put in the baking sheet) into a small saucepan. Place it over medium-high heat and bring it to a boil, stirring occasionally so the sugar dissolves completely. Once it reaches a boil, reduce the heat to medium and let it simmer for 5 to 7 minutes, stirring occasionally.
What you’re doing here is evaporating excess liquid so the sauce becomes thicker and more concentrated. You want it to be noticeably thicker and glossier than when it started — almost syrupy, but not so reduced that it becomes a thick paste. As it cools, it will thicken even more, so don’t reduce it to the point where it looks too thick in the pan.
Step 2: Test for Thickness
To check if the glaze is ready, dip a spoon into the hot sauce and let a few drops fall onto a clean plate. Wait about 10 seconds, then tilt the plate — the glaze should flow slowly, not run like water. If it’s still too thin, simmer for another 1 to 2 minutes.
Once the glaze is the right thickness, remove it from the heat and let it cool slightly so it’s warm but not boiling hot. You don’t want to brush boiling-hot glaze onto ribs that are about to go under the broiler (the sugar can burn before the glaze has a chance to caramelize properly).
Finishing the Ribs Under the Broiler
This is the step that transforms steamed, tender ribs into something that looks and tastes like restaurant-quality Korean BBQ — caramelized, slightly charred, and absolutely glossy.
Step 1: Remove the Ribs From the Oven
Once the timer goes off, carefully remove the baking sheet from the oven. The foil will be very hot, so use thick oven mitts. Carefully peel back the foil — watch out for the steam that will escape and try to do this away from your face. The ribs should look pale and somewhat steamed, which is exactly right. The meat should be quite tender — if you press it gently with a fork, it should feel soft and give easily.
Step 2: Check Doneness
Gently bend one of the rib bones to see if it wants to break. If the bone bends easily and the meat is very soft, the ribs are done. If it still feels quite firm, return the ribs to the oven (without foil) for another 15 to 20 minutes, then check again. Everyone’s oven is slightly different, so exact timing can vary by 10 to 20 minutes either direction.
Step 3: Prepare for the Broiler
Leave the foil off and position the oven rack in the highest position (usually 4 to 6 inches below the broiler element). Turn on the broiler to high and preheat for 2 to 3 minutes.
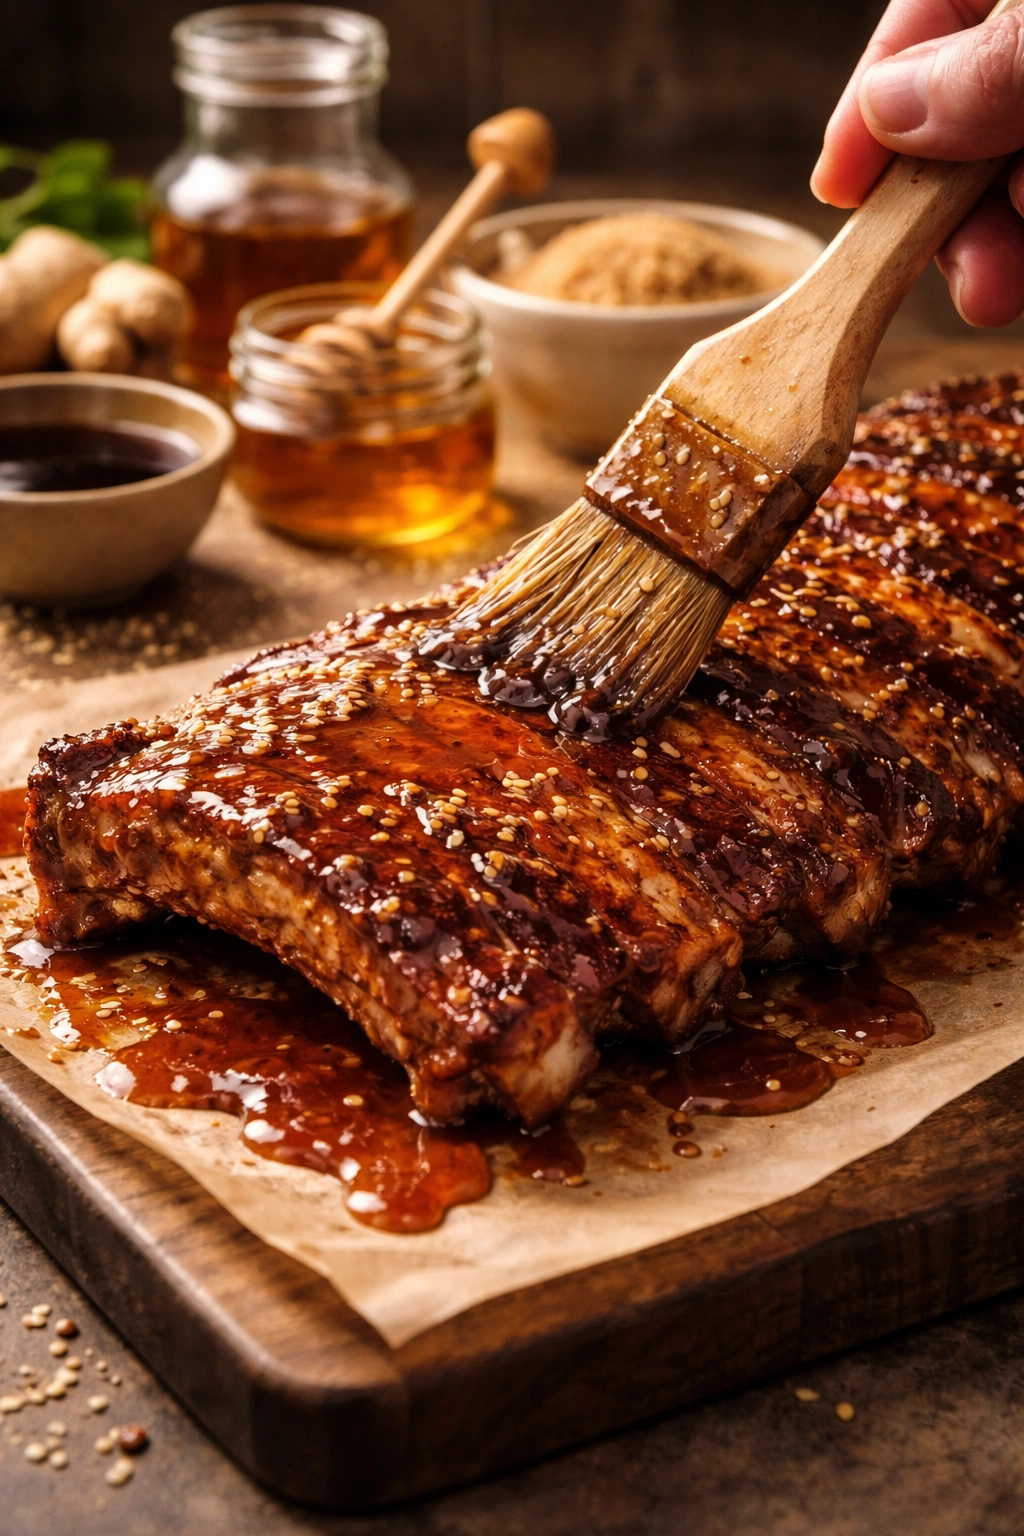
Step 4: Apply the Glaze
Using a pastry brush or the back of a spoon, brush the warm glaze evenly over the top (meat side) of the ribs. Be generous — you want a visible coating that will caramelize and stick. Make sure to get all the exposed meat, not just the tops of the bones.
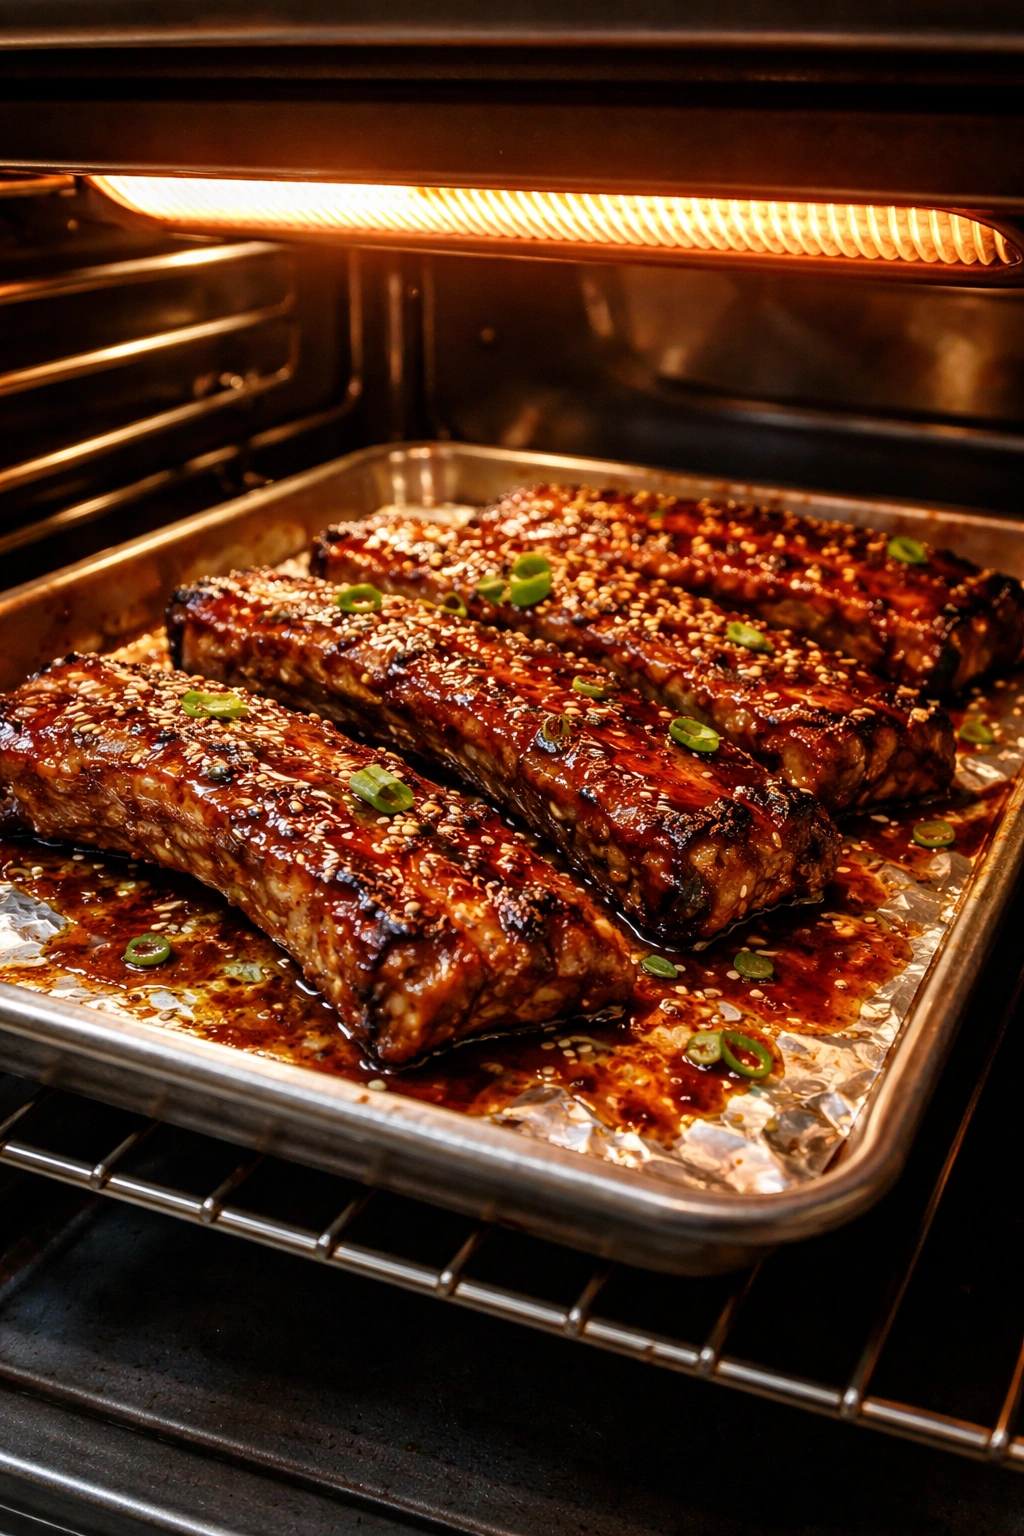
Step 5: Broil for the Caramelized Finish
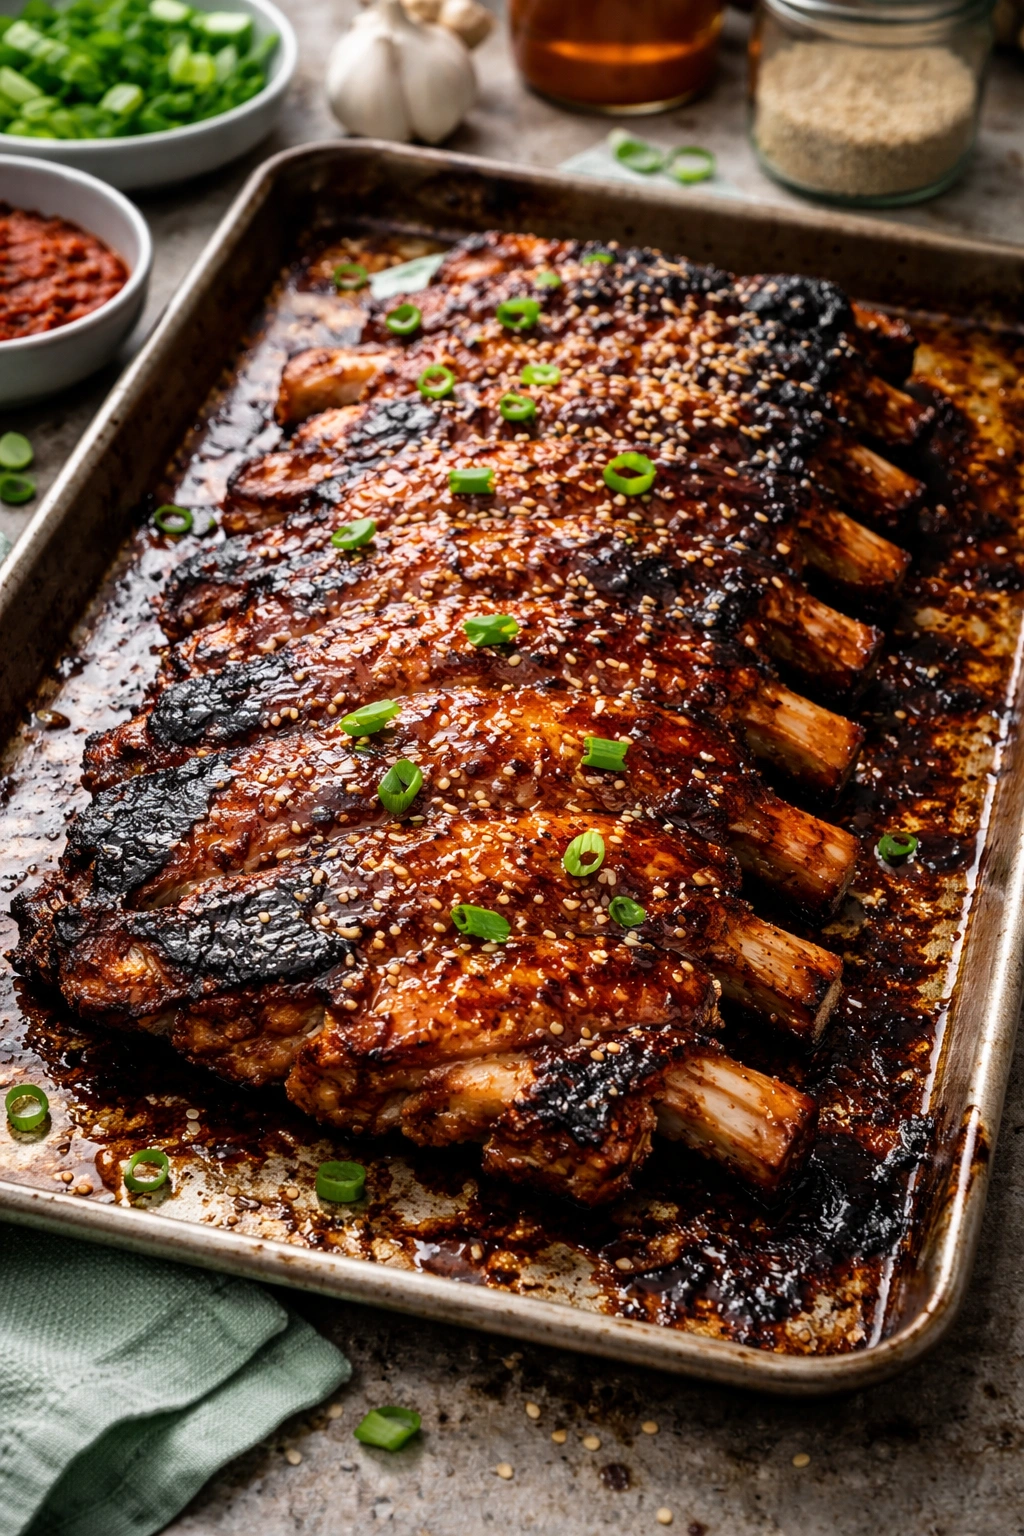
Place the baking sheet under the hot broiler and watch it closely — do not walk away. Broil for 3 to 5 minutes, until the glaze is deep brown and slightly blackened in places. The ribs should look caramelized and glossy, with some darker edges. This should happen fairly quickly because the glaze is sugar-based and browns rapidly under high direct heat.
If you see the glaze beginning to char too much (pitch black rather than deep brown), remove the pan immediately — there’s a fine line between caramelized and burnt, and broilers vary in intensity.
Step 6: Rotate and Broil the Back Side (Optional but Recommended)
For extra color and caramelization, you can flip the ribs bone-side up and broil the back for just 1 to 2 minutes as well. This isn’t essential because you want the meat side to be the showstopper, but if the bones look pale, a quick broil on the back side adds visual appeal.
Achieving the Perfect Caramelized Crust
The difference between sticky ribs that look restaurant-quality and ones that look homemade comes down to the final broiler step and how well you caramelize the glaze. Here’s what you’re actually aiming for.
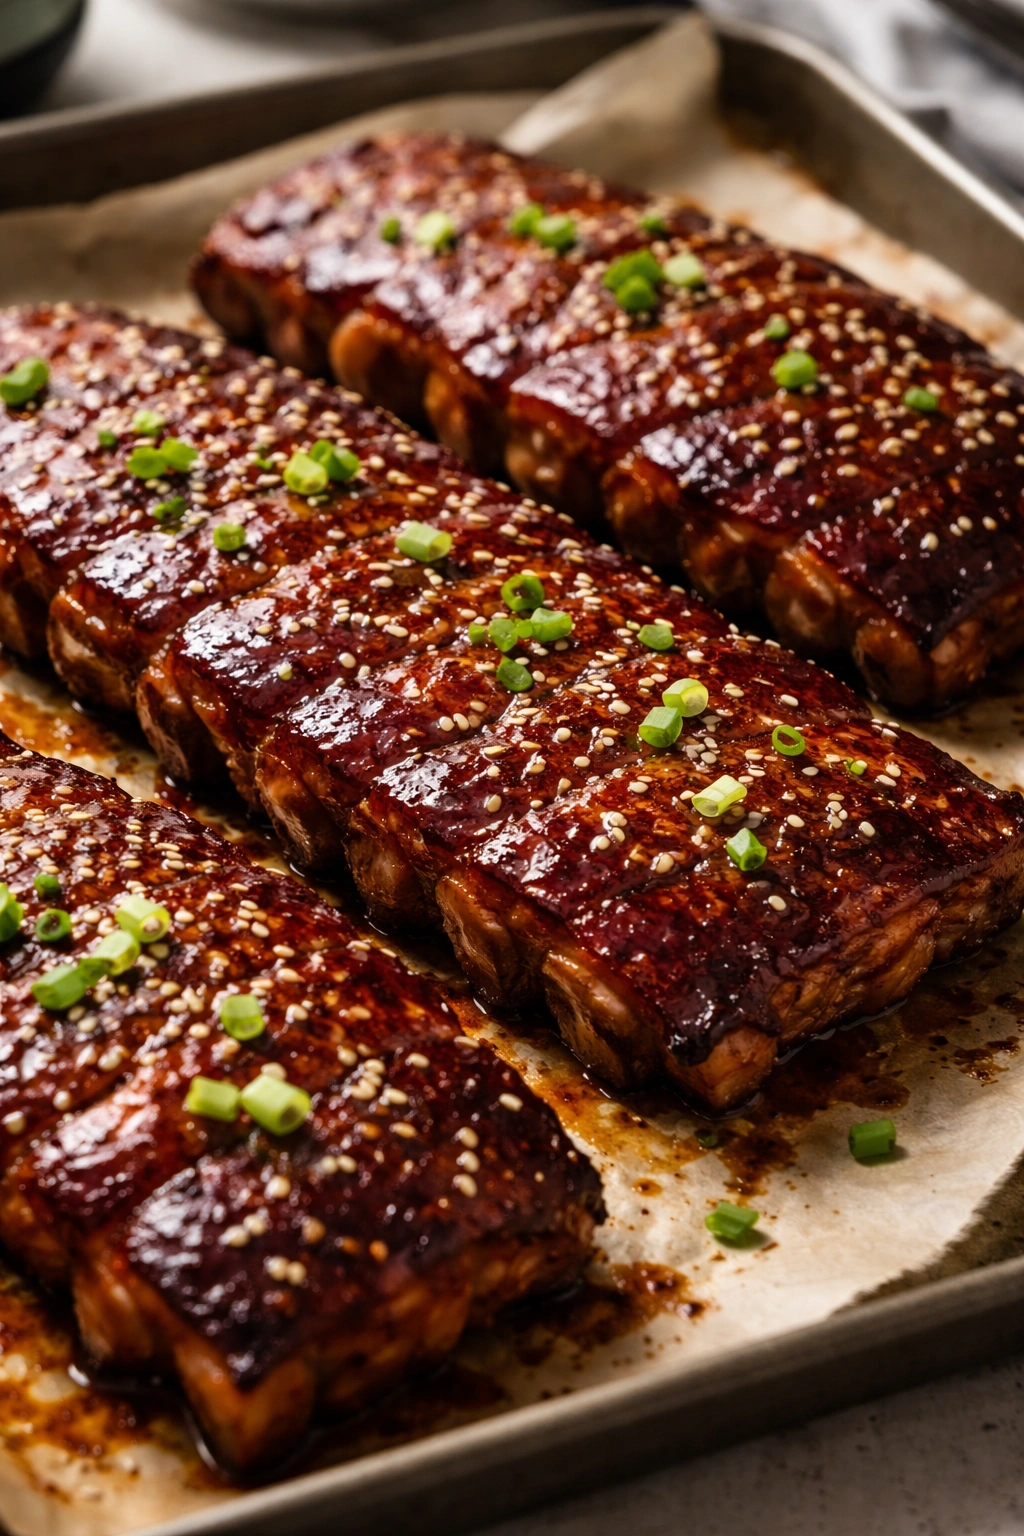
Deep Caramelization, Not Black Char
The glaze should turn a rich, deep mahogany brown, almost burgundy in places, with some darker edges and spots. It should look glossy and shiny, like it’s been lacquered onto the ribs. What you don’t want is charred black all over, which means the sugars have burnt and the glaze will taste bitter. The difference is subtle but noticeable — caramelized is sweet and complex, charred is acrid and unpleasant.
The key is watching the ribs the entire time they’re under the broiler. Most broilers are intense, and 3 to 5 minutes is usually enough. Every broiler is different, so timing isn’t an exact science. If your broiler runs particularly hot (which many do), you might need only 2 to 3 minutes. If it’s gentler, you might need closer to 5 or 6 minutes.
The Glaze Should be Sticky and Sticky
When you remove the ribs from the broiler, the glaze should immediately feel slightly tacky to the touch (though obviously let it cool a moment before touching anything). As it cools to room temperature over the next few minutes, it should set into a glossy, sticky coating that clings to the ribs. If it’s still runny or thin when cooled, you reduced it insufficiently — next time, simmer it for an extra minute or two.
Brush, Don’t Dip
Some recipes suggest dipping ribs directly into glaze. Brushing gives you much better control and ensures an even coating without excessive glaze pooling and burning. A pastry brush or even a basting brush is your friend here.
Common Mistakes That Ruin Korean Ribs
Even with a straightforward recipe, there are a few pitfalls that can throw off the final result. Knowing what can go wrong means you can avoid it.
Skipping the Membrane Removal
If the thin silvery membrane on the back of the ribs is still attached, the marinade won’t penetrate as deeply, and the final texture will be slightly rubbery in spots. It takes literally one minute to remove it, so please don’t skip this. Insert a paring knife under the membrane to loosen a corner, then pull it away with your fingers.
Marinating for Too Short a Time
Four hours is the bare minimum, but it’s genuinely not enough for these ribs to reach their potential. Overnight marinating (12 to 24 hours) makes a noticeable difference in both tenderness and flavor penetration. If you’re in a rush, you can make these in four hours, but they’ll be noticeably less flavorful and slightly less tender than overnight-marinated ribs.
Opening the Oven Too Many Times
Every time you open the oven door to peek, you release steam and extend the cooking time. Resist the urge to check on the ribs until the timer goes off. If you’re genuinely concerned about dryness, you can add a bit more water to the pan under the foil, but honestly, the oven method is very forgiving — the ribs won’t dry out if you don’t open the door.
Reducing the Glaze Too Much
If you reduce the glaze until it’s thick as ketchup, it will harden into a thick, chewy coating rather than a sticky one, and it may burn too quickly under the broiler. Aim for a consistency somewhere between honey and jam — thick enough to coat the back of a spoon, but still flowing slightly when warm.
Broiling Too Long
The glaze goes from perfect caramelization to burnt in about 60 seconds, so the broiler step requires attention. Set a timer for 3 minutes and check. If it needs more time, add 30-second increments. It’s much easier to put it back in than to fix burnt sugar.
Forgetting to Remove Ribs From the Marinade Completely
Any excess raw marinade clinging to the ribs during braising can make the meat taste overly salty or overly gingery. Pat the ribs dry or at least mostly dry before placing them on the baking sheet. The marinade you pour onto the sheet is enough.
Not Using Toasted Sesame Oil
Regular (non-toasted) sesame oil is lighter and more subtle. Toasted sesame oil is darker, more fragrant, and deeply nutty. Don’t substitute regular for toasted — it’s a significant flavor difference that changes the whole character of the dish.
Pro Tips From Korean Cooks
These are insights from people who make these ribs regularly and know the shortcuts and tricks that make a difference.
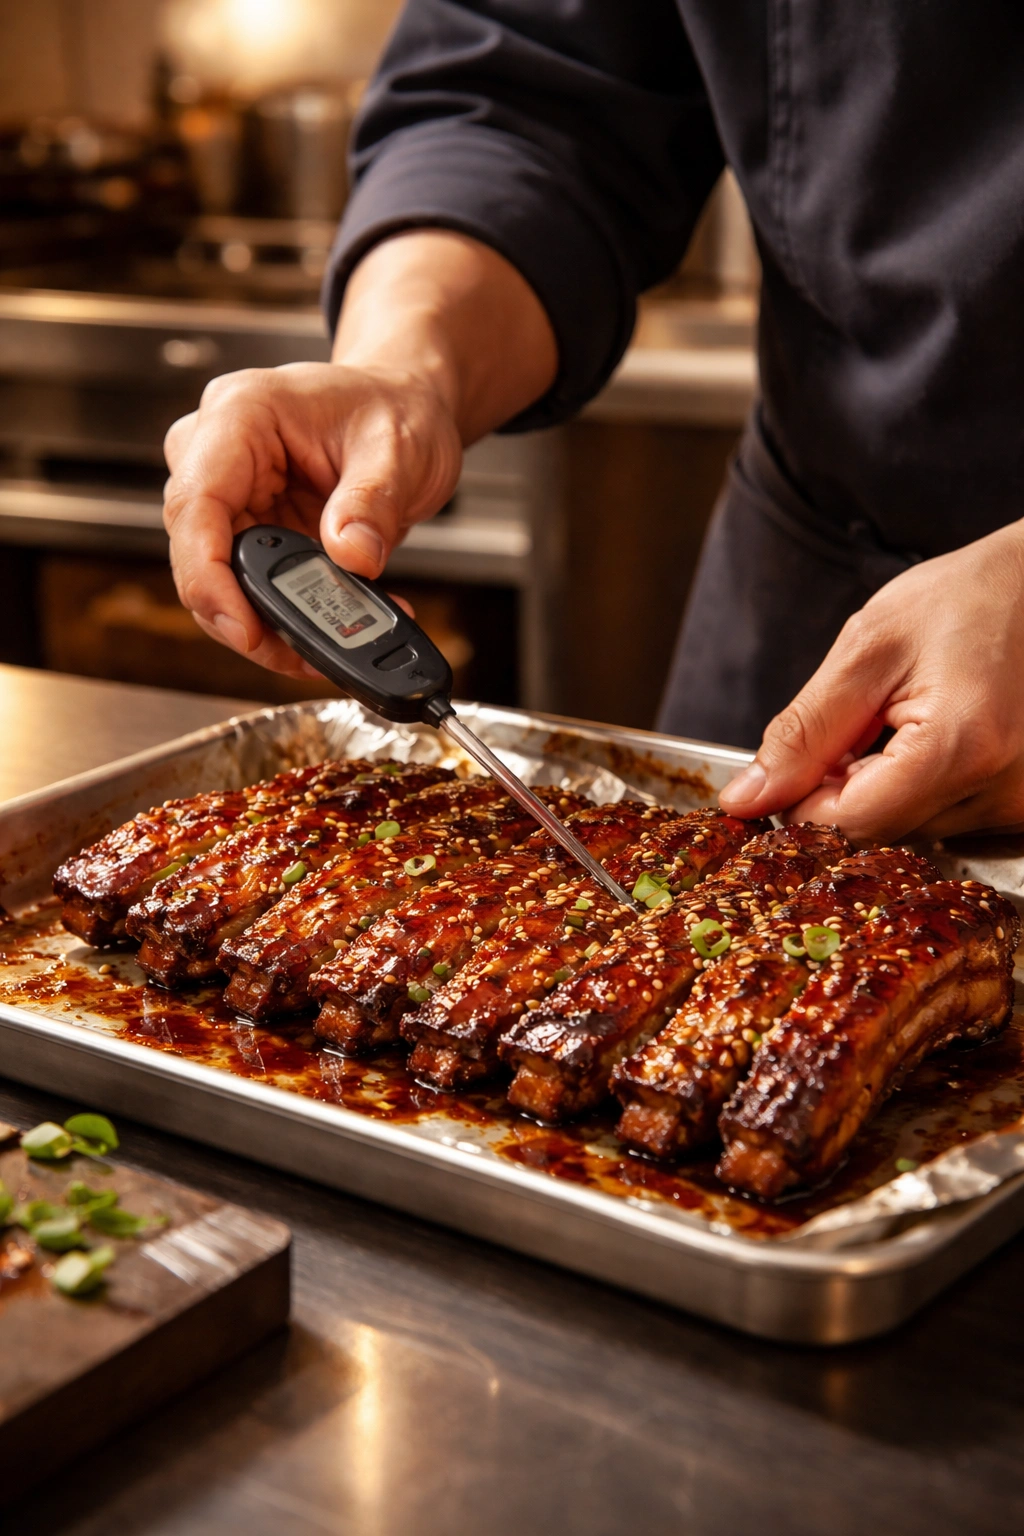
Use a Meat Thermometer for Confidence
If you want to remove the guesswork from doneness, insert a meat thermometer into the thickest part of the meat (not touching bone). Pork is technically safe to eat at 145°F (63°C), but for ribs to be fall-apart tender, you’re aiming for 195°F to 205°F (90°C to 96°C). At those temperatures, the connective tissue has fully broken down and the meat shreds easily. Baby back ribs usually reach this temp around the 2-hour mark; St. Louis ribs might take 2.5 hours or slightly more.
Save Excess Glaze for Dipping or Leftovers
Make slightly extra glaze and reserve some in a small bowl for serving. Guests love a little dipping sauce on the side, and any glaze left over is incredible on rice the next day.
Cut Into Individual Ribs When You Serve
Cut the rib racks into individual bones (or 2-bone sections if you want larger pieces) right before serving. This keeps the meat warmer longer and makes eating more convenient. Use a sharp knife or even kitchen shears to cut between the bones — shears actually work better because they don’t drag the glaze around.
Serve on a Platter, Not Individual Plates
Korean-style, these ribs are meant to be communal. Arrange them on a large platter, drizzle with any remaining glaze, and let guests pick their pieces. It’s more festive and less formal than individual plating.
Make Them a Day Ahead
You can braise the ribs completely and refrigerate them overnight, then just finish under the broiler on serving day. This is incredibly convenient for entertaining because your main hands-on work is done the day before. The ribs will keep in the fridge for 4 to 5 days before reheating.
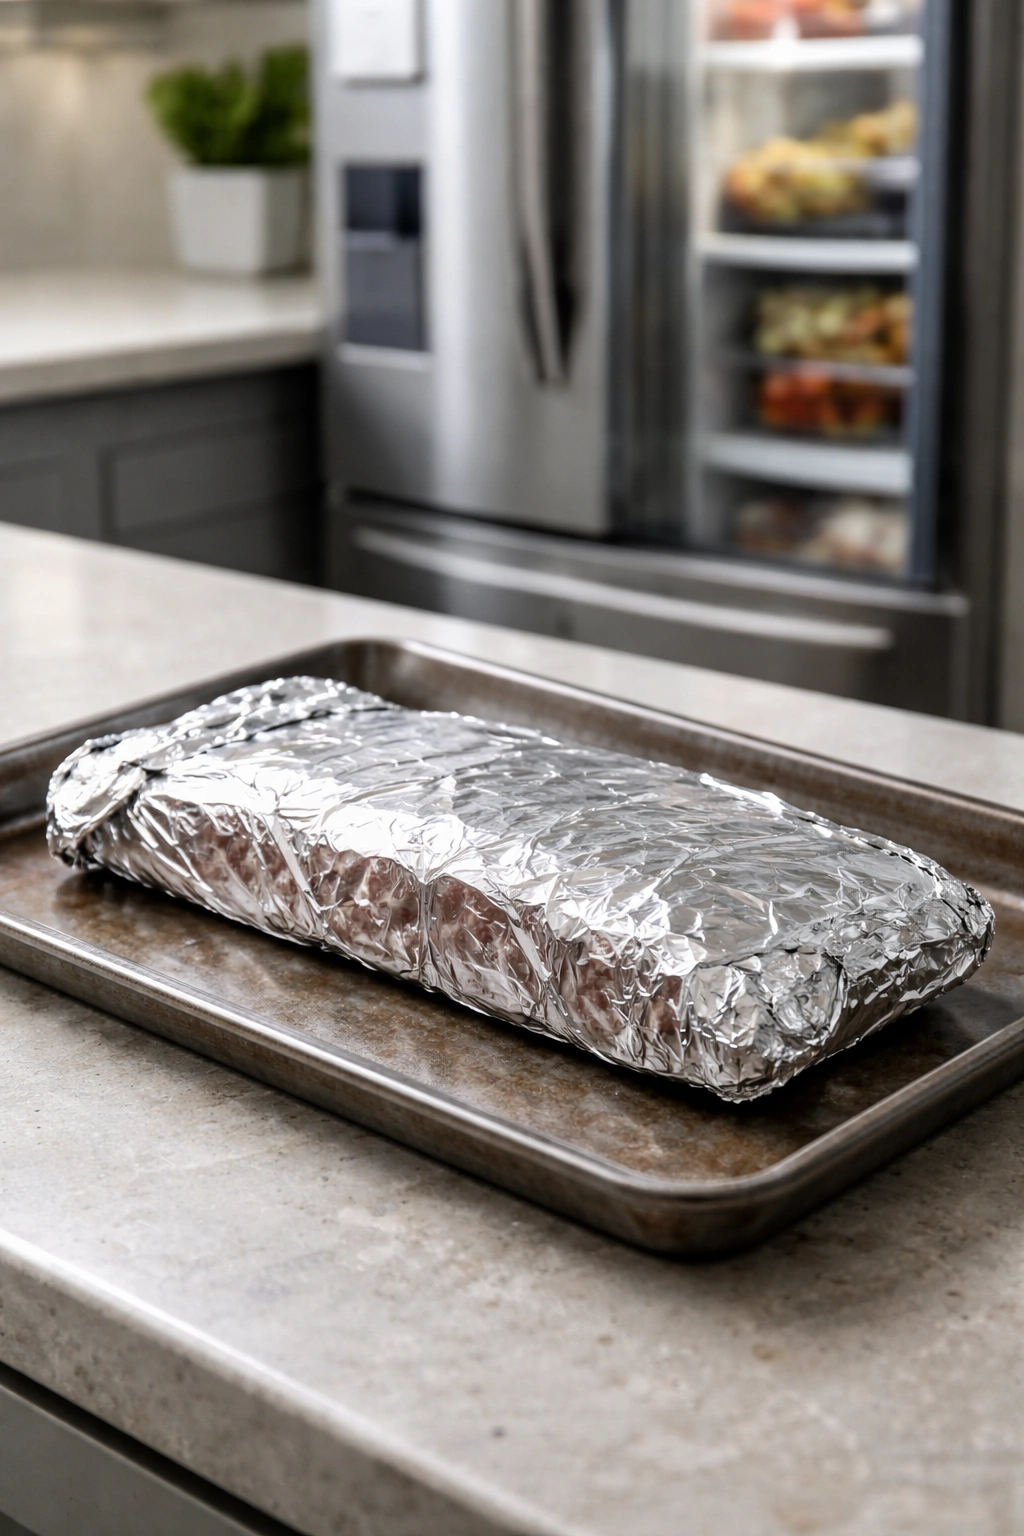
Double Batch and Freeze Half
This recipe scales easily — double the ribs, double the marinade, and bake both at once on two racks. After broiling, let one batch cool completely, wrap tightly in plastic wrap and foil, and freeze for up to 3 months. Thaw in the refrigerator overnight and reheat gently in a 325°F oven for 15 to 20 minutes.
Variations to Try

The base recipe is fantastic, but it’s also incredibly adaptable depending on what you like or what you have on hand.
Spicier Version With Gochujang
Add 1 to 2 tablespoons of gochujang (Korean red chili paste) to the marinade when you blend it. Gochujang brings authentic Korean heat and a fermented depth that’s addictive. Start with 1 tablespoon if you’re sensitive to spice, and increase next time if you want more kick. The flavor is less about burning heat and more about complex, lingering warmth.
Extra Ginger for More Zing
If you love ginger (and these ribs actually benefit from generous ginger), increase it to 1.5 tablespoons (grated) or 1.5 ounces (by weight). Fresh ginger brings brightness and heat that balances sweet flavors beautifully. This works especially well if you also add gochujang.
Orange or Citrus Version
Add the zest and juice of 1 orange or 1 lime to the marinade. The citrus adds brightness and cuts through the richness of the pork. This is particularly nice if you want a lighter, brighter flavor profile.
Beef Short Ribs Variation
If using beef short ribs instead of pork, increase marinating time to 24 hours and oven time to 3 to 3.5 hours. The marinade stays exactly the same — beef short ribs have a deeper flavor that works beautifully with this Korean glaze. The meat will be darker and richer than pork, and the eating experience will feel more luxurious.
Slow Cooker Method
After marinating, place the ribs in a slow cooker with a splash of the reserved marinade (about ½ cup). Cook on LOW for 6 to 8 hours. The meat will be even more tender, though you’ll sacrifice the broiler caramelization. To finish, place the slow-cooker ribs on a baking sheet, brush with glaze, and broil for 3 to 5 minutes as directed.
Instant Pot or Pressure Cooker
For faster cooking, place the marinated ribs (cut into smaller sections to fit) on the trivet of an Instant Pot with 1 cup water. Cook at high pressure for 35 minutes, then quick-release the pressure. Brush with glaze and broil to caramelize. This gives you done ribs in about 45 minutes of actual cooking (plus marinating time), though the texture won’t be quite as melt-in-your-mouth as the slow oven method.
Storage and Reheating
These ribs keep beautifully, and leftovers are almost as good as the fresh batch — or better, since flavors continue developing overnight.
Refrigerator Storage
Let the ribs cool to room temperature, then wrap them tightly in aluminum foil or transfer to an airtight container. They’ll keep in the refrigerator for 4 to 5 days. The glaze may harden slightly when cold, which is fine — it will soften again during reheating.
Freezer Storage
For longer storage, wrap cooled ribs tightly in plastic wrap, then overwrap with foil to prevent freezer burn. Freeze for up to 3 months. Thaw in the refrigerator overnight before reheating.
Reheating Methods
The best way to reheat depends on whether you want to refresh the glaze. To reheat gently without further cooking, wrap the ribs loosely in foil and place them in a 325°F (163°C) oven for 15 to 20 minutes, until heated through. The foil prevents drying.
For a quick refresh of the glaze, you can unwrap the ribs, brush with a touch more glaze, and broil for 1 to 2 minutes — but be careful not to overdo it, as the glaze is already cooked and can burn if given too much heat.
Leftovers also make incredible fried rice the next day. Shred any meat from the bones and toss it into cold rice with scrambled eggs, vegetables, and a splash of soy sauce. The sticky glaze on the meat adds flavor to the whole dish.
Best Sides to Serve With Korean Sticky Ribs
Korean ribs are rich and deeply flavored, so they benefit from fresh, crisp, or lightly spiced side dishes that balance the richness and cleanse the palate between bites.
White or Jasmine Rice
Plain white rice is traditional and essential — the ribs are meant to be eaten with rice, wrapped together in lettuce leaves or simply as a bed under the ribs. Jasmine rice is slightly fragrant and adds subtle flavor without competing with the ribs.
Fresh Lettuce Leaves
Butter lettuce, iceberg, or romaine leaves are meant to be used as edible wrappers. You take a leaf, add a piece of rib meat, maybe a bit of rice, and eat it like a hand-held package. The cool, crisp lettuce is a perfect textural contrast to the hot, sticky ribs.
Kimchi
Either store-bought or homemade, kimchi is the classic Korean side. The spicy, sour, fermented flavors cut through the richness of the ribs and add complexity. If you make these ribs regularly, learning to make a quick kimchi is worthwhile.
Spicy Cucumber Salad
Combine thin-sliced cucumbers with a dressing of rice vinegar, sesame oil, gochugaru (Korean red pepper flakes), garlic, and salt. This is light, refreshing, and provides a spicy-cool contrast to warm ribs.
Sautéed Spinach With Sesame
Simply sauté fresh spinach in a bit of sesame oil and garlic, then finish with sesame seeds and a pinch of salt. It’s tender, flavorful, and feels restaurant-quality.
Steamed Vegetables
Broccoli, bok choy, or snap peas steamed and finished with a touch of sesame oil are excellent light sides that don’t compete with the main dish.
Quick Pickled Radishes and Carrots
Slice radishes and carrots into thin matchsticks, then cover with a mixture of rice vinegar, water, salt, and a touch of sugar. Even after just 30 minutes, they become tangy, crisp, and refreshing — perfect alongside rich ribs.
Miso Soup or Light Broth
A simple soup with miso, soft tofu, and scallions provides warmth and umami without heaviness and complements the ribs without overwhelming the palate.
Final Thoughts
Korean sticky ribs from the oven are proof that you don’t need special equipment or restaurant conditions to create something truly impressive. What you need is a willingness to marinate overnight, patience while the oven does the work, and a few minutes of attention under the broiler at the end. The payoff is meat that’s so tender it falls off the bone, glazed in a sauce that’s simultaneously sweet and savory, with ginger warmth and sesame depth. You’ll make these once and immediately start planning when to make them again.
The beauty of this method is that it’s genuinely forgiving. The oven provides consistent, even heat. The foil traps steam so the meat can’t dry out. The marinade does the seasoning work while you sleep. Even if your timing is off by 15 or 20 minutes, the ribs will still be delicious. Once you’ve made them once, you’ll feel confident enough to adapt them — spicier if you like heat, citrusy if you prefer brightness, with beef short ribs if you want something meatier and richer.
Serve them with white rice, fresh lettuce, and a spicy dipping sauce, and you’ve created a meal that tastes like you’ve been cooking all day. Your guests won’t believe they came from your home kitchen. That’s the real magic of Korean sticky ribs — they deliver restaurant-quality results from your oven, which means you get to enjoy the satisfaction without the heat, stress, or standing over a grill for hours.