Breakfast burritos are the ultimate solution for mornings when you’re running late, skipping the drive-through, or trying to stick to a real eating plan instead of whatever’s quickest. The magic happens when you make a batch on Sunday and freeze them individually — grab one from the freezer, reheat it in three minutes, and you’ve got a complete, satisfying breakfast that tastes way better than anything drive-through offers. The truth is, most people think freezer burritos are either soggy, dry, or fall apart when you reheat them, but that’s because they’re missing a few key techniques that make the difference between a disappointing mess and something you’ll actually look forward to eating.
The real advantage of freezer burritos isn’t just convenience (though that’s huge). It’s that you control every single ingredient, so you’re not getting hidden sugar, cheap oil, or fillers. You know exactly how much protein you’re eating, whether you want vegetables mixed in or stacked on the side, and you can customize each burrito to match exactly what you’re craving that particular morning. Once you nail the method, you can make eight to twelve burritos in about 45 minutes, and then you’ve got breakfast handled for weeks.
Why Breakfast Burritos Are Perfect for Meal Prep
Breakfast burritos check every box for meal prep success. They’re portable, they hold together when wrapped properly, they reheat beautifully from frozen when you know the secrets, and they’re genuinely filling enough to carry you through a busy morning. Unlike pancakes or scrambled eggs, which get weird or rubbery after a few days, a properly wrapped burrito stays intact and tastes fresh when you thaw and reheat it.
The secret is understanding that burritos freeze best when they’re filled with ingredients that actually improve overnight — the flavors meld, the moisture distributes evenly, and everything becomes more cohesive. Scrambled eggs, cheese, cooked sausage or bacon, black beans, and roasted peppers all freeze and reheat brilliantly. Fresh salsa, cilantro, and any delicate greens go in after reheating, which keeps them crisp and bright.
Think of freezer burritos as built-in accountability for eating well. You can’t grab the drive-through if you’ve got a hot burrito ready in your freezer in the time it takes to warm up the microwave. You’re also saving money compared to buying breakfast out — a homemade burrito costs maybe two to three dollars in ingredients, while a restaurant version runs you seven to nine dollars or more.
Choosing Your Fillings and Flavor Combinations
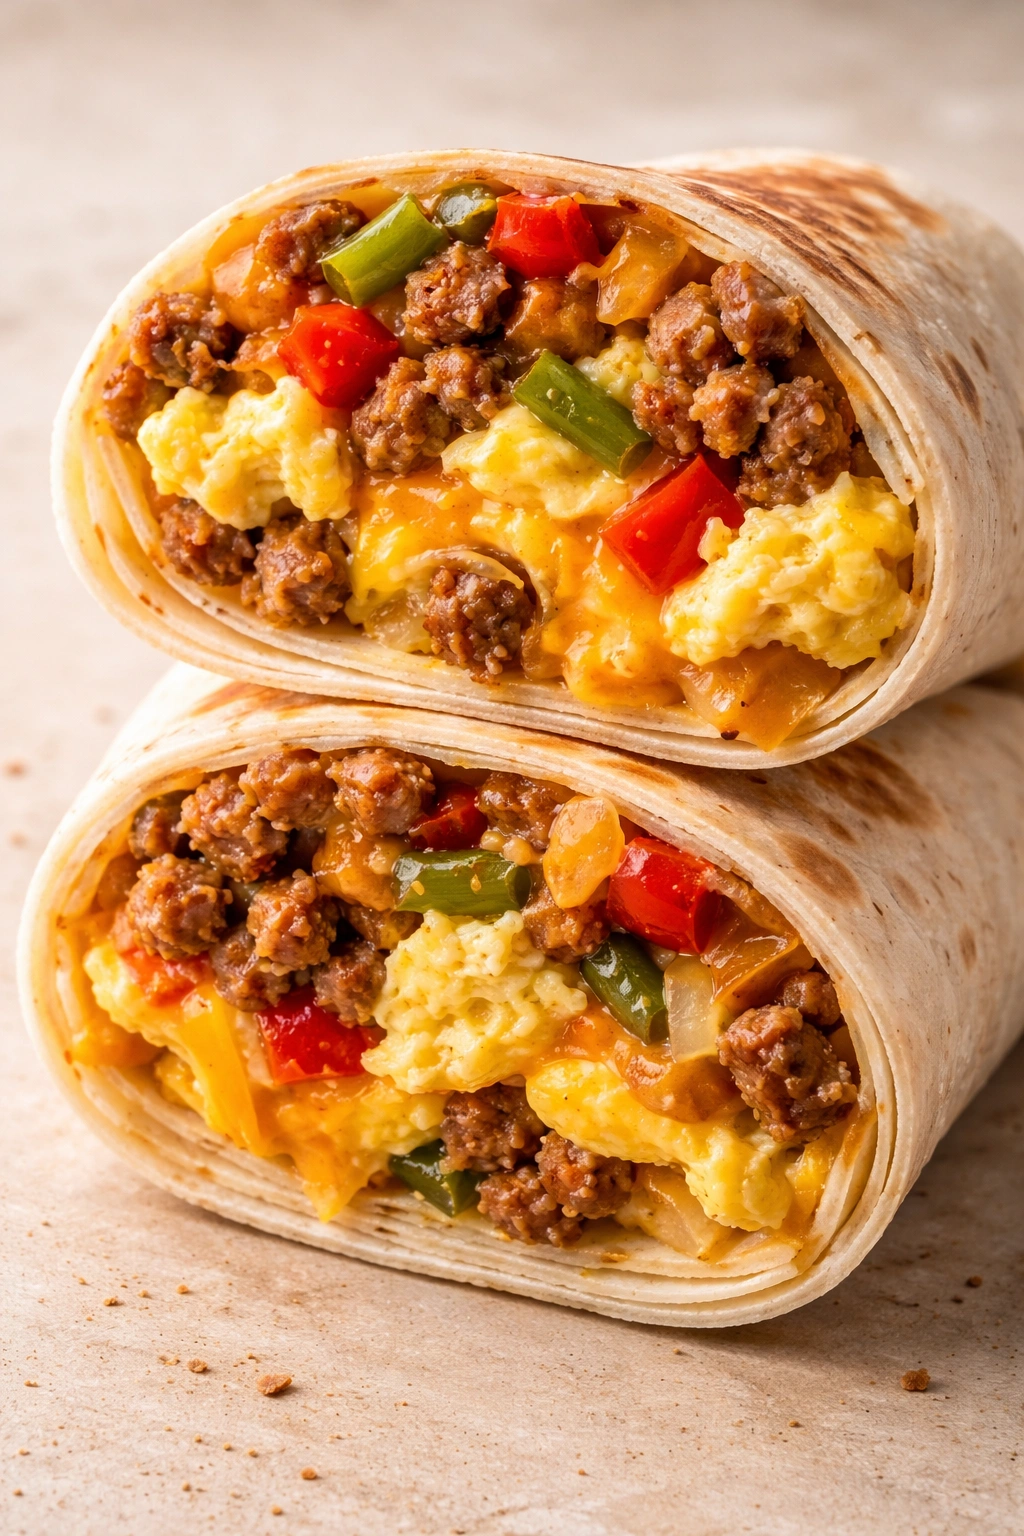
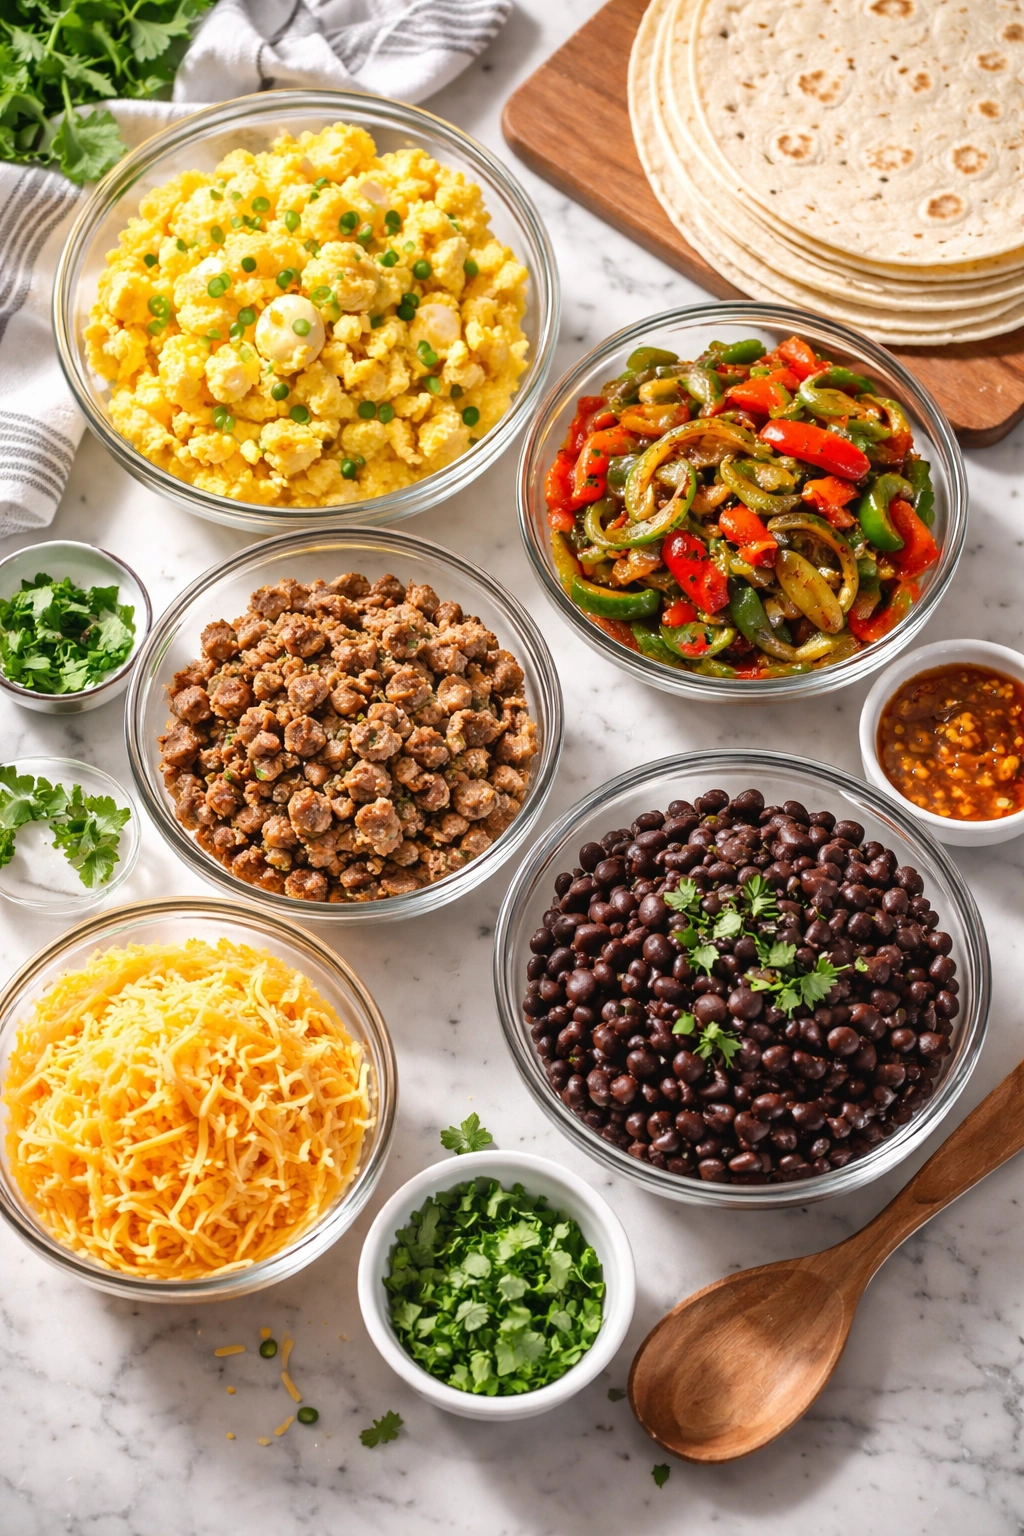
The foundation of every great breakfast burrito is a smart filling combination that hits three categories: protein, vegetables, and flavor builders. You need enough protein to actually fill you up — eggs, cheese, and a meat give you a solid foundation. Then vegetables add nutrition and texture without weighing things down. Finally, flavor builders like salsa, hot sauce, seasoning, or fresh herbs make every bite interesting instead of monotonous.
The best protein combinations are eggs cooked scrambled (not fried whole — they don’t wrap as smoothly), shredded cooked sausage or bacon, and cheese that melts during the initial cooking. Some people cook everything together as one mixture, while others prefer to layer the components so you get distinct flavors in each bite. Both work for freezing — it’s really about how you like eating it.
For vegetables, stick with ones that don’t shed a ton of moisture: diced bell peppers, onions, mushrooms sautéed until they release their water, spinach or kale that’s been cooked down, shredded hash browns (frozen hash browns work beautifully), and black beans or pinto beans. Fresh tomatoes, cucumber, and leafy greens don’t freeze well, so save those to add after reheating.
Choose one or two flavor combinations and make all your burritos that way — don’t try to do twelve different variations your first time. Classic works: scrambled eggs, sausage, cheese, and bell peppers with a little hot sauce. Vegetarian works: scrambled eggs, black beans, roasted sweet potato, cheese, and cilantro. Chorizo-style works: scrambled eggs, chorizo, cheese, and diced jalapeños. Pick one, master it, then experiment once you’re confident in the wrapping and freezing technique.
Essential Equipment and Ingredient Prep
You don’t need fancy equipment, but having a few things on hand makes the process faster and cleaner. A good nonstick skillet for cooking the filling, a cutting board, sharp knife, and parchment paper for wrapping are the essentials. A stand mixer isn’t necessary, but if you have one, it’s handy for scrambling a large quantity of eggs without them becoming rubbery — the paddle attachment on low speed works gently and evenly.
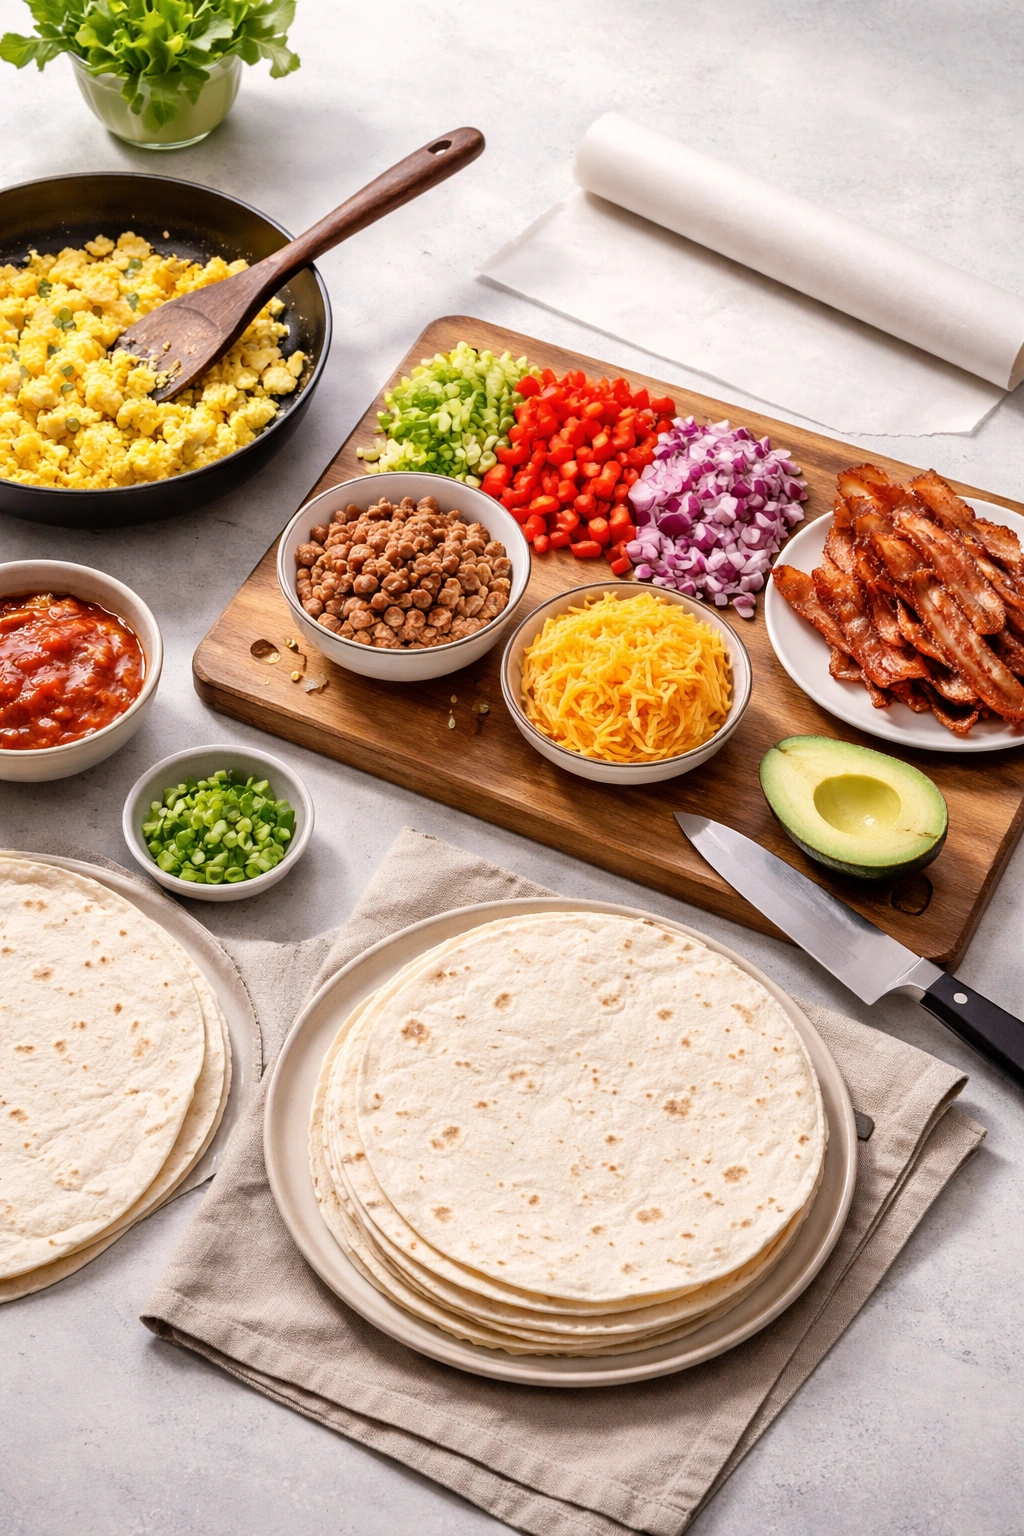
Before you start wrapping, have all your ingredients prepped and cooked: scrambled eggs cooled slightly, sausage cooked and crumbled (or bacon chopped), cheese shredded, vegetables diced and sautéed if needed, and everything sitting in separate bowls ready to assemble. Trying to cook and wrap simultaneously means your filling gets cold and your wrappers dry out waiting. If you’re organized ahead of time, you can wrap six burritos in ten minutes flat.
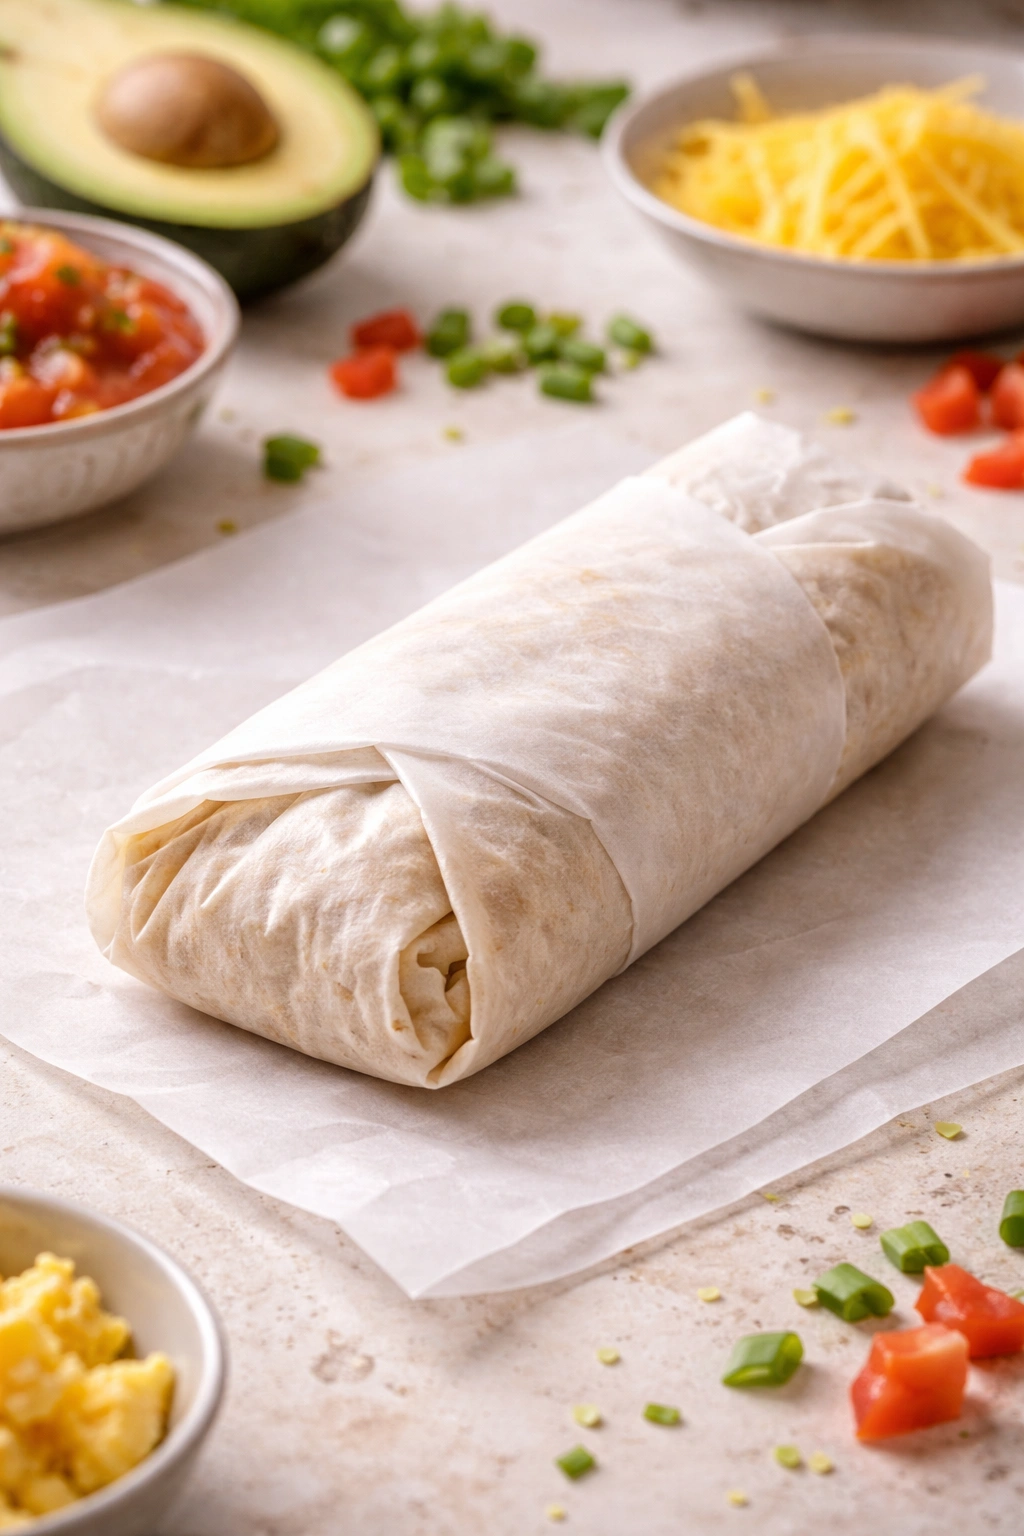
The parchment paper is crucial. Tear a piece roughly 8 inches by 8 inches and place it shiny side down on your work surface. Lay the tortilla in the center of the parchment, fill and wrap your burrito, and when you’re done, the parchment stays wrapped around the burrito during freezing — this prevents freezer burn and makes it easy to identify what you’re grabbing when you open your freezer.
The Best Tortillas for Freezing
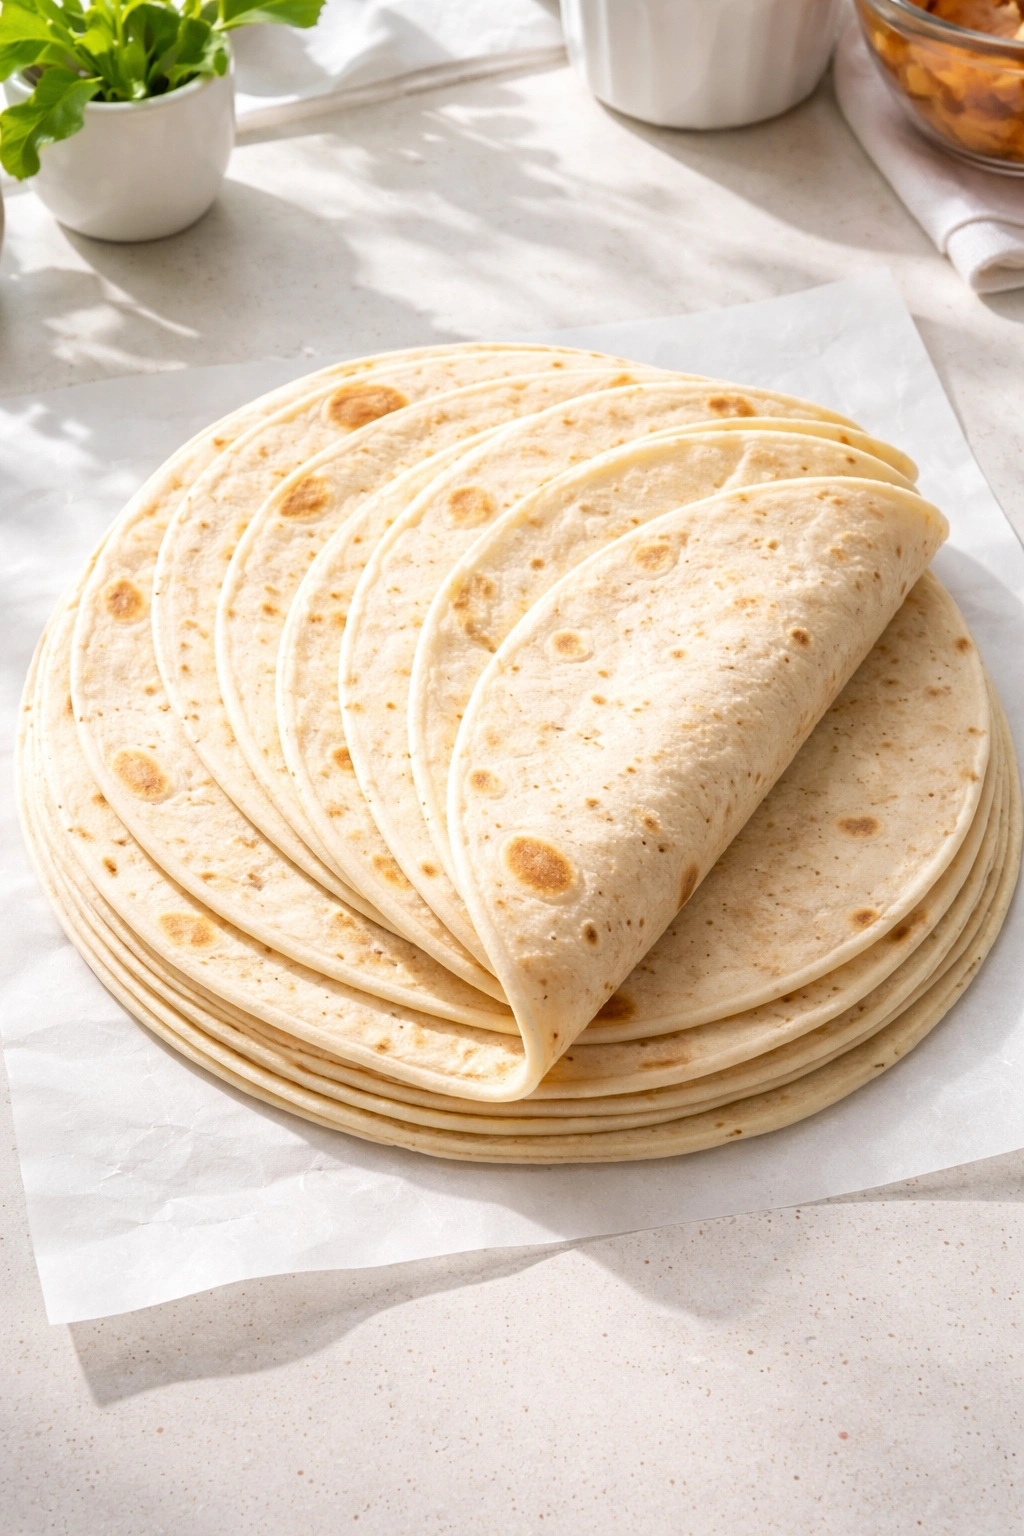
Not all tortillas are created equal when it comes to freezing. Thin flour tortillas (the standard 8-inch ones you find in every grocery store) work fine, but they can get brittle in the freezer if you’re not careful. Larger 10-inch flour tortillas are better — they hold more filling, they’re sturdier, and they freeze and reheat more forgivingly. If you can find them, look for tortillas labeled “burrito-size” (usually 10 inches) specifically because those are thicker and more flexible.
Whole wheat tortillas work but tend to tear more easily when cold, so let them warm up slightly at room temperature before assembling. Spinach or tomato tortillas add color and a subtle flavor note, and they freeze just as well as plain flour. Corn tortillas don’t work well for freezer burritos — they crack when cold and don’t hold the filling securely when reheating.
The trick with any tortilla is warming it slightly before filling. Cold tortillas are stiff and tear easily. Wrap your stack in a damp paper towel and microwave for 20-30 seconds, or lay them on a warm (but not hot) skillet for a few seconds per side. Warm tortillas are pliable, they wrap tighter without cracking, and the entire burrito is more cohesive.
Making the Perfect Filling Mixture
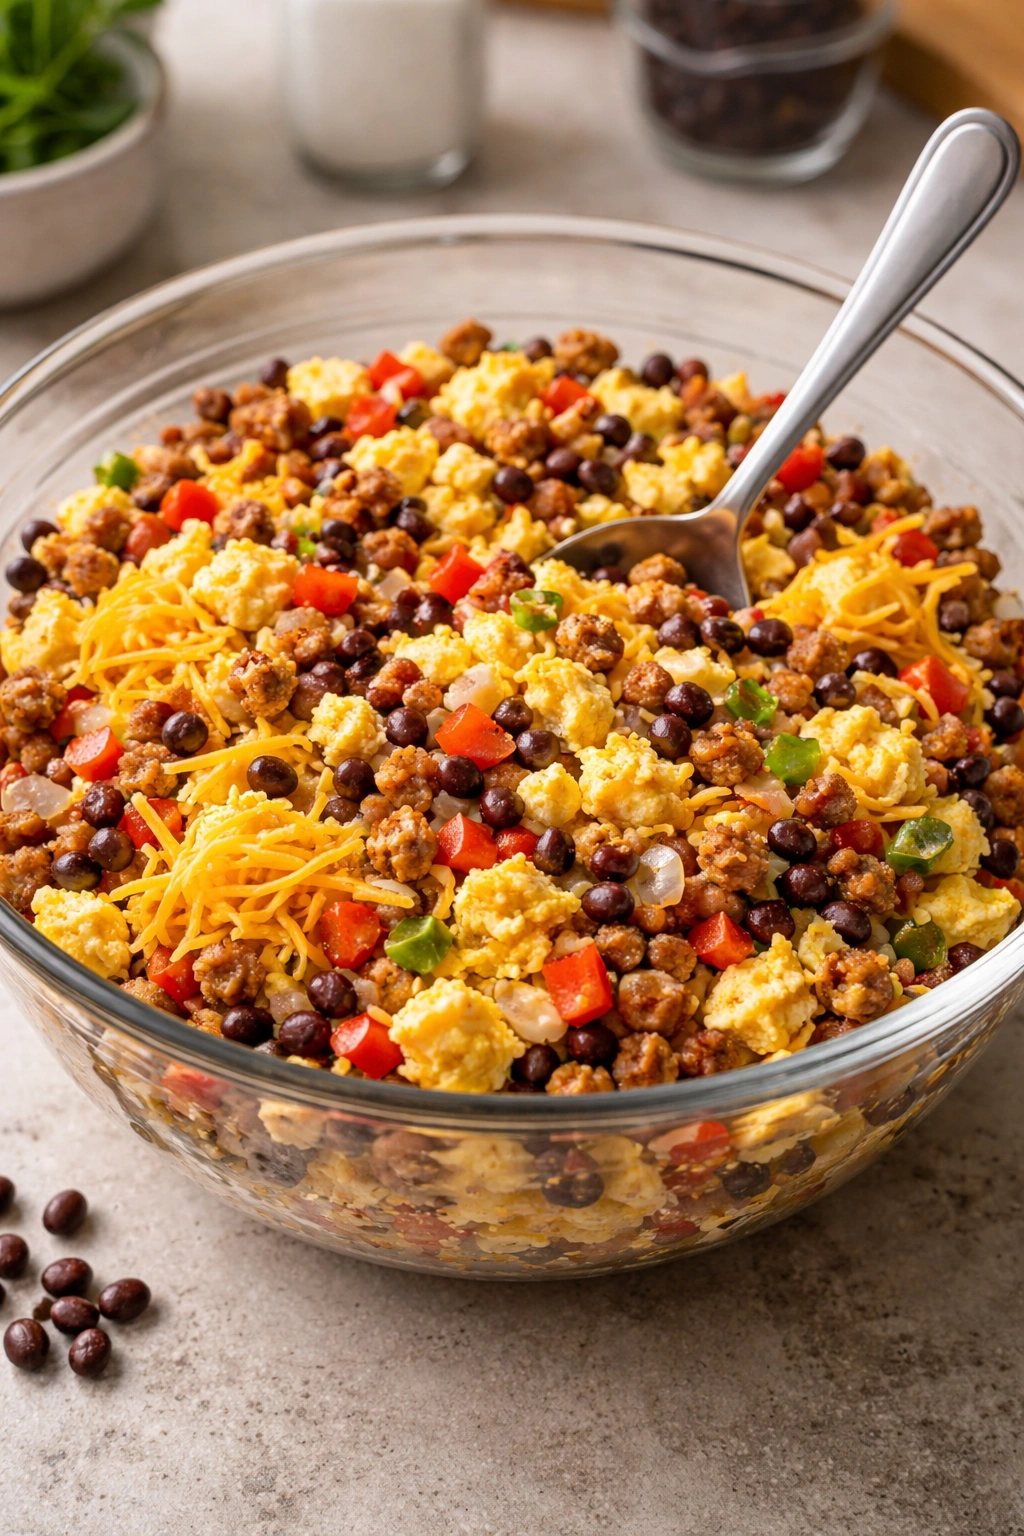
The filling is where everything comes together. Here’s what a basic batch looks like: 12 large eggs scrambled, one pound of bulk sausage cooked and crumbled, 1.5 cups of shredded cheese, one diced bell pepper sautéed with diced onion until soft, one cup of cooked black beans, and a pinch of salt and pepper. That makes roughly eight burritos with good filling coverage on each one.
The key is cooking the eggs gently and not overdrying them. Whisk your eggs with a pinch of salt before cooking. Use medium heat and a nonstick pan with a little butter. Stir constantly but gently as they cook, and pull them off the heat when they’re still slightly creamy — they’ll continue cooking with residual heat and will continue to firm up as everything sits. Overcooked scrambled eggs are grainy and will be even more unpleasant when you reheat them.
Mix all your ingredients in a large bowl while the eggs are still slightly warm so the cheese starts to melt and everything becomes more cohesive. Taste and adjust seasoning — you want it a bit more flavorful than you’d normally eat it plain, because freezing and reheating mutes flavors slightly. Let the mixture cool to room temperature before wrapping. If it’s too hot, it’ll make the tortillas steam and get soggy, and the burrito will be harder to wrap.
How to Wrap Burritos Tight Enough for Freezing
The wrap is the most important technique here. A loose wrap means your burrito falls apart when you reheat it. Here’s the step-by-step method that works every single time:
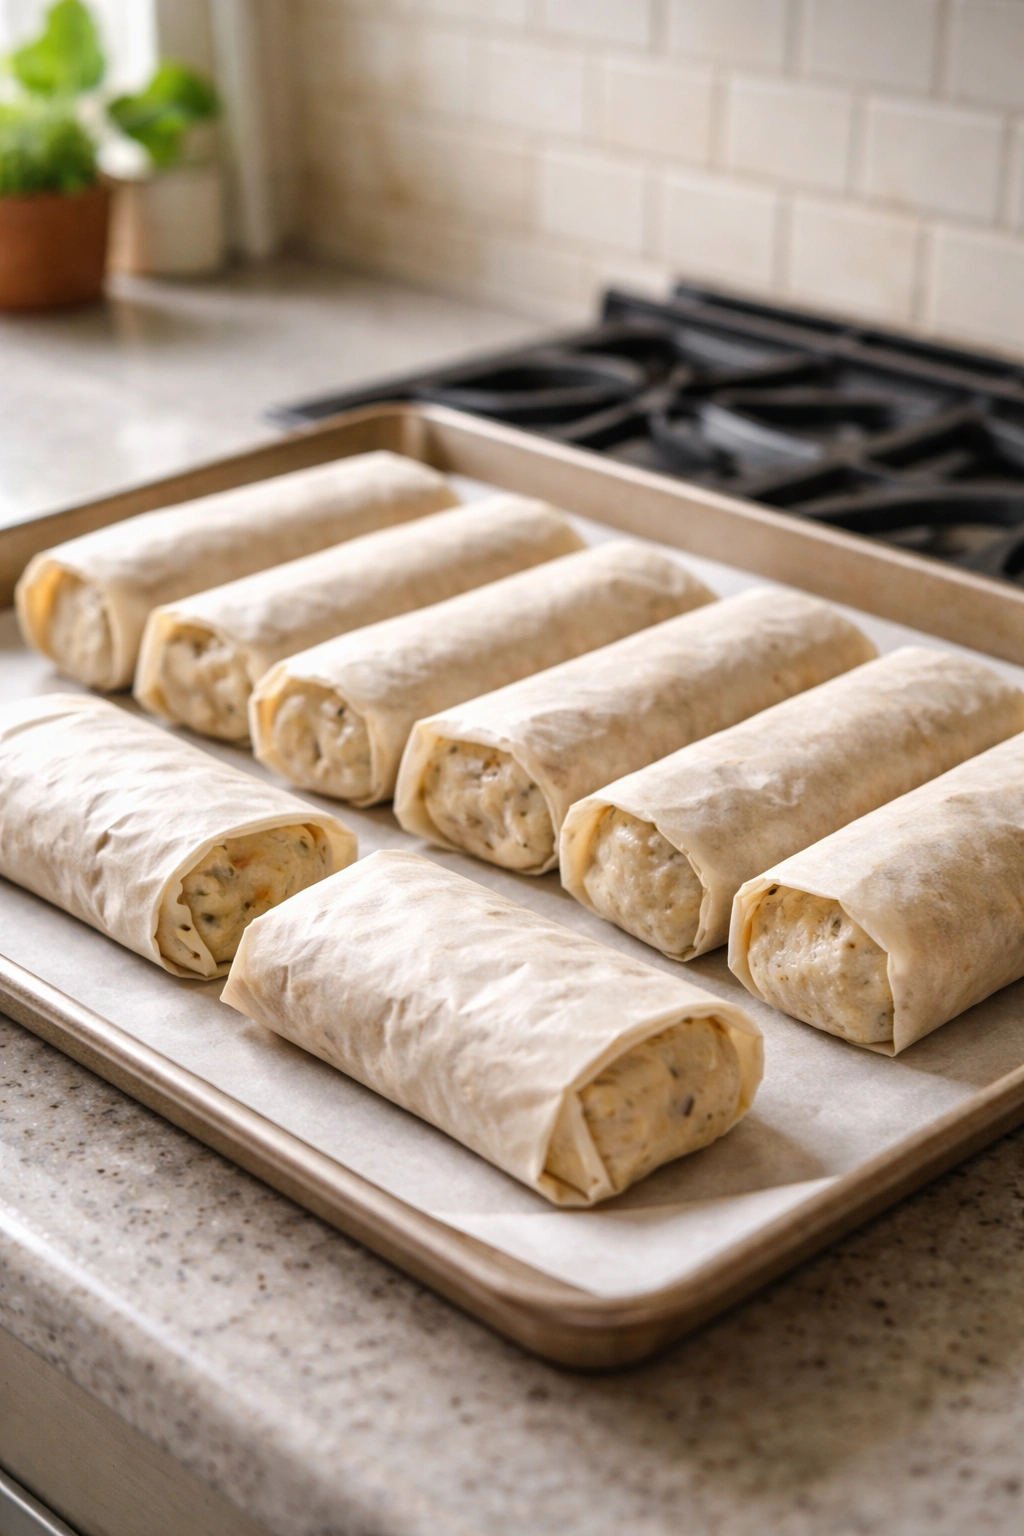
Place your parchment paper on the counter. Lay a warm tortilla in the center, slightly closer to the bottom edge of the paper. Spoon your filling in a horizontal line across the center of the tortilla, roughly two inches from the bottom edge. Do not overfill — you should see tortilla on all sides of the filling. About three-quarter cup of filling per burrito is the sweet spot.
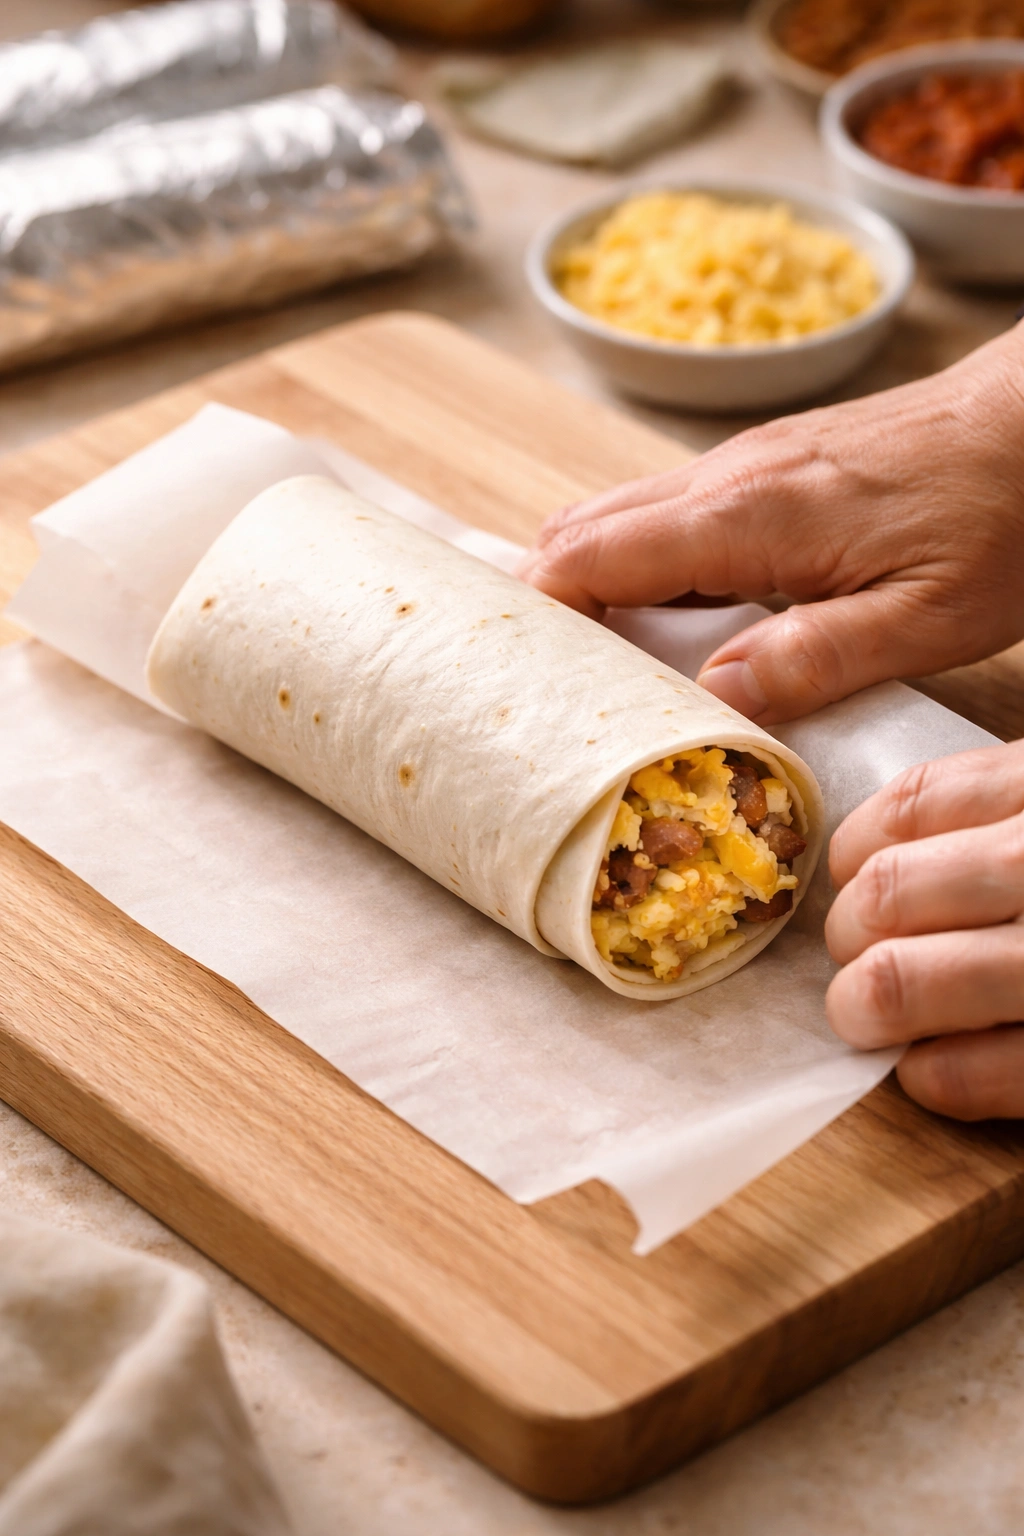
Fold the bottom edge of the tortilla up and over the filling, tucking it snugly underneath. Roll it away from you one full turn, then fold in the left and right sides like you’re making an envelope, folding them in tightly and rolling them along. Keep rolling away from you, pulling the tortilla taut as you go. The final roll should wrap the burrito completely, with the seam facing downward on your work surface.
The burrito should feel firm and compact, not squishy. If you can shift the filling inside the wrap, it’s too loose — unwrap it and try again with less filling. If it feels dense and compact, you’ve got it right. Wrap the parchment around the burrito while it’s still on the counter, fold the ends of the parchment under, and set it seam-side down on a baking sheet to cool completely before freezing.
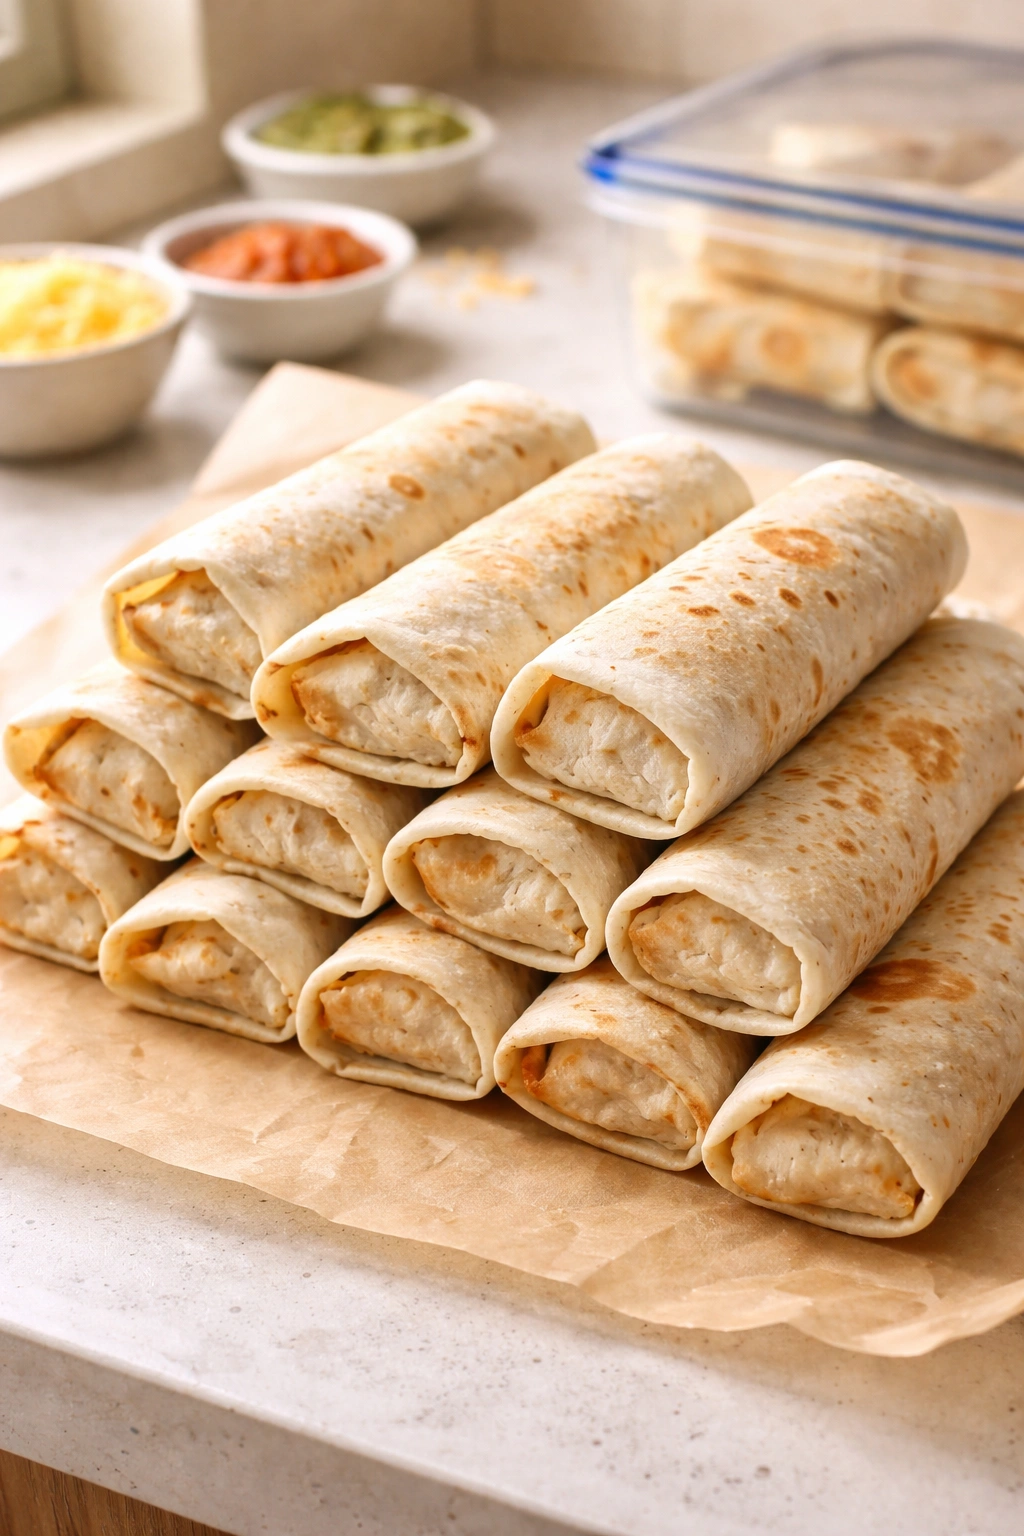
Flash-Freezing and Storage Techniques
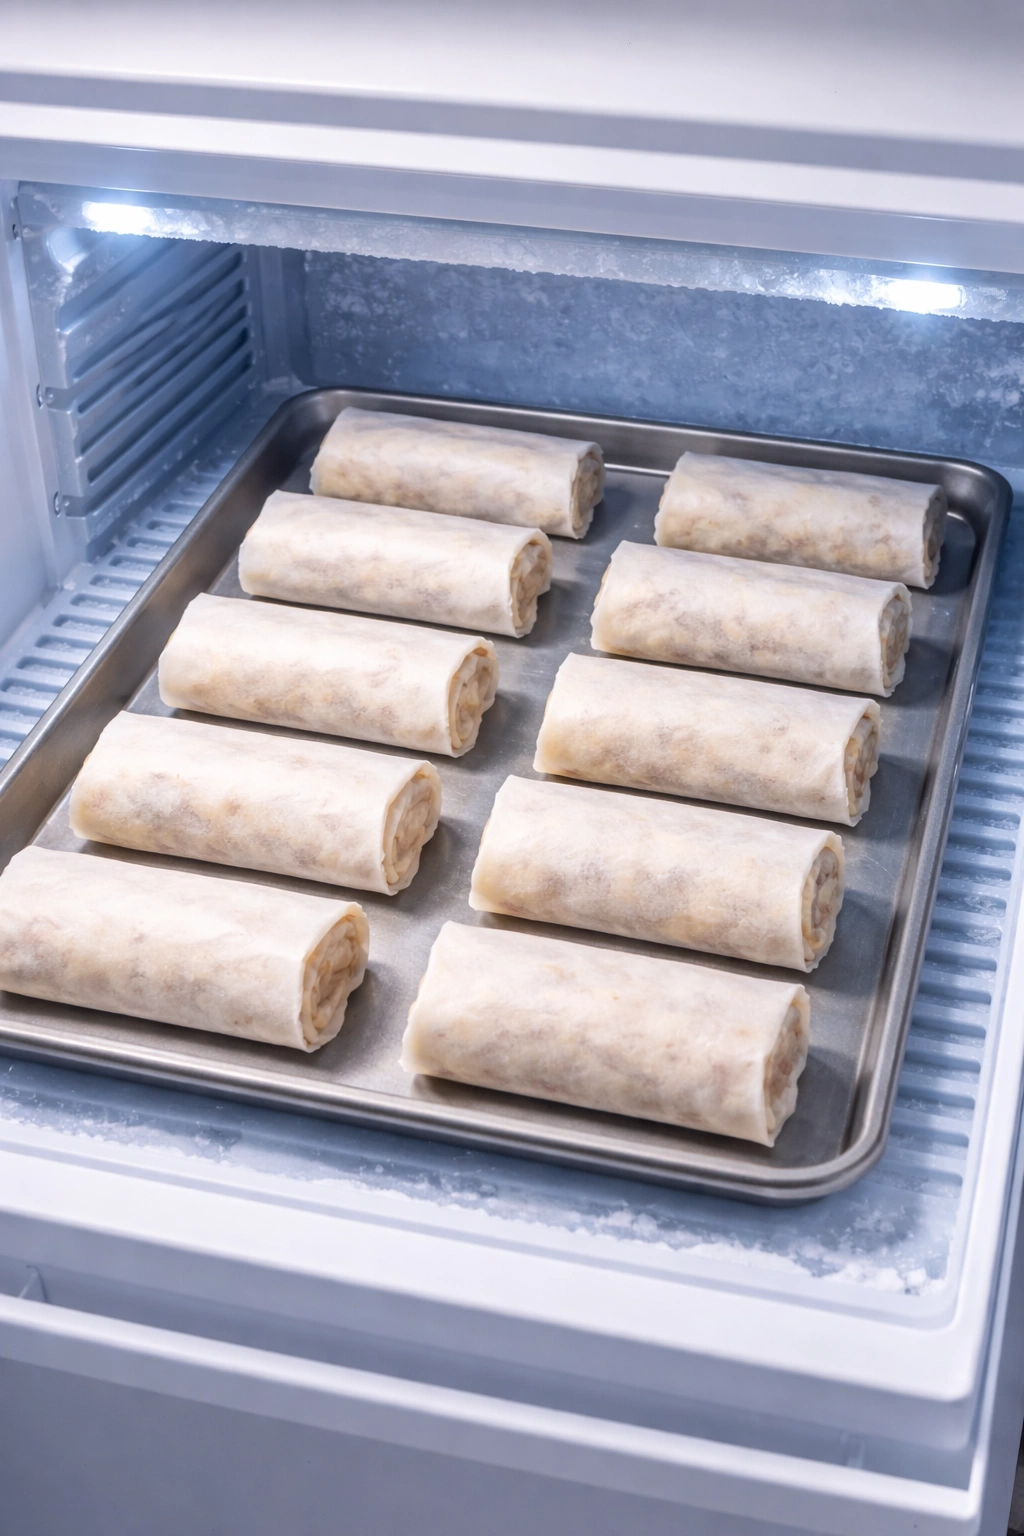
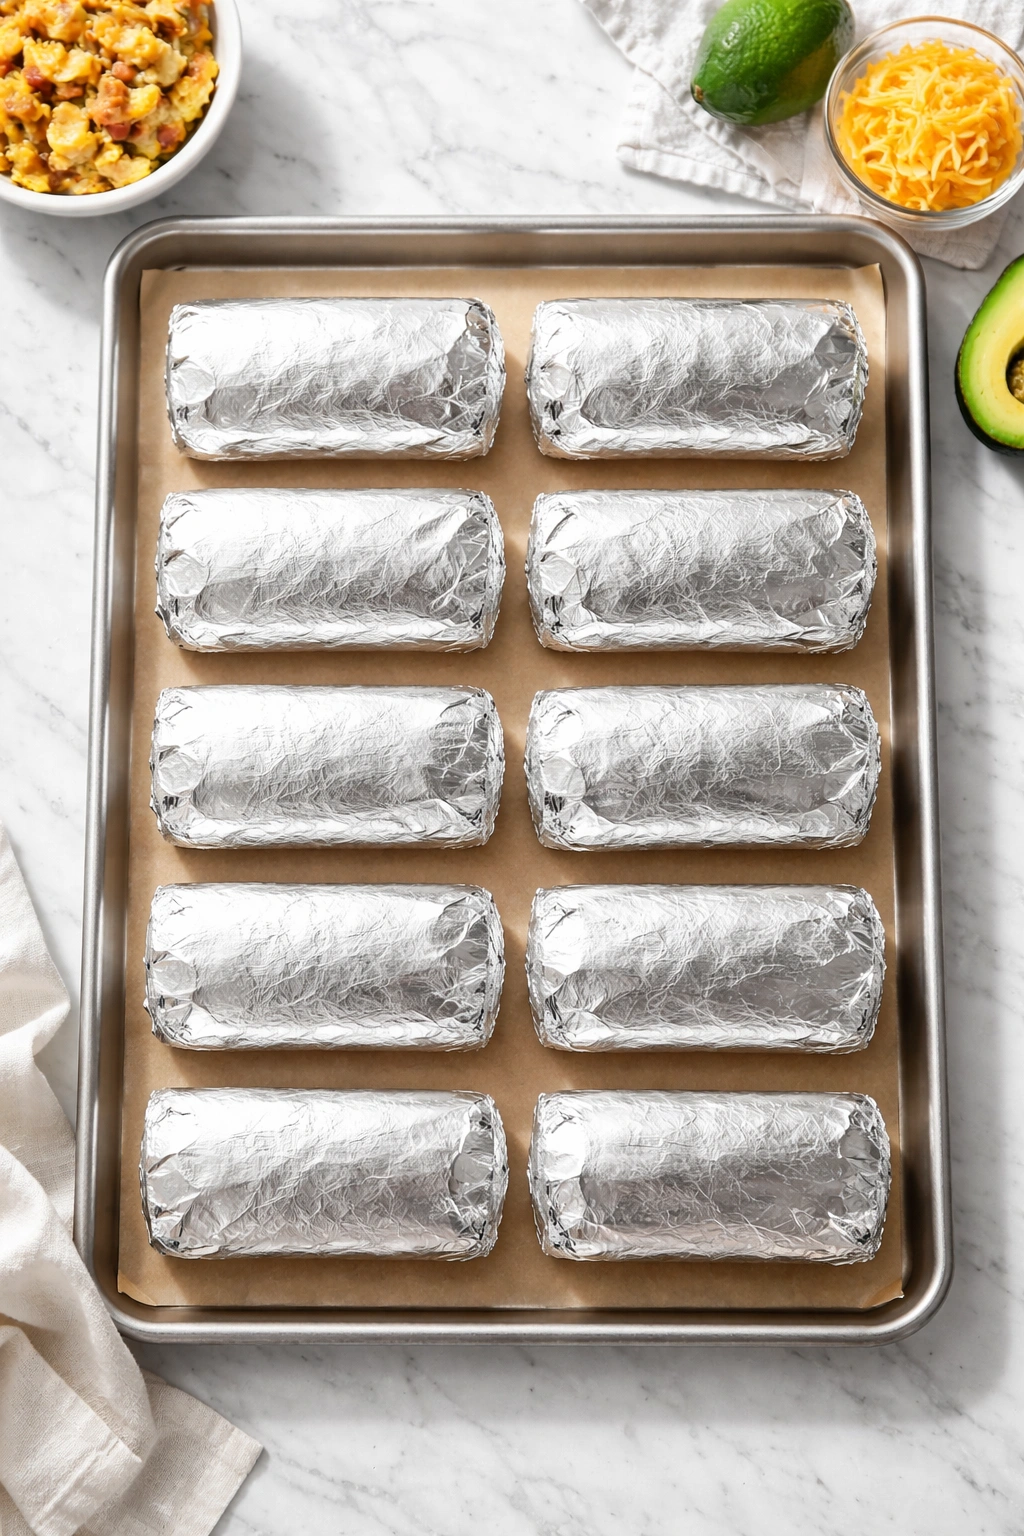
Flash-freezing prevents your burritos from sticking together and makes it easy to grab just one without thawing the whole batch. Line a baking sheet with parchment, arrange your wrapped burritos in a single layer with space between each one, and freeze for at least 3-4 hours until they’re completely solid. Then transfer them to a freezer bag, label the bag with the date, and they’ll keep for up to three months.
The parchment wrap you already have on each burrito is protecting against freezer burn while they’re in the bag. You could add an additional plastic wrap layer around the parchment if you’re really worried about ice crystals forming, but it’s not necessary if you’ll be eating them within six weeks.
Label your freezer bag with what’s inside and the date you made them. “Sausage and Pepper Burritos — Made [date]” takes ten seconds and saves you from opening the bag to figure out what you grabbed three weeks later. Store them in a designated spot in your freezer so you know exactly where to grab one in the morning when you’re groggy and rushing.
Reheating From Frozen Without Sogginess
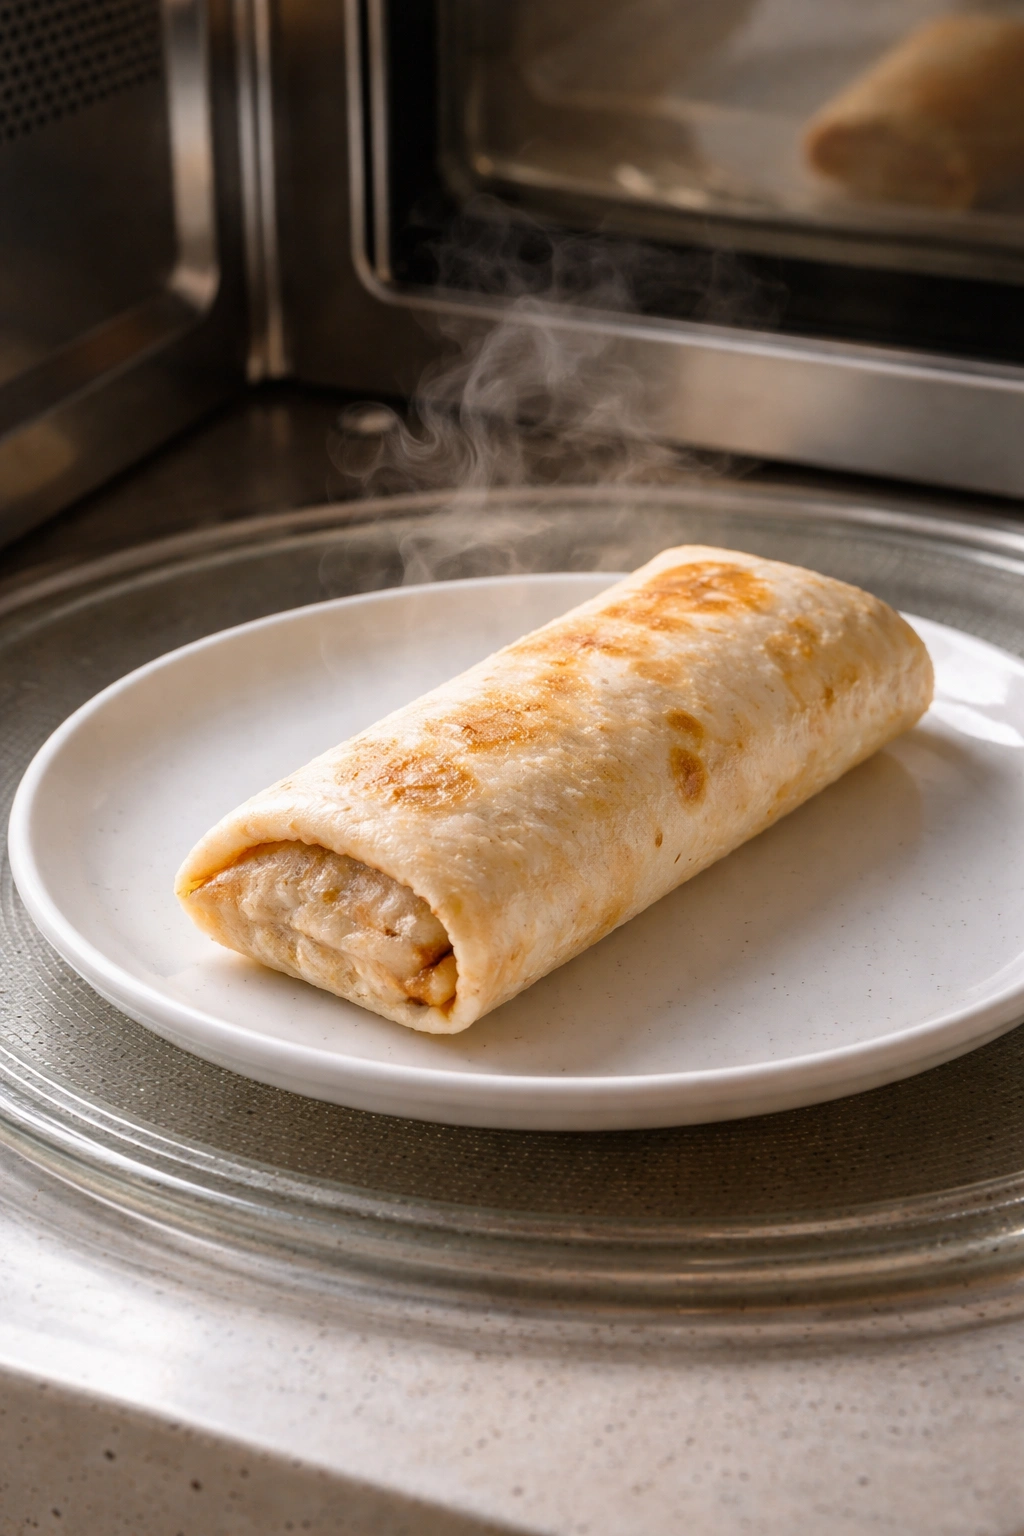
The microwave is actually the best method for reheating frozen burritos, despite what you might think. It’s fast, it keeps the burrito moist without making it soggy, and it takes zero cleanup. Remove the parchment wrapper and place the burrito directly on a microwave-safe plate. Microwave on 50 percent power for 3-4 minutes, checking halfway through and rotating it so it heats evenly.
Fifty percent power is the magic here — it thaws the burrito gently without overheating the outside while the inside is still cold. Full power power cooks the tortilla too quickly and makes everything uneven. If you microwave on high, the filling gets scalding while the tortilla is still partially cold, or the tortilla overcooks and gets tough while the filling is lukewarm.
A toaster oven or regular oven works too if you have a few extra minutes. Wrap the frozen burrito in foil and bake at 325°F for 12-15 minutes. The burrito heats evenly, the tortilla stays soft, and if you’re making breakfast for multiple people, you can reheat them all at once. The downside is it takes longer, but the result is actually slightly better if you’re patient.
Never reheat in a skillet directly — the bottom gets crispy and hot while the inside stays cold. If you want a skillet method, wait until the burrito is mostly thawed via microwave (2 minutes on 50 percent power), then finish it in a buttered skillet over medium heat for a minute per side. You’ll get a slightly crispy exterior and a perfectly warm interior.
Make-Ahead Components and Time-Saving Tips
You don’t have to cook everything fresh on burrito-making day. Scrambled eggs keep in the fridge for three days, cooked sausage keeps for four days, and cooked black beans keep for five days. If you prep these components a few days before you plan to wrap, assembly becomes incredibly fast.
Sautéed vegetables also prep beautifully ahead — cook your peppers and onions, store them in a container, and they’ll be ready to go. Shredded cheese from a bag keeps indefinitely in the freezer, so you can buy it whenever and pull it out when you need it. The only thing you actually have to do the day you wrap is scramble fresh eggs if you didn’t prep them earlier.
Some people prep everything on Friday night and assemble on Saturday morning while coffee is brewing. Others batch-cook on Sunday afternoon — a big skillet of eggs, a tray of sausage in the oven, vegetables sautéing while they listen to music or a podcast. Figure out what fits your schedule and do it that way. The point is reducing the time burden so you’ll actually do it again next week.
Common Mistakes and How to Fix Them
Filling leaking out when reheating: This happens when you overfill the burrito or don’t wrap it tightly enough. The filling expands slightly as it reheats and pushes through any weak spots. Solution: Underfill next time (aim for three-quarter cup, not a full cup), and practice the wrapping technique until you can do it consistently tight.
Burrito getting soggy or the tortilla falling apart: Too much moisture in the filling or not enough heat during reheating. Scrambled eggs release water as they sit, especially if they were slightly wet to begin with. Solution: Cook your eggs slightly firmer than you like them to eat fresh, drain any vegetables thoroughly, and use 50 percent microwave power to heat gently rather than steaming the burrito.
Reheated burrito stays cold in the middle: Uneven reheating, usually from full power microwaving. Solution: Use 50 percent power and give it the full 3-4 minutes. If you’re in a huge rush and absolutely need it faster, unwrap it and cut it in half so heat penetrates more easily.
Fillings separating or tasting bland: Undercooking ingredients or not seasoning enough. Freezing mutes flavors, so you need to be more aggressive with salt and pepper when you’re cooking. Solution: Taste your filling mixture before wrapping and add more seasoning than feels right — you can always adjust downward next time if you overseasoned.
Tortilla cracking when you wrap it: The tortilla is too cold or you’re pulling too hard during the roll. Solution: Always warm your tortillas first, even if it’s just 20 seconds in the microwave. If it’s still cracking, it might be a lower-quality tortilla — upgrade to a thicker brand next time.
Delicious Flavor Variations to Try
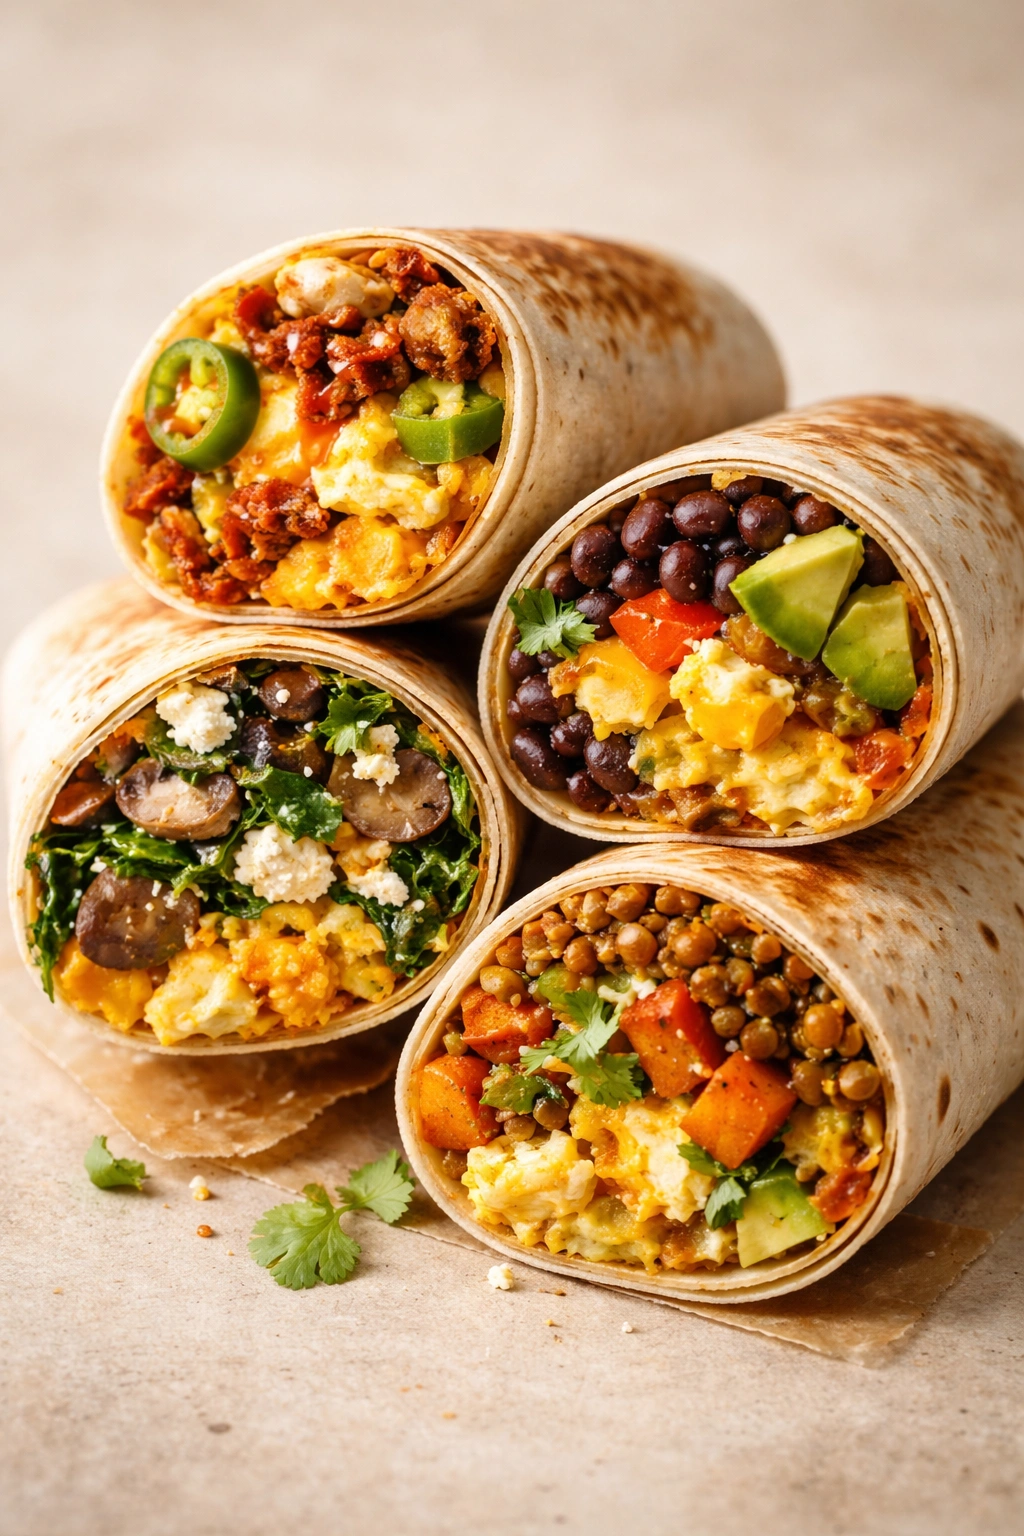
Once you’ve mastered the basic technique, the flavor possibilities are endless. Southwestern style adds diced jalapeños, chorizo instead of sausage, cotija cheese instead of cheddar, black beans, and cilantro. Vegetarian-forward uses scrambled eggs, sautéed spinach and mushrooms, cooked lentils for protein, cheese, and fresh avocado added after reheating. Southwest with a kick incorporates breakfast sausage, diced roasted sweet potato, sautéed onions and peppers, cheese, and a dash of chipotle powder mixed into the eggs.
Breakfast burrito bowls work too — prep all the same filling but only freeze them in containers instead of wrapped tortillas. Thaw overnight in the fridge and you’ve got a quick bowl to microwave. Some people prefer this because it’s faster and you can add fresh toppings easily. The trade-off is that bowls are bulkier to store and you’ve got a dish to wash instead of just a napkin.
Egg-free burritos swap the scrambled eggs for silken tofu scrambled the same way, or just load them with extra beans and vegetables plus cheese for protein. They work just as well for freezing, though the texture is different enough that you’re really making something new rather than a substitution.
Breakfast hash version uses shredded hash browns as your base, mixes them with scrambled eggs and sausage, adds cheese and sautéed peppers, then wraps it all up. Hash browns add substance and actually freeze better than you’d expect.
Serving Ideas and Side Pairings
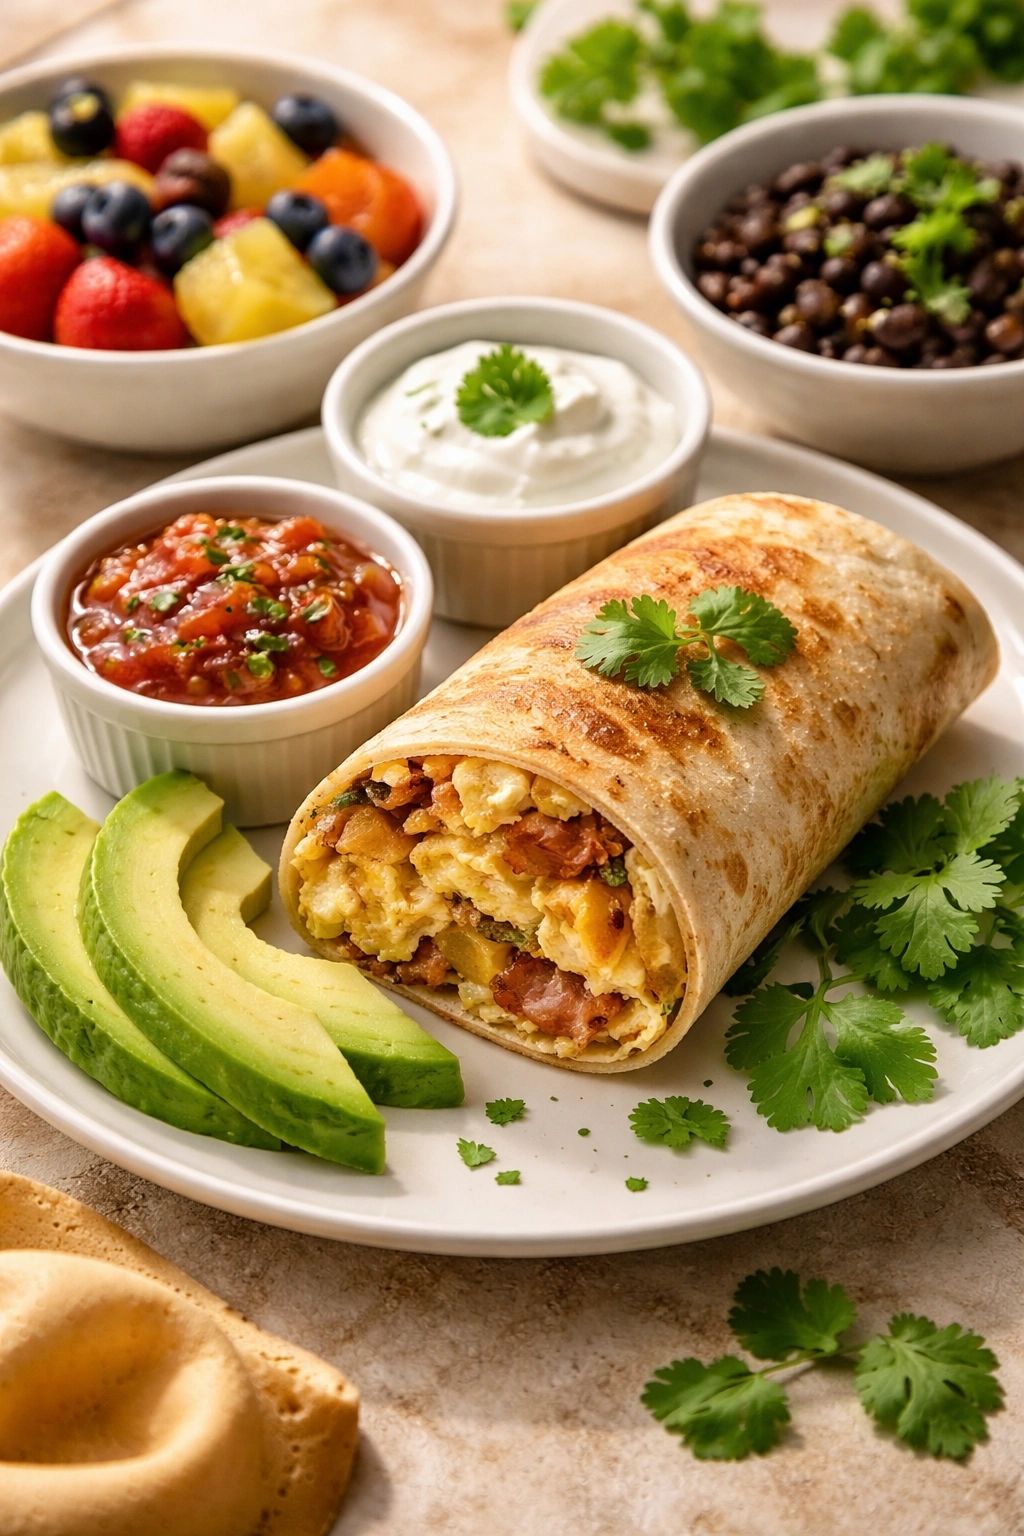
A reheated burrito is completely satisfying on its own, but if you want to build a more complete breakfast, pair it with fresh salsa, sliced avocado, a dollop of sour cream, or fresh cilantro. These additions come after reheating so they stay fresh and bright. A side of fresh fruit — berries, melon, or citrus — rounds out the meal perfectly without adding much time.
If you’ve got a moment and want something hot alongside, a small cup of black beans reheated in the microwave (seasoned with a pinch of cumin and salt) is traditional and delicious. A simple side salad with lime vinaigrette cuts through the richness of the burrito. Fresh diced tomatoes with salt and cilantro feel lighter and fresher than serving salsa from a jar.
Cold brew coffee or regular coffee is the obvious pairing, but a refreshing citrus smoothie also works. The point is that your grab-and-go burrito should feel complete and satisfying, like you sat down and made yourself a proper breakfast — because you did, you just did it ahead of time.
Final Thoughts
Freezer burritos are genuinely one of the best investments you can make for your weekday mornings. You’re spending maybe an hour on a weekend to have eight to ten breakfasts completely ready, no thinking required, just grab and reheat. That’s the difference between eating a real breakfast or stopping for drive-through because you’re rushed.
The technique matters — wrapping tight, flash-freezing properly, and reheating at the right temperature make the difference between something you’ll genuinely enjoy eating and something that feels like a chore. Master the basic method first, then play with flavor combinations once you’re confident.
Start with one batch and see how it feels in your routine. Most people find that once they try it, they end up making freezer burritos every other week because the payoff is so real. You’ll save money, eat better, and feel more in control of your mornings. That’s worth an hour of kitchen time.
Basic Freezer Breakfast Burrito Recipe
Yield: Makes 8 burritos | Prep Time: 30 minutes | Cook Time: 20 minutes | Total Time: 50 minutes | Difficulty: Beginner — the wrapping technique is the only skill to practice, and you’ll get it right by your third burrito.
Ingredients for the Filling
For the Eggs:
- 12 large eggs
- 1 tablespoon unsalted butter
- ¼ teaspoon fine sea salt
- Pinch of black pepper
For the Protein:
- 1 pound bulk sausage (or 8 slices bacon, cooked and chopped)
- 1 cup shredded cheddar cheese (or Mexican blend)
For the Vegetables:
- 1 medium bell pepper, diced
- ½ medium yellow onion, diced
- 2 tablespoons unsalted butter or olive oil
- ½ teaspoon salt
For Assembly:
- 8 large flour tortillas (10-inch burrito-size if you can find them)
- Parchment paper for wrapping
Instructions
Prepare Your Ingredients:
-
Dice the bell pepper and onion into small, even pieces roughly ¼-inch in size. This ensures even cooking and makes them distribute nicely throughout the burrito.
-
Cook the sausage in a large skillet over medium-high heat, breaking it into small crumbles with a wooden spoon as it cooks. Once it’s fully cooked through and browned (5-7 minutes), transfer it to a paper towel-lined plate to drain excess grease.
-
In the same skillet, melt the butter over medium-high heat and add the diced peppers and onions. Cook for 5-6 minutes, stirring occasionally, until the vegetables are softened and the onions are translucent. Season with salt. Transfer to a bowl and set aside.
Cook the Eggs:
-
Crack all 12 eggs into a medium bowl. Add ¼ teaspoon salt and a pinch of black pepper, then whisk vigorously for 30 seconds until the eggs are fully combined and no streaks of white remain. Do not overmix — you’re not trying to incorporate a ton of air, just combine the eggs evenly.
-
Melt 1 tablespoon of butter in a large nonstick skillet over medium heat. Once the butter is foamy and just starting to smell nutty (don’t let it brown), pour in the eggs.
-
Let the eggs sit undisturbed for 15-20 seconds, then gently push the cooked portions from the edges toward the center with a silicone spatula. Continue this gentle pushing and stirring every 15-20 seconds, never scrambling aggressively. Remove the pan from heat when the eggs are still very slightly creamy and wet-looking — they will continue to cook with residual heat and should firm up to soft curds, not dry scrambled eggs.
Advertisements
Assemble the Filling:
-
Transfer the cooked eggs to a large bowl. Add the cooked sausage, shredded cheese, and the sautéed peppers and onions. Gently fold everything together until combined. Do not overmix — you want the ingredients distributed throughout, not mashed together.
-
Taste the filling and add a pinch more salt or pepper if needed. Remember that freezing will mute the flavors slightly, so be more generous with seasoning than feels right for eating it fresh. Let the filling cool to room temperature (at least 10 minutes) before wrapping. Warm filling will steam the tortilla and make wrapping difficult.
Prepare for Wrapping:
- Wrap your stack of tortillas in a damp paper towel and microwave for 30 seconds until they’re warm and pliable. They should be just barely warm to the touch — warm enough to fold without cracking, but not steaming hot.
Wrap Each Burrito:
-
Tear eight pieces of parchment paper, each roughly 8 by 8 inches. Lay one piece of parchment shiny side down on your work surface.
-
Place one warm tortilla in the center of the parchment, positioned slightly lower than center (roughly 1 inch from the bottom edge).
-
Spoon ¾ cup of filling in a horizontal line across the tortilla’s center, roughly 2 inches from the bottom edge. The burrito should look filled but not stuffed — you should see at least 1 inch of tortilla visible on all sides of the filling.
-
Fold the bottom edge of the tortilla up and over the filling, tucking it snugly underneath. You’re not rolling yet — just folding the bottom edge down over the filling and pulling it slightly taut. Roll the burrito away from you one complete turn, keeping tension on the tortilla.
-
Fold the left edge of the tortilla inward at a 45-degree angle, about 2 inches from the left edge. Fold the right edge inward the same way, creating an envelope shape. These folds should overlap slightly in the center. These side folds trap the filling inside and prevent it from pushing out the ends during cooking and reheating.
Advertisements -
Continue rolling the burrito away from you, keeping steady tension on the tortilla. The final roll should bring the seam to the bottom. The burrito should feel firm and compact — if filling shifts inside the wrap, you didn’t fold the sides tightly enough or used too much filling.
-
Set the burrito seam-side down on a parchment-lined baking sheet. Wrap the parchment around the burrito, folding the ends underneath. The burrito should be encased in parchment to prevent freezer burn.
-
Repeat the wrapping process with the remaining 7 tortillas and filling. You should have 8 burritos arranged on baking sheets with space between each one.
Freeze:
-
Place the baking sheets in the freezer for at least 4 hours, preferably overnight, until the burritos are completely solid and rock-hard. This flash-freezing prevents them from sticking together.
-
Once fully frozen, transfer the burritos to a freezer-safe bag or container. Label with the date and contents. They’ll keep for up to 3 months.
Reheating Instructions
Microwave Method (Fastest — 3-4 minutes):
Remove the parchment wrapper and place the burrito on a microwave-safe plate. Microwave on 50 percent power for 3-4 minutes, rotating halfway through. The burrito should be hot throughout and the tortilla soft and pliable. Do not use full power — it cooks the outside too fast while the inside stays cold.
Oven Method (Better texture — 12-15 minutes):
Preheat the oven to 325°F. Wrap the frozen burrito in foil and place on a baking sheet. Bake for 12-15 minutes until heated through. The burrito will heat evenly, the tortilla will stay soft, and you can reheat multiple burritos at once. This method produces a slightly better texture, especially if you don’t mind waiting a few extra minutes.
Tips for Success
The wrap is everything. A tight wrap keeps everything contained, prevents the burrito from falling apart during reheating, and makes it actually pleasant to eat. Practice on your first burrito — by your third, you’ll be wrapping them on autopilot.
Don’t overfill. Three-quarter cup feels like it’s not enough, but it’s exactly right. Overstuffed burritos leak, fall apart, and are harder to wrap. Trust the measurement.
Use medium-high heat for vegetables, medium for eggs. Higher heat for vegetables develops flavor quickly without overcooking them. Medium heat for eggs prevents them from becoming rubbery, which is critical because they’ll be reheated later.
Cool everything completely before wrapping. Warm filling makes the tortilla steam and soggy, and your burritos won’t freeze properly. Patience at this step matters.
Label your freezer bag with the date. You’ll want to know when you made them, and you’ll actually eat them if you know they’re there.
Variations and Adaptations
Vegetarian version: Skip the sausage and add an extra cup of cooked black beans plus a cup of diced roasted sweet potato. The earthiness of the sweet potato plus the protein from the beans works beautifully.
Spicy version: Add ½ teaspoon of cumin and ¼ teaspoon of chipotle powder to the egg mixture. Dice fresh jalapeños and include them in the vegetable sauté. Use chorizo instead of sausage if you want more heat.
Hash brown base: Use 2 cups of shredded frozen hash browns, thawed and squeezed dry, as your base. Mix them with the scrambled eggs, sausage, and cheese, then add just ½ cup of sautéed vegetables per burrito. The hash browns add substance and actually freeze beautifully.
Dairy-free option: Skip the cheese or use a dairy-free cheddar shred. The burritos will still work, though you’ll want to increase the sausage or beans slightly for extra substance.
Storage and Make-Ahead
How far ahead can I prep? Scrambled eggs keep in the fridge for 3 days, cooked sausage for 4 days, and sautéed vegetables for 3 days. You can prep all these components on Friday night and wrap burritos on Saturday morning, or cook everything fresh the day you wrap — whichever fits your schedule.
How long do they keep in the freezer? Three months is the absolute maximum, but they’re genuinely best eaten within 6 weeks. After that, ice crystals can form and the texture starts to suffer slightly.
Can I freeze them longer than three months? Yes, but quality declines. The tortilla can get brittle and the filling can develop freezer burn flavors. If you make a big batch, eat half within 6 weeks and freeze the other half at the 4-week mark for later use.
Can I make a giant batch ahead for two months? Absolutely. Some people make 20-24 burritos, eat half fresh or within two weeks, and freeze the rest for the second month. Freezing in parchment prevents freezer burn remarkably well.
Serving Suggestions
Serve a reheated burrito with fresh salsa, sliced avocado, a dollop of sour cream, and a handful of fresh cilantro. A side of fruit — berries, melon, or citrus — rounds out the meal. If you’ve got five minutes, warm a cup of black beans seasoned with cumin and a pinch of salt as a side.
Cold brew coffee pairs perfectly, or a green smoothie if you want something lighter. The point is that your grab-and-go breakfast should feel complete and thoughtful, because you put thought into making it ahead of time.