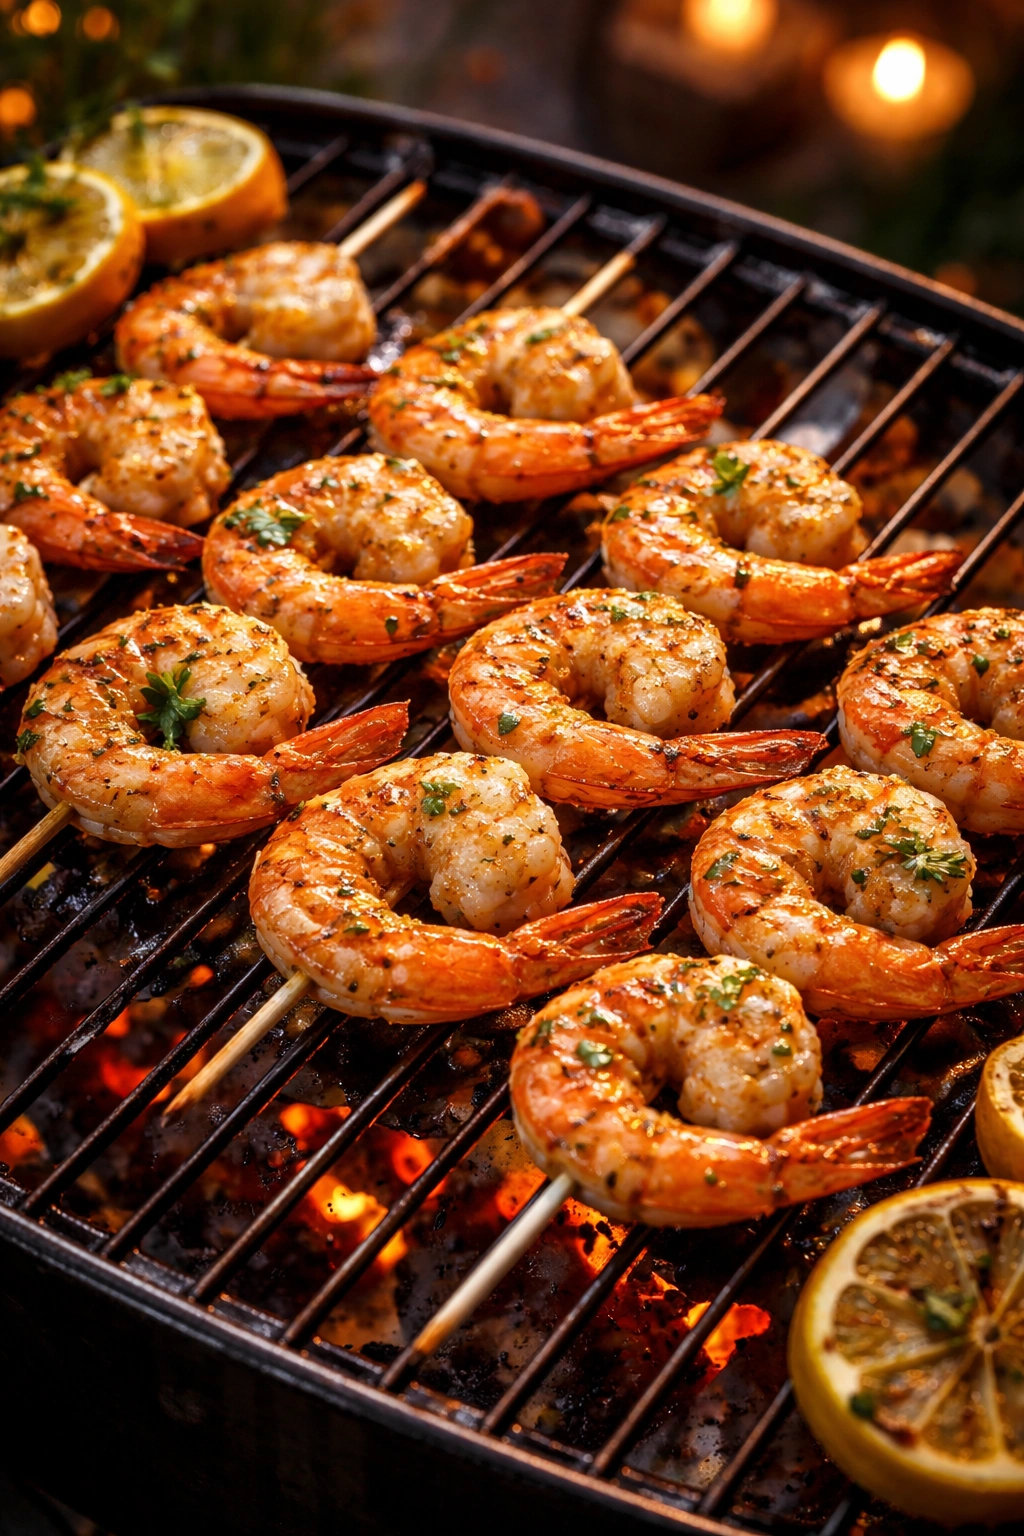
Grilled shrimp might just be the most underrated weeknight dinner move. It’s faster than ordering takeout, tastes infinitely better, costs a fraction of what you’d spend at a restaurant, and honestly? It makes you look like you know what you’re doing at the grill — even if you’re completely new to this whole thing. From the moment you fire up the grill to plating your dinner, you’re looking at roughly 20 minutes of total time, most of which is just standing around watching the shrimp cook, drink in hand.
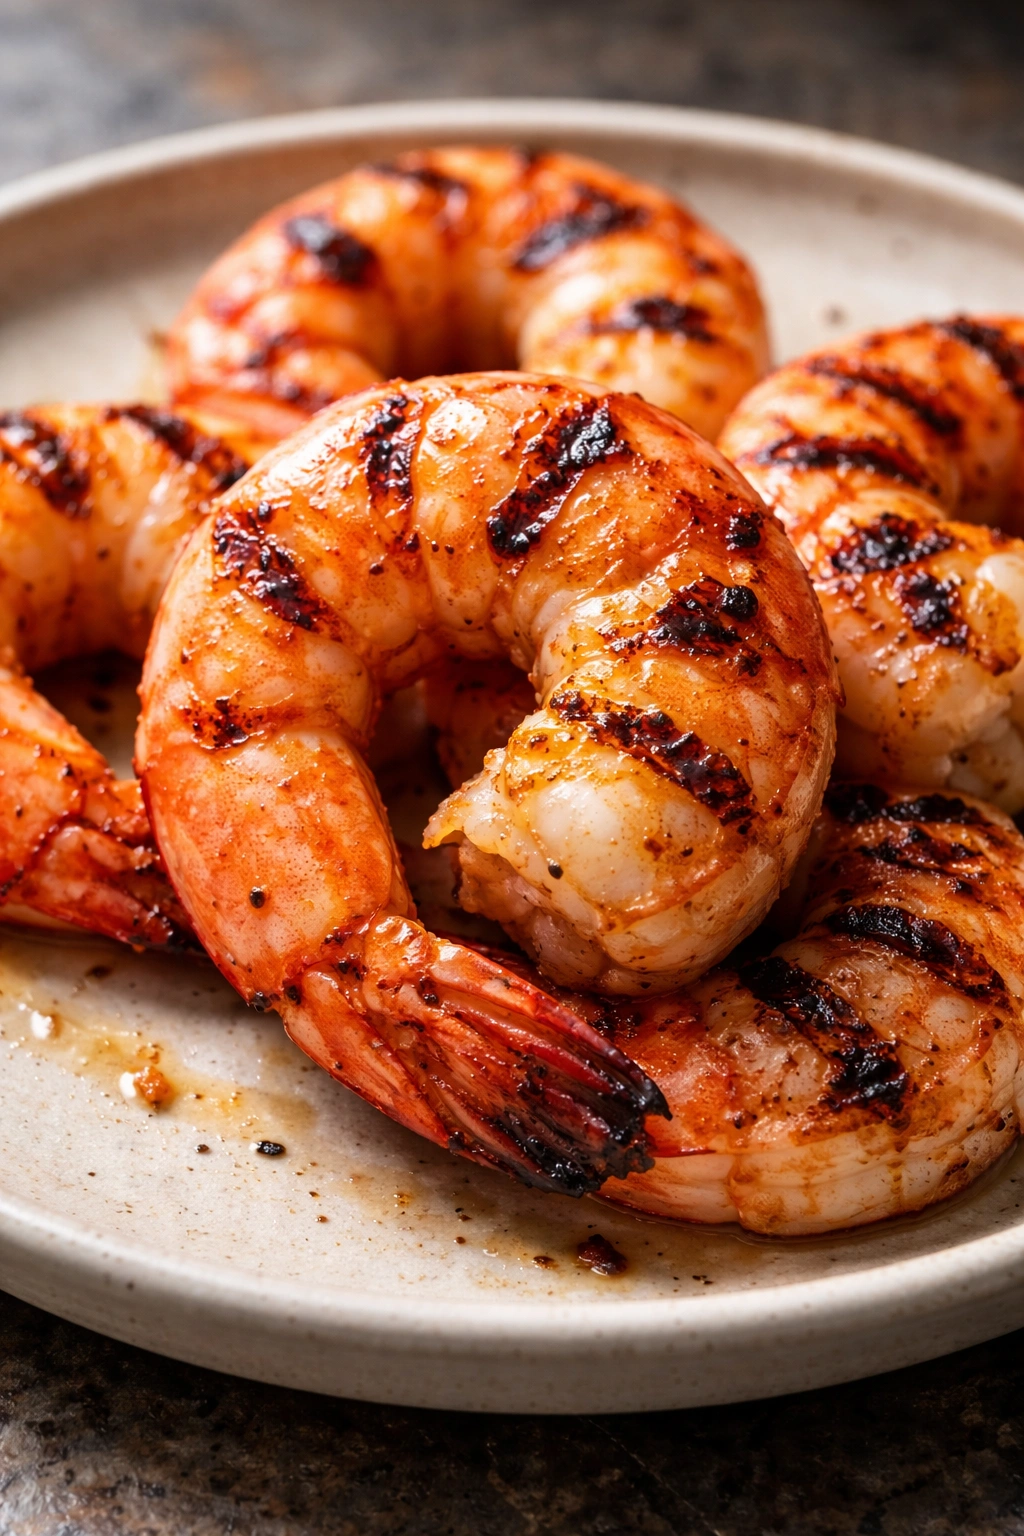
What makes grilled shrimp so special is how the heat transforms these little crustaceans into something with genuine depth. The grill adds a subtle char and smoky sweetness that brings out flavors a pan simply can’t achieve. The outside gets slightly caramelized while the inside stays tender and juicy — there’s a textural contrast that feels way more luxurious than something this quick and simple has any right to be. And because shrimp are so lean, they cook fast enough that you actually have time to throw together a real dinner on a Tuesday night without losing your mind.
The real secret isn’t some complicated technique. It’s understanding three things: choosing the right size shrimp, not overcooking them (the biggest mistake people make), and using a simple seasoning strategy that lets the natural sweetness of the shrimp shine through. Once you nail these fundamentals, you’ve got access to a dinner strategy that works year-round, whether you’re feeding yourself or a crowd.
Why Grilled Shrimp Deserves Your Attention on Busy Nights
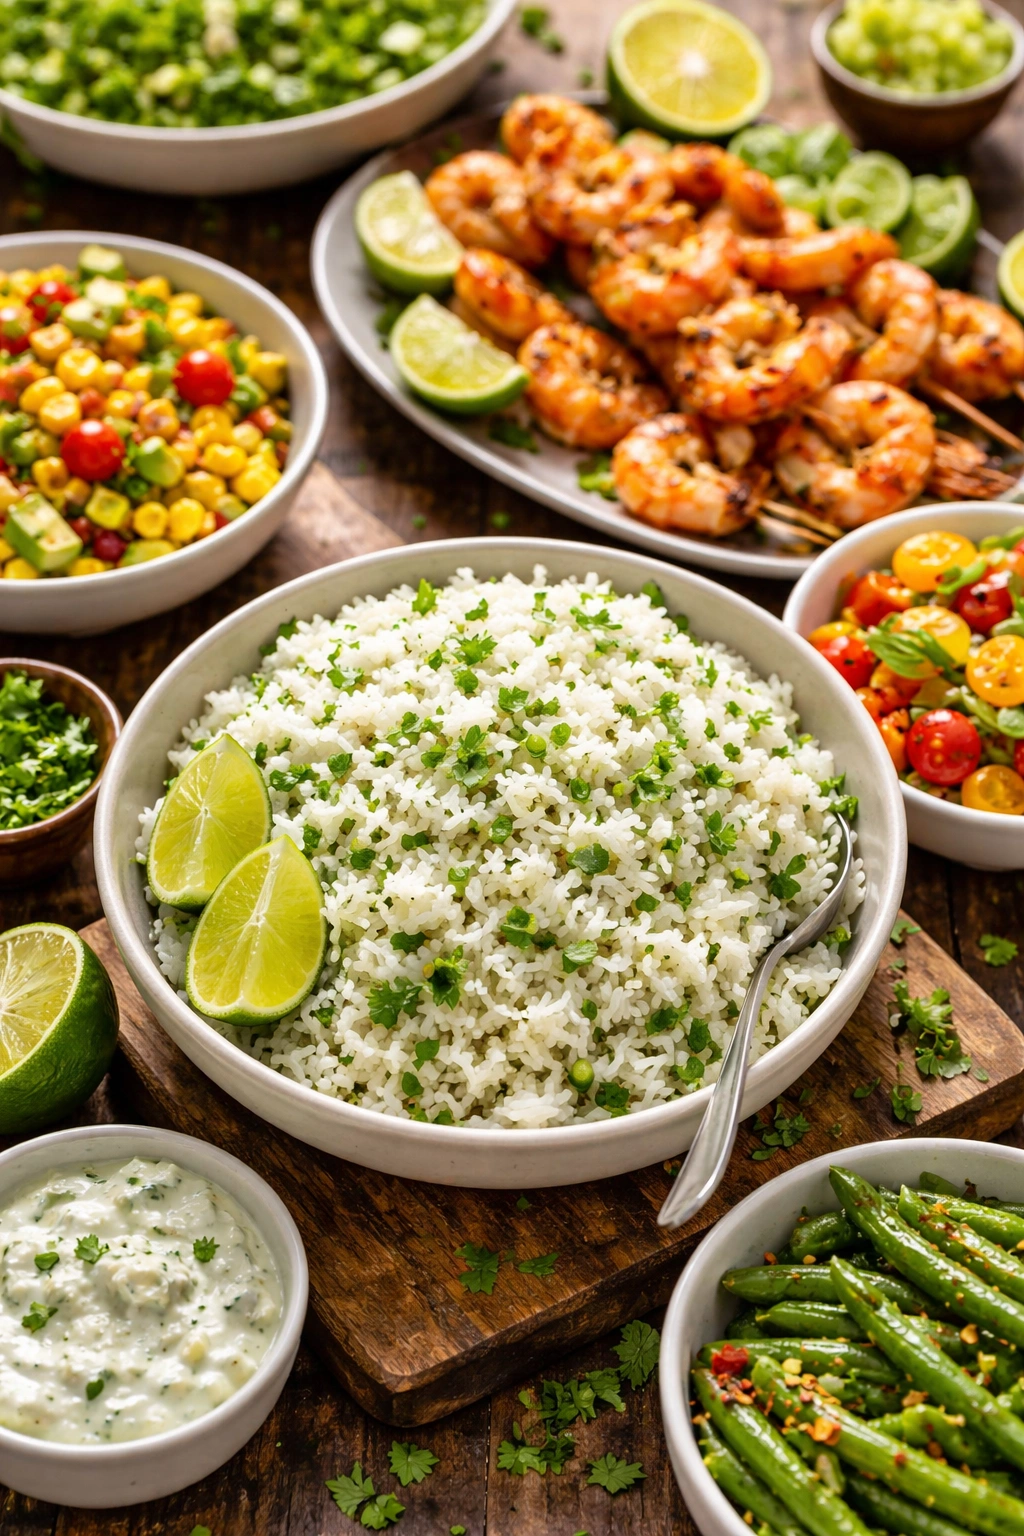
Shrimp has this almost magical combination of being both elegant and casual. Serve grilled shrimp with pasta and everyone thinks you’ve spent your entire evening cooking. Pair it with rice and veggies and it feels like a restaurant-quality health-conscious dinner. Use it as an appetizer on skewers and suddenly you’re the person who throws sophisticated gatherings. The point is: grilled shrimp works across every situation because it’s incredibly versatile.
The speed factor can’t be overstated. Most proteins require planning ahead — marinating overnight, thawing from frozen, careful temperature management. Shrimp laughs at these concerns. You can pull frozen shrimp from your freezer, thaw it in about 10 minutes under cool running water, season it, and have it on the grill within 20 minutes of deciding what’s for dinner. That’s faster than driving to a restaurant and sitting down to order.
There’s also the health angle. Shrimp is high in protein, low in calories, naturally low in carbs, and packed with selenium, vitamin B12, and omega-3 fatty acids. It’s one of the few proteins that genuinely tastes indulgent while being legitimately good for you. Your family gets a satisfying, flavorful dinner. You don’t have to feel guilty about it.
Choosing the Right Shrimp Size Matters More Than You Think
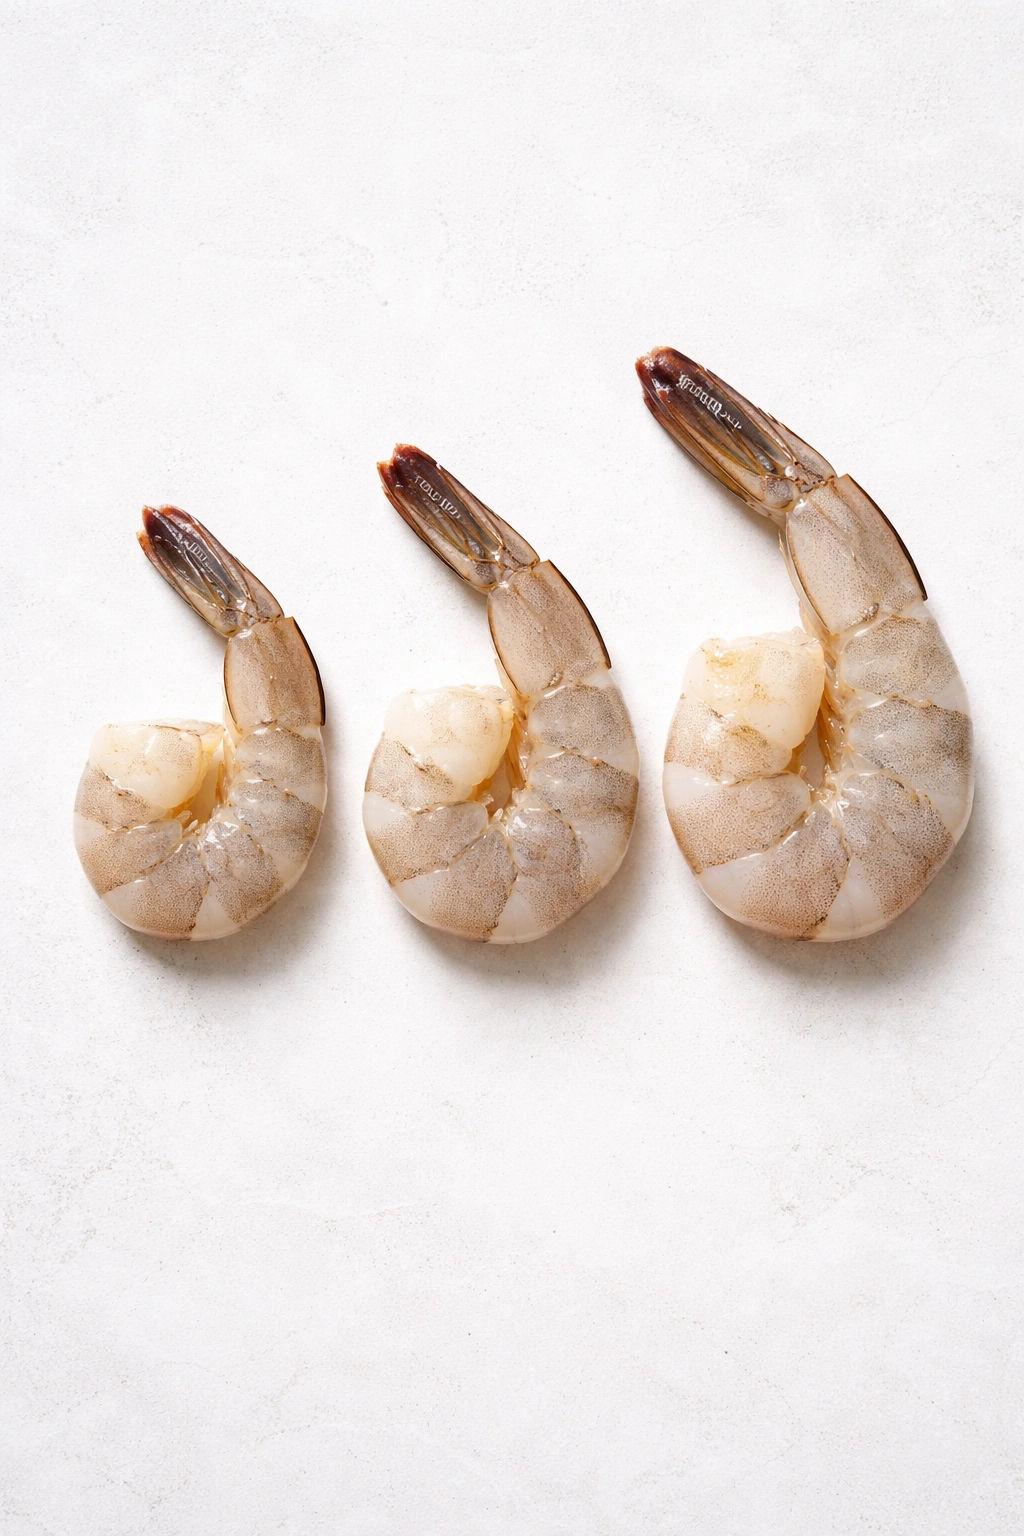
Not all shrimp are created equal for grilling purposes. The size you choose directly impacts how easy the cooking is and whether you end up with tender, juicy shrimp or something rubbery and overcooked. This is the first decision that determines everything else.
Large shrimp (26-30 count per pound) and extra-large shrimp (21-25 count per pound) are your sweet spot. These are big enough to hold seasoning, substantial enough that you can see when they’re done, and forgiving enough that even if you’re off by 30 seconds, they won’t turn into rubber. They also won’t fall through grill grates and they’re easier to thread onto skewers without accidentally impaling yourself. If you’re new to grilling shrimp, this is genuinely where you should start.
Jumbo shrimp (16-20 count per pound) are fantastic too — they’re essentially the luxury version, with even more surface area for seasoning and char. They might take an extra minute on the grill compared to large shrimp, but they’re worth it if you can find them at a reasonable price. The “colossal” sizes you sometimes see are beautiful and impressive looking, but they take longer to cook and the risk of overcooking increases significantly.
Skip small or medium shrimp entirely. People make this mistake once and never again. Small shrimp cook in about a minute and a half per side — that’s almost no time to get a char before they transform into tiny, tough hockey pucks. Threading them onto skewers is also a frustrating experience because they’re fragile and you’ll break them. Unless you’re making shrimp ceviche or adding them to a pasta dish, small shrimp are the wrong tool for the job.
Fresh vs. Frozen Shrimp
Here’s something that surprises people: frozen shrimp are often actually fresher than the “fresh” shrimp sitting on ice at the seafood counter. Most shrimp sold as fresh have already been frozen and thawed by the distributor — you’re just paying extra for their convenience of doing that thawing. If you buy quality frozen shrimp (look for individually quick-frozen, which means they were frozen separately so they don’t clump together), you’re getting a genuinely fresh product that you control the thawing for.
Frozen works beautifully for this 20-minute dinner strategy. Plan ahead enough to thaw them in the refrigerator overnight, or if you’re spontaneous like most humans, run them under cool water in a colander for about 10 minutes and they’ll thaw completely. Pat them dry with paper towels before seasoning — this helps the seasoning stick better and prevents excess moisture on the grill.
Shell-On vs. Peeled
Buy peeled and deveined shrimp. Full stop. Unless you’re making a whole shrimp with shell-on scenario where the shells add serious flavor to the broth, peeled shrimp is the move for grilling. When the shell is on, the seasoning sits on top of it instead of penetrating the meat. You also can’t see the meat to judge doneness as accurately. Peeling shrimp yourself is doable but takes time, and that defeats the whole purpose of a 20-minute dinner.
Leave the tails on though. The tail serves multiple purposes: it gives you a handle to eat the shrimp with if you’re serving them as appetizers, it looks better on a plate, and it actually helps protect that last little bit of meat from overcooking. Plus, it’s a visual signal that these are whole shrimp you grilled yourself, not some pre-cooked supermarket product.
The Absolute First Step: Prep Your Shrimp Properly
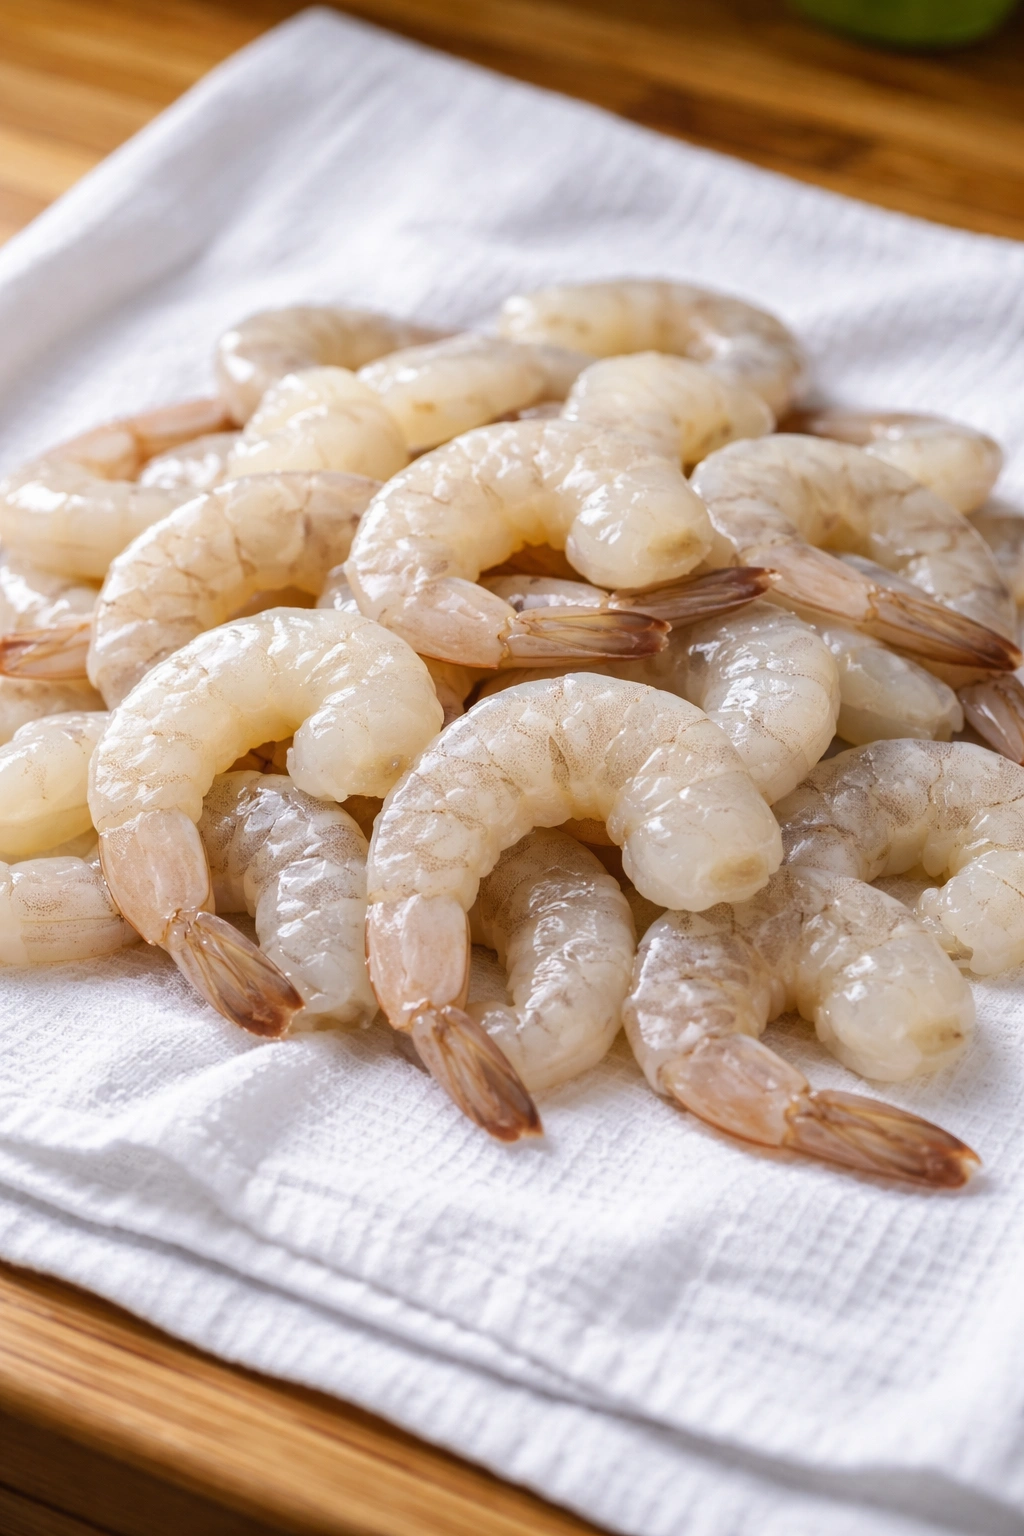
Even before you think about seasoning or fire, prep changes everything. Properly prepared shrimp is half the battle.
Pat your thawed shrimp completely dry with paper towels. Any surface moisture interferes with seasoning adherence and creates steam on the grill instead of char. This might seem like a tiny detail, but it genuinely matters. You’re looking for shrimp that feels dry to the touch — you’re not trying to be gentle, just thorough.
While they’re drying, take a quick look for any shells that didn’t get removed. Peeled shrimp occasionally have tiny shell pieces clinging to them. A quick visual check takes 10 seconds and prevents the surprise crunch of shell in your mouth while eating. If you find any, gently rub them off under cool running water.
Devein them if needed. Most shrimp sold as “peeled and deveined” actually are deveined, but some are not or are only partially deveined. The “vein” is actually the digestive tract, which is gritty and tastes funky. Use the tip of a small sharp knife to make a shallow cut along the back curve of each shrimp. Pull out the black line that runs along the back — it should come out easily. It’s slightly gross but takes about 30 seconds total for a pound of shrimp.
Simple 20-Minute Garlic and Lemon Grilled Shrimp
Yield: Serves 3-4 as a main course | Makes about 20-24 shrimp
Prep Time: 10 minutes
Cook Time: 5-7 minutes (depending on shrimp size and grill temperature)
Total Time: 20 minutes (includes thawing time for frozen shrimp)
Difficulty: Beginner — The hardest part is not overcooking the shrimp, but the visual cues in this recipe make that nearly foolproof.
This is the straightforward version that shows off the natural sweetness of the shrimp without overwhelming it. It’s the recipe you master first, then build variations from.
For the Shrimp:
- 1½ pounds large or extra-large raw shrimp (26-30 count), peeled, deveined, tails on
- 3 tablespoons extra-virgin olive oil
- 4 garlic cloves, minced very finely (about 2 teaspoons)
- 2 tablespoons fresh lemon juice (about ½ lemon, squeezed)
- ½ teaspoon smoked paprika
- ½ teaspoon kosher salt
- ¼ teaspoon freshly cracked black pepper
- ⅛ teaspoon cayenne pepper (optional, for subtle heat)
- 2 tablespoons fresh flat-leaf parsley, chopped
- Metal or sturdy bamboo skewers (if using bamboo, soak in water for 30 minutes first)
For Serving:
- 1 lemon, cut into wedges
- Additional fresh parsley for garnish
- Fleur de sel for finishing (optional but nice)
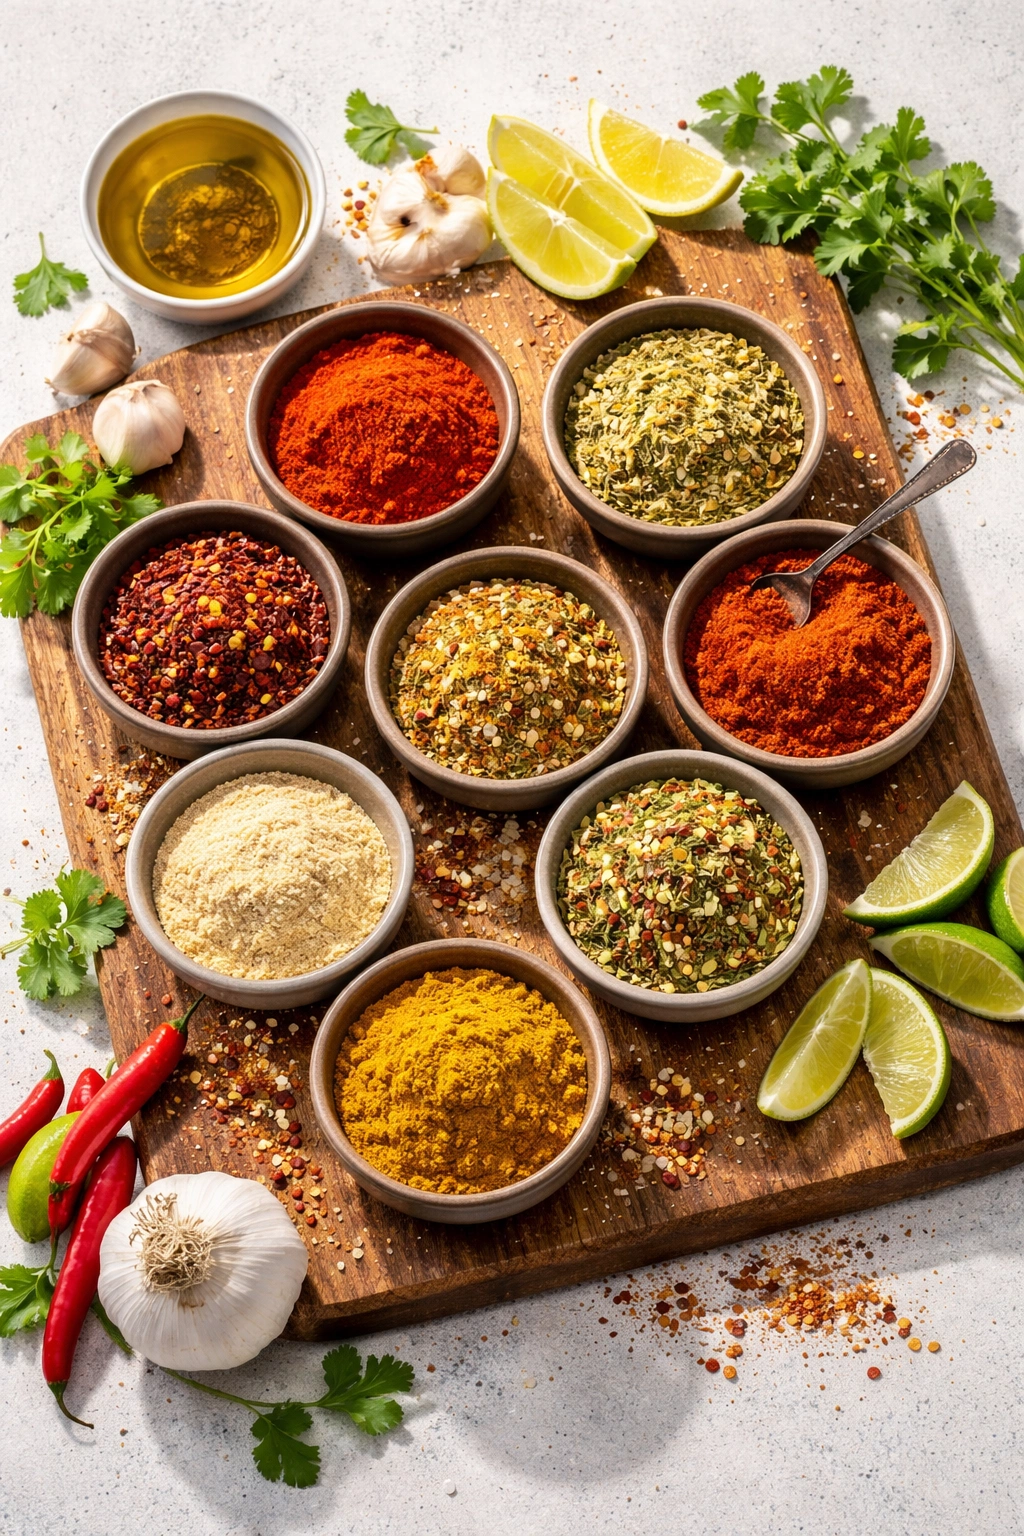
Assembly and Seasoning
1. Pat the thawed shrimp completely dry with paper towels and place them in a large bowl.
2. In a small bowl, whisk together the olive oil, minced garlic, lemon juice, smoked paprika, kosher salt, black pepper, and cayenne. Don’t skip the whisking — you want the garlic and spices evenly distributed in the oil so every shrimp gets properly seasoned.
3. Pour the marinade over the shrimp and gently fold everything together with your hands or a rubber spatula, making sure each shrimp gets coated. Don’t be aggressive — shrimp are delicate. This takes about 30 seconds.
4. Let the shrimp sit in the marinade for 5-10 minutes while you prepare the grill. This gives the seasonings time to start adhering to the meat without so much acid (from the lemon juice) that it starts cooking the shrimp or turning the texture mushy. Don’t exceed 15 minutes or you risk the lemon juice starting to denature the proteins.
Threading the Skewers
5. While the shrimp marinate, thread them onto skewers. Use 4-6 shrimp per skewer depending on their size and your skewer length — space them about ¼ inch apart so heat can circulate around each one. The spacing is important for even cooking; too tightly packed and the ones in the middle cook slower.
Pro tip: Use two parallel skewers instead of one for each set of shrimp. This prevents them from spinning on the skewer when you flip, which is genuinely frustrating. You can buy skewer pairs or just use two individual skewers placed close together.
Preparing the Grill
6. Preheat your grill to medium-high heat (about 400-425°F if you have a thermometer, or hot enough that you can hold your hand 6 inches above the grates for only 2-3 seconds). Clean the grates thoroughly with a grill brush — stuck-on food interferes with browning and sticking.
7. Once the grates are clean, oil them lightly. Use a wadded paper towel dipped in oil, or an oil-soaked cloth held with tongs. This is crucial for preventing the shrimp from sticking.
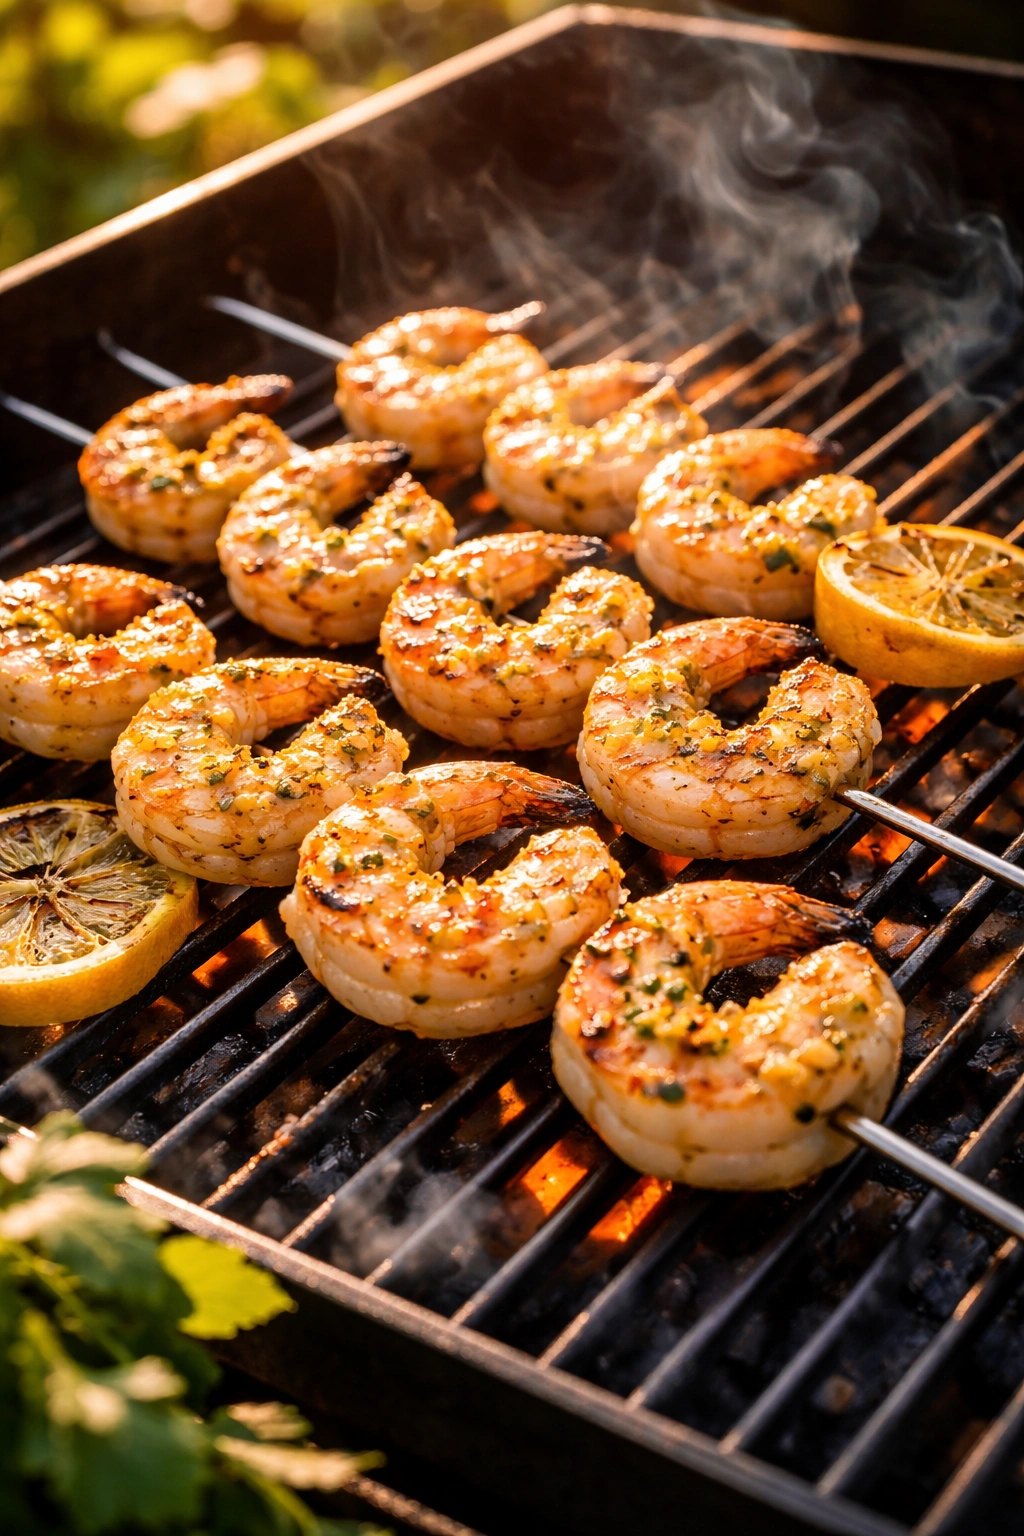
Grilling the Shrimp
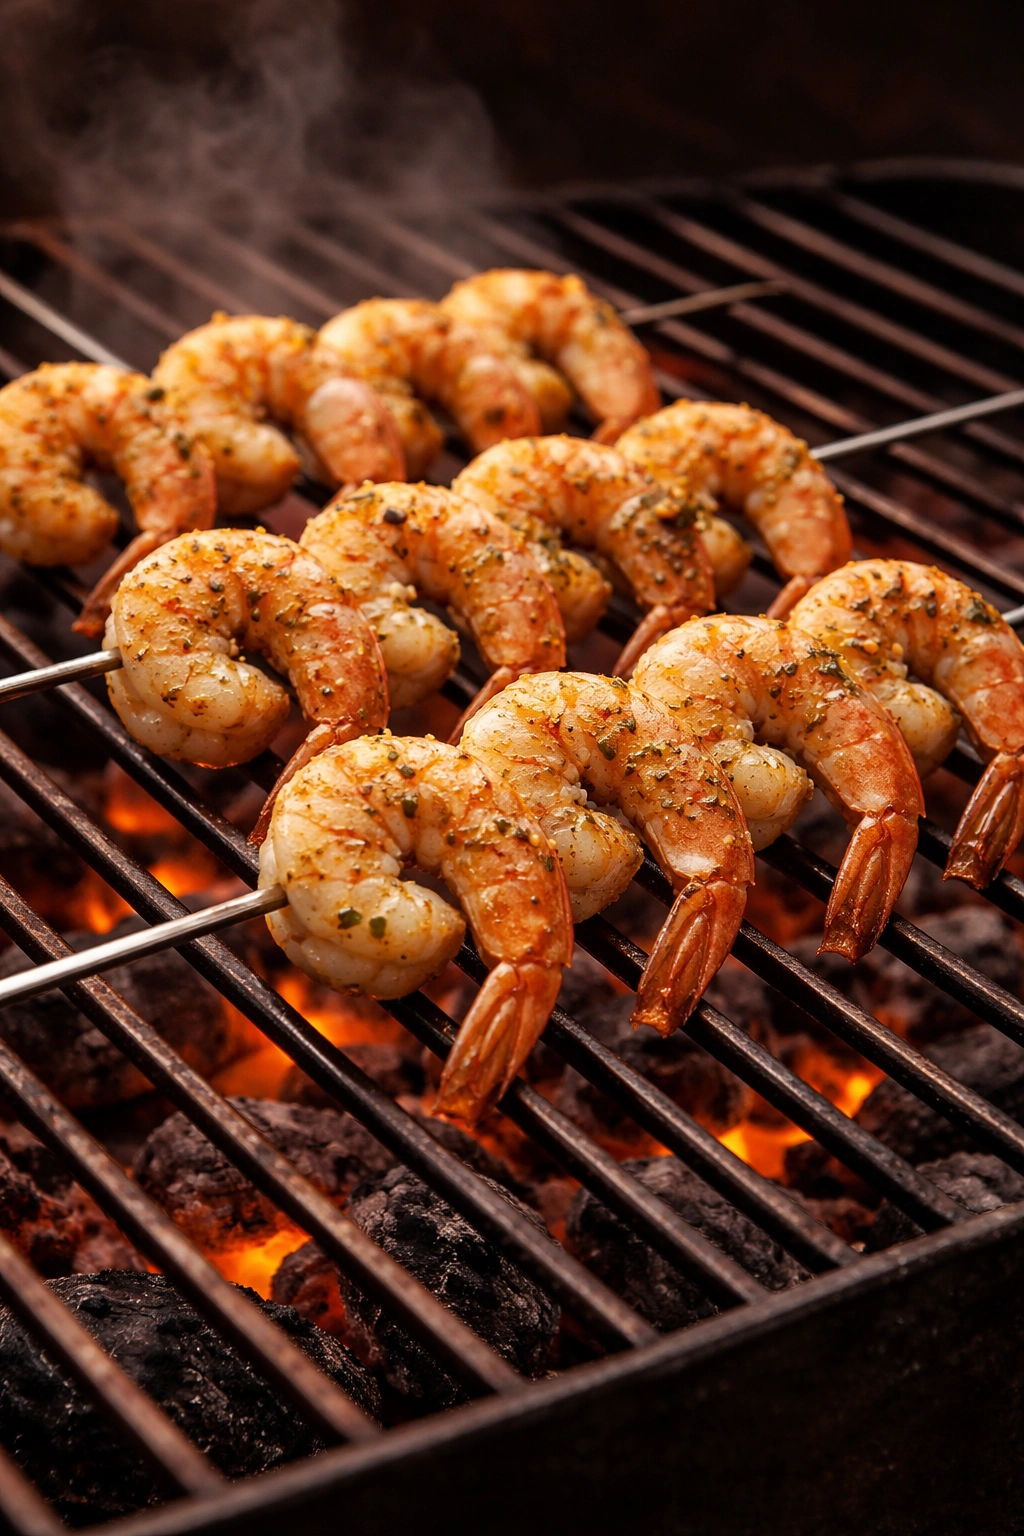
8. Place the skewers directly on the hot grates. Close the grill lid if you have one. Cook without moving them for exactly 2.5 to 3 minutes. During this time, don’t touch them, don’t poke at them, don’t flip them early — let them sit undisturbed on the heat so the outside can develop color and texture.
9. After 2.5-3 minutes, flip the skewers. The shrimp should have turned from translucent gray to opaque pink on the underside. If they’re still mostly gray, give them another 30 seconds before flipping. Once flipped, cook for another 2-2.5 minutes on the second side without moving them. The total cook time is usually 5-6 minutes for large shrimp.
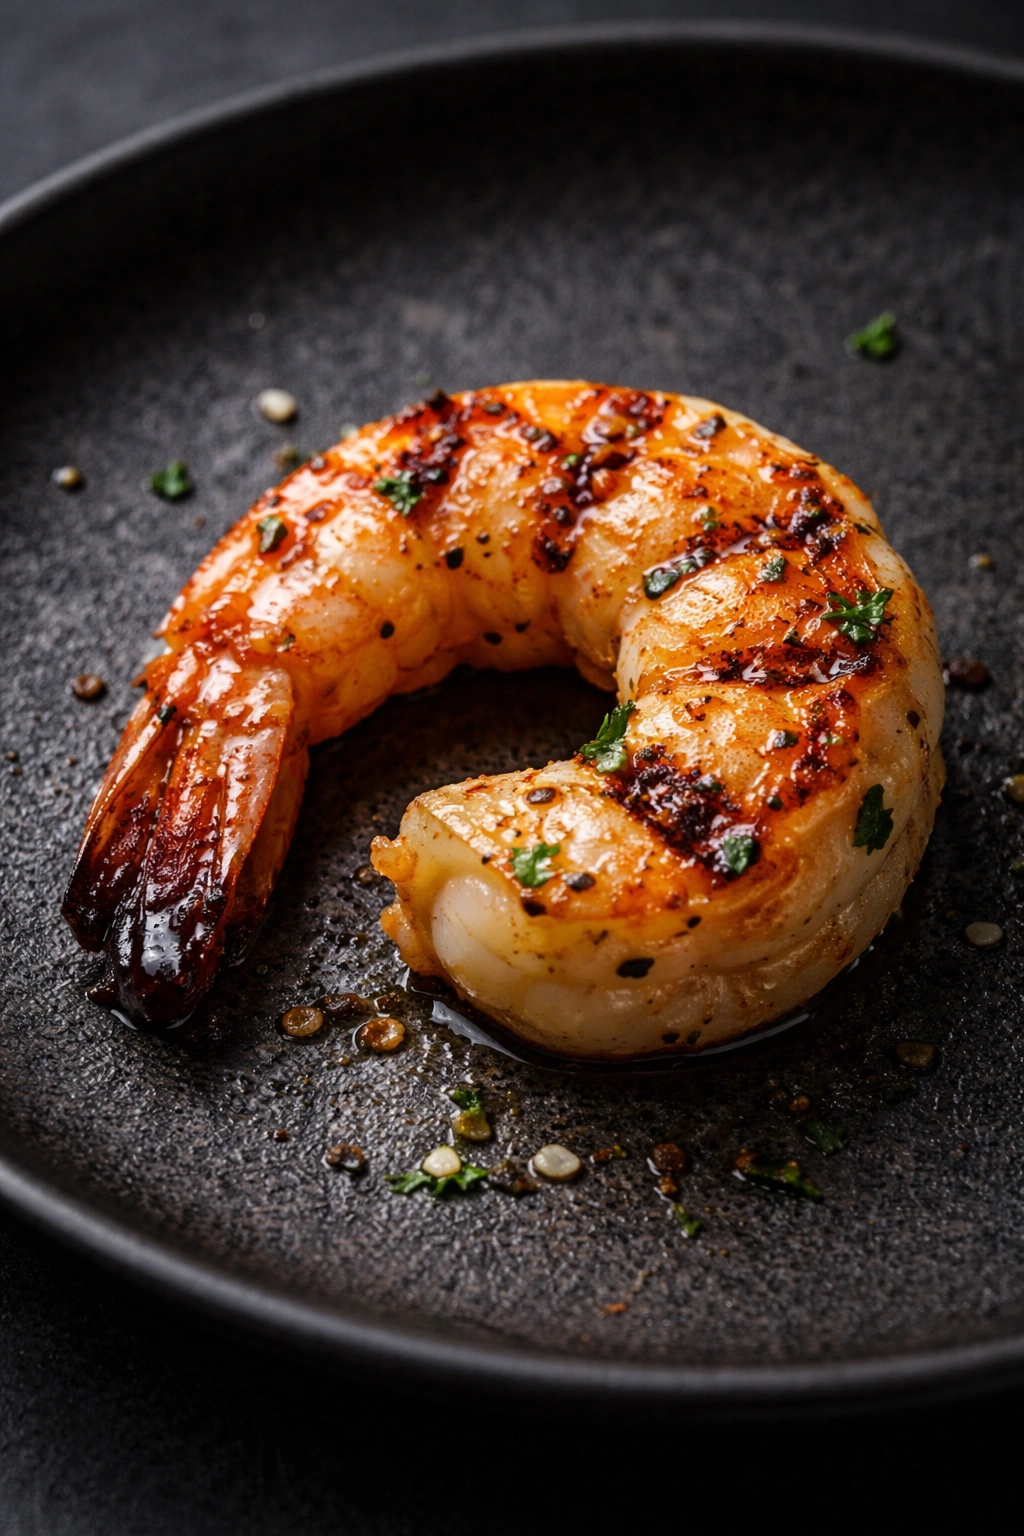
10. The shrimp are done when they’re pink throughout, opaque (not translucent), and the meat is completely white inside. The exterior should have light char marks. They should curl into a loose “C” shape. If they curl into a tight “O” shape, they’re overcooked — they’ll taste rubbery and dry.
How to tell without cutting into one: Gently press a shrimp with tongs. It should feel firm but still have a tiny bit of give — not mushy, but not hard either. You’re looking for that sweet spot between undercooked and overdone, and honestly, it happens faster than you’d expect.
11. Transfer the skewers to a platter. Scatter chopped fresh parsley over the top, drizzle with any remaining marinade, and serve immediately with lemon wedges for squeezing. If you want to be fancy, finish with a tiny pinch of fleur de sel on each shrimp.
Why Shrimp Overcooks So Catastrophically (and How to Fix It)
The reason people are nervous about grilling shrimp is valid: there’s a thin line between perfectly cooked and ruined. Shrimp goes from tender to rubbery in about 30 seconds. This happens because shrimp are basically pure protein with very little fat. When the proteins denature (which is what cooking is), they contract and squeeze out moisture. Without fat to keep things juicy, you’re left with something that feels like rubber.
The good news? You can train yourself to see the exact moment they’re done. You don’t need a thermometer or guesswork. Shrimp change color as they cook. Raw shrimp are grayish and somewhat translucent. As they cook, they turn progressively more opaque and pink. When the last of the translucent gray color disappears and the entire shrimp is opaque and pink, with white meat inside, that’s done. It’s that simple. Pull them off immediately.
The curve of the shrimp is another visual cue. Raw shrimp are pretty straight. As they cook, they curl. A perfect shrimp curls into a gentle “C” shape — like it’s giving a slight hug. An overcooked shrimp curls into a tight “O” shape — almost a complete circle. That tight curl is your signal you’ve gone too far. Mentally note that curve; it becomes your visual reference point.
Another thing people don’t realize: shrimp continue cooking slightly after you remove them from the grill. That carryover heat is usually about 30 seconds worth of additional cooking. So if you pull them off when they’re at about 90% done, by the time they hit your plate, they’re perfect.
Bold Marinades That Transform Shrimp in Minutes
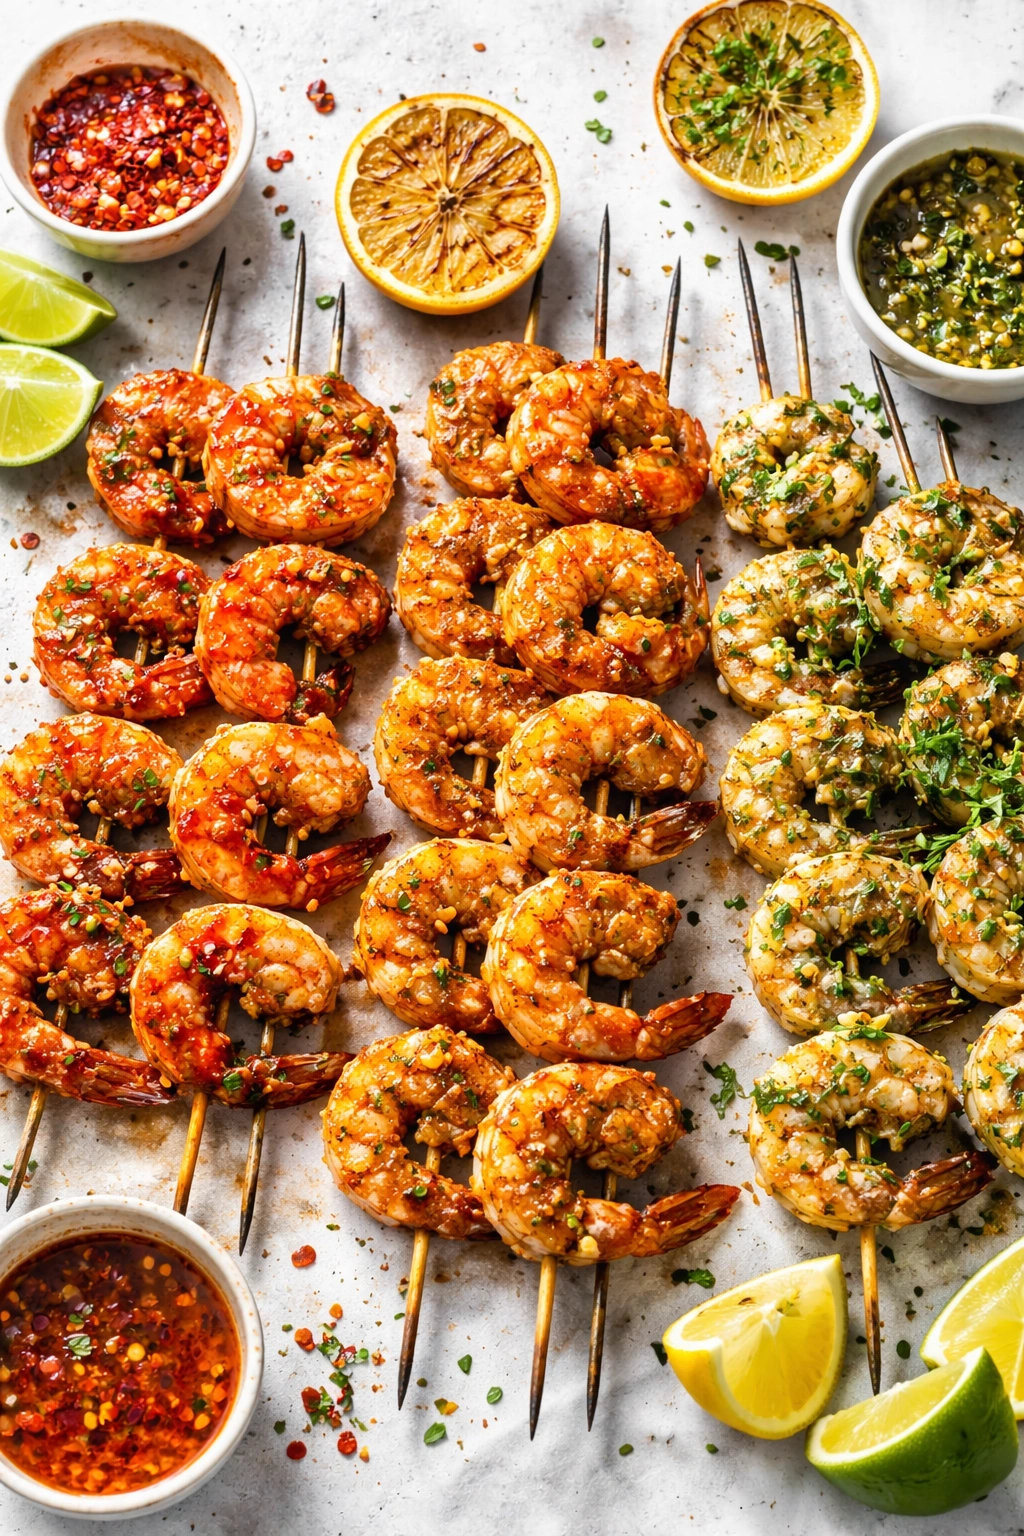
The basic lemon-garlic version is perfect, but once you’ve made it a few times, you’ll want to play around. The beautiful thing about shrimp is that it’s a blank canvas — it takes on whatever flavors you give it. These variations all use the same technique but swap the seasonings.
Spicy Garlic Shrimp with Cayenne and Smoked Paprika
Double the cayenne pepper (use ¼ teaspoon instead of ⅛), add ½ teaspoon smoked paprika, and include 1 minced garlic clove instead of 4. This version is less about garlic intensity and more about building heat and smokiness. The paprika gives it that authentic grilled flavor even before it hits the grill. It’s perfect with cilantro lime rice on the side.
Old Bay Coastal Version
Swap the garlic and cayenne for 1 tablespoon of Old Bay seasoning mixed into the oil. Add 1 minced shallot for sweetness. Add ¼ teaspoon crushed red pepper if you want to keep some heat. This tastes like you got it at a coastal seafood shack. Serve it with corn, potatoes, or coleslaw.
Mediterranean Herb Marinade
Reduce the lemon juice to 1 tablespoon and add 1 tablespoon red wine vinegar instead. Add 2 teaspoons of dried Italian seasoning (or ½ teaspoon each of dried basil, oregano, and thyme). Include 1 minced garlic clove and ¼ teaspoon red pepper flakes. This version tastes bright and herbaceous. It pairs beautifully with white wine and grilled vegetables.
Garlic Butter with Fresh Herbs
This is a richer version. Use 2 tablespoons melted butter plus 1 tablespoon olive oil instead of 3 tablespoons olive oil. Add 3 minced garlic cloves (go bold here), ½ teaspoon smoked paprika, ¼ teaspoon cayenne, and 2 tablespoons of fresh parsley plus 1 tablespoon of fresh basil if you have it. The butter makes this taste like a steakhouse appetizer. Brush any leftover warm marinade over the cooked shrimp right before serving.
Lime Cilantro with Cumin
Swap the lemon juice for 2 tablespoons fresh lime juice. Add ½ teaspoon ground cumin, 2 minced garlic cloves, and 2 tablespoons fresh cilantro. Add ⅛ teaspoon cayenne for subtle heat. This tastes like it belongs in tacos or over cilantro lime rice. It’s bright, fresh, and slightly earthy from the cumin.
Skewer Techniques That Make Everything Easier
There’s more to skewering than just stabbing shrimp on a stick. The technique genuinely affects how they cook.
Thread the skewer through the middle of the shrimp’s body, going horizontally through the meat rather than from the tail end toward the head. This keeps them stable and prevents them from spinning or rotating on the skewer when you flip. If a shrimp does rotate during cooking, the side that flips away from heat might not cook properly.
Space shrimp about ¼ inch apart. This is the Goldilocks zone. Too close together and the ones in the middle steam rather than grill. Too far apart and the skewer itself becomes a heat conductor that can slightly burn or overcook the shrimp closest to the metal.
Keep shrimp on the same skewer roughly the same size. If you mix large and medium shrimp on the same skewer, the medium ones will be overcooked by the time the large ones are done. Sort them by size before skewering — it takes 10 extra seconds and prevents mismatched results.
Metal skewers are superior to wooden ones. Seriously. Metal heats up and actually helps cook the shrimp through. Bamboo skewers just sit there (and burn, despite soaking). If you’re going to grill shrimp more than a few times, invest in a set of stainless steel skewers. You can find them at any store with a grill section or online for about $10-15 for a set of six. They last forever and completely change the experience.
If you do use wooden skewers, soak them for at least 30 minutes in water before loading them with shrimp. Even soaked, they might get a little charred on the edges, which is fine — it actually adds character. Just know that they won’t perform as well as metal.
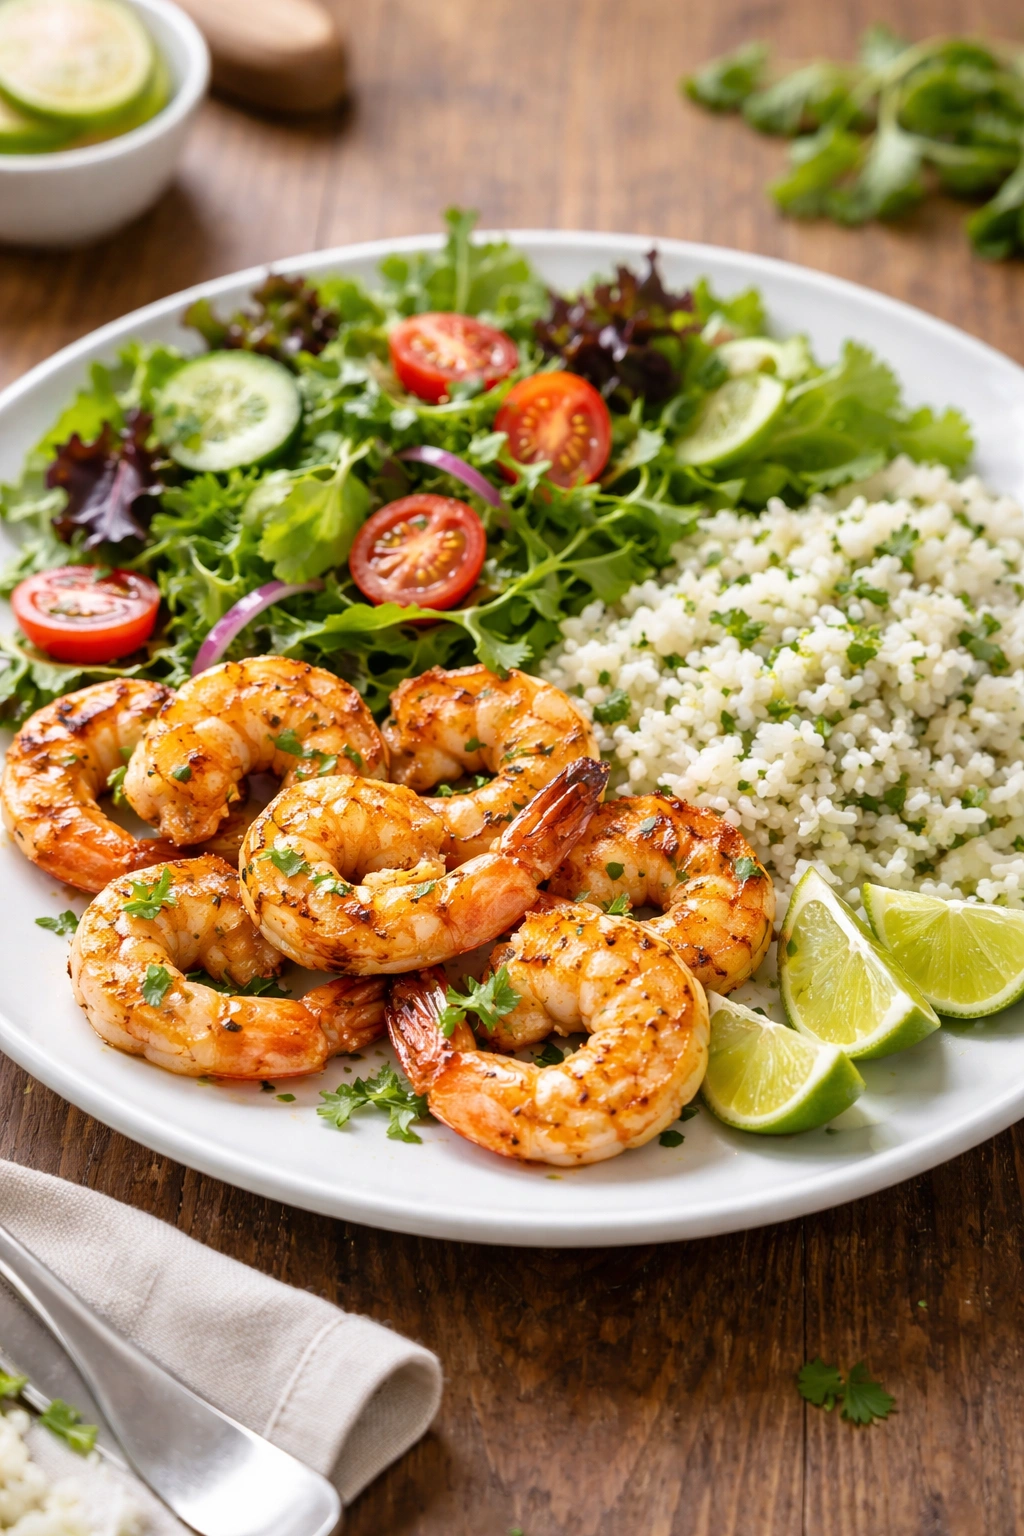
Side Dishes That Complete the 20-Minute Dinner Strategy
Grilled shrimp pairs with an endless number of sides, but timing matters if you want everything ready at once. These are sides you can prep while the shrimp marinates and toss together while they grill.
Quick Rice or Grain Options
Cilantro Lime Rice: Cook rice ahead (or buy microwave rice if we’re being real about 20-minute dinners), then toss with fresh cilantro, lime juice, salt, and a touch of butter. Takes 2 minutes. Perfect with any Mexican or Southeast Asian-inspired shrimp variation.
Garlic Butter Rice: Melt 2 tablespoons butter, add 3 minced garlic cloves, cook for 30 seconds, then toss with cooked rice. Add fresh parsley and a squeeze of lemon. This is simple, elegant, and complements the basic lemon-garlic shrimp beautifully.
Coconut Rice: Combine cooked rice with a splash of canned coconut milk, salt, and fresh cilantro. It’s creamy, slightly sweet, and pairs wonderfully with spicy shrimp variations.
Vegetable Sides That Cook Alongside
Grilled Asparagus: Toss thin asparagus spears with olive oil, salt, and pepper. Place them directly on the grill grates (they’re thin enough that they won’t fall through) starting the same time you put the shrimp on. They’ll be done in about 4-5 minutes. No skewering needed.
Charred Corn: Brush corn on the cob with butter, salt, and pepper. Place it on the grill starting when you put the shrimp on. Rotate it every couple of minutes so it chars on all sides. It’ll be perfect by the time the shrimp is done.
Quick Grilled Zucchini: Slice zucchini lengthwise into ¼-inch planks. Brush with olive oil and season with salt and pepper. Grill directly on the grates alongside the asparagus. They develop beautiful char marks and only take about 3 minutes per side.
Salad Options for Lighter Meals
Arugula Salad with Lemon: Toss peppery arugula with good olive oil, lemon juice, salt, and pepper. Top with shaved Parmesan if you have it. The slightly bitter greens contrast beautifully with the sweet, savory shrimp.
Tomato and Cucumber Salad: Dice fresh tomatoes and cucumber, toss with red onion, fresh herbs (dill or basil work great), olive oil, and a touch of balsamic vinegar. It’s refreshing and takes 3 minutes to throw together.
Broccoli Salad: Raw broccoli florets, sunflower seeds, dried cranberries, and a simple vinaigrette made from olive oil and apple cider vinegar. It’s crunchy, slightly sweet, and weirdly perfect with grilled shrimp.
Starches That Feel Special
Baked or Grilled Potatoes: If your grill is big enough, wrap potatoes in foil and put them on indirect heat while the shrimp cooks on direct heat. By the time the shrimp is done, you’ll need to pull the potatoes off and let them rest, but they’ll be ready within 20-25 minutes total.
Angel Hair Pasta: Cook pasta while the shrimp marinates. Drain it, toss with butter, fresh parsley, and garlic. Serve the shrimp over or alongside the pasta. It looks like you spent an hour cooking.
Polenta: If you’re using instant polenta (the good kind that cooks in 5 minutes), cook it while the shrimp marinates. Stir in butter and Parmesan. Serve the shrimp over a bed of creamy polenta for something that feels genuinely luxurious.
Smart Variations for Different Flavors and Dietary Approaches
Once you understand the basic technique, you can spin this in endless directions depending on what you’re craving or what your table needs.
Spice Levels
For heat lovers: Double the cayenne, add ¼ teaspoon of smoked paprika, and include ⅛ teaspoon of ground ginger for warmth. Some people add a pinch of smoked chili powder. The key is layering different types of heat rather than relying on one source — it feels more sophisticated.
For people sensitive to spice: Omit the cayenne entirely and reduce the paprika to ¼ teaspoon. Focus instead on building umami through garlic, salt, and the char from the grill. Acid from the lemon and brightness from fresh herbs still make it flavorful without any heat.
Dietary Adaptations
Whole30 or paleo: The basic recipe as written is already compliant. Olive oil, shrimp, lemon, garlic, and herbs are all clean. Just verify that your paprika and spices don’t have additives.
Low-FODMAP: Omit the garlic (or use garlic-infused oil instead, which contains the flavor without the fermentable carbs). Use scallion greens instead of regular parsley for brightness. The shrimp itself is low-FODMAP, so this is an easy adaptation.
Keto or carnivore: The basic recipe is perfect. You can add butter instead of some of the olive oil if you want to increase fat. Skip any starchy side dishes and load your plate with vegetables or just serve the shrimp on its own.
Serving Style Variations
As appetizers for entertaining: Thread 2-3 shrimp per skewer instead of 4-6, and serve them on a platter with cocktail sauce or a spicy mayo for dipping. They’re perfect for parties because people can eat them with their hands off the stick.
In tacos: Warm small flour or corn tortillas, add some shredded cabbage or cilantro, top with grilled shrimp, and drizzle with crema or a lime crema. Add avocado if you’re feeling fancy. This turns a simple dinner into something completely different.
Over pasta: Toss the shrimp with cooked pasta and a light sauce made from the reserved marinade plus a splash of white wine and fresh parsley. It feels restaurant-quality but took 20 minutes.
In salads: Slice the cooked shrimp and scatter them over whatever salad you’re making. They’re especially good over arugula with Parmesan, over a Caesar salad, or over a bright green salad with peppery greens and a citrus dressing.
Storage, Leftovers, and Make-Ahead Strategy
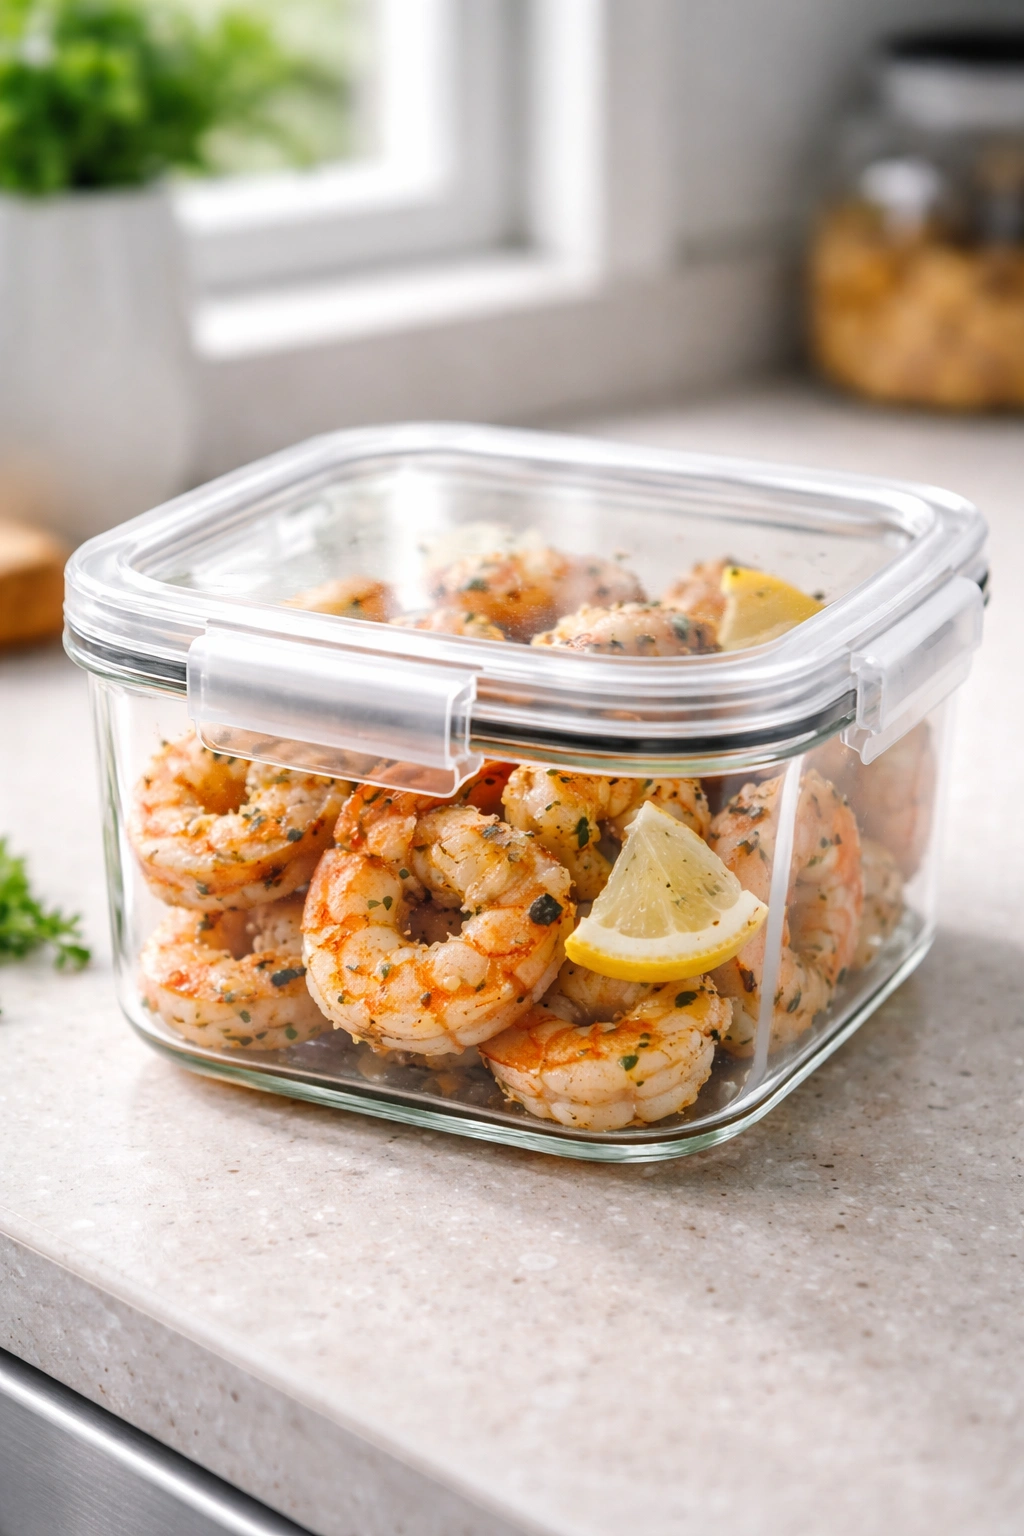
Grilled shrimp actually stores really well, which makes them perfect for meal prep or next-day lunches.
Refrigerator storage: Keep leftover cooked grilled shrimp in an airtight container in the coldest part of your fridge for up to 3 days. They’ll keep longer than raw shrimp because the protein has already denatured.
Freezer storage: Cooked grilled shrimp can be frozen for up to 3 months in a freezer-safe container or freezer bag. Thaw them in the refrigerator before reheating or eating.
Raw shrimp storage: If you’ve marinated shrimp but haven’t grilled them yet, keep them in the fridge in a sealed container for up to 8 hours. Beyond that, the acid from the lemon juice starts to have unintended effects on the texture.
Reheating: The gentlest method is to reheat shrimp in the oven at 300°F for about 5 minutes, covered loosely with foil, until warmed through. This prevents them from drying out. You can also reheat them very gently on the stovetop in a skillet with a touch of butter over low heat for 2-3 minutes, stirring occasionally. Avoid the microwave if possible — it tends to make them rubbery, even though it’s fastest.
Next-day ideas: Cold leftover grilled shrimp are legitimately delicious. Toss them into a salad with arugula, cherry tomatoes, and a lemon vinaigrette. Add them to a grain bowl with rice, roasted vegetables, and a sesame dressing. Make a shrimp salad by chopping them and mixing with mayo, diced celery, and a touch of lemon juice for sandwich filling.
Make-Ahead Strategy for Dinner Parties
If you’re grilling shrimp for a crowd, you can prep everything the night before and finish it in 5 minutes when guests arrive. Peel, devein, and pat dry the shrimp. Make the marinade and store it separately in the fridge. In the morning, combine them about 30 minutes before you plan to grill. Thread the skewers and cover them with plastic wrap. All that’s left is preheating the grill and cooking them, which looks effortless and impressive to your guests.
The Real Reasons This Works as a Complete Dinner
A complete dinner isn’t just about quantity — it’s about balance. Grilled shrimp hits all the notes: it’s the protein, it’s naturally flavorful, and because it cooks so fast, you have mental bandwidth to prepare sides without stress.
Nutritionally, you’re getting lean protein (about 20 grams per 3.5 ounces), healthy fats from the olive oil, fresh herbs and spices with polyphenols and antioxidants, and the actual satisfaction of eating something that tastes like it took effort. There’s no heaviness afterward — shrimp doesn’t sit in your stomach the way beef or pork might.
Psychologically, grilled food just feels special. Even when it took 20 minutes. Your brain doesn’t evaluate meals based on prep time; it evaluates them based on flavor, presentation, and the ritual of cooking. Grilled shrimp delivers on all three. You stood at the grill, you watched them change color, you pulled them off at the perfect moment. That’s cooking, and your brain knows it.
Practically, this is something you can make on a Tuesday night. It doesn’t require planning or specialty equipment beyond a grill. The ingredients are available year-round. It works whether you’re cooking for yourself, your partner, or a crowd. It scales up or down without changing the technique.
Final Thoughts
Grilled shrimp is one of those recipes that sits at the intersection of simplicity and sophistication. It’s so easy that a beginner can make it successfully on their first try, yet experienced cooks keep coming back to it because the results are reliable and delicious. There’s no sauce to worry about, no careful temperature checking, no mysterious steps that occasionally go wrong.
The entire concept boils down to three things: don’t overcook (watch for the color change from translucent to opaque), make sure your grill is properly oiled and hot, and use a simple seasoning strategy that lets the natural sweetness of the shrimp come through. Master those three things and you’ve got a dinner that works for busy weeknights, impresses guests, and tastes like you actually know what you’re doing. The fact that it takes 20 minutes from raw shrimp to plated dinner is honestly just a bonus.