There’s something deeply satisfying about a bowl of bean soup that sticks with you—not just in flavor, but in genuine fullness that carries you through the afternoon without the energy crash that comes from lighter meals. Most people underestimate what beans can do. They’re not just cheap and nutritious; they’re a legitimate secret weapon for satiety, packed with both protein and fiber in a way that keeps your hunger hormones in check for hours. The trick isn’t making bean soup; it’s understanding what actually makes it filling—and then building that into every step, from which beans you choose to how long you let them simmer.
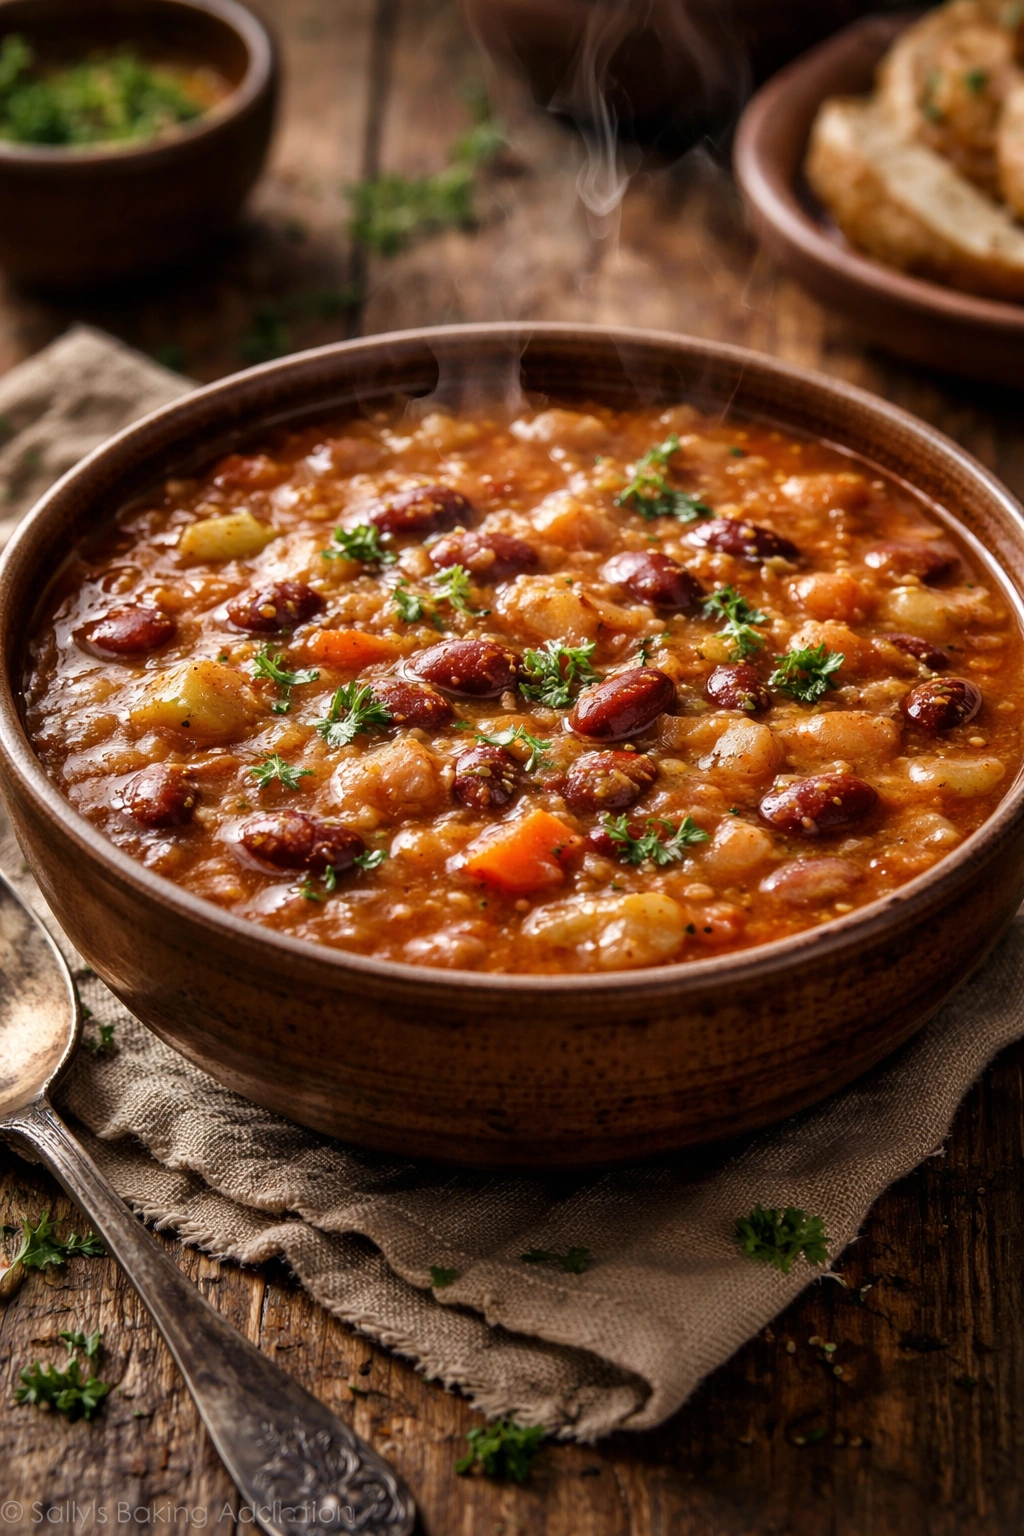
The soups that fail tend to suffer from the same problems. They’re too thin, so they disappear fast. The beans are overcooked to mush, losing the structure that your digestive system needs to feel genuinely full. The flavor is timid, so you end up eating a bigger bowl to feel satisfied. A well-made hearty bean soup fixes all of these problems at once. The beans stay intact with a slight bite. The broth is deeply savory from slow-cooked aromatics and quality stock. The soup is thick enough that it actually feels substantial—not a thin broth with beans floating in it, but a cohesive bowl where the beans themselves become creamy as they break down just slightly, thickening the soup naturally.
This is the kind of soup that tastes better the next day and keeps brilliantly in the freezer for weeks. It’s the soup you make on a Sunday and eat for lunch all week, arriving at your desk with something that feels indulgent rather than like a diet meal. Let me walk you through exactly how to build one that works.
What Makes a Bean Soup Actually Filling
Satiety isn’t magic—it’s chemistry and physics working together. When you eat a bowl of thin broth with a few scattered beans, your stomach empties that quickly, and your blood sugar rises and crashes. You’re hungry again in an hour. A hearty bean soup does the opposite. The fiber in beans (both soluble and insoluble) slows digestion and keeps your blood sugar stable for hours. The protein helps with satiety hormones. But here’s the part most recipes miss: the soup needs to be thick enough that it stays in your stomach longer, creating actual physical fullness that your brain registers.
The creaminess comes from two sources—sometimes three if you do it right. First, as beans simmer for hours, their starches leach into the broth, naturally thickening it. Second, beans themselves soften and break down slightly at the edges, releasing even more starch. Third, you can mash a portion of the cooked beans and stir them back in for extra body. A thin, watery soup might have the same total calories as a thick one, but it won’t feel as full or satisfy as long.
There’s also a behavioral component that matters. When you’re eating something that requires spoon work and actual chewing—because the beans have structure and there are vegetables to navigate—you eat slower. Slower eating gives your satiety signals time to reach your brain before you’ve already devoured the whole bowl. This is why blended soups, despite being delicious, don’t keep you full the same way a chunky soup does.
Protein and Fiber Working Together
Beans deliver roughly 15 grams of protein per cooked cup, which is substantial for plant-based eating. More importantly, they deliver that protein alongside 12-15 grams of fiber—a one-two punch that most foods can’t match. Meat is high in protein but low in fiber. White pasta is low in both. Beans are uniquely high in both, and when you combine them in a soup with vegetables (more fiber) and a quality broth, you’ve created a meal that genuinely doesn’t require snacking a few hours later.
The research on satiety consistently shows that combinations of protein and fiber outperform either one alone. You’re not just choosing beans because they’re affordable; you’re choosing them because they’re one of the few foods that naturally provide both in significant amounts, without requiring a second ingredient.
Why Dried Beans Beat Canned
There’s a time and place for canned beans—mostly when you’re making a quick weeknight meal and don’t have three hours to spend. For a soup that’s meant to be hearty and filling, dried beans are the better choice, and the reasons are both practical and nutritional.
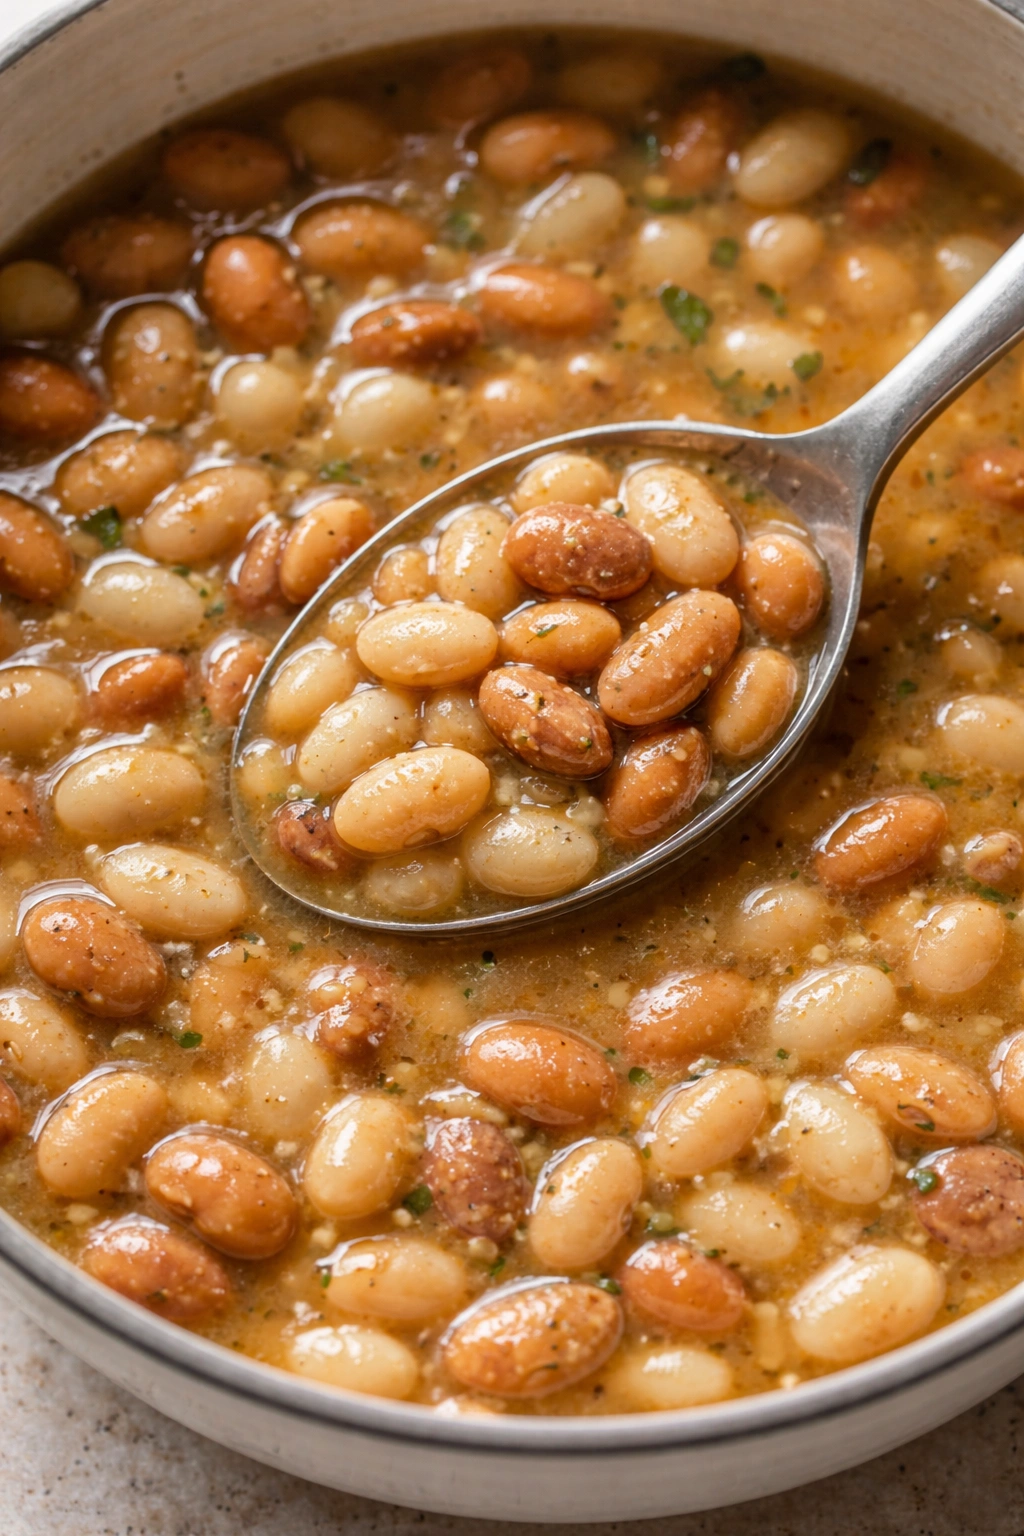
Dried beans have firmer structure after cooking, which means they hold their shape better in a soup. They don’t become a mushy, falling-apart texture that feels mealy on the spoon. Instead, they keep that slight resistance to your bite that registers as substantial and satisfying. A canned bean has already been cooked once, then sitting in liquid, then cooked again—by the time it’s in your pot, it’s softer than ideal.
Nutritionally, dried beans are denser in both protein and fiber per serving because canned beans carry water weight. You’re getting more actual nutrition per ounce of bean. The cooking liquid (which becomes your soup base) also matters—when you cook dried beans from scratch, the liquid they cook in becomes infused with their nutrients and starch, building body into your broth naturally. Canned bean liquid is just salt water and guar gum.
There’s also a cost difference that adds up if you’re making soup regularly. A pound of dried beans (about 2 cups dried) costs roughly one-third what you’d pay for the equivalent in canned beans. For a batch of soup that serves 6-8 people, that difference matters over time.
The Soaking Shortcut (Optional But Smart)
Soaking beans overnight isn’t strictly necessary, but it does speed cooking time by about 30 percent and can reduce the gas-producing compounds that bother some people. If you’re planning ahead, it’s worth it. Quick-soak is a legitimate alternative for when you forgot to plan: bring beans and water to a boil, cover, let sit one hour, then drain and proceed with your recipe. You’ll get most of the benefit without the overnight commitment.
The Flavor-Building Technique That Matters Most
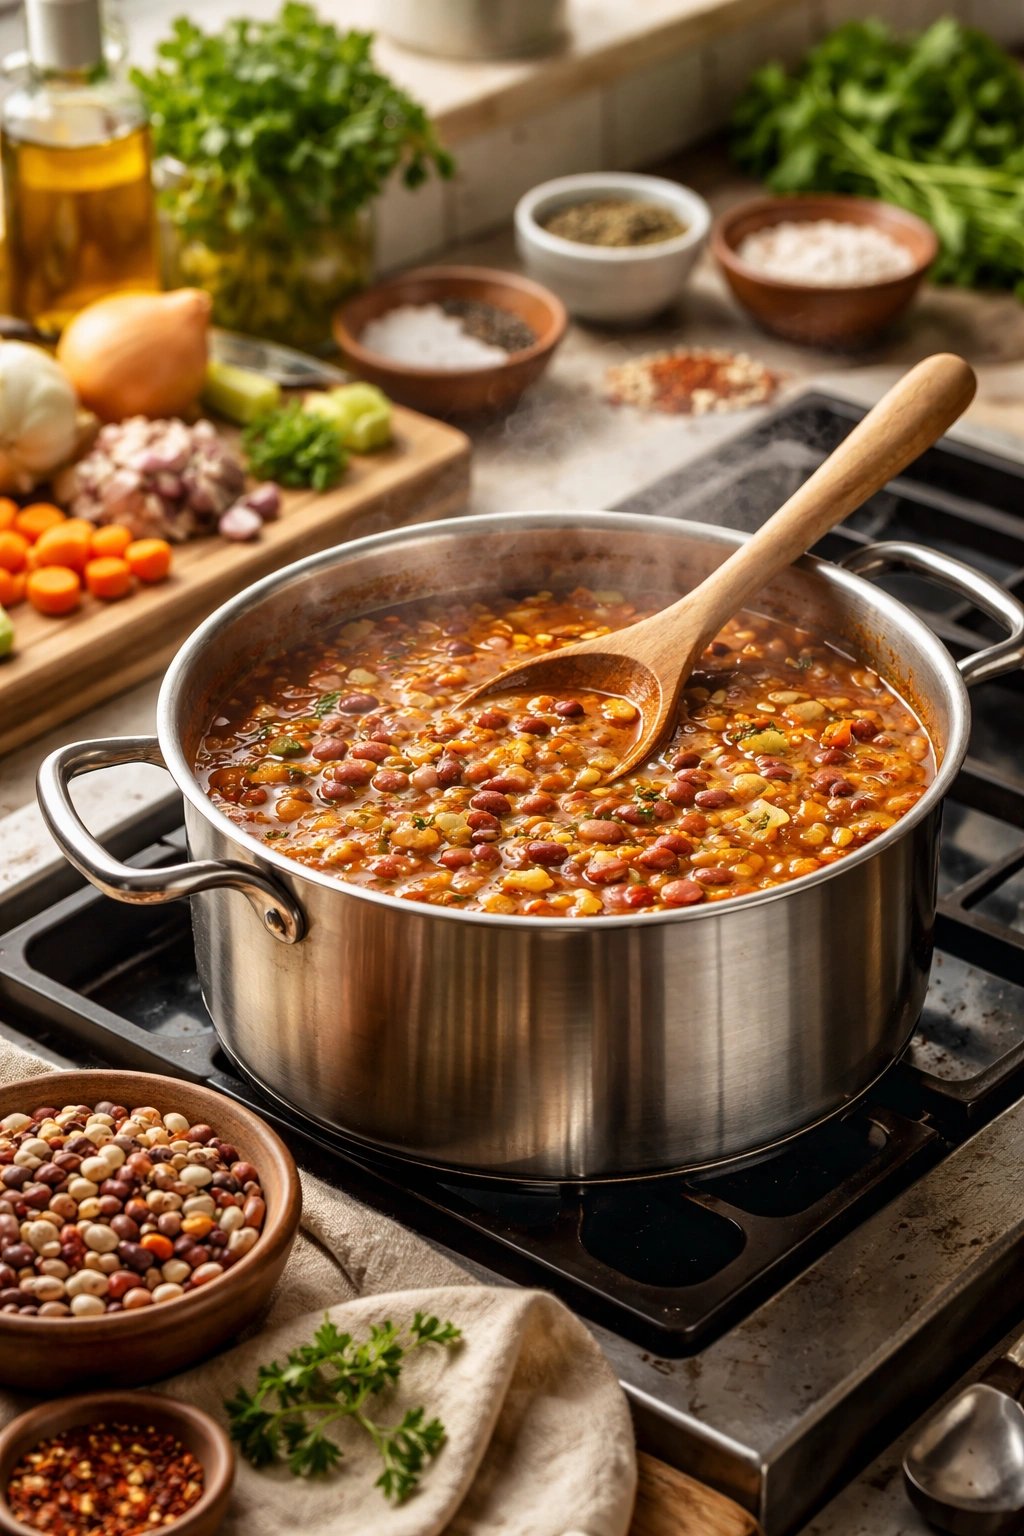
This is where most homemade bean soups go wrong. People dump beans and broth into a pot and let them simmer, expecting flavor to happen on its own. Flavor doesn’t happen on its own with beans. It happens because you build it intentionally, and the single most important step is proper sautéing of aromatics before the beans even touch the pot.
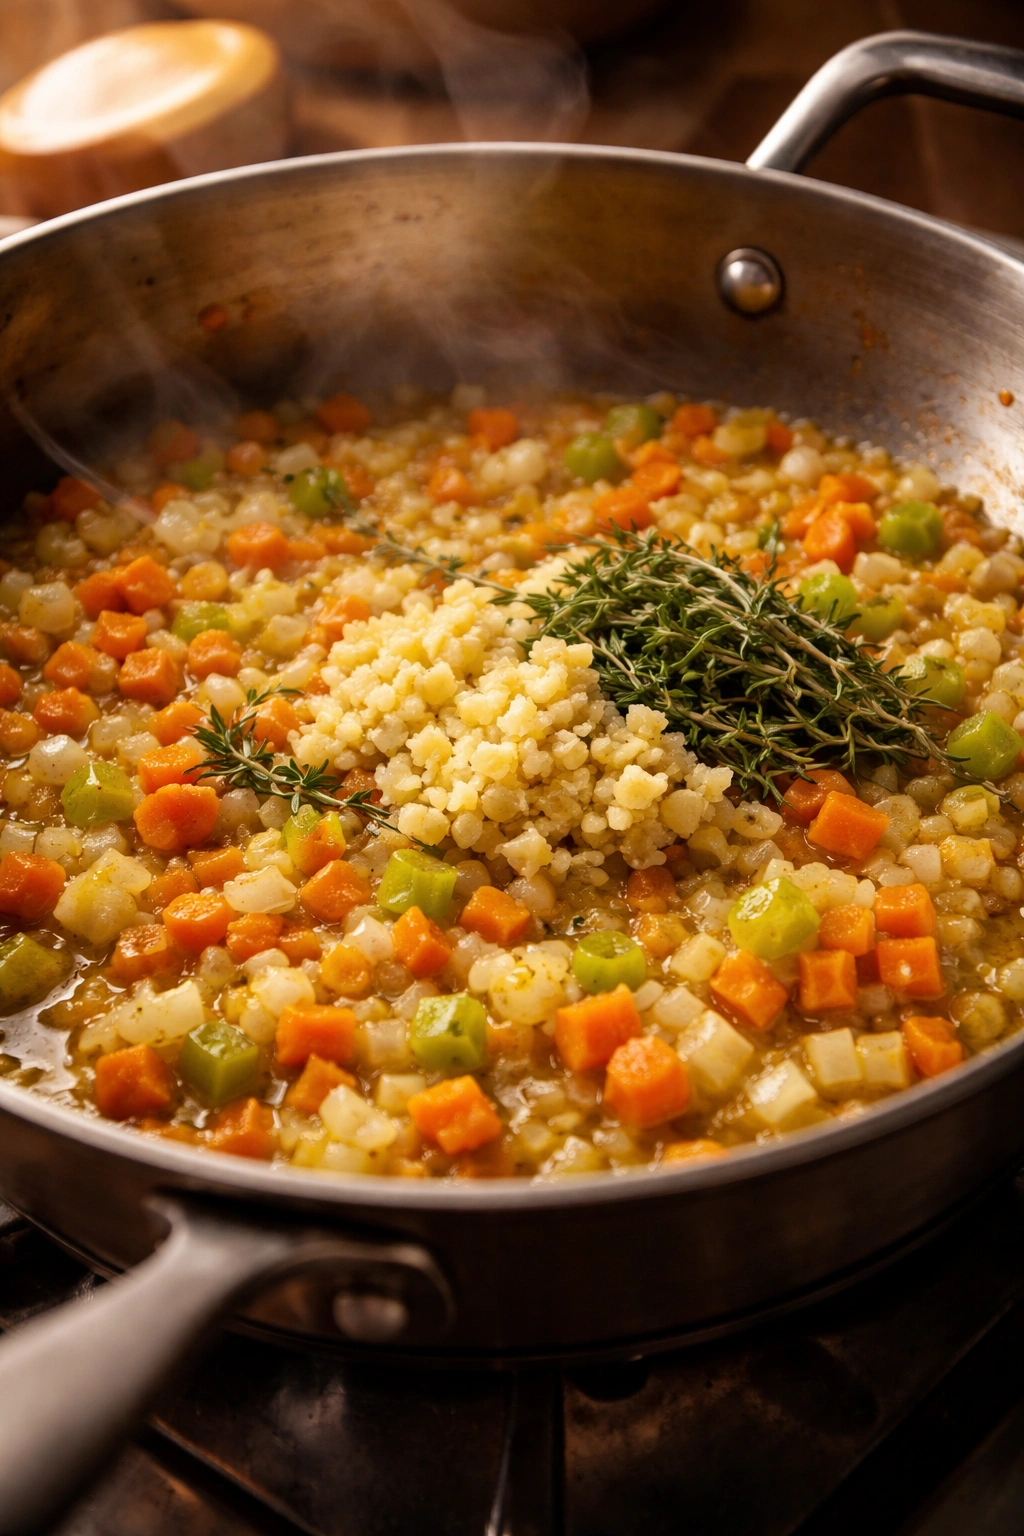
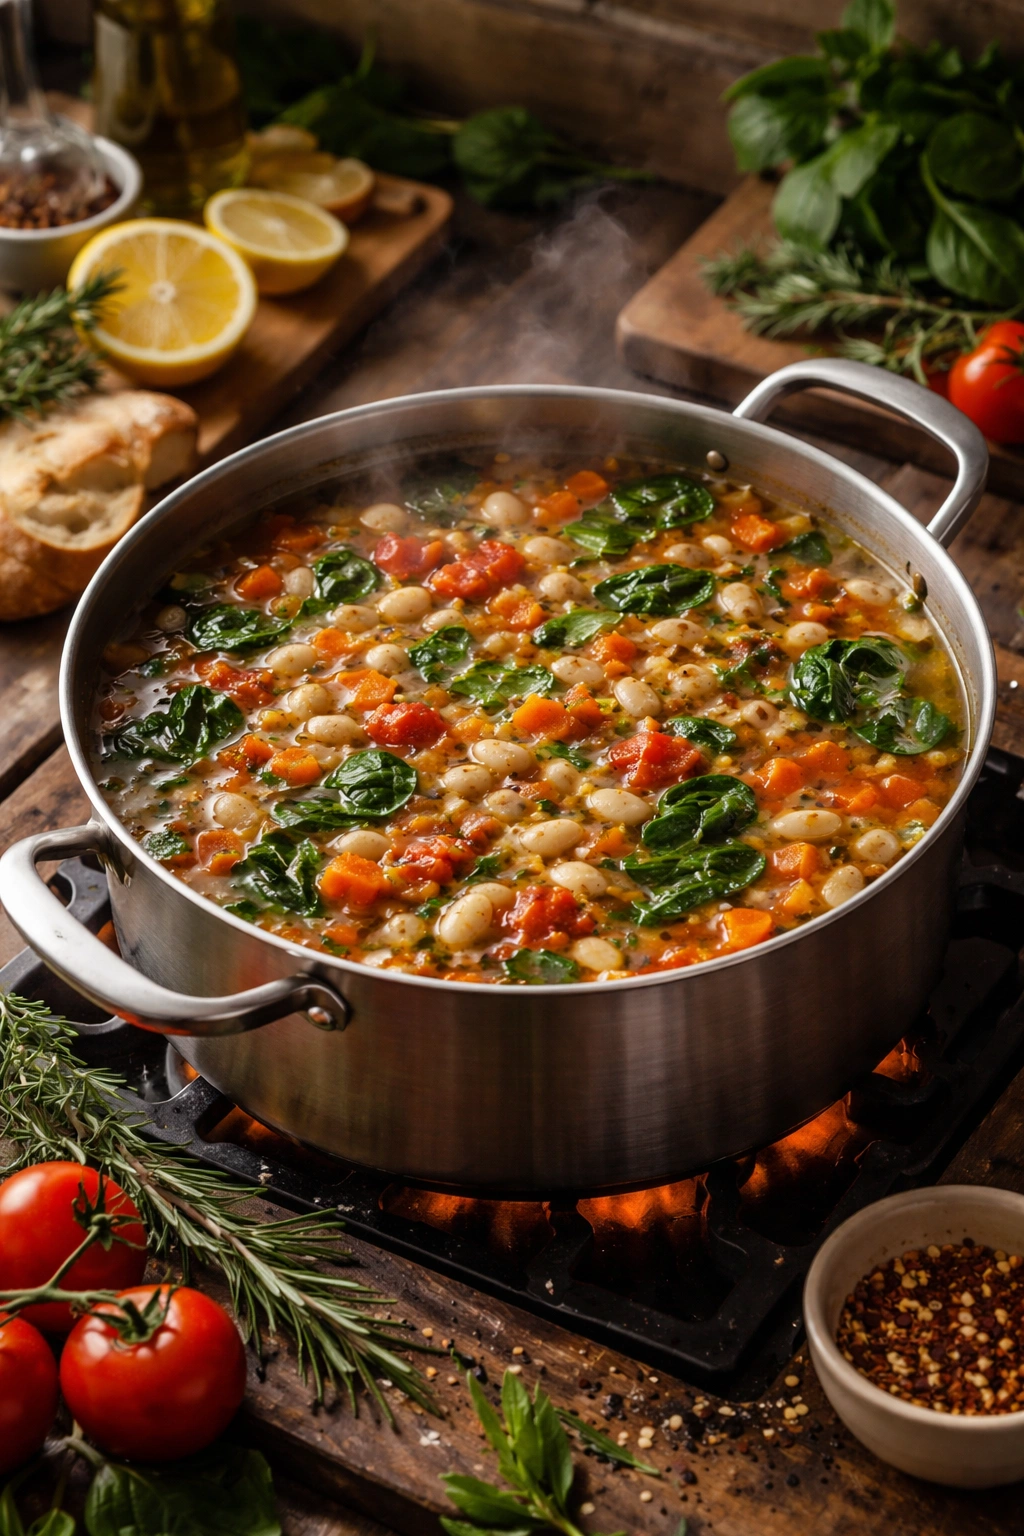
Start with diced onion, celery, and carrot—the holy trinity that anchors nearly every good soup. But here’s what matters: sauté them long enough that the onions become translucent and develop lightly golden edges, and the carrots and celery soften slightly. This takes 6-8 minutes on medium heat with a little olive oil and salt. Don’t rush it. This is where your soup’s flavor foundation gets built.
Once the vegetables are softened, add minced garlic and let it cook for about 30 seconds until it’s fragrant. If you’re using dried herbs (bay leaf, thyme), add them now. If you have tomato paste, a couple of tablespoons stirred into the vegetables and cooked for a minute adds deep savory complexity. This builds flavor compounds through caramelization—browning reactions that don’t happen if you skip straight to adding broth.
Only after this foundation is built should you add your stock and beans. The aromatics have released their sugars and sulfur compounds, creating a flavor base that carries through the entire cook. This single step—taking 10 minutes to sauté vegetables properly—is the difference between soup that tastes flat and soup that tastes like someone spent hours on it.
Broth Selection Changes Everything
The quality of your liquid carries the whole soup. If you’re using store-bought broth, low-sodium is crucial—it lets you control the salt level throughout cooking and prevents the soup from becoming oversalted as it reduces and concentrates. Chicken, vegetable, or beef broth all work; pick based on what beans and add-ins you’re using. For a hearty mixed bean soup, I prefer chicken broth for its clean body without being too assertive.
If you have homemade stock, that’s ideal—it carries more collagen and gelatin, which create a richer mouthfeel and help with satiety. But good store-bought broth does the job. What doesn’t work: bouillon cubes, “chicken flavor,” or water with salt. These create a soup that tastes thin and one-dimensional no matter how many beans you pack in.
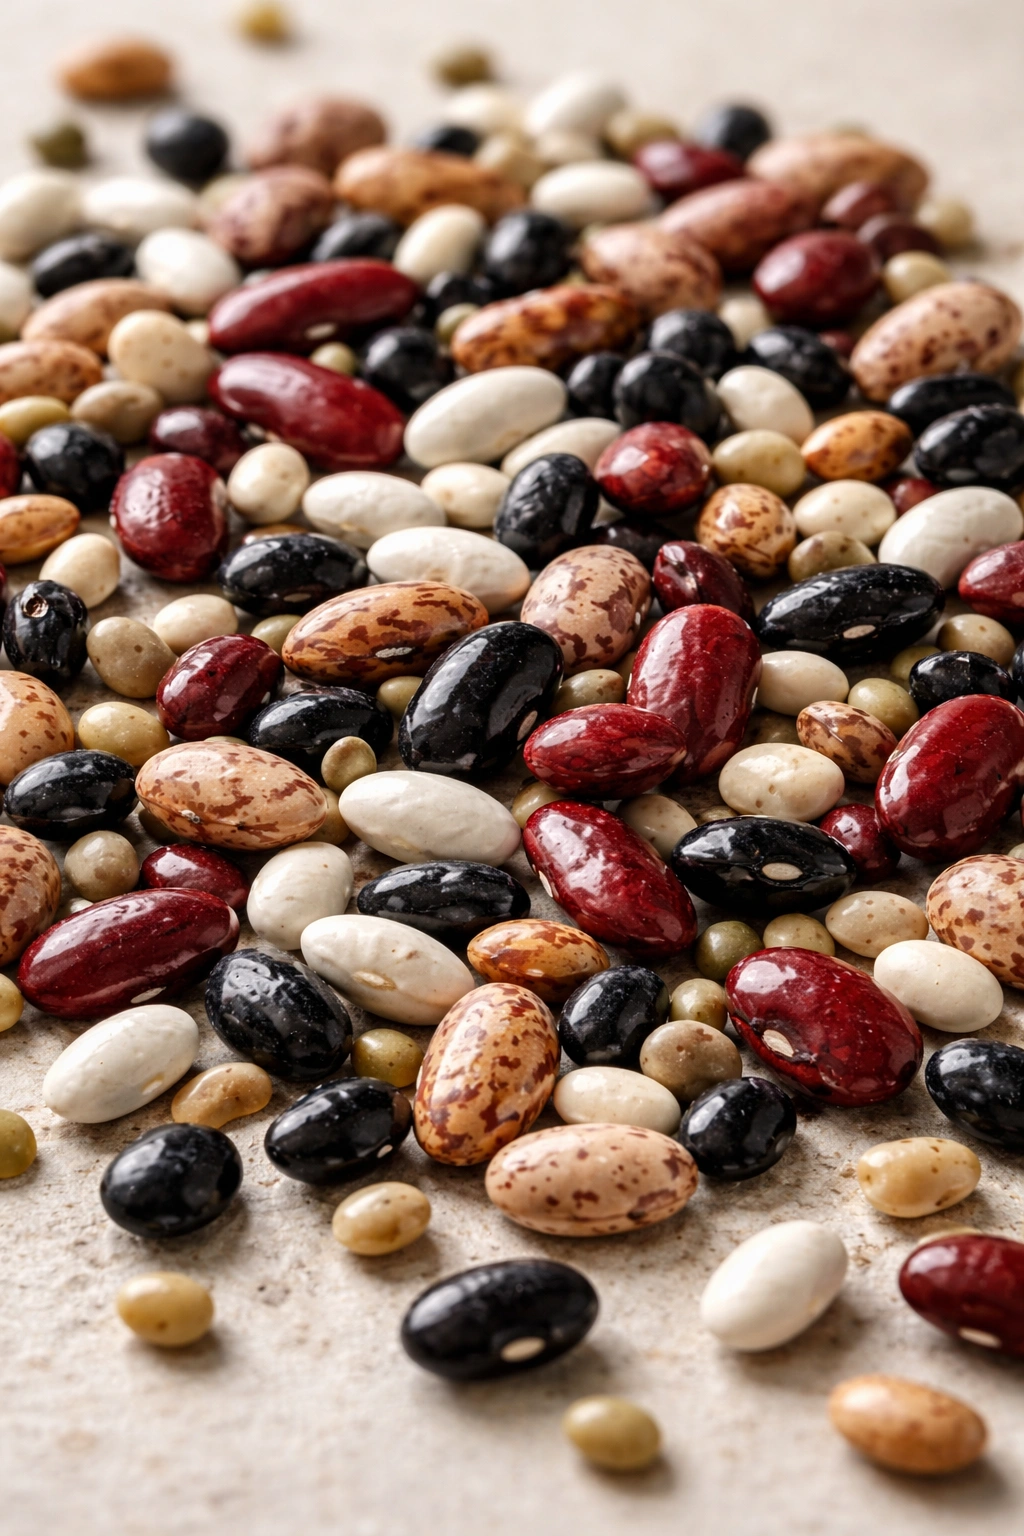
Choosing Your Bean Blend for Maximum Heartiness
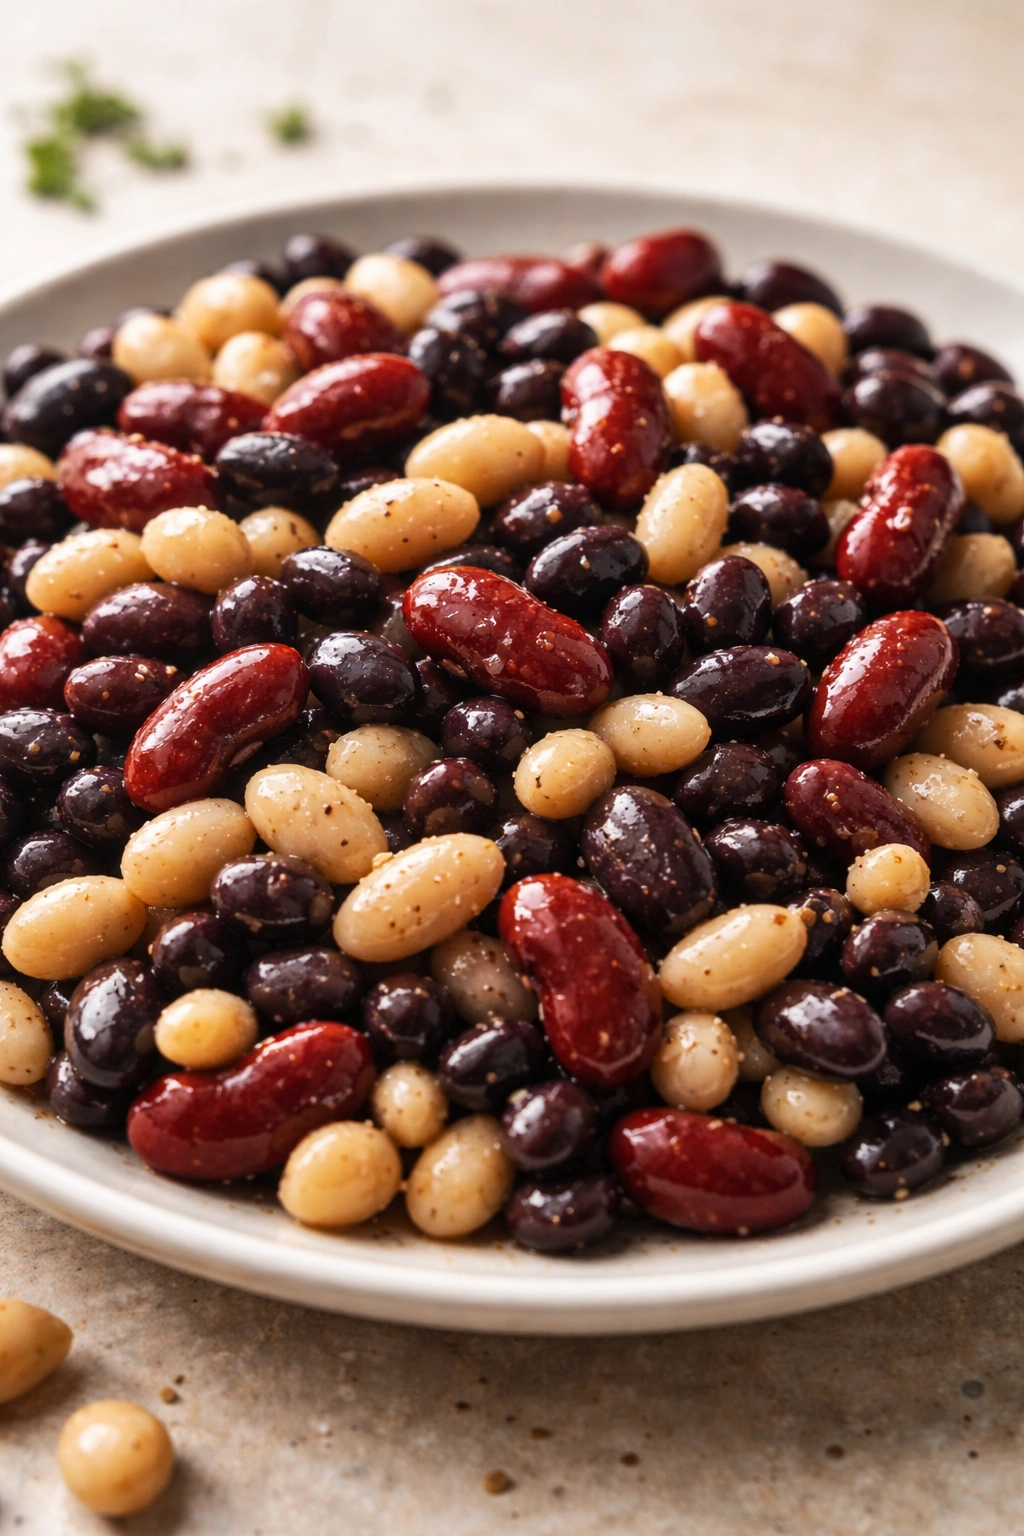
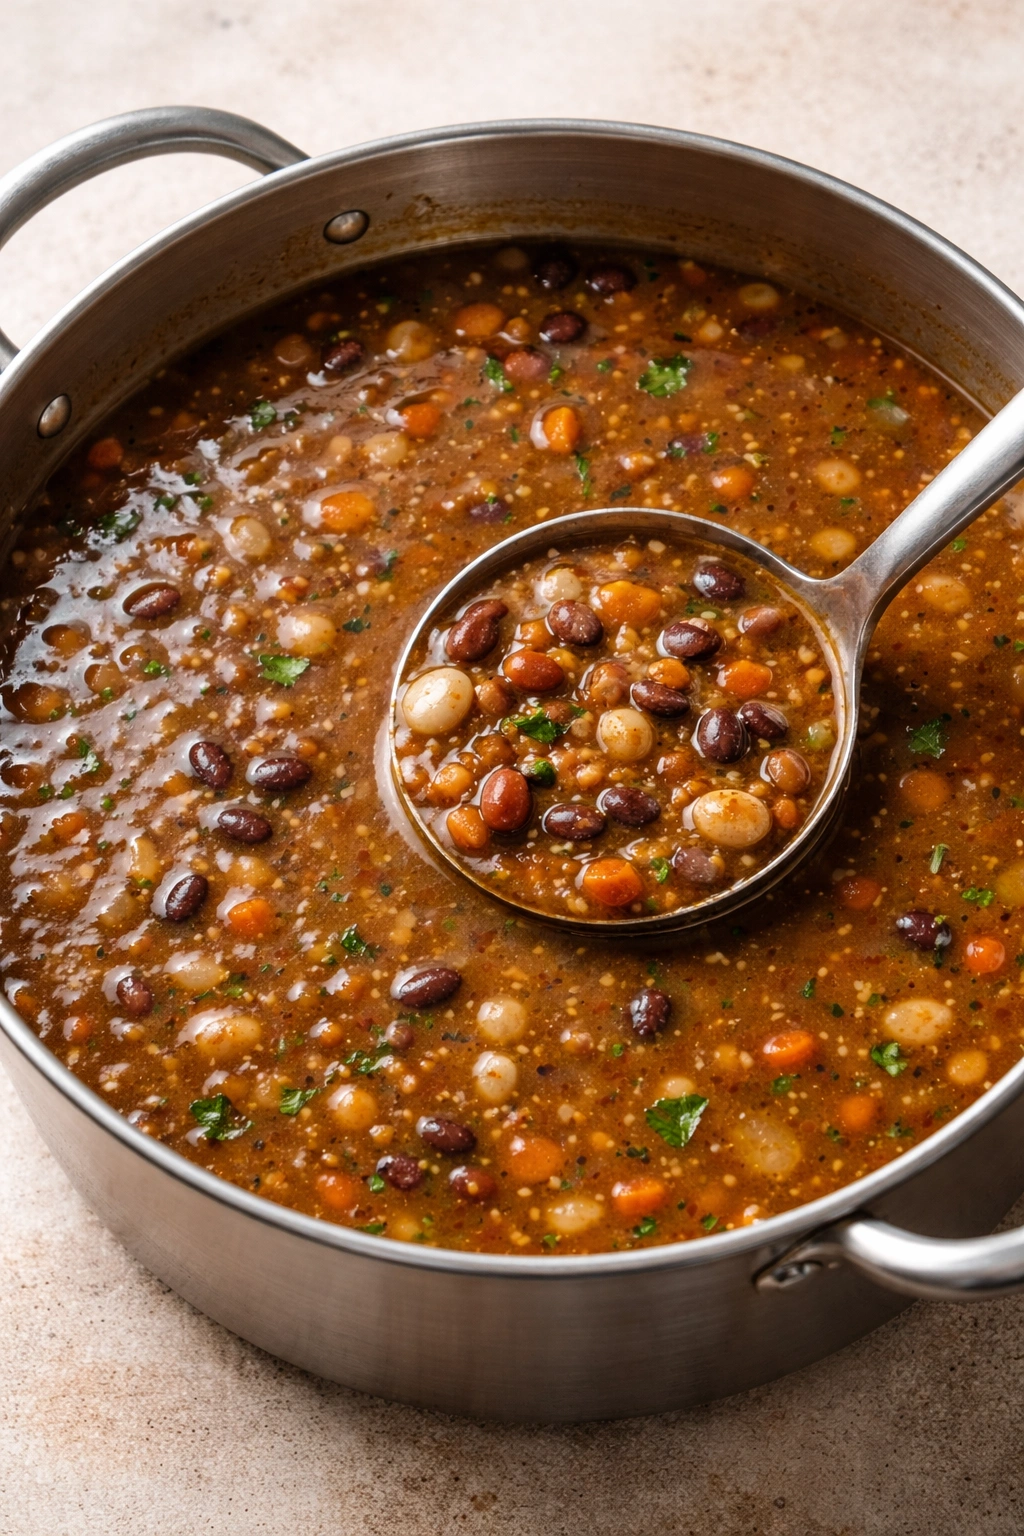
The classic combination is a mixture—at least three varieties for complexity and texture variation. I use a blend of navy beans (small and creamy), kidney beans (larger and structurally firm), and black beans or pinto beans (earthy and slightly sweet). You could also use great northern beans, cannellini beans, or even chickpeas depending on what you have access to and what flavor profile you want.
The point of mixing is that each bean cooks slightly differently and contributes something distinct. Navy beans break down slightly and help thicken the broth. Kidney beans keep their shape and structure. Black beans add earthiness and visual interest. Together, they create a more complex, satisfying soup than any single bean would.
Use roughly equal parts of each bean type—about 2/3 cup dried each for a large batch, or scale down for a smaller pot. This gives you roughly 2 cups of dried beans total, which after cooking yields about 6 cups of cooked beans—enough for a full pot of soup that serves 6-8 people generously.
Bean Cooking Time Variations
Different beans cook at different rates, which is why many recipes soak and cook them separately before adding to soup. This is more work but gives you more control. Navy beans typically cook in 60-90 minutes. Kidneys take 90-120 minutes. Black beans can take 120-150 minutes depending on their age and how dry your climate is. Older beans always take longer.
If you’re cooking them together, start the slower beans (black, kidney) first, then add the faster ones (navy, great northern) about 30 minutes later. This way they all finish around the same time. Alternatively, cook all of them together for the length of time the slowest variety needs—the faster ones will simply be done a bit earlier but won’t overcook in the simmering liquid.
The Broth Base That Keeps You Satisfied
The ratio I use is about 10 cups of broth to 2 cups of dried beans (which become about 6 cups cooked). This creates a soup that’s clearly broth-based but thick from the beans and their starches—not a gravy-thick soup, but substantive. If you like a brothier soup, use 12 cups. If you like it denser, use 8 cups. The difference in how filling it is correlates directly with thickness.
Add the broth after your aromatics are cooked, and let it come to a boil before adding your beans. Bring the whole pot to a simmer and partially cover it—the partial cover prevents rapid evaporation while letting steam escape. If it’s covered fully, the broth concentrates too quickly and becomes too salty.
Add salt conservatively at the start—a teaspoon per 10 cups of broth is a starting point. Beans are notorious for taking a long time to soften if the cooking liquid is too salty, so keep salt minimal until the beans are nearly tender. In the last 30 minutes of cooking, taste and adjust. You want the broth to taste savory but not so salty that you’re thirsty after a bowl.
Building Umami (Savory Depth)
Beyond the aromatics, add depth through umami-rich ingredients. A parmesan rind stirred into the pot adds savory depth without making the soup taste cheesy. A tablespoon of soy sauce or tamari adds savory complexity. A splash of balsamic vinegar adds rounded richness. A pinch of fish sauce (yes, in a vegetarian soup—it just adds umami, you won’t taste fish) creates incredible depth. Any of these additions are optional, but one or more of them transforms a basic bean soup into something that tastes intentional.
How Long to Cook Beans for Perfect Texture
This is where patience and attention matter. Beans need to cook until they’re completely tender—you should be able to press one between your tongue and the roof of your mouth and it should squash easily, with no firm center. This typically takes 90 minutes to 3 hours depending on the bean variety, their age, and your water hardness.
Undercooked beans stay hard and feel gritty in your mouth, which actively works against the filling sensation you’re building. They also don’t break down enough to thicken the broth. Overcooked beans turn to mush, lose their structure, and make the soup feel mushy rather than chunky and satisfying.
The way to know you’re done is to pull out a spoon of broth, let it cool, and taste a bean. It should be completely tender with no resistance. If it still has a firm bite when you press it, keep cooking and check again in 15 minutes. Don’t rely on cooking times alone—cooking times are just starting points. Your specific beans, water, and altitude all affect how long cooking takes.
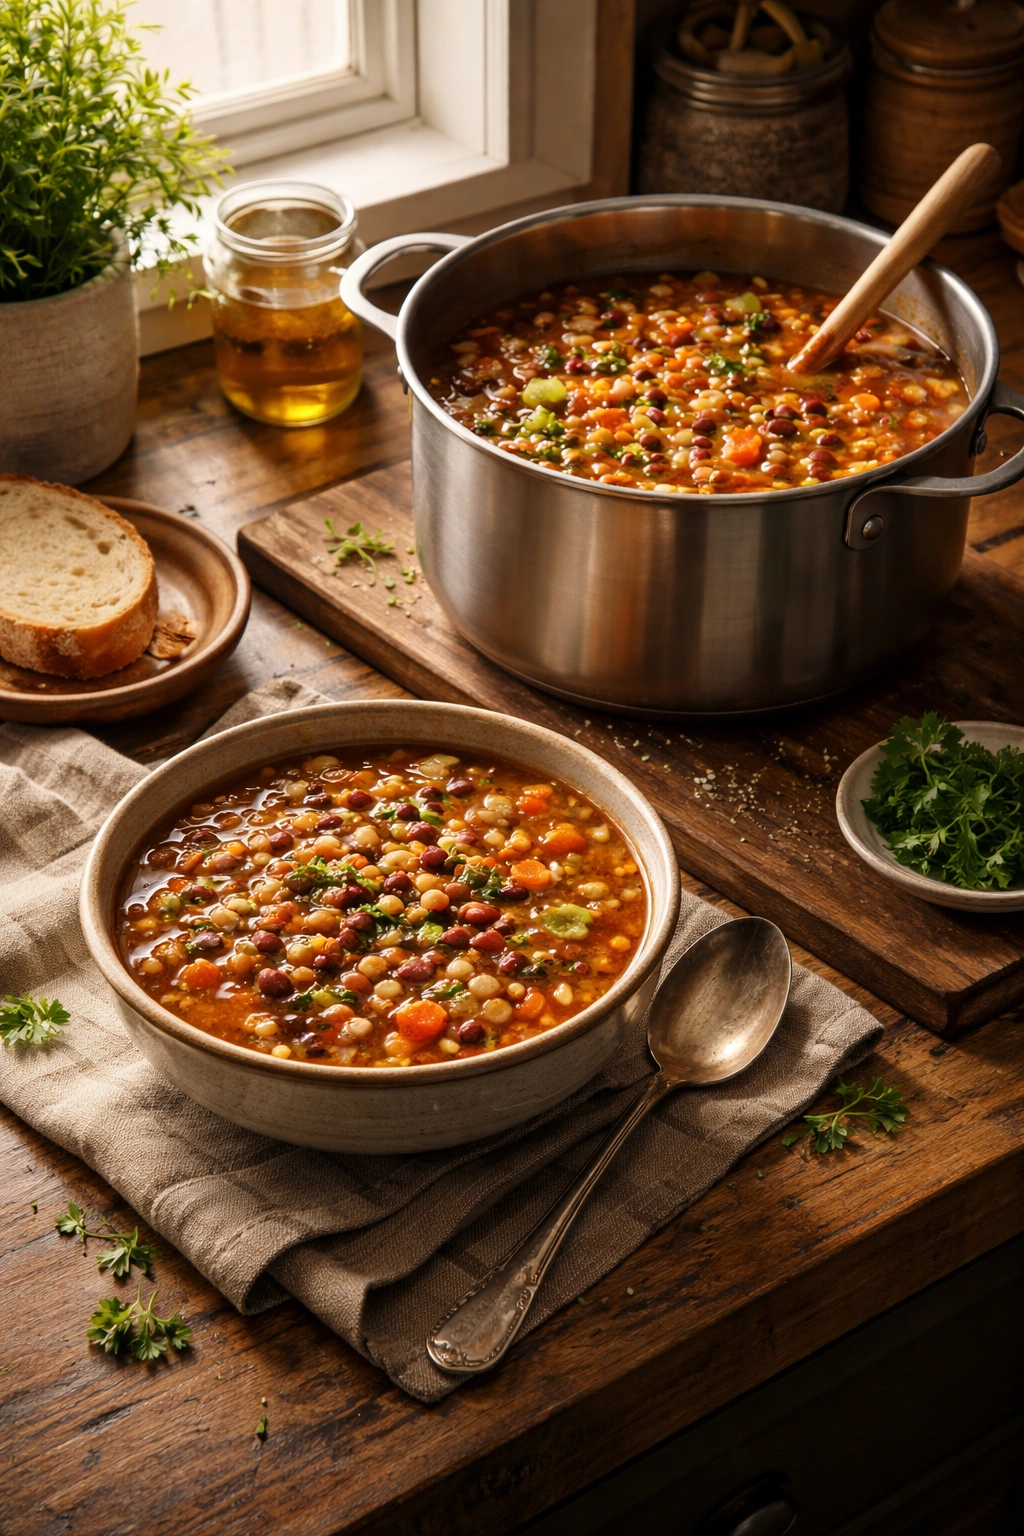
Hearty Bean Soup That Actually Keeps You Full for Hours
Yield: Serves 6 to 8 | Makes about 12 cups
Prep Time: 20 minutes
Cook Time: 2 to 3 hours (depending on bean variety and age)
Total Time: 2 hours 20 minutes to 3 hours 20 minutes active + overnight soaking (optional)
Difficulty: Beginner — This is straightforward cooking with no special techniques. The only real skill needed is patience and tasting as you go to adjust seasonings.
For the Soup:
- 2/3 cup dried navy beans
- 2/3 cup dried kidney beans
- 2/3 cup dried black beans or pinto beans
- 3 tablespoons olive oil
- 1 large yellow onion, diced into roughly 1/2-inch pieces
- 3 medium carrots, cut into 1/2-inch rounds (about 2 cups)
- 3 celery stalks, sliced into 1/2-inch pieces (about 1½ cups)
- 6 cloves garlic, minced
- 2 tablespoons tomato paste
- 2 bay leaves
- 2 teaspoons dried thyme (or 1 tablespoon fresh thyme leaves)
- 10 cups low-sodium chicken or vegetable broth
- 1 parmesan rind, about 2 inches (optional but highly recommended for umami depth)
- 1 tablespoon soy sauce or tamari
- 1 teaspoon balsamic vinegar
- Fine sea salt and freshly ground black pepper to taste
- Optional garnishes: fresh parsley, grated parmesan cheese, crusty bread for serving
Prepare the Beans:
-
If soaking overnight: Rinse the dried beans under cold water in a colander, picking through them quickly to remove any small stones or shriveled beans. Place all three types in a large bowl and cover with cold water by about 3 inches. Let soak at room temperature for 8 to 12 hours (overnight is easiest). Drain and rinse thoroughly before using.
-
If using the quick-soak method: Rinse the beans as described above. Place them in a large pot, cover with water by 3 inches, and bring to a rolling boil over high heat. Boil for 2 minutes, then remove from heat, cover, and let sit undisturbed for 1 hour. Drain and rinse thoroughly.
Advertisements
Build the Flavor Base:
-
Heat the olive oil in a large, heavy-bottomed pot (at least 6-quart capacity) over medium heat. Add the diced onion and a pinch of salt, stirring occasionally. Cook for 4 to 5 minutes until the onion begins to soften and become translucent.
-
Add the carrots and celery to the pot, stirring to coat with the oil. Cook for another 5 to 6 minutes, stirring occasionally, until all the vegetables have softened slightly and the onion edges are beginning to turn lightly golden. The vegetables should smell sweet and caramelized.
-
Add the minced garlic and cook, stirring constantly, for about 30 seconds until fragrant but not browned. Do not let garlic brown — burned garlic tastes bitter and will affect the whole pot.
-
Stir in the tomato paste, coating the vegetables. Cook for 1 minute, stirring often, to toast the tomato paste slightly — this deepens its flavor.
Add Liquid and Beans:
-
Pour the broth into the pot slowly while stirring, scraping any browned bits from the bottom of the pot into the liquid. These browned bits carry concentrated flavor and should be incorporated throughout the broth.
-
Add the soaked and drained beans, bay leaves, and dried thyme. Stir well. Do not add salt yet — salt can slow bean cooking and make the texture less tender.
-
Bring the mixture to a boil over medium-high heat, then reduce to a gentle simmer. Partially cover the pot with a lid (leave a gap so steam can escape) and maintain a low, steady simmer. The broth should bubble very gently around the edges, not aggressively.
Cook Until Beans Are Tender:
-
Check the beans at the 90-minute mark by pulling out a spoon of broth with a few beans. Let them cool, then taste and press a bean between your tongue and the roof of your mouth. It should squash easily with no firm center. If there’s still a hard bite, continue cooking and check every 15 minutes.
-
Most bean mixtures will be fully tender between 2 and 3 hours total, depending on bean age and size. As the beans cook, the broth will gradually thicken from the bean starches that leach into the liquid. The color will deepen and the aroma will become noticeably richer—this is the sign that flavor is developing.
Season and Finish:
-
Once all the beans are completely tender, add the parmesan rind (if using), soy sauce, and balsamic vinegar. Stir well and taste the broth. It should taste savory and rounded, not thin or one-dimensional.
-
Taste a bean to gauge salt level. Add salt gradually, tasting between additions, until the soup tastes well-seasoned but not oversalted. Start with 1 teaspoon and work from there — different broths have different sodium content, so exact amounts vary.
-
Add freshly ground black pepper to taste. The soup should have visible pepper specks and a warm peppery finish without overwhelming heat.
-
Optional step for extra creaminess: Remove about 2 cups of the cooked beans (using a slotted spoon so the liquid drains back into the pot) and place them in a small bowl. Using the back of a spoon or a potato masher, mash them until roughly half are broken down into a coarse paste. Stir this mashed bean mixture back into the soup. This releases additional starch and creates a naturally creamy texture without any cream or thickening agents. This step noticeably increases how filling the soup feels.
-
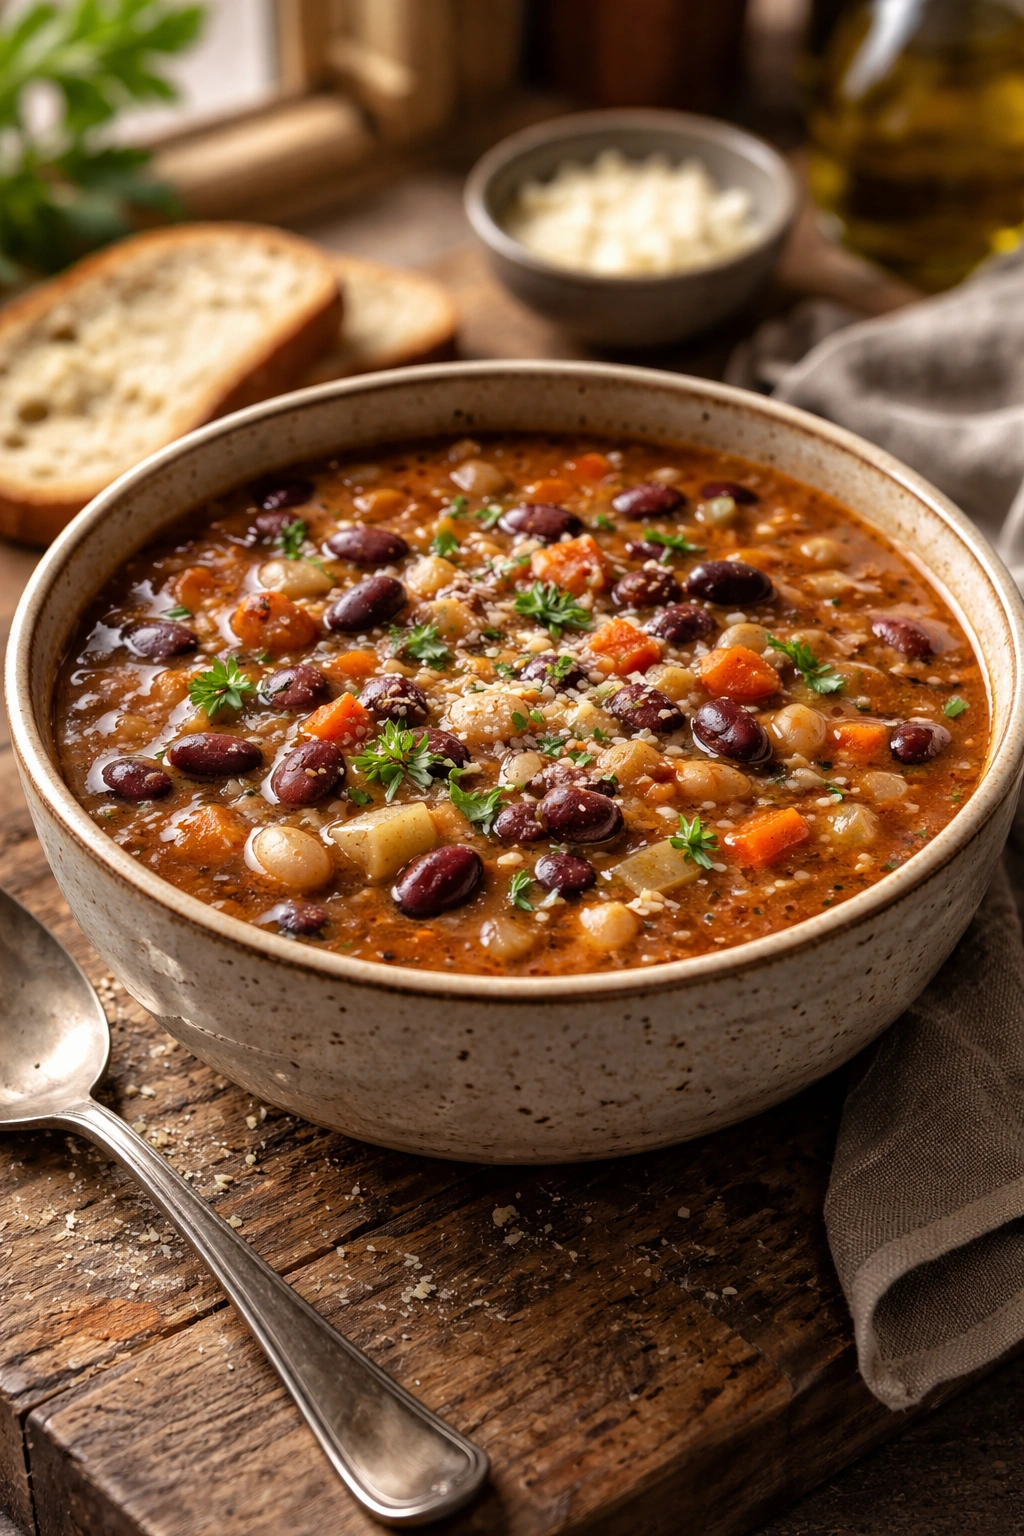
Discard the bay leaves and parmesan rind (if used). The soup is now ready to serve. Ladle into bowls and top with fresh parsley and grated parmesan if desired. Serve with crusty bread for scooping.
Tips and Common Mistakes to Avoid
The most frequent failure point is undercooked beans. People follow a standard “30 minutes” cooking time from an old recipe, or think beans are done when they’re still slightly firm, then end up with a soup that doesn’t thicken and doesn’t feel filling because the beans are undercooked. Cook your specific beans until they’re completely tender, even if it takes longer than you expected. Older beans always take longer. This is not wasted time—it’s building body into your soup.
Another common mistake is skipping the aromatic base and going straight to adding beans to cold broth. The soup tastes thin and one-dimensional. Taking 10 minutes to sauté your vegetables properly isn’t optional for flavor—it’s foundational. You’ll taste the difference immediately.
Over-salting early is also common and specifically sabotages bean tenderness. Add salt conservatively at the start, and do most of your seasoning in the last 30 minutes when the beans are almost done. Taste as you go rather than trying to hit exact salt amounts.
Using old dried beans is a trap you might not anticipate. Beans that have been sitting in your pantry for over a year can take dramatically longer to cook. If you’re buying them in bulk, date the containers so you know how old they are. Fresh beans (within the past year) cook more reliably.
A thin, watery soup can also happen if you use too much broth relative to beans. Stick to the 10-cup broth to 2-cup dried beans ratio (roughly 6-cup cooked beans) for proper thickness. If your soup ends up too thin after everything cooks, let it simmer uncovered for 15-20 minutes to reduce and concentrate the broth—this also builds deeper flavor.
Pro Tips for Success
Make it the day before. Bean soup tastes noticeably better the next day after the flavors have had time to meld and the broth has fully thickened as more starch leaches from the beans. If you’re serving immediately, let it rest off the heat for 30 minutes before serving so the flavors settle and develop.
Freeze in portions. Pour cooled soup into freezer containers or quart-sized bags (lay them flat on a baking sheet, freeze, then stack them). Soup keeps frozen for up to three months and tastes just as good reheated as it did fresh. The texture actually improves slightly because the overnight rest in the refrigerator happens during thawing.
Don’t skip the acid. The balsamic vinegar and/or lemon juice (not in the recipe but a great addition) brightens the soup and makes all the other flavors pop. Without acid, even a well-made soup tastes flat. Finish with a small splash and taste the difference.
Start with less salt than you think you need. It’s easier to add salt than to fix an over-salted soup. Add conservatively in the last 30 minutes of cooking, taste, and adjust.
Variations to Keep Things Interesting
The foundation is flexible enough that you can change it substantially without losing the filling quality that makes it work. The key is keeping the bean base and cooking method the same—only the flavor additions change.
Tuscan-Style Bean Soup
Add 2 cups of chopped fresh spinach or kale in the last 5 minutes of cooking, and finish with a squeeze of fresh lemon juice (about 2 tablespoons) instead of vinegar. Add a pinch of red pepper flakes for warmth. The greens add fiber and nutrients without making the soup feel less hearty. Use chicken broth as your base for this version.
Spanish-Inspired Chorizo and Bean Soup
Brown 8 ounces of diced chorizo in the pot before adding aromatics, then remove and set aside. Cook your vegetables in the chorizo fat. Return the chorizo to the pot with the beans. The spice and fat from the chorizo infuse the entire soup. This is not vegetarian, obviously, but it’s ridiculously filling and tastes indulgent without being heavy.
Mediterranean White Bean and Tomato
Use mostly white beans (cannellini or great northern). Add one can of diced tomatoes (about 14 ounces) along with your broth. Include fresh rosemary instead of thyme. Finish with a drizzle of good olive oil and fresh basil. This version is lighter and brighter than the classic mixed-bean version but still deeply satisfying.
Chipotle and Black Bean
Use mostly black beans with a small amount of pinto beans. Add 1 to 2 chipotle peppers in adobo sauce (minced finely) along with the tomato paste. Use vegetable broth instead of chicken. Add a squeeze of lime juice at the end. The smoke and heat make this version feel like something you’d order at a restaurant.
Curried Chickpea and Bean Soup
Swap half the mixed beans for 1 cup of dried chickpeas. Add 1 to 2 teaspoons of curry powder or garam masala to the aromatics (cook it briefly in the pot to bloom the spices). Add a can of coconut milk (about 13 ounces) in the last 10 minutes. Finish with a squeeze of lime. This version is warming and slightly exotic without being difficult.
Storage and Make-Ahead Guidance
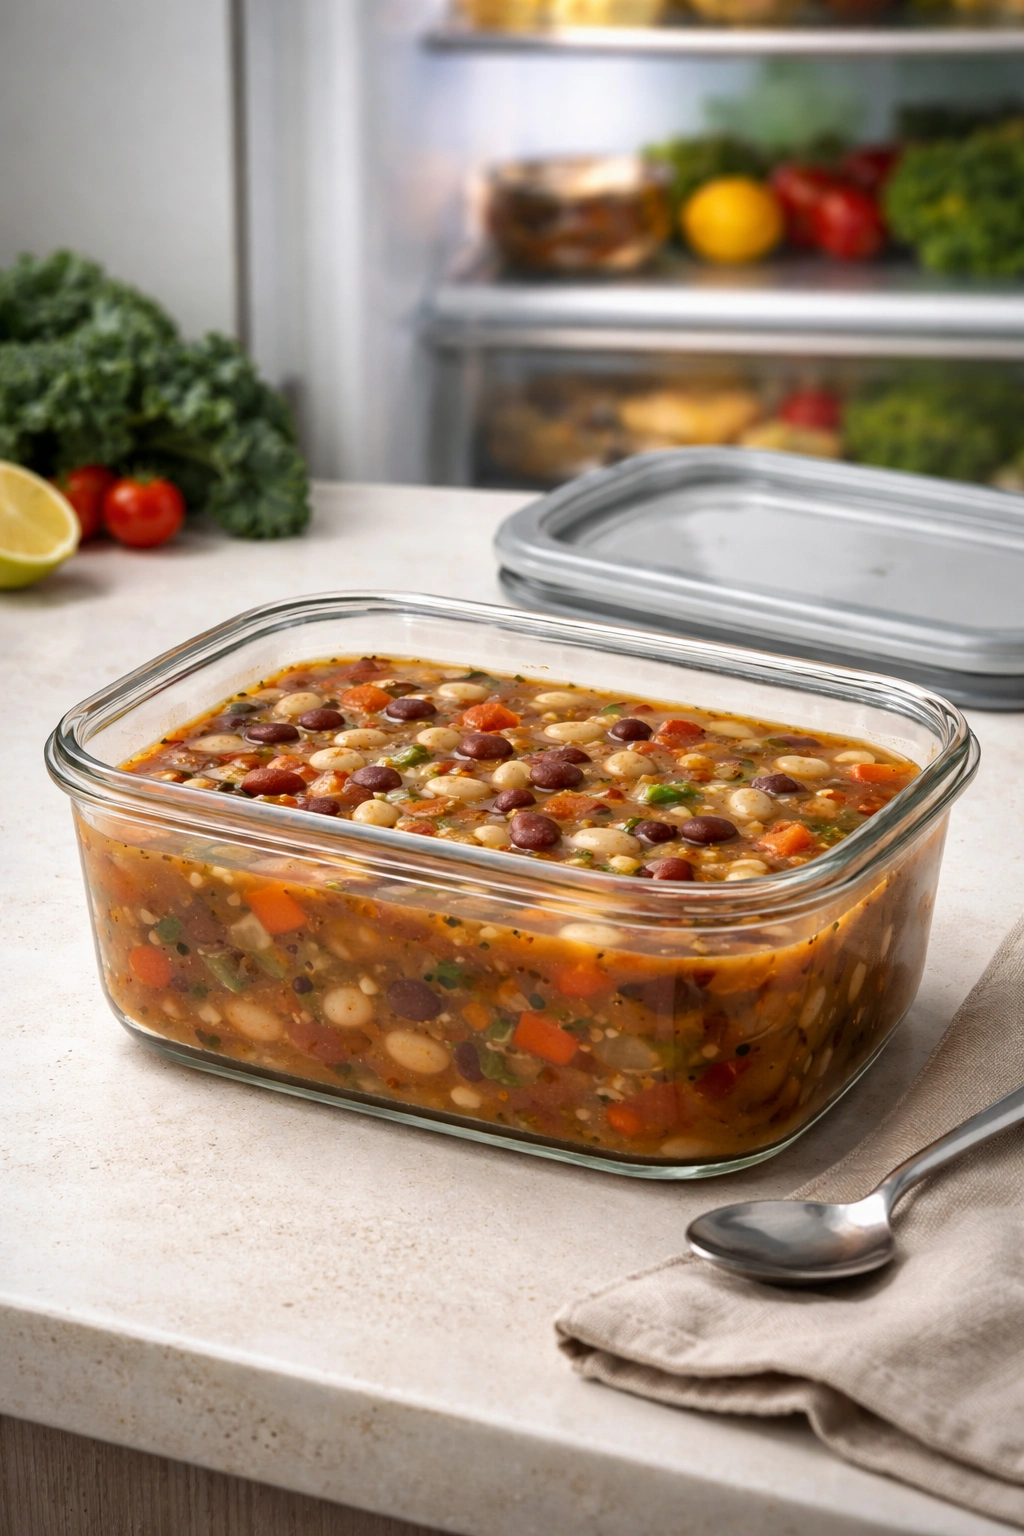
Refrigerator: This soup keeps for up to 5 days in an airtight container. The flavor deepens as it sits, making day two and three noticeably better than day one. Reheat gently on the stovetop over medium heat, stirring occasionally, until warmed through. If the soup has thickened significantly during storage (the starches continue to absorb liquid), stir in a little broth or water to reach your preferred consistency.
Freezer: This soup freezes beautifully for up to 3 months. Cool it completely before freezing. Transfer to freezer containers or quart-sized zip-top bags (lay them flat on a baking sheet, freeze until solid, then stack). Leave about 1 inch of headspace if using rigid containers—the soup expands slightly as it freezes. Thaw overnight in the refrigerator and reheat on the stovetop, or reheat directly from frozen over medium-low heat in a covered pot, stirring occasionally, for about 20-30 minutes until heated through.
Make-Ahead: You can make this soup completely through step 6 (vegetables sautéed, aromatics added, broth poured) up to 24 hours ahead. Cover and refrigerate. When you’re ready to finish, simply bring it back to a boil, add the soaked beans, and continue from step 9. This cuts the active cooking time in half on the day you want to serve it. Alternatively, soak the beans overnight and have everything prepped the night before, so cooking the soup takes one afternoon.
Component Prep: If you want maximum convenience, prepare the soup completely and freeze it in individual portions. Thaw one portion in the refrigerator the night before, then reheat for lunch. This turns the soup into grab-and-go convenience without any fresh prep on the day you eat it.
The Best Pairings and Serving Ideas
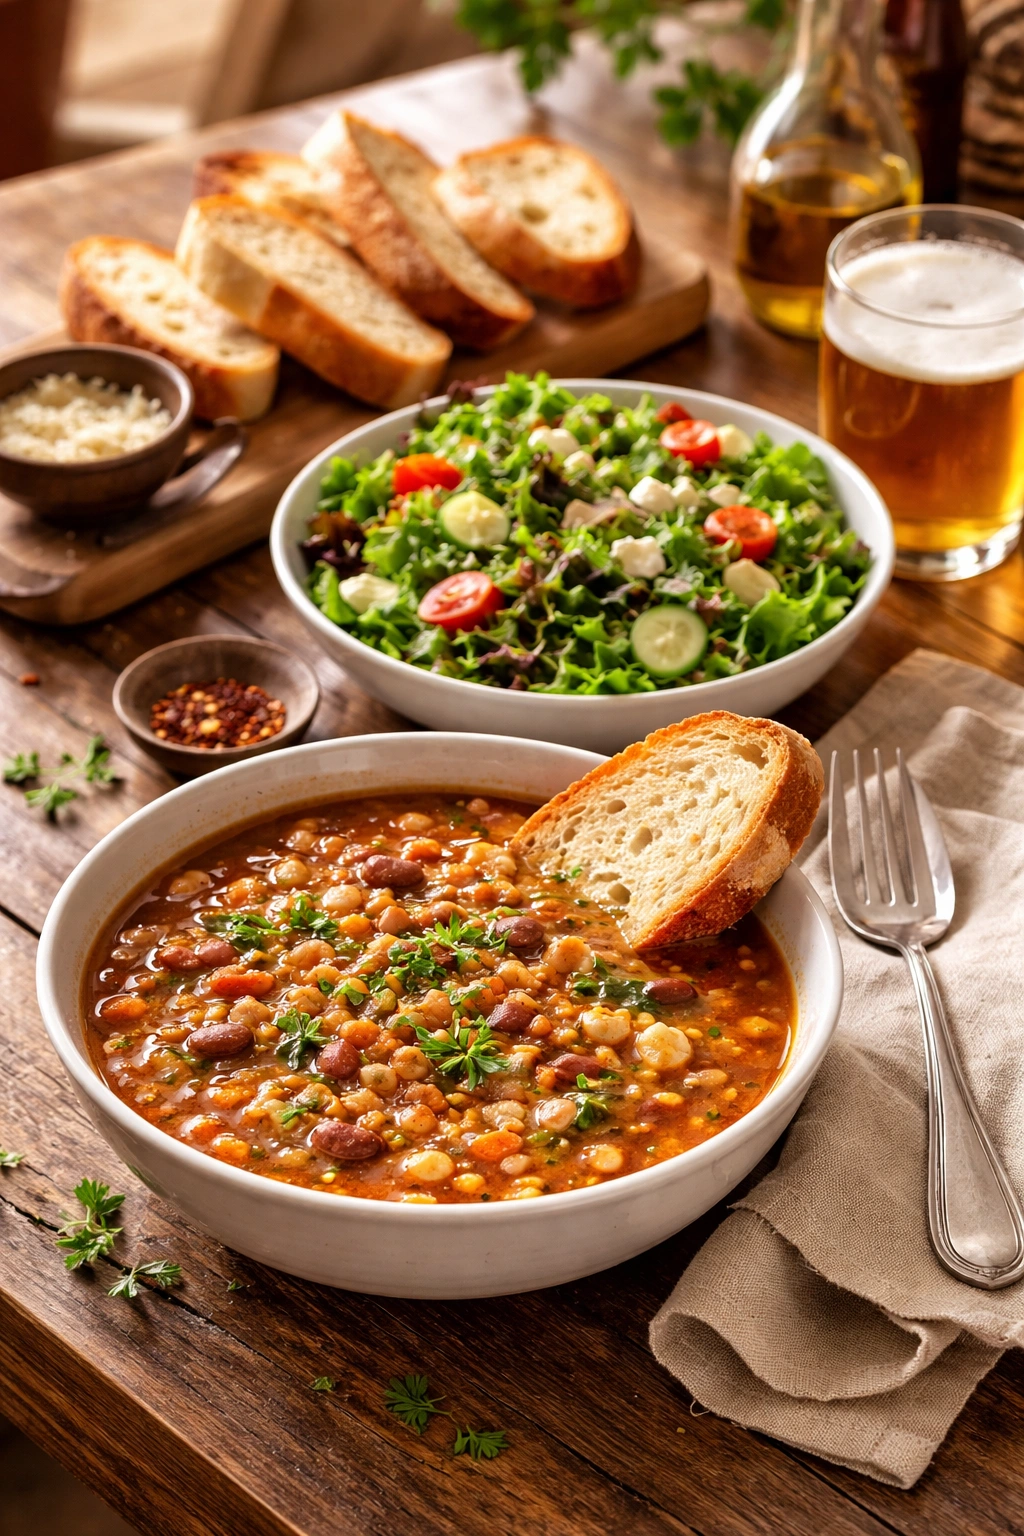
This soup is substantial enough to serve as a standalone meal, but it’s also flexible enough to pair beautifully with other foods. A thick slice of crusty bread for scooping is essential—not optional. The bread lets you capture all the broth and small beans that don’t easily fit on a spoon.
A simple green salad—just mixed greens, olive oil, lemon, salt, and pepper—provides brightness and crunch that contrasts nicely with the soup’s hearty warmth. The acidity in the vinaigrette also complements the deep savory notes in the soup.
Cheese is a natural pairing. A wedge of aged cheddar, a piece of parmesan, or even a creamy goat cheese served on the side gives you something rich to cut the soup’s earthiness. Grated parmesan stirred into the bowl is the simplest version.
For a more substantial meal, pair the soup with a half sandwich—nothing too heavy, just a simple turkey and avocado on whole grain, or a classic grilled cheese. The soup makes the meal feel complete without the sandwich needing to be huge.
A glass of crisp white wine (sauvignon blanc works beautifully) or a lighter red (pinot noir) pairs well if you’re eating this for dinner. Beer is also excellent—a crisp lager or a brown ale complements the soup’s earthiness.
For cold-weather eating, serve the soup in a mug while standing up, perhaps while reading or doing other tasks. The warmth is comforting and the mug makes it feel like a beverage rather than a formal meal.
Toppings That Add Something
Keep a few simple garnishes on hand and let people customize. Fresh parsley adds brightness. Grated parmesan adds savory depth. Crispy croutons add texture contrast. A drizzle of good olive oil adds richness. Hot sauce or chili oil adds heat. A dollop of sour cream or yogurt adds creaminess. None of these are required, but they make the soup feel like you’re doing something special with it.
Final Thoughts
A really good bean soup isn’t complicated, but it’s not thrown together either. It’s the result of paying attention to a few things that actually matter: choosing quality beans, taking time to build flavor in the aromatics, using enough broth to create substance without drowning everything, and cooking the beans all the way until they’re completely tender.
The payoff is a soup that genuinely keeps you full for hours—not because you’re forcing yourself to feel full, but because the combination of protein, fiber, and thickness creates real satiety. You eat a bowl, feel satisfied, and don’t find yourself hunting for snacks at 3 p.m. That’s worth the couple of hours of gentle simmering it takes to create it.
Make a double batch and freeze half. Make it on Sunday and eat it all week. Make it when you want to feel like you’re taking care of yourself without spending hours in the kitchen or eating something that feels austere and diet-like. A spoonful of real, properly made bean soup is one of the most underrated ways to feel genuinely nourished and satisfied with food.