Tired of banana bread that tastes like dessert disguised as breakfast? Most homemade banana bread recipes pack in enough sugar to match a slice of cake — sometimes 2 cups or more per loaf. But here’s what most people don’t realize: ripe bananas are already quite sweet, and you can drastically cut the added sugar without sacrificing moisture, flavor, or that tender crumb everyone loves. In fact, reducing sugar can actually deepen the banana flavor because you’re no longer masking it under a sugar bomb.
I’ve made banana bread hundreds of times — everything from traditional recipes to keto versions to naturally sweetened loaves — and I’ve learned exactly where the sugar does real work in the recipe and where it’s just habit. This recipe cuts the sugar to about half of what conventional recipes call for, using ripe bananas and smart ingredient choices to deliver a loaf that’s genuinely delicious, naturally moist, and something you can actually feel good about eating for breakfast or as a snack.
The key isn’t deprivation — it’s understanding the science of how sugar functions in baking, choosing the right sweeteners for balance, and using bananas at peak ripeness so their natural sugars shine through. The result is a loaf that’s subtly sweet, perfectly tender, and tastes nothing like a “healthy” sacrifice.
Why Traditional Banana Bread Contains So Much Sugar
Conventional banana bread recipes typically call for 1.5 to 2 cups of sugar per loaf — that’s roughly 12 to 16 tablespoons of added sugar in a single loaf that yields 8 to 12 slices. To put that in perspective, a slice of that traditional banana bread often contains 25 to 35 grams of sugar per serving, sometimes more. That’s roughly equivalent to eating a candy bar for breakfast, except most people think banana bread is a reasonable morning choice because it contains a fruit.
Sugar serves several critical functions in baking beyond just sweetness. It adds moisture and tenderness by absorbing water and delaying gluten development. It contributes to browning through the Maillard reaction, creating that golden crust. It provides food for yeast and bacteria, which is important if you’re adding other ingredients like sour cream or yogurt. In banana bread specifically, sugar also balances the natural tartness that develops from fully ripened bananas.
But here’s the reality: most traditional recipes use far more sugar than necessary to achieve these functions. Food manufacturers and home cooks have been conditioned to expect extremely sweet baked goods, so recipes over-sweeten to match those expectations. When you adjust your baseline expectations downward and use ingredients strategically, you can cut the sugar in half and end up with a loaf that’s actually more flavorful — not less.
How Sugar Reduction Changes Your Banana Bread
Cutting sugar dramatically doesn’t mean eliminating it entirely. Instead, it means rethinking the role sugar plays and using other ingredients to handle what sugar would normally do.
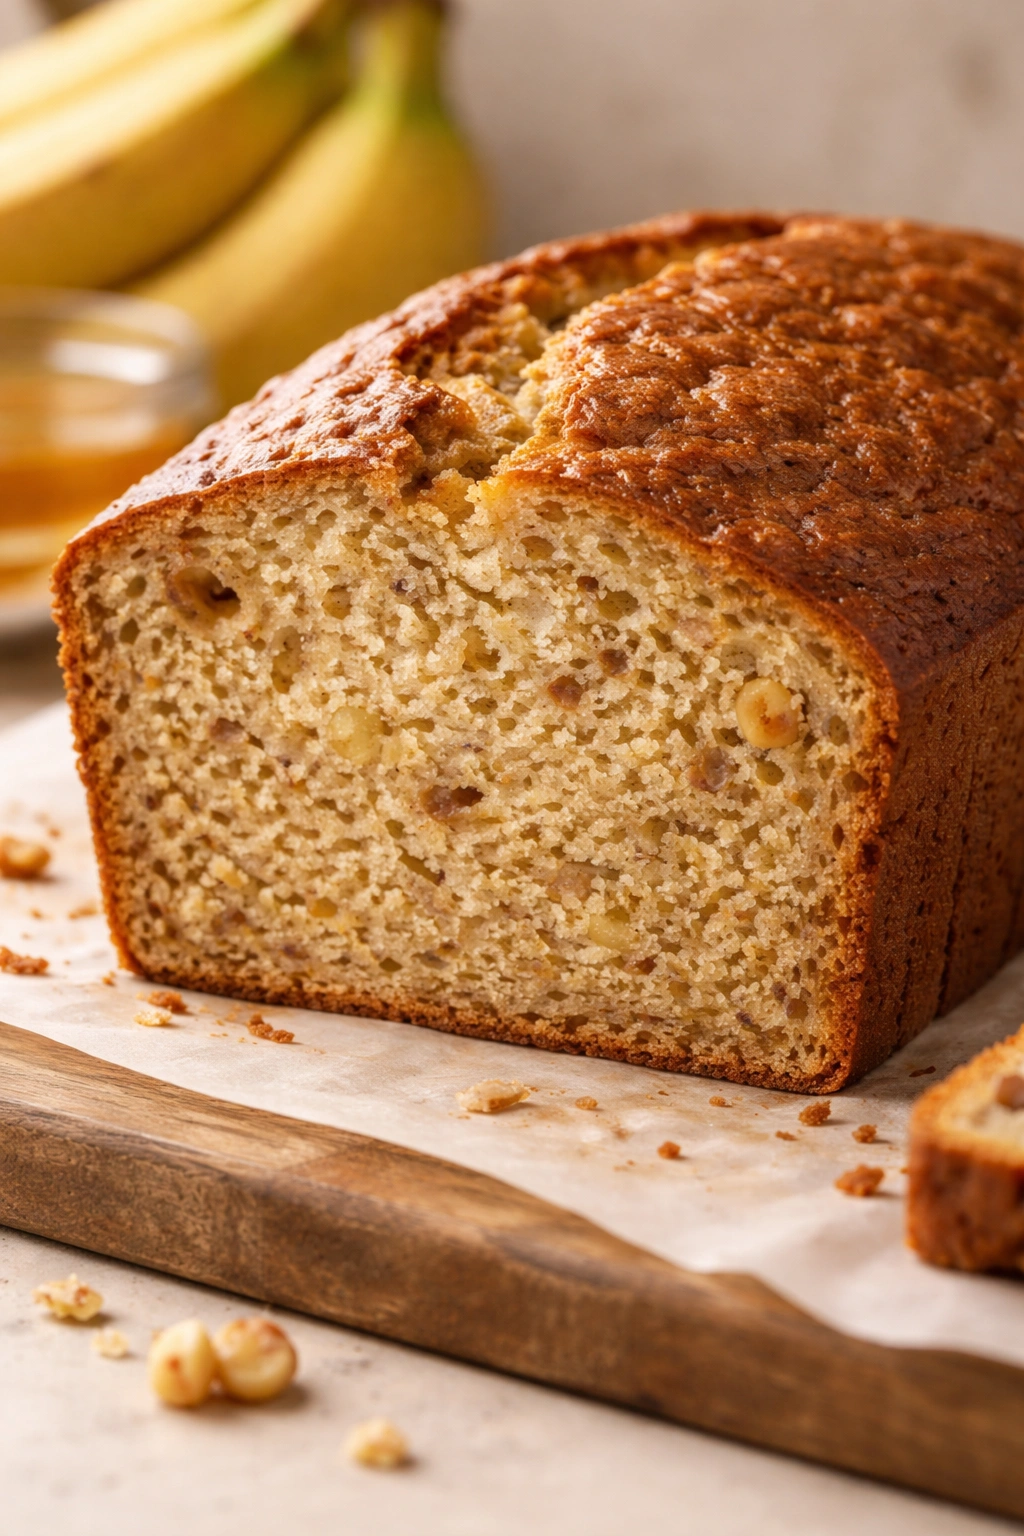
Moisture and tenderness come from fat and eggs, not just sugar. In this recipe, we’ll use a higher ratio of oil and butter relative to other ingredients, plus plenty of eggs, to create that moist crumb. Overripe bananas contribute significant moisture as well — their softer texture means more liquid in the batter.
Browning happens through eggs and bananas, not only through sugar. The bananas contain natural sugars that will caramelize during baking. The eggs contribute their own browning compounds. You’ll get a beautiful golden crust without needing excessive white sugar.
Flavor becomes more interesting. Without a sugar-forward taste masking everything else, you can actually taste the banana, the subtle warmth of cinnamon, the richness of butter, and the depth of vanilla. Many people taste banana bread this way and are surprised that they prefer it — it feels like an actual food, not a vehicle for sweetness.
Why Banana Ripeness Actually Matters Here
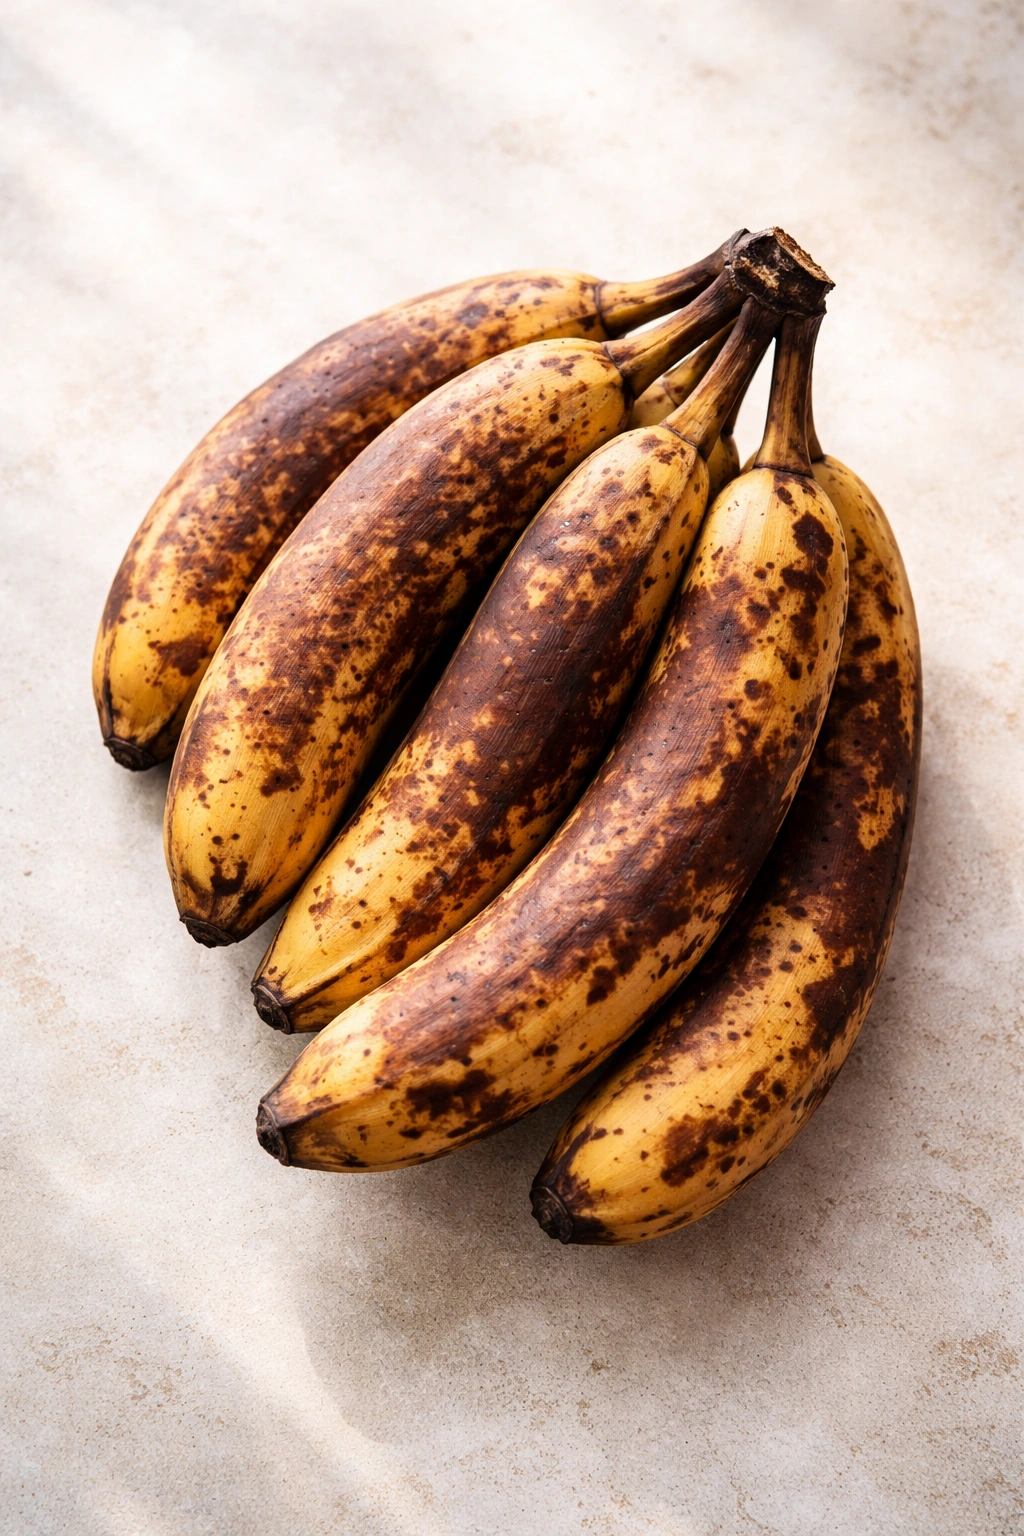
The overripe bananas are not optional in this recipe — they’re fundamental. When bananas fully ripen, their starches convert to sugars, and their pectin breaks down, creating a softer, wetter fruit. A banana that’s mostly yellow with some brown spots contains roughly 16 to 18 grams of sugar per 100 grams. A banana that’s almost entirely brown contains 19 to 22 grams of sugar per 100 grams.
For this recipe, you want bananas so ripe they look almost overripe — the peels should be mostly brown with just a little yellow showing through, and the flesh should be soft enough that you can break them apart with your fingers without using a knife. These bananas will be sweet, soft, and will mash easily into a smooth puree.
If your bananas aren’t ripe enough, the bread will be drier and less sweet (not what we want), and you’ll be tempted to add more sugar to compensate. It’s worth waiting for proper ripeness or buying bunches and letting them sit at room temperature for several days. If they ripen too fast, you can slice them, freeze them on a baking sheet, and then store them in an airtight container for up to 3 months — they’ll thaw to perfect ripeness just before you bake.
Sweetener Options Beyond White Sugar
You have several options for adding sweetness while keeping added sugar low. Each brings different properties to the loaf.
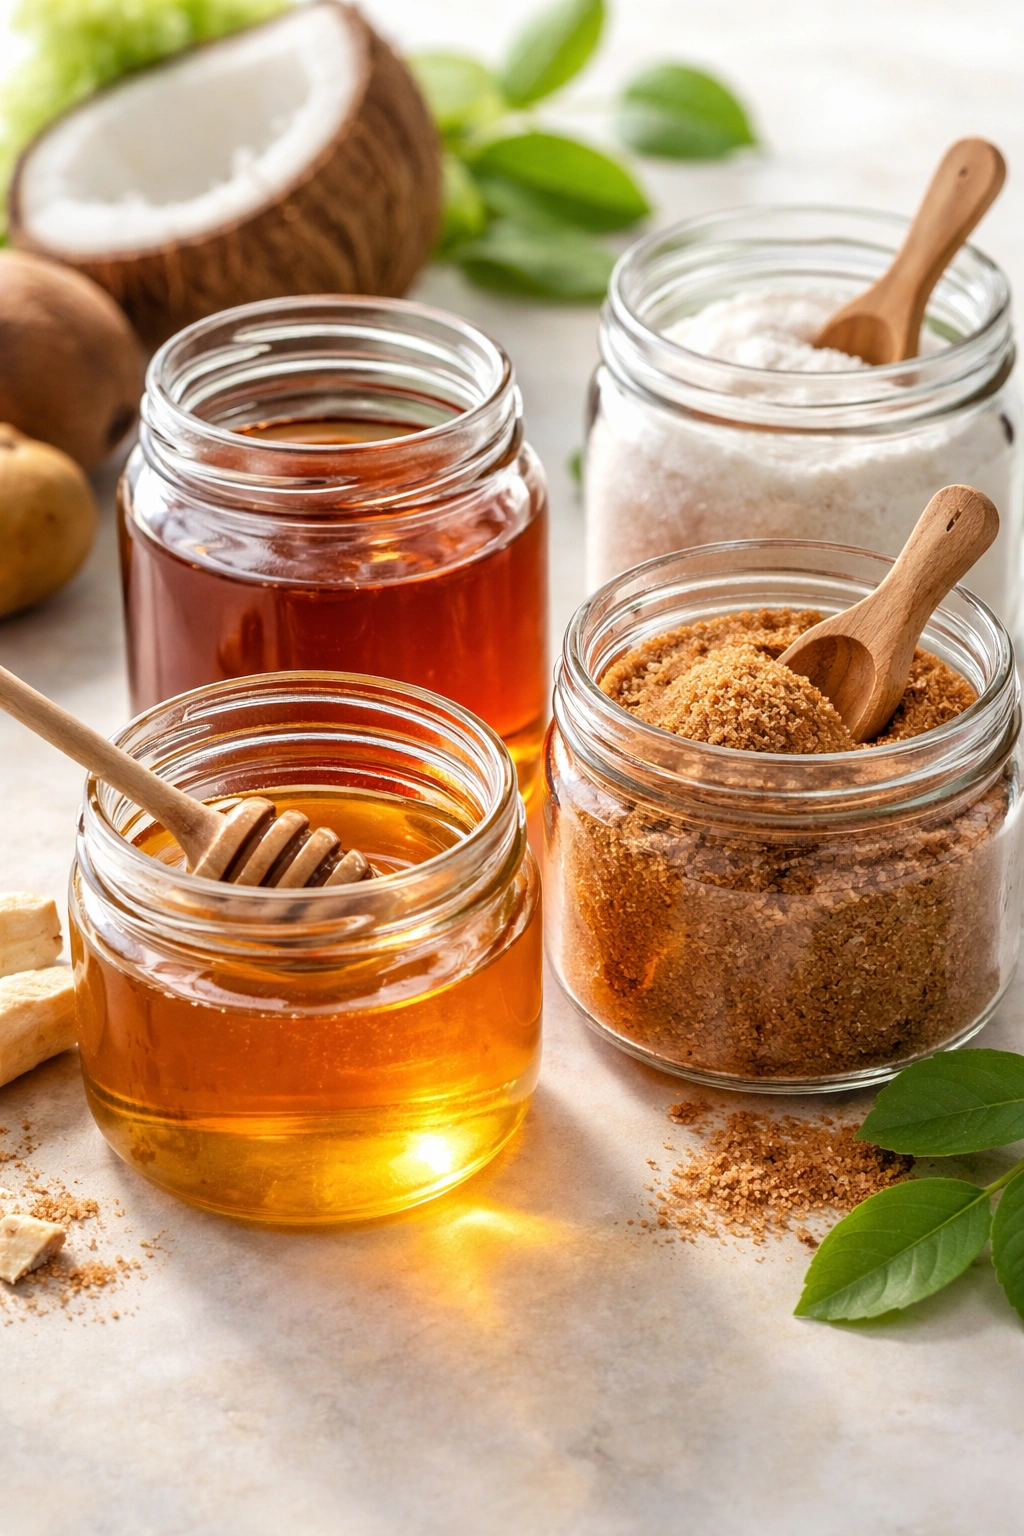
Honey or maple syrup adds moisture, creates a slightly denser (but still tender) crumb, and contributes their own subtle flavors. They’re roughly 1.5 times as sweet as white sugar by volume, so you can use less. They also brown slightly more than white sugar, which can deepen the crust color. Use raw, unfiltered versions for more complexity. The downside: honey and maple contain sugars too, just from different sources, so this isn’t a no-sugar solution — it’s a different sweetener choice.
Coconut sugar is my top pick for this recipe. It has a lower glycemic index than white sugar (though still substantial), contains some minerals, and has a subtle caramel-like flavor that complements bananas beautifully. Use it in a 1:1 ratio to white sugar. It doesn’t dissolve quite as thoroughly as white sugar, so it can create a slightly grainier texture, but honestly, banana bread isn’t a delicate sponge cake — a little texture is fine.
Monk fruit sweetener or stevia brings sweetness with almost no sugar and no calories. These work well mixed with a small amount of regular sugar or honey (pure stevia can have a slight aftertaste that some people notice, so blending helps). The challenge: they can create a slightly different texture in baking, and they don’t brown or caramelize the way sugar does. Use them as part of your sweetening strategy, not the only sweetener.
Applesauce or mashed dates contribute natural sugars, fiber, and moisture. Applesauce is milder-flavored; dates add a deeper, richer sweetness. You can replace up to one-third of the other sweeteners with unsweetened applesauce. Dates need to be soaked in hot water for 10 to 15 minutes and blended smooth. These are whole-food options that feel less processed than refined sweeteners.
For the recipe I’m sharing, I’m using coconut sugar for most of the sweetness, with a small amount of honey for moisture and browning power.
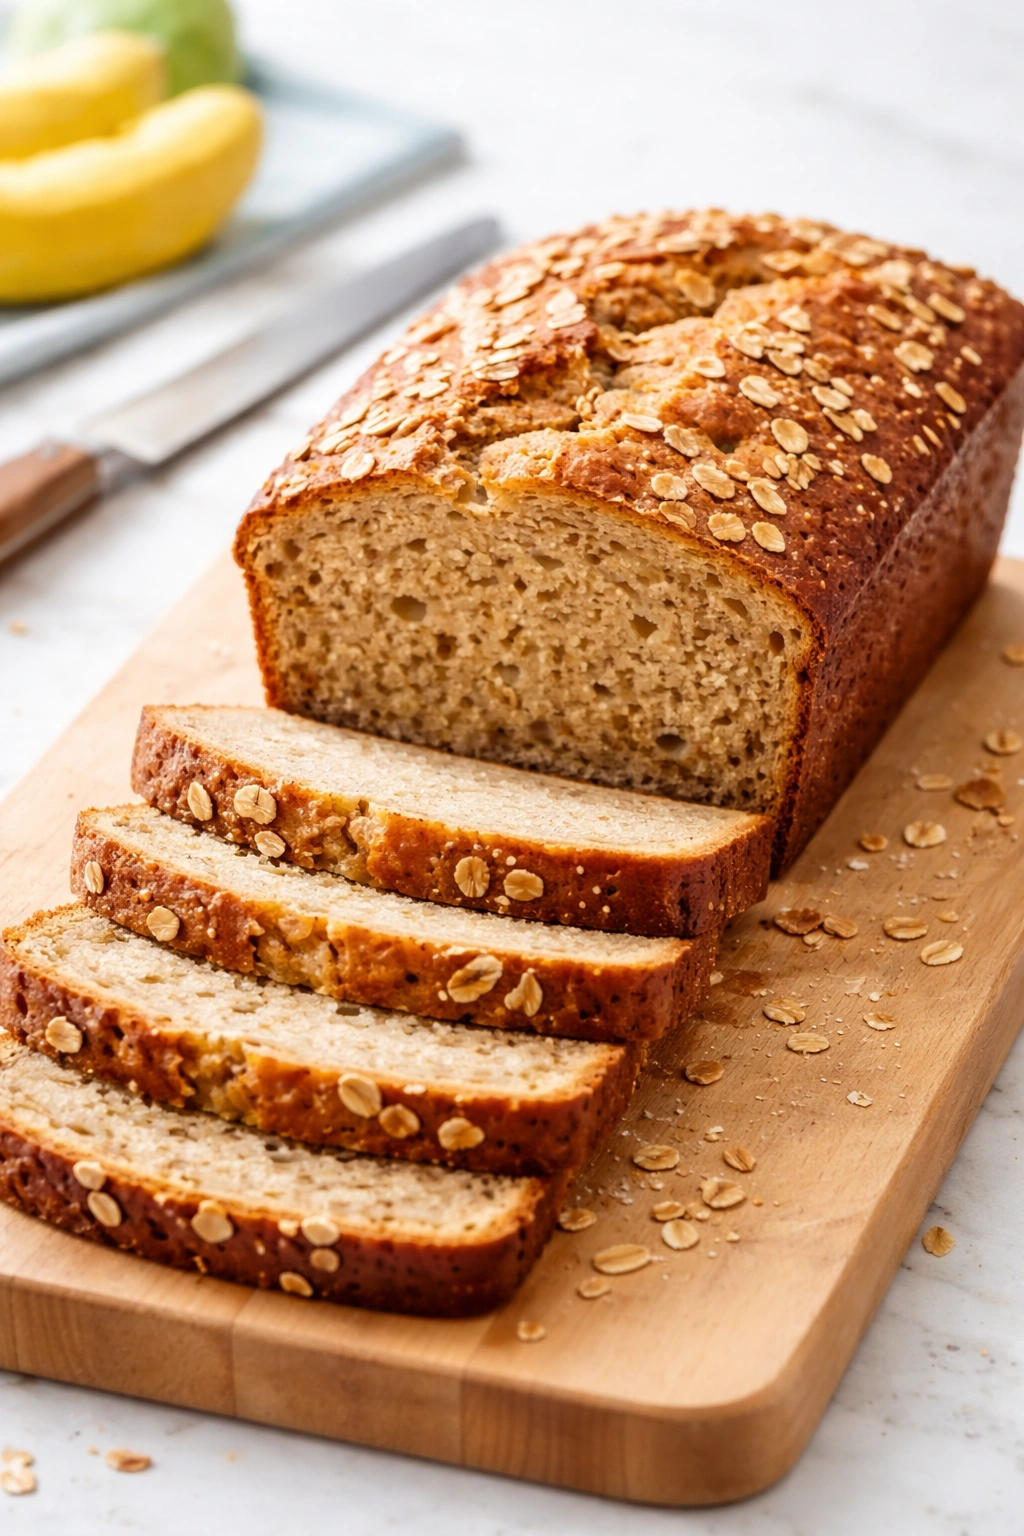
Yield: Makes one 9×5-inch loaf (8 to 10 slices)
Prep Time: 15 minutes
Cook Time: 50 to 55 minutes
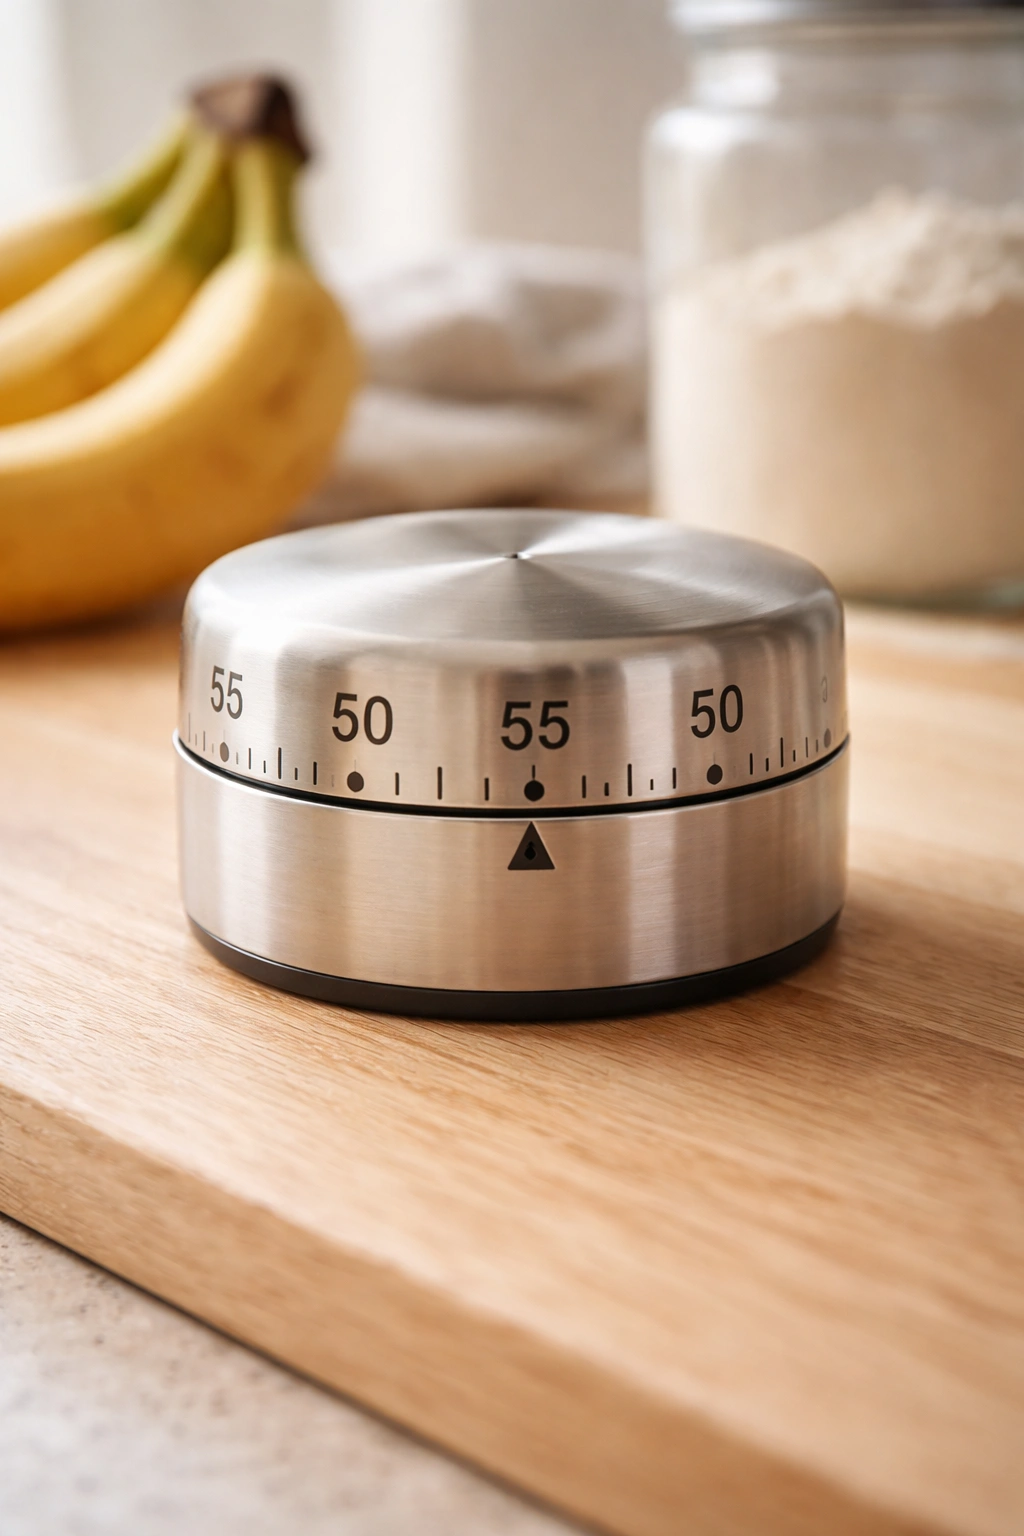
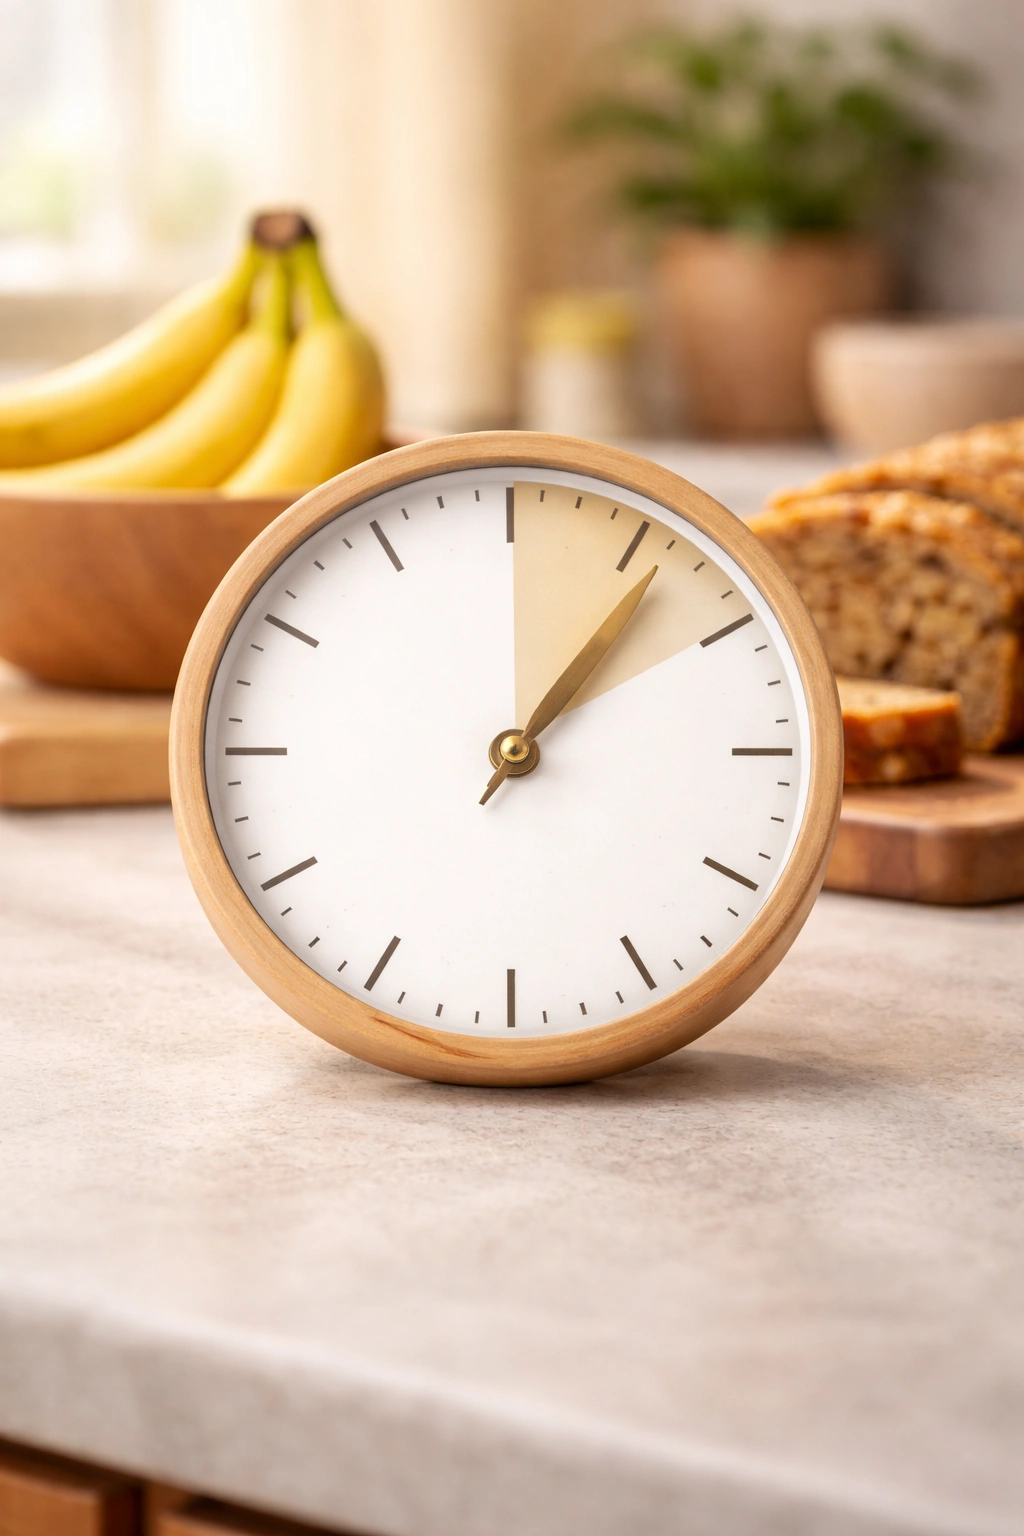
Total Time: 1 hour 5 minutes to 1 hour 10 minutes
Difficulty: Beginner — This recipe uses straightforward mixing techniques and standard equipment. The lower sugar content doesn’t make it harder to bake; it just requires ripe bananas and simple ingredient swaps.
The Ingredients You’ll Need
For the Loaf:
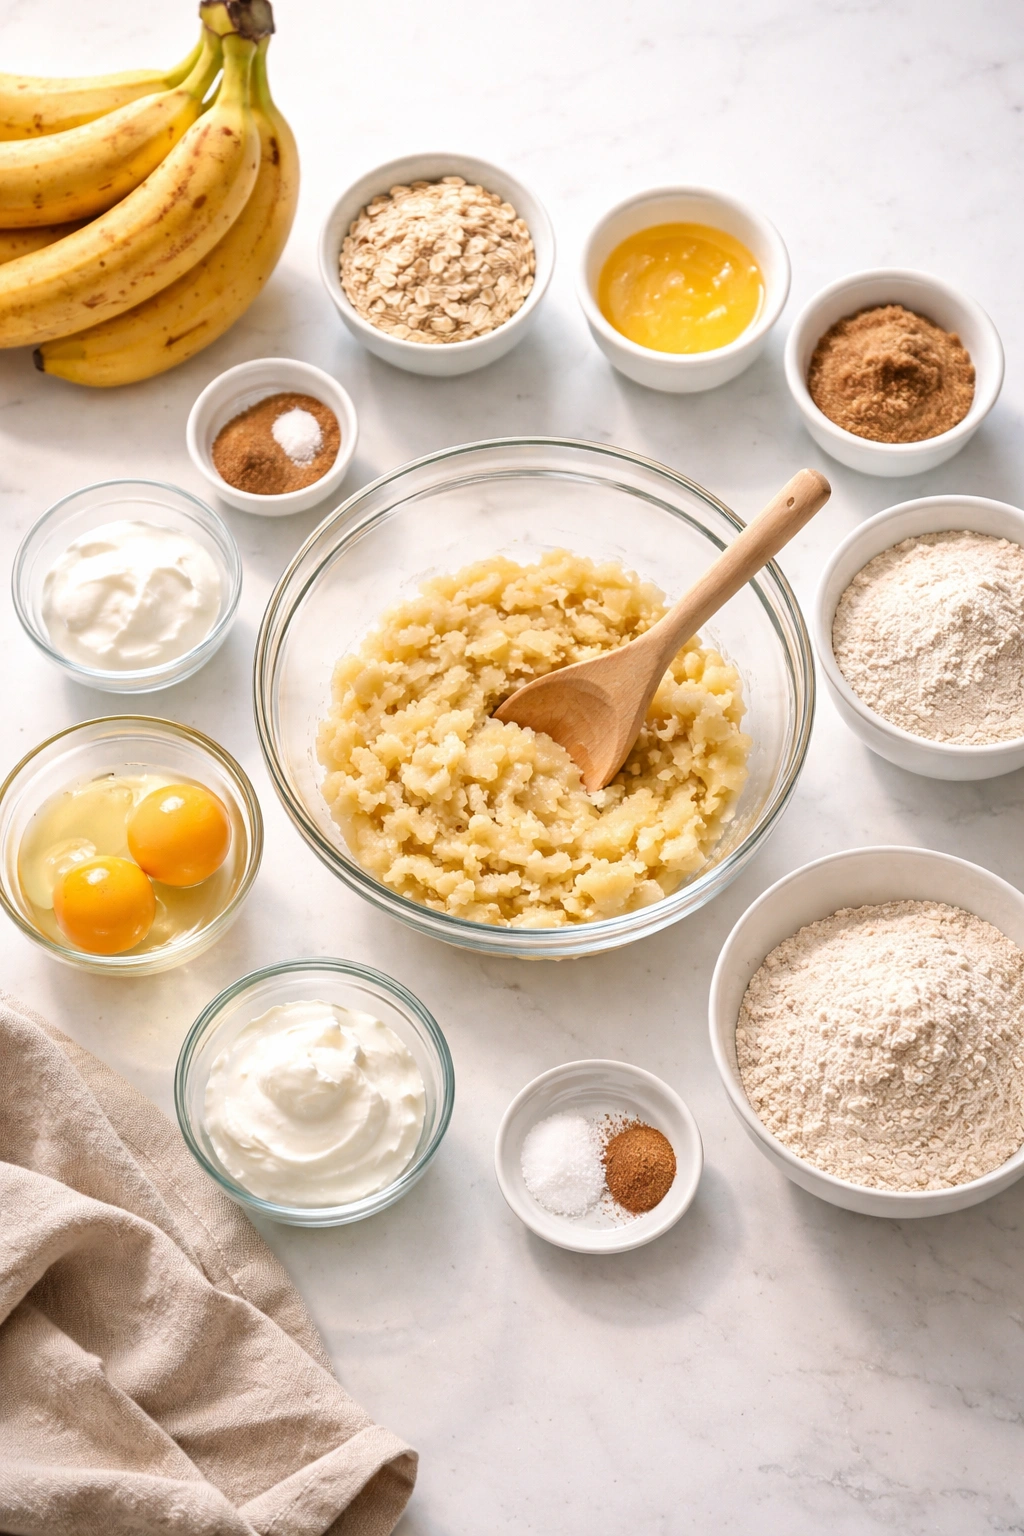
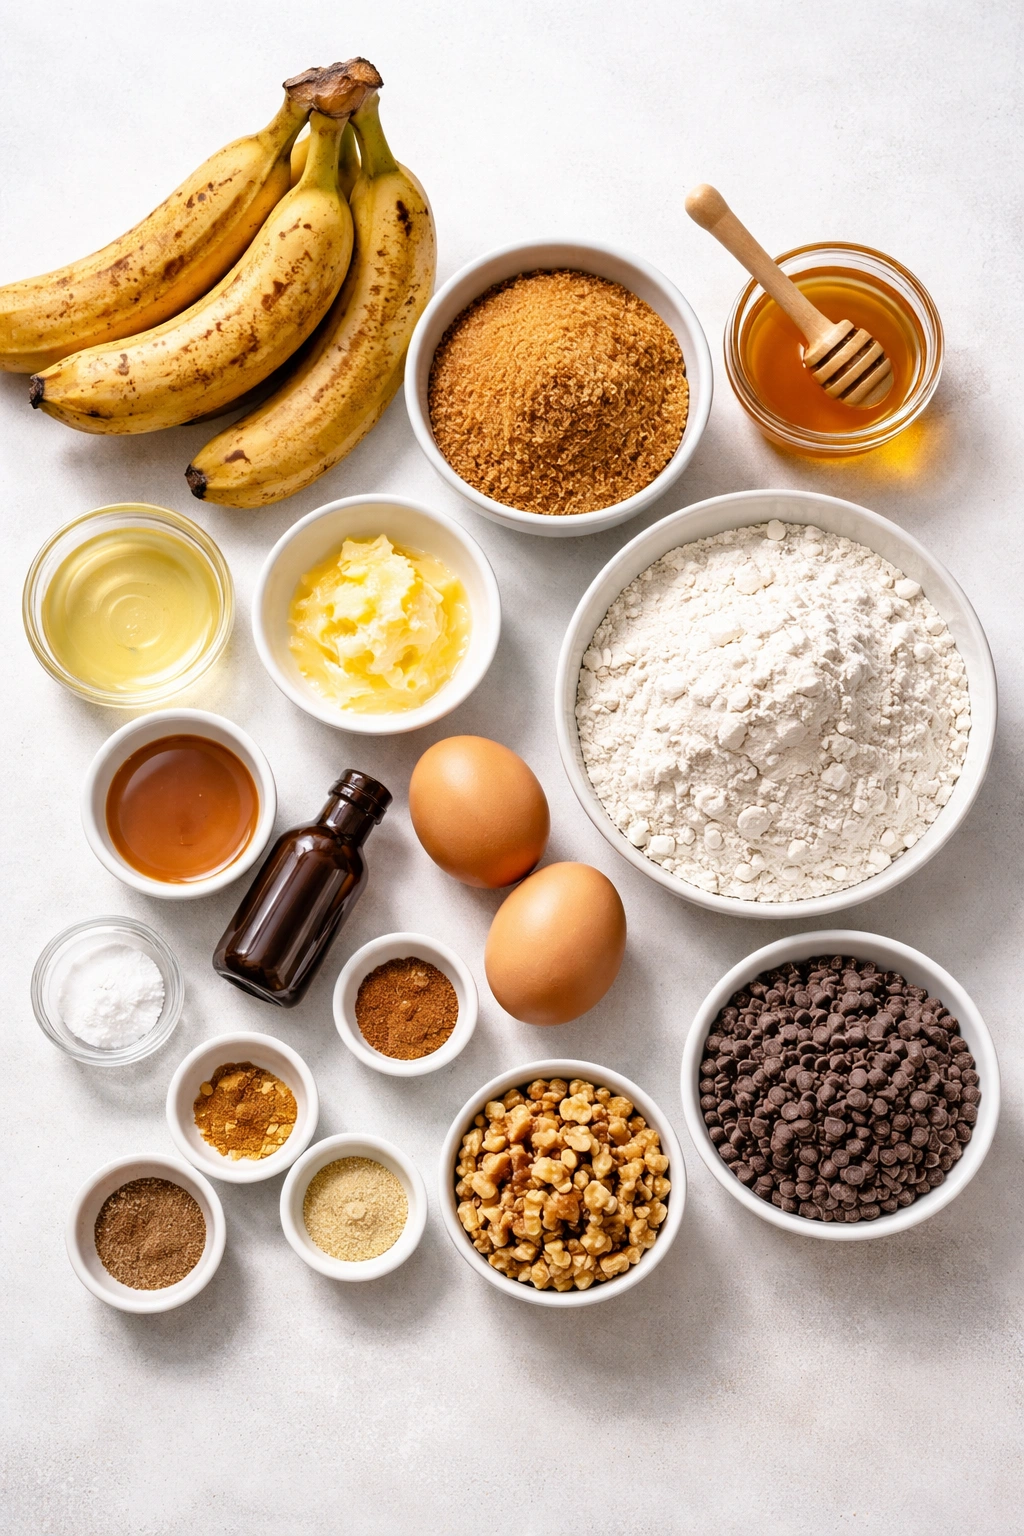
- 3 very ripe bananas (mostly brown peel, soft flesh), peeled and broken into chunks — about 1⅓ cups mashed
- ½ cup (120 ml) neutral oil like vegetable, canola, or light coconut oil
- 4 tablespoons (56 grams) unsalted butter, melted
- ¾ cup (150 grams) coconut sugar (or light brown sugar if you prefer)
- 3 tablespoons raw honey or maple syrup
- 2 large eggs, room temperature
- 1 teaspoon pure vanilla extract
- 1¾ cups (210 grams) all-purpose flour (or whole wheat pastry flour for more fiber — spoon and level rather than scoop)
- 1½ teaspoons baking soda
- ½ teaspoon fine sea salt
- ½ teaspoon ground cinnamon
- ¼ teaspoon ground nutmeg (optional but recommended — it adds warm depth without adding sugar)
- ¼ teaspoon ground ginger, or a small pinch of ground cloves (optional — either one adds subtle warmth)
Optional Mix-Ins:
- ½ cup chopped walnuts or pecans (toasted if you have time — it deepens their flavor)
- ⅓ cup mini chocolate chips (if you want a touch of indulgence without going overboard on sugar)
- 2 tablespoons ground flaxseed or chia seeds (adds nutrition without changing the flavor)
- Zest of one lemon (adds brightness and makes the banana flavor pop)
For the Pan:
- 1 tablespoon unsalted butter, softened, for greasing
- 1 tablespoon all-purpose flour, for dusting the pan
- Parchment paper (optional but makes cleanup effortless)
Step-by-Step Instructions
Prepare the Pan and Preheat:
-
Preheat your oven to 350°F (175°C) and position the rack in the center of the oven. The center rack ensures even baking from top and bottom.
-
Grease a 9×5-inch loaf pan thoroughly with softened butter — get the bottom corners and all the way up the sides. Dust it lightly with flour, tapping out any excess. If you have parchment paper, cut a piece 5 inches wide and lay it in the bottom and up the two long sides of the pan, leaving a 1-inch overhang on each long side. This makes lifting the finished loaf out of the pan completely effortless, and it prevents the bottom from sticking.
Make the Wet Ingredients:
-
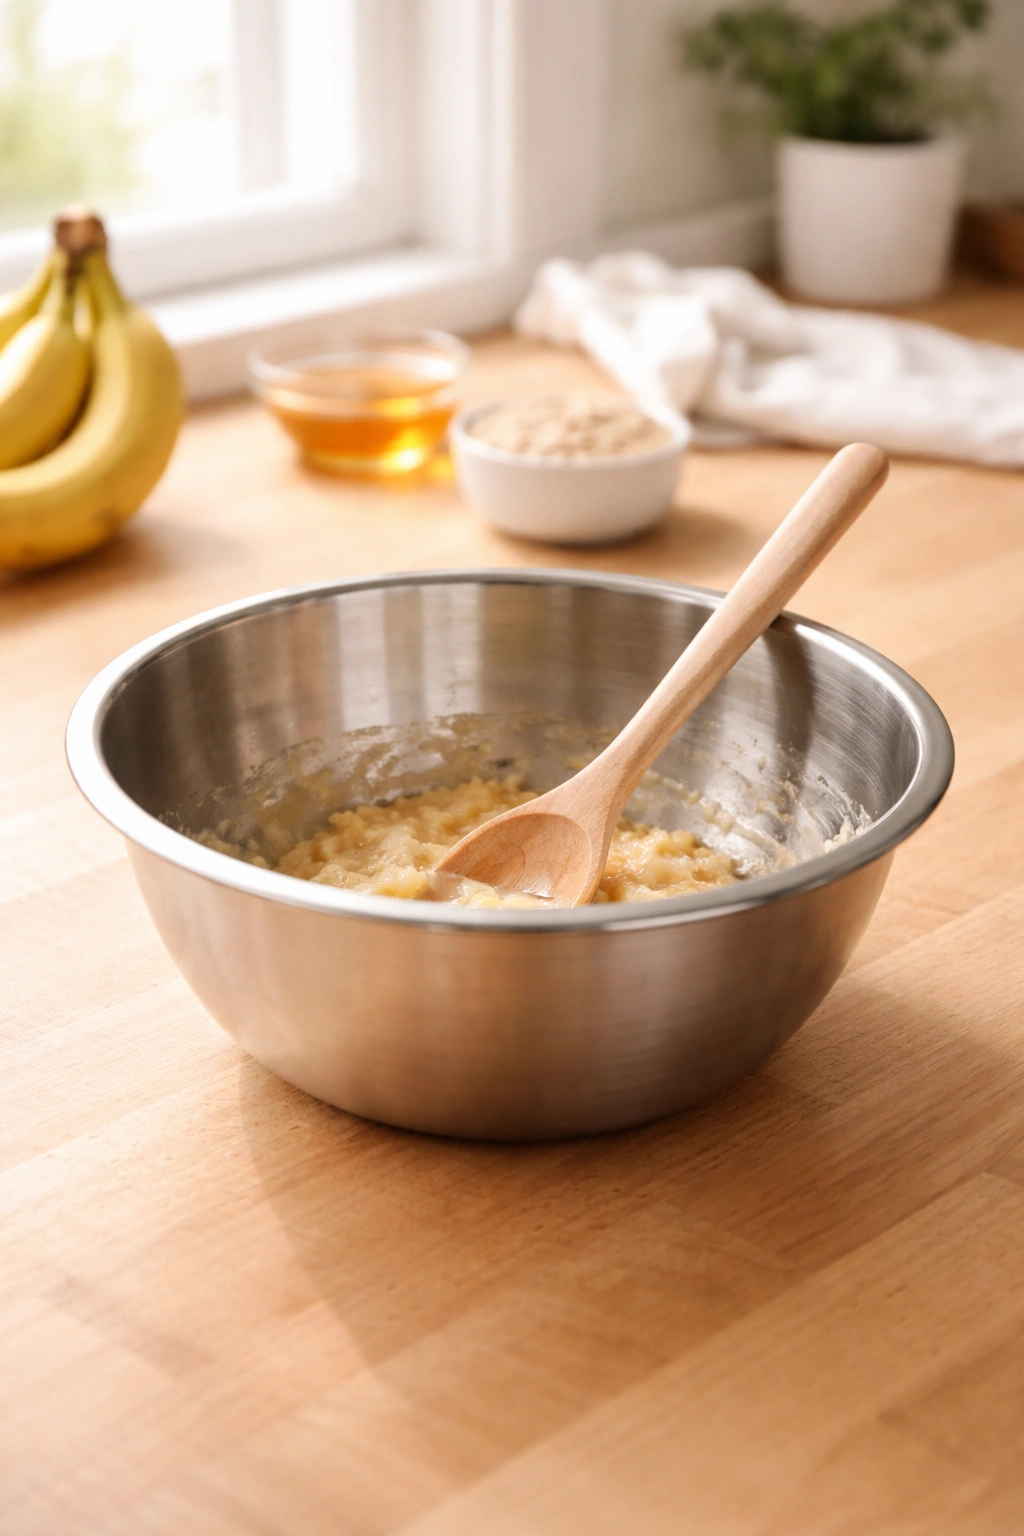
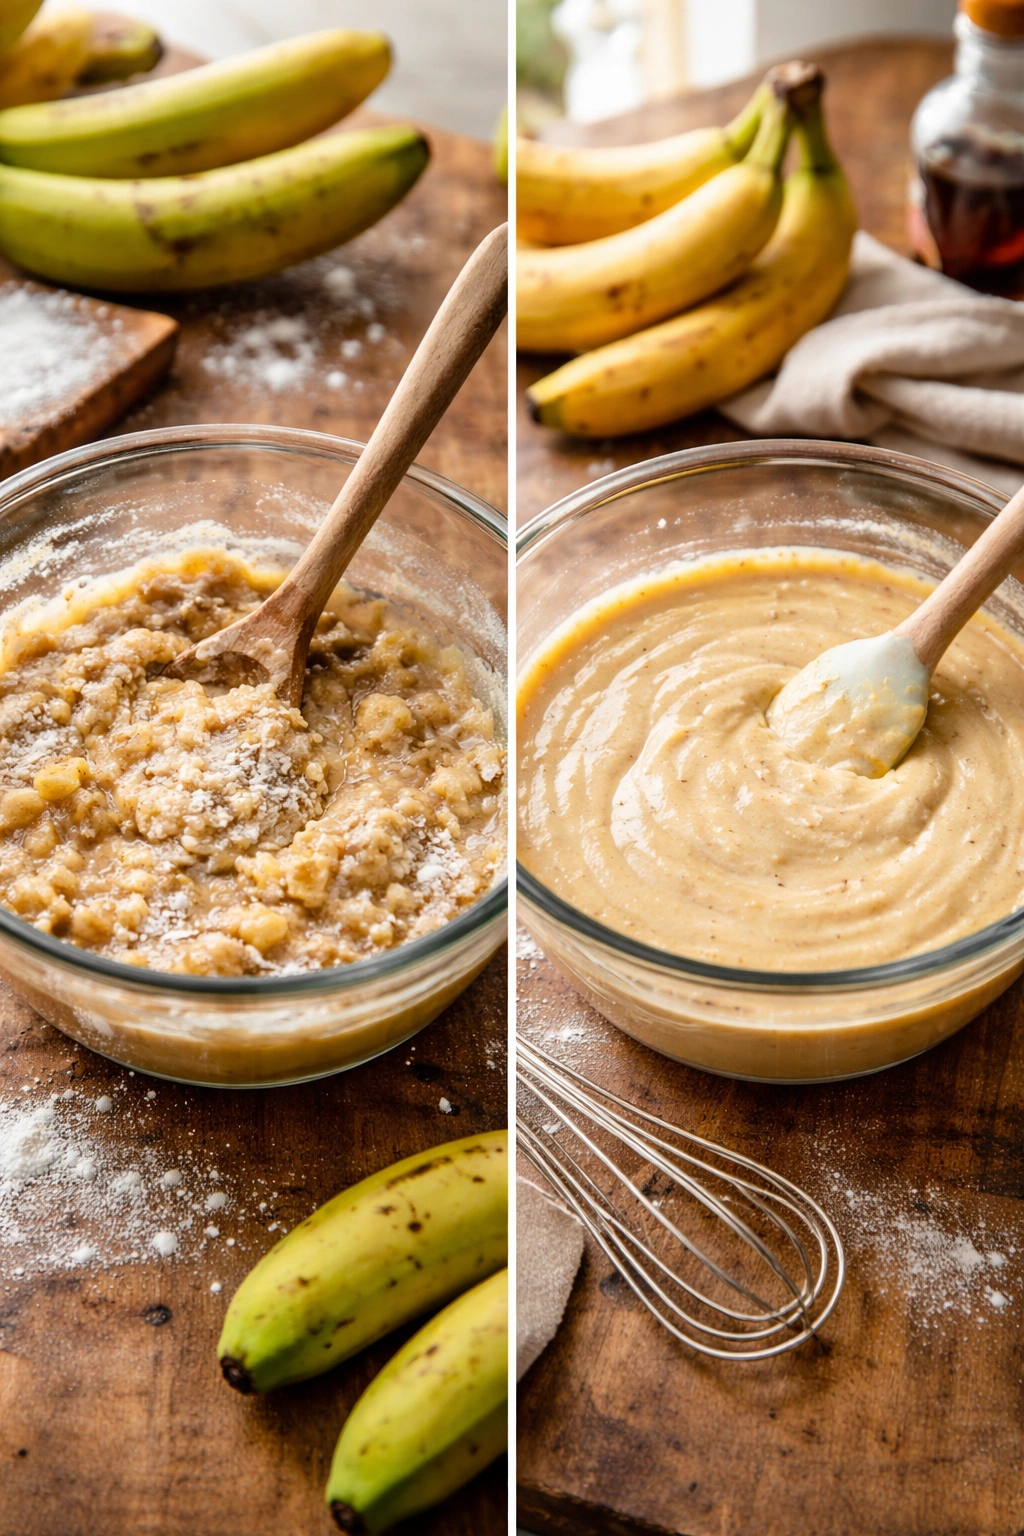
Add the broken banana chunks to a medium bowl and mash them with a fork until mostly smooth. A few small lumps are okay and actually create nice texture. You should have about 1⅓ cups of mashed banana.
-
Add the oil and melted butter to the mashed bananas and stir until combined. The mixture will be loose and wet, which is exactly right.
-
Add the coconut sugar and honey to the banana mixture and stir until the sugar is fully incorporated. Take about 1 minute here — breaking down the sugar slightly makes the batter smoother. The mixture should look relatively uniform, though coconut sugar won’t dissolve completely like white sugar would.
-
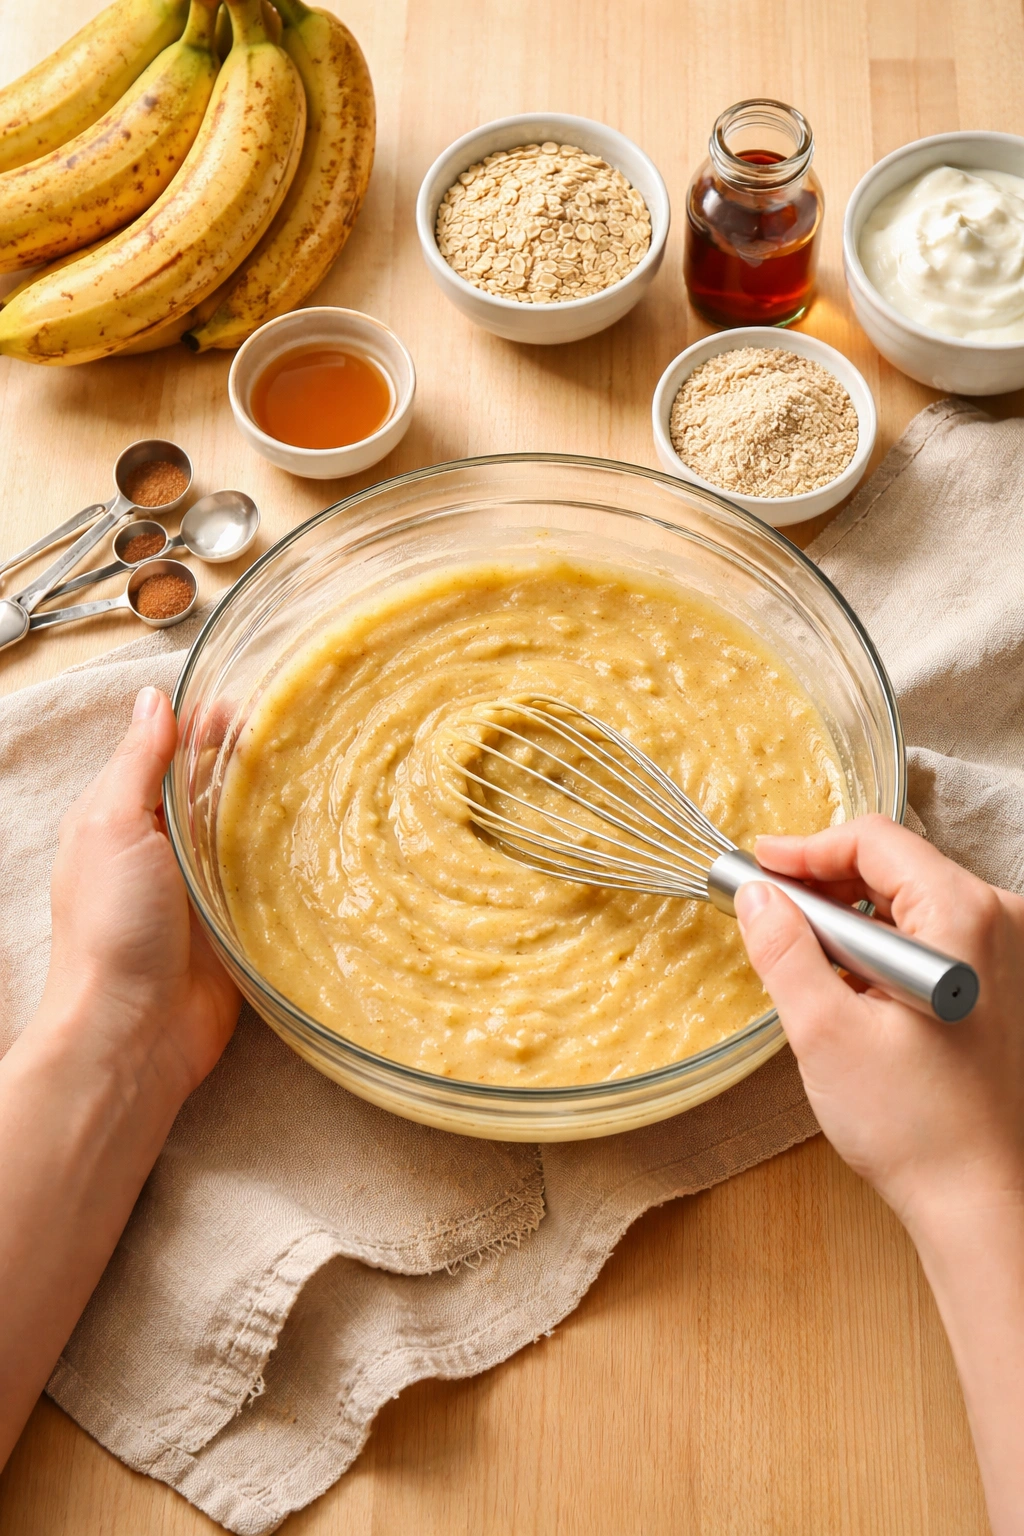
Add the eggs and vanilla extract and whisk together vigorously for about 30 seconds. This fully incorporates the eggs and introduces a bit of air into the batter, which contributes to lift. The mixture should be pale and slightly fluffy.
Advertisements
Mix the Dry Ingredients:
- In a separate bowl, whisk together the flour, baking soda, salt, cinnamon, and nutmeg (if using) and any other spices. Whisking together (rather than just stirring) distributes the baking soda evenly throughout the flour, which prevents bitter pockets of undiluted baking soda in the finished loaf. This step takes about 30 seconds.
Combine:
-
Pour the wet ingredients into the bowl with the dry ingredients and fold them together with a rubber spatula. Fold gently, scraping from the bottom of the bowl and folding over the top, rotating the bowl as you go. Do not overmix. You want just enough folding to combine the wet and dry — the batter should look shaggy and barely combined. Overmixing develops gluten, which makes banana bread dense and tough. You should see a few streaks of flour still visible. This takes about 20 to 30 seconds. The batter will be quite thick but still pourable.
-
If you’re adding mix-ins like nuts or chocolate chips, fold them in gently at this point. Do the same gentle folding motion — just 4 to 5 folds should distribute them evenly.
Bake:
-
Pour the batter into the prepared loaf pan and spread it into an even layer with an offset spatula or the back of a spoon. Even out the top so the loaf bakes uniformly.
-
Bake for 50 to 55 minutes, rotating the pan halfway through if your oven bakes unevenly (many do). The loaf is done when a wooden toothpick or metal skewer inserted into the very center comes out with just a few moist crumbs clinging to it (not wet batter, but not completely dry either). The edges should have just barely started to pull away from the sides of the pan. Don’t overbake — this is the most common mistake with reduced-sugar banana bread. It will continue cooking slightly as it cools, and you want to pull it out when it still feels slightly moist in the center. A loaf that bakes too long will be dry throughout.
Cool:
-
Set the pan on a wire cooling rack for 10 minutes. During this time, the loaf will firm up enough to handle without falling apart, but it will still be warm. This cooling window is crucial — removing it too early means it’ll fall apart; waiting too long means it’ll stick to the pan.
-
After 10 minutes, if you used parchment paper, grab the overhang on the sides and gently lift the loaf directly out of the pan onto a cooling rack. If you didn’t use parchment, run a thin knife around all four sides to loosen it, then turn the pan sideways and gently slide the loaf out onto the cooling rack.
Advertisements -
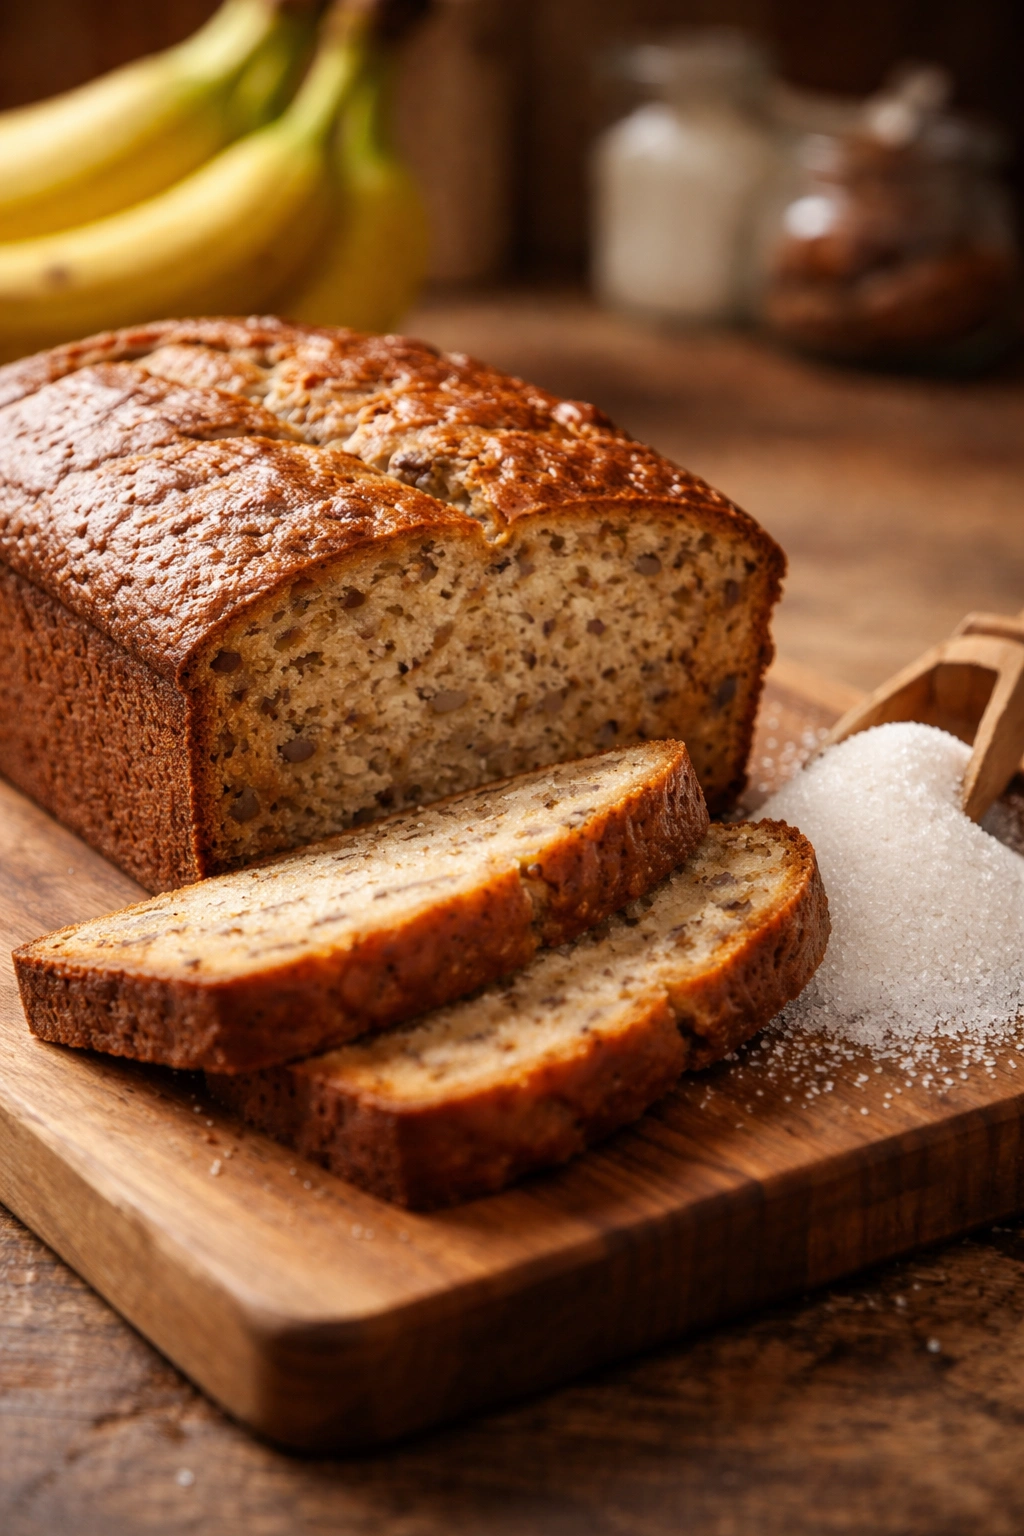
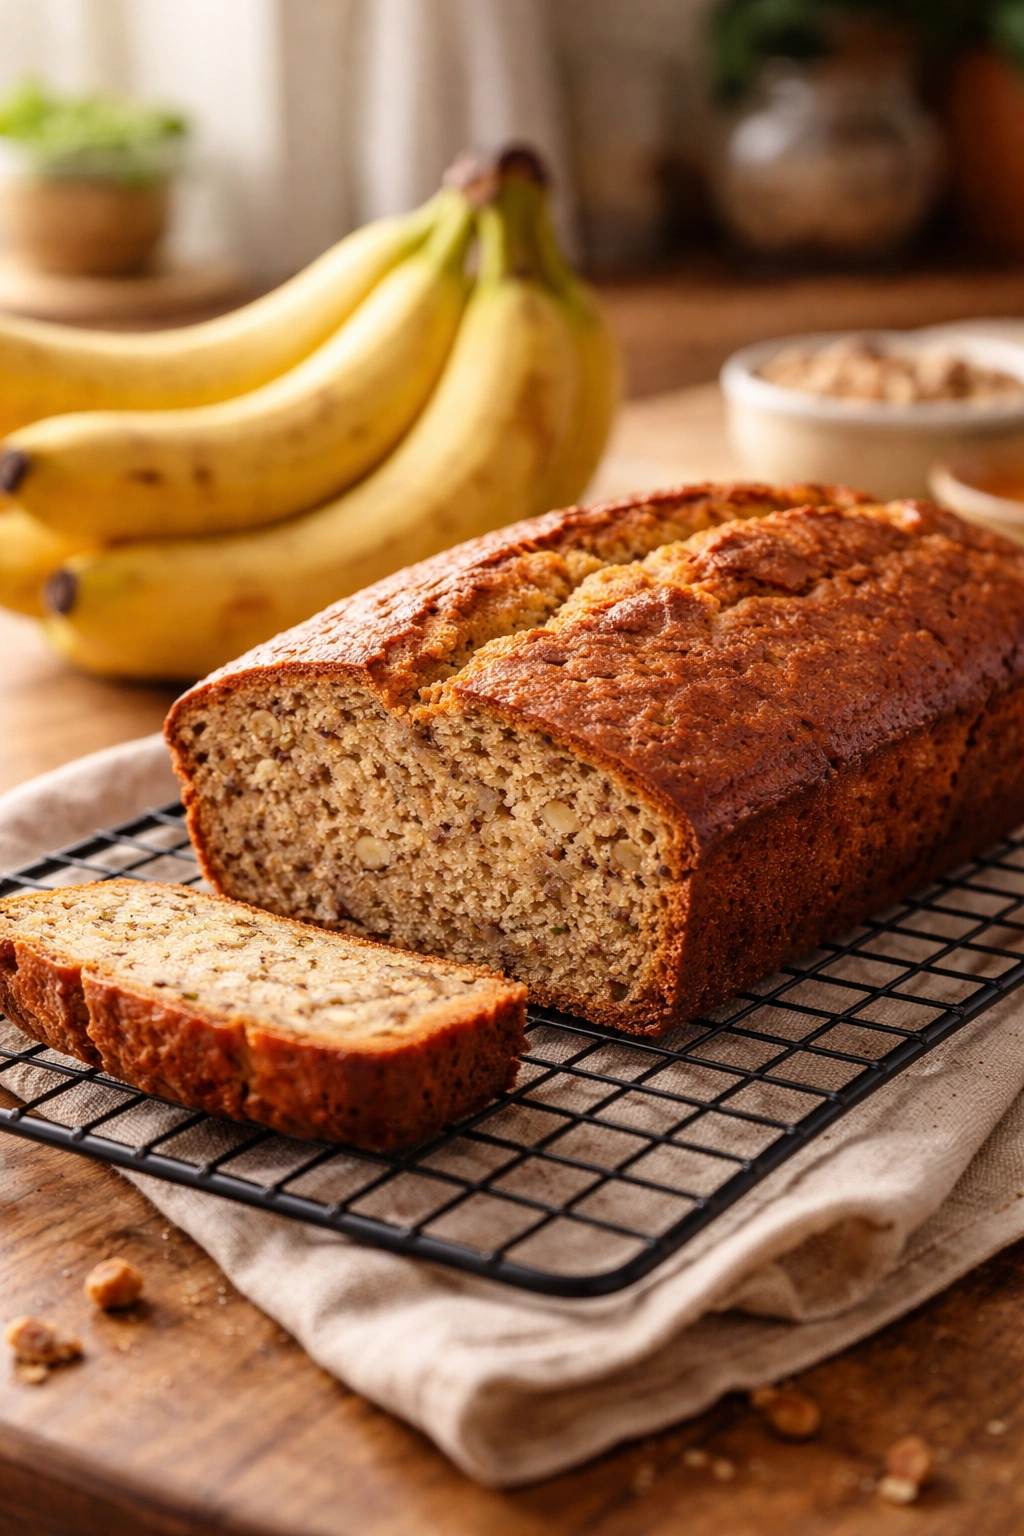
Allow the loaf to cool completely on the rack — at least 1 full hour, preferably 2 hours. Never slice a warm loaf. The crumb is still setting up internally, and slicing will crush it and make the pieces fall apart. A fully cooled loaf slices cleanly and neatly.
Tips for Success and Why They Matter
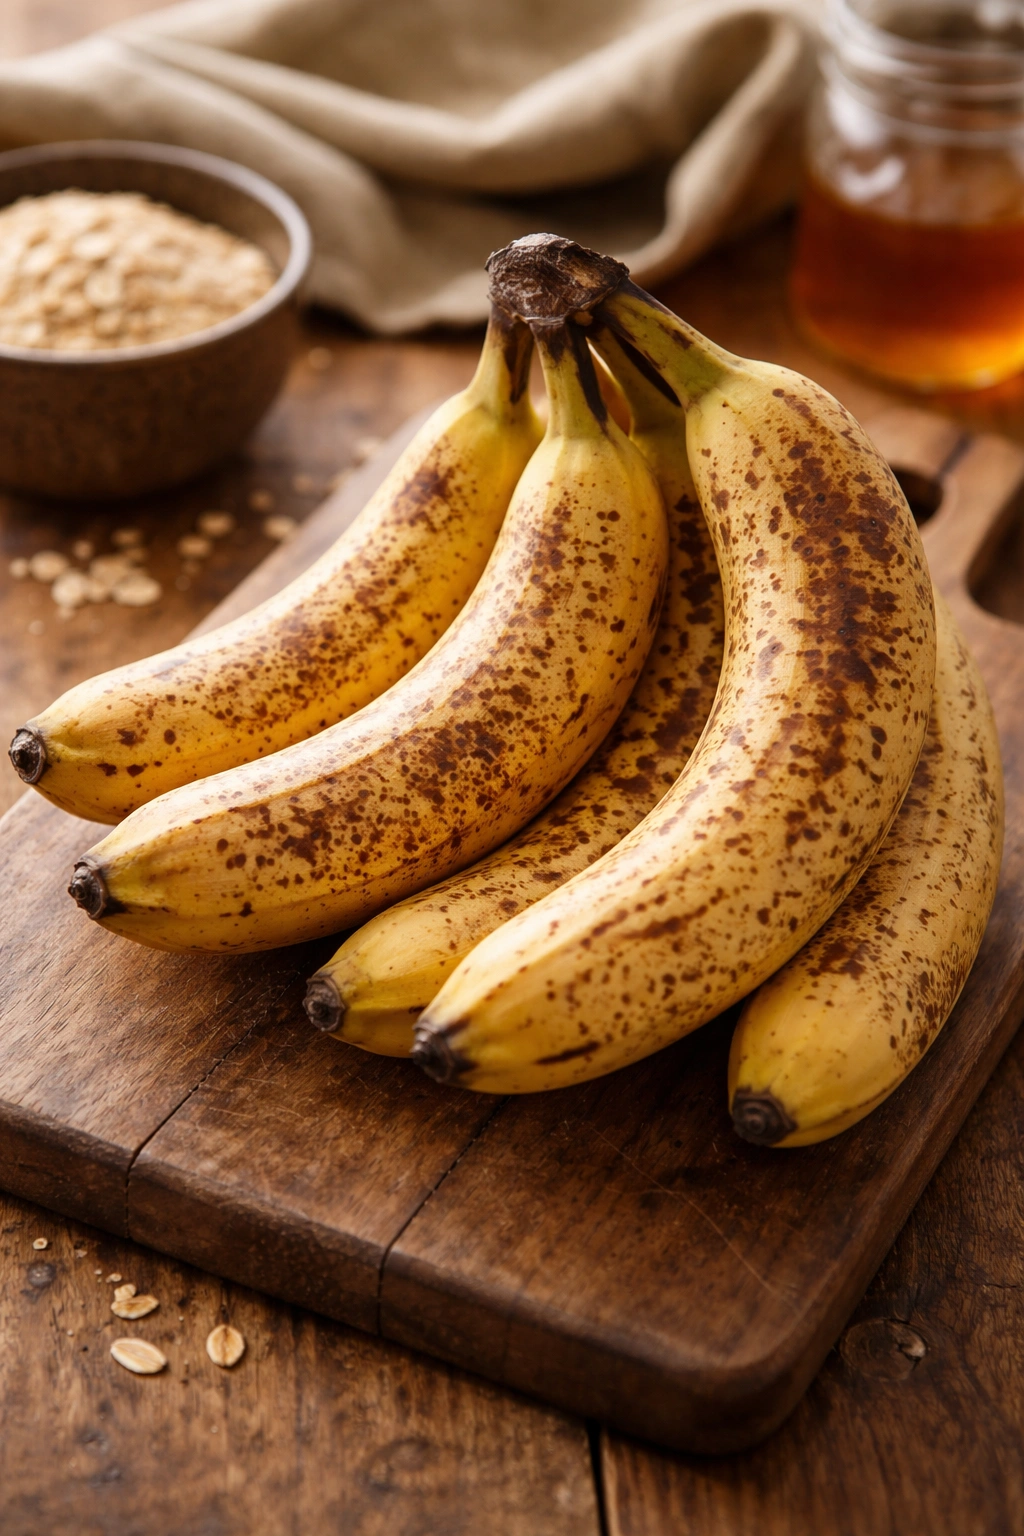
Let your bananas get very ripe. This is the most important tip. Brown-spotted bananas contain more natural sugars and moisture than yellow ones. If you’re going to reduce added sugar, you need the banana itself to carry more of the sweetness and moisture load. If your bananas are only slightly yellow, they won’t deliver the same results, and you’ll notice the difference immediately in flavor and texture.
Measure flour by weight if you have a scale. Measuring flour by scooping directly into the bag and leveling off compacts the flour too much, which results in a denser loaf. Either weigh your flour on a kitchen scale (210 grams for 1¾ cups all-purpose) or use the spoon-and-level method: spoon flour from the bag into a measuring cup and level off with a knife. This is a small detail, but it’s the difference between a light, tender loaf and a dense one.
Room-temperature eggs mix into the batter more smoothly. Cold eggs won’t incorporate fully, which can result in an uneven texture. Take your eggs out of the refrigerator 15 to 20 minutes before you start baking, or place them in a warm water bath for 5 minutes.
Don’t skip the spices. Cinnamon, nutmeg, and ginger aren’t just flavor additions — they actually enhance the perception of sweetness. Warm spices activate taste receptors that make food taste sweeter even when the sugar content is lower. This is why spiced banana bread often tastes more satisfying than plain banana bread at the same sugar level.
Toast the nuts if you have 5 extra minutes. Spread them on a small baking sheet at 350°F for 3 to 5 minutes while your oven is preheating. Toasted nuts have deeper, richer flavor, which adds complexity to the bread and makes it feel more indulgent without needing more sugar.
Use an instant-read thermometer if you’re uncertain about doneness. The center of the loaf should reach 200 to 205°F (93 to 96°C). This takes the guesswork out of the toothpick test, especially if your oven runs hot or cold.
Common Mistakes and How to Avoid Them
Mistake: Using yellow or just-ripe bananas. The bread will taste less sweet and will be drier, because you’ve lost the moisture and natural sugars that come with full ripeness. Solution: Plan ahead. Buy bananas with this recipe in mind and let them ripen on your counter until they’re mostly brown.
Mistake: Adding all the sugar at once to the wet ingredients. Coconut sugar especially won’t dissolve completely, which can result in a slightly gritty texture throughout the loaf. Solution: Mix the sugar into the banana mixture thoroughly, taking about a minute to break it down before adding the eggs.
Mistake: Overmixing the batter. This develops gluten and results in a dense, tough crumb instead of tender. Solution: Fold the wet and dry ingredients together just until combined — it should take about 20 to 30 seconds. A few streaks of flour are fine and actually preferable.
Mistake: Baking until the toothpick comes out completely clean. This means you’ve overbaked, and the loaf will be dry throughout. Solution: Pull the loaf out when the toothpick has just a few moist crumbs clinging to it, not when it’s completely clean. The loaf continues cooking as it cools.
Mistake: Slicing the loaf while it’s still warm. The interior hasn’t fully set, so the bread falls apart and the slices look ragged. Solution: Wait at least 1 to 2 hours for complete cooling. If you’re desperate, at least wait 45 minutes.
Flavor Variations to Try
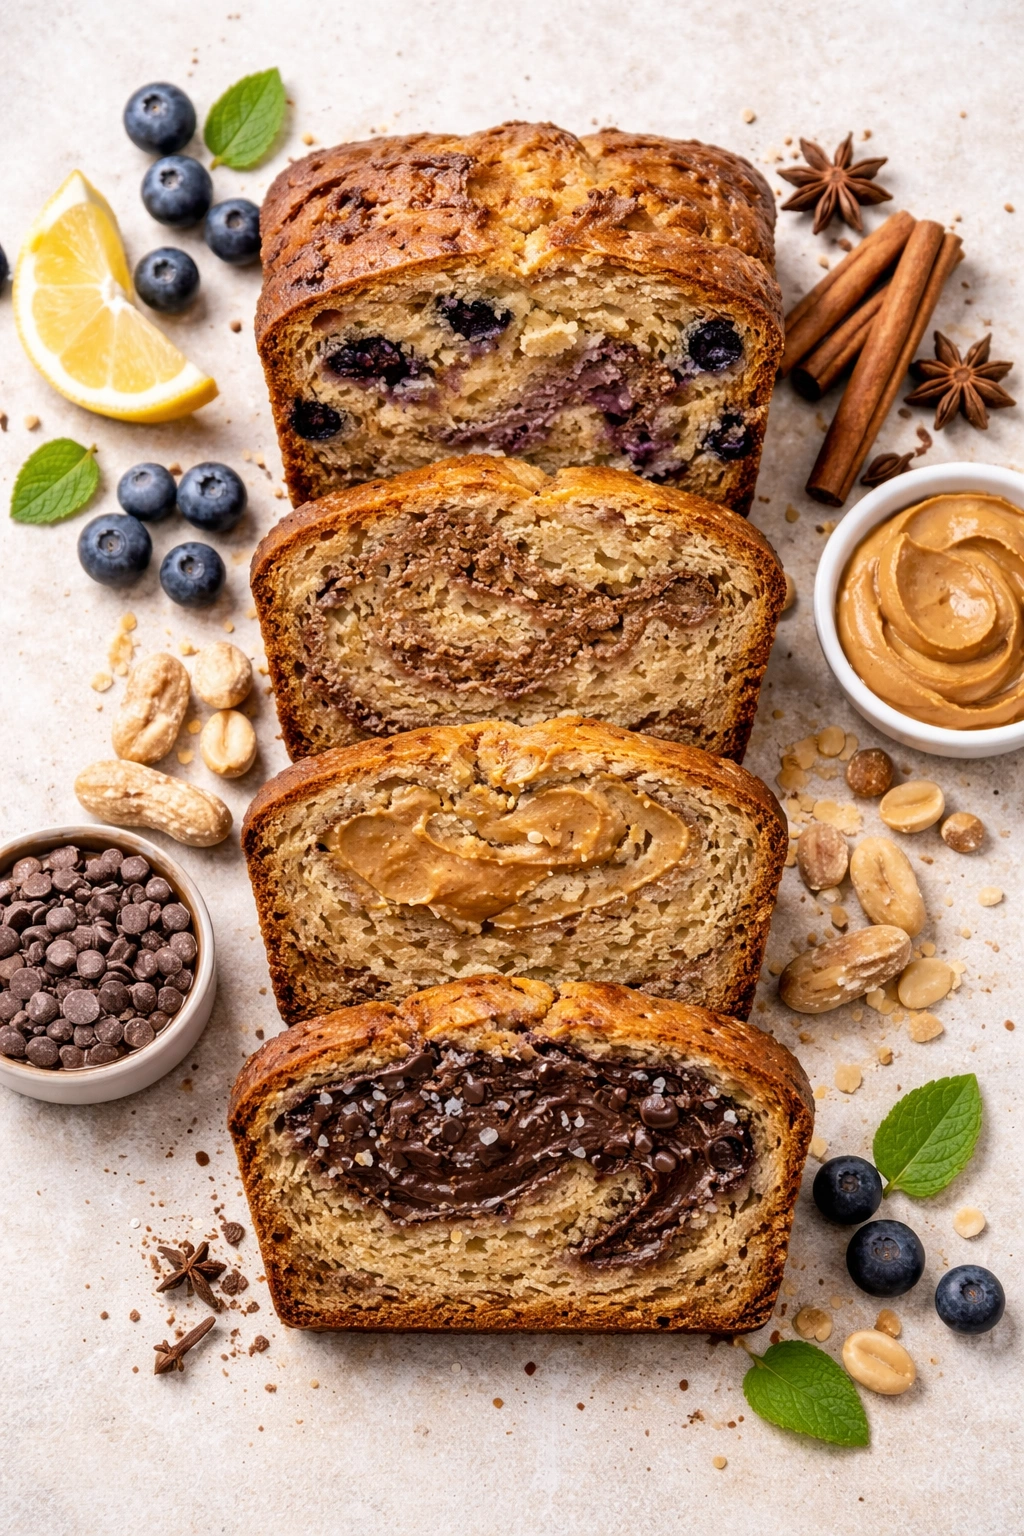
Lemon-blueberry: Add the zest of one lemon to the wet ingredients, and fold ¾ cup fresh or frozen blueberries into the batter with the nuts. Lemon brightens the banana flavor and doesn’t add sweetness.
Chai spice: Replace the cinnamon, nutmeg, and ginger with ½ teaspoon chai spice blend (or combine ½ teaspoon cinnamon, ¼ teaspoon ginger, ¼ teaspoon cardamom, and a pinch of black pepper and clove). This adds complexity and sophistication without sweetness.
Peanut butter swirl: Warm ¼ cup natural peanut butter and drizzle it into the batter before baking, then swirl it gently with a knife. Make sure to use natural peanut butter with no added sugar — conventional peanut butter will add too much sugar.
Chocolate and sea salt: Add ⅓ cup high-quality dark chocolate chips (70% cacao or higher) and a pinch of fleur de sel or fine sea salt to the batter. The dark chocolate is less sweet than milk chocolate, and the salt enhances both chocolate and banana flavors.
Cream cheese swirl: Mix 2 ounces softened cream cheese with 1 tablespoon honey and a pinch of cinnamon. Drop small spoonfuls over the batter in the pan and swirl before baking. This adds richness and tanginess without a lot of extra sugar.
Double banana intensity: Substitute one of the regular bananas with a plantain at the same ripeness level. Plantains are slightly starchier and have a different flavor profile. Use half banana and half plantain for a subtle shift.
Whole wheat version: Replace up to half the all-purpose flour with whole wheat pastry flour (not regular whole wheat flour, which is heavier). You may need an extra tablespoon or two of liquid if the batter seems too thick, because whole wheat absorbs more moisture.
Storage and Make-Ahead Guidance
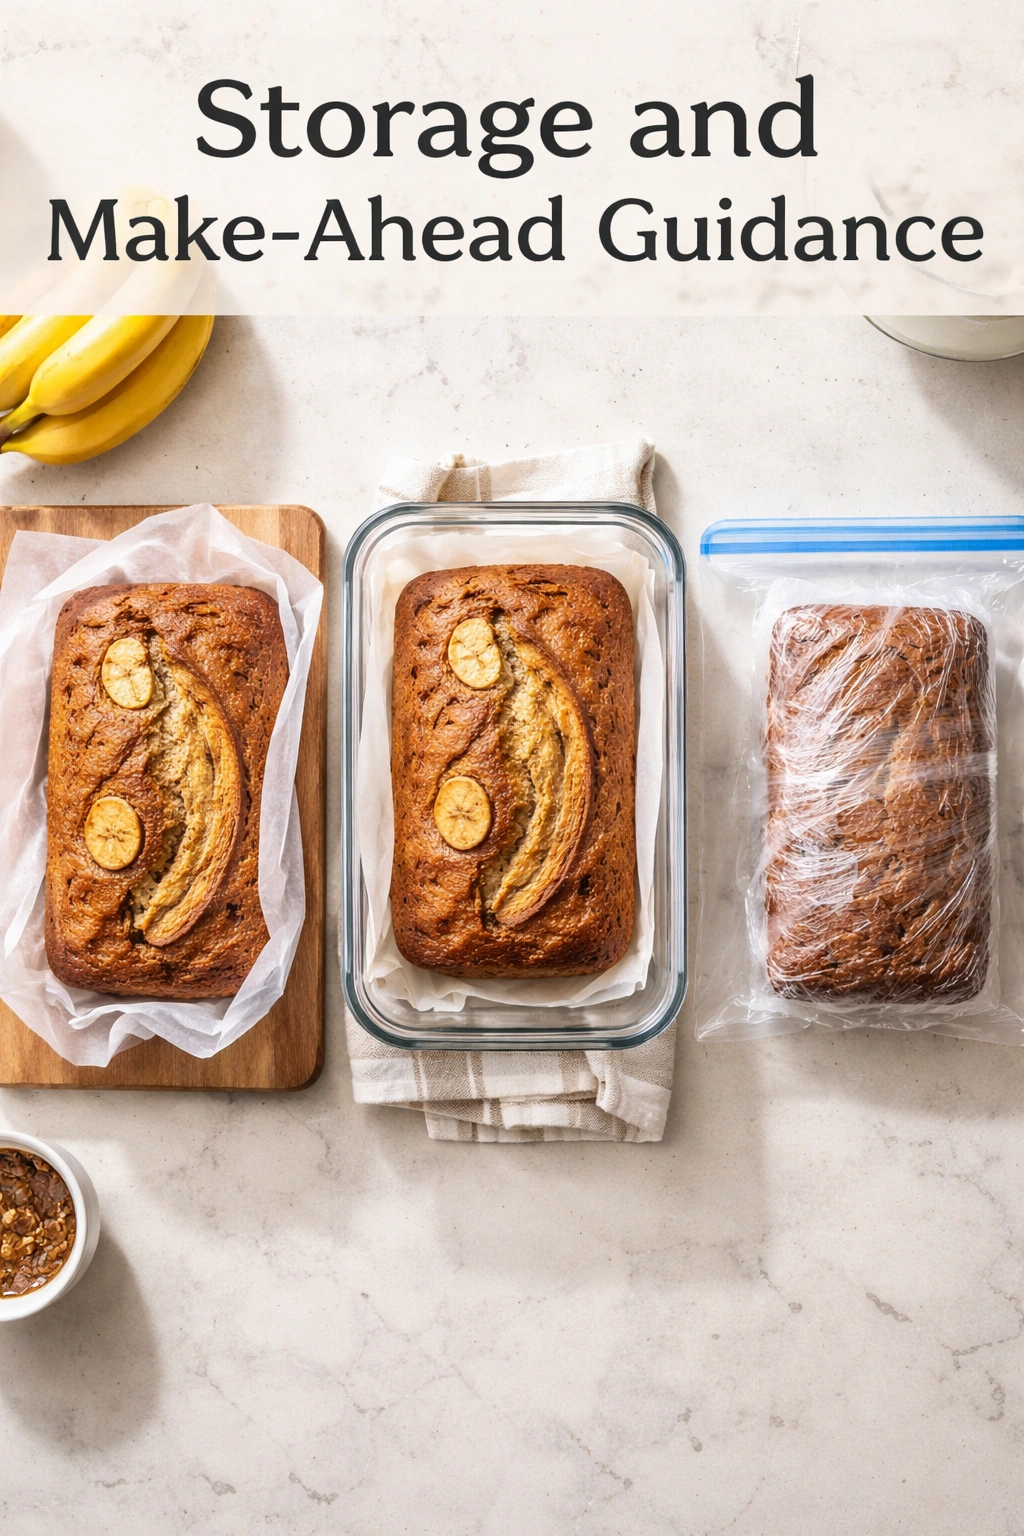
At room temperature: Banana bread keeps beautifully on the counter for 2 to 3 days, wrapped loosely in plastic wrap or stored in an airtight container. The crumb will actually improve slightly as it sits — the moisture redistributes and the flavors meld together. This is one of the best things about banana bread: day-two slices taste better than day-one, at least through day two or three.
In the refrigerator: Wrapped in plastic wrap or stored in an airtight container, banana bread will keep for up to 7 days in the fridge. Cold banana bread is denser and less flavorful, so let it come to room temperature for 30 to 45 minutes before serving, or toast a slice for the best texture and flavor.
In the freezer: Wrap individual slices in plastic wrap and place them in a freezer bag, or wrap the whole loaf in plastic wrap and then aluminum foil. Banana bread freezes beautifully for up to 3 months. Thaw individual slices at room temperature for 1 to 2 hours, or pop them in the toaster oven at 325°F for 10 to 15 minutes. If you want to toast them, go straight from freezer to toaster oven — no thawing needed.
Make-ahead strategy: You can prepare the batter up to 4 hours in advance and refrigerate it in the prepared loaf pan, covered with plastic wrap. Bake it directly from the fridge — add 3 to 5 minutes to the baking time since the batter starts cold. Alternatively, you can make the banana bread the day before you plan to serve it. It slices more neatly anyway after a full cooling and resting period.
Serving Ideas and Pairings
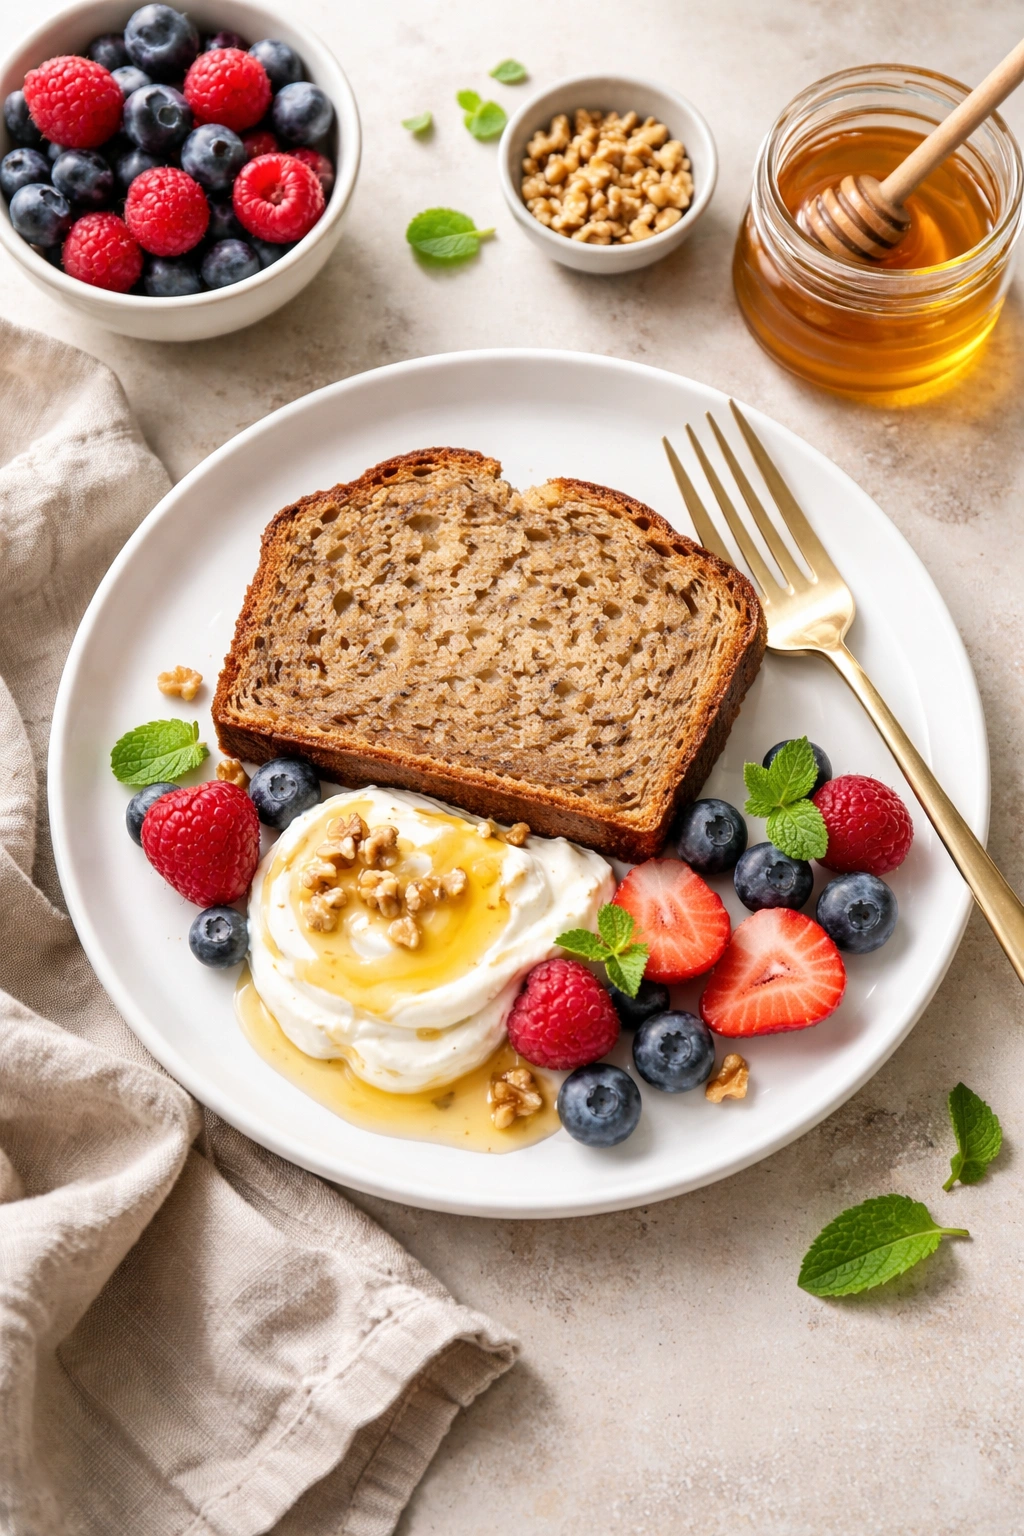
Classic breakfast plate: Serve a slice with plain Greek yogurt, a drizzle of honey, and a handful of fresh berries. The tanginess of yogurt balances the banana bread nicely and adds protein to make it a complete breakfast.
Coffee pairing: A slice with a cup of black coffee or espresso is the traditional choice, and it works beautifully. The coffee’s bitterness offsets the banana’s sweetness perfectly.
Spread options: Cream cheese is the obvious choice, but also consider:
- Almond or peanut butter for added protein
- Cultured butter and a pinch of sea salt
- Ricotta mixed with a touch of honey and lemon zest
- A very thin layer of good-quality jam (the bread is already sweet, so you don’t need much)
Dessert application: Slice the loaf thick, toast it, spread it with cream cheese, and serve it as a simple dessert. Some people add a drizzle of chocolate on top, though honestly, it doesn’t need it.
Lunchbox portion: Toast a slice, let it cool slightly, wrap it in parchment paper, and pack it in a lunchbox. Banana bread travels beautifully and tastes just as good at room temperature as it does warm.
Breakfast sandwich: Toast a slice, spread it with cream cheese, add a thin slice of good cheese and a slice of turkey or ham if you want, and eat it like an open-faced sandwich. This sounds odd, but it works.
Final Thoughts
Lower-sugar banana bread isn’t a deprivation — it’s actually a better version of banana bread once your palate adjusts. The first time you make this recipe, you might notice the absence of the intense sugar hit you’re used to. By the second slice, you’ll probably notice how much more you taste the actual banana, the warmth of spices, and the butter. That’s the point.
The most important factor is using bananas that are fully ripe. That single choice makes this recipe work. If you commit to that one thing, everything else falls into place. The bread will be moist, naturally sweet, and delicious enough that no one will realize they’re eating banana bread with significantly less sugar than traditional recipes.
Make this once, taste it, and if you like it, make it again. By the third time, it will feel as natural as any other recipe in your rotation. And you’ll probably find yourself thinking twice about going back to recipes with twice as much sugar — because honestly, those taste heavy and one-note once you’ve had this version.