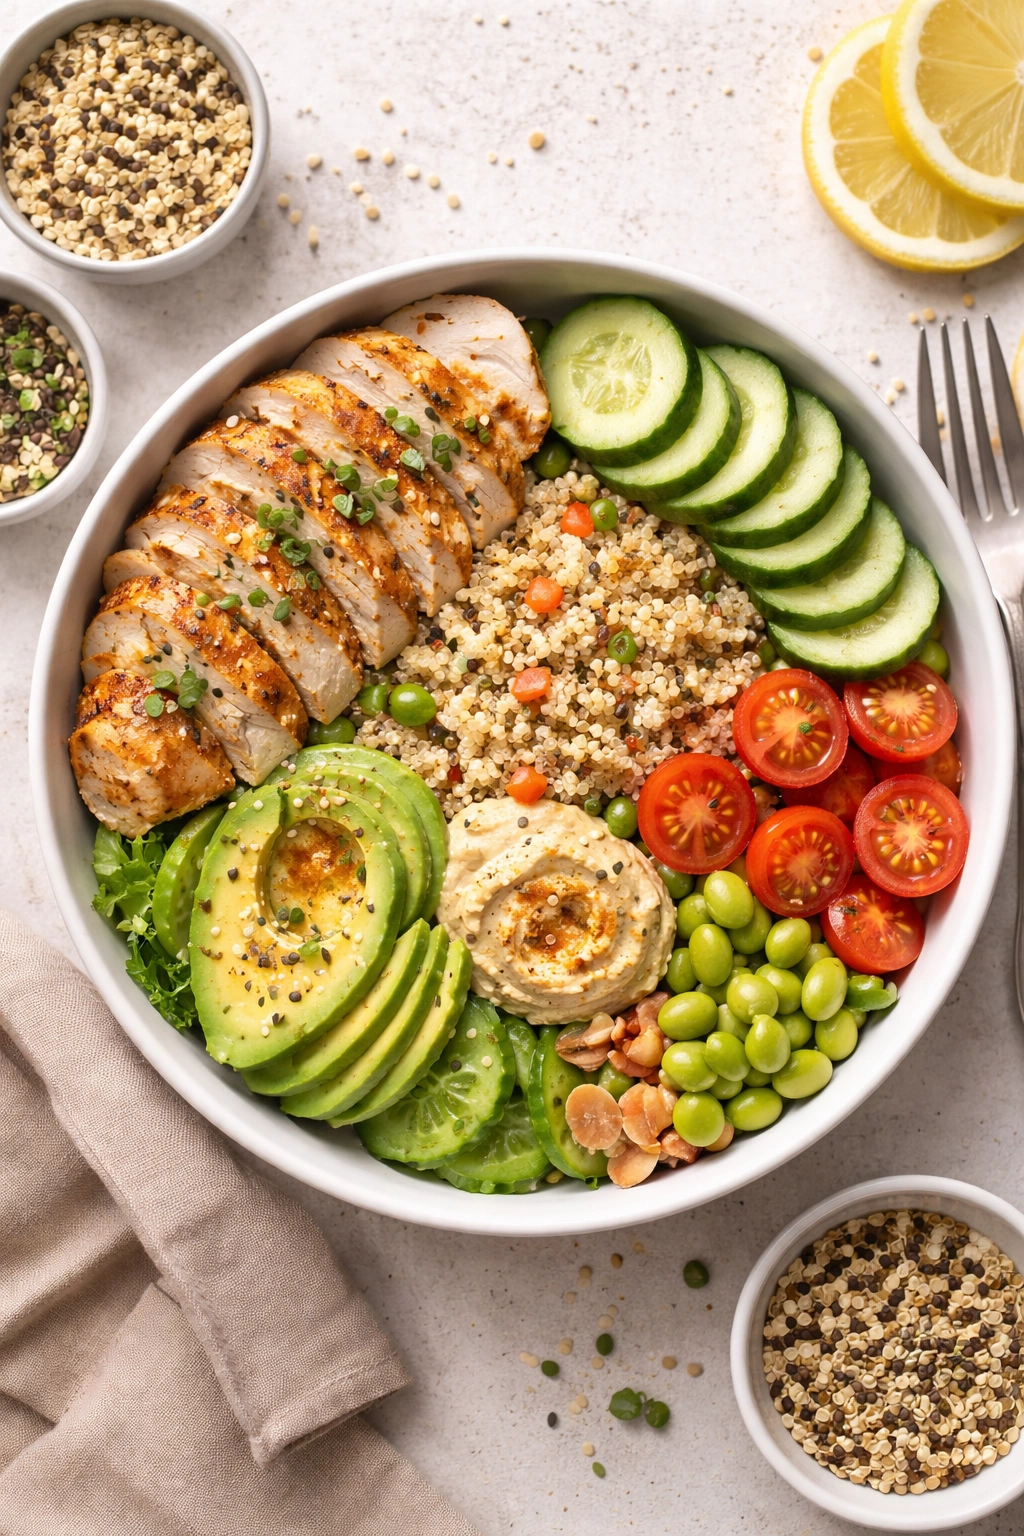
High-protein lunch bowls are one of the smartest meal prep investments you can make for your week. They’re customizable, satisfying, and genuinely delicious when assembled thoughtfully — which is probably why they’ve become the go-to strategy for anyone juggling busy schedules and serious health goals. But here’s what separates a truly great prep-ahead bowl from one that tastes sad and mushy by Wednesday: strategy. The difference comes down to knowing which proteins hold up best, how to layer components so nothing gets waterlogged, what temperature approach actually works with your routine, and how to build flavor combinations that don’t bore you into submission halfway through the week.
The beauty of high-protein lunch bowls is that they check all the boxes at once. You get the convenience of grab-and-go eating. You hit your protein targets effortlessly. You control ingredients and portions instead of relying on whatever’s available at lunch. And you actually enjoy what you’re eating, which makes the whole thing sustainable instead of a punishment you quit after two weeks. Whether you’re fueling athletic training, managing energy for a desk job, or working toward body composition goals, bowls make it possible to eat well without spending your entire Sunday cooking.
This guide covers everything you need to build high-protein lunch bowls that genuinely last through the week without turning into sad, separated components. You’ll learn which proteins actually stay delicious when chilled, the layering tricks that keep everything fresh, how to build flavors that compound instead of flatten, and the real-world strategy that makes meal prep a sustainable habit instead of another failed attempt.
Why High-Protein Lunch Bowls Save Your Week (and Your Goals)
Meal prep bowls solve one of the biggest nutrition challenges most people face: decision fatigue. When you show up to lunchtime without a plan, you either grab whatever’s available (often not great nutritionally), spend time figuring out what to eat (burning willpower you need elsewhere), or end up skipping lunch and overeating later. A prepped bowl eliminates that friction entirely. You open the fridge, grab your container, and eat something genuinely good without thinking about it.
From a practical standpoint, high-protein bowls let you hit your daily protein target consistently. Most people underestimate how much protein they’re actually consuming because they don’t structure their meals around it. A thoughtfully built bowl with a solid protein portion, complementary carbs, and fat creates a complete nutritional picture that keeps you full through the afternoon, stabilizes blood sugar, and supports muscle maintenance or growth depending on your goals. That’s not accidental — it’s the direct result of deliberate design.
Time and Money Efficiency
Batch cooking proteins once or twice a week means you’re cooking efficiently instead of making small portions every single night. You buy ingredients in bulk, prep them in one dedicated session, and get 4-5 meals out of it. That approach costs significantly less than buying prepared foods or eating out, and it gives you complete control over quality and ingredients.
Consistency Without Boredom
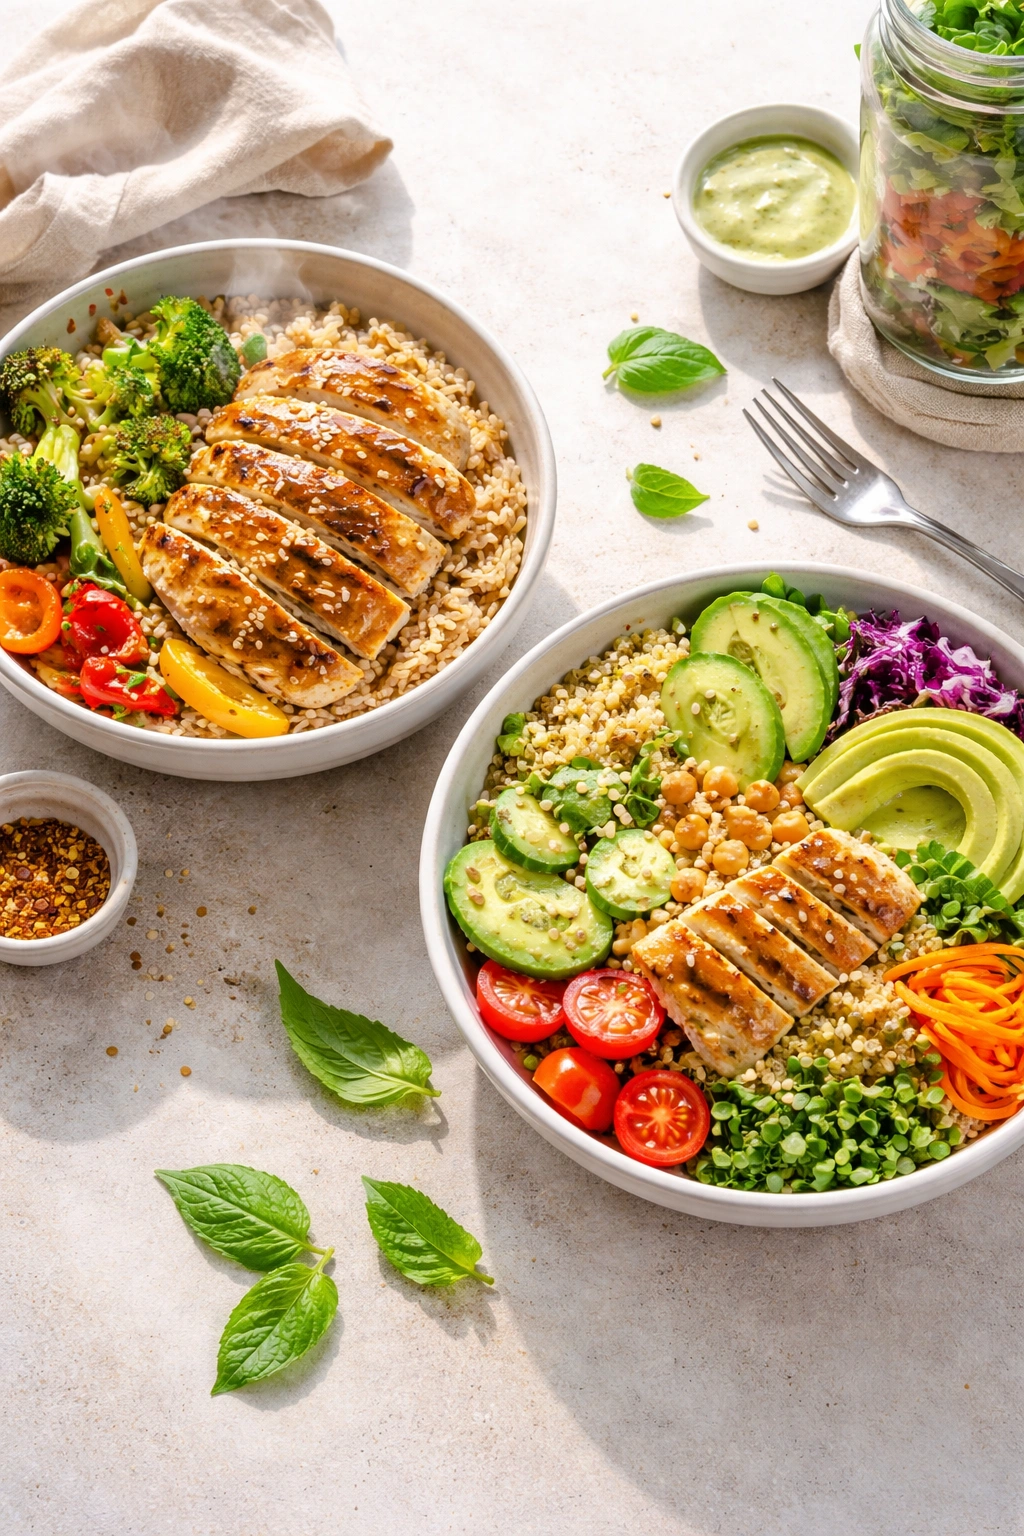
The modular nature of bowl building means you can eat the same base and proteins throughout the week while rotating vegetables, toppings, and dressings. This keeps things interesting without requiring you to cook five completely different meals. You might have a Mediterranean bowl on Monday, an Asian-inspired version on Wednesday, and a tex-mex variation on Friday — all using the same prepped chicken and grain base.
Choosing Proteins That Stay Delicious All Week
Not all proteins hold up equally well in the fridge for 4-5 days. Some dry out, some develop weird textures, and some just don’t taste as good when chilled. Your protein choice matters as much as any other component because it’s the backbone of your bowl.
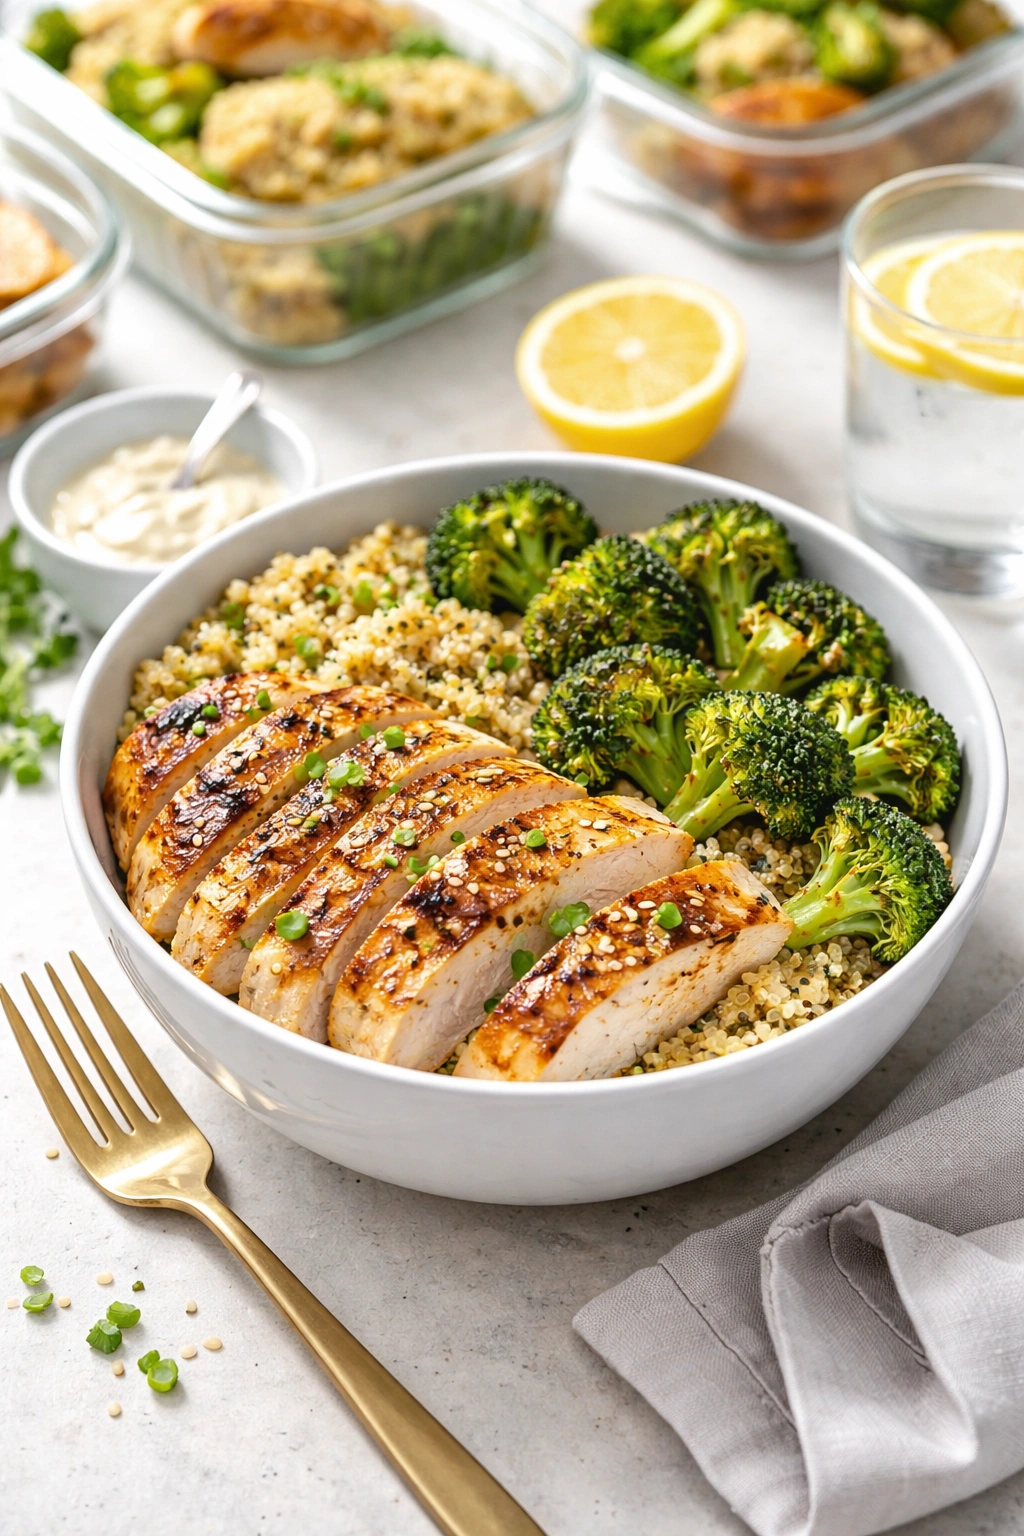
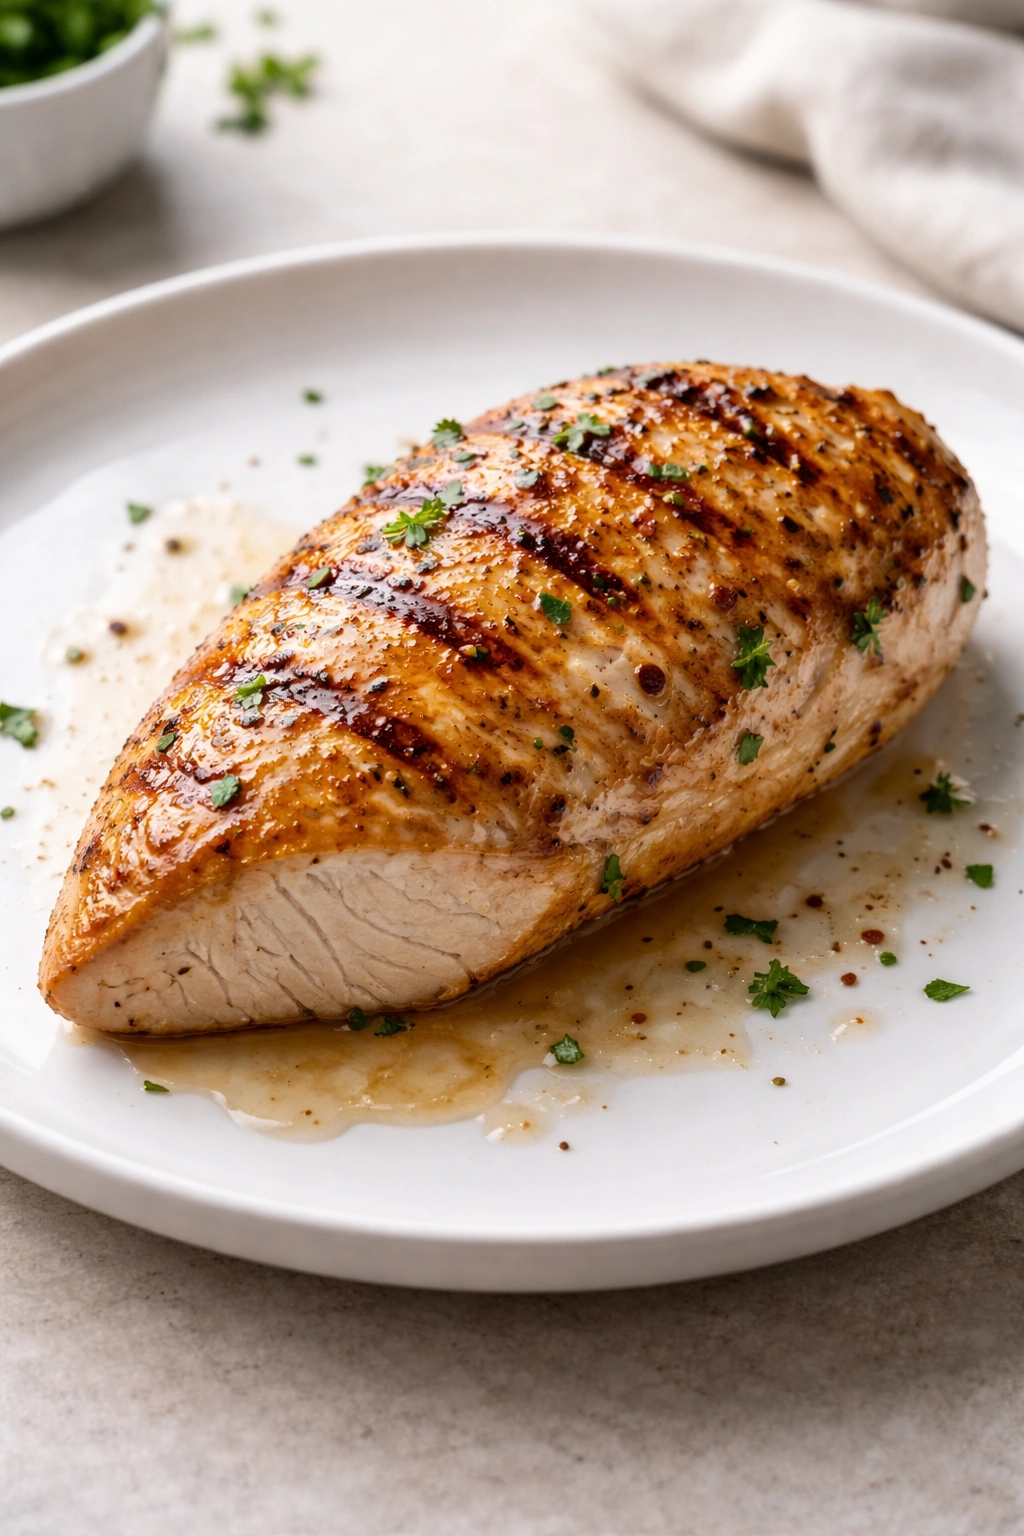
Grilled or baked chicken breast is the classic meal prep protein for good reason — it’s lean, takes on flavors easily, and if cooked properly with enough moisture (brining, marinating, or adding sauce), it stays tender through the week. Cook it whole before slicing, season it boldly, and store it in a shallow container where the meat stays in contact with its own juices.
Ground turkey or lean ground beef works beautifully when cooked with aromatics and fat. Brown it with onions and garlic, add a bit of tomato paste or soy sauce, and let it cool in its own rendered fat. The fat protects the meat and keeps it moist. Don’t drain all the liquid — that’s exactly what you want for staying tender in the fridge.
Salmon and other fatty fish are phenomenal for meal prep because they’re naturally moist. They stay delicious when chilled and actually get easier to flake. Bake salmon at 400°F for 12-15 minutes until just barely opaque in the center — the slight undercook means it won’t dry out as it rests and chills. The omega-3s add nutritional complexity beyond basic amino acids.
Proteins to Use with Caution
Lean ground chicken, very lean ground turkey, and plain white fish tend to dry out noticeably by day 3 or 4. If you want to use these, cook them with broth, sauce, or enough fat to keep them moist. A plain baked tilapia fillet is going to taste sad by midweek — but that same tilapia in a flavorful broth or topped with a creamy sauce stays perfectly pleasant.
Eggs deserve their own mention because they’re an excellent protein source that most people overlook in meal prep. Hard-boiled eggs keep for a full week, and while they’re often treated as a topping rather than the main protein, you can absolutely build a bowl around 2-3 eggs as your primary protein with supporting vegetables and a grain.
High-Protein Dairy Options
Greek yogurt works as a protein component in cooler bowls, especially when paired with vegetables that aren’t too wet. It works best mixed into a dressing rather than as a plain dollop. Cottage cheese is having a moment in meal prep because of its high protein content, though it works best in bowls where you’re leaning into creamy dressings and fresher vegetables rather than heavy roasted components.
Building the Foundation: Grains vs Salad Bases
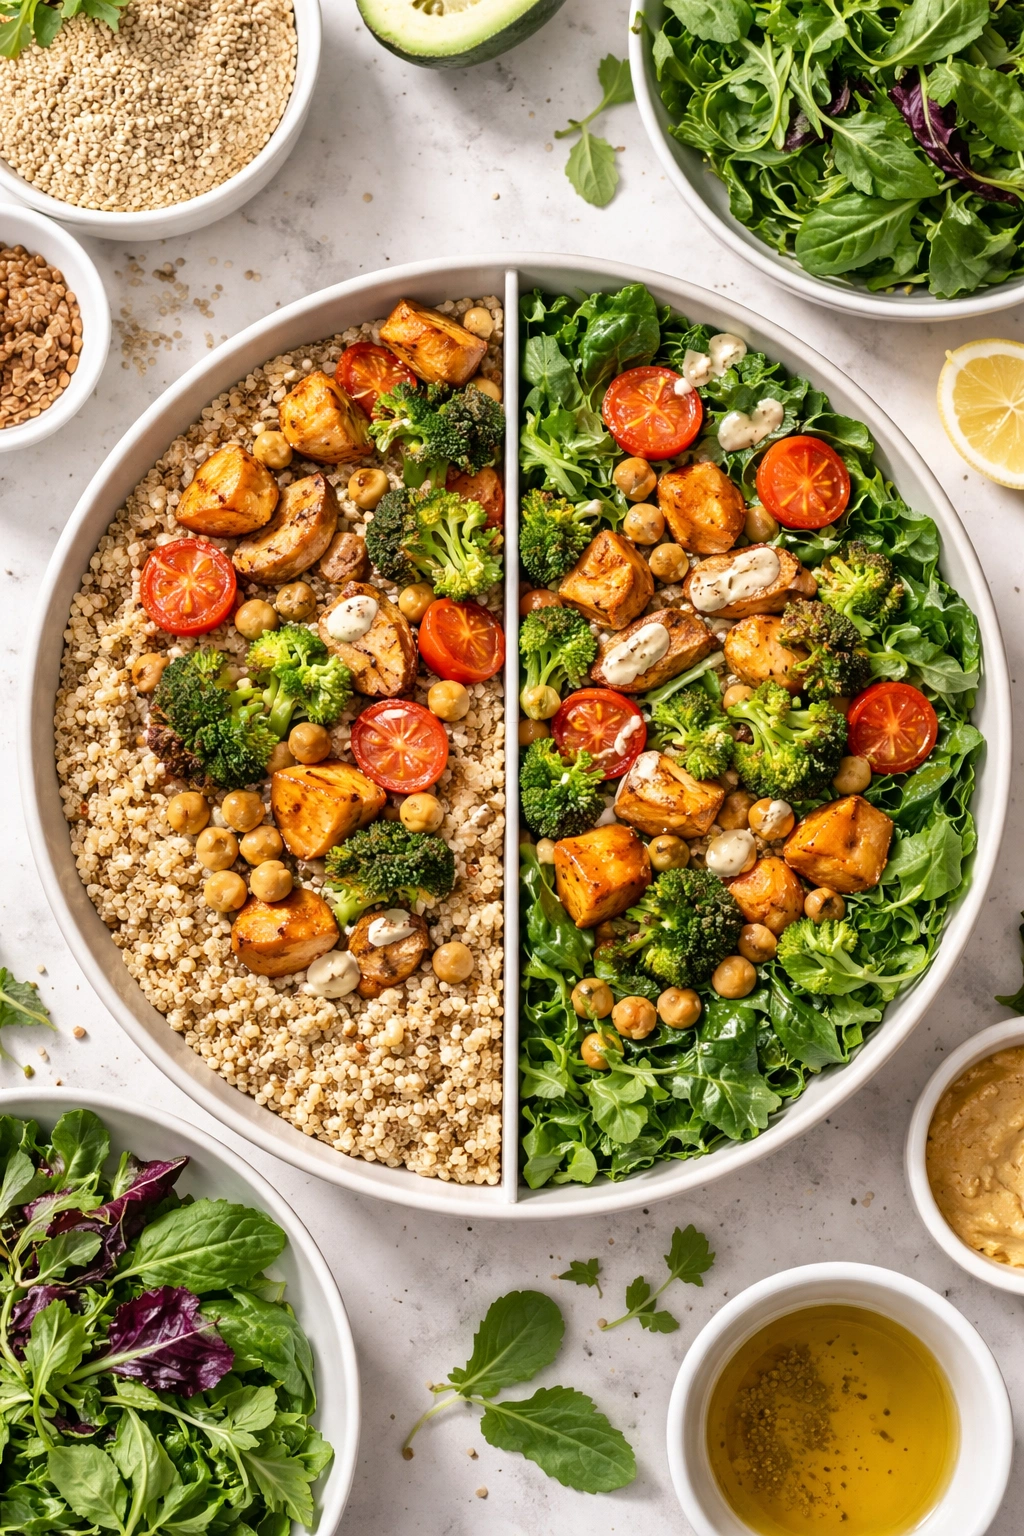
Your base is the structural foundation that everything else builds on. It’s also where you establish the temperature and texture profile of your entire bowl. You’re choosing between grain-based bowls, salad-based bowls, or a hybrid approach.
Grain bowls are warm or room-temperature bases built on rice, quinoa, farro, or other whole grains. They’re hearty, filling, and pair beautifully with roasted vegetables and rich proteins. A grain-based bowl stays stable throughout the week and actually improves slightly as flavors meld. Cook your grain in broth instead of water — that one small choice adds noticeable flavor and keeps things interesting.
Salad-based bowls start with leafy greens and lighter vegetables as the base. They’re fresher and lighter, perfect if you prefer to eat something that doesn’t feel heavy at lunch. The major challenge is preventing wilting and sogginess — which is solvable through proper layering technique and choosing heartier greens like spinach, kale, or a sturdy mixed blend rather than delicate butter lettuce.
Hybrid bowls use a combination of grain and greens, often with the grain on the bottom (which insulates the greens from dressing) and a bed of greens on top. This gives you the best of both worlds — the heartiness of grain with the freshness of salad — though it requires a slightly bigger container.
Temperature Considerations
Warm grain bowls can be eaten cold straight from the fridge or reheated in 90 seconds in the microwave, which makes them incredibly adaptable to different days and your mood. Cold salad bowls are always fresh but might feel less satisfying on a cold day. Consider your typical lunch environment and what actually sounds appealing — if you’re eating in a cold office, cold salad might not feel good. If you’re somewhere without microwave access, room-temperature grain is easier than trying to heat something.
The Vegetable Layer That Keeps Everything Fresh
Raw and roasted vegetables make up the bulk of your bowl by volume, which is exactly what you want nutritionally. The trick is choosing vegetables that actually hold up for 4-5 days and don’t turn into mush or release water everywhere.
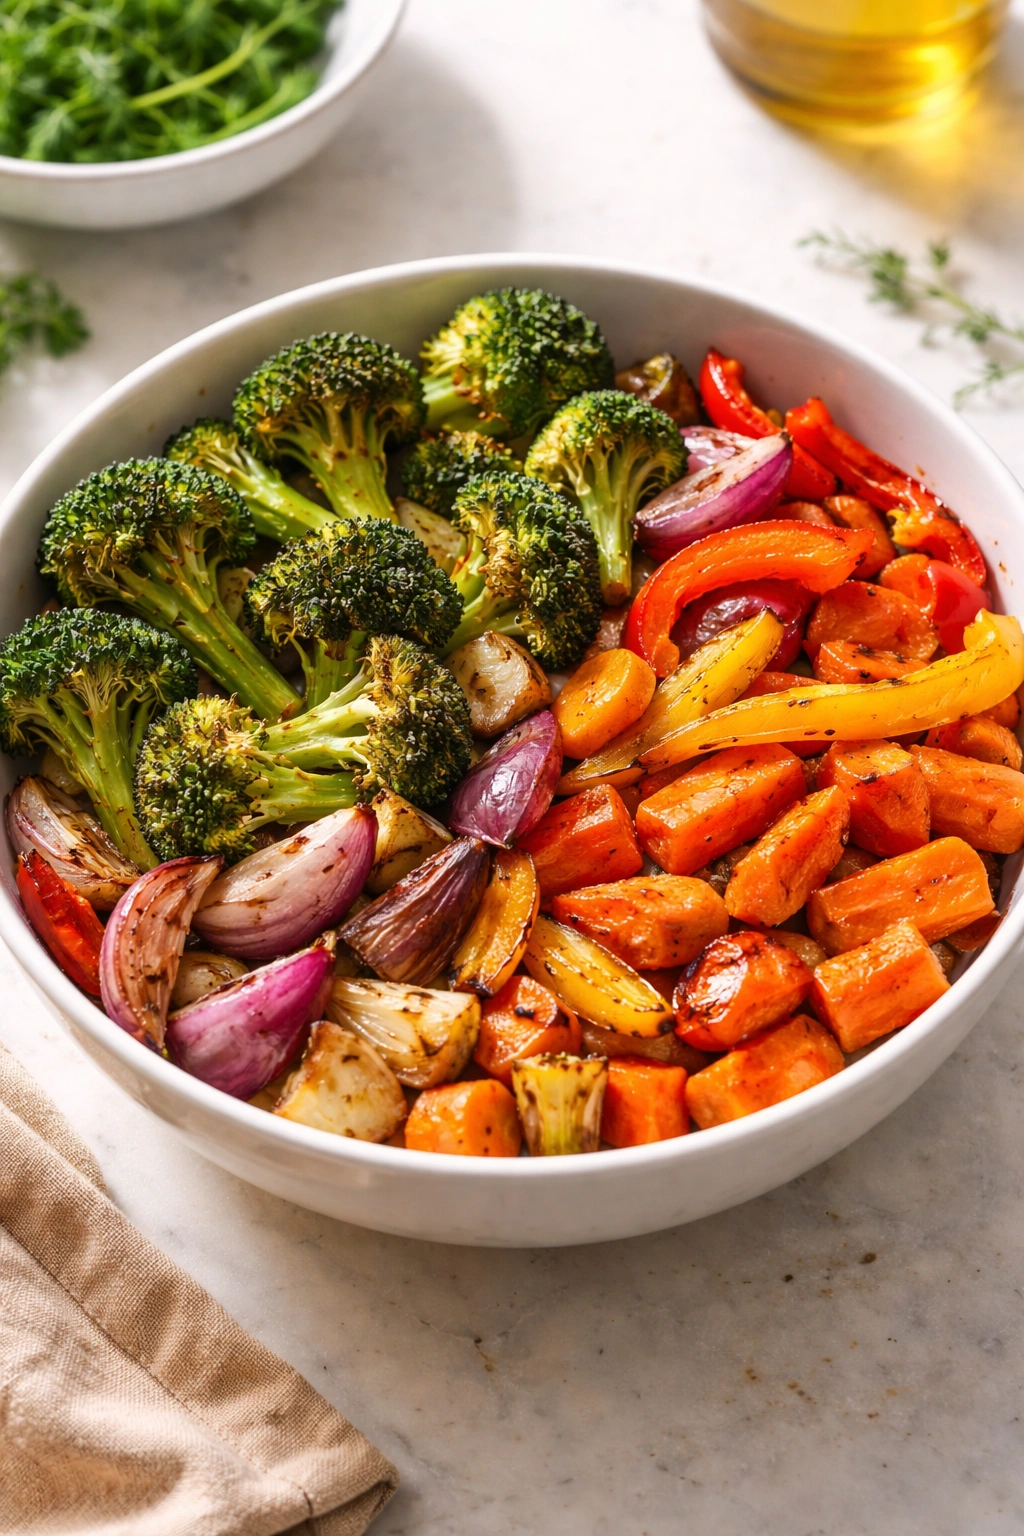
Roasted vegetables — broccoli, cauliflower, Brussels sprouts, bell peppers, zucchini, carrots — are more stable and shelf-stable than raw once they’ve been cooked and cooled. Roast them with a bit of oil, salt, and your choice of seasonings at 425°F until they’re tender and slightly caramelized. Store them separately from your dressing until you’re ready to eat, or store them in the dressing if you don’t mind them getting softer through the week.
Hearty raw vegetables — cucumber, celery, radishes, jicama, carrots, bell peppers, snap peas — keep their texture and crunch for days. These work beautifully in grain bowls where the grain absorbs some dressing and the raw vegetables provide textural contrast.
Leafy greens should be washed and thoroughly dried before storing. Excess water is the enemy of salad-based bowls. Pat them completely dry after washing, then store in a separate container or layer them strategically so they don’t sit in liquid from other components.
Vegetables to Use Strategically
Watery vegetables like tomatoes, fresh mushrooms, and cucumbers release liquid over time. They’ll be fine at the bottom of a grain bowl where the moisture gets absorbed by the grain, but they’ll make a salad-based bowl soggy. If you want to use these, add them on the day you eat the bowl or store them separately and add them just before eating.
Avocado is technically a vegetable (botanically a fruit) that doesn’t hold well in meal prep because it oxidizes and browns. Either skip it or prep it fresh on the day you eat the bowl. Some people slice it and store it with a squeeze of lemon juice, which slows oxidation slightly, but it’s never going to be as good as freshly sliced.
Adding Crunch, Flavor, and Healthy Fats
Toppings are where bowls go from functional to genuinely crave-worthy. These are the components that add textural contrast, concentrated flavor, and healthy fats that make everything taste better and help with nutrient absorption.
Nuts and seeds — almonds, cashews, walnuts, pumpkin seeds, sunflower seeds, sesame seeds — add crunch, healthy fats, and micronutrients. Toast them lightly before storing to deepen flavor. Add them on top of your bowl or store separately and sprinkle them on just before eating if you’re concerned about them getting soft from sitting in dressing. About ¼ cup per bowl gives you meaningful nutrition without being excessive on calories.
Cheese adds creaminess, calcium, and umami. Crumbled feta, shredded sharp cheddar, or a sprinkle of parmesan all work well in meal prep bowls. Store it separately from wet components or the packing moisture will soften it. Use about ¼ cup per bowl so the flavor registers without overwhelming everything else.
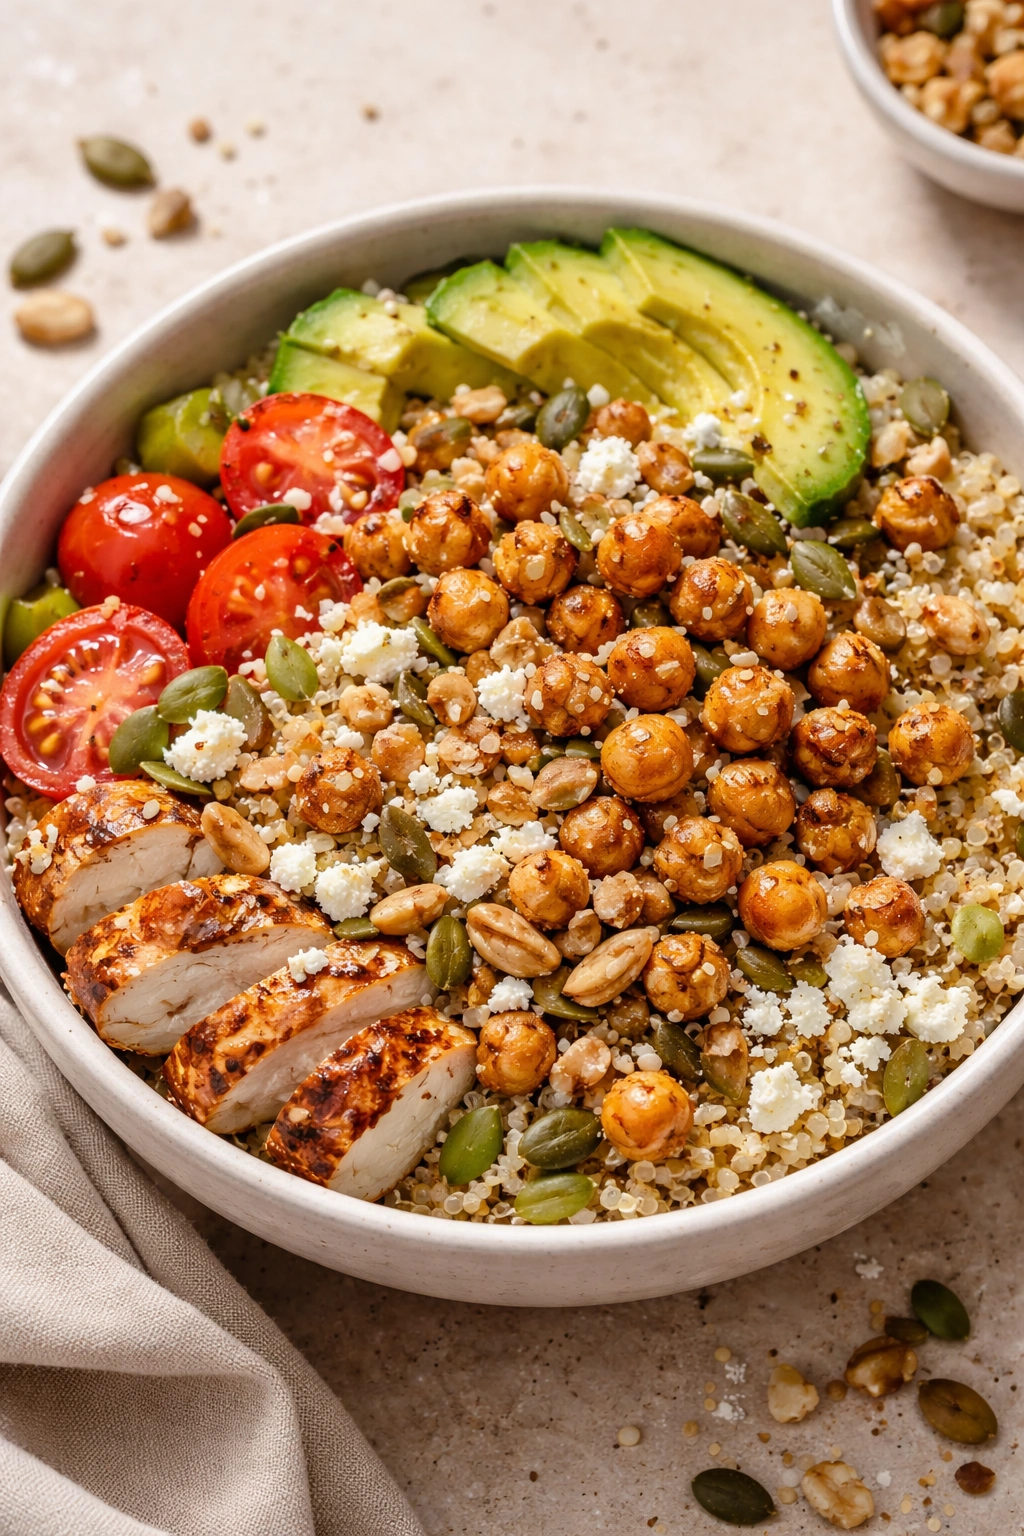
Crispy additions — croutons, tortilla strips, fried onions, crispy chickpeas, toasted breadcrumbs — provide the contrast that makes each bite interesting. Make your own crispy chickpeas by tossing canned chickpeas with oil and seasonings, then roasting at 425°F for 20-25 minutes until golden. These actually stay crispy through the week if stored in an airtight container separate from your bowl.
Fresh herbs — cilantro, parsley, basil, dill — brighten everything and taste like care was taken. Chop them fresh or store them standing upright in a jar with a bit of water, like flowers. Add them right before eating so they don’t wilt.
Creating Flavor Combinations That Don’t Get Boring
Eating the same bowl every day isn’t just boring — it’s a fast track to abandoning meal prep entirely. The good news is you can build multiple flavor profiles throughout the week using mostly the same prepped ingredients.
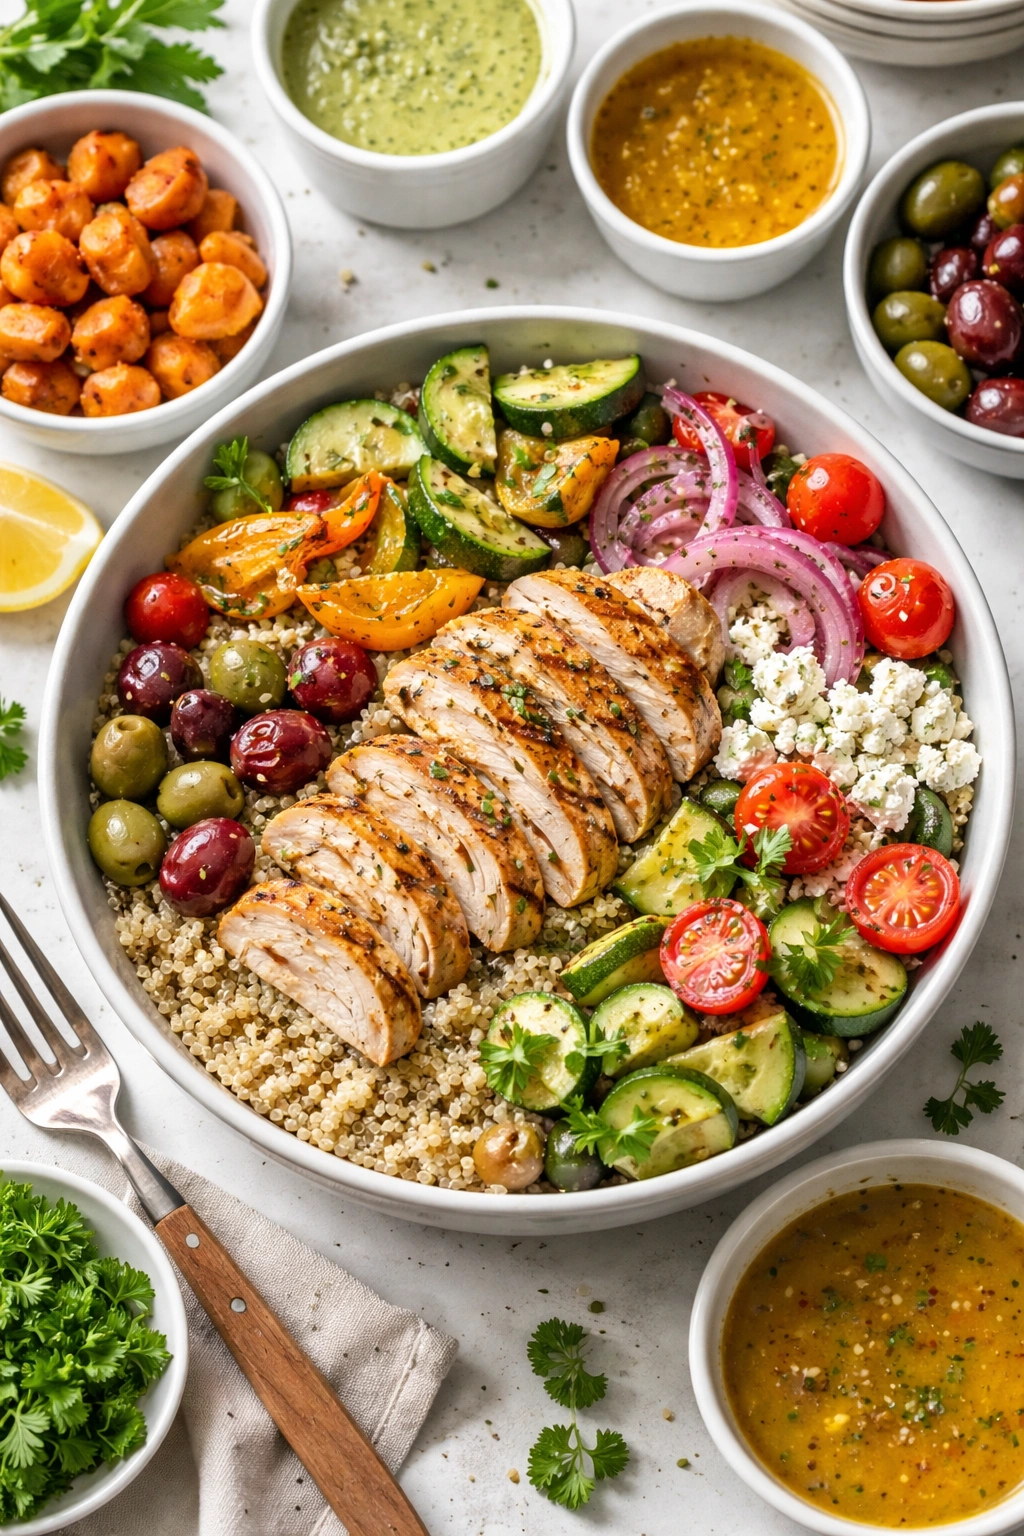
Mediterranean approach: grilled chicken, quinoa or farro, roasted zucchini and bell peppers, cherry tomatoes, olives, feta, red onion, fresh parsley. Dress with lemon vinaigrette.
Asian-inspired: ground turkey or salmon, jasmine rice, shredded carrots, snap peas, edamame, shredded red cabbage, green onions, sesame seeds. Dress with ginger-soy dressing.
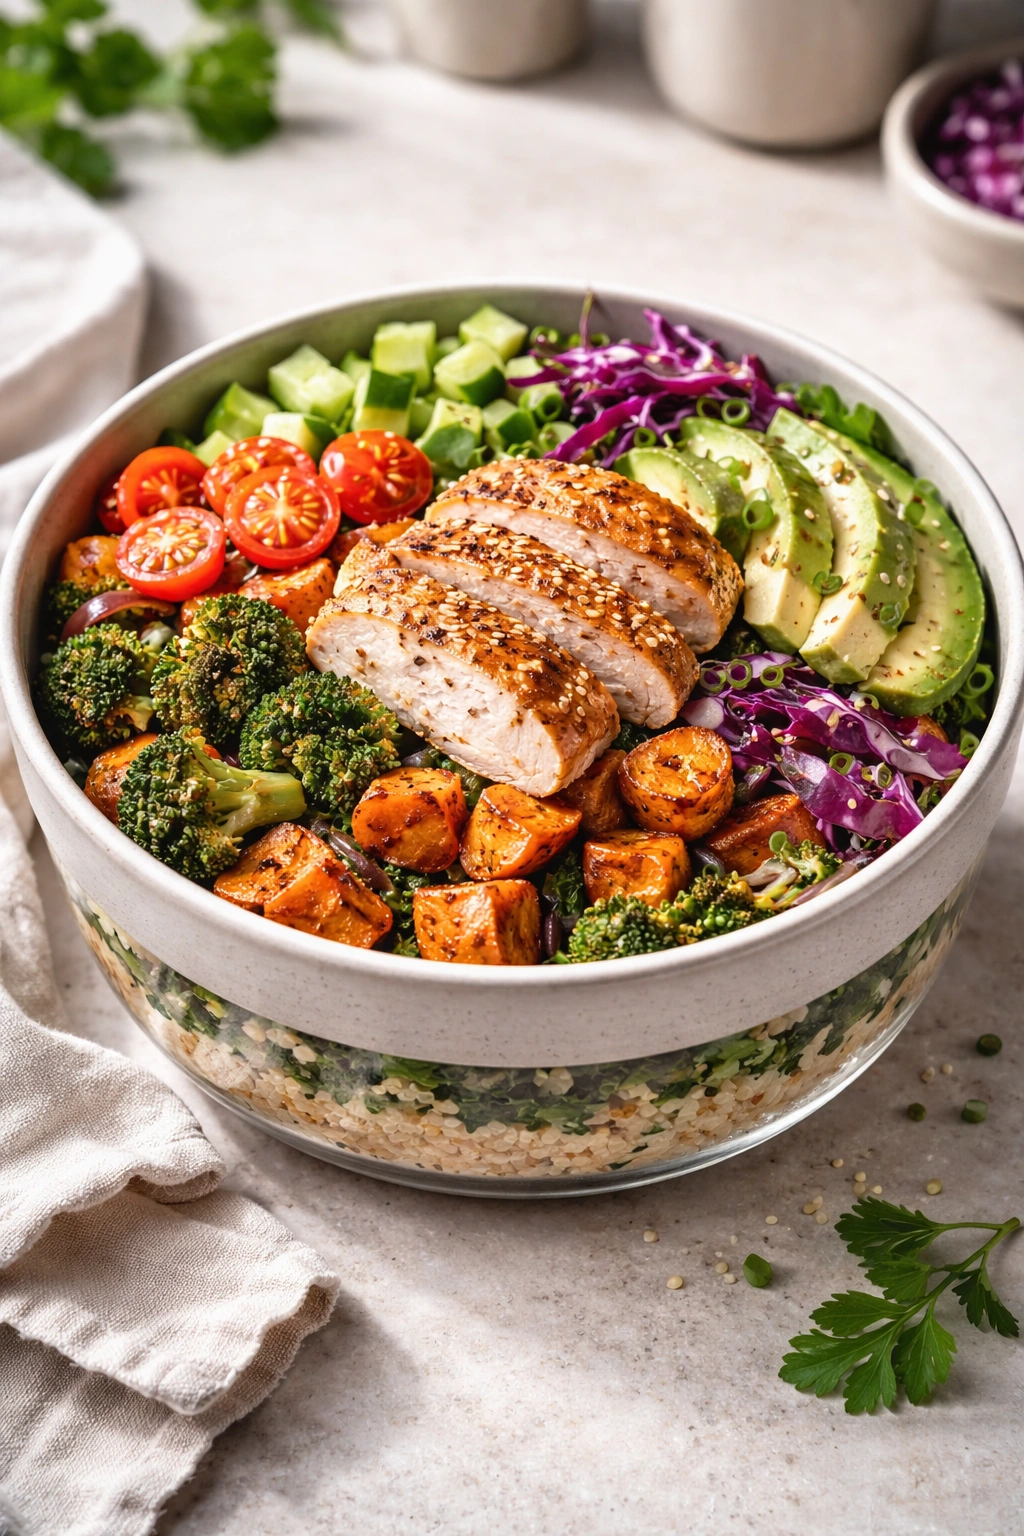
Tex-Mex version: seasoned ground beef or black beans, cilantro lime rice, roasted sweet potato, black beans, corn, bell peppers, red onion, cotija cheese, cilantro. Dress with lime-cumin vinaigrette or a light Greek yogurt crema.
Warm bowl approach: roasted chicken, wild rice blend, roasted broccoli and mushrooms, caramelized onions, toasted almonds, dried cranberries, fresh thyme. Dress lightly with balsamic vinaigrette.
The key to rotating flavors is having 3-4 different dressings and 2-3 different vegetable preparations ready for the same base proteins and grains. You’re not cooking five completely different meals — you’re strategically changing the flavor profile while working with what’s already prepped.
How to Layer Your Bowl for Maximum Freshness
Layering order matters. It’s not just about organization — it directly affects which components stay fresh and which get soggy.
Layer 1: The barrier. If you’re using a grain base, this goes on the bottom. If you’re using salad, put your sturdiest greens here. The grain or hearty greens act as a sponge and barrier, soaking up excess moisture from the dressing so it doesn’t make delicate components mushy. A quarter-inch layer is plenty.
Layer 2: Roasted vegetables. These go next, nestled on top of your grain or greens. They’re stable enough that they won’t wilt, and they taste fine whether they absorb a bit of liquid or not. This layer can be pretty thick — use as much as you want. Basically half your container.
Layer 3: Protein. Place your protein in the center or distributed across the top. This positioning makes it easy to locate and pull out if you’re not eating the whole bowl at once. It’s also less likely to dry out if it’s not in direct contact with liquid or a hot surface.
Layer 4: Raw vegetables and fresh components. These go near the top where they’re less likely to sit in liquid. Save extremely delicate components like fresh herbs and avocado for addition right before eating.
Layer 5: Toppings. Nuts, seeds, cheese, and crispy things go on top, either just before you pack the container or stored separately. If you add them before storing, eat the bowl soon — they’ll start losing crunch as soon as they touch anything moist.
Dressing: Keep separate or mix strategically. If you’re uncertain about whether your bowl will hold up, keep dressing in a separate small container. This is the safest approach, especially for salad-based bowls. For grain bowls, you can mix dressing in the day before or in the morning, and it actually helps flavors develop. Just avoid saturating it — aim for 2-3 tablespoons of dressing per bowl, not a pool.
Making Warm vs Cold Bowls Work for Your Schedule
Your temperature choice should match your actual lifestyle and lunch situation, not some idealized version of your day.
Cold bowls straight from the fridge are grab-and-go simplicity. You need zero kitchen resources — no microwave, no stovetop, no time. They work perfectly if you genuinely prefer cool food at lunch. The vegetables stay crisp, and everything is ready in seconds. The limitation is that cold grains can feel a bit stiff — not bad, just different from warm. Let your bowl sit on the counter for 10 minutes before eating if you find room-temperature more appealing than cold.
Reheated bowls give you warm, satisfying food with about 90 seconds of microwave time. If you have microwave access at lunch, this is genuinely worth doing. The grain warms up, flavors bloom a bit more, and the whole experience feels more like a proper meal. Stir your bowl halfway through reheating so everything warms evenly. Let it sit for a minute after heating — it’ll be very hot. Dressings reheat fine with grains; dressing a salad before reheating makes the greens wilt, so add those fresh or use a room-temperature base with warm protein.
Strategic separation for flexibility. Cook your protein and grain together for efficiency, but store them in separate compartments if your container has them. This lets you eat it cold, warm just the grain, or warm everything depending on your mood and situation that day. It adds maybe 15 seconds of prep work but makes your meal significantly more adaptable.
Dressings That Stay Creamy Without Soggy Veggies
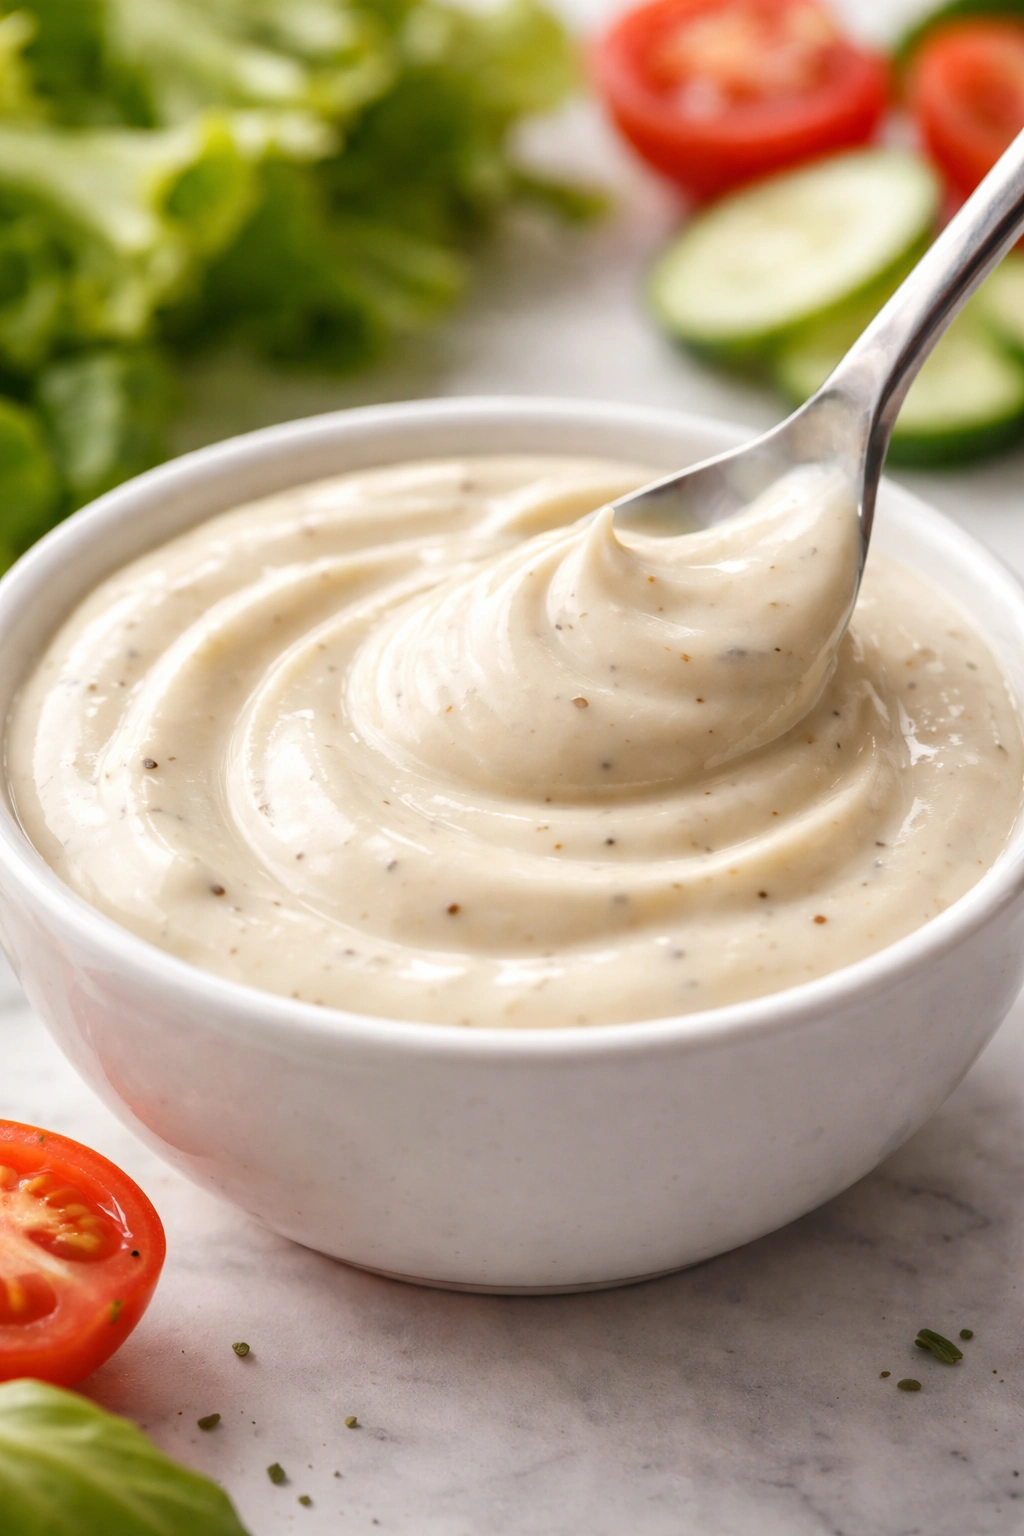
Dressing is where most meal prep bowls fail. Too much dressing = soggy mess. No dressing = dry, boring food. Too much vinegar = everything tastes one-note by day 4. The solution is building dressings strategically.
Oil-based vinaigrettes — your standard ratio of 3 parts oil to 1 part acid (vinegar or lemon juice) — are stable and won’t separate significantly over the week. They can sit on grain all week without problems. For salad-based bowls, keep vinaigrette separate and dress just before eating, or use only 1-2 tablespoons per bowl mixed into greens and everything else added on top.
Creamy dressings — Greek yogurt-based, tahini-based, or avocado-based — stay fresher longer if you keep the acid component (lemon juice, vinegar, hot sauce) minimal in the dressing itself and add brightness through the other bowl components. A tahini dressing with just a touch of lemon keeps its smooth texture through the week.
Asian-style dressings with ginger, soy sauce, sesame oil, and rice vinegar actually deepen and improve if you make them a day or two ahead. The flavors have time to meld. Make slightly less acidic than you think you want — you can always add more hot sauce or vinegar on eating day, but you can’t remove excess acid.
Storage tip: Keep dressing in a tight-sealed container separate from your bowl unless you’re certain the combination works. This takes maybe 10 extra seconds during meal prep but prevents the entire week of bowls from getting waterlogged. Shake the dressing well before using — oil separates from other ingredients over time.
Balancing Macros in Your Meal Prep Bowls
A truly satisfying high-protein lunch bowl has intentional balance across all three macronutrients. Protein without enough carbs or fat leaves you hungry. Carbs without protein means a blood sugar spike and crash. This is why the modular approach works so well — you’re building in balance from the start.
Protein portion: 25-35 grams per bowl. This is roughly the amount in 4 ounces of cooked chicken, 5 ounces of fish, one cup of Greek yogurt, or two eggs plus some legumes. This range keeps you full, supports muscle, and fits easily into a standard meal prep container.
Carbohydrates: ½ to ¾ cup cooked grain. This might sound small, but it’s plenty when you’re also getting carbs from vegetables. A half-cup of cooked rice plus roasted vegetables and some whole grain bread elsewhere in your day gives you solid carbohydrate intake without going overboard. Measured by cooked volume, this is roughly a closed fist of grain.
Healthy fats: From multiple sources. You’re getting fat from your protein (if you’re not using the leanest cuts), your cooking oil, nuts and seeds in toppings, cheese, and your dressing. Aim for about 10-15 grams total, which happens naturally when you add a quarter-cup of nuts, a tablespoon or two of oil-based dressing, and a modest amount of cheese.
Vegetables: As much as you want. Volume is basically unlimited. Fill your bowl with colorful vegetables and you’re adding negligible calories while getting fiber, micronutrients, and satisfaction. The contrast between hearty proteins and grains with tons of vegetables is literally the whole appeal of bowl eating.
Quick Macro Check
A sample bowl might look like this: one cup of cooked rice (200 calories, 4g protein, 44g carbs, 1g fat), four ounces of chicken breast (185 calories, 35g protein, 0g carbs, 4g fat), two cups roasted vegetables (80 calories, 3g protein, 16g carbs, 2g fat), ¼ cup almonds (200 calories, 7g protein, 7g carbs, 18g fat), 2 tablespoons vinaigrette (180 calories, 0g protein, 0g carbs, 20g fat). Total: approximately 845 calories, 49g protein, 67g carbs, 45g fat. That’s genuinely balanced and genuinely filling.
Storage, Shelf Life, and Reheating Like a Pro
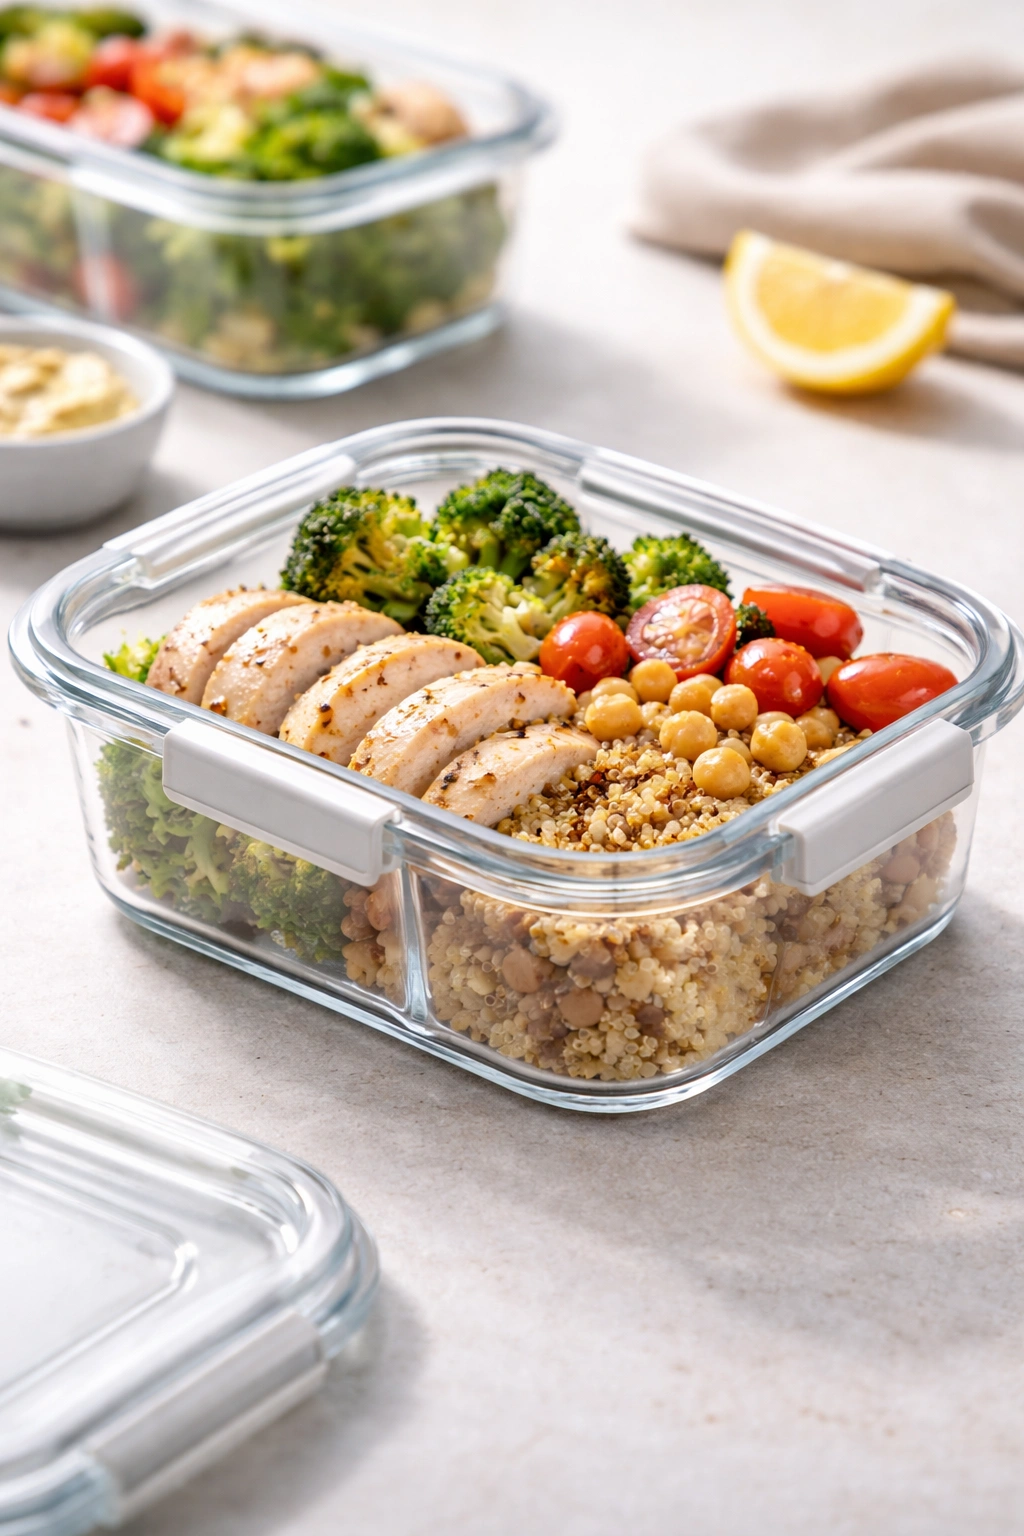
Proper storage is what makes meal prep actually work. Bad storage means food goes bad faster, quality deteriorates, and you end up throwing away money and effort.
Container choice matters. Glass containers with secure lids are ideal because they don’t retain odors or stain like plastic, and they’re microwave-safe. They’re more expensive upfront but last years. If you’re using plastic, at least use BPA-free containers, and don’t microwave proteins in plastic — transfer to a glass bowl or plate first. Containers should be sized so your bowl is relatively full, not swimming in air. Air exposure speeds spoilage and can make things dry out.
Shelf life reality: Properly stored high-protein bowls last 4-5 days in the fridge. By day 6, you’re pushing it. This is why meal prepping twice a week (Sunday and Wednesday, for example) beats trying to make 10 bowls last the entire week. Cooked proteins stay safe longer than this, but quality and taste decline noticeably after day 5.
Temperature control is critical. Your fridge needs to be at 40°F or below. Use a simple thermometer to verify — many home fridges run slightly warmer than ideal, which shortens shelf life. Store your bowls on a shelf, not the door, where temperature fluctuates more.
Reheating approach: Transfer to a microwave-safe plate or bowl. Stir well so heat distributes evenly. Microwave in 60-second intervals, stirring between, until the grain is warm throughout and protein is heated through. Usually 90 seconds total, but it depends on how cold it was and your microwave’s power. Let it sit for a minute — it’ll continue heating and be way too hot to eat immediately.
Do not refrigerate hot bowls. Cool them completely on the counter first, ideally within an hour of cooking. Hot food sitting in the fridge can actually raise the internal temperature of your fridge, affecting food safety of everything else in there. Let food cool, then store.
Common Mistakes That Derail Meal Prep Success

Most people’s meal prep attempts fail not because the idea is bad, but because of small execution mistakes that compound through the week.
Underseasoning proteins. This is the number one reason people find meal prep bowls boring by day 3. Your proteins need actual seasoning — not just salt and pepper, but layers of flavor. Marinate your chicken. Season ground meat while cooking, not after. Let everything cool in its cooking liquid so flavors set. Bland protein makes everything else taste worse.
Not keeping dressing separate. You probably need to do this more often than you think. Even if you did it perfectly, even a “dry” dressing will eventually make greens limp and grain soggy just from sitting. Separate containers are genuinely the safest bet, especially for your first few attempts.
Overcrowding containers. Pack it too full and the lid doesn’t seal properly, air gets in, and everything dries out faster. Packing things in too tightly can also crush delicate vegetables. Fill your container about three-quarters full, leave a little breathing room.
Cooking everything at the same temperature. If you’re roasting chicken, potatoes, and vegetables together at the same temperature the whole time, something’s going to be overcooked and something’s going to be underdone. Cook proteins and denser vegetables together, add tender vegetables for the last 5-10 minutes, and keep greens completely separate.
Ignoring container shape. A tall, narrow container concentrates layers and makes things get mushy faster because vegetables all sit in the same juice. Wider, shallower containers distribute components and let things breathe better. The specific container shape shouldn’t be an afterthought.
Prepping too much at once. If you’re cooking 10 servings of everything because you think you need meals for 10 days, you’re fighting against food safety and quality by day 5. Cook for 4-5 meals, eat them, then do a second prep session. This isn’t less efficient — it’s smarter because you’re actually going to enjoy the food.
Customizing Bowls for Specific Dietary Needs
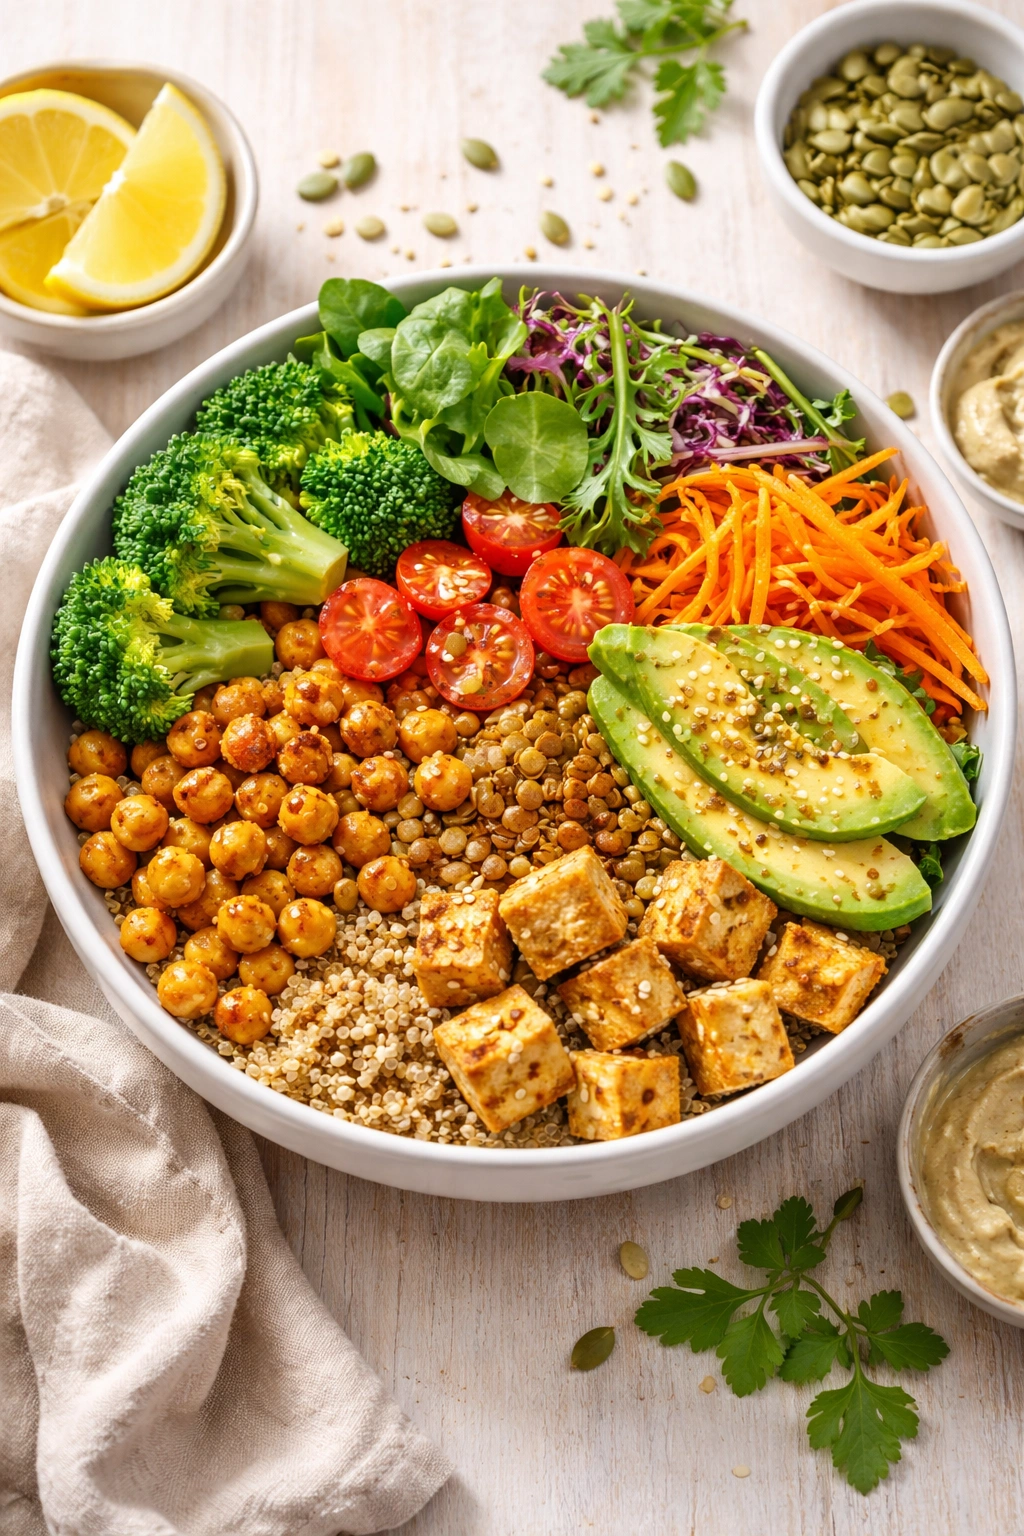
The modular nature of bowls makes them genuinely adaptable to different eating styles and preferences, which is a huge part of why they work so well for group meal prep scenarios.
Vegetarian and vegan options: Swap animal proteins for legumes, tofu, tempeh, or seitan. A half-cup of cooked lentils plus a quarter-cup of nuts gives you solid protein. Greek yogurt works for vegetarian but not vegan. Chickpeas roasted until crispy are actually crave-worthy enough that vegetarians and meat-eaters fight over them.
Gluten-free approach: Use quinoa, rice, millet, or polenta as your base instead of farro or wheat berries. Check that your dressing ingredients don’t contain hidden gluten (especially in soy sauce — use tamari instead). Otherwise, bowls are naturally pretty gluten-free friendly since most components are whole foods.
Lower-carb or keto versions: Use cauliflower rice or salad greens as your base. Increase your protein and fat portions. Add nuts, seeds, avocado, and cheese more generously. Skip the grain entirely or reduce it to a small garnish. These actually stay fresher longer because you’re using less liquid-absorbing carbohydrate.
High-fiber focus: Include a variety of vegetables, choose whole grains over refined, and add legumes and seeds. Fiber needs adequate water intake, so encourage whoever you’re prepping for to drink water with meals. Up the vegetable quantity and choose colorful varieties for maximum fiber and micronutrient diversity.
Final Thoughts
High-protein lunch bowls work because they meet you where you are — busy, hungry, and trying to eat well without spending your entire life cooking. They work because they’re flexible, genuinely delicious when you put thought into them, and they build consistency instead of requiring willpower.
The real skill in meal prep bowls isn’t complex cooking technique or exotic ingredients. It’s understanding that layering matters, that protein needs seasoning, that dressing should usually stay separate, and that the same prepped ingredients can taste completely different depending on what flavors you pair them with. Those four insights alone transform bowls from boring obligation into something you actually look forward to eating.
Start with one flavor combination that genuinely appeals to you. Cook it well, store it carefully, and eat it through the week. Once you nail that one, add a second variation for the next prep session. You don’t need ten different bowl ideas to start — you need one that works so well you actually finish it and feel like doing it again next week. That consistency compounds fast.