There’s something profoundly intimate about making pasta from scratch for two people. No industrial mixers, no feeding a crowd, no pretense—just flour, eggs, and the time to get to know your dough. What might seem like an indulgent extra effort actually becomes the simplest, most rewarding way to cook together. The beauty of a small-batch pasta is that it’s less daunting than you’d expect, more manageable in every way, and delivers fresher, more delicate noodles than any dried box ever could. You’ll have silky pasta with a tender bite in roughly an hour from start to finish—and most of that is just resting time while you sip wine or prep sauce. Making homemade pasta for two isn’t about impressing anyone; it’s about treating yourself and someone you care about to something genuinely better, made by your own hands.
The truth that changes everything is this: smaller batches are easier. A full pound of pasta dough requires serious kneading strength and rolling patience. A half-pound batch designed for two? It’s forgiving, quick to knead, and rolls out smoothly without wearing you out. If you’ve been intimidated by homemade pasta before, this is the place to start. You’re not committing to hours in the kitchen or specialized equipment you don’t own. You’re committing to learning a technique that, once mastered, becomes less a recipe and more a rhythm—something you can make again and again with confidence.
Why Homemade Pasta for Two Is Worth the Effort
Dried pasta has its place, absolutely. But fresh pasta is a different animal entirely. The texture is tender and yielding, almost delicate, with a subtle eggy richness that no dried noodle can replicate. Fresh pasta also cooks in minutes instead of ten, allowing your sauce to do the heavy lifting without any starch-loading. When you’re cooking for just two people, the economics shift in fresh pasta’s favor—you’re not spending more money, you’re actually spending less while getting infinitely better results.
Beyond the taste and texture, there’s the undeniable pleasure of making something together. Pasta-making is a two-person job done beautifully by one, but it shines when shared. One person can roll while the other cuts, or you can trade tasks, teaching each other as you go. There’s no wrong way to spend an hour this pleasantly, and the conversation flows differently when your hands are busy. Many couples and close friends find that cooking side-by-side, without the pressure of feeding a dining room, becomes one of their favorite rituals.
Finally, the reward is immediate and visible. You watch the dough transform from a rough, dry mixture into something smooth and supple under your hands. You see it flatten and thin under the roller, becoming nearly translucent and elegant. You cut it into noodles, and suddenly you have your own pasta—something you made, something that exists nowhere else. That sense of accomplishment matters, especially in cooking.
The Core Science Behind a Perfect Small-Batch Dough
Before you start, it helps to understand what’s actually happening inside your dough. Pasta dough is a balance of hydration and gluten development. The flour provides structure; the eggs provide both moisture and richness. When you knead, you’re organizing gluten strands into a network strong enough to hold together during rolling, but tender enough to feel silky, not tough.
Most traditional pasta ratios use a 1:1 ratio—one egg per hundred grams of flour. For a two-person batch, this often yields dough that’s slightly too dry and crumbly, especially if your eggs run small. The best approach for small batches uses slightly higher hydration: roughly 185 grams of combined egg (3 large eggs plus 1 yolk) to 300 grams of flour. This ratio is more forgiving, producing dough that’s soft and pliable right from the start, without the dry, stubborn texture that makes hand-kneading frustrating.
The flour matters too, though not as dramatically as some sources suggest. Italian Tipo 00 flour—milled so fine it feels like talcum powder—produces the silkiest, most delicate pasta. If you can’t find it, all-purpose flour absolutely works and yields nearly identical results. The real variable is freshness: older flour absorbs water differently, so aged flour may need a few extra drops of water to reach the right consistency.
Temperature also plays a quiet role. Room-temperature dough is easier to knead, rests faster, and rolls more smoothly than cold dough straight from a cold kitchen. If your home is genuinely chilly, let your dough sit near a warm spot (not directly under heat) for the first rest.
Essential Equipment You Actually Need
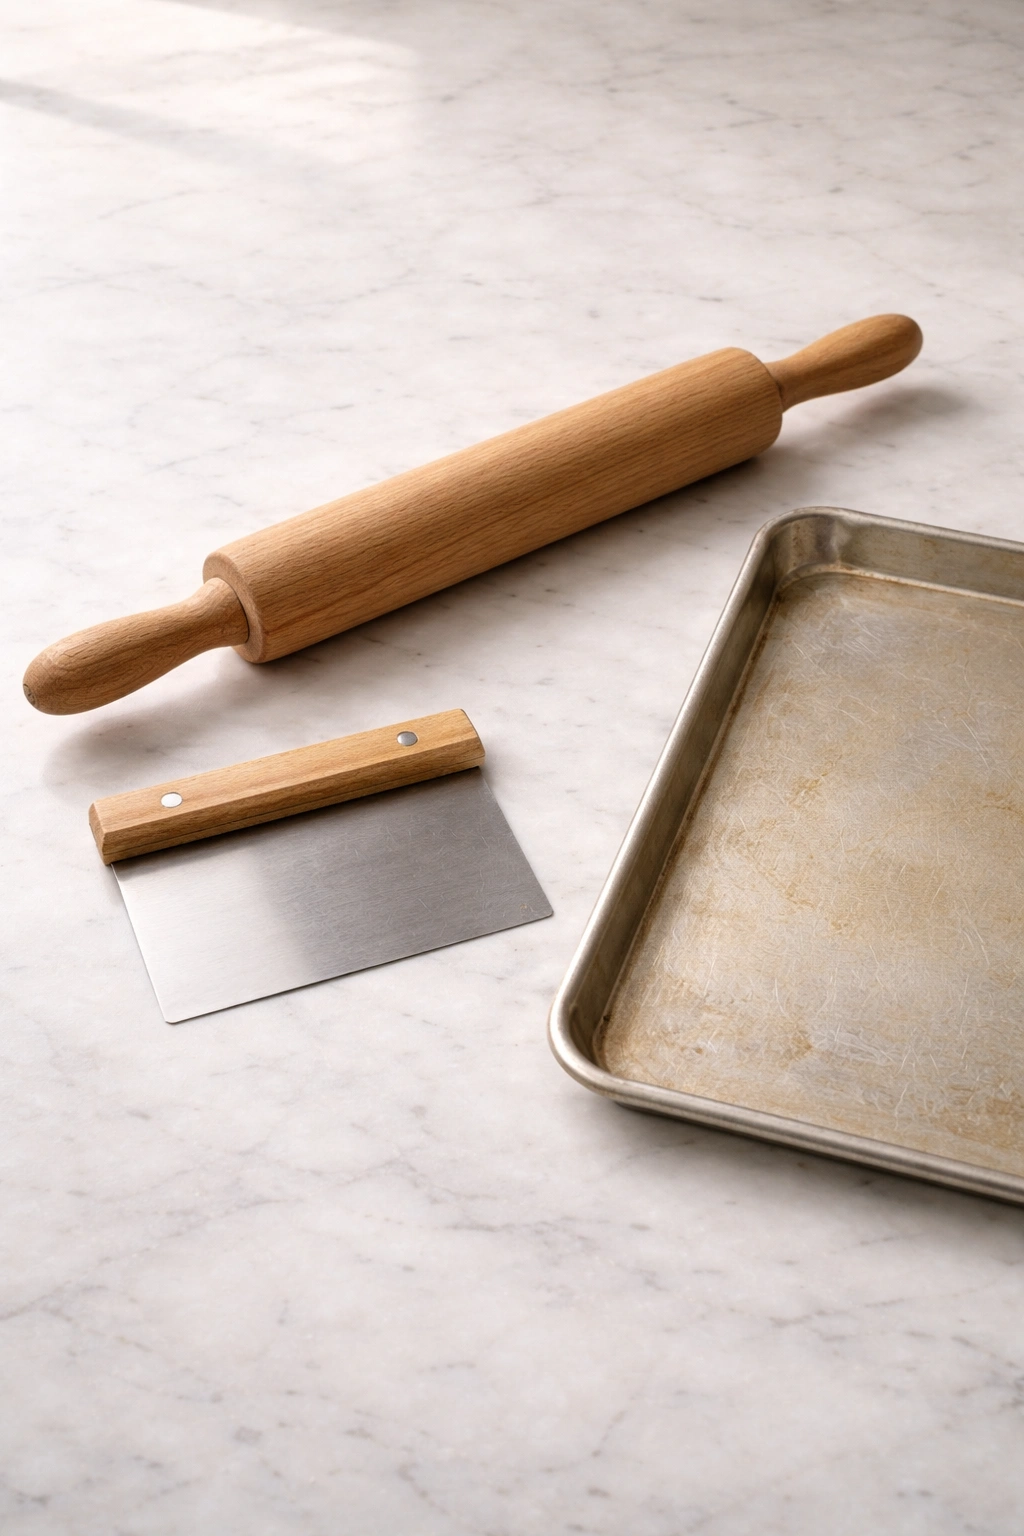
The beautiful truth about small-batch pasta for two is that you probably already own everything required. A pasta machine—whether hand-cranked or electric—is genuinely helpful but completely optional. Thousands of people make excellent fresh pasta with nothing but a rolling pin and elbow grease. Hand-rolling takes slightly longer and requires a bit more pressure, but it works beautifully and many home cooks find it meditative.
If you decide to invest in a pasta machine, a simple hand-cranked model costs under thirty dollars and occupies minimal space. The crank allows you to rest between passes without tiring your wrist or arms. An electric attachment for a KitchenAid stand mixer, if you own one, is sleek and efficient but certainly not necessary. Either way, you’ll need a clean work surface at least two feet long—a kitchen table is ideal. The dough expands considerably when rolled.
Beyond that: a fork for mixing, a bowl (or your work surface if you prefer the traditional well method), a rolling pin if you hand-roll, a pizza cutter or sharp knife for cutting, a bench scraper for manipulating dough, and semolina or rice flour for dusting. That’s the entire arsenal. A sheet pan, some parchment or a clean kitchen towel, and you’re completely equipped.
Getting the Ingredients Absolutely Right
Flour choice deserves real thought, not because it’s complicated but because it genuinely affects your outcome. Italian Tipo 00 flour—brands like Molino Grassi or Caputo—is the gold standard. It’s milled from soft wheat to an almost impossibly fine powder, creating dough with a silky, almost velvety feel. If your local grocers don’t stock it, quality online sources have you covered. The cost difference versus regular all-purpose flour is minimal, especially for a small two-person batch.
If Tipo 00 simply isn’t available, King Arthur Baking Company’s all-purpose flour or bread flour works well. Some pasta purists claim that all-purpose produces slightly chewier pasta, but the difference is subtle enough that you’ll barely notice, especially in a well-sauced dish. What matters far more is consistency and freshness: flour that’s been sitting open for months absorbs moisture differently than fresh flour, so store it in an airtight container if you’re not using it regularly.
Eggs are equally important. Use large eggs—they weigh around 55-58 grams each. Small or extra-large eggs can throw off your hydration balance noticeably. The yolk matters too; it adds richness and helps bind the dough more smoothly. Room-temperature eggs mix more smoothly than cold ones straight from the refrigerator. Pull them out ten minutes before you start mixing if your kitchen is cool.
Some recipes add a teaspoon of olive oil to the dough. Oil makes the dough marginally easier to knead by hand and slightly more extensible (easier to roll thin). It’s entirely optional, but for a two-person batch made by hand, the small addition is worth the minimal effort. Use good olive oil—not extra virgin, which has a flavor that doesn’t belong in pasta, but a decent all-purpose olive oil.
Salt does not go in the dough itself, a point that confuses many home cooks. Instead, you salt the water generously when you cook the pasta. This approach gives you far better control over the final seasoning.
Making the Dough from Scratch: A Detailed Step-by-Step
Measure Your Ingredients Precisely
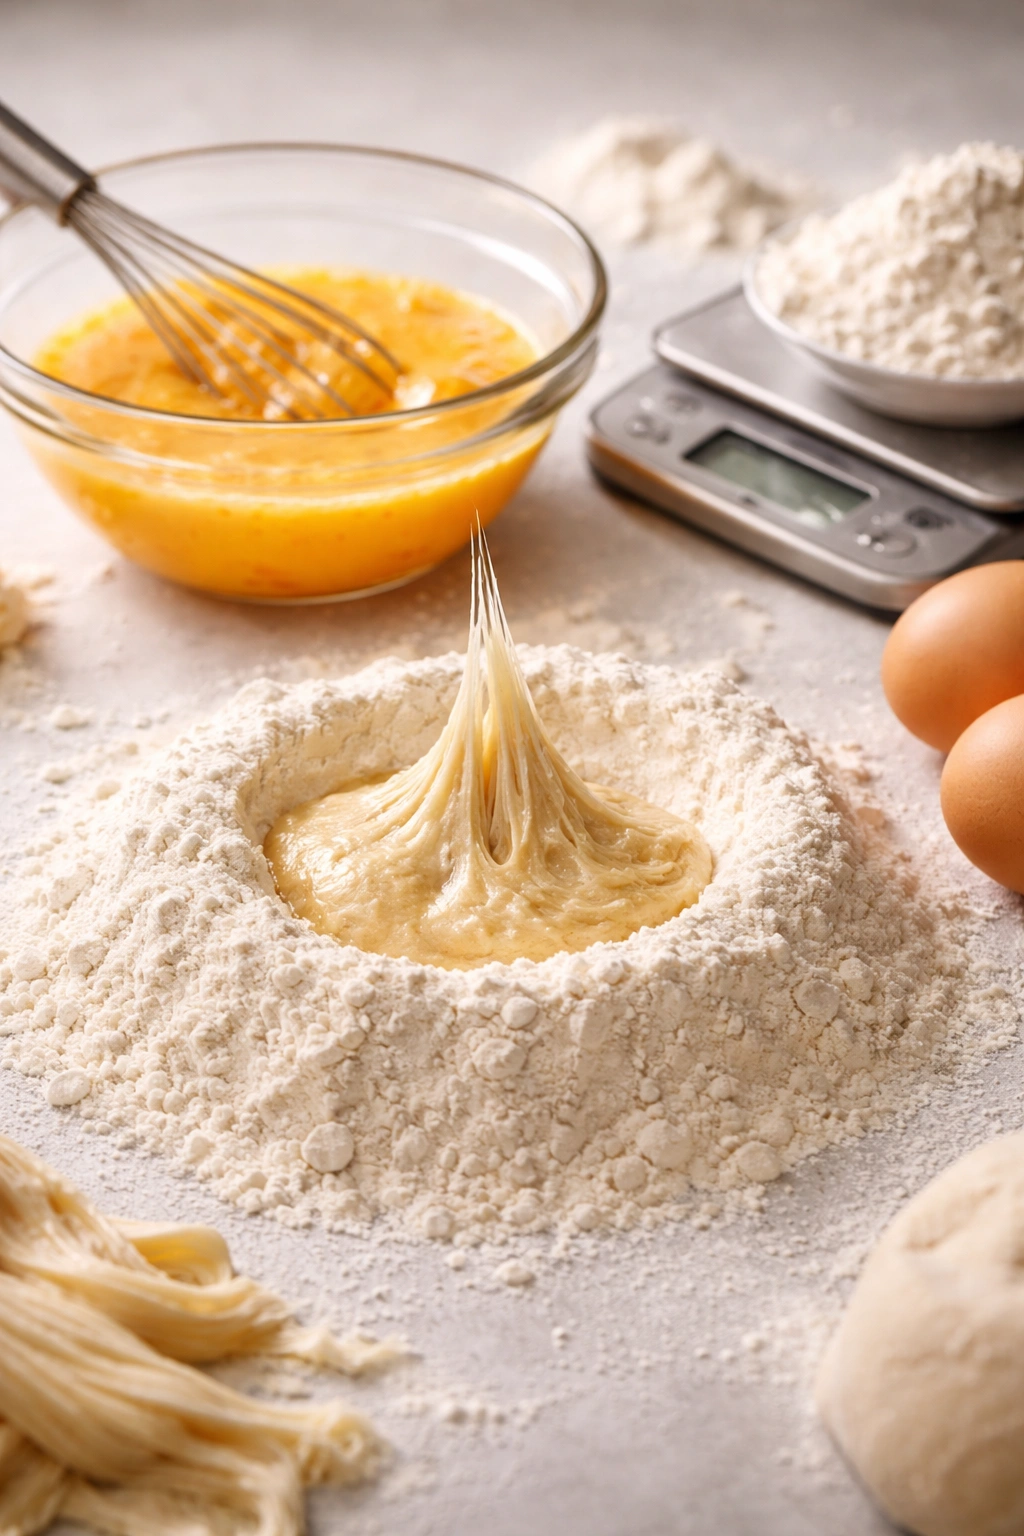
The secret to consistent, never-crumbly pasta dough is weighing your ingredients. Measuring cups pack flour unevenly, which is why recipes using cups often fail. A simple digital scale costs less than a fancy coffee and eliminates the guesswork entirely. Measure 300 grams of flour, crack 3 large eggs into a small bowl and add 1 egg yolk (save the white for another use), and you’re ready.
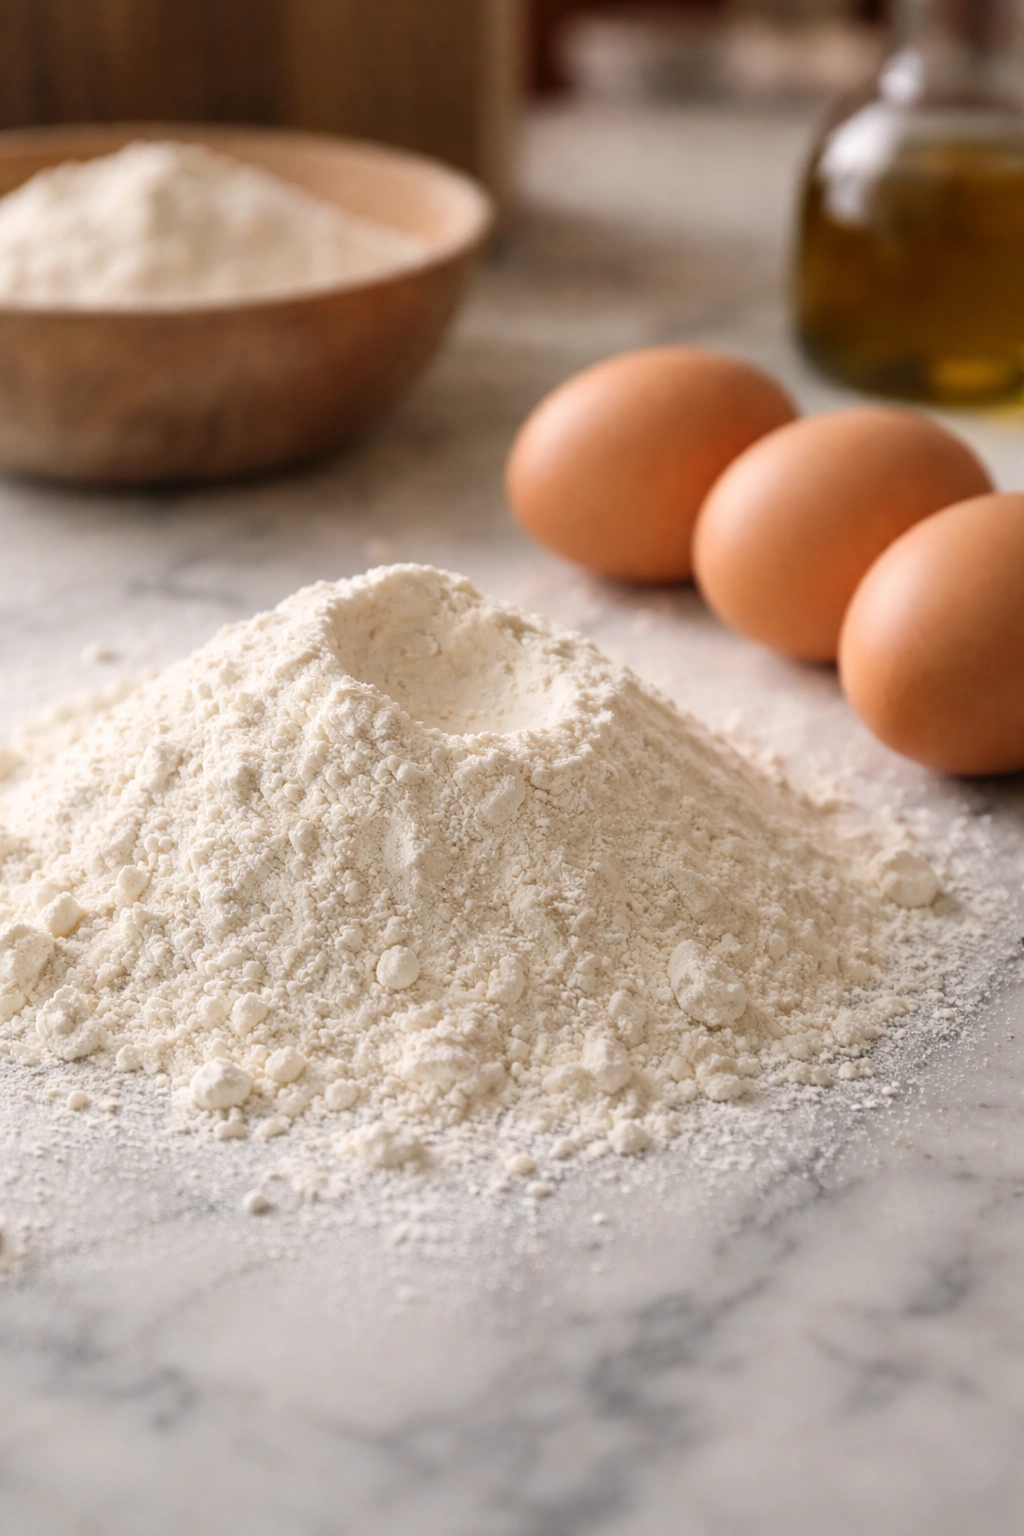
Form Your Well (or Skip to Mixing)
The traditional method—mounding flour on a clean surface and making a well in the center—is romantic and tactile, though it requires more cleanup. Place your flour in a mound, use your fingers to create a shallow well in the very center, crack your eggs into that well, and beat them gently with a fork. The fork gradually incorporates flour from the inner walls of the well, creating a thickening mixture.
Alternatively, do everything in a large bowl: dump the flour in, create your well, add eggs, and mix with a fork. This method contains the flour and makes cleanup trivial. Either approach yields identical results.
Mix Until Shaggy, Then Rest
Keep mixing with the fork or your fingers until the dough comes together into a rough, shaggy mass. It will look dry and possibly crumbly at this stage—that’s normal. If substantial bits of flour remain after a minute of mixing, add water one teaspoon at a time until everything coheres. Cover your rough dough with an upturned bowl or plastic wrap and let it rest at room temperature for 10-15 minutes.
This rest is crucial and often skipped in recipes, but it transforms your kneading experience. The resting time allows the flour to fully hydrate, absorbing moisture from the eggs. When you return to knead, the dough will be significantly softer and more cooperative.
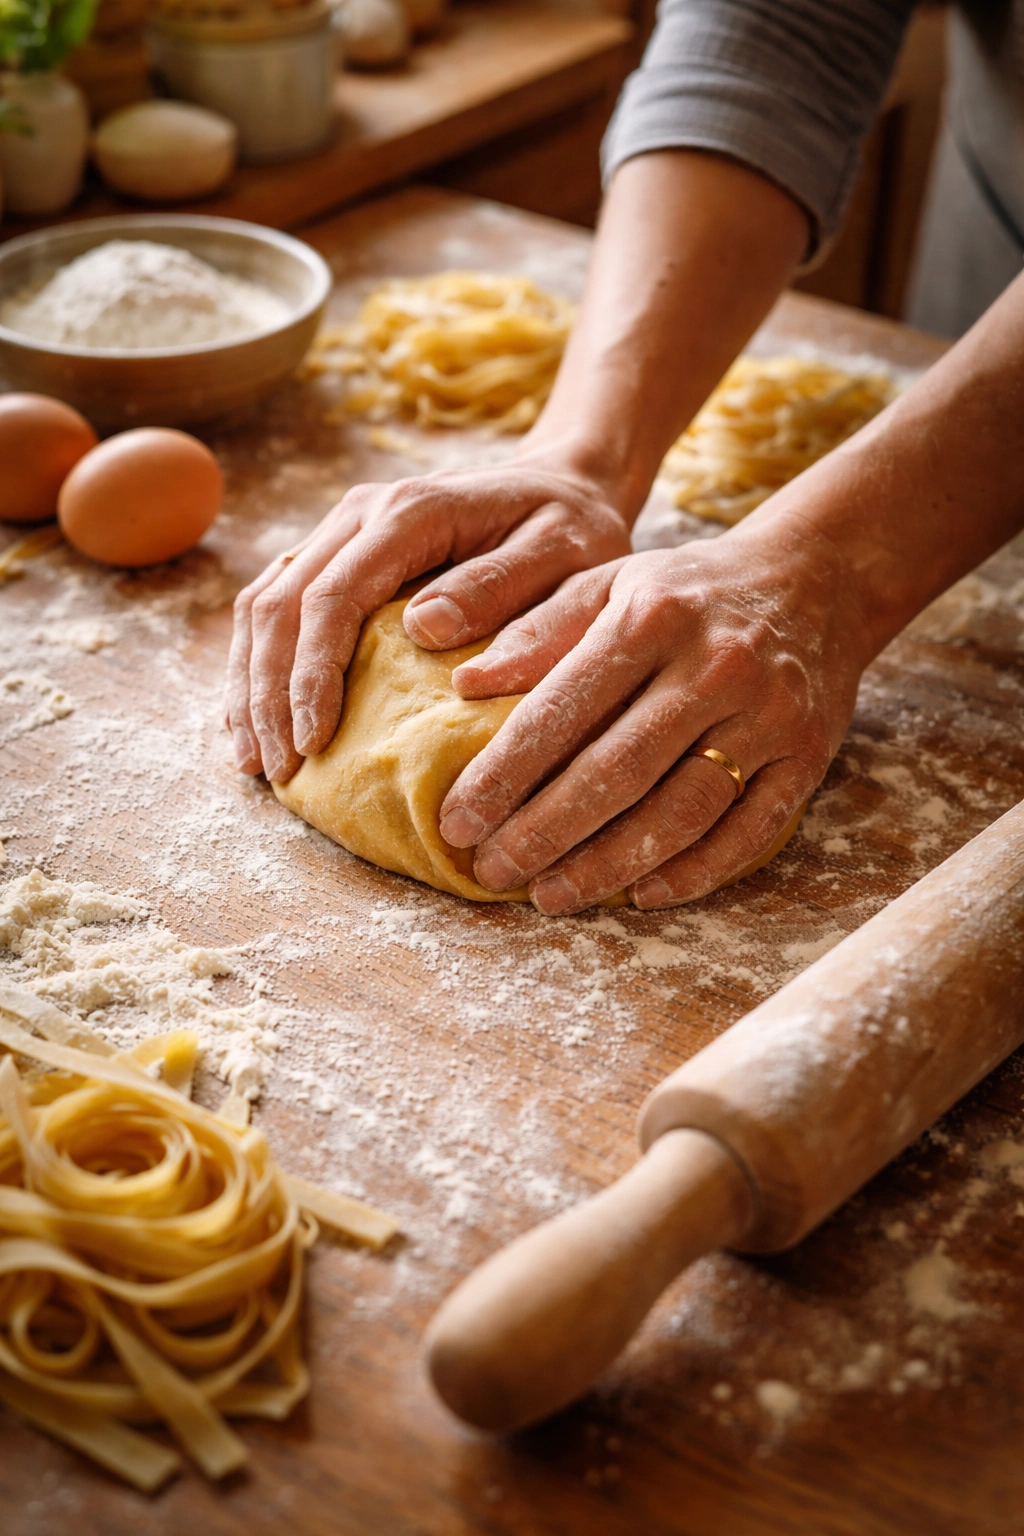
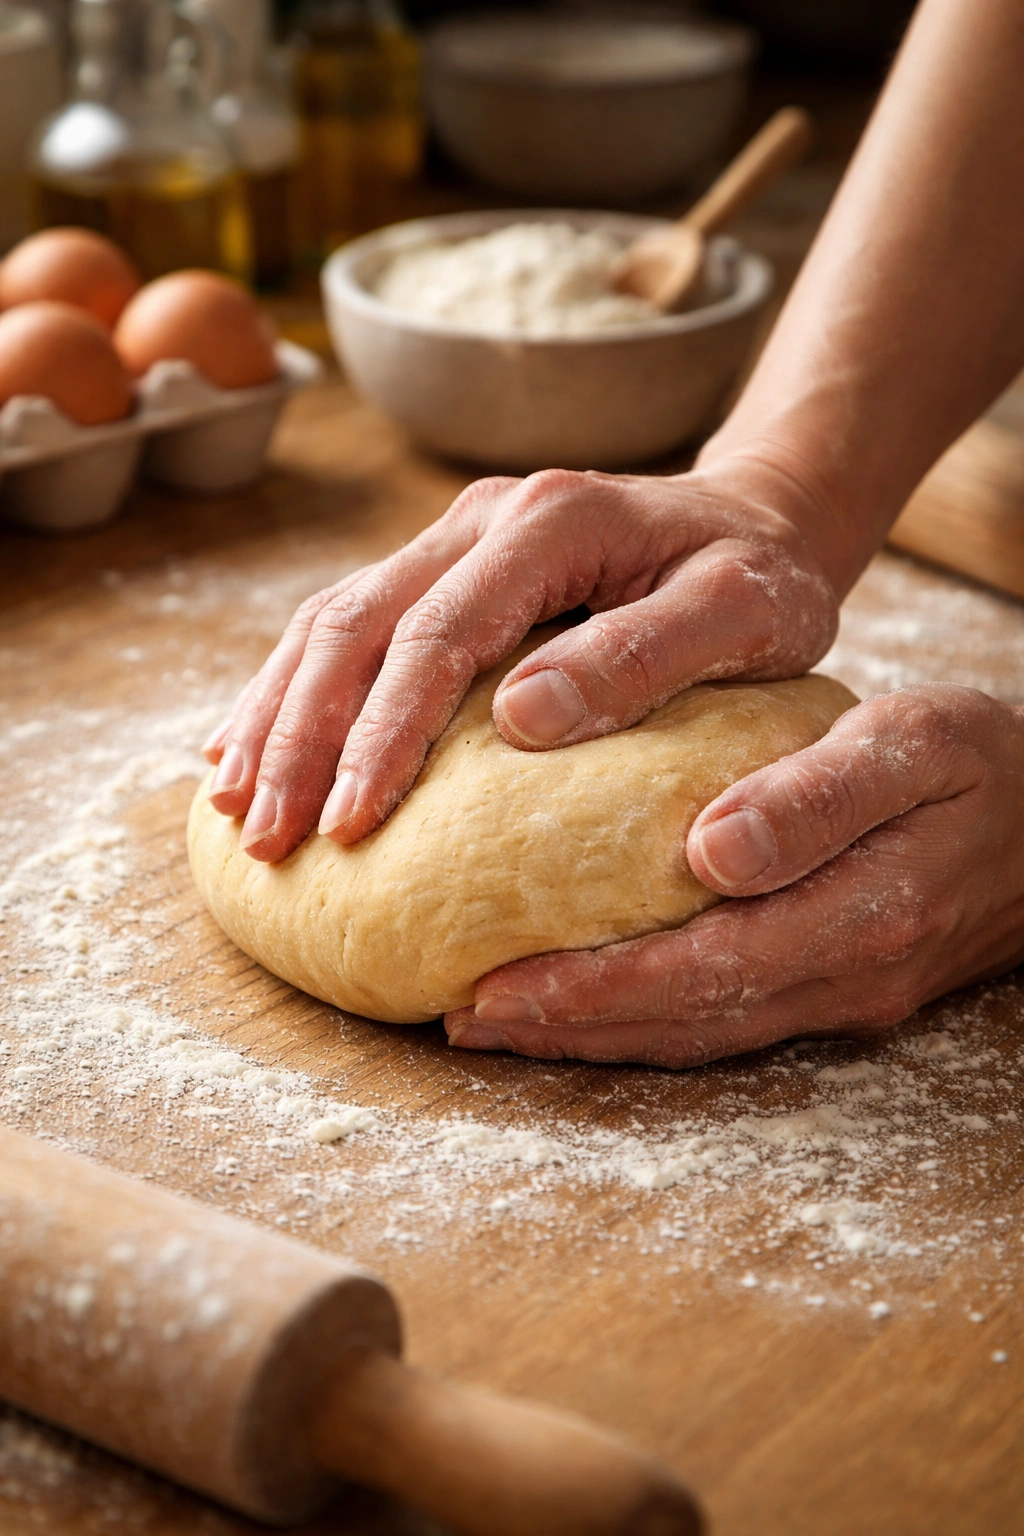
Knead Until Smooth and Supple
After resting, your dough should feel more pliable. Begin kneading by pushing the dough away from you with the heel of your hand, folding it back over itself, and rotating it slightly. You’re essentially rocking the dough, using your body weight rather than pure arm strength. This is gentler and less fatiguing than aggressive kneading.
The dough will feel stiff and slightly resistant at first—this is completely normal. Keep kneading for 5-7 minutes. Around the 2-minute mark, you’ll notice a dramatic shift: the dough softens noticeably, becoming smooth and pliable. You’re looking for a texture that springs back slowly when poked (unlike bread dough, which springs back quickly). The surface should have a subtle sheen, almost silky.
Some home cooks prefer using a stand mixer fitted with the dough hook. Mix on speed 2-3 for about 5 minutes. The mixer handles the work efficiently and frees your hands, though you lose the tactile connection to your dough—which some cooks find valuable for understanding when the dough is truly ready.
Rest the Finished Dough
Once your dough is smooth and soft, shape it into a ball, wrap it tightly with plastic wrap, and let it rest at room temperature for 30 minutes. This rest allows gluten strands to relax and the dough to become even more extensible (easier to roll). Don’t skip this step—dough without adequate rest tears during rolling and requires frustrating re-kneading.
Some recipes recommend refrigerating pasta dough for extended resting (up to 18 hours). This is fine and sometimes convenient, but for a same-day small batch, room-temperature resting for 30 minutes is ideal. The dough will be ready to roll exactly when you are.
Rolling Your Dough into Thin, Elegant Sheets
Preparing Your Workspace
Before removing your rested dough, set up your rolling station. Dust your work surface generously with semolina flour (or rice flour, if you prefer—both absorb less moisture than regular flour and prevent sticking). Have a sheet pan or large plate dusted with semolina ready to receive your finished sheets. Semolina is non-negotiable here; without it, sheets will stick and adhere to themselves permanently.
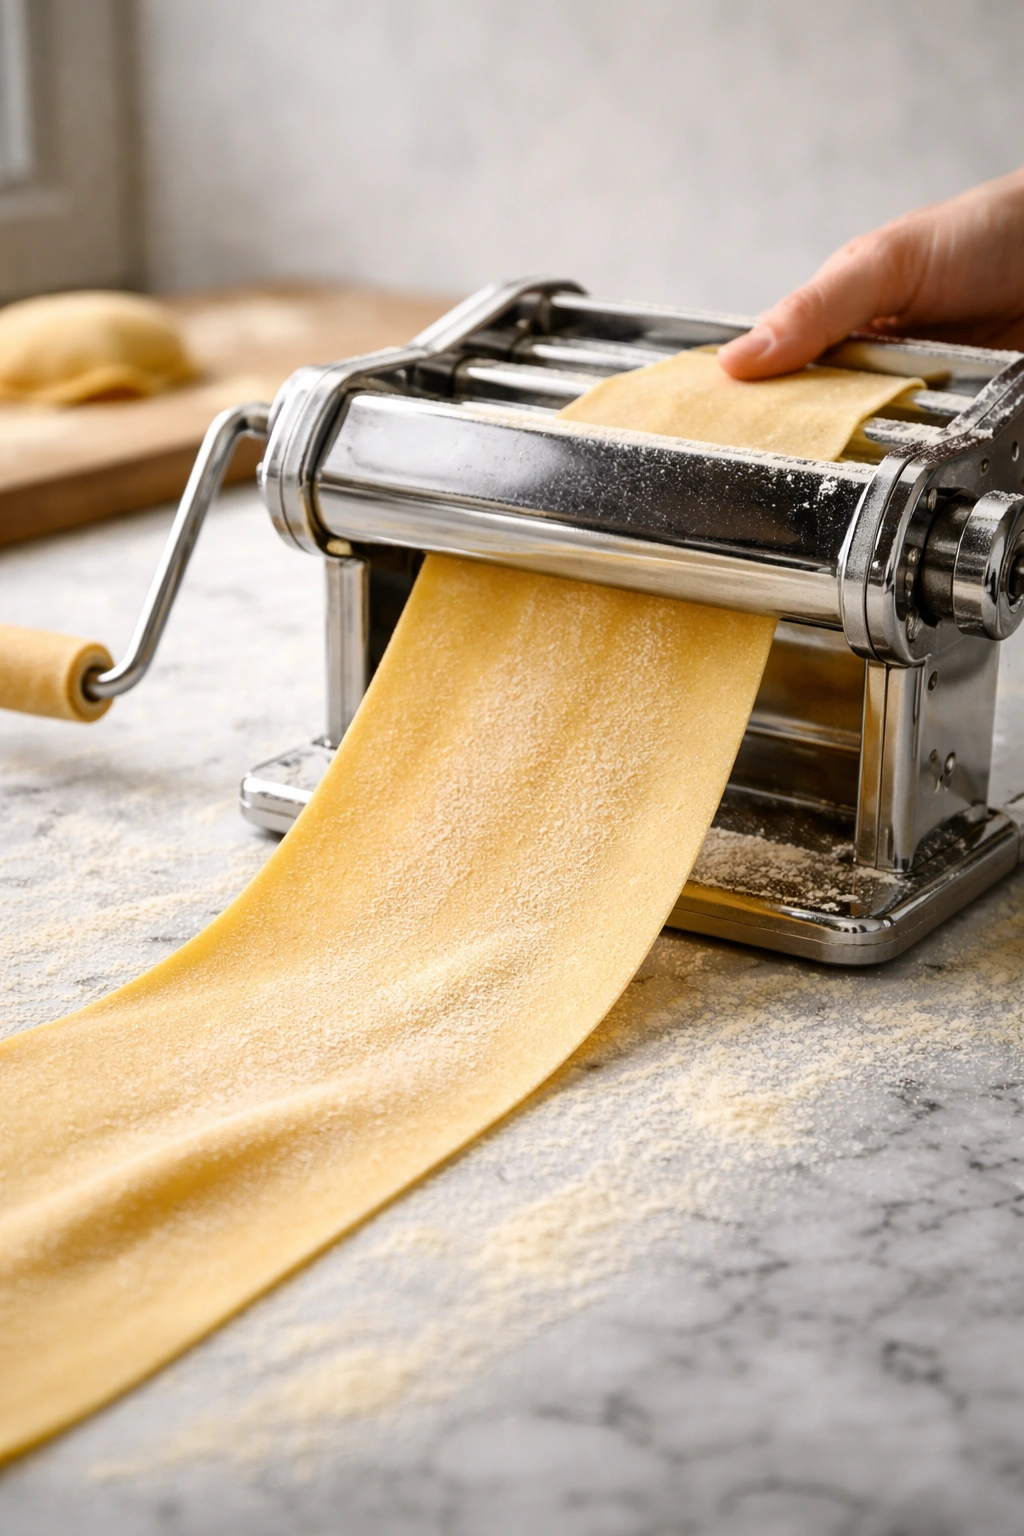
Your First Pass Through the Roller
Cut your rested dough into two equal pieces. Flatten one piece into a rough disc about 3 inches wide. Set your pasta machine to the widest setting (usually labeled “1”). Feed the disc through, catch it gently on the other side, and let it drop onto your semolina-dusted surface. The first pass lengthens the dough and begins organizing the gluten.
Feed it through again on the same setting. Now it’s noticeably longer and smoother. Don’t skip these two passes on the widest setting—they create the foundation for a uniform, smooth sheet.
Progressive Thinning
Now advance to setting 2 and feed the dough through once. Advance to setting 3 and feed through once. Continue this pattern (setting 4, then 5, etc.) until you reach the second-to-last setting on your machine. Most manual machines have settings 1-7; stop at 6. Electric machines vary; consult your manual if unsure.
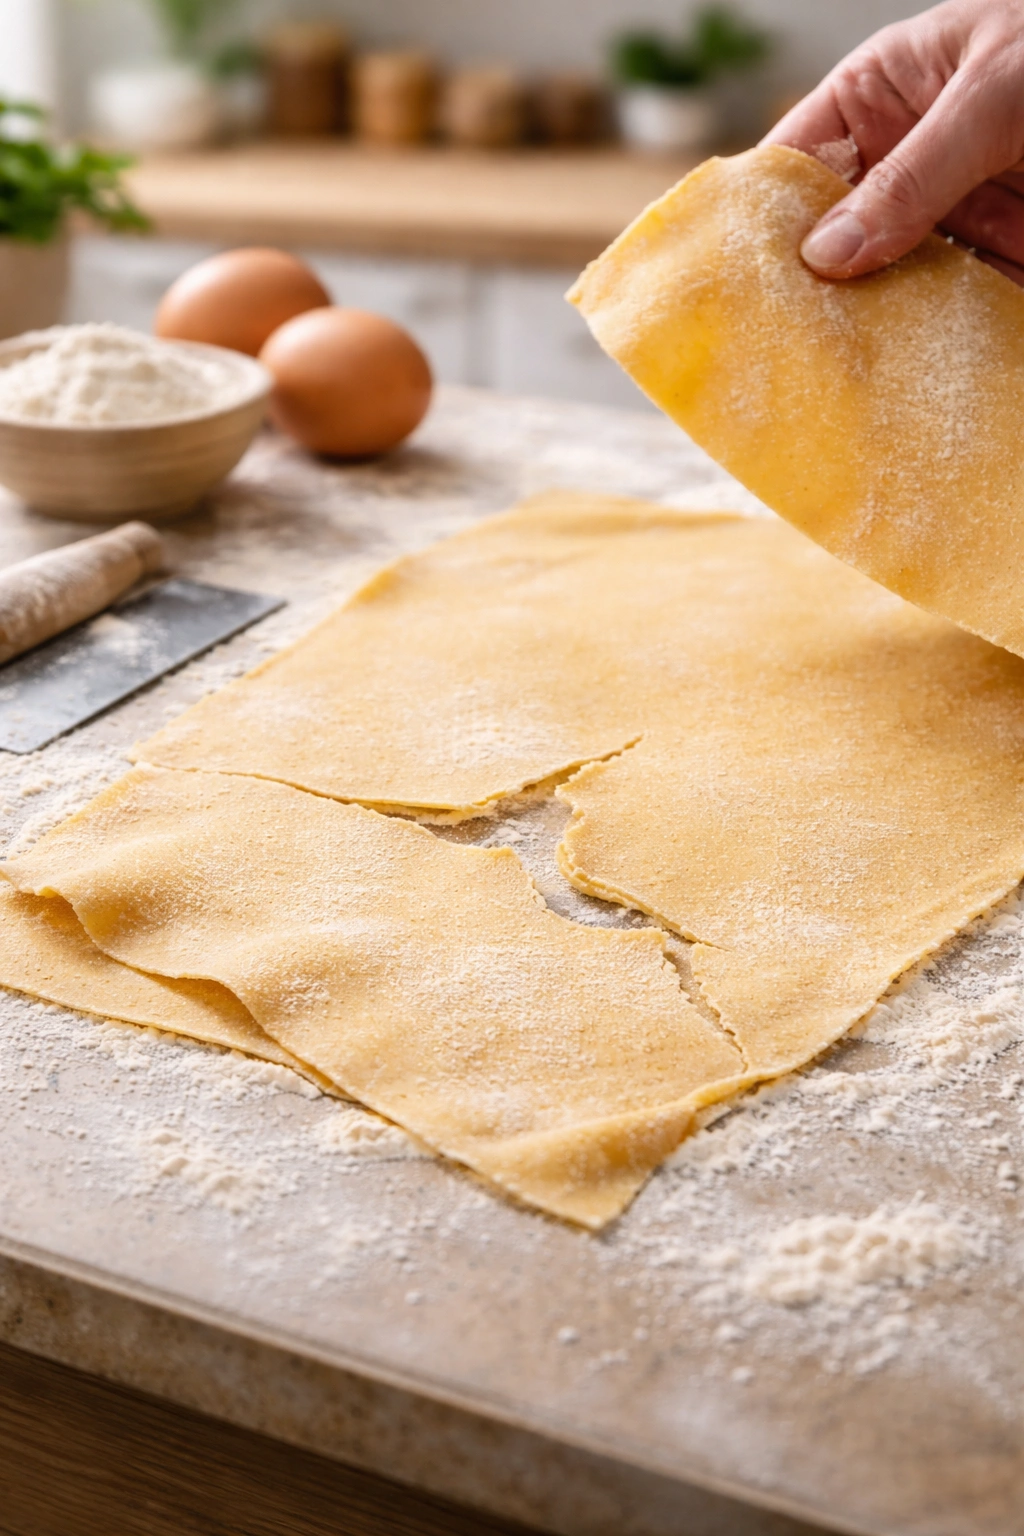
The dough should be thin enough that you can see the silhouette of your hand underneath when you hold the sheet up to light. It shouldn’t be transparent, which would indicate it’s too thin and will likely tear, but you should definitely see through it slightly. This thickness is perfect for filled pastas like ravioli and can be used for ribbon pastas like fettuccine.
If you hand-roll instead of using a machine, dust your work surface heavily with semolina and your rolling pin generously. Place your flattened disc in the center and roll from the center outward, rotating the dough frequently to maintain even thickness. Work slowly and gently; aggressive rolling creates uneven spots and tears. Aim for the same transparency you’d get from a machine—thin enough to see light through it, but not so thin it tears.
Resting Between Passes
If your dough seems to be sticking or tearing during rolling, stop and let the sheet rest on your semolina-dusted pan for 5-10 minutes. The surface dries slightly and becomes less sticky, dramatically improving workability. This is especially helpful if your kitchen is warm or humid.
Handling Your Finished Sheets
Once rolled to the correct thickness, fold each sheet in half and lay it on your semolina-dusted sheet pan. Fold gently—sharp creases can create weak spots. Keep the sheets covered loosely with a kitchen towel or leave them uncovered if you’re cutting right away. The sheets can rest this way for 30 minutes without any problem.
Some cooks prefer to semi-dry their sheets for 5-15 minutes before cutting. Hang them over a chair back, a hanging rod, or even a colander placed over a bowl. The surface becomes slightly leathery—not dry, but less soft and doughy—which makes cutting cleaner and prevents strands from sticking together later. This optional step takes only minutes and pays dividends.
Cutting and Shaping Your Finished Pasta
Creating Clean Cuts
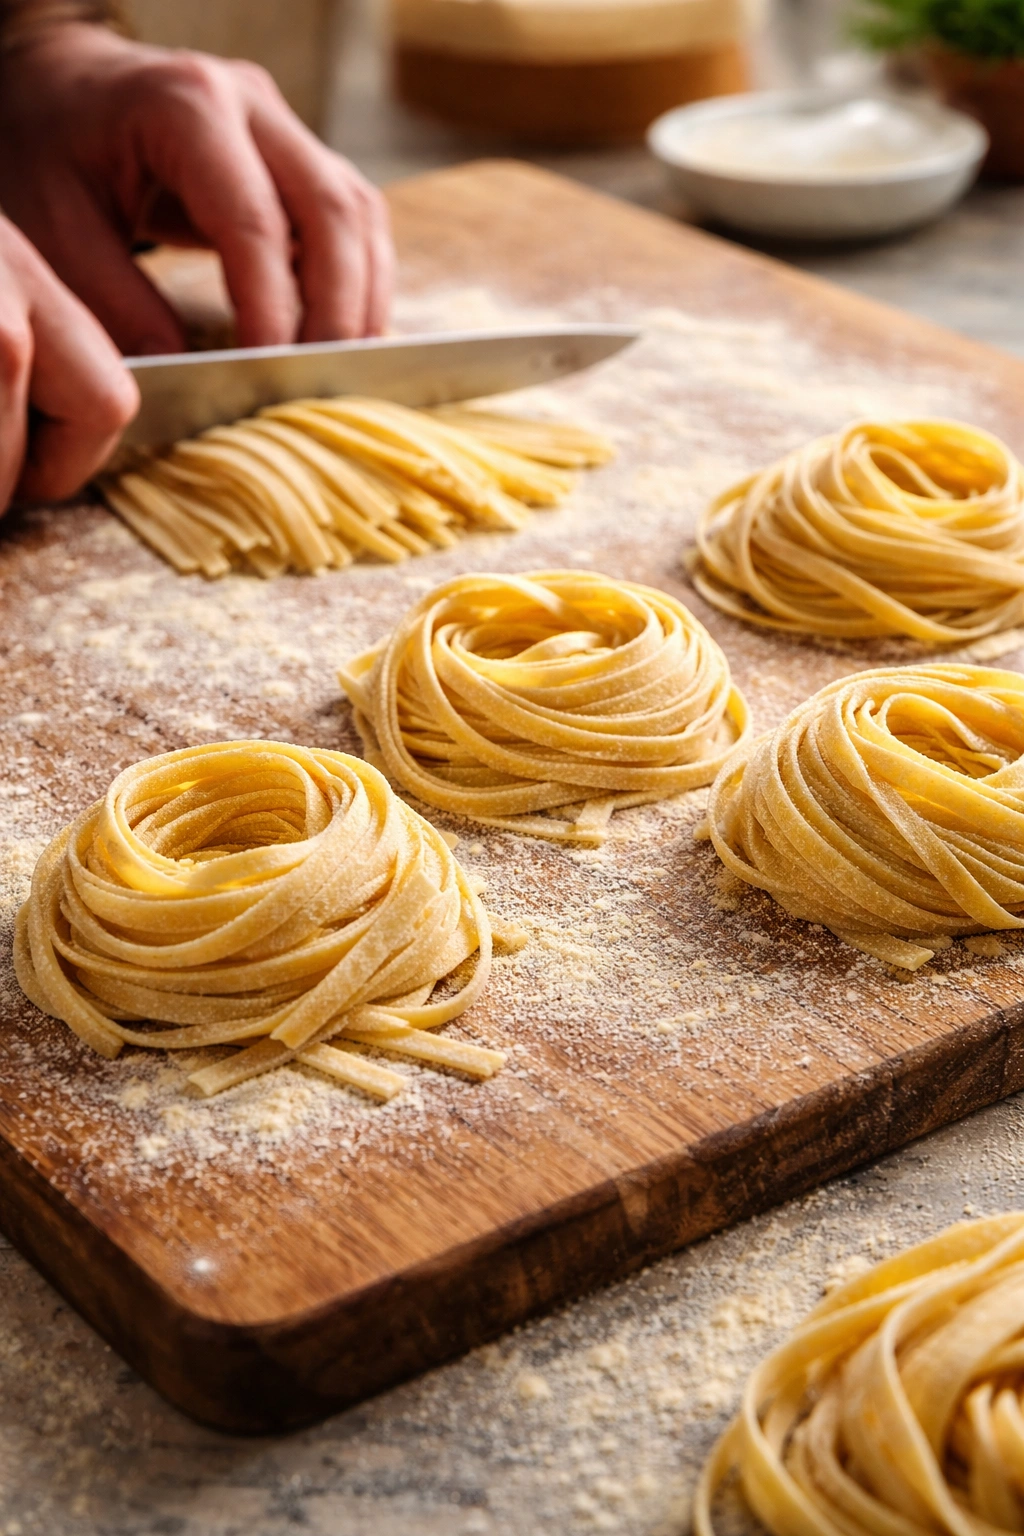
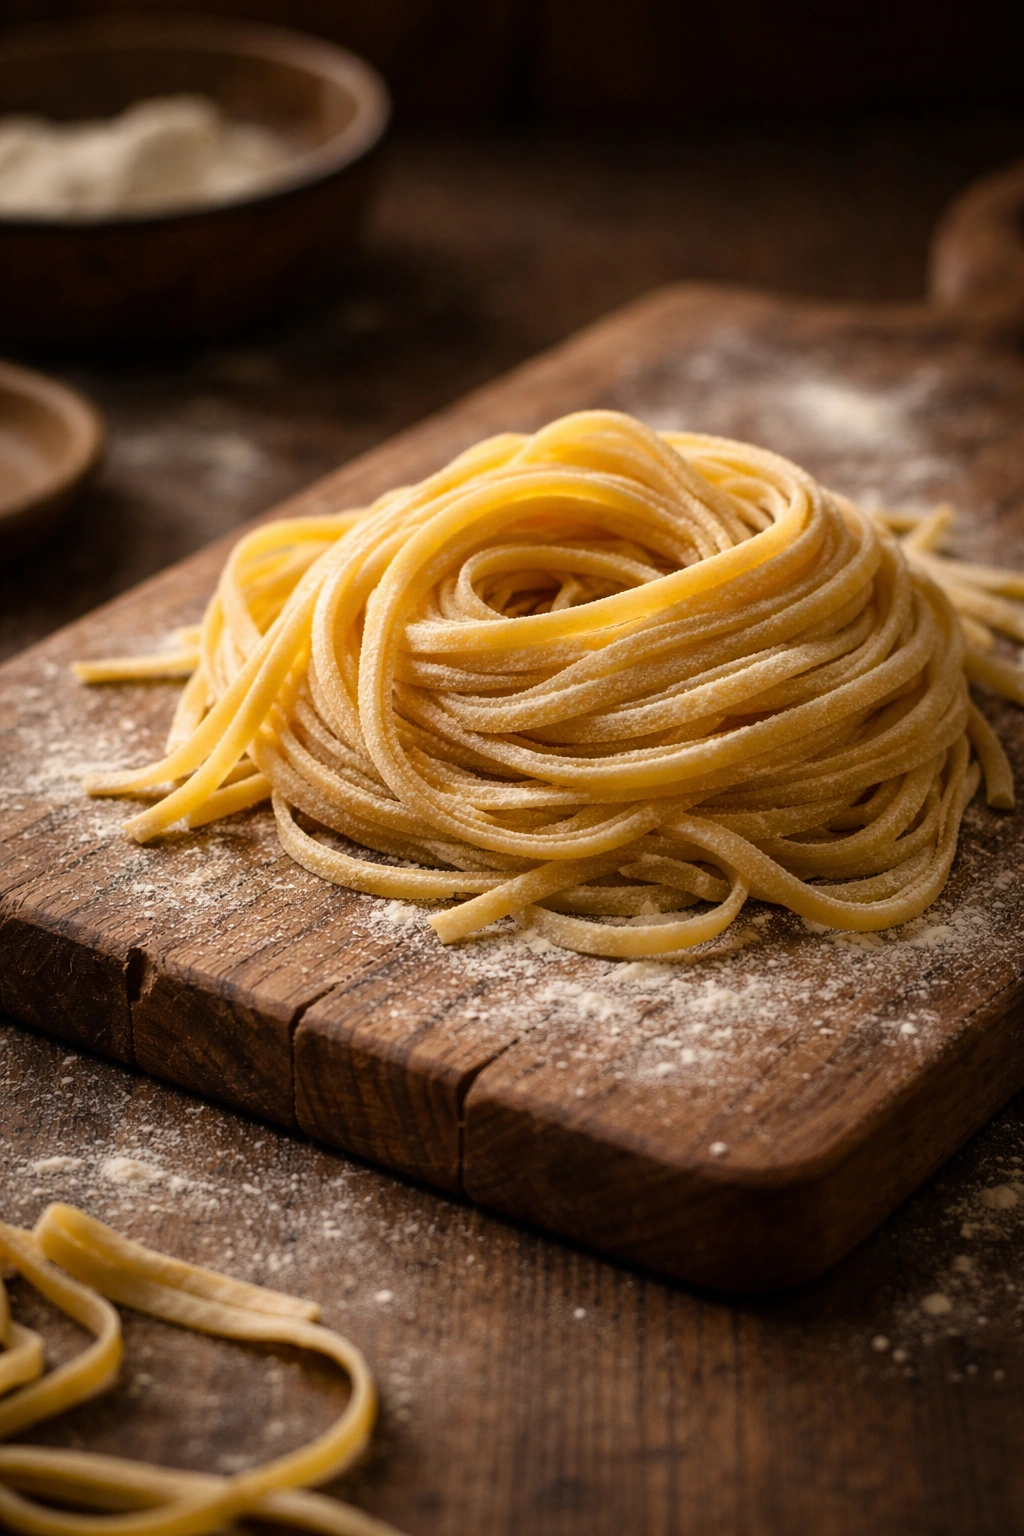
If you have a pasta machine with cutting attachments, feed your semi-dried sheet through the fettuccine or tagliatelle cutter (depending on your desired width). Catch the strands as they emerge and lay them on a semolina-dusted sheet pan or flat surface in loose piles or nests.
Without a cutter attachment, fold your sheet in half lengthwise, then roll it loosely into a spiral. Using a sharp knife or pizza cutter, slice across the roll at your desired width—roughly ¼-inch for fettuccine or tagliatelle. Immediately dust the cut strands with semolina and unroll them gently. The semolina prevents adhesion while the pasta dries.
Drying Your Fresh Pasta
This step is easy to rush and produces regrets if you do. Fresh pasta should rest on your sheet pan for at least 30 minutes before cooking, and preferably for 1-2 hours if you have time. During this drying period, the outer surface firms slightly and the strands lose their stickiness, making them easy to handle and preventing them from welding together during cooking.
If you’re not cooking the pasta on the same day, allow it to air-dry for several hours (until it snaps slightly when bent) before storing. This extra drying prevents the strands from sticking during refrigeration or freezing.
Cooking Fresh Pasta Perfectly
Boiling Water and Salting
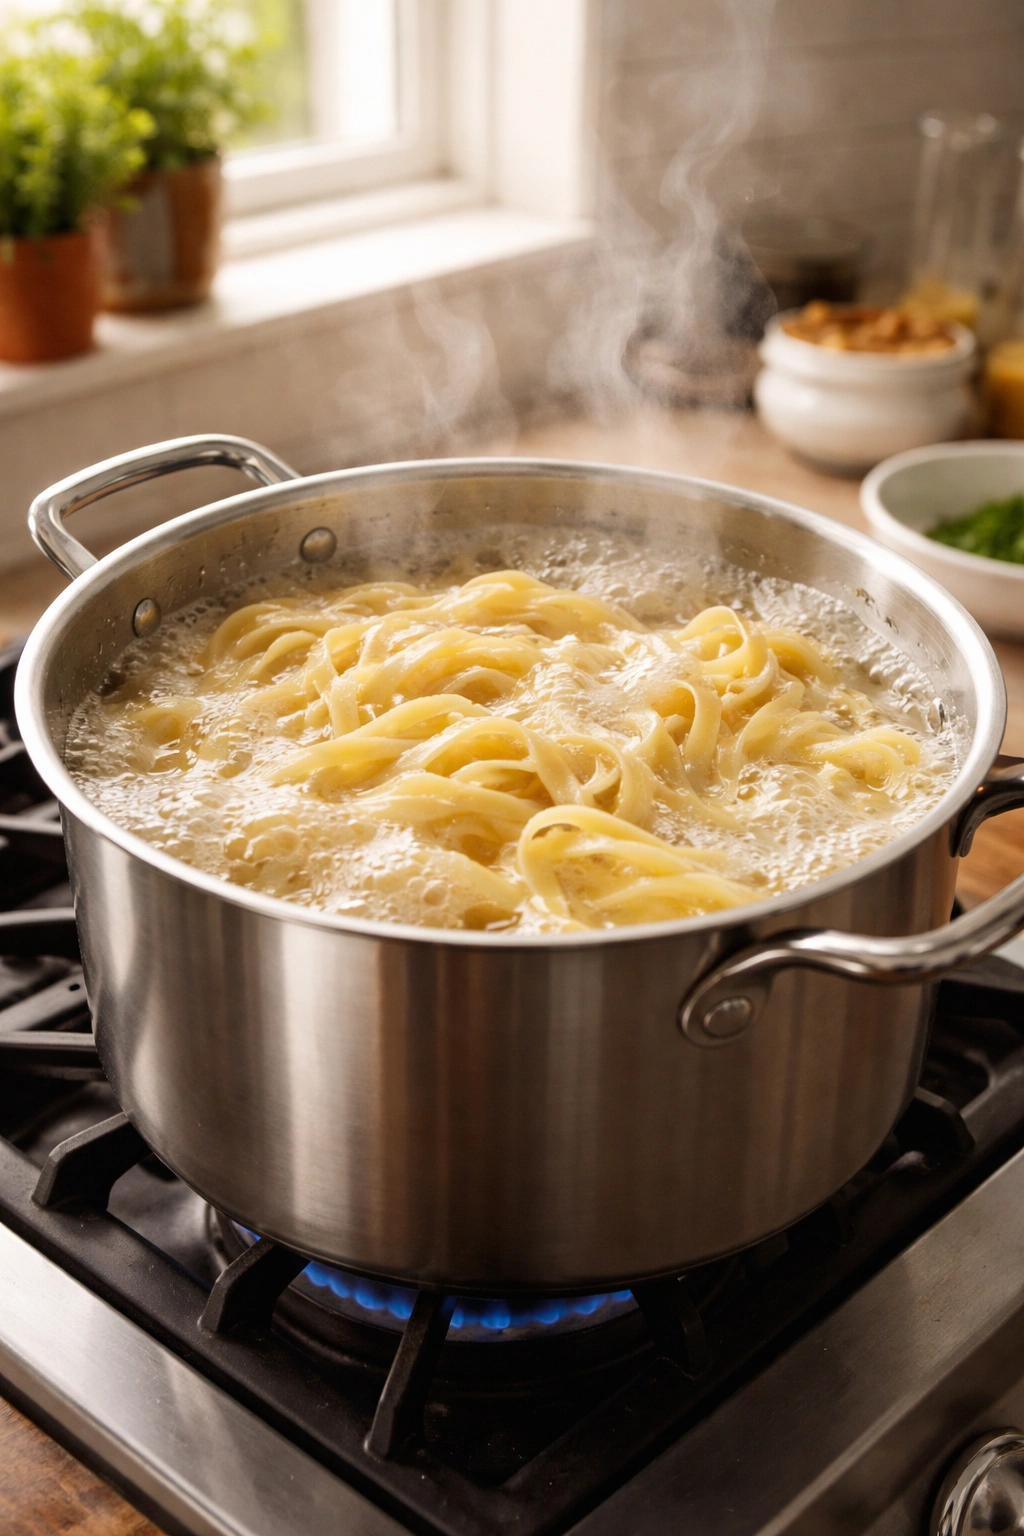
Bring a large pot of water to a rolling boil—use plenty of water, at least 6 cups for a two-person serving. Once boiling, add salt generously. The water should taste distinctly salty, like seawater. Some cooks worry about over-salting, but under-salted water produces bland pasta no matter how good your sauce is. The starch in the pasta absorbs the salt’s seasoning.
Timing the Cook
Fresh pasta cooks astonishingly quickly compared to dried pasta. Add your noodles and set a timer for 2 minutes. At the 2-minute mark, taste a strand. Fresh pasta should be tender but still have a gentle bite—not mushy, but not chalky either. Depending on thickness and humidity, it might need another 30 seconds to a full minute.
A useful visual cue: fresh pasta floats to the surface when it’s nearly done. The moment the last strand rises, give it another 10-15 seconds and fish out a sample to taste. This timing approach is far more reliable than watching the clock.
If your pasta is overdone, it’s not salvageable (unlike dried pasta, which firms slightly after draining). Cook slightly less time next time; you can always give it another 15 seconds if needed.
Finishing Without Draining
Here’s a technique that changes everything: don’t drain your pasta into a colander. Instead, use tongs to transfer the cooked pasta directly from the boiling water into your waiting sauce. Carry a cup of that starchy pasta water with you—the starch acts as an emulsifier, helping the sauce cling to each strand and creating a cohesive dish.
If you must drain (perhaps you’re making a pasta salad), do so gently and reserve at least 1 cup of the cooking water. Use this water to loosen your sauce if needed, adding it gradually until the consistency is perfect.
Sauce Pairings That Celebrate Fresh Pasta

Fresh pasta’s delicate texture shines with lighter, fresher sauces that let the noodles themselves shine. Butter and sage is the classic—melt quality unsalted butter in a skillet, add fresh sage leaves, and cook just until the butter turns nutty brown. Toss your pasta in this sauce with generous Parmigiano-Reggiano, a squeeze of lemon, and cracked black pepper. The simplicity lets your homemade pasta be the star.
Cream-based sauces work beautifully but are rich; remember you’re cooking for two, so richness is less of a concern here. Carbonara, a silky mushroom cream sauce, or a delicate lemon cream sauce all pair wonderfully with fresh pasta. Use your reserved pasta water to adjust consistency; a bit of starch helps cream sauces emulsify perfectly.
Fresh tomato sauce showcases the pasta’s tender texture. Cook crushed San Marzano tomatoes with garlic, a pinch of red pepper, and fresh basil. Don’t oversimplify—good tomatoes and quality ingredients matter here. Toss in your pasta, add a handful of fresh basil at the end, and finish with excellent olive oil.
For seafood sauces—clams in white wine, shrimp in light garlic cream, or even a delicate tuna sauce—fresh pasta is ideal. The tender noodles complement delicate proteins beautifully and cook quickly enough that your seafood doesn’t overcook while you’re finishing the dish.
Pesto, whether traditional basil or a creative variation with arugula or sun-dried tomatoes, clings to fresh pasta luxuriously. Thin your pesto slightly with pasta water and a drizzle of olive oil so it coats rather than clumps.
Common Mistakes and How to Prevent Them
The most frequent issue with small-batch pasta is dough that’s too dry and crumbly. This almost always stems from measuring flour by volume rather than weight, or from using eggs that were too small. Remember: weigh your ingredients, use large eggs, and add water or oil in tiny increments if your dough genuinely needs loosening. The rest during kneading usually softens dry dough dramatically, so be patient before adding liquid.
Dough that tears during rolling usually means insufficient resting time before rolling, or rolling at too-cold a temperature. Fresh pasta dough rolls most smoothly at room temperature, 68-72°F. If your kitchen is chilly, let your rested dough sit for another 10-15 minutes before rolling. Additionally, semi-drying your sheets for 5-10 minutes before cutting prevents tears when feeding through a machine.
Pasta that sticks together after cooking happens when you don’t use enough semolina flour during cutting and resting. Dust liberally—it seems like too much until you realize you can never use too much semolina. It absorbs excess moisture and prevents adhesion completely.
Cooked pasta that tastes bland means your boiling water wasn’t salty enough. Taste it before adding pasta; it should be as salty as seawater. The pasta itself contains no salt, so all seasoning comes from this water.
Overcooked pasta happens when you’re not tasting frequently enough. Fresh pasta goes from perfect to mushy in 30-45 seconds, so begin tasting at the 2-minute mark without fail. Err on the side of slightly undercooked; the residual heat as you sauce the pasta will finish the cooking.
Variations and Creative Adaptations
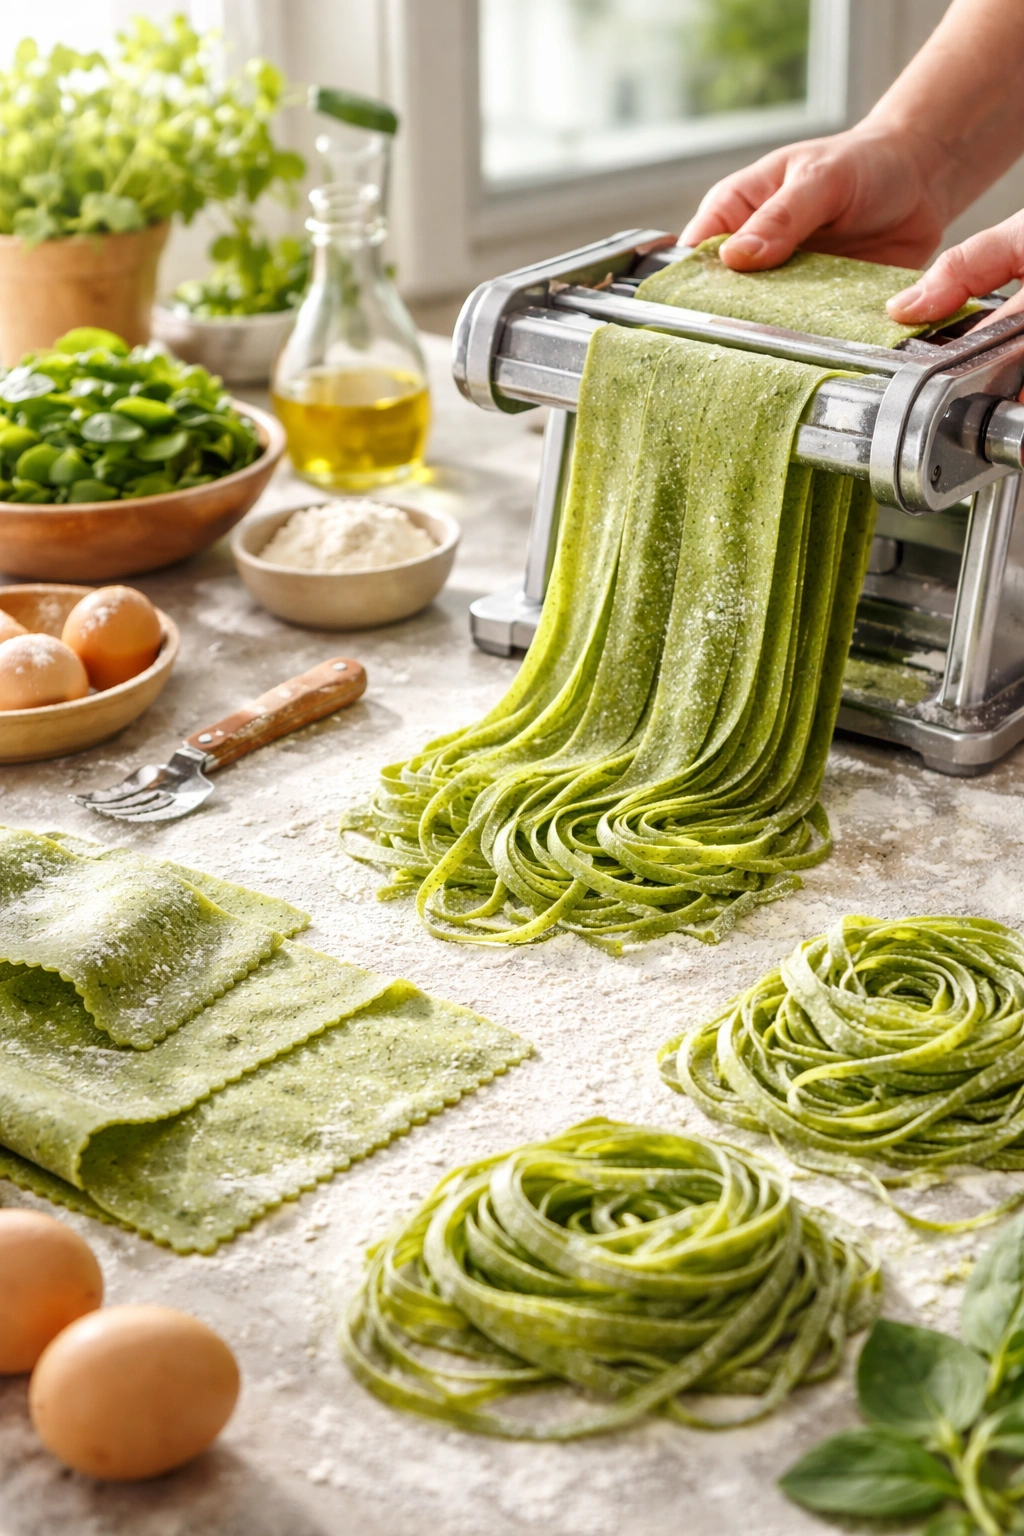
Once you’ve mastered the basic dough, countless variations open up. Spinach pasta is popular and forgiving: blend 2 ounces of fresh spinach (thawed if frozen, squeezed completely dry) into a puree, then incorporate it with the eggs before mixing with flour. The spinach adds moisture, so you might need to reduce the egg content slightly—start with 2 large eggs plus 1 yolk if you include spinach.
Semolina pasta, using semolina flour instead of all-purpose, creates a slightly firmer, more traditional Italian pasta. Semolina is coarser and absorbs moisture differently; you may need an extra teaspoon of water during mixing. The final pasta has a subtle golden color and slightly more pronounced bite.
Whole wheat pasta works well for small batches: substitute up to half your flour with whole wheat flour. The dough will be slightly darker and nuttier, with a more rustic texture. This is delicious but slightly less silky than all-white pasta.
Herb-infused pasta: finely mince fresh herbs (parsley, basil, chives, or thyme) and incorporate them during the initial mixing. Use about ¼ cup of fresh herbs. The herbs add flavor directly to the pasta itself and create a rustic, beautiful appearance.
For dairy-free or vegan versions, replace the eggs with aquafaba (the liquid from canned chickpeas): use 3 tablespoons of aquafaba per egg. The texture will be slightly different—perhaps slightly less silky—but still delicious and perfectly serviceable.
Storing, Refrigerating, and Freezing Your Homemade Pasta
Fresh pasta doesn’t store as long as dried pasta, but it keeps beautifully with proper handling. At room temperature, fully dried pasta (the strands snap slightly when bent) keeps in an airtight container for up to 2 weeks. However, most homemade pasta reaches only a semi-dried state and requires refrigeration.
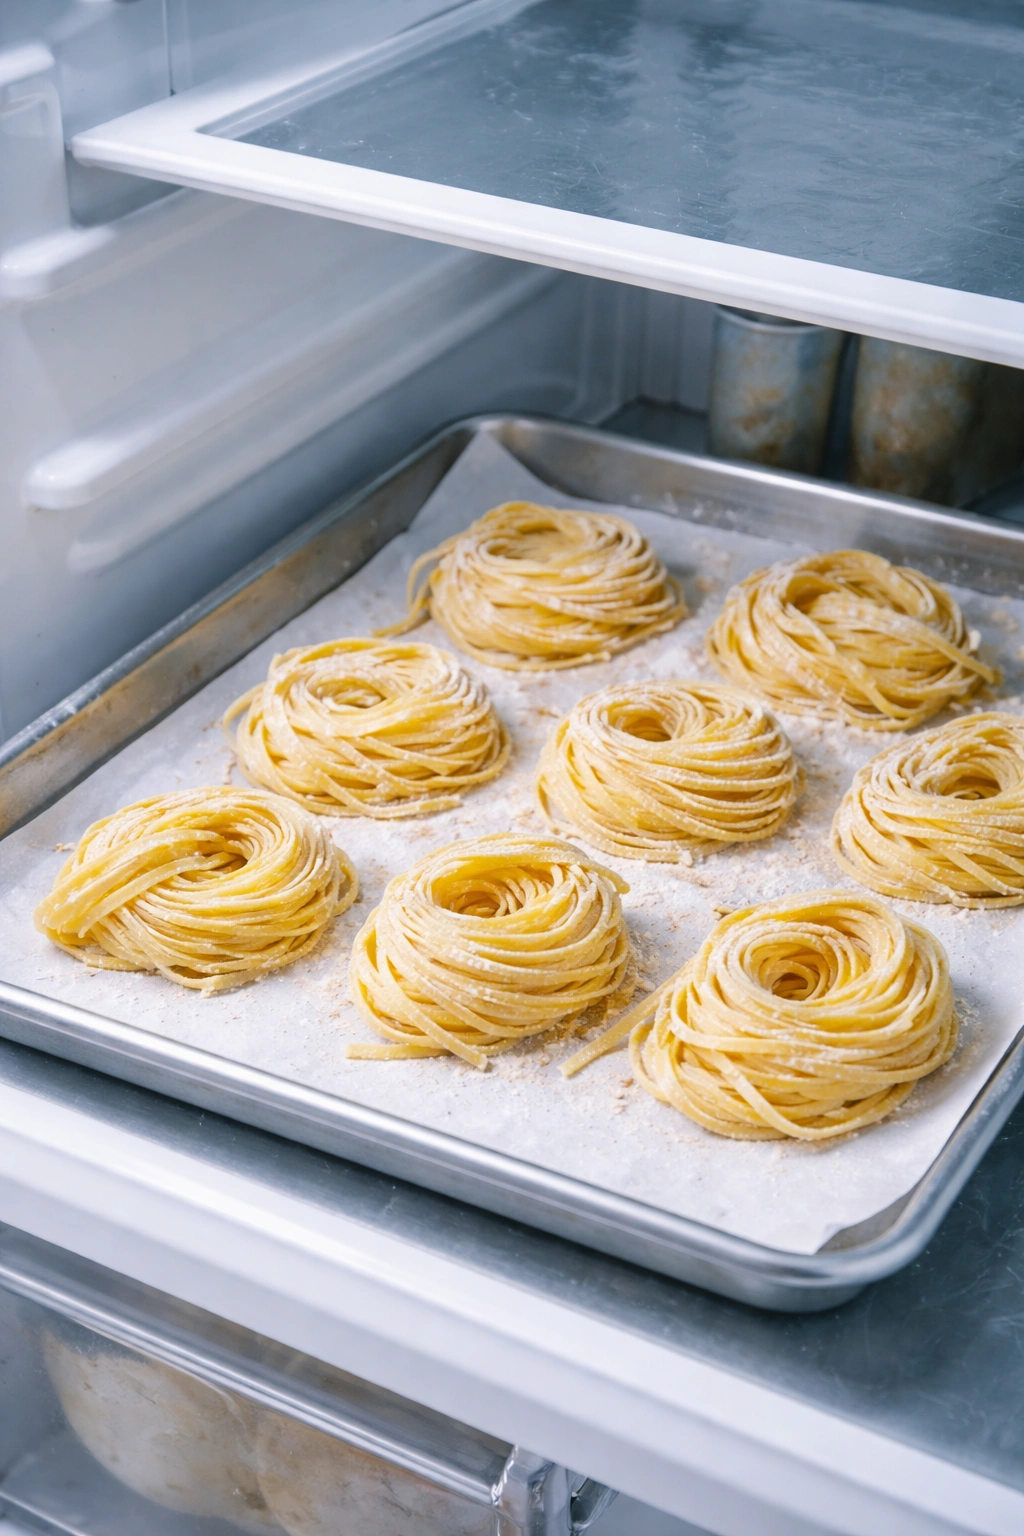
In the refrigerator, lay your finished pasta flat on a parchment-lined plate or sheet pan, cover it loosely with a kitchen towel, and refrigerate for up to 3 days. Don’t stack it directly on itself or in containers without parchment—it sticks. Before cooking, you needn’t bring it to room temperature; cook it directly from the fridge, adding only 30-45 seconds to the cooking time.
For freezing, allow your pasta to air-dry for at least 15-20 minutes (until it no longer feels damp to the touch), then portion it into portions on a sheet pan. Freeze uncovered for 2-3 hours until solid, then transfer to an airtight freezer container or zip-top bag. Frozen pasta keeps for up to 4 weeks. Cook straight from frozen without thawing; it will need the full 2-3 minutes or slightly longer.
Some cooks prefer making fresh pasta and freezing it rather than refrigerating because texture remains better after a week or longer of freezing than of refrigeration. If you’re planning to make pasta on the weekend and cook it later in the week, freezing is your best option.
Cooked pasta (leftovers from your dinner) keeps in the refrigerator for up to 3 days. Toss it with a small drizzle of olive oil to prevent sticking, store in an airtight container, and reheat gently over medium-low heat with a splash of water or additional sauce.
Making It a Ritual: The Pleasure of Cooking Together

The practical aspects of homemade pasta are important, but the emotional truth is equally significant. Making pasta for two creates an excellent excuse to slow down, unplug, and focus entirely on another person for an hour. There’s no multitasking while one person is carefully rolling a sheet—you’re present, attentive, teaching each other small techniques.
Assign roles that suit your preferences: perhaps one person prefers rolling while the other prefers cutting and dusting. Perhaps you take turns, switching tasks halfway through. There’s no wrong way to divide the work. The pasta-making becomes a conversation, a shared project, a small ritual you can return to regularly.
The actual cost is minimal—less than three dollars for ingredients—making this an accessible luxury. You’re not requiring fancy equipment, special ingredients, or hours of advanced planning. You’re simply deciding that fresh pasta is worth thirty minutes of focused attention and effort. That decision, repeated over time, becomes tradition.
Final Thoughts
Homemade pasta for two is worth the effort precisely because the effort is smaller than most people assume and the reward is completely disproportionate. You’re not spending hours in the kitchen or wrestling with an overwhelming batch; you’re spending roughly an hour total, much of which is waiting for dough to rest. The actual hands-on time is closer to 20-30 minutes. In return, you have fresh pasta with a silky, tender texture and delicate flavor that no dried box can match—plus the intangible pleasure of having made something beautiful with your own hands.
Start with the basic recipe, cook it a few times until the process feels natural rather than instructional, and then explore variations. Master the dough, and the rest becomes intuitive. This isn’t a dish that requires perfection on the first try; it requires only patience, decent ingredients, and a willingness to learn. By the third or fourth time you make pasta together, it stops being a recipe you’re following and becomes something you simply know how to do—a skill, a rhythm, a small but meaningful part of your cooking life. That’s when homemade pasta becomes less about the technique and more about the memory you’re creating together.