



Mason jar salads have become a game-changer for anyone serious about eating healthy without spending an hour on meal prep each week. The beauty of this approach isn’t just the convenience—it’s that your salad actually stays fresh when you build it correctly, and the flavors meld together over a few days in ways that make each bite taste better than the last. If you’ve ever tried to meal prep salads and watched them turn into a sad, soggy mess by Wednesday, you’ve been assembling them in the wrong order.
The secret isn’t complicated, but it does matter: the dressing goes on the bottom, the sturdy vegetables that can handle moisture come next, and the delicate greens live at the very top where they stay dry until you shake the whole jar and eat. This method transforms meal prep from a daily chore into something you do once on Sunday and then grab from your fridge all week long. You’ll save money, eat better, and actually finish what you make—which is honestly half the battle with healthy eating.
Understanding Dressing Layering in Mason Jar Salads
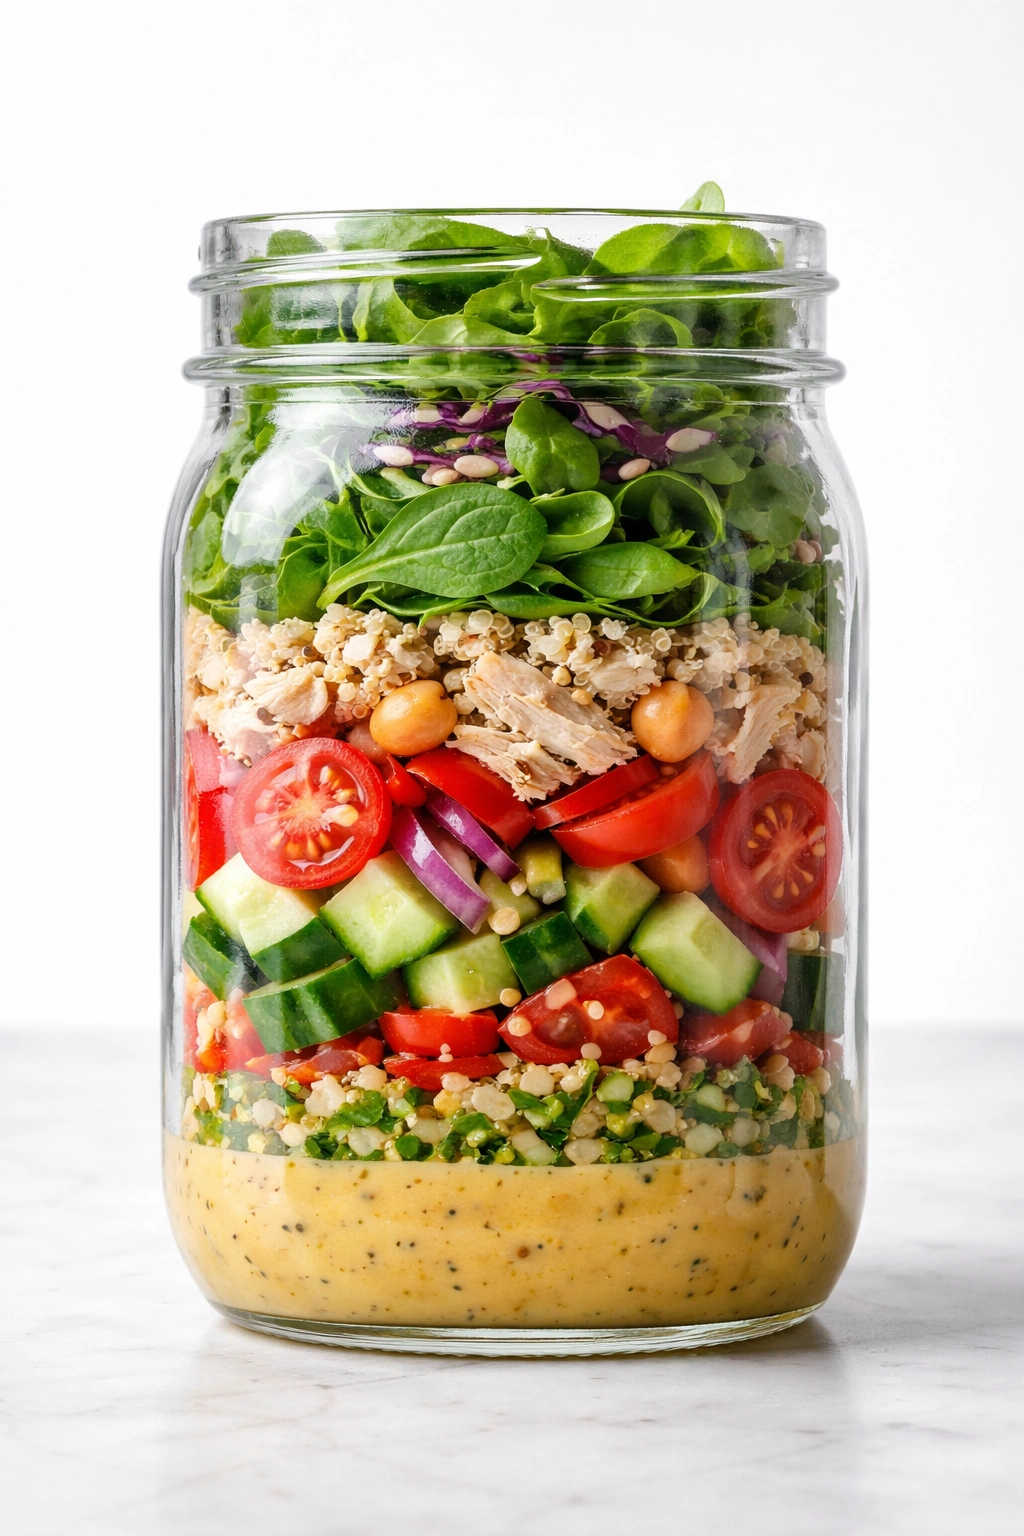
The reason mason jar salads work when traditional plastic-container salads fail comes down to understanding how dressing interacts with different vegetables over time. When dressing sits directly against sturdy vegetables like carrots, cucumbers, bell peppers, and broccoli, something interesting happens: those vegetables gradually soften slightly as the moisture from the dressing penetrates them, but they don’t fall apart. They actually become more flavorful because the dressing has time to infuse.
The real enemy is leafy greens. Lettuce, spinach, arugula, and kale will absolutely wilt and turn to mush if dressing touches them for more than a few hours. This is why the layering order is non-negotiable. The dressing stays isolated at the bottom in a contained layer, separated from the greens by a strategic buffer of sturdy vegetables and grains.
You’ll want to use about two to three tablespoons of dressing per mason jar salad—enough to coat everything when you shake it, but not so much that you end up with a pool of liquid at the bottom. A good ratio is roughly two parts oil to one part acidic element (vinegar, lemon juice, lime juice) plus whatever seasonings make sense for your flavor profile. Oil-based vinaigrettes work best because oil doesn’t break down the sturdy vegetables the way something watery might. Creamy dressings work beautifully too, though they’re slightly thicker and take a bit longer to distribute when you shake the jar.
The Crucial Order: Building Your Salad Layers
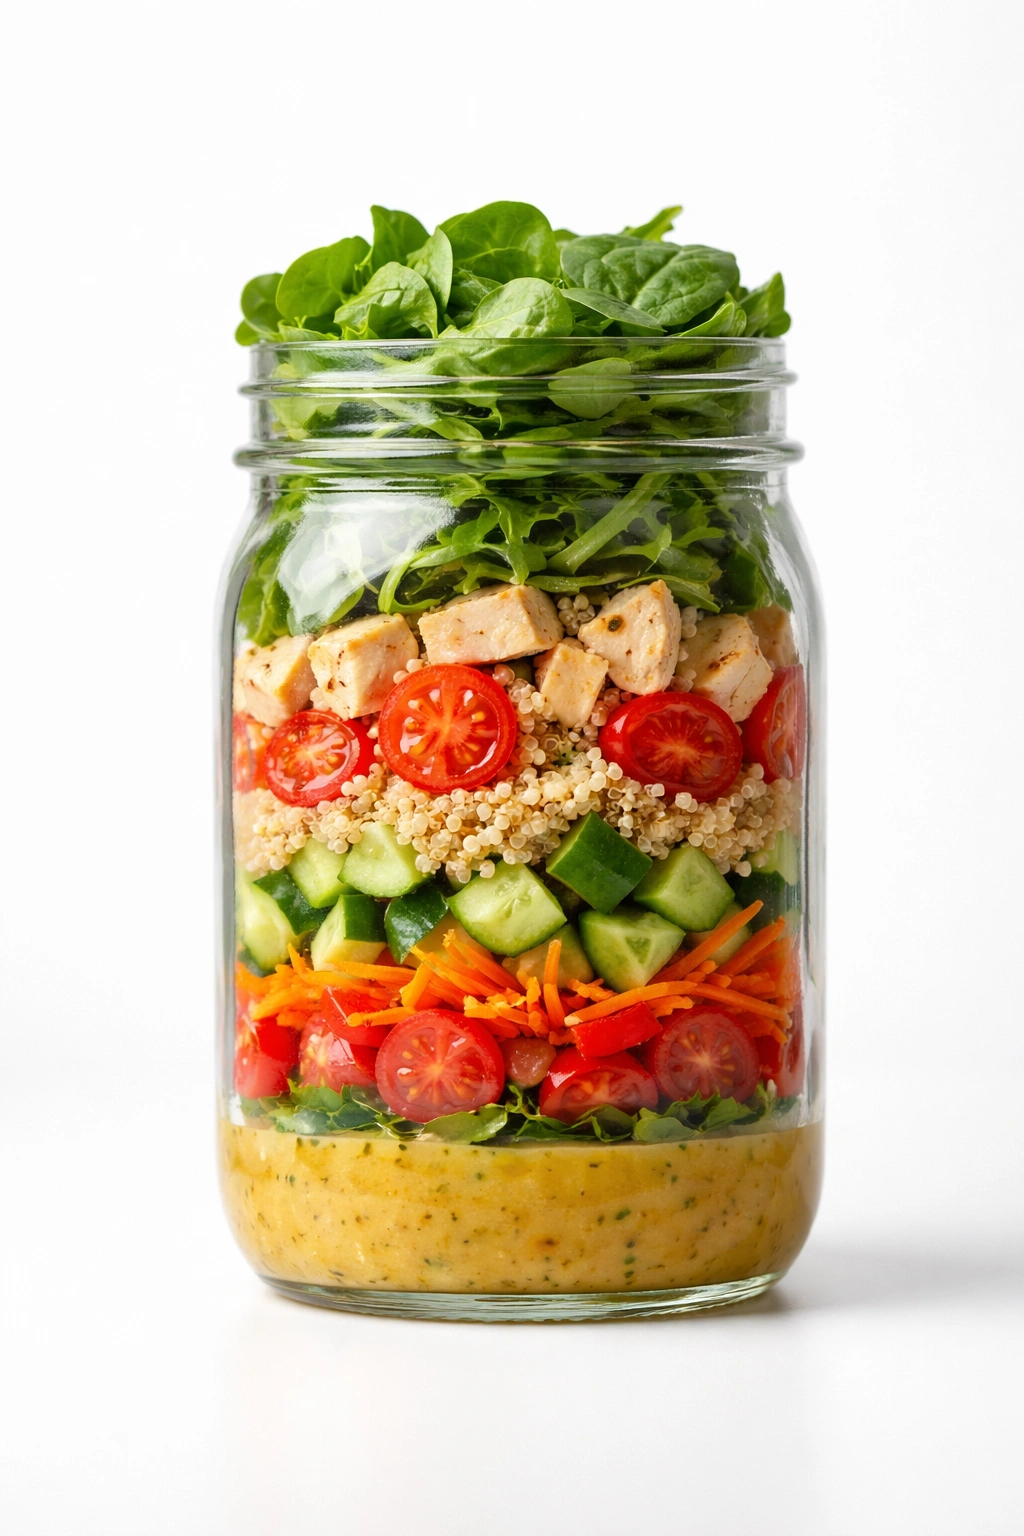
The assembly order for a mason jar salad is rigid, and there’s a reason for each layer. Start by pouring your dressing directly into the bottom of a clean quart-sized mason jar (or two pint jars if you prefer smaller portions). The dressing stays put here, creating a protective barrier.
Next comes what I call the “barrier vegetables”—the sturdy, dense vegetables that can sit in dressing without falling apart. This includes diced cucumbers, sliced bell peppers, shredded carrots, diced tomatoes, sliced radishes, chopped broccoli or cauliflower florets, snap peas, corn, or any roasted vegetables. This layer serves two purposes: it physically separates the dressing from the greens, and it adds substance and texture to your salad.
Then comes your grains or proteins if you’re including them—think cooked quinoa, farro, chickpeas, lentils, shredded chicken, hard-boiled eggs, or crumbled tofu. This layer sits on top of the vegetables and helps create another barrier.
Finally, at the very top, goes your delicate leafy greens. Lettuce, spinach, arugula, mixed greens, kale—whatever you prefer. The greens sit dry and crisp until the very moment you eat, because they’re far enough from the dressing that no moisture has reached them. When you’re ready to eat, you simply shake the jar vigorously for about 15 seconds, and the dressing coats everything evenly.
How to Store and Meal Prep Mason Jar Salads
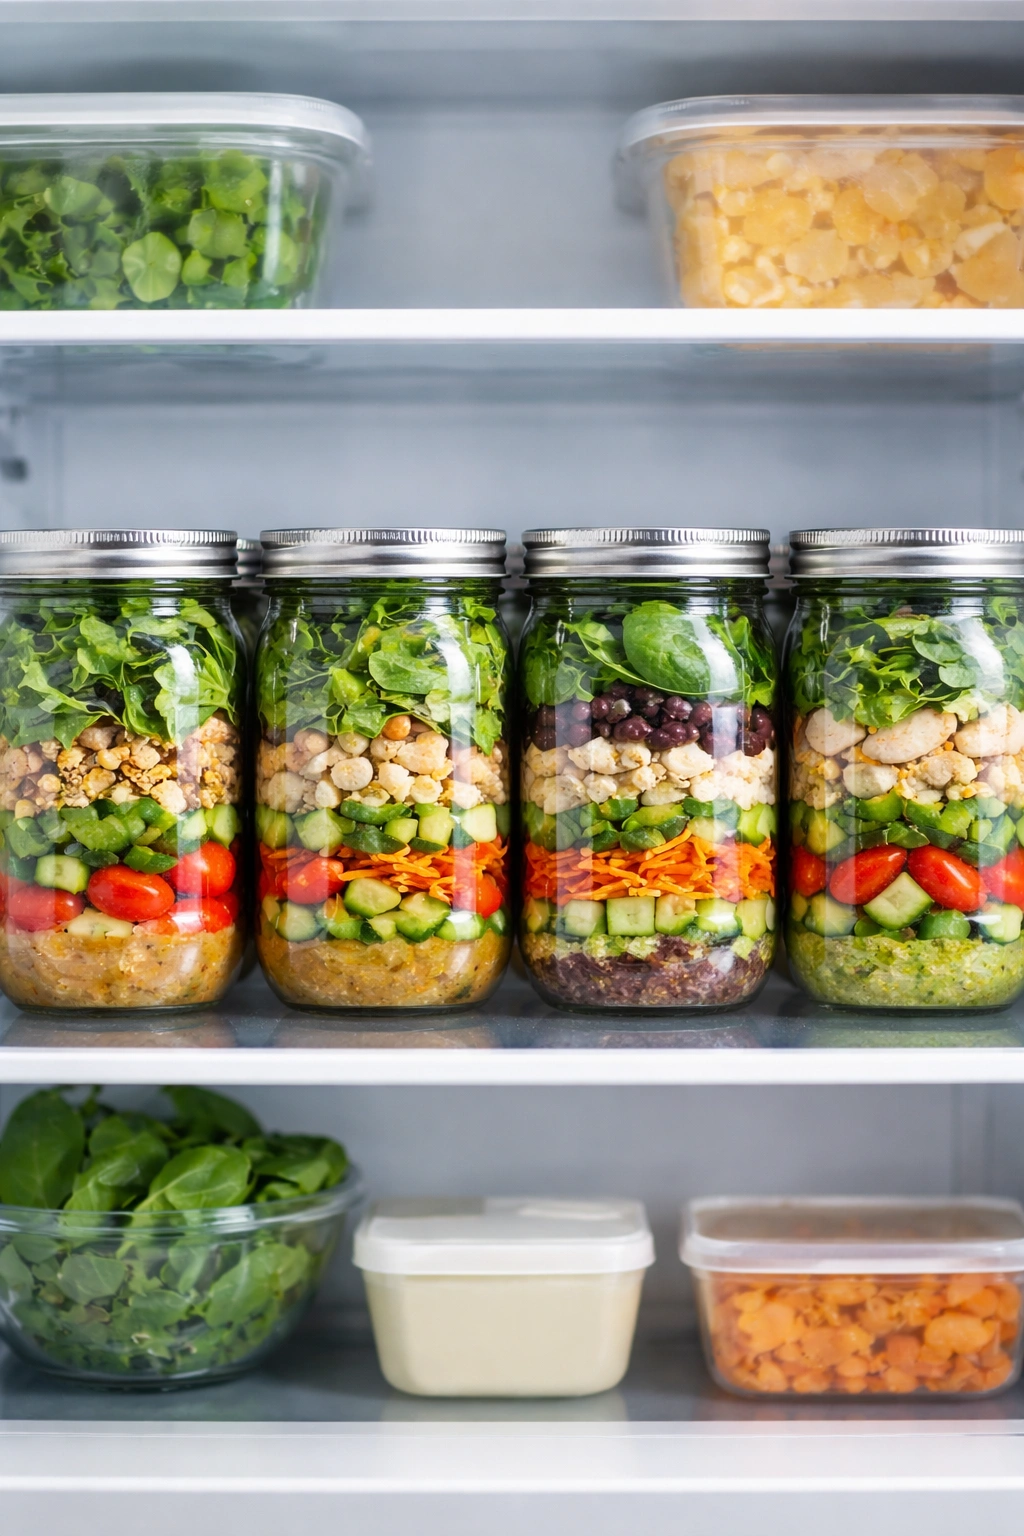
Proper storage is what makes mason jar salads actually last in your fridge without turning into compost. Mason jars with airtight lids create a sealed environment that keeps greens fresher longer than any plastic container. The key is ensuring everything is completely dry before assembly—wet vegetables will accelerate wilting, and excess moisture will cloud your dressing.
You can prep mason jar salads up to five days in advance, though most are genuinely best between day two and day four when the flavors have had time to meld but everything still maintains good texture. The dressing won’t separate or go rancid; it’ll just sit there, keeping everything below it preserved. Store your jars on a shelf in the fridge where they won’t get jostled around—the back of a shelf is perfect.
When you’re ready to eat, simply remove the jar from the fridge, seal the lid tightly, and shake it hard for about 15 seconds. The dressing will distribute evenly throughout. You can eat it directly from the jar, pour it into a bowl, or transfer it to whatever vessel feels comfortable. The shake method isn’t just a gimmick; it actually ensures every bite has proper dressing distribution, something that never happens when you pre-toss a salad.
If you’re making five salads at once, set up an assembly line on your counter with small bowls of each ingredient. Lay out five jars, add dressing to all five, then move through vegetables, proteins, and greens systematically. The whole process takes about ten minutes once you’re in a rhythm. This is genuinely faster and easier than making a salad every single evening.
1. Mediterranean Chickpea Mason Jar Salad
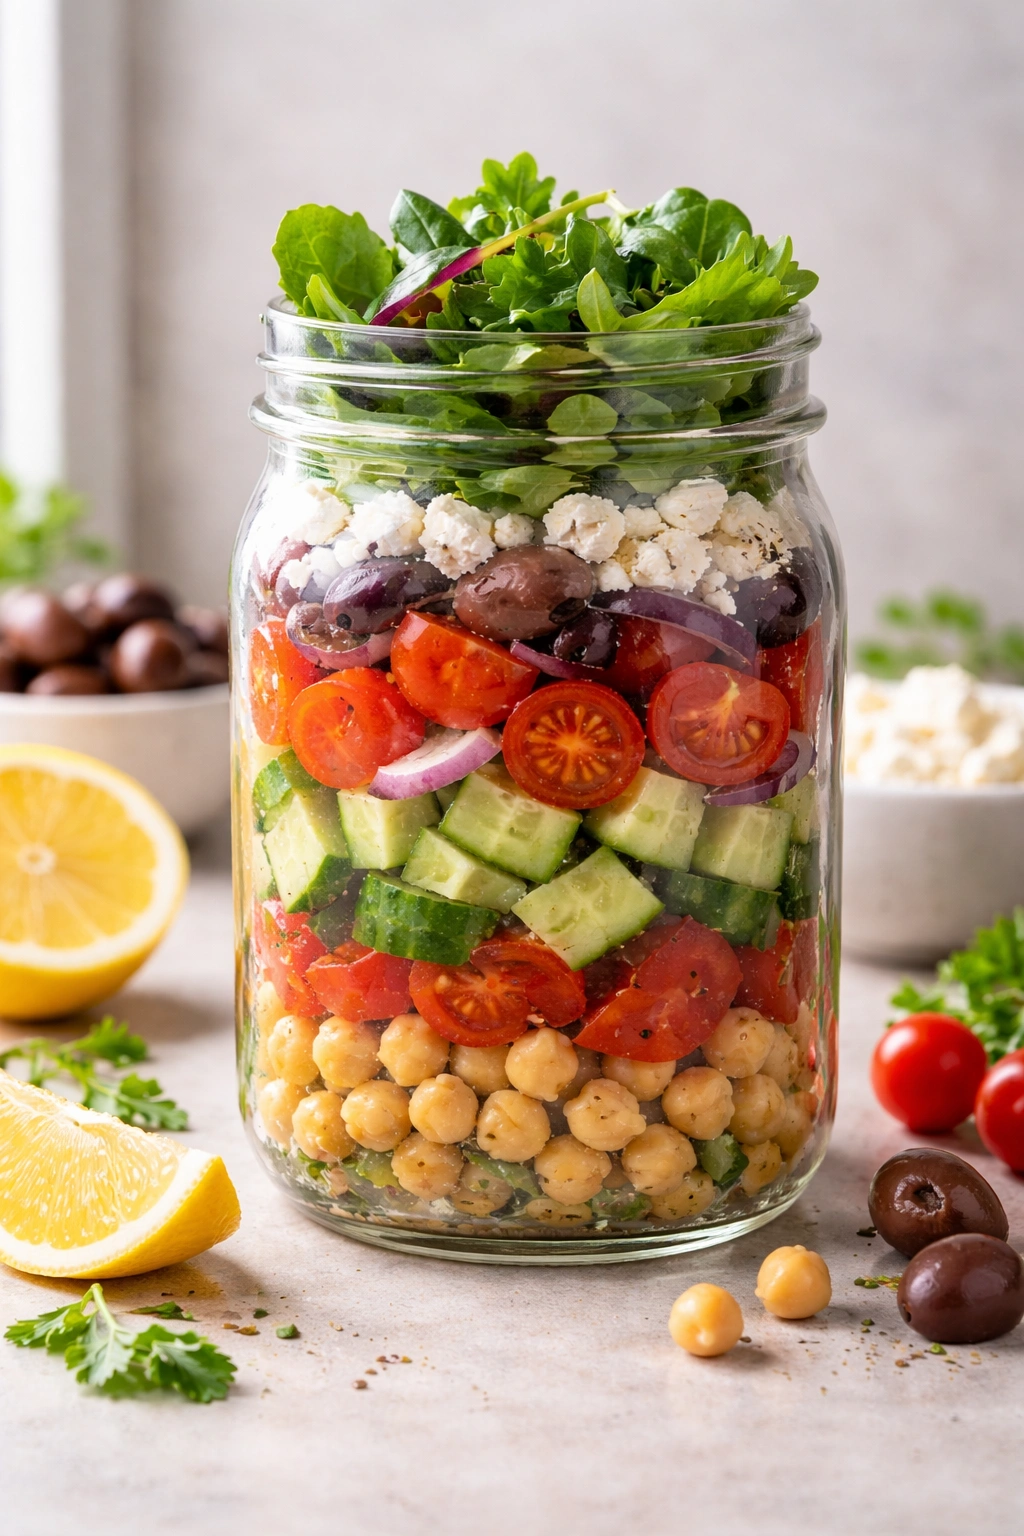
This salad hits the Mediterranean notes beautifully—bright lemon, briny olives, creamy chickpeas, and fresh herbs that work together rather than competing. It’s substantial enough to be a complete lunch on its own, and it gets even better on day two when everything has time to meld.
Yield: 1 large salad (serves 1 as a main, 2 as a side) Prep Time: 12 minutes Cook Time: None Total Time: 12 minutes Difficulty: Beginner — no cooking required, just assembly.
For the Lemon-Herb Dressing:
- ¼ cup extra-virgin olive oil
- 3 tablespoons fresh lemon juice
- 1 tablespoon red wine vinegar
- 1 clove garlic, minced very finely
- 1 teaspoon dried oregano
- ½ teaspoon fine sea salt
- ¼ teaspoon freshly cracked black pepper
For the Salad:
- 1 can (15 ounces) chickpeas, drained, rinsed, and patted dry
- ½ cup diced cucumber
- ½ cup halved cherry tomatoes
- ¼ cup diced red onion
- ½ cup diced bell pepper (red or yellow works beautifully)
- ¼ cup Kalamata olives, pitted and halved
- ¼ cup crumbled feta cheese
- 2 cups mixed baby lettuce, spinach, or arugula
- 2 tablespoons fresh parsley, chopped
- 1 tablespoon fresh mint, chopped (optional but recommended)
Assembly and Storage
Make your dressing first by whisking together the olive oil, lemon juice, red wine vinegar, minced garlic, oregano, salt, and pepper in a small bowl or jar. The dressing should look slightly separated and beautiful—this is exactly right. Pour the dressing into the bottom of your mason jar.
Add the drained chickpeas next, distributing them evenly. The chickpeas will sink slightly into the dressing and begin absorbing the flavors immediately. Over the next few days, they’ll become increasingly flavorful.
Layer your cucumber, tomatoes, red onion, and bell pepper on top of the chickpeas. These vegetables can handle moisture and actually improve as the dressing begins to infuse them. The acid from the lemon juice will slightly soften the raw vegetables, making them more digestible and flavorful.
Add the Kalamata olives and feta cheese next. The feta will soften slightly and release more of its salty, tangy flavor into the surrounding vegetables. This is where the salad starts to feel complete rather than just assembled.
Finally, top with your mixed greens, and sprinkle the fresh parsley and mint over the very top. The herbs should sit completely dry and green—this is your visual cue that everything is assembled correctly.
This salad keeps brilliantly for up to five days. The flavors actually deepen and improve through day three, making Wednesday a genuinely exciting day to eat lunch rather than something that requires willpower.
Tips and Variations
If you’re not a feta fan, crumbled goat cheese provides a similar tanginess with a different flavor profile, or skip the cheese entirely and add a hard-boiled egg for protein instead. Chickpeas can be roasted with olive oil, salt, and a pinch of smoked paprika the night before and then added instead of canned for a crunchier texture—they hold up beautifully in the jar.
You can easily swap the herbs—basil works wonderfully, or cilantro if you’re drawn to different Mediterranean flavors. The beauty of this salad is its flexibility. If your market has fresh dill or tarragon, either one would be exceptional.
For a heartier version that becomes an entire meal, add ½ cup cooked farro or quinoa as your grain layer. The heartiness makes it perfect for a post-workout meal or a lunch that needs to carry you through an active afternoon.
2. Asian Sesame Noodle Mason Jar Salad
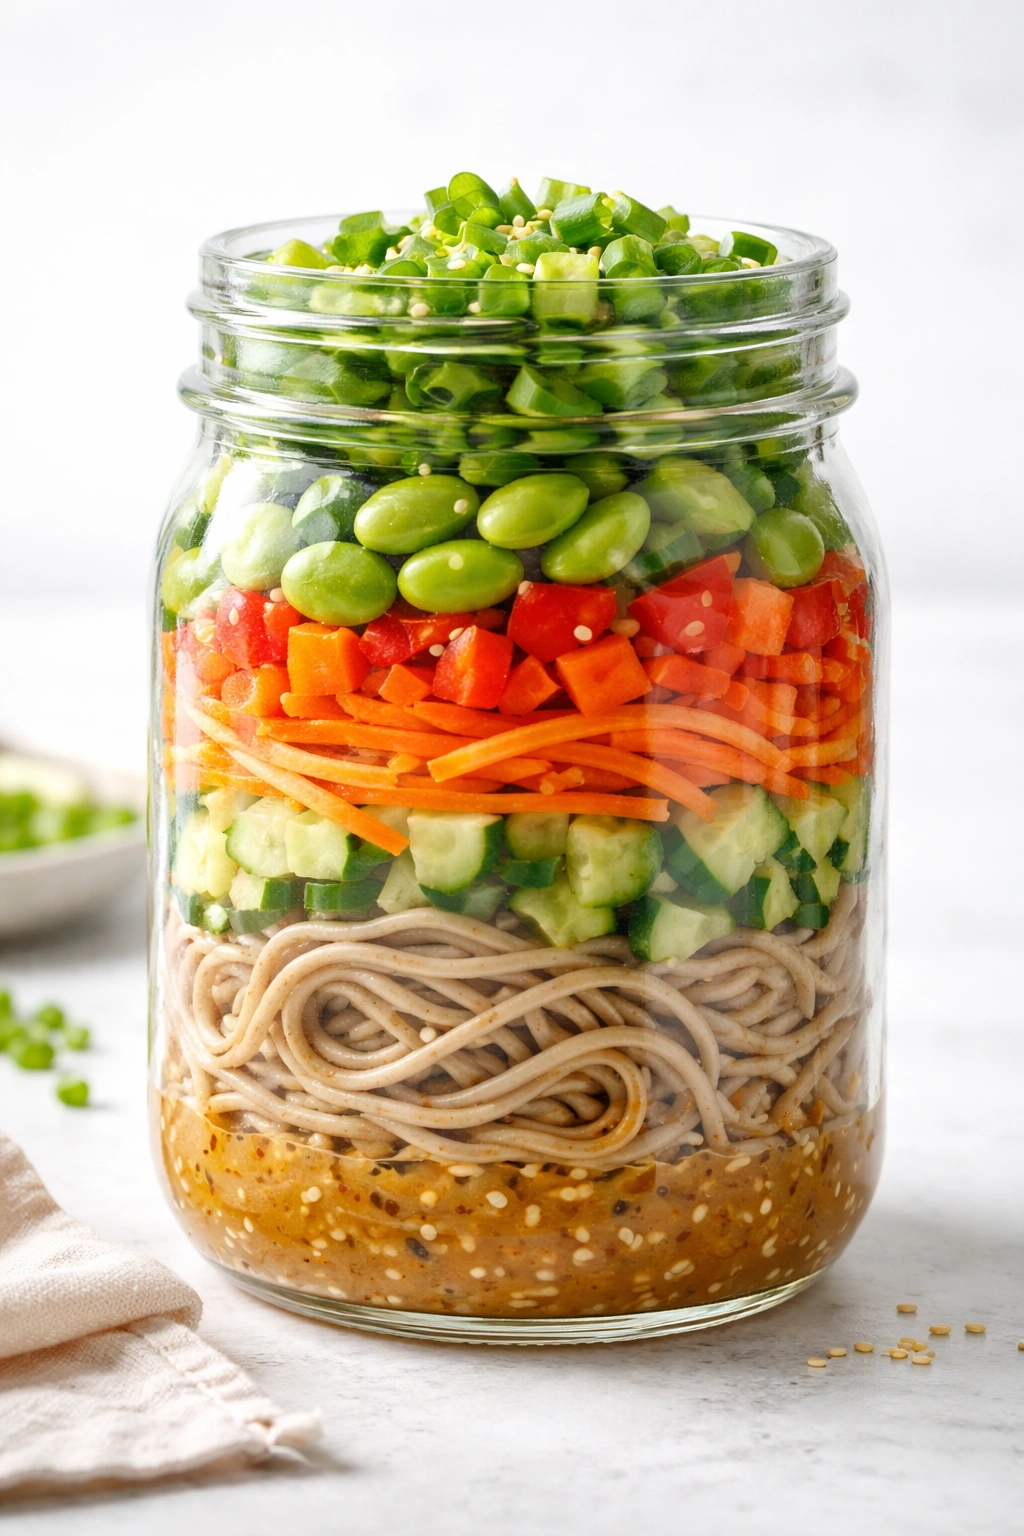
This one features chewy noodles, crunchy vegetables, and a rich sesame-ginger dressing that tastes like it came from your favorite take-out spot. It’s genuinely more flavorful on day two or three when the noodles have absorbed the dressing. The addition of peanut butter (just a tablespoon) in the dressing creates an incredible depth that most people can’t quite identify—they just know it tastes amazing.
Yield: 1 large salad (serves 1 as a main, 2 as a side) Prep Time: 15 minutes Cook Time: 10 minutes for noodles Total Time: 25 minutes Difficulty: Beginner — the only cooking step is boiling noodles.
For the Sesame-Ginger Dressing:
- 3 tablespoons toasted sesame oil
- 2 tablespoons rice vinegar
- 1 tablespoon tamari or low-sodium soy sauce
- 1 tablespoon unsweetened peanut butter
- 1 tablespoon fresh lime juice
- 1 teaspoon grated fresh ginger
- 1 clove garlic, minced very finely
- ½ teaspoon red pepper flakes (or less if you prefer mild)
For the Salad:
- 1.5 ounces dried rice noodles, soba noodles, or spaghetti
- ½ cup shredded carrots
- ½ cup diced cucumber
- ½ cup thinly sliced bell pepper (red, yellow, or orange)
- ¼ cup edamame (fresh or thawed frozen)
- ¼ cup sliced green onion
- 2 cups mixed greens or shredded napa cabbage
- 2 tablespoons chopped cilantro
- 1 tablespoon sesame seeds (black, white, or a mix)
- Optional: sliced red chili pepper for garnish
Noodle Preparation and Assembly
Bring a pot of water to a rolling boil and cook your noodles according to package directions, but subtract one minute from the recommended time—you want them just slightly firmer than al dente since they’ll continue absorbing the dressing. Drain them and rinse under cold water until completely cool. This stops the cooking and prevents them from turning mushy. Pat them dry gently with a clean kitchen towel.
Whisk your dressing ingredients together in a small bowl. The peanut butter will seem resistant to combining at first, but as you whisk, it will gradually emulsify with the oils and create something silky and rich. Once fully combined, pour the dressing into the bottom of your mason jar.
Add the cooled noodles on top of the dressing. They’ll look coiled and pretty at first, but don’t worry—they’ll relax and meld with everything when you shake the jar to eat. The sesame dressing is thick enough to coat them without making them soggy.
Layer your carrots, cucumber, bell pepper, and edamame next. These vegetables provide the crunch and color that makes this salad visually striking. They’ll soften slightly as the dressing penetrates, becoming more tender and more flavorful.
Add the green onion and cilantro, then top with the mixed greens or napa cabbage. The cabbage is exceptional here because it’s sturdy enough to handle dressing but provides a genuinely different texture than typical lettuce. The whole jar should look visually balanced with color layering visible from the outside.
Sprinkle your sesame seeds on the very top as a garnish. They’ll toast slightly from the residual warmth and provide a beautiful nutty flavor and crunch when you eat.
Tips and Variations
This is one of the salads that genuinely improves on day two and three—the noodles absorb more of the dressing and the overall flavor becomes richer. Don’t hesitate to make these on Sunday and eat them Wednesday if you prefer deeper flavors.
For a protein boost, add shredded rotisserie chicken, diced baked tofu, or a hard-boiled egg. The sesame dressing is complementary to all of them without overpowering their flavor. If you add cooked shrimp, keep it more loosely packed rather than compressed into the jar so it doesn’t get mangled.
Peanut butter in the dressing is flexible—if you’re allergic or prefer not to use it, replace it with tahini for a similar richness without the peanut flavor. The salad works beautifully either way. You can also experiment with different nut butters like almond butter, which provides a more delicate flavor.
For a vegetable swap, bok choy (chopped), water chestnuts, snap peas, and shredded purple cabbage all work beautifully in this salad. The key is maintaining that combination of tender and crunchy elements.
3. Roasted Vegetable and Farro Mason Jar Salad
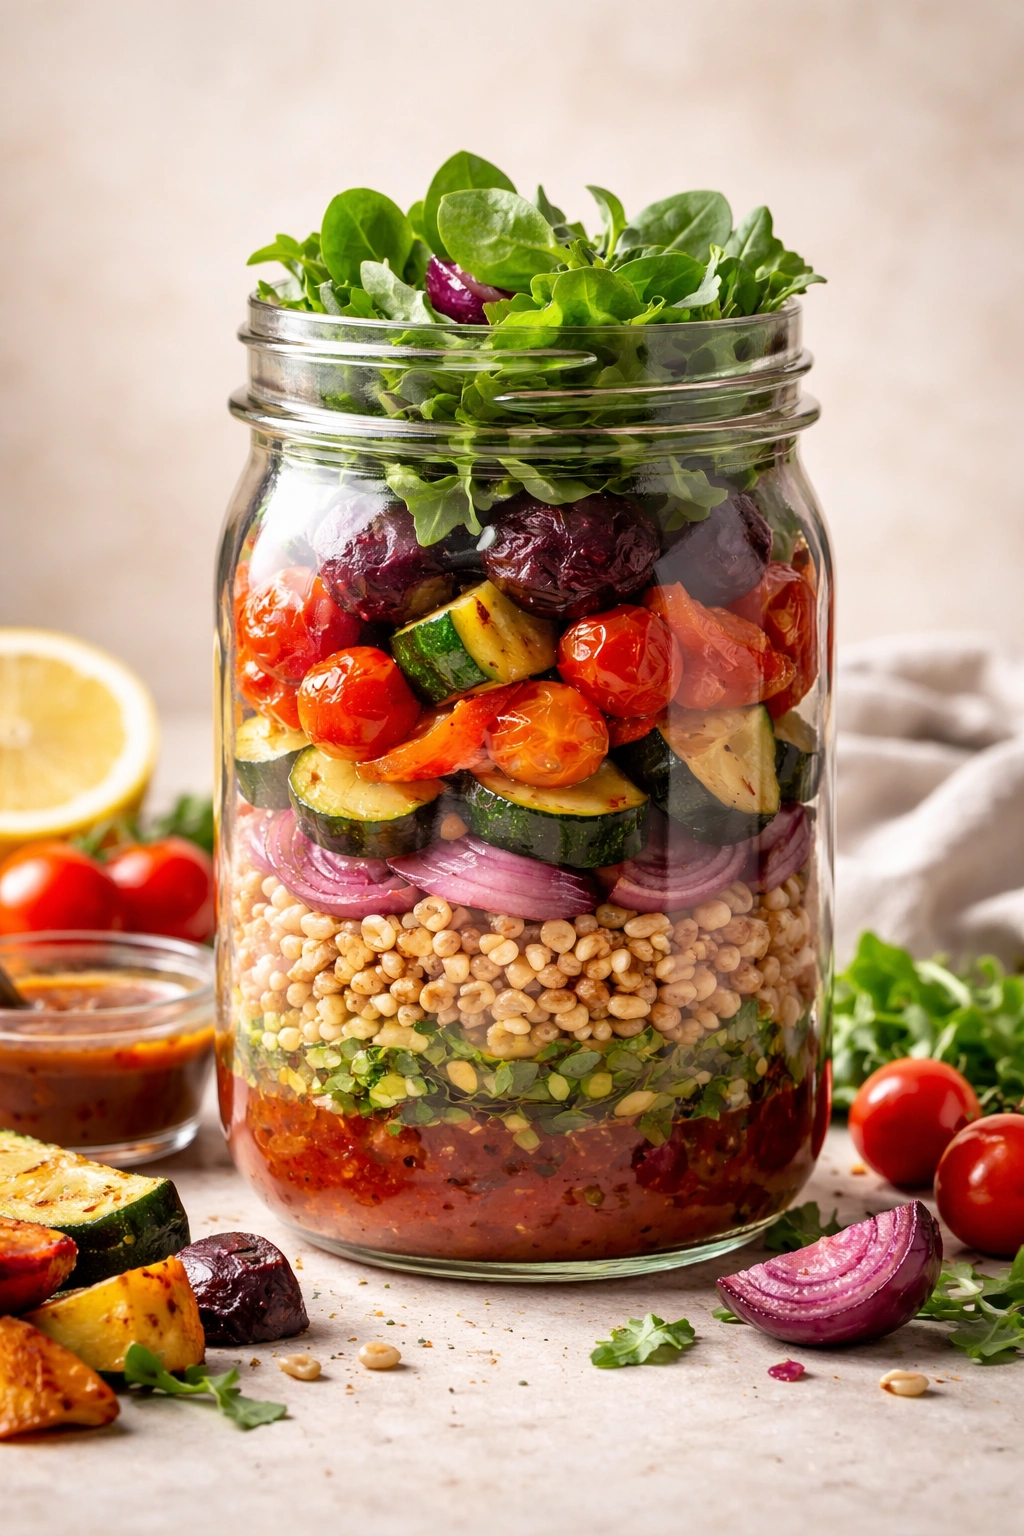
This salad is hearty and warming, filled with roasted vegetables that have concentrated, caramelized flavors and chewy farro grains. The red wine vinaigrette is slightly tangy and pairs beautifully with the sweetness of roasted root vegetables. It’s the kind of salad that makes you feel like you’re eating something genuinely nourishing rather than just having a quick lunch.
Yield: 1 large salad (serves 1 as a main, 2 as a side) Prep Time: 15 minutes Cook Time: 25 minutes for vegetables and farro Total Time: 40 minutes Difficulty: Intermediate — involves roasting vegetables and cooking farro.
For the Red Wine Vinaigrette:
- ¼ cup extra-virgin olive oil
- 3 tablespoons red wine vinegar
- 1 tablespoon balsamic vinegar
- 1 teaspoon Dijon mustard
- 1 clove garlic, minced
- ½ teaspoon dried thyme
- ½ teaspoon fine sea salt
- ¼ teaspoon freshly cracked black pepper
For the Roasted Vegetables:
- 1 cup cubed beets (about 2 medium beets)
- ¾ cup cubed zucchini
- ¾ cup cubed bell pepper (red or orange)
- ½ small red onion, cut into wedges
- 1 tablespoon olive oil
- ¼ teaspoon fine sea salt
- Pinch of freshly cracked black pepper
For the Salad:
- ¾ cup cooked farro, cooled
- ½ cup halved cherry tomatoes
- ¼ cup crumbled goat cheese or feta
- 2 cups mixed baby lettuce or spinach
- 2 tablespoons fresh parsley, chopped
- 1 tablespoon chopped fresh thyme or dill (optional)
- ¼ cup candied walnuts or sunflower seeds
Roasting and Cooking the Components
Preheat your oven to 425°F (220°C). Cut your beets, zucchini, bell pepper, and red onion into roughly equal-sized cubes so they roast evenly. Toss them with olive oil, salt, and pepper on a rimmed baking sheet, spreading them in a single layer without crowding. Roast them for 25 to 30 minutes, stirring halfway through, until the vegetables are tender and the edges are slightly caramelized.
While the vegetables roast, bring a pot of water to a boil. Cook your farro according to package directions (usually 30-35 minutes)—aim for tender grains that still have a slight chew, not mushy. Drain it and spread it on a plate to cool while the vegetables finish.
Whisk your vinaigrette ingredients together in a small bowl. The mustard acts as an emulsifier, helping the oil and vinegar become friends rather than separating immediately. This dressing is intentionally tangy to cut through the sweetness of the roasted vegetables.
Assembly
Once the roasted vegetables have cooled slightly (they don’t need to be completely cold), pour your vinaigrette into the bottom of your mason jar. Add the cooled farro on top. The warm farro will absorb the dressing beautifully, and even if it’s just slightly warm rather than completely cooled, it won’t hurt anything.
Layer your cooled roasted vegetables on top of the farro. They’ll nestle together and create a beautiful visual composition with the colors visible through the glass. Add the cherry tomatoes next—they provide freshness and slight acidity that balances the rich, roasted flavors.
Add the goat cheese, then top with your mixed greens and fresh parsley. If you’re using fresh thyme or dill, add a pinch here. Finally, scatter your candied walnuts or sunflower seeds on the very top for texture and a subtle sweetness that plays beautifully against the earthiness of the roasted vegetables.
Tips and Variations
You can absolutely prep the components of this salad the night before—roast the vegetables, cook the farro, and make the dressing, then assemble the jars in the morning. This is one of the easiest salads to batch on a Sunday because each component holds so well.
Different root vegetables work beautifully here. Sweet potato, parsnip, regular potato, or Brussels sprouts (halved and cut into smaller pieces) all roast into something genuinely delicious. The key is roasting hot enough to caramelize the outsides while keeping the insides tender. If your vegetables are very large, cut them smaller so they roast completely by the 30-minute mark.
For a protein boost, add ¼ cup of chickpeas or white beans that you’ve also roasted with a little olive oil and seasoning. They become crispy on the outside and creamy inside, and they’re incredible in this context. A hard-boiled egg or some roasted tofu would also be phenomenal.
The vinaigrette is flexible—if you prefer something less tangy, reduce the vinegars by a tablespoon and increase the olive oil. If you like more depth, add a touch of maple syrup or honey to balance the acidity.
4. Caprese Grain Bowl Mason Jar Salad
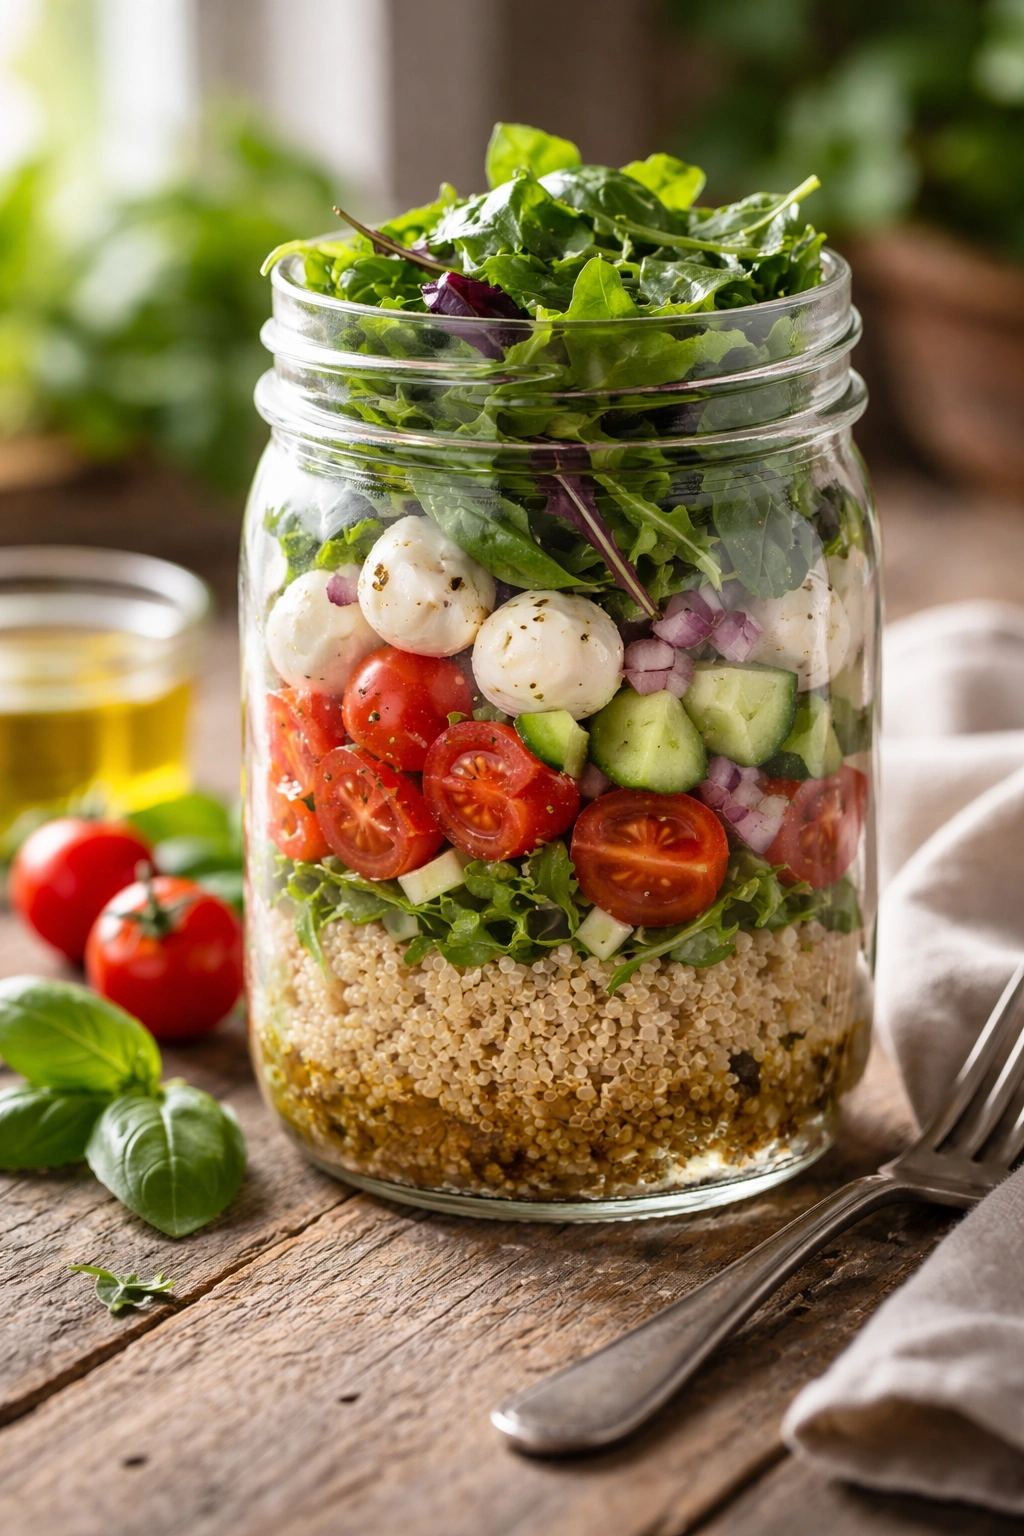
This is your fresh, summery option—a celebration of ripe tomatoes, creamy mozzarella, fresh basil, and a simple balsamic vinaigrette. It comes together in minutes, tastes elegant enough for a special lunch, and genuinely tastes best when eaten within two to three days. This is less about meal-prep longevity and more about having something assembled and ready to grab.
Yield: 1 large salad (serves 1 as a main, 2 as a side) Prep Time: 10 minutes Cook Time: 15 minutes for grains (if using quick-cook options) Total Time: 25 minutes Difficulty: Beginner — minimal actual cooking, mostly assembly.
For the Balsamic Vinaigrette:
- 3 tablespoons extra-virgin olive oil
- 2 tablespoons balsamic vinegar
- ½ teaspoon Dijon mustard
- ½ clove garlic, minced very finely
- Pinch of fine sea salt
- Pinch of freshly cracked black pepper
For the Salad:
- ½ cup cooked quinoa or farro, cooled
- ¾ cup diced fresh tomatoes (Roma or heirloom if available)
- ½ cup fresh mozzarella balls (ciliegine) or diced fresh mozzarella
- ½ cup diced cucumber
- ¼ cup diced red onion
- 2 cups mixed greens or arugula
- 1 cup fresh basil leaves, torn
- 2 tablespoons pine nuts or sliced almonds, lightly toasted
- Sea salt and freshly cracked black pepper to taste
- Optional: 6-8 caramelized balsamic pearls for garnish
Assembly
Whisk together your balsamic vinaigrette—it should be simple and elegant, letting the quality of the vinegar shine through. Pour it into the bottom of your mason jar.
Add your cooled grains (quinoa or farro) on top. If you’re using farro, you can prepare it the night before so it’s ready immediately. Quinoa cooks faster and is also great here.
Layer your fresh tomatoes next—they’re sturdy enough to handle dressing and actually absorb the balsamic flavor beautifully over a few hours. Add your fresh mozzarella right after the tomatoes. The mozzarella will soften slightly and become even creamier as the dressing mingles with it.
Add the cucumber and red onion for crunch and slight sharpness. These vegetables provide a textural and flavor contrast to the soft, creamy mozzarella.
Top with your mixed greens, then tear your fresh basil leaves directly into the jar. Use only the tender young basil leaves if you can—mature basil leaves can develop a peppery, slightly metallic flavor that’s less pleasant. The basil should stay bright green and fragrant until you eat it because it sits dry at the very top.
Toast your pine nuts or almonds lightly in a dry skillet until they’re fragrant and slightly golden, then scatter them on top of the basil as a final garnish.
Tips and Variations
Fresh basil is crucial here—dried basil will taste dusty and significantly less pleasant. This salad tastes best eaten within two days because fresh tomatoes and basil are at their peak when very fresh. If you’re making this for later in the week, use firmer heirloom tomatoes that won’t turn mushy.
Burrata cheese (fresh mozzarella with a cream center) is absolutely magnificent if you can find it, though it’s typically more expensive. It creates an incredibly creamy element when combined with the balsamic dressing. Traditional fresh mozzarella works beautifully too and is more accessible and budget-friendly.
You can add thin slices of prosciutto or roasted chicken if you want protein, though the mozzarella and grains already make this a satisfying, complete meal. If you do add meat, layer it between the grains and tomatoes so the dressing keeps it from drying out.
For a different herb direction, try substituting the basil with fresh oregano and adding a tiny pinch of red pepper flakes to your vinaigrette. This gives it a different Italian vibe that’s still absolutely delicious.
5. Southwestern Quinoa Mason Jar Salad
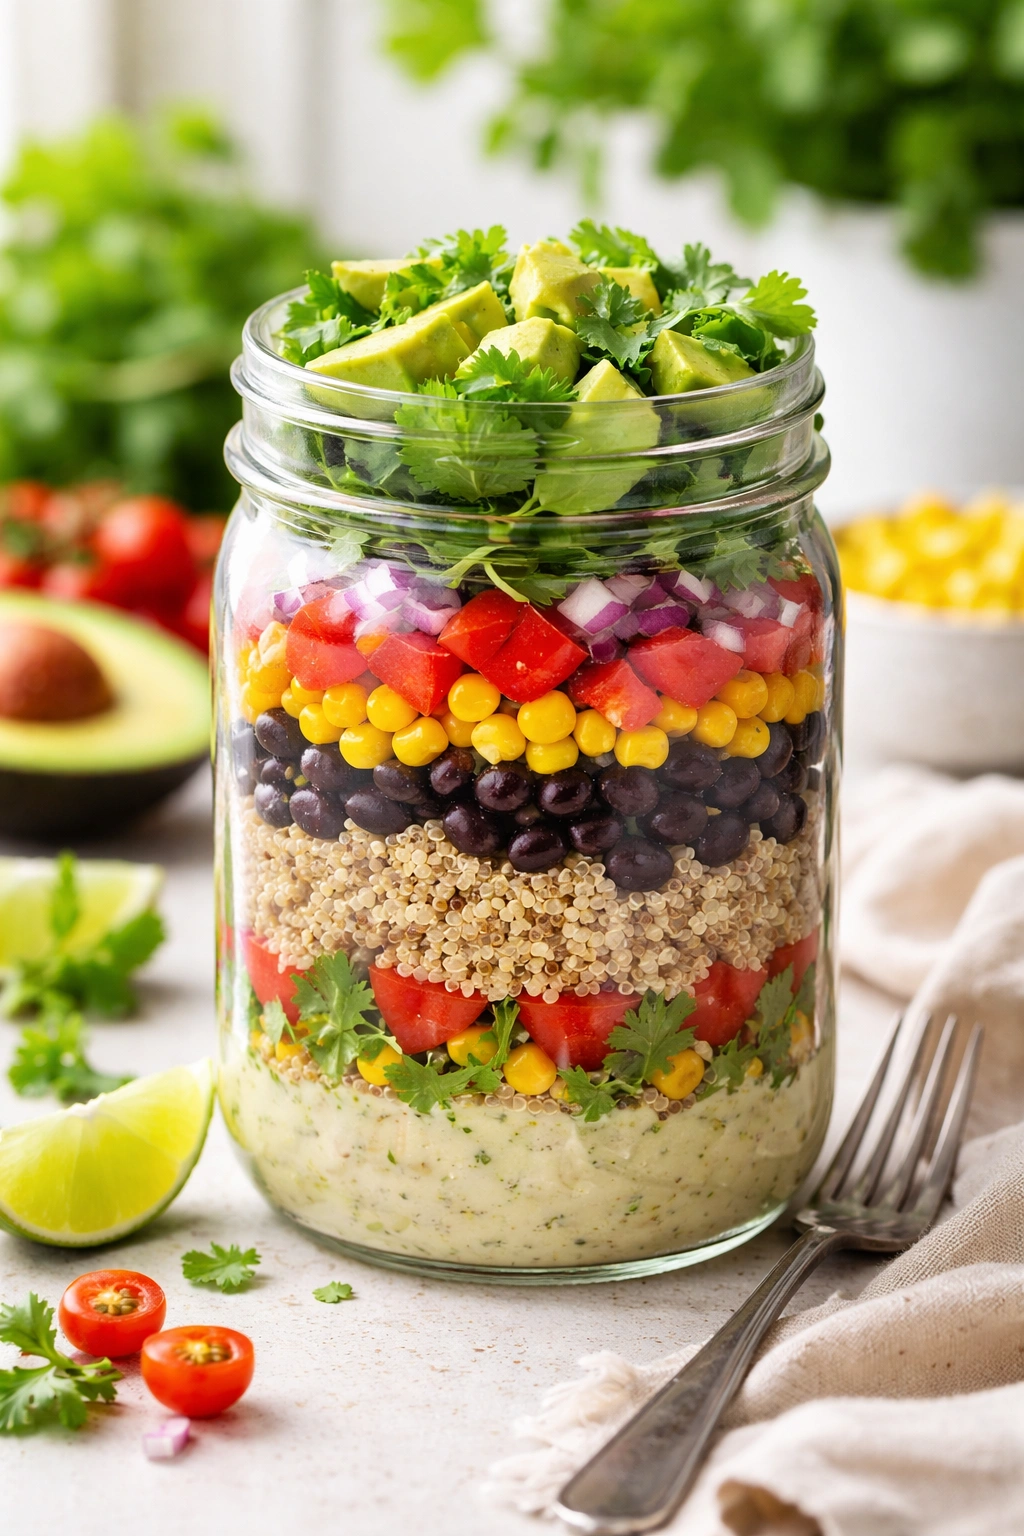
This salad brings bold, vibrant flavors—cumin, lime, cilantro, black beans, corn, and a creamy cilantro-lime dressing. It tastes like a deconstructed burrito bowl, and it’s actually better on day two when the flavors have had time to meld. The spice level is moderate, but you can easily increase it by adding jalapeños or more chili powder to your dressing.
Yield: 1 large salad (serves 1 as a main, 2 as a side) Prep Time: 12 minutes Cook Time: 20 minutes for quinoa (or use pre-cooked) Total Time: 32 minutes Difficulty: Beginner — straightforward assembly with minimal cooking.
For the Cilantro-Lime Dressing:
- ¼ cup extra-virgin olive oil
- 3 tablespoons fresh lime juice
- 2 tablespoons Greek yogurt or sour cream
- 1 clove garlic, minced
- ½ cup fresh cilantro, packed
- ½ teaspoon ground cumin
- ¼ teaspoon chili powder
- ¼ teaspoon fine sea salt
- Pinch of freshly cracked black pepper
For the Salad:
- ¾ cup cooked quinoa, cooled
- ½ cup cooked or canned black beans, drained and rinsed
- ½ cup corn (fresh, frozen and thawed, or canned)
- ½ cup diced red bell pepper
- ¼ cup diced red onion
- ¼ cup diced avocado (add this on day 1 only if not eating immediately)
- 2 cups mixed greens or shredded romaine lettuce
- ¼ cup shredded sharp cheddar cheese
- 2 tablespoons chopped cilantro
- Lime wedge for serving
Dressing Preparation
Blend your cilantro-lime dressing by combining the olive oil, lime juice, Greek yogurt, minced garlic, fresh cilantro, cumin, chili powder, salt, and pepper in a blender or food processor. Blend until smooth and vibrant green. The yogurt makes the dressing creamy without being heavy, and it keeps the bright cilantro flavor front and center. If you don’t have a blender, finely chop the cilantro and whisk everything together—it won’t be quite as silky, but it’ll still taste excellent.
Assembly
Pour your cilantro-lime dressing into the bottom of your mason jar. The dressing should look like liquid herb goodness.
Add your cooked quinoa on top of the dressing. Quinoa is one of the best grains for mason jar salads because it’s light, absorbs flavor beautifully, and creates a great textural contrast with everything else.
Layer your black beans and corn together or separately—they create a beautiful color combination and provide substance. These legumes and vegetables are sturdy and happy to sit in dressing.
Add your red bell pepper and red onion next. The red onion will mellow and become sweeter as it sits in the lime dressing—this is actually desirable here because it balances the spice.
Now, here’s the question of avocado: If you’re eating this salad within a few hours of assembling it, add the diced avocado now. If you’re making it Sunday and eating it Wednesday, don’t include avocado—it will brown and become unappetizing. Instead, add the avocado on the morning you plan to eat it, or just before you eat.
Top with your mixed greens or shredded romaine, then sprinkle the cheddar cheese and fresh cilantro on the very top.
Tips and Variations
The creamy yogurt-based dressing is what sets this apart from a standard southwest salad. The yogurt creates creaminess without the heaviness of mayo or the richness of pure oil, and it keeps the bright, fresh flavors of the lime and cilantro clear and prominent.
You can easily customize the heat level. If you like it spicier, add a diced jalapeño to the dressing or layer it in with the vegetables. A pinch of cayenne pepper in the dressing brings heat without overwhelming. If you prefer mild, simply skip the chili powder and let the cumin provide warmth instead.
For protein, shredded rotisserie chicken, diced black beans (double the amount), or crumbled crispy bacon all work beautifully. The dressing is flavorful enough that it won’t be overpowered, and the spice profile complements all of them.
Cotija cheese is exceptional here if you can find it—it’s crumbly, salty, and has a tangy flavor that plays beautifully in a southwestern context. If you can’t find it, sharp cheddar or feta both work as substitutes.
Customizing Your Mason Jar Salads
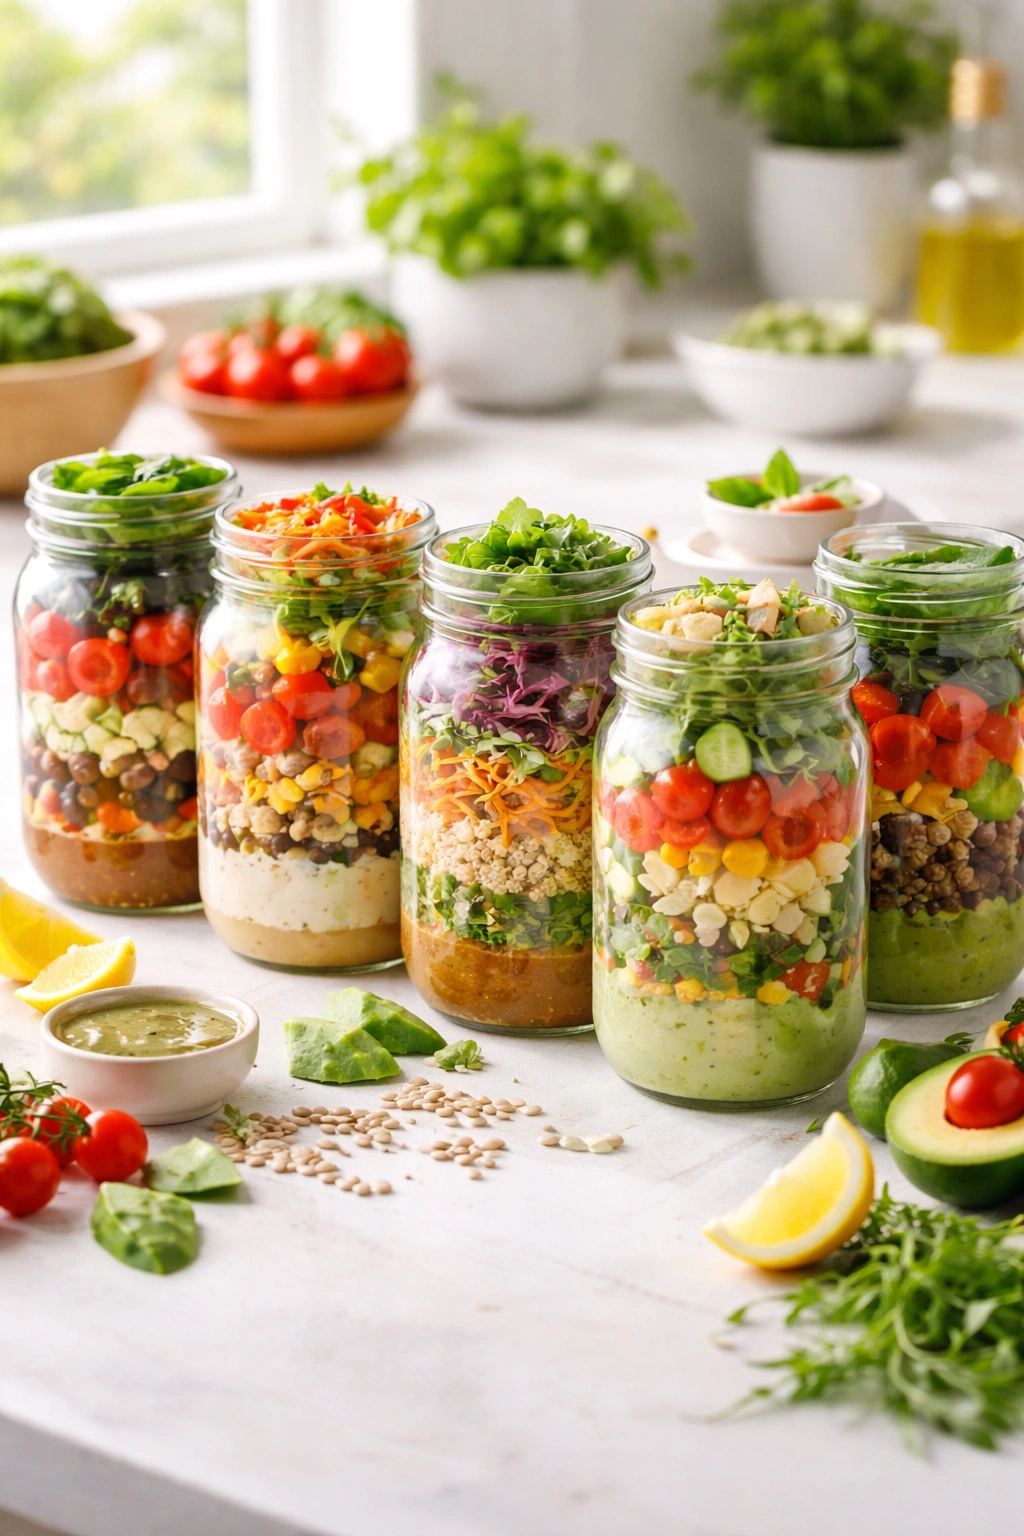
Once you understand the fundamental structure of mason jar salads, you can absolutely build your own combinations with confidence. The formula is simple: flavorful dressing at the bottom, sturdy vegetables that can handle moisture in the middle, grains or proteins for substance, and delicate greens at the very top.
Start by picking a dressing flavor profile. Are you in the mood for something Mediterranean? Asian-inspired? Vinegar-based? Creamy? Once you choose a direction, let that inform your vegetable and protein choices. A sesame dressing naturally pairs with edamame, cabbage, and ginger-forward flavors. A balsamic vinaigrette loves roasted vegetables and goat cheese.
Think about texture balance. You want crunch (raw vegetables, nuts, seeds), creaminess (cheese, avocado, creamy dressing), chewiness (grains, legumes), and brightness (fresh herbs, citrus). When all four elements are present, the salad feels complete and satisfying rather than monotonous.
Don’t be afraid to combine elements from different recipes. The Mediterranean base can incorporate grains from the roasted vegetable salad. The Asian dressing works beautifully with southwestern vegetables. The structure is flexible; the formula is what matters.
Final Thoughts
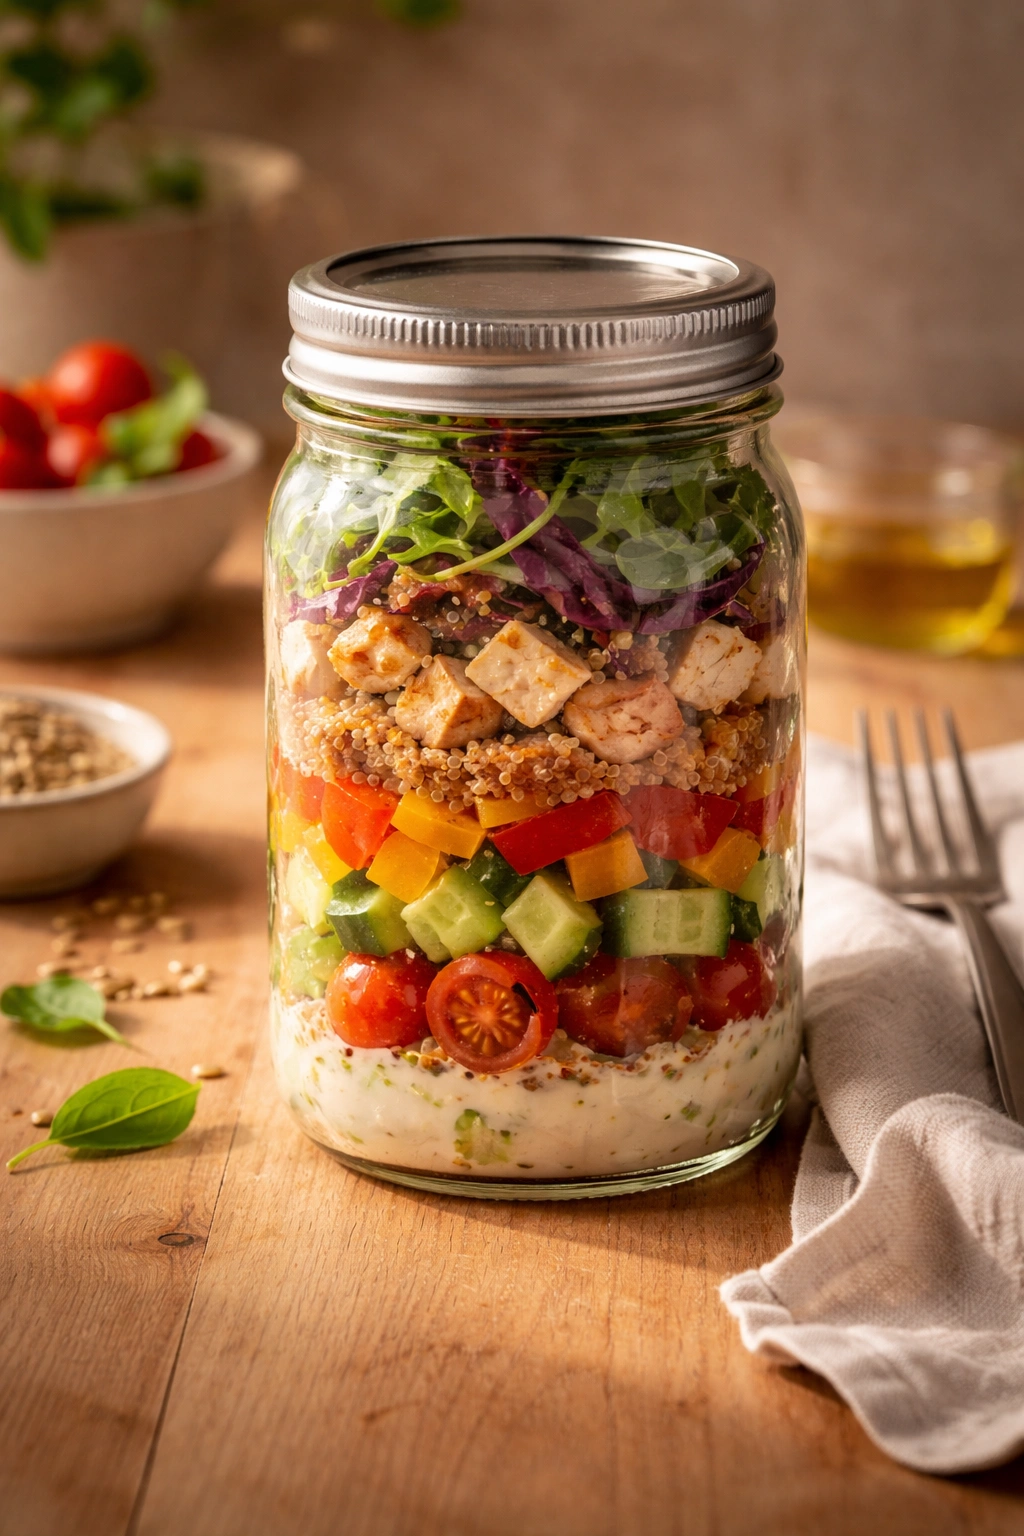
Mason jar salads aren’t a trend—they’re a genuinely practical solution to one of the biggest obstacles to healthy eating: having good food ready when hunger strikes. They work because they’re not a sacrifice or a punishment. They taste good, they’re satisfying, and they actually stay fresh through the week.
The beauty of these five recipes is that they give you a complete week of different flavor profiles and textures, each one interesting enough that you’ll look forward to lunch rather than dreading another salad. By Sunday evening, you’ll have five complete meals assembled, ready to grab, and genuinely more delicious than the moment they were made.
Start with whichever recipe calls to you most, master the layering technique, and then let your own preferences guide you. Once you develop the habit of Sunday assembly, you’ll find yourself experimenting with combinations and ingredients you wouldn’t normally try. That’s when mason jar salads become more than meal prep—they become a way of genuinely nourishing yourself without the daily friction that usually derails good intentions.
