There’s something almost magical about the way shrimp transforms in a hot skillet when it meets butter, garlic, and just a whisper of wine. Within minutes, you’ve got restaurant-quality seafood on your plate—the kind of dish that feels fancy enough for unexpected guests but quick enough for a Tuesday night when you didn’t plan ahead. That’s the beauty of shrimp scampi in a rich garlic butter sauce: it’s elegant without being fussy, indulgent without requiring hours of prep, and most importantly, it delivers that restaurant-perfect depth of flavor that makes people ask for the recipe before they’ve even finished eating.
The magic isn’t complicated. It’s really about understanding three things: how to cook shrimp without overdoing it, how to build a silky, emulsified sauce that clings to every shrimp instead of pooling on your plate, and how to layer flavors so that the garlic sings, the lemon brightens, and the butter ties everything together into something greater than the sum of its parts. This isn’t a dish that tolerates rushing, but it rewards attention with results that taste like you spent far more time on dinner than you actually did.
What makes this version different from countless other shrimp scampi recipes isn’t a secret ingredient—it’s understanding the why behind every step. When you know why you’re doing something, you can troubleshoot when things go wrong, adjust for your own preferences, and make this dish confidently every single time. Let’s walk through how to create shrimp scampi that tastes like you’ve been perfecting it for years.
Why Shrimp Scampi Became an Italian-American Classic
The story of shrimp scampi actually tells us something important about how dishes evolve and travel. The word “scampi” originally referred to langoustines—small Mediterranean crustaceans in the lobster family that were abundant in Italian coastal regions. In Italy, these creatures were traditionally prepared simply: sautéed in garlic and olive oil, maybe with a splash of white wine, finished with parsley and lemon.
When Italian immigrants arrived in America in the early 20th century, they brought their cooking traditions with them but had to adapt to what was available. Langoustines were nearly impossible to find in American markets, but shrimp were plentiful and affordable. So they applied the same cooking method to shrimp and the dish found its home in Italian-American restaurants from New York to San Francisco. Over time, American cooks added butter to the olive oil, expanding on the Italian simplicity with a richer sauce—and that’s essentially what we’re making here.
Today, shrimp scampi is one of the most beloved seafood dishes in casual dining, but the best versions are the ones made at home where you control the quality of every ingredient. There’s no heavy cream, no unnecessary thickeners, no shortcuts—just buttery, garlicky shrimp finished exactly the way you like it.
What Makes This Garlic Butter Sauce So Special
The sauce in a proper shrimp scampi isn’t something that happens by accident. It’s built intentionally through technique and timing. When you cook garlic in butter and olive oil, the heat draws out the garlic’s natural sugars and deepens its flavor without the harshness of raw garlic. But if you’re not careful, you’ll burn it and end up with something acrid and bitter.
The white wine isn’t just flavor—it’s also a deglazing agent that picks up all the caramelized bits stuck to the bottom of your pan, and it adds acidity that balances the richness of the butter. As it reduces, the wine becomes more concentrated and less “winey,” creating a sauce that’s complex without tasting like you’ve been cooking with alcohol. Some recipes use vermouth instead, which is already oxidized and requires less reduction time, making it excellent if you’re scaling the recipe up.
The real secret to a great sauce is emulsification. When you whisk butter into the reduced wine and pan juices, the butter breaks down into tiny particles that remain suspended in the liquid, creating a silky, luxurious texture that coats each shrimp and clings to your pasta if you’re serving it that way. This is different from a greasy, broken sauce where the butter pools separately—emulsified sauce has a completely different mouthfeel.
A squeeze of fresh lemon juice added at the end serves multiple purposes. It brightens all the rich flavors, adds a subtle tartness that prevents the dish from feeling heavy, and actually helps stabilize the emulsified sauce. The acid helps keep everything in balance so your sauce stays creamy and doesn’t separate as it sits.
Choosing and Preparing Your Shrimp
The quality of your shrimp determines the quality of your final dish more than anything else. This is one recipe where it’s absolutely worth spending a bit more for better shrimp. If possible, buy wild-caught shrimp instead of farmed. They have better flavor, a firmer texture, and a cleaner taste. If wild-caught isn’t available or is out of budget, frozen shrimp are actually your friend here.
Many people assume fresh shrimp at the grocery store’s seafood counter is superior, but most of it has been previously frozen and thawed. Frozen shrimp, by contrast, are flash-frozen right on the boat at peak freshness. As long as they’re not covered in freezer burn and haven’t been sitting in your freezer for years, frozen shrimp will cook better and taste fresher than shrimp that has been thawed for days.
The size matters too. For this dish, you want large to extra-large shrimp—roughly 20 to 30 shrimp per pound. Smaller shrimp will overcook in seconds and turn rubbery before you can finish the sauce. Jumbo shrimp (fewer than 20 per pound) are even better if you can find them, as they’re more forgiving and create a more luxurious presentation.
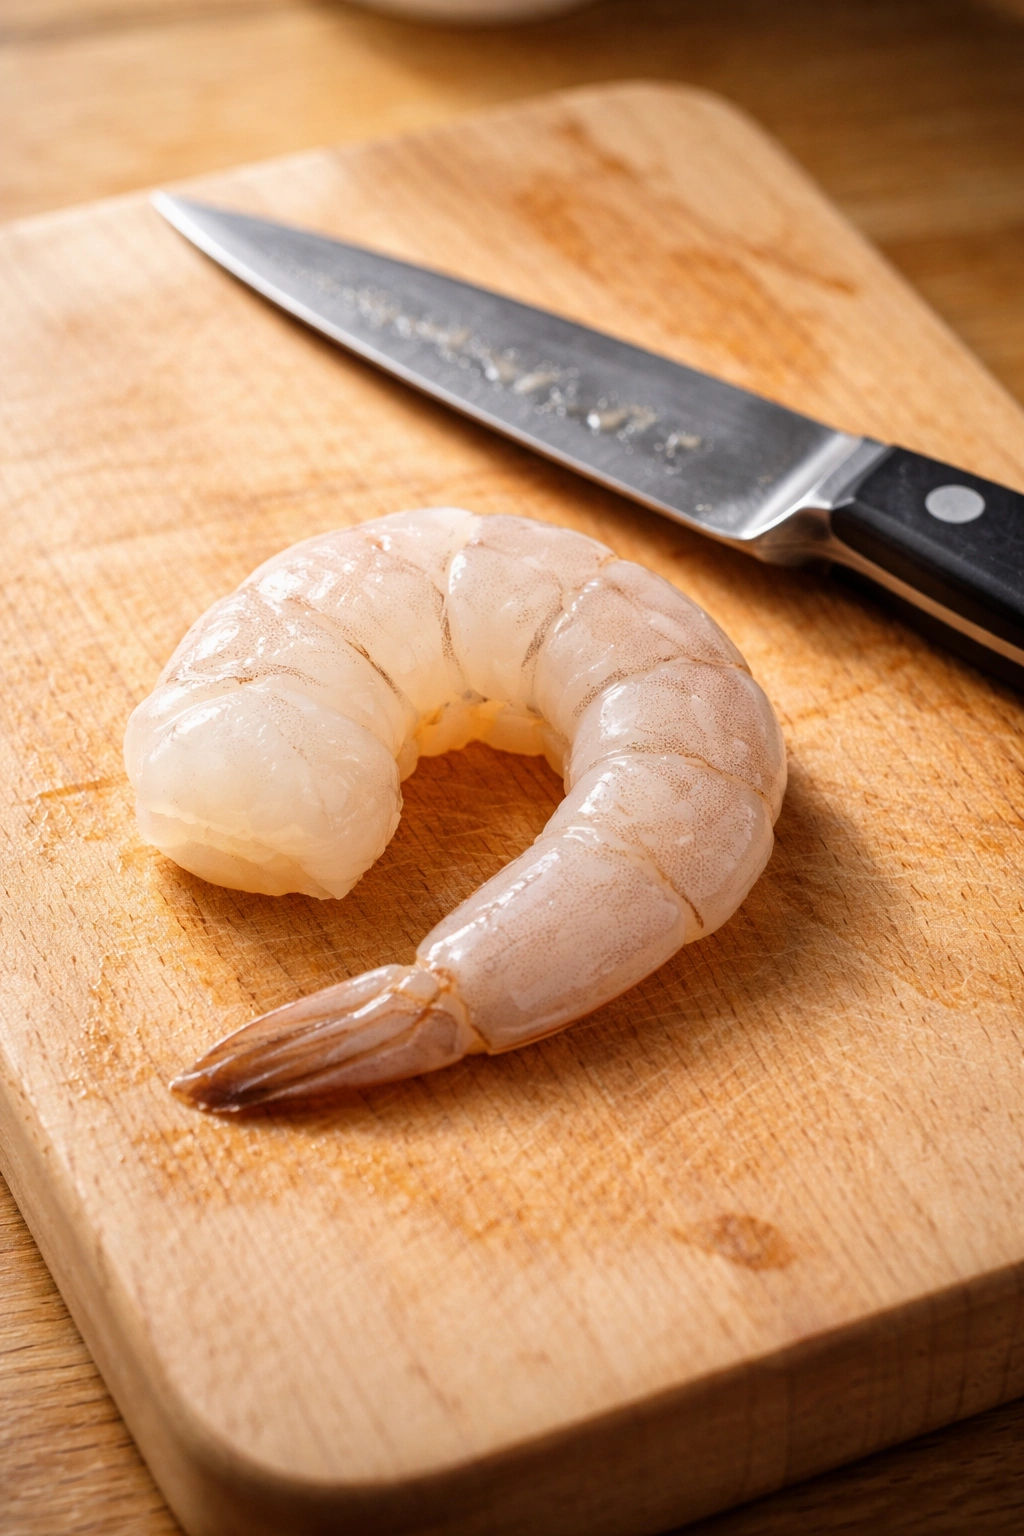
Always buy shrimp that have been peeled and deveined if that’s available to you. Deveining is that black vein running along the back of the shrimp—it’s the shrimp’s digestive tract. While technically edible, it looks unappetizing and can taste slightly gritty, so removing it is worth your effort. If your shrimp still have shells or tails on, that’s fine for presentation if you’re serving as an appetizer, but they’re trickier to eat in a buttery sauce.
The Science of a Perfect Emulsified Sauce

Understanding what’s happening chemically when you make this sauce helps you troubleshoot if something goes wrong, and it might help you appreciate just how elegant this simple technique is.
Butter is an emulsion itself—it’s tiny fat globules suspended in water, held together by lecithin. When you add cold, cubed butter to hot liquid, the heat melts the fat but the rapid mixing prevents the fat and water from completely separating. The vigorous stirring and swirling breaks the butter into infinitesimally small particles that stay suspended throughout the liquid, creating that silky, luxurious texture. This is an emulsion, and it’s the same technique French chefs use to make beurre blanc and hollandaise.
Temperature is critical. The liquid needs to be hot enough to melt the butter but not so hot that it breaks the emulsion. Once you add the butter, lower the heat slightly and keep swirling and stirring constantly. You want motion and medium heat, not a rolling boil.
If your sauce does break—if it looks greasy and separated instead of smooth and creamy—don’t panic. Add a teaspoon or two of cold water or even a tiny bit of lemon juice and whisk vigorously. The water helps the particles reset and often brings the emulsion back together. The worst that happens is you have a delicious, buttery pan sauce that’s just a bit looser than you wanted, which still tastes fantastic.
Building Layers of Flavor: Garlic, Wine, and Lemon
The shrimp scampi flavor profile relies on balancing bold and bright flavors. Let’s break down each component and how it contributes to the whole.
Garlic is the foundation. Fresh minced garlic (not pre-minced from a jar) is essential here. When garlic is minced finely and cooked in hot fat, the heat activates compounds that create the savory, rich garlic flavor we love. The key is cooking it just until fragrant—about 30 seconds to a minute—without letting it brown. If you burn the garlic, you’ll get a bitter, acrid flavor that overpowers everything else and there’s no fixing it. Fresh garlic cloves minced by hand work better than a microplane, which can create a garlic purée that burns more easily in hot oil.
White wine adds sophistication and prevents the sauce from being one-dimensionally buttery. It should be a dry wine you’d actually drink—something like Sauvignon Blanc, Pinot Grigio, or Chardonnay. Avoid anything labeled “cooking wine,” which often contains salt and additives. The wine needs to reduce by roughly half, which concentrates its flavors while cooking off the raw alcohol taste. You want the wine to smell like wine, not like paint thinner, which means it’s reduced enough.
Lemon juice, added at the very end after you remove from heat, is the brightness that ties everything together. It cuts through the richness, prevents the sauce from tasting heavy, and makes all the other flavors seem more vivid. Fresh-squeezed lemon juice is noticeably better than bottled, which can taste tinny. Just a couple tablespoons is enough—you’re not making a lemon-forward dish, just adding enough brightness to make the garlic and butter sing.
Equipment and Tools You’ll Actually Need
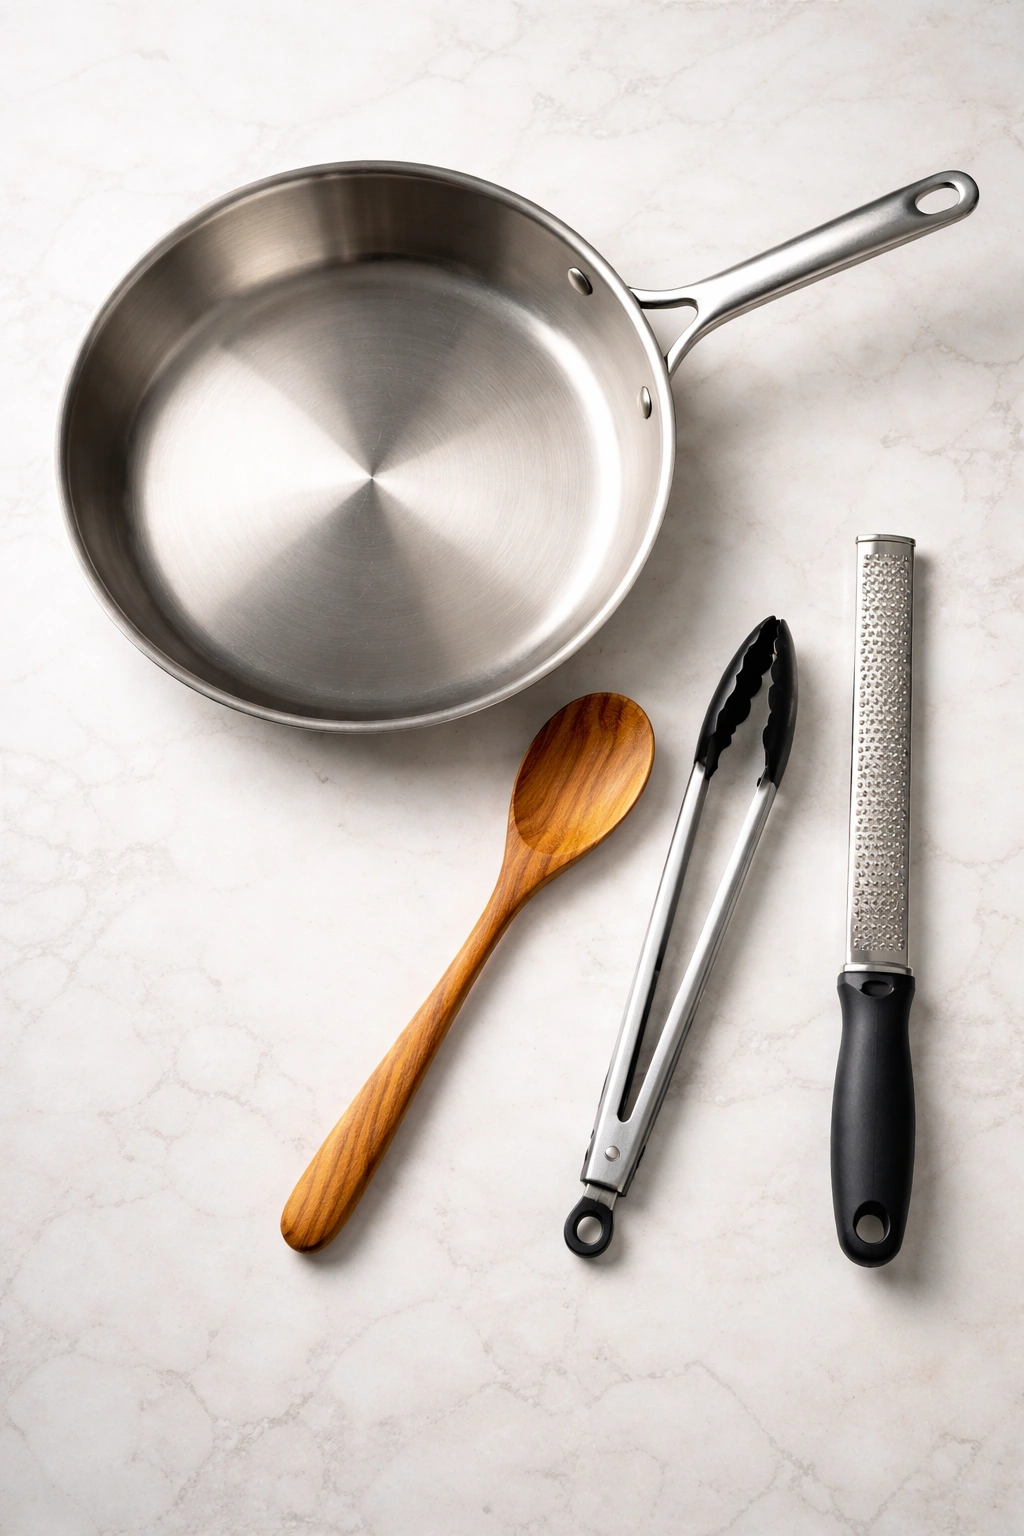
You don’t need much to make excellent shrimp scampi, but the right pan makes a real difference. A large stainless steel skillet or heavy-bottomed sauté pan (12 inches is ideal) gives you enough surface area to cook the shrimp in a single layer without crowding them. Overcrowded shrimp will steam instead of sear, and you lose the flavor development that comes from a quick, hot sear.
Cast iron skillets work wonderfully too—they retain heat exceptionally well, which means your shrimp will develop a beautiful golden exterior. If you use nonstick, make sure it’s good quality, because a thin, flaky nonstick coating will eventually end up in your food. Stainless steel is more forgiving and easier to deglaze (which is important when you’re building your sauce).
You’ll want a wooden spoon or silicone spatula for stirring and scraping up browned bits, a slotted spoon for transferring the cooked shrimp out of the pan without taking all the cooking fat with them, and maybe cooking tongs if you want to flip the shrimp precisely. A microplane or box grater is helpful for zesting lemon if you want to add that touch.
That’s really all you need. No fancy equipment required. The best tool in your arsenal is actually your attention and understanding of what’s happening in the pan.
Yield: Serves 4 as a main course or 6 as an appetizer
Prep Time: 15 minutes
Cook Time: 10 minutes
Total Time: 25 minutes
Difficulty: Beginner to Intermediate — This recipe requires understanding heat control and sauce technique, but there are no complex steps. The key is attention rather than skill. If you can pay close attention for 10 minutes and follow the timing cues, you’ll succeed.
Complete Ingredient List
For the Shrimp and Pan Base:
- 1½ pounds large to extra-large shrimp, peeled and deveined (about 20-30 shrimp per pound)
- 5 tablespoons unsalted butter, divided (2 tablespoons for cooking shrimp, 3 tablespoons for the sauce)
- 3 tablespoons extra-virgin olive oil, divided (2 tablespoons for cooking shrimp, 1 tablespoon for garlic and aromatics)
- Kosher salt, to taste
- Freshly cracked black pepper, to taste
For the Sauce:
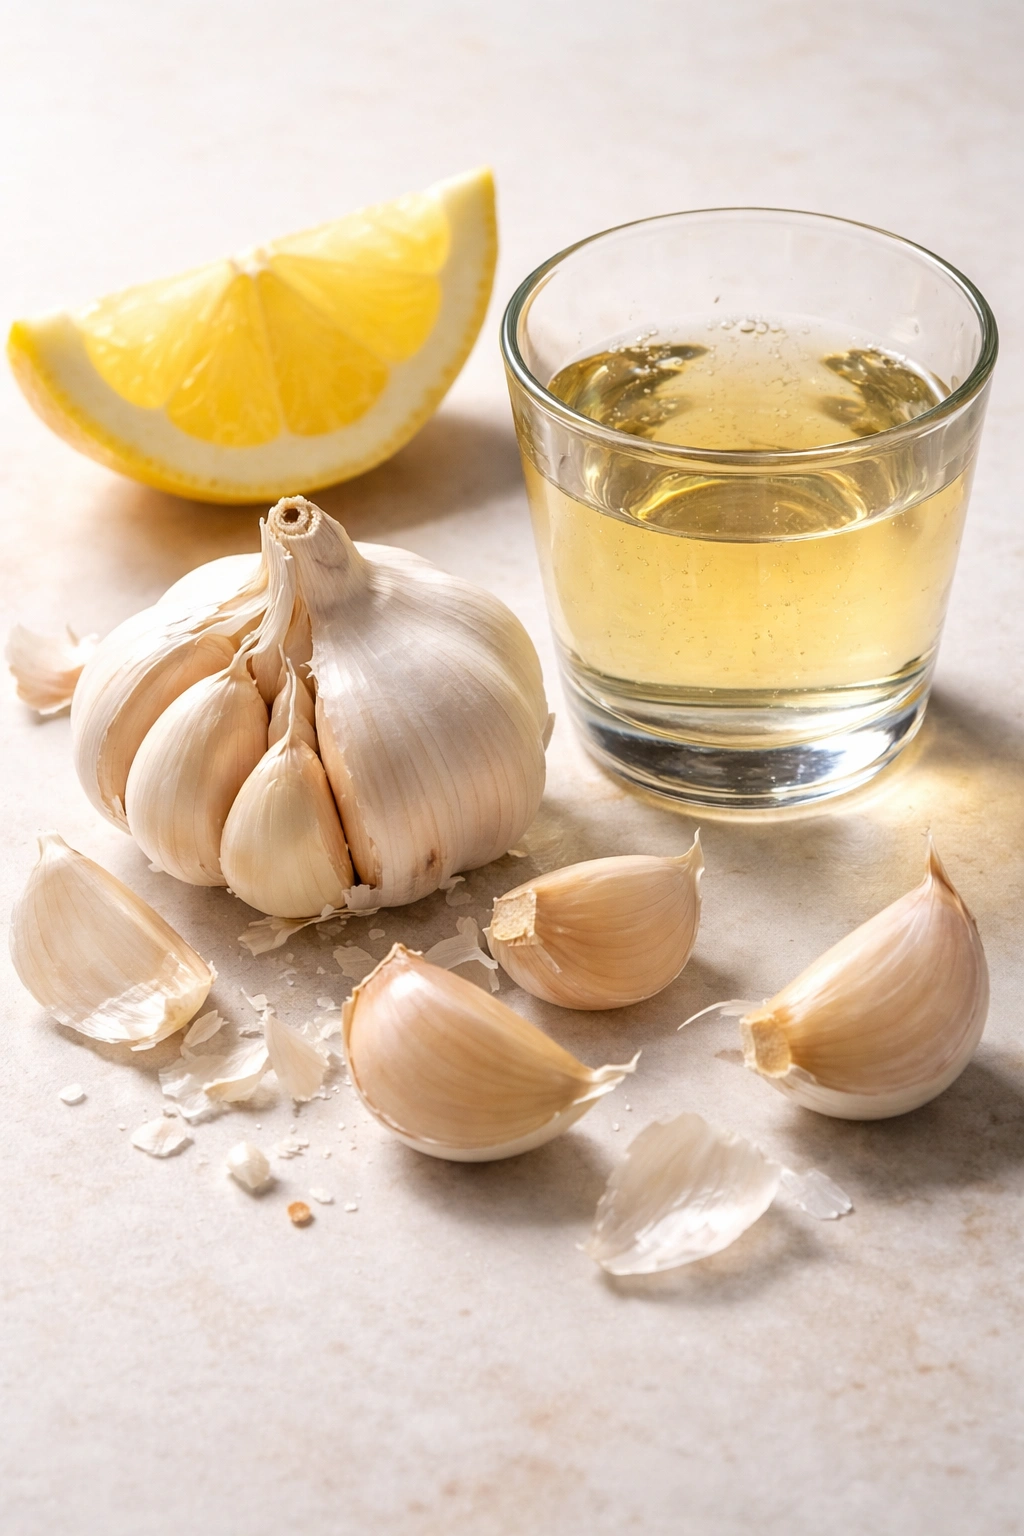
- 6 large garlic cloves, minced (about 2 tablespoons minced garlic)
- ⅓ to ½ cup dry white wine—Sauvignon Blanc, Pinot Grigio, or Chardonnay (use ⅓ cup if your pan is very wide, ½ cup for standard skillets)
- ¼ teaspoon crushed red pepper flakes (optional, but recommended for depth)
- 3 tablespoons freshly squeezed lemon juice (from 1 large lemon)
- 1 teaspoon finely grated lemon zest (optional but adds brightness)
- ¼ cup fresh parsley, finely chopped
- Additional kosher salt and freshly cracked black pepper to taste
Optional Additions for Serving:
- Crusty bread for dipping or soaking up sauce
- Cooked pasta (linguine, angel hair, or spaghetti)
- Steamed rice
- Zucchini noodles for lower-carb option
Step-by-Step Cooking Instructions
Prepare Your Ingredients:
-
Pat the shrimp completely dry with paper towels—any moisture on the surface will create steam when they hit the hot pan, preventing proper browning. Place dried shrimp on a plate and leave at room temperature while you prepare everything else.
-
Mince the garlic finely by hand (not with a microplane or food processor) into small, roughly uniform pieces. Set aside in a small bowl.
-
Measure out the wine, lemon juice, and parsley ahead of time. Cut the butter into tablespoon-sized cubes so it melts evenly into the sauce.
-
Have a slotted spoon and your remaining ingredients within arm’s reach of the stove—this recipe moves fast once you start.
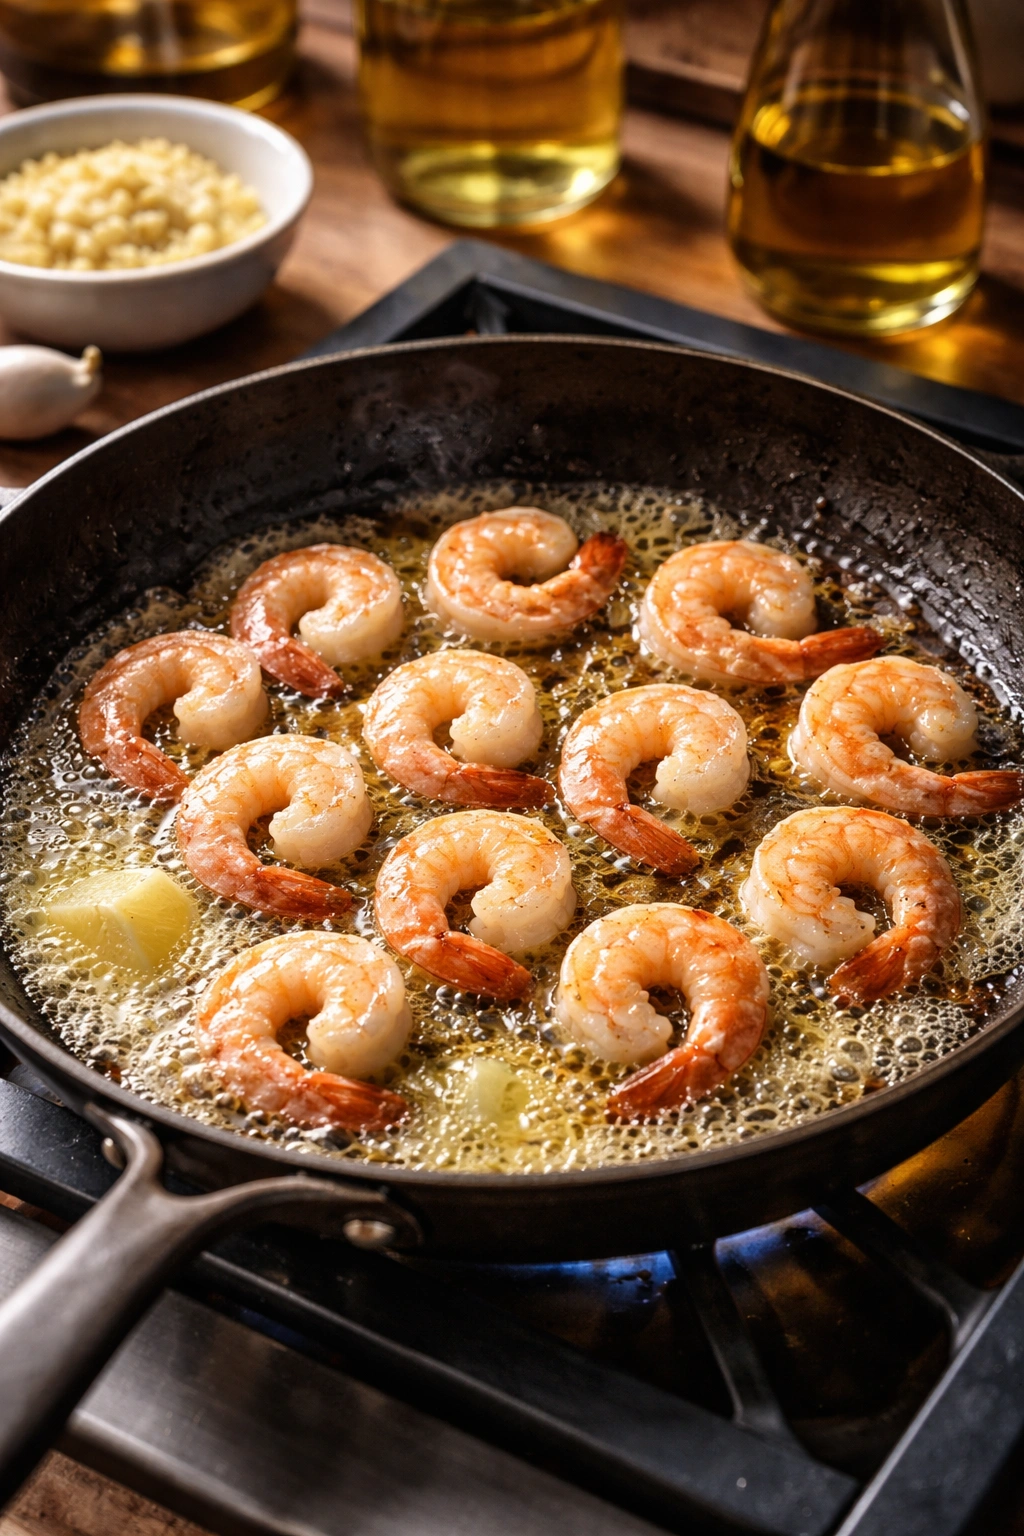
Cook the Shrimp:
-
Place a large skillet over medium-high heat. Add 2 tablespoons of the butter and 2 tablespoons of the olive oil and let them heat together until the butter is melted and foaming and the oil is shimmering—about 2 minutes.
-
Once the pan is properly hot (you should see visible shimmer and smell the butter’s nutty aroma), carefully add the shrimp in a single, even layer. Do not stir or move them for at least 90 seconds—they need uninterrupted contact with the hot pan to develop color. Season the shrimp with a pinch of salt and a few cracks of black pepper.
-
After 90 seconds to 2 minutes (depending on the exact size), flip each shrimp and cook the other side for another 90 seconds to 2 minutes until the shrimp are pink on both sides and opaque (white) in the thickest part when you cut one open. The shrimp should be just barely cooked through—they’ll continue cooking slightly from residual heat.
-
Using a slotted spoon, transfer the cooked shrimp to a clean plate, leaving as much of the butter and oil in the pan as possible. Be careful not to overcook the shrimp at this stage—they’ll go back in the pan later and cook a bit more in the sauce.
Build the Sauce:
-
Add the remaining 1 tablespoon of olive oil to the pan with the remaining cooking fat. Lower the heat to medium and let it warm for about 30 seconds.
-
Add the minced garlic to the oil and butter and cook, stirring constantly, for just 30 seconds to 1 minute—until the garlic is fragrant and just barely starting to turn light golden. Watch carefully here—if the garlic smells harsh or acrid instead of sweet and nutty, you’ve burned it and need to start over with fresh garlic.
-
Immediately pour in the white wine while stirring, scraping up any browned bits stuck to the bottom of the pan (this is called deglazing, and those brown bits are flavor). Increase the heat to medium-high and let the wine come to a boil.
-
Allow the wine to bubble and reduce for 2 to 3 minutes, stirring occasionally. You want the wine to reduce by roughly half in volume. When it’s ready, it should smell like wine (not harsh or vinegary) and should coat the back of a spoon when you dip one in.
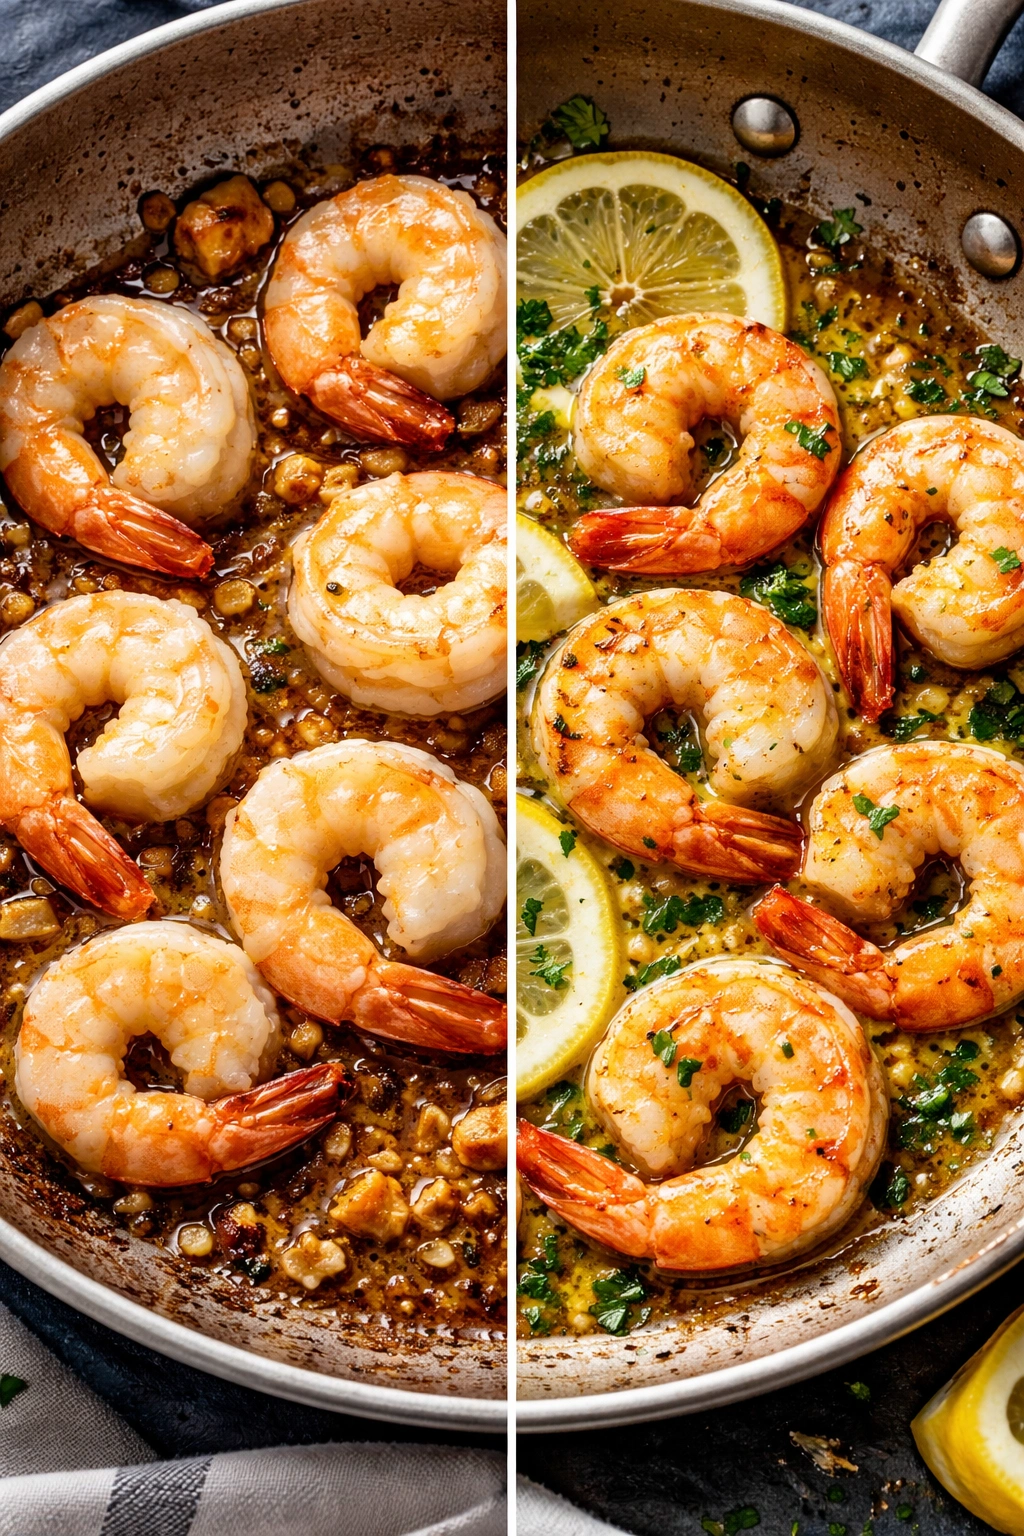
Create the Emulsified Sauce:
-
Remove the pan from the heat. Add the 3 tablespoons of cold, cubed butter all at once.
-
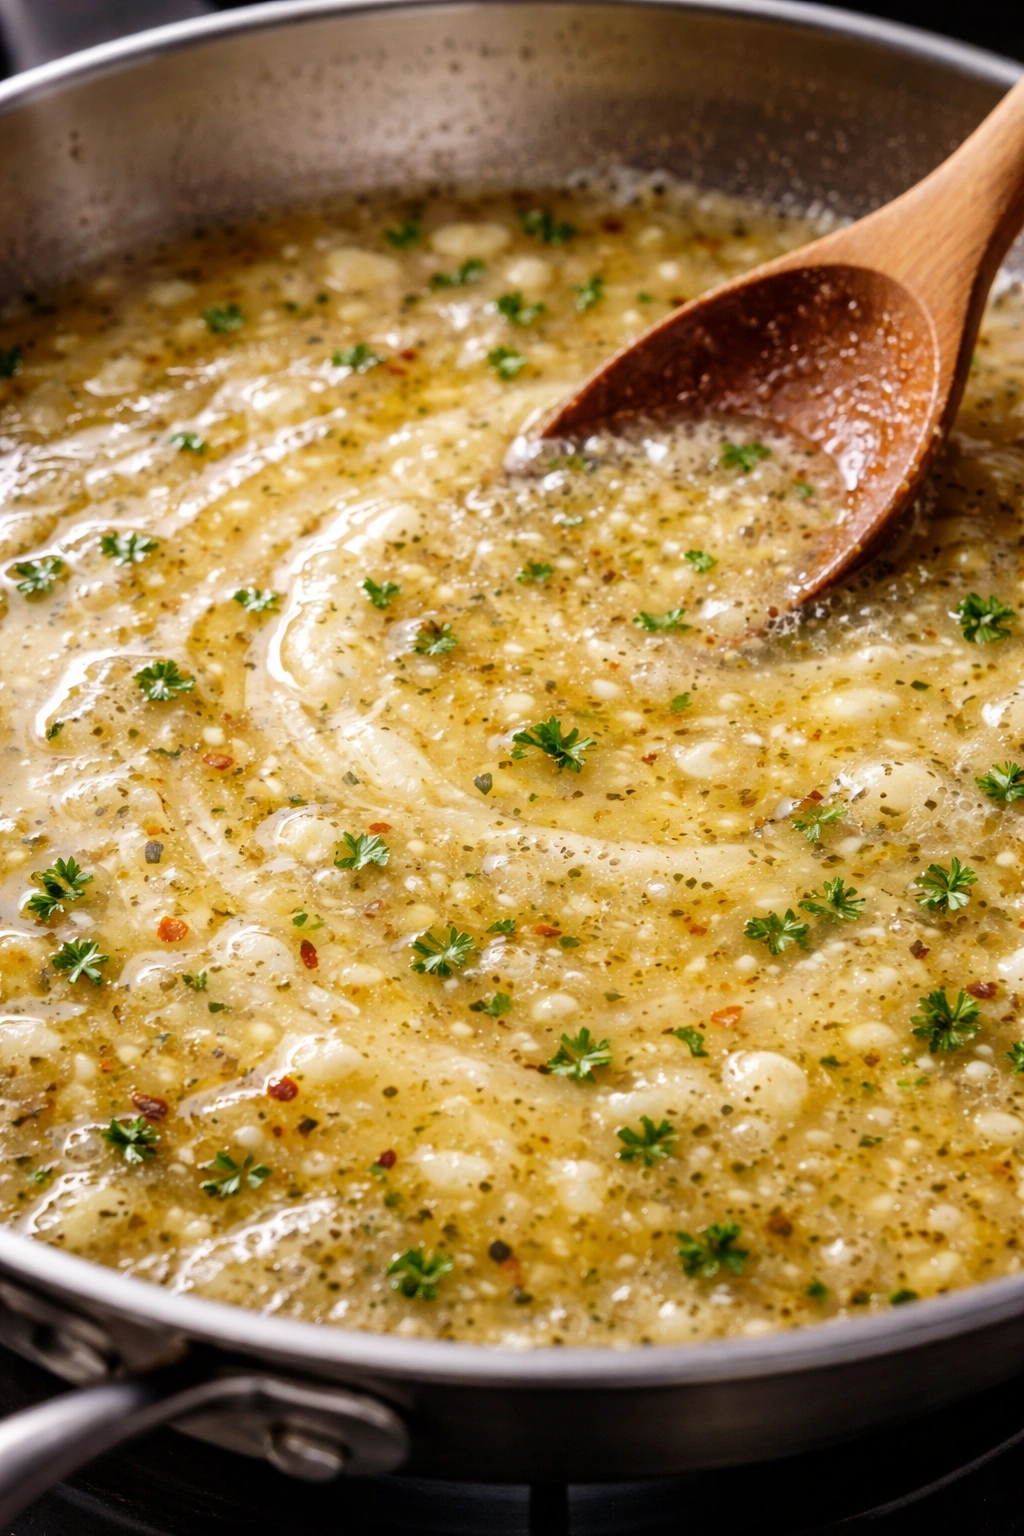
Using a fork or whisk, vigorously stir and swirl the pan constantly as the butter melts, incorporating each piece as it softens. The motion is crucial—constant swirling and stirring keeps the butter particles suspended in the wine and creates the emulsion. This should take about 1 minute.
-
Once all the butter is melted and incorporated, the sauce should look thick, glossy, and opaque rather than greasy and separated. If it does look broken (separated and oily), add 1 to 2 teaspoons of cold water and whisk vigorously to bring it back together.
Finish and Serve:
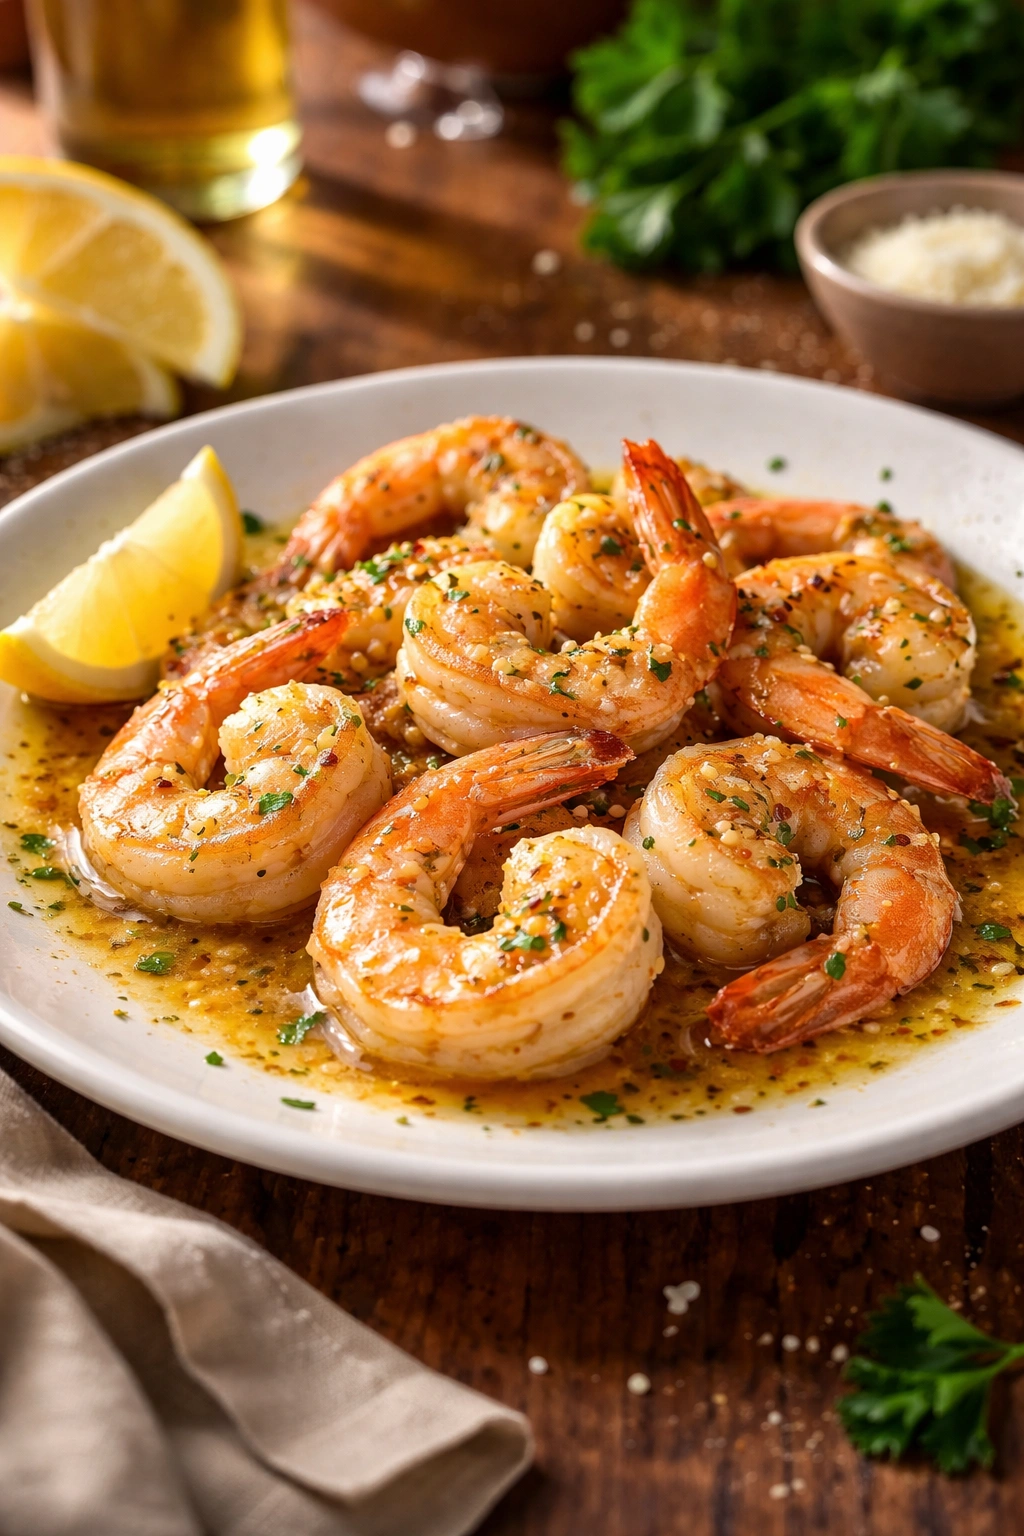
-
Remove the pan from the heat and stir in the lemon juice and lemon zest (if using). Taste the sauce and season with additional salt and pepper as needed—remember that the shrimp and the wine have already contributed some saltiness.
-
Return the cooked shrimp to the pan and gently toss to coat completely in the sauce. If the shrimp have cooled significantly, place the pan back over medium heat and warm the shrimp through for about 1 minute, stirring gently, until they’re heated through and coated in sauce.
-
Sprinkle the fresh parsley over the top and give the pan one final gentle toss.
-
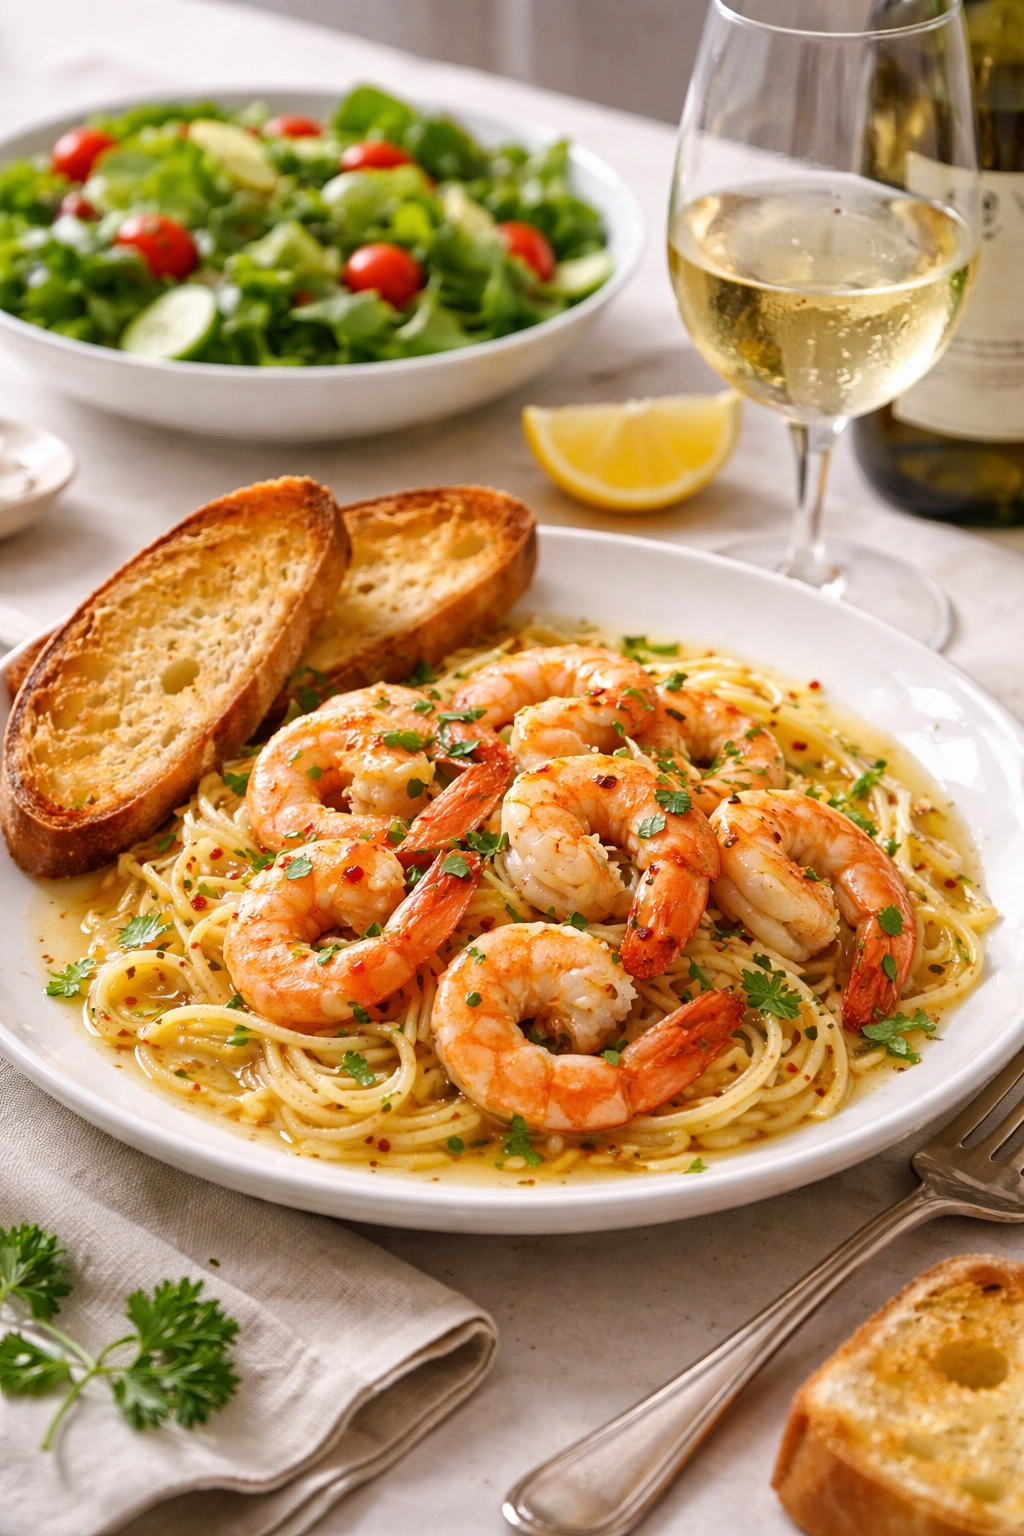
Serve immediately while the sauce is still silky and warm. If you’re serving over pasta, add the shrimp and sauce directly to the hot, drained pasta and toss gently to coat. If serving as an appetizer or standalone, use a slotted spoon to transfer shrimp to a serving dish and spoon extra sauce over each portion.
Common Mistakes and How to Avoid Them
Overcooked shrimp is the number one mistake, and it’s the hardest to fix once it’s done. Overcooked shrimp becomes tough, rubbery, and loses its delicate sweetness. The thing to understand is that shrimp continue cooking slightly from residual heat even after you remove them from the pan. So cook them until they’re just cooked through during the initial sear—they don’t need to cook any further in the sauce. If you’re nervous about doneness, cook them 30 seconds less than you think you need. They’ll be perfect by the time they’re coated in sauce.
Burnt garlic ruins the entire dish because the bitter, acrid flavor will linger throughout. The key is respecting heat. Once you add the garlic, stir constantly and watch it like a hawk. It should smell sweet and nutty, not harsh. At the first sign of browning, add the wine immediately to stop the cooking.
A broken sauce happens when the emulsion temperature gets too high or when you’re too aggressive with the stirring. Keep the heat at medium rather than high, add cold butter to warm (not boiling) liquid, and stir constantly but not frantically. If it does break, don’t throw it out—just add cold water and whisk vigorously.
Using pre-minced garlic from a jar or garlic powder might seem convenient, but it won’t give you the same flavor. Pre-minced garlic oxidizes and tastes stale, and garlic powder is one-dimensional. Fresh garlic minced right before cooking makes an enormous difference in the final dish.
Adding the lemon juice too early is a waste. If you add it while the pan is still very hot, some of the bright, fresh lemon flavor will cook away. Wait until you’ve added the butter and the sauce is emulsified, then add the lemon juice after removing from heat.
Variations and Serving Ideas
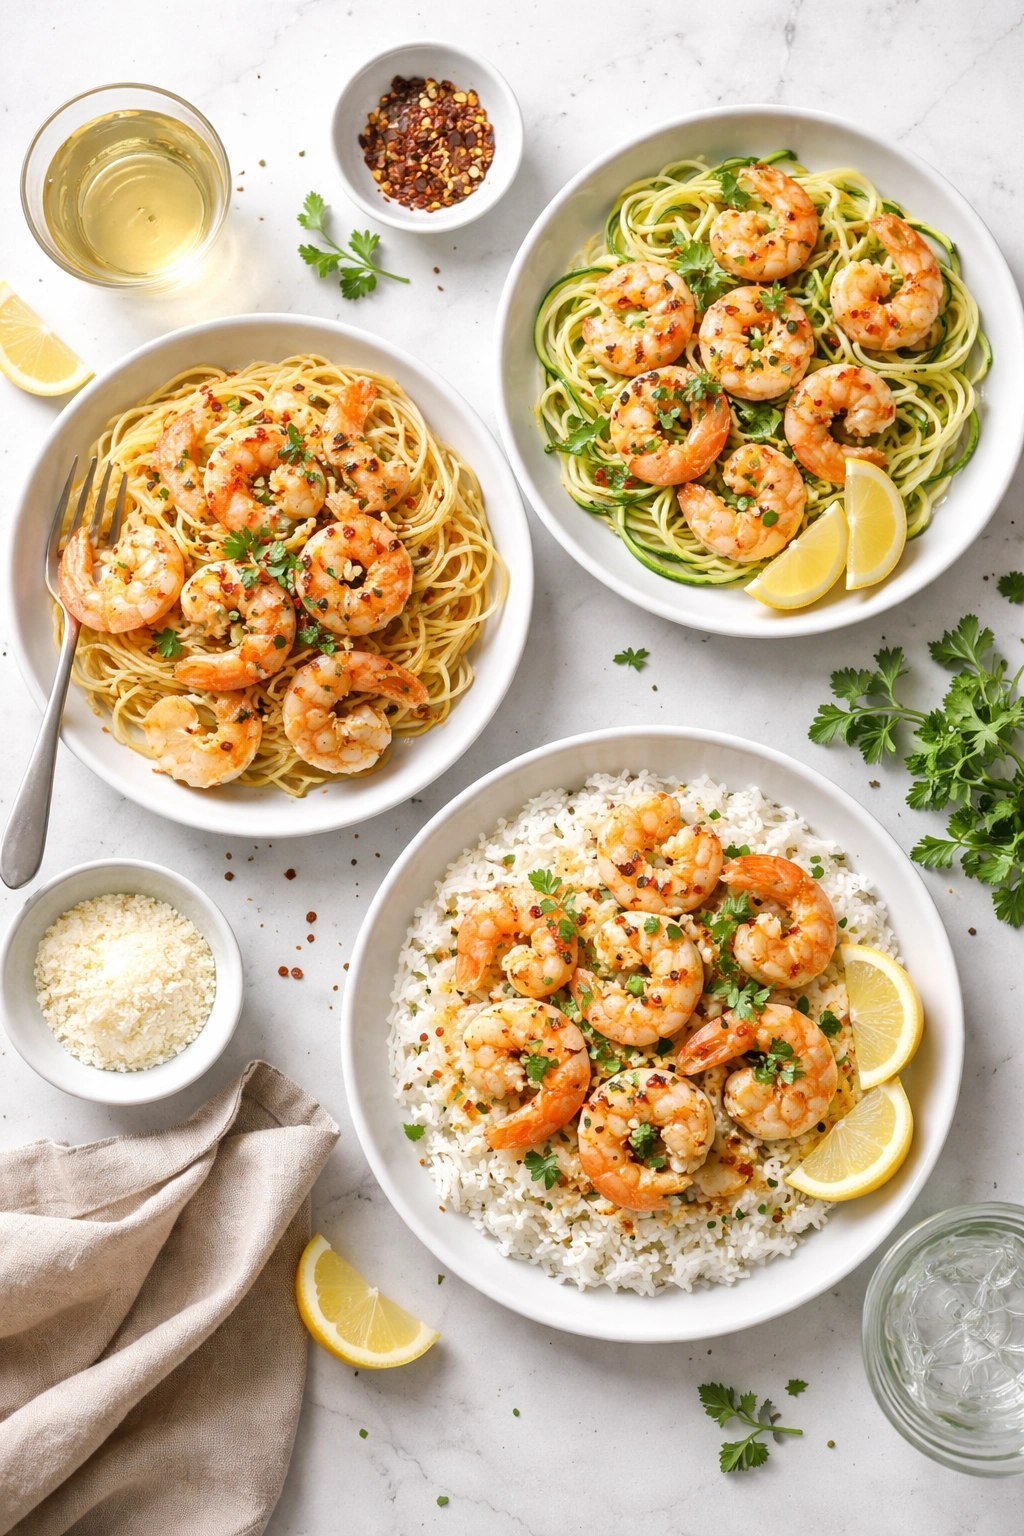
With Pasta: This is the most traditional way to serve shrimp scampi. Cook linguine or angel hair pasta according to package directions while you’re making the shrimp. Drain the pasta (save a cup of pasta water) and add it directly to the shrimp and sauce. Toss gently, adding a splash of pasta water if the sauce seems too thick to coat the noodles. The starchy pasta water helps the sauce distribute evenly.
Over Rice: For a lighter feel, serve over steamed white rice, jasmine rice, or risotto. The rice catches the sauce and lets you eat the buttery pan sauce alongside the shrimp without pasta’s heaviness.
With Zucchini Noodles: For a lower-carb version, spiralize fresh zucchini or use store-bought zucchini noodles. Lightly sauté them in a separate pan just until they release their moisture, then toss with the shrimp and sauce.
As a Bread Dipper: One of the best ways to enjoy this is as an appetizer with crusty bread. Serve the shrimp in a shallow bowl with plenty of sauce, and let guests soak up every drop with toasted baguette slices. It’s elegant and finger-friendly.
With Red Pepper Flakes Increased: If you love heat, double the red pepper flakes or add a pinch more. The gentle warmth actually enhances the garlic flavor even if you don’t notice the spice.
With a Splash of Heavy Cream: For a richer version, add 2 to 3 tablespoons of heavy cream after adding the butter and whisking until the sauce is smooth. This creates a silkier, more luxurious sauce and mellows any sharpness from the wine.
With Fresh Herbs Beyond Parsley: Add minced tarragon, chives, or fresh dill along with the parsley for herbaceous complexity. Tarragon especially pairs beautifully with the garlic butter.
Cold as a Pasta Salad: Leftovers can be tossed with chilled pasta, cherry tomatoes, and arugula for a next-day lunch. The flavors actually deepen and meld overnight.
Storage, Reheating, and Make-Ahead Tips
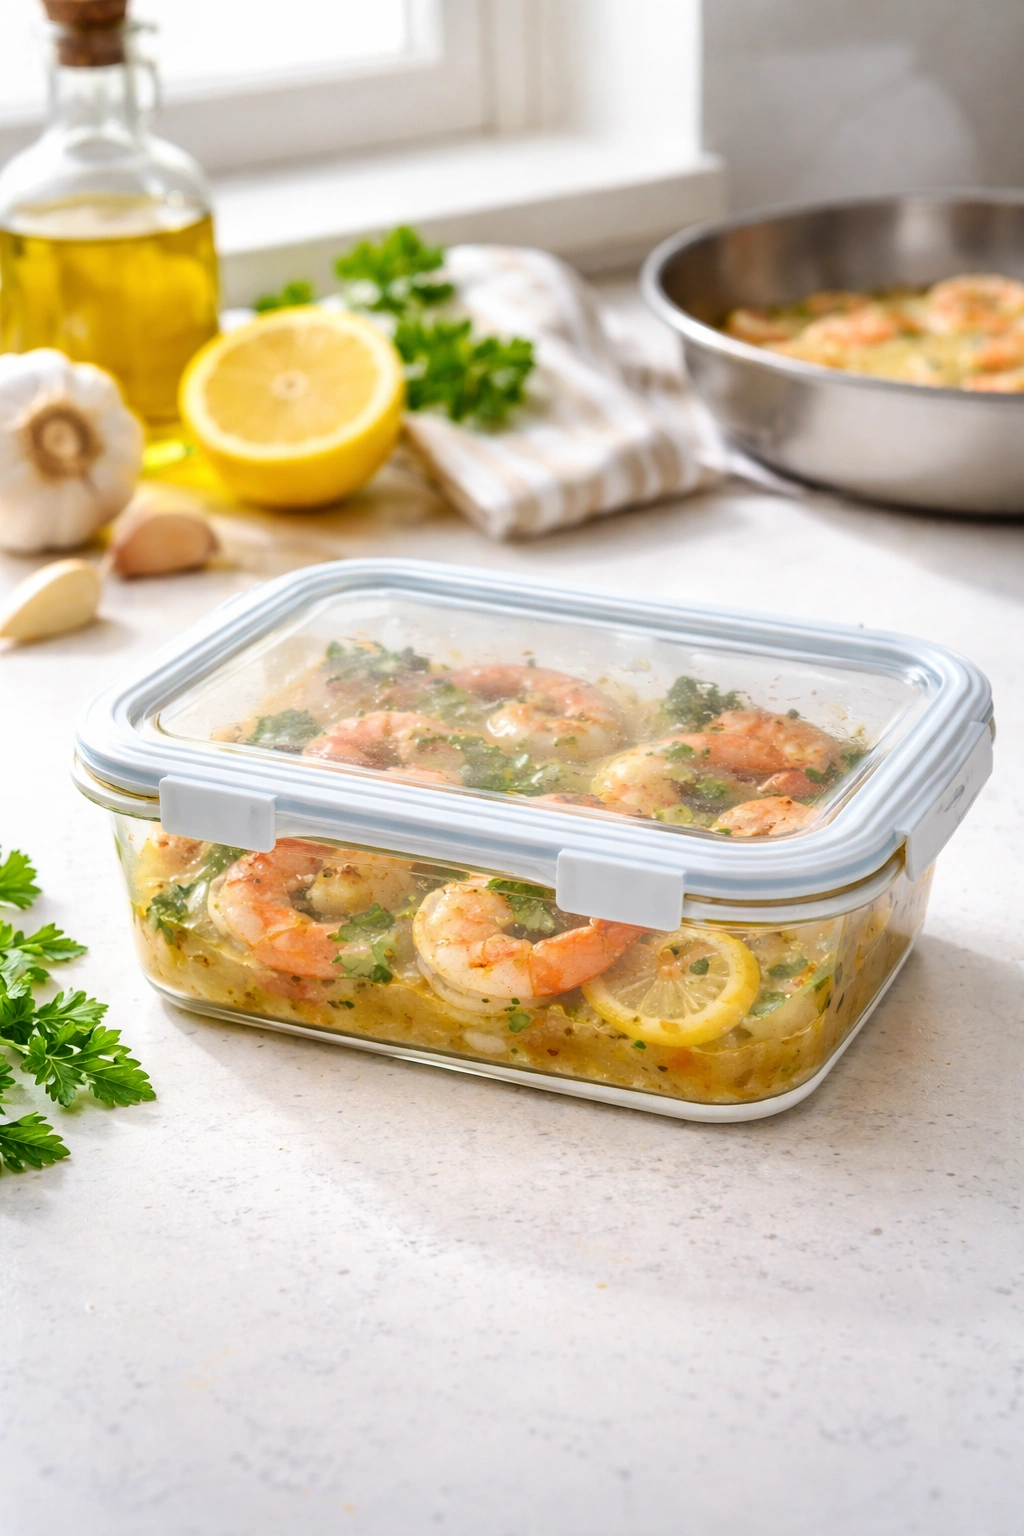
Shrimp scampi is best enjoyed immediately, while the sauce is silky and the shrimp are still tender. However, leftovers can be refrigerated in an airtight container for up to 2 days, and they’re still quite good.
To Reheat: Avoid the microwave if possible—it tends to make shrimp even tougher. Instead, place leftover shrimp and sauce in a skillet over medium-low heat, stirring gently, until warmed through (about 5 minutes). If the sauce seems thick or congealeded (because the butter has solidified), add a tablespoon of white wine or water and stir as it heats to loosen it up. Once it’s warm, don’t keep it on the heat longer than necessary—shrimp can only be reheated without becoming rubbery if you keep the temperature low and the time short.
Make-Ahead Strategy: You can prep almost everything ahead of time. Mince the garlic, measure the wine and lemon juice, pat the shrimp dry, and chop the parsley a few hours in advance. The actual cooking should happen close to serving time. If you must make it further ahead, cook the shrimp, let them cool slightly, then refrigerate them separately from the sauce. Rewarm both gently before combining.
Freezing: Shrimp scampi doesn’t freeze well. The texture of the shrimp deteriorates, and the sauce tends to separate. If you do have leftovers you want to preserve, freeze just the shrimp for up to 3 months in an airtight container, and make fresh sauce when you reheat.
Serving Suggestions and Perfect Pairings
Shrimp scampi is versatile enough to work for casual weeknight dinners or elegant entertaining. The richness of the butter sauce pairs beautifully with bright, acidic sides.
Wine Pairing: Serve with a crisp white wine—the same one you used in the sauce, actually. Sauvignon Blanc, Pinot Grigio, or Chardonnay all echo the flavors in the dish and won’t overpower the delicate shrimp. A light rosé works too.
Side Salad: A simple green salad with lemon vinaigrette or Dijon mustard vinaigrette balances the richness of the butter sauce. The acid and greens refresh your palate between bites.
Vegetable Sides: Steamed or roasted asparagus, broccoli, or green beans work beautifully. Or try a simple arugula salad with lemon and shaved Parmesan.
Bread: Crusty sourdough or a good baguette is essential—not just for eating alongside, but for soaking up every last drop of that incredible sauce. Toast it lightly for even better texture and flavor.
For Special Occasions: Serve this as part of a multi-course Italian meal. Start with a light antipasto, follow with the shrimp scampi and pasta or risotto, then finish with a simple dessert like lemon panna cotta or affogato. It feels fancy without being fussy.
Final Thoughts

Once you understand the mechanics of this dish—how to sear shrimp without overcooking them, how to build and emulsify a butter sauce, how to balance richness with brightness—you’ll make it confidently and adjust it for your own tastes. Some nights you might add more garlic, other nights you might increase the wine or swap the white for vermouth. The foundation is solid enough to support your preferences.
The beauty of shrimp scampi is that it proves you don’t need complicated techniques or obscure ingredients to create restaurant-quality food at home. You just need good ingredients treated with respect, heat controlled intentionally, and your full attention for about 10 minutes. That’s genuinely all it takes to create something so delicious that people will ask where you learned to cook like this. The answer, of course, is right here—understanding the why behind every step, and then making it your own.