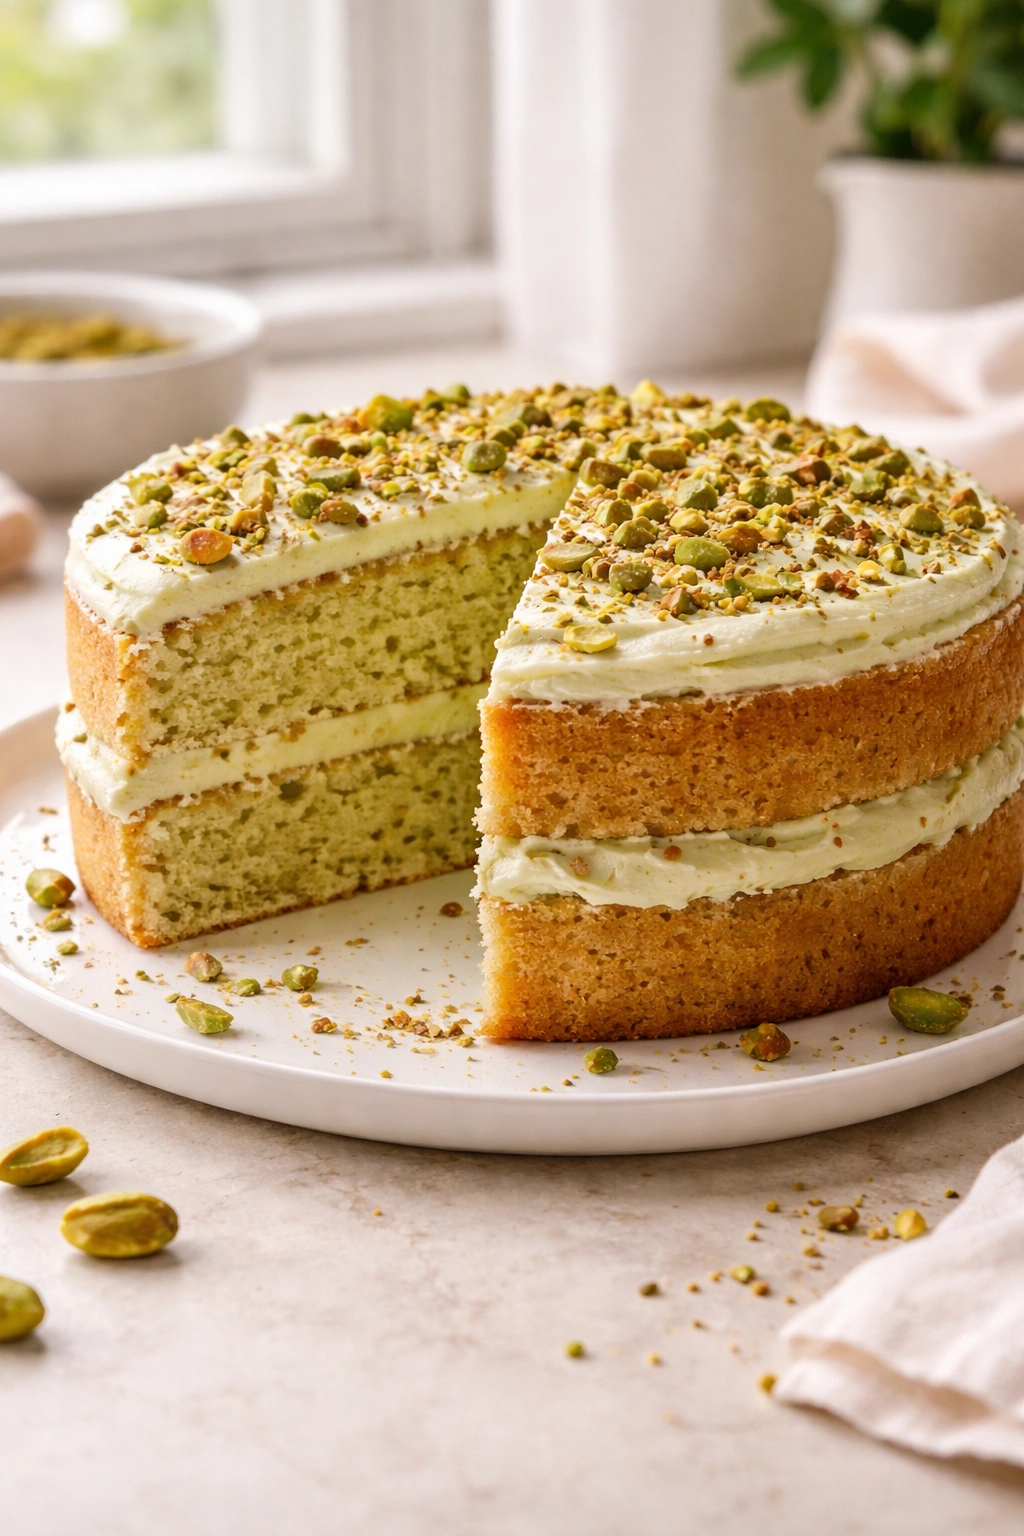
Pistachio has this subtle, delicate flavor that somehow feels both sophisticated and comforting at the same time — and when you bake it into a sponge cake, that nuttiness becomes the star of the show. A homemade pistachio sponge cake is nothing like the dense, artificial-tasting versions you’ll find in many bakeries. When you make it from scratch, you control every element: the quality of the pistachios, the moisture level in the crumb, the height of the rise, and exactly how much of that beautiful green color comes through naturally instead of from food coloring.
The truth is, a pistachio sponge cake isn’t intimidating to make — it just requires understanding a few key techniques that elevate an ordinary cake into something truly special. You’ll need a solid grasp of how to properly cream butter and sugar, why whipping egg whites matters, and the gentle folding method that keeps all that air you’ve worked to incorporate from deflating. Once you’ve made one, you’ll have the confidence to spin off into variations with different frostings, fillings, and flavor combinations that feel entirely your own.
This is the kind of cake that impresses without requiring fancy equipment or hard-to-find ingredients. A stand mixer is helpful but not essential — you can absolutely make this with a hand mixer or even by hand if you’re patient and have decent arm strength. The payoff is a tender, moist crumb with genuine pistachio flavor in every bite, a dome that rises beautifully in the oven, and a cake that tastes noticeably better the next day as the flavors deepen and the texture becomes even more refined.
Why Pistachio Sponge Cake Is Worth Making From Scratch
Baking a pistachio sponge cake at home gives you control over the most important variable: how much actual pistachio flavor ends up in your cake. Many commercial pistachio cakes use modest amounts of pistachio paste and rely on green food coloring to create the illusion of flavor — the result tastes artificial and the color feels disconnected from the taste. When you toast raw pistachios yourself and grind them into flour, the oils release and the flavor becomes concentrated and vivid in a way that no bottled paste can replicate.
A sponge cake structure is ideal for pistachios because the light, airy crumb lets the delicate nutty flavor shine without getting lost in richness. You’re not fighting against layers of ganache or heavy buttercream that would overpower the subtle taste. The cake itself becomes the focal point, and pistachio can finally taste like what it actually is: complex, slightly savory, with undertones of almond and vanilla.
Beyond flavor, homemade sponge cake has a completely different mouthfeel than grocery store versions. Commercial cakes often contain stabilizers and emulsifiers that create a dense, plasticine texture that stays suspiciously unchanged for weeks. Your homemade version will have an actual crumb structure — light enough to practically melt on your tongue, but with enough structure to slice cleanly. It’s the kind of cake that feels special because it’s made with care, and that care shows in every bite.
Yield: Serves 12 to 16 | Makes one 9-inch two-layer cake Prep Time: 35 minutes (hands-on active preparation) Cook Time: 30 to 35 minutes (baking time) Total Time: 65 to 70 minutes active + 1 hour cooling before assembly Difficulty: Intermediate — This cake requires careful technique in whipping egg whites and folding, but the steps are straightforward. If you’ve made a traditional sponge cake before, you’ll find this very manageable. First-timers should budget extra time to read through all the steps before starting.
The Complete Ingredient List
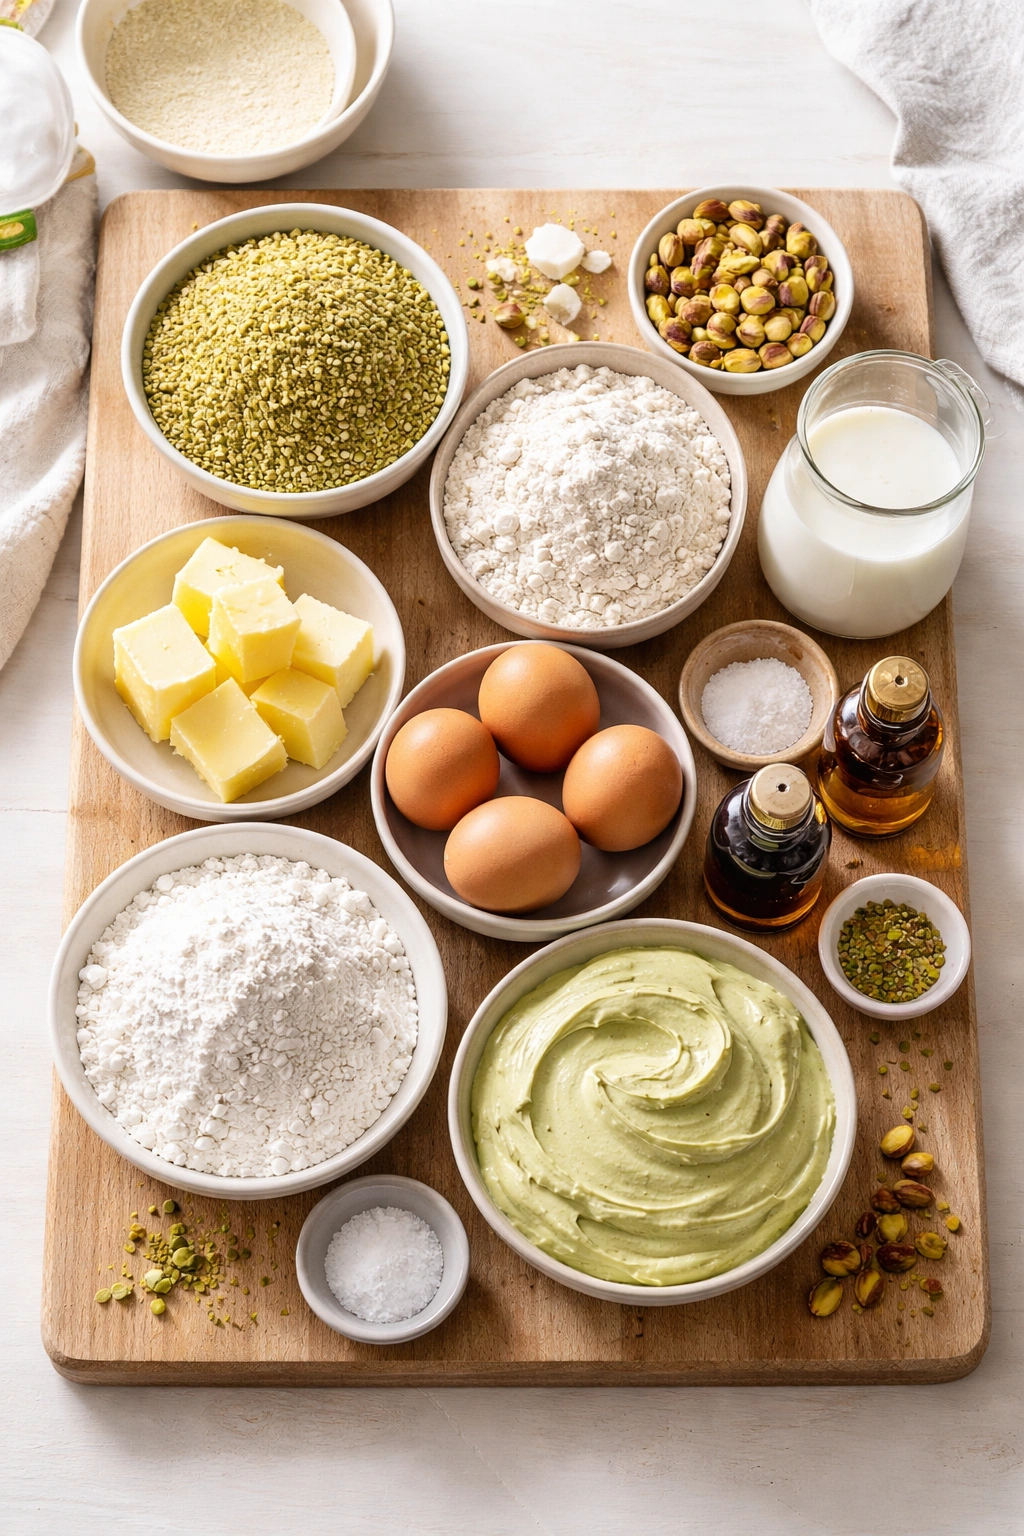
For the Pistachio Sponge Cake:
- 1½ cups raw pistachios (unsalted, skins on — about 6 ounces)
- ¾ cup all-purpose flour
- 1 teaspoon baking powder
- ¼ teaspoon fine sea salt
- ½ cup (1 stick) unsalted butter, softened to room temperature
- ¾ cup granulated sugar, divided into two separate ⅜-cup portions
- 4 large eggs, separated into yolks and whites (room temperature is critical)
- ¼ cup whole milk (room temperature)
- 1 teaspoon pure vanilla extract
- ¼ teaspoon almond extract (optional but highly recommended — it deepens the pistachio flavor without making the cake taste like almonds)
- Pinch of cream of tartar (helps stabilize the egg white foam)
For the Pistachio Buttercream Frosting:
- 1 cup (2 sticks) unsalted butter, softened to room temperature
- 3 cups powdered sugar, sifted
- ½ cup pistachio paste (or grind an additional ¾ cup roasted, salted pistachios into a fine flour, then process with 2 tablespoons of butter until it becomes paste-like)
- 2 to 3 tablespoons whole milk (add gradually until you reach spreadable consistency)
- ½ teaspoon vanilla extract
- Pinch of fine sea salt
For Assembly and Garnish:
- 2 tablespoons unsalted butter (for brushing cake layers if desired — optional)
- 2 tablespoons pistachio liqueur or 2 tablespoons milk mixed with ¼ teaspoon almond extract (optional syrup for brushing between layers)
- ¼ cup roasted, salted pistachios, roughly chopped (for garnish)
- 1 tablespoon powdered sugar (for dusting)
Choosing Quality Pistachios for Maximum Flavor
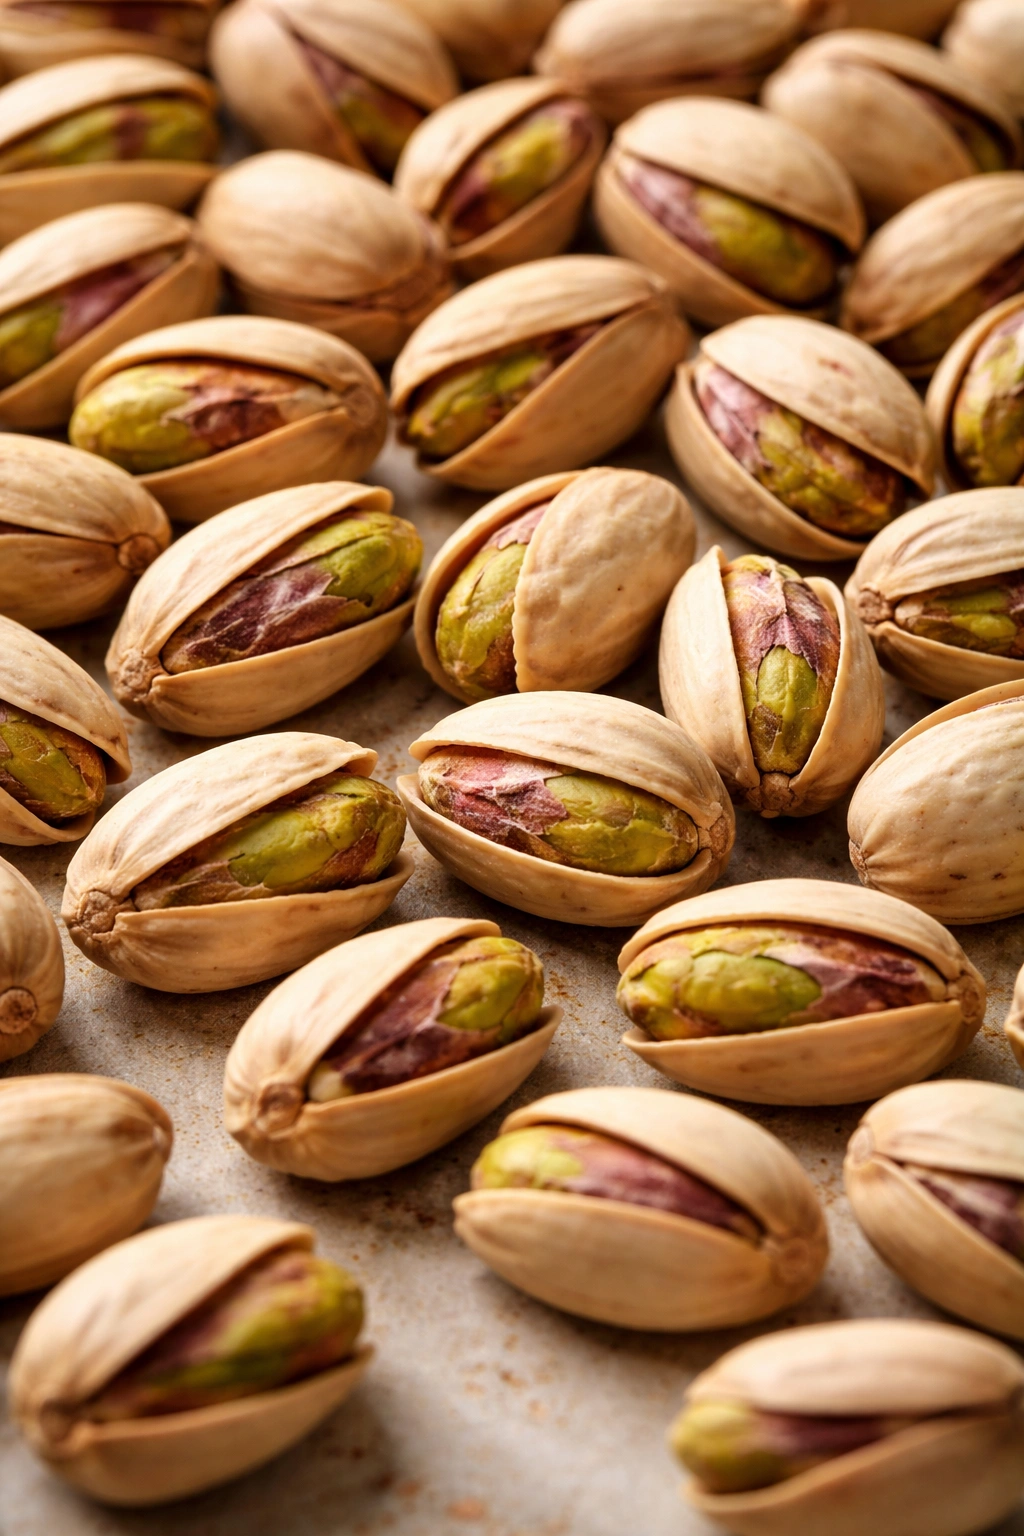
The single most important ingredient in a pistachio cake is, obviously, the pistachios themselves. Raw pistachios are essential here — you need the ones without salt, and ideally with the red skin still attached. The skin contains the most concentrated pistachio flavor, and that’s where you’ll get the beautiful natural pale green color that develops when you toast and grind them.
When shopping, look for pistachios that feel heavy for their size and smell fresh and nutty, not rancid or stale. If a pistachio smells musty, bitter, or off in any way, it’s been stored improperly or is too old — buy from a different supplier. Bulk sections at natural food stores and nut-focused shops typically rotate their inventory faster than conventional supermarkets, so you’re more likely to find fresh ones. Buy whole raw pistachios with skins, not pre-blanched or pre-ground versions.
Toasting your pistachios before grinding is the step that transforms them from merely pleasant to spectacular. Raw pistachios taste slightly flat and green; toasting deepens their flavor into something richer, more complex, and more intensely pistachio-like. Spread them on a rimmed baking sheet and toast at 325°F (165°C) for exactly 12 to 14 minutes, stirring halfway through. You’ll know they’re done when the kitchen fills with that nutty aroma and the skins look slightly darkened. Let them cool completely before grinding.
The Grinding Process Matters
A food processor creates pistachio flour that’s finer and more uniform than chopping by hand. Pulse the cooled pistachios in short bursts (not continuous grinding) until you reach a texture resembling coarse breadcrumbs with some fine flour mixed in. Process too long and the natural oils release and you’ll end up with pistachio paste instead of flour — which is fine for the frosting, but not what you want for the cake structure. The goal is flour-like texture, not smooth paste. This usually takes 20 to 30 seconds of pulsing, depending on your processor.
Once ground, use the pistachio flour immediately. It oxidizes and loses flavor if exposed to air for long periods. If you must prepare it ahead, store it in an airtight container in the freezer for up to one week, but same-day use produces noticeably better flavor and more vibrant color.
The Creaming Method That Creates a Light Crumb
The creaming step is where you build the foundation for an open, tender crumb. This isn’t quick — proper creaming takes 3 to 4 full minutes of beating, and it’s worth every second. You’re not just mixing butter and sugar together; you’re incorporating air into the butter and creating tiny pockets that will trap more air when the eggs are added. These air pockets are what give sponge cake its characteristic light, feathery texture.
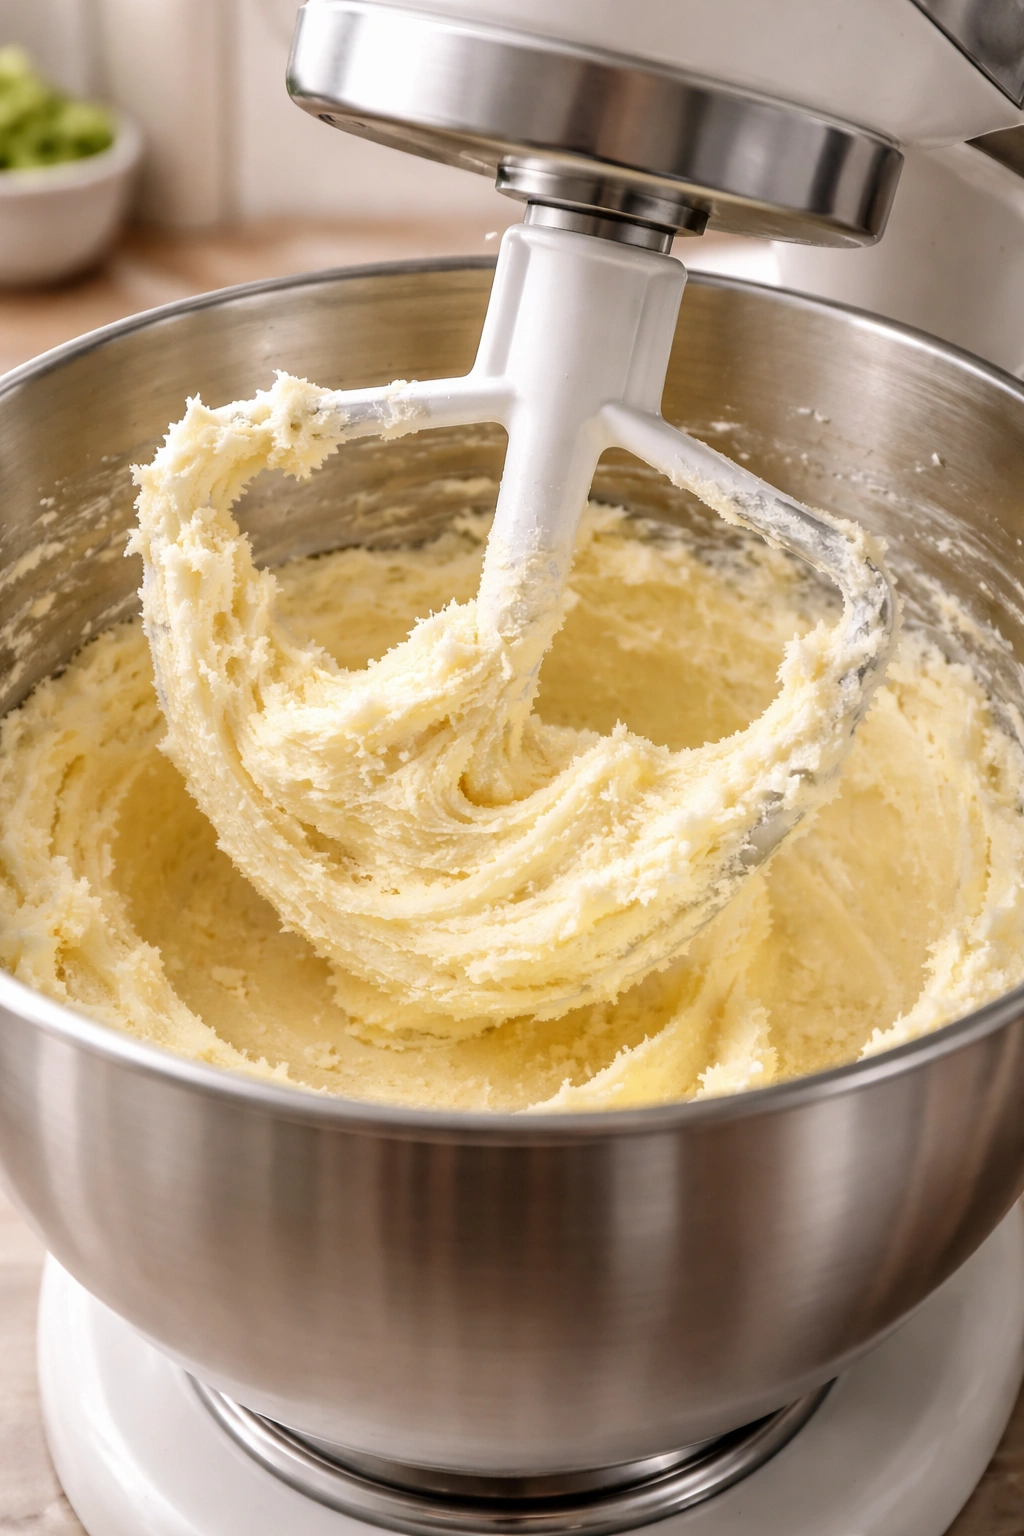
Start with softened butter — it should yield easily to finger pressure but shouldn’t be so soft that it’s greasy or melting. Place the softened butter in the bowl of a stand mixer fitted with the paddle attachment (or use a hand mixer in a large bowl). Add ⅜ cup of the granulated sugar and beat on medium speed for 3 to 4 minutes. You’ll see the mixture transform from a dense yellow paste into something noticeably paler, fluffier, and increased in volume — it should roughly double in size and look almost like fluffy frosting. This is the moment you’ll know you’ve creamed it enough.
The pale color and increase in volume are your visual cues that you’ve successfully incorporated air. Don’t trust the clock alone — let your eyes and the mixer’s behavior guide you. If the mixture still looks dense and yellow, keep beating. If it’s pale and fluffy and a few peaks form when you lift the beaters, you’re done.
Adding Eggs with Proper Technique
Reduce the mixer speed to medium-low. Add the egg yolks one at a time, beating for 20 to 30 seconds after each addition and scraping down the sides of the bowl with a rubber spatula after the second yolk. After adding all four yolks, the batter may look slightly separated or curdled — this is completely normal and happens because the egg yolks are watery while the butter mixture is thick and lipid-based. The next step (adding flour) will bring everything back together, so don’t worry if it looks imperfect at this stage.
In a small bowl, whisk together the pistachio flour, all-purpose flour, baking powder, salt, and almond extract (if using). In another small bowl, combine the milk and vanilla extract. With the mixer on low speed, add the flour mixture and milk mixture in alternating additions: flour first, then milk, then flour, then milk, then flour — beginning and ending with the flour. Mix only until each addition just disappears into the batter. Do not overmix at this stage — once you can’t see any streaks of flour, stop immediately. Overworking develops gluten, which makes the cake dense and tough.
Whipping Egg Whites for Maximum Height and Airiness
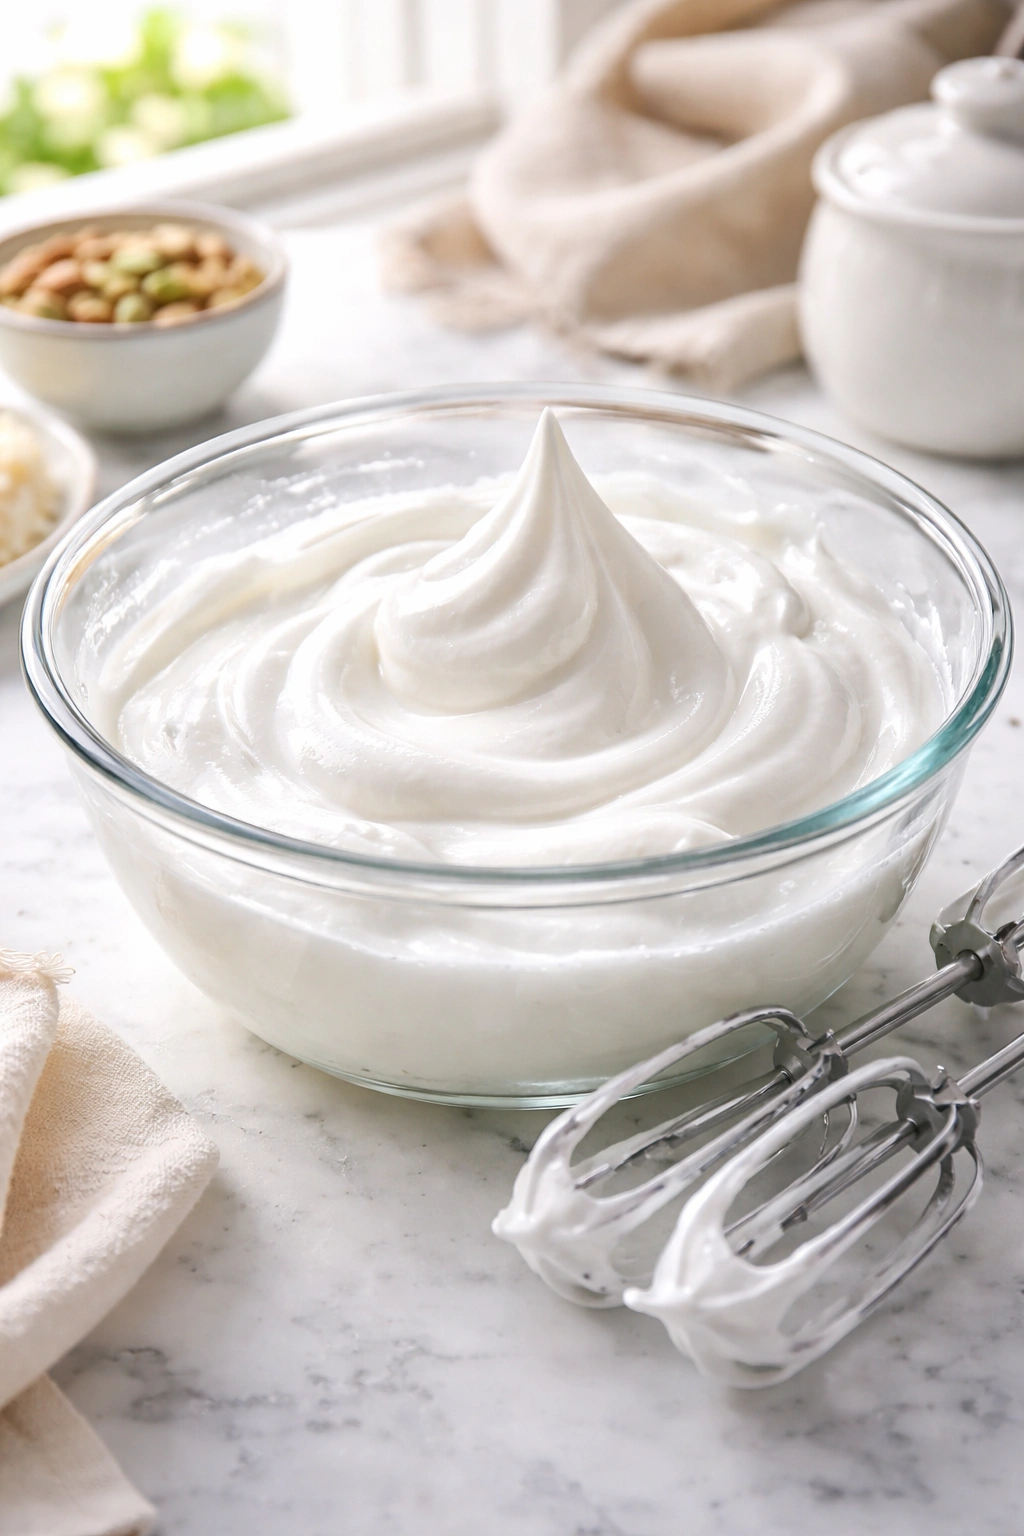
This is where the sponge cake’s spectacular rise comes from. Egg whites whipped to stiff peaks trap an enormous amount of air, and when that air heats in the oven, the structure sets and creates the cake’s distinctive light crumb. Success depends entirely on proper technique and clean equipment.
The egg whites must be completely free of any yolk, oil, or moisture from the bowl. Even a single drop of yolk or a film of grease will prevent proper whipping. Separate the eggs over a small bowl, transferring the whites to your mixer bowl only when you’re certain they’re completely clean. Some bakers prefer cracking eggs into a small bowl first, then transferring whites to the mixer bowl, as a safety measure against accidentally breaking a yolk directly into the mix.
Use a very clean stand mixer bowl fitted with the whisk attachment (if using a hand mixer, use very clean beaters). Add the pinch of cream of tartar to the egg whites — this stabilizes the foam and helps the whites reach maximum volume. Beat on medium-high speed for about 2 minutes, until soft peaks form and the whites look foamy and opaque. Gradually add the remaining ⅜ cup of granulated sugar while the mixer runs, about 1 tablespoon at a time, beating for about 15 to 20 seconds between each addition.
Continue beating for another 1 to 2 minutes after all the sugar is incorporated. The whites are ready when they form stiff, glossy peaks that stand straight up when you lift the whisk. This should take 4 to 5 minutes total from start to finish. The sugar actually helps stabilize the foam, so whites beaten with sugar hold their structure longer than unsweetened whites — another reason to add it gradually rather than all at once.
Important note: Overbeating egg whites causes them to become dry and grainy, which defeats the purpose. Stop as soon as they reach stiff peaks. If you beat them a minute too long, you’ll see a dull, cottony appearance and liquid will pool at the bottom of the bowl. At that point, the foam is broken and won’t incorporate properly into the cake.
The Folding Technique That Preserves Lift
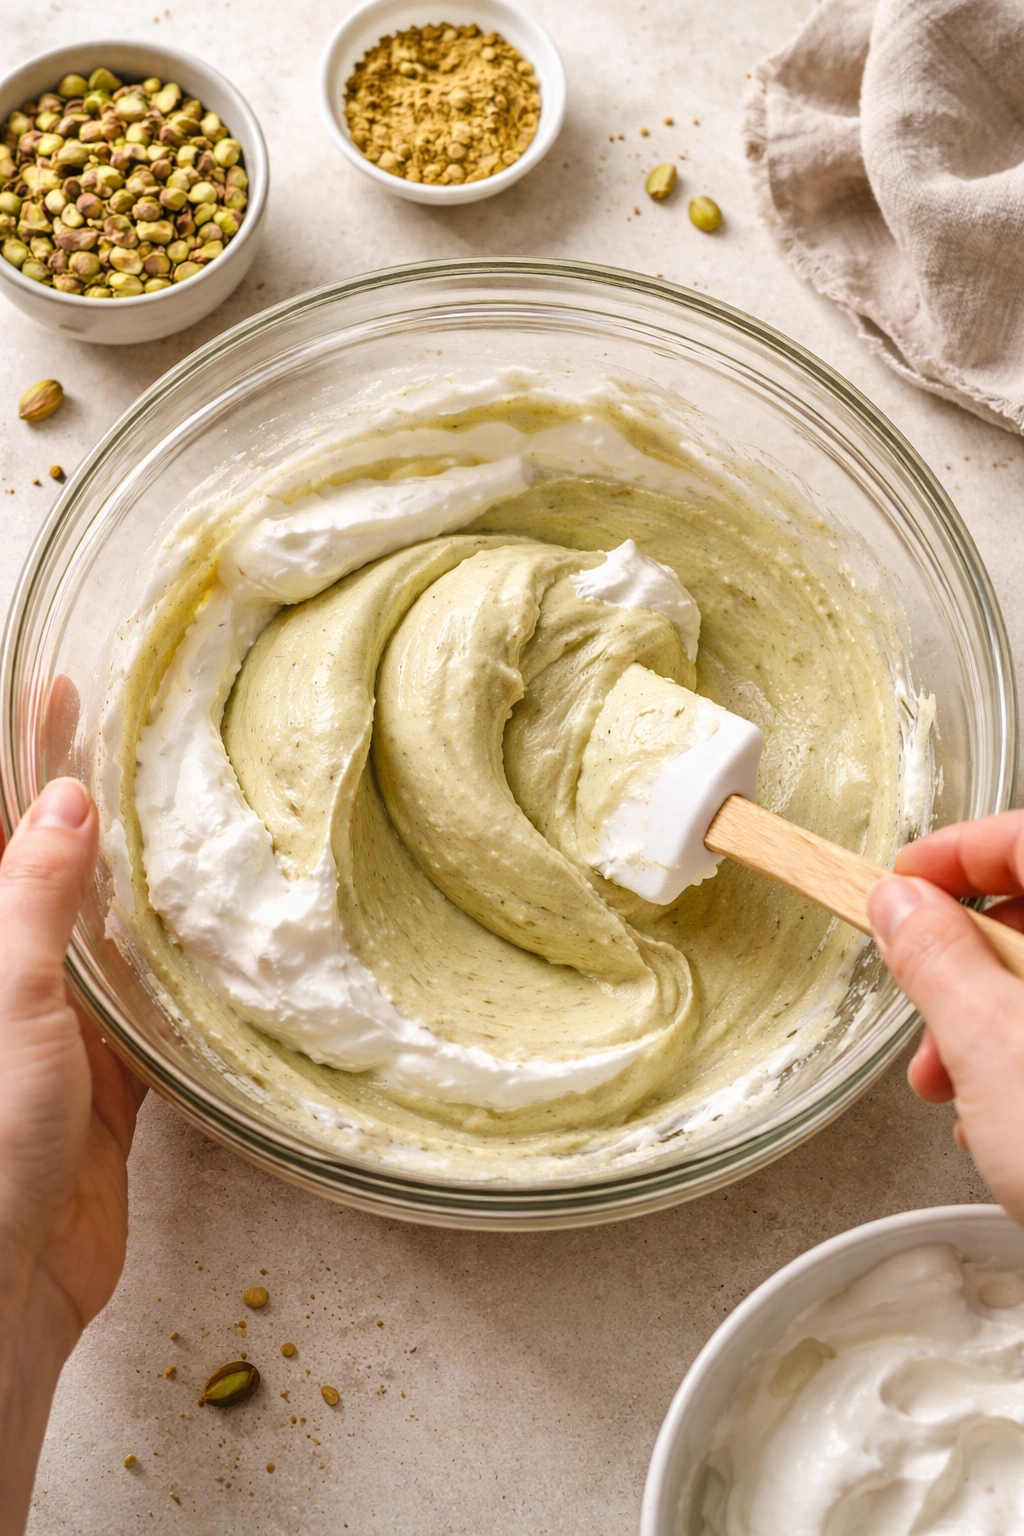
Folding the whipped egg whites into the pistachio batter is the most critical step in the entire recipe. This is where many home bakers make the mistake that turns a sponge cake dense: they stir or beat the whites in, which deflates all the air you just worked so hard to incorporate. Instead, you’ll use a gentle folding motion that combines the two mixtures while preserving the air bubbles.
Using a large rubber spatula, scoop the whipped egg whites into the pistachio batter. Using an over-and-under folding motion (not circular stirring), fold gently but deliberately, scraping the bottom and sides of the bowl and folding the heavier batter over the top of the lighter whites. Rotate the bowl a quarter turn with each fold, working around the bowl systematically rather than staying in one spot.
After about 8 to 10 folds, you’ll notice streaks of white foam still visible in the batter — this is the moment to stop. A few streaks of white are perfectly fine; they’ll blend in as the batter sits for a moment. Resist the urge to fold until the batter looks completely uniform. Once you’ve folded in about 70% of the whites, the batter becomes lighter and the remaining whites incorporate more easily on their own. Overfold-ing deflates the whites and loses height.
Step-by-Step Baking Instructions
Prepare the Pans and Preheat:
-
Preheat the oven to 350°F (175°C) and position the rack in the center of the oven. Center positioning ensures even baking from top and bottom without the top browning before the center sets.
Advertisements -
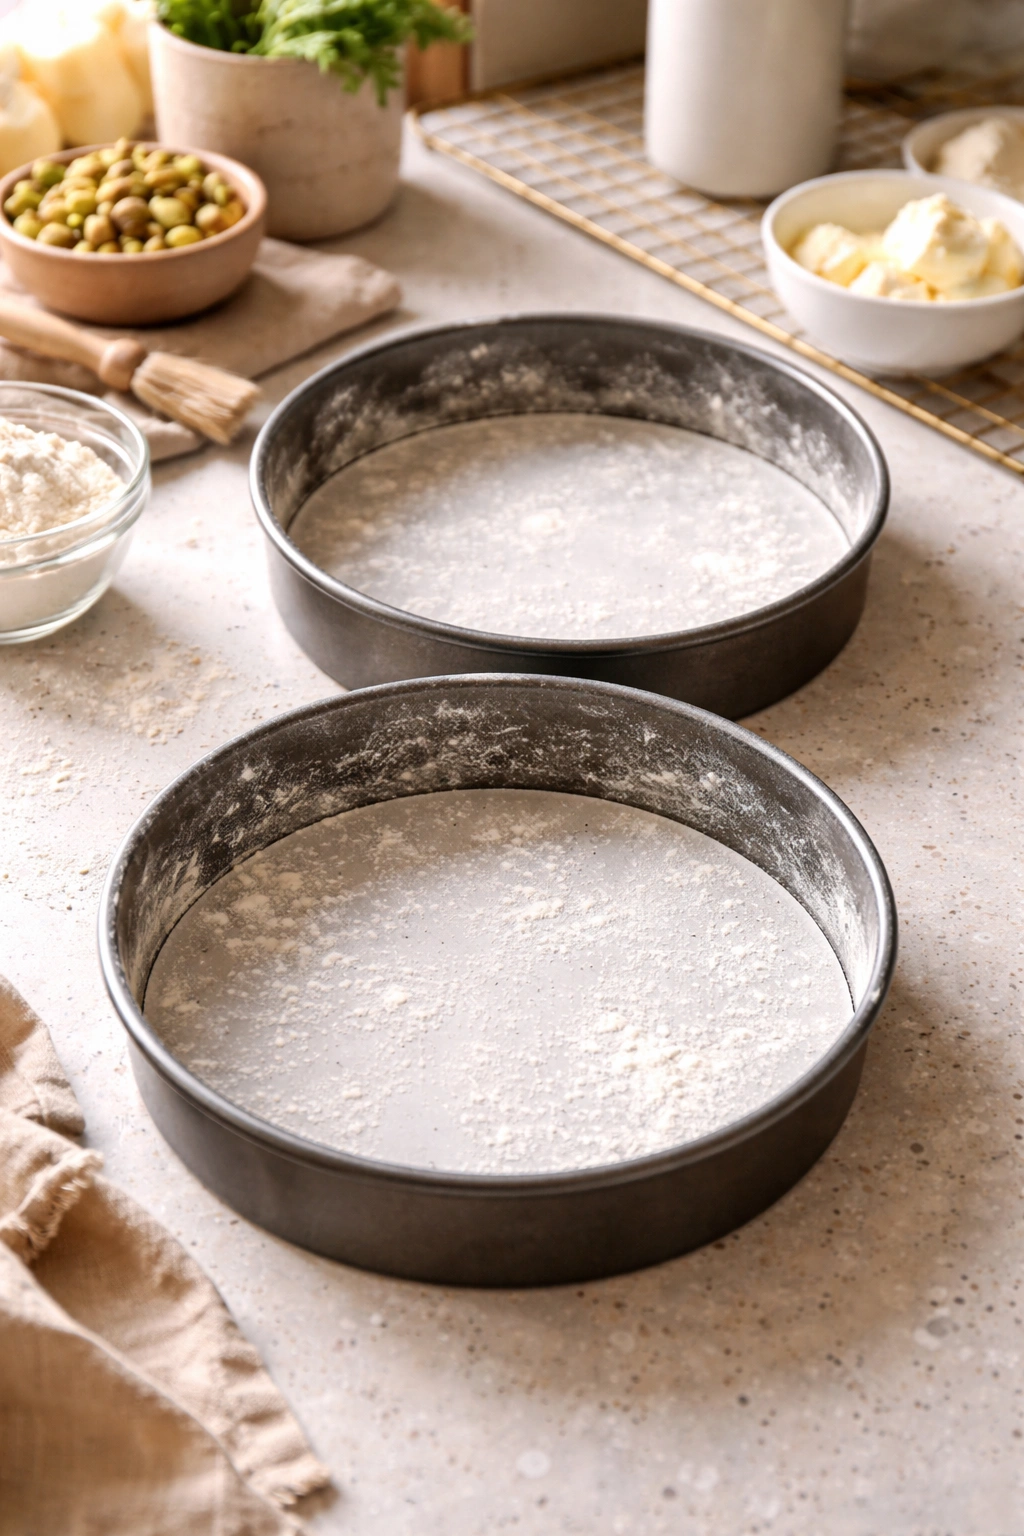
Grease two 9-inch round cake pans with unsalted butter, coating the sides, bottom, and edges thoroughly. Line the bottom of each pan with a circle of parchment paper, then grease the parchment as well. Dust both pans lightly with all-purpose flour (or pistachio flour for a more flavorful option), tapping out any excess. This extra step ensures clean, easy release after baking.
-
Double-check that your oven temperature has reached 350°F (175°C) with an oven thermometer if you have one. Oven temperature accuracy is crucial with sponge cakes — too hot and the outside sets before the inside bakes, too cool and the cake rises less and may not set properly.
Mix and Prepare the Batter:
-
In a small bowl, toast the raw pistachios at 325°F (165°C) for 12 to 14 minutes on a rimmed baking sheet, stirring halfway through, until fragrant and the skins look slightly darkened. Remove from the oven and spread on a clean plate to cool completely — about 10 minutes. This cooling step is essential; warm pistachios will be harder to grind into flour.
-
Once cooled, pulse the pistachios in a food processor in short bursts (10 to 15 pulses, then check texture) until the mixture resembles coarse breadcrumbs with some fine flour. Stop processing the moment you’ve reached flour-like texture — avoid overprocessing, which releases the oils and creates paste instead of flour.
-
In a small bowl, whisk together the pistachio flour, all-purpose flour, baking powder, salt, and almond extract (if using) until evenly combined. Set aside.
-
In another small bowl, whisk together the milk and vanilla extract. Set aside.
-
Place the softened butter in the bowl of a stand mixer fitted with the paddle attachment. Add ⅜ cup of the granulated sugar. Beat on medium speed for 3 to 4 minutes, until the mixture is noticeably paler, fluffier, and increased in volume — it should look almost like frosting. Scrape down the sides of the bowl.
-
Reduce the mixer to medium-low speed. Add the four egg yolks one at a time, beating for 20 to 30 seconds after each addition and scraping down the bowl after the second yolk. The batter may look slightly separated after all the yolks are incorporated — this is normal and expected.
-
With the mixer on low speed, add the flour mixture and milk mixture in alternating additions: flour, milk, flour, milk, flour. Mix only until each addition just disappears into the batter. Do not overmix. Stop the moment you see no flour streaks. Overmixing develops gluten and creates a dense crumb.
Advertisements
Whip the Egg Whites:
-
Pour the egg whites into a separate very clean mixer bowl fitted with the whisk attachment. Add the cream of tartar and beat on medium-high speed for about 2 minutes, until soft peaks form — the foam will look opaque and fluffy but won’t hold a shape yet.
-
Gradually add the remaining ⅜ cup of granulated sugar, about 1 tablespoon at a time, beating for 15 to 20 seconds between additions. After all the sugar is added, continue beating for 1 to 2 more minutes until stiff peaks form — the whites should stand straight up when you lift the whisk and look glossy, not dry or dull.
Fold and Pour:
-
Using a large rubber spatula, scoop all of the whipped egg whites into the pistachio batter. Using a gentle over-and-under folding motion (not stirring or beating), fold the two mixtures together, rotating the bowl a quarter turn with each fold and scraping the bottom and sides. Stop folding when only a few white streaks remain visible — a few streaks are better than overfold-ing, which deflates the foam.
-
Divide the batter evenly between the two prepared cake pans, using an offset spatula to spread it gently into an even layer. Try not to compress the batter as you distribute it; you want to preserve all those air bubbles you’ve created.
Bake:
-
Place both pans in the preheated 350°F (175°C) oven on the center rack. Bake for 30 to 35 minutes, rotating the pans halfway through (at about 15 minutes), until a toothpick or skewer inserted in the very center of each cake comes out clean or with just a few moist crumbs clinging to it, and the edges have begun to pull away slightly from the sides of the pans.
-
The cakes are done when they look evenly golden on top, spring back immediately when you press the surface lightly with a fingertip, and smell intensely of pistachio. Do not overbake — a sponge cake that’s baked even 2 to 3 minutes too long will become noticeably drier.
Cool:
-
Remove the cakes from the oven and set both pans on a wire cooling rack. Allow the cakes to cool in the pans for 10 minutes — this allows them to set enough to handle without falling apart.
-
After 10 minutes, run a thin knife around the inside edge of each pan to loosen the cake. Place a wire cooling rack over the top of one cake pan, then flip the pan and rack together so the cake lands on the rack. Lift the pan away. Peel off the parchment paper and set the cake aside. Repeat with the second cake. The cakes should cool completely at room temperature — at least 1 hour — before frosting or assembly. Do not frost a warm cake; the frosting will melt and the layers will slide apart.
Testing for Doneness Without Overbaking
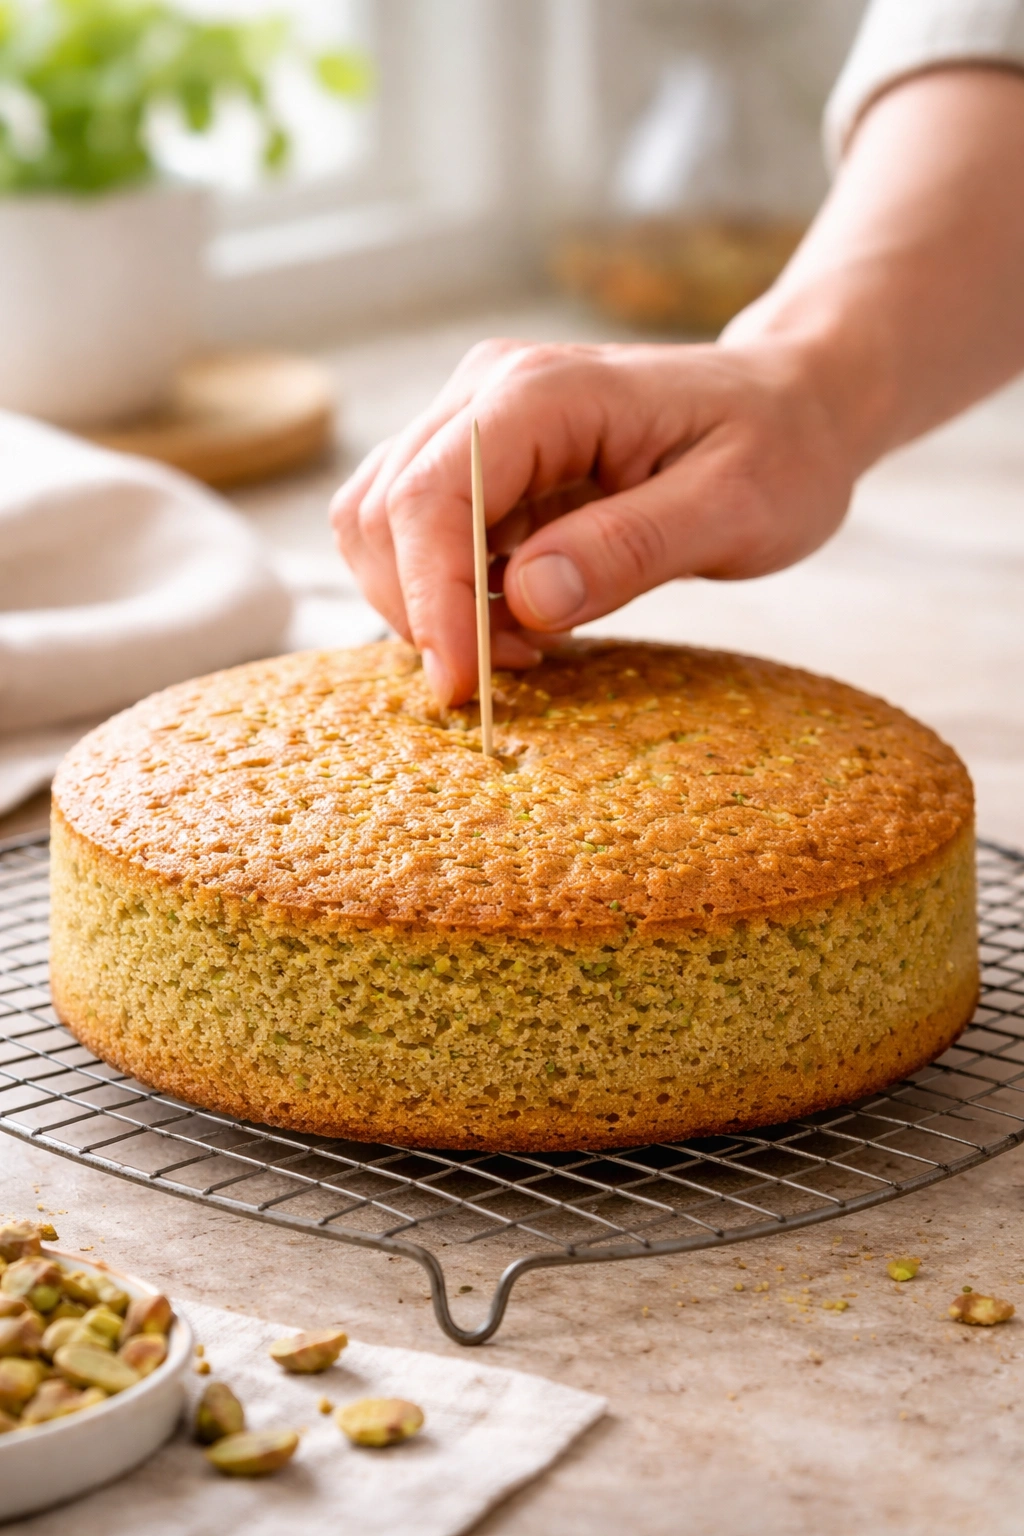
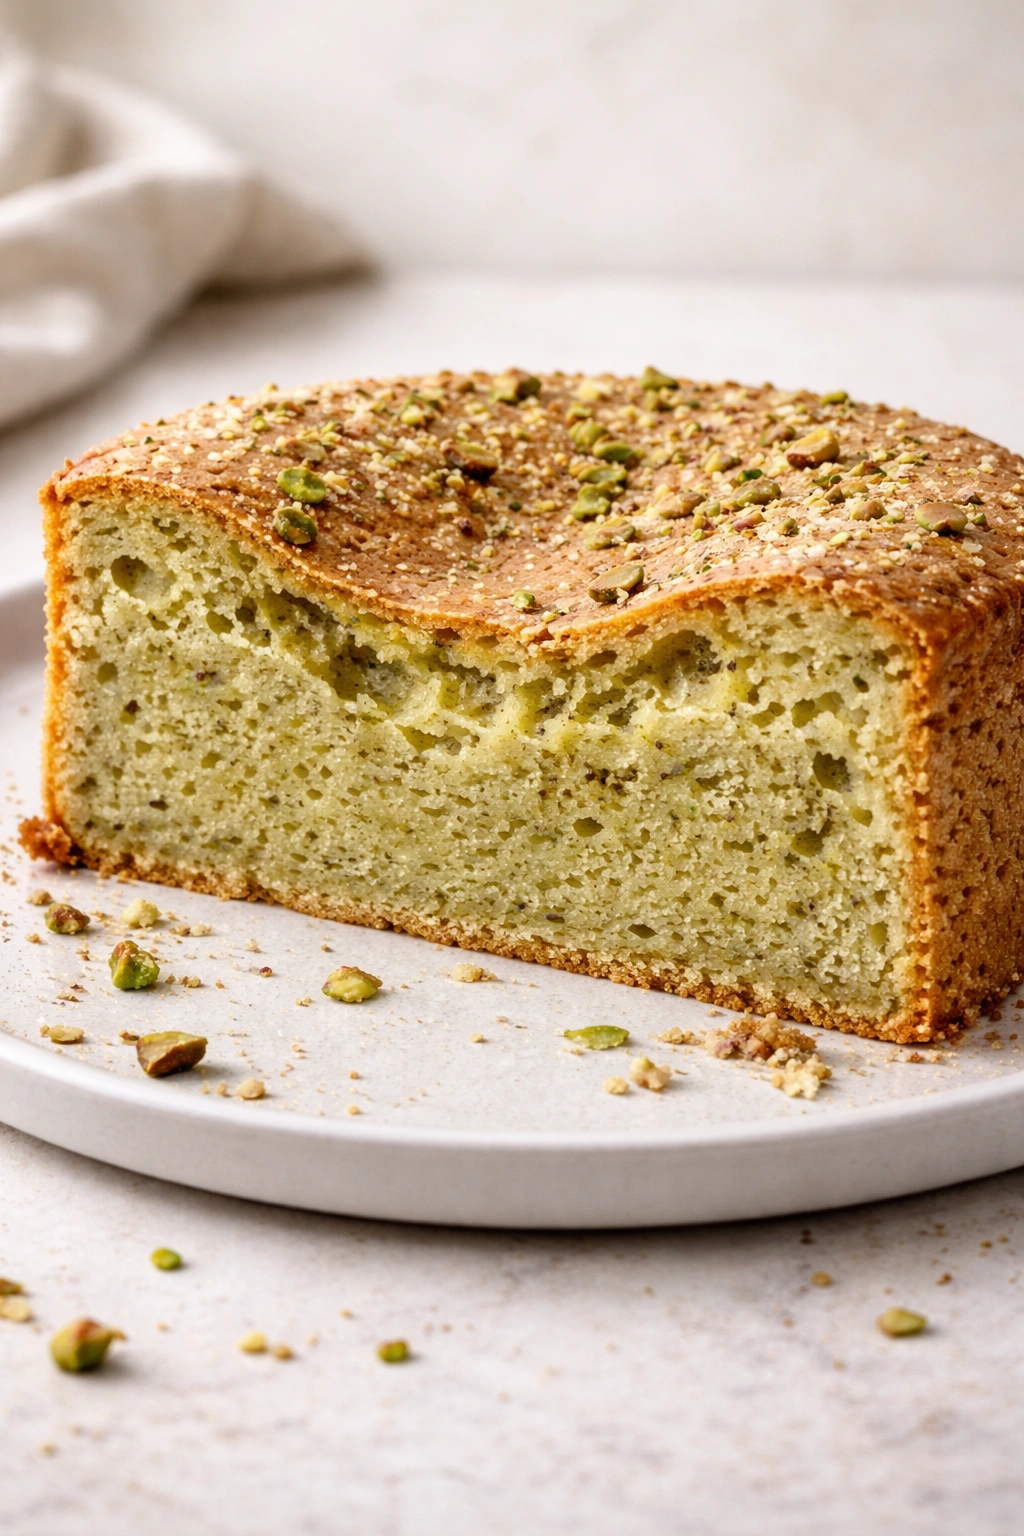
Sponge cakes are deceptively easy to overbake, especially once you’re looking at them through the oven window and they look beautiful and golden. The key is trusting the toothpick test but understanding what you’re looking for. When you insert a toothpick into the very center, it should come out clean or with just a few moist crumbs — not completely dry, but not wet batter either. A few moist crumbs actually indicate perfect doneness; the cake will continue to cook slightly from residual heat as it cools.
The visual cues matter too. Your sponge cake is done when the top looks evenly golden (not pale or dark), the edges have started to pull away from the sides of the pan by about ¼ inch, and the cake springs back immediately when you press the surface lightly with a fingertip. If you press and the indentation stays for more than a moment, it needs more baking.
The smell test is also valuable. A perfectly baked pistachio sponge cake smells intensely of pistachio and toasted nuts — rich and complex. If it barely smells like anything yet, it probably needs another 2 to 3 minutes. Once you’ve opened the oven door for the toothpick test, the temperature drops significantly, so close the door quickly and reset your mental timer. An additional 2 minutes in the oven is often the difference between perfect and overbaked.
Cooling and Layering the Cake
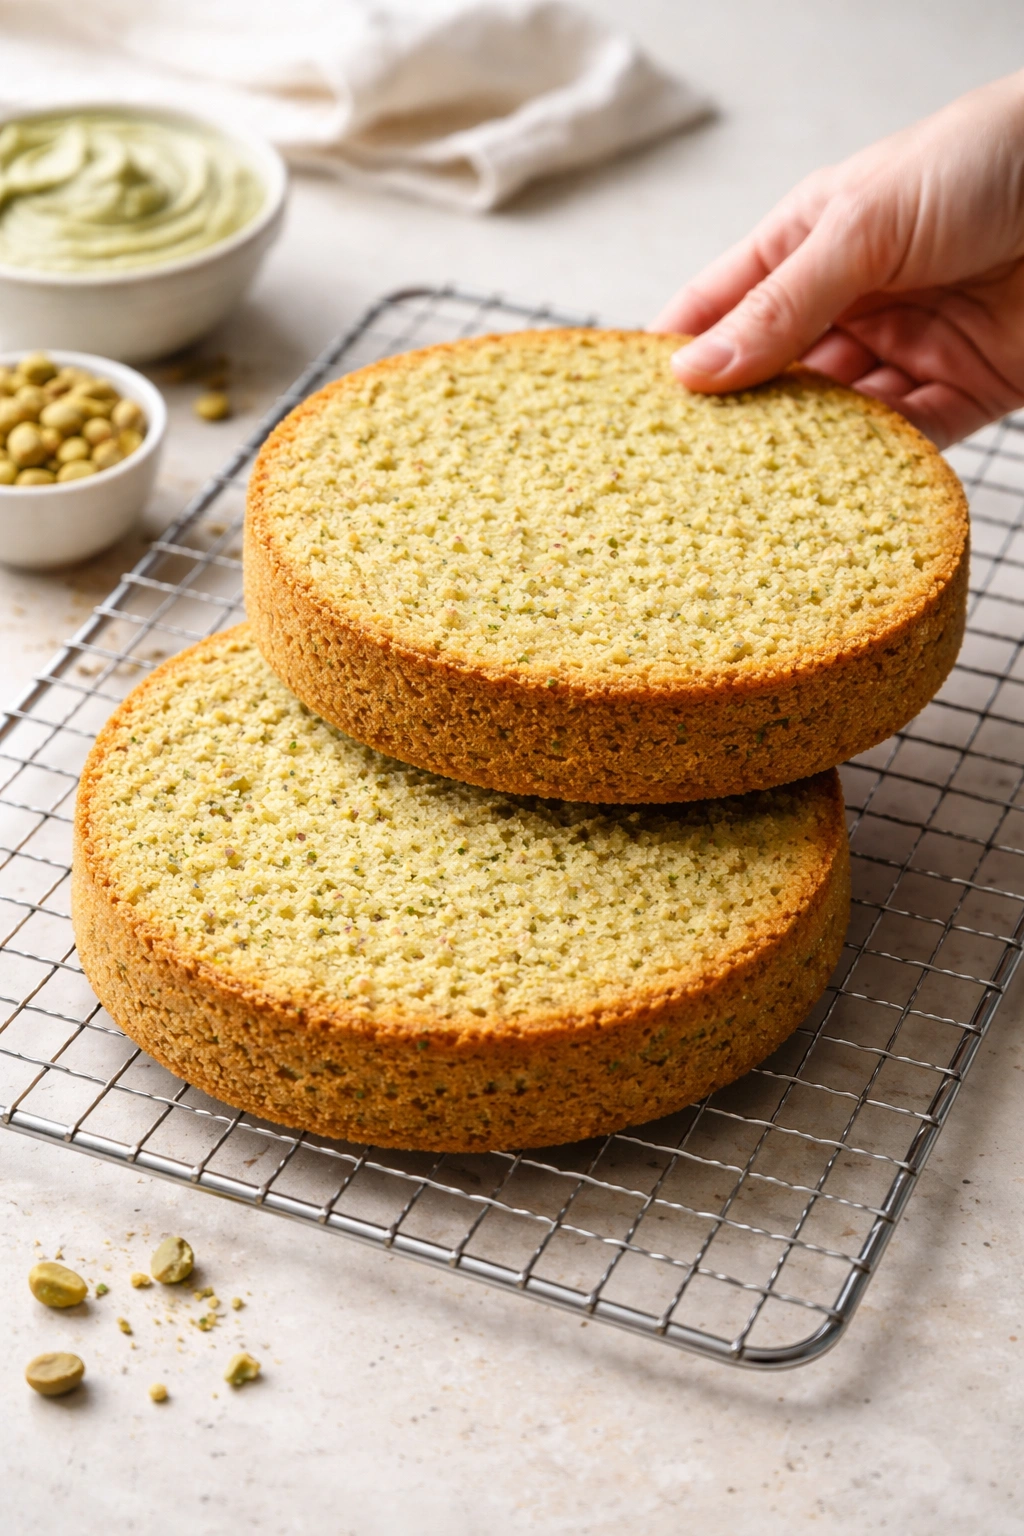
Patience during cooling is what separates a successful sponge cake from a frustrating one. Rushing to assemble while the cake is still warm causes the layers to crack, the frosting to slide off, and the whole structure to lack the structural integrity needed for clean slicing. After removing the cakes from the pans and peeling off the parchment, place them on wire racks in a cool part of your kitchen and leave them alone for at least 1 hour.
Once completely cool, the cakes should be level and feel slightly springy when pressed gently. If a cake has domed significantly on top, you can carefully trim the dome with a long serrated knife, using a gentle sawing motion. This creates a flat surface for stacking. Some bakers prefer to place a cutting board on top of the cake, then invert the board and cake together, trim the dome that’s now facing up, then flip everything back right-side up. This method keeps the cake more stable during trimming.
If you want to brush the cake layers with a light syrup for extra moisture, mix 2 tablespoons pistachio liqueur (or 2 tablespoons milk mixed with ¼ teaspoon almond extract) with 2 tablespoons water. Using a pastry brush, lightly brush each cake layer with this mixture — just enough to add subtle flavor without making the cake soggy. This step is optional but appreciated if your kitchen tends to be very dry.
Pistachio Buttercream Frosting
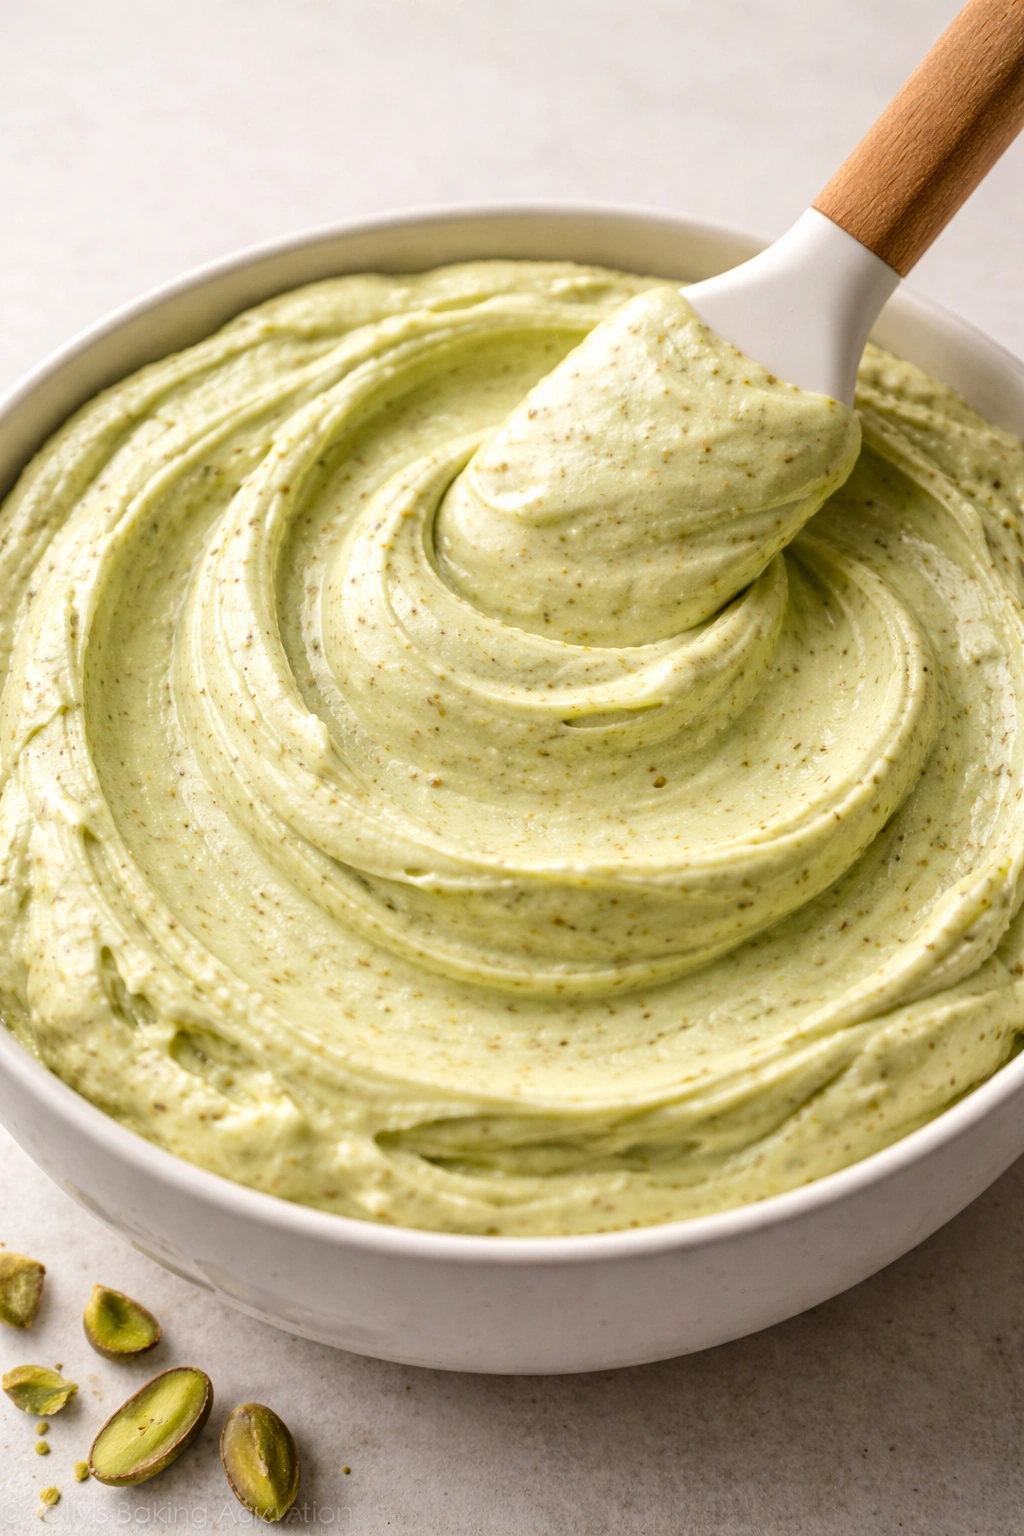
The frosting is where you layer on more pistachio flavor and create a beautiful, spreadable finish that complements the delicate cake. A pistachio buttercream is best made from pistachio paste, which you can buy pre-made or make yourself by grinding extra roasted pistachios with a small amount of butter into a smooth paste.
Place the softened butter in a clean mixer bowl fitted with the paddle attachment. Beat on medium speed for 1 to 2 minutes until the butter is pale and fluffy — this incorporates air and creates a lighter texture than dense, heavy frosting. With the mixer on low speed, add the sifted powdered sugar one cup at a time, beating for about 30 seconds after each addition and scraping down the bowl. After the first cup is incorporated, the mixture will be very thick and pale. Add the pistachio paste, beating until fully combined.
Begin adding the milk one tablespoon at a time, beating on medium speed after each addition, until you reach a spreadable consistency. The frosting should be thick enough to hold its shape when piped but soft enough to spread smoothly without tearing into the cake’s crumb. Add the vanilla extract and salt, beating once more to combine.
The frosting can be made up to 2 days ahead and stored in an airtight container in the refrigerator. Let it come to room temperature and re-beat for 1 to 2 minutes before spreading, which restores the light, fluffy texture that makes this frosting so appealing.
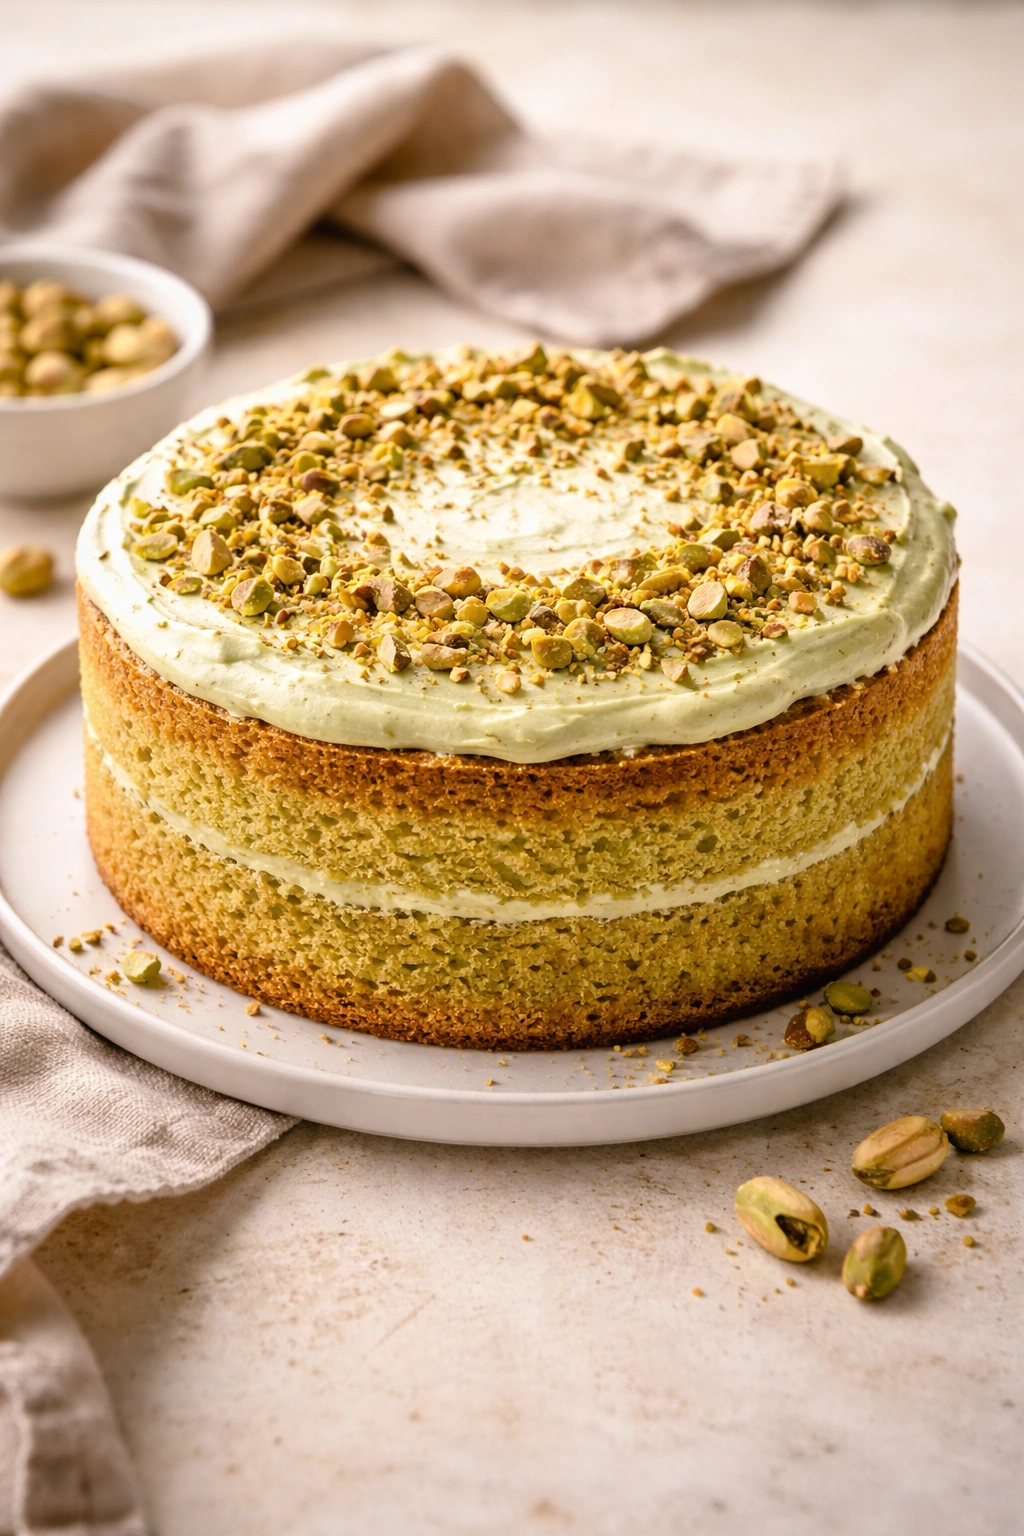
Assembling and Frosting the Cake
Place one cake layer on a cake board or your serving plate. Using an offset spatula or the back of a spoon, spread about ½ cup of frosting evenly over the top, going almost to the edges but leaving about ¼ inch from the very edge (the frosting will squeeze slightly as you add the second layer, and this prevents it from squishing out the sides). Place the second cake layer on top, right-side up, pressing gently so the layer sits evenly.
Spread a thin layer of frosting (called a crumb coat) over the top and sides of the entire cake — just enough to seal in any loose crumbs. Refrigerate for 15 to 20 minutes until this thin layer is firm, then apply your final, thicker frosting layer, working smoothly around the sides and on top. The crumb coat prevents crumbs from getting dragged into your final frosting layer, which makes a cleaner, more professional-looking finish.
Garnish the top with the roughly chopped roasted pistachios and a light dusting of powdered sugar. The natural green color of the cake and the lighter green of the frosting already make a beautiful presentation, and the pistachio garnish adds texture and another layer of flavor.
Troubleshooting Dense or Collapsed Cake
A dense, sunken pistachio sponge cake is usually the result of one specific misstep, and identifying it helps you nail the recipe the next time. The most common culprit is overfold-ing the egg whites — if you beat them in instead of folding them gently, or if you fold for too long, you’ll deflate the foam and lose the height and airiness that define a sponge cake. The solution is trusting that a few white streaks remaining in the batter is actually the correct stopping point.
A collapsed cake that bakes well but falls several hours after cooling suggests you’ve overbaked it slightly. Overbaking sets the structure so firmly that as the cake cools and the interior contracts, gaps form and the cake sinks. This is why checking for doneness at 30 minutes and not leaving the oven door open for extended periods matters so much.
If your cakes came out dense from the start, review the creaming step. Insufficient creaming (beating butter and sugar less than 3 minutes) means you haven’t incorporated enough air into the base, and no amount of whipped egg whites can fully compensate. Proper creaming creates visible volume increase and a pale, fluffy mixture.
Occasionally a dense cake results from mixing the batter too much once the flour is added. Overmixing develops gluten, which tightens the crumb and creates a cake with a smaller crumb structure. The frosting and gentle folding minimize this risk, but if you notice you’ve been mixing longer than a few seconds after the last flour addition, you’ve probably overdone it.
Flavor Variations and Complementary Pairings
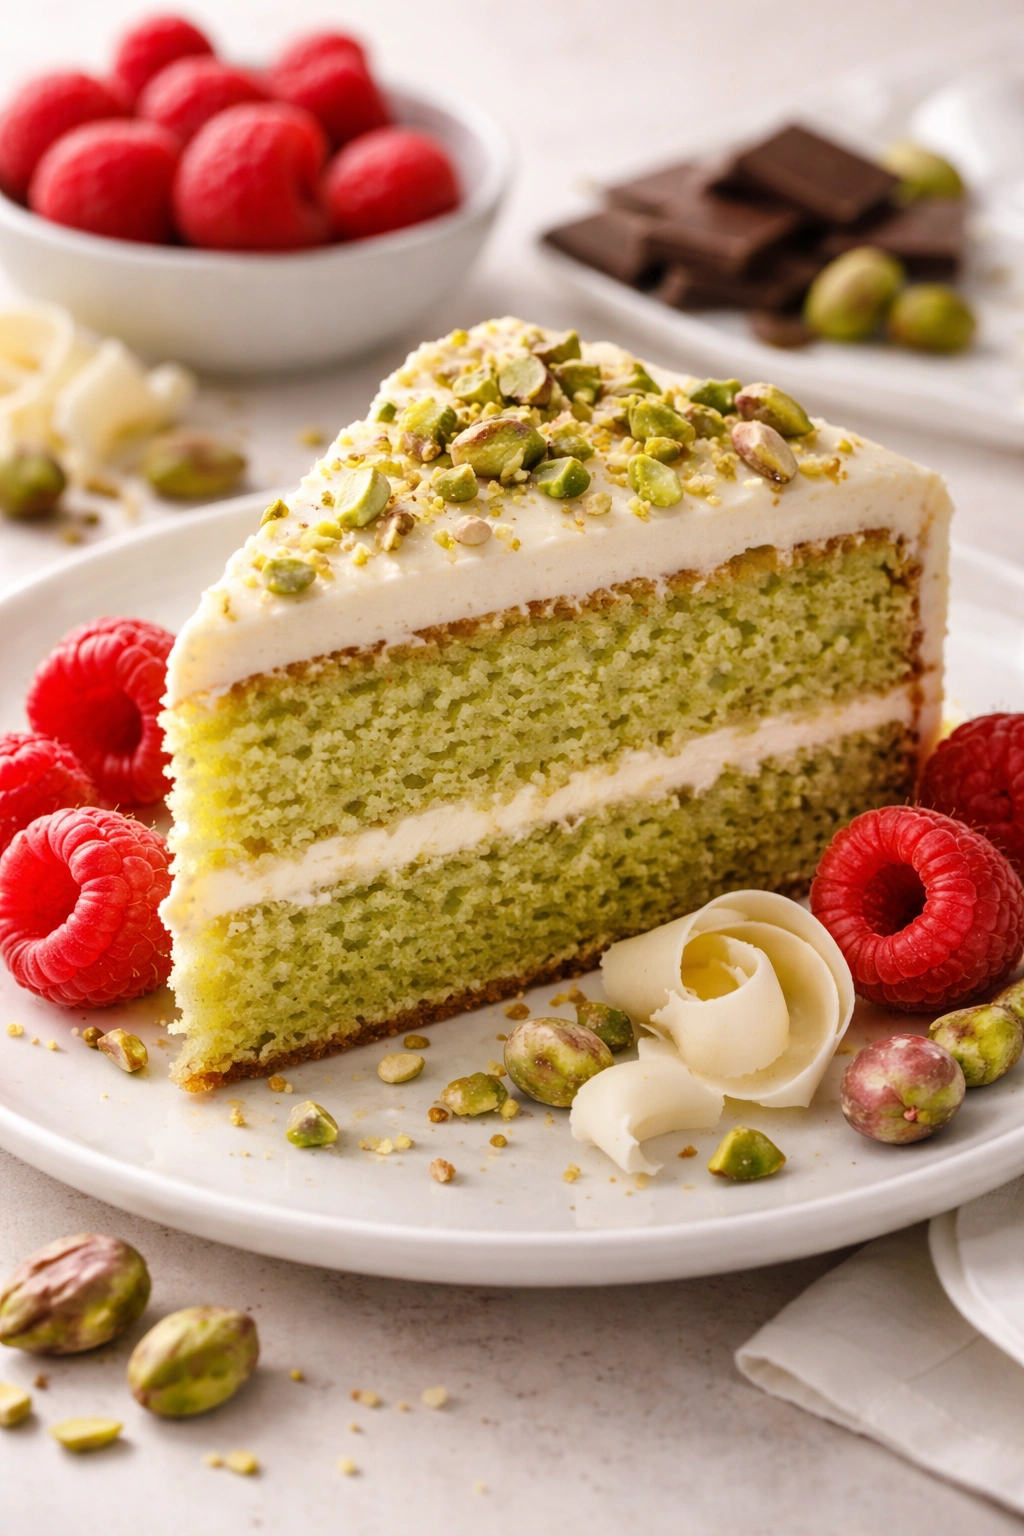
Once you’ve mastered the basic pistachio sponge cake, the formula opens up beautifully to variations that let you make this cake your own. A raspberry pistachio combination is stunning — substitute ½ cup fresh or frozen raspberries for ½ cup of the pistachio flour, folding the berries in right before the egg whites. The tartness balances the subtle pistachio flavor, and the pink-and-green marble effect is visually striking. Adjust baking time to 35 to 40 minutes since the extra moisture from the berries extends cooking time slightly.
For a chocolate pistachio cake, replace ¼ cup of the all-purpose flour with unsweetened cocoa powder and increase the sugar slightly to ¾ cup total (the cocoa adds slight bitterness). The chocolate and pistachio combination is sophisticated — use a dark chocolate frosting or a chocolate-pistachio hybrid frosting (half pistachio, half chocolate).
A white chocolate pistachio version works beautifully too. Fold 2 ounces of finely chopped white chocolate into the finished batter right before the egg whites, and use white chocolate in the frosting by replacing ½ cup of the powdered sugar with finely grated white chocolate, melted and slightly cooled before mixing in. This creates a creamier, slightly sweeter frosting that lets the pistachio flavor remain central.
For serving, the simplicity of the cake means it pairs beautifully with many accompaniments. Fresh whipped cream, a dollop of crème fraîche with honey, or a light raspberry sauce complement without overwhelming. Some bakers serve a thin slice of pistachio cake with a small scoop of vanilla or cream cheese ice cream. Spring and summer gatherings pair this cake with sparkling wine or Prosecco. In other seasons, it’s equally at home alongside strong coffee or herbal tea.
Storage and Make-Ahead Tips
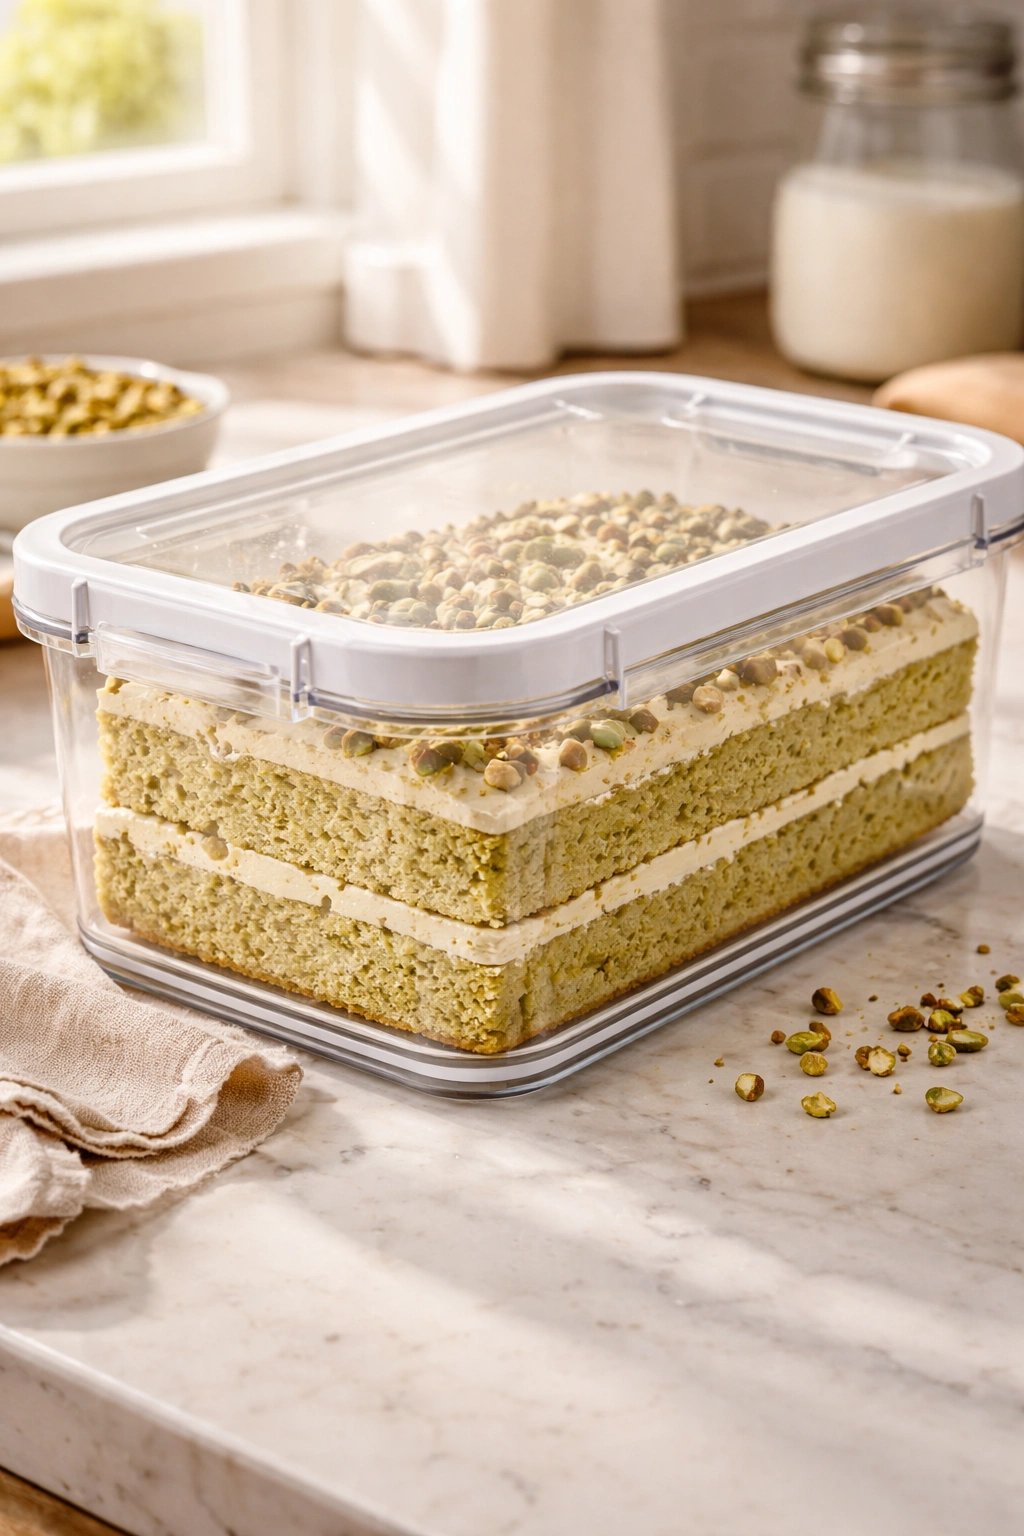
A pistachio sponge cake actually improves slightly after a day as the flavors meld and the crumb becomes a touch more tender from moisture redistribution. Store the finished, frosted cake in an airtight container at room temperature for up to 2 days, or refrigerate for up to 4 days. If refrigerated, remove it from the fridge 30 minutes before serving to bring it back to room temperature — cold cake feels denser and the flavors taste muted.
The unfrosted baked cake layers can be wrapped tightly in plastic wrap and frozen for up to 1 month. Thaw at room temperature for about 2 hours, unwrapped, before frosting. The frosting can be made up to 2 days ahead, stored covered in the refrigerator, and brought to room temperature with a brief re-beating before spreading.
If you want to assemble the cake ahead, you can do so up to 1 day before serving. Wrap the finished frosted cake loosely in plastic wrap and refrigerate. The texture is slightly firmer when cold, but the flavor is excellent — just give it 30 minutes at room temperature before serving.
Leftover slices keep covered at room temperature for 2 days or refrigerated for up to 4 days. Pistachio sponge cake doesn’t freeze well once frosted (the texture of frosting changes unpleasantly during freezing), but you can freeze individual unfrosted layers indefinitely.
Final Thoughts
Making a pistachio sponge cake from scratch is an investment in technique that pays dividends beyond this single recipe. The skills you master — proper creaming, whipping egg whites to perfection, and gentle folding — transfer directly to any sponge or angel food cake. Once you understand how and why each step matters, you can troubleshoot any baking mistake and adapt recipes with genuine confidence.
The beauty of a homemade pistachio sponge cake is that it doesn’t require exotic equipment or professional baking experience. A stand mixer and a wire cooling rack help, but they aren’t essential — patience and attention matter far more. What makes this cake remarkable isn’t complicated technique or rare ingredients; it’s the care you take in each step and the decision to toast your own pistachios instead of relying on a jar of paste or food coloring to create flavor.
This is the kind of cake that gets passed down and improved over time. Make it once and note what you’d do differently next time. Was the pistachio flavor strong enough? Did the cake have the height you wanted? Would a different frosting suit your taste better? Each bake teaches you something, and the next version will reflect what you learned. That’s how a recipe goes from something you followed to something that’s genuinely yours.