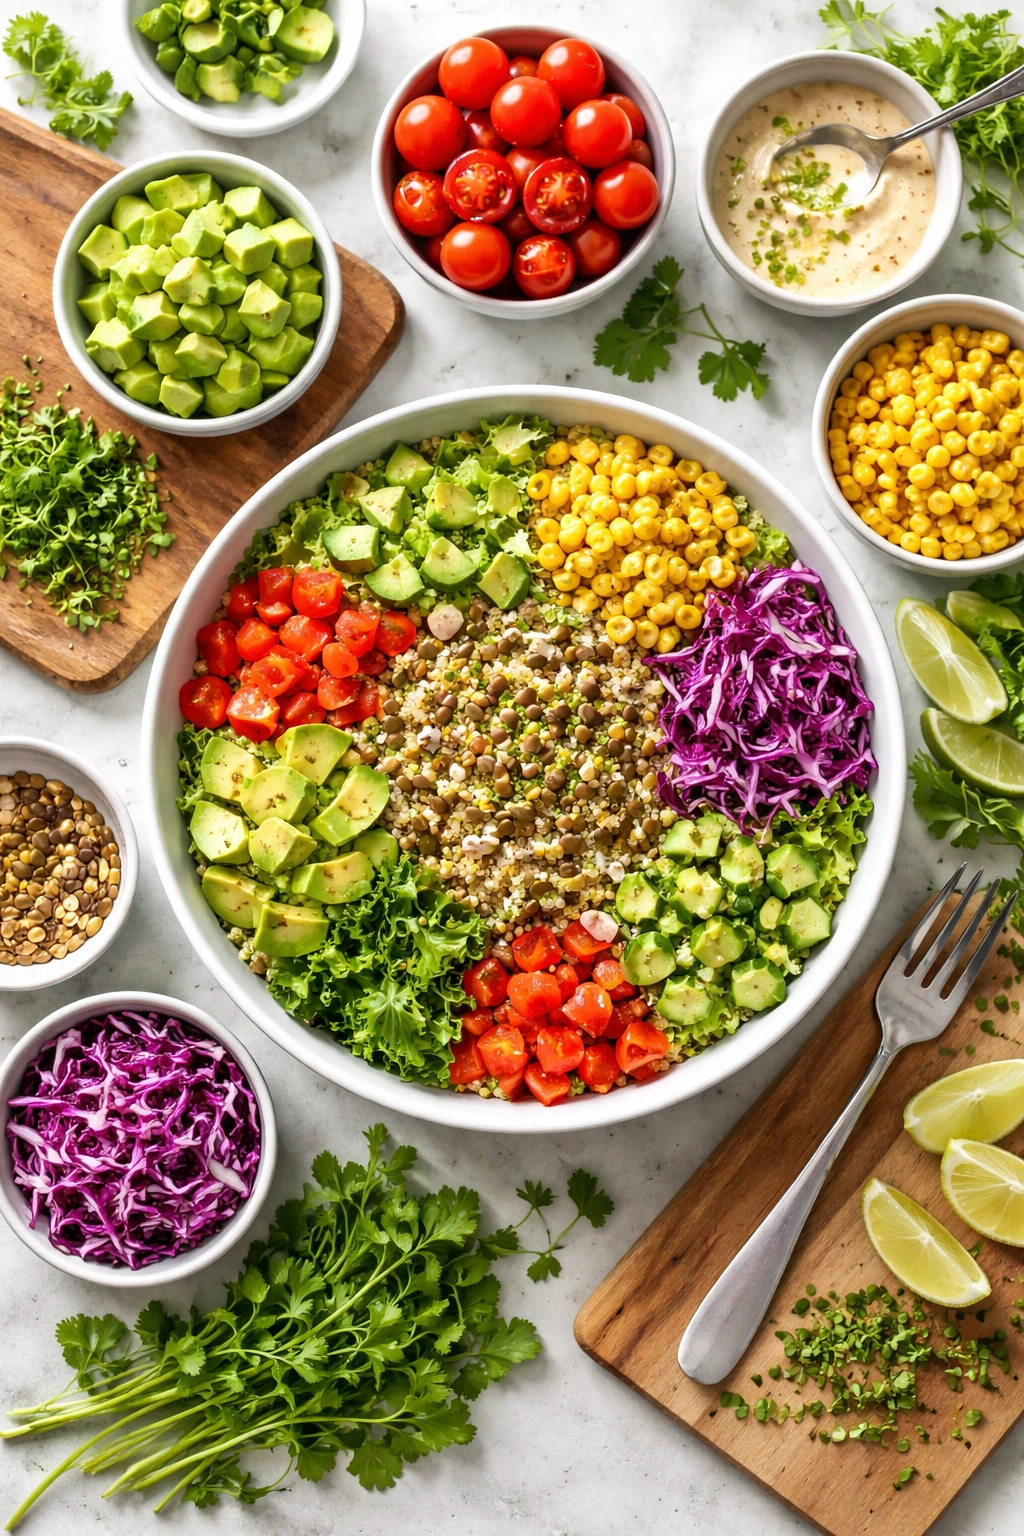
There’s something genuinely satisfying about building a bowl with your own hands—layering flavors and textures that complement each other perfectly, knowing exactly what went into every bite. A corn and quinoa bowl sits at that sweet spot where it’s healthy enough to eat for lunch without guilt, but flavorful and filling enough that you’ll actually crave it. The combination might sound simple on the surface, but when you get the technique right, these two whole grains create something that feels both light and deeply nourishing. Corn brings natural sweetness and a subtle pop of texture, while quinoa adds nutty earthiness and complete protein. Together, they form a base that’s practically begging for fresh vegetables, a punchy dressing, and maybe a squeeze of lime. The best part? You can have a bowl on the table in less than thirty minutes, with most of that time spent chopping vegetables rather than standing over a stove.
Why This Corn and Quinoa Bowl Is Different
Most grain bowls follow a predictable formula: throw some cooked grains in a bowl, add raw vegetables, drizzle with a dressing, call it healthy. This approach works fine if you’re eating at a desk while answering emails, but it doesn’t create the kind of meal that makes you slow down and actually enjoy your food. The version I’m sharing here treats the bowl as something more intentional—where every component is prepared to bring out its best qualities.
The approach starts with understanding that corn needs to be cooked in a way that intensifies its sweetness rather than steaming it into bland submission. Quinoa needs enough seasoning and fat woven through it so it doesn’t taste like cardboard. The vegetables should be cut to sizes that feel pleasant in your mouth, not chopped so fine they disappear into the grain, and not so large that they overwhelm every other element. The dressing has to be bold enough to pull everything together without drowning the delicate flavors underneath.
This isn’t complicated technique work—it’s mostly just understanding the why behind each step. Once you’ve made this bowl a few times, you’ll be able to build variations without needing a recipe at all. You’ll know how to adjust the components based on what’s in your fridge, the season, your mood that day, or what you’re pairing it with for dinner.
The Magic of Combining Corn and Quinoa
Corn and quinoa are a more interesting pairing than they might first appear. Corn is mostly carbohydrate with small amounts of protein and healthy fats—it’s delicious and naturally sweet, but nutritionally incomplete on its own. Quinoa is one of the few plant-based complete proteins, containing all nine essential amino acids, plus fiber, magnesium, and manganese. Together, they create a bowl that’s genuinely satiating without relying on meat or dairy.
The flavor and texture work beautifully together too. Corn has a tender, slightly creamy bite when cooked properly, while quinoa has a subtle crunch from its natural germ and a slightly fluffy interior. The contrast keeps the bowl from feeling monotonous when you’re eating a whole plateful. Corn’s sweetness also complements the earthiness of quinoa—they’re not competing flavors, but supporting ones that make each other taste better.
From a practical standpoint, both grains hold up well when dressed several hours ahead, won’t turn to mush if they sit in the refrigerator overnight, and taste good at room temperature or gently reheated. If you’re meal prepping, this bowl is genuinely convenient to make in a big batch on Sunday afternoon. The individual components are forgiving enough that you don’t need to time everything to come together at exactly the same moment—you can cook the quinoa early, prepare the vegetables while the corn cooks, and then dress everything just before serving.
Choosing Your Ingredients for Maximum Flavor and Nutrition
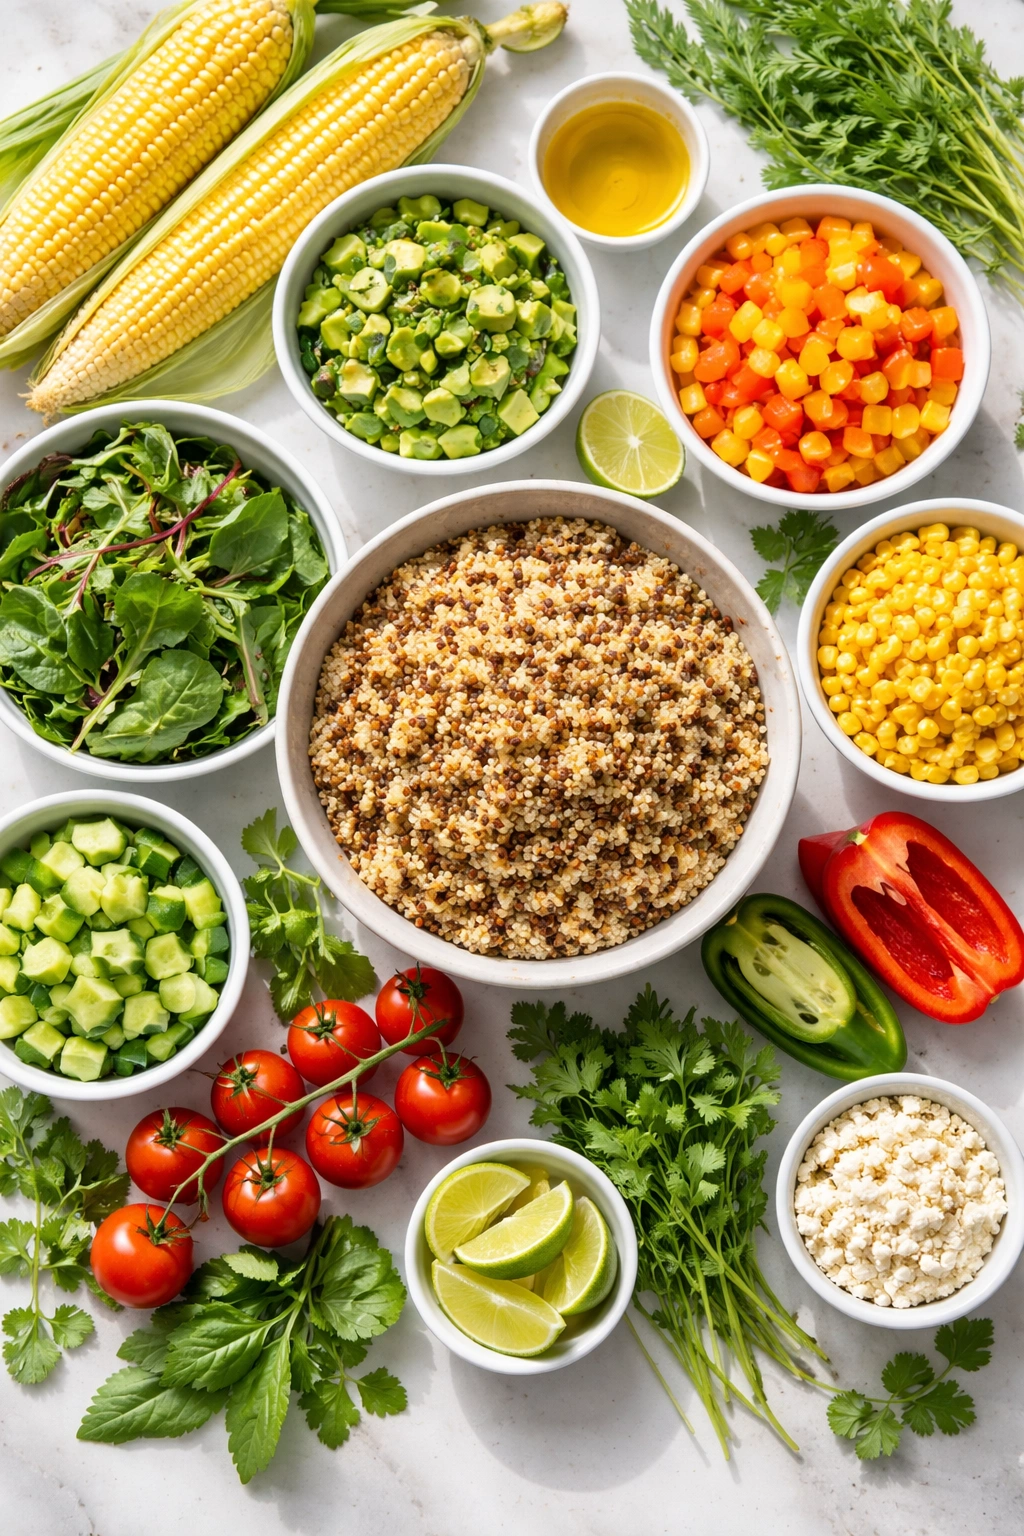
The quality of individual ingredients matters more in a bowl than it does in most dishes, because there’s nowhere to hide. You’re not blending things into a sauce or baking them into something transformed. Every ingredient is visible and distinct, so fresh, flavorful components make a genuine difference.
For corn, fresh corn in season is incomparable—kernels should be plump, milky, and sweet. If you’re working outside of peak corn season, frozen corn is actually better than supermarket corn that’s been sitting around. Frozen corn is picked at peak ripeness and frozen immediately, which preserves more sweetness and nutrition than corn that’s been shipped and stored for weeks. Canned corn works in a pinch, but rinse it thoroughly to remove the starchy liquid it’s packed in.
Quinoa quality matters too, and honestly, most quinoa sold in supermarkets is already quite good. Look for quinoa that looks uniform in color without lots of debris mixed in. Some people prefer white quinoa for its slightly milder flavor, while others like red or black quinoa for earthiness and earthier visual appeal in the finished bowl. For this recipe, white or a tri-color blend both work wonderfully.
The vegetables you choose should be what’s fresh and in season wherever you are. Spring might mean fresh radishes, young snap peas, and tender lettuce. Summer brings tomatoes, cucumbers, and bell peppers. Fall offers roasted squash and fresh greens. Winter is perfect for hearty kale, shredded carrots, and red cabbage. Buying produce that’s actually in season means it will taste better, cost less, and have traveled shorter distances—it’s a win across the board.
Yield: Serves 2 as a main course | Serves 4 as a side dish
Prep Time: 20 minutes
Cook Time: 20 minutes
Total Time: 40 minutes
Difficulty: Beginner — the steps are straightforward, no special equipment is required, and everything comes together with basic knife skills. The recipe is very forgiving if you’re learning.
Full Ingredient List
For the Quinoa:
- 1 cup quinoa, rinsed thoroughly under cold water
- 2 cups vegetable broth or water
- 1 tablespoon olive oil
- ½ teaspoon fine sea salt
- ¼ teaspoon freshly ground black pepper
For the Corn:
- 2 cups fresh corn kernels (from 3-4 medium ears) OR frozen corn, thawed (not canned, or rinsed well if using canned)
- 1 tablespoon unsalted butter
- ½ medium red onion, finely diced
- 2 cloves garlic, minced
- ¼ teaspoon fine sea salt
- Pinch of freshly ground black pepper
- 1 tablespoon fresh lime juice
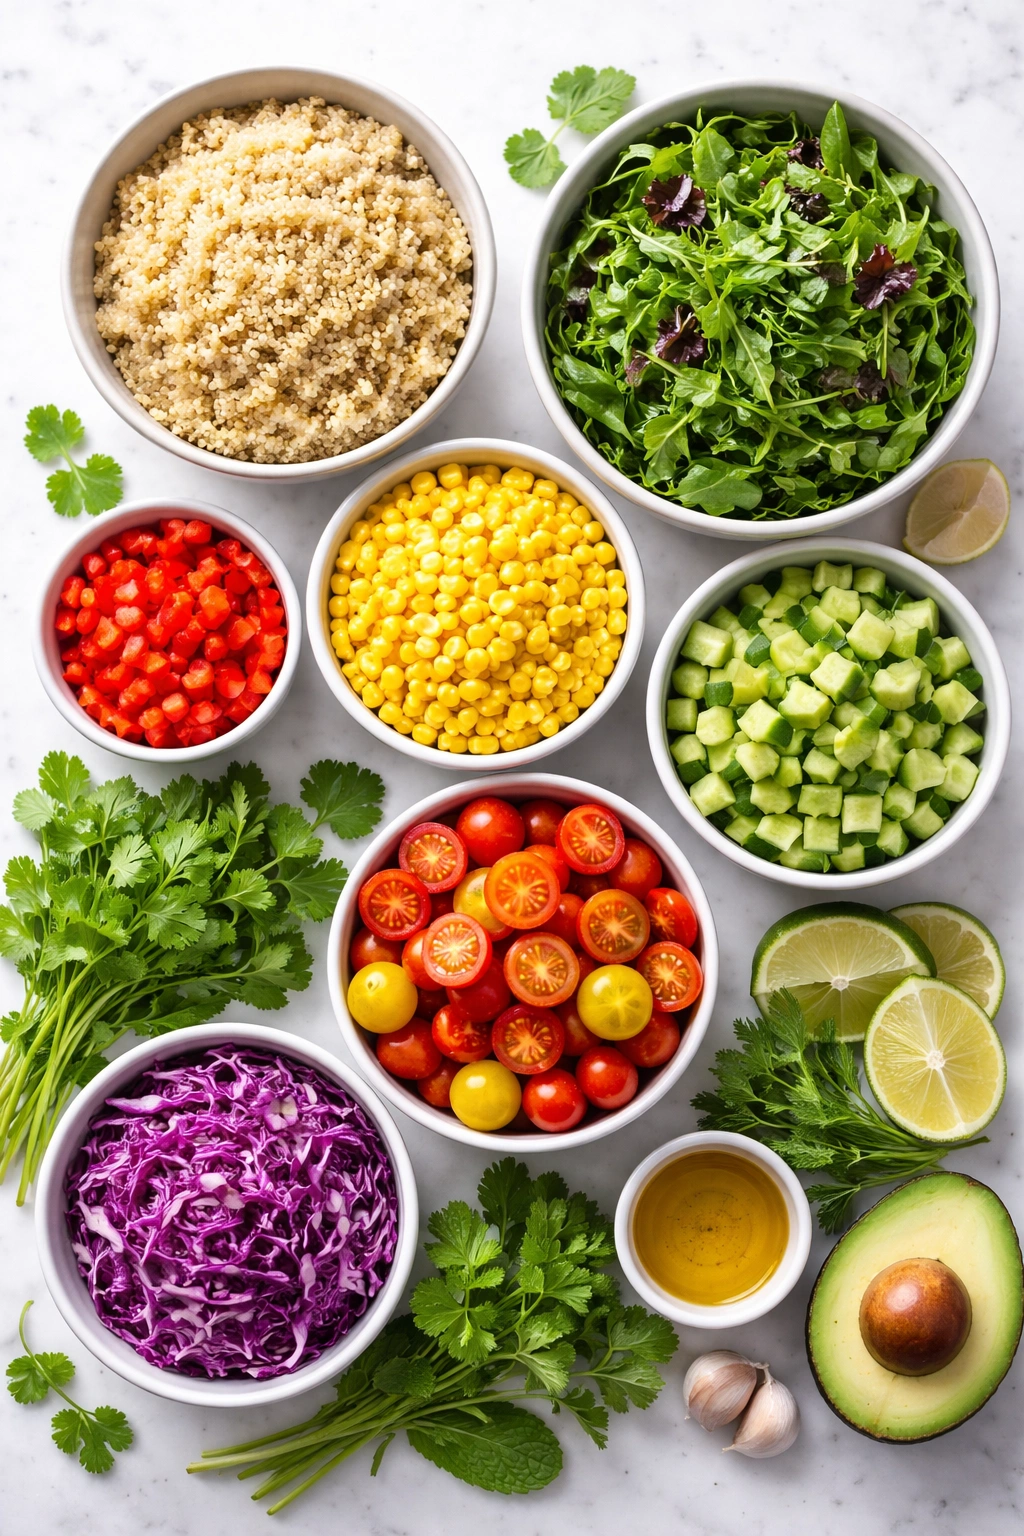
For the Base and Vegetables:
- 2 cups fresh salad greens, spinach, or arugula (or a combination of tender greens)
- 1 cup cherry or grape tomatoes, halved
- 1 English cucumber or 2 Persian cucumbers, thinly sliced or cut into half-moons
- 1 bell pepper (any color), cut into ¼-inch dice
- ¼ red cabbage, thinly shredded (approximately 1 cup)
- ⅓ cup fresh cilantro leaves, loosely chopped
- ¼ cup fresh mint leaves, torn by hand (optional but encouraged)
For the Lime-Cilantro Dressing:
- 3 tablespoons fresh lime juice (approximately 2 medium limes)
- 2 tablespoons best-quality extra-virgin olive oil
- 1 tablespoon unseasoned rice vinegar or white wine vinegar
- 1 clove garlic, minced very finely
- 2 tablespoons fresh cilantro, finely chopped
- ½ teaspoon honey or agave nectar (balances the acidity)
- ¼ teaspoon fine sea salt
- Pinch of freshly ground black pepper
- Optional: ¼ teaspoon red pepper flakes for gentle heat
For Serving and Finishing:
- Lime wedges, for serving
- Fleur de sel or other finishing salt
- Optional: crumbled cotija cheese, toasted pepitas (pumpkin seeds), or crumbled feta if you want to add richness
Making Perfect Fluffy Quinoa Every Time
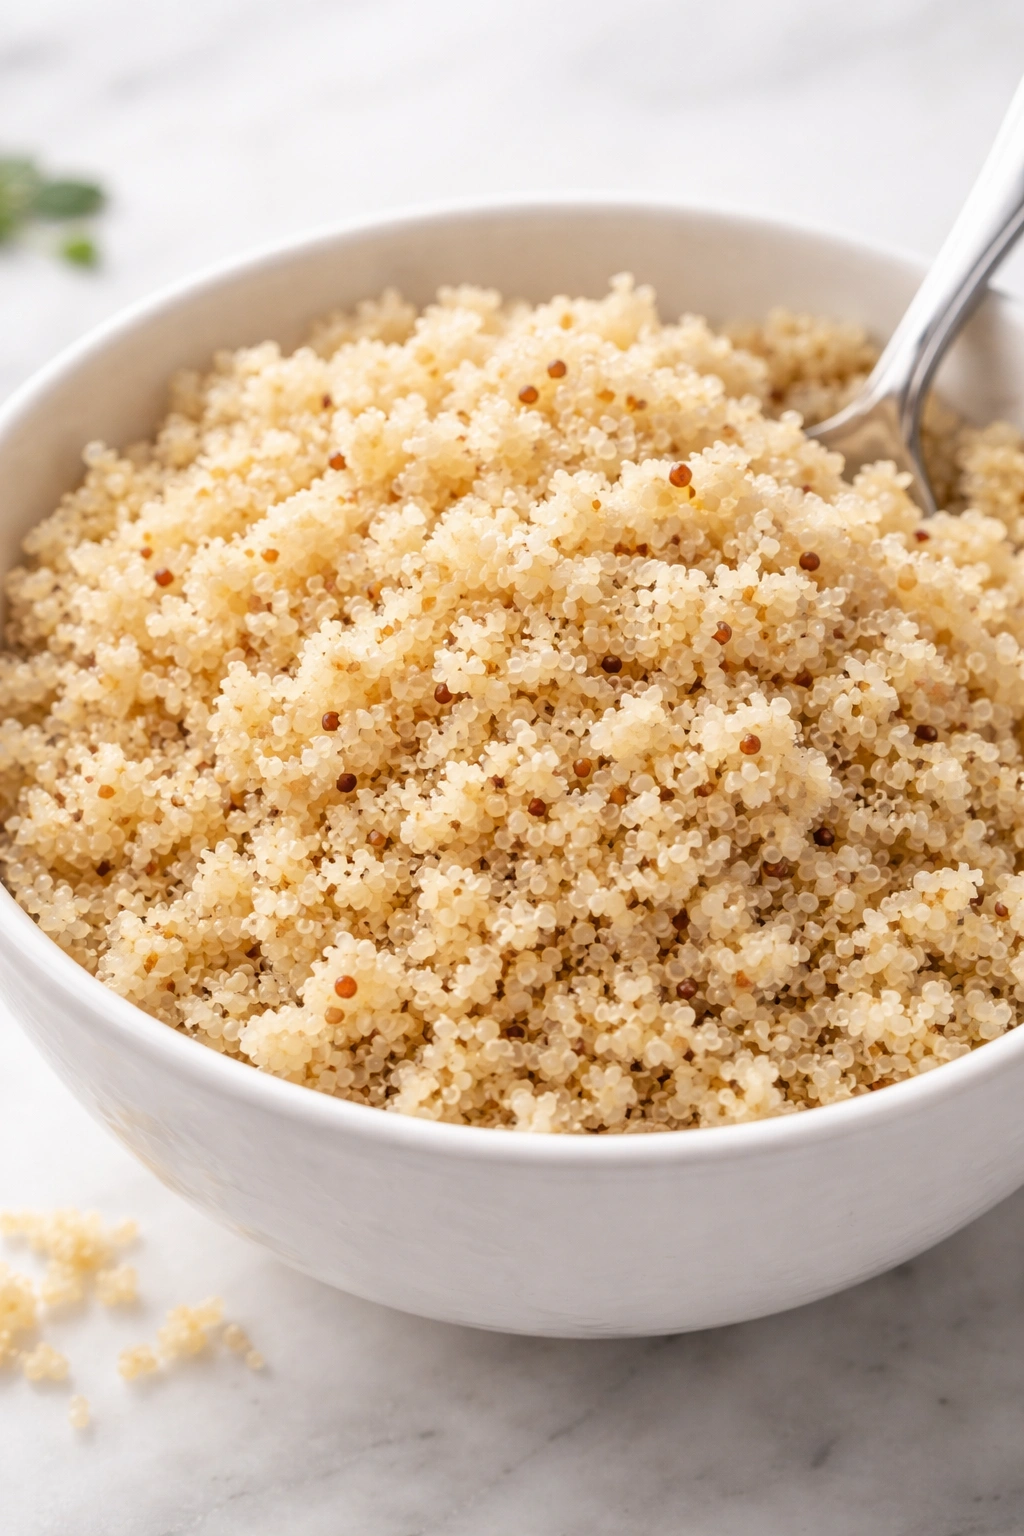
The biggest mistake people make with quinoa is not rinsing it properly before cooking. Quinoa is coated with saponins—bitter compounds that protect the plant—and even though most commercial quinoa is pre-rinsed, rinsing again takes thirty seconds and makes a noticeable difference in the final flavor. Place the quinoa in a fine-mesh strainer and rinse under cold running water, stirring it gently with your fingers for about 20 seconds until the water runs clear.
Measure your liquid carefully. The standard ratio is 2 parts liquid to 1 part quinoa, which gives you fluffy, separate grains rather than a mushy mass. Bring the broth or water to a boil in a medium pot, then add the rinsed quinoa and the olive oil. The oil isn’t strictly necessary, but it helps prevent the grains from sticking together as they cook. Add the salt now—seasoning the cooking liquid means the quinoa absorbs the salt evenly throughout rather than tasting bland inside and salty if you add it after.
Once the liquid returns to a boil, reduce the heat to low and cover the pot. Let it simmer gently for 15 minutes—don’t lift the lid and peek, as this releases steam and extends the cooking time. After 15 minutes, remove from heat and let it rest, covered, for 5 minutes. This final rest allows any remaining liquid to absorb and the grains to fluff up. Remove the lid and fluff the quinoa gently with a fork, breaking up any clumps that formed during cooking.
The quinoa should be tender but not mushy, with a visible white germ that’s come loose from each grain. If it’s still a bit wet, leave the lid off for a minute or two to let any excess moisture evaporate. Transfer it to a large bowl and let it cool to room temperature while you prepare the other ingredients. The residual heat will continue to set the texture.
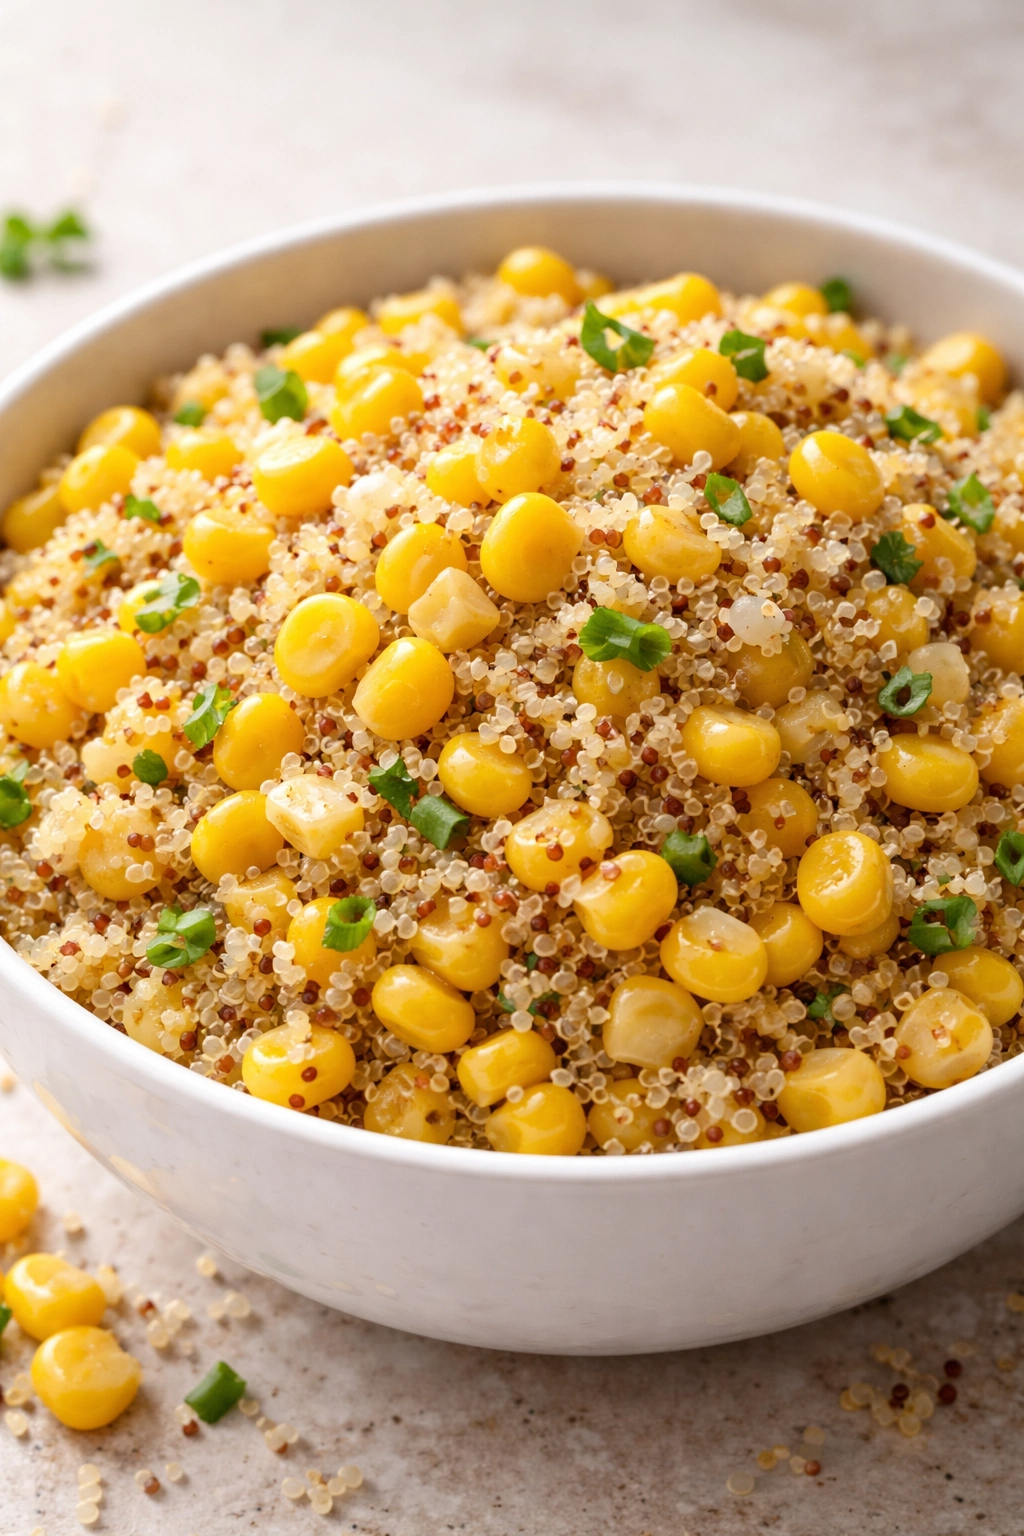
Preparing Fresh Corn for Peak Sweetness
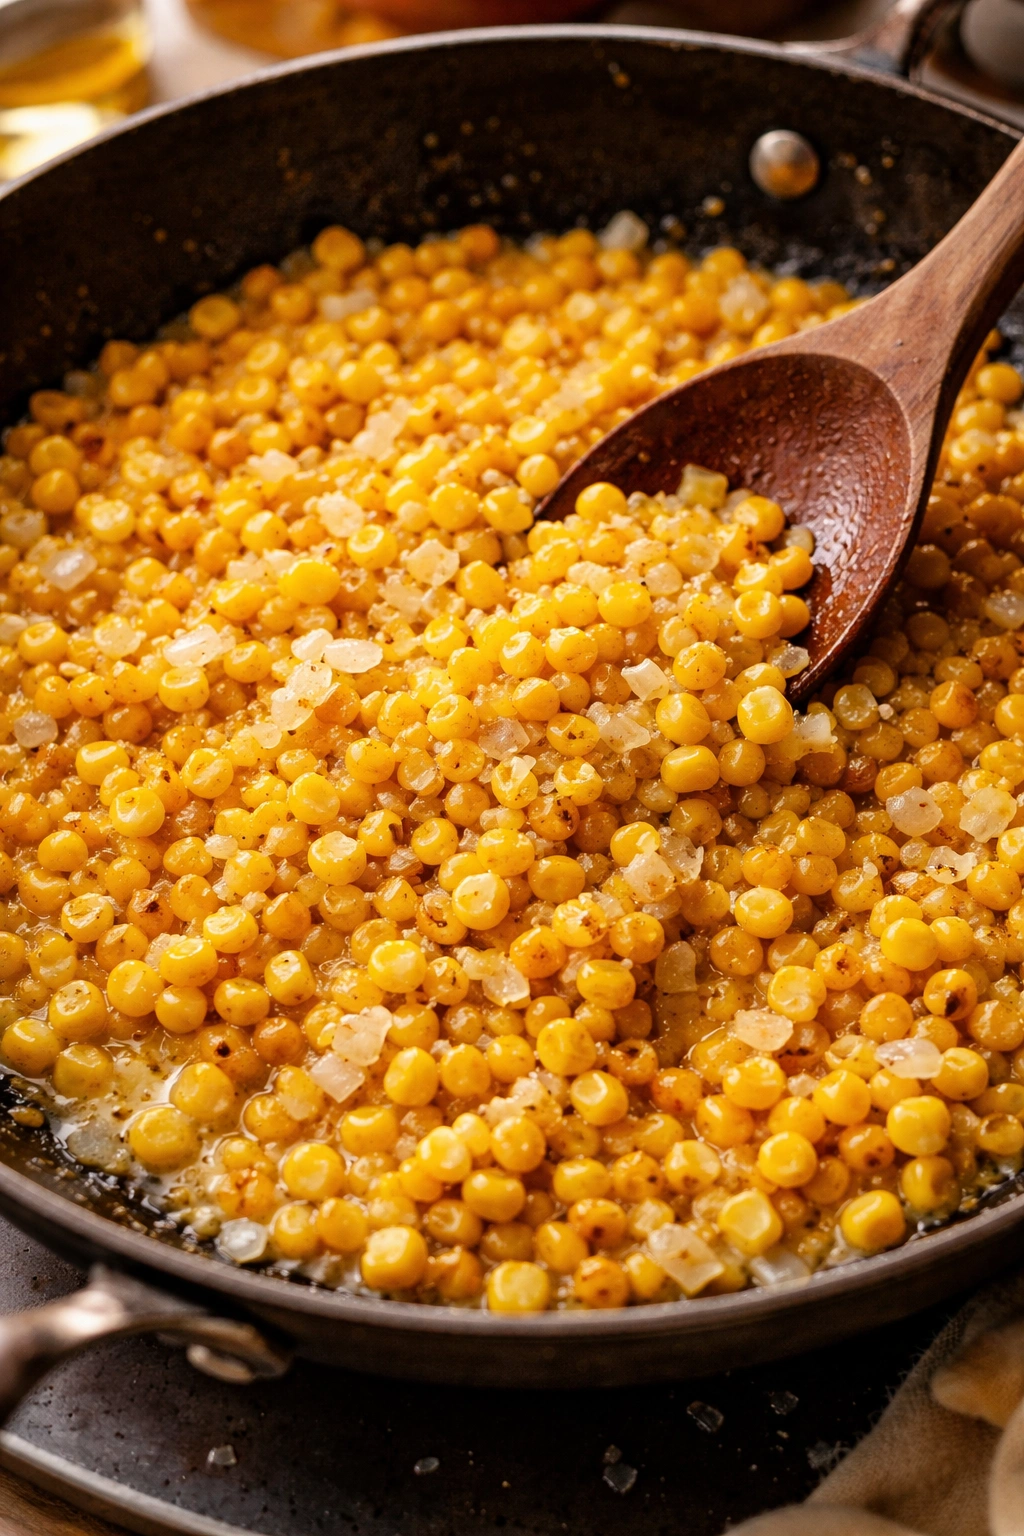
Fresh corn needs heat to taste truly sweet, so cooking it in butter with aromatics is where the real magic happens. If you’re using frozen corn, thaw it first by placing it in a colander and letting it sit at room temperature for about 10 minutes—this keeps it from watering down your pan.
Heat the butter over medium-high heat in a large skillet. Once it’s foaming and smells nutty—watch carefully, this takes about 1 minute—add the diced red onion. Cook it, stirring occasionally, for about 2 minutes until it’s softened and just beginning to turn translucent at the edges. The onion adds sweetness that deepens the corn’s natural flavor.
Add the minced garlic and cook for about 30 seconds more until it becomes fragrant. You’re not trying to brown the garlic here; gentle heat means it stays sweet rather than becoming bitter. Now add the corn kernels and cook, stirring frequently, for 5 to 7 minutes. The corn should develop light golden spots as it caramelizes slightly—this is where sweetness intensifies and deeper flavors develop. If you’re using fresh corn, it’ll be done when the kernels are tender and taste noticeably sweeter than they did going into the pan.
Remove the pan from heat and squeeze the fresh lime juice over the corn, then add the salt and pepper. Let it cool in the pan for a few minutes before transferring it to a plate. The lime juice adds brightness and prevents the sweetness from becoming cloying.
Building the Dressing That Ties Everything Together
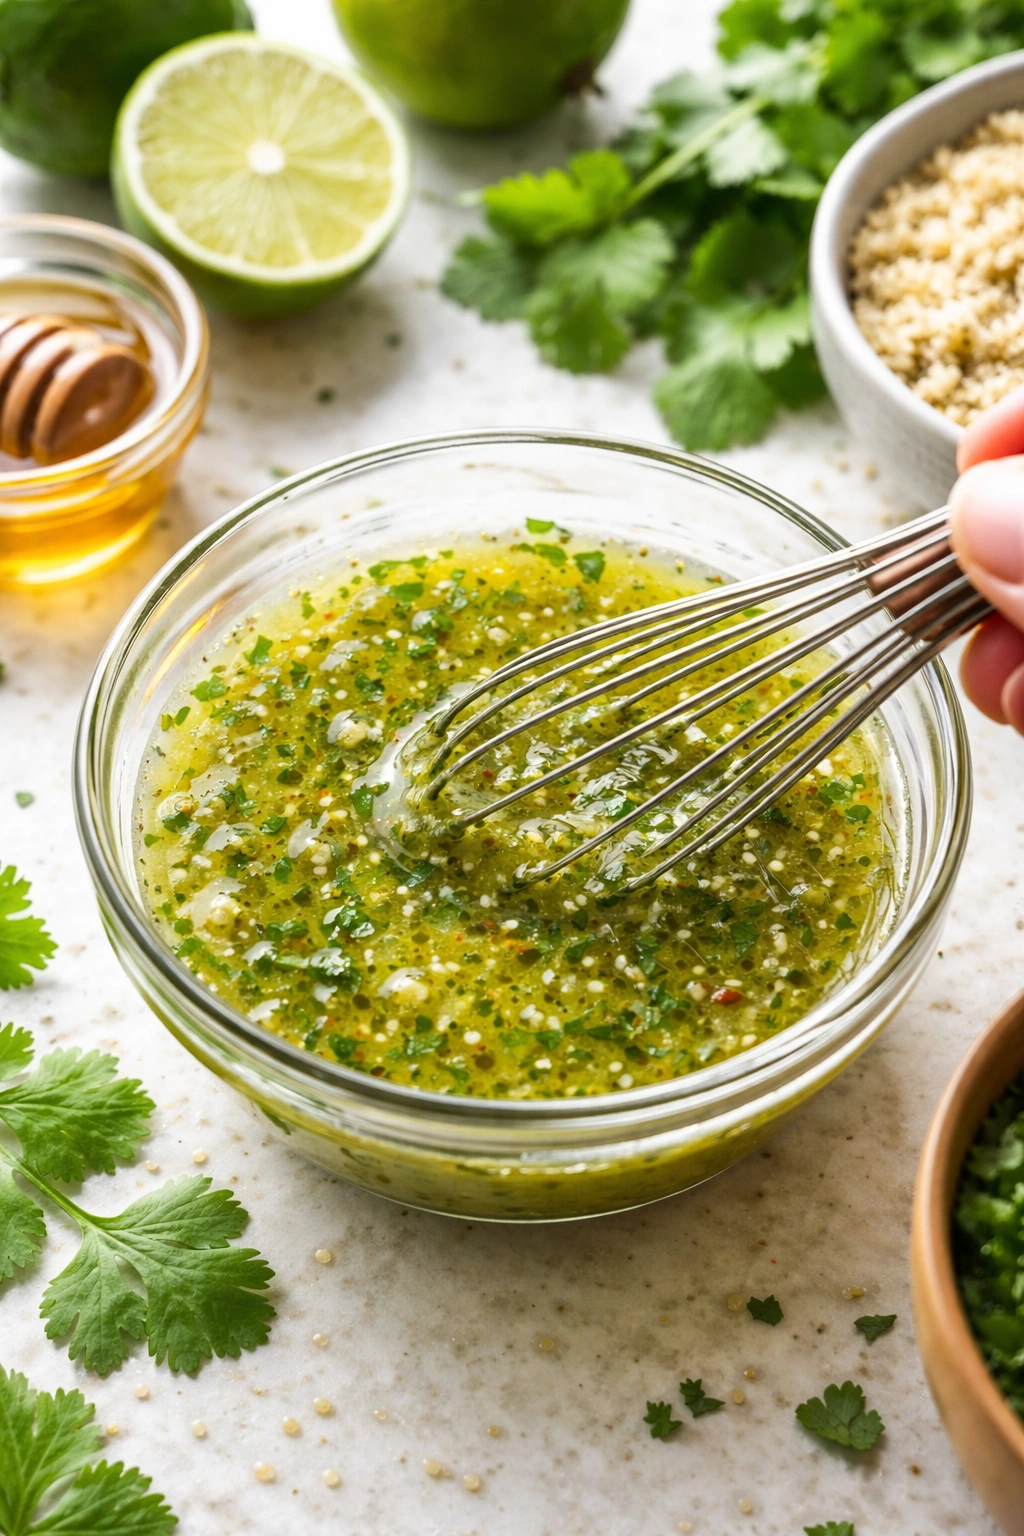
A bright, well-balanced dressing is what transforms these components from separate ingredients into a coherent bowl. This particular dressing is bright from lime juice, slightly sweet from honey, herbal from cilantro, and rounded out by good olive oil. It’s not thick or creamy—it’s meant to coat the grains lightly without making the bowl feel heavy.
Combine the lime juice, rice vinegar, minced garlic, and honey in a small bowl. Whisk these together first—let the honey dissolve completely into the acidic liquid, which happens after about 30 seconds of whisking. This step prevents honey granules from ending up in your finished bowl. Add the cilantro, salt, pepper, and red pepper flakes if you want a subtle kick.
Now whisk in the olive oil slowly while continuing to whisk. You’re not emulsifying it the way you would a vinaigrette with an egg, but you are incorporating the oil enough that it coats your mouth pleasantly rather than separating into greasy puddles. Taste it and adjust—if it’s too acidic, add a tiny drizzle more honey or a pinch of salt. If it needs more brightness, add another squeeze of lime juice. The dressing should taste bold enough to hold up when mixed with mild grains, but not so strong that it overpowers the vegetables.
Make the dressing no more than 15 minutes before serving. If it sits too long, the herbs lose their fresh brightness and the flavors flatten.
The Assembly and Final Touches
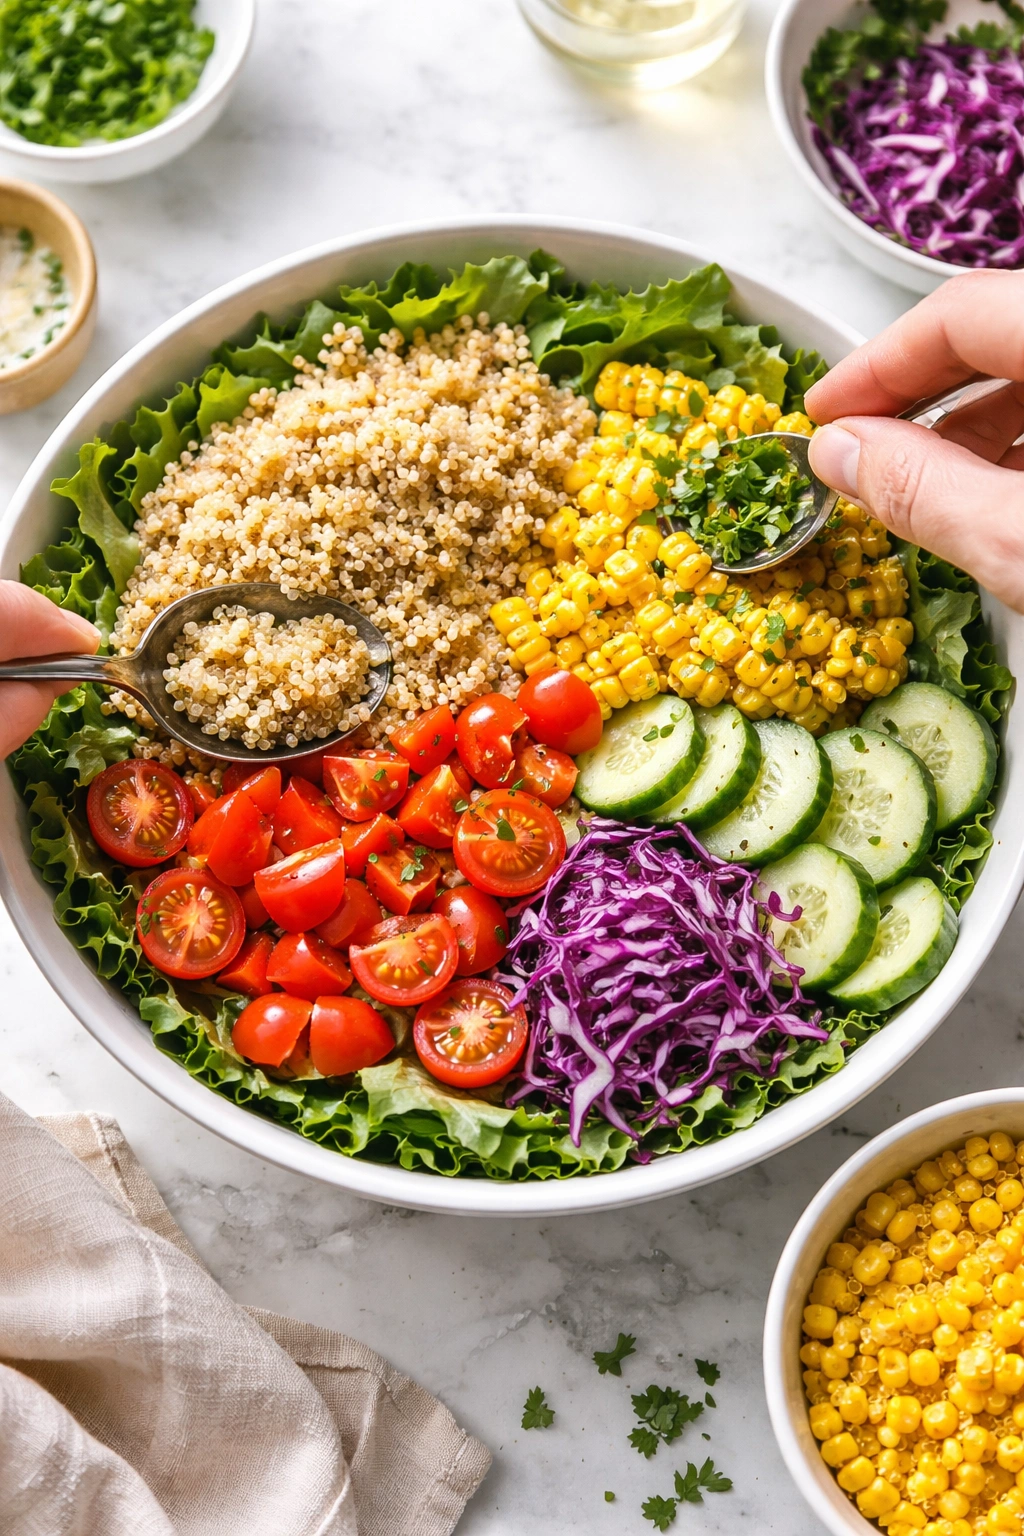
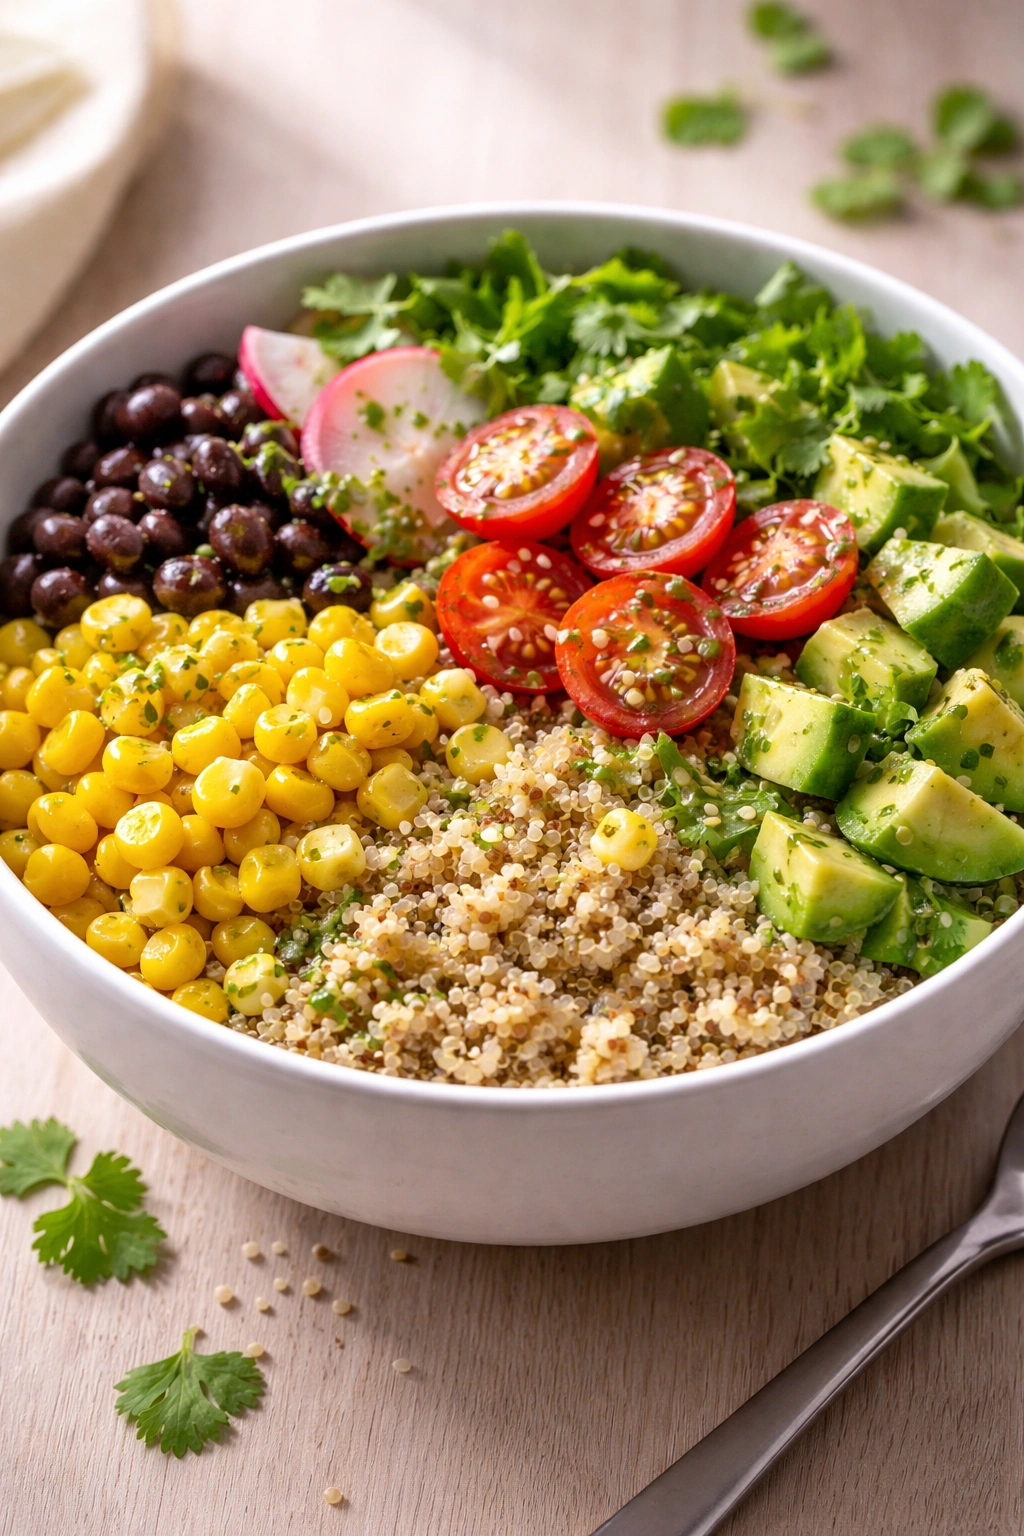
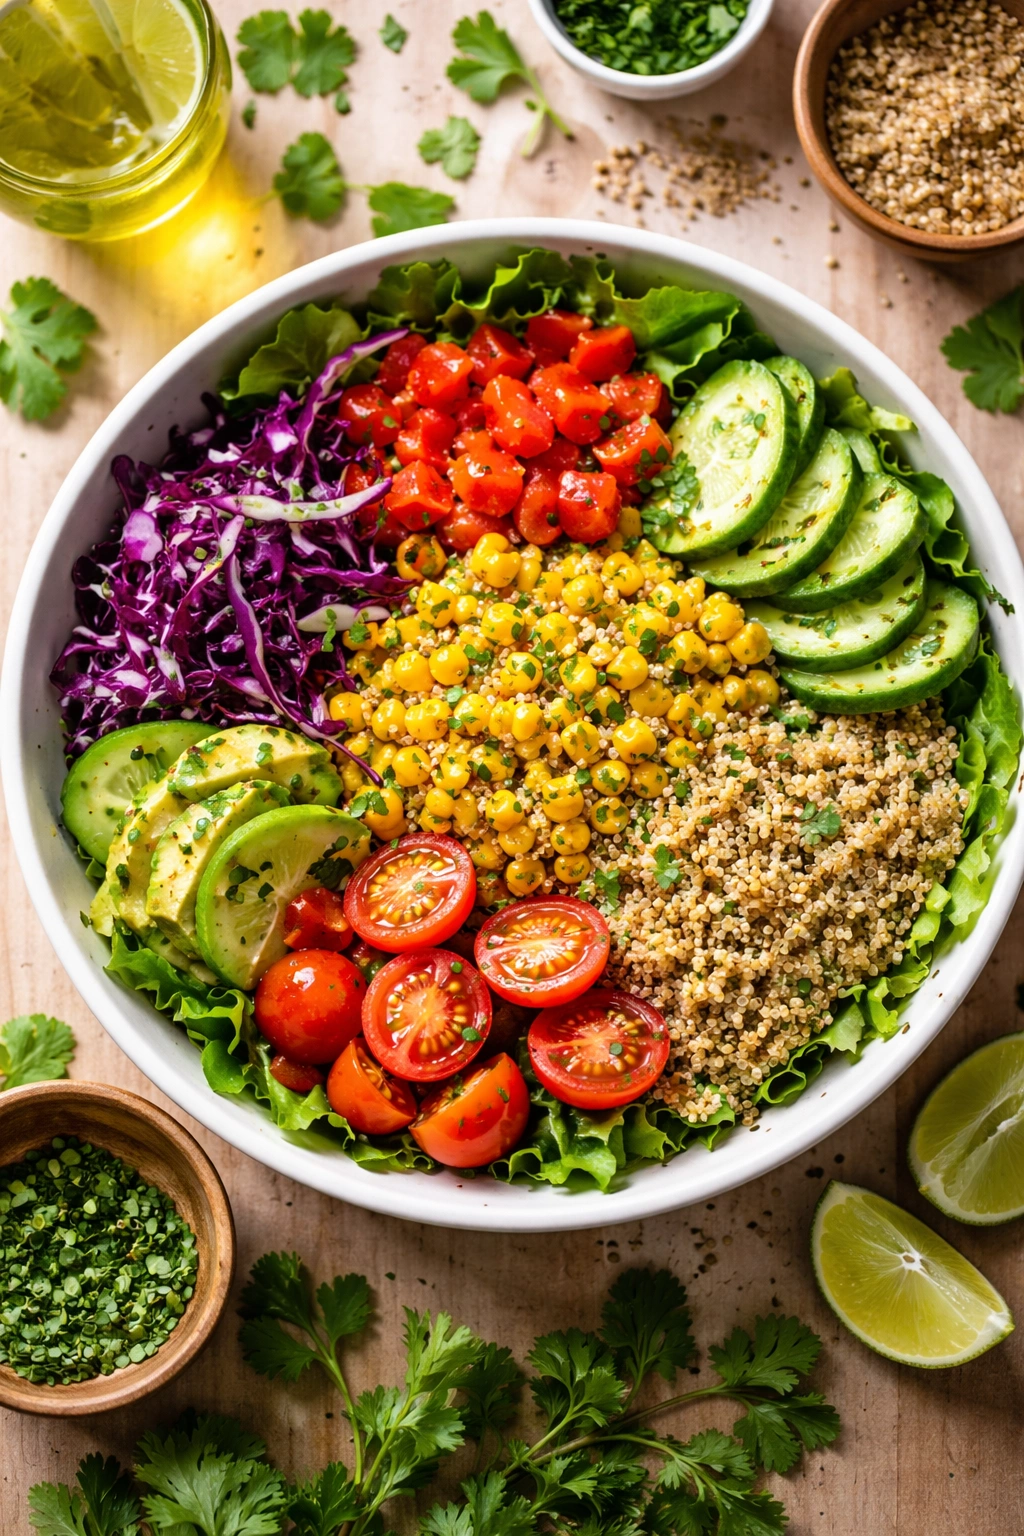
This is where the bowl becomes something greater than the sum of its parts. Start with the tender greens as your base—they should cover the bottom of your bowl and take up maybe 30 percent of the volume. These greens will wilt slightly when you add the warm quinoa and corn, which softens them slightly without making them unpleasantly cooked.
Spread the cooled quinoa over the greens, then add the warm or room-temperature corn. They’ll still release gentle heat, which will slightly wilt the greens underneath without making anything mushy. This is why cooking sequence matters—if everything is cold, the bowl feels flat and dingy. If it’s too hot, the vegetables become sad.
Arrange the tomatoes, cucumber, bell pepper, and shredded cabbage in distinct sections around the bowl. This isn’t just for looks (though it is beautiful)—it means every spoonful you take gets a mix of flavors and textures. If everything is stirred together, the dressing coats everything at once and the flavors blend into each other rather than singing individually.
Drizzle the dressing over the vegetables and grains. You don’t need to use every drop—start with about three-quarters of it and add more if needed. Scatter the cilantro and mint on top just before serving. If you’re using cheese, seeds, or other finishing ingredients, add them now.
The bowl is now ready to eat immediately, while there’s still a temperature contrast between the warm grains and the cool vegetables. Serve with lime wedges on the side so people can squeeze them over their own bowls and control the brightness level.
Pro Tips for Perfectly Balanced Bowls Every Time
Cut vegetables to consistent sizes. Aim for pieces that are roughly the same size—about the size of a large pea or a small grape. When pieces are uniform, they distribute evenly throughout the bowl and you get them in every spoonful.
Toast your sesame seeds or pepitas if you’re using them. A quick 2-3 minute toast in a dry skillet brings out oils and deepens their nutty flavor. They’ll taste three times more flavorful than raw.
Use the ripest, most flavorful tomatoes you can find. Watery, mealy tomatoes are the quickest way to make a bowl taste bland. If good tomatoes aren’t available, use halved cherry tomatoes instead—their concentrated flavor holds up better than large flavorless tomatoes.
Don’t skip the lime juice on the corn. This small step prevents the bowl from tasting one-dimensional. The acid brightens everything and makes the corn taste fresher.
Make the dressing fresh, right before serving. Cilantro and other fresh herbs lose vibrancy if they sit in liquid for too long. If you’re meal prepping, store the dressing separately and add it just before eating.
Taste as you go. Build your bowl and take a bite before declaring it done. Is it missing brightness? Add a squeeze of lime. Does it feel flat? A pinch of fleur de sel will perk everything up. Learning to adjust as you go is more valuable than following any recipe exactly.
Common Mistakes That Throw Off the Flavor Balance
Underseasoning the quinoa. Quinoa tastes bland on its own—this isn’t a flaw, it’s just how it is. Season it generously in the cooking liquid, then taste it again after cooking. Many people under-season because they’re thinking of it as a “healthy” food, but well-seasoned quinoa is infinitely more enjoyable to eat.
Not cooking the corn long enough. Some people microwave or quickly steam corn and expect it to taste sweet. The sweetness develops through gentle heat and caramelization—there’s no shortcut. Cook it in the skillet for the full 5-7 minutes until it develops color and tastes noticeably sweeter.
Overdressing the bowl. More dressing isn’t better—it makes everything soggy and the grains taste like they’re drowning in liquid. Start with less than you think you need and add more if the bowl feels dry. The dressing should coat the grains lightly, not pool at the bottom.
Using flavorless oil. Cheap vegetable oil won’t hurt anything, but a good extra-virgin olive oil adds a peppery richness that makes the whole bowl taste more grown-up. Olive oil is one of the few places in this recipe where the difference between decent and excellent is noticeable.
Preparing everything at the same temperature. If all components are cold, the bowl tastes dull. The contrast between warm grains and cool vegetables is part of what makes the bowl feel alive and interesting. Time your cooking so the quinoa and corn finish warm while the vegetables are still crisp and fresh.
Flavor Variations to Keep Things Fresh
The beauty of this bowl is that it adapts to any ingredient you have on hand, any flavor direction you want to go, and any dietary restriction you’re working with.
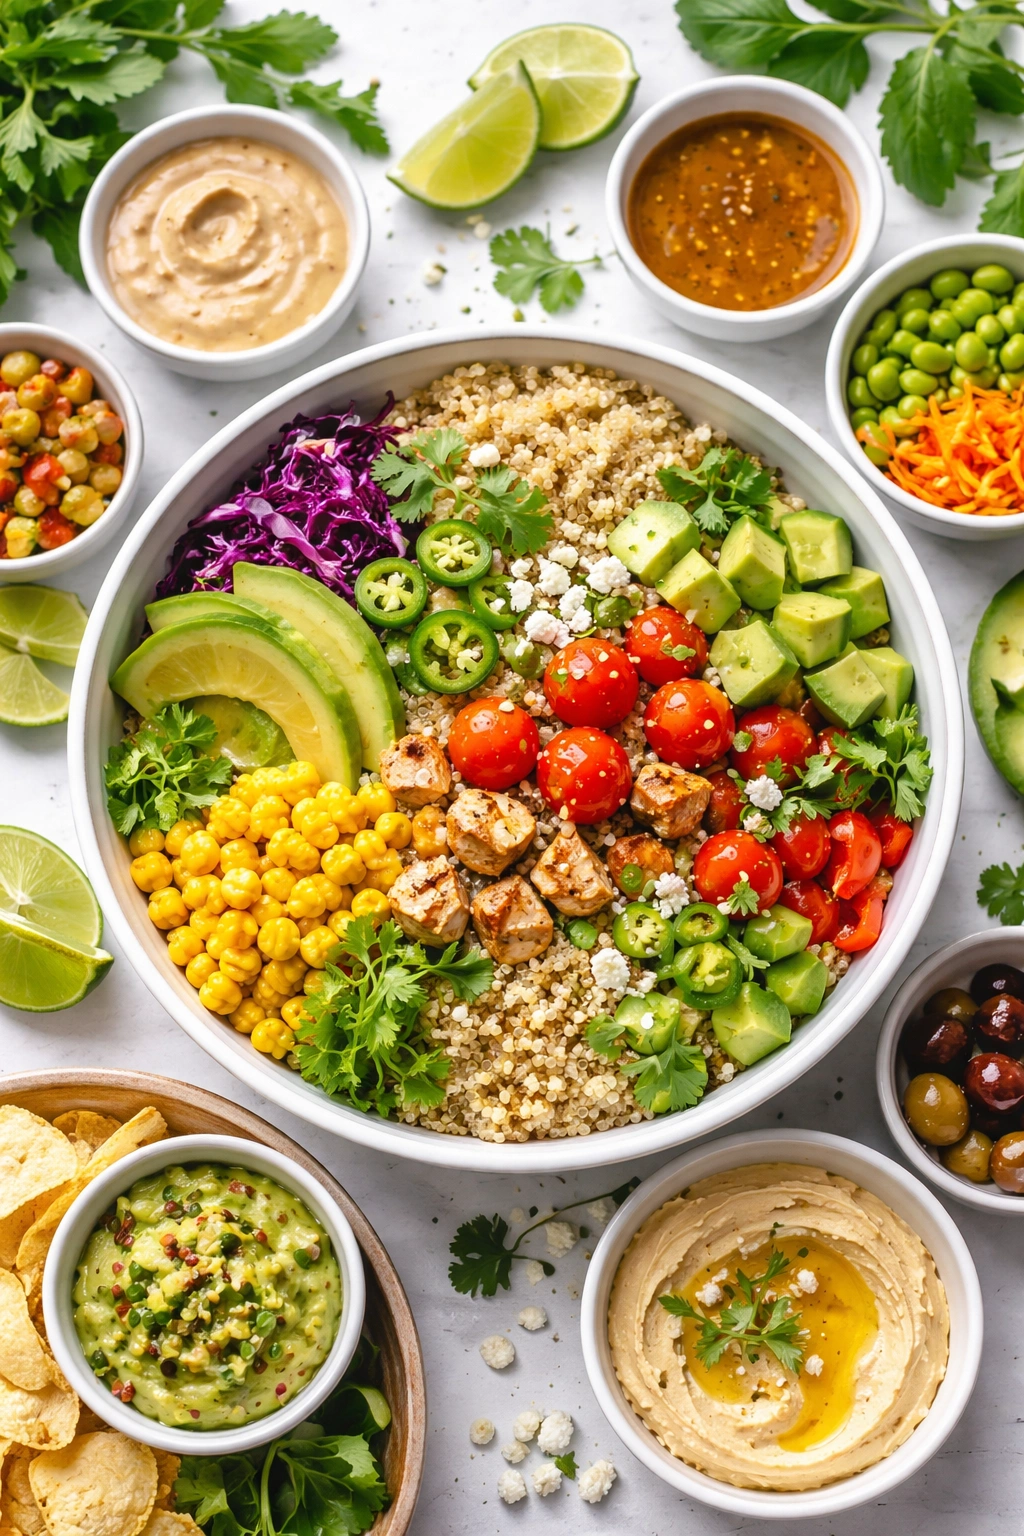
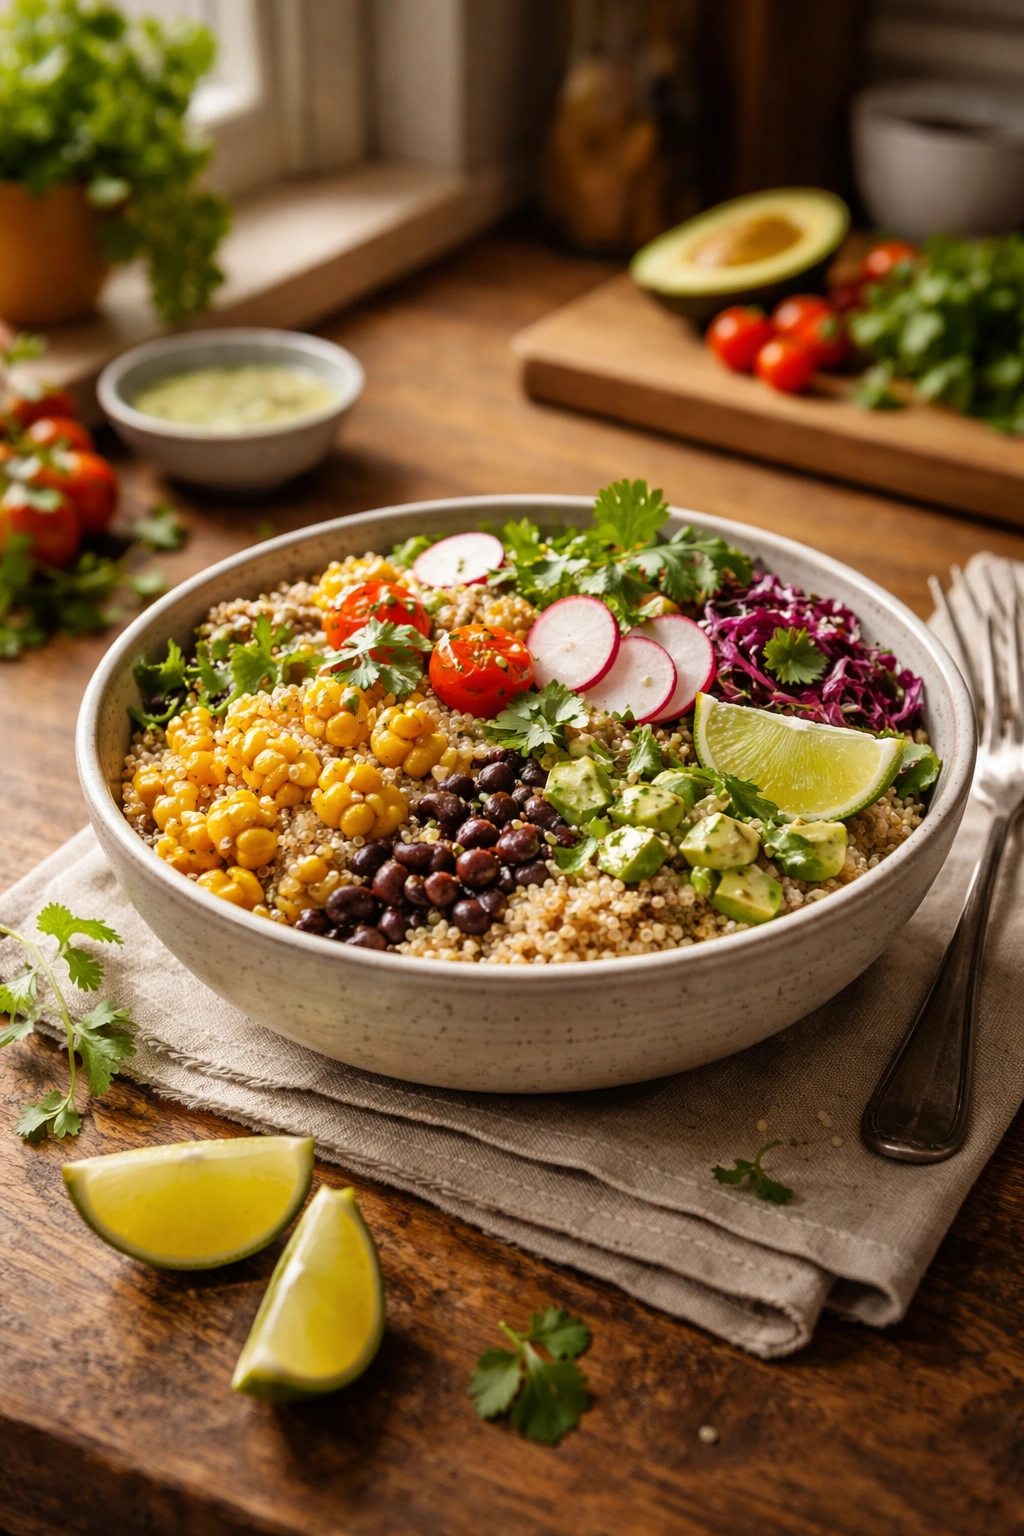
For a Mexican-inspired version: Swap the cilantro-lime dressing for a chipotle-lime version (add 1-2 canned chipotles in adobo sauce, blended with lime and olive oil). Add black beans alongside the corn, use cotija cheese for finishing, and include diced avocado if you want richness. A sprinkle of crushed tortilla chips adds textural contrast.
For an Asian direction: Replace the cilantro-lime dressing with a ginger-sesame version (replace the cilantro with grated fresh ginger, add 1 tablespoon sesame oil to the dressing, and swap the rice vinegar for rice wine vinegar). Add shredded carrots, snap peas, edamame, and crispy onions for texture. Top with toasted sesame seeds and serve with lime wedges.
For a Mediterranean approach: Use red wine vinegar instead of rice vinegar in the dressing, swap the cilantro for parsley, and add a minced anchovy if you want fishiness (or skip it if you don’t). Include roasted cherry tomatoes, Kalamata olives, diced cucumber, and crumbled feta. A handful of fresh dill adds herbaceous depth.
For a completely vegetable-forward version: If you want to increase vegetables and decrease grains, reduce the quinoa to ¾ cup and use roasted vegetables alongside raw ones—roasted zucchini, roasted broccoli, roasted bell peppers all add deeper flavor than raw versions.
For a protein boost: Add a grilled chicken breast cut into strips, baked tofu cubes, or hard-boiled eggs. Legumes like chickpeas or black beans also work beautifully and add fiber alongside the protein. A generous handful of nuts (almonds, walnuts, pecans) adds richness and satiety.
For a dairy-free or vegan version: The bowl is already naturally dairy-free if you skip the cotija cheese. Use avocado or tahini as your source of richness instead. Toasted nuts and seeds become more important for texture and satiety.
Make-Ahead and Storage Strategies

This bowl is genuinely convenient for meal prep, though how you store it depends on how many days ahead you want to prepare it.
Same-day prep (4-6 hours ahead): Cook the quinoa and corn in the morning, let them cool completely, then store them in separate airtight containers in the refrigerator. Prepare the vegetables and store them in a container lined with paper towels to absorb excess moisture. Keep the dressing separate in a small jar or container—definitely don’t mix everything together this far ahead. When you’re ready to eat, assemble the bowl and dress it fresh.
Next-day prep (overnight): All components keep beautifully overnight in the refrigerator. The flavors actually meld slightly, which some people prefer. Store everything separately in airtight containers. The greens might wilt slightly if you assemble the bowl the night before, so add those fresh when you’re about to eat.
Three-day storage: Quinoa and corn both keep for three days refrigerated. Cooked vegetables like roasted vegetables also keep three days. Raw vegetables like cucumber and tomatoes are best when fresher, though they’ll hold for 3 days. Dressing keeps for a full week refrigerated—the acidity preserves it.
Freezing: Cooked quinoa freezes well for up to three months if you freeze it in a flat layer on a baking sheet first, then transfer to a freezer bag. This prevents it from freezing into one hard block. Corn also freezes, though it’ll lose some of its pop when thawed. Assemble and eat fresh after thawing—don’t expect the same texture as a fresh bowl.
Reheating: You can gently reheat the bowl in a microwave (2-3 minutes, stirring halfway) or in a pot on the stovetop over medium heat. It’s honestly better at room temperature or cold, so don’t feel obligated to reheat it. Many people prefer eating leftover bowls straight from the fridge the next day.
Serving Ideas and Pairing Suggestions
This bowl works beautifully as a complete meal on its own, but it also plays nicely alongside other dishes.
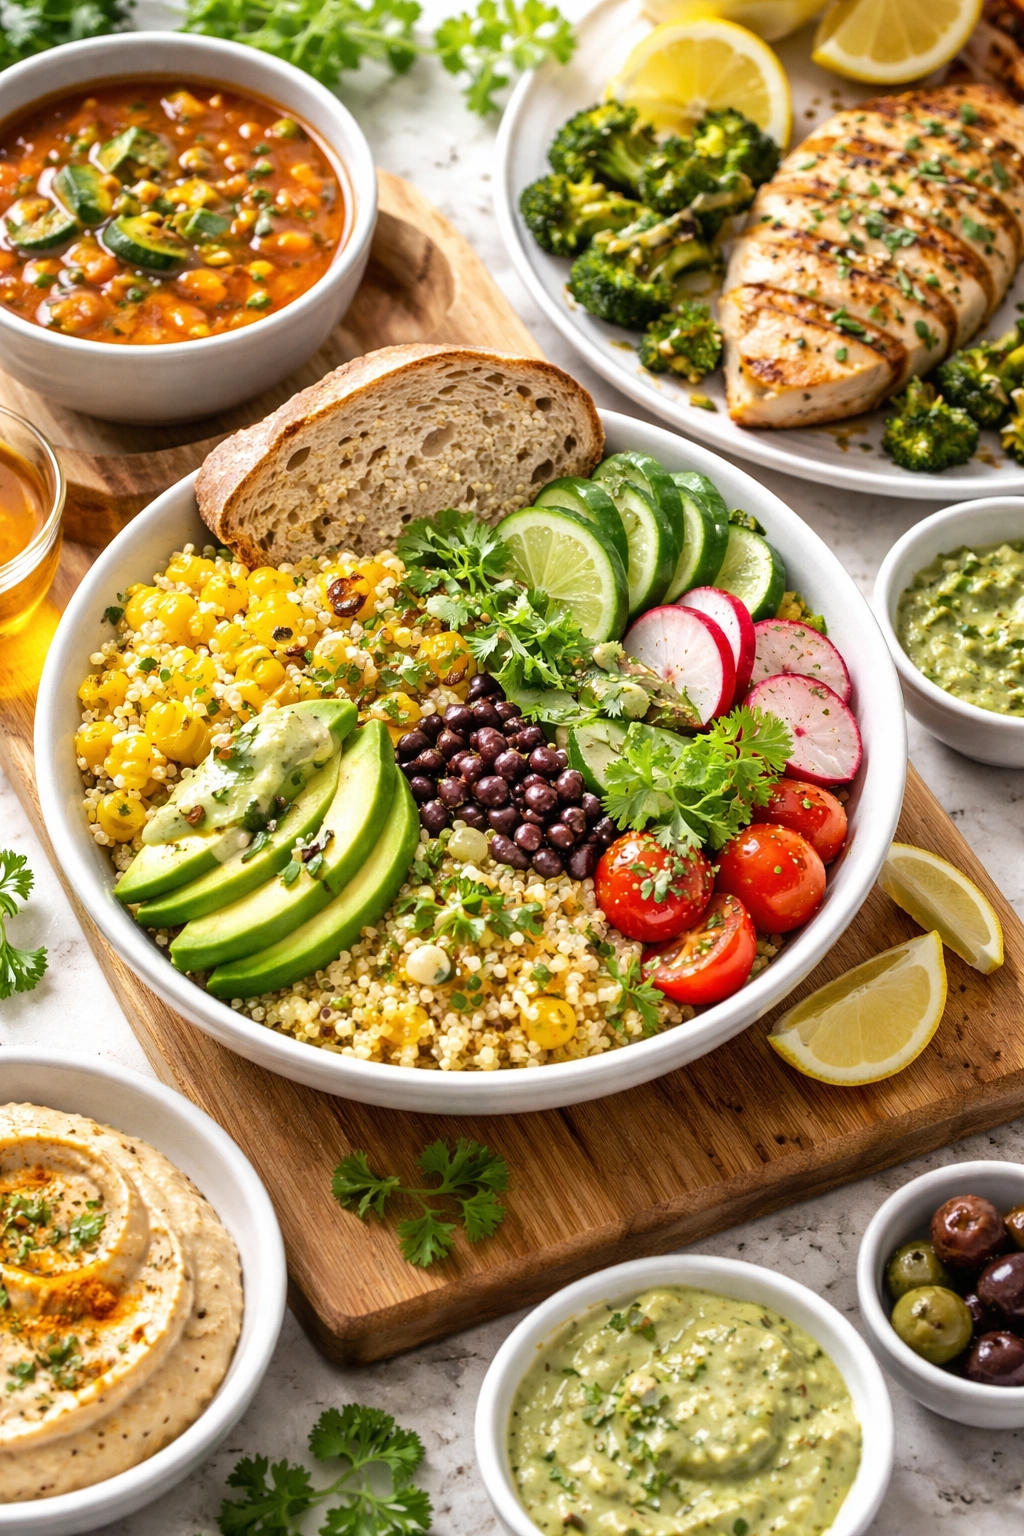
As a lunch bowl: Pair it with a simple soup like a light broth-based vegetable soup or a chilled gazpacho in warm months. A crusty piece of whole grain bread on the side rounds out the meal and gives you something to soak up any extra dressing.
As a side to grilled protein: Make these bowls alongside grilled chicken, baked salmon, or grilled tofu. The bright flavors cut through richness and the bowl’s lightness prevents the meal from feeling heavy.
As part of a summer spread: Serve it alongside grilled vegetables, fresh mozzarella, and fresh bread. It fits naturally into a Mediterranean-style meal with other vegetables and grains.
For meal prep: Make a big batch on Sunday and portion into containers with the dressing on the side. You’ll have nutritious lunches for the next 3-4 days without thinking about it.
As a dinner side: Serve alongside roasted vegetables or a simple salad if you want something lighter, or alongside heartier grains if you’re feeding people with bigger appetites.
The bowl is substantial enough that it works well for most people as a complete lunch or light dinner. If you’re serving it to someone with a larger appetite, add a protein component or serve it with bread and cheese on the side.
Final Thoughts
A healthy bowl doesn’t have to be complicated or taste like penance for something. This corn and quinoa combination works because every component is genuinely flavorful—the grains are seasoned properly, the vegetables are fresh, and the dressing is bright without being aggressive. Once you’ve made it once, you’ll understand how it comes together well enough to adjust it based on what you have in your kitchen or what flavor direction appeals to you that day.
The best meals are the ones you actually want to eat, that you’ll make again next week, and that leave you feeling satisfied rather than deprived. If this bowl becomes something in regular rotation in your kitchen, you’re doing it right. The simple act of taking 40 minutes to prepare real food from real ingredients, rather than defaulting to whatever’s convenient, is the real victory.