Sheet pan pancakes have become a game-changer for anyone who’s ever stood at the stove flipping individual pancakes while a line of hungry people waits impatiently at the table. Instead of spending an hour working the griddle, you mix one batter, pour it into a sheet pan, and bake an entire batch simultaneously. What emerges from the oven is a golden, fluffy slab that feeds 8 to 12 people in roughly 20 minutes of hands-on time.
What makes this approach so appealing isn’t just the convenience—it’s that the results are genuinely outstanding. A baked pancake has a tender crumb and a slight structural integrity that holds up beautifully under generous toppings. You don’t get the unevenly cooked bottoms or the occasional dense pancake that sometimes escapes the eye of even experienced cooks. The oven’s dry, even heat transforms the batter into something consistently excellent, batch after batch.
The beauty of this method is that it works whether you’re hosting a family brunch, preparing breakfast for overnight guests, or feeding a crowd at a special gathering. The recipe scales effortlessly, the prep time is minimal, and you’re free to focus on beverages, setting the table, or simply enjoying the company of your guests instead of being tethered to the cooktop. Once you make sheet pan pancakes, you’ll understand why they’ve become the go-to solution for anyone who wants to feed multiple people without the stress.
The Rise of Sheet Pan Pancakes in Home Cooking
Sheet pan pancakes aren’t a new concept, but they’ve gained popularity as more home cooks have discovered just how well they solve the fundamental problem of breakfast for a crowd. Traditional stovetop pancakes demand constant attention—you’re timing each batch, watching for bubbles, flipping at precisely the right moment, and managing temperature to prevent burning while ensuring the centers cook through. For 12 people, that’s 24 pancakes (assuming 2 per person), which means 24 individual cooking events if you’re only making 1 or 2 at a time on a standard griddle.
The baked method simplifies this dramatically by letting the oven do the work. You mix your batter once, pour it into a prepared sheet pan, and the oven’s consistent heat transforms the entire batch simultaneously. The result is that everyone at the table eats at the same time, still warm from the oven, with that ideal texture that comes from gentle, even baking rather than direct skillet heat.
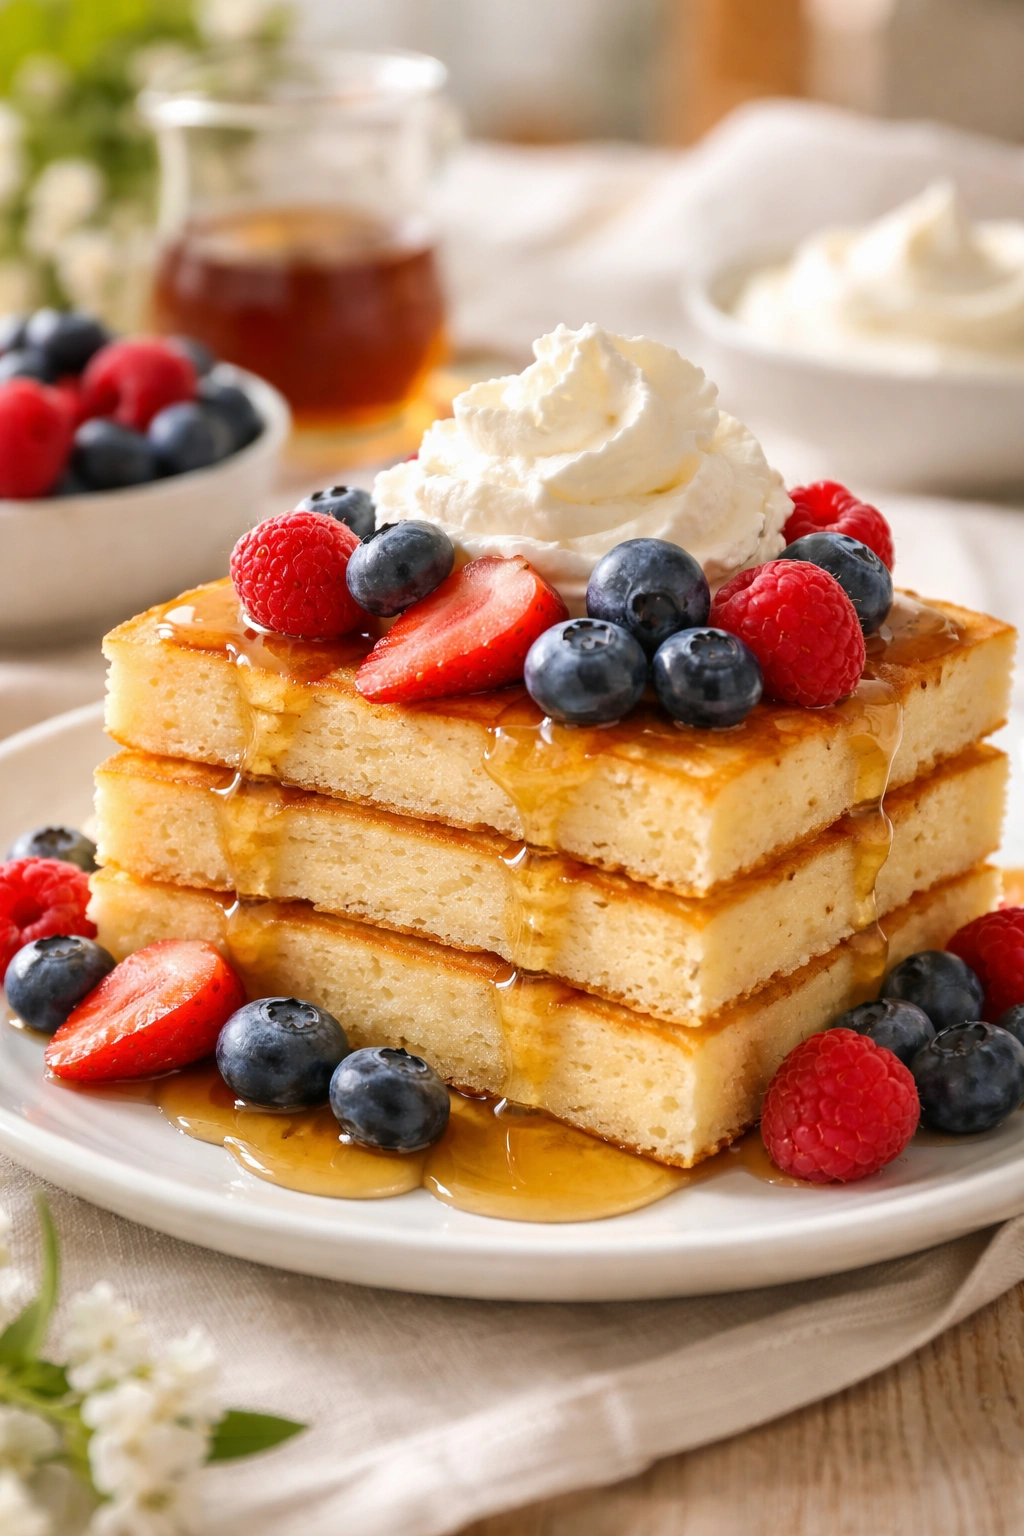
What’s particularly smart about this approach is that the technique produces a pancake with a slightly different texture than the stovetop version—not better or worse, just different. A baked pancake tends to be just a bit more tender and delicate, with a more cake-like interior, while maintaining the breakfast appeal people expect. The edges get slightly crispy and caramelized, while the center stays light and fluffy. This texture actually pairs exceptionally well with the generous toppings that characterize modern brunch culture—fresh berries, whipped cream, maple syrup, and more don’t feel overwhelming on a baked pancake the way they sometimes can on a thicker stovetop version.
Why Sheet Pan Pancakes Are Perfect for Feeding a Crowd
The practical advantages are obvious, but there are several specific reasons why this method outshines other crowd-feeding breakfast options. First, there’s the math: a standard sheet pan holds enough batter for 12 pancakes cut into 12 generous squares, meaning you’re feeding 6 people with 2 pancakes each in one oven batch. If you’re feeding 24 people, you’re looking at two back-to-back bakes, which takes less than an hour of total oven time—far faster than any stovetop approach.
Second, there’s the actual cooking skill required. Making perfect stovetop pancakes takes practice—knowing when to flip, how hot to keep the griddle, how to prevent overcooking the bottoms while undercooking the tops. Sheet pan pancakes eliminate these variables almost entirely. The oven temperature is consistent, the heat surrounds the batter evenly, and there’s no flipping required. A first-time baker can produce restaurant-quality results on their first attempt.
Third, there’s the psychological relief of not being stuck at the stove. When you’re hosting, you want to be present with your guests. You want to pour coffee, chat at the table, and enjoy the morning. Sheet pan pancakes give you that freedom. Once the pan goes in the oven, you have 15-20 minutes to set out toppings, brew more coffee, or simply be part of the gathering instead of working alone in the kitchen.
Fourth, there’s the consistency factor. Every single pancake bakes in the same oven environment with the same heat exposure, so every piece has the same level of doneness. You never open the oven to find half the pan perfectly golden and the other half pale and undercooked. This consistency is particularly important when you’re feeding people with different preferences—some want their pancakes slightly softer, others prefer a bit more structure. A sheet pan gives everyone the same reliable, good result.
Finally, sheet pan pancakes are forgiving. If you’re a few minutes late getting them on the table, they’ll keep warm better than individual pancakes would. They’re also easier to cut and portion than flipping individual pancakes, and the pieces maintain their integrity under butter, syrup, and generous toppings without falling apart.
Sheet Pan Pancakes for a Crowd
Yield: Serves 8 to 12 people (one 18 × 13-inch sheet pan; 12 generous squares per pan)
Prep Time: 10 minutes
Cook Time: 18 to 22 minutes
Total Time: 28 to 32 minutes
Difficulty: Beginner — This requires no special skills or equipment beyond a standard sheet pan. The steps are straightforward, and the oven does nearly all the work. Even a first-time baker will achieve excellent results.
For the Pancake Batter:
- 2¾ cups all-purpose flour
- 3 tablespoons granulated sugar
- 1 tablespoon baking powder
- 1 teaspoon fine sea salt
- 3 large eggs, room temperature
- 2¼ cups whole milk
- 3 tablespoons unsalted butter, melted and slightly cooled
- 1 tablespoon pure vanilla extract
- Optional: ½ teaspoon ground cinnamon for subtle spiced warmth
For Preparing the Pan:
- 2 tablespoons unsalted butter, softened to room temperature
- 1 tablespoon neutral oil (vegetable or canola)
Equipment and Preparation Tips
Using the right pan matters for this recipe. A standard 18 × 13-inch rimmed sheet pan (also called a jelly roll pan or half-sheet pan) is ideal—this size fits perfectly in a standard home oven and provides the right depth for pancake batter to rise evenly. Smaller sheet pans will result in thicker pancakes that may not bake through as quickly; larger pans will spread the batter too thin and result in less-fluffy results.
The butter and oil combination for preparing the pan serves a purpose. Butter provides flavor and helps with browning the edges, while the neutral oil ensures that every part of the pan stays well-lubricated and that the pancakes release cleanly without sticking, even in the corners. This combination gives you the best of both worlds—flavor and function.
Room temperature ingredients matter in pancake batter. Cold eggs and milk take longer to incorporate smoothly, and cold ingredients make it harder to achieve a cohesive batter without overmixing. Set your eggs and milk out about 20 minutes before you plan to mix the batter, or place the milk in a warm water bath briefly to bring it to room temperature. This small step makes the difference between a batter that mixes smoothly in under a minute and one that requires extra stirring.
Preheating your oven is essential. Set it to 400°F (200°C) at least 15 minutes before you plan to bake. A properly preheated oven ensures that the pancakes begin rising immediately once they hit the heat, producing the maximum fluffiness.
Prepare the Pan and Preheat:
-
Position the oven rack in the center of the oven and preheat to 400°F (200°C) for at least 15 minutes.
-
Place an 18 × 13-inch rimmed sheet pan on the stovetop over medium heat for about 2 minutes—just long enough to warm it slightly. This helps the butter and oil distribute evenly. Remove from heat.
-
Brush the entire interior of the warm pan generously with softened butter, making sure to coat the corners, edges, and the bottom thoroughly. Drizzle the neutral oil over the butter and tilt the pan to distribute it evenly across the entire surface. The pan should shimmer when tilted.
Mix the Batter:
-
In a large bowl, whisk together the flour, sugar, baking powder, salt, and cinnamon (if using) until fully combined and no lumps of baking powder remain. Set aside.
-
In another medium bowl, whisk together the eggs, milk, melted butter, and vanilla extract until fully combined and smooth.
-
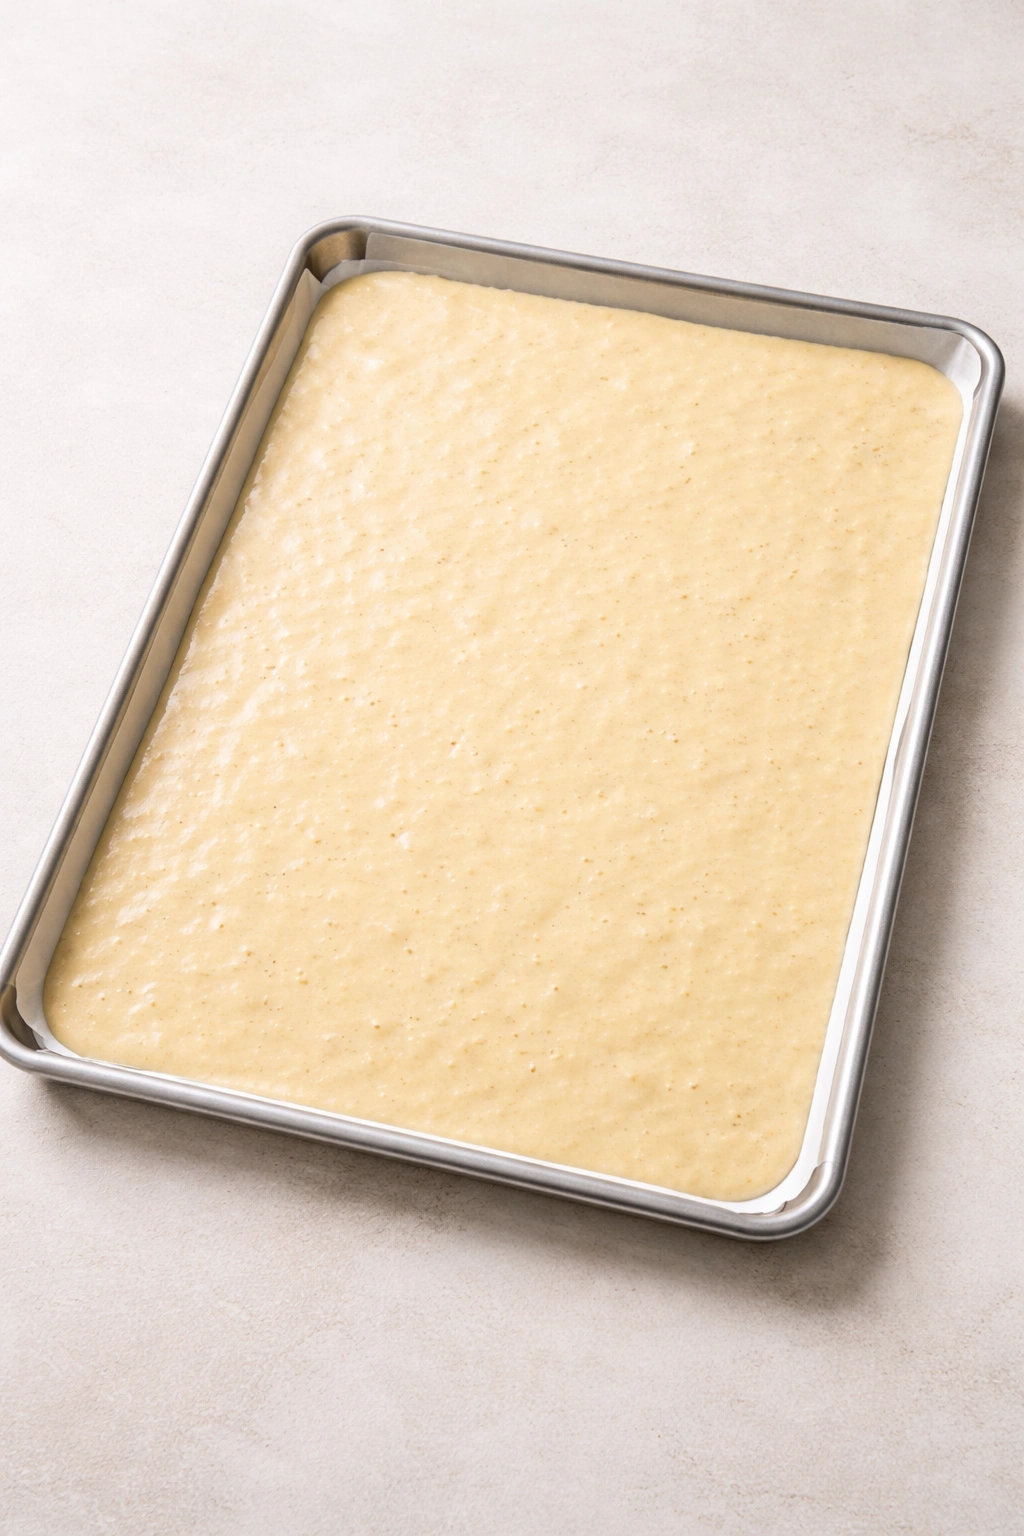
Pour the wet ingredients into the dry ingredients. Using a spatula or wooden spoon, stir gently until the ingredients are just barely combined. Do not overmix—the batter should look slightly lumpy and shaggy at this stage. Overmixing develops gluten, which makes the pancakes tough and dense instead of tender and fluffy. A few streaks of flour are completely fine and actually preferred. Stop stirring as soon as you don’t see any pure flour remaining.
Advertisements -
Pour the batter into the prepared sheet pan, working quickly while the pan is still warm. Use an offset spatula or the back of a spoon to spread the batter into an even layer, making sure it reaches into all corners and to the edges. The batter should spread easily without requiring much pressure. If it seems stiff, let it rest for 1 minute, which allows the baking powder to begin activating.
Bake:
-
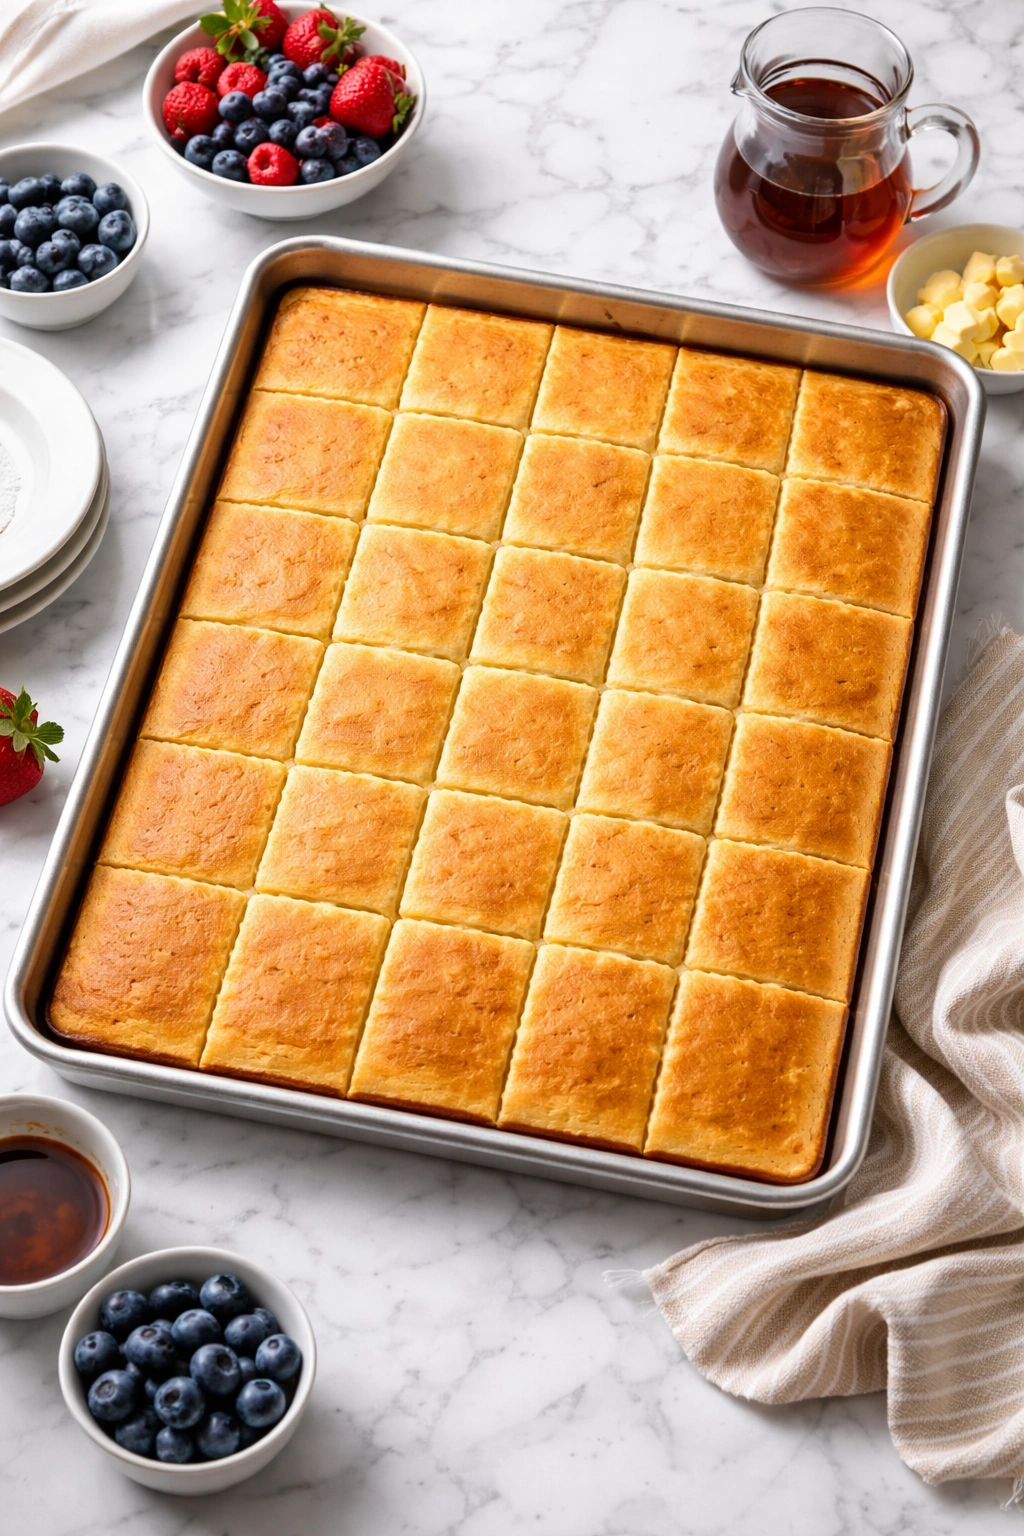
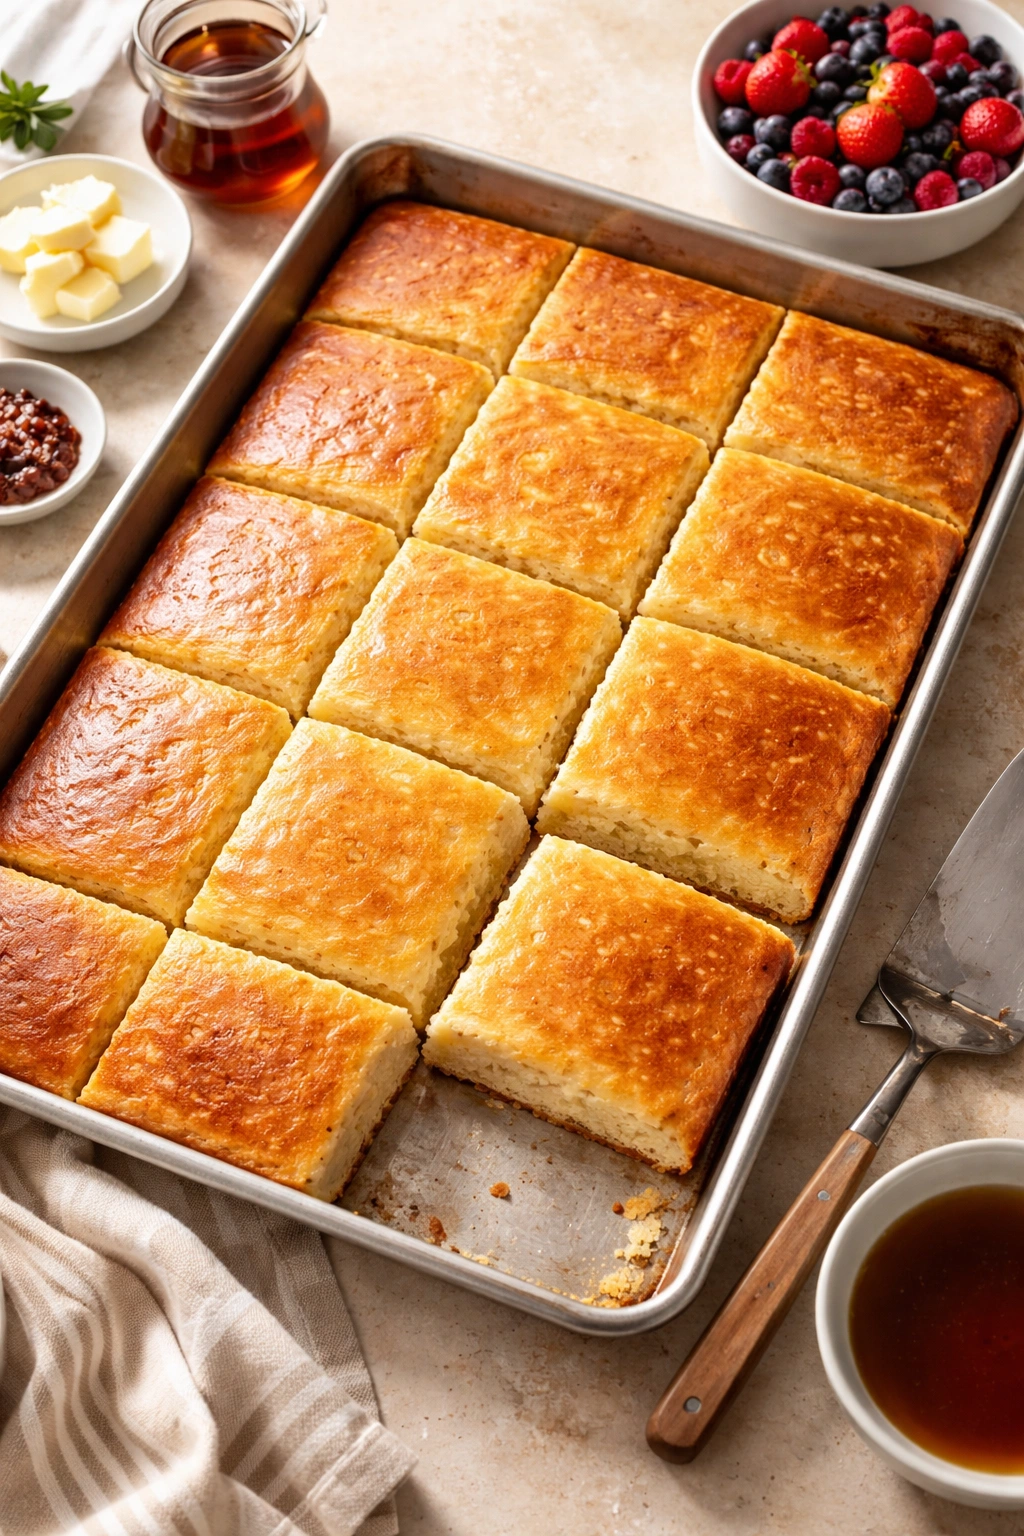
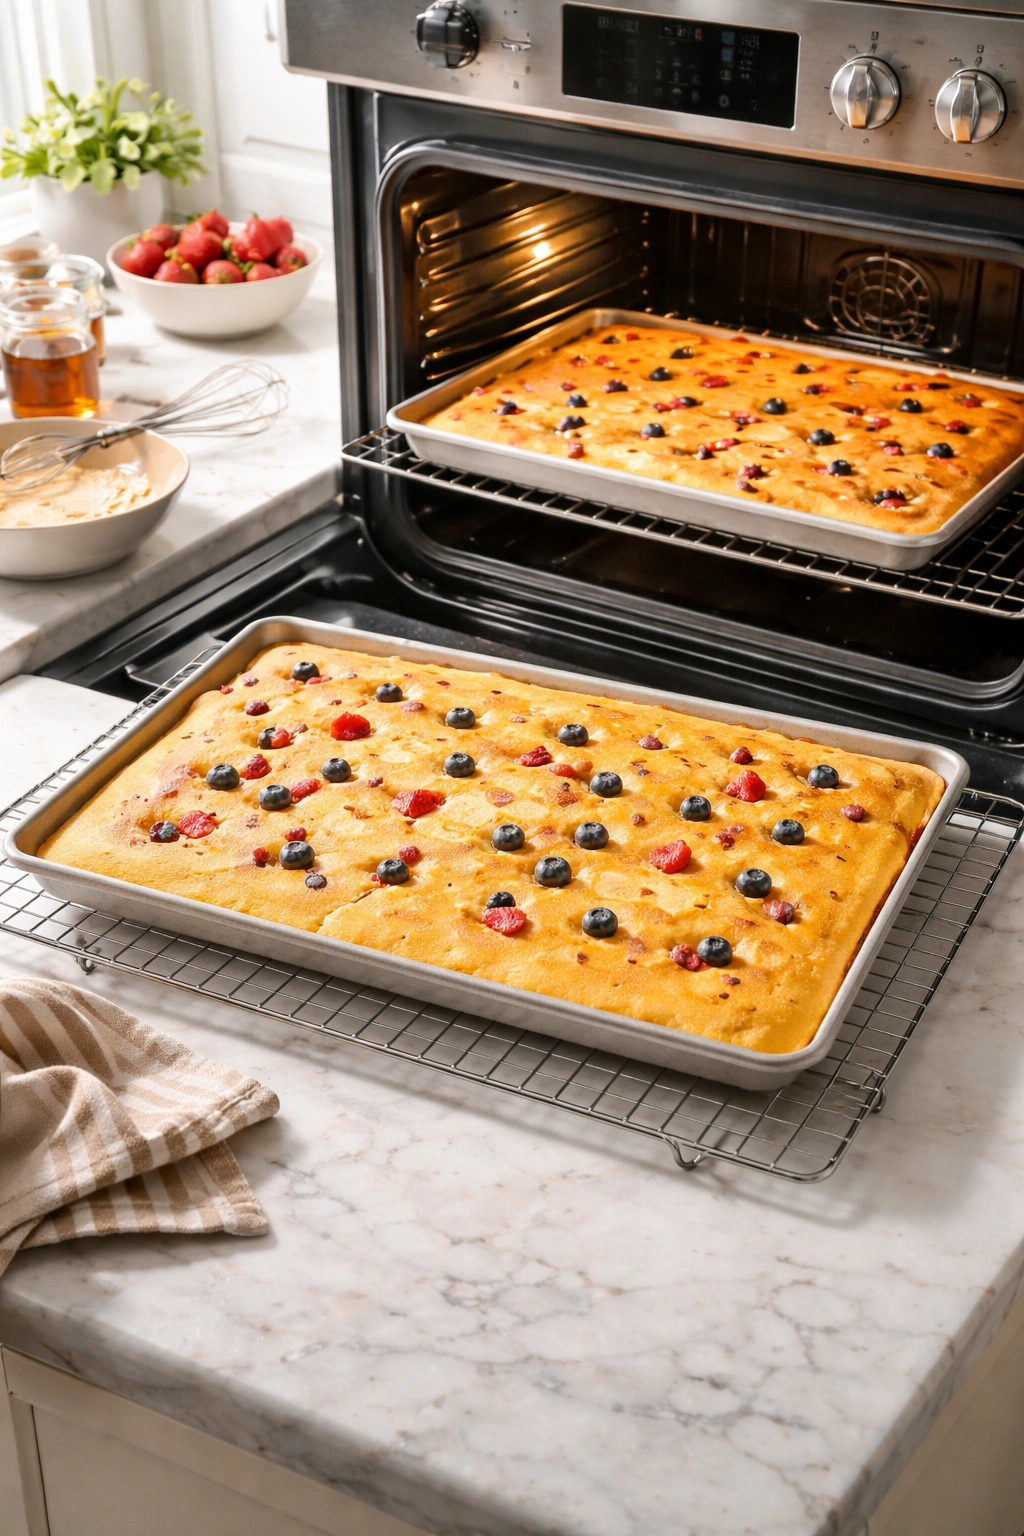
Carefully transfer the sheet pan to the preheated oven. Bake for 18 to 22 minutes, depending on your oven’s accuracy. The pancakes are done when the top is light golden brown and a toothpick inserted in the very center comes out clean or with just a few moist crumbs clinging to it. The edges will be noticeably darker—almost caramelized—and slightly crispy, while the center will still be soft and tender.
-
Remove the sheet pan from the oven and place it immediately on a wire cooling rack or heat-safe surface. Allow the pancakes to cool in the pan for 2 to 3 minutes—this brief rest allows them to firm up just enough to be handled cleanly without breaking apart.
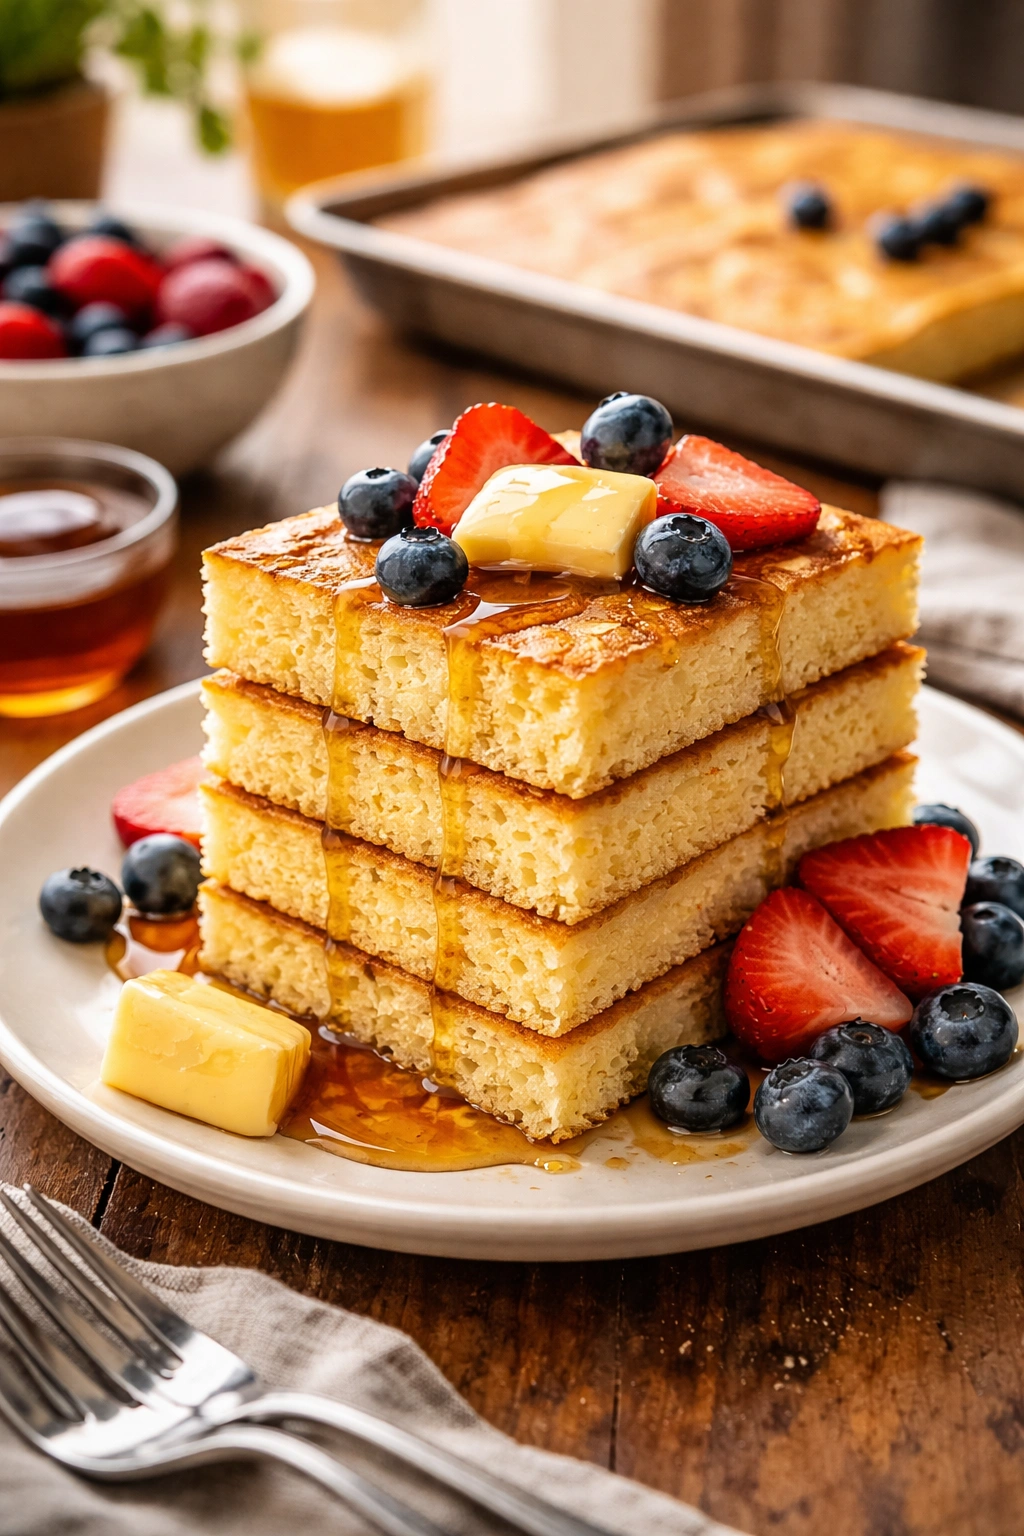
-
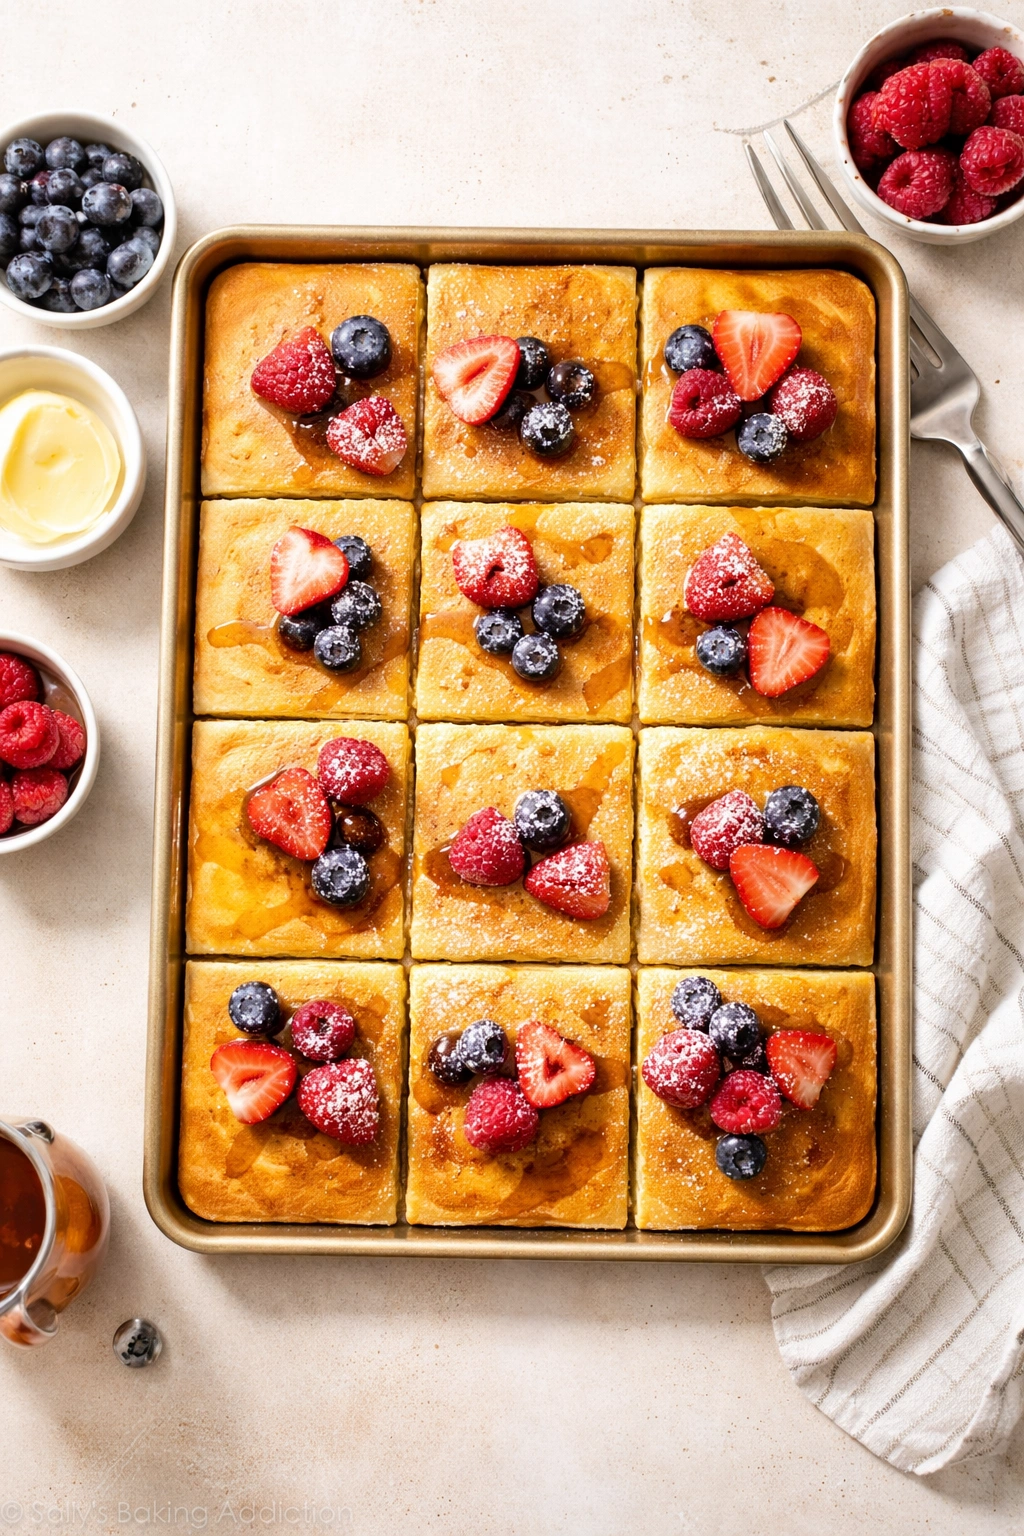
Using a sharp knife, cut the pancakes into 12 equal squares (4 rows across the width, 3 rows along the length). For a crowd-serving situation, you can keep them in the pan while you plate them, or transfer them to a serving platter. If you’re holding the pancakes for more than 5 minutes before serving, tent the pan loosely with foil to trap steam and keep them warm and moist.
Tips for Perfect Sheet Pan Pancakes Every Time
Oven temperature accuracy is one of the single most important factors in success. If your oven runs hot, the pancakes may brown too quickly before the inside cooks through. If it runs cool, they’ll bake too slowly and may lose some of their fluffiness. Invest in an oven thermometer if you don’t already have one—they’re inexpensive and reveal whether your oven is actually at the temperature you think it is. If you discover your oven runs 25 degrees hot or cool, simply adjust the temperature accordingly when baking pancakes.
The timing window for perfectly baked pancakes is relatively forgiving once you know your oven. Most ovens need 18 to 22 minutes, but the first time you make sheet pan pancakes, set a timer for 16 minutes and start checking the doneness by gently touching the top (it should feel set and spring back when pressed lightly) and inserting a toothpick. Make a mental note of the exact time when yours are done, and use that as your reference for future batches.
Don’t skip the edge browning. Those slightly crispy, caramelized edges are actually the best part of a sheet pan pancake—they provide textural contrast to the tender center. Some cooks try to prevent this browning, but it’s not a flaw; it’s a feature. If your oven browns the edges significantly before the center is done, lower the temperature by 10 or 15 degrees next time, but don’t try to stop the browning altogether.
The ratio of wet to dry ingredients is calibrated for a sheet pan pancake texture. Don’t add extra milk if the batter seems thick—sheet pan pancakes actually need slightly thicker batter than stovetop pancakes do, because it needs to hold its shape and rise in place without spreading too thin. If you find the batter is genuinely stiff and difficult to spread, let it rest for 2 minutes before spreading, which allows the flour to fully hydrate.
Vanilla extract adds noticeable flavor depth, but it’s not strictly necessary. If you don’t have it, omit it without substitution—the pancakes will still be excellent. Don’t substitute imitation vanilla for pure vanilla if you can avoid it; pure vanilla has a subtly more complex flavor that reads as more sophisticated in a breakfast context.
Common Mistakes and How to Avoid Them
The most frequent error is overmixing the batter, which develops gluten and produces tough, dense pancakes instead of tender, fluffy ones. This happens because people are used to making cake batter very smooth and lump-free, and they assume pancake batter should match that standard. It shouldn’t. Pancake batter should be lumpy and shaggy-looking. Mix only until you stop seeing streaks of pure flour, and then stop immediately. This takes about 30 seconds of gentle stirring.
Insufficient pan preparation leads to sticking, which is frustrating and makes the pancakes difficult to plate. Make sure you coat the entire pan—bottom, sides, edges, and corners—with butter and oil. Spotty preparation results in spotty sticking. Don’t be timid here; generous coating is what you want. If you’re concerned about sticking, use parchment paper on the bottom of the pan, which eliminates the risk entirely (though it also prevents the bottom from browning slightly, which some people actually prefer).
Using cold ingredients slows batter mixing and makes it harder to achieve a smooth combination without overmixing. Room temperature eggs and milk incorporate far more easily. This is a small detail, but it genuinely makes mixing faster and batter texture better.
Not preheating the oven thoroughly results in pancakes that don’t rise as much as they should. The initial burst of heat from a fully preheated oven activates the baking powder and creates the lift that makes pancakes fluffy. If you put the batter into a partially preheated oven, you’ll get denser, less impressive results. Preheat for at least 15 minutes.
Underbaking is common because people expect pancakes to look like the golden-brown individual pancakes from stovetop cooking. Sheet pan pancakes look slightly different—the top is more matte and pale golden, while the edges are decidedly darker. The color difference initially looks concerning, but it’s completely normal. Use the toothpick test: insert one in the very center, and if it comes out clean or with just moist crumbs, the pancakes are done. Overbaking is harder to accidentally do with this method because it’s difficult to get pancakes from perfectly baked to burnt in the 18- to 22-minute window.
Flavor Variations You Can Create
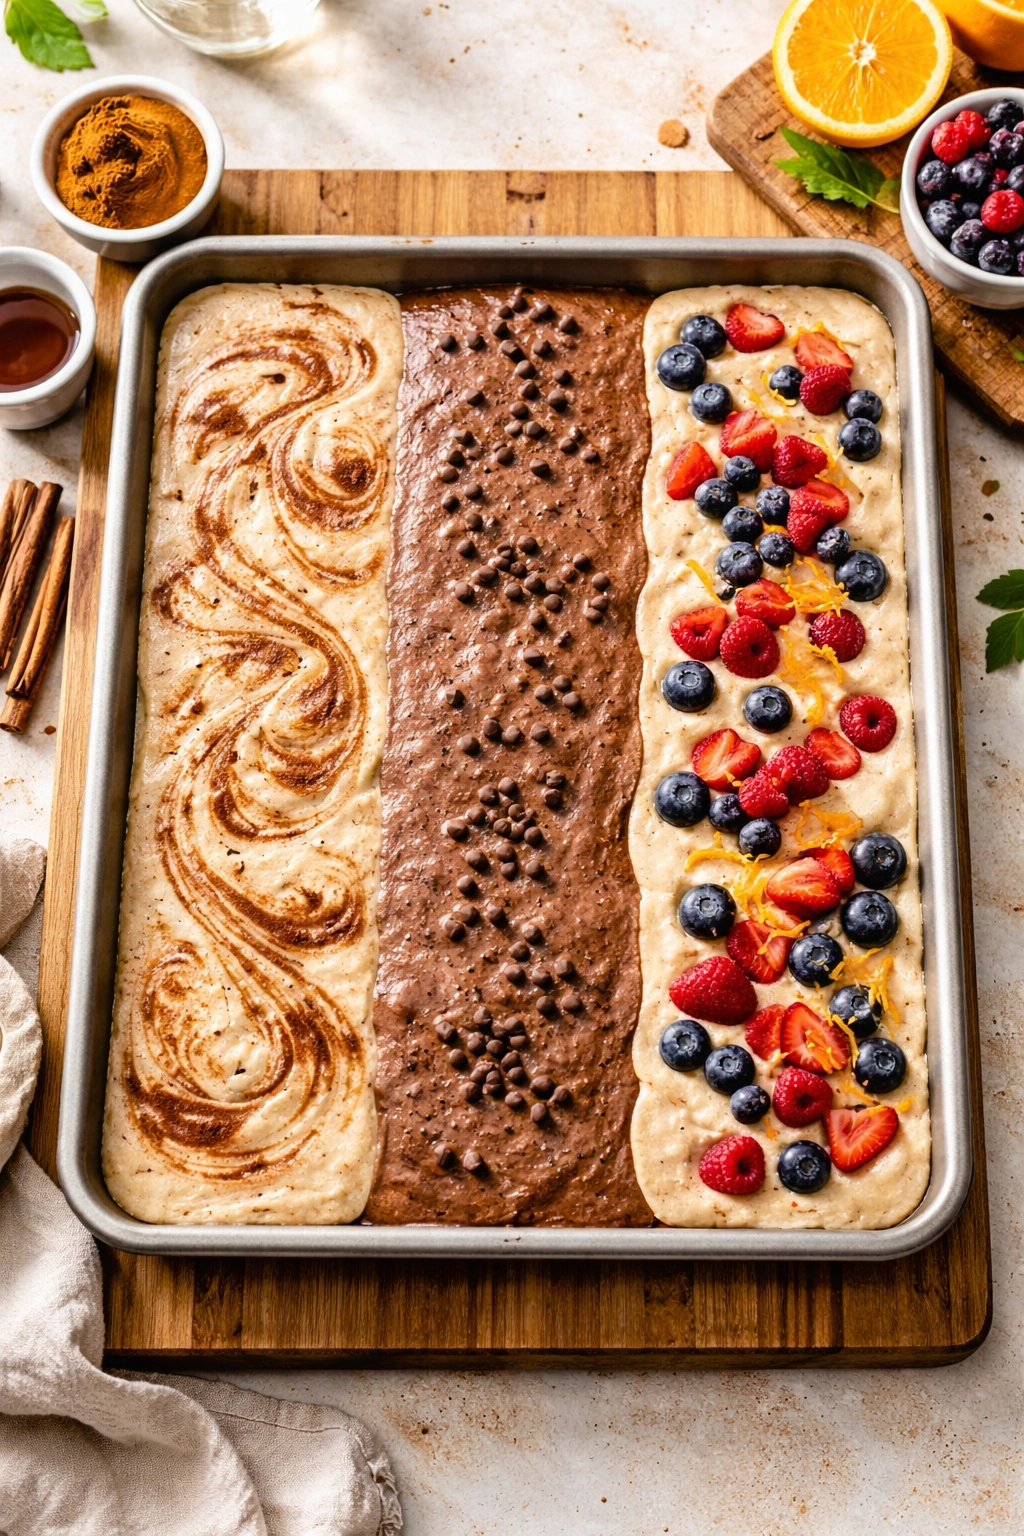
The base recipe is wonderfully neutral, which means it takes flavor additions beautifully. Cinnamon is the most classic addition—increase it to 1 full teaspoon for a noticeably spiced pancake, or add it alongside ¼ teaspoon ground nutmeg for something warmer and more complex. Both spices work exceptionally well with maple syrup and cinnamon-sugar toppings.
Chocolate lovers can add 2 to 3 tablespoons unsweetened cocoa powder to the dry ingredients, which produces a subtle chocolate flavor and a slightly darker pancake. Use slightly less cocoa (not more) if you add it; too much makes the pancakes taste more like cake. Serve with whipped cream and fresh raspberries for a brunch that feels intentionally fancy.
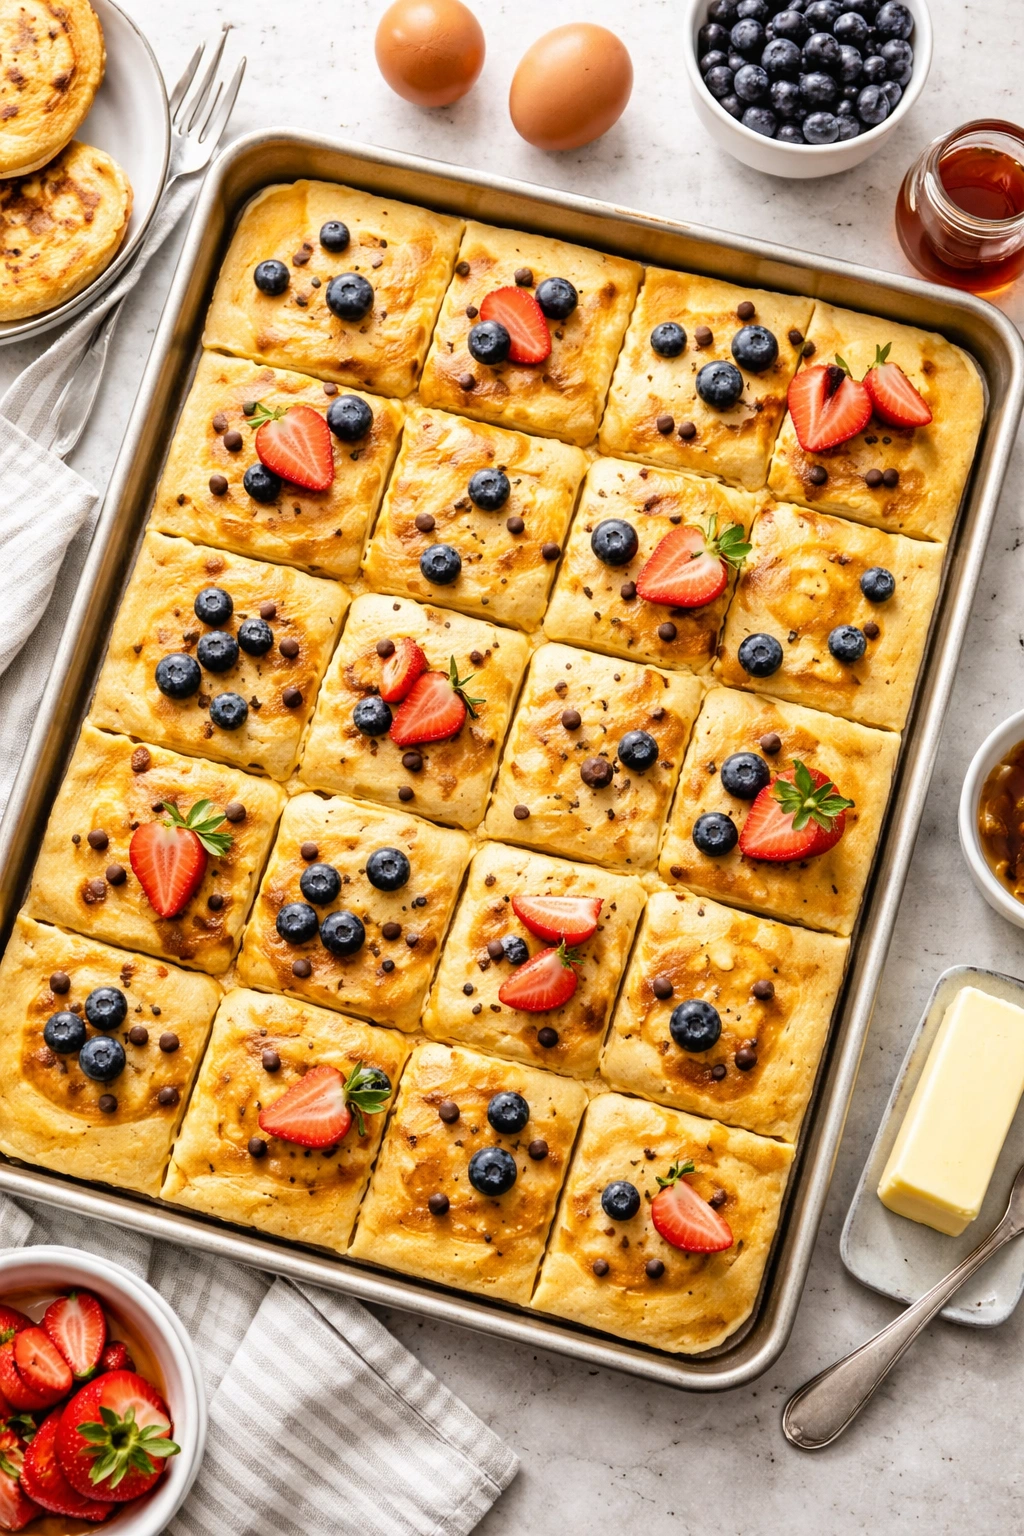
Blueberries or other fresh berries can be folded directly into the batter just before pouring into the pan. Add them gently at the very end to prevent them from breaking apart and staining the batter an unappetizing shade. Use about 1 to 1½ cups of fresh or frozen berries (don’t thaw frozen ones first—they’ll bleed more). The berries distribute throughout the pancakes as they bake and create pockets of fruit flavor.
Citrus zest—lemon, lime, or orange—adds brightness and sophistication. Add 1 to 2 tablespoons of finely grated zest to the dry ingredients. The subtle citrus flavor is surprising and delicious, especially when paired with berry toppings or whipped cream.
Almond extract at ¼ to ½ teaspoon creates a subtle nod to almond pancakes without making them taste aggressively almond-forward. This works beautifully if you’re serving the pancakes with sliced peaches or other stone fruit.
A tablespoon of honey or maple syrup mixed into the wet ingredients adds subtle sweetness and a delicate flavor complexity that goes unnoticed until someone comments that these pancakes taste “special” somehow.
Dietary Adaptations and Substitutions

For a gluten-free version, use a quality gluten-free all-purpose flour blend that includes xanthan gum. Substitute it 1:1 for the regular flour, and reduce the milk by 2 to 3 tablespoons—gluten-free flour absorbs liquid slightly differently, and the batter should be similar to the regular recipe in consistency. Everything else in the recipe remains the same. The results are genuinely indistinguishable from regular pancakes, with the same texture and fluffiness.
Dairy-free pancakes require substituting milk and butter. Use an unsweetened plant-based milk (oat, almond, or soy all work well) in place of regular milk at the same quantity. Replace the melted butter with neutral oil or melted coconut oil. The batter and baking performance will be virtually identical to the standard recipe, though dairy-free pancakes tend to have a marginally less rich flavor. Serve with dairy-free butter if desired.
For a vegan version, you’ll need an egg replacer in addition to the milk and butter substitutions above. Use 3 tablespoons of aquafaba (the liquid from canned chickpeas, strained and measured) in place of the eggs, and proceed with dairy-free milk and oil as described above. The results are excellent and nearly indistinguishable from standard pancakes in texture, though the flavor is subtly lighter.
For those avoiding eggs specifically but okay with dairy, simply replace the eggs with an equal volume of aquafaba or a commercial egg replacer product that matches the package instructions for 3 eggs, and use regular milk and butter. This works beautifully.
To reduce added sugar, simply omit the 3 tablespoons of granulated sugar from the dry ingredients. The pancakes will be slightly less sweet but still delicious, especially when paired with sweet toppings like maple syrup or whipped cream.
Storage, Make-Ahead, and Reheating Guidance
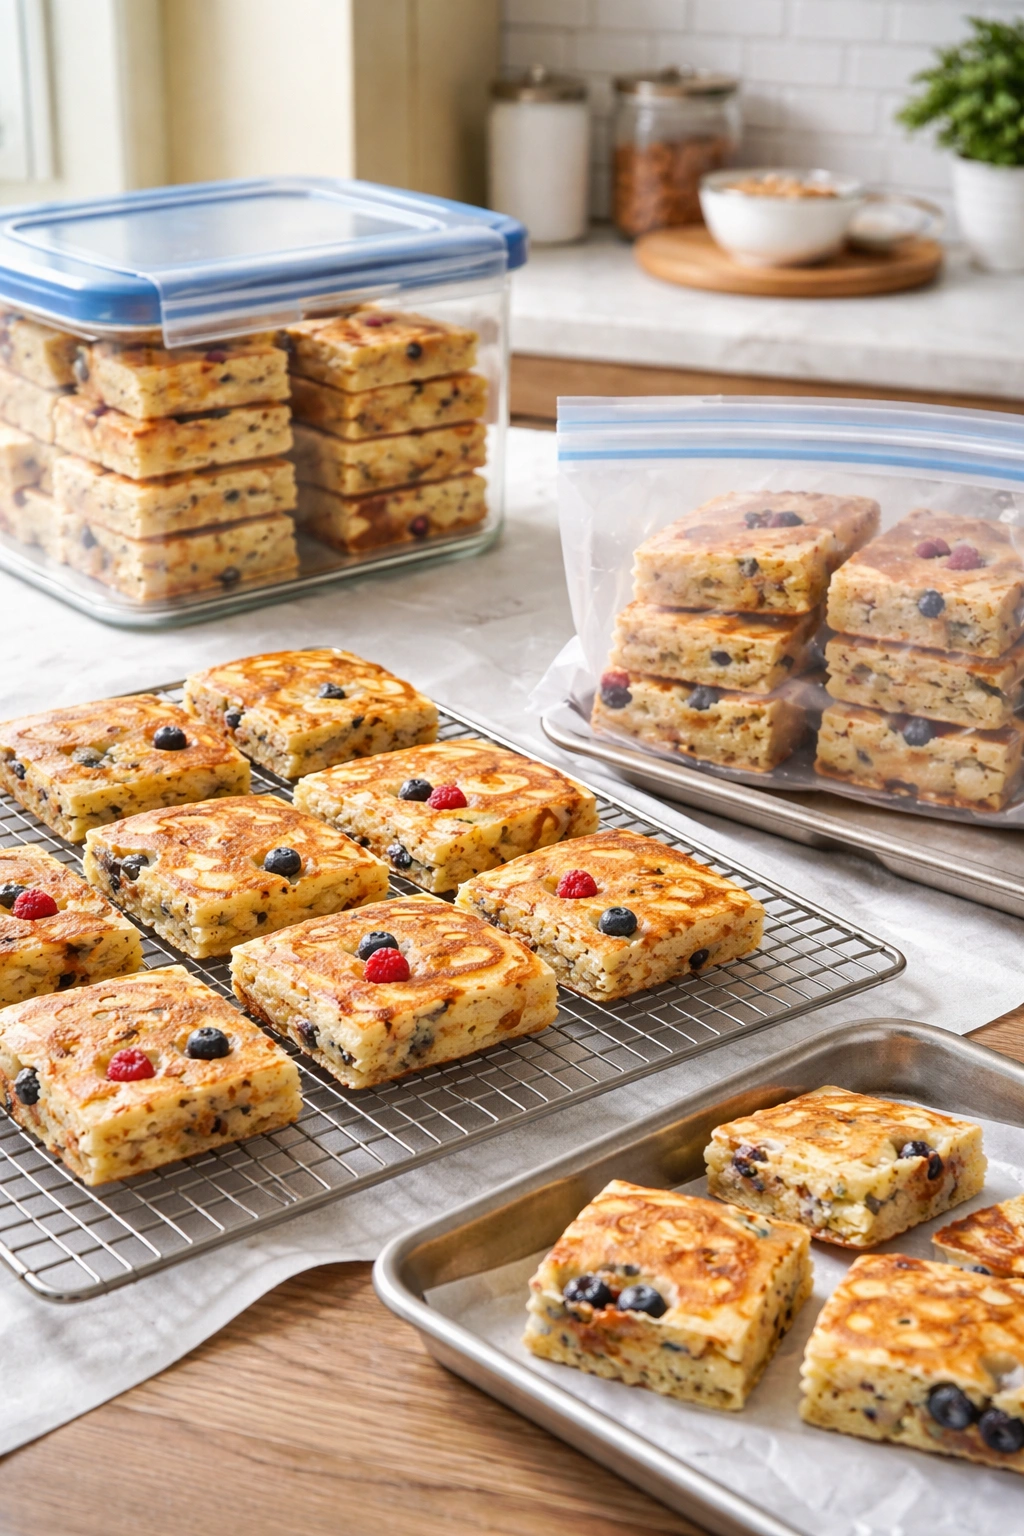
Sheet pan pancakes keep beautifully for several days. Let them cool completely at room temperature, then store them in an airtight container in the refrigerator for up to 4 days. They lose a bit of their just-baked fluffiness as they sit, but they’re still delicious and far better than starting from scratch.
To reheat refrigerated pancakes, spread them in a single layer on a sheet pan and warm in a 300°F (150°C) oven for 5 to 10 minutes, depending on how cold they are. This method gently reheats them without drying them out or making them tough. Alternatively, you can toast individual pieces in a toaster or toaster oven, which adds a pleasant crispness to the edges.
For freezing, allow pancakes to cool completely, then arrange them in a single layer on a baking sheet and freeze for at least 3 hours or until solid. Once frozen, transfer them to a freezer bag for long-term storage (up to 3 months). When you’re ready to eat them, you can reheat frozen pancakes in a 300°F oven for 10 to 15 minutes, or toast them directly from frozen until warm.
The batter itself can be made ahead and refrigerated for up to 1 day before baking. Mix according to the instructions and pour into the prepared sheet pan, then cover with plastic wrap and refrigerate. When ready to bake, remove from the fridge about 15 minutes before baking to bring it closer to room temperature (this speeds up baking time very slightly). The pancakes will bake in about 20 to 24 minutes depending on how cold the batter is—just watch for the visual and toothpick test rather than relying strictly on the timer.
For a crowd situation, you can prepare the batter in advance (up to 1 day) and bake it while your guests are arriving or having coffee. The entire baking process takes less than 25 minutes from oven to table, so this is very feasible if you prepare smartly.
Serving Ideas and Topping Suggestions
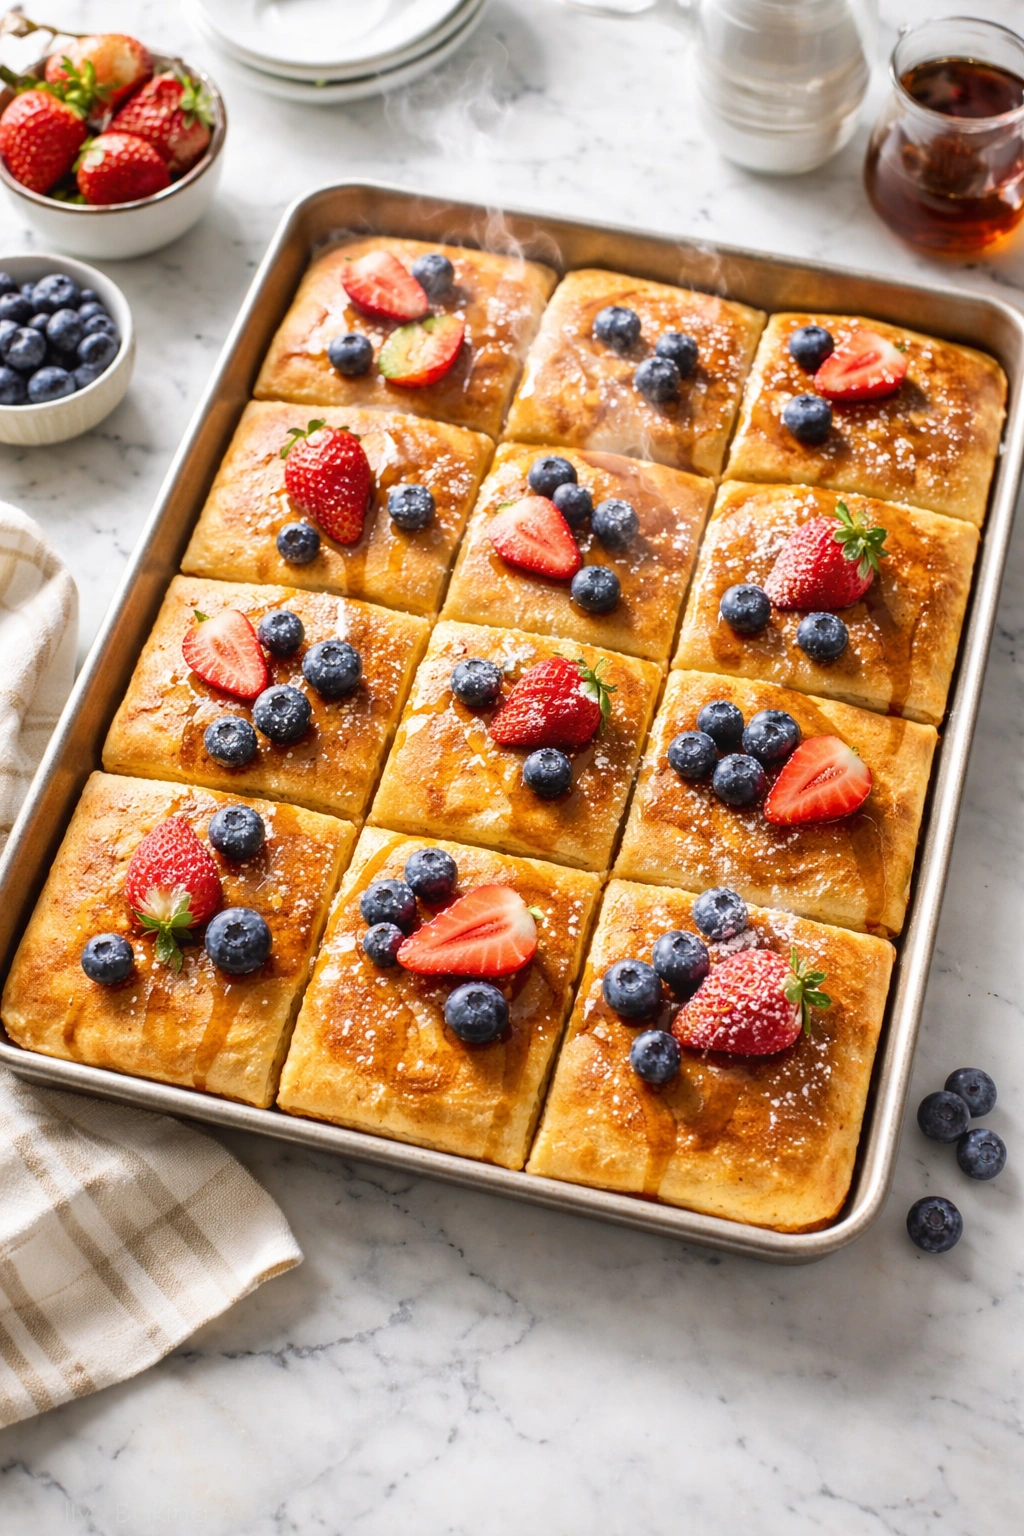
The beauty of sheet pan pancakes is that they’re a blank canvas for toppings. The classic maple syrup, butter, and powdered sugar approach is timeless and requires no explanation. Warm the maple syrup before serving (30 seconds in the microwave works), as warm syrup has superior flavor and spreads across the pancakes more evenly than cold syrup.
Fresh berries are phenomenal with sheet pan pancakes—raspberries, blueberries, strawberries (halved), or blackberries all work beautifully. The pancake texture holds up excellently under berry weight, and the contrast between soft berries and fluffy pancake is ideal. Serve berries at room temperature or briefly macerated with a small spoon of honey and a squeeze of lemon juice, which brightens their flavor.
Whipped cream transforms these from breakfast to brunch-worthy elegance. Make it fresh just before serving (whip cold heavy cream with a teaspoon of powdered sugar and a splash of vanilla extract until stiff peaks form), or use good-quality store-bought whipped cream if time is tight. A generous dollop of whipped cream and fresh berries makes the simplest pancake feel restaurant-quality.
Citrus curd—lemon, lime, or passion fruit—adds luxurious tartness. Serve alongside the pancakes so guests can spread it like jam, or dollop it on top with whipped cream and fresh berries for a genuinely elegant presentation.
Greek yogurt mixed with a touch of honey and vanilla creates a tangy, protein-rich topping that works beautifully if you’re serving a health-conscious crowd. The slight tartness balances the sweetness of the pancake perfectly.
For a savory direction, skip the sweet toppings entirely and serve the pancakes with eggs, crispy bacon or sausage, fresh avocado, and a simple salsa. Season with salt and pepper. This approach transforms them into a savory brunch item that’s versatile and unexpected.
Nutella and sliced bananas create the most popular toppings among kids (and many adults). Serve at room temperature for the best flavor and ease of spreading.
Maple-glazed nuts, roasted berries, or caramelized apples add sophistication if you’re serving a more intentional brunch. These toppings can be made an hour or two in advance and kept at room temperature.
Best Practices for Baking Multiple Batches
If you’re feeding more than 12 people, you’ll need to bake a second pan. The good news is that timing is straightforward. As the first batch comes out of the oven and goes to the cooling rack, you can immediately prepare the second pan and pop it in the oven. Keep the first batch warm by tenting it loosely with foil.
Your prep time is nearly identical for both batches—you can either make double the batter ahead of time and store it in the refrigerator, or mix it fresh for the second batch while the first is baking. The fresh-mixed approach actually works better because the batter is fresher and more reactive to the baking powder.
Space matters if you’re using one oven. The sheet pans need to be on the center rack for even baking, and you can’t stack them on top of each other. If you have access to a second oven (a convection oven or a neighbor’s oven if you’re doing this at a venue), you can bake two pans simultaneously. Otherwise, plan for the second batch to bake while the first batch finishes cooling and being plated.
For even larger crowds (24+ people), it’s sometimes easier to have someone else handle the toppings station while you manage the baking. Set out all toppings, syrups, butter, and plates before the first batch comes out of the oven. As you cut and plate the first batch, guests can immediately start adding their preferred toppings while the second batch bakes.
If your oven has an uneven hot spot, rotate the sheet pan halfway through the baking time. This is particularly important if you’ve noticed uneven browning on a previous batch. Most ovens don’t require this, but if yours does, rotate after 10 minutes of baking and it will solve the problem immediately.
Final Thoughts
Sheet pan pancakes solve the fundamental challenge of feeding multiple people a delicious, hot breakfast without spending hours at the stove. They’re consistent, forgiving, and genuinely delicious—not a compromise version of stovetop pancakes, but a legitimate method that produces excellent results every single time.
The real secret to success is understanding that this isn’t about trying to recreate stovetop pancakes in the oven. It’s a different method with its own logic and advantages. The slightly different texture—more tender, more delicate, with crispy edges—is actually superior for this context because it holds up beautifully under generous toppings and remains fluffy without becoming dense as it cools.
Once you’ve made sheet pan pancakes once, you’ll likely reach for this method even when you’re cooking for a regular-sized family. The convenience is just too good to pass up, and the results are genuinely excellent. Keep the basic recipe in your mental cookbook, experiment with flavor variations as your guests’ preferences become clear, and don’t hesitate to make two pans when you know you’ll be hungry. Your future self—the one who gets to sit at the table and enjoy breakfast instead of hovering over a hot griddle—will be grateful.