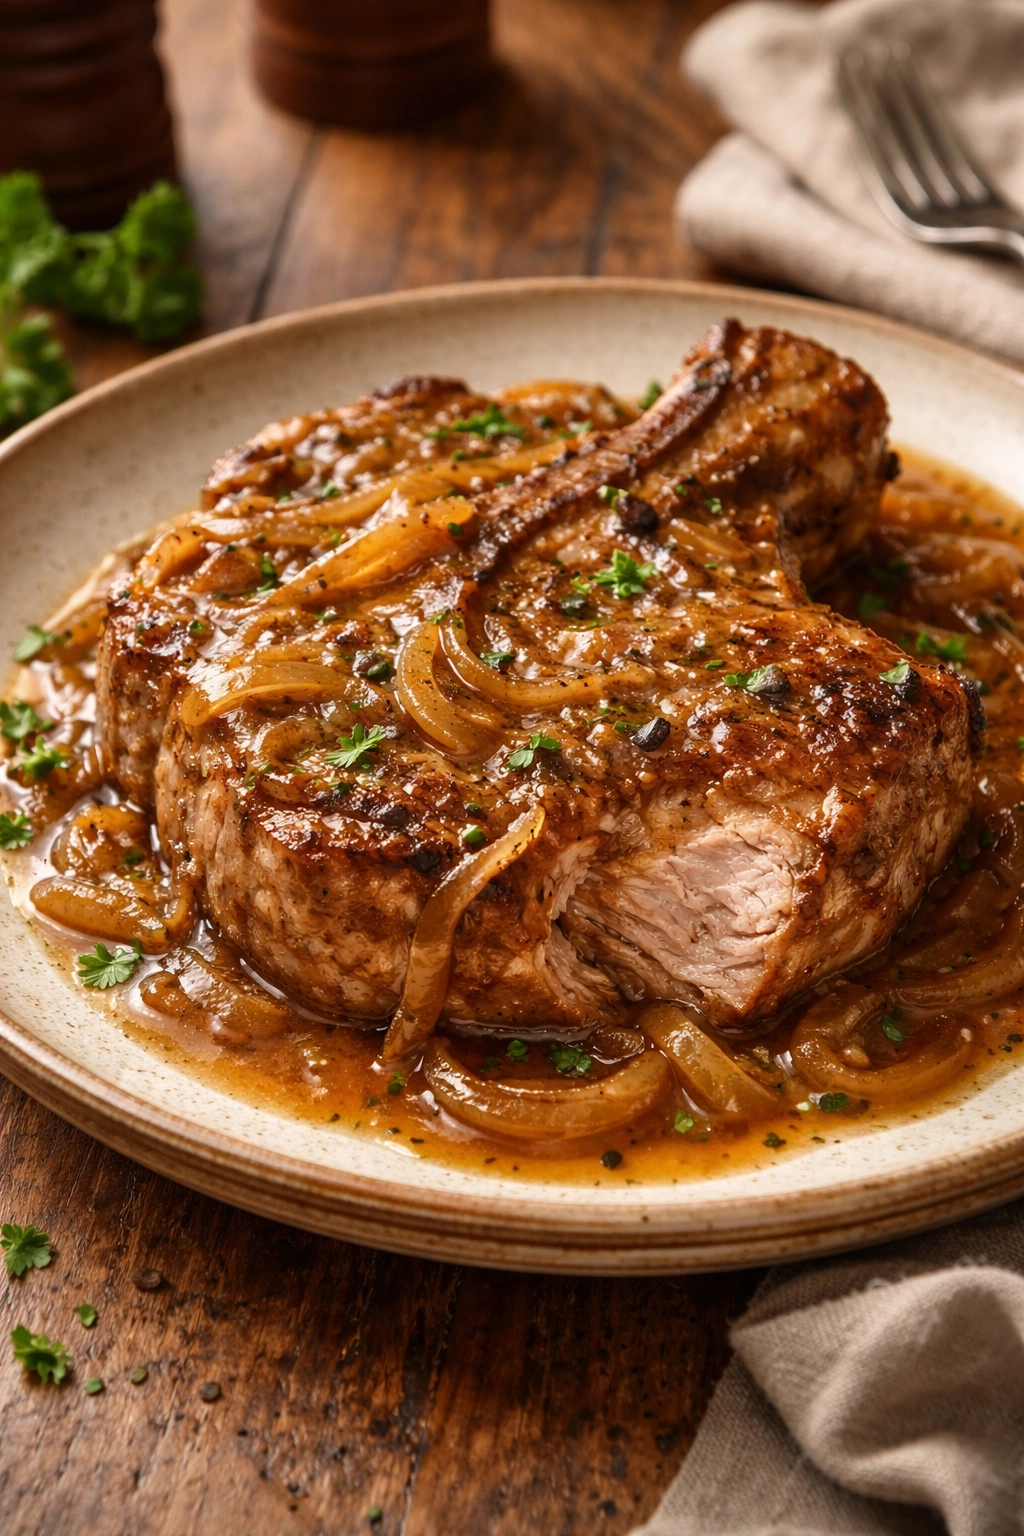
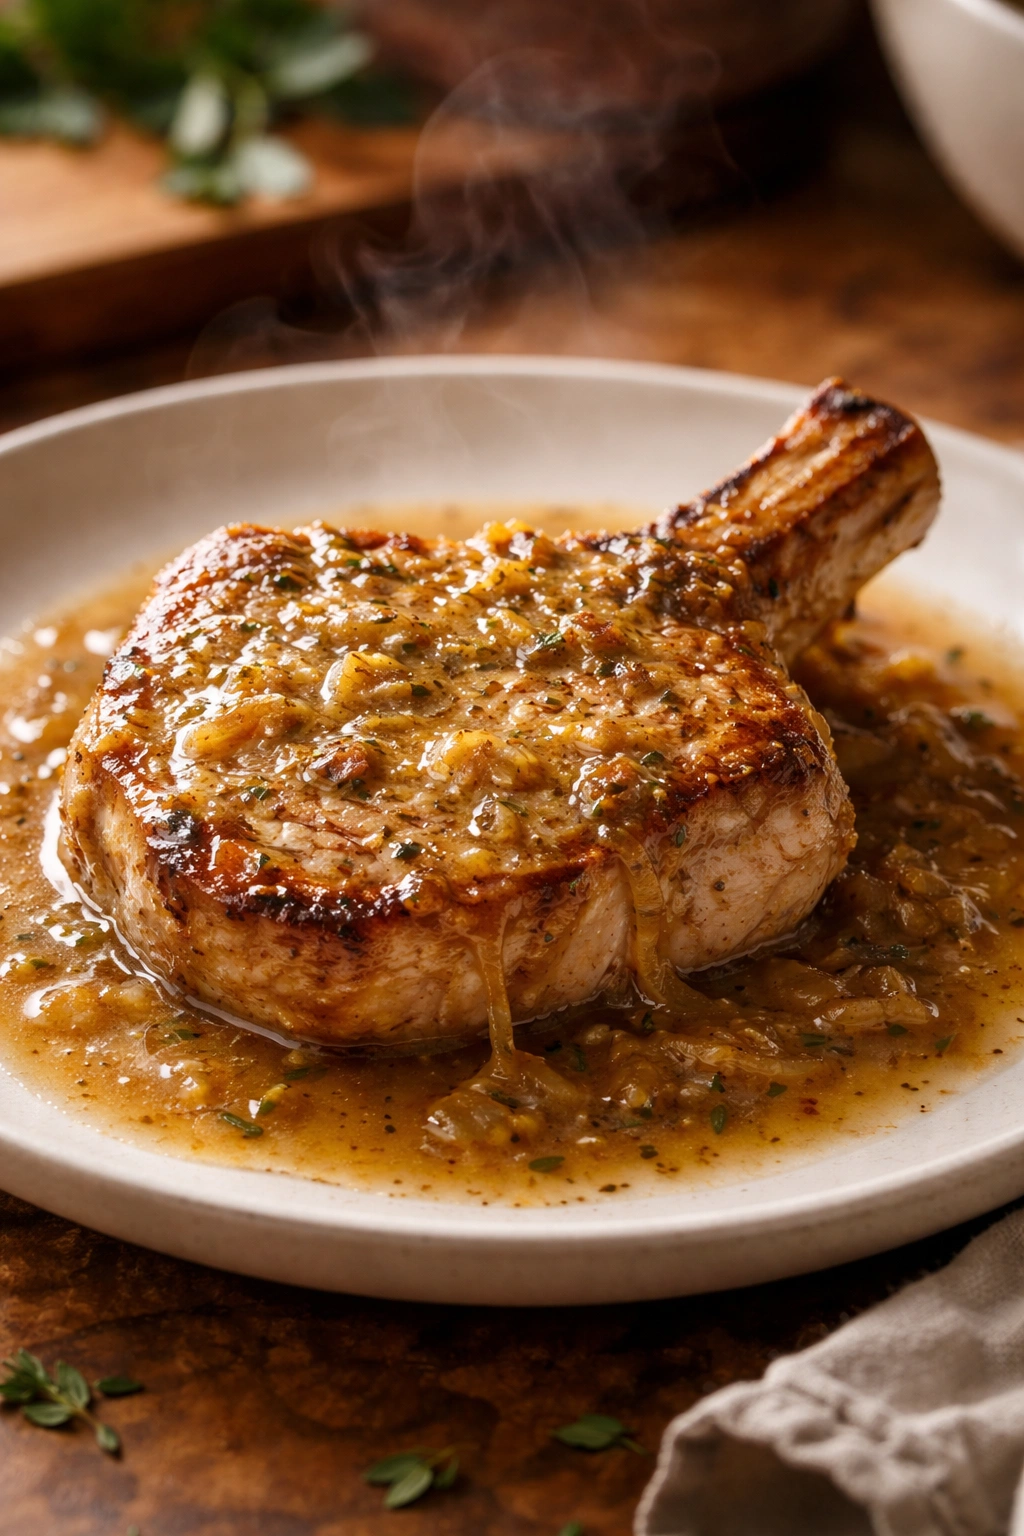
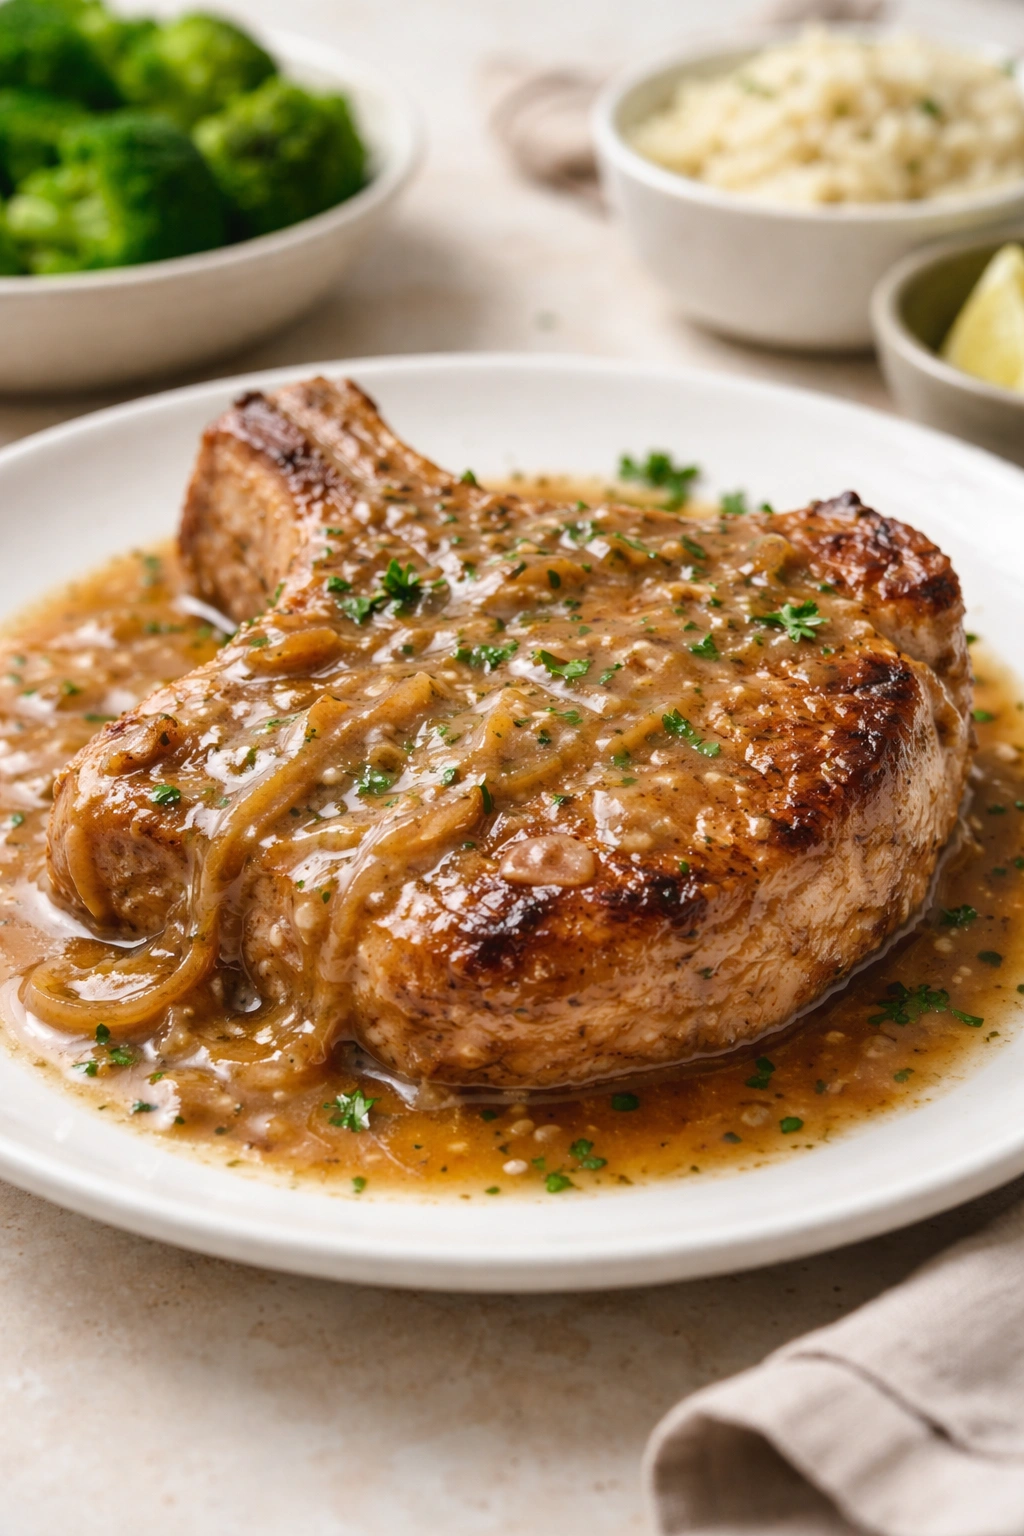
Smothered Pork Chops Baked in the Oven
There’s something undeniably comforting about a plate of smothered pork chops—the tender meat falling away from the bone, a rich onion-and-herb gravy clinging to every bite, and the promise of leftovers that somehow taste even better the next day. The catch? Most homemade versions end up dry and tough, a texture that sends even the most patient cook back to frozen dinners or takeout. But it doesn’t have to be that way. The secret to truly exceptional smothered pork chops comes down to understanding exactly how the oven transforms them, why certain cuts matter more than you’d think, and the one technique that seals in moisture while building flavor at the same time. This recipe delivers fork-tender, juicy pork chops every single time, finished in a velvety gravy that’s so good you’ll find yourself using bread or mashed potatoes just to soak up every last drop.
What Makes Oven-Baked Smothered Pork Chops So Tender and Juicy
The magic of smothered pork chops comes from the combination of browning and slow-cooking in a moist environment. When you sear the pork chops on the stovetop first, you create a golden crust that locks in flavor and develops what’s called the Maillard reaction—a chemical transformation that creates hundreds of new flavor compounds. But here’s where most recipes go wrong: they finish the chops on the stovetop, where the concentrated heat from below can dry them out in minutes.
The oven is entirely different. Once your pork chops are nestled into that rich gravy and the dish goes into the oven, the gentle, radiant heat surrounds the meat from all sides, cooking it slowly and evenly. The gravy acts as both insulation and flavor delivery—it prevents the exterior from overcooking while the interior gently reaches its target temperature. This moist environment is the difference between dry, rubbery meat and something so tender you can cut it with a fork.
Another reason oven-baked smothered pork chops turn out so much better is the resting period. Because the meat isn’t subjected to intense direct heat, it can sit quietly in the oven without getting progressively tougher. The proteins have time to relax and redistribute their moisture throughout the meat fiber instead of expelling it outward. This is why smothered pork chops made in a Dutch oven and baked at a moderate temperature consistently outperform every other cooking method.
The gravy itself plays a crucial role in keeping the meat juicy. As the pork chops cook, they naturally release their own juices into the sauce, which then circulates around the meat and gets reabsorbed. This creates a self-basting effect that would be impossible to achieve on the stovetop alone. By the time your pork chops are done, they haven’t just cooked through—they’ve actually absorbed flavor from the broth, herbs, and browning on the bottom of the pan.
Why Bone-In Pork Chops Are the Gold Standard for This Dish

If you want the best possible results, bone-in pork chops are non-negotiable. The bone does two essential things: it conducts heat more slowly than meat alone, protecting the interior from overcooking while the exterior browns, and it contributes enormous flavor to both the chops themselves and the gravy. Collagen in the bone breaks down during cooking into gelatin, which gives your gravy a naturally silky texture and rich mouthfeel that you can’t replicate with boneless chops and canned soup.
Thick-cut bone-in pork chops (about three-quarter inch to one inch thick) are ideal. They’re thick enough that you can sear the exterior without cooking the interior all the way through, leaving room for the oven to finish the job gently. Thinner chops tend to dry out before the gravy has a chance to really penetrate, and they finish cooking before the flavors have time to develop fully. You want chops substantial enough that they stand up to the cooking process without falling apart, yet tender enough to cut with minimal effort.
When you’re shopping, look for pork chops that are at least eight ounces each, preferably with a good amount of marbling (those thin white lines of fat running through the meat). That intramuscular fat is crucial—it melts during cooking and keeps the meat moist from the inside out. Lean chops with barely any visible fat will dry out no matter how careful you are, which is why premium cuts are worth the extra cost for this dish.
One genuinely underrated benefit of bone-in chops is that they’re fun to eat. There’s nothing wrong with picking up the bone at the end and gnawing on it while that gravy drips down your chin. If anyone gives you a strange look, explain that you’re getting every ounce of flavor from your dinner—and it’s delicious.
Why Searing Before Baking Makes All the Difference
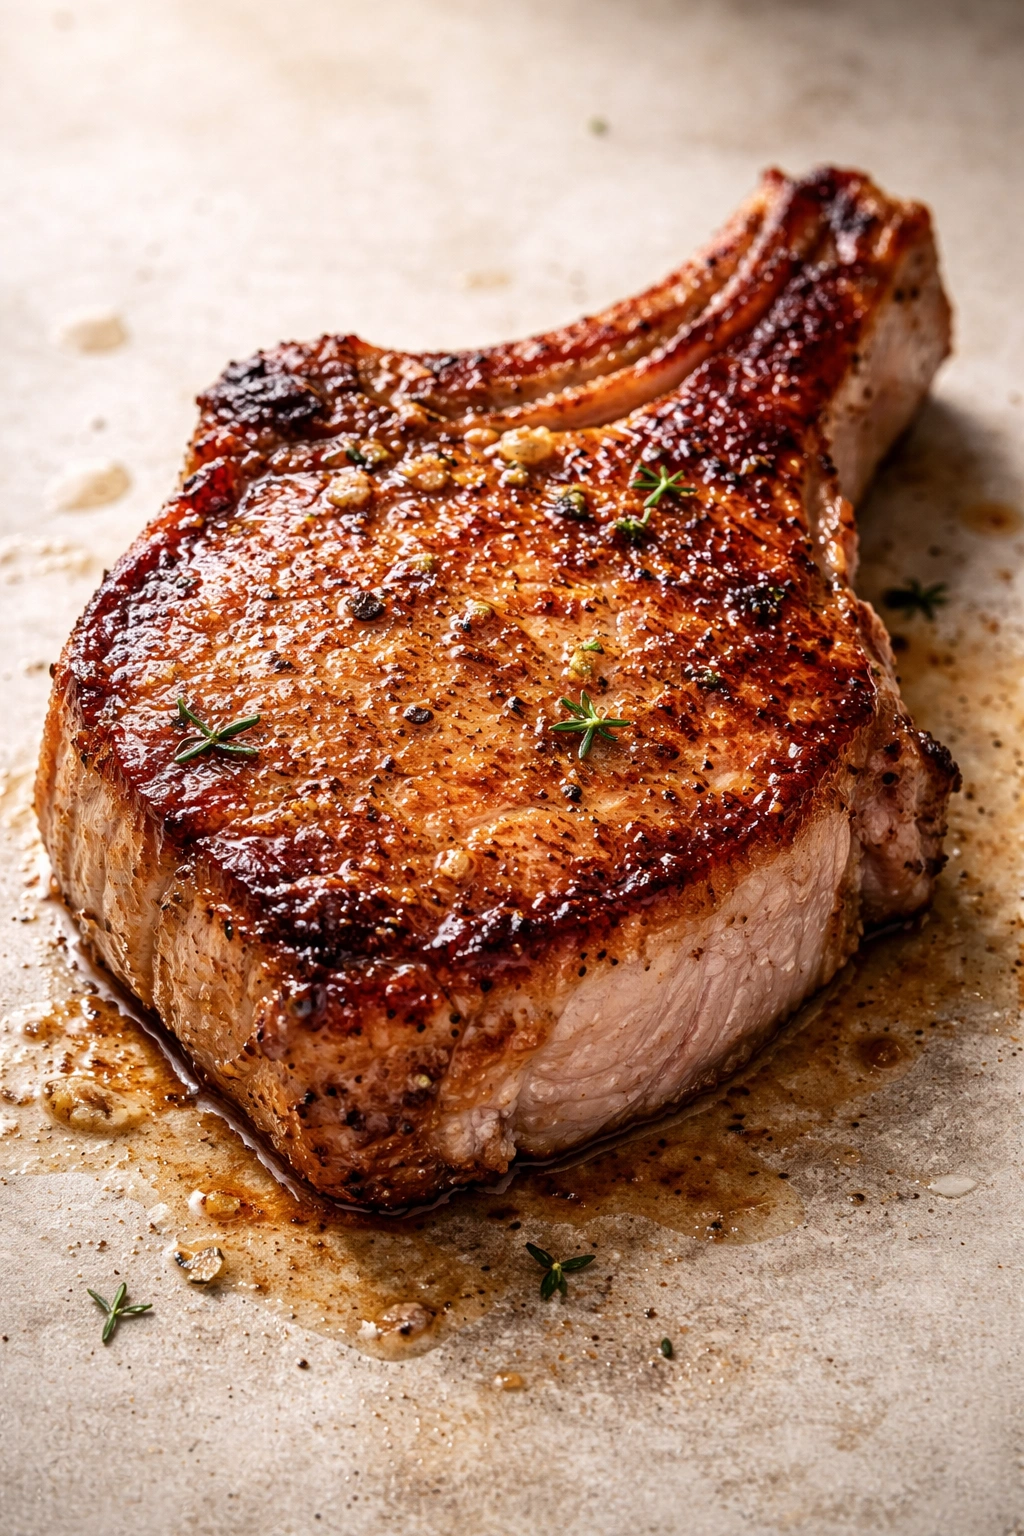
The stovetop searing step isn’t just for looks. When you place a cold or room-temperature pork chop into hot oil, the high heat causes the amino acids and sugars on the meat’s surface to bond together, creating a flavorful brown crust. This crust acts as a seal, preventing the loss of juices during the subsequent baking. It’s the difference between a pale, weak-flavored chop and one with real character.
The key to proper searing is getting your oil hot enough—you want it shimmering but not smoking—and resisting the urge to move the chops around. Leave each side undisturbed for two to three minutes, which gives the meat sufficient contact with the pan to develop that golden color. You’re not trying to cook the chops through at this stage; you’re just building flavor and creating that protective crust. Once both sides are golden, they come out and wait briefly on a plate while you build the gravy base.
The browned bits stuck to the bottom of the pan (called fond) are liquid gold. When you add your broth and scrape the pan with a wooden spoon, all those caramelized particles dissolve into the liquid and become the foundation of an incredibly flavorful sauce. This is why deglazing the pan is never optional—it’s where the depth comes from. Skip this step and your gravy tastes thin and one-dimensional. Do it properly and you’ve got something restaurant-quality.
The Secret to a Rich, Silky Gravy Without Cream Soup
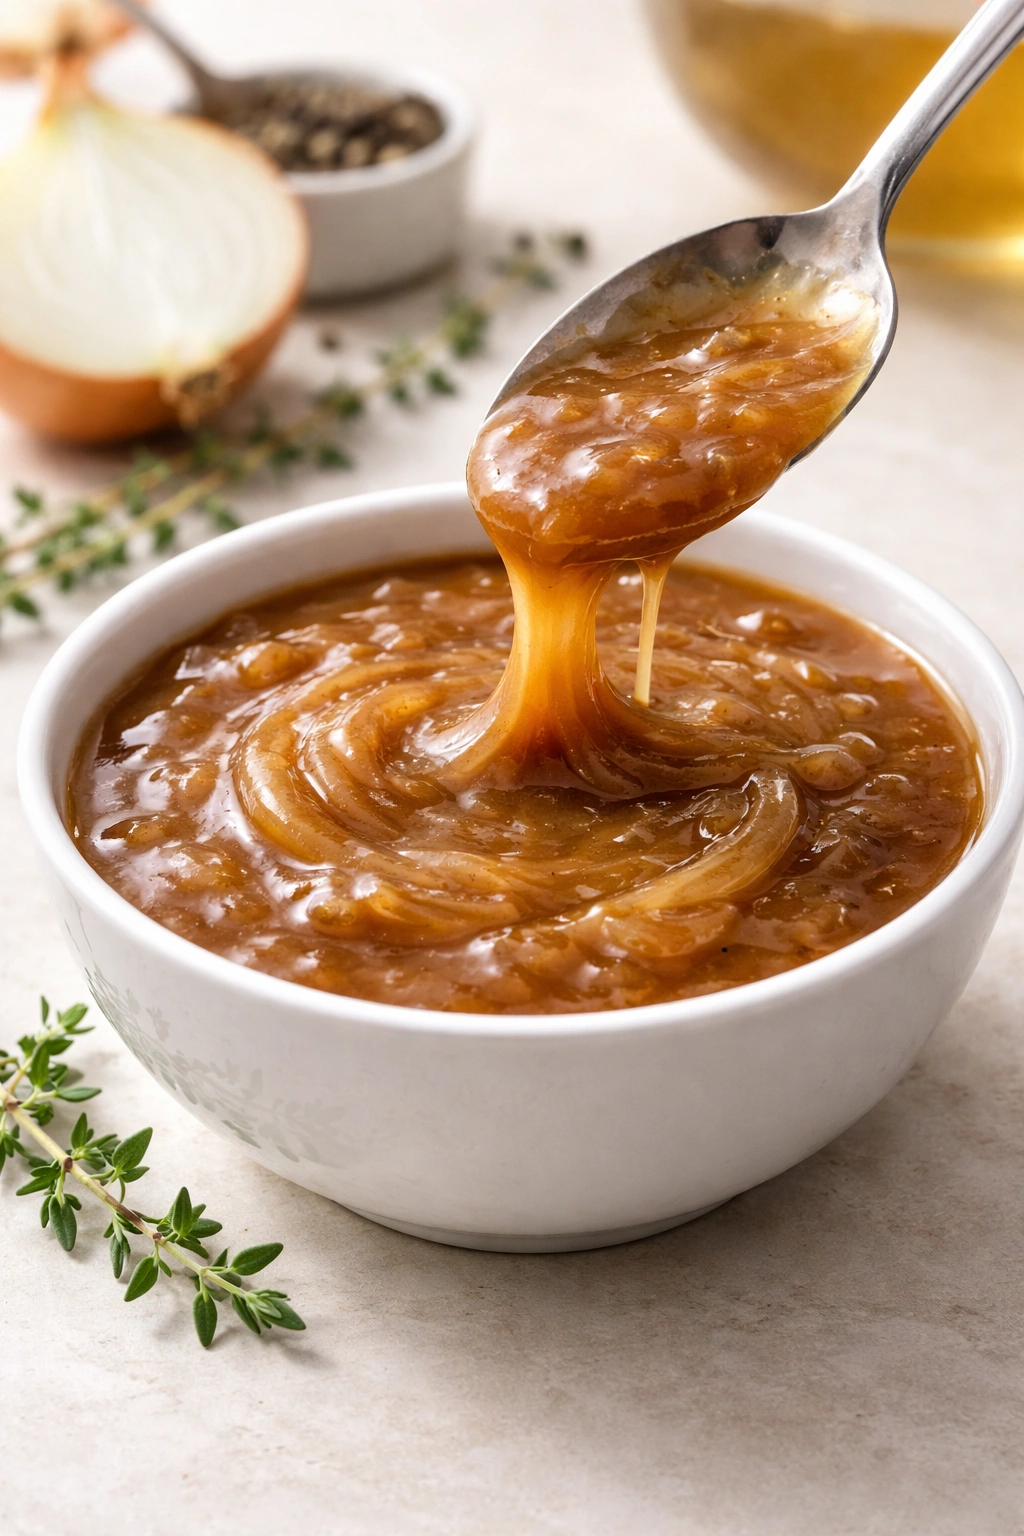
Most smothered pork chop recipes rely on condensed cream of mushroom soup for convenience, and while that works in a pinch, it adds a metallic aftertaste and excessive sodium that masks the true flavor of the pork and the vegetables. Making the gravy from scratch takes only a few additional minutes and delivers incomparably better results.
The foundation is simple: sautéed onions, garlic, a roux (flour cooked in fat), and good quality chicken broth. As the onions cook slowly over medium heat, their natural sugars caramelize, turning sweet and nutty. By the time they’re golden and soft (which takes about ten to fifteen minutes if you’re patient), they’ve transformed from sharp and pungent into something mild and almost dessert-like. This is the flavor backbone of your gravy.
A proper roux—equal parts fat and flour cooked together—acts as a thickening agent without creating a gluey texture. You cook the flour in the fat for a minute or two, just long enough for the flour to absorb the fat and lose its raw taste, then whisk in your cold or room-temperature broth slowly to prevent lumps. The heat of the pan will gradually warm the broth and activate the thickening power of the flour, creating a sauce with a light, velvety consistency that clings to the pork without feeling heavy.
Some recipes add cream or sour cream to the gravy, which certainly makes it richer, but it’s not necessary. The natural gelatin from the pork bones, combined with the emulsified fat and the roux, creates plenty of body and richness on its own. If you do want to add cream for extra luxury, wait until the very end, after the pork is cooked, and stir it in off the heat to prevent it from breaking or curdling.
Smothered Pork Chops Recipe
This recipe serves four to six people and delivers consistently tender, juicy pork chops every single time. The combination of careful searing, a flavorful gravy base, and gentle oven cooking creates a dish that tastes like it took all day, even though the total time is under ninety minutes.
Yield: Serves 4 to 6 | 4 to 6 pork chops
Prep Time: 15 minutes
Cook Time: 60 minutes
Total Time: 75 minutes
Difficulty: Intermediate — You’ll sear the chops on the stovetop and bake them in the oven, but the steps are straightforward and the recipe is forgiving if you follow the temperature guidance carefully.
Ingredients
For the Pork Chops:
- 4 to 6 bone-in pork chops (8 ounces each, about ¾-inch to 1-inch thick)
- 1 teaspoon fine sea salt
- ½ teaspoon freshly ground black pepper
- ½ teaspoon garlic powder (optional but recommended)
- ¼ teaspoon smoked paprika (optional)
- 2 tablespoons vegetable oil or olive oil
For the Gravy:
- 2 tablespoons unsalted butter
- 1 large yellow or sweet onion, sliced into thin half-moons (about 2 cups)
- 4 cloves fresh garlic, minced (or 1½ teaspoons jarred minced garlic)
- 3 tablespoons all-purpose flour
- 3 cups low-sodium chicken broth (or homemade stock)
- 2 sprigs fresh thyme (or 1 teaspoon dried thyme, crushed)
- 1 bay leaf
- ½ teaspoon fine sea salt (add more to taste at the end)
- ¼ teaspoon freshly ground black pepper
- Optional: 2 to 3 tablespoons heavy cream or sour cream, added after cooking for extra richness
Instructions
Prepare and Sear the Pork Chops:
-
Remove the pork chops from the refrigerator 20 to 30 minutes before cooking (this helps them cook more evenly, though it’s optional). Pat them completely dry with paper towels—moisture on the surface prevents proper browning.
-
Preheat your oven to 325°F (160°C) and position the rack in the center.
-
In a small bowl, combine the salt, black pepper, garlic powder, and smoked paprika. Sprinkle both sides of each pork chop generously with this mixture, patting it gently so it adheres.
-
Heat the oil in a large oven-safe skillet (cast iron works beautifully) over medium-high heat. Once the oil is shimmering and a drop of water sizzles immediately upon contact, you’re ready.
-
Working in batches if necessary to avoid crowding the pan, place the pork chops into the hot oil. Do not move them for 2 to 3 minutes—let them sit undisturbed so they develop a golden crust on the bottom.
Advertisements -
Flip each chop and sear the other side for another 2 to 3 minutes until that side is also golden brown. The chops won’t be cooked through at this point, and that’s exactly right.
-
Transfer the seared pork chops to a clean plate or cutting board and set aside. Do not wipe out the skillet—all those browned bits are flavor you need.
Build the Gravy:
-
Reduce the heat to medium and add the butter to the same skillet. Once the butter is melted and foaming, add the sliced onions and stir to coat with the fat.
-
Cook the onions, stirring occasionally, for 12 to 15 minutes, until they’re soft, golden, and noticeably reduced in volume. This slow caramelization is what creates the depth of flavor in the gravy. Don’t rush this step by turning up the heat.
-
Add the minced garlic and fresh thyme to the onions and cook for about 1 minute, stirring constantly, until the garlic is fragrant. Be careful not to let the garlic brown, which would make it bitter.
-
Sprinkle the flour over the onions and garlic, stirring constantly to coat everything evenly. Cook for 1 to 2 minutes, stirring, so the flour absorbs the fat and loses its raw taste. This is your roux, and it’s the secret to a silky, non-lumpy gravy.
-
Remove the pan from the heat briefly. Slowly whisk in the chicken broth, a little at a time, until you have a smooth paste, then continue whisking in the rest of the broth until fully incorporated. This gradual whisking prevents lumps from forming. If any lumps do form, strain the gravy through a fine-mesh sieve before returning to the pan.
-
Return the pan to medium heat and bring the gravy to a gentle simmer, stirring frequently. The mixture will thicken noticeably as the roux finishes cooking, usually within 2 to 3 minutes. Add the bay leaf, additional salt, and pepper. Taste and adjust seasoning as needed.
Bake the Pork Chops:
-
Nestle the seared pork chops back into the gravy, arranging them in a single layer. Spoon some of the gravy over each chop so they’re partially submerged or well-coated. The gravy should come halfway up the sides of the chops; if it doesn’t, add a little more broth.
-
Cover the skillet tightly with an oven-safe lid or heavy-duty aluminum foil. Place in the preheated 325°F oven.
-
Bake for 45 to 60 minutes, depending on the thickness of your chops. Use an instant-read meat thermometer inserted into the thickest part of a chop (not touching the bone) to monitor doneness. The pork is perfectly cooked at an internal temperature of 145°F (63°C), which gives you juicy, slightly pink meat with a safe core temperature. If you prefer meat fully white throughout, cook to 160°F (71°C), but be aware this increases the risk of dryness. Start checking at the 45-minute mark.
-
Remove the skillet from the oven and let the pork chops rest in the gravy for 10 minutes before serving. This resting period is crucial—it allows the juices to redistribute throughout the meat, ensuring maximum tenderness and juiciness. Don’t skip it, even if you’re hungry.
-
If you’d like to add cream for extra richness, remove the bay leaf and thyme sprigs, then stir in 2 to 3 tablespoons of heavy cream or sour cream off the heat. Stir until fully incorporated and smooth.
-
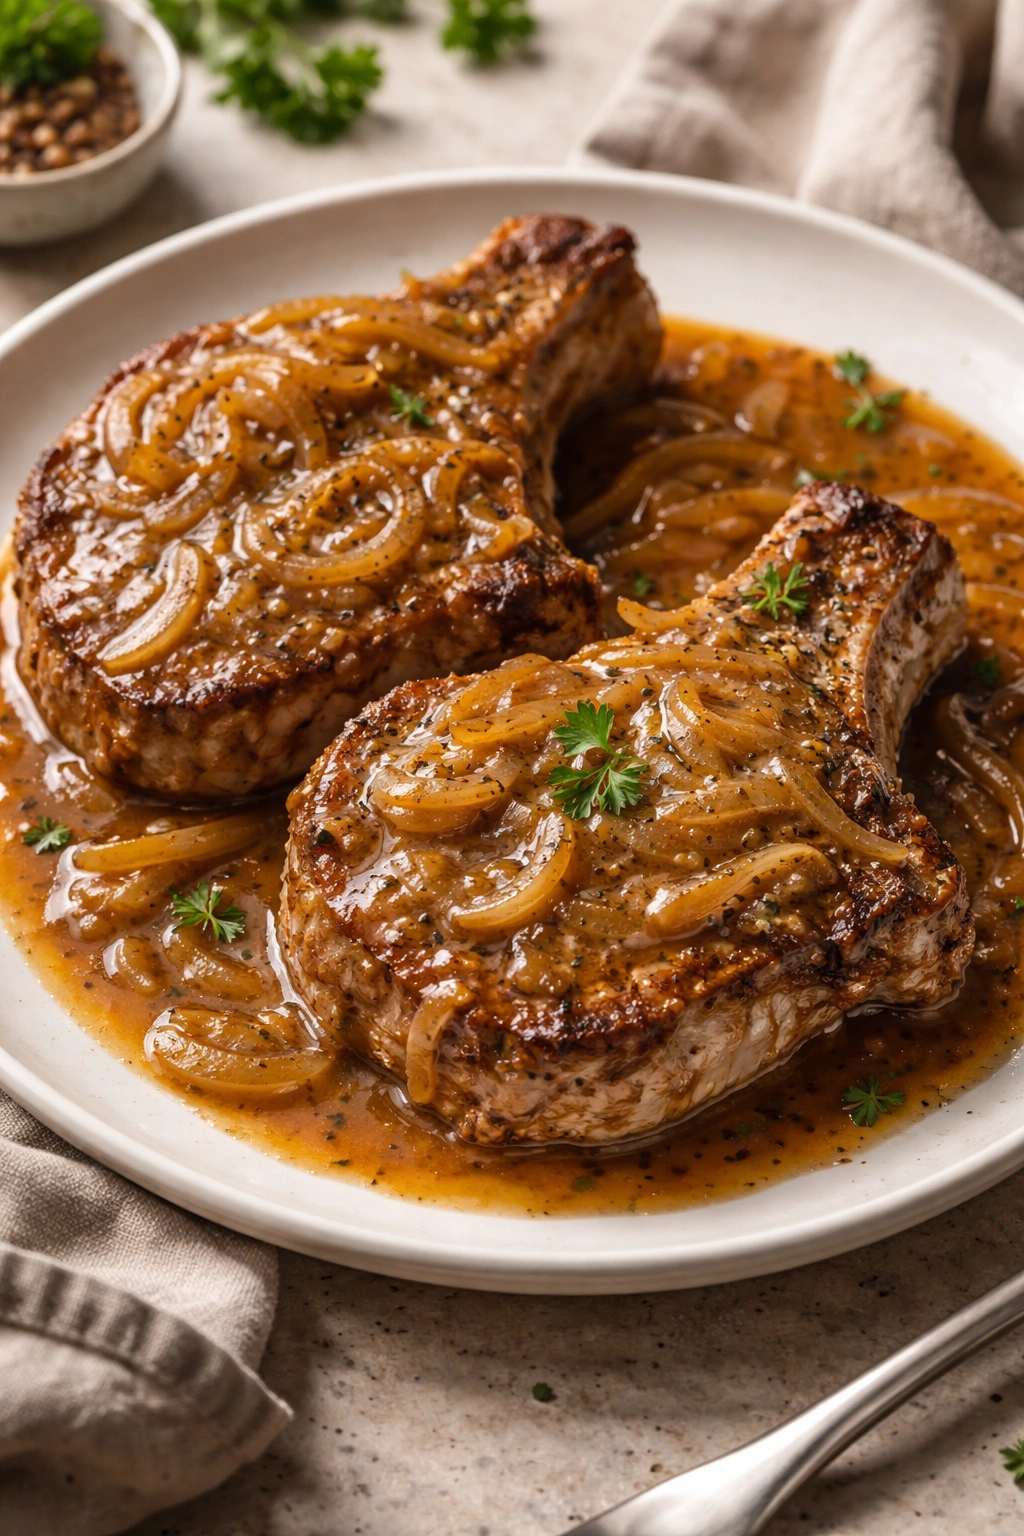
Serve the pork chops hot, spooning plenty of gravy and onions over each chop.
How to Know When Your Pork Chops Are Done Without Drying Them Out

The biggest enemy of juicy pork chops is overcooking. Because pork is so lean compared to beef, even a few minutes past the target temperature can result in disappointing dryness. An instant-read meat thermometer is the only truly reliable way to know when your chops have reached the right level of doneness. There’s simply no way to gauge it by sight or feel, no matter how experienced you are.
The USDA’s official safety guideline is 145°F (63°C), which leaves a slight blush of pink in the center of the meat. This is both safe (the temperature is high enough to kill harmful bacteria) and delicious—the meat is maximally juicy and tender at this point. Many home cooks push to 160°F because that’s the traditional “well done” temperature they grew up with, but this is genuinely unnecessary for pork and results in noticeably drier meat.
When you insert your thermometer, aim for the thickest part of the largest chop, being careful to avoid the bone (which conducts heat faster and will read higher than the meat). Wait a few seconds for the reading to stabilize. The first chop that hits 145°F is your signal that the batch is nearly done—pull the skillet from the oven and check the other chops. They may cook at slightly different rates depending on their exact thickness and position in the oven, so check each one to be sure.
If you don’t have a meat thermometer, invest in one. A good instant-read thermometer costs less than ten dollars and will transform your cooking by removing the guesswork from proteins forever. It’s the single best kitchen tool for ensuring consistent, delicious results.
Why Resting the Meat Matters More Than Most Cooks Realize
After your pork chops come out of the oven, they need to rest in the hot gravy for at least ten minutes before plating. This isn’t just about letting them cool enough to eat comfortably—it’s a critical step that directly affects juiciness and texture. During cooking, the proteins in the meat contract and squeeze out moisture, which rises to the surface. When you rest the meat, those proteins gradually relax and reabsorb a significant portion of that liquid back into the tissue.
If you cut into a pork chop immediately after it comes out of the oven, you’ll see the juices run out onto your plate instead of staying in the meat. Even three or four minutes of resting helps, but ten minutes makes a dramatic difference. Since your gravy is hot and flavorful, the chops are also reabsorbing some of those rich, savory notes while they rest, making them taste even better.
The resting period is also when the exterior, which has been exposed to the relatively dry heat of the oven, can reabsorb some surface moisture from the gravy. This results in a more tender, less tough bite even at the edges of the meat. It’s the difference between a good pork chop dinner and a truly exceptional one.
Making Your Smothered Pork Chops Extra Special with Variations
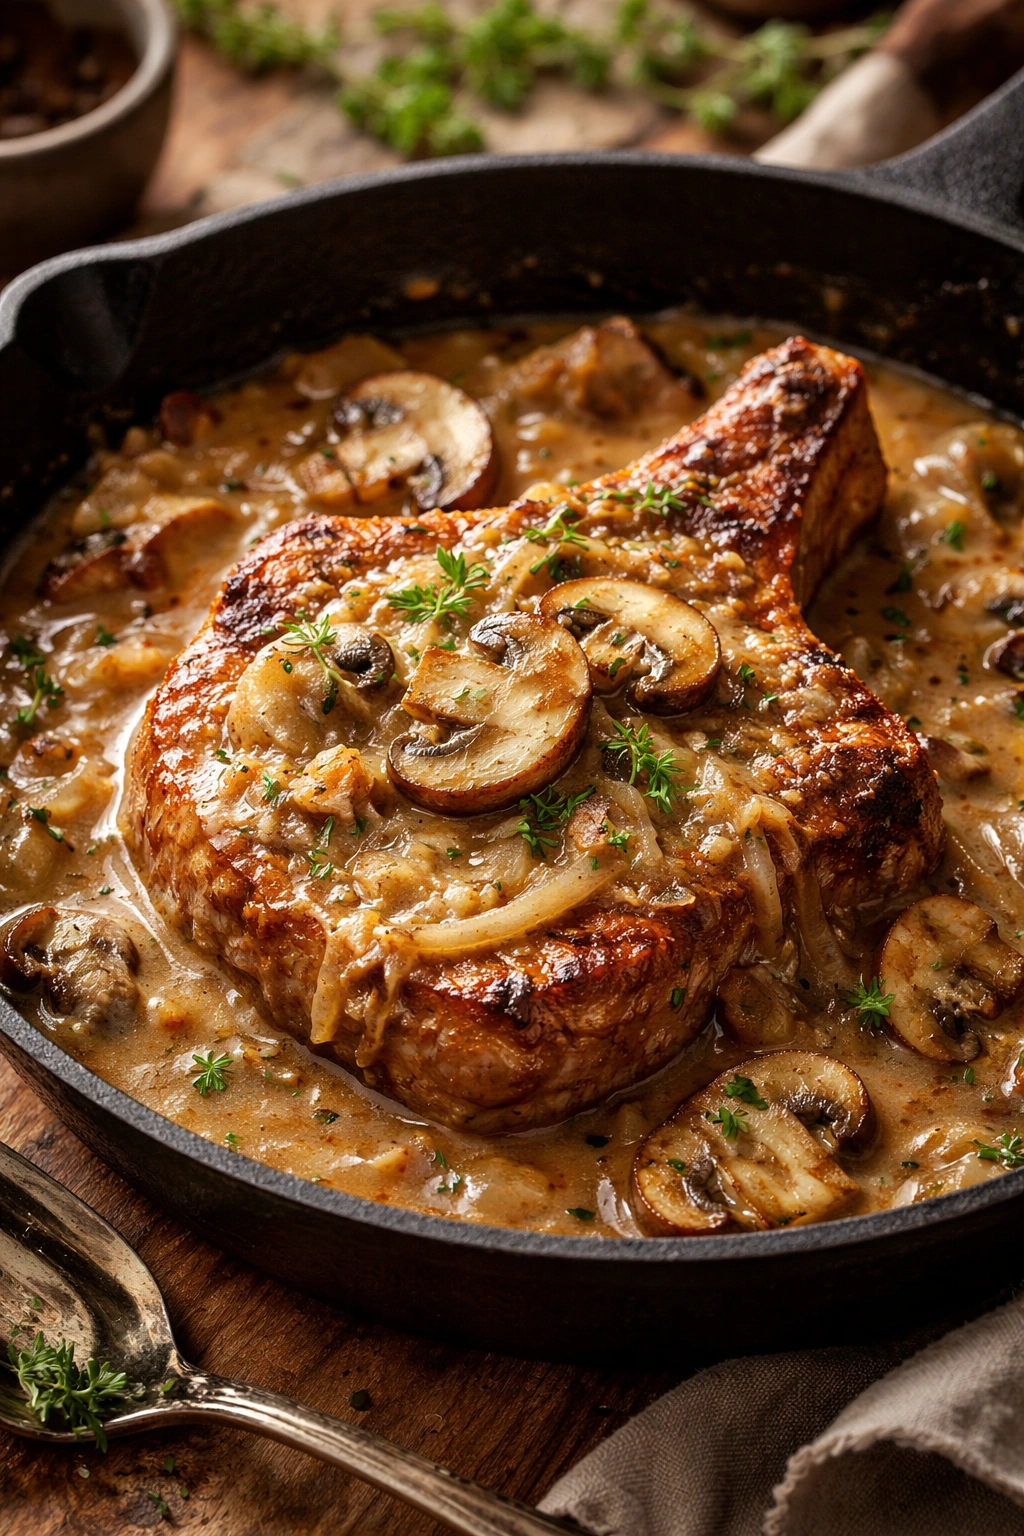
Once you master the basic recipe, you can easily adapt it to your tastes or make use of what you have on hand. Mushrooms are the classic addition—sauté fresh mushrooms (cremini, shiitake, or even basic button mushrooms work) alongside the onions, or add them in the last fifteen minutes of cooking so they don’t fall apart. The earthy, umami-rich flavor of mushrooms pairs beautifully with pork and adds texture to the gravy.
Fresh herbs can be swapped or combined. Rosemary, sage, and oregano all work wonderfully in place of or alongside thyme. If you’re using rosemary (which has a strong flavor), use a single small sprig or half a teaspoon of dried herb instead of the full amount called for thyme. Parsley added at the very end (off the heat) adds a fresh brightness that balances the richness.
For a bolder, more robust gravy, substitute half the chicken broth with beef broth or use beef broth entirely. This creates a deeper, more savory sauce that’s particularly good if you’re serving the chops over something hearty like mashed potatoes or egg noodles.
A touch of Dijon mustard or whole grain mustard (one to two teaspoons stirred in with the flour) adds complexity without making the dish taste overtly mustard-forward. The mustard plays in the background, enhancing the savory notes without announcing itself.
Apple cider vinegar or balsamic vinegar (one to two teaspoons added to the finished gravy) brightens the sauce and adds a subtle acidity that prevents the dish from feeling one-note. This is particularly nice if you’re using sweet onions.
For those who enjoy a creamier sauce without adding cream, stir a tablespoon of cream cheese into the hot gravy at the end of cooking. It melts instantly and adds richness and body without the acidity of sour cream.
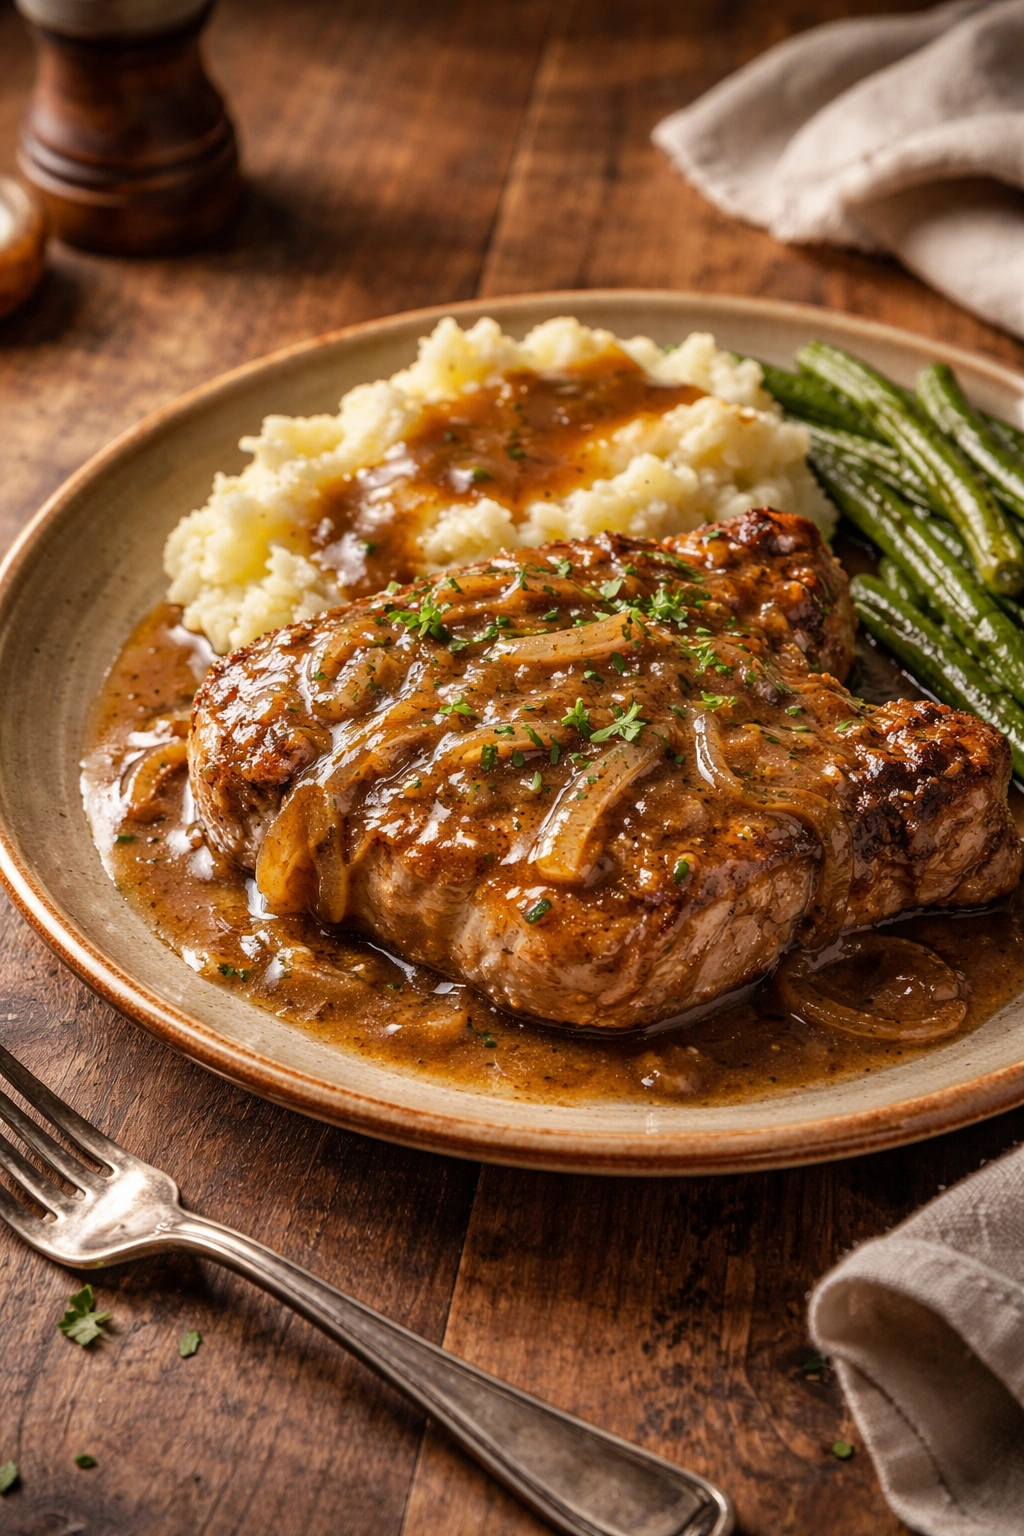
The Best Side Dishes to Soak Up All That Rich Gravy
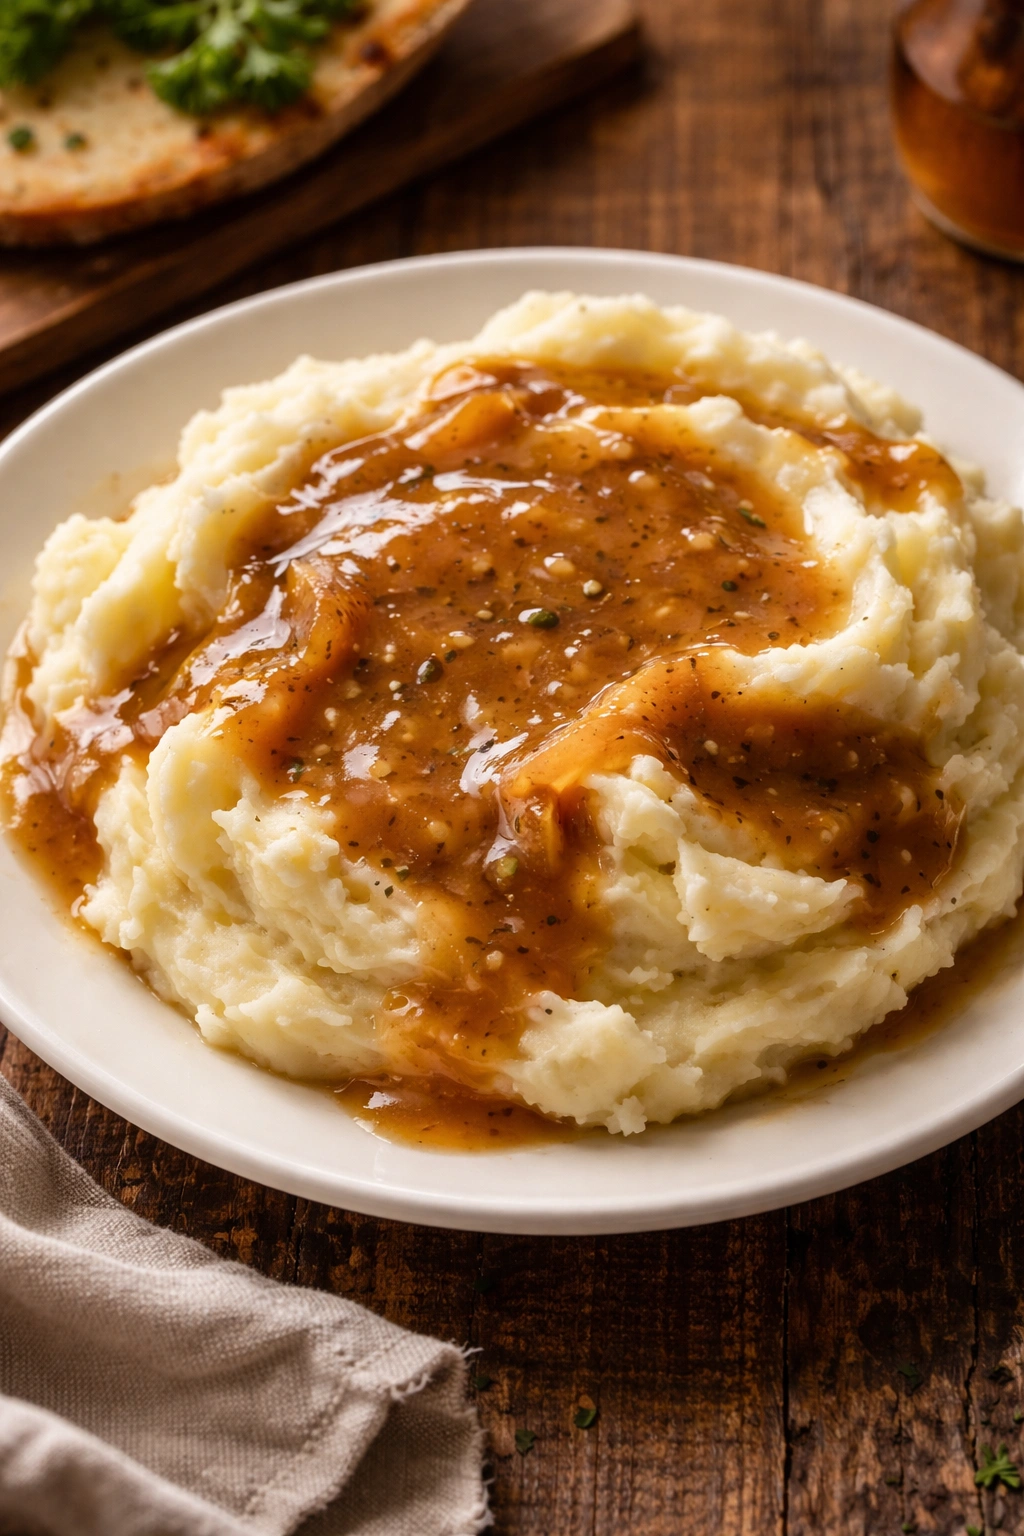
The gravy is genuinely the star here, so you want sides that have enough surface area and absorbency to take full advantage. Mashed potatoes are the classic choice for good reason—the starchy, neutral base absorbs the gravy beautifully while adding heartiness to the meal. Make them buttery and creamy (or keep them simple with just butter and milk if you prefer), and you’ll be using a spoon to get every last bit of sauce.
Egg noodles or buttered rice are equally excellent, especially if you prefer something lighter than mashed potatoes. The noodles or rice grains act like little vessels for the gravy, making each bite a perfect combination of meat, sauce, and starch. A sprinkle of fresh parsley over the top adds color and freshness.
Creamed corn or buttered corn provides sweetness that balances the savory richness of the gravy, plus a slight textural contrast. Steamed or sautéed green beans with a touch of garlic and butter add color and a vegetable component without fighting for attention with the star dish.
For those wanting something lighter, a simple green salad with a tangy vinaigrette can balance the richness of the gravy. The acidity in the dressing cuts through the fat and refreshes your palate between bites.
Crusty bread isn’t technically a side, but it absolutely deserves mention. There’s a reason so many traditional recipes mention serving smothered pork chops with bread—you’ll use it to soak up every drop of gravy on your plate. A simple white or whole grain bread works perfectly.
Storage, Make-Ahead Prep, and Reheating Like a Pro
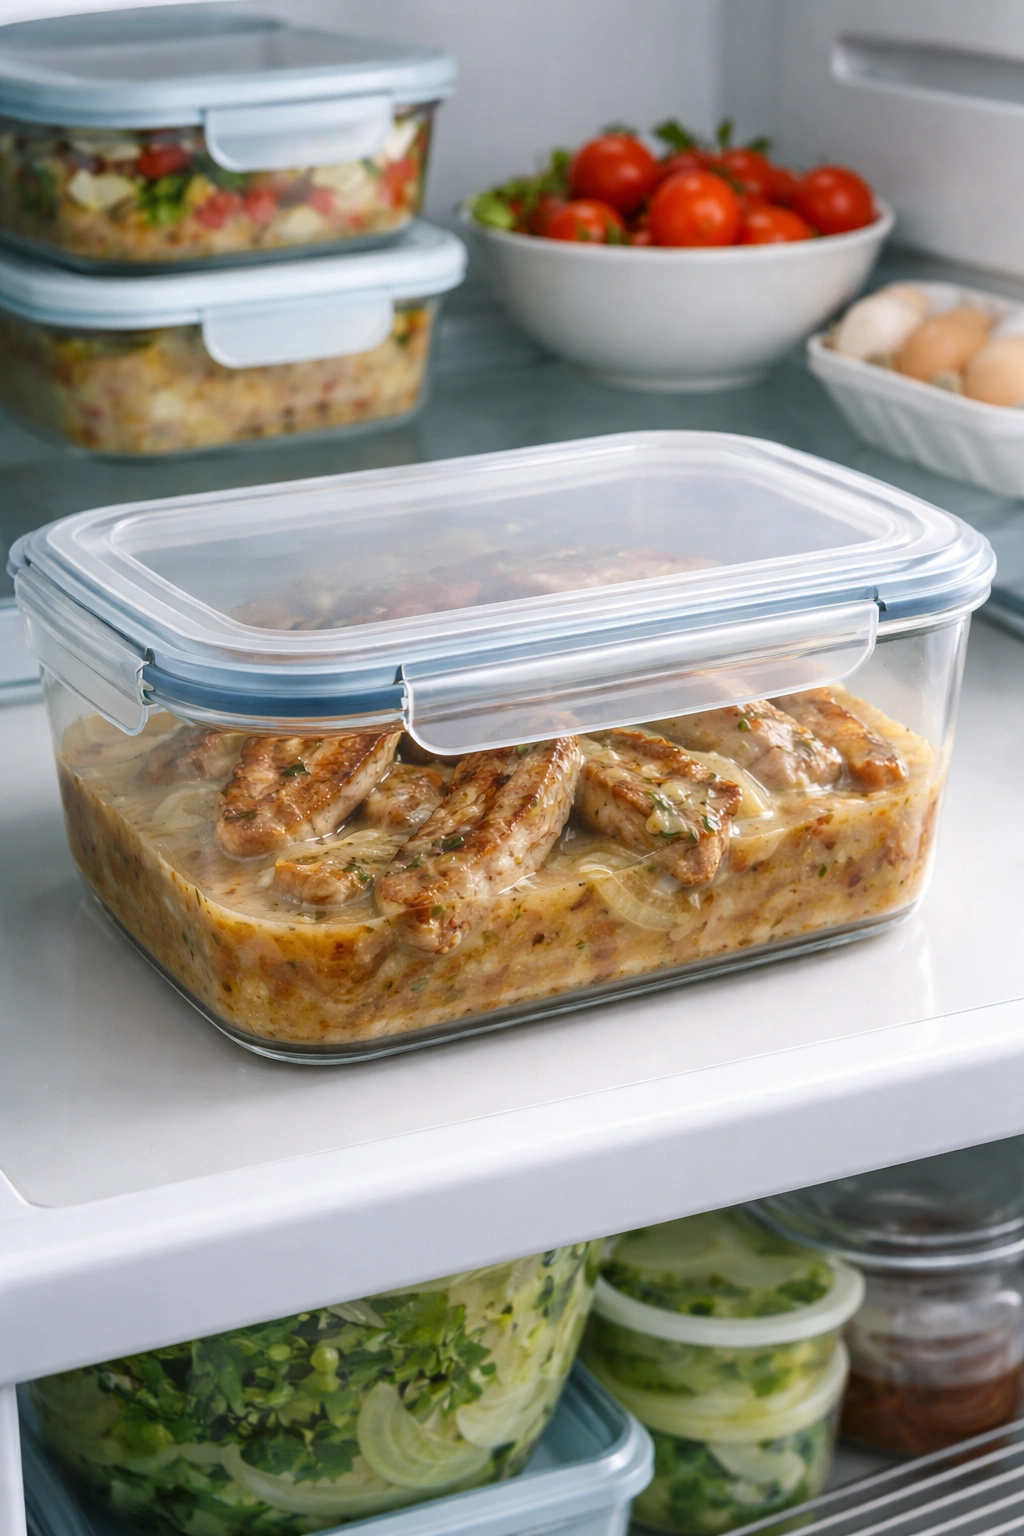
Smothered pork chops actually taste better the next day, after the flavors have had time to meld and deepen. Store leftovers in an airtight container in the refrigerator for up to four days. The gravy will thicken slightly as it cools, but this makes it easier to scoop out and reheat without splashing.
When you’re ready to reheat, the stovetop is your best option. Place the pork chops and gravy in a skillet over medium-low heat, covering with a lid or foil to prevent the gravy from splattering. Reheat gently for five to ten minutes, just until the pork is hot throughout. Avoid high heat, which can cause the outside to toughen before the inside is warm. If the gravy seems too thick after refrigeration, whisk in a tablespoon or two of broth or water to reach the right consistency.
The microwave works in a pinch—place a chop and some gravy in a microwave-safe bowl, cover loosely (leaving a small gap for steam to escape), and reheat in thirty-second intervals, checking for doneness. The texture won’t be quite as good as stovetop reheating, but it’s perfectly acceptable for a quick lunch.
You can prepare this dish partially ahead of time. Sear the pork chops and prepare the gravy base (through the point where you’ve whisked in the broth and are ready to return everything to the skillet) up to 24 hours in advance. Store the seared chops and the unthickened gravy in separate containers in the refrigerator. When you’re ready to cook, bring the gravy back up to a simmer, return the pork chops, and bake as directed. You might need to add a minute or two to the cooking time since the chops will be cold coming from the fridge.
Freezing is absolutely possible and works beautifully for up to three months. Let the cooked pork chops and gravy cool completely, then transfer them together to a freezer-safe container or heavy-duty zip-top bag, removing as much air as possible. When you’re ready to eat, thaw overnight in the refrigerator (never at room temperature, which invites bacterial growth), then reheat gently on the stovetop or in a 325°F oven covered with foil until heated through. The meat remains tender and the gravy tastes just as good as it did fresh.
Adapting Smothered Pork Chops for Different Dietary Needs
For a gluten-free version, substitute cornstarch or a gluten-free all-purpose flour for the regular flour in the roux, using the same amount. Cornstarch is slightly more efficient at thickening, so you might use one tablespoon less if the gravy seems too thick, and it creates a cleaner taste without the slightly wheaty flavor of flour. Make absolutely certain any broth you use is certified gluten-free, as some commercial broths contain hidden gluten.
For a lower-carbohydrate or keto-friendly approach, use the same roux method but replace half the chicken broth with heavy cream or use cream-based broth. Omit or dramatically reduce any sweetness from the onions by reducing their cooking time to just five minutes rather than the full twelve to fifteen minutes. The gravy will be richer and more savory, with considerably fewer carbohydrates. The pork itself is already keto-friendly, and the gravy becomes the focus of carb management.
For dairy-free cooking, skip the optional cream and sour cream at the end, and make sure your broth is dairy-free (many are, but some have hidden milk products). The gravy made with just the roux and broth is delicious and completely dairy-free. You can also add a tablespoon of cornstarch mixed with a little cold broth at the very end to achieve extra thickness if you like a heavier gravy.
For a lower-sodium version, use low-sodium or sodium-free broth and reduce the added salt significantly—taste as you go and add salt at the end instead of at the beginning. The pork itself contains sodium, and the gravy will concentrate those flavors as it simmers. You’ll likely need considerably less salt than the recipe calls for. Avoid any canned soup products, which are notoriously high in sodium.
Final Thoughts
Smothered baked pork chops belong in your regular dinner rotation, not as something special you attempt once in a blue moon. The technique is straightforward, the ingredient list is short, and the results are genuinely impressive every single time you make them. Once you’ve experienced truly juicy, tender pork chops smothered in silky homemade gravy, you’ll understand why this has been comfort food in kitchens for generations.
The keys are simple: use thick, bone-in pork chops that can stand up to the cooking process, sear them properly to build flavor, make your gravy from scratch rather than relying on canned soup, and bake gently in the oven rather than cooking on the stovetop. None of these steps are difficult or time-consuming, and the reward is a dinner that tastes expensive and complicated but takes less than ninety minutes from start to table.
Don’t skip the resting period, don’t skip the meat thermometer, and don’t worry if your first attempt isn’t absolutely perfect. Even a smothered pork chop dinner that’s slightly overcooked or slightly underdone is better than most restaurant versions. Once you’ve made this recipe three or four times, it becomes automatic, and you’ll find yourself making it as often as your family will eat it. Serve it with mashed potatoes and plenty of bread to soak up the gravy, and you’ve got a meal that will earn you genuine praise and probably requests for you to make it again next week.