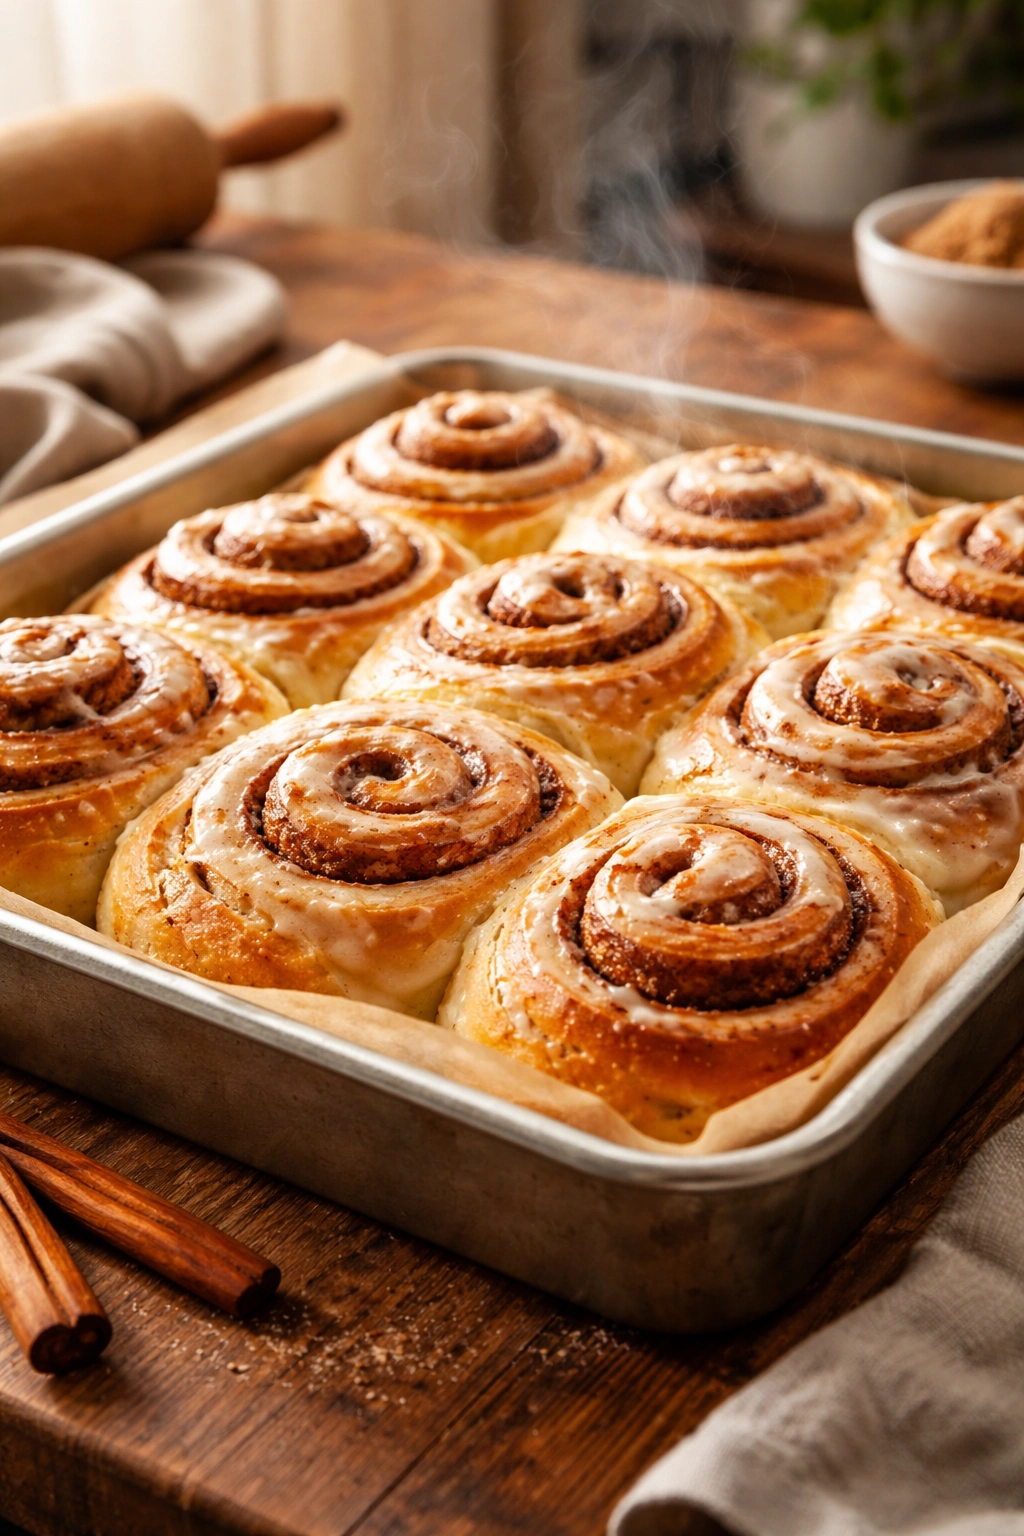
There’s something almost magical about pulling a pan of soft, gooey cinnamon rolls out of the oven. The aroma alone is worth the effort—warm cinnamon, brown sugar, butter, and yeast all melding into that unmistakable scent that says “something delicious is happening in this kitchen.” But here’s the thing: homemade cinnamon rolls from scratch aren’t actually difficult to make. They just require patience, attention to a few key details, and the willingness to let time work in your favor. Once you understand how the dough behaves and what your rolls need at each stage, you’ll realize that bakery-quality rolls are absolutely within reach in your own home.
The difference between homemade and store-bought is night and day. Those pillowy-soft layers, the way the filling nestles into every swirl, the cream cheese frosting that soaks into the warm dough—none of that happens by accident. It happens because you’re controlling every variable: the temperature of your milk, the amount of kneading, the length of the rises, the oven temperature. It’s your attention to these details that transforms simple ingredients into something that tastes like you’ve been baking for years. And the best part? You can make a batch on Sunday and have fresh rolls ready to pop into the oven on Monday morning, or freeze them for whenever you need a special-occasion breakfast.
This isn’t a recipe that demands fancy equipment or obscure ingredients. You need a stand mixer (though hand-kneading works too), basic pantry staples, and about three hours from start to finish. Most of that time is hands-off rising, which means you’re free to do other things while the yeast works its magic. Whether you’re baking these for a holiday morning, a special brunch, or just because you want to treat yourself to something warm and gooey on a Saturday, this is the recipe that delivers. Let’s walk through exactly how to make soft homemade cinnamon rolls that your family will be begging you to make again and again.
Why Homemade Cinnamon Rolls Are Worth the Effort
The convenience of grabbing a can of pre-made dough from the grocery store is real, and the results are… adequate. But there’s simply no comparison to making cinnamon rolls entirely from scratch. When you bake your own, you control the richness of the dough, the ratio of filling to dough, and how deep that cinnamon flavor goes. You also get rolls that are demonstrably softer and more tender than anything you can buy.
What makes homemade rolls special is the dough itself. A proper cinnamon roll dough is enriched with milk, butter, and an egg, which creates a crumb structure that’s tender and moist rather than dense or dry. The combination of fat (from both butter and the egg yolk) and the right amount of kneading creates a dough with excellent elasticity, which means it can rise to impressive heights without tearing or developing tough spots. Store-bought cinnamon rolls often taste one-dimensional—cinnamon and sugar, period. Homemade rolls have complexity: the sweetness of the brown sugar, the warmth of real cinnamon, the richness of the butter, and the slight tang that develops as the yeast ferments over a few hours.
There’s also something deeply satisfying about the baking process itself. Mixing the dough with your hands or a mixer, feeling it transform from shaggy and sticky to smooth and elastic, rolling it out, filling it, and watching it rise—these are tactile, immediate experiences. You’re not just following instructions on a box; you’re creating something from its component parts. That’s worth the three hours it takes, every single time.
Understanding the Key Ingredients for Perfect Rolls

Every ingredient in a cinnamon roll dough serves a specific purpose, and using quality versions of each one makes a noticeable difference. Let’s break down what you need and why.
Milk is the foundation of a tender dough. Whole milk produces the richest, softest rolls because of its higher fat content. If you only have 2% on hand, that works perfectly fine—the difference is subtle. Even non-dairy milks like almond or oat milk work, though they lack the fat that contributes to tenderness, so some bakers report needing to adjust slightly. What matters most is warming your milk to between 105°F and 115°F—this is the ideal temperature to activate yeast without killing it. Too hot, and you’ll denature the yeast and end up with rolls that don’t rise. Too cool, and the yeast will activate slowly, dragging out your timeline. The easiest test is to dip your finger in: it should feel warm, like a baby’s bathwater, but never so hot that you can’t keep your finger in it comfortably.
All-purpose flour provides structure, but bread flour elevates your rolls to another level entirely. The difference comes down to protein content. Bread flour has about 12-13% protein, while all-purpose has about 10-11%. That extra protein develops into more gluten, which creates a chewier, sturdier crumb that somehow still manages to be soft. If you’ve never baked with bread flour before, this is the recipe to start with—you’ll immediately understand why so many experienced bakers swear by it. All-purpose flour absolutely works and will produce good rolls, but bread flour produces rolls that have that signature chewy-yet-tender texture that makes you reach for a second one before you’ve even finished the first.
Yeast is the engine that makes everything rise. You’ll need about 2¼ teaspoons of instant yeast (which equals one standard packet). Don’t use yeast that’s been sitting in your pantry for years—check the expiration date. Yeast loses potency over time, and expired yeast is the #1 reason rolls don’t rise properly. Store any leftover yeast in the refrigerator or freezer to extend its life. The warmth and the small amount of sugar in the dough will activate the yeast, causing it to produce carbon dioxide bubbles that puff up your dough and create those beautiful layers.
Butter, egg, and a touch of sugar create richness and softness. The butter melted into the dough contributes fat, which tenderizes the crumb and makes the rolls more moist. An egg (or sometimes an egg plus an extra yolk, depending on the recipe) does the same thing—it’s an emulsifier that helps bind everything together and adds richness. A small amount of granulated sugar feeds the yeast and sweetens the dough itself, while the filling is where the brown sugar comes in, providing a deeper, more caramel-like sweetness and that slightly molasses-forward flavor that makes cinnamon rolls so craveable.
Salt is non-negotiable, even though some people are surprised by this. Salt does two things: it enhances flavor (a dough without salt tastes flat and one-dimensional), and it actually helps control the yeast, preventing it from over-rising and creating air pockets that would compromise the texture. Don’t skip it.
The Secret to Soft, Pillowy Dough
The most common complaint from home bakers is that their cinnamon rolls come out dense or tough rather than soft and pillowy. In almost every case, the culprit is one of two things: too much flour or insufficient kneading. Understanding how to avoid these pitfalls is half the battle.
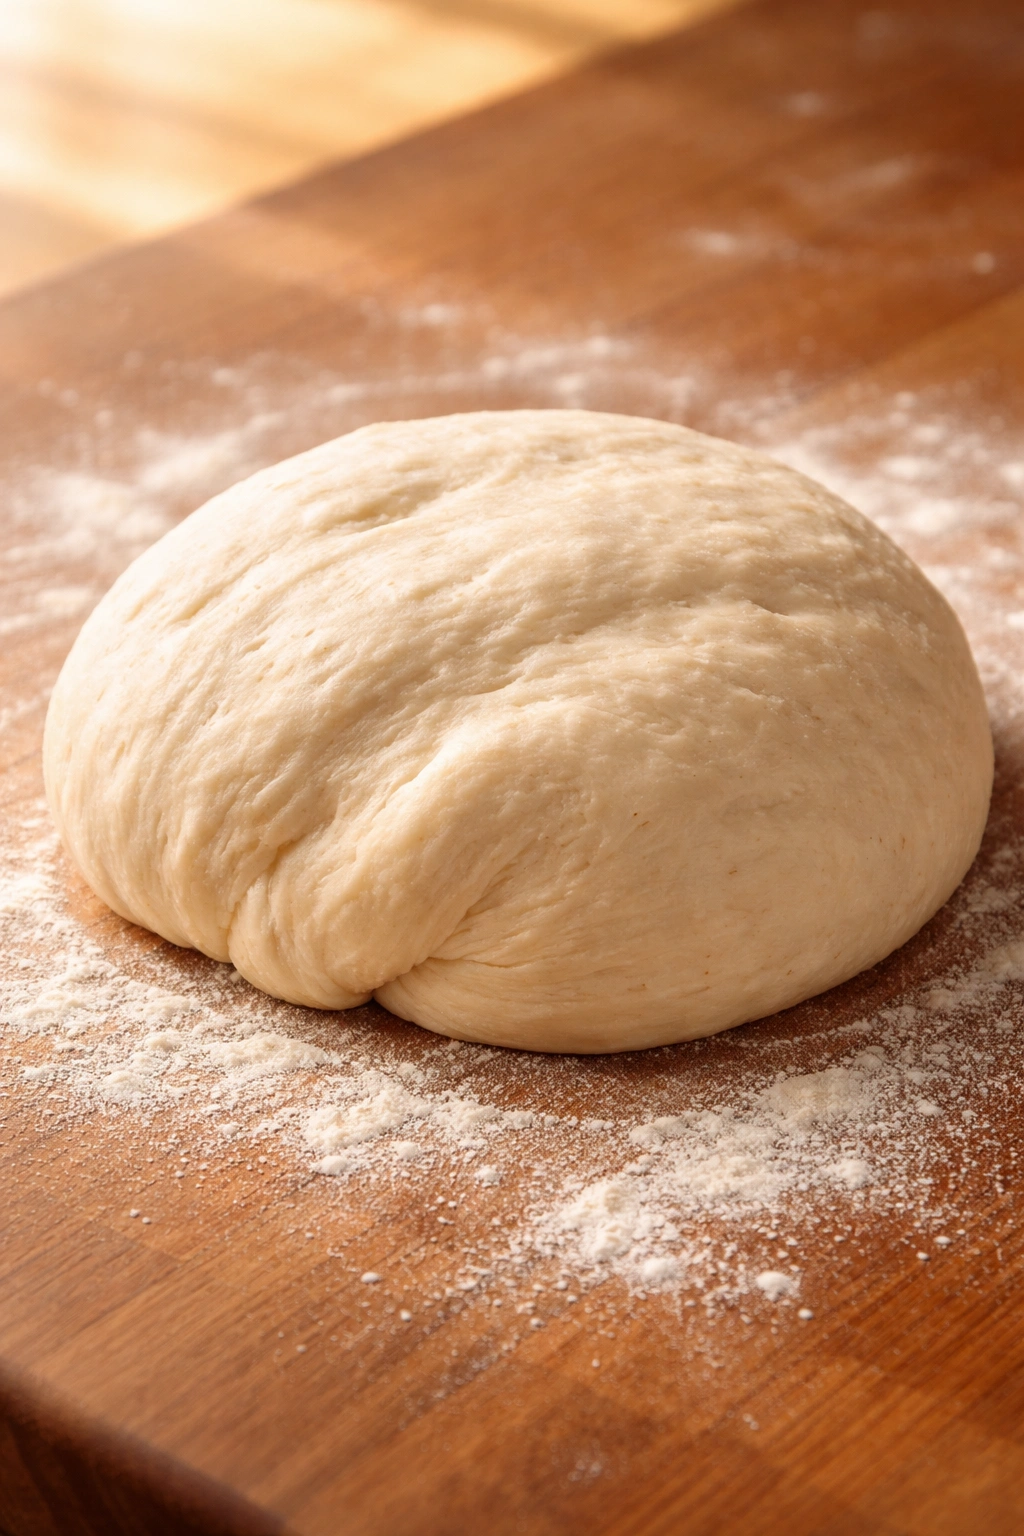
When you’re mixing your dough, add flour gradually rather than all at once. The recipe will call for a specific amount, but that’s a starting point, not a guarantee. Humidity in your kitchen, the moisture content of your flour, and even the brand of flour you’re using can all affect how much you actually need. Start with the lower amount and only add more flour a tablespoon at a time as you knead, until the dough feels right. The correct texture is soft, slightly tacky, and elastic—not stiff and definitely not dry. If you pick up a piece of the dough, it should spring back gently when you poke it. If it’s sticky enough that it clings to your fingers, that’s fine; you can dust your work surface with flour when you roll it out. If you add too much flour early on, you’ll end up with dense, tough rolls that no amount of rising time can fix.
Kneading builds gluten, which is essential for light, fluffy rolls. If you’re using a stand mixer with a dough hook, knead on medium speed for about 8-10 minutes. The dough should go from shaggy and rough to smooth and elastic. You’ll actually see and feel the change—the dough becomes cohesive and pulls away from the sides of the bowl (though it may still stick slightly to the bottom, which is perfectly fine). If you’re kneading by hand, this takes a bit longer, about 10-15 minutes, but the principle is the same. Knead until the dough is smooth and springs back when pressed.
Let the dough rest before rolling. After you’ve finished kneading and placed your dough in its greased bowl, cover it loosely and let it rise until it has roughly doubled in size. This usually takes 1½ to 2 hours at room temperature, depending on how warm your kitchen is. The dough is developing flavor during this time as the yeast ferments, and the gluten is relaxing, which makes the dough easier to roll without tearing. You’ll know it’s ready when you gently poke it and it doesn’t immediately spring back—it should hold a slight indent.
Choosing Your Yeast: Active Dry vs Instant
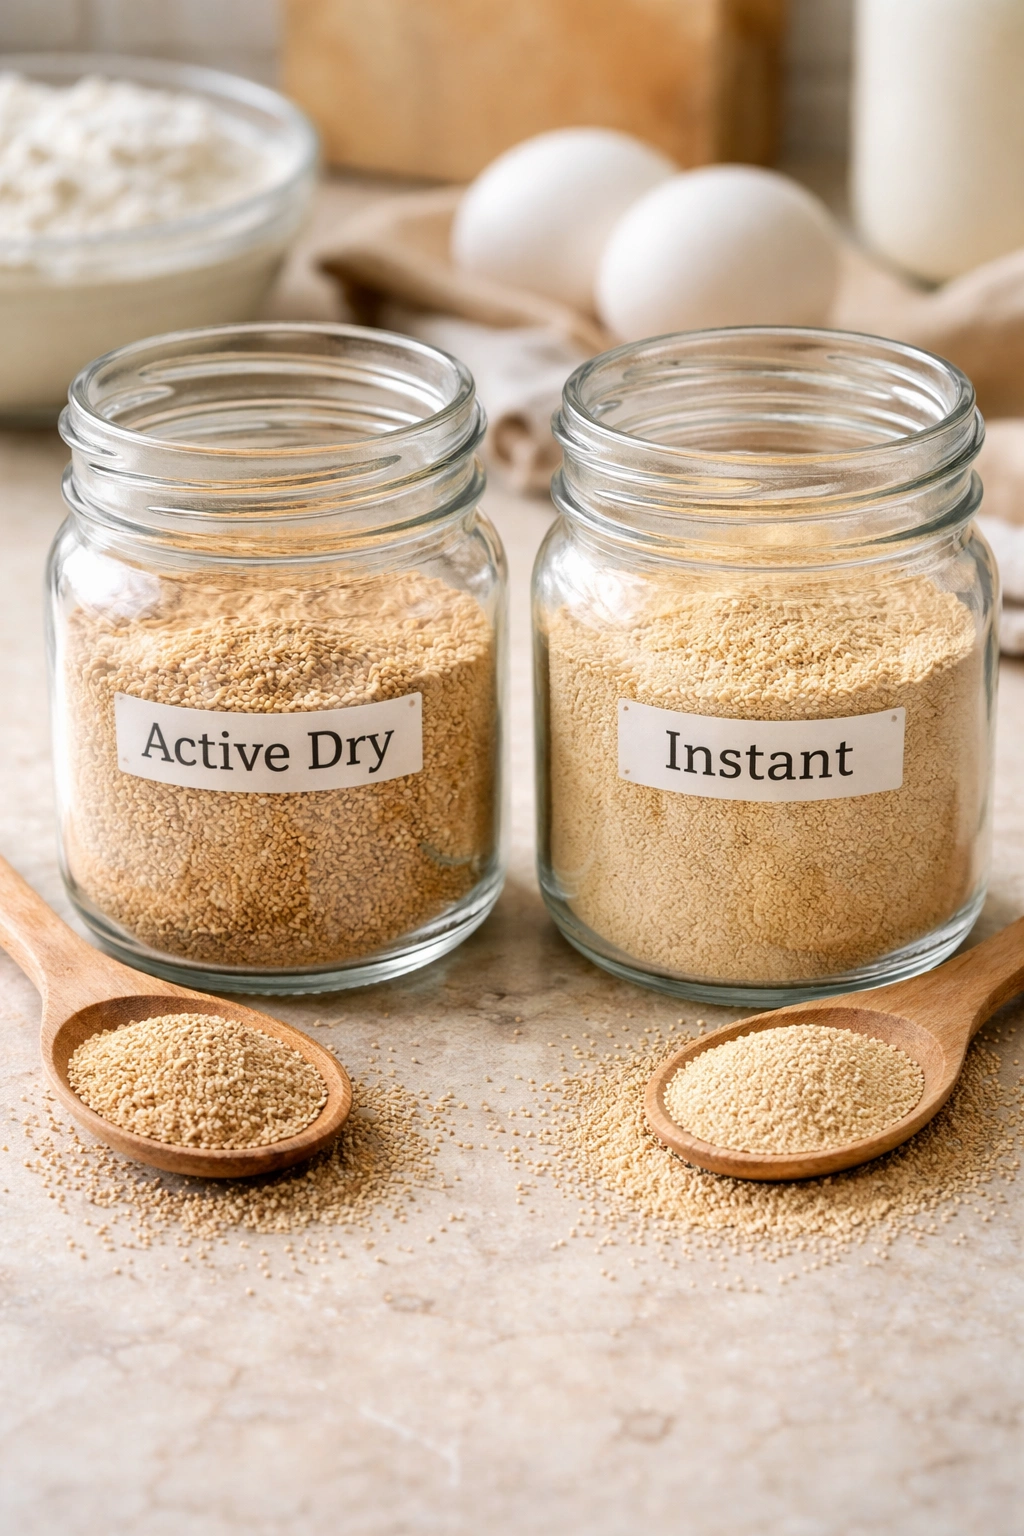
There are two main types of dry yeast available at most grocery stores, and they behave differently enough that understanding which one you’re using matters.
Instant yeast (also called rapid-rise or bread machine yeast) is finely ground and activates quickly. It can be mixed directly into dry ingredients without proofing first, though many bakers still prefer to dissolve it in warm milk to ensure it’s active before committing it to the dough. If you use instant yeast, your rise times will be faster—you might see significant rise in as little as 45 minutes to an hour. This is perfect if you want to make cinnamon rolls and have them ready to bake the same day.
Active dry yeast has larger granules and rises more slowly. It must be dissolved (or “proofed”) in warm liquid first—watch for tiny bubbles to form on the surface, which signals that the yeast is alive and ready to work. Rise times with active dry yeast are longer, sometimes taking 1.5-2 hours or more for the first rise. Active dry yeast is actually ideal if you want to make the dough the night before and refrigerate it, because the slower, cooler fermentation develops deeper flavor and the yeast is less likely to over-proof while sitting in the fridge.
Either yeast works perfectly in this recipe, but understanding the difference helps you plan your timeline. If you want rolls for breakfast, make your dough the night before using active dry yeast, shape them, and refrigerate them overnight. The next morning, let them come to room temperature and they’ll rise while your oven preheats. If you want to bake the same day, use instant yeast and plan for a 3-hour window from start to finish. Never use yeast that’s past its expiration date, and always store any open yeast in the refrigerator or freezer—it stays fresher longer when kept cold.
Rolling and Filling Your Cinnamon Rolls Perfectly
This is where the magic happens, and also where a lot of bakers make mistakes that lead to uneven rolls or filling that leaks out during baking.
After your dough has risen, dust your work surface generously with flour. Turn the dough out onto this floured surface and dust the top as well. Using a rolling pin (or in a pinch, even a wine bottle works), gently stretch and roll the dough into a rectangle roughly 12 by 24 inches. The exact dimensions don’t matter too much—you’re aiming for something thin enough to roll easily but thick enough that you have plenty of dough to work with. If the dough resists rolling, let it rest for a minute or two. The gluten needs a chance to relax, and pushing through resistance often tears the dough.
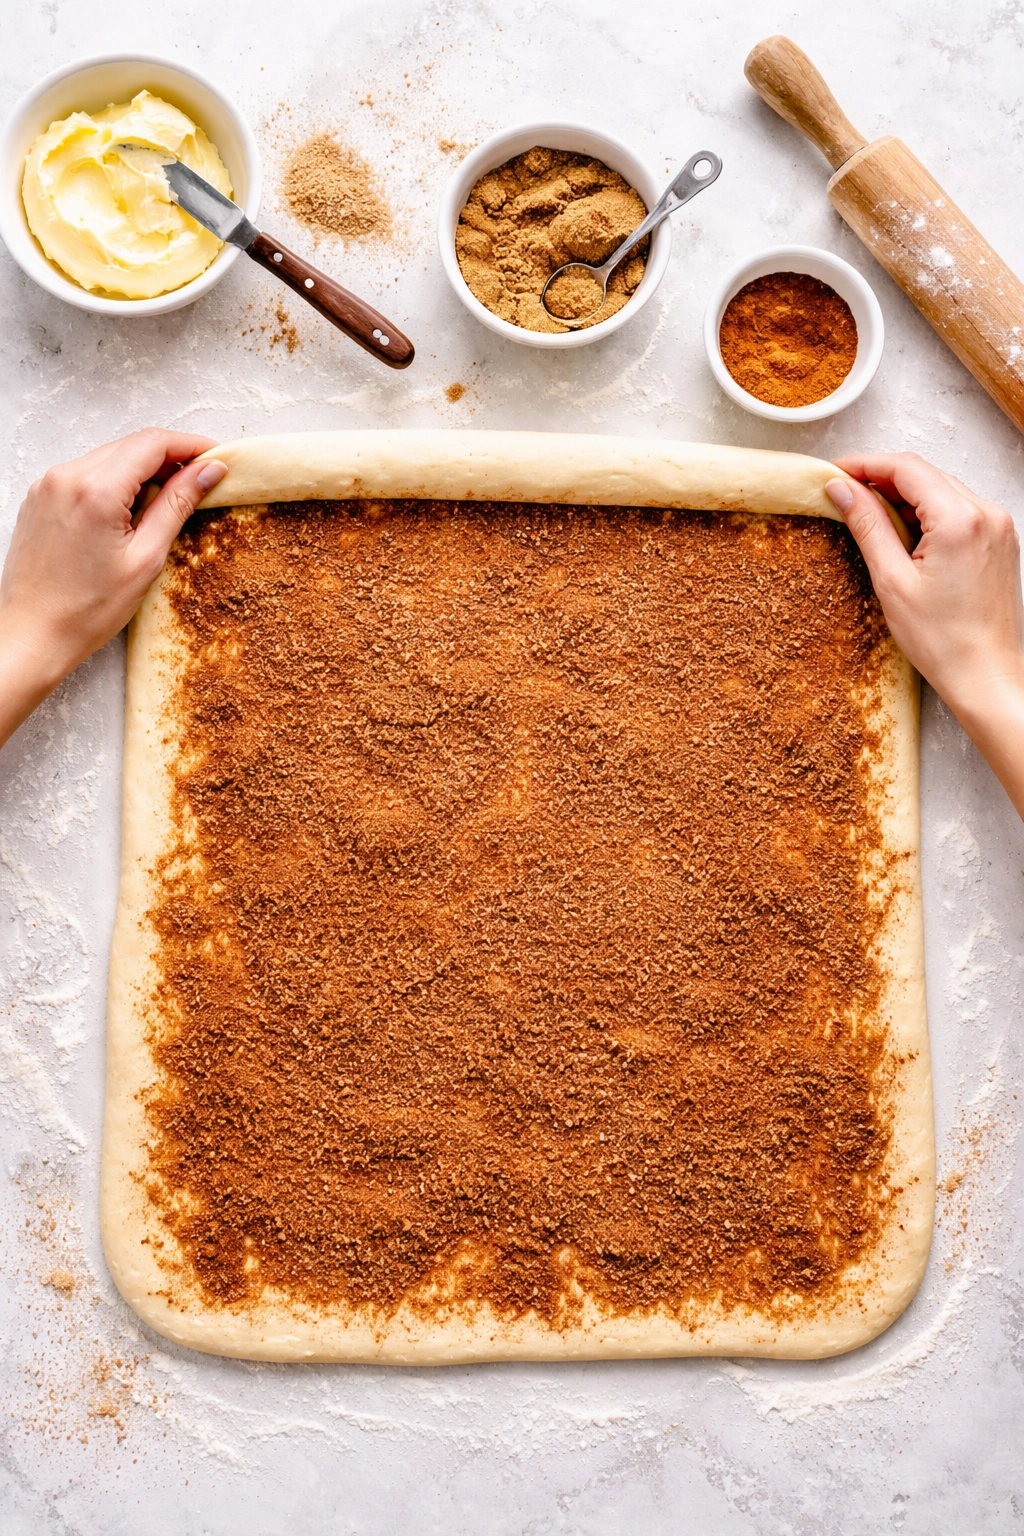
Spread your filling with room-temperature butter, not melted butter. This is crucial. If your butter is cold and hard, it won’t spread evenly and you’ll create thin spots and thick spots, leading to uneven rolls. If your butter is melted or too warm, it will soak into the dough and the filling won’t stay cohesive as you roll. Room-temperature butter should be soft enough to spread with a spatula but still hold its shape. If you forgot to bring your butter out early, microwave it in 5-second intervals until it reaches the right consistency.
Mix your brown sugar and cinnamon together before sprinkling. This ensures even distribution of the cinnamon throughout the filling. Use your hands to gently rub the brown sugar into the softened butter after you’ve spread it—this helps it adhere and prevents it from sliding around as you roll. Don’t be timid here; really work it in.
Roll the dough tightly, starting from the long edge, rolling away from you toward the opposite edge. The tighter you roll, the more defined your layers will be—this is what creates those beautiful spirals you see when you slice a cinnamon roll. Once you’ve rolled it into a log, use a very sharp serrated knife to cut it into 12 even pieces (about 1½ inches wide each). Here’s a pro tip many bakers don’t know: unflavored dental floss makes the cleanest cuts. Slip the floss under the dough log at your mark, bring the ends up and cross them over the top, then pull sharply in opposite directions. The floss cuts right through without compressing the dough the way a knife blade does, even a sharp one. If you’re using a knife, use long, gentle sawing motions rather than pressing straight down.
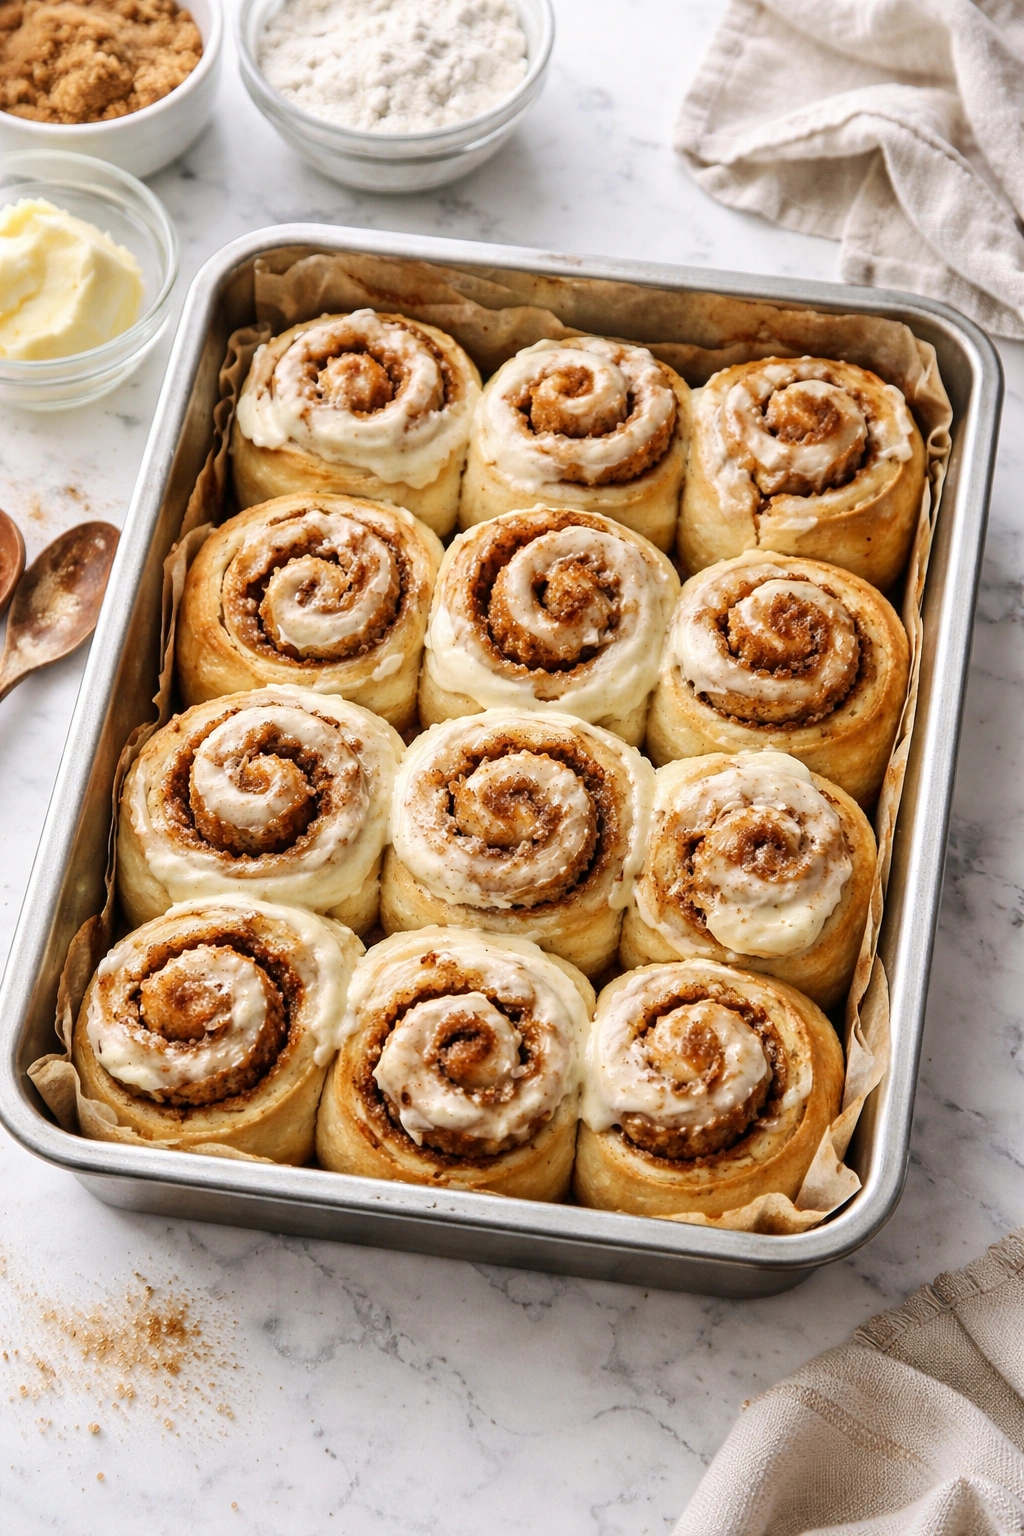
Place your rolls cut-side down in a greased 9-by-13-inch baking pan. Make sure you have enough space between each roll that they’re not touching—they need room to rise without crowding into each other. If your rolls are too close together, the outer ones will rise unevenly or develop a crust on the sides.
The Rise That Changes Everything
The second rise—after you’ve shaped and cut the rolls—is where patience pays off. This is not the time to rush.
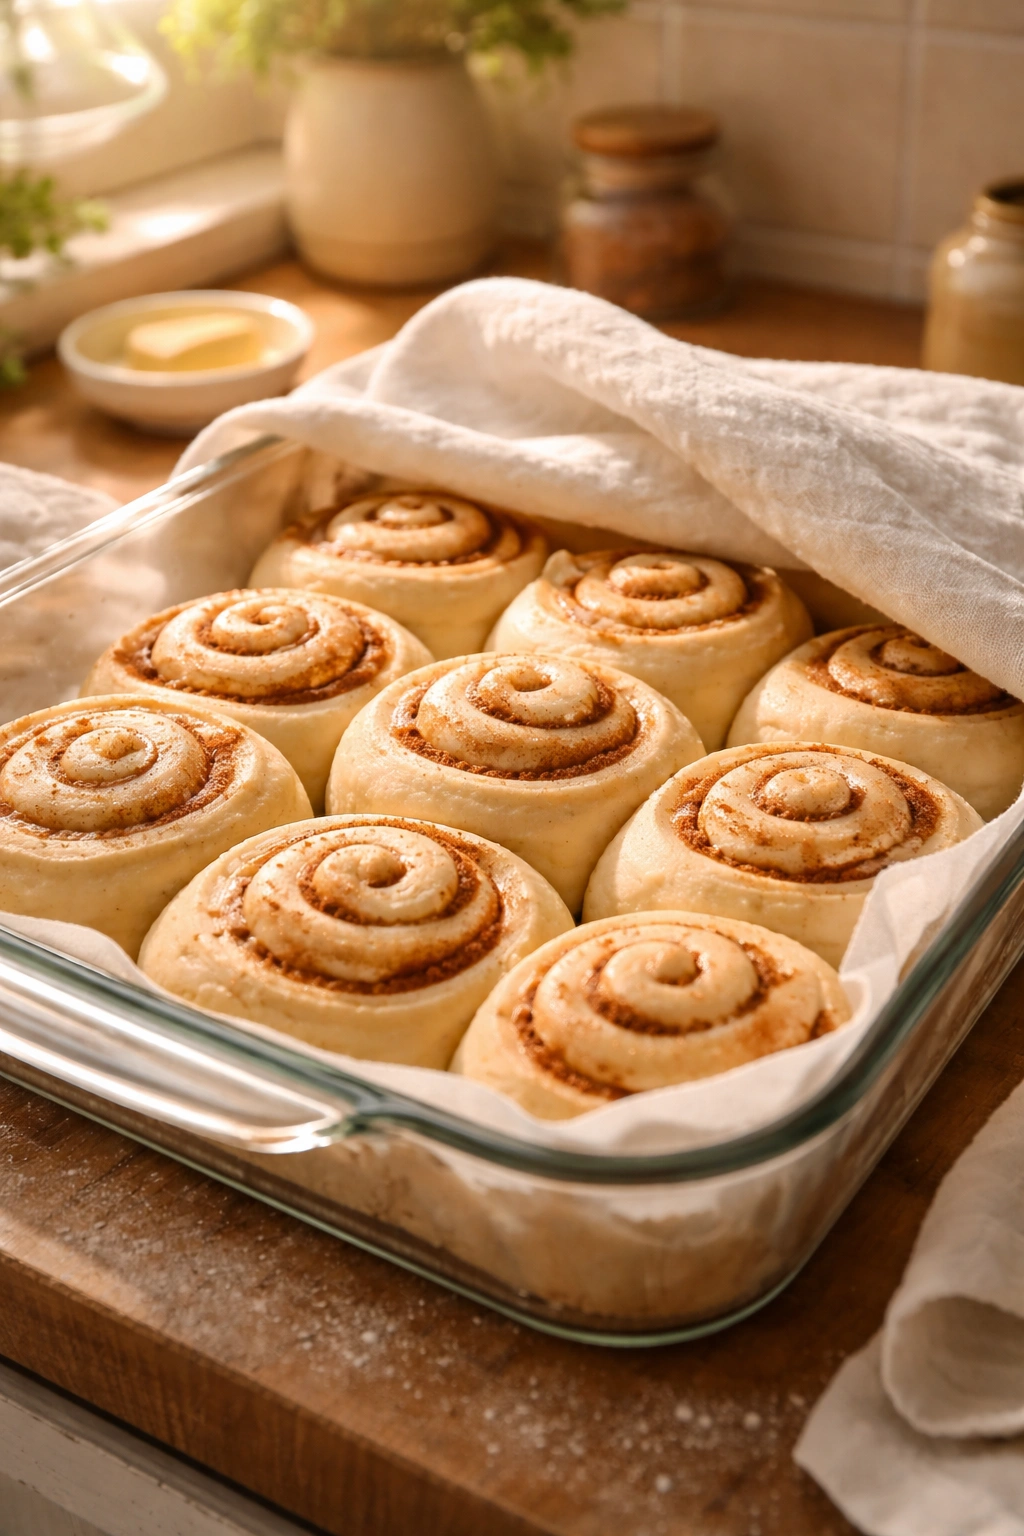
Cover the pan loosely with plastic wrap, a kitchen towel, or aluminum foil. You want the rolls to be able to rise without drying out, but you don’t want the cover to be so tight that it restricts them. Let them sit in a warm, draft-free place until they’ve nearly doubled in size. This usually takes about 45 minutes to an hour, depending on your kitchen temperature. The ideal proofing temperature is around 75°F—if your kitchen is cooler, the rise will take longer. A clever trick is to turn your oven on to its lowest setting for a couple of minutes, then turn it off and place your covered pan inside with the door cracked open. The residual warmth creates the perfect environment for rising.
Don’t let the rolls over-proof. This is a common mistake, and it leads to rolls that bake up airy and somewhat gummy rather than dense and gooey. You want them nearly doubled, not completely doubled. If you poke a risen roll gently and it springs back immediately, it still needs more time. If you poke it and the indent holds, they’re ready for the oven. A useful trick is to take a photo of your pan before the rolls start rising, then compare it to the rolls as they proof—when they’ve roughly doubled, they’re ready to bake.
Some recipes call for pouring heavy cream over the rolls before baking, which creates an extra-gooey, caramel-sauce-like base. If you’re doing this, warm the cream slightly (just enough to take the chill off—it should be warm to the touch, not hot) and pour it over the risen rolls right before they go into the oven. This doesn’t alter the baking time but does add richness and moisture that some bakers absolutely swear by. It’s an optional step, but if you want bakery-quality gooiness, it’s worth doing.
Baking for Golden, Gooey Perfection
Your oven should be preheated to 350°F for standard cinnamon rolls, though some recipes use 375°F. The difference is subtle—the higher temperature produces slightly darker, crispier edges, while 350°F keeps everything softer throughout. Use an oven thermometer to verify your oven’s actual temperature, because many ovens run hotter or cooler than their dial suggests. A cinnamon roll recipe is sensitive enough that a 25-degree difference can affect your results.
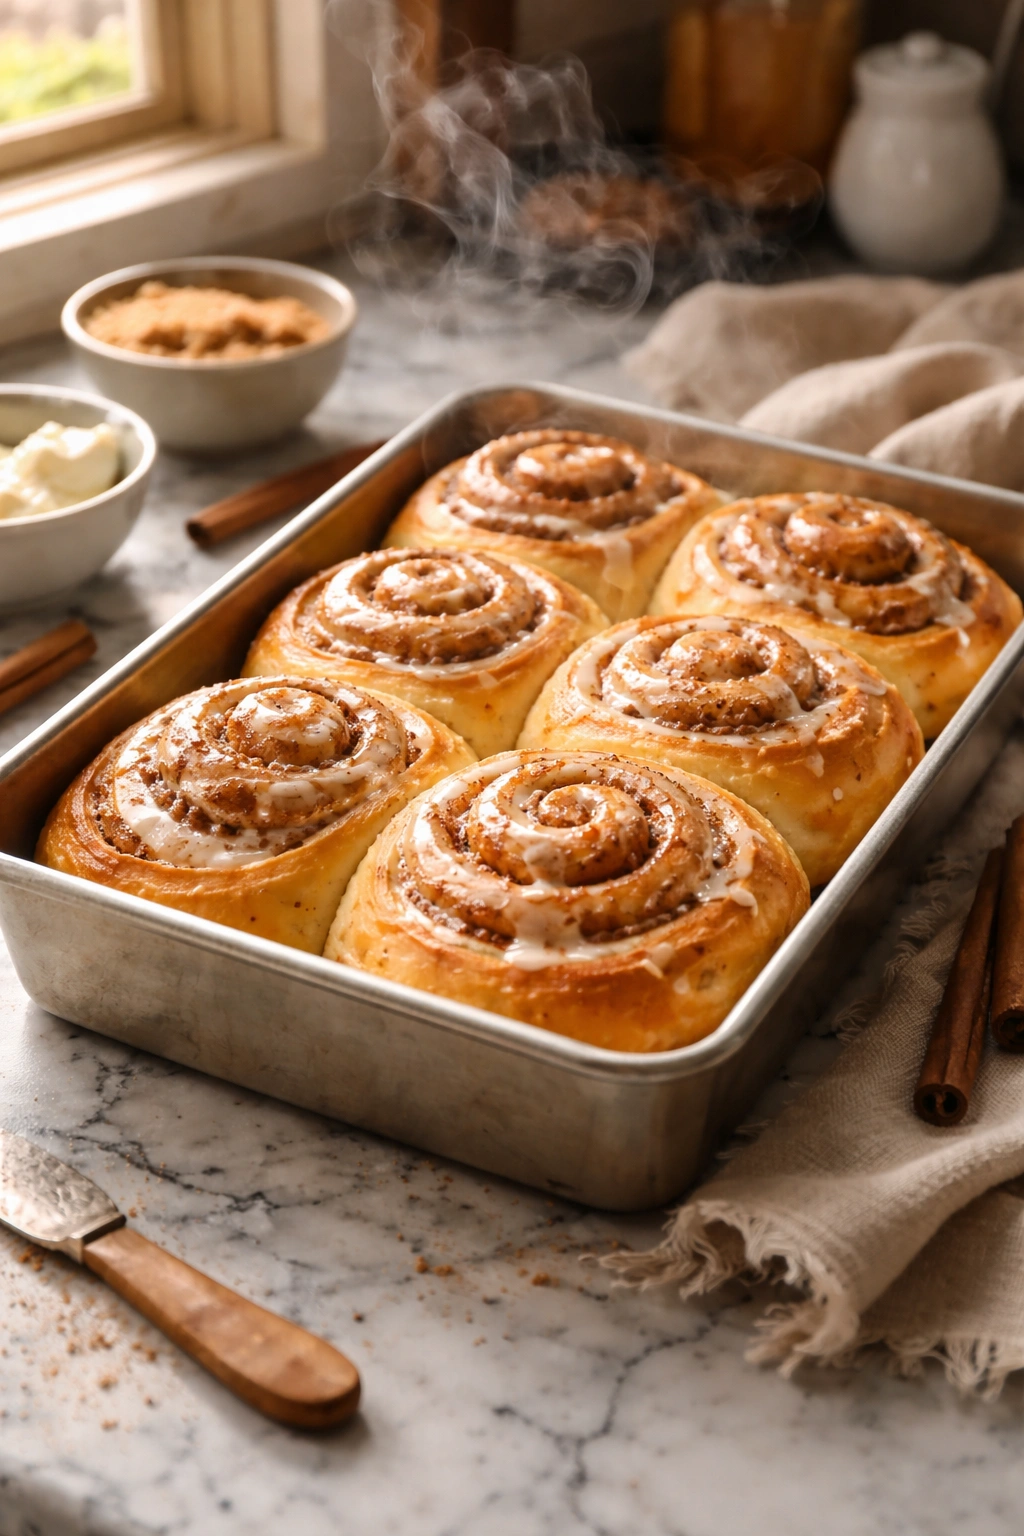
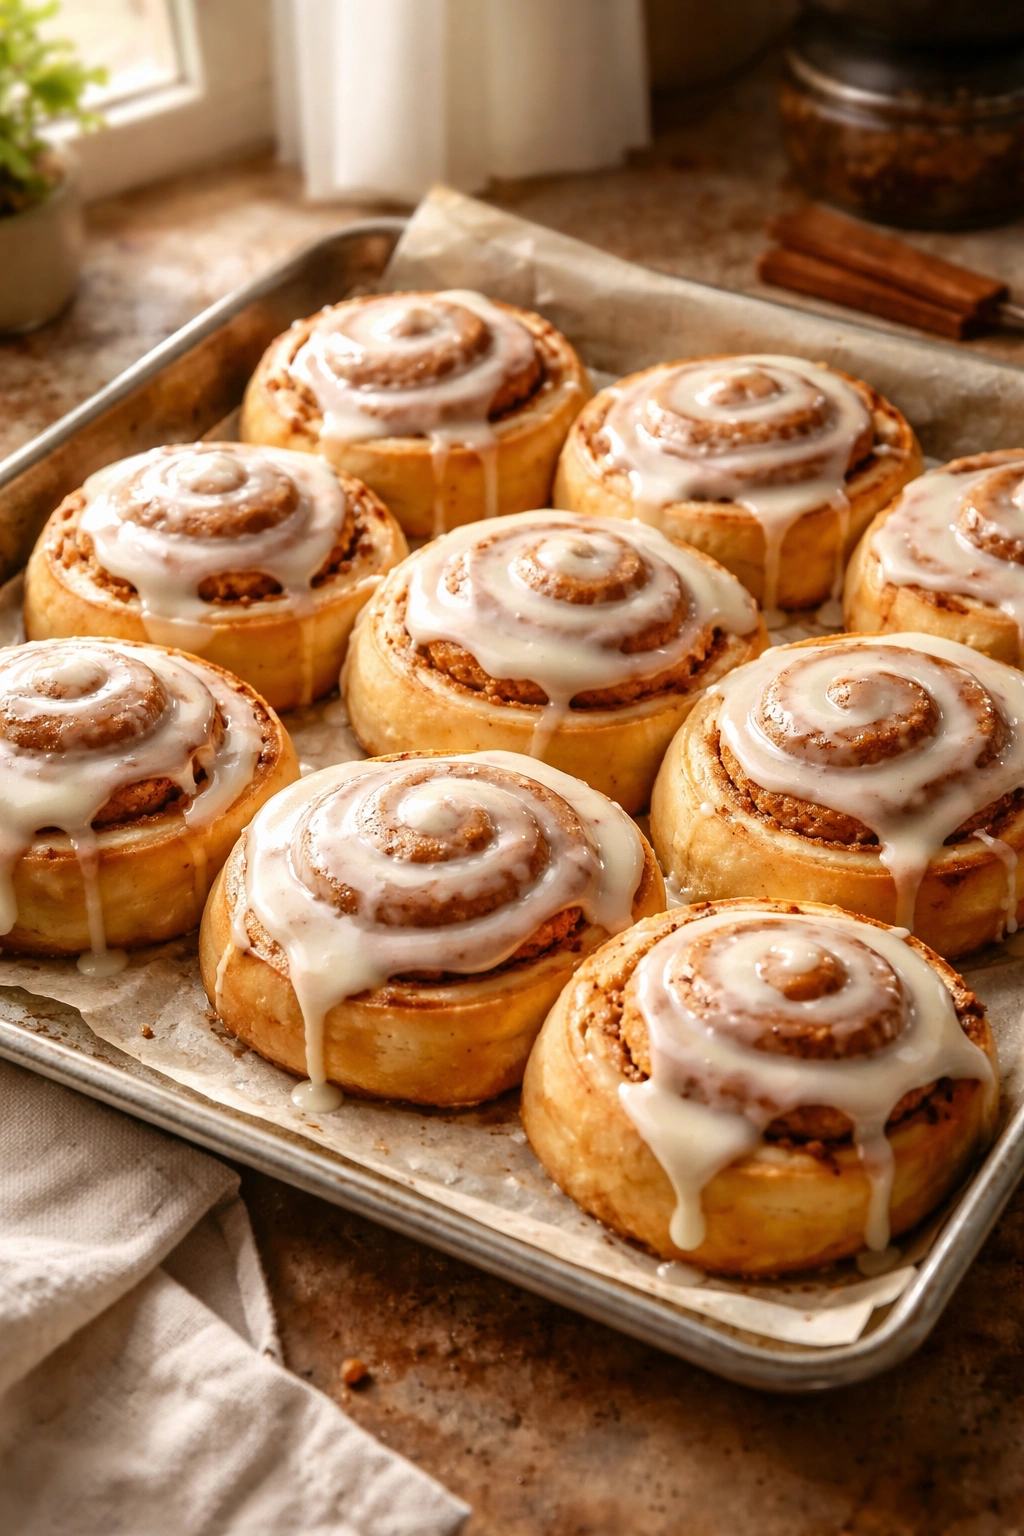
Bake for 20-25 minutes, until the rolls are lightly golden brown on top. You’re looking for color on the surface, but you don’t want them dark brown or crispy. The interior of the rolls should still be set but not dry. If your oven tends to brown things quickly, you can loosely tent the pan with aluminum foil halfway through baking to prevent over-browning while the insides finish cooking.
The internal temperature of a perfectly baked cinnamon roll is around 190-195°F when you use an instant-read thermometer in the center roll. This takes the guesswork out of doneness and ensures that your rolls are baked through without being overdone. Pull the pan out of the oven and let it cool on a wire rack for just a minute or two before frosting—you want the rolls to be hot enough that the frosting melts into all the layers, but not so hot that the frosting slides right off.
Cream Cheese Frosting That Soaks Into Every Swirl
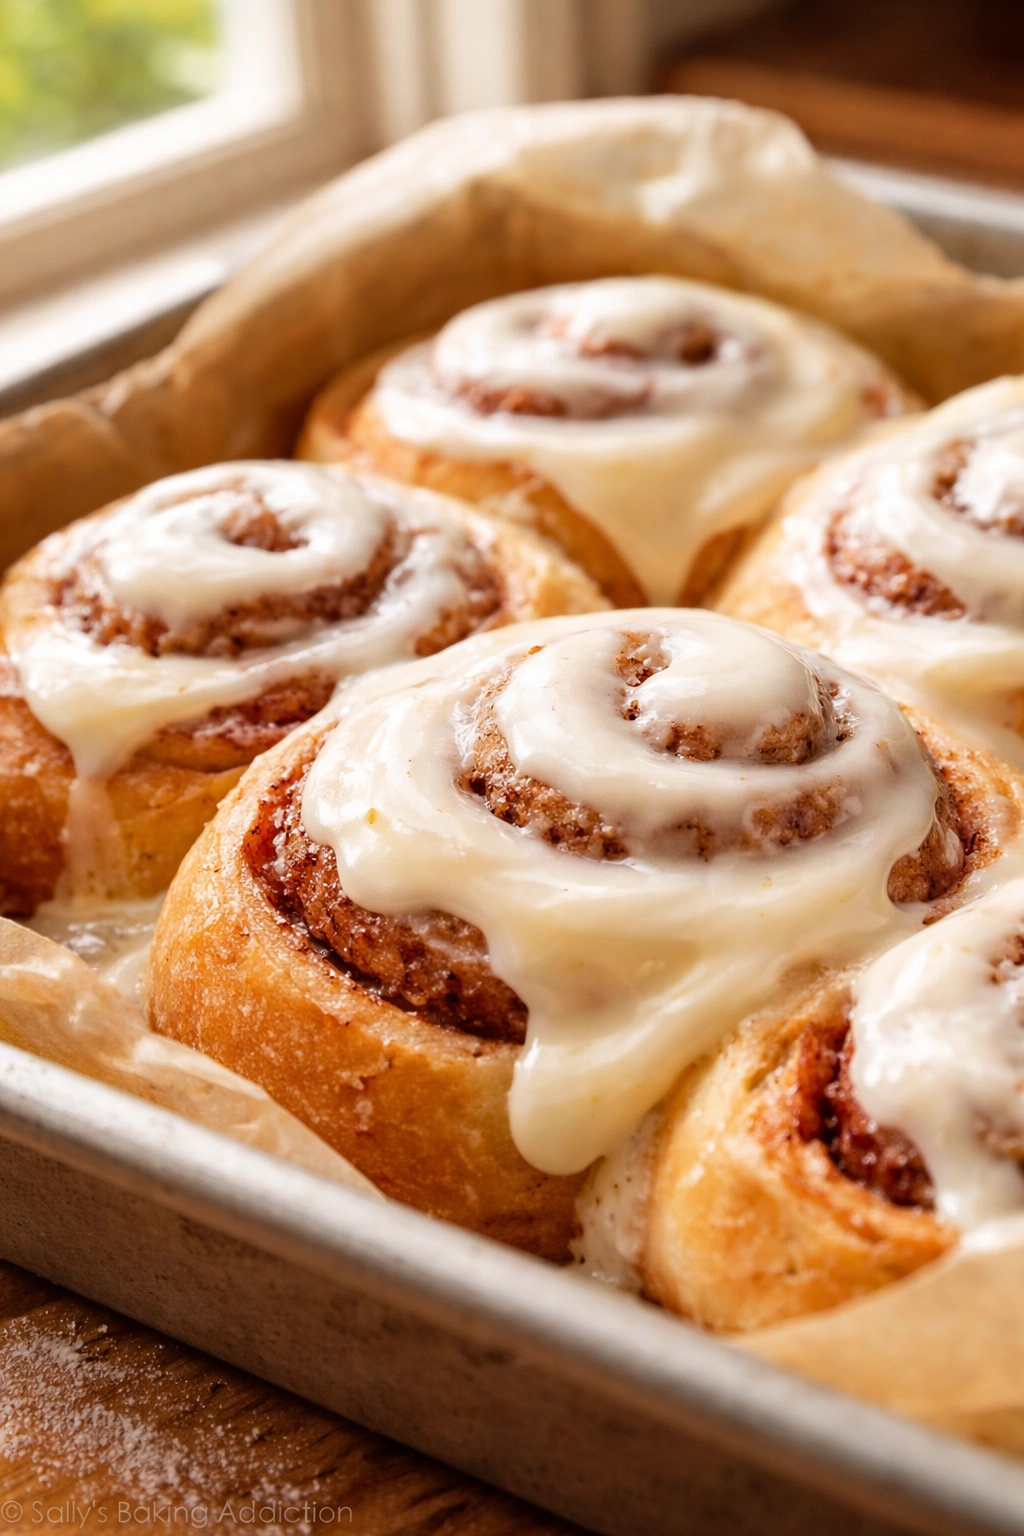
This is the final touch that transforms good cinnamon rolls into unforgettable ones. The frosting should be silky smooth and should soak into every swirl and crevice of the warm rolls.
You’ll need softened cream cheese, softened butter, powdered sugar, and a touch of vanilla extract. Beat the cream cheese and butter together on medium speed until they’re completely smooth and combined, with no lumps or streaks of either ingredient visible. This takes about 1-2 minutes with an electric mixer. Then sift in your powdered sugar (sifting prevents lumps) and beat on low speed until everything is combined and smooth. Add vanilla extract and a tiny pinch of salt, which enhances the sweetness and balances the tang of the cream cheese.
The texture of the frosting matters. Some people like it thick and spreadable like actual frosting, piling it on top of the warm rolls. Others prefer a thinner glaze that soaks into the cinnamon swirls. If you want a thinner consistency, add a tablespoon or two of milk and whisk until you reach the desired thickness. Spread or drizzle the frosting over the warm rolls immediately after they come out of the oven, so it melts into all the layers. Some bakers apply it in two stages: a third of the frosting on the hot rolls right out of the oven, then the rest after the rolls have cooled for a few minutes. This creates both soaked-in sweetness and a pretty frosting layer on top.
If you prefer, you can use a simpler vanilla or coffee glaze instead of cream cheese frosting. Just whisk together powdered sugar, a little milk or strong brewed coffee, and vanilla extract until smooth. It’s faster and less rich, but still delicious.
Make-Ahead Options: Overnight and Freezer Methods
One of the best things about cinnamon rolls is how amenable they are to advance preparation. You can shape and freeze them, or prepare them the night before and bake fresh rolls for breakfast.
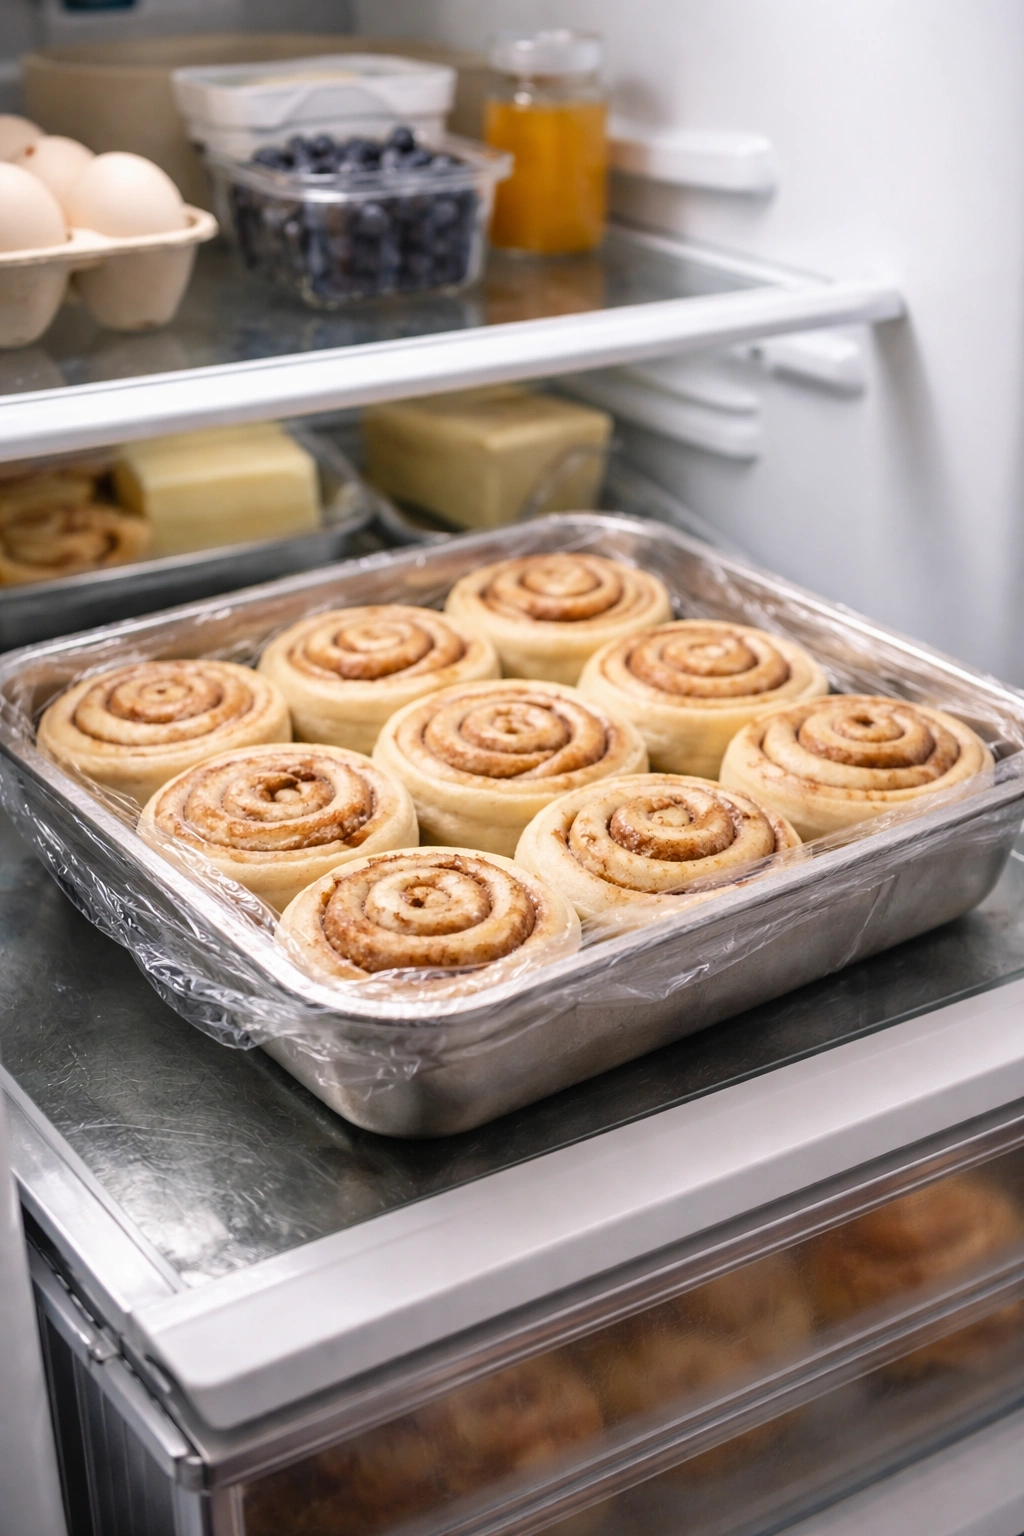
To make overnight rolls, prepare your dough through the kneading stage, let it have its first rise, then shape and cut the rolls as usual. Place them in a greased baking pan, cover them loosely with plastic wrap, and refrigerate overnight (or up to 18 hours). The next morning, remove the pan from the fridge and let the rolls come to room temperature—this usually takes 45 minutes to an hour, depending on your kitchen. Once they’re at room temperature, uncover them, preheat your oven, and bake as directed. The long, slow rise in the refrigerator actually deepens the flavor, as the yeast ferments slowly in the cold, and active dry yeast is particularly well-suited to overnight preparation.
To freeze unbaked rolls, shape and cut them as usual, then place them several inches apart on a baking sheet and freeze until solid (about 2 hours). Transfer the frozen rolls to a resealable freezer bag and store for up to 3 months. When you’re ready to bake, place them in a greased baking pan at room temperature and let them thaw and rise for about 2-3 hours (they’ll take longer than fresh rolls because they start out cold). Once they’ve risen to nearly double their size, bake as directed.
You can also freeze fully baked rolls. Let them cool completely, then wrap them individually in plastic wrap and place them in a freezer bag. When you want to eat them, thaw at room temperature for a couple of hours, then reheat briefly in the microwave or oven until warm. The frosting may melt and slide a bit when reheating, but that just means extra gooey cinnamon rolls.
Troubleshooting Dense or Under-Risen Rolls
Even with careful attention to the recipe, sometimes rolls don’t come out as fluffy as you’d hoped. Understanding what went wrong helps you fix it next time.
If your rolls are dense and heavy, too much flour was likely added during kneading. This is the #1 culprit. Remember that the dough should be soft and slightly tacky—if it’s stiff and firm, you’ve added too much flour. Next time, add flour more gradually and resist the urge to add more just because the dough feels sticky. A slightly sticky dough that you have to flour your work surface for is infinitely better than a stiff dough that produces heavy rolls.
If your rolls didn’t rise much at all, the yeast may not have been activated. Check your yeast’s expiration date. Check that your milk wasn’t too hot (above 115°F) when you added the yeast. Make sure your kitchen isn’t too cold—a chilly kitchen will slow rising dramatically. If it’s winter or your house is naturally cool, that warm oven trick (turning it on low, then off, then using it as a proofing box) is your friend.
If the rolls rose unevenly or some are much taller than others, your pan may have been too small or the rolls were packed too tightly. Rolls need space to expand. Make sure you’re using a 9-by-13-inch pan and not crowding more than 12 rolls into it. If you prefer larger rolls, make fewer of them and give them more room.
If the rolls are gummy in the center even though they look golden on top, they’re underbaked. Bake them a few minutes longer next time, or lower your oven temperature by 25°F so they bake more gently throughout. You can also check internal temperature with a thermometer to ensure they’ve reached 190°F.
Storage and Reheating Your Baked Cinnamon Rolls
Freshly baked cinnamon rolls are best eaten warm, but they store beautifully for several days and reheat wonderfully.
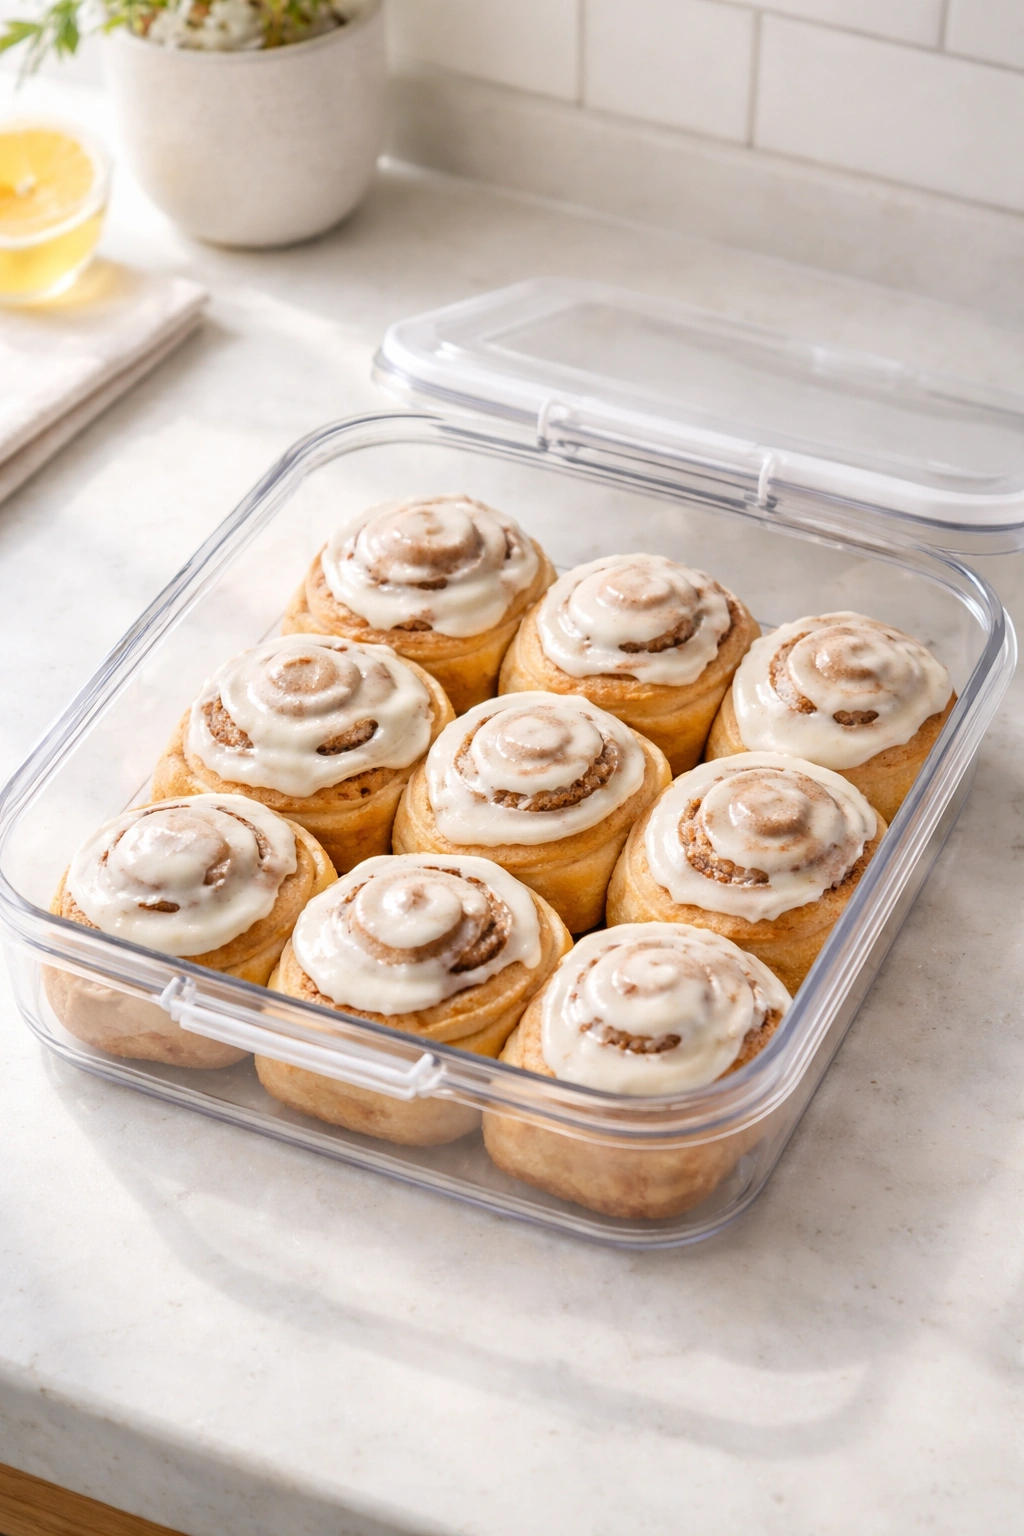
At room temperature, frosted cinnamon rolls will stay fresh and soft for about 1-2 days in an airtight container. The frosting may firm up a bit, but the rolls themselves remain tender. If you eat them cold straight from the container, they’re still delicious, though not quite as magical as warm rolls.
In the refrigerator, they’ll keep for up to 5 days in an airtight container. Cold rolls are firmer than room-temperature ones, which some people actually prefer because they’re easier to eat without the frosting dripping everywhere. To warm them back up, wrap a roll loosely in foil and heat it in a 350°F oven for about 5-7 minutes, or microwave a single roll for 15-20 seconds until warm throughout. The frosting will soften as the roll warms, creating that just-baked texture again.
In the freezer, fully baked and frosted rolls will keep for up to 3 months. Wrap them individually in plastic wrap before placing them in a freezer bag to prevent freezer burn. Thaw at room temperature for 2-3 hours, then reheat gently to restore the soft, warm quality.
Flavor Variations to Customize Your Rolls
Once you’ve mastered the basic recipe, variations are endlessly fun to explore.
Brown butter cinnamon rolls add richness and a subtle nuttiness. Brown the butter (the amount used in the dough) in a small saucepan over medium heat, watching until it turns golden and fragrant. Let it cool before adding it to the dough. The brown bits add depth that regular melted butter can’t match.
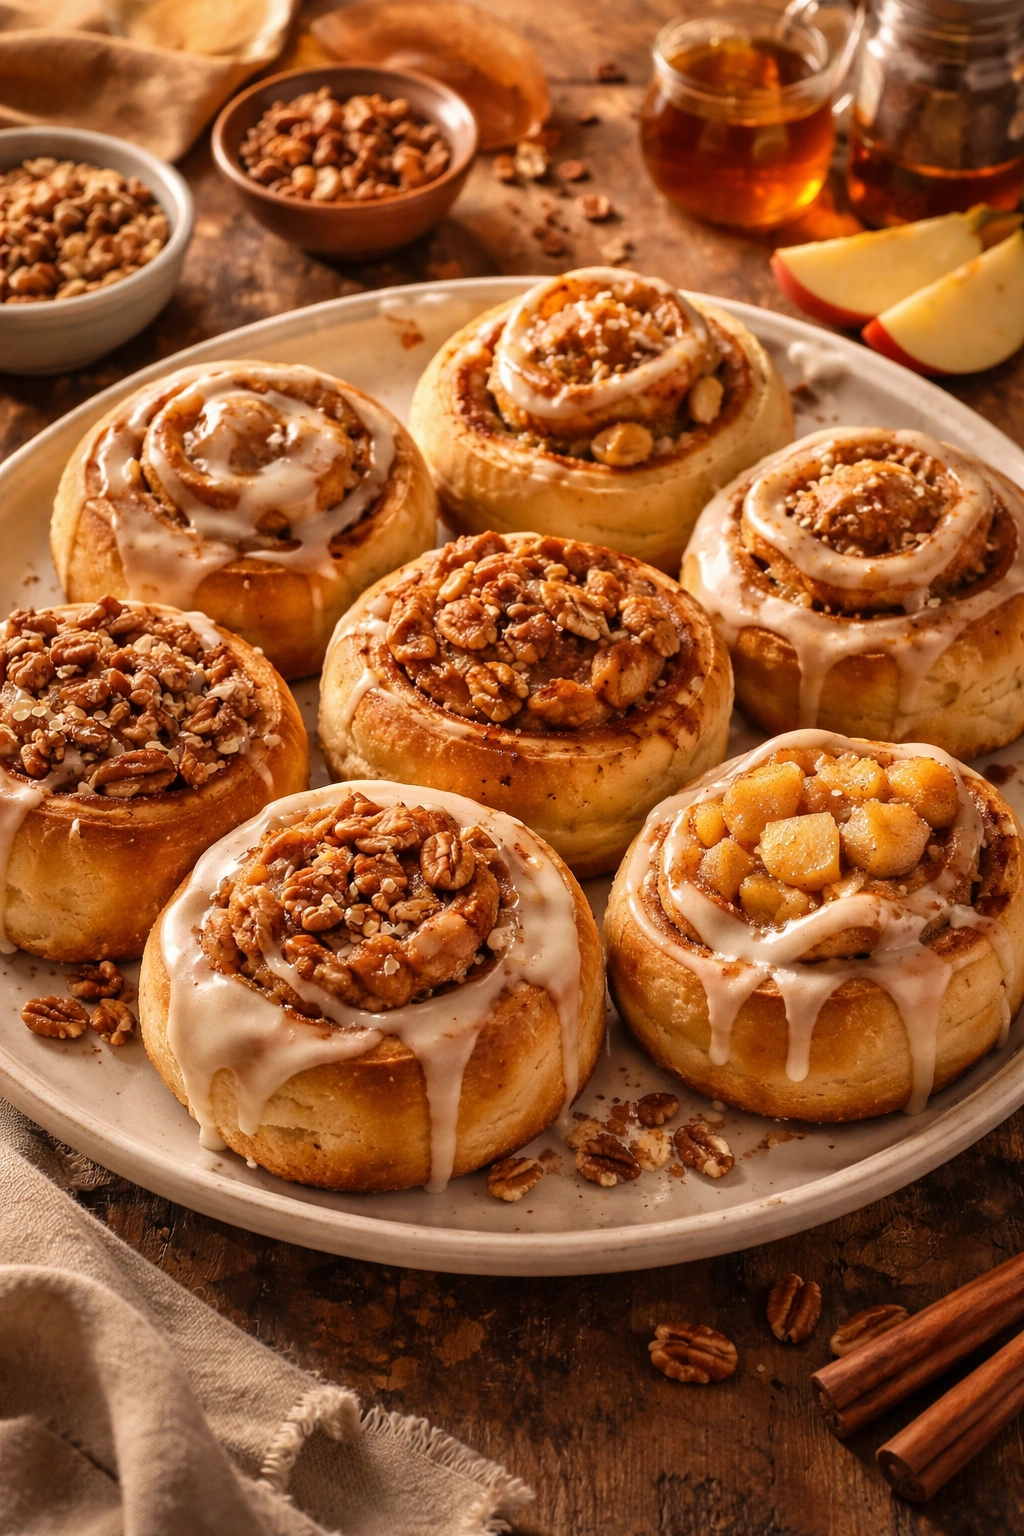
Add chopped pecans or walnuts to your filling for texture and extra flavor. Distribute them evenly over the brown sugar mixture before rolling.
For a cream cheese and cinnamon filling, mix softened cream cheese with brown sugar and cinnamon instead of using just butter. This creates a richer, tangier filling.
Maple cinnamon rolls use maple extract or a touch of real maple syrup in both the dough and the filling. Use maple syrup to replace some of the granulated sugar in the dough, and add a splash of maple extract to the filling.
Apple pie cinnamon rolls add diced apple that’s been tossed with a bit of sugar and cinnamon to the filling. The apple adds moisture and a slight tartness that balances the sweetness.
Pumpkin spice rolls replace a small portion of the milk with pumpkin puree and add pumpkin pie spice to the dough, along with regular cinnamon in the filling.
Chocolate-filled rolls use cocoa powder mixed with brown sugar and a tiny pinch of cinnamon instead of (or in addition to) the regular cinnamon filling.
Yield: Makes 12 rolls | Serves 6 to 12
Prep Time: 30 minutes
Cook Time: 23 minutes
Rise Time: 2 hours 30 minutes (includes first and second rise)
Total Time: 3 hours 23 minutes active + rise time
Difficulty: Beginner to Intermediate — The recipe is straightforward and requires no special skills, but success depends on understanding yeast behavior and being patient with the rising stages.
Easy Homemade Cinnamon Rolls
For the Dough:
- 1 cup whole milk, warmed to 105–115°F (240 ml)
- 2¼ teaspoons instant dry yeast (one standard packet)
- 5 tablespoons granulated sugar (63g)
- 4⅔ cups bread flour, spooned and leveled (560g), plus more for dusting
- ½ cup unsalted butter, melted (113g)
- 1 large egg, at room temperature
- 1 tablespoon pure vanilla extract
- 1½ teaspoons fine sea salt
- ½ teaspoon ground cinnamon
For the Filling:
- 6 tablespoons unsalted butter, softened to room temperature (85g)
- ½ cup packed light or dark brown sugar (110g)
- 1½ tablespoons ground cinnamon
For the Cream Cheese Frosting:
- 4 ounces full-fat cream cheese, softened to room temperature (113g)
- 2 tablespoons unsalted butter, softened to room temperature (28g)
- ⅔ cup powdered sugar, sifted (80g)
- 1 teaspoon pure vanilla extract
- Tiny pinch of fine sea salt
Optional:
- ½ cup heavy cream, warmed slightly (for pouring over rolls before baking)
Prepare the Dough:
-
In a large mixing bowl or the bowl of a stand mixer, combine the warm milk, yeast, and granulated sugar. Stir gently to combine and set aside for about 1 minute. The yeast will begin to dissolve into the warm liquid.
Advertisements -
Add the melted butter, egg, and vanilla extract to the milk mixture. Stir to combine.
-
Add the salt, cinnamon, and bread flour (start with 4½ cups and hold back the remaining ¼ cup). If using a stand mixer, attach the dough hook to the mixer.
-
Mix on low speed until the flour is barely combined and no dry flour streaks remain. The dough will look shaggy and rough at this stage.
-
Let the dough rest for 5 minutes. This allows the flour to fully hydrate and makes kneading much easier. Do not skip this step.
-
Increase the mixer speed to medium-low and knead the dough for 8–10 minutes, adding the reserved flour only if absolutely necessary. The dough should be soft, slightly tacky, and elastic — it should pull away from the sides of the bowl but may stick slightly to the bottom, which is completely normal and fine. Do NOT add flour just because the dough feels sticky. A soft, tacky dough produces softer rolls; a stiff dough produces dense rolls.
-
If kneading by hand, transfer the dough to a lightly floured work surface and knead for 10–12 minutes by hand, using a pushing-and-folding motion. The dough should reach the same texture described above.
-
Lightly grease a large bowl with cooking spray or oil. Transfer the dough to the greased bowl, turning it to coat all sides lightly.
-
Cover the bowl loosely with a clean kitchen towel or plastic wrap. Place it in a warm, draft-free location (about 75°F is ideal).
First Rise:
- Allow the dough to rise until nearly doubled in size — approximately 1½ to 2 hours. Do not allow it to completely double; you’re looking for roughly 50% increase in volume. To check, gently poke the dough with your finger. If the indent springs back immediately, it needs more time. If the indent holds slightly, it’s ready.
Prepare the Pan and Filling:
-
While the dough is rising, lightly grease a 9×13-inch baking pan with softened butter or cooking spray. Set aside.
-
In a small bowl, stir together the softened butter (for the filling), brown sugar, and cinnamon until well combined and uniform. Set aside.
Shape the Rolls:
-
Generously dust a clean work surface with flour. Turn the risen dough out onto this surface and dust the top with additional flour as needed. Using a rolling pin, gently roll and stretch the dough into a rough 12×24-inch rectangle. The dough may resist a bit — if it does, let it rest for a minute or two to allow the gluten to relax.
-
Using an offset spatula or the back of a spoon, spread the cinnamon-sugar butter mixture evenly over the entire dough rectangle, leaving approximately a ½-inch border along one of the long edges (this unbuttered edge will help seal the roll).
-
Gently rub the brown sugar into the softened butter using your fingertips — this helps the filling adhere to the dough and prevents it from sliding around as you roll.
-
Starting at the long edge opposite the unbuttered border, roll the dough up tightly into a log, rolling away from you. Seal the edge by pressing gently where the dough overlaps.
-
Using a very sharp serrated knife (or unflavored dental floss for the cleanest cuts), mark 12 even portions on the dough log — approximately 1½ inches wide each. Cut carefully at each mark. If using a serrated knife, use long, gentle sawing motions rather than pressing straight down, to avoid compressing the dough. If using dental floss, slip it under the dough at your mark, bring both ends up and cross them over the top, then pull sharply and quickly in opposite directions until the floss cuts cleanly through.
-
Place each roll cut-side down in the prepared baking pan, spacing them evenly so they’re not quite touching. The rolls need a little room to rise without crowding.
Second Rise:
-
Cover the pan loosely with plastic wrap, a kitchen towel, or aluminum foil. Place in a warm, draft-free location and allow the rolls to rise until nearly doubled in size — approximately 45 minutes to 1 hour. As with the first rise, you’re looking for roughly doubled volume, not completely doubled. A gentle poke should leave an indent that holds slightly.
-
Optional: While the rolls are rising, warm the heavy cream in a small saucepan over low heat or in the microwave until it’s just warm to the touch (not hot). Warming the cream ensures the rolls won’t experience a temperature shock, which could interrupt their rising.
Bake the Rolls:
-
When the rolls are nearly risen, preheat your oven to 350°F with the rack positioned in the center.
-
If using the heavy cream, carefully pour it over the risen rolls right before baking, allowing it to soak down into and around the rolls. This creates an extra-gooey base and rich caramel-like sauce.
-
Uncover the pan and bake for 20–25 minutes, until the rolls are lightly golden brown on top and the centers are set. If the rolls begin to brown too quickly, loosely tent the pan with aluminum foil and continue baking. For precise doneness, use an instant-read thermometer — the internal temperature of a perfectly baked roll should be approximately 190–195°F in the center roll.
Make the Frosting:
-
While the rolls are baking, prepare the frosting. In a medium mixing bowl, using an electric mixer on medium speed, beat the softened cream cheese until smooth and creamy — about 1 minute.
-
Add the softened butter and beat until smooth and fully combined with the cream cheese — about 1 minute more.
-
Reduce the mixer speed to low. Sift in the powdered sugar and add the vanilla extract and salt. Beat until everything is combined and smooth. For a thinner glaze consistency, add 1–2 tablespoons of milk and beat until smooth. For a thicker frosting, use as is.
Advertisements
Finish and Serve:
-
Remove the rolls from the oven and place the pan on a wire cooling rack.
-
Frost the rolls while they are still hot. Spread or drizzle the cream cheese frosting generously over the warm cinnamon rolls, allowing it to soak into all the layers and swirls. Some bakers prefer to apply the frosting in two stages: one-third immediately while the rolls are piping hot (so it melts into the layers), then the remaining frosting after a few minutes of cooling (so it sets on top as well). Both approaches work beautifully.
-
Allow the rolls to cool for a few minutes before serving. They are best eaten warm, while the dough is still tender and the frosting is still soft.
Final Thoughts

Making soft homemade cinnamon rolls from scratch is one of those baking projects that seems more complicated than it actually is. Once you understand the few key principles—proper yeast activation, gentle handling of the dough, patience with the rises, and the importance of not adding too much flour—you’ll find yourself making these regularly. They’re forgiving enough for beginners but interesting enough for experienced bakers to keep refining and customizing.
The real magic happens when you pull that pan from the oven and the aroma hits you—that’s when you’ll know every minute was worth it. Your kitchen will smell like a professional bakery, and you’ll have created something that’s infinitely better than anything you could buy. That’s the point when your family gathers, asks if there are more, and starts planning when you’ll make them again. Make a double batch next time so you have extras to freeze, because once people taste these rolls, they’ll be requesting them for every special occasion.