There’s something deeply satisfying about a thick, hearty bowl of soup that sticks to your ribs—the kind you can practically eat with a fork. This thick and hearty corn and bean soup delivers exactly that experience. It’s the sort of dinner that feels like comfort wrapped in warmth, yet comes together in under an hour with ingredients you likely already have in your pantry. The magic happens when creamy beans meet sweet corn kernels in a richly seasoned broth that clings to every spoonful rather than swimming around your bowl.
What makes this soup so special isn’t just its satisfying texture or the way it warms you from the inside out. It’s that this dish works whether you’re feeding a busy family on a weeknight, prepping meals for the week ahead, or looking for something wholesome that doesn’t require hours of tending. One pot, straightforward steps, and a collection of humble ingredients transform into something that tastes far more complicated than it actually is. Even better, it tastes better the next day when flavors have melded together, making it an ideal candidate for batch cooking.
Why Corn and Beans Work So Well Together
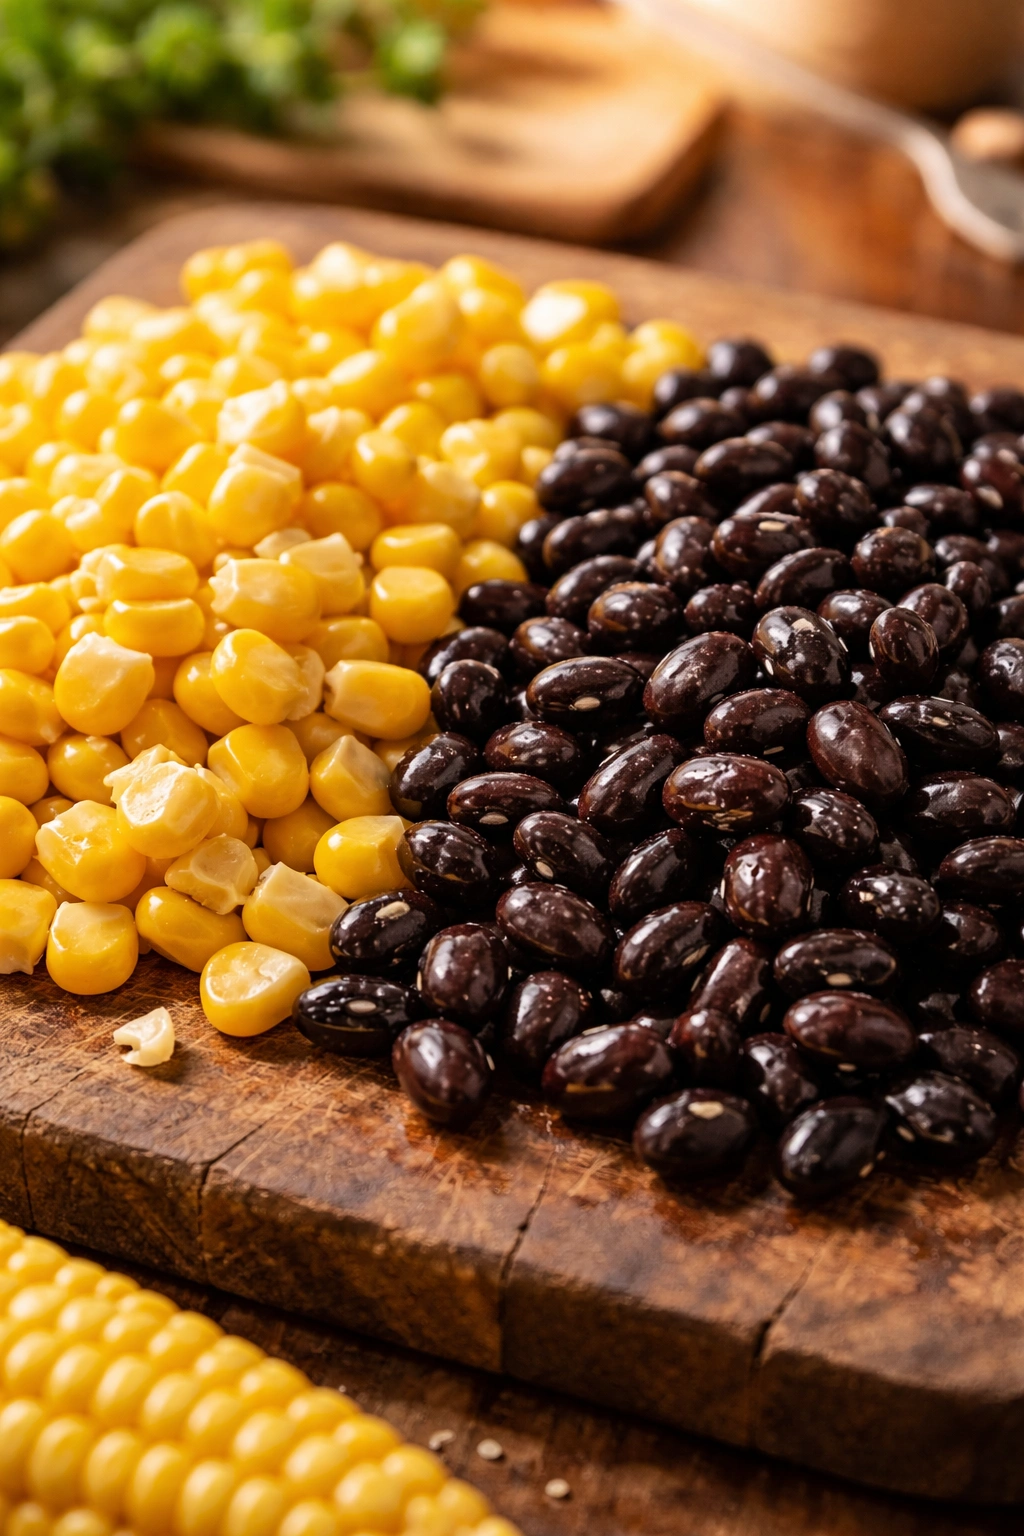
The pairing of corn and beans is one of nature’s great culinary combinations, and there’s genuine reason for this beyond just flavor. Beans bring protein and deep, earthy notes to a dish, while corn adds sweetness, brightness, and texture. Together, they create a sense of fullness and satisfaction that keeps you genuinely satisfied for hours afterward.
Black beans are the traditional choice for this soup, though kidney beans, pinto beans, or even white beans work beautifully depending on what you have available. The bean you choose will subtly shift the soup’s character—black beans create a more robust flavor, while cannellini or white beans provide a creamier mouthfeel. Each variety contributes its own nutritional profile, packed with fiber, plant-based protein, and essential minerals like magnesium and iron.
Corn brings more than just sweetness to the table. When you combine fresh, frozen, or canned corn with beans, the starch from the corn naturally helps thicken the soup without requiring a roux or flour. This is what transforms a thin broth into the thick, spoon-coating consistency that makes this soup feel so satisfying. The natural sugars in corn also help balance the spices and create depth without adding any actual sugar to the pot.
The Perfect Soup for Meal Prep

One of the best reasons to make this soup is its complete practicality for feeding a household throughout the week. This soup actually improves overnight—the flavors continue melding together as the soup sits in the refrigerator, making day-two bowls taste even better than the first serving. This characteristic makes it one of the most forgiving soups to cook in large batches.
Unlike creamy soups that can become grainy when reheated, this corn and bean soup maintains its texture beautifully through multiple warming cycles. Freeze individual portions in airtight containers or mason jars, and you’ll have quick dinners ready whenever you need them. Parents often find that making a large pot on Sunday afternoon provides multiple weeknight solutions when cooking time is tight.
The soup also adapts well to different eating schedules. You can have it on the stove simmering while you attend to other tasks, since it doesn’t demand constant attention. The longer it simmers gently, the more the flavors deepen, so you’re not racing against a clock—you’re actually rewarded for patience.
Understanding Bean Textures for the Ideal Thickness
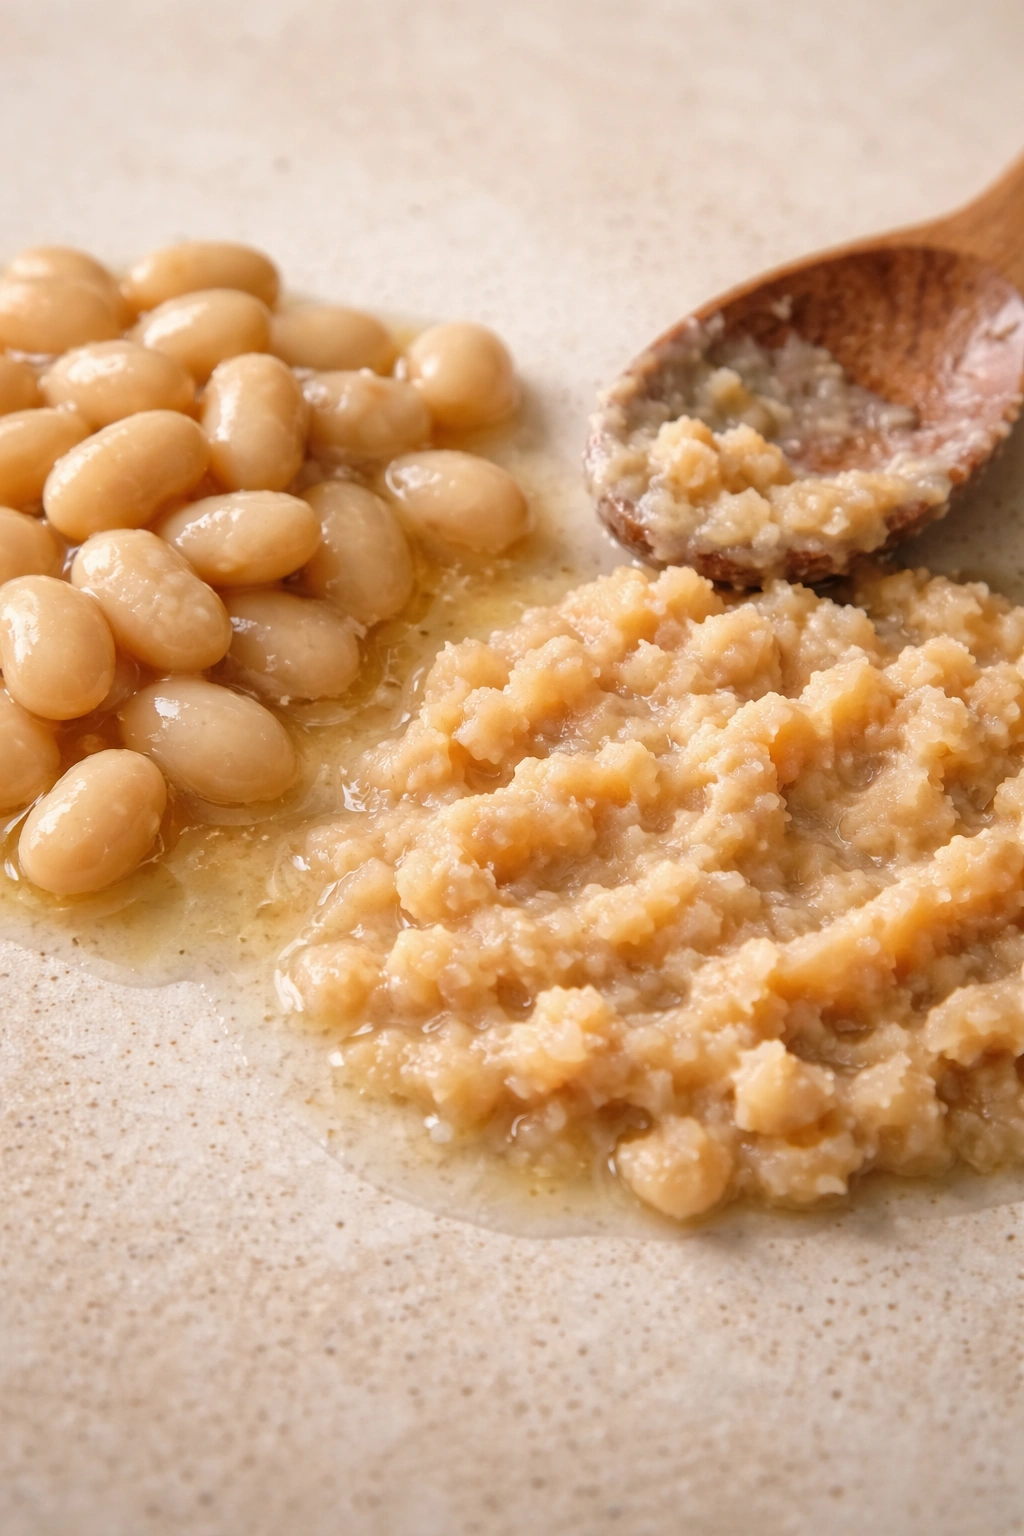
The real secret to achieving that ideal thick, hearty consistency lies in understanding what happens to beans during cooking. When beans cook, their starches begin breaking down and dissolving into the cooking liquid, naturally thickening it. This is why canned beans work so well—they’re already fully cooked, and you simply need to warm them and let them release their starch into the broth.
If you’re using dried beans, you’ll want to soak them first to reduce cooking time and help with digestibility. However, for this recipe, canned beans eliminate the soaking step entirely while still delivering the desired thickness. The key is not draining all the liquid from the canned beans—reserve about half the liquid from each can. This starchy liquid becomes your soup’s thickening agent, creating that spoon-coating consistency naturally without any flour or cream.
Some home cooks prefer to lightly mash a portion of the beans after cooking. Using a potato masher or the back of a spoon, gently crush perhaps one-quarter to one-third of the beans once they’re fully heated through. This releases more of their natural starches into the broth while keeping enough whole beans for texture. You’ll end up with a soup that’s thick enough to coat the spoon yet still has distinct beans you can identify with each bite.
How to Build Layers of Flavor
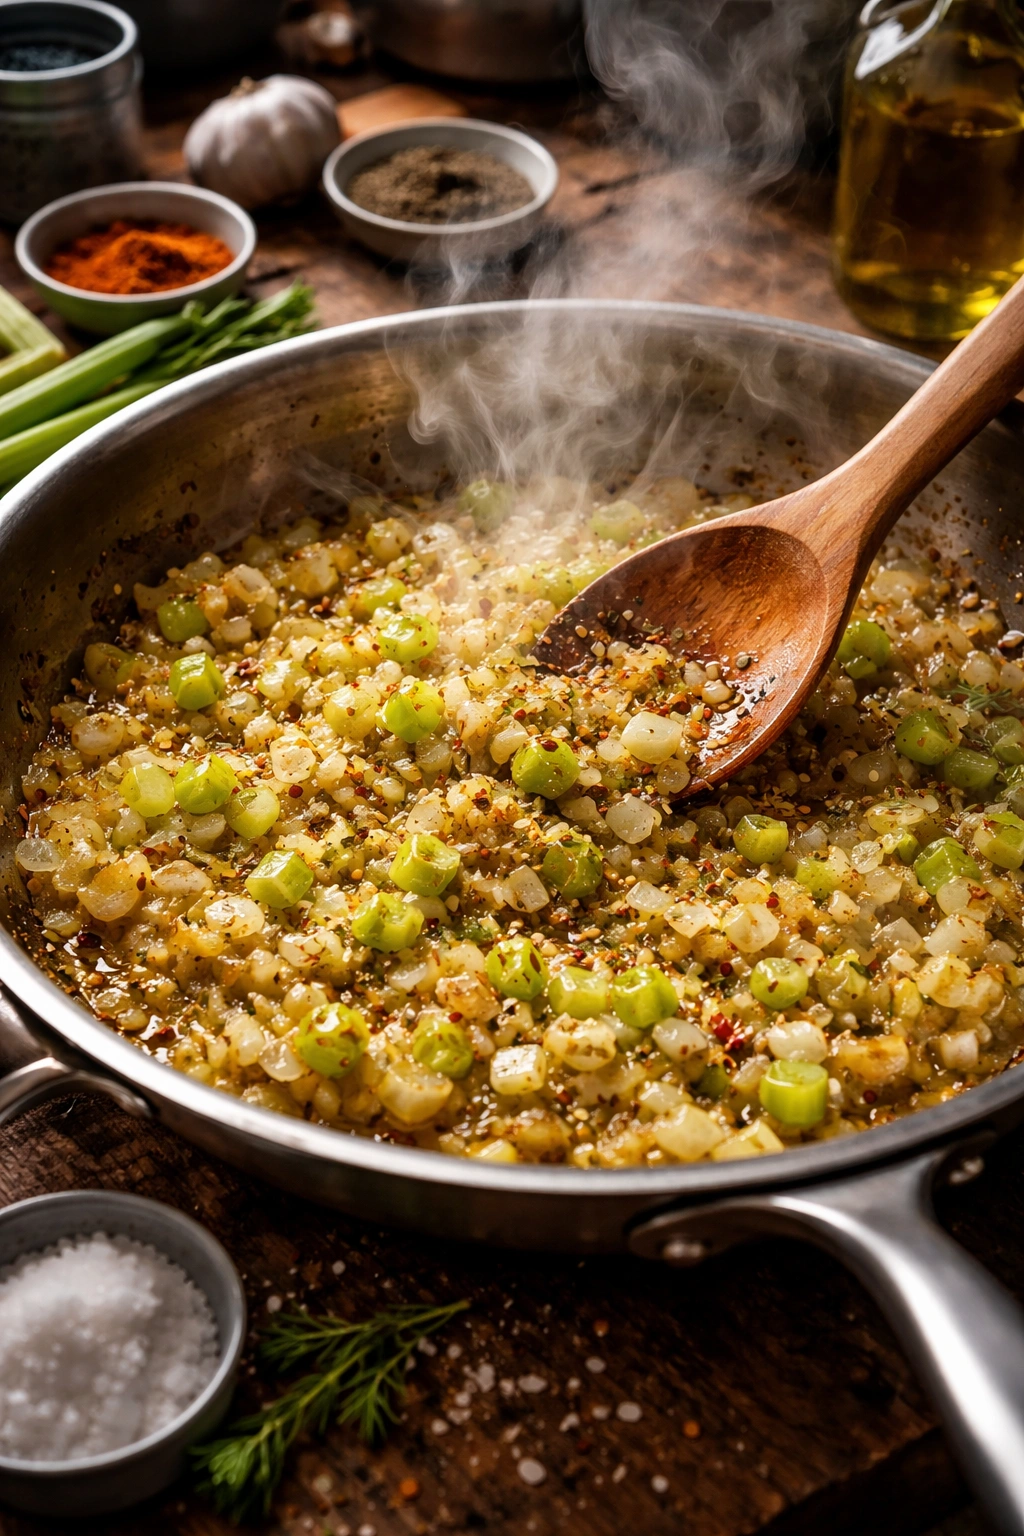
The foundation of any truly satisfying soup begins with properly sautéed aromatic vegetables. Don’t skip this crucial step—it’s the difference between a soup that tastes good and one that tastes like you’ve been simmering it for hours. Start by heating oil in a large pot and adding diced onion, minced garlic, and diced celery or bell peppers.
Let these vegetables cook for 3-4 minutes, stirring occasionally, until they become soft and the onion turns translucent with light golden edges. This process develops deeper, caramelized flavors that form the soup’s actual foundation. Only once these vegetables have softened and begun to smell fragrant should you move on to adding your spices.
The spices themselves need those few minutes to bloom once combined with the warm vegetables and oil. Add chili powder, ground cumin, and a pinch of red pepper or smoked paprika to this warm mixture, and let them cook for roughly one minute until they become very fragrant. This toasting process activates their essential oils, making them far more flavorful than if you simply dumped them into cold liquid. You’ll notice the difference immediately in your finished soup.
Choosing Your Seasonings Wisely
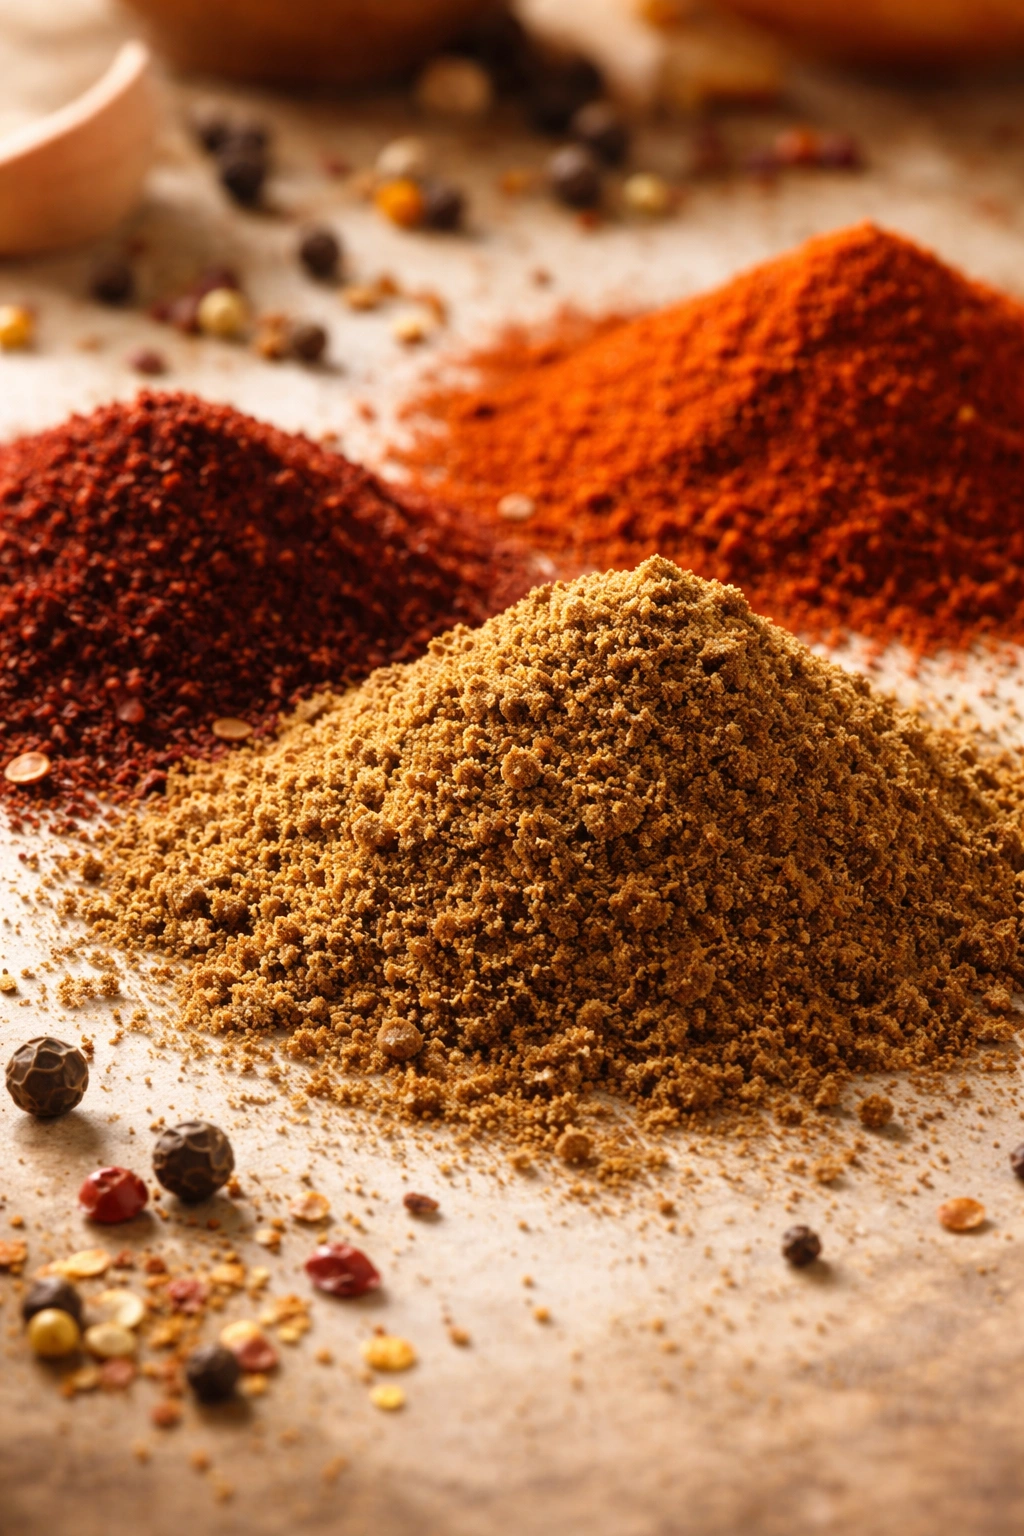
This soup’s flavor profile draws inspiration from Mexican and Southwestern cooking, which means your seasonings should reflect that culinary tradition. Ground cumin is non-negotiable—it brings an earthy, slightly warm note that’s almost indefinably crucial to the soup’s identity. Chili powder adds depth and gentle heat without overwhelming; start with a tablespoon and taste before adding more, as different brands vary significantly in their intensity.
Salt and freshly ground black pepper are your fine-tuning tools at the end. Always taste the soup before serving and adjust the seasoning—this final tasting is when you’ll discover whether it needs more salt, a touch more chili powder, or perhaps a squeeze of lime juice for brightness. Many cooks add cilantro at the very end, which adds a fresh, herbal note that contrasts beautifully with the warm spices.
For those who prefer more heat, diced jalapeño pepper can be added along with the initial aromatics, or you can offer hot sauce as a topping so each person can adjust their own spice level. Smoked paprika adds a subtle, smoky dimension without any real heat. Some versions include a touch of cumin, cocoa powder, and cinnamon—these seem unusual but actually reference authentic Mexican cooking traditions where chocolate appears in complex spice blends.
The Art of Achieving the Right Consistency

Getting the consistency right is where home cooks often struggle, yet it’s actually quite forgiving once you understand the mechanism. The initial simmering with beans, corn, and broth will result in a fairly thin, brothiness. This is normal. As you approach the end of cooking and especially as the soup cools and sits, it will naturally thicken as the beans continue releasing starch.
If you prefer a thicker soup, simmer uncovered for the final 5-10 minutes to allow some liquid to evaporate. If you’ve overshot the thickness and the soup is too dense, simply add more broth or water, a half-cup at a time, until you reach the consistency you prefer. The soup should be thick enough that the broth coats a spoon, but still should spoon easily into a bowl—not so thick it becomes heavy or paste-like.
Some versions finish by blending half the soup with an immersion blender or in a regular blender, then stirring the pureed portion back into the remaining whole-bean mixture. This creates a creamier texture without any actual cream. For a vegetarian or vegan version, this blending technique works beautifully to add richness without dairy. For a traditional creamy version, you can stir in heavy cream, half-and-half, or even evaporated milk at the very end—but always let the soup cool slightly first, or the dairy can break.
Why Fresh, Frozen, and Canned Corn All Work
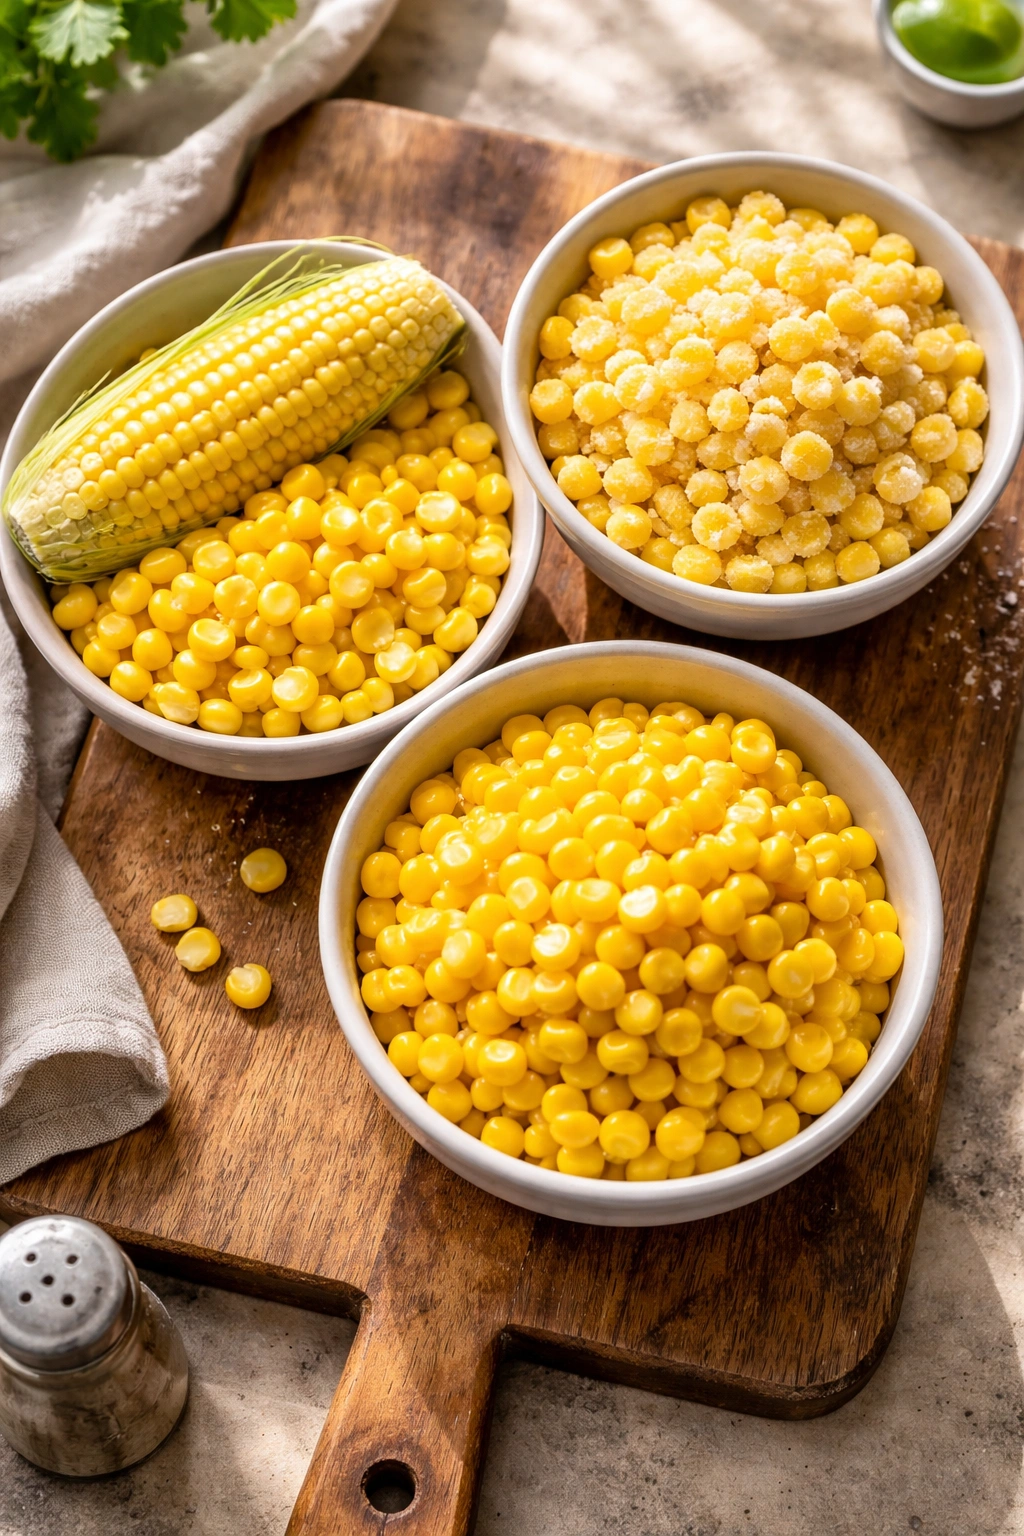
There’s genuine flexibility with your corn choice, which is one of the reasons this soup works across seasons and pantries. Fresh corn at peak season brings the most intense sweetness and tender kernels—slice the kernels directly from the cob if you have it. Frozen corn works just as well and requires no prep; simply add it directly to the pot. The freezing process actually preserves sweetness and nutrients remarkably well.
Canned corn presents a trade-off: it’s convenient and shelf-stable, but it tends to be softer and slightly less sweet than fresh or frozen. Many cooks prefer canned corn when they’re using another fresh vegetable to balance it out, or when they plan to let the soup simmer longer. Some versions use Mexicorn—corn with diced peppers and spices already mixed in—which can add extra dimension with less effort.
The quantity matters less than the proportion. Aim for roughly two cups of corn kernels total, whether fresh, frozen, or canned. This amount provides visible corn kernels throughout the soup without overwhelming the beans. Some people prefer a higher corn-to-bean ratio and adjust accordingly; the recipe remains flexible enough to accommodate your preferences.
Yield: Serves 6 to 8 | Makes about 8 cups
Prep Time: 15 minutes
Cook Time: 30 to 35 minutes
Total Time: 45 to 50 minutes
Difficulty: Beginner — This soup comes together straightforwardly with simple chopping and pot tending; no special equipment or techniques required, making it perfect even for first-time soup makers.
Complete Ingredient List
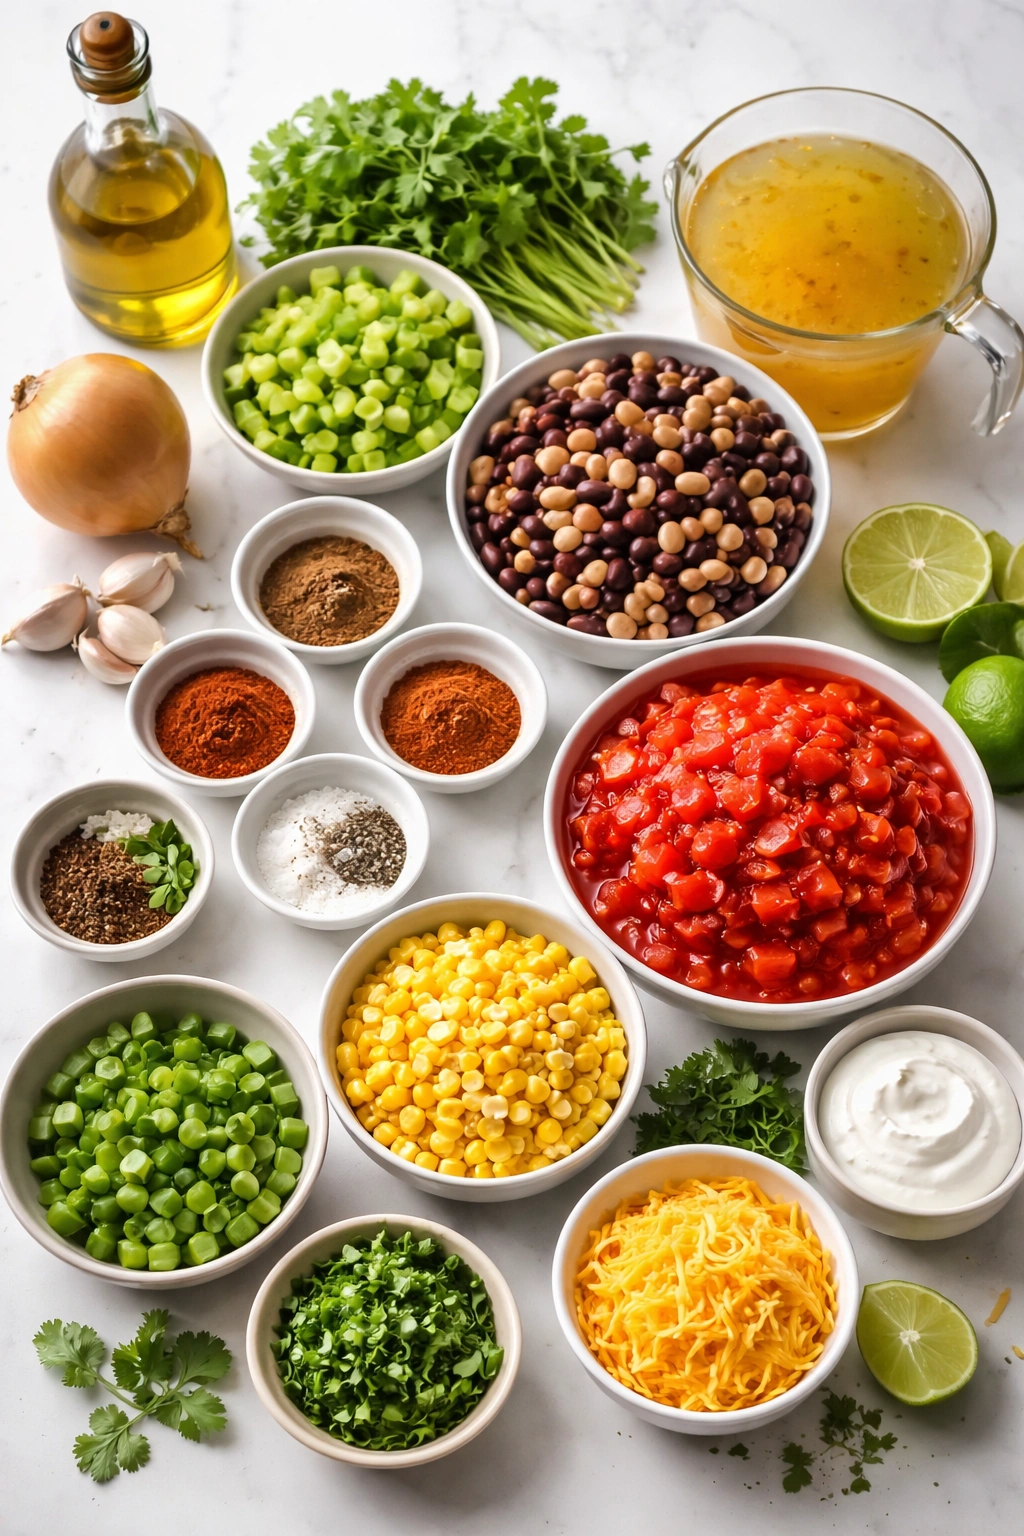
For the Soup Base:
- 2 tablespoons extra virgin olive oil
- 1 large yellow or white onion, diced
- 3 to 4 cloves fresh garlic, minced
- 1 cup diced celery or diced green bell pepper (or a combination)
- 2 teaspoons ground cumin
- 1½ tablespoons chili powder (adjust based on your heat preference)
- ¼ teaspoon smoked paprika or ground red pepper
- ½ teaspoon kosher salt, plus more to taste
- ¼ teaspoon freshly ground black pepper, plus more to taste
For the Body of the Soup:
- 3 cans (15 ounces each) black beans, pinto beans, or kidney beans, drained and rinsed (or approximately 4½ cups cooked beans from scratch)
- 2 cups fresh, frozen, or canned corn kernels, drained if canned
- 1 can (14.5 ounces) diced tomatoes with juice (fire-roasted tomatoes add extra depth)
- 4 cups vegetable broth, chicken broth, or a combination of broth and water
- ½ teaspoon lime zest (optional but recommended)
- 2 tablespoons fresh lime juice
- ¼ cup fresh cilantro, finely chopped (optional)
For Creamier Versions (Optional):
- 1 cup heavy cream, half-and-half, or full-fat coconut milk (add at the very end, after soup cools slightly)
- 1 cup freshly shredded cheddar, pepper jack, or Oaxaca cheese (optional; add in small batches, stirring between additions)
Step-by-Step Instructions
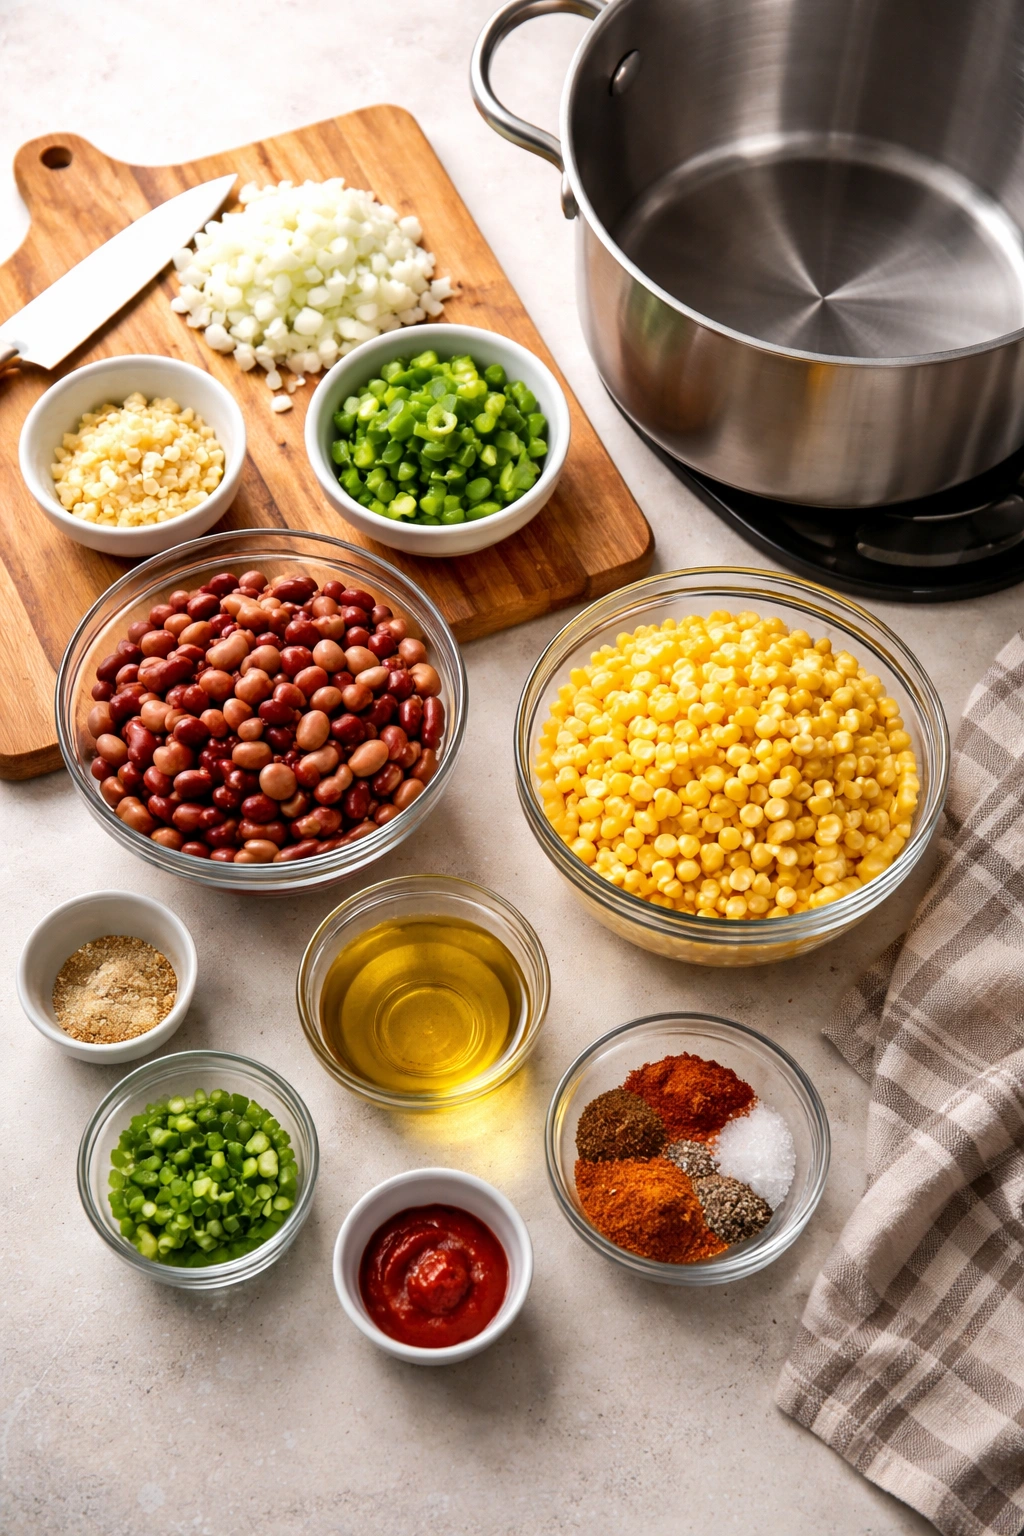
Prepare Your Ingredients:
-
Dice the onion into ½-inch pieces, aiming for uniform size so everything cooks at the same rate. Mince the garlic into small, fine pieces. Dice the celery or green bell pepper—or split the difference and use half of each. Having everything prepped and ready before you heat the pot makes the actual cooking process smooth and stress-free.
-
Drain and rinse all canned beans thoroughly under cold running water, using a fine-mesh strainer. This removes excess sodium and the starchy liquid that would otherwise cloud your soup. Reserve the drained beans in a bowl.
-
Measure out your corn and confirm you have 2 cups total. If using frozen corn, there’s no need to thaw it—it will cook right in the hot broth. If using canned corn, drain it well.
Build the Flavor Foundation:
-
Heat the olive oil in a large pot or Dutch oven over medium heat. You’ll know it’s ready when it shimmers and moves easily around the pot—this takes about 30 seconds to 1 minute.
-
Add the diced onion to the hot oil and cook, stirring frequently, for about 3 minutes. The onion should become soft, translucent, and beginning to turn golden at the very edges. This caramelization develops deeper, sweeter flavors that form your soup’s actual foundation—don’t rush this step or skip it.
-
Stir in the minced garlic and celery (or green pepper), and continue cooking, stirring often, for approximately 2 minutes until the garlic becomes fragrant. You should smell an unmistakable, warm garlic aroma rising from the pot. This is your signal that the garlic’s essential oils have activated and are ready to infuse the soup.
-
Add the ground cumin, chili powder, smoked paprika, salt, and black pepper directly to the warm vegetables and oil. Do not add them to cold liquid—this warm spice blooming step is crucial. Stir constantly for about 1 minute, until the spices become very fragrant and the mixture looks like a warm paste. You’ll notice the aroma shift from just garlic to something spiced and complex.
Advertisements
Build the Soup:
-
Pour in the broth and stir well, scraping the bottom of the pot with a wooden spoon to loosen any flavorful bits stuck there. This deglazing step captures all those caramelized, flavorful pieces that would otherwise be wasted.
-
Add the drained beans and corn kernels to the broth, stirring until everything is evenly distributed throughout the pot.
-
Add the canned diced tomatoes along with all their juice. Stir the entire mixture thoroughly so all components are incorporated. The tomatoes add acidity, which brightens the soup and balances the spices beautifully.
-
Increase the heat to medium-high and bring the soup to a gentle boil—you should see steam rising and bubbles breaking the surface around the edges. Do not allow it to boil aggressively; a gentle, rolling boil is ideal.
Develop the Soup:
-
Once the soup reaches a gentle boil, reduce the heat to medium-low and maintain a simmer. Partially cover the pot with a lid, leaving it slightly ajar so steam can escape. You want steady, gentle bubbles rising to the surface at a rate of roughly one per second.
-
Allow the soup to simmer for 20 to 25 minutes. During this time, the beans warm completely, the corn kernels become tender, the flavors meld together, and the broth begins thickening as the beans release their natural starches. Stir occasionally—every 5 minutes or so is sufficient—to ensure even cooking and to prevent anything from sticking to the bottom of the pot.
-
After 20 minutes, taste the soup. The vegetables should be soft and tender, the corn kernels should be completely cooked through (bite one to confirm), and the flavors should taste well-blended rather than distinct and separate. If any vegetables still feel hard or crunchy, continue simmering for another 5 minutes and taste again.
Adjust Thickness and Consistency:
-
At this point, assess the soup’s consistency. It should be thick enough that the broth coats a spoon but still pourable and spoon-able, not paste-like. If the soup is too thin for your preference, remove the lid and continue simmering uncovered for 5 to 10 additional minutes. The exposed surface allows liquid to evaporate, naturally thickening the broth.
-
If you prefer an even creamier, thicker soup, use a potato masher to gently mash approximately one-quarter to one-third of the beans directly in the pot. This releases more of their natural starches into the broth, creating a creamier texture without any actual cream. Stir well after mashing.
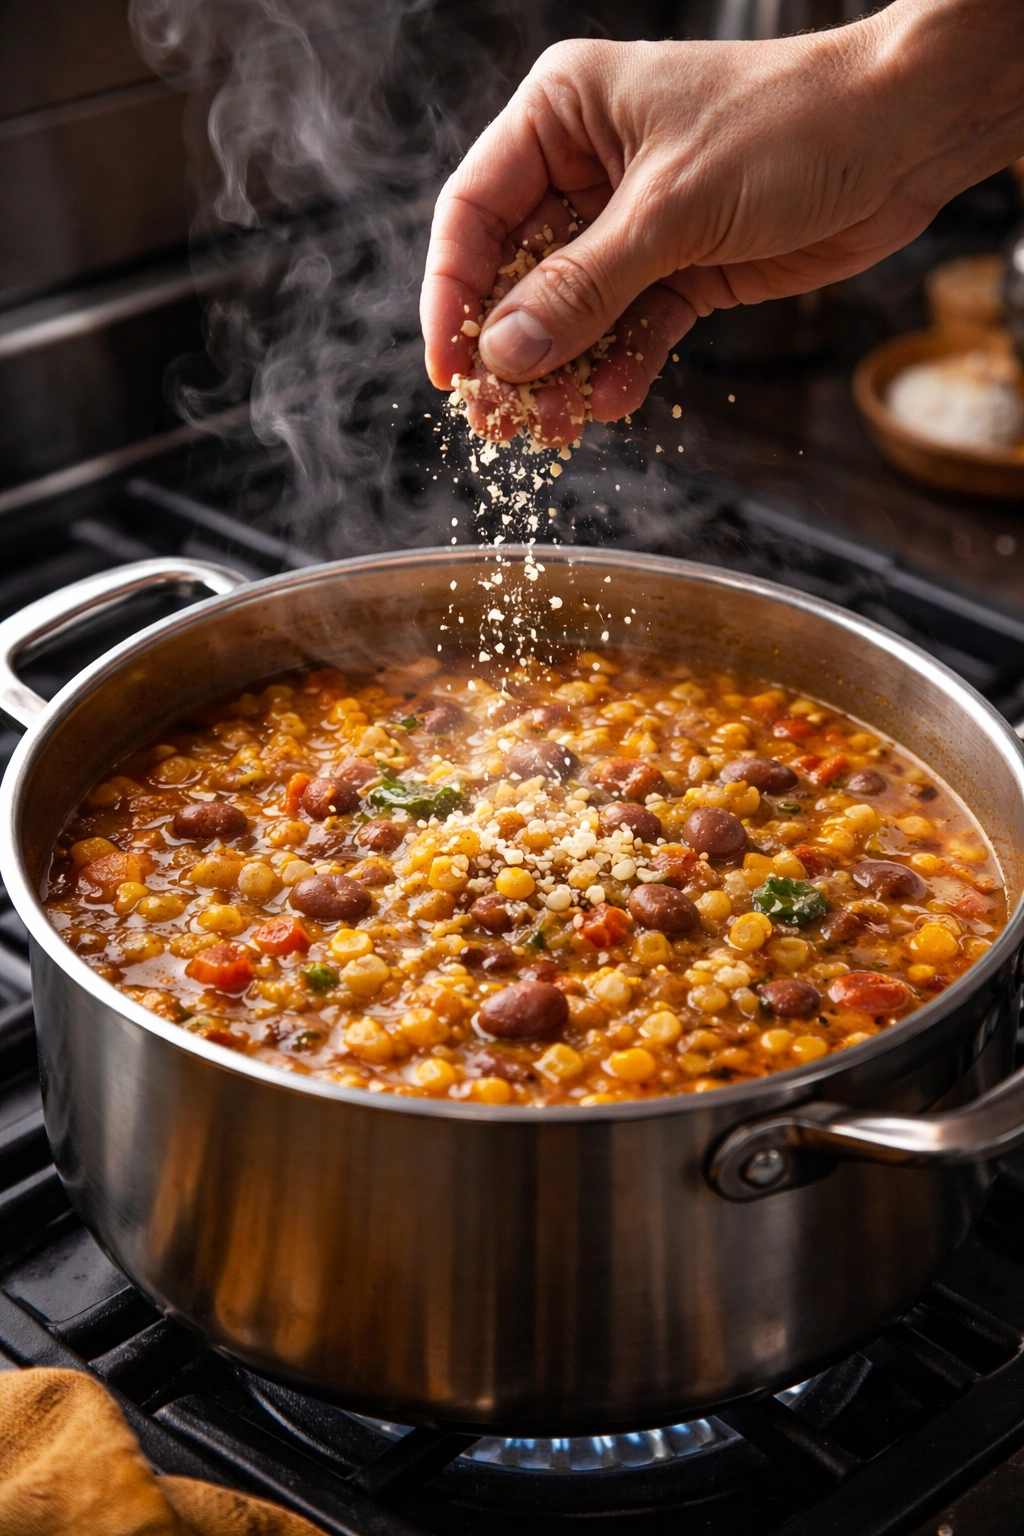
Finish the Soup:
-
Stir in the lime juice and lime zest (if using), and taste the soup carefully for seasoning. Add additional salt or chili powder, a pinch at a time, if needed. The soup should taste balanced—not too salty, with the spices present but not overpowering.
-
If making a creamy version, remove the pot from heat and let it cool for 2 to 3 minutes. Then slowly stir in the heavy cream, half-and-half, or coconut milk. Never add cold dairy to boiling soup—the temperature difference can cause the dairy to break and become grainy. Stir gently and continuously as you add it, distributing it evenly throughout the soup.
-
If adding cheese for extra richness, add it in small batches (a handful at a time), stirring between additions until each batch melts completely. Fresh, block cheese that you shred yourself melts much more smoothly than pre-shredded cheese, which contains anti-caking agents that prevent proper melting.
-
Stir in the fresh cilantro (if using) just before serving. Fresh cilantro added at the very end maintains its herbal brightness and doesn’t lose its fresh flavor to the heat.
-
Serve the soup immediately in bowls, ladling carefully so you capture both the thick, flavorful broth and the beans and corn throughout. Serve with your choice of toppings (see suggestions below).
Pro Tips for Perfect Soup Every Time
Use freshly minced garlic rather than jarred. The fresh version develops a more natural, less harsh flavor when bloomed in oil. Jarred garlic tends to become bitter when heated at high temperatures and leaves an unpleasant aftertaste.
Don’t skip the rinsing step with canned beans. This removes excess sodium and the starchy liquid that would make your soup cloudy. A quick rinse in a fine-mesh strainer under cold water takes just thirty seconds and noticeably improves the final result.
Taste as you go, especially with salt and spices. Different brands of chili powder and spices vary in their intensity. Starting with the suggested amounts and tasting before adding more prevents over-seasoning, which is much harder to fix than under-seasoning.
Let the soup cool slightly before adding dairy products. Whether it’s cream, milk, half-and-half, or cheese, adding cold dairy directly to boiling soup causes it to curdle or become grainy. Even a 2-3 minute cooling period makes an enormous difference.
Make extra and freeze it. This soup freezes beautifully for up to three months. Ladle cooled soup into individual airtight containers or freezer bags, leaving about an inch of headspace. Label with the date. Thaw overnight in the refrigerator and reheat gently on the stovetop, adding a splash of broth if needed to adjust consistency.
Save the corn cobs if using fresh corn. They make an exceptional corn broth that you can use in place of regular broth for even more corn flavor. Simply simmer the cobs in water for 20-30 minutes, strain, and use as your cooking liquid.
Easy Variations to Try
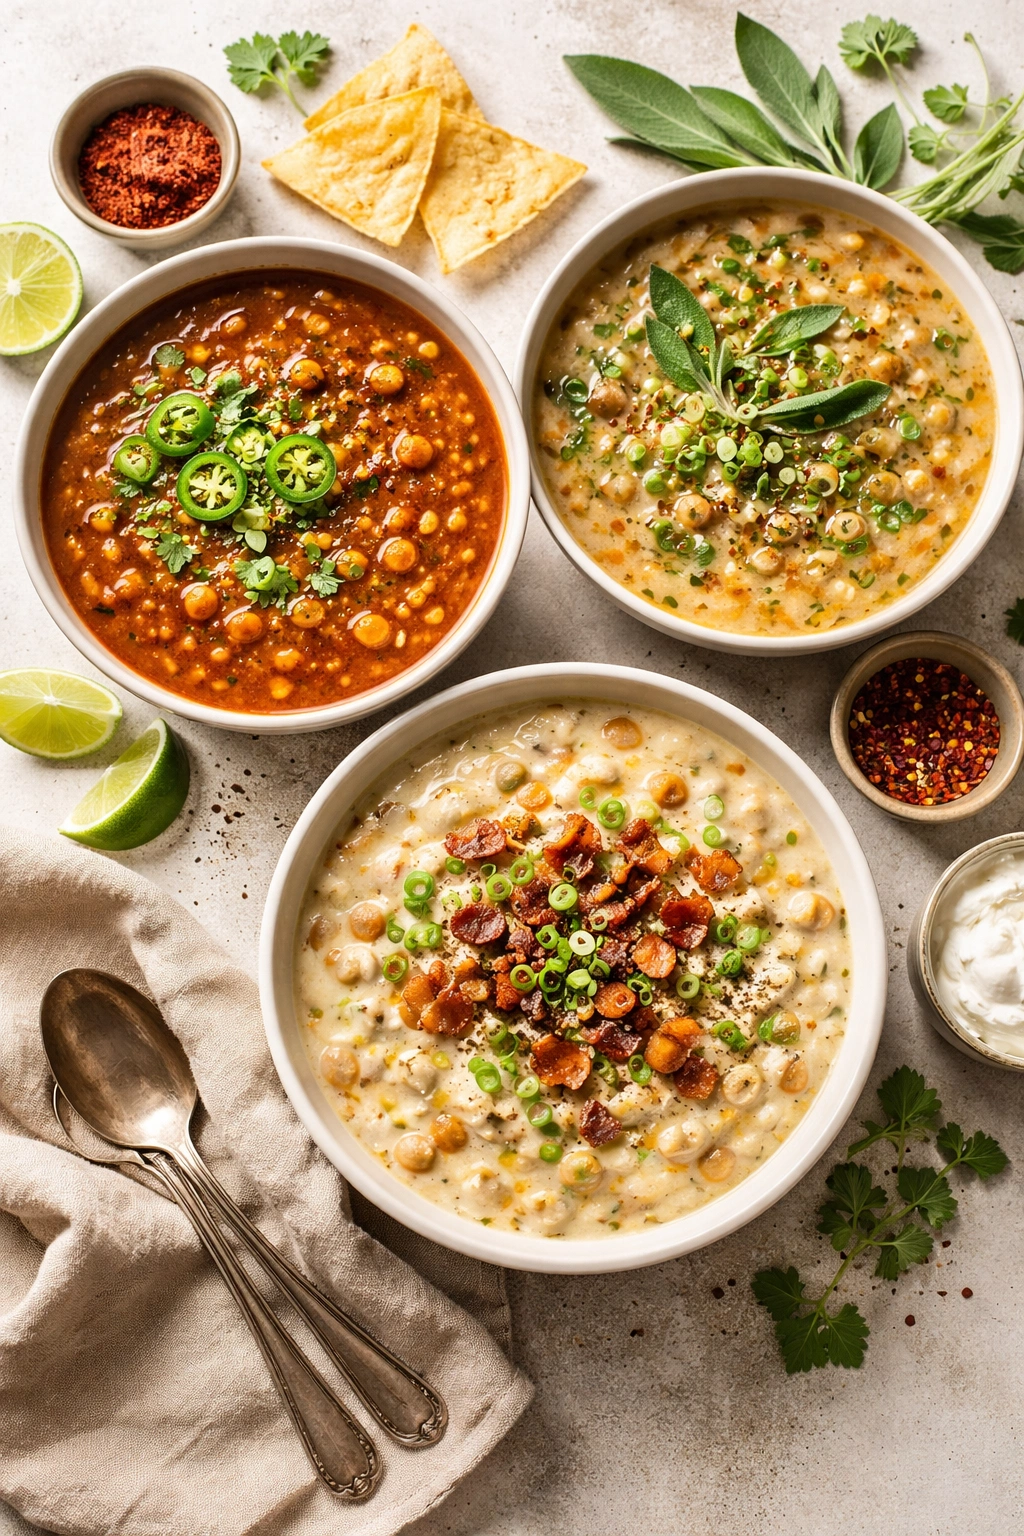
Black Bean and Corn with Roasted Poblano: Replace the green bell pepper with one roasted poblano pepper, peeled and diced. Roasting mellows the pepper’s heat while adding a subtle smoky depth. You can roast peppers directly over a gas flame or under your oven’s broiler until blackened, then let them steam in a covered bowl before peeling away the skin.
Spicy Chipotle Version: Add 1 to 2 teaspoons of chipotle powder or 1 to 2 tablespoons of finely diced chipotle chiles in adobo sauce. This adds a genuine smoky heat that’s more complex than simple chili powder. If using canned chipotles in adobo, finely chop them and add their sauce as well.
White Bean and Corn with Sage: Substitute cannellini beans for the black beans and add 1 teaspoon of dried sage (or 1 tablespoon of fresh sage, chopped) when you add the spices. This Mediterranean twist creates a lighter, more herbaceous soup.
Creamy Corn Chowder Style: Add one diced medium potato along with the beans and corn, and finish the soup with 1 cup of heavy cream and ½ cup of freshly shredded cheddar cheese. The potato adds starchy body and makes this more of a chowder—thicker and more substantial.
Vegetarian with Extra Vegetables: Dice and add one diced zucchini, one diced carrot, or one diced red bell pepper. These additions bring more color, nutrition, and texture. Add them in step 9, alongside the beans and corn, so they cook fully with the other components.
With Meat: Brown 1 pound of ground beef, turkey, or chorizo before adding the aromatics, drain well, and set aside. Add it back to the pot in step 9 along with the beans and corn. The cooked meat adds protein and a richer, deeper flavor dimension.
Instant Pot Version: Use the sauté function to cook the aromatics and bloom the spices exactly as described. Once you reach step 9, transfer to Instant Pot, seal the lid, and set to high pressure for just 1 minute. The beans are already cooked (from being canned), so this short cook time is simply for the flavors to meld. Quick-release the pressure and proceed with finishing steps.
Storage and Make-Ahead Instructions
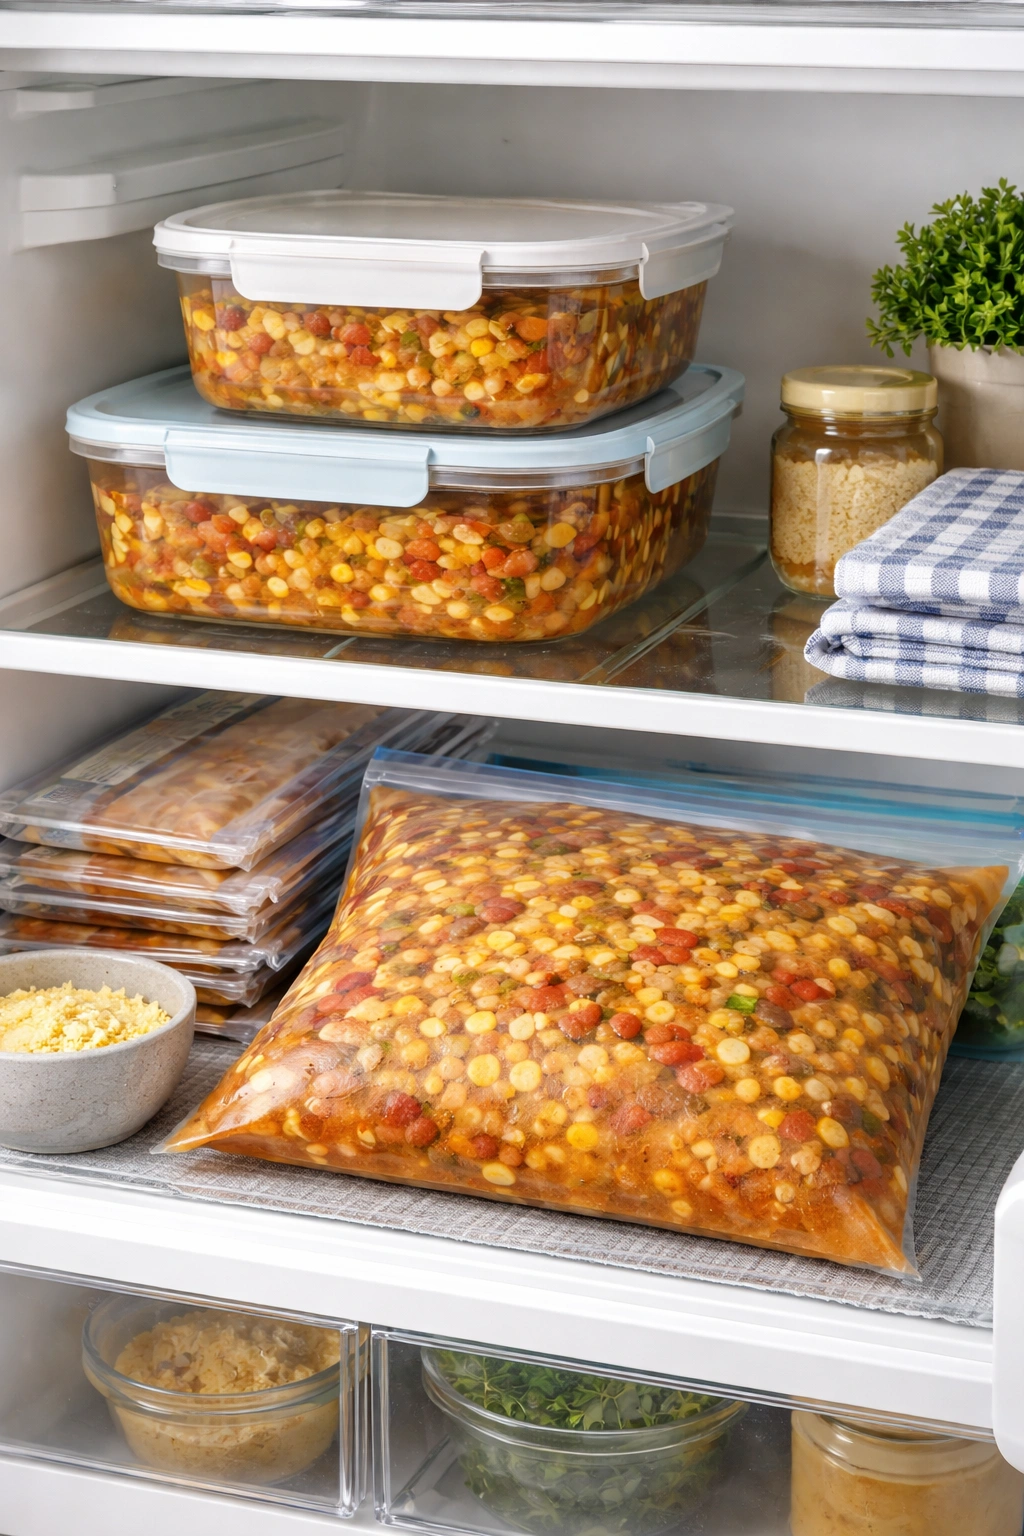
Refrigerator Storage: Allow the soup to cool to room temperature, then transfer to airtight containers. Store in the refrigerator for up to 4 to 5 days. The flavors actually deepen and improve overnight as the beans continue absorbing the seasoned broth.
Freezer Storage: Cool the soup completely to room temperature before transferring to freezer-safe containers or bags. Leave about one inch of headspace in containers, as the soup will expand slightly as it freezes. The soup keeps beautifully frozen for up to 3 months. Label containers with the contents and date for easy identification.
Thawing: Thaw frozen soup overnight in the refrigerator, or reheat gently from frozen on the stovetop over medium-low heat, stirring occasionally and adding a splash of broth or water if the consistency has become too thick.
Reheating: Warm the soup gently on the stovetop over medium heat, stirring occasionally. Avoid boiling, which can break any dairy if you’ve added cream or cheese. Alternatively, reheat individual portions in the microwave in a microwave-safe container, heating in 1-minute intervals and stirring between each.
Make-Ahead Notes: You can prepare the soup through step 10 (adding tomatoes) up to 24 hours in advance. Cover and refrigerate. When ready to serve, bring the soup to a gentle boil and continue with step 11. If you’ve added dairy, add it only right before serving to maintain the best texture.
Best Toppings and Serving Ideas
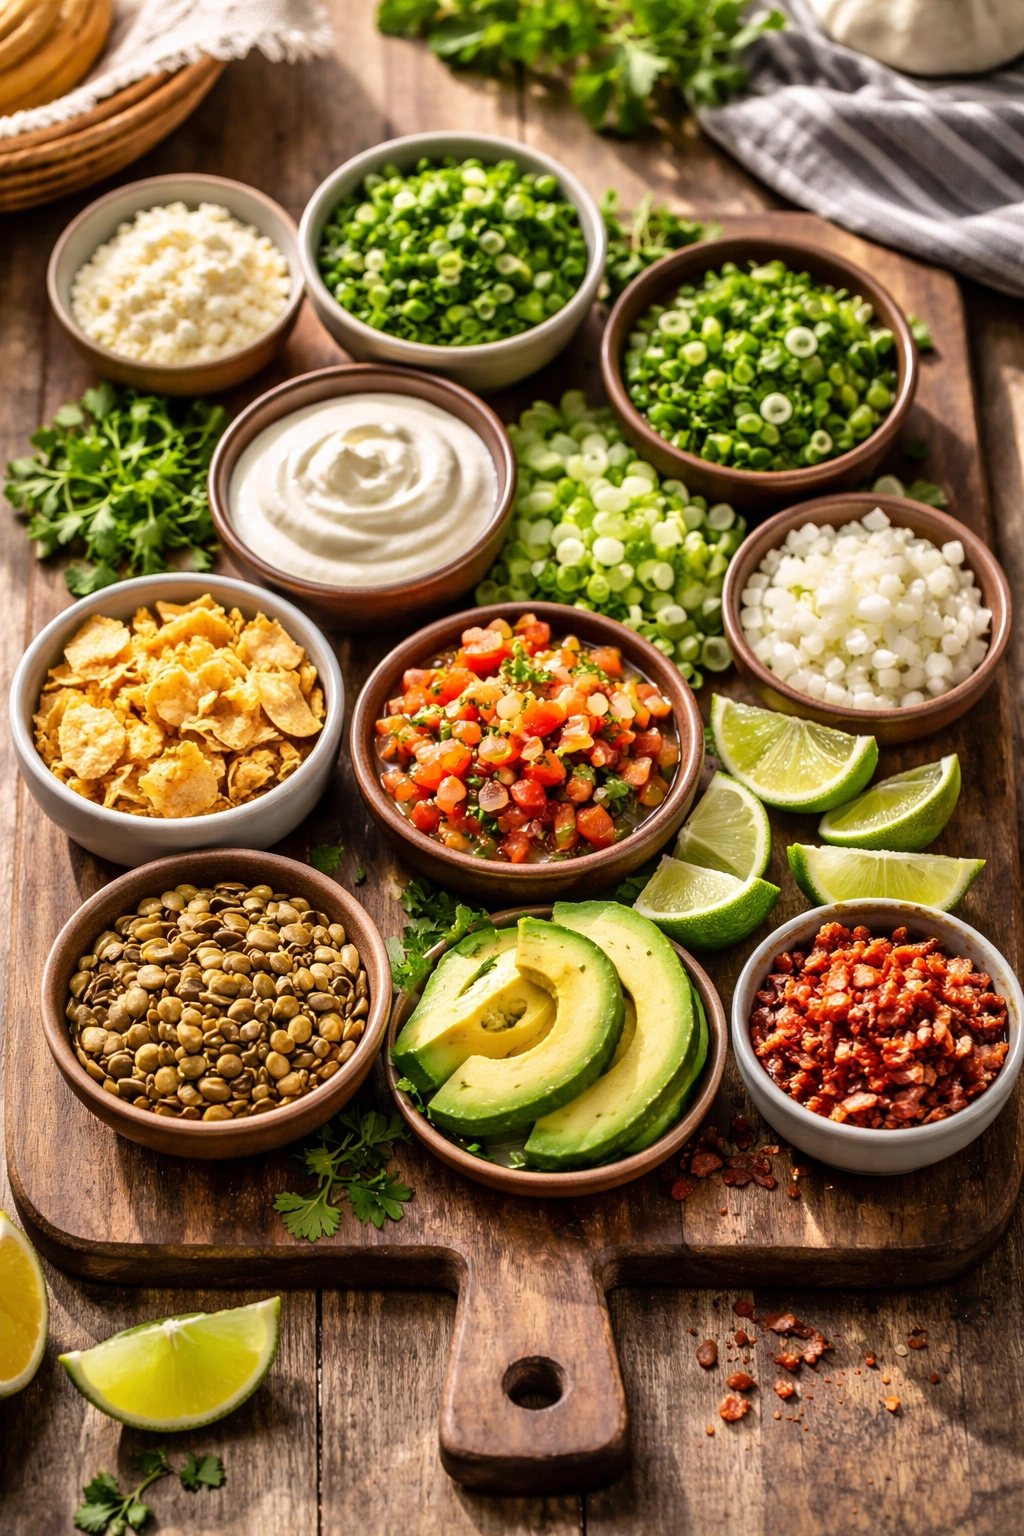
The toppings are where this soup transforms from good to absolutely memorable. Set out a small bowl of each topping so guests can customize their own bowl to their preference.
Dairy and Cream: Sour cream, crème fraîche, or Mexican crema added as a dollop creates a cooling contrast to the warm spices. Greek yogurt works as a healthier alternative. Freshly grated cotija cheese (a crumbly, salty Mexican cheese) adds texture and authentic flavor.
Herbs and Aromatics: Fresh cilantro adds a bright, herbal note. Fresh parsley works if cilantro isn’t available. Thinly sliced scallions or fresh chives add onion flavor and crunch. Diced white onion provides sharp contrast.
Heat and Brightness: Sliced fresh jalapeño peppers for those who want extra heat. Lime wedges for squeezing—the acid brightens every spoonful. Hot sauce or pico de gallo for customizable spice level. Diced red onion for sharp, fresh flavor.
Crunch and Texture: Crispy tortilla strips or crushed tortilla chips add satisfying crunch. Toasted pumpkin seeds bring nutty richness and texture. Diced avocado or sliced avocado adds creamy luxury. Crumbled crispy bacon for non-vegetarian versions.
Bread and Sides: Serve alongside warm cornbread, Mexican street corn flatbread, or simple crusty bread for dipping and soaking up the broth. A simple side salad with lime vinaigrette provides refreshing contrast to the rich, warm soup.
Serving Suggestions: This soup works beautifully as a main course for lunch or a lighter dinner. For heartier appetites, serve with grilled cheese sandwiches, quesadillas, or a substantial salad. For entertaining, offer it as the first course before a Mexican-inspired main dish. It’s equally at home at a casual family dinner or a more formal gathering—simply present it respectfully in nice bowls with a few elegant toppings.
Final Thoughts

This thick and hearty corn and bean soup represents everything wonderful about home cooking: simple ingredients that transform into something genuinely nourishing and delicious, made even better by time and reheating. It costs just a few dollars to make a pot that feeds a family or provides multiple meals throughout the week. It requires no special equipment or advanced techniques—just basic knife skills and the ability to stir a pot occasionally.
What makes this soup truly special is how it adapts to your pantry and preferences while maintaining its essential character. Whether you use black beans or kidney beans, fresh or frozen corn, make it vegetarian or add meat, serve it thick or slightly brothier—the soup remains deeply satisfying. The flavor profile, rooted in Mexican and Southwestern cooking traditions, brings warmth and comfort that works equally well on a cool autumn evening or whenever you need the emotional solace that really good soup provides.
Make this soup often, adjust it fearlessly based on what you have available, and don’t hesitate to double or triple the recipe. Your future self—the one raiding the freezer for an easy dinner—will thank you with every spoonful.