Building your first wine and cheese board can feel intimidating, but honestly, it doesn’t have to be. The beauty of a cheese board is that there’s no wrong way to do it — only ways that work better than others once you understand a few core principles. Whether you’re hosting a small gathering or bringing something impressive to a dinner party, the difference between a board that makes people pause and one that just sits there comes down to a handful of practical decisions you’ll make before you ever step foot in a cheese shop.
The real secret isn’t about knowing obscure varieties or having expensive taste. It’s about understanding how flavors work together, respecting the cheeses you’re serving by treating them properly, and building a board with intentional contrast rather than just throwing expensive things on a platter and hoping for the best.
Understanding Cheese Categories and Flavor Profiles

Cheese falls into predictable categories, and knowing them makes everything else easier. Rather than memorizing names, think about texture and intensity — these are the variables that actually matter when you’re building a board.
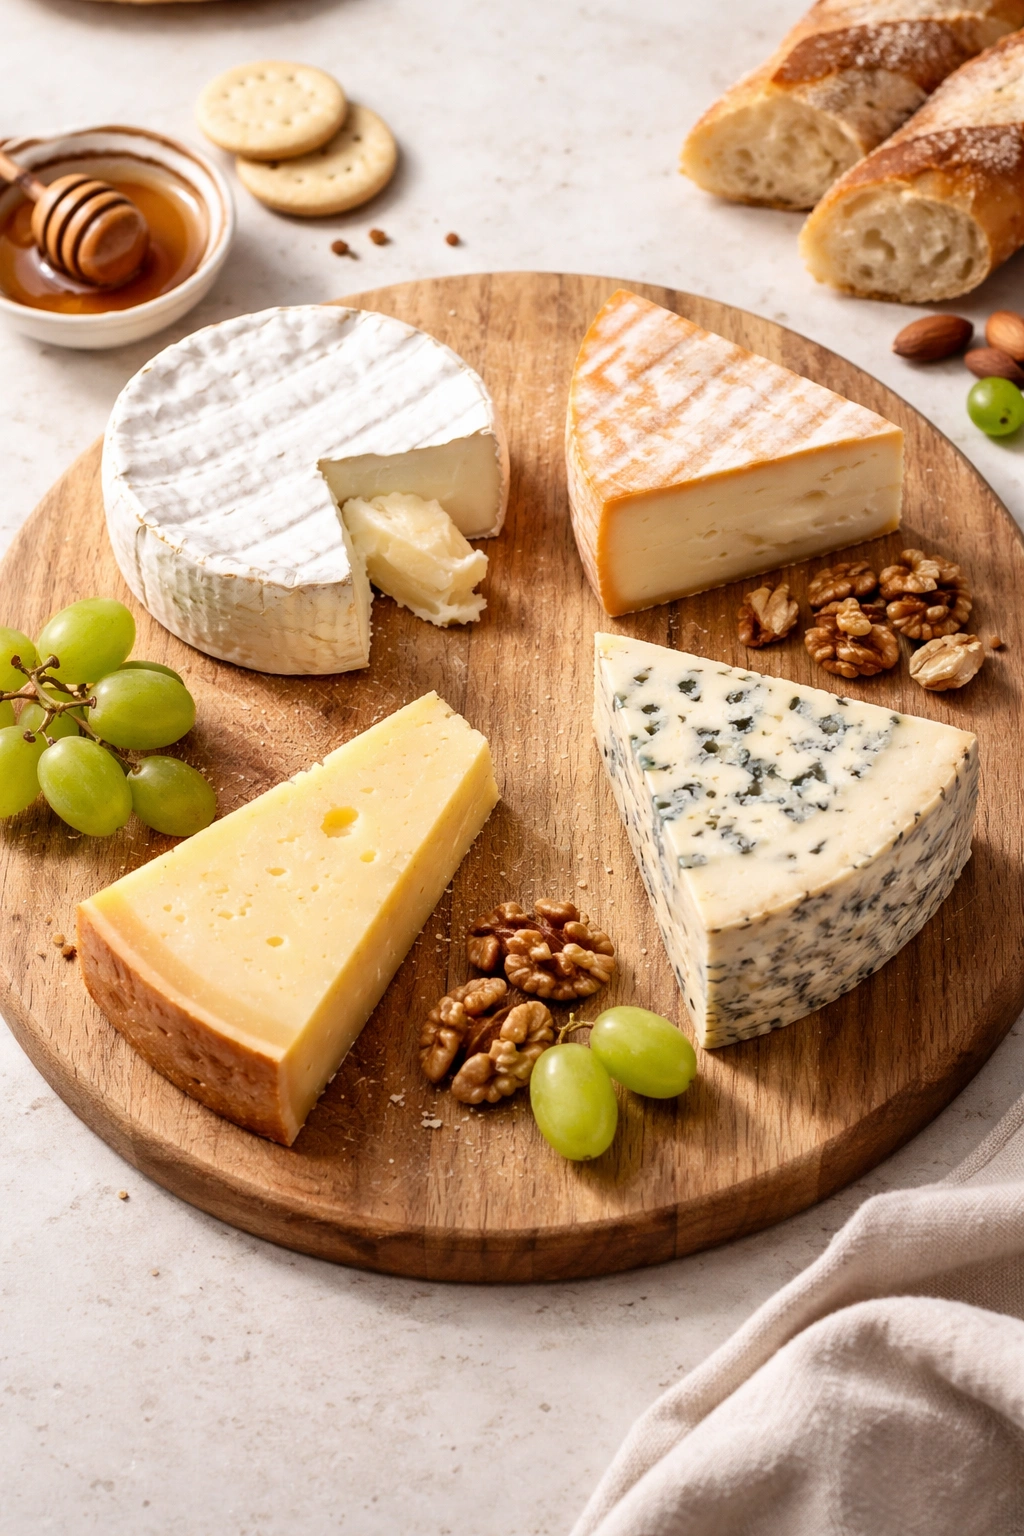
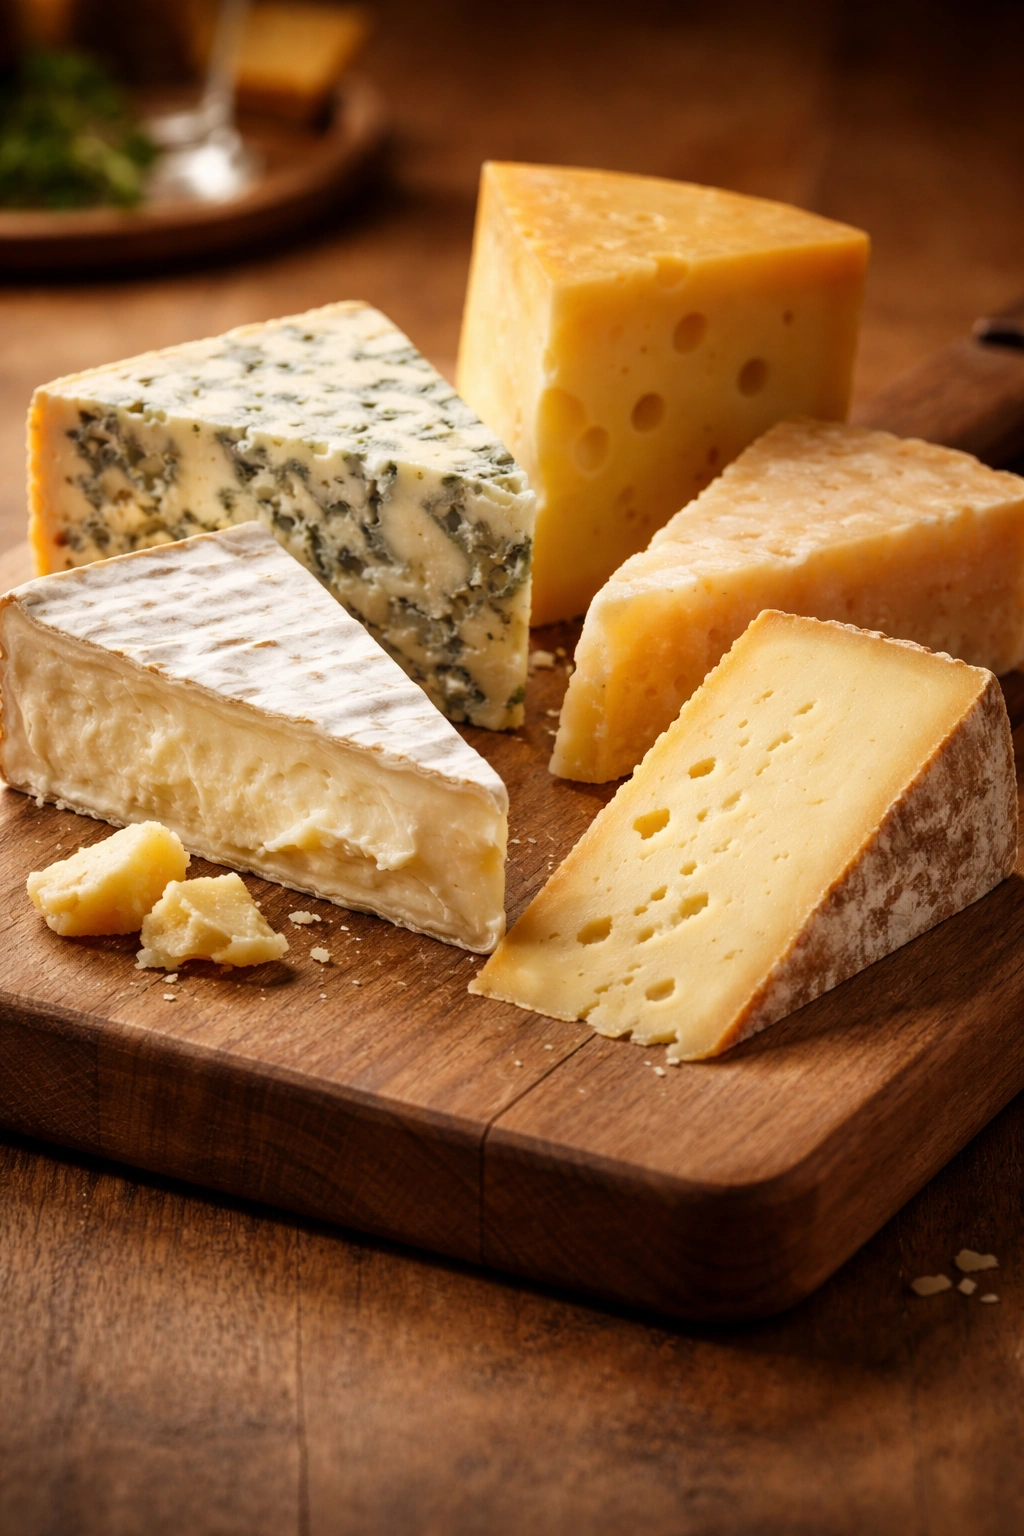
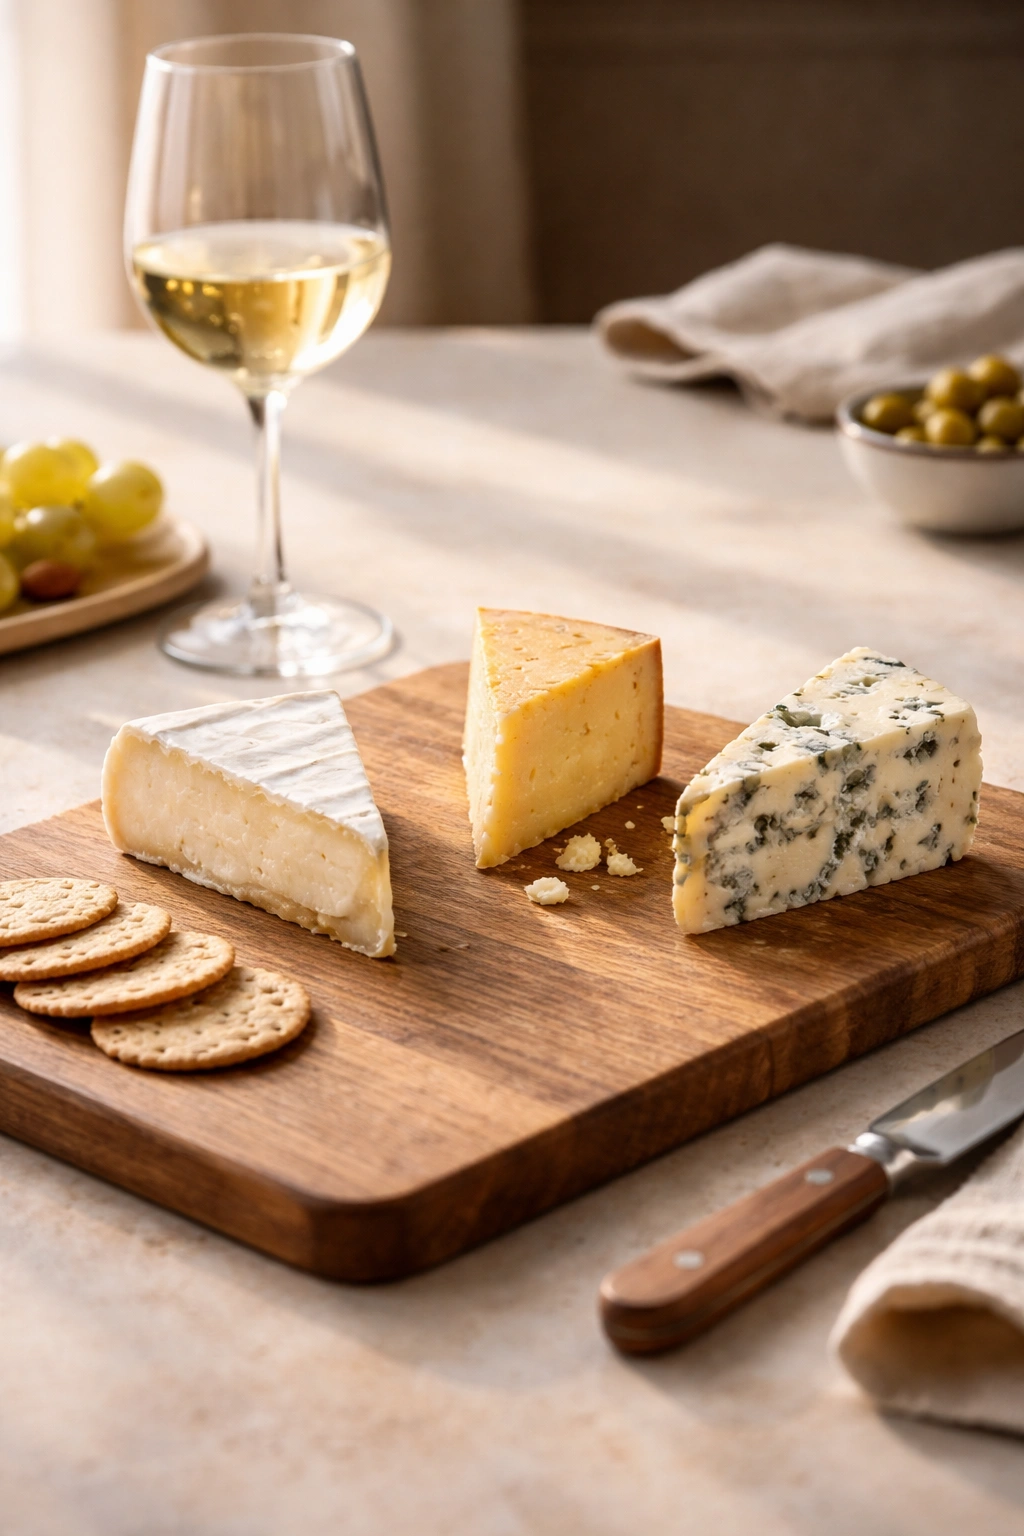
Soft cheeses are the most delicate category. Brie, camembert, and fresh chèvre have a creamy, spreadable texture that falls apart on your tongue. They’re mild and buttery, with subtle earthiness. These are your approachable cheeses — the ones people reach for first because they’re not intimidating. They’re also the most temperature-sensitive; they need to sit out before serving or they’ll taste like dense, flavorless clay.
Semi-soft cheeses like aged gouda, manchego, or gruyère have a firmer structure than soft cheeses but still have that creamy quality. They slice cleanly, hold their shape, and have more developed flavor — nuttier, sometimes caramel notes. These are the bridge cheeses that work with almost everything.
Hard cheeses like aged cheddar, parmigiano-reggiano, or pecorino have crystalline texture and intense, concentrated flavor. They crumble rather than slice smoothly. These are powerful players on a board — a little goes a long way. They’re also more forgiving with temperature because their lower moisture content means they won’t sweat or fall apart when warm.
Blue cheeses are their own category because of their flavor intensity. Gorgonzola, roquefort, and stilton are funky, peppery, sometimes sharp. These are polarizing — some people love them immediately, others avoid them. On your first board, include a small amount so people who are curious can try it without feeling like they have to eat something that makes them uncomfortable.
The key is including variety across these categories — don’t build a board of three soft cheeses or three hard ones. Mix them so the board feels complete and gives people different experiences as they taste through it.
The Essential Rule: Three Cheeses Is Perfect for Beginners
Here’s where first-timers go wrong: they either choose one prestigious cheese and build around it, or they overwhelm the board with five or six options thinking more is more impressive.
Three cheeses is the sweet spot. It’s enough to show range and give people real choices. It’s not so many that flavors blur together or you buy more than you can serve properly. It’s also the number people can actually taste and remember — beyond that, it becomes a blur of competing flavors.
Choose one soft, one semi-soft, and one hard or blue. That’s the formula. Soft and hard create nice textural contrast. Semi-soft bridges them. The combination means someone can build their own tasting journey from milder to more intense, or skip around depending on their preference.
For quantities, buy between four and six ounces of each cheese, depending on how many people you’re serving and what else is on the board. Four ounces per cheese for 4–6 people is reasonable. Eight ounces if you’re feeding 10 or more, or if cheese is the main event rather than one element of a larger spread.
Pairing Wine With Cheese: The Real Logic
This is where most first-timers overthink things. The cliché pairing advice — “red wine with hard cheese, white wine with soft cheese” — isn’t wrong exactly, but it’s incomplete and sometimes backwards.
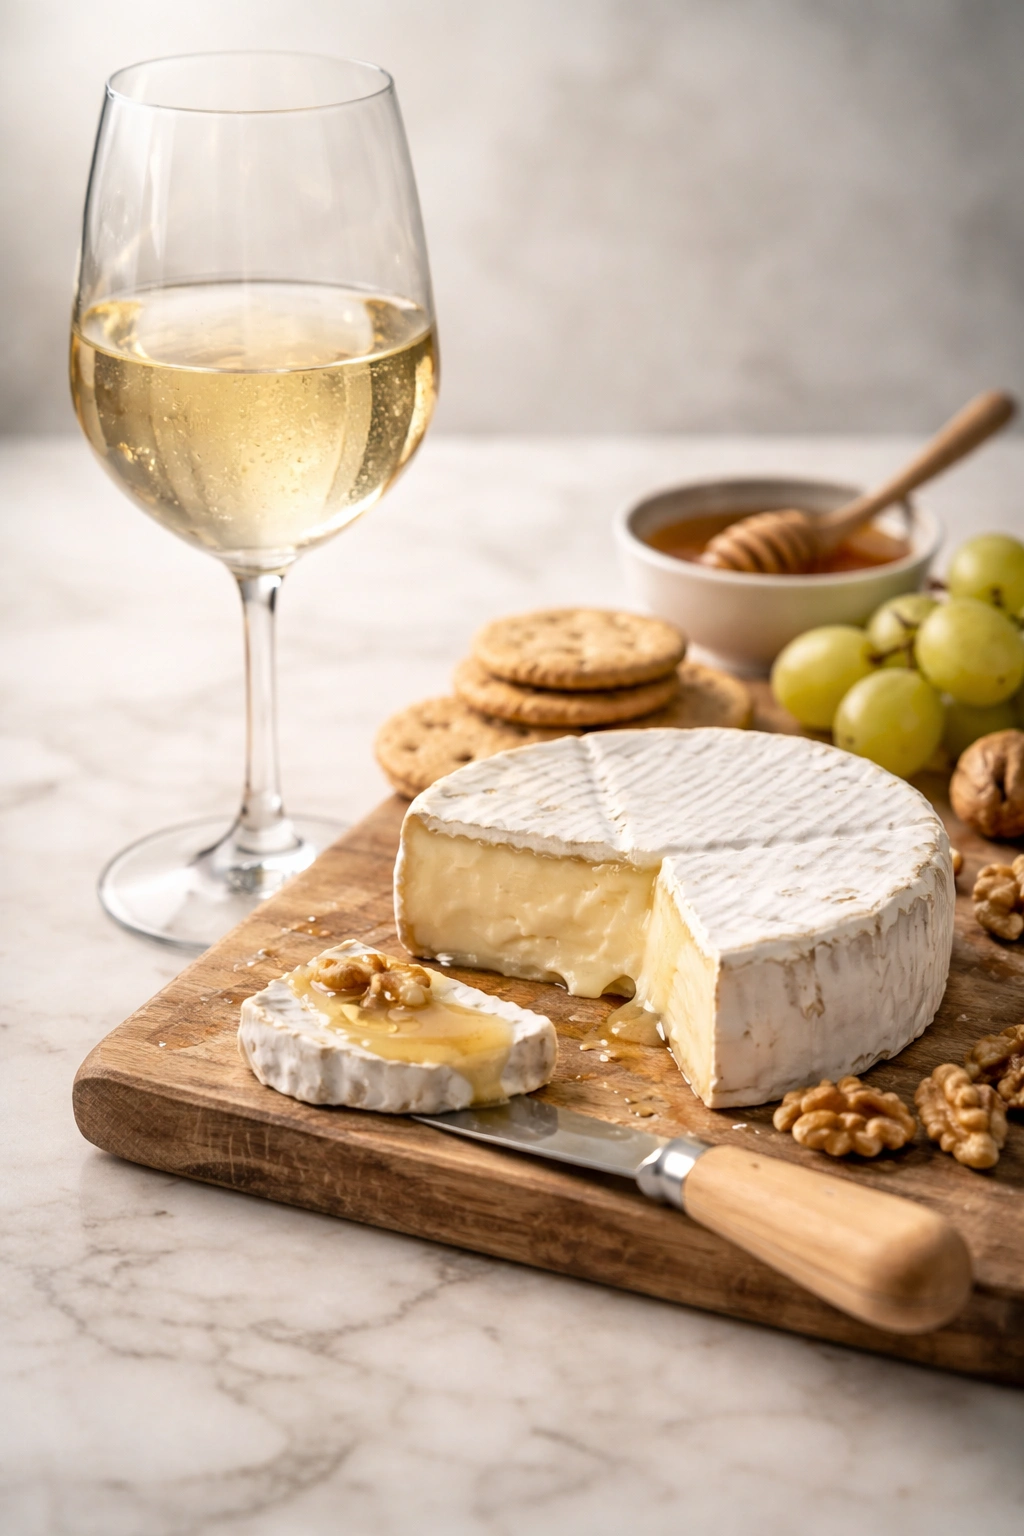
The actual principle is simpler: pair based on intensity and acidity, not color. A light, crisp white wine with high acidity works beautifully with hard, salty cheeses because the acidity cuts through richness. A full-bodied red with softer tannins pairs well with soft, creamy cheeses because the cheese mellows the tannins and adds texture to the wine.
If you’re serving one soft, one semi-soft, and one hard cheese, pick one white wine and one red. A crisp sauvignon blanc or unoaked chardonnay handles soft and hard cheeses well — the acidity brightens everything. A pinot noir or lighter-bodied red (avoid heavy, heavily-oaked wines) works across all three because it’s delicate enough not to overwhelm anything.
Don’t buy expensive wine. A bottle in the $12–$18 range is perfectly appropriate for a cheese board. People are focused on the food; the wine is there to complement, not perform. That said, buy something you’d actually drink — if a wine tastes thin or sharp to you on its own, it won’t suddenly improve next to cheese.
Bring both bottles to room temperature or very slightly chilled, depending on preference. Cold wine and cold cheese don’t taste like much of anything. Room temperature is often better because the flavors open up more.
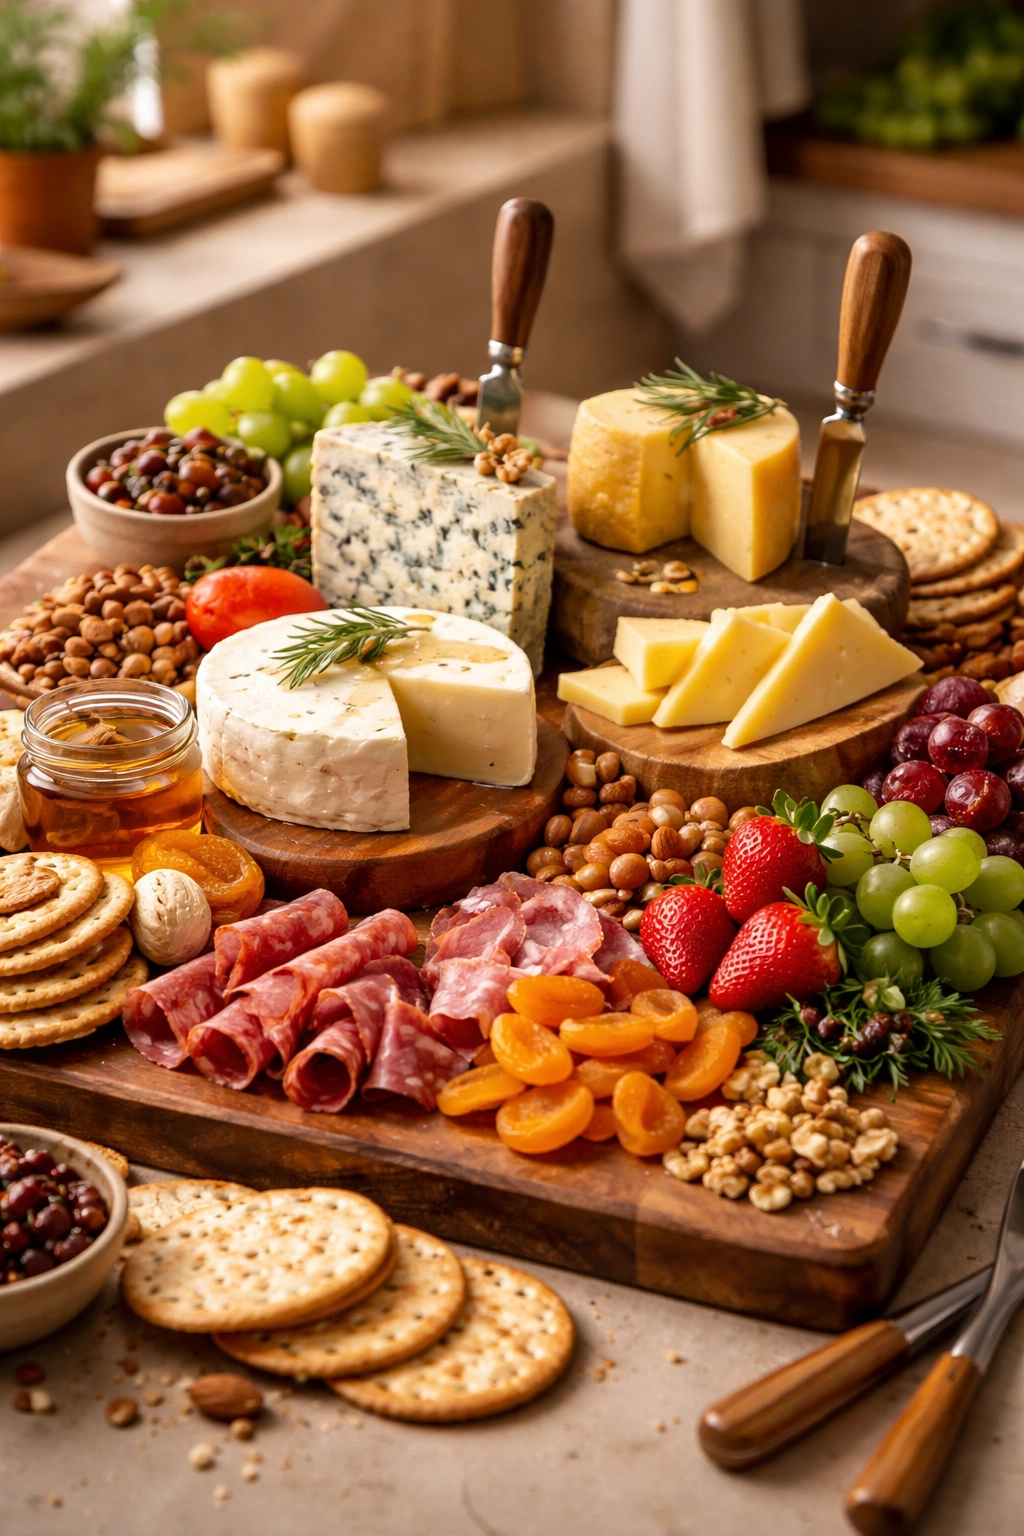
Building the Board: Layout and Visual Logic
The arrangement matters more than people realize, and not for the reasons you might think. It’s not about making it Instagram-pretty (though that can be a pleasant side effect). It’s about function — you want people to be able to access cheeses, crackers, and spreads without playing Jenga with the board.
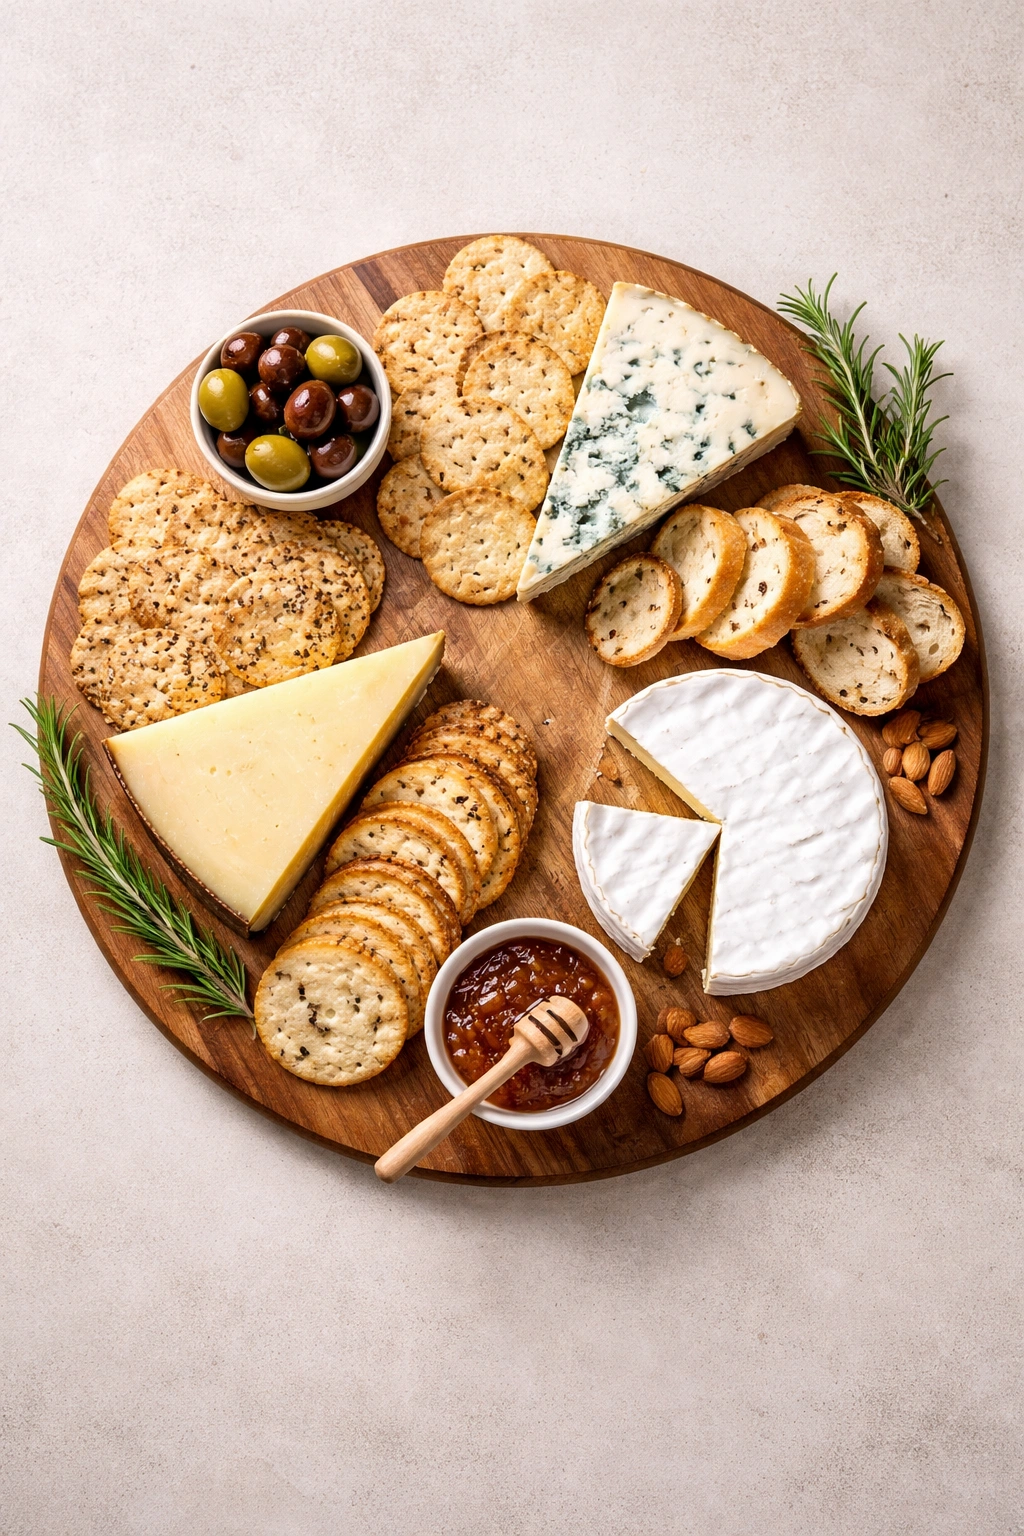
Start with cheese placement. Put your three cheeses in a triangle or line formation, leaving enough space around each one so people can cut and serve themselves without touching other items. Place each cheese far enough apart that flavors don’t literally bleed into each other. A soft cheese next to a blue cheese will transfer flavors if they’re touching or too close.
Put harder cheeses in positions that are easy to cut into — near the edge of the board where a knife has leverage. Soft cheeses can sit more centrally since people will spread them rather than slice them.
Crackers and bread should form the second layer. Arrange them in clusters between the cheeses rather than in one massive pile. If crackers are separated into three small piles, one near each cheese, people naturally gravitate toward the right pairing without thinking about it. Use 2–3 types of crackers maximum. More than that and you’re creating confusion rather than choice.
Space is more important than fullness. A board with breathing room looks intentional and organized. A crammed board looks either chaotic or like you’re worried about running out of food. Leave about 20% of the board surface visible — it actually makes the food look more abundant, not less.
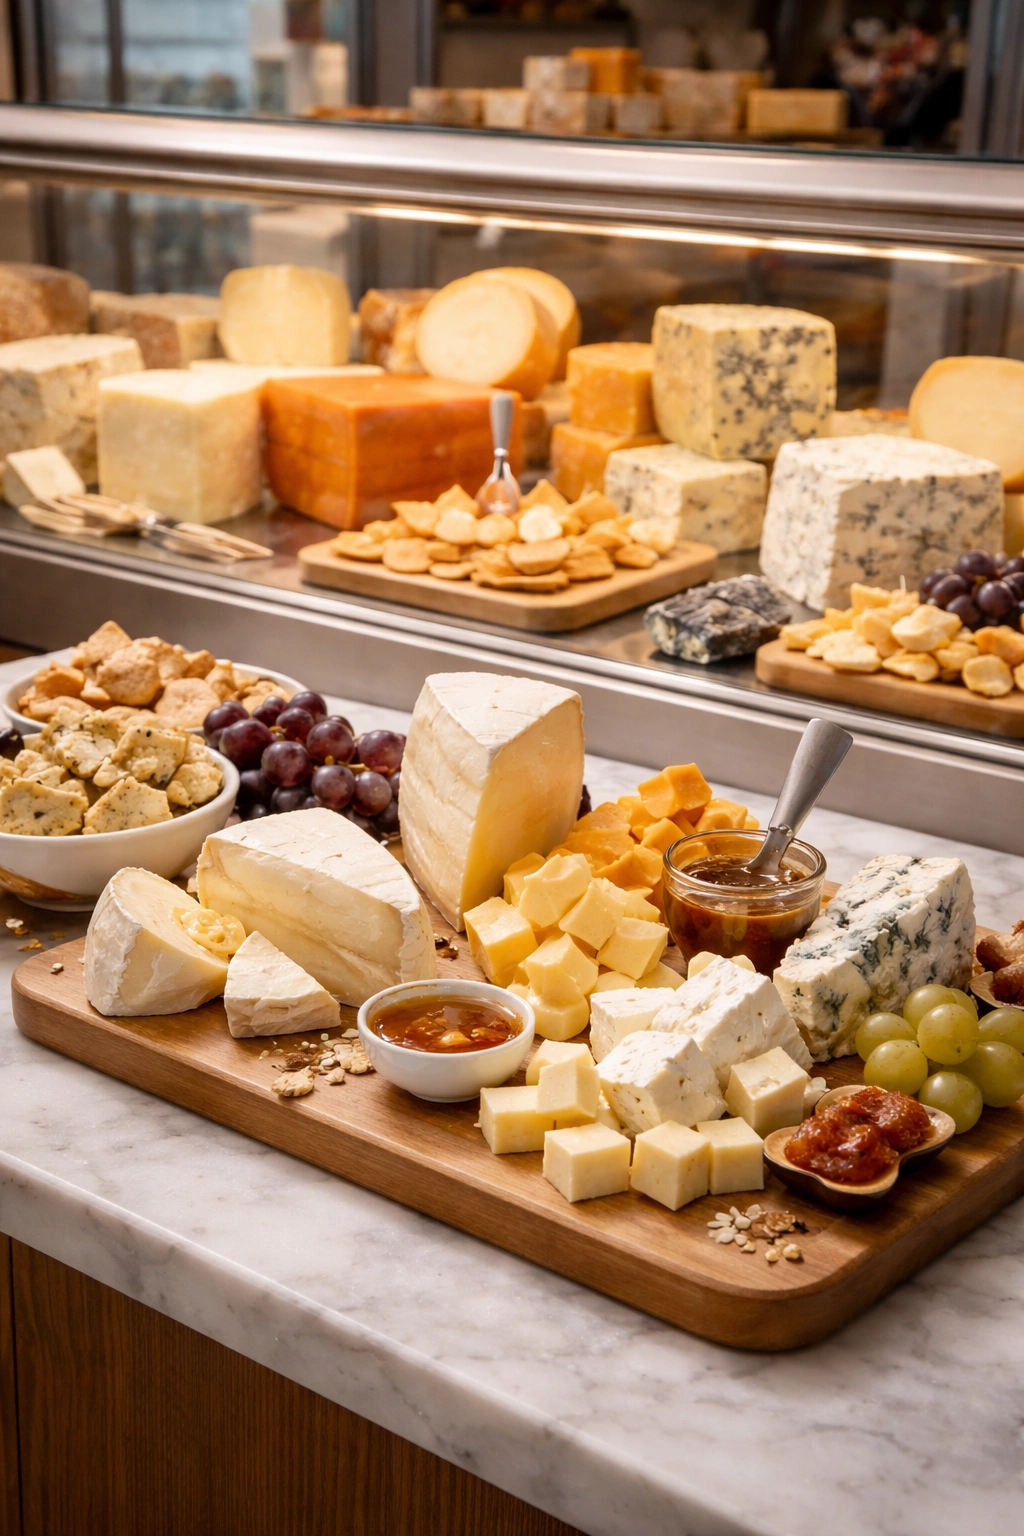
Choosing Cheeses: Where to Actually Buy and What to Taste
Your first instinct might be to grab whatever the grocery store has in the “specialty cheese” section. Don’t. The prepackaged, pre-sliced options are often old, and they taste like plastic.
Go to an actual cheese counter — a place that sells cheese by weight and has someone there who can help. This person is your secret weapon. Tell them you’re building a board for the first time and describe how many people you’re serving. They’ll steer you toward cheeses that are in their prime right now, taste good together, and aren’t going to blow your budget.
Most cheese counters let you sample before you buy. Taste everything. Taste the soft cheese by itself, then with a cracker. Do the same with the others. You’re not looking for your “favorite” necessarily — you’re looking for cheeses that taste clean and lively rather than dull. If something tastes bland or has an off, musty flavor, it’s not past its prime yet, or the shop isn’t turning inventory fast enough. Skip it.
Buy cheese the day you’re serving it, or maximum the day before. Soft cheeses especially fade quickly once cut. If you must buy ahead, ask the counter person to cut and wrap each cheese separately in paper, not plastic. Plastic makes cheese sweat and taste flat.
Temperature Matters More Than You Think
This is the detail that separates a so-so board from one that actually tastes good: most cheeses need to come out of the fridge 30–45 minutes before serving.
Cold cheese doesn’t taste like much. Soft cheeses are dense and chalky. Hard cheeses are brittle and flavorless. Semi-soft cheeses lose their creamy quality. The flavors and aroma compounds need warmth to activate and become noticeable. This is why restaurant cheese boards always taste better than the ones you build at home from cold fridge cheese — the restaurant lets them come to room temperature.
Set a phone reminder. Take the cheeses out of the fridge and place them on the board (or on a plate while you’re finishing setup) 30–45 minutes before guests arrive. Cover them loosely with a clean kitchen towel so they warm up but don’t dry out or pick up any dust or cooking smells from the kitchen.
Wine should be cool but not ice-cold. Pour it about 15 minutes before people arrive so it reaches a good serving temperature. Red wine is often served slightly warmer than white — room temperature for reds is actually ideal, even if that seems counterintuitive.
Crackers: The Invisible Foundation
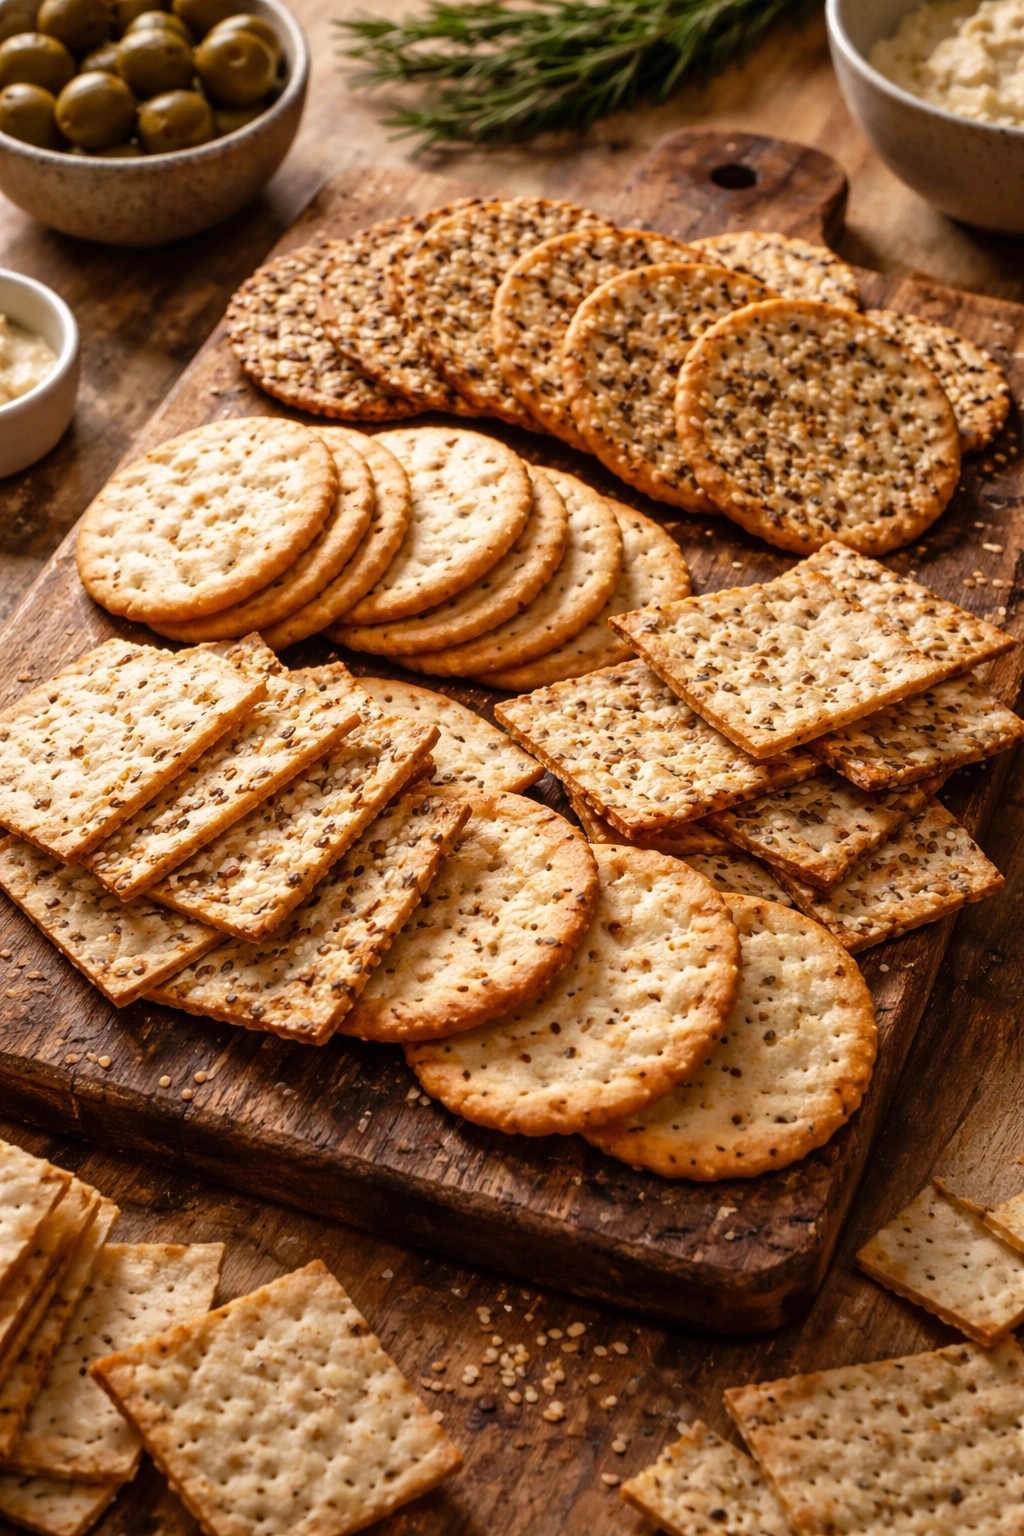
Crackers might seem like the boring part of the board, but they’re actually crucial. They’re the vehicle for the cheese. A bad cracker makes good cheese taste mediocre. A good cracker makes everything better.
Skip thin, dainty crackers if this is a real board. People want substance. You want something sturdy enough to hold soft cheese without shattering, flavorful enough that it doesn’t compete with or overshadow the cheese, and interesting enough that it tastes good on its own.
Water crackers are a safe choice — neutral, crisp, sturdy. A seeded cracker (with sunflower or pumpkin seeds) adds texture and visual interest. One rustic, slightly crumbly cracker rounds things out. That’s three types, which is plenty.
Expect about 5–8 crackers per person, depending on how much other food is on the board. If there’s charcuterie, fruits, and spreads, people will use fewer crackers. If cheese and crackers are the main event, plan for more.
Fruits and Nuts: When to Say No
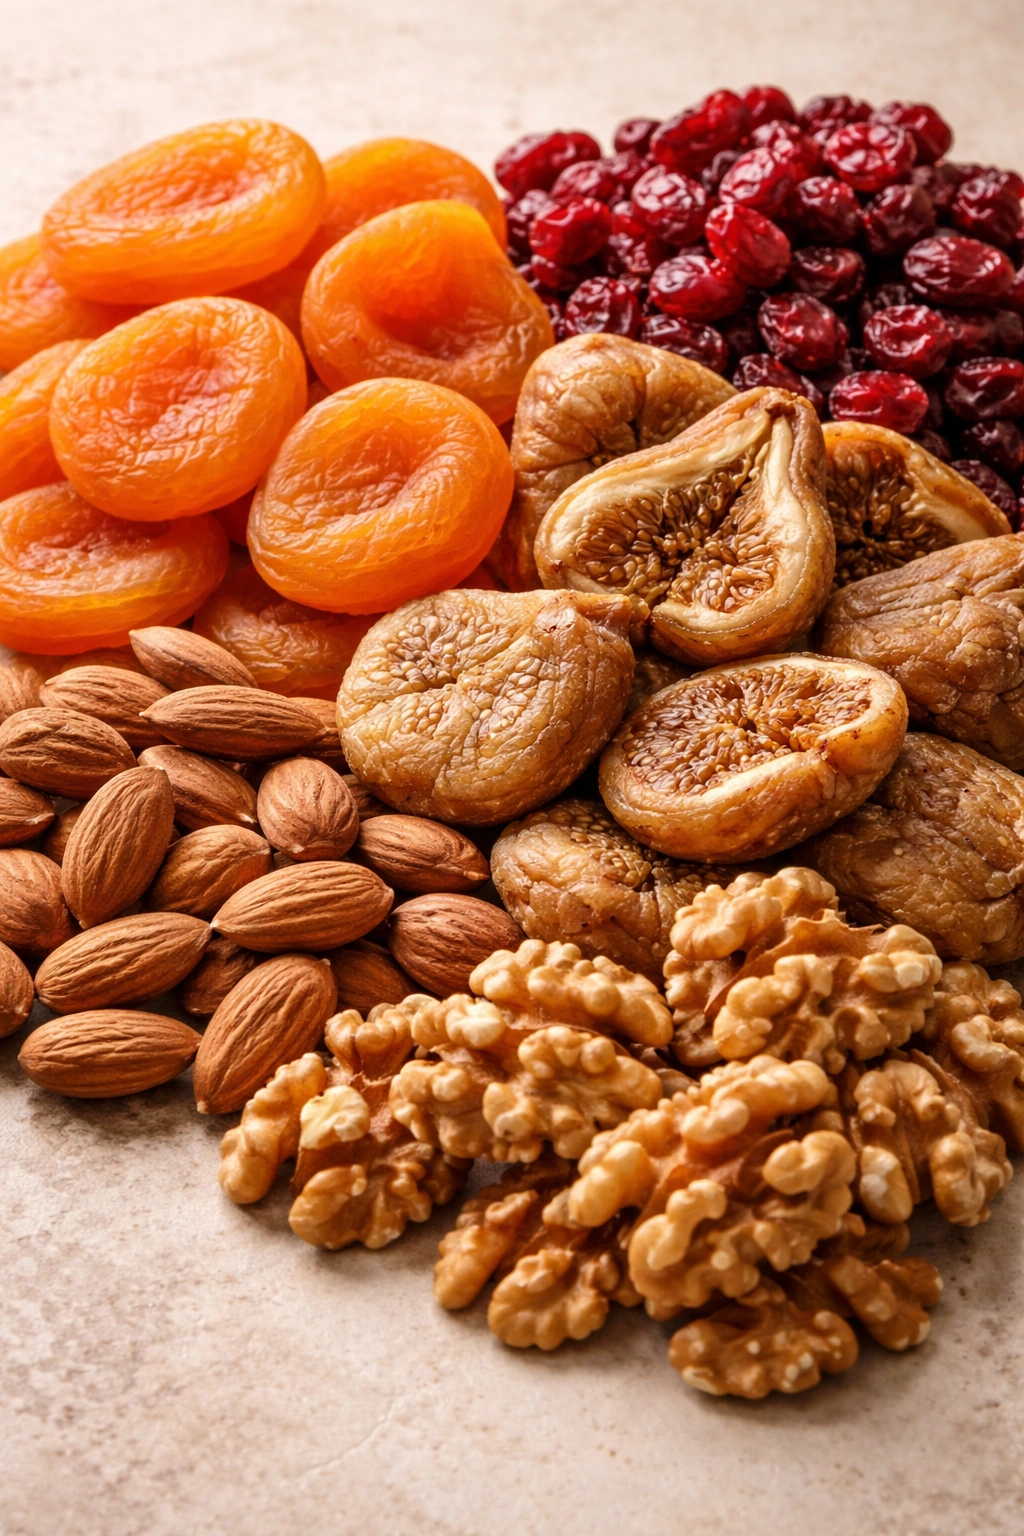
The instinct is to load the board with dried apricots, candied walnuts, honeycomb, and fig jam. It’s tempting because they look good and feel indulgent. But here’s the problem: too many sweet or flavor-forward additions compete with the cheese rather than complement it.
Choose dried fruit over fresh fruit for a cheese board — it’s less watery, so it doesn’t make crackers soggy. Add one dried fruit, not three. Dried apricots, dried figs, or dried cranberries are solid choices that don’t overwhelm soft or hard cheeses. Avoid anything candied or heavily sweetened; that’s dessert, not a cheese course.
Nuts are good. Add about a half-cup of one type. Marcona almonds, candied pecans, or raw walnuts. Candied nuts work better with soft, mild cheeses because they taste like dessert. Raw nuts work better across the board because they’re more savory. Sliced or chopped nuts scatter easily and feel messy; whole nuts are more elegant and practical.
One spread, maximum. Honey or fig jam. Not both. Not plus quince paste plus apricot preserves. Pick one. It should be something people reach for as an accent, not something that becomes the main attraction. A small ramekin near the soft cheese is enough.
Charcuterie: To Include or Not
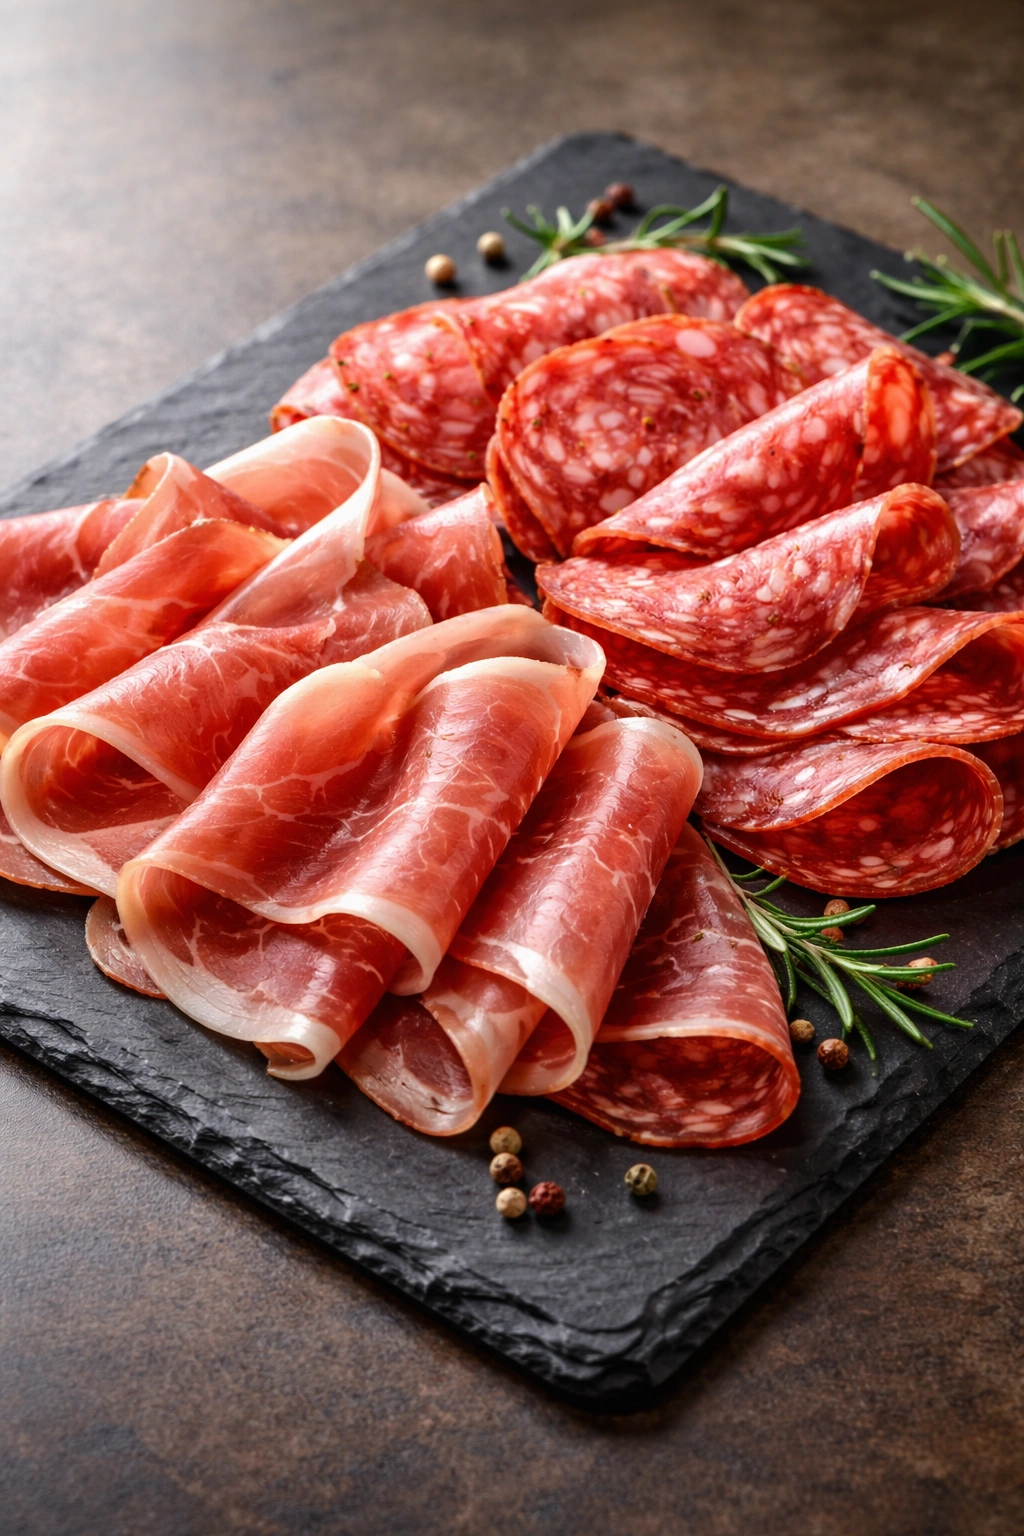
Cured meats are optional on a cheese board. Some people call it a “charcuterie board” immediately when meat is involved. To be clear: cheese boards don’t need meat to be complete or impressive.
If you do add charcuterie, choose 2–3 types maximum. Prosciutto, soppressata, and maybe a salami. Buy thin-sliced, good quality meat. Arrange it in loose piles or folds rather than neat rows — it looks more generous and inviting that way.
The issue is that cured meats take up visual real estate and can distract from the cheese if you’re building your first board. They also introduce their own flavors, which makes the board more complex rather than more coherent. Skip them your first time. Once you’re comfortable building a cheese-focused board, then experiment with adding meat.
Building the Visual Story
Arrange your board with a sense of progression and balance. You’re not creating abstract art — you’re creating a functional, visually pleasing landscape that guides people through flavors.
Place cheeses at different visual heights. Use a small wooden block or a ramekin under one cheese to elevate it. This creates depth and makes sure nothing is hidden behind something else. Let cheeses be the stars — everything else (crackers, fruit, nuts) fills in around them.
Use odd numbers. Three cheeses, not four. One type of nut, not two. This is a subtle design principle, but it actually works: odd numbers feel intentional and balanced, while even numbers feel random.
Balance colors. If you chose a pale soft cheese and a pale semi-soft cheese, make sure your hard cheese is darker or more visually distinct. Include something with color — dried apricots, dark nuts, fresh herbs as garnish.
Use serving utensils. A small cheese knife next to each cheese. A cracker or butter spreader for spreads. A nut spoon. These are not optional; they signal that this is a thoughtfully assembled board, not just stuff piled on a plate.
Common First-Timer Mistakes to Avoid
Buying too early. Cheese deteriorates in the fridge. Don’t buy more than 24 hours ahead. Wine keeps fine, but cheese doesn’t.
Leaving cheese in the fridge until the moment guests arrive. See the temperature section above. Cold cheese tastes like nothing. Plan your timing.
Choosing cheeses because they sound fancy, not because they taste good. Buy what actually tastes clean and alive, not what sounds impressive. A delicious Vermont cheddar beats a mediocre imported brie every single time.
Overcrowding the board. Blank space isn’t wasted space. It’s design. It makes what you’ve chosen look intentional.
Cutting cheese way too early. Cut soft cheeses minutes before serving, hard cheeses up to an hour before. Exposed cut surfaces dry out and brown, especially soft cheese. If you’re serving a whole wheel of brie, leave it whole and let people scoop what they want.
Forgetting that people need plates. Small plates, napkins, and forks matter. This isn’t casual finger food; it’s a tasting experience. Give people the tools to eat thoughtfully.
Pairing wine by color instead of character. A heavy, oak-forward chardonnay tastes worse with cheese than a light pinot noir. Pair by acidity and weight, not by red or white.
Adding items you don’t actually like. If you don’t love fig jam or honeycomb, don’t put it on the board just because you think it’s supposed to be there. Your ambivalence will show, and guests will sense it.
Serving Your Board: The Actual Moment
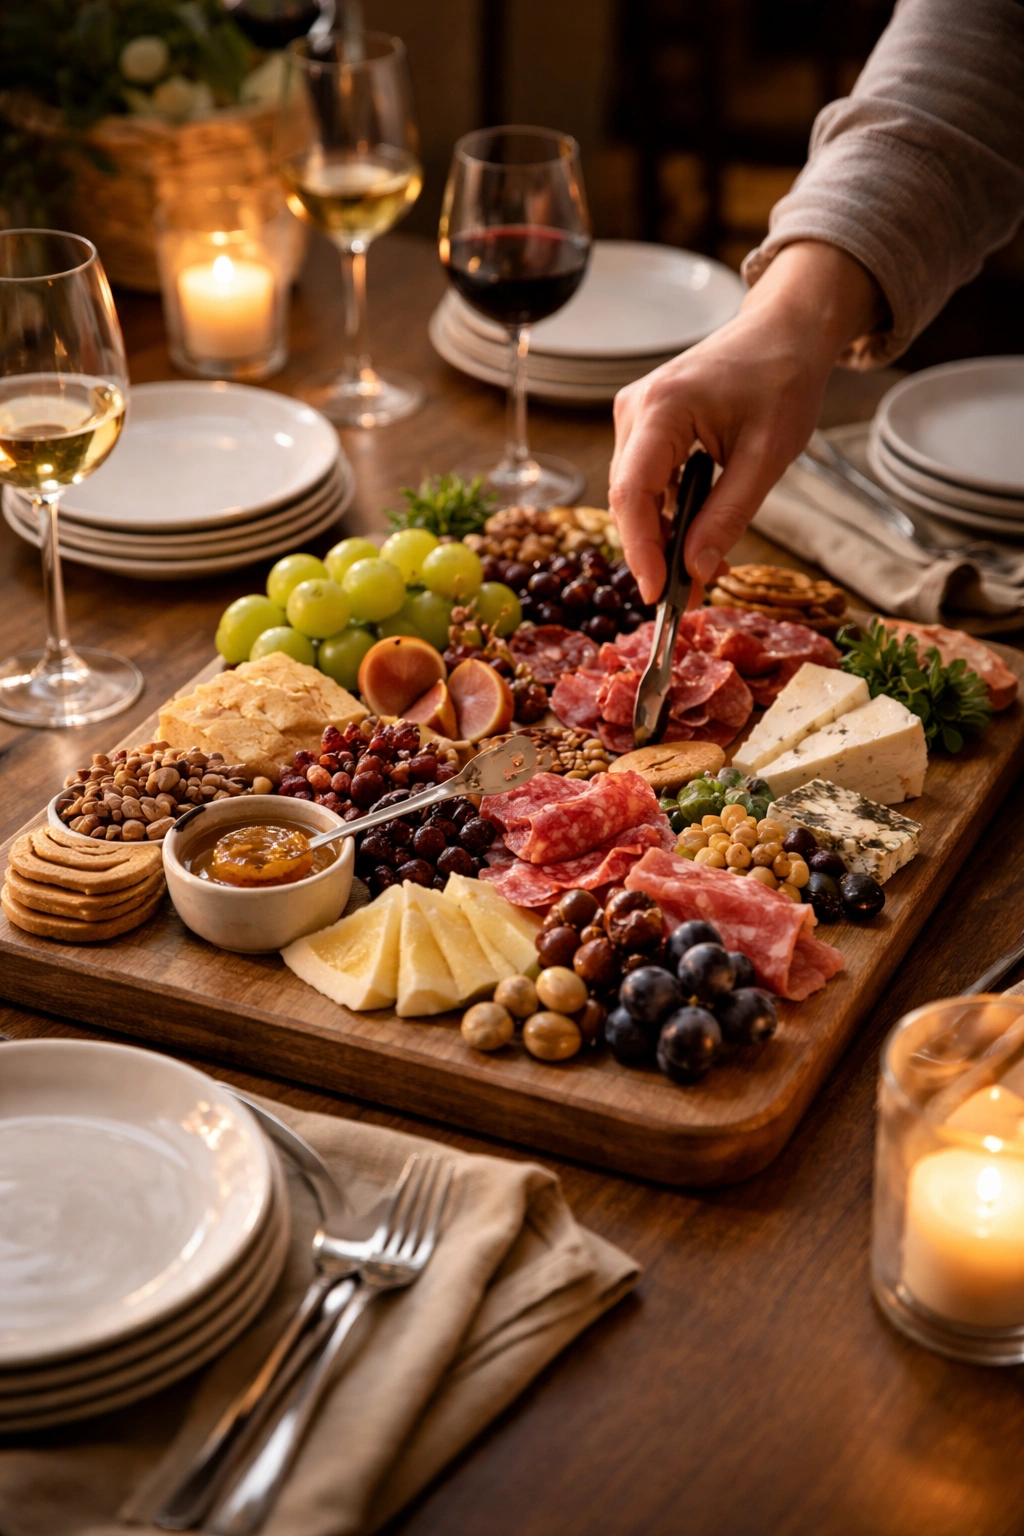
Bring the board out about 5–10 minutes before people eat, so cheeses are at their best temperature. If it’s particularly warm, keep the board in the shade or away from direct light — soft cheeses will melt.
Tell people where to start or how to build a bite. Don’t assume they know. “Start with the soft one, move through the semi-soft, and finish with the hard if you want to go lightest to strongest” gives people permission to eat however they want, but gives them a roadmap if they need one.
Have enough small plates available. People will want to try different combinations and compare flavors. They don’t want to eat off the board itself.
Keep napkins visible and accessible. Cheese is rich, and people appreciate having something to wipe their hands on.
Refill water. This might sound silly, but water is crucial. Cheese is salty and rich. Water cleanses the palate and makes the whole experience more pleasant. Have plain water available, not just wine.
Don’t hover. Set out the board and let people explore it. The best conversations happen when people are relaxed and the board isn’t the center of attention anymore.
Storage and Leftovers
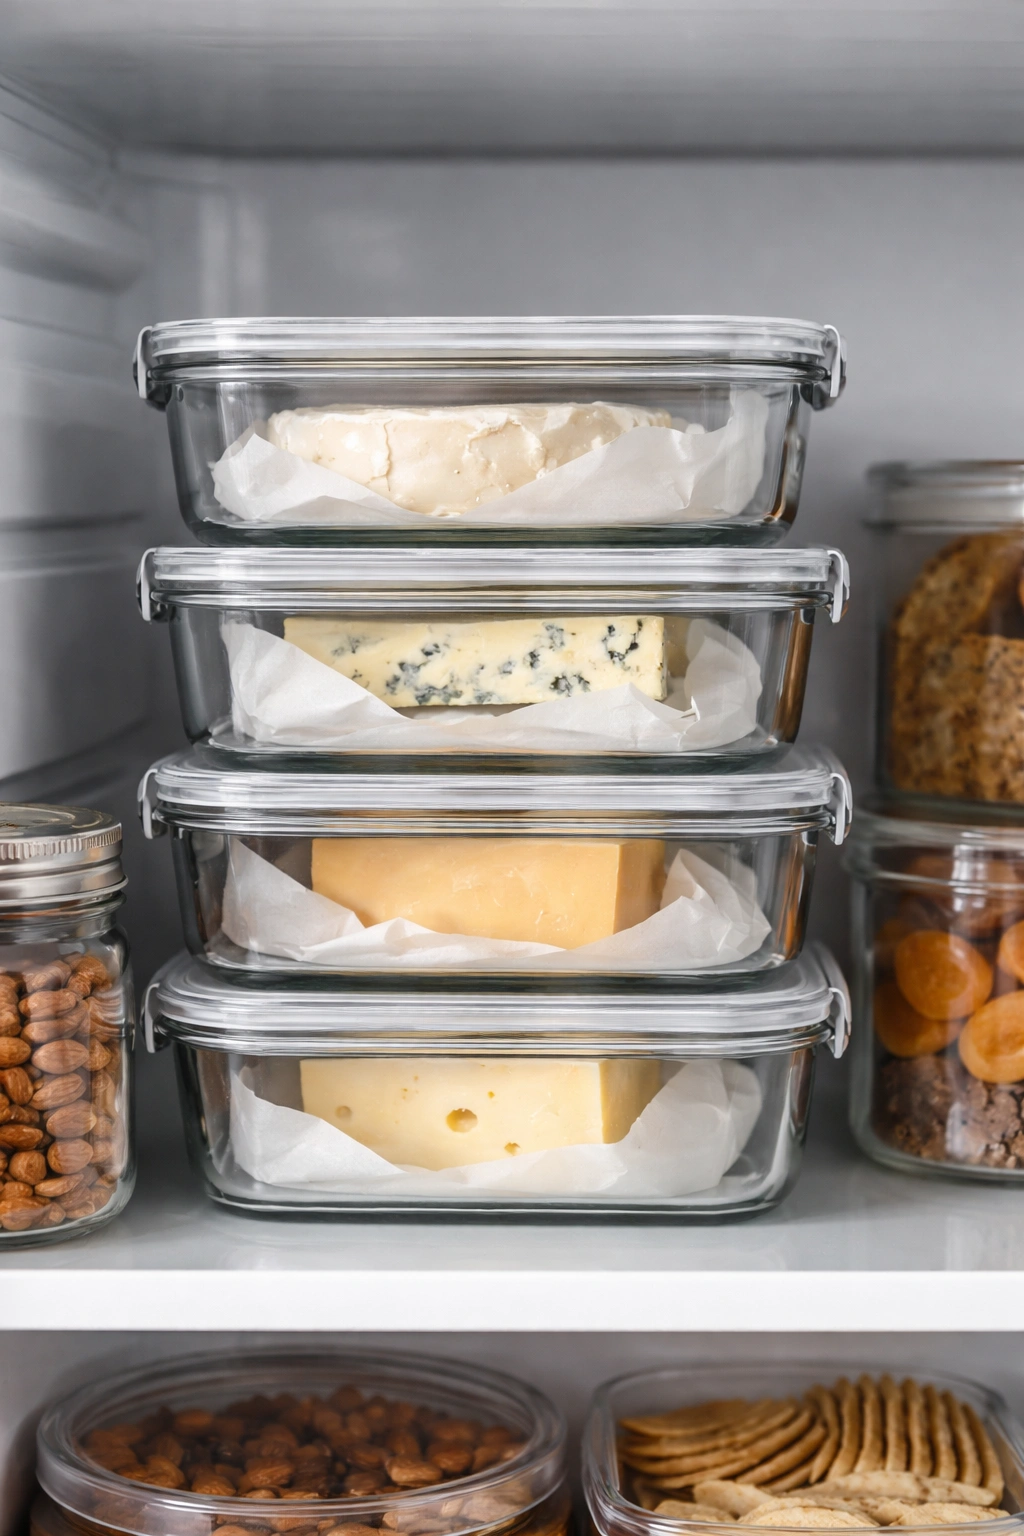
Wrap each cheese individually in parchment paper, then place in an airtight container. Label with the cheese name and date. Soft cheeses keep 3–5 days. Hard cheeses keep 2–3 weeks. Semi-soft falls somewhere in between.
Crackers? Toast them in a low oven (275°F / 135°C) for 5 minutes if they’ve gone soft, or store them in an airtight container for up to a week. Don’t leave them sitting out exposed.
Dried fruit and nuts keep indefinitely in an airtight container.
Wine, once opened, keeps 3–5 days if you recork it and store it upright in the fridge.
The truth about leftovers: they rarely look as good the next day, but they taste fine. Leftover cheese on tomorrow’s lunch plate tastes exactly as good as it did on the board. Don’t waste it.
Key Takeaways
Your first cheese board doesn’t need to be complicated or expensive to impress people. Three thoughtfully chosen cheeses, good wine, quality crackers, and intentional spacing will beat an overcrowded board with eight cheeses and no room to breathe every single time.
Buy cheese from a counter where someone can help you, not from a prepackaged section. Taste before you commit. Let cheese reach room temperature before serving — this detail alone will make your board taste significantly better.
Remember that soft, semi-soft, and hard gives you the perfect range. That one good cracker is more important than three mediocre ones. And blank space on a board is a feature, not a failure.
The skill you’re actually building isn’t about knowing obscure cheeses or wine pairings — it’s about understanding that food, when treated with care and intention, tastes better and means more. That translates to every board you build, whether it’s your first or your fiftieth.