Eating vegetarian while avoiding gluten doesn’t mean settling for boring, repetitive meals—or spending hours in the kitchen scrambling to figure out what to cook. In fact, some of the most satisfying, naturally gluten-free dinners emerge from vegetarian cooking traditions that have zero reliance on wheat, pasta, or breadcrumbs. The Mediterranean kitchen, Indian cuisine, Mexican cooking, and Asian stir-fry culture all offer deeply flavored, protein-packed dinners that happen to be plant-based and naturally free of gluten. Whether you’re managing celiac disease, gluten sensitivity, or simply exploring plant-based eating, the problem isn’t finding options—it’s knowing where to start among so many possibilities. The dinners that follow aren’t sad substitutes or compromise meals; they’re genuinely delicious, craveable options that you’ll want to make again and again.
1. Chickpea Shakshuka with Crispy Herb-Roasted Pita Chips

Shakshuka is a Middle Eastern dish where eggs are poached in a fragrant tomato and spice sauce—and swapping in chickpeas creates a naturally gluten-free vegetarian version that’s hearty enough for dinner. The beauty of shakshuka is how the runny yolks become your sauce, mingling with paprika, cumin, and fresh cilantro. Serve it with homemade pita chips (or simply roasted vegetables) and you’ve got a one-pan dinner that feels both comforting and restaurant-quality. The recipe takes about 30 minutes from start to finish.
Why This Works as a Vegetarian Main
Chickpeas provide substantial plant-based protein—a single cup of cooked chickpeas delivers around 15 grams—making this dinner genuinely filling. The eggs add another dose of protein and fat, which together slow digestion and keep you satisfied for hours. The warm spices (paprika, cumin, cayenne) stimulate appetite and aid digestion, which is why this dish has been cooked the same way for centuries across the Levant.
How to Build the Perfect Shakshuka
- Heat 3 tablespoons olive oil in a large skillet over medium heat
- Add 1 diced onion and 4 minced garlic cloves, cooking for 4-5 minutes until softened and lightly golden
- Stir in 2 teaspoons ground cumin, 1½ teaspoons smoked paprika, and ½ teaspoon cayenne pepper, cooking for 1 minute until fragrant
- Add one 28-ounce can crushed tomatoes (fire-roasted if you can find them), 1 cup cooked chickpeas, and ½ teaspoon fine sea salt
- Simmer uncovered for 10-12 minutes, stirring occasionally, until the sauce thickens slightly and the flavors deepen
- Make 4-6 small wells in the sauce, then crack 1 egg into each well
- Cover the skillet and reduce heat to low, cooking for 6-8 minutes until the egg whites are set but yolks remain runny
- Finish with fresh cilantro, crumbled feta cheese if desired, and a drizzle of harissa oil
Pro tip: Make the tomato-chickpea sauce up to 2 days ahead, then simply reheat it and poach the eggs fresh when you’re ready to serve—perfect for busy weeknights when you want a homemade dinner without the full time commitment.
2. Crispy Tofu Stir-Fry with Coconut Aminos and Charred Broccoli
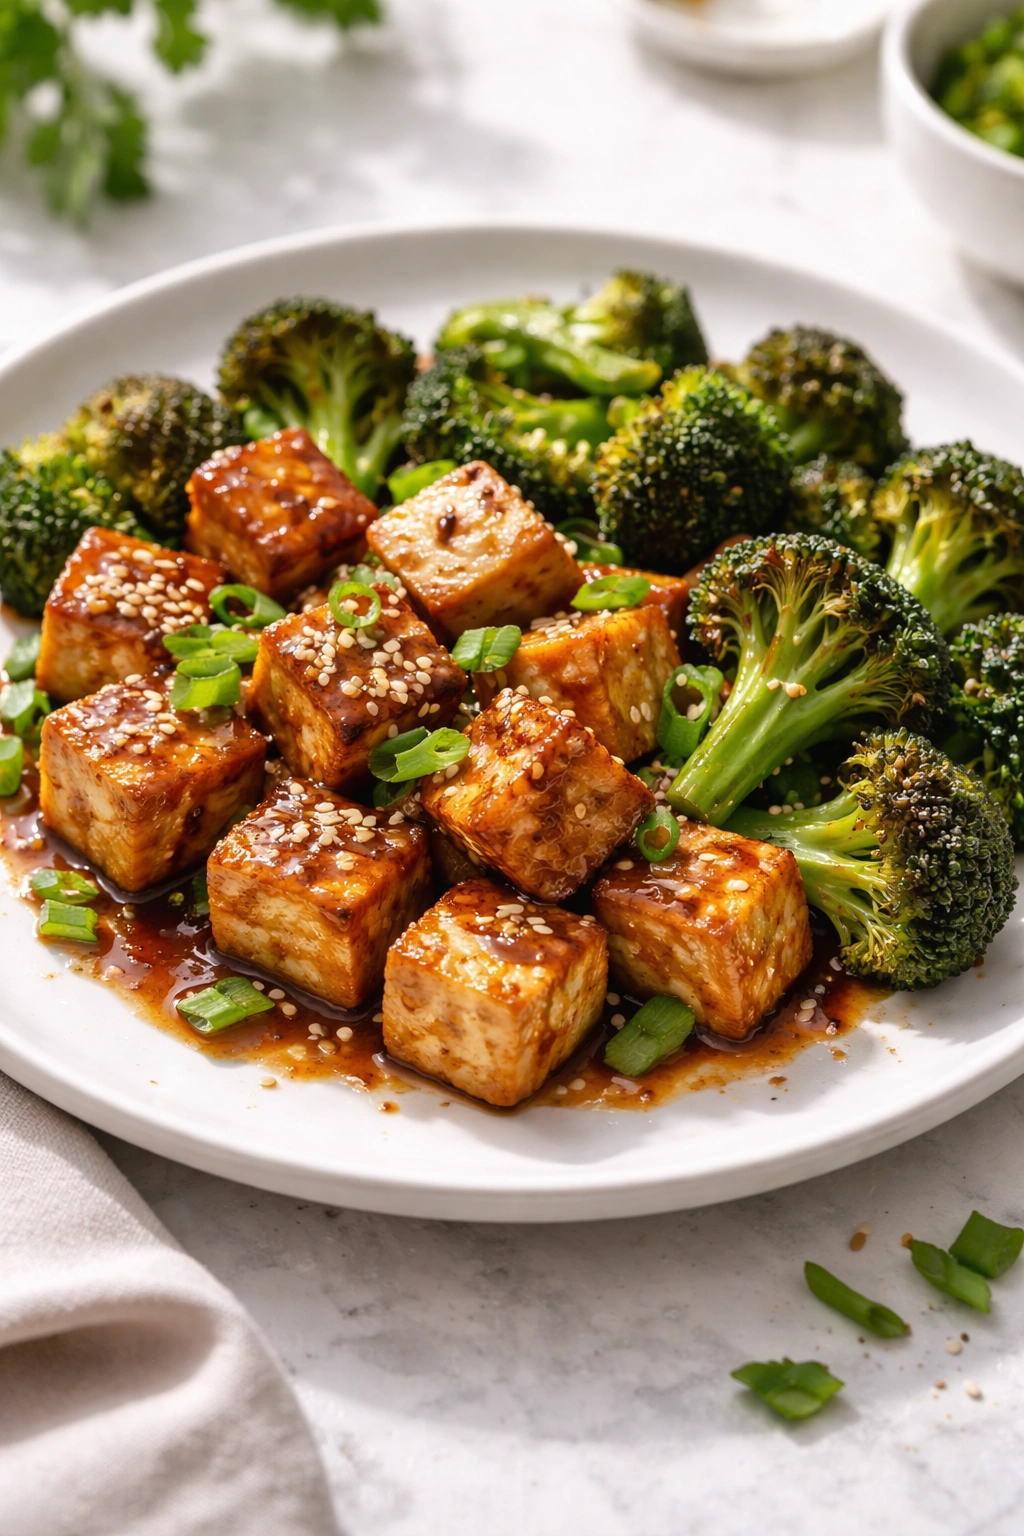
Tofu gets a bad reputation, mostly because most people have never learned how to cook it properly. The secret is pressing out excess moisture, then giving it a golden, crispy exterior through high-heat pan-frying before tossing it with vegetables and a rich, savory sauce. Coconut aminos (a soy-free, gluten-free alternative to soy sauce) provides umami depth without the soy, and you’ll barely notice the swap. Served over white or brown rice, this dinner comes together in under 25 minutes.
Why Crispy Tofu Changes Everything
Soft or silken tofu is watery and absorbs flavors poorly; firm or extra-firm tofu can be pressed to remove moisture and then crisped until its exterior is almost crunchy. That contrast—crispy edges giving way to a creamy center—is what makes tofu craveable. The high heat also creates the Maillard reaction, a chemical process that builds deep, savory flavors you can’t get from gentle steaming.
The Step-by-Step for Perfect Crispy Tofu Stir-Fry
- Press 14 ounces firm tofu between clean kitchen towels for 10-15 minutes, applying gentle pressure to remove excess liquid
- Cut the pressed tofu into ¾-inch cubes
- Heat 4 tablespoons neutral oil in a large skillet or wok over medium-high heat
- Working in batches if needed, add the tofu cubes in a single layer without stirring for 3-4 minutes, until the bottom side turns golden and crispy
- Flip each piece and cook the other side for another 3-4 minutes until evenly crispy, then set aside on a plate
- Return the skillet to medium-high heat and add 1 head broccoli (cut into florets), ½ cup sliced bell peppers, and ¼ cup thinly sliced green onions
- Stir-fry for 4-5 minutes until the broccoli is charred on the edges but still tender-crisp
- Return the crispy tofu to the skillet and add 4 tablespoons coconut aminos, 1 tablespoon sesame oil, 1 teaspoon grated ginger, and 2 minced garlic cloves
- Toss everything together for 1-2 minutes, allowing the sauce to coat all the vegetables and tofu
- Serve over steamed rice with sesame seeds and a pinch of crushed red pepper
Pro tip: Prepare your tofu and vegetables in advance by pressing the tofu and cutting your vegetables the morning of, storing them separately until cooking—then dinner prep takes only 15 minutes of active cooking.
3. Roasted Cauliflower Steaks with Tahini-Herb Sauce and Pomegranate
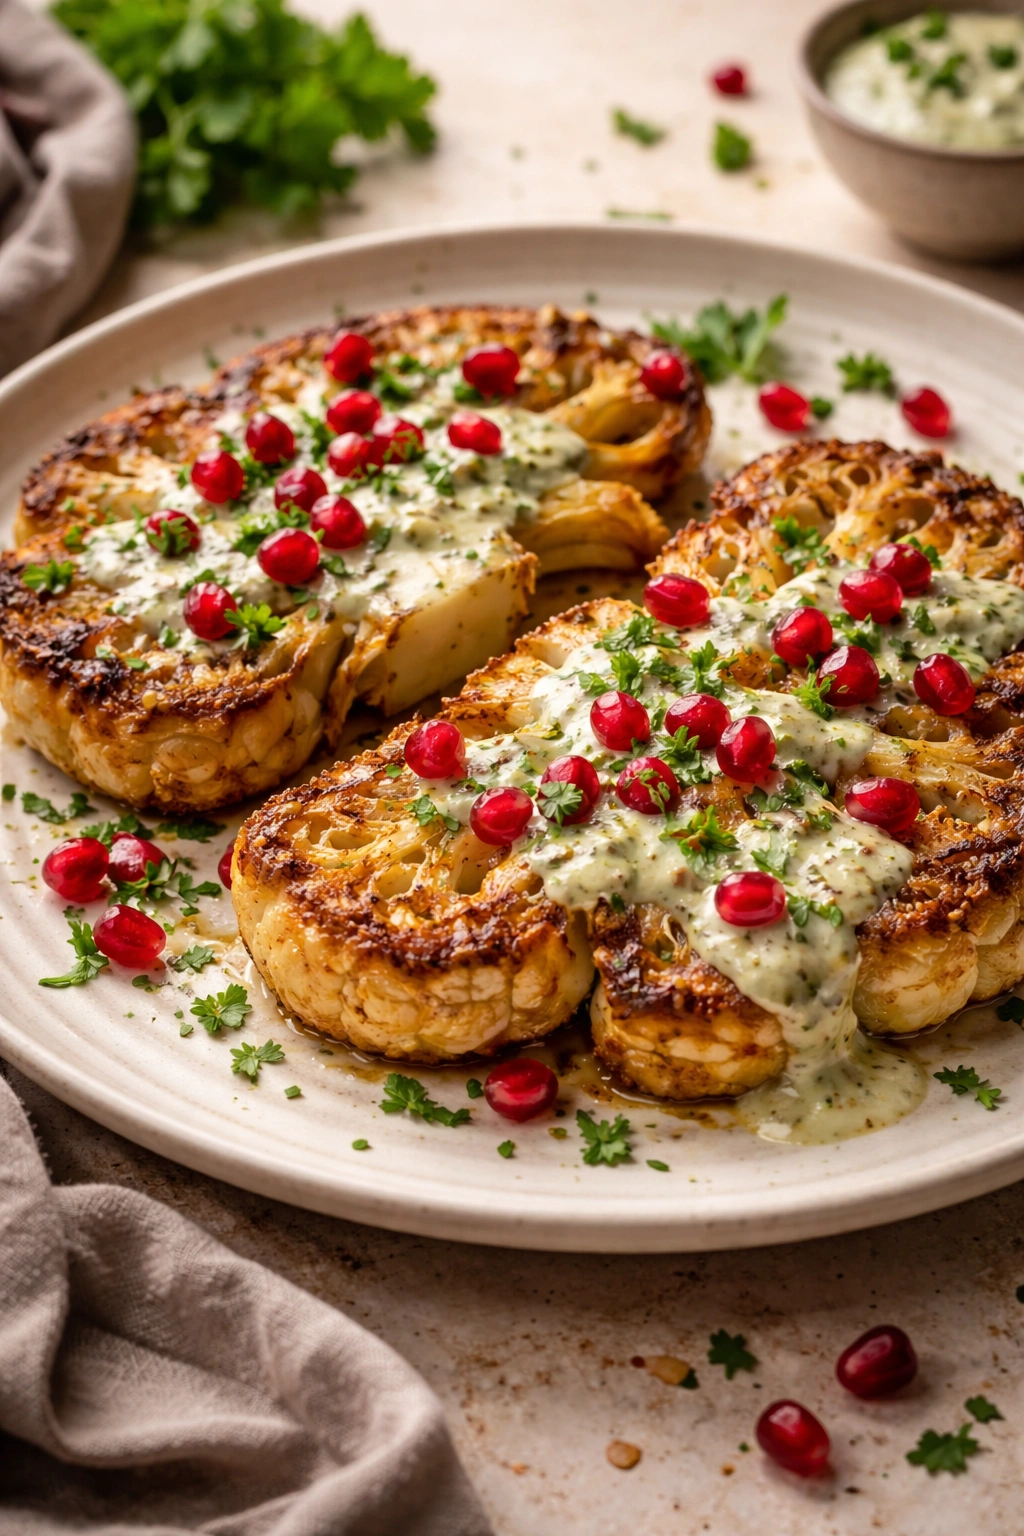
Cauliflower steaks are thick cross-sections of cauliflower cut vertically and roasted until caramelized and tender. They’re substantial enough to serve as a vegetarian main and dramatic enough to impress guests. A drizzle of tahini sauce (made with tahini, lemon, garlic, and water) pulls everything together, while pomegranate seeds add brightness and a subtle sweet-tart contrast. This dinner is naturally gluten-free and takes about 40 minutes, mostly hands-off roasting time.
The Science of Roasting Cauliflower
When cauliflower is roasted at high heat, its natural sugars caramelize, creating complex, almost nutty flavors that taste nothing like the boiled cauliflower many people remember from childhood. The exterior becomes crispy and brown while the interior stays creamy and tender. High heat also drives off moisture, concentrating flavors and improving texture dramatically.
How to Create Picture-Perfect Cauliflower Steaks
- Preheat your oven to 425°F (220°C) and line a large baking sheet with parchment paper
- Cut a medium head of cauliflower into four ¾-inch-thick steaks (you’ll cut vertically through the head to create these cross-sections; trim any loose florets)
- Arrange the steaks on the baking sheet and brush both sides generously with olive oil, then season with fine sea salt and freshly ground black pepper
- Roast for 20-25 minutes, flipping halfway through, until the edges are deeply caramelized and a fork pierces the center easily
- While the cauliflower roasts, make the tahini sauce: whisk together 4 tablespoons tahini, 3 tablespoons fresh lemon juice, 2 minced garlic cloves, ½ teaspoon fine sea salt, and 4-5 tablespoons warm water until you reach a drizzle-able consistency
- Arrange the roasted steaks on a serving plate and drizzle generously with tahini sauce
- Top with ⅓ cup pomegranate seeds, fresh parsley, and a pinch of sumac for brightness
- Serve warm or at room temperature
Pro tip: Make extra tahini sauce and store it in a jar in the refrigerator for up to 5 days—it’s spectacular drizzled over roasted vegetables, spooned into bowls of chickpea soup, or used as a dip for crudités.
4. Black Bean and Quinoa Stuffed Poblano Peppers
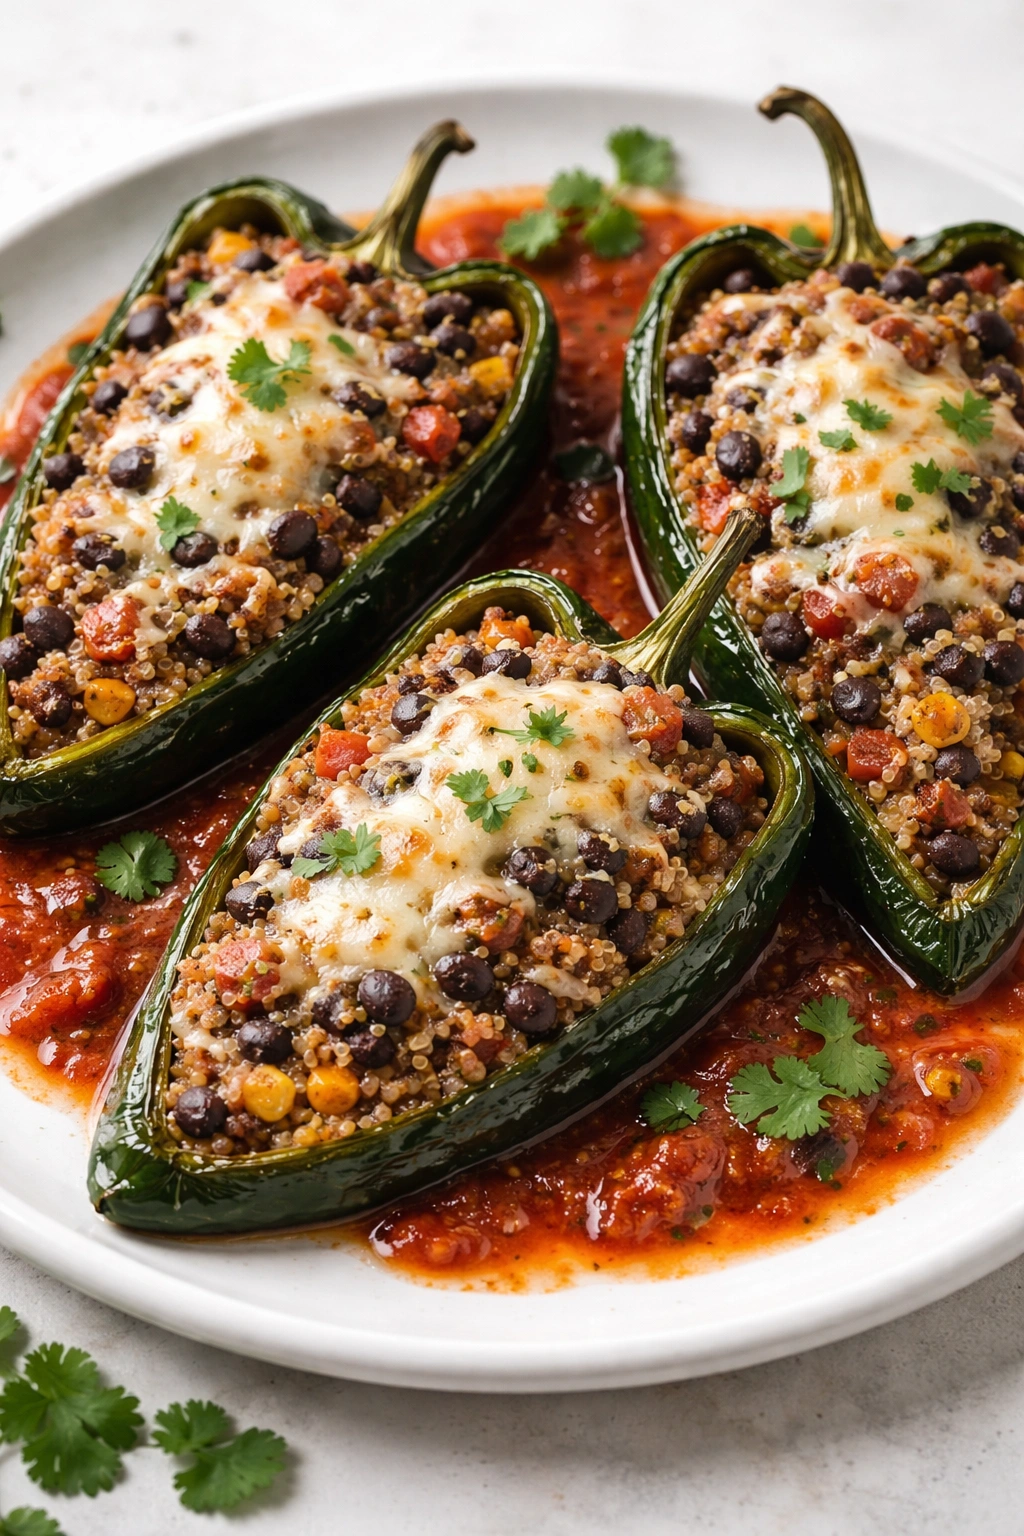
Poblano peppers (the milder cousins of jalapeños) are roasted until their skin blisters, then peeled to reveal tender flesh. They’re stuffed with a protein-rich mixture of black beans, cooked quinoa, roasted corn, and cheese, then covered in a homemade red sauce and baked. This dinner is naturally gluten-free, vegetarian, and deeply satisfying—closer to comfort food than health food, though it delivers on both fronts. Prep takes about 20 minutes and baking takes another 25-30 minutes.
Why Poblano Peppers Are the Best Pepper for Stuffing
Poblanos have thicker walls than bell peppers, which means they don’t collapse during roasting and baking. Their natural flavor is rich and slightly sweet with a hint of smoke. When roasted and peeled, their texture becomes creamy rather than raw and crunchy, making them elegant enough for dinner guests. They’re mild enough that even heat-sensitive eaters can enjoy them.
The Complete Assembly Guide for Poblano Peppers
- Preheat your broiler and arrange the oven rack about 4 inches below the heating element
- Place 4 large poblano peppers directly on the oven rack under the broiler and broil for 3-4 minutes per side, until the entire skin is charred black
- Transfer the peppers to a paper bag or bowl covered with plastic wrap and let them steam for 10 minutes (this makes the skin easier to peel)
- Peel away the charred skin under cool running water, then make a slit down one side and gently remove the seeds and stem
- Meanwhile, combine 1½ cups cooked black beans, 1 cup cooked quinoa, ¾ cup roasted corn, ½ cup shredded sharp cheddar cheese, ⅓ cup diced red onion, 2 tablespoons fresh cilantro, and ½ teaspoon fine sea salt in a bowl
- Preheat your oven to 350°F (175°C)
- Stuff each poblano with about ¾ cup of the black bean mixture, packing gently so it holds together but isn’t compressed
- Arrange the stuffed peppers in a baking dish and pour 2 cups red enchilada sauce (store-bought or homemade) around them
- Cover with foil and bake for 25-30 minutes until the filling is heated through
- Top with additional shredded cheese and fresh cilantro, then serve with lime wedges and Greek yogurt or crème fraîche
Pro tip: Roast and peel the poblanos up to 2 days ahead, storing them in an airtight container in the refrigerator—then on cooking day, you only need to mix the filling and assemble before baking.
5. Thai Curry with Sweet Potato, Green Beans, and Coconut Milk
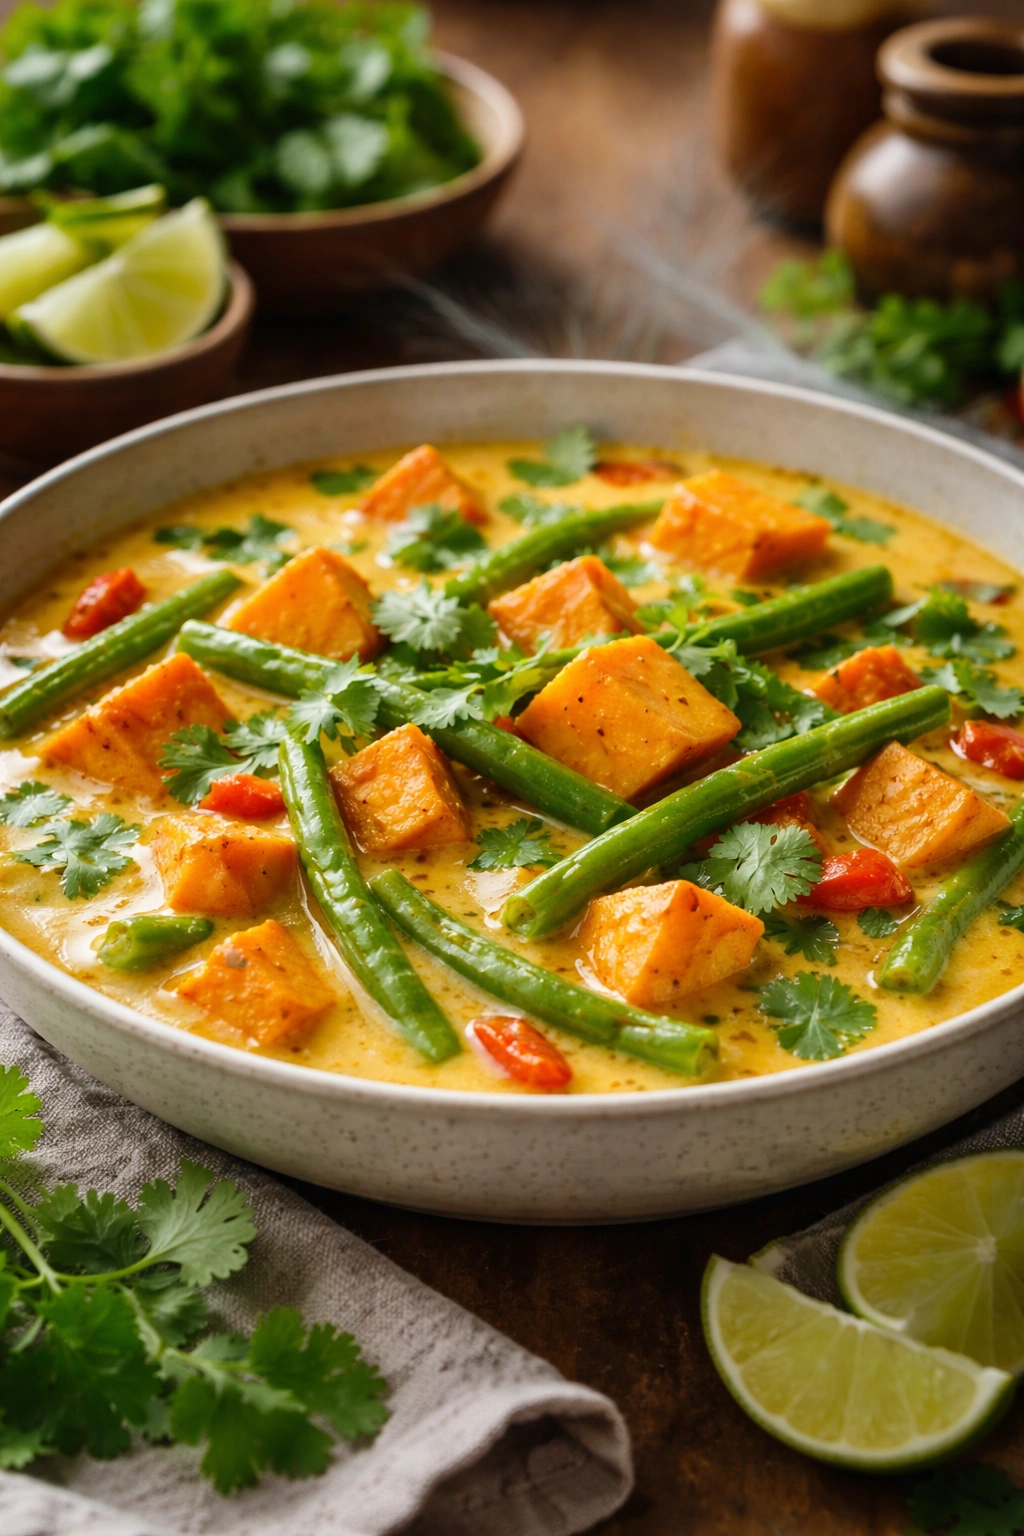
Thai curry—whether red, green, or yellow—is a quick, fragrant dinner that comes together in a single pot or wok. The curry paste (which you can make from scratch or buy pre-made) combines chilies, garlic, ginger, lemongrass, and shrimp paste to create a deeply aromatic base. Sweet potatoes add body and natural sweetness, while green beans contribute a fresh, grassy note. The coconut milk creates a rich, luxurious sauce without any cream. This dinner is naturally gluten-free and ready in about 25 minutes.
Why Thai Curry is Perfect for Vegetarian Cooking
Thai cuisine relies on pastes, fresh herbs, and aromatics to build flavor rather than relying on meat stock or soy sauce. The fat from coconut milk carries flavors beautifully and creates a naturally creamy sauce. The balance of spicy, salty, sour, and sweet (fundamental to Thai cooking) means the dish never feels one-dimensional, even without meat. Fresh basil added at the end adds an aromatic brightness that’s nearly impossible to replicate.
The Simple Method for Perfect Thai Curry
- Heat 2 tablespoons coconut oil or neutral oil in a large pot or wok over medium-high heat
- Add 3 tablespoons red Thai curry paste (or yellow, depending on your preference) and cook for 1-2 minutes, stirring constantly, until fragrant
- Add 1 diced sweet potato, 2 cups green beans (trimmed and cut into 2-inch pieces), ¼ cup diced red onion, and 2 minced garlic cloves
- Stir everything together and cook for 2-3 minutes until the paste coats all the vegetables
- Pour in one 13.5-ounce can full-fat coconut milk and 1 cup vegetable broth
- Bring to a simmer, then reduce heat to medium and cook uncovered for 12-15 minutes, until the sweet potato is completely tender when pierced with a fork
- Taste and adjust seasoning with fine sea salt, fresh lime juice (about 1 tablespoon), and fish sauce if you want deeper umami (optional but recommended)
- Stir in 1 cup fresh Thai basil (or regular basil if Thai basil isn’t available) right before serving
- Serve over jasmine rice with lime wedges and a scatter of crushed peanuts
Pro tip: Make a double batch of this curry and freeze half in an airtight container—it reheats beautifully and tastes even better the next day as the flavors continue to meld.
6. Baked Feta and Vegetable Phyllo Pie (Spanakopita-Style)

Phyllo pie might seem complicated, but it’s actually one of the easiest impressive dinners you can make—and phyllo dough is naturally gluten-free in most brands (always verify the box). Layers of crispy, buttery phyllo encase a filling of sautéed spinach, herbs, crumbled feta, and ricotta. The interior stays creamy and tender while the exterior becomes golden and shatters when you cut into it. This dinner takes about an hour, but only about 15 minutes of that is active work.
Why Phyllo Is Easier Than It Looks
Phyllo dough is incredibly thin and delicate, which intimidates many cooks—but that very delicacy makes it forgiving. The dough is pre-rolled and sold in sheets, so there’s zero kneading or rolling involved. As long as you brush each layer with butter or oil to prevent drying, you’ll get a beautiful golden result. The paper-thin sheets layer to create dramatic, crispy texture without any special technique.
The Assembly Guide for Crispy, Golden Phyllo Pie
- Preheat your oven to 375°F (190°C) and line a 9×13-inch baking pan with parchment paper
- Heat 2 tablespoons olive oil in a large skillet over medium heat, then add 1 diced onion and cook for 4 minutes until softened
- Add 1 pound fresh spinach (or 10 ounces frozen spinach, thawed and squeezed dry) and cook for 3-5 minutes, stirring frequently, until the spinach is completely wilted and any liquid has evaporated
- Stir in ¾ cup crumbled feta, 1 cup ricotta cheese, 2 tablespoons fresh dill, 2 tablespoons fresh parsley, 2 minced garlic cloves, ½ teaspoon fine sea salt, and a pinch of nutmeg
- Remove from heat and allow to cool slightly, about 5 minutes
- Melt 6 tablespoons unsalted butter in a small saucepan or microwave
- Lay out a package of phyllo dough and have a damp kitchen towel ready (phyllo dries out quickly if exposed to air)
- Place one phyllo sheet in the bottom of your baking pan, brush lightly with melted butter, then repeat with 4 more sheets, brushing each one
- Spread the spinach-feta filling evenly over the phyllo base
- Layer 5 more phyllo sheets on top, brushing each sheet with melted butter
- Using a sharp knife, score the top layers into 6 rectangles or 12 squares (this makes cutting and serving easier after baking)
- Bake for 30-35 minutes until the top is deeply golden and crispy
- Allow to rest for 5 minutes before cutting along your score lines and serving
Pro tip: The filling can be made up to 1 day ahead and stored in the refrigerator—assemble the phyllo pie and bake it fresh on serving day, or assemble it ahead, cover tightly with plastic wrap, and bake it directly from the refrigerator (adding 5-10 minutes to the baking time).
7. Lentil and Mushroom Ragù with Polenta
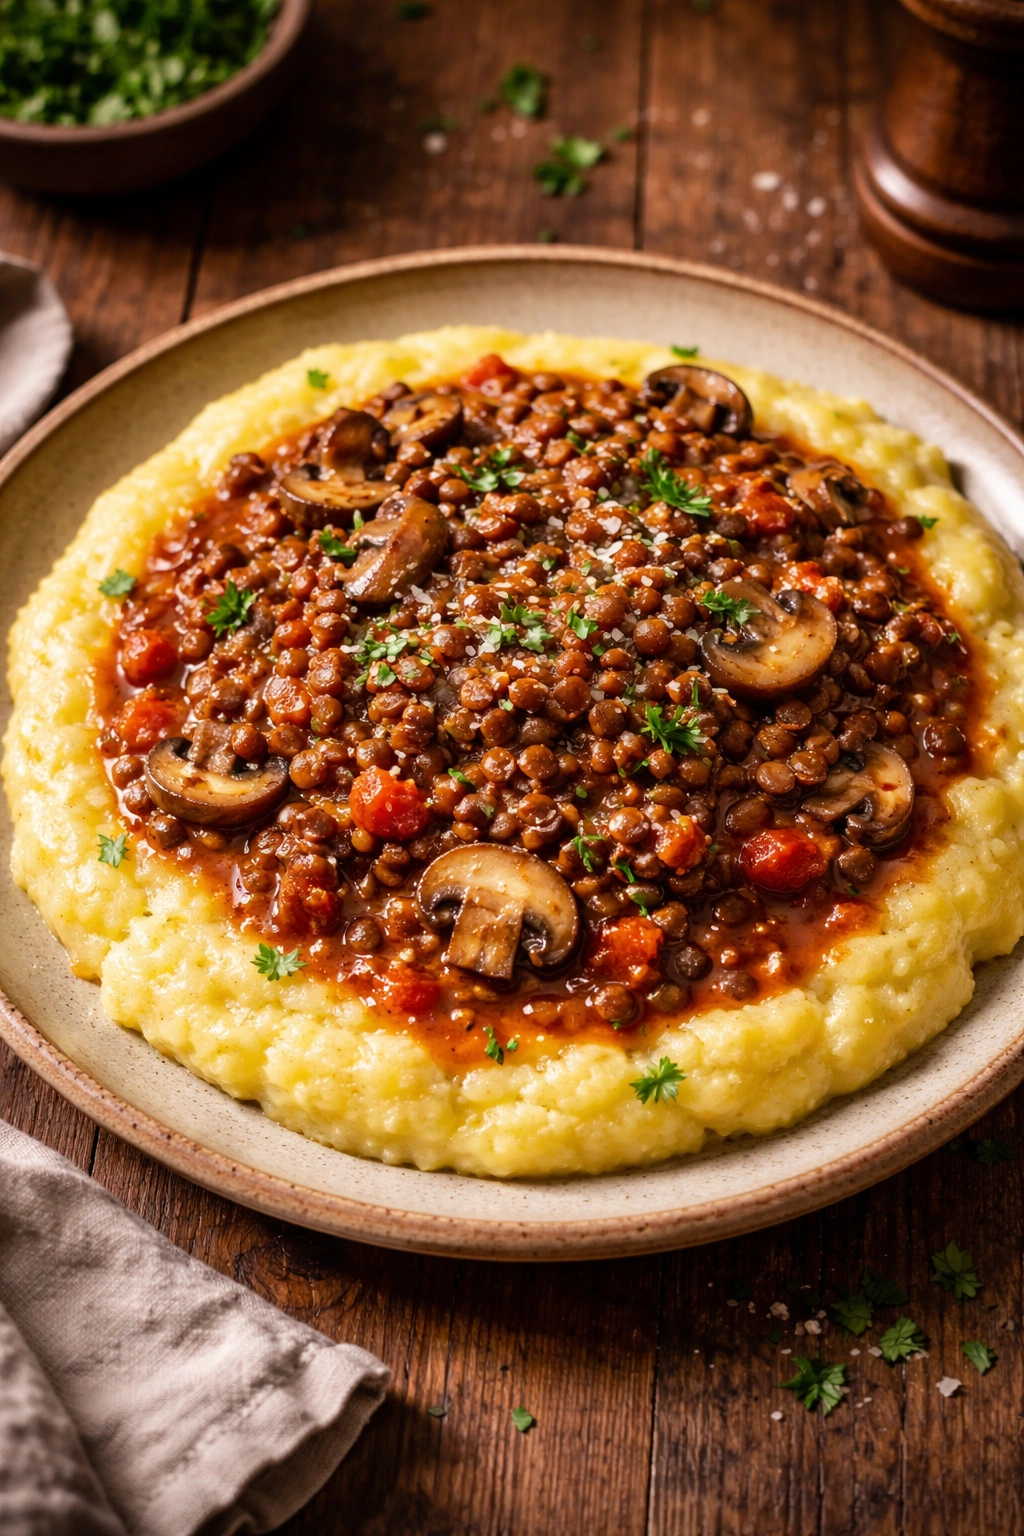
A ragù is a slow-simmered sauce traditionally made with meat—but substituting lentils and mushrooms creates a vegetarian version that’s equally rich, savory, and deeply satisfying. Mushrooms provide umami (that savory depth usually associated with meat), while brown lentils hold their shape and add substantial texture. Creamy polenta (cornmeal cooked in broth and butter until smooth) becomes the perfect canvas for this sauce. This dinner takes about 45 minutes and fills your kitchen with the most comforting aromas.
The Umami Secret That Makes Vegetarian Ragù Craveable
Umami—the fifth taste after sweet, salty, sour, and bitter—comes from compounds like glutamates and nucleotides found in aged cheeses, tomato paste, mushrooms, and fermented foods. A vegetarian ragù gets its savory depth from combining multiple umami sources: tomato paste, mushrooms, red wine, and nutritional yeast all contribute glutamates that build a complex, meaty flavor profile. The result is a sauce that satisfies meat eaters and vegetarians equally.
How to Build a Slow-Simmered Vegetarian Ragù
- Heat 3 tablespoons olive oil in a large, heavy-bottomed pot over medium heat
- Add 12 ounces mushrooms (cremini, portobello, or a mix), finely chopped into ¼-inch pieces (this is crucial—small pieces allow the mushrooms to break down and distribute throughout the sauce)
- Cook for 8-10 minutes, stirring occasionally, until the mushrooms release their liquid and the liquid evaporates, leaving the mushrooms slightly golden
- Add 1 diced onion, 2 diced carrots, 2 diced celery stalks, and 4 minced garlic cloves
- Cook for 5-6 minutes, stirring occasionally, until the vegetables are softened
- Add 3 tablespoons tomato paste and cook for 1-2 minutes, stirring constantly, to deepen the tomato flavor
- Pour in ¾ cup dry red wine and use a wooden spoon to scrape up any browned bits stuck to the bottom of the pot
- Add 1 cup brown lentils (rinsed), 3 cups vegetable broth, 1 teaspoon dried oregano, ½ teaspoon dried thyme, 1 bay leaf, 1 tablespoon balsamic vinegar, and ¾ teaspoon fine sea salt
- Bring to a simmer, then reduce heat to low, cover partially, and simmer for 35-40 minutes, stirring occasionally, until the lentils are completely tender but not falling apart
- Meanwhile, make the polenta: bring 3 cups vegetable broth to a boil in a separate pot, then very slowly whisk in 1 cup polenta (cornmeal), whisking constantly to prevent lumps from forming
- Reduce heat to low and stir frequently for 15-20 minutes until the polenta is very thick and creamy and pulls away slightly from the sides of the pot
- Stir in 4 tablespoons butter and ½ teaspoon fine sea salt
- Spoon the creamy polenta into bowls and top with the lentil-mushroom ragù
- Finish with freshly grated Parmigiano-Reggiano, fresh parsley, and a crack of black pepper
Pro tip: The ragù actually tastes better the next day as the flavors deepen and meld—make it ahead and refrigerate, then gently reheat and serve over fresh polenta made just before serving.
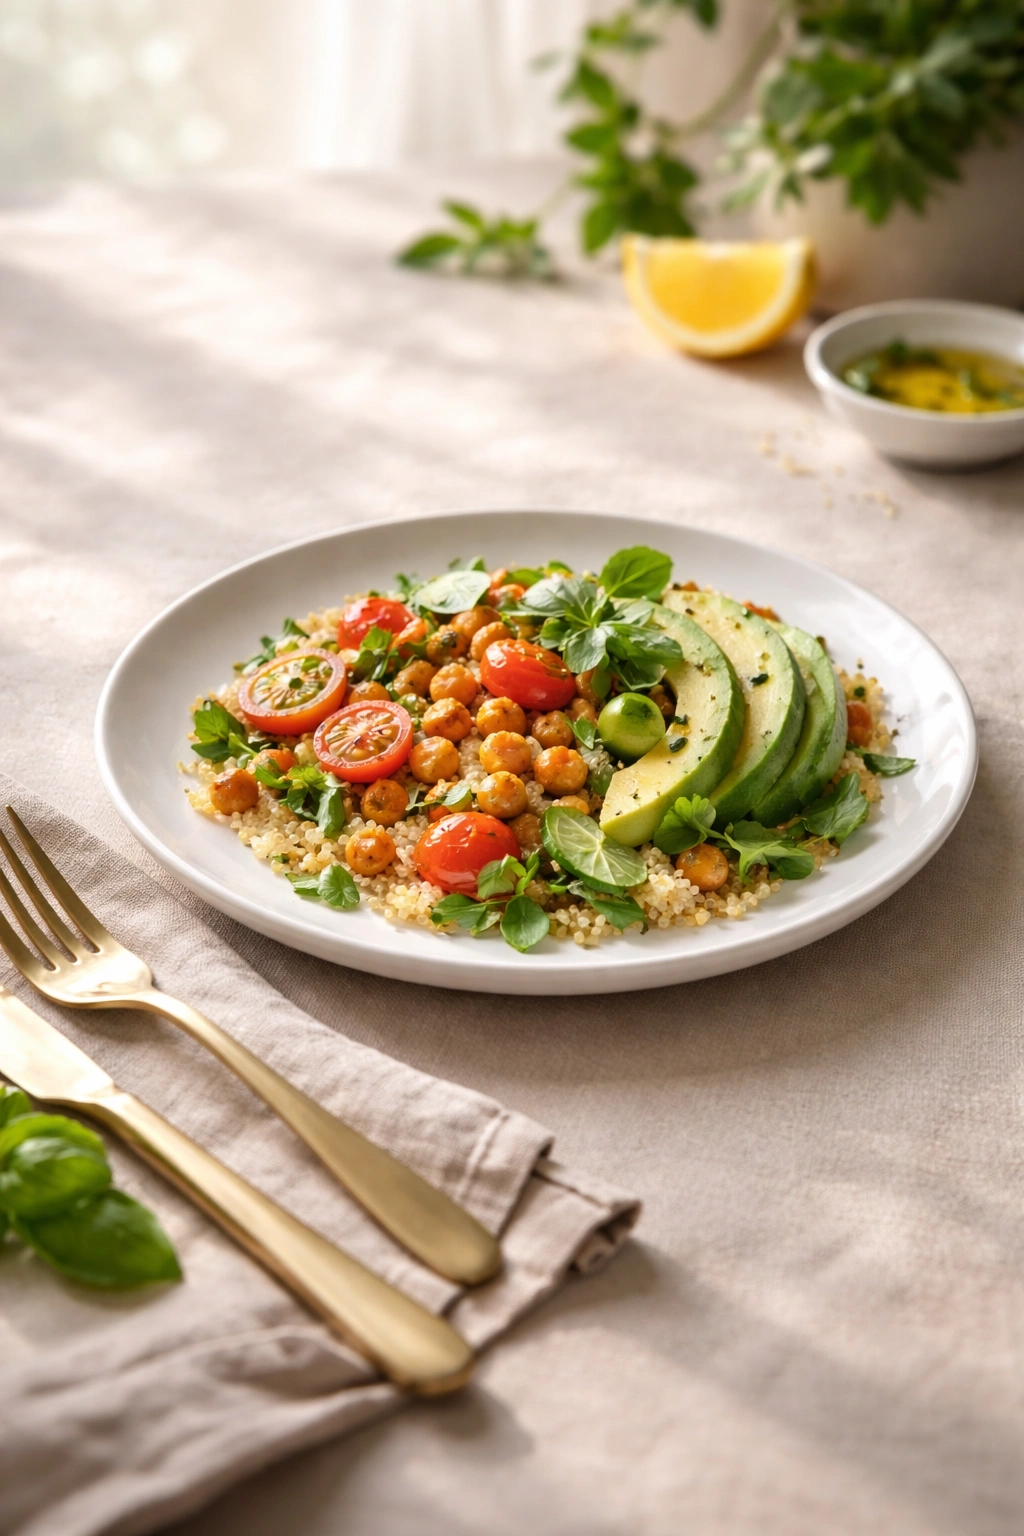
8. Charred Cabbage and Chickpea Buddha Bowl with Tahini Dressing
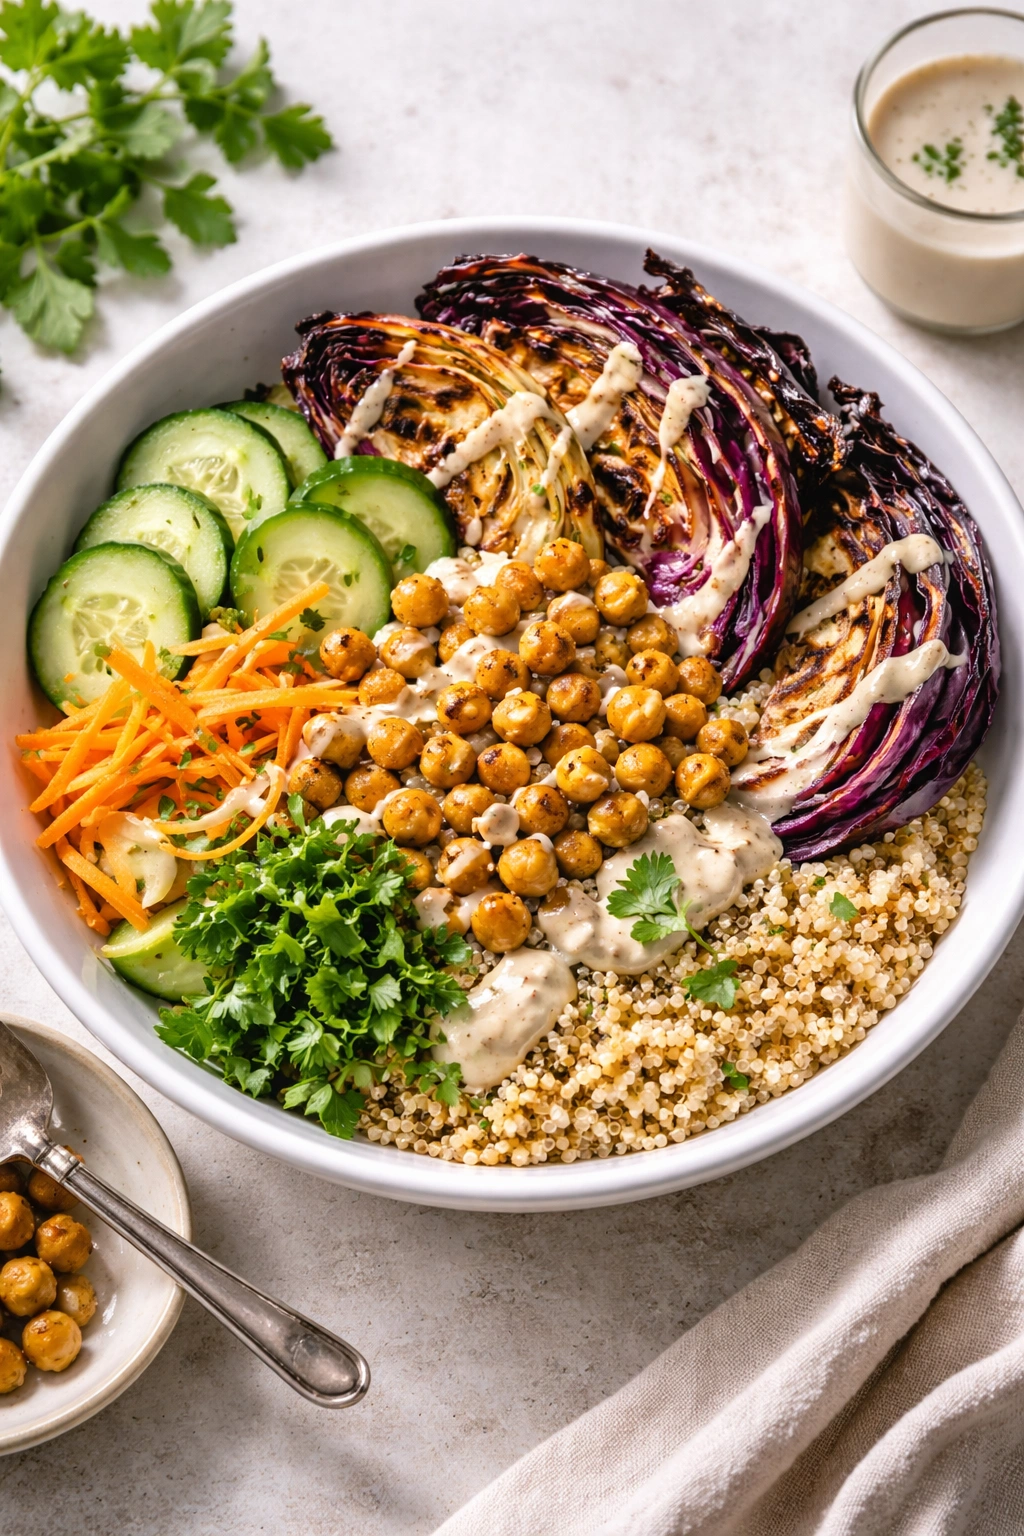
Buddha bowls are actually a dinner format rather than a specific recipe—they’re composed of a grain base, roasted or charred vegetables, a protein source, fresh herbs, and a creamy dressing that ties everything together. The charm of a Buddha bowl is how you can customize it completely based on what’s in your kitchen, making them perfect for using up vegetables on the edge of expiration. A charred-cabbage version with chickpeas is hearty, deeply flavored, and takes less than 30 minutes to assemble.
Why Buddha Bowls Are the Ultimate Flexible Dinner
Nutritionally, a Buddha bowl delivers vegetables, plant-based protein, whole grains, and healthy fats in a single, balanced meal. The open format also means you can work around dietary restrictions, food preferences, and pantry limitations—no two Buddha bowls need to be identical. The dressing is what transforms separate ingredients into a cohesive, craveable dish, so investing time in a great tahini dressing pays dividends.
The Component Breakdown for a Charred-Cabbage Buddha Bowl
- Cook 1 cup farro or quinoa according to package directions, fluffing with a fork and allowing to cool slightly
- While grains cook, heat 3 tablespoons olive oil in a large skillet over medium-high heat until shimmering
- Add 4 cups roughly chopped green or purple cabbage and cook without stirring for 3-4 minutes until the bottom layer is deeply charred and caramelized
- Stir and continue cooking for another 4-5 minutes until the cabbage is tender with crispy, charred edges
- Season with fine sea salt and freshly ground black pepper, then transfer to a plate
- In the same skillet, add 1½ cups cooked chickpeas, 1 teaspoon smoked paprika, ½ teaspoon ground cumin, and ¼ teaspoon cayenne pepper
- Cook for 3-4 minutes, stirring occasionally, until the chickpeas are heated through and lightly golden
- For the tahini dressing, whisk together 4 tablespoons tahini, 3 tablespoons fresh lemon juice, 1 minced garlic clove, ½ teaspoon fine sea salt, and 4-5 tablespoons warm water until creamy
- Divide the cooked grain among 4 bowls, then arrange the charred cabbage, seasoned chickpeas, ½ avocado (sliced), fresh herbs (cilantro and mint work beautifully), and any other vegetables you have (roasted beets, shredded carrots, cucumber slices) in sections around the bowl
- Drizzle generously with tahini dressing
- Serve at room temperature or slightly warm, with lime wedges and a scatter of toasted seeds (pumpkin, sunflower, or sesame)
Pro tip: Assemble the components ahead (cooked grain, charred vegetables, prepared toppings all in separate containers) and dress the bowl only right before serving—this way the bowl doesn’t wilt and you can customize each person’s dressing amount.
9. Eggplant Caponata over Creamy Polenta or Gluten-Free Crusty Bread
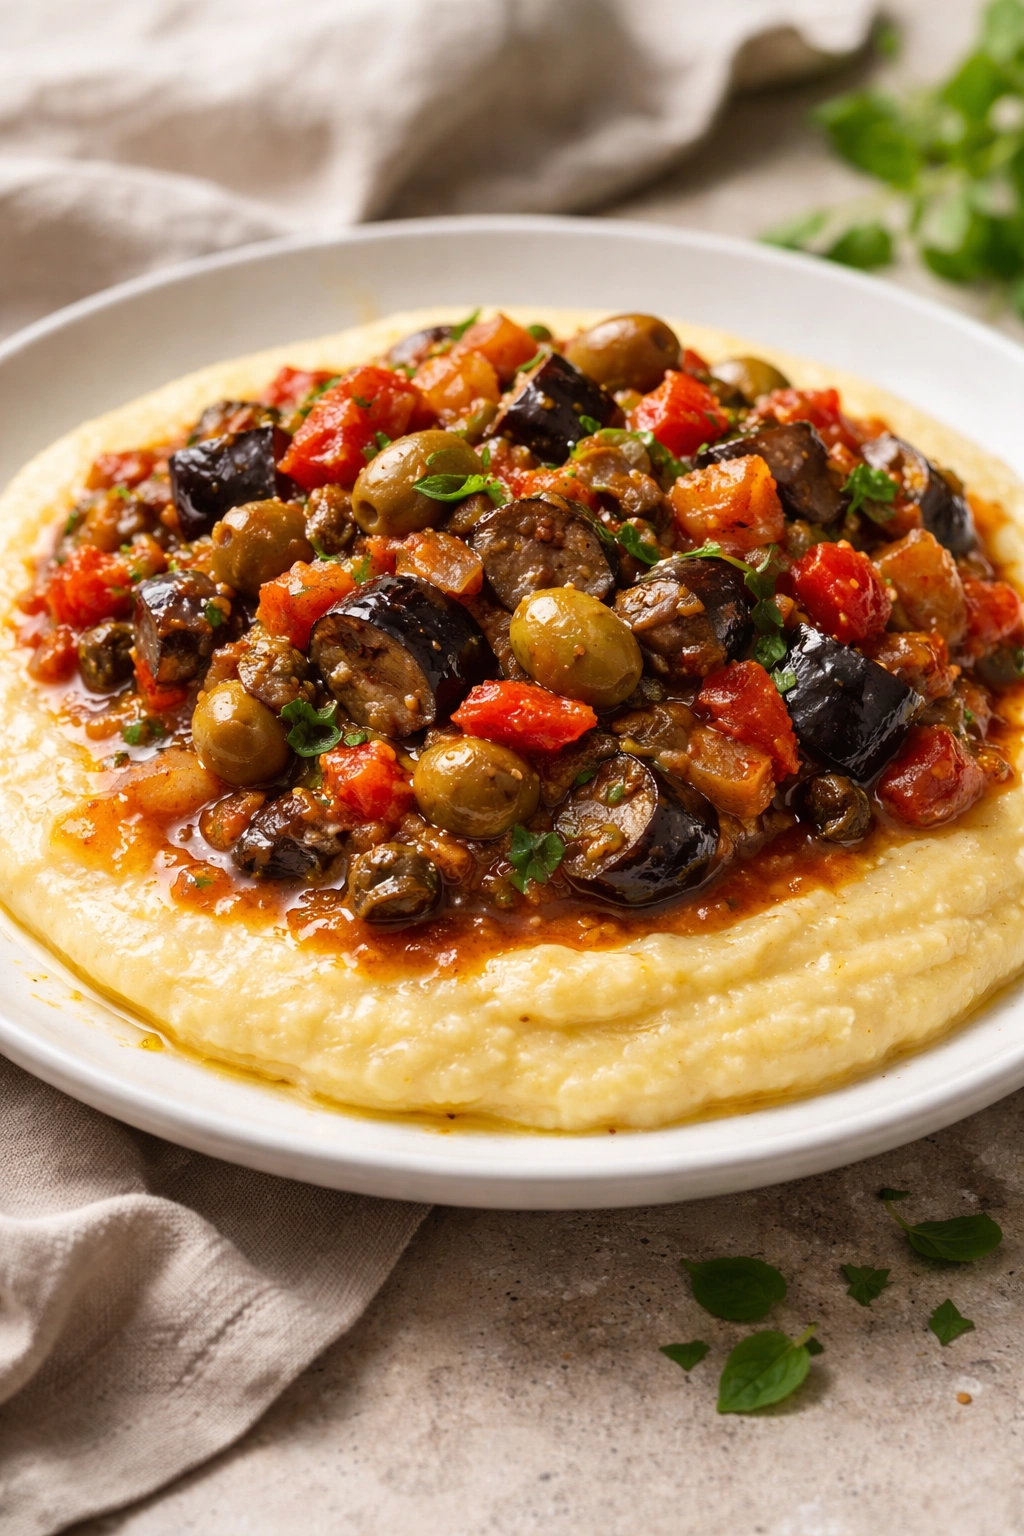
Caponata is a Sicilian vegetable stew of eggplant, tomatoes, olives, and capers, finished with a splash of vinegar for brightness. It’s traditionally served as an appetizer at room temperature, but serving it warm over creamy polenta or crispy gluten-free bread transforms it into a satisfying dinner. The sweet, salty, briny, tart flavors create an incredibly complex and addictive dish. This dinner takes about 40 minutes and tastes even better the next day, making it perfect for meal prep.
Why Caponata Is a Vegetable Lover’s Dream
Caponata is entirely vegetables, yet it delivers the depth and richness usually associated with braised meat dishes. Eggplant, when cooked gently, becomes silky and absorbs the surrounding flavors. The combination of olives, capers, and vinegar creates a briny, acidic element that keeps the dish from feeling heavy. Unlike salads, which are eaten raw and cold, caponata’s cooking process softens everything into a luscious stew that tastes refined and intentional.
The Slow-Cook Method for Perfectly Flavored Caponata
- Cut 2 medium eggplants into ¾-inch cubes (about 6 cups), then toss with 1 teaspoon fine sea salt and set in a colander for 10 minutes to weep (this removes excess moisture so the eggplant fries rather than steams)
- Pat the eggplant dry with paper towels
- Heat 5 tablespoons olive oil in a large, deep skillet over medium-high heat
- Working in batches, add the eggplant in a single layer and cook for 4-5 minutes per side, stirring only once, until golden on all sides (the key to good caponata is letting the eggplant develop color; overcrowding the skillet prevents this)
- Transfer the cooked eggplant to a plate
- Add 1 diced onion to the skillet and cook for 4 minutes until softened
- Add 4 minced garlic cloves and cook for 1 minute until fragrant
- Add one 28-ounce can crushed tomatoes, the cooked eggplant, ⅓ cup green olives (pitted), 3 tablespoons capers, 2 tablespoons tomato paste, 1 tablespoon balsamic vinegar, 1 teaspoon dried oregano, and ½ teaspoon fine sea salt
- Reduce heat to low and simmer gently, uncovered, for 20-25 minutes, stirring occasionally, until the sauce thickens and deepens in color
- Taste and adjust seasoning with additional salt or vinegar as needed
- Serve warm over creamy polenta, with fresh basil, crushed red pepper, and a drizzle of excellent olive oil
- Alternatively, serve at room temperature with crispy gluten-free bread for scooping
Pro tip: Make this up to 3 days ahead and refrigerate in an airtight container—it tastes progressively better as the flavors deepen, and you can simply reheat it gently on the stovetop right before serving.
10. Baked Acorn Squash Stuffed with Farro, Kale, and Cranberries
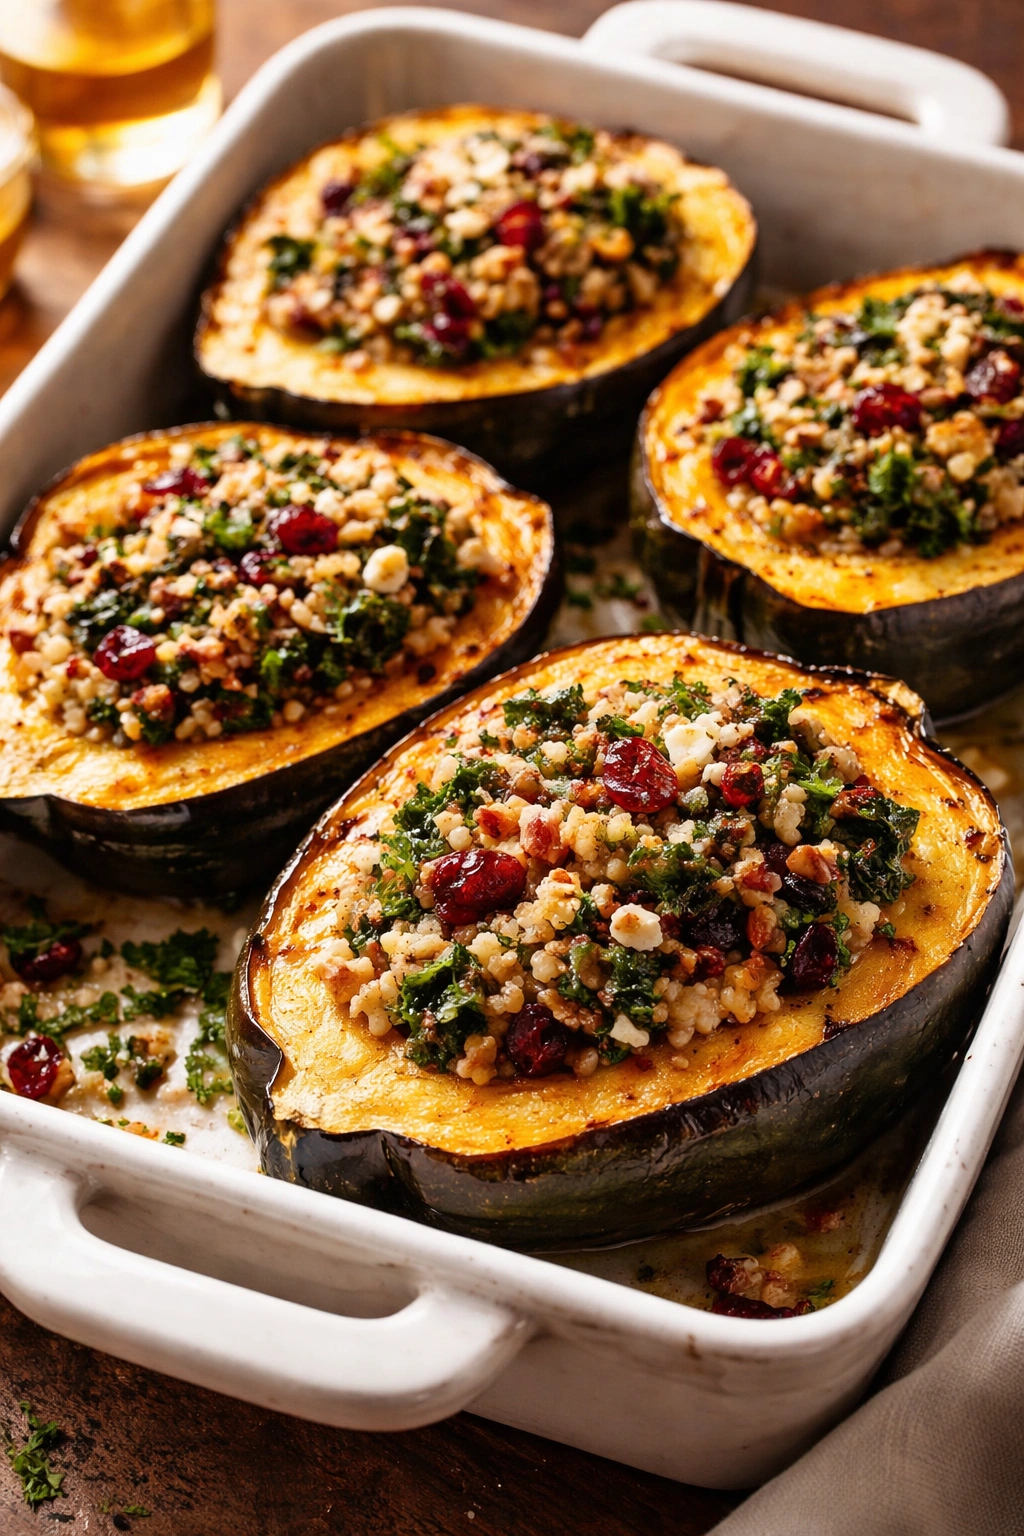
Roasted squash halves become edible bowls for a grain, vegetable, and fruit filling—this is an elegant, naturally gluten-free vegetarian dinner that looks far more complicated than it actually is. The sweet, creamy flesh of acorn squash pairs beautifully with nutty farro, bitter kale, tart cranberries, and toasted pumpkin seeds. This dinner takes about an hour total, with most of that being passive roasting time. It’s perfect for entertaining or for a cozy dinner for two.
Why Squash-as-a-Bowl Changes How People Think About Vegetables
Roasted squash is soft enough to eat with a fork, meaning the entire “bowl” becomes part of the meal—nothing goes to waste. The natural sweetness of roasted squash contrasts perfectly with savory, bitter, and tart ingredients. Serving dinner in an individual roasted squash makes the meal feel special and intentional, transforming what could be a simple grain bowl into something that feels like fine dining.
The Assembly Guide for Stuffed Acorn Squash
- Preheat your oven to 400°F (200°C) and line a large baking sheet with parchment paper
- Cut 2 medium acorn squashes in half and scoop out the seeds with a sturdy spoon (reserve the seeds for roasting if desired)
- Brush the cut sides of the squash halves with 1 tablespoon olive oil and season with fine sea salt and freshly ground black pepper
- Place the squash halves cut-side down on the baking sheet and roast for 35-40 minutes until the flesh is completely tender and a fork pierces it easily
- Meanwhile, cook 1 cup farro according to package directions (this typically takes 25-30 minutes), then fluff with a fork
- Heat 2 tablespoons olive oil in a large skillet over medium heat, then add 1 minced garlic clove and cook for 30 seconds until fragrant
- Add 6 cups roughly chopped fresh kale (any variety), toss with the oil, and cook for 4-5 minutes, stirring frequently, until the kale is completely tender and slightly crispy at the edges
- Stir in the cooked farro, ⅓ cup dried cranberries, ⅓ cup toasted pumpkin seeds, 2 tablespoons maple syrup, 1 tablespoon apple cider vinegar, and ½ teaspoon fine sea salt
- Cook for 1-2 minutes, tossing everything together, until heated through
- Remove the squash from the oven and carefully flip each half cut-side up
- Divide the farro-kale mixture evenly among the 4 squash halves, mounding it gently into the cavity
- Return to the oven and bake for 10 minutes to meld the flavors
- Top each squash with a dollop of Greek yogurt or tahini dressing, fresh cranberries, and a few pumpkin seeds
- Serve warm with fresh sage leaves for garnish and an extra drizzle of maple syrup
Pro tip: Roast the squash halves and prepare the filling components ahead, then assemble and finish baking the stuffed squashes right before dinner—this way you have a warm, just-made meal without the full time commitment on serving day.
Final Thoughts
The real secret to vegetarian gluten-free cooking isn’t finding complicated substitutes or accepting boring compromises. It’s recognizing that some of the world’s most delicious, deeply satisfying cuisines—Mediterranean, Indian, Thai, Mexican—built their foundations on plant-based ingredients without ever needing wheat flour or soy sauce. These ten dinners prove that vegetarian eating isn’t limited or boring when you approach it with the same creativity and quality ingredients you’d bring to any other meal.
Start with whichever dinner sounds most craveable to you, rather than trying to master all ten at once. Make the shakshuka once and you’ll have the technique for life. Roast cauliflower steaks a few times and you’ll understand how temperature and timing transform every vegetable you cook. Build your confidence one dinner at a time, and within a few weeks, you’ll have a collection of recipes you actually want to eat regularly—not because they’re virtuous, but because they taste genuinely delicious.