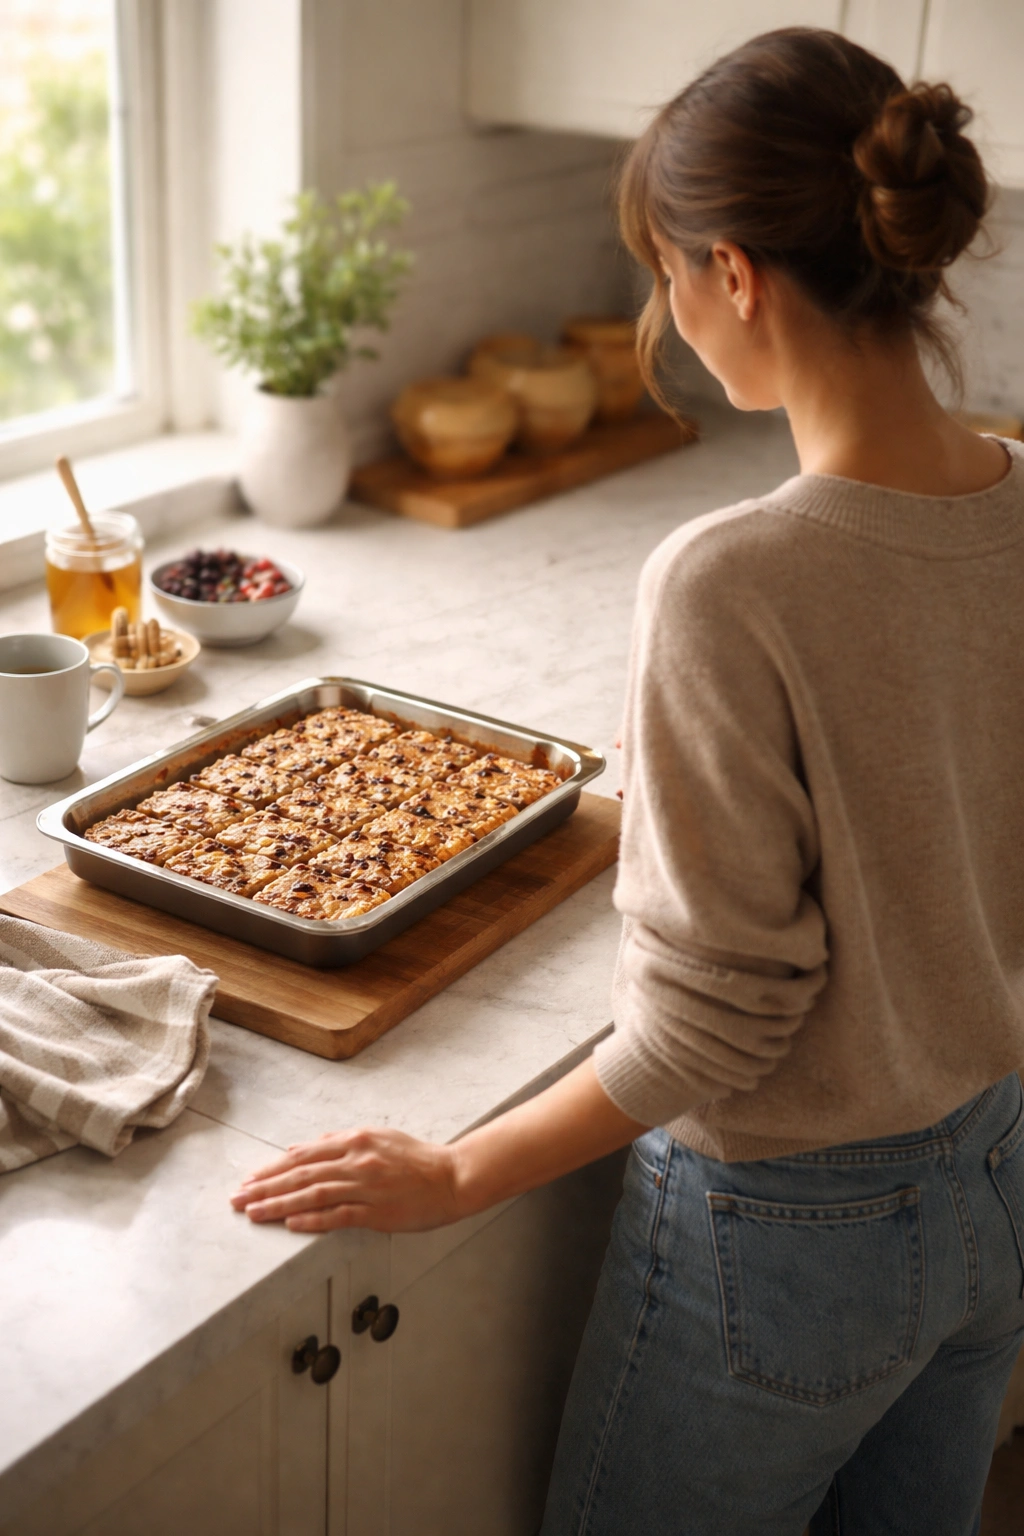
Baked oatmeal is one of the most underrated breakfast shortcuts in the modern kitchen. Instead of standing over the stove stirring oatmeal every single morning, you bake a large pan, slice it into portions, and have grab-and-go breakfasts ready for the entire week. Each piece reheats in seconds—either a quick microwave zap or eaten cold straight from the fridge—making it perfect for rushed mornings when you need something nutritious but have zero time.
The beauty of baked oatmeal lies in its flexibility. It’s technically a baked casserole made with rolled oats, eggs, milk, and a sweetener, but from that simple base, you can build literally any flavor combination. Chocolate peanut butter one week, apple cinnamon the next, blueberry lemon after that. It’s forgiving, it’s portable, and it genuinely tastes like a treat even though it’s packed with fiber and protein.
What makes baked oatmeal ideal for meal prep isn’t just the convenience—it’s that the texture actually improves after sitting in the fridge for a day or two. Unlike some baked goods that dry out, baked oatmeal stays tender and moist as the ingredients continue to meld together. You can make it on Sunday and eat it confidently through Wednesday or Thursday. It freezes beautifully too, so you can bake two pans at once and extend your prep window even further.
The five recipes that follow represent the flavor profiles that have proven most reliable for actual weekly meal prep. These aren’t trending recipes or Instagram-worthy creations—they’re the ones that taste genuinely good three days after baking, that reheat without getting rubbery, and that satisfy you through mid-morning without leaving you starving by lunch.
1. Maple Pecan Baked Oatmeal with Brown Sugar Crunch
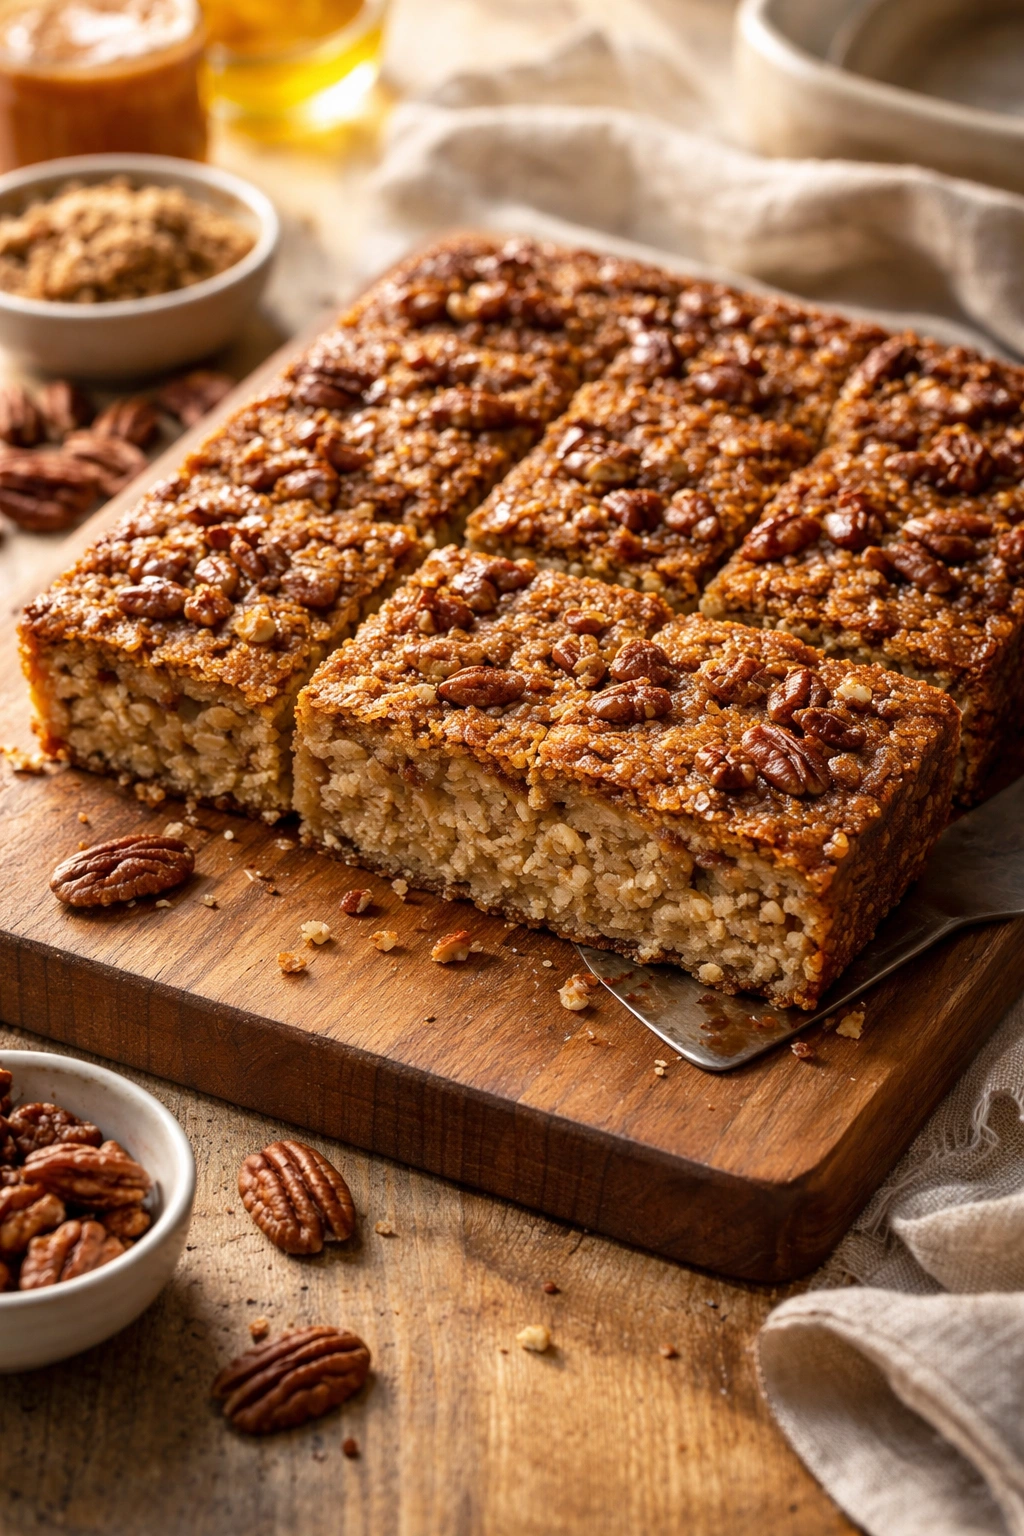
This is the recipe to make when you want something that tastes indulgent enough for weekend breakfast but wholesome enough to feel good about eating on a Tuesday morning. Maple syrup provides a rich, subtle sweetness that doesn’t taste artificial, while pecans add both texture and fat content that keeps you satisfied for hours. The brown sugar crunch topping transforms regular baked oatmeal into something that feels more like a coffeecake.
Yield: Serves 8 to 10 | Makes one 9×13-inch pan
Prep Time: 15 minutes
Cook Time: 35 to 40 minutes
Total Time: 50 to 55 minutes
Difficulty: Beginner — no special equipment required, straightforward mixing and baking.
For the Base:
- 3 cups old-fashioned rolled oats (not instant, not steel-cut)
- 1½ teaspoons baking powder
- ½ teaspoon fine sea salt
- 1 teaspoon ground cinnamon
- ¼ teaspoon ground nutmeg
- 2 large eggs, room temperature
- 1¼ cups whole milk
- ½ cup pure maple syrup (not maple-flavored syrup)
- 4 tablespoons unsalted butter, melted
- 2 teaspoons pure vanilla extract
- 1 cup toasted pecans, roughly chopped (not finely ground)
For the Topping:
- ⅓ cup packed brown sugar
- ¼ cup rolled oats
- 3 tablespoons unsalted butter, cold and cut into small cubes
- Pinch of fine sea salt
Prepare and Bake:
-
Preheat the oven to 350°F (175°C) and position the rack in the center. Grease a 9×13-inch baking pan with softened butter or cooking spray, then line the bottom with parchment paper for easy removal after baking.
-
In a large bowl, whisk together the oats, baking powder, salt, cinnamon, and nutmeg until evenly combined. Set aside.
-
In a separate medium bowl, whisk together the eggs, milk, maple syrup, melted butter, and vanilla extract until completely smooth and no streaks of egg remain.
-
Pour the wet ingredients into the dry ingredients and stir with a wooden spoon until just combined. Do not overmix—the batter should come together in about 15-20 seconds of stirring. A few dry specks of oats are fine; overmixing will make the final texture tough and dense.
-
Fold in the chopped pecans gently with a rubber spatula, distributing them evenly throughout the batter.
-
Pour the batter into the prepared pan and spread it into a uniform, level layer using an offset spatula or the back of a spoon.
-
Make the topping: In a small bowl, combine the brown sugar, rolled oats, and salt. Add the cold butter cubes and use your fingertips to rub the mixture together until it resembles coarse breadcrumbs with some pea-sized clumps of butter remaining visible. Do not overwork this—the cold butter is what creates the crunchy texture.
Advertisements -
Sprinkle the topping evenly across the oatmeal base, pressing it down very gently so it adheres without compacting.
-
Bake for 35 to 40 minutes, until the edges are set and beginning to pull away from the sides of the pan, but the very center still has a slight jiggle when you shake the pan gently. The topping should be golden brown, not dark. A toothpick inserted near the center should come out moist but not wet with batter.
-
Remove the pan from the oven and let it cool on a wire rack for at least 20 minutes before slicing. The oatmeal will continue to set as it cools—patience here prevents it from falling apart when you cut it.
-
Once completely cool, use a sharp knife to cut into 8 to 10 equal squares. If the knife sticks, wipe it clean between cuts.
Storage and Reheating:
This baked oatmeal keeps in an airtight container in the refrigerator for up to 5 days. The topping stays surprisingly crispy for the first 2-3 days, then gradually softens as it absorbs moisture from the base—still delicious, just a different texture. To reheat, place a square on a microwave-safe plate and microwave for 45 to 60 seconds until warm throughout. Alternatively, eat it cold directly from the fridge, which actually works beautifully here because the maple flavor is rich enough to taste good without heat. For longer storage, wrap individual squares in plastic wrap and freeze for up to 3 months. Thaw overnight in the refrigerator or reheat directly from frozen (add 30-45 seconds to microwave time).
Flavor Variations:
Substitute ¾ cup chopped walnuts or almonds for the pecans if you prefer, or do a 50-50 mix. For a more autumnal version, add ½ teaspoon ground ginger and ¼ teaspoon ground cloves to the dry ingredients. To dial up the maple intensity, replace 2 tablespoons of the milk with an additional 2 tablespoons of maple syrup, though this makes the oatmeal slightly softer. You can also add ½ cup chopped dried apples to the wet ingredients for an apple-spiced variation.
Pro tip: Toast your pecans yourself in a 350°F oven for 8-10 minutes rather than buying pre-toasted if possible—the flavor is noticeably deeper and more nutty, which makes a real difference in a recipe where pecans are the star ingredient.
2. Blueberry Lemon Baked Oatmeal with Streusel Topping
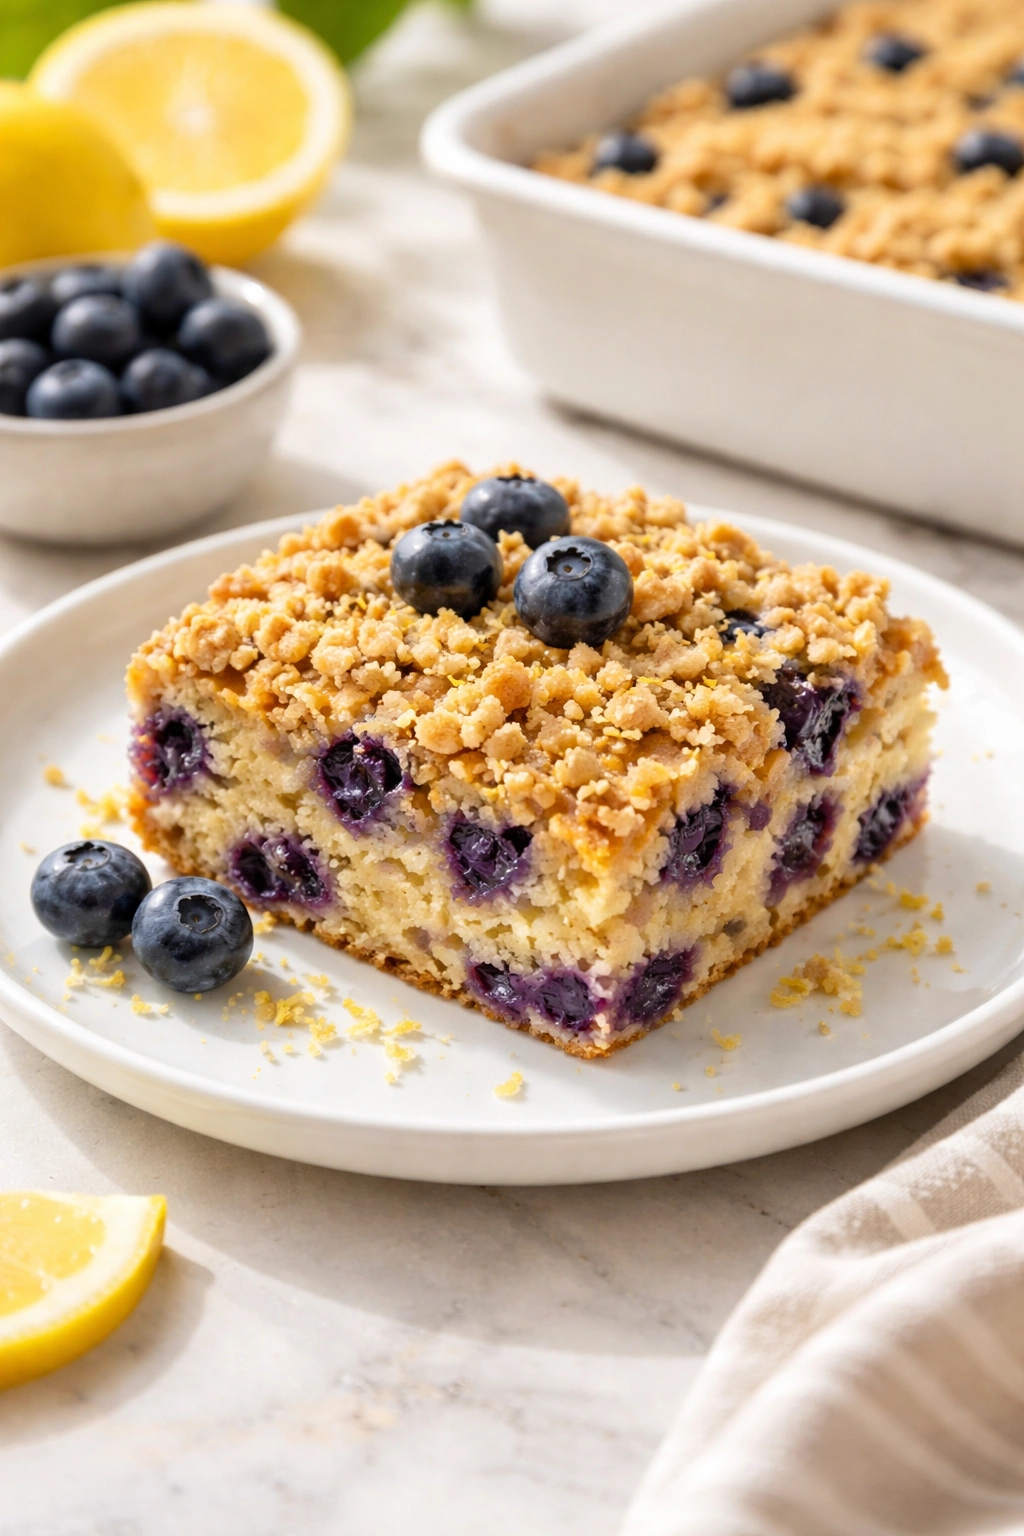
This flavor combination feels bright and almost summery, which makes it perfect for meal prep across multiple seasons. Lemon zest gives you a sharp, citrus note without any liquid that would throw off the oatmeal’s texture, while blueberries burst into jammy little pockets as the pan bakes. Unlike recipes that call for frozen blueberries (which can turn the batter gray), fresh berries hold their shape and color better.
Yield: Serves 8 to 10 | Makes one 9×13-inch pan
Prep Time: 20 minutes
Cook Time: 35 to 38 minutes
Total Time: 55 to 58 minutes
Difficulty: Beginner — the only slightly more involved step is zesting the lemon, which takes under a minute with a microplane.
For the Base:
- 3 cups old-fashioned rolled oats
- 1½ teaspoons baking powder
- ½ teaspoon fine sea salt
- Zest of 2 medium lemons (about 1½ tablespoons), finely grated on a microplane
- 2 large eggs, room temperature
- 1¼ cups whole milk
- ⅓ cup honey or agave syrup
- 4 tablespoons unsalted butter, melted
- 2 tablespoons fresh lemon juice (from one of the zested lemons)
- 2 teaspoons pure vanilla extract
- 1¾ cups fresh blueberries (not thawed if previously frozen)
For the Streusel:
- ⅓ cup all-purpose flour
- ⅓ cup rolled oats
- ¼ cup packed brown sugar
- 3 tablespoons granulated sugar
- 4 tablespoons cold unsalted butter, cut into small cubes
- Pinch of fine sea salt
- ¼ teaspoon ground cinnamon
Prepare and Bake:
-
Preheat the oven to 350°F (175°C) and position the rack in the center. Grease a 9×13-inch baking pan and line the bottom with parchment paper.
-
In a large mixing bowl, whisk together the oats, baking powder, salt, and lemon zest. The zest should be distributed evenly throughout the dry mixture. Set aside.
Advertisements -
In a separate medium bowl, whisk together the eggs, milk, honey, melted butter, lemon juice, and vanilla until smooth. The lemon juice will slightly curdle the milk, which is completely normal and does not affect the final result.
-
Pour the wet mixture into the dry ingredients and stir until just combined—about 15-20 seconds of mixing. Lumps are fine; overmixing is the enemy of tender baked oatmeal.
-
Gently fold in the blueberries using a rubber spatula. Work gently so you don’t crush them and turn the batter purple. A few broken berries are unavoidable and fine, but try to keep most of them intact.
-
Pour the batter into the prepared pan and spread it into an even layer.
-
Make the streusel: In a small bowl, combine the flour, oats, brown sugar, granulated sugar, cinnamon, and salt. Add the cold butter cubes and use your fingertips to rub the mixture together until it resembles coarse sand with some pea-sized clumps of butter still visible. Do not use a food processor for this step—the friction will warm the butter and ruin the streusel texture. Use your hands.
-
Distribute the streusel evenly across the oatmeal, pressing down very lightly. Avoid compacting it into a solid crust.
-
Bake for 35 to 38 minutes, until the edges are set and the streusel is golden brown. The center should still have a very slight jiggle, and a toothpick in the center should come out moist but not dripping with batter.
-
Cool in the pan on a wire rack for at least 20-25 minutes before cutting. The filling is quite soft when hot, so patience here prevents the squares from falling apart.
-
Cut into 8 to 10 equal squares with a sharp knife, wiping the blade clean between cuts.
Storage and Reheating:
This version keeps for 4 to 5 days in an airtight container in the refrigerator. The streusel gradually softens over time, but the blueberry-lemon flavor remains bright throughout the storage window. Reheat individual squares in the microwave for 45 to 60 seconds, or eat cold straight from the fridge. The cold version is actually quite refreshing. For freezing, wrap squares tightly in plastic wrap and then in foil. They keep frozen for up to 3 months and can be reheated from frozen (add 20-30 seconds to microwave time).
Flavor Variations:
Raspberries work beautifully in place of blueberries, or you can do a 50-50 mix of both. Add ½ teaspoon ground ginger to the dry ingredients for a subtle spice that complements the lemon. If you want a more pronounced lemon flavor, add 1 teaspoon of pure lemon extract to the wet ingredients (use caution here—extract is potent, and a little goes a long way). For a poppy seed variation, add 2 tablespoons of poppy seeds to the dry ingredients; they’ll add a subtle crunch and pair beautifully with the lemon.
Worth knowing: Buy lemons specifically for zesting rather than trying to zest old lemons from the produce drawer. Fresh lemons have thinner, more flavorful skin. Microplane zesting tools are inexpensive and make this step genuinely effortless—they’re worth having in your kitchen.
3. Chocolate Peanut Butter Baked Oatmeal with Cocoa Nib Crunch
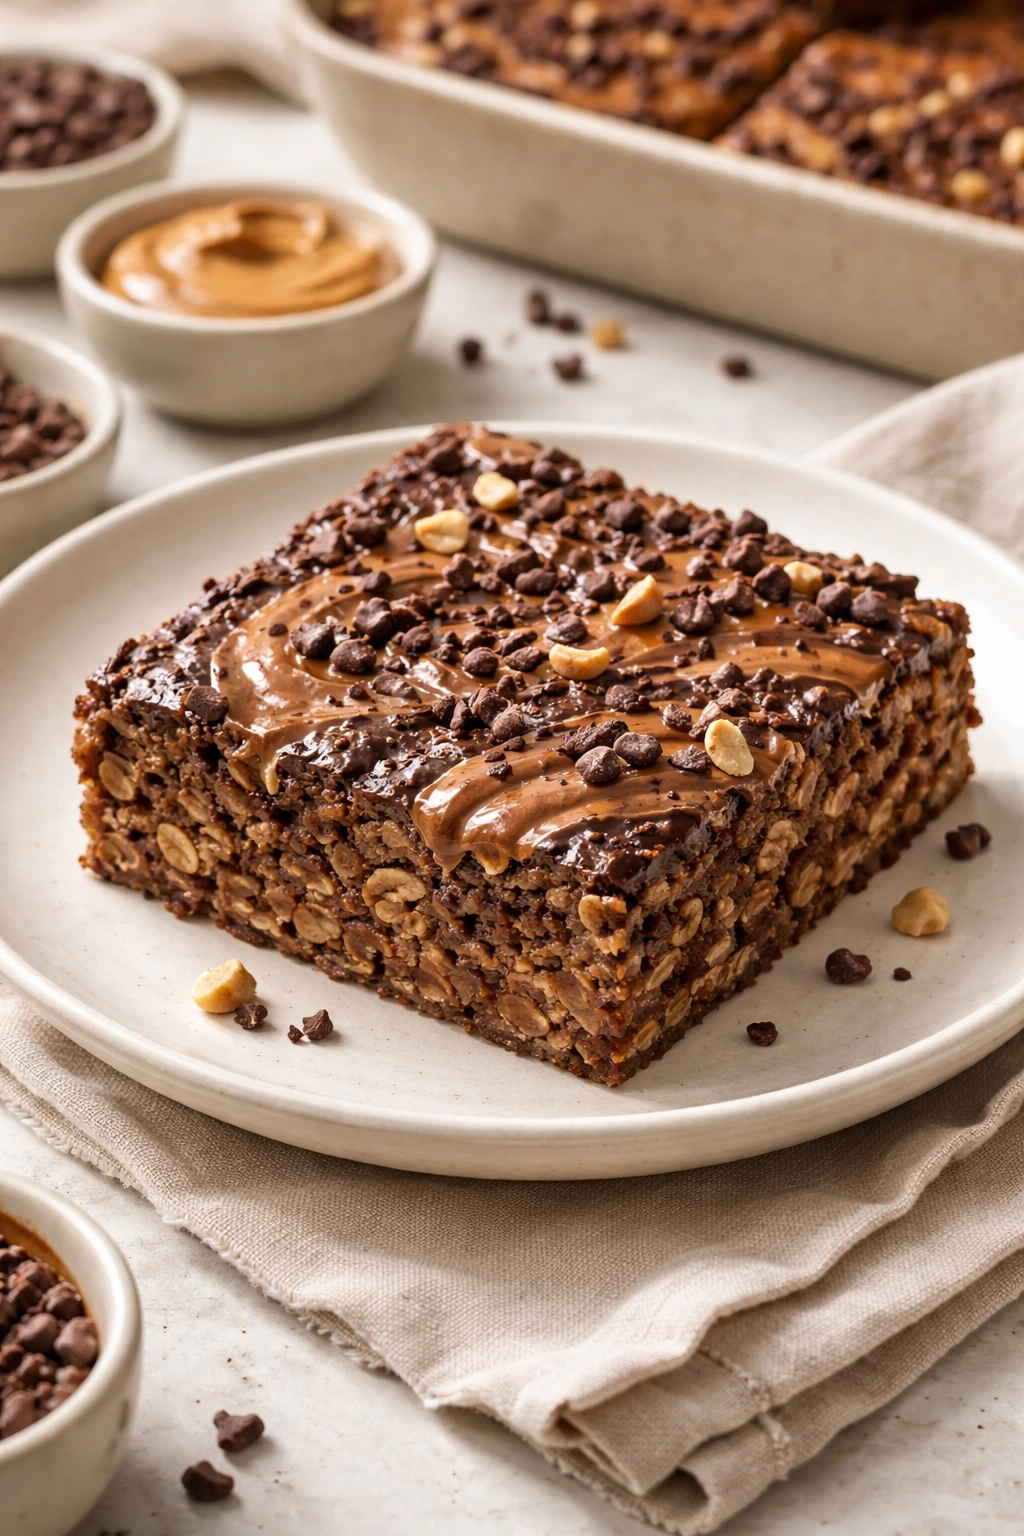
This flavor combination skews toward breakfast-dessert territory, which is exactly the point—meal prep doesn’t mean sacrificing flavor. Rich chocolate combined with nutty peanut butter creates a deeply satisfying breakfast that genuinely tastes like you’re treating yourself. Cocoa nibs in the topping add visual appeal and a subtle crunch that makes every bite feel special.
Yield: Serves 8 to 10 | Makes one 9×13-inch pan
Prep Time: 15 minutes
Cook Time: 33 to 37 minutes
Total Time: 50 to 55 minutes
Difficulty: Beginner — standard mixing and baking with no special techniques required.
For the Base:
- 3 cups old-fashioned rolled oats
- ½ cup unsweetened cocoa powder, sifted (lumps will make the texture grainy)
- 1½ teaspoons baking powder
- ½ teaspoon fine sea salt
- ½ teaspoon ground cinnamon
- 2 large eggs, room temperature
- 1¼ cups whole milk
- ½ cup natural peanut butter, stirred well (or creamy store-bought)
- ⅓ cup pure maple syrup or honey
- 4 tablespoons unsalted butter, melted
- 2 teaspoons pure vanilla extract
- ½ teaspoon instant espresso powder (optional but recommended—it deepens chocolate flavor without making it taste like coffee)
For the Topping:
- ⅓ cup natural peanut butter
- 3 tablespoons honey or maple syrup
- ⅓ cup raw cocoa nibs
- Pinch of fine sea salt
Prepare and Bake:
-
Preheat the oven to 350°F (175°C) and position the rack in the center. Grease a 9×13-inch baking pan and line with parchment paper.
-
Sift the cocoa powder into a large mixing bowl to remove lumps. This step is genuinely important—unsifted cocoa powder creates grainy pockets in the final texture. Add the oats, baking powder, salt, cinnamon, and espresso powder to the cocoa and whisk until evenly distributed. Set aside.
-
In a separate medium bowl, whisk together the eggs and milk until smooth. Add the peanut butter and whisk vigorously for about 30 seconds until mostly smooth—a few small peanut butter streaks are fine. Add the maple syrup, melted butter, and vanilla, whisking until completely combined.
-
Pour the wet ingredients into the dry ingredients and stir with a wooden spoon for about 20 seconds, until just combined. Do not overmix—lumps are fine, and overmixing will create a dense, tough texture.
-
Pour the batter into the prepared pan and spread it into an even layer.
-
Make the topping: In a small bowl, stir the peanut butter and honey together until smooth and pourable. Drizzle this mixture across the top of the oatmeal in thin, irregular lines or dollops. Use the back of a spoon to spread it gently across the surface—you don’t need perfect coverage, as the topping will spread further as it bakes.
-
Sprinkle the cocoa nibs and salt across the top, distributing them as evenly as possible. The nibs will not disappear into the batter; they’ll stay on top and create a crunchy layer.
Advertisements -
Bake for 33 to 37 minutes, until the edges are pulling away from the sides of the pan and the center shows only the slightest jiggle when you shake the pan. A toothpick inserted in the center should come out moist but not wet with batter. Do not overbake this version—the chocolate and peanut butter center should remain slightly underbaked and fudgy.
-
Cool in the pan on a wire rack for at least 25-30 minutes before cutting. This version needs slightly more cooling time because the center is intentionally softer.
-
Cut into 8 to 10 equal squares with a sharp knife.
Storage and Reheating:
This baked oatmeal keeps for 4 to 5 days in an airtight container in the refrigerator. The cocoa nib topping gradually softens as it sits, but it never loses its crunch entirely. Reheat in the microwave for 50 to 70 seconds, which will soften the center and make it almost fudgy—genuinely luxurious for a meal-prep breakfast. You can also eat it cold straight from the fridge, which is surprisingly good because the peanut butter flavor intensifies when cold. For freezing, wrap squares individually and freeze for up to 3 months. Thaw overnight in the fridge or reheat directly from frozen (add 30-45 seconds to microwave time).
Flavor Variations:
Substitute almond butter or tahini for the peanut butter if you prefer. Add ½ teaspoon instant coffee powder to the dry ingredients for an even deeper chocolate-coffee flavor. For a dessert-leaning version, replace the cocoa nibs topping with chopped dark chocolate chunks (60-70% cacao) and a sprinkle of fleur de sel. If you want to dial back the chocolate intensity, reduce the cocoa powder to ⅓ cup and increase the oats to 3⅓ cups.
Pro tip: The secret to keeping the peanut butter topping from sinking into the batter is to spread it after the batter is already in the pan. If you mix it into the wet ingredients, it distributes unevenly and gets lost. Spreading it on top ensures every piece gets that peanut butter-cocoa nib layer.
4. Apple Cinnamon Baked Oatmeal with Walnut Butter Swirl
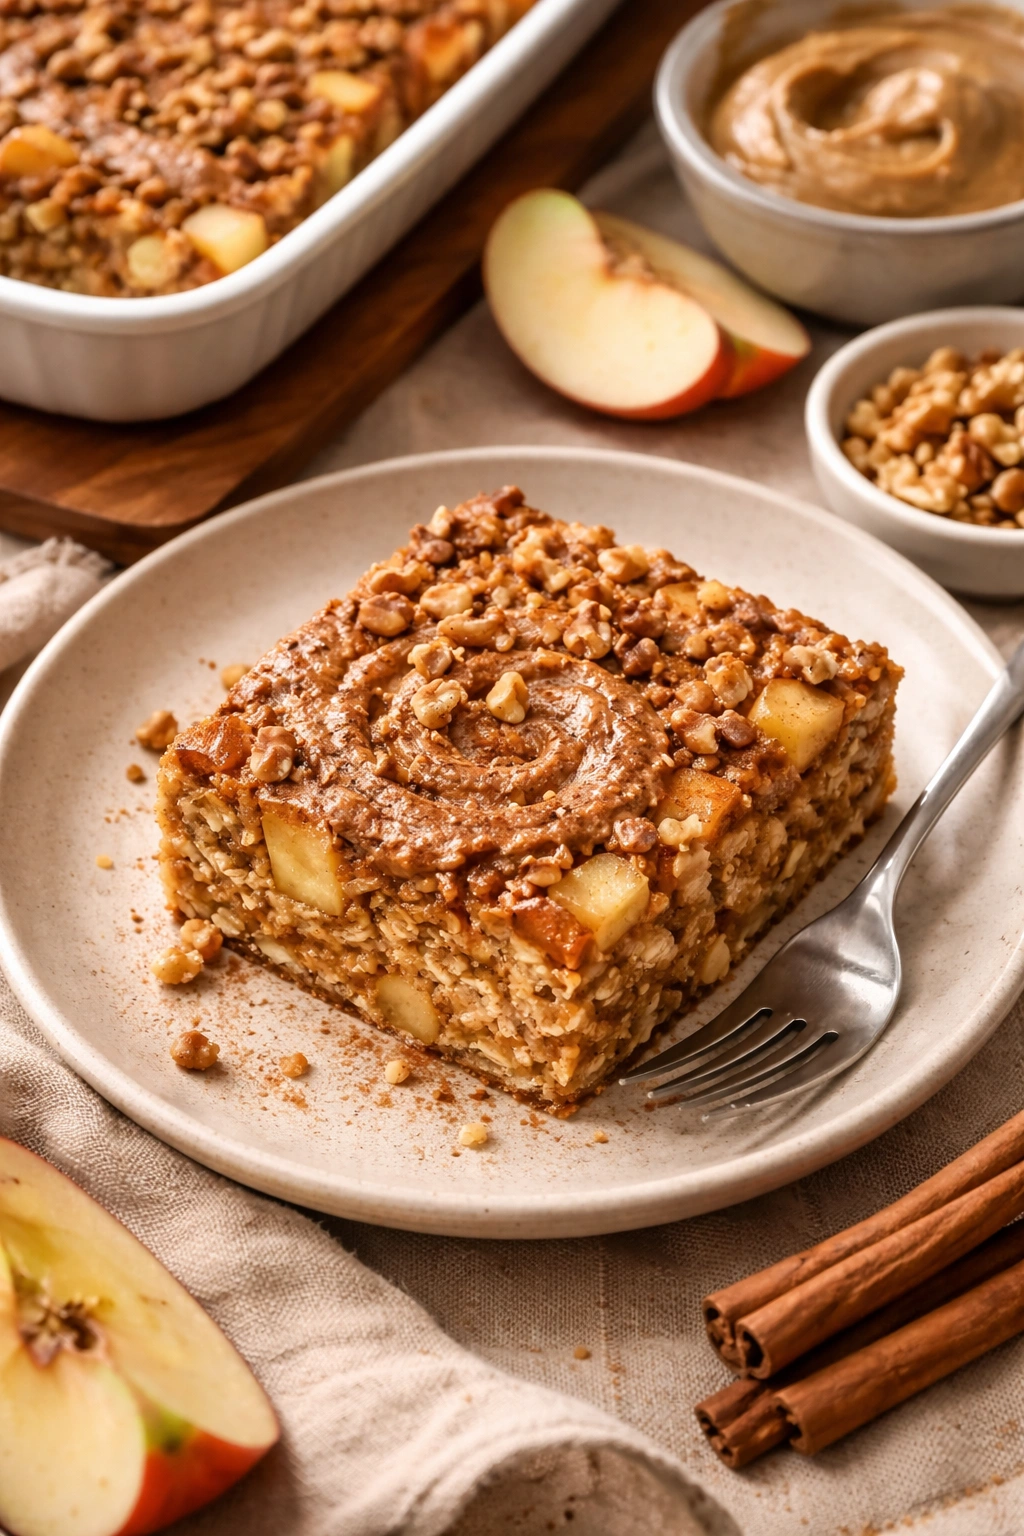
This flavor profile feels homey and nostalgic—think apple pie meets breakfast casserole. Fresh apples soften into the batter as everything bakes, creating little pockets of sweetness, while a walnut butter swirl adds richness and healthy fats. This version reheats beautifully and tastes even better on day three when all the flavors have melded together.
Yield: Serves 8 to 10 | Makes one 9×13-inch pan
Prep Time: 20 minutes
Cook Time: 38 to 42 minutes
Total Time: 58 to 65 minutes
Difficulty: Beginner — the only slightly more involved step is dicing the apples, which takes about 5 minutes.
For the Base:
- 3 cups old-fashioned rolled oats
- 1½ teaspoons baking powder
- ½ teaspoon fine sea salt
- 2 teaspoons ground cinnamon
- ½ teaspoon ground nutmeg
- ¼ teaspoon ground allspice
- 2 large eggs, room temperature
- 1¼ cups whole milk (or unsweetened almond milk)
- ⅓ cup unsulfured molasses or honey
- 4 tablespoons unsalted butter, melted
- 1 tablespoon apple cider vinegar
- 2 teaspoons pure vanilla extract
- 3 medium apples (any variety—Honeycrisp, Granny Smith, Pink Lady, or a mix), peeled, cored, and cut into ½-inch dice (about 3 cups)
For the Swirl:
- ½ cup walnut butter, natural or store-bought (creamy is easier to work with than crunchy)
- 2 tablespoons honey or maple syrup
- Pinch of fine sea salt
Prepare and Bake:
-
Preheat the oven to 350°F (175°C) and position the rack in the center. Grease a 9×13-inch baking pan and line with parchment paper.
-
In a large bowl, whisk together the oats, baking powder, salt, cinnamon, nutmeg, and allspice until the spices are evenly distributed. Set aside.
-
In a separate medium bowl, whisk together the eggs, milk, molasses, melted butter, apple cider vinegar, and vanilla until smooth. The vinegar will slightly curdle the milk, which is normal and expected.
Advertisements -
Pour the wet ingredients into the dry ingredients and stir for about 20 seconds until just combined. The batter should come together quickly without overmixing.
-
Fold in the diced apples gently with a rubber spatula, distributing them evenly throughout the batter. Some apples will soften and break down slightly during folding—that’s fine.
-
Pour the batter into the prepared pan and spread it into an even layer.
-
Make the swirl: In a small bowl, stir together the walnut butter, honey, and salt until you have a thick, spreadable consistency. Dollop this mixture across the top of the oatmeal in 8-10 spoonfuls, spacing them roughly evenly. Use a butter knife or small offset spatula to swirl the walnut butter gently through the top layer of batter, creating ribbons of color. Do not overmix the swirl—3-4 swirls per dollop is perfect. Overworking it creates muddy streaks instead of distinct ribbons.
-
Bake for 38 to 42 minutes, until the edges are set and pulling away from the pan, and the center shows only a slight jiggle. The top should be set and no longer wet, though the very center will remain soft. A toothpick in the center should come out moist but not dripping with batter.
-
Cool in the pan on a wire rack for at least 25 minutes before cutting. This version needs adequate cooling time because the walnut butter swirl stays quite soft when warm.
-
Cut into 8 to 10 equal squares with a sharp knife, wiping it clean between cuts to prevent walnut butter from smudging.
Storage and Reheating:
This baked oatmeal keeps for 4 to 5 days in an airtight container in the refrigerator. The apple flavor deepens as it sits, making day-three squares actually superior to day-one. The walnut butter swirl gradually softens and integrates into the base, which some people prefer and others find less striking—neither is wrong. Reheat individual squares in the microwave for 50 to 60 seconds. Eating it cold from the fridge is also excellent—the walnut butter swirl is more defined when cold. For freezing, wrap squares tightly and freeze for up to 3 months. Thaw overnight or reheat directly from frozen.
Flavor Variations:
Try a pear-ginger version by substituting 3 cups diced pears for the apples and adding ½ teaspoon ground ginger to the dry ingredients. For a more dessert-like version, replace the walnut butter swirl with almond butter and add ½ cup chopped toasted pecans mixed into the dry ingredients. You can also use pecan butter or almond butter in place of the walnut butter swirl if you prefer a different nut flavor.
Worth knowing: If your apples are mealy or not very flavorful, add 1 tablespoon of fresh lemon juice to the wet ingredients to brighten the apple flavor. Honeycrisp or Pink Lady apples tend to stay firmer during baking and provide better texture than softer varieties like Red Delicious. Dice them close to when you mix the batter to prevent browning.
5. Strawberry Banana Baked Oatmeal with Greek Yogurt Topping
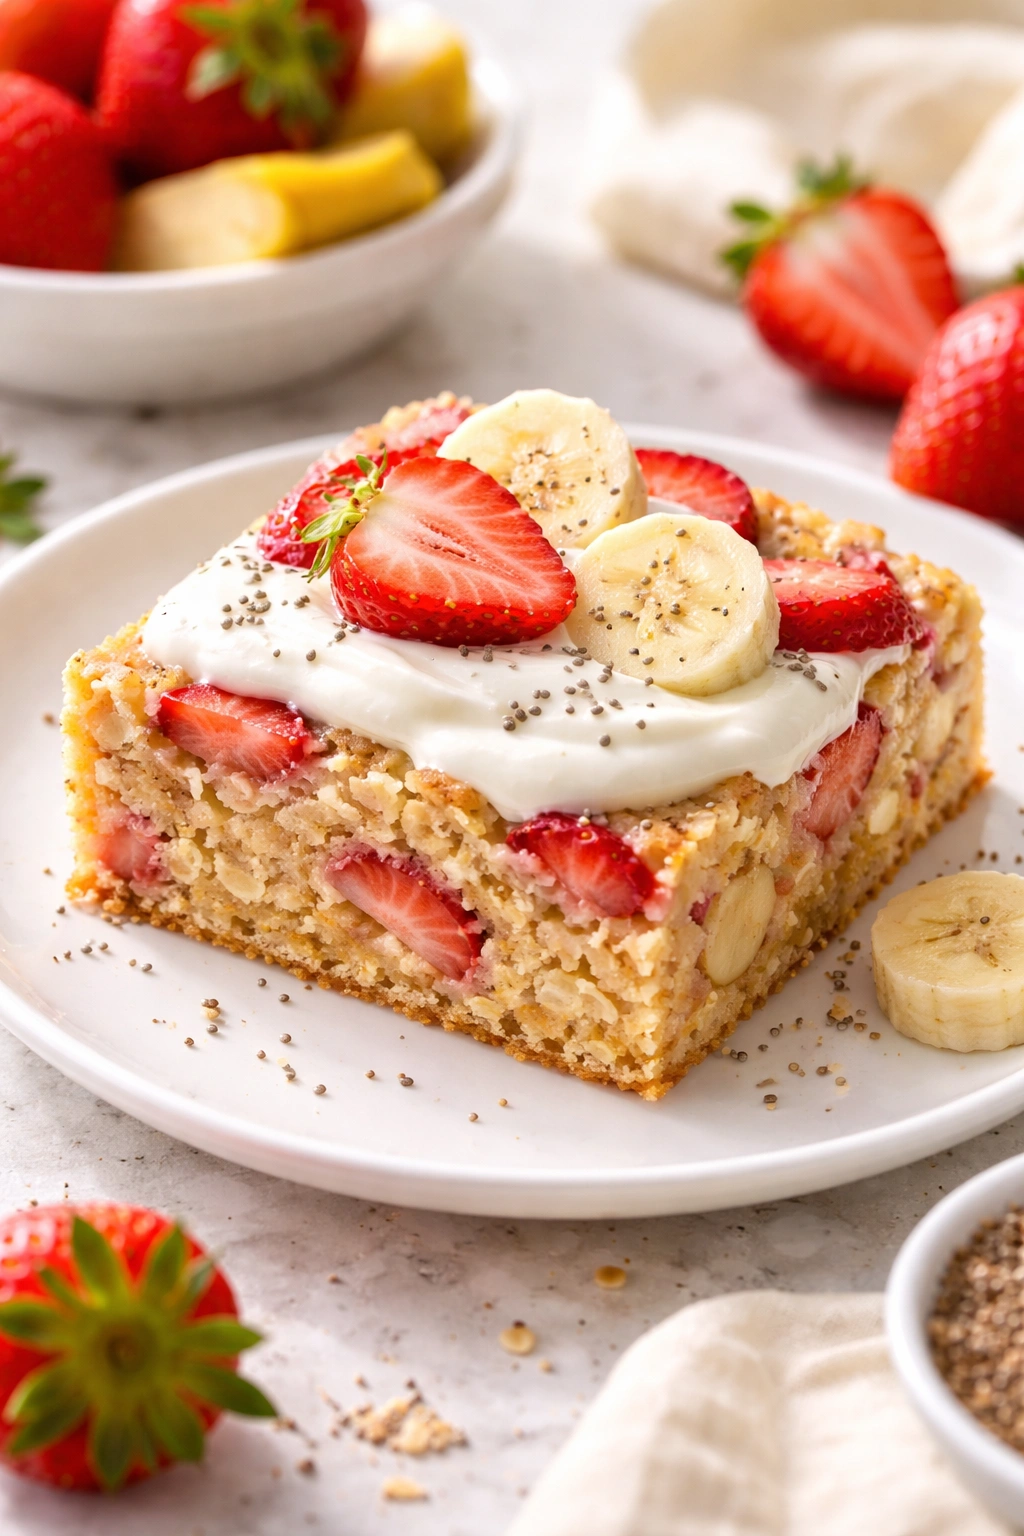
This is the lightest and brightest of the five recipes—perfect for when you want something that tastes fresh and fruity without feeling heavy. Banana provides natural sweetness and helps bind the batter, while fresh strawberries stay mostly whole and create little pockets of juicy sweetness. The Greek yogurt topping adds a tangy contrast and extra protein, making this version especially filling.
Yield: Serves 8 to 10 | Makes one 9×13-inch pan
Prep Time: 15 minutes
Cook Time: 33 to 37 minutes, plus 5 minutes for topping
Total Time: 55 to 60 minutes
Difficulty: Beginner — no special techniques required.
For the Base:
- 3 cups old-fashioned rolled oats
- 1½ teaspoons baking powder
- ½ teaspoon fine sea salt
- 1 teaspoon vanilla powder (or substitute with 1 teaspoon vanilla extract added to the wet ingredients)
- ½ teaspoon ground cardamom (optional but recommended—it adds subtle sophistication to strawberry-banana)
- 2 large eggs, room temperature
- 1¼ cups whole milk
- 2 ripe but not mushy bananas, mashed (about 1 cup)
- ⅓ cup honey or agave syrup
- 3 tablespoons unsalted butter, melted
- 1½ teaspoons pure vanilla extract
- 1½ cups fresh strawberries, hulled and halved (or quartered if very large)
For the Topping:
- ¾ cup plain Greek yogurt, full-fat or 2%
- 2 tablespoons honey
- ½ teaspoon pure vanilla extract
- 2 tablespoons chopped fresh strawberries
- 1 tablespoon sliced almonds, toasted
- Pinch of fleur de sel or fine sea salt
Prepare and Bake:
-
Preheat the oven to 350°F (175°C) and position the rack in the center. Grease a 9×13-inch baking pan and line with parchment paper.
-
In a large mixing bowl, whisk together the oats, baking powder, salt, vanilla powder, and cardamom. Set aside.
-
In a separate medium bowl, combine the eggs, milk, mashed banana, honey, melted butter, and vanilla extract. Whisk vigorously for about 30 seconds until smooth. The mixture should be thick because the banana adds substance; if it looks too thin, you likely used bananas that were too ripe and released extra liquid—this is okay, just proceed.
-
Pour the wet ingredients into the dry ingredients and stir for about 20 seconds, until just combined.
-
Gently fold in the strawberry halves using a rubber spatula, distributing them evenly. Some strawberry pieces will break down slightly—this is normal and fine. Try to keep the pieces mostly intact.
-
Pour the batter into the prepared pan and spread it into an even layer.
-
Bake for 33 to 37 minutes, until the edges are set and pulling away from the sides, and the center shows only a slight jiggle. The top should appear moist but set, not wet. A toothpick in the center should come out moist but not dripping with batter.
-
Remove from the oven and let cool in the pan on a wire rack for at least 20 minutes.
-
While the oatmeal cools, prepare the topping: In a small bowl, stir together the Greek yogurt, honey, and vanilla extract until smooth and creamy. Set aside.
Advertisements -
Once the oatmeal has cooled, cut it into 8 to 10 equal squares.
-
Top each square with about 1 tablespoon of the Greek yogurt mixture, spreading it gently across the surface. Garnish with a few chopped strawberry pieces and a small pinch of sliced almonds and salt. Apply the topping just before eating—it will absorb into the oatmeal as it sits, which some people enjoy and others prefer to avoid.
Storage and Reheating:
The base oatmeal keeps for 4 to 5 days in an airtight container in the refrigerator. Store the Greek yogurt topping separately in a sealed container for up to 3 days. Assemble with the topping just before eating for the best texture—the yogurt creates a nice contrast against the soft oatmeal. You can reheat the base in the microwave for 45 to 50 seconds before topping it, or eat it cold. For freezing, freeze the base only (not the yogurt topping). Wrap squares tightly and freeze for up to 3 months. Thaw overnight or reheat from frozen, then top with fresh yogurt mixture when ready to eat.
Flavor Variations:
Raspberries work beautifully in place of strawberries, creating a more tart flavor. For a tropical variation, substitute diced fresh mango or pineapple for the strawberries and replace the cardamom with ¼ teaspoon ground ginger. You can also use peach slices instead of strawberries for a classic summer flavor combination. If you want to skip the yogurt topping, sprinkle the baked squares with granola and a drizzle of honey instead.
Pro tip: Choose bananas that are ripe (yellow with some brown spots) but not overripe (completely brown and mushy). Overripe bananas release extra liquid and can make the batter too wet. If you only have overripe bananas available, reduce the milk to 1 cup.
Final Thoughts
Baked oatmeal transforms meal prep from a weekly chore into something that actually feels manageable and worth doing. You’re not standing over the stove every morning—you’re cutting a slice from the pan and eating breakfast in the time it takes to brew coffee. The recipes above each bring distinct flavor profiles to your week, so you can rotate between them across different weeks or even bake multiple pans simultaneously if you’re willing to spend an extra 20 minutes on a Sunday.
The real power of these recipes is that they taste genuinely good without requiring any special ingredients or techniques. Everything here uses standard pantry staples and simple baking methods. You’ll have better-tasting, more satisfying breakfasts than most people manage on a weekday, and you’ll accomplish it with significantly less effort than making oatmeal the traditional way.
Start with whichever flavor combination sounds most appealing to you right now, then branch out to the others as you get comfortable with the basic method. Each recipe is flexible enough that you can adjust it to your preferences without ruining it. The confidence you build from that first successful pan will make every batch that follows feel effortless.