That moment when you’re craving a Taco Bell quesadilla at 11 PM but the drive-thru is closed—or when you’d rather not spend $7 on something you could make at home for half the cost. If you’ve ever bitten into that crispy, melted cheese pocket with its surprisingly flavorful seasoned chicken filling, you know exactly why it’s worth replicating. The thing is, it’s not that difficult to recreate. Once you understand what makes it taste the way it does, you can build a version at home that’s arguably better than the original because you control every component.
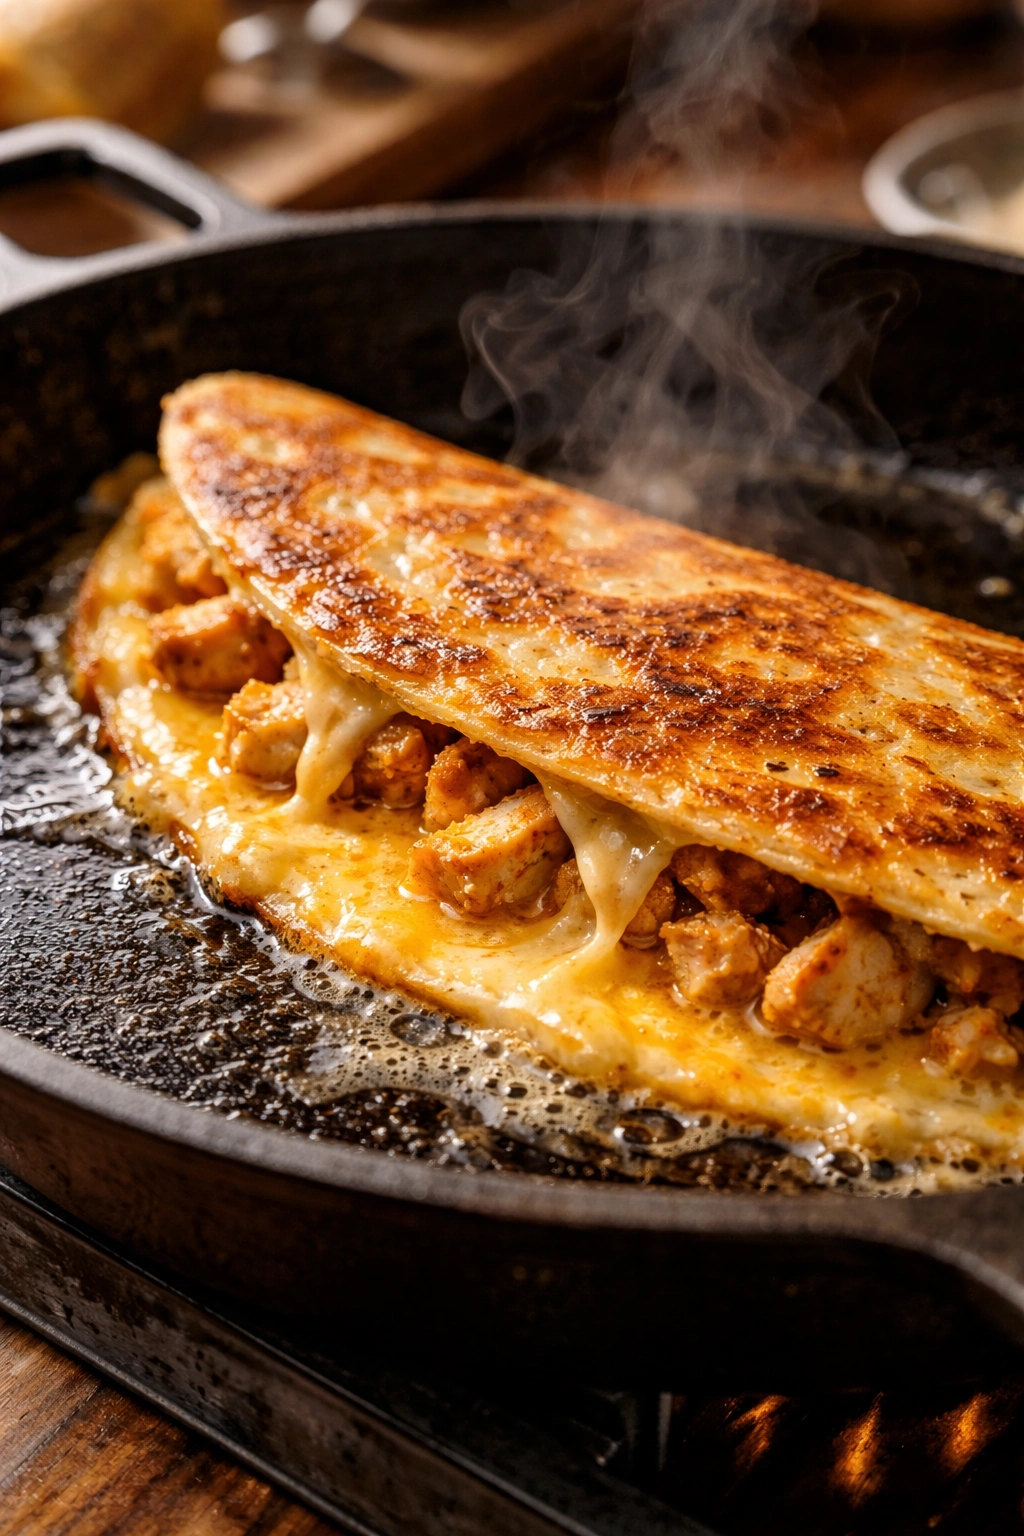
This copycat recipe captures what makes Taco Bell’s quesadilla so craveable: that perfect contrast between a golden, crispy exterior and a soft, pillowy interior; melted, stretchy cheese; seasoned chicken that tastes like it actually has flavor (not bland); and a subtle background note from simple ingredients that work in concert. The secret isn’t some exotic technique or hard-to-find ingredient—it’s understanding the layering, the cooking method, and how to get the cheese to melt while the tortilla crisps up. You’ll be making these regularly once you nail the technique, whether for a quick lunch, a casual dinner, or when unexpected guests arrive.
What Makes This Quesadilla So Craveable
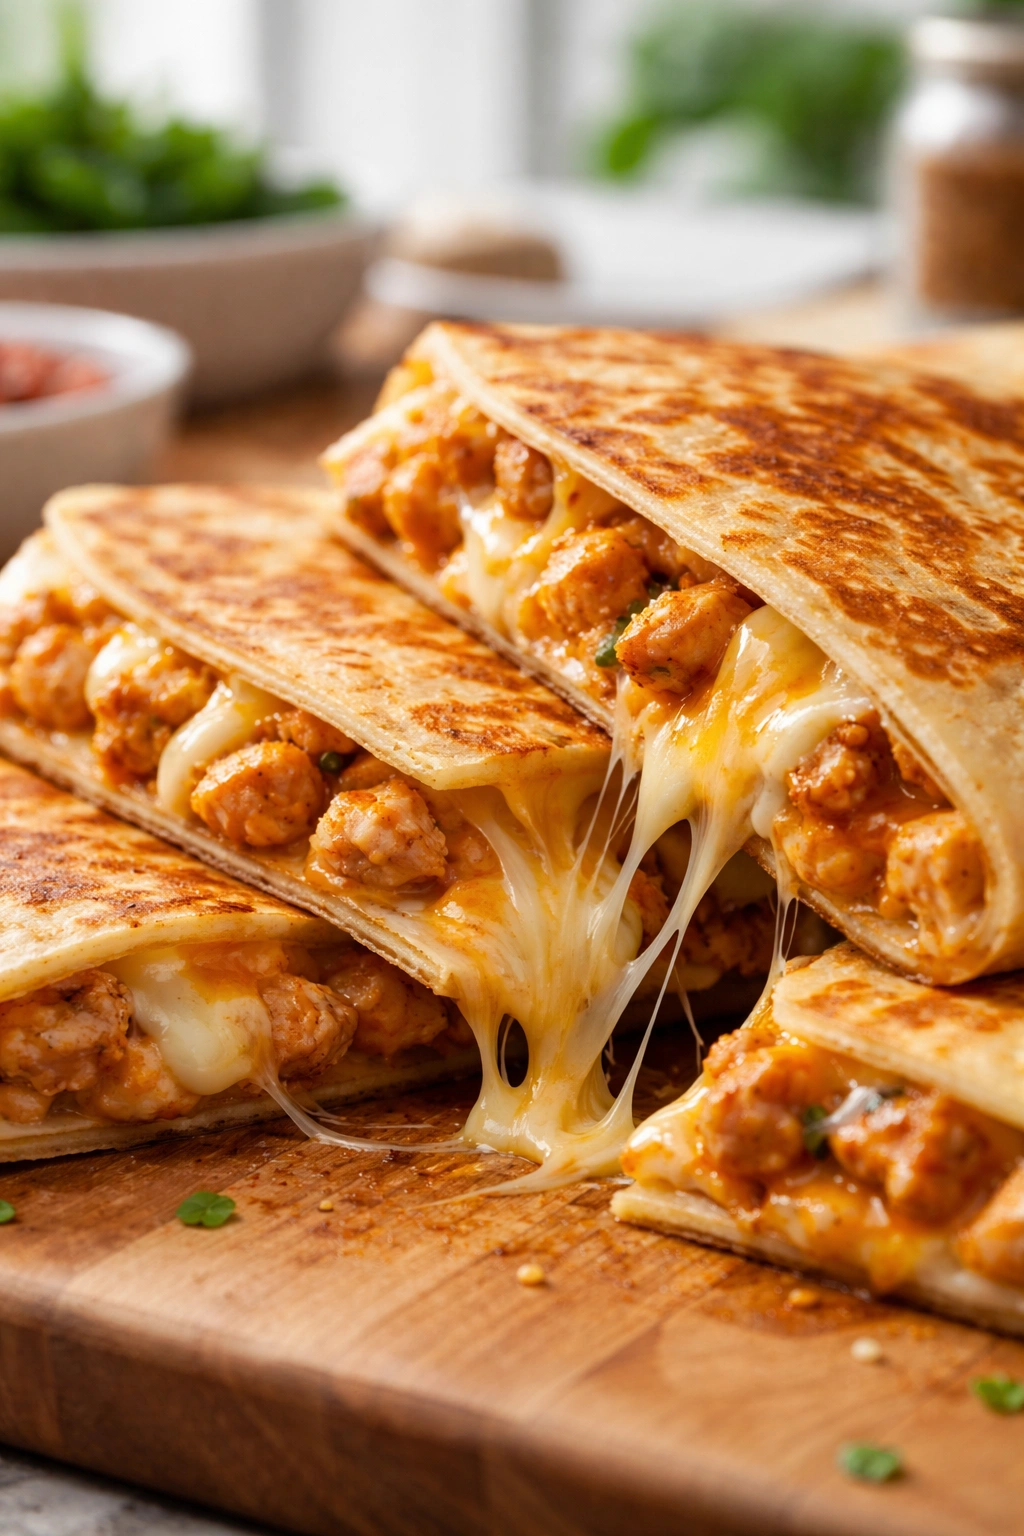
The genius of Taco Bell’s quesadilla lies in its simplicity and balance. You’re working with just a few ingredients, but each one matters. The seasoned chicken has just enough spice and salt to be interesting without overwhelming the cheese. The cheese blend—a combination of mozzarella and cheddar works beautifully—melts into a creamy, cohesive layer that actually holds everything together rather than pooling in the corner.
The tortilla itself is critical. Unlike a flour tortilla that stays soft, this needs enough surface area to crisp up in butter while staying pliable enough to fold without cracking. The butter creates that brown, slightly caramelized exterior that gives the whole thing texture and visual appeal. You’re not going for a deep fry situation here—just enough butter in a skillet to create a golden crust on both sides.
What separates this from just throwing some cheese and chicken between two tortillas is the technique. Temperature matters. Timing matters. The order in which you assemble everything matters. Get those right and you’ll have something that tastes deliberately made, not hastily assembled.
About This Copycat Recipe
This recipe is designed for someone who wants to replicate the Taco Bell quesadilla experience without needing specialty equipment or ingredients you’d have to hunt down. Everything here is available at any standard grocery store, and the cooking method uses a simple skillet that most home cooks already own.
The filling is straightforward: seasoned shredded chicken. You can use a rotisserie chicken to save time, or poach and season chicken breasts yourself for more control over the flavor and sodium content. Both methods work equally well. The cheese is a blend that melts smoothly and develops a slight crust where it contacts the hot skillet.
This recipe makes one quesadilla at a time, which might seem inefficient, but it’s actually the best approach. Trying to make multiple quesadillas simultaneously results in some overcooking on the pan while others haven’t crisped up yet. One at a time ensures each one gets the attention it needs to turn out perfectly. If you’re cooking for a crowd, that section later in this article shows you how to scale up strategically.
Ingredients Breakdown
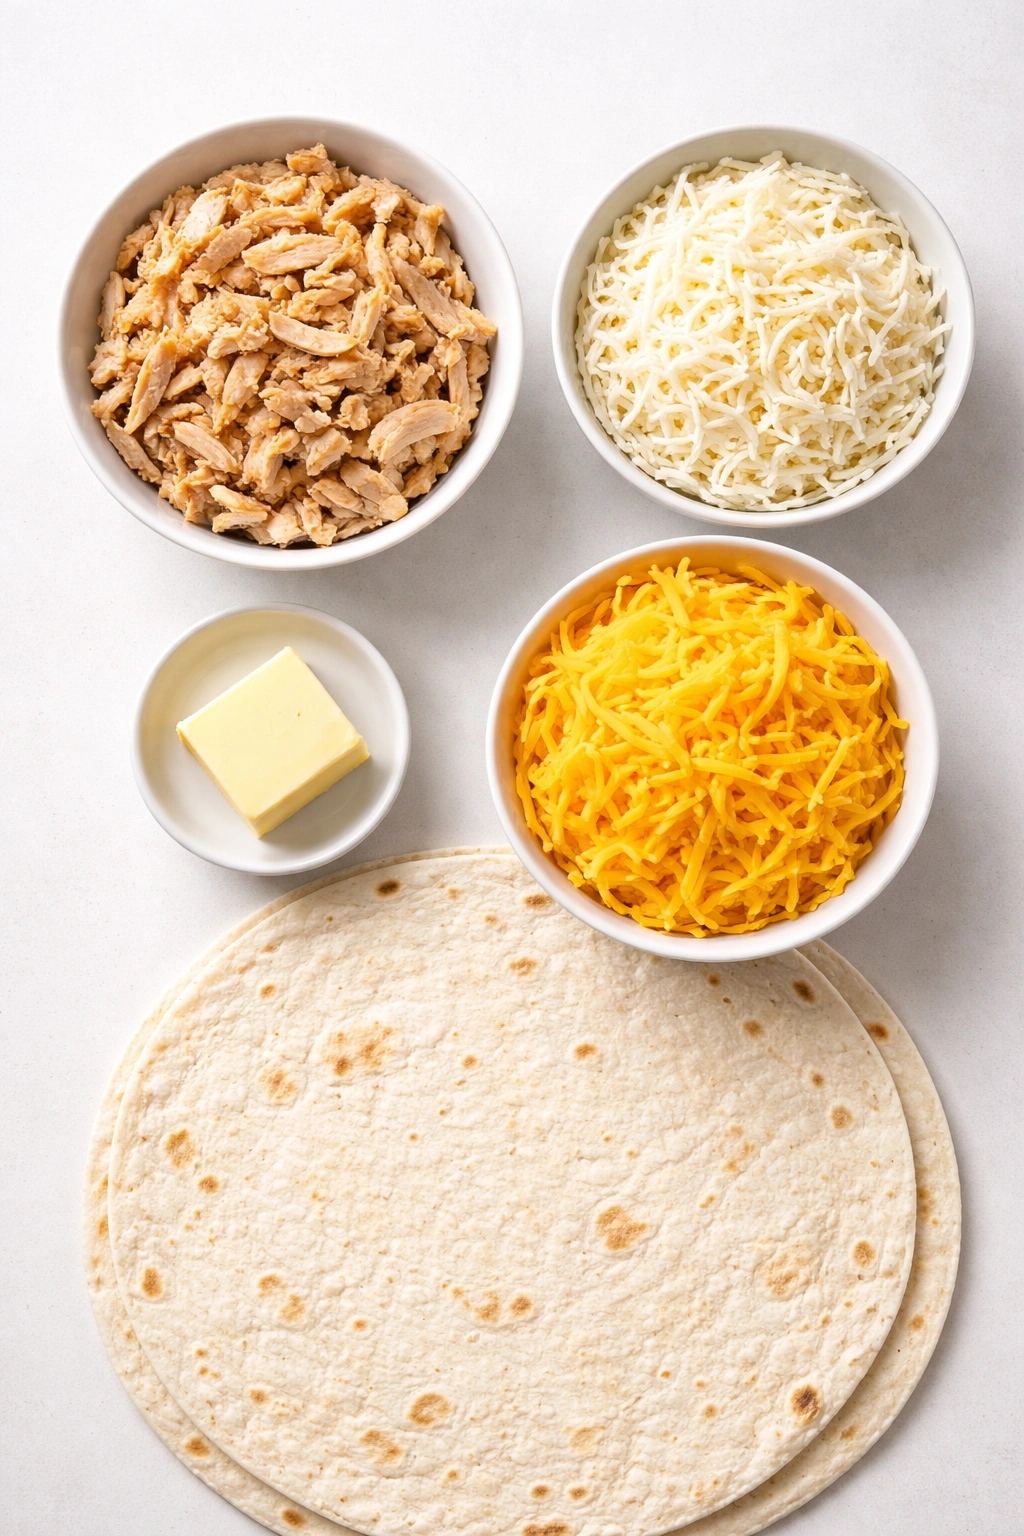
For the Quesadilla Filling:
- 1 cup shredded cooked chicken (rotisserie chicken works perfectly), seasoned with salt and pepper to taste
- ½ teaspoon garlic powder
- ¼ teaspoon cumin (optional but recommended for deeper flavor)
- ⅛ teaspoon cayenne pepper (adjust to your spice preference, or omit if you prefer mild)
- ¾ cup shredded mozzarella cheese (low-moisture works best to avoid a watery quesadilla)
- ¼ cup shredded sharp cheddar cheese (adds flavor complexity and helps with browning)
- 1 tablespoon diced onion (white or yellow, finely minced—optional but adds subtle flavor depth)
For Cooking:
- 1 large flour tortilla, 10 inches (burrito-sized tortillas work better than standard taco-sized; the larger surface area crisps more evenly)
- 1½ tablespoons unsalted butter, divided (½ tablespoon for each side, plus ½ tablespoon for the skillet)
- Pinch of fine sea salt
- Pinch of white pepper (or black pepper if that’s what you have)
Optional Additions:
- 1 tablespoon salsa (mild or hot, depending on preference)
- 1 teaspoon pickled jalapeños, drained and chopped
- A few cilantro leaves, chopped (adds freshness without changing the core flavor)
For Serving:
- Sour cream
- Salsa (pico de gallo, medium salsa, or fire-roasted—choose based on your heat preference)
- Lime wedge
- Optional: hot sauce of choice
Seasoning the Chicken the Right Way
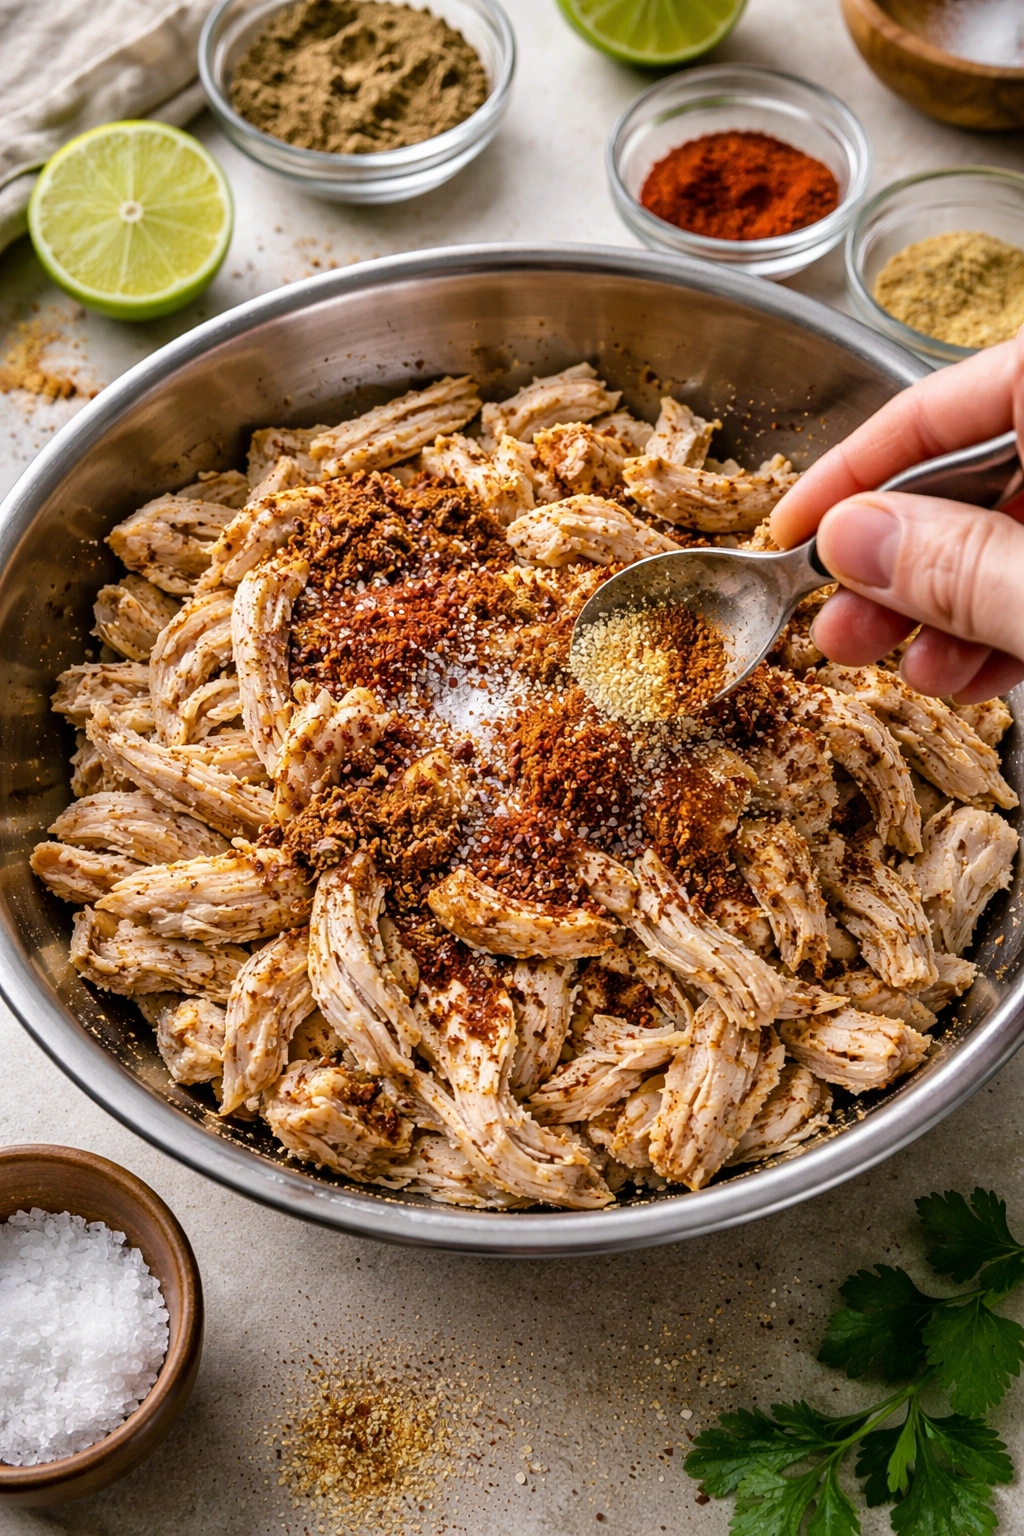
This is where a lot of homemade versions fall short. The chicken needs to taste like something before it ever touches the cheese. If you’re using a rotisserie chicken (the shortcut that works beautifully), shred it first, then toss it with a small bowl with the garlic powder, cumin, cayenne, salt, and pepper. Mix thoroughly so the seasoning distributes evenly rather than clumping in one spot.
If you’re starting from raw chicken breasts, poach them gently in salted water for 12-15 minutes until cooked through, then shred them while they’re still slightly warm (they shred more easily). Let them cool, then season the same way. The goal is chicken that’s flavorful enough to stand on its own, but not so aggressively seasoned that it overpowers the cheese and tortilla.
Taste as you go. You want to notice the chicken has depth, not just salt. The spices should be subtle enough that someone biting into this would think “that tastes like a quesadilla,” not “why is this so spicy?” If you’re sensitive to heat, drop the cayenne entirely—the garlic and cumin are doing the real flavor work anyway.
Equipment You’ll Need
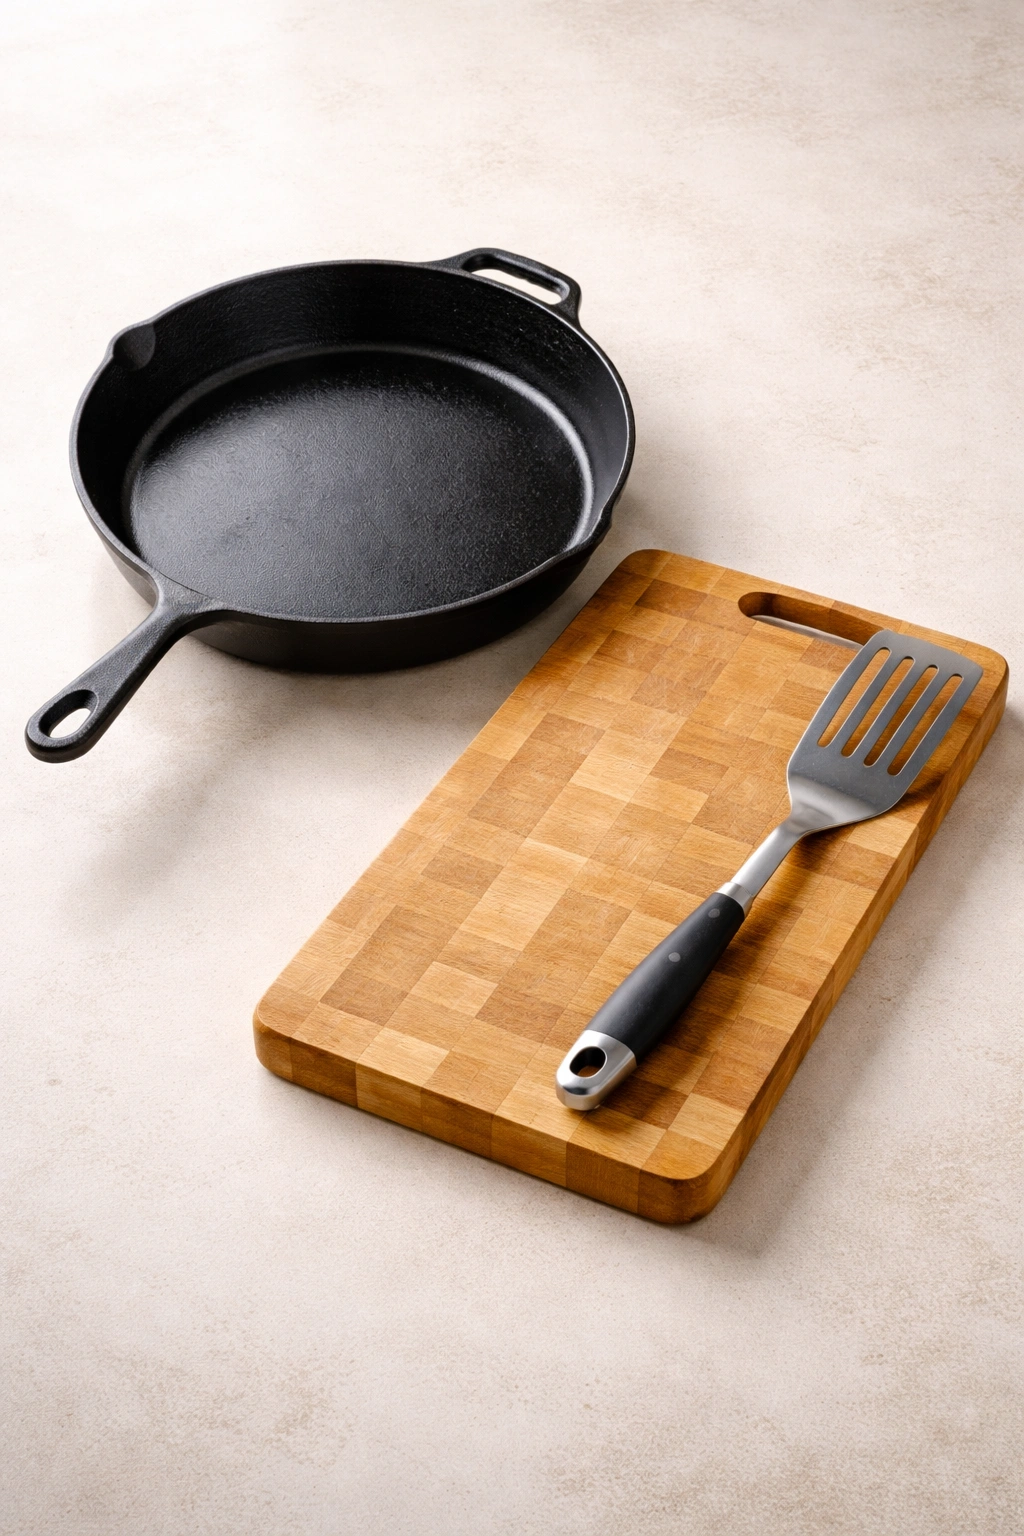
The good news: this is a minimal-equipment recipe. You don’t need a panini press, a quesadilla maker, or any specialized gear. Here’s what actually matters:
A medium or large skillet (cast iron or stainless steel both work beautifully; nonstick works but isn’t necessary). Cast iron is actually ideal because it distributes heat evenly and develops a gorgeous crust on the tortilla. You want at least a 12-inch skillet so the tortilla has room to lay flat without folding up the edges.
A butter knife or small offset spatula for spreading any additions on the tortilla. A spatula (flexible, flat, and sturdy) for flipping the quesadilla without tearing it. Some people swear by two spatulas—one in each hand for stability during the flip—and that’s not a bad approach if you’re nervous about landing it wrong.
A cutting board and sharp knife for chopping any toppings or the quesadilla itself if you want to serve it in wedges (which looks more appealing and is easier to eat).
That’s genuinely it. The simplicity is part of why this works so well as a weeknight recipe.
Step-by-Step Instructions
Prepare Your Filling and Mise en Place:
-
While your skillet heats, prepare your quesadilla components. In a small bowl, combine the seasoned shredded chicken, mozzarella cheese, cheddar cheese, and finely diced onion (if using). Mix gently with a fork until everything is distributed evenly through the mixture. The cheese should cling to the chicken pieces slightly—you want a cohesive filling, not separate piles of chicken and cheese.
-
Place one large flour tortilla on a clean, flat work surface (a cutting board or even a plate works). Lay it flat with the smoother side facing down.
Heat the Skillet:
-
Place a medium or large skillet over medium-high heat. Let it preheat for 1 minute until it’s hot enough that a drop of water sizzles immediately upon contact. You want this hot enough to crisp the tortilla but not so hot that it burns before the inside cooks through.
-
Add ½ tablespoon of butter to the hot skillet. Swirl it around to coat the cooking surface evenly. Let it foam gently for about 15 seconds (you’ll see it bubble slightly and turn light brown) — this indicates the butter temperature is perfect for achieving that golden crust.
Cook the First Side:
-
Once the butter is foaming, immediately place the seasoned tortilla flat into the center of the skillet. The butter will sizzle when it touches the tortilla—that’s the sound of browning happening.
-
Let the first side cook undisturbed for 45 seconds to 1 minute. You’re looking for a light golden-brown color to develop on the bottom, with some slightly darker spots where the butter pooled. Don’t walk away—this happens quickly and you want to catch it at the right moment before it tips over into burnt.
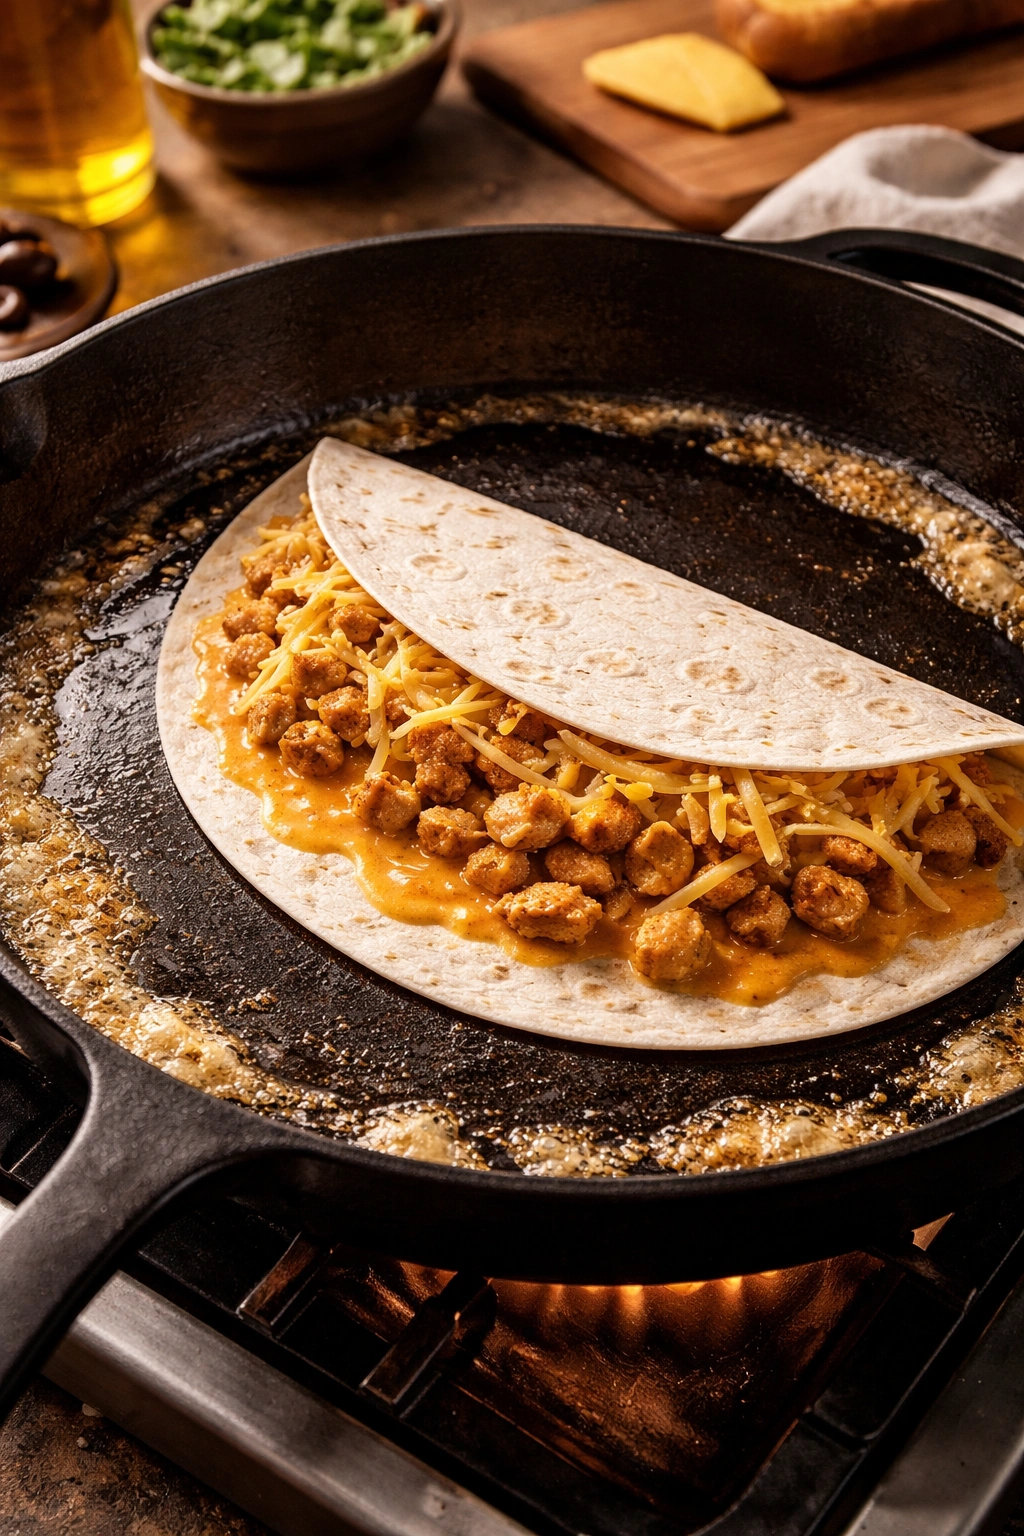
Fill and Fold:
-
While the first side cooks, have your filling mixture ready. When the first side has that light golden color, carefully add your filling to one half of the tortilla (not centered, but on one side), using about ¾ cup of the chicken-and-cheese mixture. Leave about a ½-inch border around the edges so the cheese doesn’t squeeze out when you fold it. Spread the filling gently with the back of a fork or the edge of your knife so it’s in an even layer.
-
If you’re adding salsa, pickled jalapeños, or cilantro, now is the moment—sprinkle those on top of the filling, keeping them within the border so they don’t interfere with the seal when you fold.
-
Using a flexible spatula, gently fold the unfilled half of the tortilla over the filled half, creating a half-moon shape. Press down gently on top with your spatula—not hard enough to squeeze filling out, but firmly enough to help the cheese start adhering to both tortilla layers. You should hear a slight crackle of the tortilla crisping further.
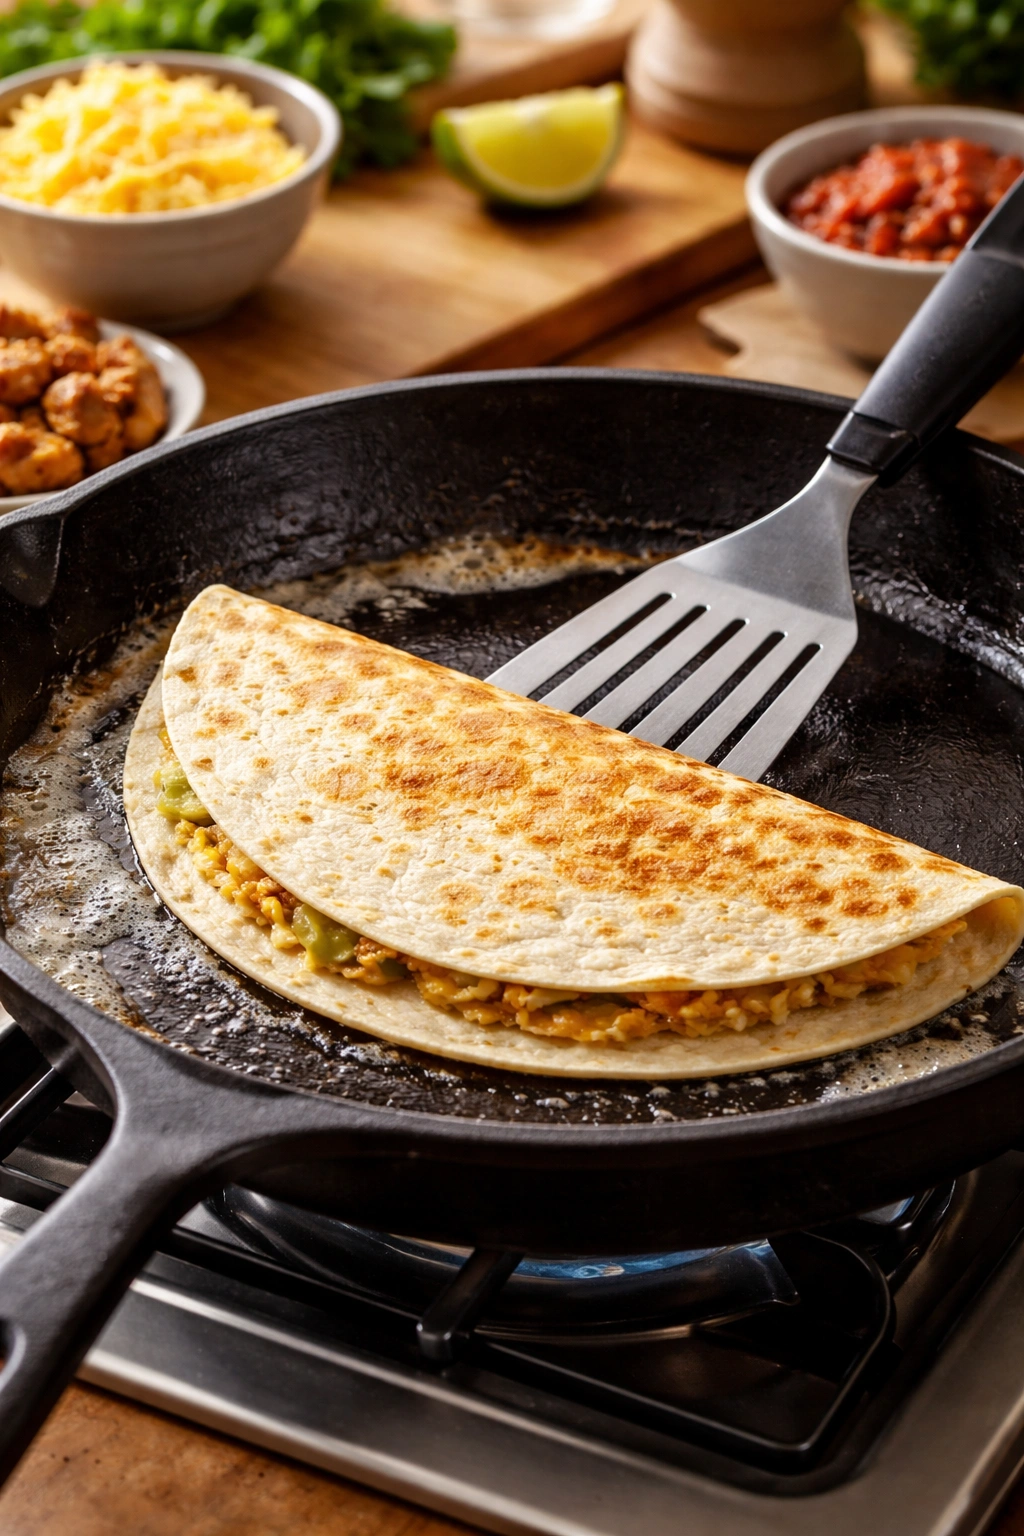
Cook the Second Side:
-
Add the remaining ½ tablespoon of butter to the skillet around the folded quesadilla. Tilt the skillet slightly so the melting butter flows around and under the edges.
-
Let this side cook for 45 seconds to 1 minute, until it achieves that same light golden-brown color. The entire quesadilla should now feel firmer when you give it a gentle press with the spatula—the cheese is melting and creating structure inside.
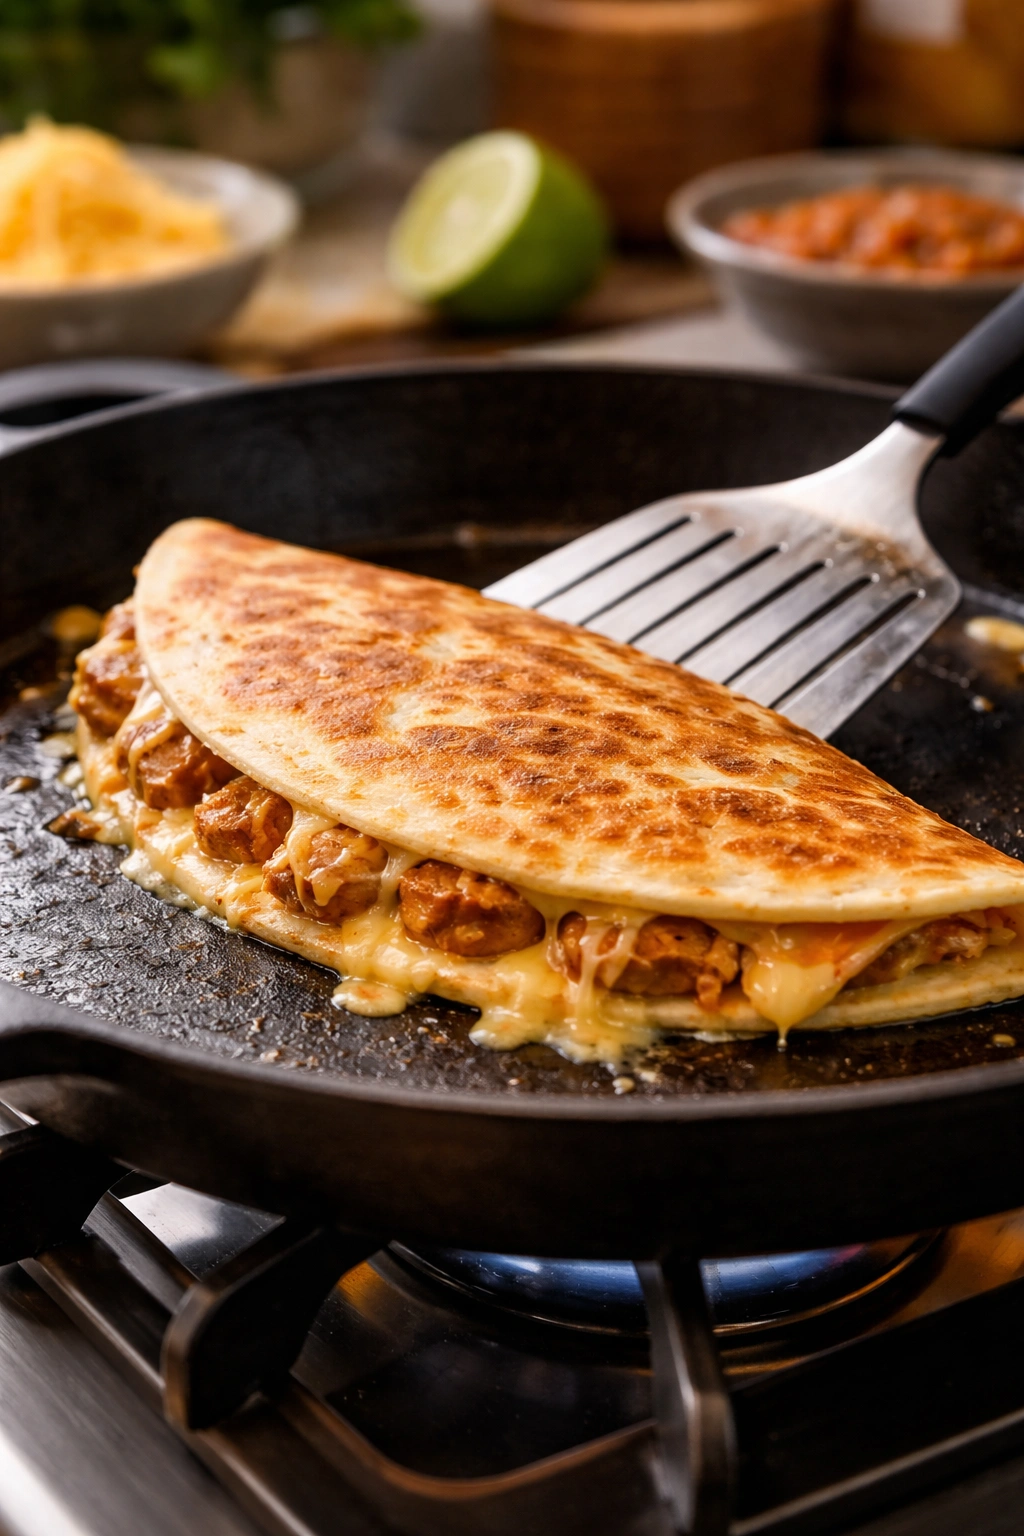
Flip and Finish:
-
This is the moment that intimidates people, but it’s honestly straightforward. Using a sturdy, flexible spatula (some people use two spatulas for extra confidence), slide it completely under the folded quesadilla and flip it in one confident motion. Hesitation is the enemy here—one smooth, decisive flip lands it perfectly. If you overthink it, you’ll fold the spatula or lose the angle and it will flip unevenly.
-
Once flipped, let the second side cook for another 45 seconds to 1 minute until it matches the color of the first side. Both sides should now have that golden-brown crust with some darker spots, and when you press the top gently with your spatula, you should feel the filling is no longer shifting around—the cheese has melted enough to hold everything together.
Rest and Serve:
-
Transfer the finished quesadilla to a cutting board. Let it rest for 30 to 45 seconds before cutting—this brief moment allows the cheese to set slightly, which prevents it from oozing everywhere when you slice it. If you cut immediately, the interior is still actively melting and the pieces will fall apart on the plate.
-
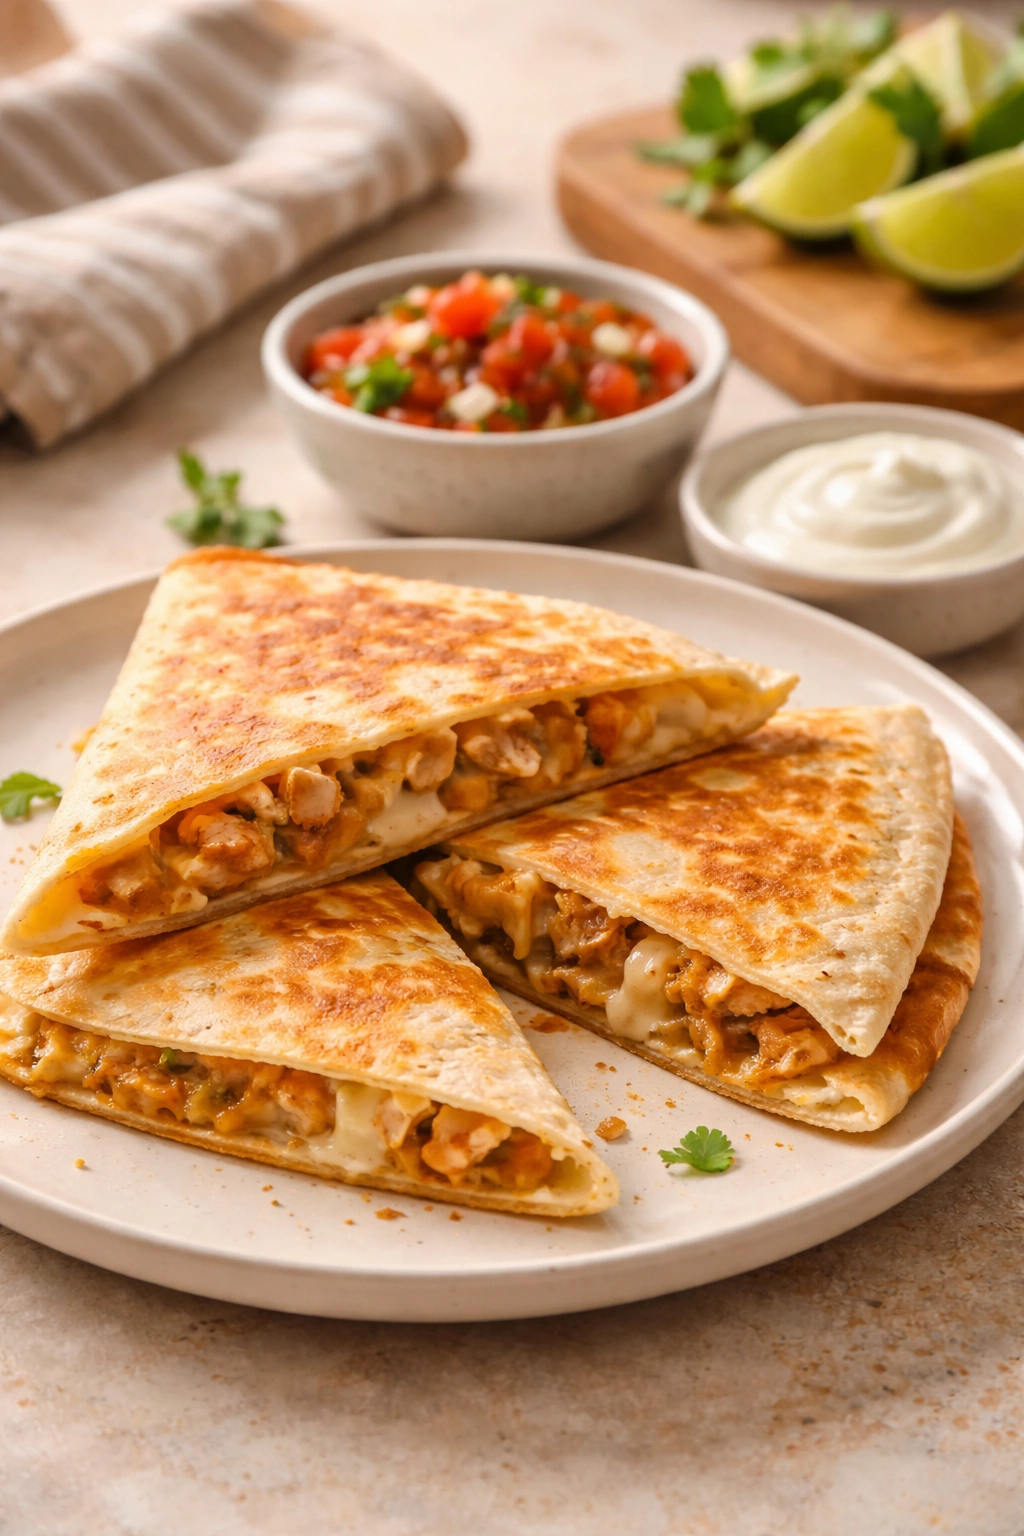
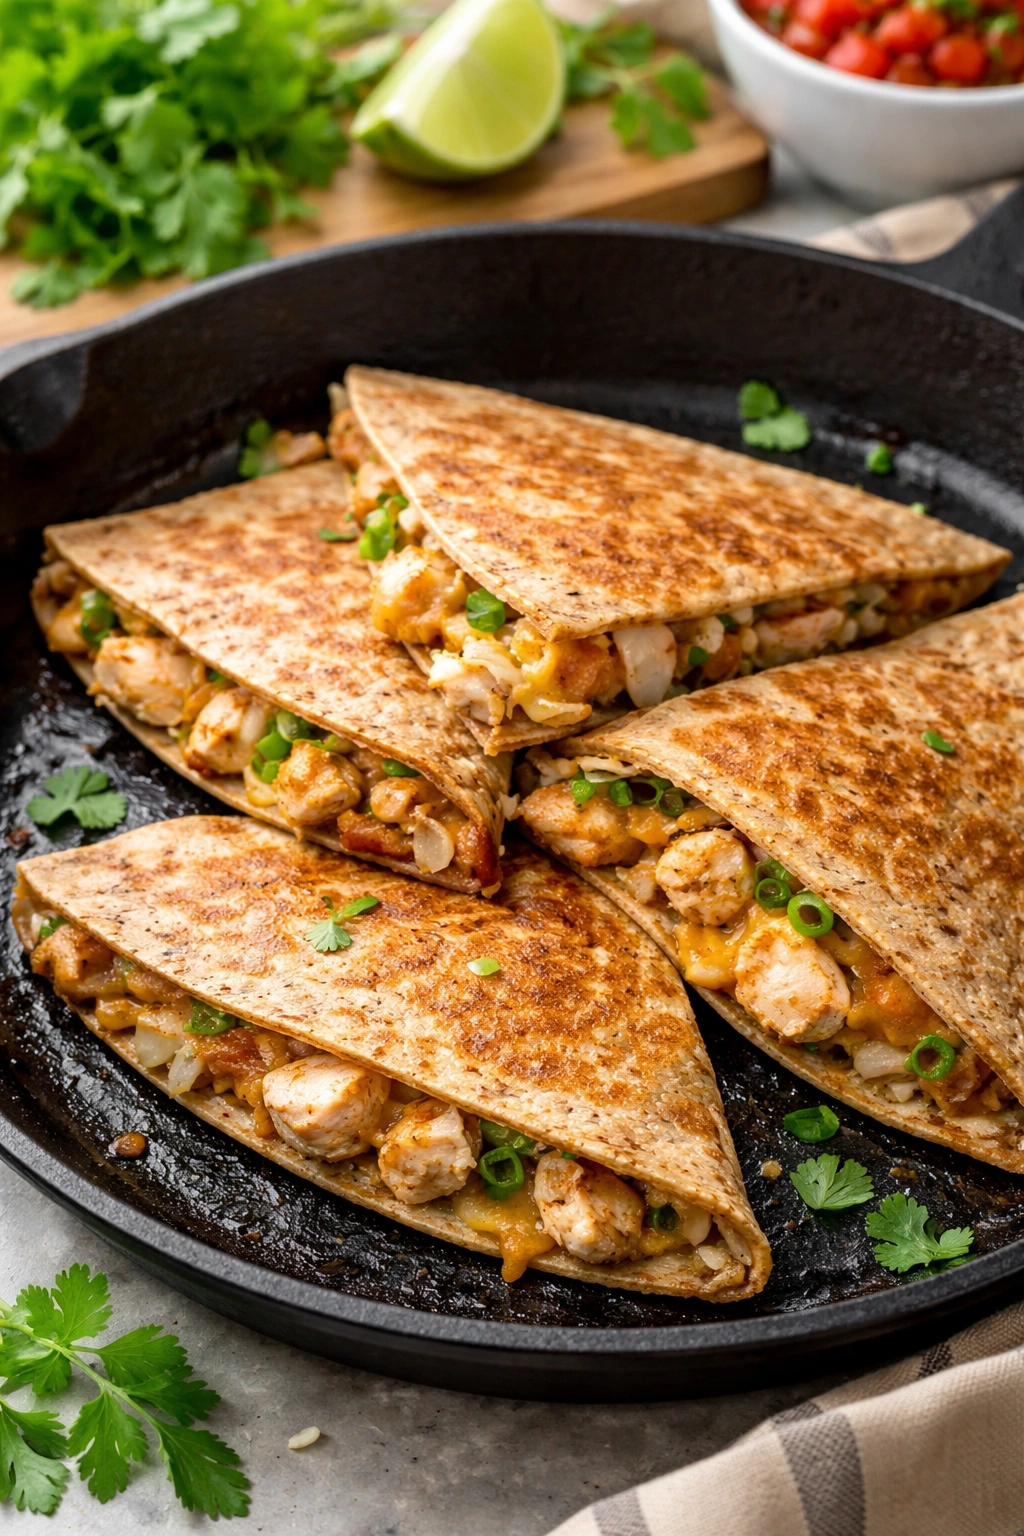
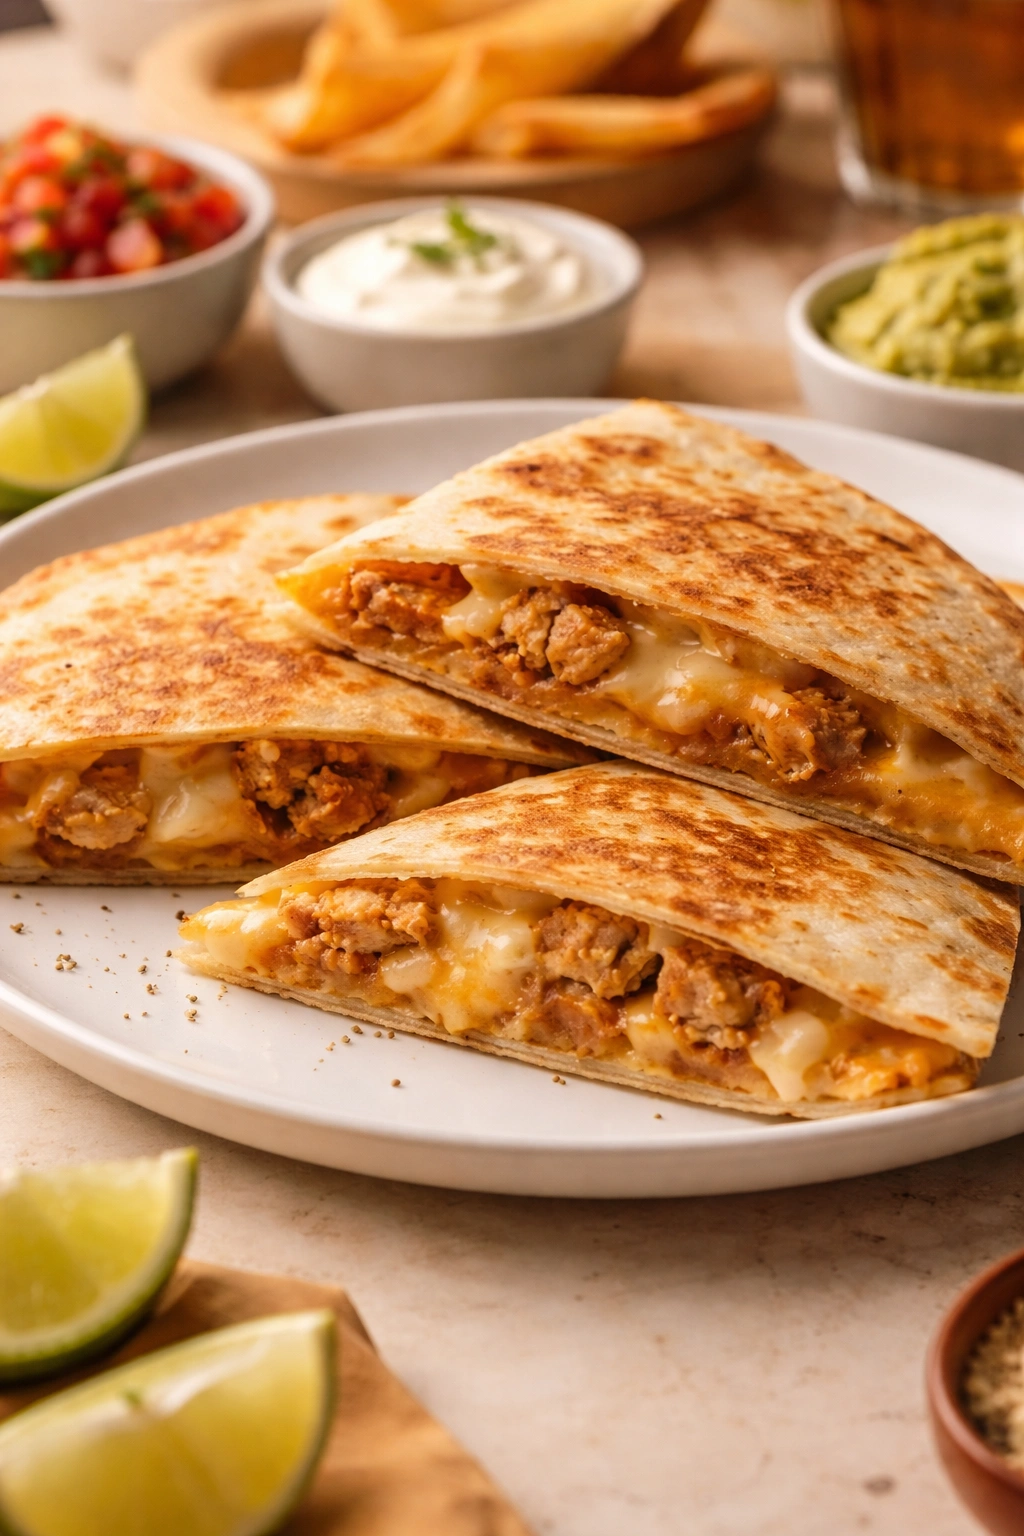
Using a sharp knife, cut the quesadilla in half diagonally, creating two triangular pieces. This is partly aesthetic (triangle wedges just photograph and present better), but it’s also practical—it creates a natural handle at the point, making it easier to eat by hand without getting your fingers covered in melted cheese.
-
Plate immediately and serve with sour cream, salsa, and a lime wedge on the side. The contrast between the hot, crispy quesadilla and the cool sour cream is part of the appeal, so don’t skip that component.
Yield, Timing, and Difficulty
Yield: Serves 1 (easily doubled or multiplied for additional quesadillas cooked one at a time)
Prep Time: 10 minutes (assuming chicken is already cooked and shredded; add 20-30 minutes if starting from raw chicken)
Cook Time: 5 minutes
Total Time: 15 minutes (or 35-40 minutes if cooking chicken from scratch)
Difficulty: Beginner — The technique is simple and forgiving. The only skill required is a confident flip, and even that becomes natural after one attempt. No special equipment or advanced techniques needed.
Pro Tips and Common Mistakes to Avoid
The biggest mistake home cooks make is using too much filling. When you see a quesadilla at a restaurant, it looks delightfully generous, but it’s actually very carefully portioned. Too much filling creates pressure inside the quesadilla that forces the cheese to squeeze out the sides and create a mess. It also prevents the tortilla from crisping properly because it’s weighing everything down. Stick to the ¾-cup measurement even though it seems conservative—trust that it’s the right amount.
Another common problem is skipping the preheating step or using medium heat instead of medium-high. The skillet has to be hot enough that the butter foams immediately when it hits the pan. If your tortilla is slowly browning over several minutes, your heat isn’t high enough. Turn it up. The whole process from first side to flip should take about 2-3 minutes total cooking time. If you’re hovering around 5 minutes, the quesadilla is becoming too firm inside before the outside develops color.
Don’t use low-moisture mozzarella incorrectly—make sure you’re actually buying the kind sold in blocks or shredded bags, not fresh mozzarella (the soft, creamy kind in water). Fresh mozzarella releases too much liquid and makes the quesadilla soggy. Low-moisture mozzarella melts cleanly and adheres to the filling without seeping.
Here’s something that genuinely helps: slightly warm your filling before assembling the quesadilla. If the chicken and cheese mixture has been sitting in the fridge, take 30 seconds and microwave it until it’s just barely warm (30-45 seconds, tops). This accomplishes two things: it starts the melting process so the cheese needs less cooking time on the skillet, and it means the filling temperature matches the quesadilla exterior better, so everything finishes at the same moment. A cold filling that then has to heat through as the exterior crisps often results in an overcooked tortilla before the filling is actually warm.
The flip is the intimidating part, but here’s the reality: even if you slightly botch the flip, it still tastes fine. You’re not balancing something delicate—it’s a folded tortilla with cheese inside. It can handle a slightly awkward flip. The worst-case scenario is it lands slightly askew and you just press it gently back into shape with your spatula. It still cooks fine and still tastes delicious.
Flavor Variations and Customizations

Once you master the basic technique, you can easily experiment with different combinations. Beef and cheese works beautifully—use seasoned ground beef instead of chicken, prepared the same way (browned, drained, seasoned with cumin and garlic). Steak and cheese is another popular variation: use thinly sliced carne asada or even seasoned flank steak shredded into bite-sized pieces.
For a spicy version, increase the cayenne to ¼ teaspoon, add pickled jalapeños to the filling (not just on top), and serve with hot salsa instead of mild. Some people add a pinch of chili powder to the chicken seasoning for deeper heat and smokiness.
A southwestern style incorporates fresh corn kernels (about 2 tablespoons), a touch of lime zest mixed into the filling, and cilantro both in the filling and as a garnish. Black beans (drained and lightly mashed) can replace about ¼ cup of the chicken if you want to add heartiness and don’t mind a slightly more textured filling.
For breakfast versions, skip the chicken entirely and use scrambled eggs, crumbled cooked sausage, and cheddar cheese. Cook it the exact same way—the method works regardless of filling. Add diced bell peppers if you want vegetables, or keep it simple.
The three-cheese version uses mozzarella, cheddar, and a tablespoon of grated Parmesan mixed into the filling for a sharper, more complex cheese flavor that some people prefer over the standard two-cheese blend.
Making It Healthier
If you want to reduce the calorie content without sacrificing texture or taste, there are strategic adjustments. Start by using all chicken breast (which is leaner than thighs, if that’s what went into your rotisserie chicken) and cutting the butter slightly—use 1 tablespoon total instead of 1½ tablespoon (you’ll lose a tiny bit of golden-brown crust but not enough to notice if you’re careful with timing).
Another approach is using a whole wheat tortilla instead of a standard flour tortilla. They handle slightly differently (they’re a bit more fragile when hot), but they work, and the flavor is more neutral than you’d expect. The crispiness is less pronounced, but the overall technique remains the same.
Reducing the cheese by ¼ cup and adding something with volume but fewer calories (like black beans or sautéed bell peppers mixed into the filling) creates a quesadilla that’s less dense without feeling skimpy. The extra vegetables also add nutrition.
Skip the sour cream on the side and serve with plain Greek yogurt instead. It has the same cool, creamy contrast with tangy undertones but higher protein and fewer calories. The flavor difference is subtle enough that most people don’t notice, and it honestly pairs beautifully with the seasoned chicken.
Cooking for a Crowd
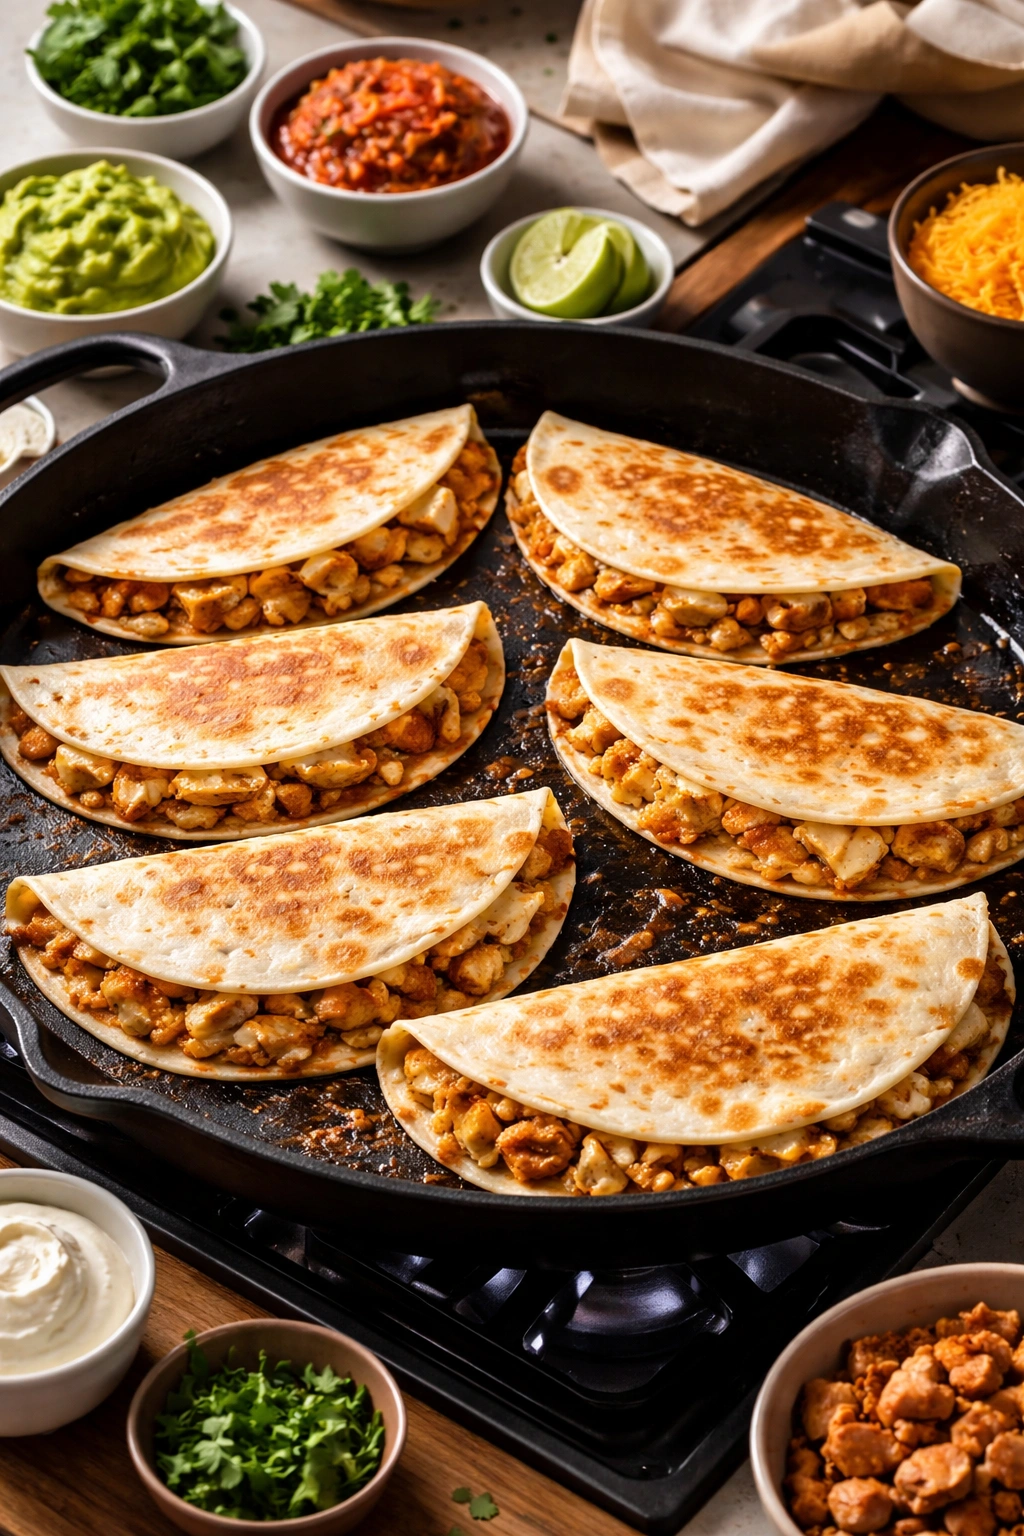
If you’re making quesadillas for multiple people, the goal is to cook them sequentially rather than simultaneously, which ensures each one gets proper attention and crispy exterior. The reality: trying to cook four quesadillas at once results in three that are overdone and one that’s underdone.
Here’s the efficient approach: preheat your skillet once and keep it at the right temperature. Make the first quesadilla using the method above and transfer it to a plate. While it rests, quickly assemble the second quesadilla and place it directly in the same hot skillet (you may need to add another ½ tablespoon butter, but the skillet should still be hot enough that you can go right ahead).
Since you’ll be cooking multiple quesadillas, you can prepare all your filling components in advance and portion them into separate small bowls—one portion per quesadilla. Have all your tortillas laid out and ready to go. The assembly then becomes a quick, efficient process: place tortilla, add preportioned filling, fold, cook, plate, repeat.
For a party of 8-10 people, you’re looking at about 8-10 minutes of actual cooking time (one minute per quesadilla plus transition time). The beautiful part is that quesadillas served over the course of 2-3 minutes feels like they’re all arriving together because they’re all hot and people are eating them in sequence.
If you want to serve everyone simultaneously, here’s a workaround: cook all the quesadillas one by one and keep them warm on a baking sheet in a 200°F oven for up to 10 minutes while you finish cooking. They’ll stay hot and maintain their crispiness surprisingly well if you stack them on top of paper towels to absorb excess moisture.
Storage and Reheating Guide
A freshly made quesadilla is genuinely the best version of this recipe—the contrast between the crispy exterior and warm interior is part of the appeal. That said, they do reheat reasonably well if you have leftovers.
Room temperature storage: A quesadilla left on the counter loses its crispiness pretty quickly (within about 30 minutes as it cools, the tortilla becomes soft). If you’re planning to eat it within the hour, wrapping it loosely in foil keeps it warmer longer, but it still won’t have that fresh-cooked crust.
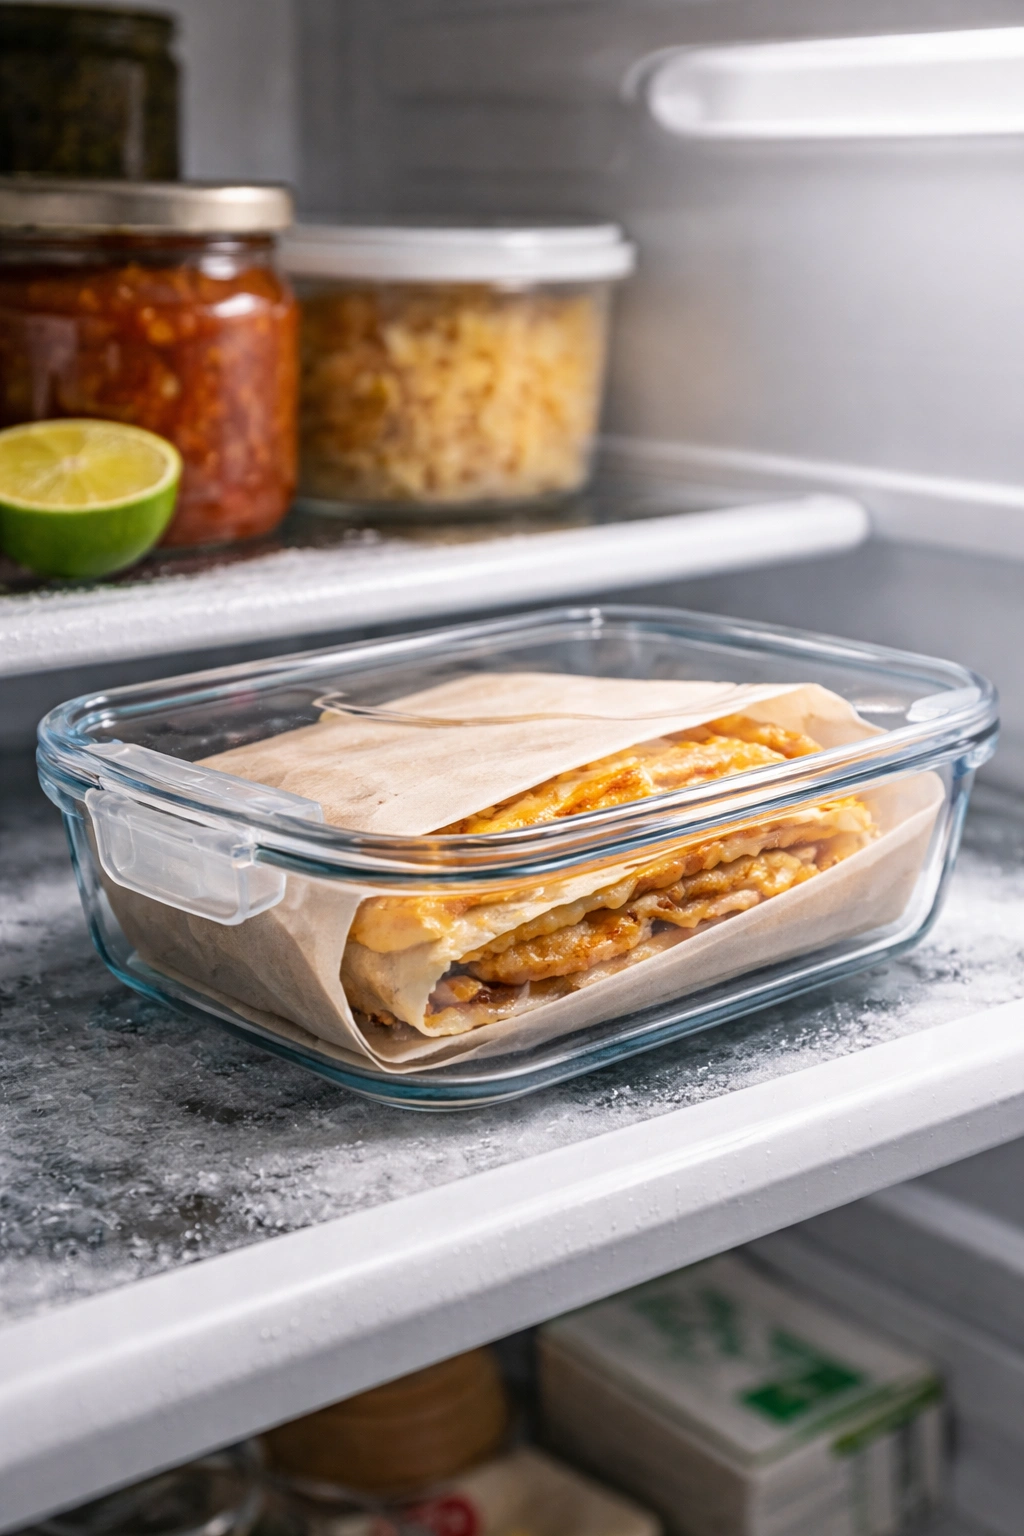
Refrigerator storage: In an airtight container, a quesadilla stays fresh for up to 2 days. The filling stays good, but the tortilla becomes noticeably soft by day two.
Freezer storage: This is where quesadillas actually shine as a make-ahead option. Wrap cooled quesadillas individually in parchment paper, then place them in a freezer bag. They freeze beautifully for up to 3 months. The filling maintains its quality, and reheating works surprisingly well.
Reheating from room temperature: Place the quesadilla back in a hot skillet (medium-high heat) for 1-2 minutes per side. This re-crisps the exterior and reheats the filling without overdoing it. You’re not cooking it from scratch, just restoring the texture—so it’s quick.
Reheating from refrigerated: Use the same skillet method but add about 30 seconds to each side (so 1½ to 2½ minutes total). Let it sit at room temperature for 5-10 minutes first if you have the time; it reheats more evenly.
Reheating from frozen: Unwrap the frozen quesadilla and place it directly in a medium-temperature skillet (medium, not medium-high, since it’s starting frozen). Cook for 2-3 minutes per side, until it’s heated through and re-crisped. Don’t try to rush this with high heat or the outside will burn before the inside thaws.
The microwave technically works in a pinch (30-45 seconds, checking halfway through), but it makes the tortilla rubbery. The skillet method is barely more effort and produces exponentially better results.
Serving Suggestions and Pairings
A properly made quesadilla is almost a complete meal on its own, but the sides you choose dramatically change the overall eating experience.
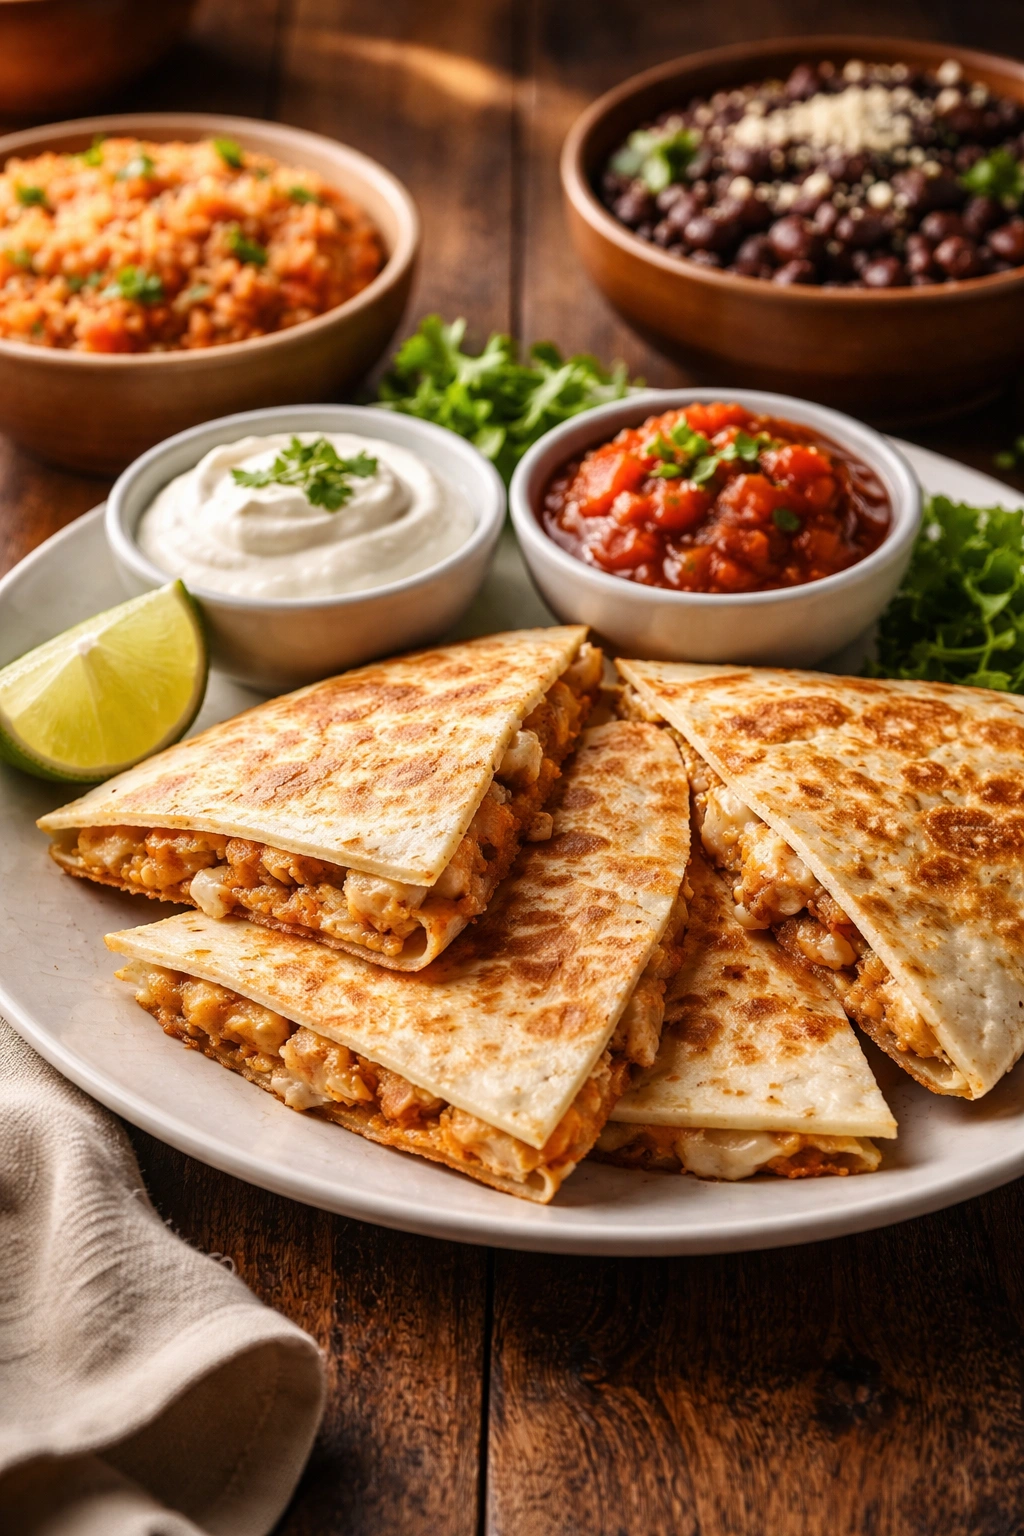
The classic pairing is what you get at the restaurant: sour cream, salsa, and lime. The sour cream should be full-fat and cold—it’s the cooling contrast that makes everything work. The salsa should be your preference regarding heat level (mild if you want this meal to be approachable, fire-roasted if you like things spicy). The lime wedge isn’t just decoration; a squeeze over the top adds brightness that cuts through the richness of the cheese and butter.
As part of a casual lunch or light dinner, serve the quesadilla with a simple green salad dressed with lime vinaigrette. The acidity of the dressing complements the richness of the cheese, and the cool, crisp vegetables provide textural contrast. Add cilantro to the salad if you want to echo the flavors in the quesadilla.
With rice and beans, the quesadilla becomes a more substantial meal, almost like a deconstructed burrito situation. This works beautifully for family dinner or casual entertaining. Mexican rice (the kind with tomato and broth) pairs more seamlessly than plain white rice. Black beans or refried beans both work; choose based on what your household prefers.
Alongside other Tex-Mex items, quesadillas fit naturally. Serve them with enchiladas, tacos, or a small amount of guacamole and chips before the main course. If you’re doing a spread, quesadillas slot in as a main protein option alongside other options.
For breakfast or brunch, the breakfast version (with scrambled eggs and sausage) pairs beautifully with fresh fruit, breakfast potatoes, or both. A simple green salad with lime dressing works here too, if your brunch leans healthier.
Beverages that pair well: Mexican hot chocolate (spiced, not sweet) in cooler months; agua fresca in warmer months; a crisp lager beer if you’re going the casual evening route; sparkling water with lime if you want something non-alcoholic. The richness of the quesadilla calls for either something warm and slightly bitter (hot chocolate, coffee) or something cold and acidic (lime water, beer) to cut through it.
How to Get Crispy Edges Every Time
The crispy exterior is what separates a homemade quesadilla from something that tastes homemade in the less-appealing sense. This is actually a technique issue more than an ingredient issue—the same tortilla and butter can yield dramatically different results based on execution.
The first critical factor is butter temperature. You want the butter to foam when the tortilla hits the skillet, which indicates it’s reached approximately 330-350°F. At this temperature, the water in the butter evaporates rapidly while the milk solids brown, creating that golden crust. If the skillet is too cool, the butter just soaks into the tortilla and you get a soft, oil-soaked result. If the skillet is too hot, the butter browns too aggressively and the tortilla burns before the interior cooks. Medium-high heat for a standard stovetop hits that sweet spot reliably.
The second factor is timing. Don’t cook the first side longer than 1 minute in an attempt to get it crispier—you’ll overshoot and burn it. That 45-second to 1-minute window creates the browning you want. More time just means burnt. The second side cooks quickly too—the skillet is already hot and the filling has already started softening the tortilla from the inside, so it needs less time to achieve the same color.
The third factor is moisture control. Make sure your filling isn’t weeping (which means your cheese had too much moisture or your chicken released water). If the inside is actually wet, that moisture rises through the tortilla and makes the crust soggy. This is why low-moisture mozzarella matters—it doesn’t release liquid the way fresher cheeses do.
A final pro tip: let the tortilla sit directly on the hot skillet without moving it for at least 45 seconds before checking color. The temptation is to peek every 15 seconds, but each time you lift it, you interrupt the browning process. Resist that urge and trust the timing. The sizzle you hear tells you it’s working.
Freezer-Friendly Quesadilla Prep
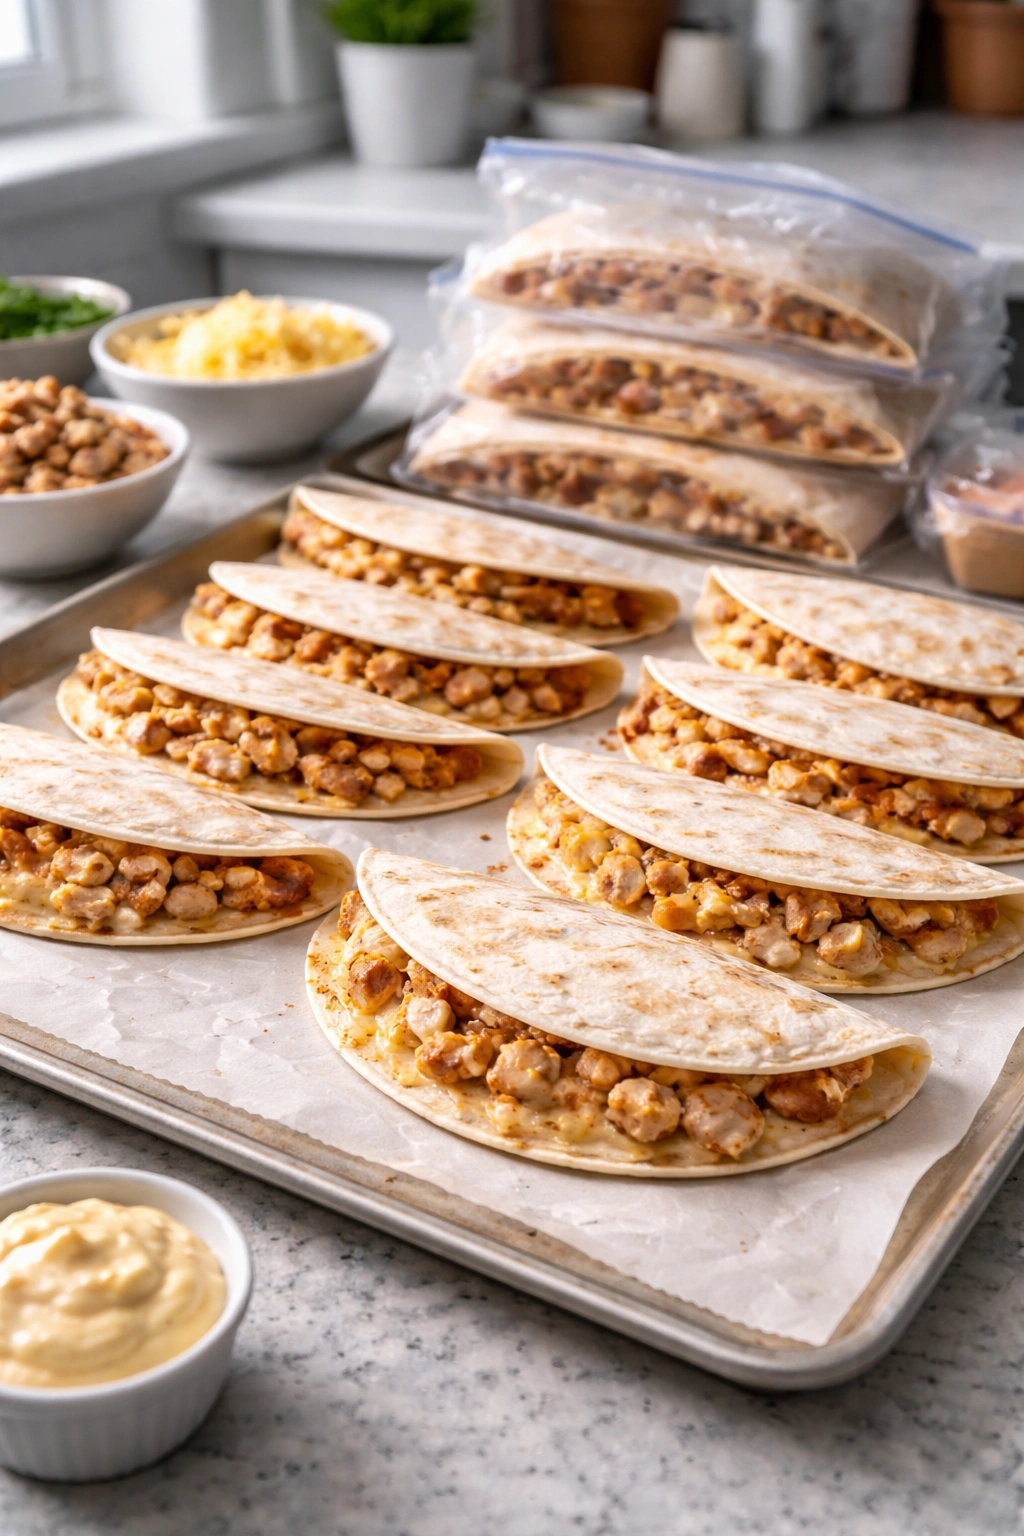
Since these reheat well, prepping them as a freezer meal is genuinely clever for busy weeks. The best approach is to assemble them fully, cook them partially, then finish them when you want to eat.
Here’s the make-ahead method: assemble your quesadillas completely but cook them only on the first side (about 45-60 seconds until lightly golden). This partial cooking sets the shape so it doesn’t fall apart later. Let them cool completely, then wrap individually in parchment paper and freeze in an airtight freezer bag for up to 3 months.
When you’re ready to eat, pull one from the freezer and place it directly in a hot, buttered skillet. Cook it as if it were fully raw—about 45-60 seconds per side at medium-high heat. The first partial cooking cut down on total cooking time, so you’ll be done in about 2 minutes.
Alternatively, you can prep the filling in advance and freeze just that component. Portion the chicken-and-cheese mixture into small containers or even into sandwich bags that you flatten before freezing. When you want a quesadilla, thaw the filling in the fridge overnight, warm it briefly in the microwave, and assemble and cook fresh. This gives you the texture of a fresh-cooked quesadilla with most of the prep work already done.
Final Thoughts
The beauty of this copycat recipe is that it’s genuinely simple while still delivering that restaurant-quality result that makes people wonder how you made something so good so quickly. You’re not doing anything complicated—you’re just being intentional about temperature, timing, and proportions.
Once you’ve made this a few times, it becomes automatic. You stop thinking about the technique and start thinking about variations. You make it for lunch. You make it for unexpected guests who arrive at dinner time. You make a batch for the freezer because you realize it’s an absurdly convenient meal to have on hand. You discover you actually prefer the homemade version to the restaurant version, which isn’t that surprising when you’re using quality ingredients and paying attention to every step.
The real takeaway here is that quesadillas—this version or any version—are one of those recipes that prove you don’t need lots of ingredients or complicated techniques to impress yourself or anyone eating what you’ve made. You need the right heat, the right timing, and filling that actually tastes good. Everything else is just details. Master this, and you’ve got a recipe in your rotation that works for breakfast, lunch, dinner, or a late-night snack at any time of the week.