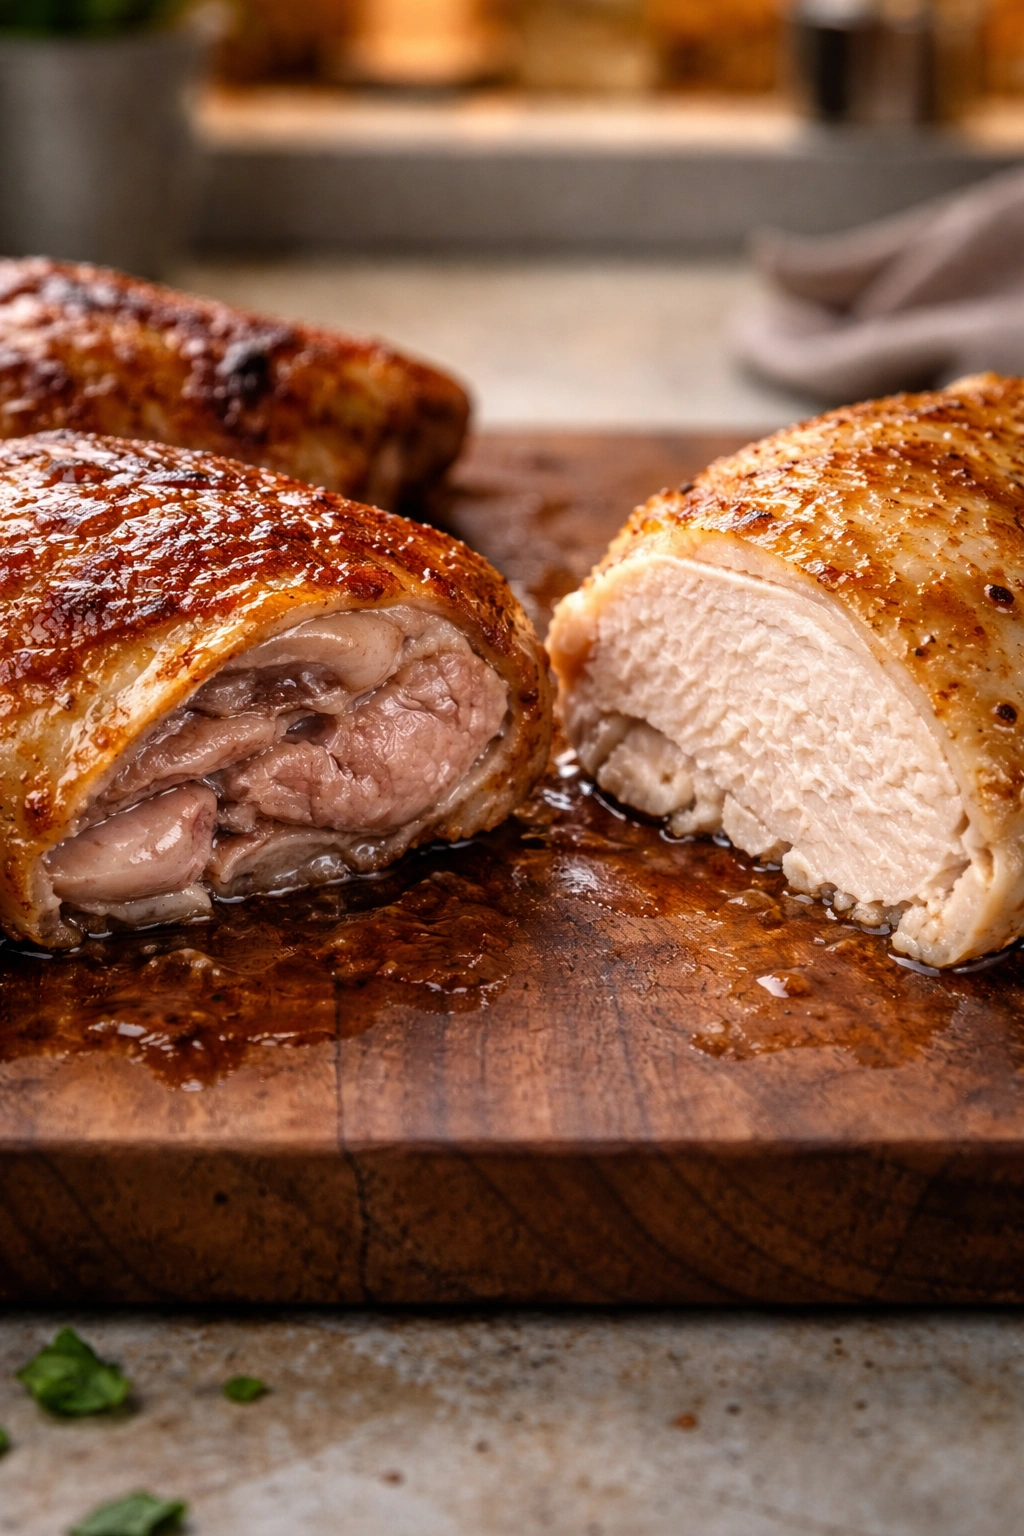
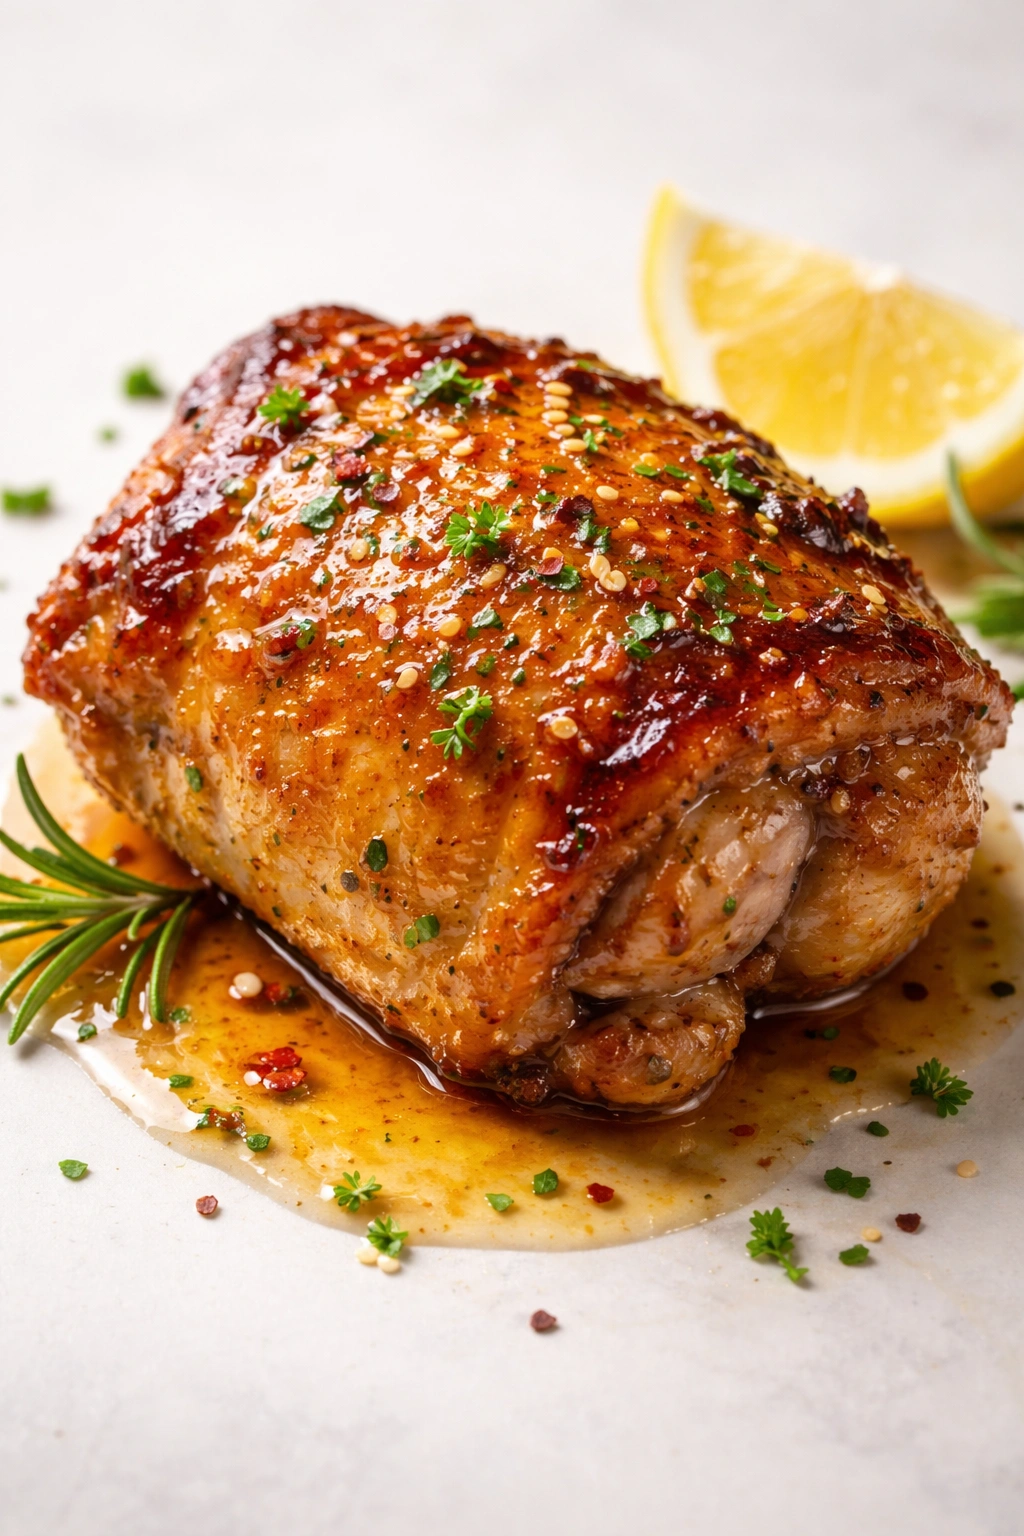
There’s something magical about pulling a tray of baked chicken thighs from the oven with skin that crackles when you touch it and meat so tender it practically falls off the bone. The challenge most home cooks face, though, isn’t getting the skin crispy — it’s keeping that meat juicy. Chicken breasts? They dry out in minutes if you’re not careful. But chicken thighs are a different story. They’re forgiving, flavorful, and built by nature to stay moist through nearly any cooking method. The secret to perfectly juicy baked chicken thighs lies in understanding why dark meat behaves so differently than white meat, and how a few simple techniques can guarantee restaurant-quality results every single time you open that oven door.
This is the kind of weeknight dinner that tastes like you spent hours in the kitchen, when in reality you invested maybe five minutes of actual work. Your oven does everything else, transforming simple seasoned thighs into a meal that earns genuine compliments at the dinner table.
Why Dark Meat Stays Juicier Than Chicken Breasts
The fundamental difference between chicken thighs and breasts comes down to muscle fiber composition and fat content. Chicken breast is white meat — a lean, relatively inactive muscle that works hard when the bird flies, which is why it’s so lean and prone to drying out during cooking. The thighs, by contrast, are dark meat from the legs, a muscle group that gets constant use.
This constant activity creates a higher fat content — roughly double that of chicken breast. That extra fat is what keeps your thighs moist, even when they’re in the oven longer than technically necessary. The fat surrounds the muscle fibers and acts as insulation, preventing moisture from escaping as rapidly. When the collagen in dark meat breaks down from the heat, it converts to gelatin, which contributes to the luxurious, mouthwatering texture.
Here’s the practical benefit: you can cook chicken thighs to a higher internal temperature than breasts and they’ll still be juicy. While chicken reaches food safety at 165°F, dark meat actually tastes better and becomes even more tender at 180-190°F. That extra heat breaks down more of the connective tissue, releasing even more of those savory gelatin compounds that give you that restaurant-quality, fall-apart texture.
This is why chicken thighs are the forgiving choice for home cooks. Whether you accidentally leave them in for an extra ten minutes or your oven runs hot, you’ve got a much bigger margin for error than you do with breasts.
Selecting Bone-In, Skin-On Thighs for Maximum Juiciness
You’ll see some recipes that work with boneless, skinless thighs, and sure, those will technically cook — but if maximum juiciness is your goal, bone-in, skin-on is the only way to go. The bone isn’t just for flavor (though it absolutely adds that). The bone conducts heat differently than meat, which means it helps the meat cook more evenly. Heat reaches the bone faster, and then radiates back out, creating gentle, consistent cooking from the inside.
The skin is equally important. When you leave the skin on during roasting, two things happen. First, the skin self-bastes the meat underneath, meaning as the chicken’s own fat renders out of the skin, it constantly drips back onto the meat, essentially basting it throughout cooking. Second, the fat in the skin creates a protective barrier that slows evaporation of moisture from the meat.
That said, don’t let perfection be the enemy of good. If you only have boneless thighs, they’ll still come out juicy — just adjust your timing down by about 10 minutes and keep an eye on the thermometer. And if you’re trying to eat the skin but prefer it removed after cooking, that works too. Just leave it on during roasting for the cooking benefits, then pull it off before eating.
Look for thighs that are roughly 6-8 ounces each. Smaller thighs cook faster and may dry out if you’re not watching carefully. Larger ones, especially if they’re truly enormous, may need extra time. Medium thighs are the sweet spot for consistent, even cooking without any guesswork.
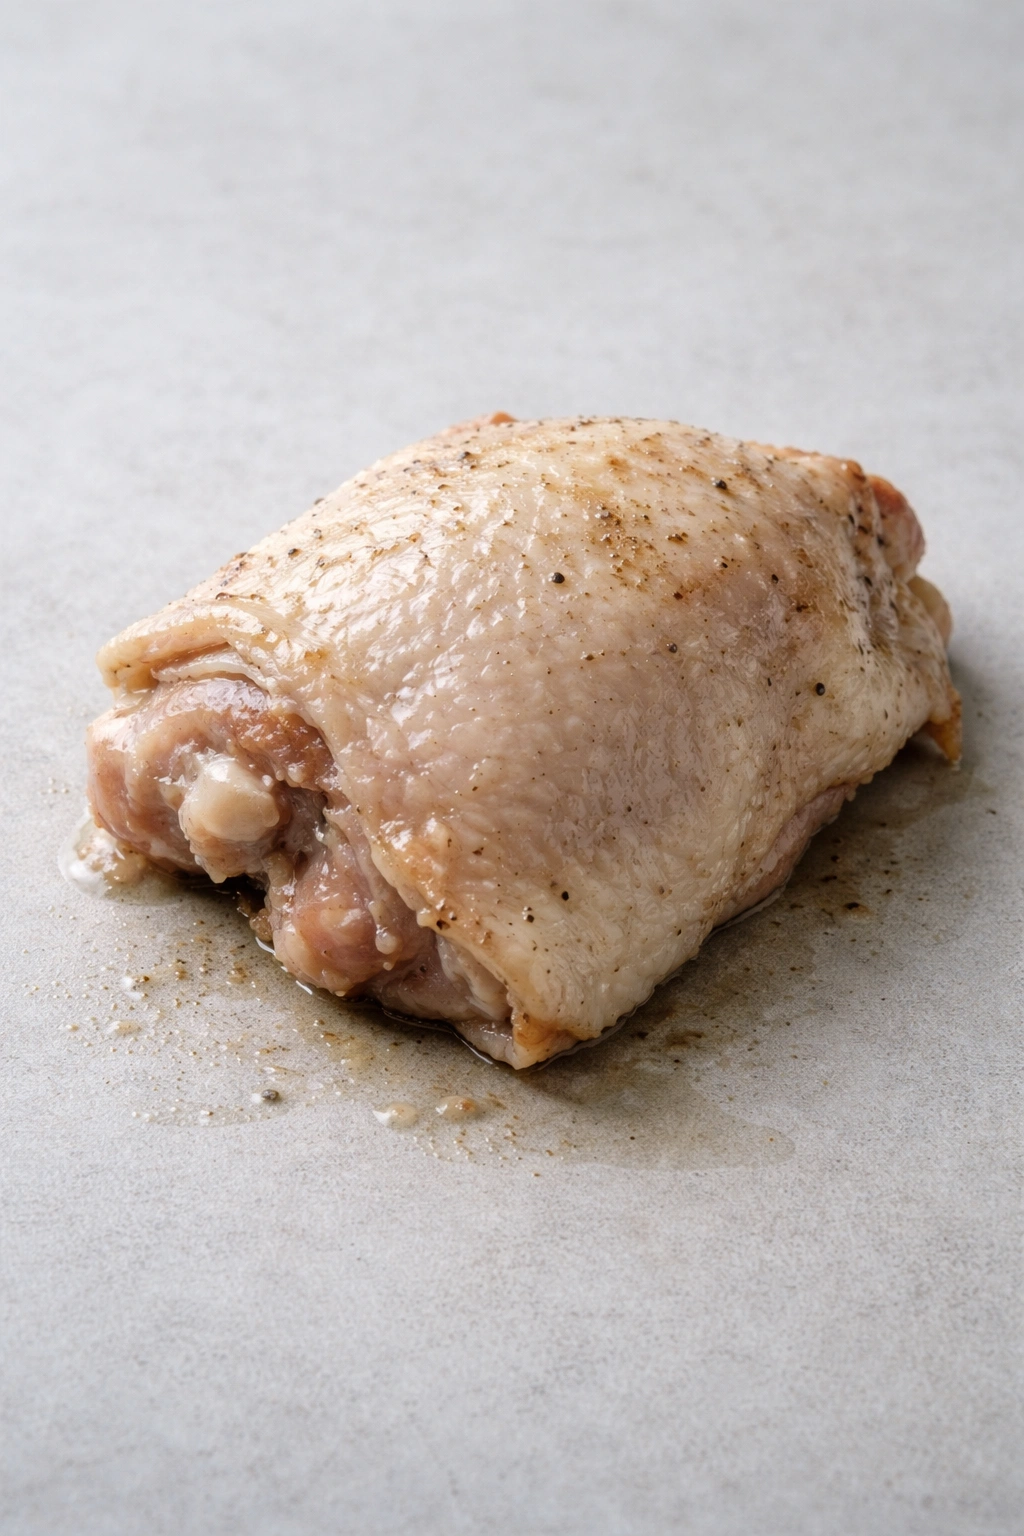
Drying the Skin Is Non-Negotiable for Crispiness
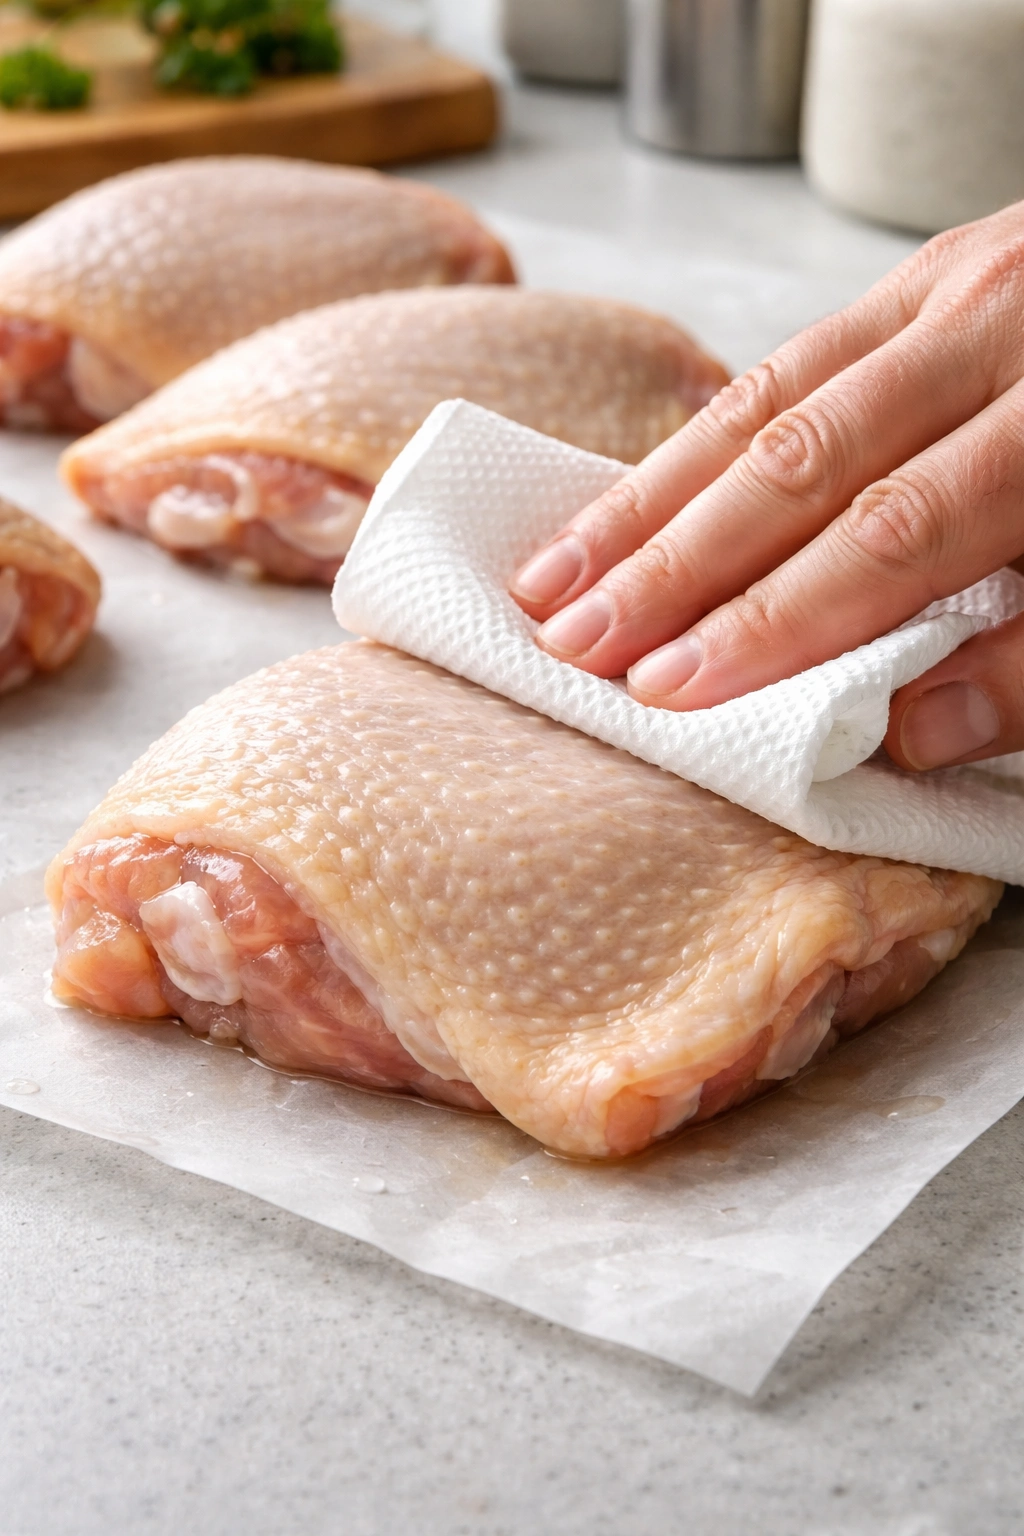
This step takes maybe two minutes and it’s possibly the most important thing you’ll do. When you get your chicken home from the grocery store, it’s sitting in packaging with condensation everywhere. That moisture is the enemy of crispiness — you can have the best seasoning and the hottest oven, but that moisture will cook off first, steaming the skin rather than crisping it. Worse, all that moisture can actually wash away your seasonings before the chicken even goes in the oven.
Pat the chicken completely dry with paper towels, not just a quick pat but a genuine effort to remove every bit of surface moisture you can access. Grab the thigh with the paper towel and gently squeeze it to really mop up the moisture. Some cooks even let the patted-dry thighs sit uncovered in the fridge for 30 minutes to an hour before seasoning — this additional drying step ensures an almost-paper-like skin surface that will crisp up beautifully.
Here’s the truth: dry skin turns crispy and golden. Wet or damp skin steams instead. This is why all the best restaurant recipes, from Thomas Keller to Gordon Ramsay, emphasize this single step. It’s simple but transformative.
Room Temperature Rest Before Baking Ensures Even Cooking

When you pull chicken straight from the refrigerator and put it directly in a hot oven, the outside starts cooking immediately while the inside is still cold. The outside gets done before the inside is even warm, which means either you overcook the outside to finish the inside, or you end up with unevenly cooked meat. More importantly, cold meat takes longer to reach the target internal temperature, which means more time in the oven and more opportunity for moisture loss.
Let your seasoned thighs sit on the counter for 15-20 minutes before the oven goes on. This resting period does several things simultaneously. It allows the temperature throughout the meat to equalize — when the thighs finally go in the oven, they heat evenly from the outside in, rather than in layers. It also gives the seasonings time to penetrate slightly and meld with the meat’s surface, creating a more cohesive crust.
If you’re marinating the thighs in an oil-based mixture, this rest period serves double duty. The oil and seasonings can start coating the meat and seeping into the surface. Even a 15-minute rest dramatically improves the final flavor compared to seasoning right before baking.
Seasoning Strategy: Flavor Without Fear of Drying
One worry that stops people from seasoning boldly is the misconception that salt dries out meat. Actually, salt is crucial for keeping meat moist. Salt dissolves on the surface and begins penetrating the muscle fibers, where it holds onto moisture at the cellular level. The key is applying salt enough time before cooking — not just seconds before the thighs go into the oven.
This is why the 15-20 minute rest period matters so much. Apply your salt generously, then let it sit. This gives the salt time to dissolve and start working. If you salt right at the moment you put the thighs in the oven, the salt doesn’t have time to penetrate.
Oil is equally important for maintaining juiciness. A light coating of olive oil helps conduct heat more evenly and protects the surface from drying too quickly. The oil also helps the fat-soluble flavors from dried herbs and spices activate and distribute across the surface. Don’t be shy — you want enough oil that the seasonings are slightly sticky on the meat.
For seasoning blends, stick with tried-and-true combinations. Italian seasoning, garlic powder, onion powder, paprika, salt, and black pepper is the classic approach — it’s classic because it works. You can certainly build from there with fresh herbs, smoked paprika for depth, a hint of chili powder for complexity, or even a touch of honey to help the seasonings caramelize. The exact seasonings matter less than making sure you’re applying them generously enough that they actually coat the entire surface.
Temperature and Timing: The Core Variables for Success
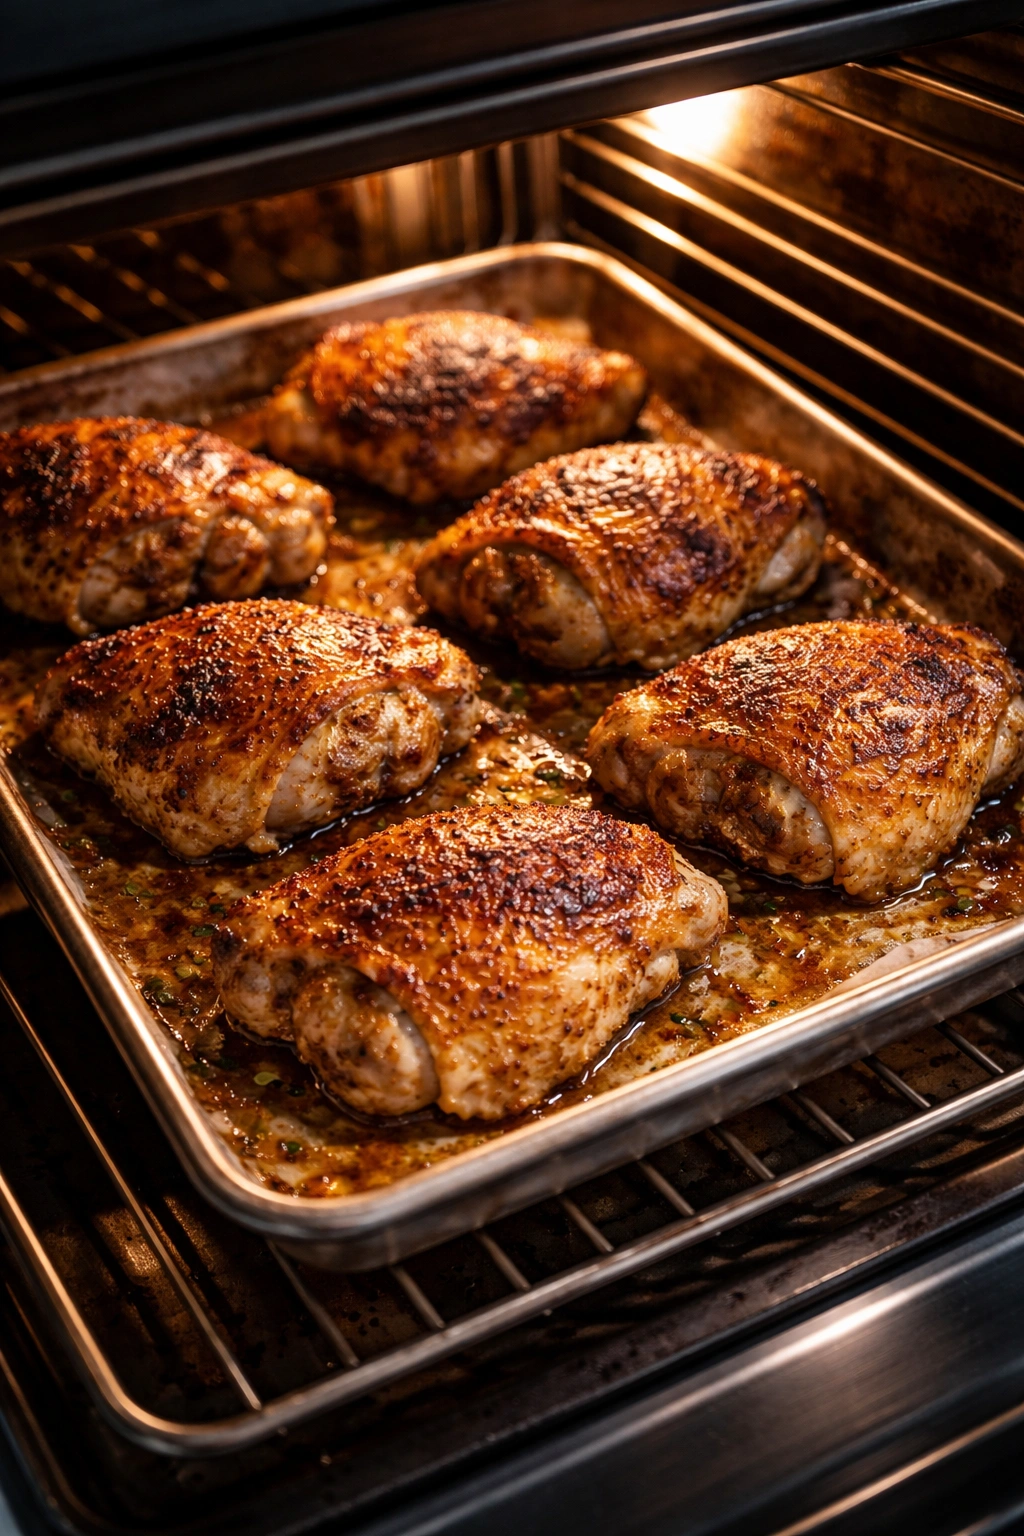
The oven temperature you choose directly affects how quickly the skin crisps versus how thoroughly the inside cooks. Most recipes recommend 400-425°F, and there’s good reason for this range. At 400°F, you get a gentle approach that prioritizes even cooking and juiciness — the thighs will take about 35-40 minutes and you’ve got some built-in forgiveness if your oven runs slightly hot or cold.
At 425°F, you’re prioritizing a crispier, more caramelized skin, and the thighs cook faster — usually 25-35 minutes. This higher heat creates better browning and crisping, but you need to pay closer attention since the window between perfectly done and overdone is narrower.
The internal temperature is your true north here. The USDA says chicken is safe at 165°F. But for dark meat? That’s actually the floor, not the ceiling. At 165°F, thighs are technically done, but they’re still a bit firm. At 180-190°F, that connective tissue has truly broken down and the meat becomes incredibly tender and juicy. You don’t want to go much higher than 190°F (cooking to 200°F or beyond can start to make the meat stringy), but aim for that 180-190°F range for the best texture.
Invest in a good instant-read thermometer — it’s the single best way to take the guesswork out of doneness. Stick it into the thickest part of the thigh without touching the bone (the bone conducts heat and reads higher than the meat). Once you get a few readings, you’ll intuitively understand how done your thighs are.
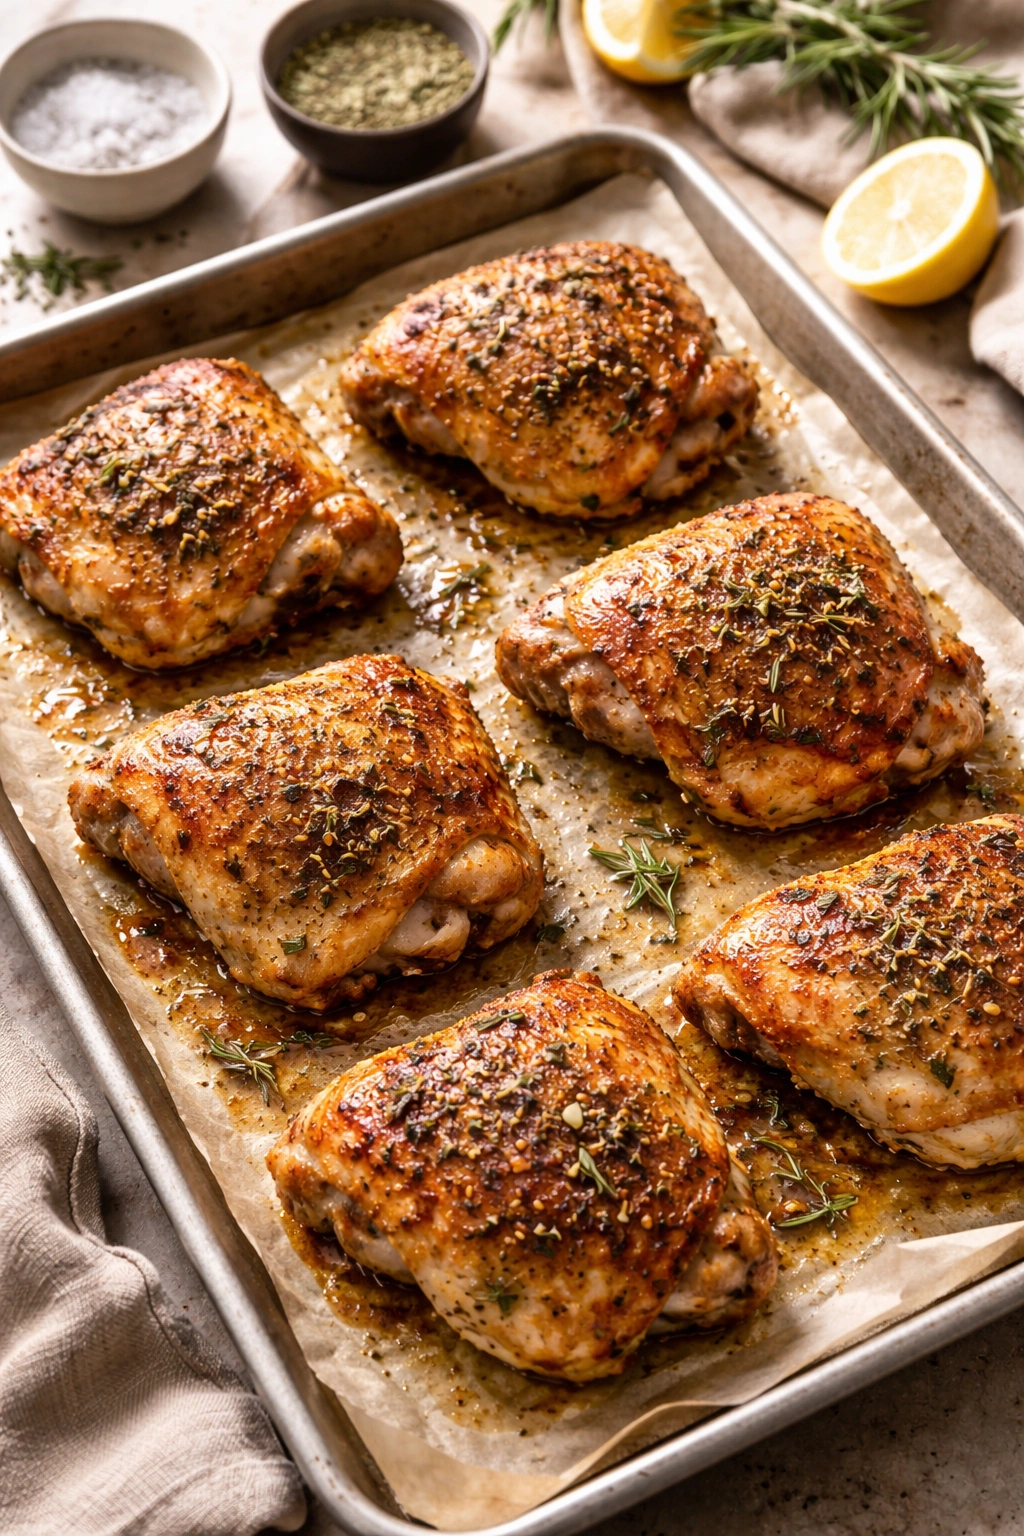
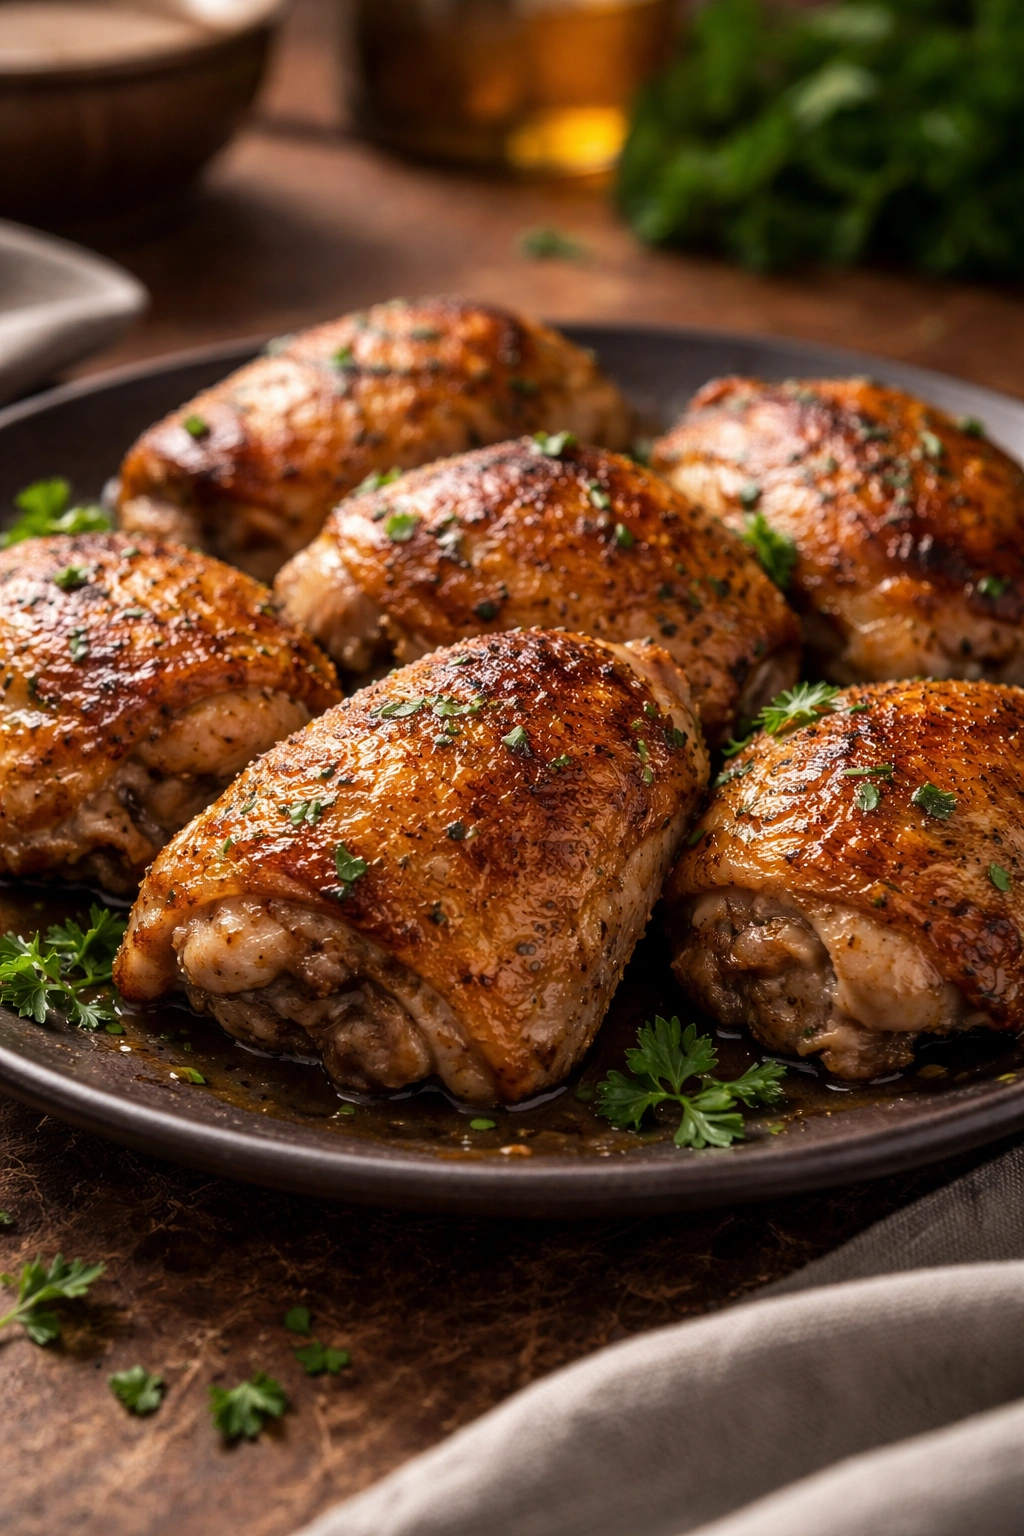
Complete Recipe: Herb-Seasoned Baked Chicken Thighs
Yield: Serves 4-5 | Makes 6-8 thighs
Prep Time: 10 minutes
Cook Time: 35-40 minutes
Total Time: 50 minutes (not including 15-minute rest)
Difficulty: Beginner — This recipe requires no special skills, just basic seasoning and oven knowledge. The thermometer tells you exactly when it’s done.
For the Chicken:
- 6-8 bone-in, skin-on chicken thighs (approximately 3-4 pounds total), patted completely dry
- 2 tablespoons extra virgin olive oil
- 1 teaspoon kosher salt
- ½ teaspoon freshly ground black pepper
- 1½ teaspoons garlic powder
- 1½ teaspoons onion powder
- 1 teaspoon paprika (or ½ teaspoon sweet paprika + ½ teaspoon smoked paprika for more complexity)
- 1 teaspoon dried Italian seasoning (or ½ teaspoon dried oregano + ½ teaspoon dried thyme)
- ¼ teaspoon cayenne pepper (optional, for subtle heat)
Prepare the Chicken and Season:
-
Remove the chicken thighs from their packaging and pat them completely dry with paper towels on all sides, including the underside. Use paper towels to gently squeeze any moisture away from the skin — this is crucial for achieving crispy skin.
-
Trim any excess skin or fat hanging off the thighs using kitchen shears or a sharp knife, leaving the majority of the skin intact.
-
Place the dried thighs in a large mixing bowl or on a large cutting board.
-
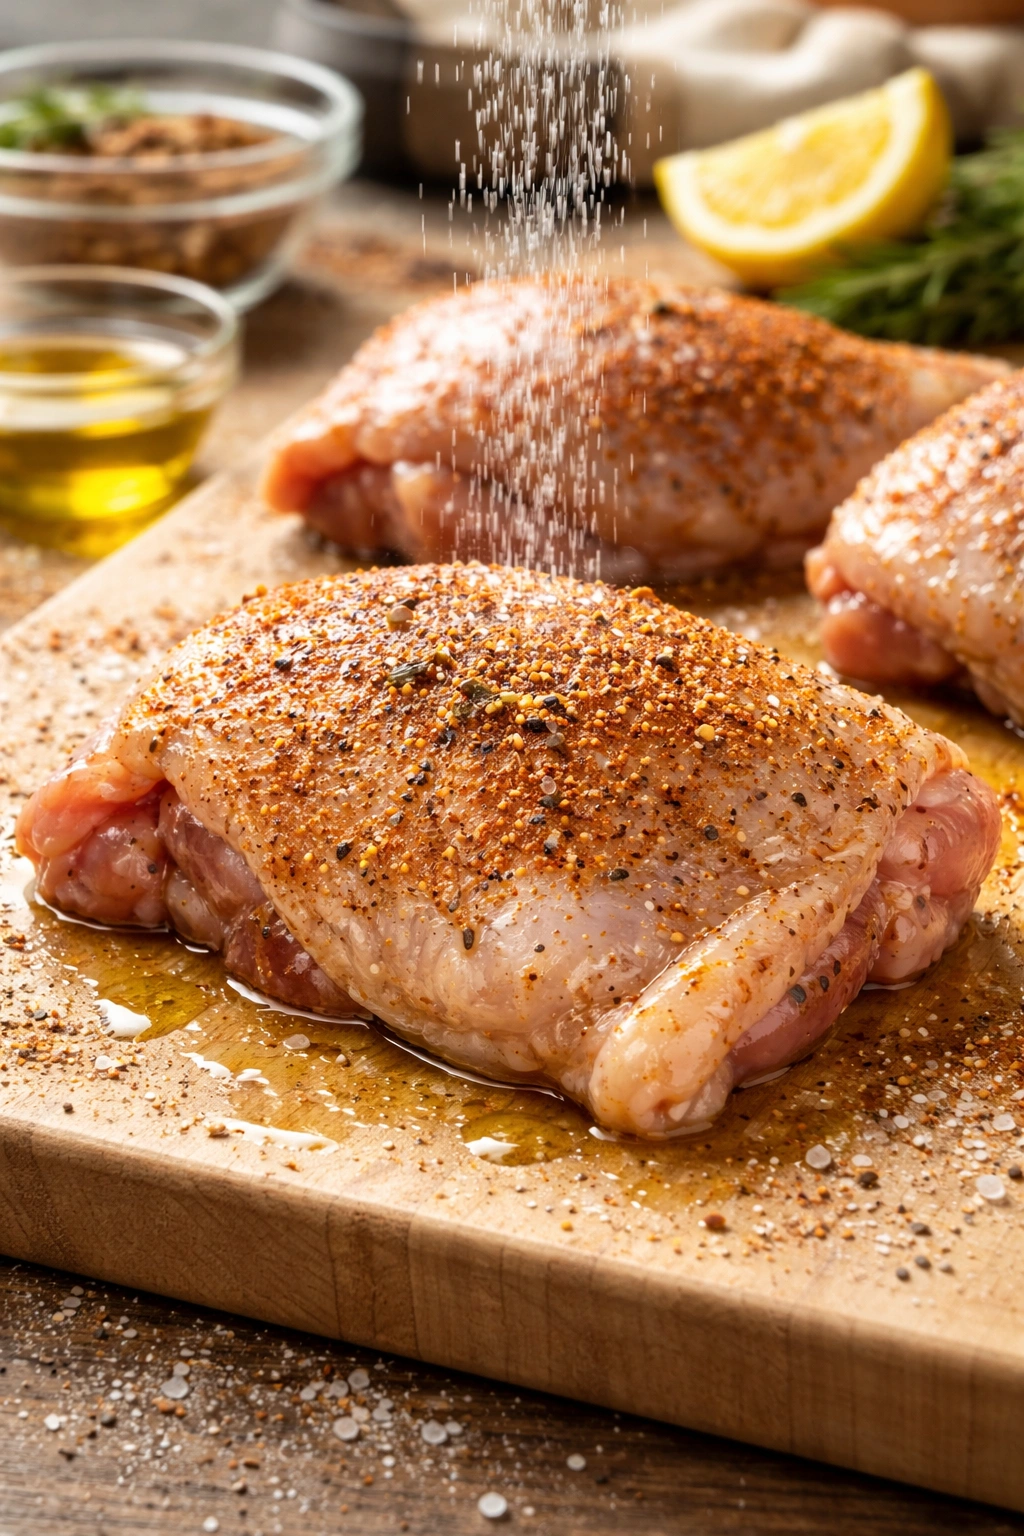
In a small bowl, combine the salt, black pepper, garlic powder, onion powder, paprika, Italian seasoning, and cayenne pepper (if using). Stir to combine into a uniform seasoning blend. Taste a tiny pinch to make sure it has enough salt and isn’t too one-dimensional — adjust if needed.
-
Drizzle the olive oil over the chicken thighs and, using your hands, rub the oil into the skin, coating all surfaces evenly. The oil should cover the entire surface of each thigh.
-
Sprinkle the seasoning blend evenly over the thighs, then rub and massage the seasonings into the oiled skin on both sides and around the edges. Get seasoning under any folds or crevices. Don’t be timid — every part of the exposed skin should be coated with the seasoning blend.
Rest the Chicken:
- Once seasoned, allow the chicken thighs to rest at room temperature for 15-20 minutes in a cool spot. This resting period allows the temperature to equalize inside the meat and gives the seasonings time to penetrate the surface. While the chicken rests, preheat your oven.
Bake the Chicken:
-
Preheat your oven to 425°F and position the oven rack in the upper-middle area of the oven (this helps the top of the chicken crisp better).
Advertisements -
Line a rimmed baking sheet with foil or parchment paper for easy cleanup, or simply use an oven-safe baking dish. If using a baking sheet, you can place a wire rack on top — this allows air to circulate under the chicken for more even cooking and crisper skin. If you don’t have a rack, that’s fine; just arrange the thighs in a single layer with a bit of space between them so they’re not crowded.
-
Place the seasoned thighs skin-side up on the prepared baking sheet or in the baking dish. Do not cover them. The uncovered chicken will brown and crisp; covering traps steam and results in soft, soggy skin.
-
Place the baking sheet in the preheated oven and bake for 25-35 minutes at 425°F, or 35-40 minutes at 400°F, depending on the size of your thighs and your oven’s temperature accuracy. Medium-sized thighs (around 6-8 ounces each) at 425°F typically need 28-32 minutes.
-
Around the 20-minute mark, take a quick look — the thighs should be browning. If the skin is still very pale, your oven may run cool. Continue baking and check more frequently.
-
Check the internal temperature with an instant-read thermometer at the thickest part of the largest thigh, not touching bone. Once the thickest part reads 165°F, the chicken is safely cooked through. But don’t stop there — continue cooking until it reaches 180-190°F for maximum juiciness and tenderness. This will take another 5-10 minutes beyond 165°F.
-
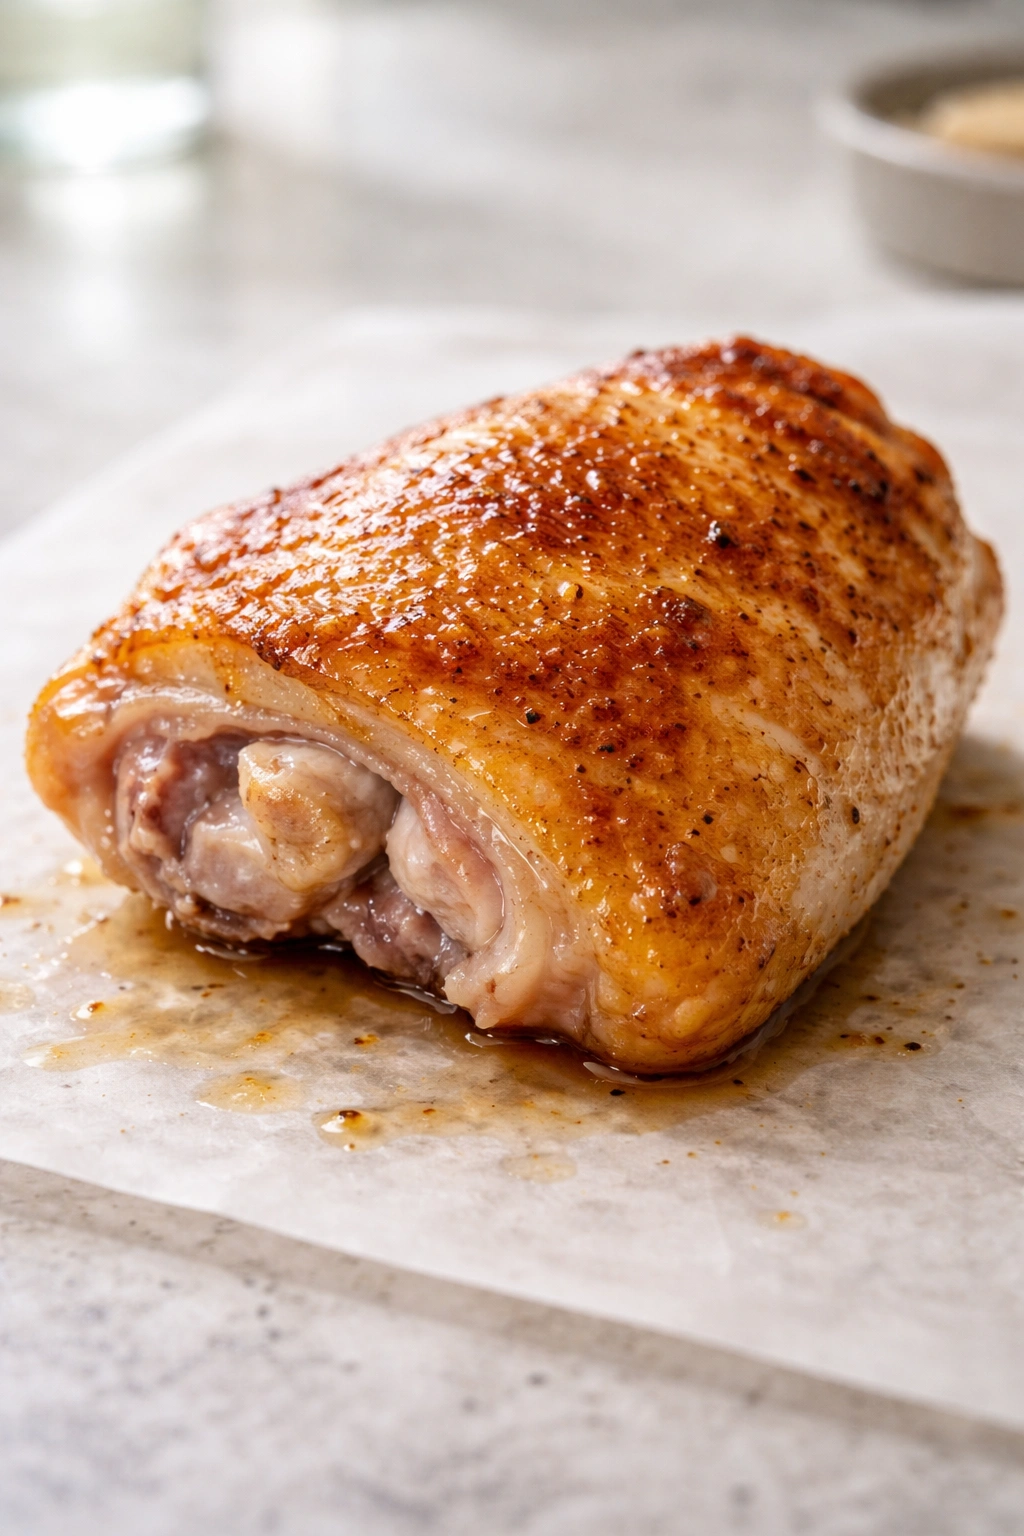
Once the thighs reach 180-190°F internal temperature and the skin is deeply golden and crispy, remove them from the oven. If the skin doesn’t look as crispy as you’d like, switch on the broiler for the last 1-2 minutes — watch closely so the skin doesn’t burn.
Rest Before Serving:
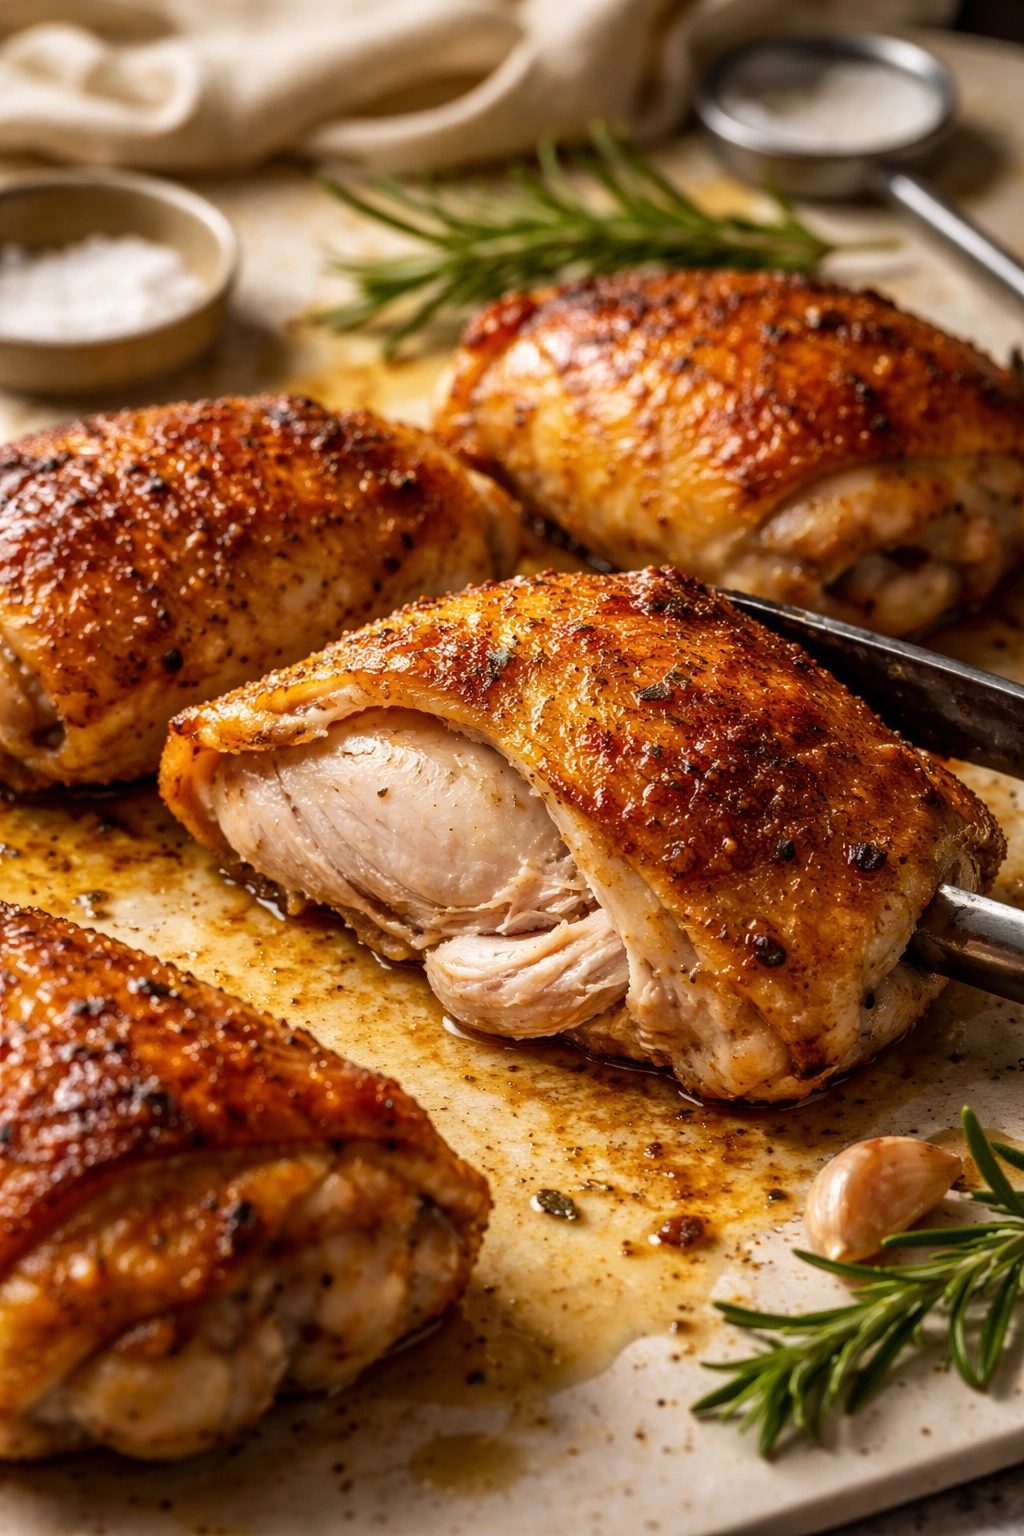
- Let the cooked thighs rest on the baking sheet or on a serving plate for at least 5 minutes before serving. During this rest, the meat’s muscle fibers relax and reabsorb the juices that were mobilized during cooking. This resting period is the difference between juicy meat and meat that’s merely cooked — do not skip it. Cutting into the thighs immediately after removing from the oven causes all those flavorful juices to run out onto the plate instead of staying in the meat.
The Broiler Trick for Extra-Crispy Skin
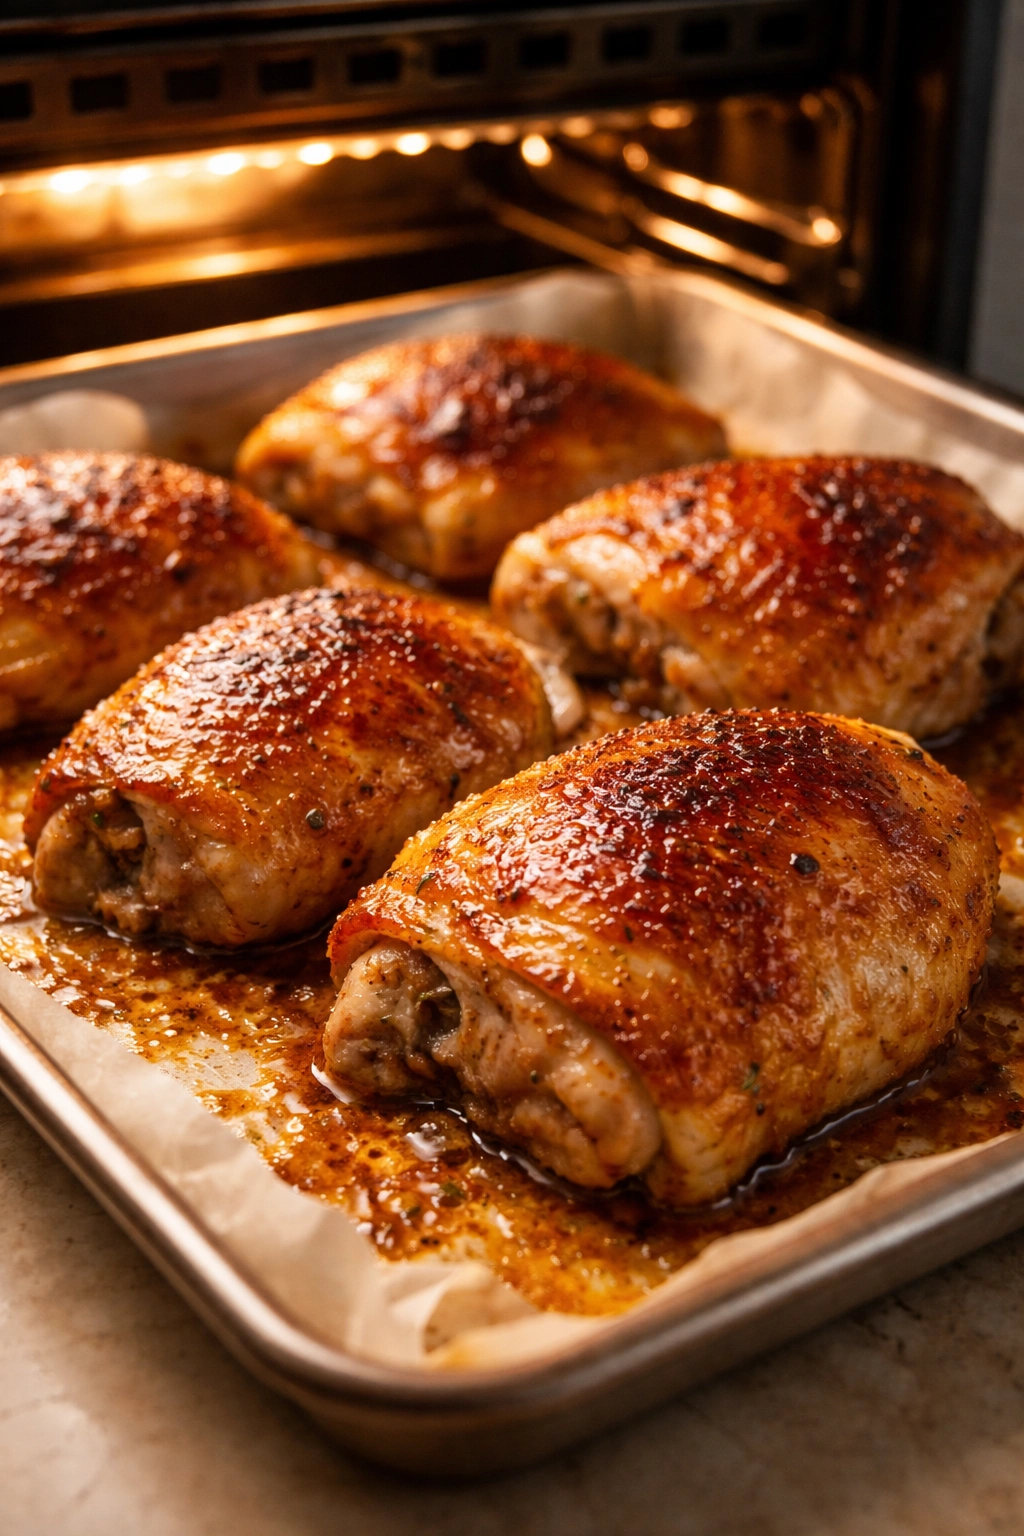
If your oven temperature runs cool or the skin just isn’t getting as crispy as you’d like, there’s an easy fix. In the last 1-2 minutes of cooking, switch your oven to the broiler setting. The intense overhead heat will quickly crisp and darken the skin. Watch it constantly — broiler heat is intense and skin can go from golden to charred in seconds. Broil just until the skin is as crispy as you want it, typically 1-3 minutes depending on your oven.
This final broil step is completely optional. If your skin is already golden and crispy from the bake, skip it entirely. But if you want that extra shatter-when-you-bite-it crispiness, this is the move.
Essential Tips for Juicy Thighs Every Single Time
Pat the skin dry multiple times if needed. Chicken from the grocery store is often quite wet. If a lot of condensation comes out as you pat, go ahead and pat again. Extra-dry skin is the single biggest guarantee of crispy results.
Don’t skip the seasoning resting period. Fifteen to twenty minutes might feel like a long time when you’re hungry, but this rest allows salt to penetrate the meat and seasonings to properly coat the surface. It’s not just helpful — it’s genuinely transformative.
Use a meat thermometer every time, no exceptions. Visually guessing doneness is fine for experience cooks, but a thermometer removes all doubt. Even experienced cooks should use one for consistency. Look for a decent instant-read thermometer in the $15-30 range — it’s one of the best kitchen investments you can make.
Arrange thighs in a single layer without crowding. If you’re cooking a large batch, use two baking sheets rather than piling them all onto one. Crowded thighs steam each other rather than roasting, and the skin won’t crisp properly. Thighs should have at least an inch of space around them.
The thighs are done when the juices run clear and the meat pulls easily from the bone. Beyond the thermometer reading, these visual and tactile cues confirm that the cooking is complete. Perfectly cooked thighs should practically slide off the bone.
Let them rest after coming out of the oven. This cannot be overstated. Five to ten minutes resting allows the redistribution of juices back into the muscle fibers. Cut into a thigh immediately out of the oven and you’ll see all the liquid run out onto the plate. Let it rest, and that same liquid stays in the meat.
Common Mistakes That Compromise Juiciness
Skipping the drying step. This is the number one reason baked chicken thighs come out with pale, soggy skin rather than crispy skin. The thighs taste fine, but they don’t have that textural contrast. Dry skin is the foundation of everything else.
Cooking at too low a temperature for too long. While a slow, low-temperature cook might seem gentler, it actually means the chicken is spending a long time in the oven, which can cause more moisture loss. Hotter heat for a shorter time is actually better for keeping meat juicy. A quick cook at 425°F is better than a slow cook at 350°F.
Not letting the seasonings penetrate. If you season the thighs and immediately put them in the oven, the salt doesn’t have time to dissolve and penetrate. That 15-20 minute rest is when the real seasoning happens.
Overcrowding the pan. When thighs are touching or very close together, they steam rather than roast. Always give them breathing room.
Cutting into the thighs immediately. Those juices are hottest and most mobile right out of the oven. They’ll escape the moment you cut. Wait five minutes and almost all of them stay put.
Flavor Variations and Adaptations
The basic seasoned version above is hard to beat, but chicken thighs are a blank canvas for your flavor preferences. Here are some tested variations:
Lemon Herb: Replace the Italian seasoning with fresh or dried lemon zest (about ½ teaspoon), and add ½ teaspoon dried oregano and ½ teaspoon dried thyme. The brightness of lemon pairs beautifully with juicy thighs.
Honey Garlic: Before seasoning the thighs, brush them with a mixture of 2 tablespoons honey, 3 minced garlic cloves, and 1 tablespoon Dijon mustard. The honey caramelizes beautifully during baking while keeping the meat incredibly moist.
Smoky Paprika: Use 1½ teaspoons smoked paprika instead of regular paprika, and add ¼ teaspoon of ground cumin for warmth. This gives you a deeper, smokier flavor reminiscent of Spanish cooking.
Spicy Version: Keep the base seasoning and add ½ teaspoon cayenne pepper and ¼ teaspoon of red pepper flakes. If you want real heat, go up to ½ teaspoon of cayenne.
Mediterranean: Add ½ teaspoon dried oregano, ¼ teaspoon dried basil, and ½ teaspoon dried rosemary to the base blend. Some cooks also add a touch of ground fennel for a subtle licorice note.
Asian-Inspired: Brush the thighs with a mixture of 1 tablespoon soy sauce, 1 tablespoon honey, ½ tablespoon rice vinegar, and 2 minced garlic cloves before seasoning with salt, pepper, and a touch of ginger powder.
The beauty of chicken thighs is that they’re forgiving with seasonings. You can be bold without fear of overpowering the meat.
Storage, Make-Ahead, and Reheating Strategies
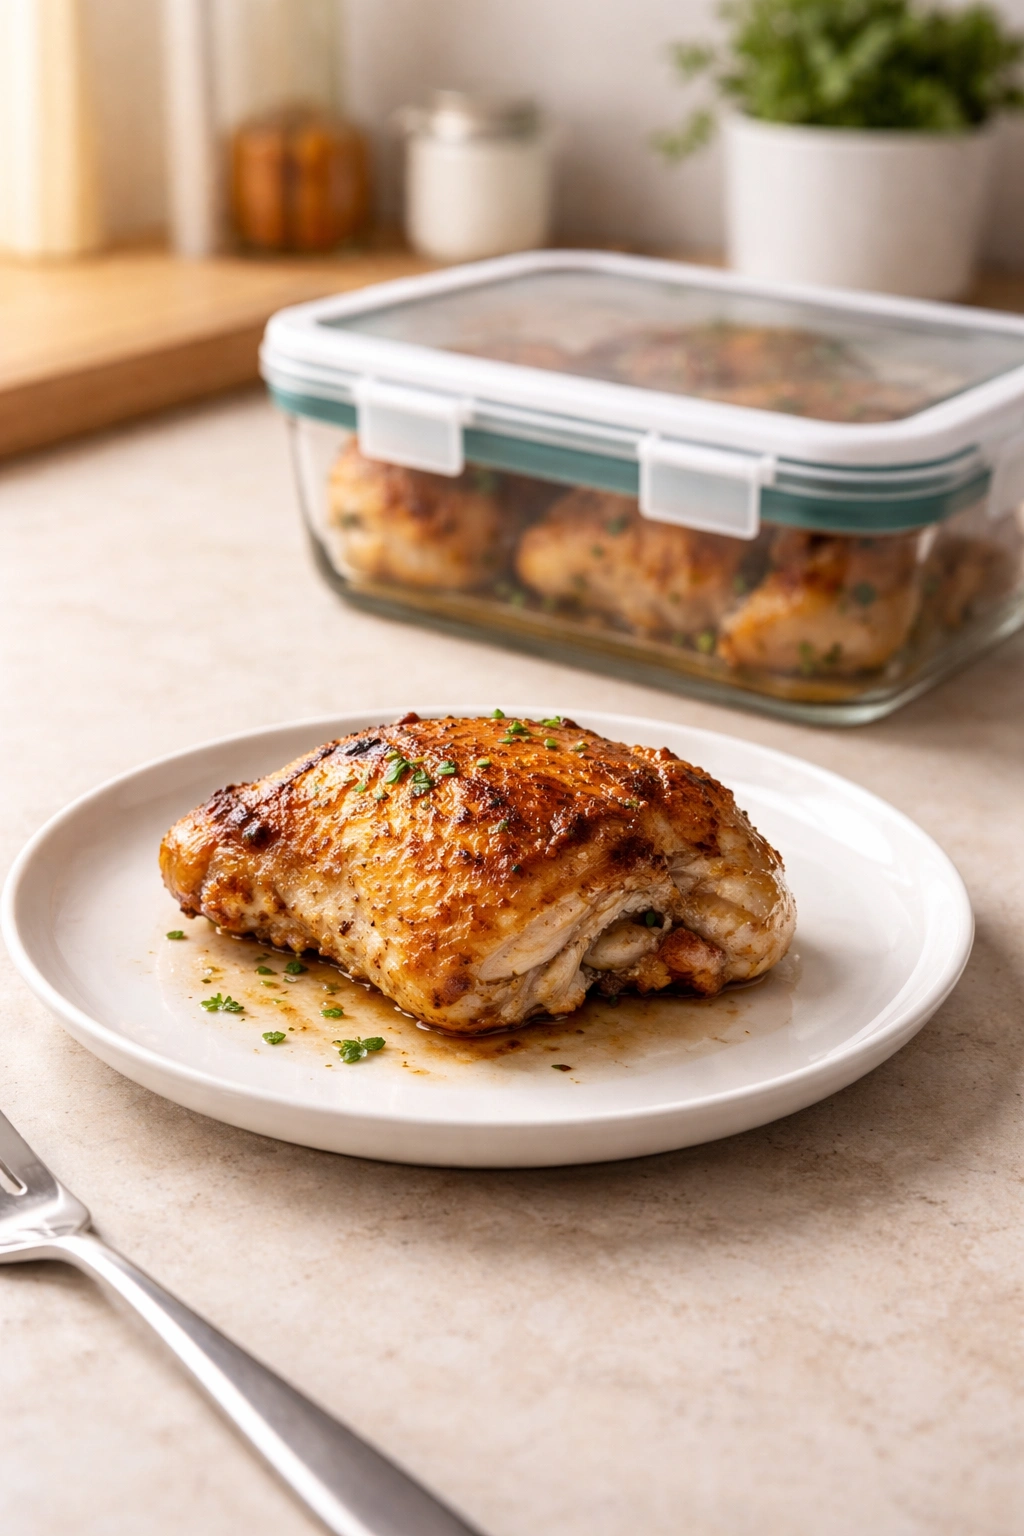
Storing cooked thighs: Let the cooked thighs cool to room temperature, then transfer them to an airtight container. They’ll keep in the refrigerator for 3-4 days. You can also store them loosely covered with foil if you prefer, but airtight keeps them fresher longer.
Freezing: Cooked thighs freeze beautifully for up to 3 months. Let them cool completely, then place them in a freezer-safe container or ziplock bag, removing as much air as possible. Thaw overnight in the refrigerator before reheating.
Make-ahead option: You can season the thighs up to 24 hours in advance. Store them covered on a plate in the refrigerator, then remove them 15-20 minutes before baking to bring them closer to room temperature. The seasonings actually penetrate even more during refrigerated storage, so the flavor will be even better.
Reheating for best results: The oven is your friend here. Preheat to 350°F and place the thighs on a baking sheet. Cover loosely with foil and bake for 12-15 minutes until heated through. In the last 2-3 minutes, remove the foil so the skin can re-crisp slightly.
If you’re in a hurry, the microwave works — place a thigh on a microwave-safe plate, cover it, and heat at 50% power for 2-3 minutes. The skin won’t re-crisp, but the meat will be hot.
Cold thighs: These are actually delicious. Some cooks prefer them eaten cold from the fridge on the next day, with the meat becoming almost a different (and wonderfully tender) texture. They’re perfect for slicing over salads or adding to grain bowls.
What to Serve Alongside Juicy Baked Chicken Thighs
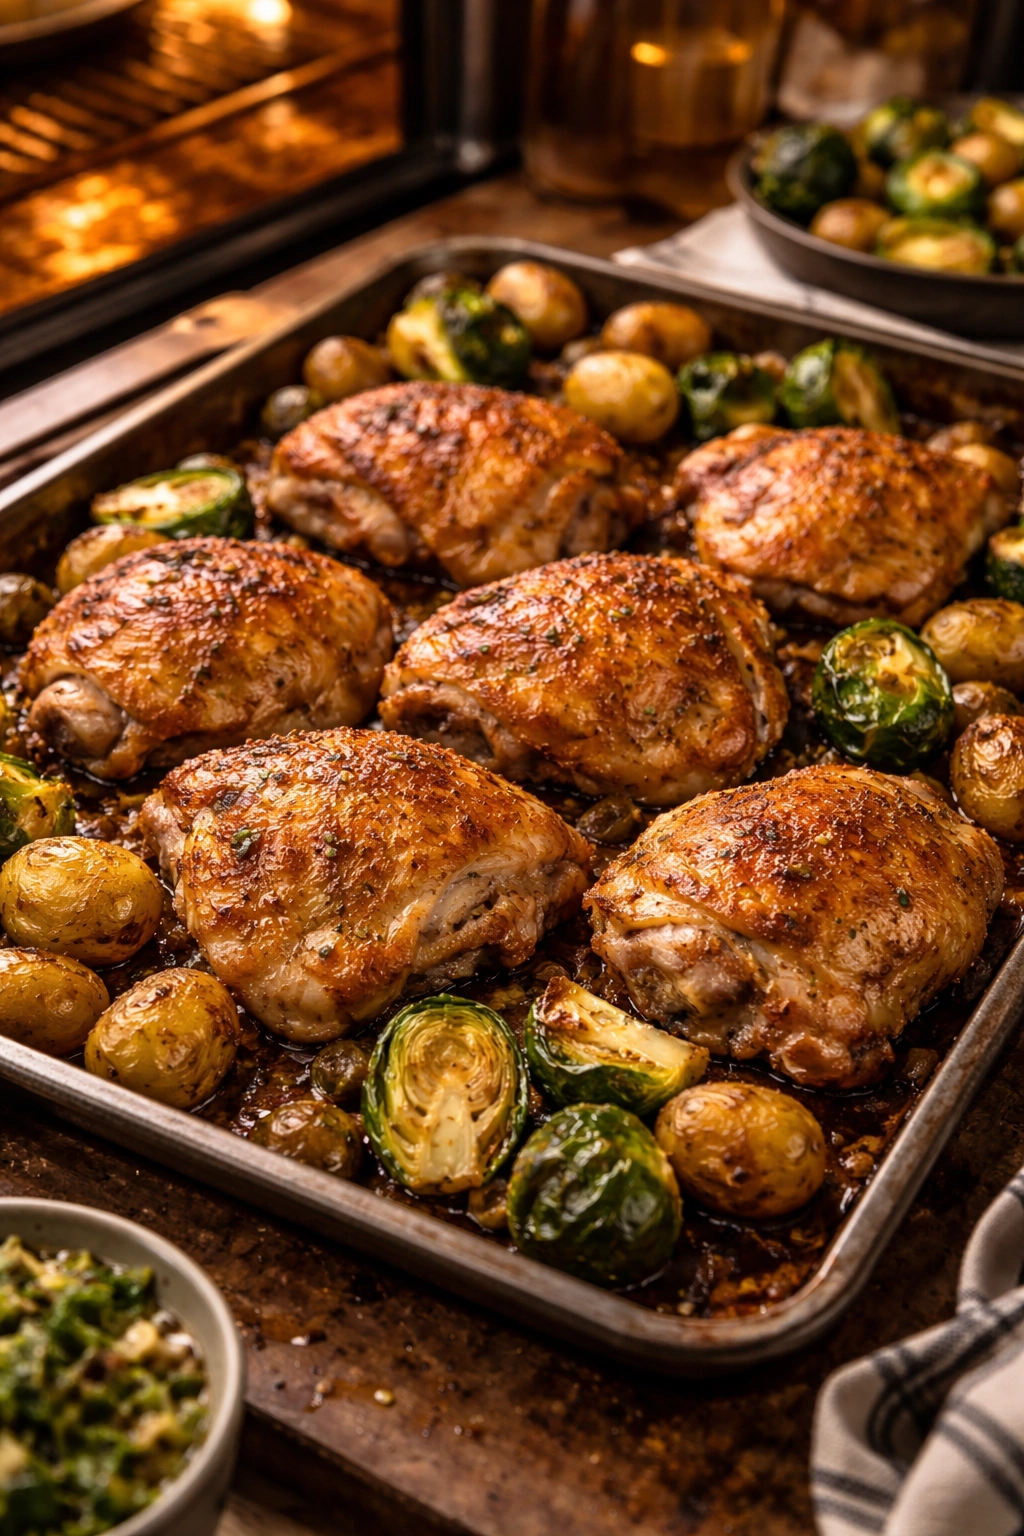
The beauty of baked thighs is that they pair with almost anything. Since the oven is already on, roasting vegetables at the same time makes sense. Roasted potatoes (regular or sweet) are the classic pairing — the starch soaks up the pan drippings beautifully. Brussels sprouts roasted cut-side down become crispy and caramelized. Green beans tossed with garlic butter are light and don’t compete with the chicken.
For something fresher, a crisp salad (Caesar, arugula with lemon vinaigrette, or a simple mixed green salad with good olive oil) provides textural contrast to the rich chicken.
If you want to make gravy, save those pan drippings. A simple pan sauce made with chicken broth and a touch of cornstarch transforms those browned bits into something special. Some cooks deglaze the pan with white wine for extra depth.
For carb options beyond potatoes, rice pilaf, couscous, or even egg noodles tossed with herbs and butter work beautifully.
Final Thoughts
The truth about juicy baked chicken thighs is that they’re not complicated or mysterious. You don’t need special equipment or difficult techniques. What you need is to understand that dark meat has natural advantages over white meat, and respecting those advantages is the entire secret.
The combination of bone-in, skin-on cuts, a proper seasoning rest, a hot oven, and cooking to the right internal temperature (180-190°F instead of stopping at 165°F) creates a result that tastes expensive and elegant but requires almost no skill to execute. This is the kind of recipe that becomes a weeknight staple because it’s so reliable. Once you’ve made it a few times, it becomes automatic — and your family will be grateful every single time those thighs come out of the oven.