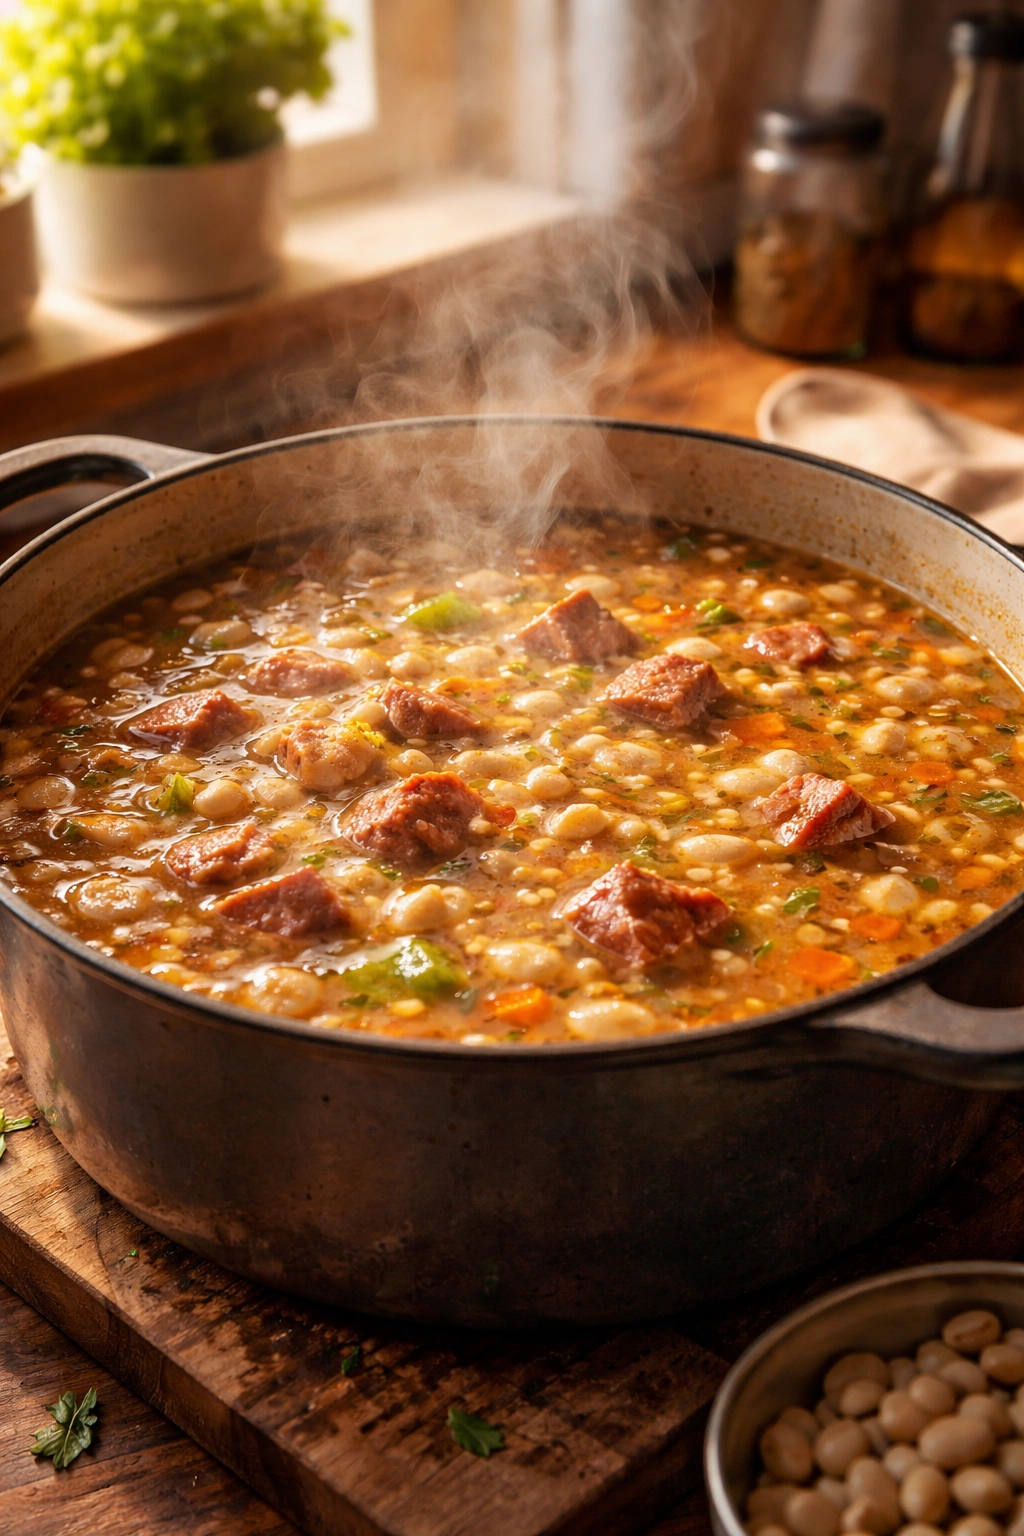
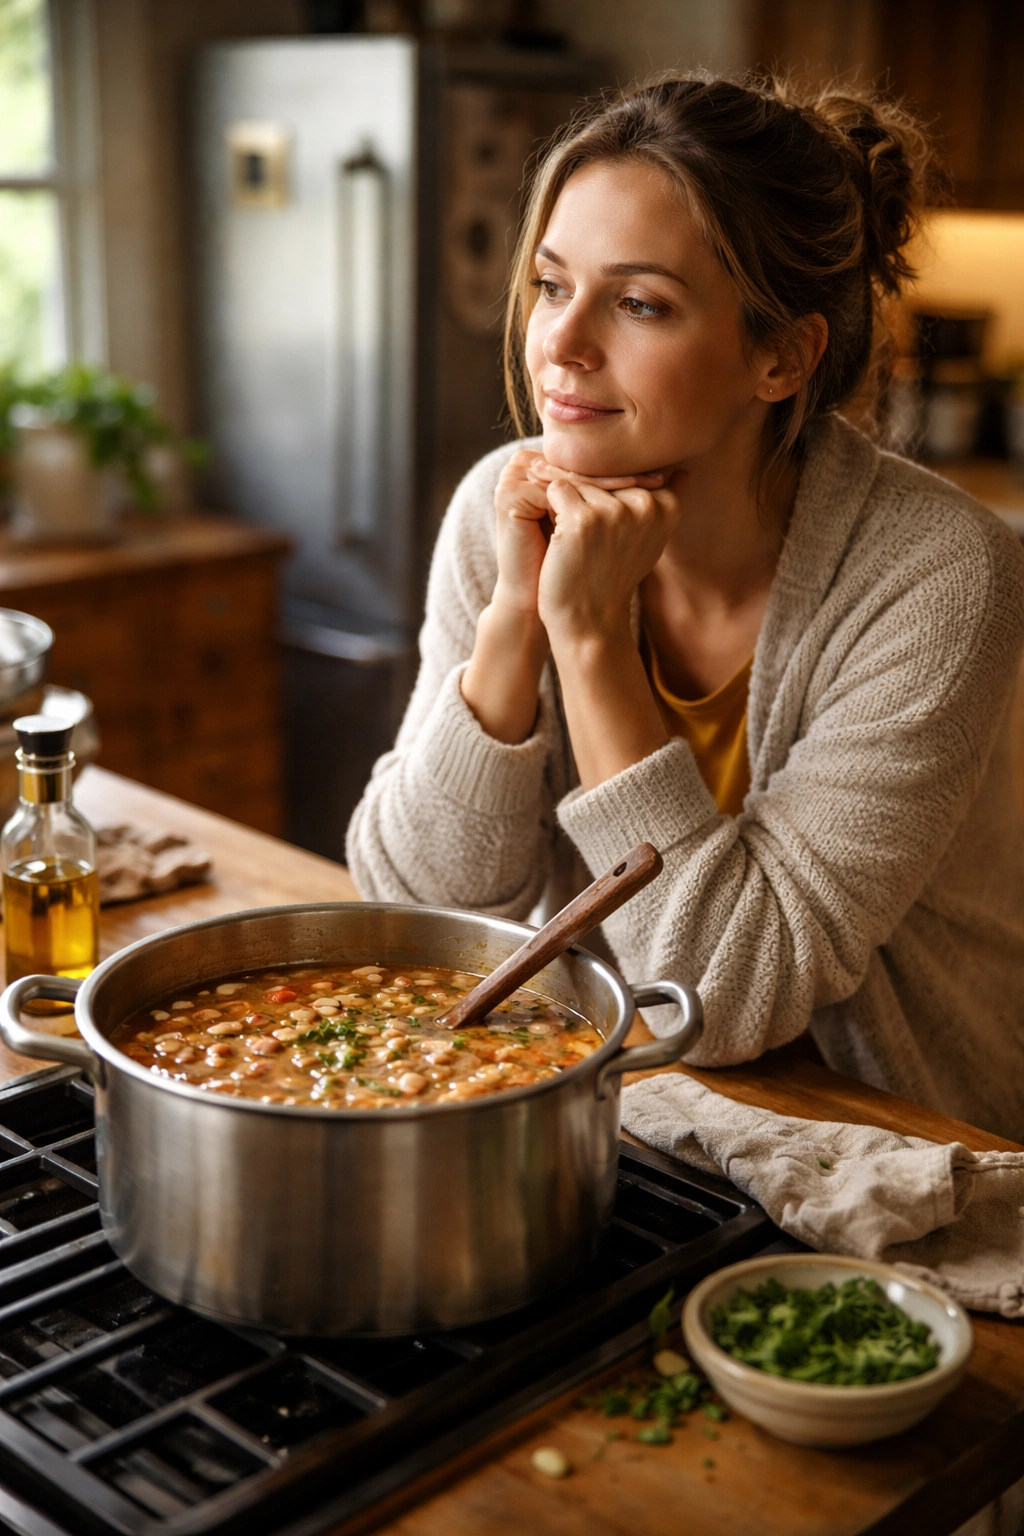
There’s something undeniably magical about opening your refrigerator the morning after making a big pot of ham and bean soup. The aroma alone reminds you exactly why you spent those few hours of active cooking time the day before—but here’s the real secret: the soup tastes noticeably better now than it did when you first ladled it into bowls. The beans have softened further, the broth has thickened to a silky, almost stew-like consistency, and every single flavor has mellowed and deepened in ways that seem almost impossible overnight. If you’ve never experienced this phenomenon, you’re missing one of comfort food’s best-kept secrets.
This isn’t just a charming coincidence. There’s solid chemistry behind why ham and bean soup improves with time, and understanding that chemistry transforms how you approach making it. The flavors from the smoked ham, aromatic vegetables, and tender beans literally have time to marry and integrate. The starch released by the beans settles more fully into the broth, creating that luxurious, thickened texture that no amount of extra simmering on day one can achieve. This is why generations of home cooks and professional chefs alike have made ham and bean soup a do-ahead meal—it’s actually supposed to be made ahead. You’re not just saving yourself work; you’re creating something demonstrably better through patience.
The beauty of this soup extends beyond flavor. It’s a one-pot meal that uses simple, affordable ingredients (especially if you’re working with leftover ham from a holiday), requires minimal hands-on attention, and produces enough servings to feed a family for multiple days. It’s a soup that welcomes both precision and improvisation—you can follow a recipe exactly or adapt it generously based on what you have in your pantry. Whether you’re a seasoned cook or someone picking up a soup pot for the first time, ham and bean soup rewards your effort with results that get better every single day.
Why This Soup Gets Better Overnight
The transformation that happens in your refrigerator isn’t magic; it’s straight chemistry. When you finish cooking the soup on day one, not all the flavor-blending work is complete. The individual components—the smoky notes from the ham, the earthiness of the beans, the subtle sweetness of cooked carrots and onions—are still establishing their relationships with one another. Time allows these flavors to fully integrate. The ham hock or ham bone releases collagen during the long simmer, and overnight that collagen sets and thickens the broth into something almost velvety. The beans, which may still feel distinct on day one, break down slightly more and release additional starch, further contributing to the thickening.
Another critical factor is temperature. Warm soup tastes noticeably different from the same soup served at room temperature or cold. Your palate perceives certain flavors more acutely when food is hot, which actually masks subtle flavors that only become apparent when the soup cools and you reheat it gently. This is why adding fresh herbs or making seasoning adjustments on day two often feels necessary—you’re actually tasting the soup more clearly once those day-one temperature effects wear off. The flavors haven’t magically become stronger; you’re simply perceiving them with greater accuracy.
Salt distribution also plays an underrated role. When you salt the soup on day one, the salt is concentrated in certain areas, especially near where you added it. Overnight, that salt diffuses evenly throughout the entire pot. You might think the soup tastes less salty on day two—it doesn’t. The salt is still there; it’s just more evenly distributed, which actually makes the soup taste better balanced rather than aggressively salty in certain spoons and milder in others. This is a subtle shift that nevertheless changes your entire experience of eating the soup.
Choosing the Right Ham for Maximum Flavor
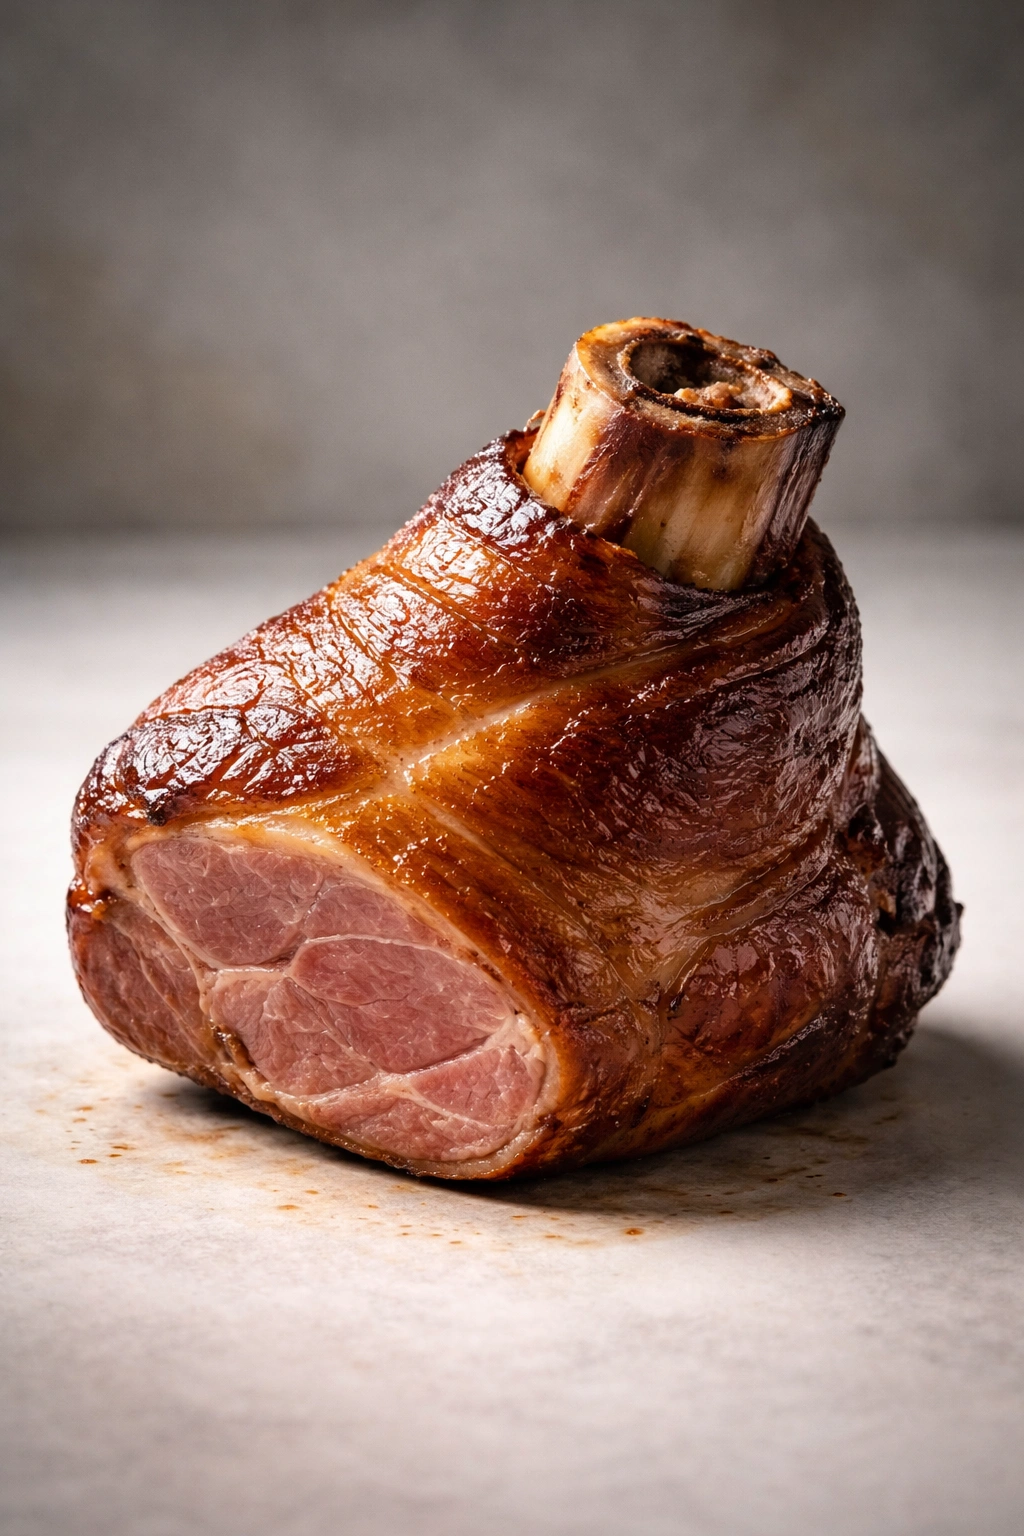
The single most important ingredient decision you’ll make is what kind of ham to use. The type of ham you choose fundamentally determines whether your soup will taste rich and deeply satisfying or merely adequate. If you have a leftover ham bone or ham hock from a holiday meal (Christmas, Easter, or even a spiral ham you cooked specifically for sandwiches), you’re already ahead. These bones have rendered their fat into the meat during the roasting process, and that cooked fat contains concentrated pork and smoke flavors that are nearly impossible to replicate with raw ham.
Smoked ham shanks or ham hocks are your next-best option if you don’t have a leftover bone. Ham hocks come from the lower leg of the pig—think of it as the pig’s ankle—and they’re sold year-round in the meat department of most grocery stores, usually for a fraction of the price of other cuts. Shanks, by contrast, come from below the shoulder (for front legs) or the rear leg, and they typically have more meat on them than hocks. If you have a choice between the two, shanks produce a meatier soup because they contain more actual ham alongside the bone. However, both work beautifully. The long, moist cooking process renders the collagen from these cuts, creating an impossibly rich broth that forms the foundation of excellent soup.
Diced leftover ham or ham steak can work in a pinch if bones aren’t available, though you’ll lose some depth of flavor. The issue with pre-cooked ham pieces is that they’ve already given up most of their collagen and fat during their initial cooking. This means you’ll want to compensate by using chicken or ham broth instead of water, and potentially adding a small amount of smoked paprika to boost the missing smokiness. Quality matters here too—avoid the ultra-thin-sliced deli ham and reach for thicker ham steaks or leftover whole pieces if possible. They’ll maintain better texture during the long soup cook and contribute more palpable meat in the final bowl.
Understanding White Beans and Cooking Methods
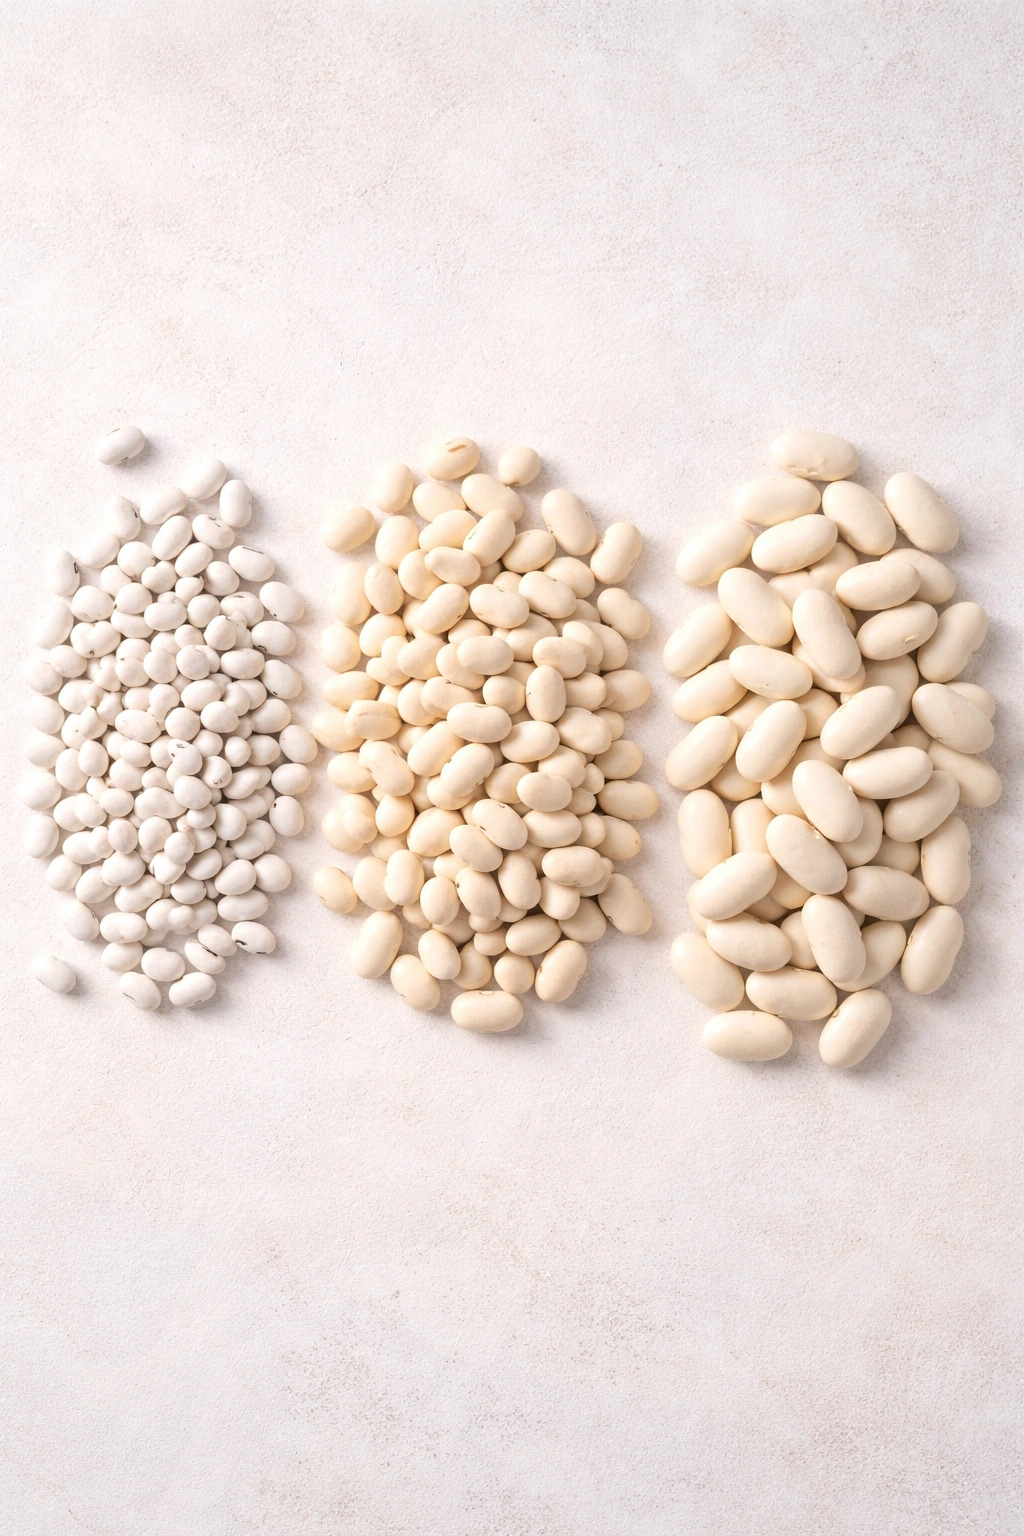
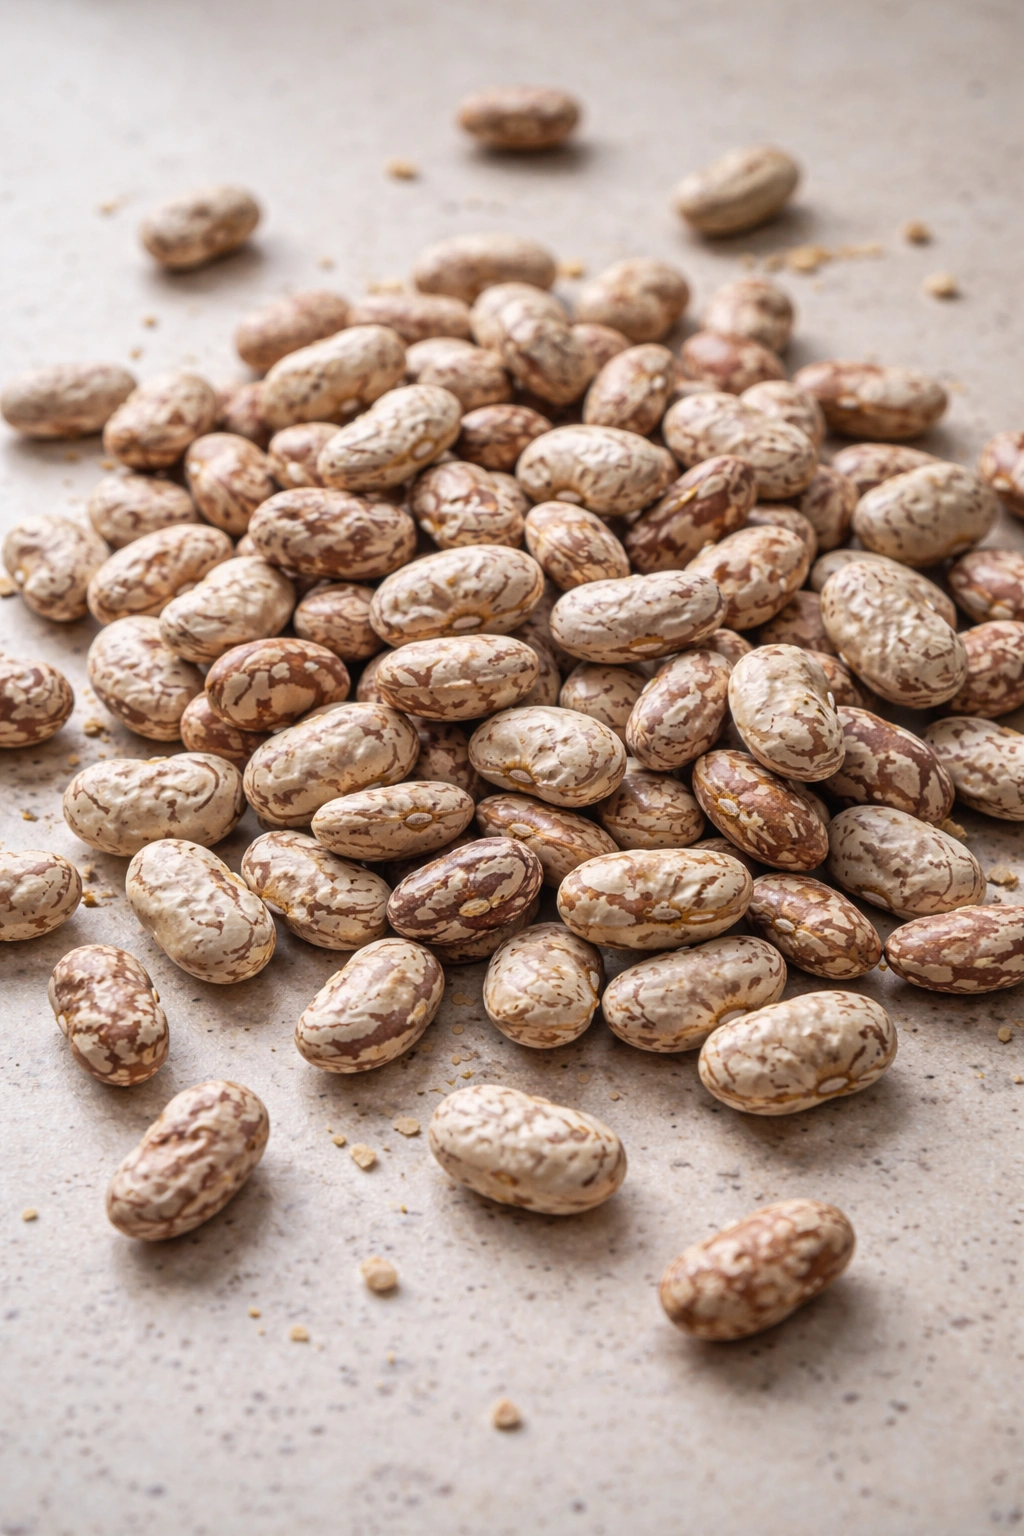
White beans are non-negotiable for this soup, but the specific variety you choose influences the final texture more than most home cooks realize. The main contenders are navy beans (small, cook quickly, create the creamiest broth), great northern beans (medium-sized, maintain their shape, slightly firmest texture when cooked), and cannellini beans (largest, stay whole and visible, create a creamy broth between navy and great northern). Each variety excels in slightly different ways.
Navy beans are the traditional choice for this reason: they have the softest flesh of the three common white beans, meaning they break down more easily during the long cook. That breakdown releases starch into the broth, creating a naturally thickened, creamy soup without requiring you to blend anything. If you want your soup to taste like it spent all day slowly developing its silky texture, navy beans deliver that effortlessly. Great northern beans, by contrast, are firmer and hold their shape better; the soup remains more clearly a collection of visible beans suspended in broth, which some cooks prefer. Cannellini beans split the difference—creamy when pureed but maintaining visible whole beans if left as-is.
The debate between dried beans versus canned beans ultimately comes down to time and texture preference. Dried beans require planning ahead (overnight soaking is optional but dramatically reduces cooking time), but they absorb the broth flavor more completely as they cook from scratch. Canned beans are already cooked and slightly mushy, which actually helps them thicken broth faster, but they provide less “cooking” flavor integration. Many experienced soup makers use the quick-soak method: boil dried beans for one minute, cover, let them sit for one hour, drain, and proceed. This gives you 80% of the time-savings benefit of overnight soaking without requiring advance planning.
The Science of Soup Thickening

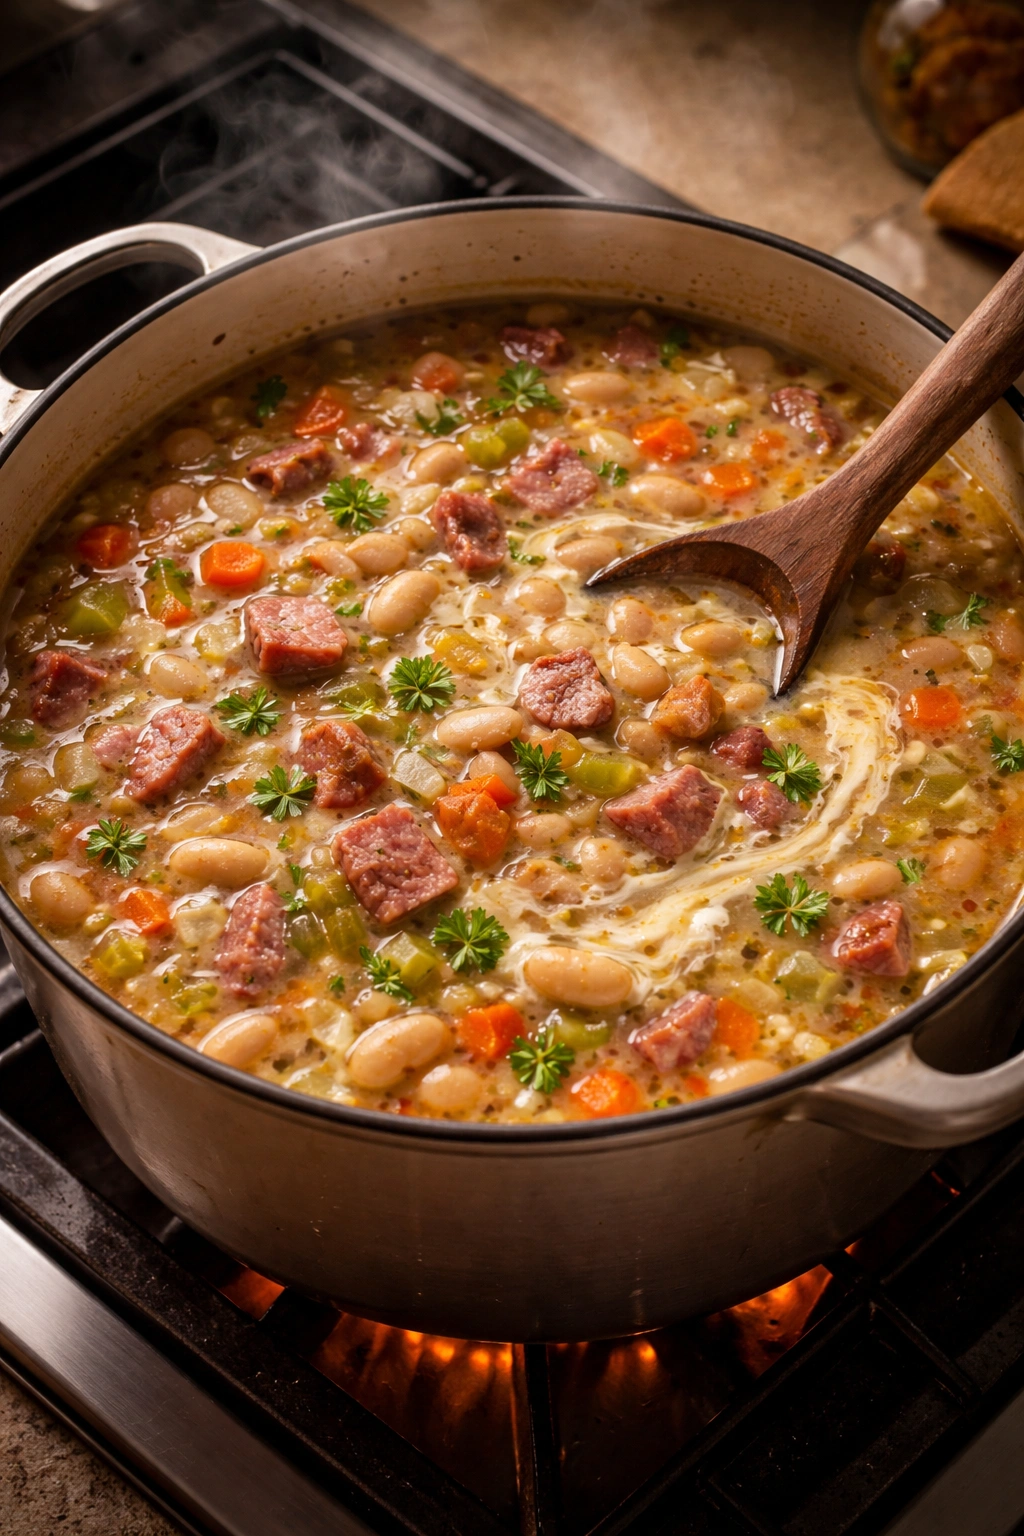
Thickening happens through multiple mechanisms, and understanding them helps you create the texture you prefer. The primary thickener in ham and bean soup is bean starch. As beans cook, their cell walls break down and release starch granules into the surrounding liquid. These granules absorb water and swell, effectively thickening the broth. This process accelerates over time—the soup actually gets noticeably thicker in your refrigerator, sometimes dramatically so. This is why day-two soup often seems almost stew-like compared to the thinner broth from day one.
Collagen from the ham bone is the second major thickening mechanism. Ham bones and ham hocks are full of collagen—the connective tissue that holds animal bones and joints together. When you simmer these bones for hours, the moist heat converts collagen into gelatin. Gelatin is a natural thickening agent that sets further as the soup cools. This is why a ham bone produces such a different texture than diced ham meat; you’re literally extracting gelatin from the bone structure. This gelatin contributes to that silky, mouth-coating sensation that makes excellent soup feel luxurious.
If you want your soup even thicker, you have options. Mashing some of the cooked beans against the side of the pot with a wooden spoon breaks down more bean structure and releases additional starch. Using an immersion blender to puree a portion of the soup (usually about one-third to one-half) creates a creamy base while leaving visible whole beans for texture. Some cooks add a cornstarch slurry (cornstarch mixed with cold water) right before serving if they want immediate thickening without waiting overnight. Each approach works; the choice depends on how much time you have and what texture appeals to you.
Building Layers of Flavor
The foundation of exceptional ham and bean soup isn’t built with a single ingredient; it’s constructed layer by layer, each element adding complexity that subsequent elements build upon. This layering process is why the soup improves so dramatically overnight—each layer has time to fully integrate with the others, creating a unified whole rather than a collection of separate flavors.
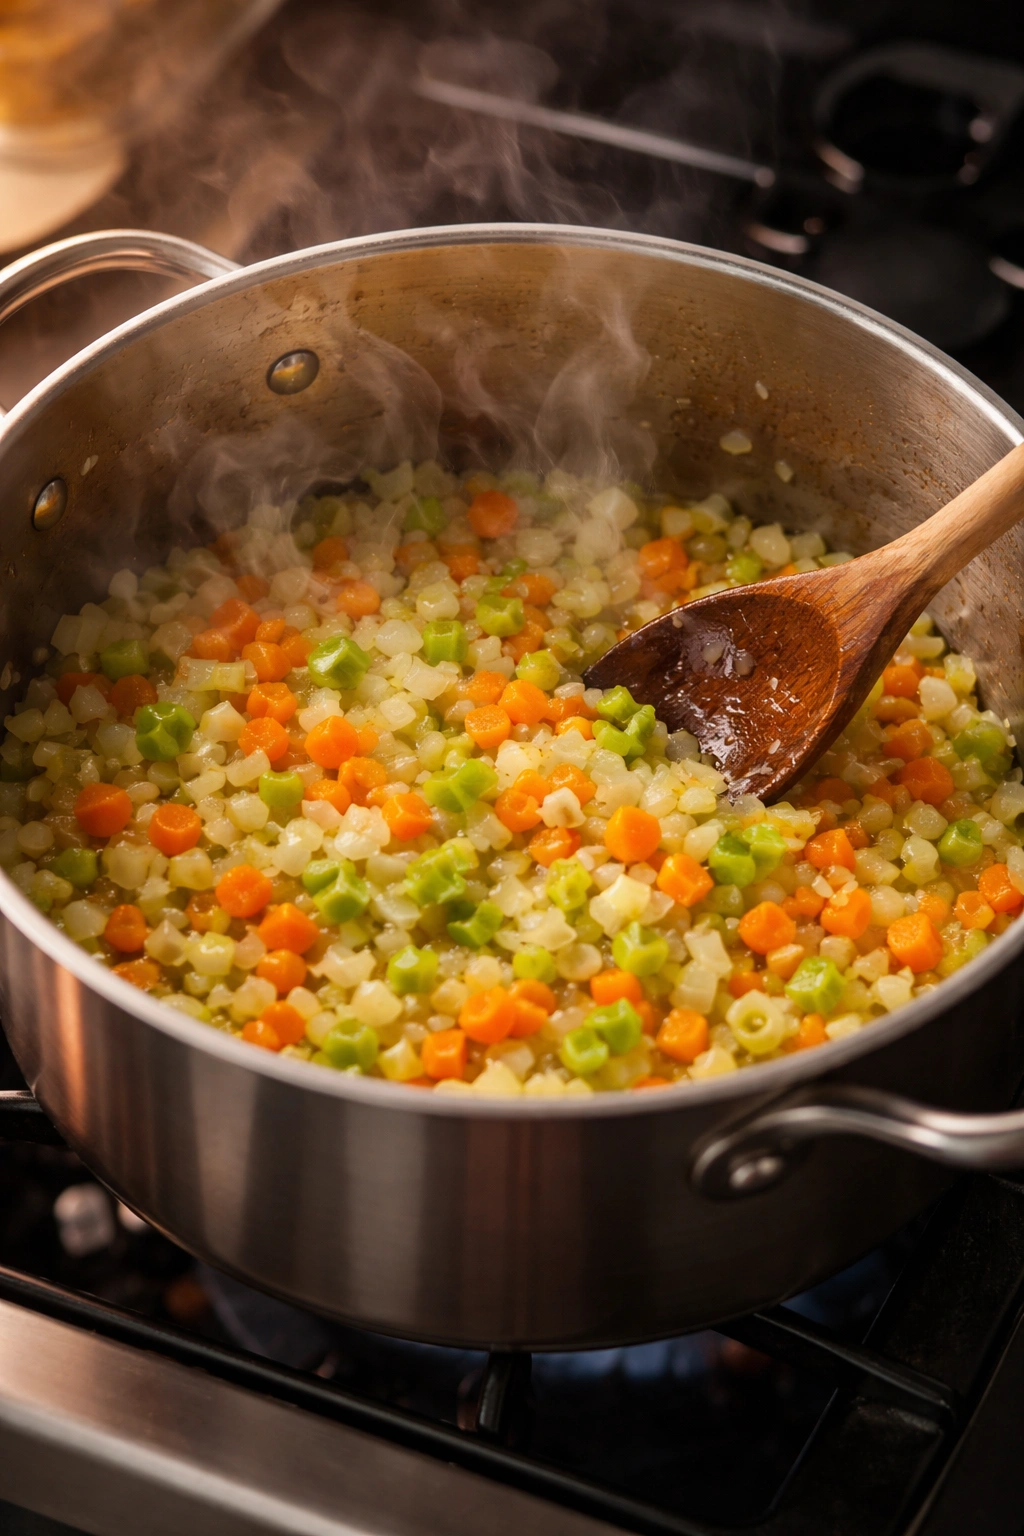
The first layer begins with sweating the aromatics. Before anything else goes into the pot, you heat olive oil or butter and cook diced onion, carrots, and celery slowly over medium heat. The goal is to soften these vegetables and draw out their water content, which concentrates their natural sugars and creates a flavorful base. This is called “sweating” because the vegetables release moisture into the oil without browning. This step takes only five to seven minutes but fundamentally changes the depth of the finished soup. Skipping it creates noticeably thinner, less developed flavor.
The second layer is the ham bone itself. Once you add the ham, water, and seasonings and bring everything to a simmer, that bone spends hours releasing fat, gelatin, and smoke flavor into the broth. This is where your choice of ham type matters most. A holiday ham bone already has rendered pork fat from roasting, so it contributes more immediate flavor than a raw ham hock, which needs to render its own fat during the cook. Neither is wrong; they just require slightly different expectations for depth of flavor and initial taste versus day-two taste.
The third layer emerges as the beans slowly soften and break down. Navy beans in particular contribute earthiness and starch. As they cook, they gradually release starch into the broth, thickening it and creating that creamy mouthfeel. The beans themselves become almost creamy in texture, almost melting on your tongue. This process takes hours, which is why slow cooking (whether on the stovetop, in a slow cooker, or overnight) produces far superior results to rushing through a fast cook on high heat.
The final layer consists of fresh herbs and finishing flavors added near the end: fresh parsley for brightness, maybe a dash of hot sauce for subtle heat, possibly a touch of smoked paprika if you’re using ham without much smoke character. These finishing touches are what make day-two soup taste noticeably better than day-one soup. On day one, they taste bright and distinct. By day two, they’ve had time to integrate with the deeper flavors, creating balance and complexity. This is why experienced cooks often say the soup tastes better the next day even if they used identical ingredients on both days—the timing of when they tasted it, and thus how fully the flavors had married, was different.
Complete Ingredient List
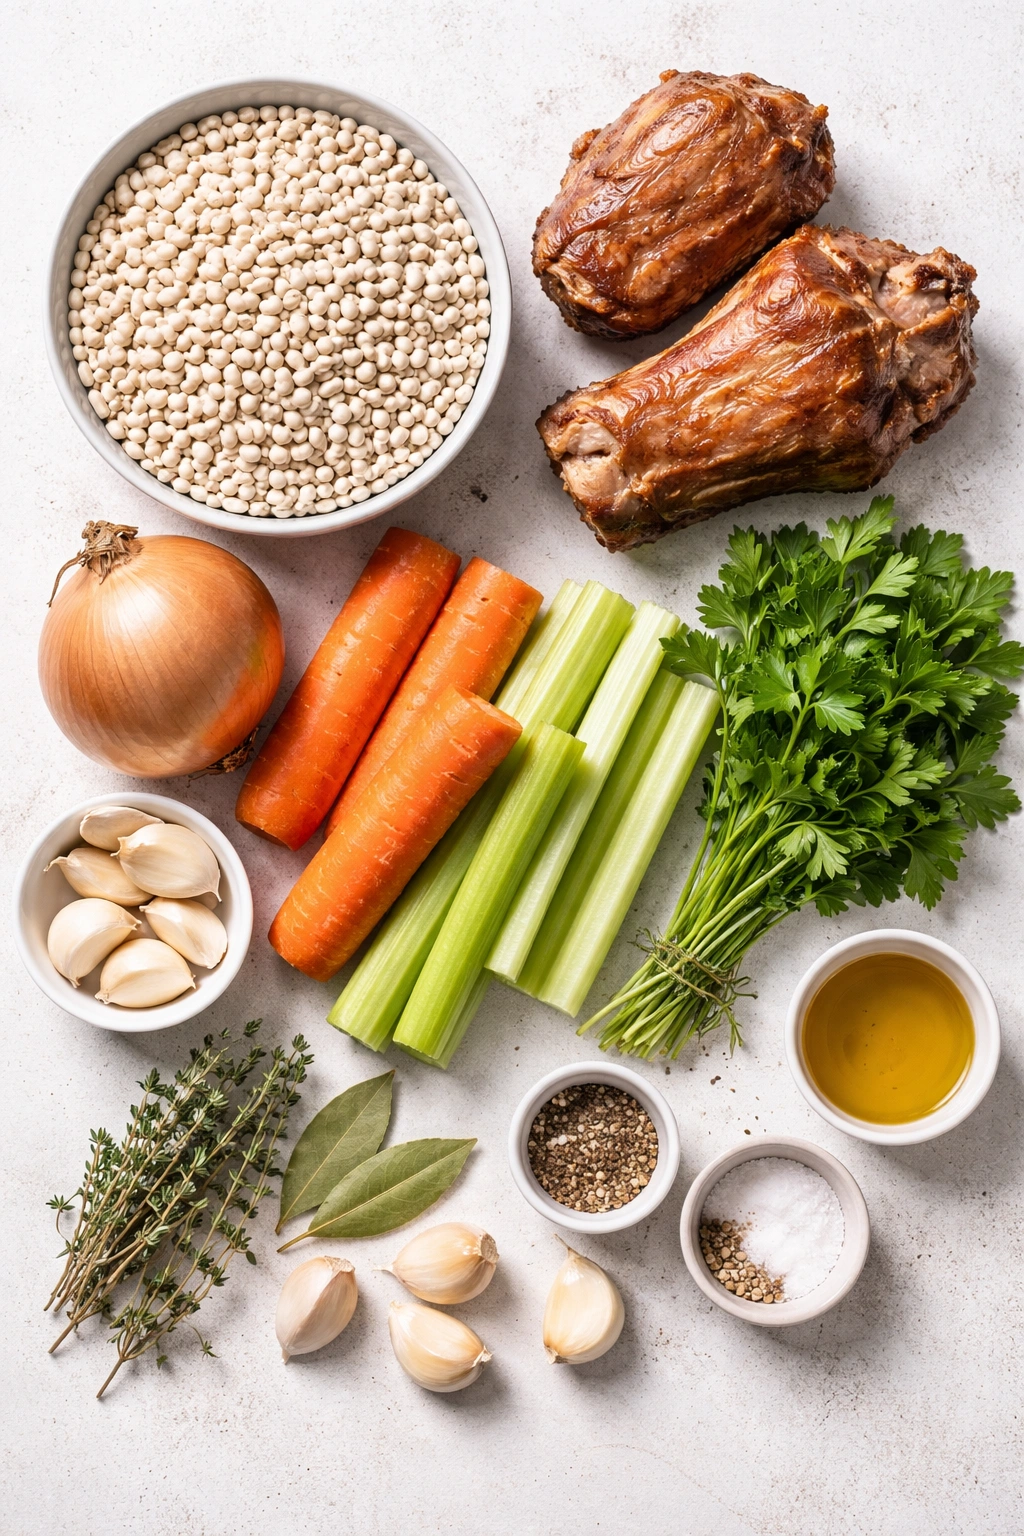
For the Soup Base:
- 1 pound (2½ cups) dried navy beans, great northern beans, or cannellini beans, sorted and rinsed (or 4 cans of white beans, drained and rinsed, if using canned)
- 2 to 3 pounds smoked ham shanks, ham hocks, or 1 large meaty ham bone
- 6 to 8 cups low-sodium chicken broth or water (use broth if not using a ham bone for extra flavor)
- 2 tablespoons extra-virgin olive oil or unsalted butter
- 1 large yellow onion (about 1½ cups), diced
- 3 large carrots (about 2 cups), peeled and diced
- 3 celery ribs (about 1½ cups), diced
- 4 to 5 cloves fresh garlic, minced (not garlic powder—fresh makes a perceptible difference)
Seasonings and Herbs:
- 2 sprigs fresh thyme (or 1 teaspoon dried thyme)
- 2 sprigs fresh flat-leaf parsley, plus ¼ cup finely chopped fresh parsley leaves for garnish
- 1 bay leaf
- 1 teaspoon kosher salt, plus more to taste (reduce if using salted broth)
- ½ teaspoon freshly ground black pepper, plus more to taste
- 2 to 3 dashes Tabasco or other hot sauce (optional, but highly recommended for depth)
Optional Additions for Extra Depth:
- 1 to 2 teaspoons soy sauce or tamari (adds umami without changing flavor noticeably)
- ½ teaspoon smoked paprika (if your ham lacks smoke character)
- 2 cups roughly chopped fresh kale, Swiss chard, or spinach (add during last 10 to 15 minutes)
Yield: Serves 6 to 8 people | Makes approximately 10 cups of soup
Prep Time: 20 minutes (hands-on vegetable chopping and bean sorting)
Cook Time: 3 to 3½ hours (stovetop with pre-soaked beans) or 6 hours (slow cooker with pre-soaked beans) or 9 hours (slow cooker with unsoaked beans)
Total Time: 3 hours 20 minutes to 9 hours 20 minutes, depending on cooking method. If soaking beans overnight, add 8 hours to plan accordingly. Overnight soaking is optional but reduces active cook time significantly.
Difficulty: Beginner — This recipe requires only basic knife skills, standard equipment (one large pot), and the ability to follow straightforward simmering instructions. The long cooking time is entirely hands-off; you’re simply allowing the ingredients to develop flavor over time with occasional stirring. First-time soup makers have excellent success with this recipe.
Preparing and Cooking the Soup
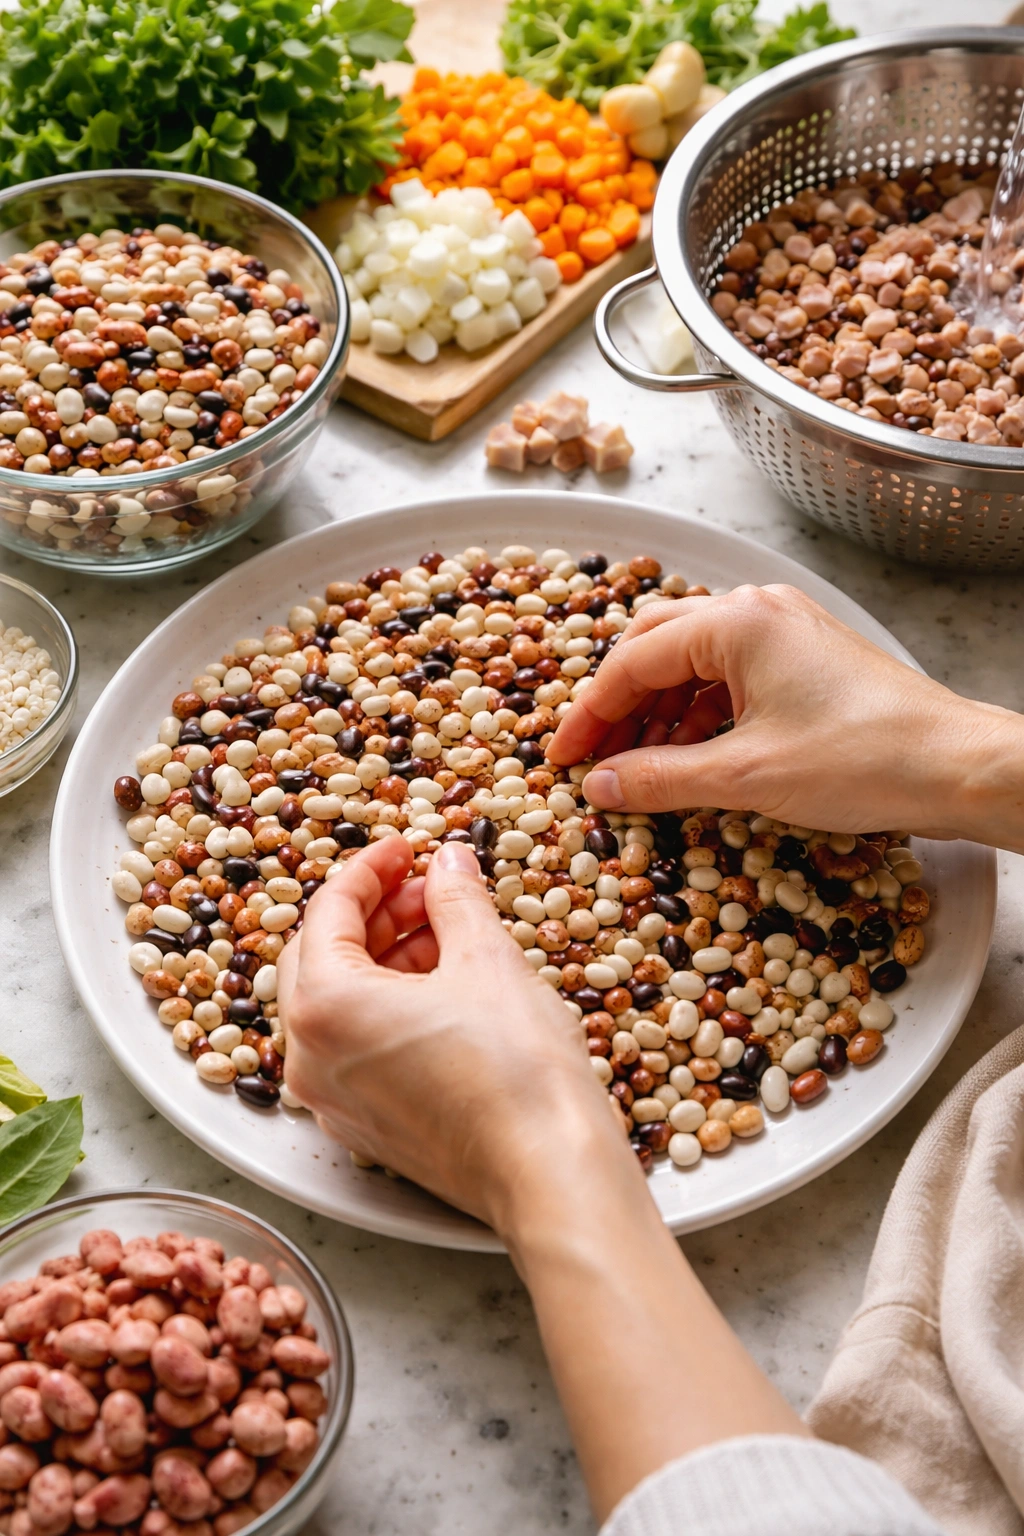
Step 1: Prepare the Dried Beans (if using)
If you’re using dried beans, sort through them carefully before cooking. Spread them on a clean kitchen counter or a light-colored plate and look for any that are shriveled, discolored, broken, or cracked—discard these along with any small stones that sometimes end up in packages of dried beans. This sorting step takes only a couple of minutes but prevents unpleasant surprises in your finished soup.
Rinse the sorted beans under cold running water, gently rubbing them between your fingers to remove any dust or debris. Drain completely. At this point, you can either proceed with the quick-soak method or skip ahead if you soaked overnight.
For overnight soaking: Place the rinsed beans in a large bowl or pot and add enough cold water to cover them by 4 inches (they’ll expand significantly). Cover loosely and refrigerate for 8 to 12 hours. The next day, drain the soaking water (which removes compounds that cause digestive discomfort), rinse the beans one more time, and they’re ready to cook.
For quick soaking: Place the rinsed beans in a large pot and add enough water to cover them by 4 inches. Bring to a boil over high heat and boil for exactly 1 minute. Remove from heat, cover the pot, and let sit undisturbed for 1 hour. Drain the soaking water and rinse thoroughly. The beans are now ready to use in your soup.
Step 2: Build the Aromatic Base
Heat the olive oil or butter in a large Dutch oven or heavy-bottomed soup pot over medium-high heat. Once the oil is shimmering (this takes about 1 minute), add the diced onion. Cook, stirring occasionally, for 5 to 7 minutes, until the onion pieces turn translucent and you can see through them—this indicates the water content is evaporating and the natural sugars are caramelizing slightly.
Add the diced carrots and celery to the pot with the onions. Continue cooking, stirring occasionally, for another 4 to 5 minutes, until the carrots and celery have softened slightly and everything smells wonderfully fragrant. You’re not looking for browning here; you want a gentle soften that coaxes out the vegetables’ natural flavors without charring.
Add the minced garlic and cook for exactly 1 minute more, stirring constantly. Garlic burns easily and becomes bitter if overcooked, so this brief window is all you need. You should smell a rich, garlicky aroma at this point—this is your signal that the aromatics are perfectly done. Remove the pot from heat temporarily.
Step 3: Add the Ham and Liquid
Add the drained soaked beans (or canned beans if you’re using those) to the pot along with the aromatic vegetables. Add the ham bone or ham shanks/hocks, positioning them so they’re partially submerged in the liquid. Pour in the chicken broth or water—if using water, aim for the higher end of the range (8 cups) to ensure the beans stay covered throughout cooking; if using broth, 6 to 7 cups is usually sufficient since broth is slightly more concentrated.
Add the fresh thyme sprigs, parsley sprigs, and bay leaf to the pot. Don’t add the fresh parsley garnish yet—that goes on at the table. Stir everything together so the beans are evenly distributed and the seasonings are incorporated. At this stage, the mixture will look thin and somewhat soupy, which is exactly correct. The thickening happens during the long simmer as starch releases from the beans and gelatin releases from the ham bone.
Step 4: Bring to a Simmer and Begin the Long Cook
Increase the heat to medium-high and bring the entire pot to a boil. You’ll see large bubbles breaking the surface vigorously—this is your signal to reduce the heat immediately to medium-low. The goal is a gentle simmer, not a rolling boil. A rolling boil can cause beans to split and become mushy on the outside while remaining hard in the center, and it encourages excessive evaporation.
Once the heat is reduced and the soup is simmering gently (you should see occasional small bubbles breaking the surface, but not a constant vigorous rolling), partially cover the pot with a lid. The “partial” cover is important—you want some steam to escape so the broth reduces slightly and concentrates in flavor, but you don’t want rapid evaporation that would require constant water additions. If you fully cover the pot, it will boil more vigorously and reduce less than ideal.
Let the soup simmer undisturbed for 2 to 2½ hours (if your beans were soaked) or 3 to 3½ hours (if you’re starting with unsoaked dried beans). Stir occasionally—every 30 to 45 minutes is fine. You’re not trying to rush anything; you’re giving time for flavors to develop. Check that the beans remain mostly covered with liquid; add a splash more broth or water if the level drops noticeably below the top of the beans.
Step 5: Check Doneness and Remove the Ham
After the minimum cooking time has passed, taste a bean. It should be completely tender—you should be able to easily squish it between your tongue and the roof of your mouth, with no firmness or grittiness in the center. If beans still feel the slightest bit grainy in the middle, give them another 15 to 30 minutes.
Once the beans are completely tender, carefully remove the ham bone or ham shanks from the pot using tongs. Set it on a cutting board and let it cool until you can handle it comfortably, about 10 to 15 minutes. Using a sharp knife, cut away any meat clinging to the bone and chop it into bite-sized pieces. Discard the bone, skin, and any gristle. You should have at least ½ cup to 1 cup of chopped ham to return to the soup, sometimes more if you started with a very meaty bone.
Step 6: Add Salt and Final Seasonings
Taste the soup carefully before adding the final salt. Ham bones and ham shanks contribute significant salt to the broth, so you may not need to add much more. Add salt in small pinches, tasting after each addition, until the soup tastes well-seasoned and savory—not bland, but not overwhelmingly salty either. If using completely unsalted beans and water, you’ll probably need closer to the full 1 teaspoon of salt. If using canned beans or broth, you may need only ¼ to ½ teaspoon additional.
Stir in the chopped ham meat you removed from the bone, and add 2 to 3 dashes of Tabasco or your preferred hot sauce if using. Don’t skip this—even people who don’t think they like hot sauce typically find that a tiny amount adds crucial depth and complexity that makes people ask “what’s in this soup?” They’re tasting the balance, not heat.
Add ½ teaspoon of freshly ground black pepper (never pre-ground; the flavor difference is enormous). Taste again and adjust seasonings as needed. At this point, the soup should taste noticeably better than it will taste hot—don’t be surprised if it tastes slightly flat or over-salted. This is normal. As the soup cools, flavors mellow and integrate. When you reheat it tomorrow, you’ll understand why everyone says it tastes better the next day.
Step 7: Cool and Refrigerate
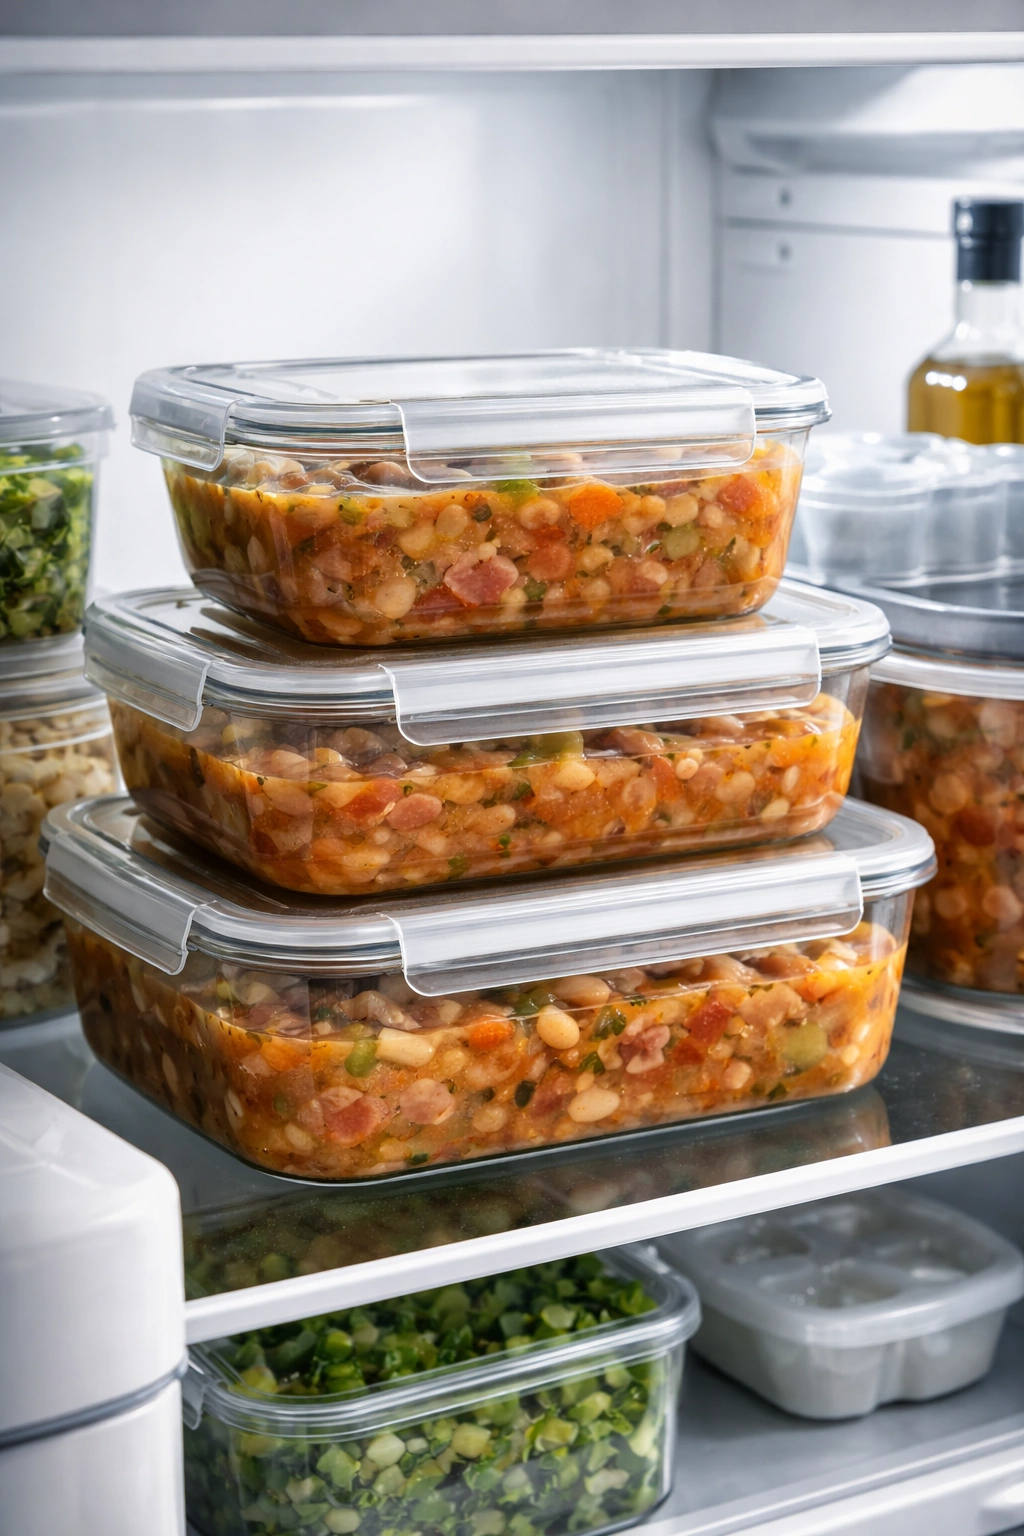
Let the soup cool to room temperature, which takes about 30 to 45 minutes. Once it’s no longer steaming, transfer it to an airtight container and refrigerate. Do not skip the refrigeration step—this is where the magic happens. The soup will thicken noticeably as it cools, and overnight, flavors continue to integrate and develop.
Professional Tips for Perfect Results Every Time

The difference between adequate ham and bean soup and exceptional ham and bean soup often comes down to small decisions and techniques that experienced cooks know from experience. Here are the techniques that consistently produce superior results.
Use a heavy-bottomed pot. This distributes heat evenly, preventing hot spots that can cause beans on the bottom to become mushy while beans on top remain firm. A Dutch oven or heavy soup pot is ideal; avoid thin-bottomed pots that tend to scorch.
Never skip the sauté step. Rushing directly to simmering without softening the aromatics first produces noticeably thinner, less developed flavor. Those five to seven minutes of gentle cooking are perhaps the most important five to seven minutes you’ll spend on this soup.
Stir occasionally but don’t obsess. Constant stirring can break apart beans and make them fall apart into the broth (though some of this is actually desirable for thickening). Stirring every 30 to 45 minutes is sufficient and allows the soup to develop a proper simmer.
Taste for salt after the soup cools. This is crucial. Salt perception changes dramatically with temperature. A soup that tastes perfectly seasoned when hot might taste under-seasoned when cold, and vice versa. Always taste your finished soup at the temperature you’ll be eating it.
Don’t cook past tenderness. Beans continue to soften and break down even after they reach the “tender” stage. If you simmer them for hours past the point where they’re done, they’ll become mushy and lose their texture entirely. Check for doneness starting around the 2-hour mark if using soaked beans, and remove from heat as soon as they’re done.
Save some of the cooking broth before you blend. If you choose to blend part of the soup for creaminess, set aside the thickened broth before blending so you can thin the finished soup if it’s thicker than you prefer. This gives you control over the final consistency.
Taste your finished soup before serving, not before refrigerating. The soup tastes completely different hot versus cold. A soup that tastes over-salted when hot will taste perfectly balanced when cold. This is one of the most surprising aspects of overnight soups that catches first-time makers off guard.
Common Mistakes That Prevent Success
Even with excellent ingredients and the right technique, certain missteps derail home cooks. Knowing what goes wrong helps you avoid these pitfalls.
Using old beans is the single most common cause of failure. Dried beans older than one year, even when stored properly, become increasingly difficult to cook. Their seed coat hardens, preventing water from penetrating evenly. You end up with beans that are mushy on the outside and still hard in the center even after hours of cooking. Always buy dried beans from stores with good turnover, and try to use them within a year of purchase. If you’re unsure how old your beans are, that’s reason enough to buy a fresh package.
Skipping the soak (or using the wrong soak method) creates uneven cooking. Unsoaked beans cook unevenly, with outer layers becoming mushy before the center softens. The quick-soak method dramatically improves this, reducing cook time from 3+ hours to 2 hours while producing more even results. Overnight soaking is even better.
Adding salt too early prevents beans from softening. This is a common myth (salt doesn’t actually prevent proper soaking), but adding significant salt to the pot when the beans are still raw can slow their softening. Add salt only after the beans are already tender, then adjust the amount based on taste.
Using water instead of broth when you have no ham bone creates bland soup. Ham bones are essential flavor providers. If you’re starting with diced ham or ham steak instead of a bone, you must use chicken or ham broth instead of water to compensate. The broth provides depth that water cannot.
Over-salting the finished soup is irreversible. Many home cooks add salt incrementally and taste as they go, which is wise, but they sometimes forget that the soup will taste less salty once it cools and overnight. When in doubt, under-season on day one; you can always add more salt on day two, but you cannot remove it.
Cooking at too-high heat boils away flavor rather than concentrating it. A rolling boil causes excessive evaporation and can split beans. A gentle simmer allows proper flavor development while keeping beans intact. This is why partial coverage works better than full coverage—you want some evaporation, but controlled evaporation.
Variations and Adaptations
The basic framework of this soup is flexible enough to support numerous variations without losing its essential character. These adaptations let you personalize the recipe based on what you have available and what flavors you’re craving.
Creamy version: After the beans are fully tender, use an immersion blender to puree approximately one-third to one-half of the soup. This breaks down some beans entirely while leaving others whole, creating a soup that’s creamy and thick without being entirely uniform. Alternatively, mash some beans against the side of the pot with a wooden spoon to achieve a similar effect.
Smoky version: If your ham lacks significant smoke character, add ½ teaspoon of smoked paprika during the last 30 minutes of cooking. This adds complexity without changing the fundamental character of the soup. Some cooks also add a tiny splash of liquid smoke, but smoked paprika is safer because it’s harder to over-do.
Vegetable-forward version: Add diced potatoes, turnips, or parsnips alongside the carrots about 45 minutes before the end of cooking. Add greens like kale, Swiss chard, or spinach during the last 10 to 15 minutes, stirring until they wilt. These additions make the soup heartier while maintaining its essential ham-and-bean identity.
Spicy version: Add diced jalapeños alongside the aromatic vegetables during the sauté step, or stir in a small pinch of cayenne pepper toward the end of cooking. Fresh jalapeños create a bright heat; cayenne adds deeper warmth. Start conservatively—you can always add more, but you can’t remove it.
Mediterranean version: Substitute cannellini beans for navy beans, add fresh oregano alongside the thyme, include sun-dried tomatoes (about ½ cup, chopped), and finish with fresh basil instead of parsley. This transforms the soup’s character while keeping its essential structure.
Bean variety mix: Use a 15-bean mix or combine different white beans rather than using only one type. Different beans cook at different rates and contribute varying textures, creating a more interesting final dish.
Leftover ham version: If you have cooked ham steak or deli ham but no bones, use chicken or ham broth instead of water, and add the diced ham during the last 30 minutes of cooking rather than at the beginning. This prevents overcooking the ham while still allowing its flavor to infuse the broth.
Storage, Reheating, and Make-Ahead Instructions
This soup’s improvement over time makes it an ideal make-ahead meal, but proper storage is essential for maintaining quality and safety.
Refrigerator storage: Allow the soup to cool to room temperature before transferring it to airtight containers. Leaving it on the counter for extended periods invites bacterial growth. Once refrigerated, the soup keeps for 4 to 5 days. The flavor actually improves day two and three, then gradually becomes less vibrant by day four or five.
Freezer storage: Ham and bean soup freezes beautifully for up to 3 months. Cool the soup completely before transferring it to freezer-safe containers or heavy-duty freezer bags. For bags, you can lay them flat to freeze, which saves space and allows faster thawing. Leave about ½ inch of space at the top; soups expand as they freeze.
Thawing: The preferred method is refrigerator thawing overnight, which ensures even, gentle reheating. If you’re short on time, you can reheat from frozen directly on the stovetop over low heat, stirring occasionally, though this takes longer.
Reheating: Thawed soup reheats beautifully on the stovetop over medium-low heat, stirring occasionally, until heated through (about 10 to 15 minutes). You can also reheat in the microwave in a microwave-safe container, stirring halfway through. The soup will likely be noticeably thicker after refrigeration; thin it with additional broth or water if you prefer a brothier consistency. Some of this thickening is actually desirable—it means the soup has improved.
Make-ahead strategy: Make the entire soup one to three days before you plan to serve it. Reheat portions as needed, knowing that each serving will taste progressively better. This also simplifies weeknight meals—simply reheat what you need rather than starting from scratch.
Serving Suggestions and Perfect Pairings
Ham and bean soup is satisfying enough to serve as a complete meal on its own, but thoughtful pairings elevate it from simple comfort food to something memorable.
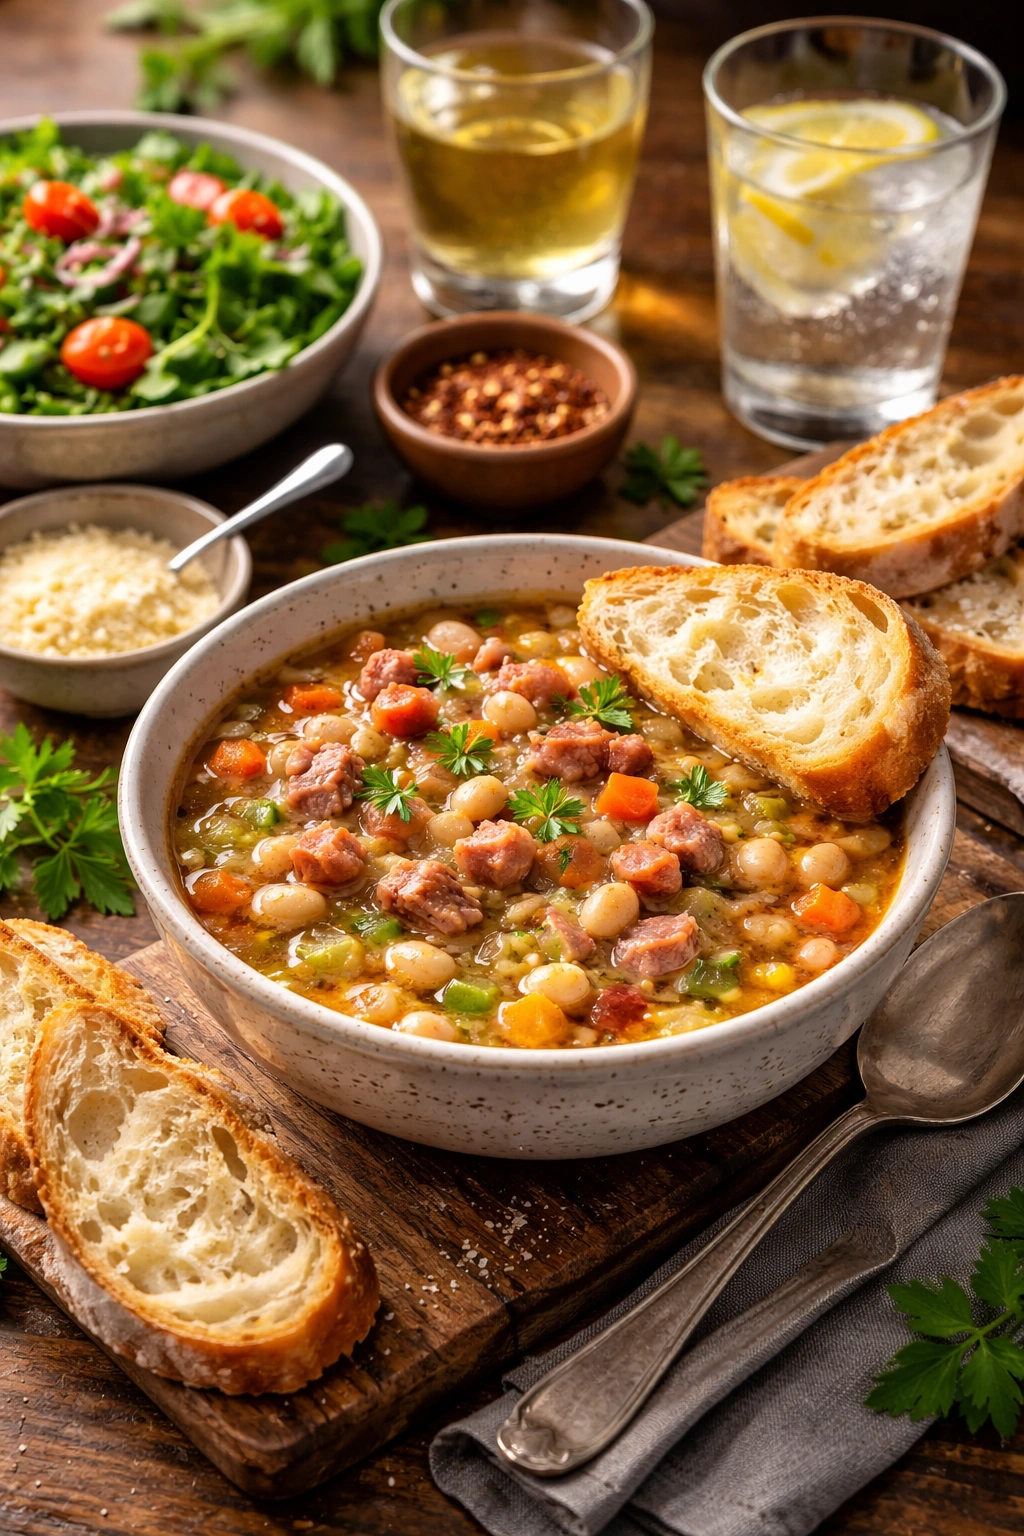
Bread pairings: Crusty artisan bread, either fresh or toasted, is perhaps the most traditional accompaniment. Cornbread or cornbread muffins (particularly in Southern interpretations) provide slightly sweet contrast. Warm, buttered biscuits work beautifully. Even simple oyster crackers or crusty breadsticks provide textural contrast and vehicle for soaking up every last spoonful of broth.
Salad accompaniments: A simple green salad with vinaigrette (the acidity cuts through the soup’s richness beautifully) or a hearty kale salad provide freshness and textural variety. Avoid creamy dressings that compete with the soup’s richness.
Garnishing for presentation: Ladle the soup into bowls, then top each serving with a small handful of fresh parsley leaves, a grind of black pepper, and a drizzle of excellent extra-virgin olive oil. Some cooks add crispy bacon bits, a dollop of sour cream, or grated Parmesan cheese, though these are optional and depend on your preferences.
Beverage pairings: A medium-bodied wine like Pinot Noir, Zinfandel, or Chardonnay pairs beautifully with the soup’s richness and smokiness. Non-alcoholic options include apple cider (particularly warming if served warm) or a simple green tea.
Occasion suitability: This is the quintessential soup for cold-weather entertaining, weeknight family dinners, meal prep for the week ahead, or any occasion when you want something that tastes like home. It’s also excellent for feeding a crowd on a budget—a single pot feeds six to eight people for a fraction of the cost of most other dinner options.
Final Thoughts
Understanding why this soup tastes better the next day transforms how you approach making it. You’re not just following a recipe; you’re participating in a process of flavor development that requires time. The best thing you can do for yourself is make this soup, tightly cover it, refrigerate it, and then forget about it until the next day. Resist the urge to add “final” adjustments on day one. Let time do the work it does best.
When you open that refrigerator the next morning and that aroma hits you, you’ll understand completely why generations of cooks have relied on ham and bean soup. It tastes rich, deeply satisfying, and somehow better than when you first made it—because it literally is. That’s not nostalgia or imagination. That’s science, time, and excellent ingredients working together to create something genuinely nourishing. Make a batch this week. Your future self will thank you.