Crumbl cookies have become a cultural phenomenon — those massive, soft, pillowy sugar cookies that seem to sell out within hours of each new flavor drop. If you’ve ever stood in line for these cookies (or, let’s be honest, ordered them online at outrageous prices), you’ve probably wondered whether you could recreate that exact texture and flavor at home without the premium price tag. The answer is absolutely yes, and it’s far easier than you might think.
The secret to nailing a Crumbl-style cookie isn’t some complicated culinary technique — it’s understanding the fundamental principles that make them work. These cookies succeed because of a precise balance of ingredients, careful attention to chilling time, and knowing exactly when to pull them out of the oven while the centers are still slightly underbaked. The size matters too (they’re substantially larger than a standard cookie), but you can scale that to whatever you prefer. What makes them special is that tender, almost cake-like crumb that stays moist for days, paired with a crispy-edged exterior that gives way to a pillowy center.
Over the years, Crumbl has released hundreds of flavors — some seasonal, some limited-time only, some that develop cult followings. Rather than chasing every limited release, you can build your own flavor library at home. Whether you’re craving their signature vanilla sugar cookie, a decadent chocolate creation, or something unexpected like the bourbon brown butter masterpiece, these copycat recipes deliver the authentic Crumbl experience without the wait or the wallet damage.
The Core Technique Behind Crumbl Cookies
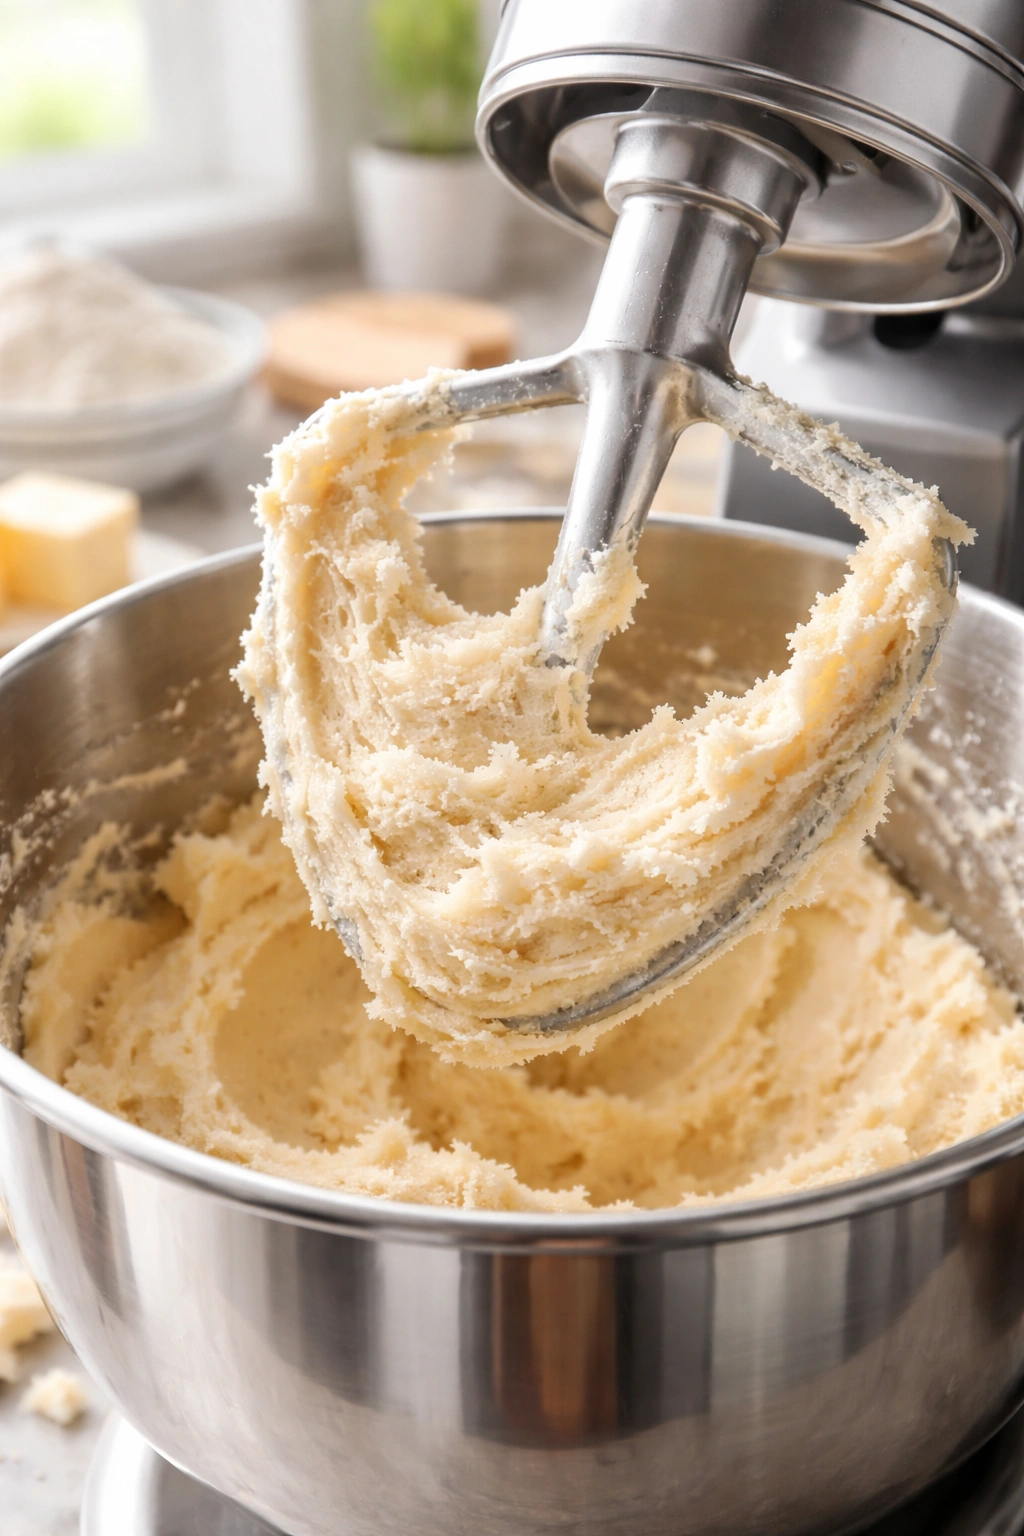
The foundation of every Crumbl-style cookie starts with understanding what makes them different from standard chocolate chip cookies or traditional sugar cookies. The dough relies heavily on butter and sugar, creamed together until pale and fluffy — this step is non-negotiable and creates the light, tender structure these cookies are famous for. The ratio of butter to flour is more generous than typical cookies, which contributes to the melt-in-your-mouth quality that keeps people coming back.
Temperature control matters far more here than in most baking. The dough must be thoroughly chilled before baking — ideally overnight, though several hours works in a pinch. This prevents the cookies from spreading too thin and helps them bake up thick, tall, and fluffy rather than flat and crispy. Room-temperature dough will give you completely different results, so don’t skip this step as a time-saver.
The oven temperature is deliberately moderate (350°F rather than 375°F or higher). This slower bake allows the centers to stay soft and pillowy while the edges develop that signature slight crispness. You’re aiming for what looks almost underbaked when you pull them from the oven — the edges should be set and lightly golden, but the centers should jiggle slightly when you shake the pan. They’ll continue to cook on the baking sheet as they cool, and you’ll be left with that perfect texture.
Why Size Matters for Crumbl-Style Cookies
Crumbl’s iconic silhouette comes from their substantial size — each cookie is roughly 3 inches in diameter and about ¾ inch thick. This larger format isn’t just for show; it’s essential to achieving their signature texture. A smaller cookie baked at the same temperature and time would be overbaked by the time the edges were set properly.
You don’t have to match Crumbl’s exact size if you don’t want to. The recipes that follow can be portioned into smaller cookies (which will bake faster), but they’ll taste noticeably more like traditional cookies rather than the pillowy Crumbl experience. The generous size gives the center time to stay soft while the edges set, creating that contrast that makes these cookies special.
The Importance of Chilling
Don’t underestimate the power of a cold dough. Chilling serves multiple purposes: it firms up the butter so the dough doesn’t spread excessively, it allows the flour to fully hydrate for better gluten development, and it gives flavors time to meld and deepen. At minimum, chill the dough for 4 hours; overnight is genuinely better if your schedule allows. You can also keep scooped portions in the freezer and bake directly from frozen (adding just 1-2 minutes to the bake time) for fresh-baked cookies whenever you want them.
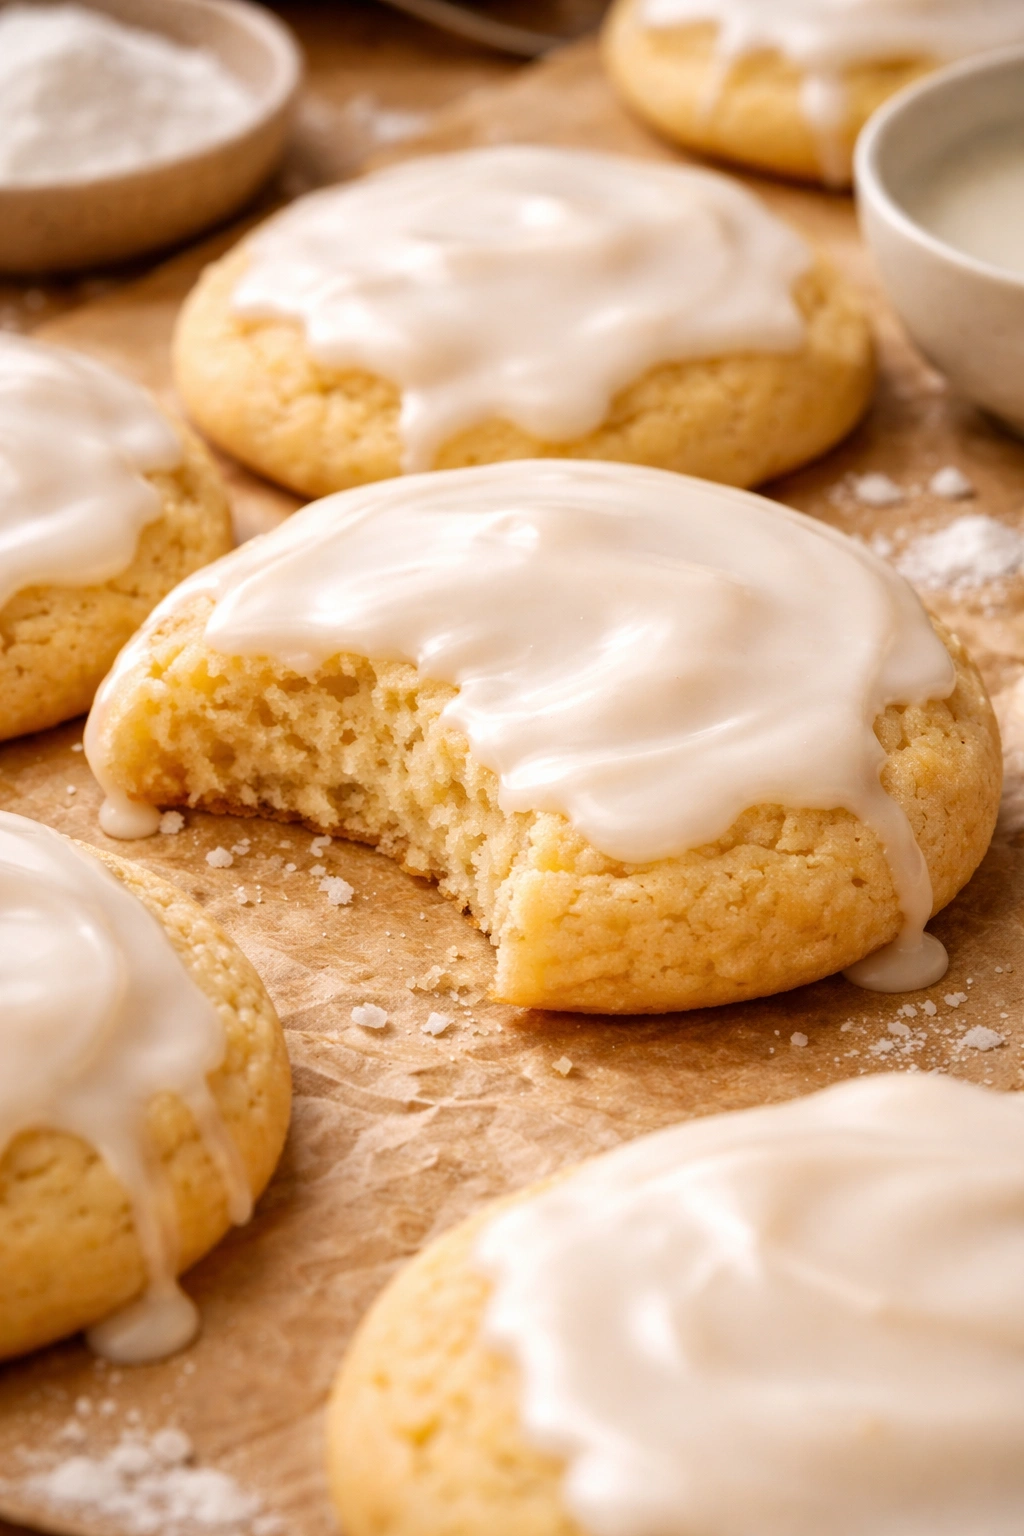
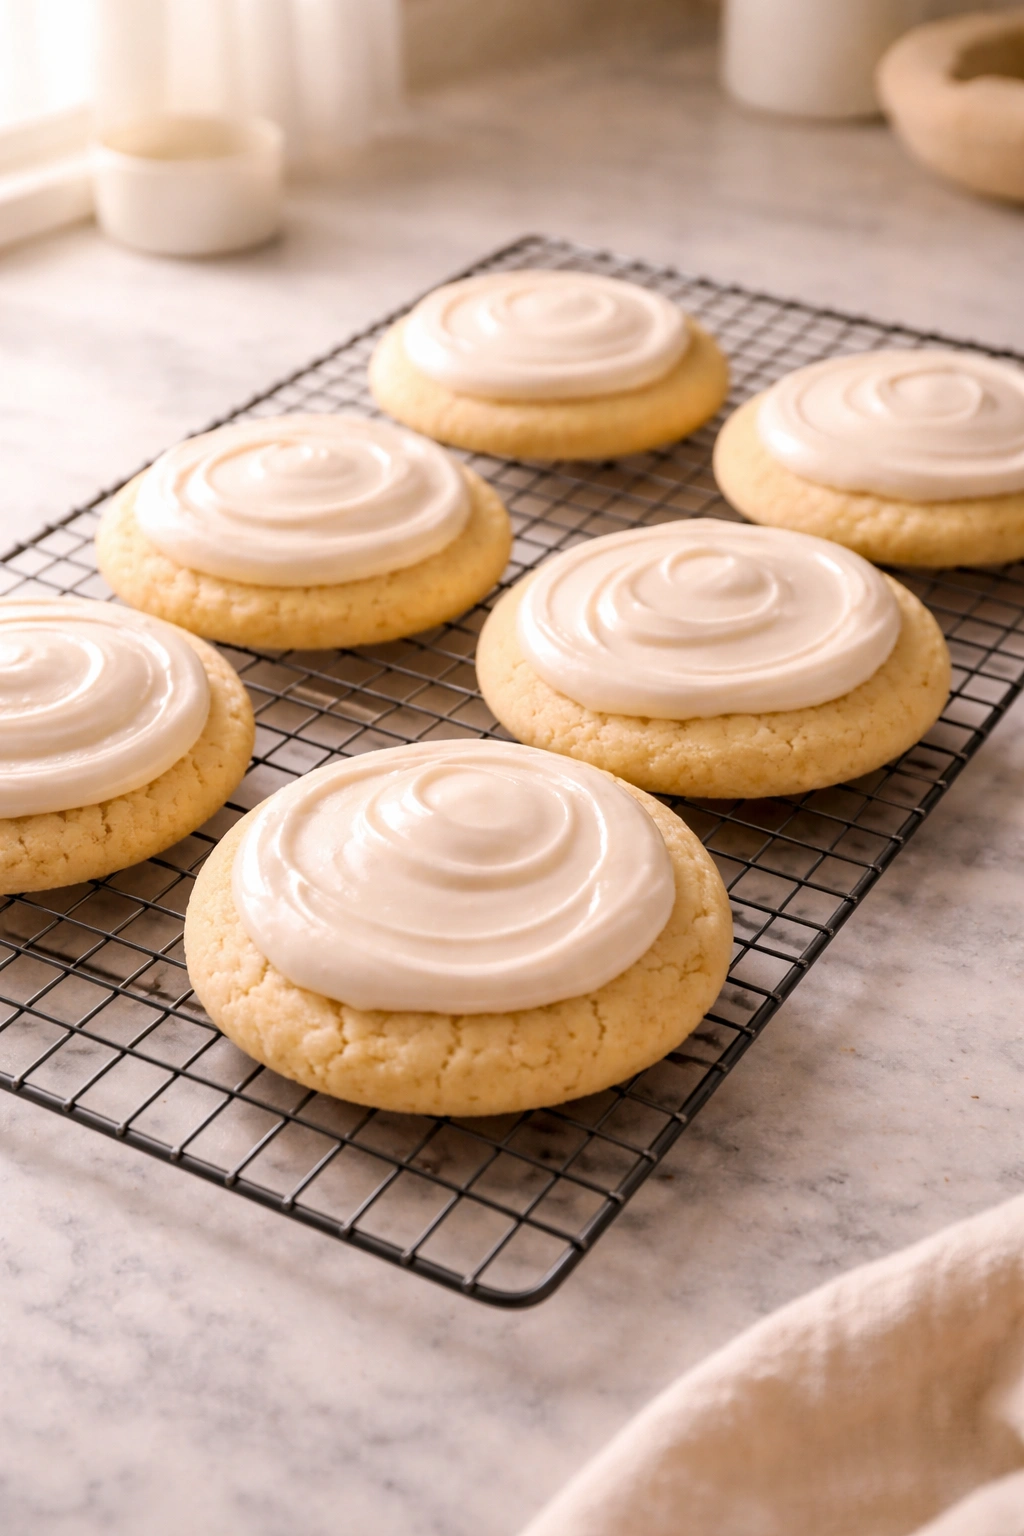
Classic Vanilla Sugar Cookie Copycat
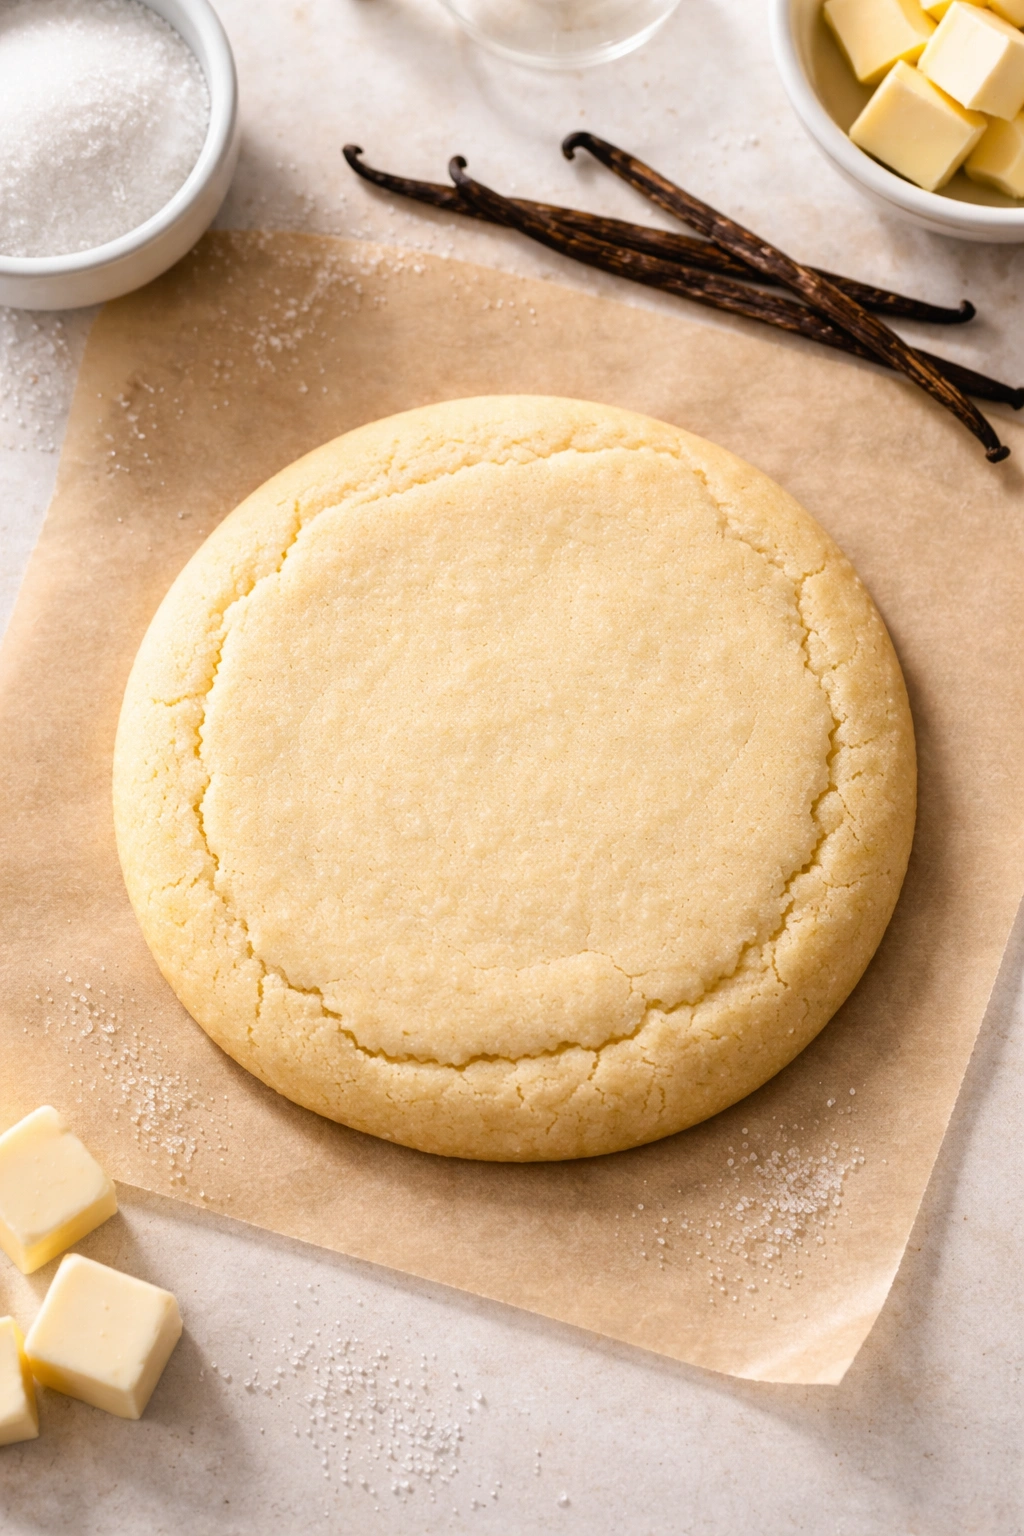
This is the Crumbl flagship — the cookie that started the obsession. The magic is in its simplicity: superior vanilla extract, quality butter, and careful technique combine into something that tastes far more sophisticated than its basic ingredient list suggests.
Yield: Makes 12 large cookies (3-inch diameter)
Prep Time: 20 minutes
Chill Time: 4 hours minimum (overnight preferred)
Bake Time: 12-14 minutes
Total Time: 4 hours 30 minutes active + overnight chilling
Difficulty: Beginner — No special equipment required, straightforward mixing and baking technique perfect for first-time Crumbl recreators.
For the Cookie Dough:
- 2¼ cups all-purpose flour
- ½ teaspoon baking soda
- ½ teaspoon fine sea salt
- 1 cup (2 sticks) unsalted butter, softened to room temperature
- ¾ cup granulated sugar
- ¼ cup light brown sugar, packed
- 1 large egg, room temperature
- 1 tablespoon pure vanilla extract (use real vanilla, not imitation — this makes an enormous difference)
- ½ teaspoon vanilla powder (optional but adds complexity and a subtle vanilla depth imitation extract can’t match)
For the Vanilla Glaze:
- 1½ cups powdered sugar, sifted
- 2-3 tablespoons heavy cream or whole milk
- ½ teaspoon pure vanilla extract
- Pinch of fine sea salt
Prepare the Dough:
-
In a medium bowl, whisk together the flour, baking soda, and salt until fully combined. Set aside.
Advertisements -
Using a stand mixer fitted with the paddle attachment (or a hand mixer), cream together the softened butter, granulated sugar, and brown sugar on medium speed for 3-4 minutes. Stop and scrape down the sides of the bowl halfway through. The mixture should look noticeably lighter in color, fluffy in texture, and increased in volume — this creaming step is what creates the tender, pillowy crumb that makes Crumbl cookies special.
-
Add the egg and beat for 1 minute on medium speed until fully incorporated and the mixture looks smooth and slightly fluffy again. Scrape down the sides.
-
Add the vanilla extract and vanilla powder (if using). Beat for another 30 seconds until combined.
-
Reduce the mixer to low speed. Add the flour mixture in one addition and mix only until the dough just comes together. Do not overmix — overmixing develops gluten and will make the cookies tough and cake-like (not in the good way). The dough should look shaggy but unified, with no visible streaks of flour.
-
Turn the dough out onto plastic wrap, press it into a flat disk, and refrigerate for at least 4 hours, ideally overnight. Cold dough is absolutely critical for achieving the right texture.
Bake the Cookies:
-
Preheat the oven to 350°F (175°C) and line two baking sheets with parchment paper or silicone baking mats.
-
Remove the dough from the refrigerator. Using a ¼-cup cookie scoop (or a 2-tablespoon measuring spoon), portion the dough into 12 equal mounds on the prepared baking sheets, spacing them about 2 inches apart. Resist the urge to flatten them — they’ll spread during baking naturally.
-
Bake for 12-14 minutes, rotating the pans halfway through. The edges should be set and lightly golden, but the centers should still look slightly underbaked and feel soft when gently pressed. The cookies will appear to jiggle slightly when you shake the pan — this is exactly what you want.
-
Remove from the oven and let the cookies cool on the baking sheet for 5 minutes. This resting period allows them to firm up just enough to transfer without falling apart, while the centers continue to cook gently from residual heat.
Advertisements -
Transfer to a wire cooling rack and allow to cool completely (about 30 minutes) before glazing.
Make the Vanilla Glaze:
-
In a small bowl, whisk together the sifted powdered sugar, vanilla extract, and salt. Add the cream one tablespoon at a time, whisking after each addition, until you reach a pourable consistency that coats the back of a spoon but still drips slightly. The glaze should be smooth and glossy, not stiff.
-
Once the cookies are completely cool, dip the tops into the glaze or spoon it over the surface, letting any excess drip off naturally. Place glazed cookies back on the cooling rack over a sheet of parchment paper to catch drips. Let the glaze set for at least 30 minutes before serving.
Tips for Perfect Vanilla Crumbl Cookies:
Use real vanilla extract, not imitation — the flavor difference is dramatic and worth the extra cost. Real vanilla creates a warm, complex sweetness while imitation vanilla tastes thin and slightly chemical. Vanilla powder adds another dimension, but it’s optional if you don’t have it on hand.
Pro tip: Don’t skip the chilling step thinking a quick dough will save time. Properly chilled dough bakes up significantly taller and fluffier than room-temperature dough. The extra wait time is what separates these from ordinary sugar cookies.
Measure your flour correctly by spooning it into the measuring cup and leveling off with a knife — scooping directly from the bag compacts the flour and results in too much flour in your dough, which makes the cookies drier and tougher.
Storage and Make-Ahead:
These cookies stay fresh and soft at room temperature in an airtight container for up to 5 days. They actually improve after a day or two as the flavors continue to meld and the crumb sets into an even better texture. To make them further ahead, freeze unbaked dough portions in a freezer bag for up to 3 months — bake directly from frozen, adding just 1-2 minutes to the bake time. Baked cookies freeze beautifully for up to 2 months (with or without glaze).
Chocolate Crumbl Cookie with Fudgy Center
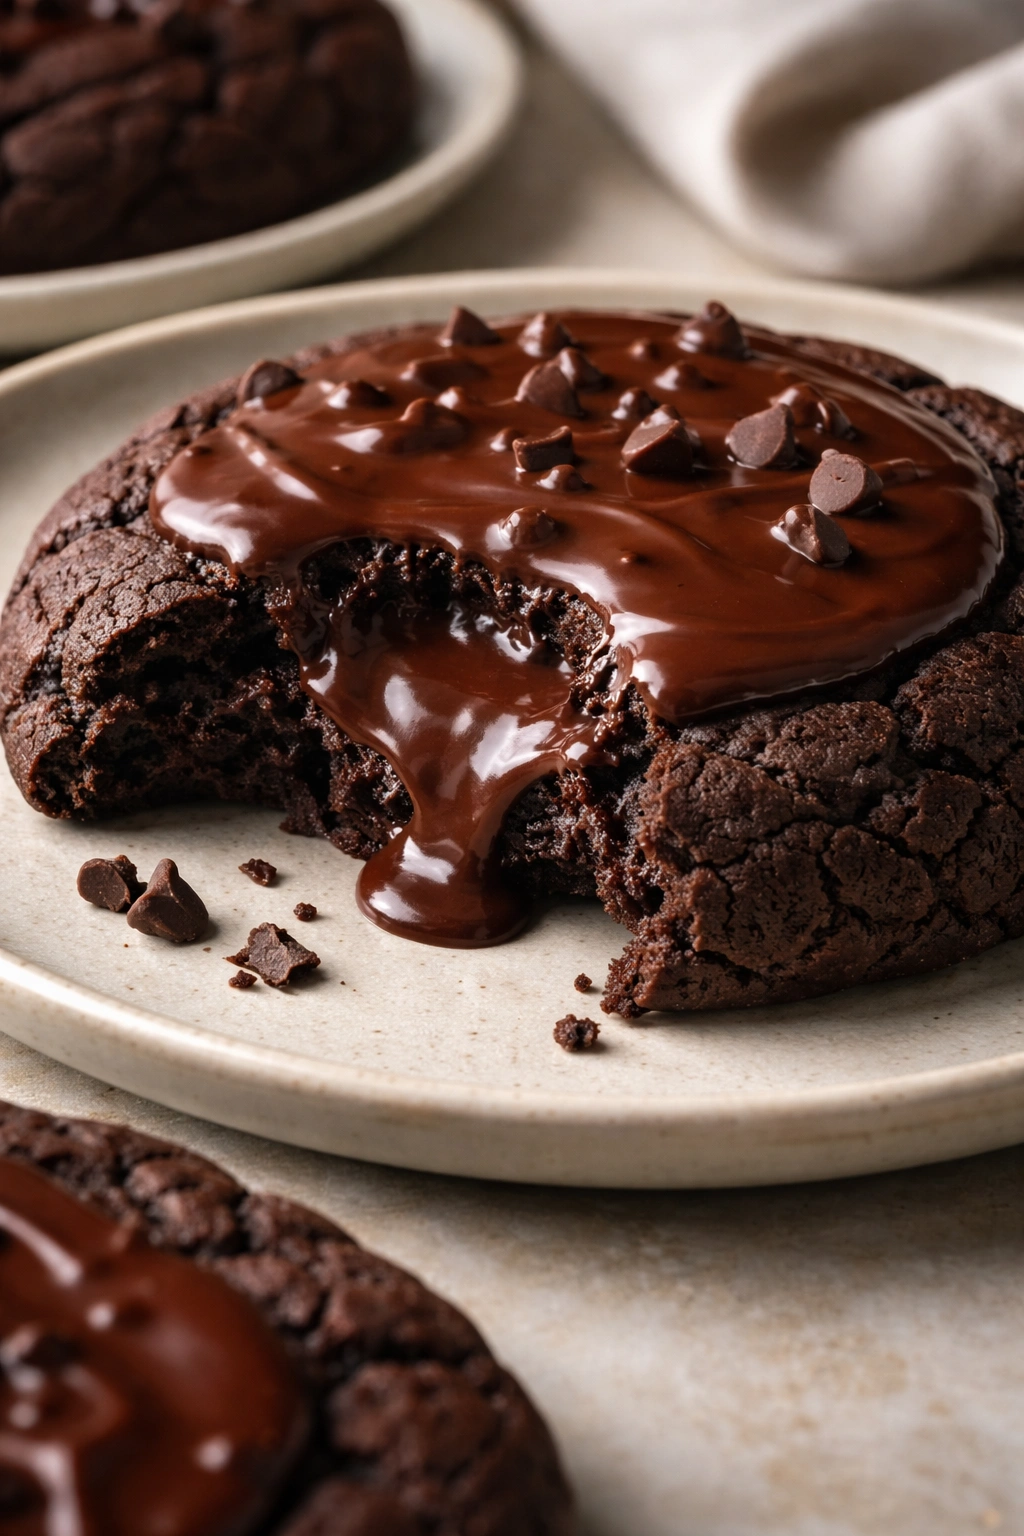
This is the cookie when you want chocolate flavor without the complication of chunks or swirls. A pure chocolate dough that bakes up tender with an almost brownie-like center, topped with a silky chocolate glaze.
Yield: Makes 12 large cookies
Prep Time: 25 minutes
Chill Time: 4 hours minimum (overnight preferred)
Bake Time: 13-15 minutes
Total Time: 4 hours 35 minutes active + overnight chilling
Difficulty: Intermediate — Requires careful attention to the melting and tempering of chocolate and slightly more precise mixing technique than the vanilla version.
For the Cookie Dough:
- 2 cups all-purpose flour
- ½ cup unsweetened cocoa powder, sifted
- ½ teaspoon baking soda
- ½ teaspoon fine sea salt
- 1 cup (2 sticks) unsalted butter, softened to room temperature
- ¾ cup granulated sugar
- ¼ cup light brown sugar, packed
- 1 large egg, room temperature
- 1 teaspoon pure vanilla extract
- 3 ounces semi-sweet chocolate, finely chopped (about ½ cup)
For the Chocolate Glaze:
- 4 ounces semi-sweet or dark chocolate, finely chopped
- 3 tablespoons unsalted butter
- 2 tablespoons light corn syrup (creates shine and prevents the glaze from setting too hard)
- Pinch of fine sea salt
Prepare the Dough:
-
In a medium bowl, sift together the flour, cocoa powder, baking soda, and salt. Sifting the cocoa is important — it removes lumps and ensures even distribution throughout the dough, which prevents bitter pockets. Set aside.
-
Using a stand mixer fitted with the paddle attachment, cream together the softened butter, granulated sugar, and brown sugar on medium speed for 3-4 minutes, until the mixture is pale, fluffy, and noticeably increased in volume.
-
Add the egg and vanilla extract. Beat for 1 minute on medium speed until fully incorporated. Scrape down the sides of the bowl.
-
Reduce the mixer to low speed and add the flour mixture in one addition. Mix only until just combined — the dough should look shaggy but unified. Do not overmix.
-
Using a rubber spatula, fold in the finely chopped chocolate by hand until evenly distributed throughout the dough. The chocolate pieces should be small enough to distribute smoothly without creating dense pockets.
-
Turn the dough out onto plastic wrap, press into a flat disk, and refrigerate for at least 4 hours, ideally overnight.
Bake the Cookies:
-
Preheat the oven to 350°F (175°C) and line two baking sheets with parchment paper.
-
Remove the dough from the refrigerator. Using a ¼-cup cookie scoop, portion into 12 equal mounds on the prepared baking sheets, spacing them about 2 inches apart. Do not flatten — let them spread naturally during baking.
-
Bake for 13-15 minutes, rotating the pans halfway through. The edges should be set and the tops should look crackled and dry, but the centers should still feel soft when gently pressed. You’re aiming for that sweet spot where the edges are baked through but the center is still slightly underbaked.
Advertisements -
Let cool on the baking sheet for 5 minutes, then transfer to a wire rack to cool completely (about 30 minutes).
Make the Chocolate Glaze:
-
Place the chopped chocolate and butter in a small bowl. Heat gently — either in a double boiler over simmering water, or in a microwave-safe bowl in 20-second intervals, stirring between each interval — until completely melted and smooth. Remove from heat.
-
Stir in the corn syrup and salt until the glaze is glossy and smooth. Let it cool for 2-3 minutes — you want it warm enough to pour but not so hot it runs off the cookie.
-
Dip the tops of the completely cooled cookies into the glaze or spoon it over the surface. Let any excess glaze drip off naturally. Place glazed cookies on the rack and let the glaze set for at least 1 hour before serving — chocolate glaze takes longer to set than royal icing or vanilla glaze.
Tips for Perfect Chocolate Cookies:
Sift your cocoa powder — this is the one time it genuinely matters. Unsifted cocoa has lumps that create bitter pockets and prevent the cocoa flavor from distributing evenly.
Worth knowing: The corn syrup in the chocolate glaze is crucial. It creates a glossy finish and prevents the glaze from cracking when you bite into the cookie. Without it, the chocolate sets rock-hard.
Don’t add too much chocolate by weight — small pieces distributed throughout the dough are better than larger chunks that disrupt the tender crumb structure.
Storage and Make-Ahead:
These cookies last up to 5 days in an airtight container at room temperature. Store with parchment between layers to prevent the glaze from sticking. Freeze unbaked dough portions for up to 3 months, or freeze baked cookies (with glaze set) for up to 2 months.
Brown Butter Pecan Crumbl Cookie
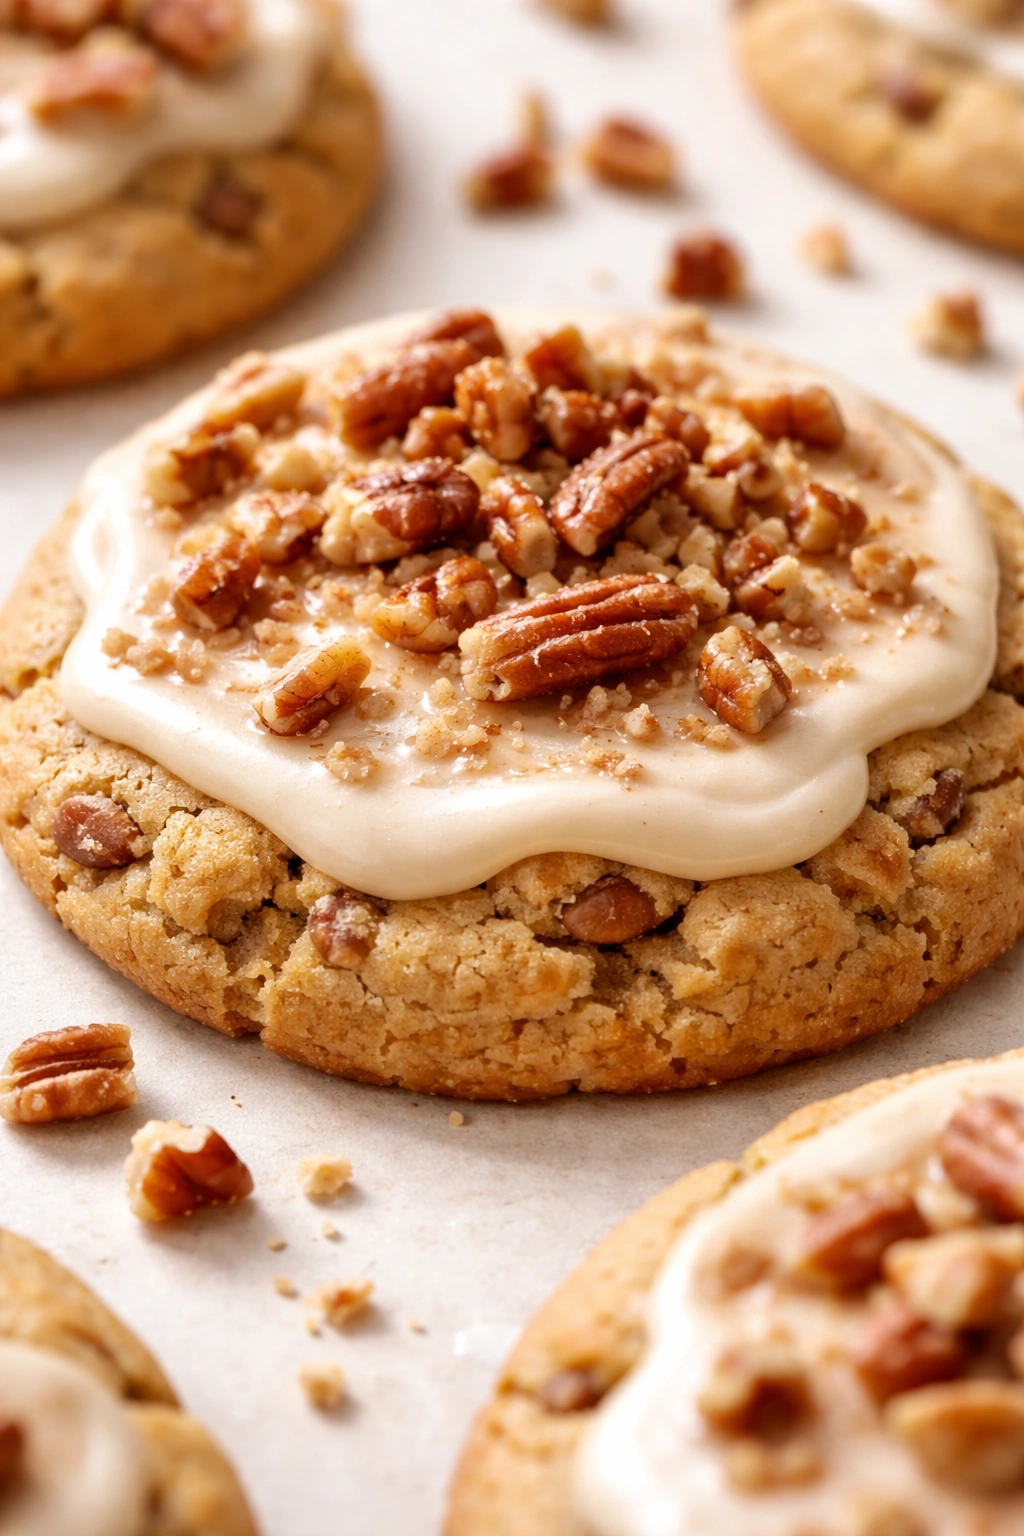
Brown butter takes every ingredient it touches to a deeper, more complex place. In a Crumbl-style cookie, browned butter creates a rich, toasty base that pairs beautifully with the nutty crunch of pecans and a brown sugar depth. The glaze is a brown butter cream cheese — a more sophisticated finish than plain vanilla.
Yield: Makes 12 large cookies
Prep Time: 30 minutes (includes brown butter cooling time)
Chill Time: 4 hours minimum (overnight preferred)
Bake Time: 12-14 minutes
Total Time: 5 hours active + overnight chilling
Difficulty: Intermediate — Brown butter technique requires attention, but the payoff is incredible flavor depth.
For the Cookie Dough:
- ¾ cup (1½ sticks) unsalted butter
- ½ cup (1 stick) unsalted butter, softened to room temperature (you’ll add this to the cooled brown butter)
- ¾ cup granulated sugar
- ¼ cup light brown sugar, packed
- 1 large egg, room temperature
- 1 teaspoon pure vanilla extract
- 2¼ cups all-purpose flour
- ½ teaspoon baking soda
- ½ teaspoon fine sea salt
- ¾ cup pecan pieces, chopped into rough ¼-inch pieces
For the Brown Butter Cream Cheese Glaze:
- 3 tablespoons unsalted butter
- 3 ounces cream cheese, softened to room temperature
- ¾ cup powdered sugar, sifted
- ½ teaspoon vanilla extract
- Pinch of fine sea salt
Brown the Butter:
-
In a small saucepan over medium heat, melt the ¾ cup butter. Swirl the pan occasionally (don’t stir constantly — you want to monitor the butter, not whip air into it). After 5-7 minutes, the milk solids will begin to fall to the bottom of the pan and brown, creating a nutty aroma. Continue cooking for another 1-2 minutes, watching closely, until the butter is golden brown and smells deeply nutty. Don’t let it burn — the line between perfect brown butter and burnt butter is thin.
-
Pour the brown butter (including all those flavorful browned solids) into a bowl and let it cool to room temperature — about 20 minutes. You need it cool enough that it won’t cook the egg when you add it, but warm enough that it blends smoothly with the softened butter.
Prepare the Dough:
-
Once the brown butter is cool, add it to the softened ½ cup butter in a stand mixer bowl. Add the granulated sugar and brown sugar. Using the paddle attachment, beat on medium speed for 2-3 minutes until smooth and creamy — you won’t get the same fluffy increase in volume you’d get with regular butter (brown butter is denser), so you’re looking for a smooth, cohesive mixture rather than pale and fluffy.
-
Add the egg and vanilla extract. Beat for 1 minute on medium speed until fully combined. Scrape down the sides.
-
In a separate bowl, whisk together the flour, baking soda, and salt. Reduce the mixer to low speed and add the flour mixture in one addition, mixing only until just combined. Do not overmix.
-
Using a rubber spatula, fold in the chopped pecans by hand until evenly distributed.
-
Turn the dough out onto plastic wrap, press into a flat disk, and refrigerate for at least 4 hours, ideally overnight.
Bake the Cookies:
-
Preheat the oven to 350°F (175°C) and line two baking sheets with parchment paper.
-
Remove the dough from the refrigerator. Using a ¼-cup scoop, portion into 12 mounds on the prepared baking sheets, spacing them about 2 inches apart.
-
Bake for 12-14 minutes, rotating the pans halfway through. The edges should be set and golden, and the centers should feel just barely set when gently pressed. Brown butter cookies can look less golden than regular cookies at the same stage, so rely more on touch than color.
-
Let cool on the baking sheet for 5 minutes, then transfer to a wire rack to cool completely.
Make the Brown Butter Cream Cheese Glaze:
-
In a small saucepan over medium heat, melt the 3 tablespoons butter and allow it to brown following the same process as step 1 — about 8-10 minutes total until deep golden and fragrant. Pour into a bowl and let cool for 5 minutes.
-
Add the softened cream cheese to the cooled brown butter. Using a fork or small whisk, beat together until smooth and combined. The mixture might look slightly separated or grainy at first — keep whisking and it will come together into a smooth glaze.
-
Add the sifted powdered sugar, vanilla extract, and salt. Whisk until smooth and spreadable — the glaze should be thick enough to hold on the cookie but still pourable.
-
Once the cookies are completely cooled, spoon or spread the glaze on top. Let set for 30-45 minutes before serving. This glaze sets softer than a traditional royal icing, creating a slightly more luxurious mouthfeel.
Tips for Perfect Brown Butter Pecan Cookies:
Brown butter flavor is fragile — once cooled, it can separate or look grainy if you rush the glaze preparation. Keep all your ingredients at room temperature and beat gently to avoid breaking the emulsion.
Pro tip: Toast your pecan pieces lightly in a dry skillet over medium heat for 2-3 minutes before adding them to the dough. This intensifies their flavor and creates an even more complex taste profile.
Don’t skip cooling the brown butter completely before mixing with the other ingredients — warm brown butter creates a dough that’s difficult to chill properly.
Storage and Make-Ahead:
These cookies last 5 days at room temperature in an airtight container. The cream cheese glaze should stay at room temperature or in a cool kitchen — if you refrigerate them, bring them back to room temperature before eating for the best texture and flavor.
Strawberry Shortcake Crumbl Cookie
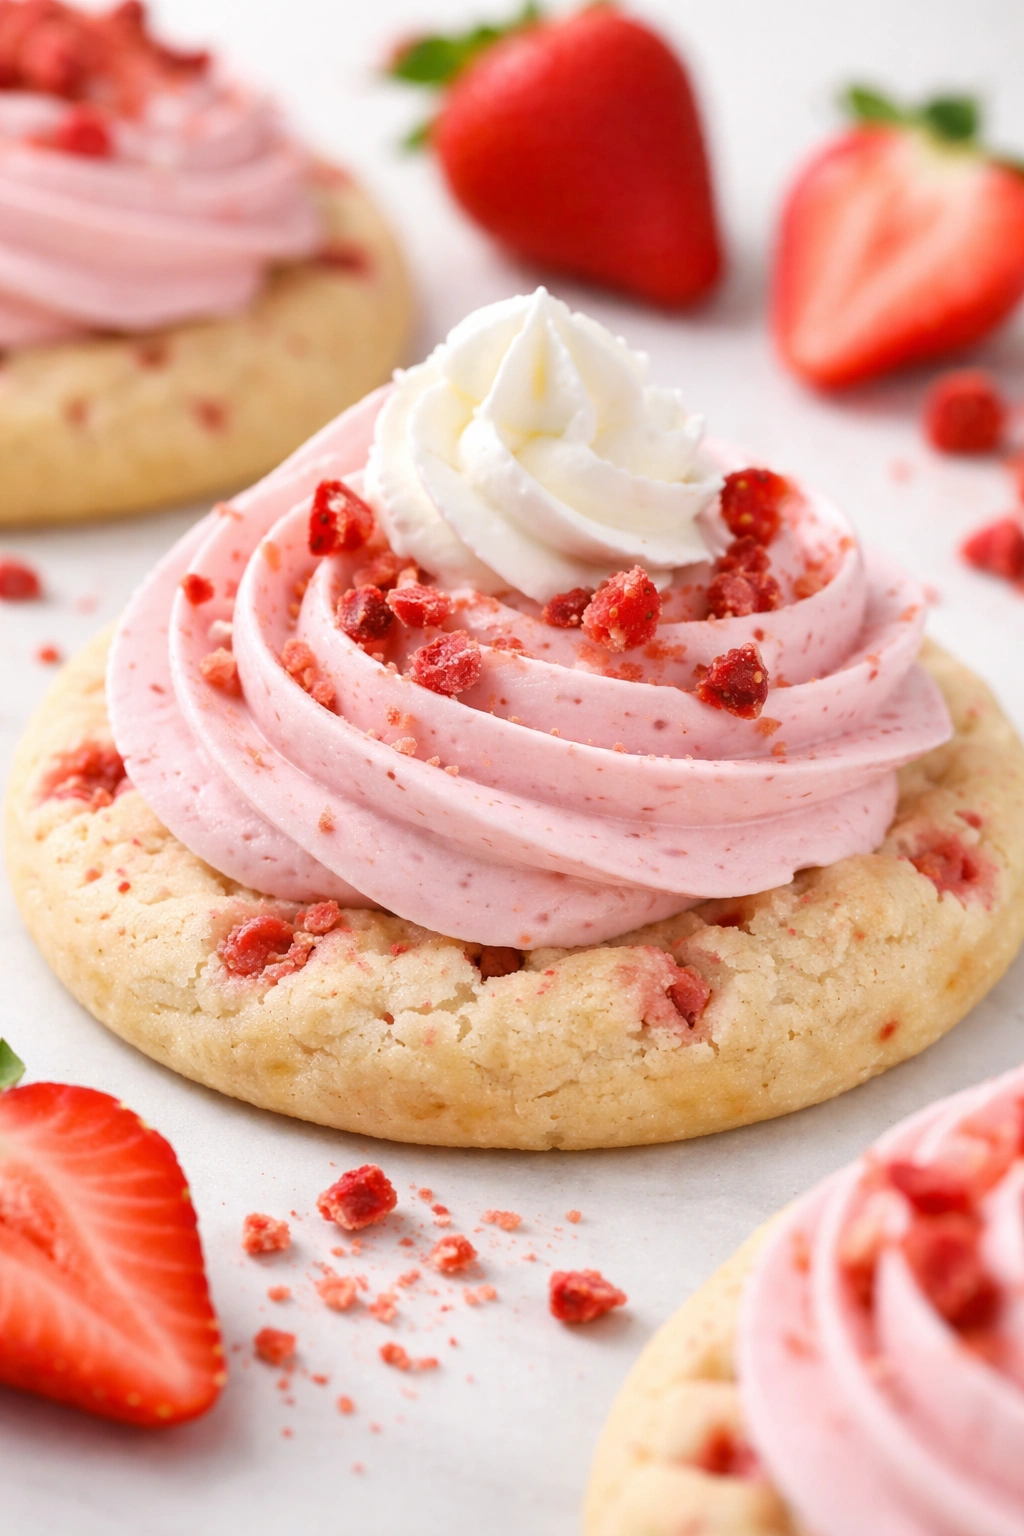
This is Crumbl’s take on a summer classic — a vanilla cookie base studded with freeze-dried strawberry pieces, topped with a strawberry buttercream and a dollop of whipped cream. It’s fruity, elegant, and tastes like summer in a single bite.
Yield: Makes 12 large cookies
Prep Time: 25 minutes
Chill Time: 4 hours minimum (overnight preferred)
Bake Time: 12-14 minutes
Total Time: 4 hours 35 minutes active + overnight chilling
Difficulty: Intermediate — Requires making a strawberry buttercream in addition to the cookie dough.
For the Cookie Dough:
- 2¼ cups all-purpose flour
- ½ teaspoon baking soda
- ½ teaspoon fine sea salt
- 1 cup (2 sticks) unsalted butter, softened to room temperature
- ¾ cup granulated sugar
- ¼ cup light brown sugar, packed
- 1 large egg, room temperature
- 1 teaspoon pure vanilla extract
- ½ cup freeze-dried strawberry pieces, roughly chopped into small fragments
For the Strawberry Buttercream:
- ½ cup (1 stick) unsalted butter, softened to room temperature
- 1 cup powdered sugar, sifted
- 3 tablespoons freeze-dried strawberry powder (or finely ground freeze-dried strawberries)
- ¼ teaspoon vanilla extract
- Pinch of fine sea salt
For Topping:
- Fresh whipped cream (optional but highly recommended)
- Additional freeze-dried strawberry pieces for garnish
Prepare the Dough:
-
In a medium bowl, whisk together the flour, baking soda, and salt. Set aside.
-
Using a stand mixer fitted with the paddle attachment, cream the softened butter, granulated sugar, and brown sugar on medium speed for 3-4 minutes until pale, fluffy, and increased in volume.
-
Add the egg and vanilla extract. Beat for 1 minute on medium speed until fully incorporated. Scrape down the sides.
-
Reduce the mixer to low speed and add the flour mixture in one addition, mixing only until just combined. Do not overmix.
Advertisements -
Using a rubber spatula, fold in the chopped freeze-dried strawberries by hand until evenly distributed. The strawberry pieces should be small enough to remain distributed throughout the dough rather than creating dense pockets.
-
Turn the dough out onto plastic wrap, press into a flat disk, and refrigerate for at least 4 hours, ideally overnight.
Bake the Cookies:
-
Preheat the oven to 350°F (175°C) and line two baking sheets with parchment paper.
-
Remove the dough from the refrigerator. Using a ¼-cup scoop, portion into 12 mounds on the prepared baking sheets, spacing them about 2 inches apart.
-
Bake for 12-14 minutes, rotating the pans halfway through. The edges should be lightly golden and set, with the centers still soft. The freeze-dried strawberries will add specks of deep pink throughout the cookie.
-
Let cool on the baking sheet for 5 minutes, then transfer to a wire rack to cool completely.
Make the Strawberry Buttercream:
-
Using a stand mixer fitted with the paddle attachment (or a hand mixer), beat the softened butter on medium speed for 1-2 minutes until creamy and pale.
-
Add the sifted powdered sugar in two additions, beating for 30-45 seconds after each addition and scraping down the sides of the bowl.
Advertisements -
Add the strawberry powder, vanilla extract, and salt. Beat for another 1-2 minutes until the frosting is smooth, fluffy, and a light pink color.
-
Once the cookies are completely cooled, spread or pipe a generous dollop of strawberry buttercream on top of each cookie. If desired, top with a small spoonful of fresh whipped cream and a few freeze-dried strawberry pieces as garnish.
Tips for Perfect Strawberry Shortcake Cookies:
Freeze-dried strawberries are essential here — they provide concentrated strawberry flavor and a slight crunch that’s part of the cookie’s appeal. Fresh strawberries would add moisture and won’t distribute properly through the dough.
Worth knowing: You can find strawberry powder online or at specialty baking stores. If you can’t find it, grind freeze-dried strawberries into a fine powder using a food processor or blender, then strain through a fine-mesh sieve to remove any large pieces.
The buttercream should be spreadable but not runny. If it’s too soft, chill it for 10-15 minutes before frosting the cookies.
Storage and Make-Ahead:
These cookies with frosting last 3-4 days in an airtight container at room temperature. Don’t refrigerate them unless absolutely necessary — cold temperatures make the buttercream stiff and less enjoyable. You can bake the cookies and freeze them unfrosted for up to 2 months, then frost and serve them fresh. The whipped cream topping is best added within an hour of serving.
Cinnamon Roll Crumbl Cookie
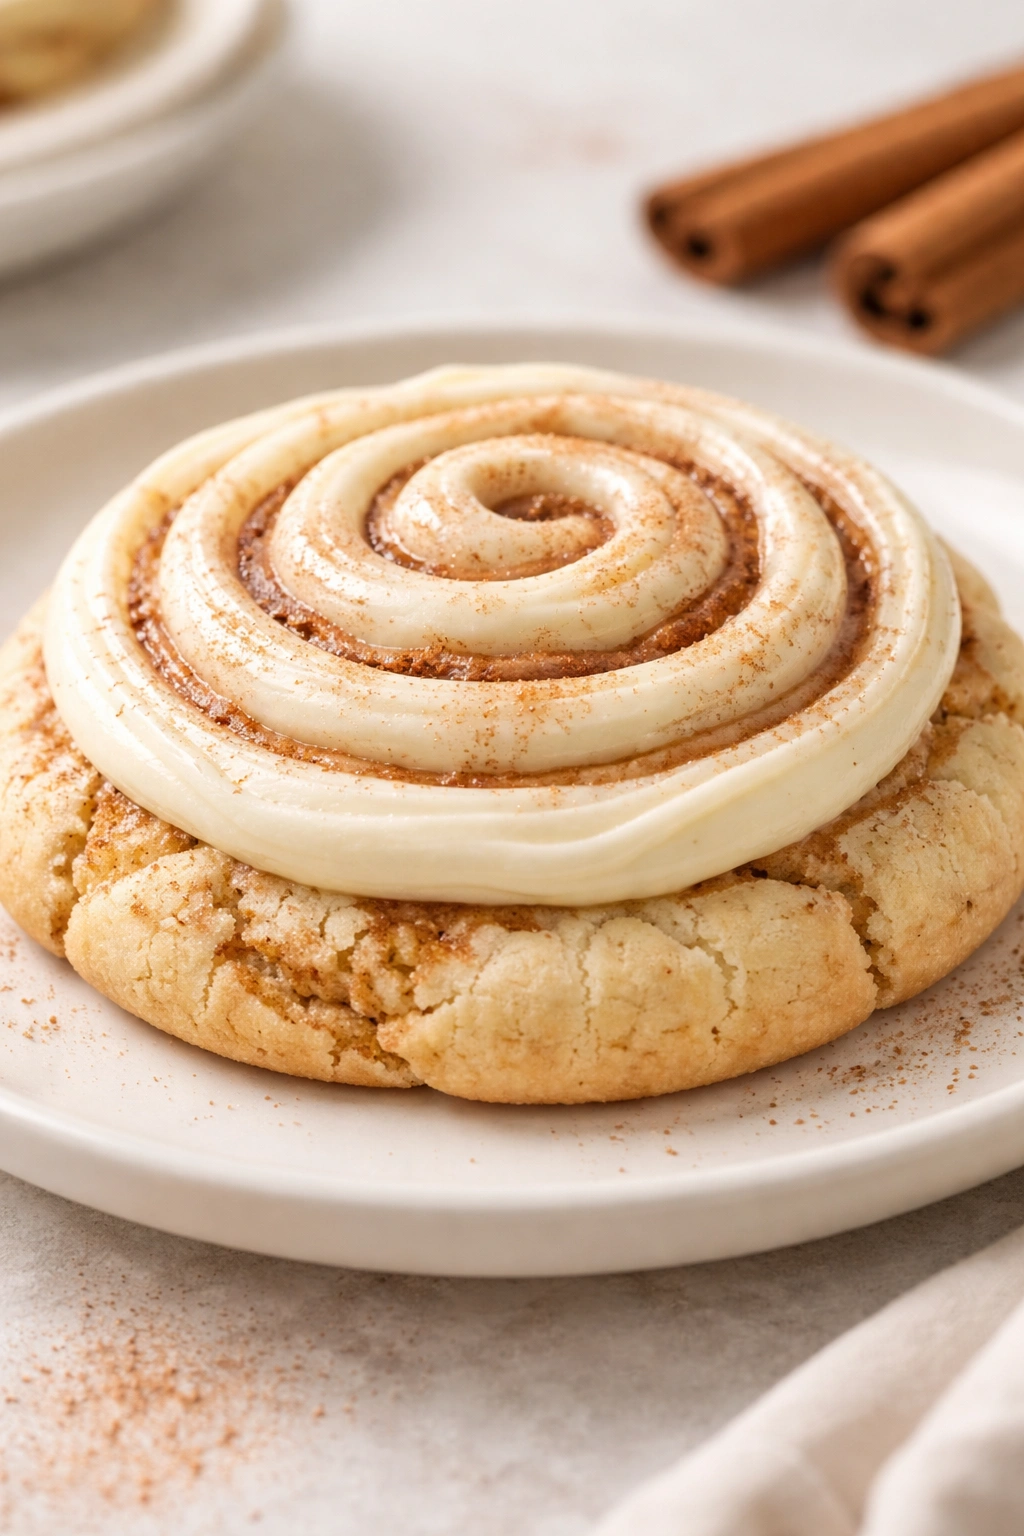
This flavor reimagines the beloved cinnamon roll as a cookie — a vanilla dough with a cinnamon-brown sugar swirl throughout, topped with a cream cheese frosting that tastes exactly like cinnamon roll icing.
Yield: Makes 12 large cookies
Prep Time: 30 minutes
Chill Time: 4 hours minimum (overnight preferred)
Bake Time: 13-15 minutes
Total Time: 5 hours active + overnight chilling
Difficulty: Intermediate — Requires incorporating a cinnamon swirl into the dough before chilling.
For the Cookie Dough:
- 2¼ cups all-purpose flour
- ½ teaspoon baking soda
- ½ teaspoon fine sea salt
- 1 cup (2 sticks) unsalted butter, softened to room temperature
- ¾ cup granulated sugar
- ¼ cup light brown sugar, packed
- 1 large egg, room temperature
- 1 teaspoon pure vanilla extract
For the Cinnamon Swirl:
- 3 tablespoons unsalted butter, melted
- ⅓ cup light brown sugar, packed
- 1½ teaspoons ground cinnamon
- Pinch of fine sea salt
For the Cream Cheese Frosting:
- 4 ounces cream cheese, softened to room temperature
- 3 tablespoons unsalted butter, softened to room temperature
- ¾ cup powdered sugar, sifted
- ½ teaspoon vanilla extract
- Pinch of fine sea salt
Prepare the Dough:
-
In a medium bowl, whisk together the flour, baking soda, and salt. Set aside.
Advertisements -
Using a stand mixer fitted with the paddle attachment, cream together the softened butter, granulated sugar, and brown sugar on medium speed for 3-4 minutes until pale and fluffy.
-
Add the egg and vanilla extract. Beat for 1 minute on medium speed until fully incorporated. Scrape down the sides.
-
Reduce the mixer to low speed and add the flour mixture in one addition, mixing only until just combined. Do not overmix. The dough should look unified but not overworked.
Add the Cinnamon Swirl:
-
In a small bowl, whisk together the melted butter, brown sugar, cinnamon, and salt until it resembles wet sand.
-
Turn the dough out onto a large piece of plastic wrap. Using a rolling pin, gently roll the dough into a rough rectangle about ¼-inch thick. Spread the cinnamon mixture evenly over the entire surface of the dough, using an offset spatula or the back of a spoon.
-
The key here is not to overwork the dough. You’re not making a cinnamon roll, so you don’t need to roll it tightly. Instead, simply fold the dough in half (or even thirds) and gently press it back into a disk shape, creating a marbled effect with the cinnamon mixture distributed throughout. Some swirls and unevenness is part of the charm and authenticity of this cookie.
-
Wrap tightly in plastic wrap and refrigerate for at least 4 hours, ideally overnight.
Bake the Cookies:
-
Preheat the oven to 350°F (175°C) and line two baking sheets with parchment paper.
Advertisements -
Remove the dough from the refrigerator. Using a ¼-cup scoop, portion into 12 mounds on the prepared baking sheets, spacing them about 2 inches apart. The cinnamon swirl might create slightly irregular shapes — that’s perfect.
-
Bake for 13-15 minutes, rotating the pans halfway through. The edges should be set and lightly golden, and you’ll see the cinnamon swirls on the surface. The centers should still feel soft when gently pressed.
-
Let cool on the baking sheet for 5 minutes, then transfer to a wire rack to cool completely.
Make the Cream Cheese Frosting:
-
Using a stand mixer fitted with the paddle attachment (or a hand mixer), beat together the softened cream cheese and butter on medium speed for 1-2 minutes until smooth and combined.
-
Add the sifted powdered sugar in two additions, beating for 30-45 seconds after each addition and scraping down the sides of the bowl.
-
Add the vanilla extract and salt. Beat for another 30-45 seconds until the frosting is light, fluffy, and spreadable.
-
Once the cookies are completely cooled, spread a generous layer of cream cheese frosting on top of each cookie.
Tips for Perfect Cinnamon Roll Cookies:
Don’t overwork the dough when incorporating the cinnamon mixture. The goal is marbled, rustic swirls throughout, not a perfectly even distribution. Some cookies will have more cinnamon, some less, and that’s exactly how they should be.
Pro tip: If your cream cheese frosting seems too soft to spread, refrigerate it for 10-15 minutes before frosting the cookies. It should be spreadable but hold its shape.
The cinnamon-to-sugar ratio in the swirl is intentionally generous — this is what creates that authentic cinnamon roll flavor experience.
Storage and Make-Ahead:
These cookies last 3-4 days in an airtight container at room temperature. Do not refrigerate unless absolutely necessary — cold temperatures make the frosting firm and less enjoyable. Unbaked dough freezes beautifully for up to 3 months. Bake from frozen, adding 1-2 minutes to the bake time.
Cookie Decorating and Flavor Variations
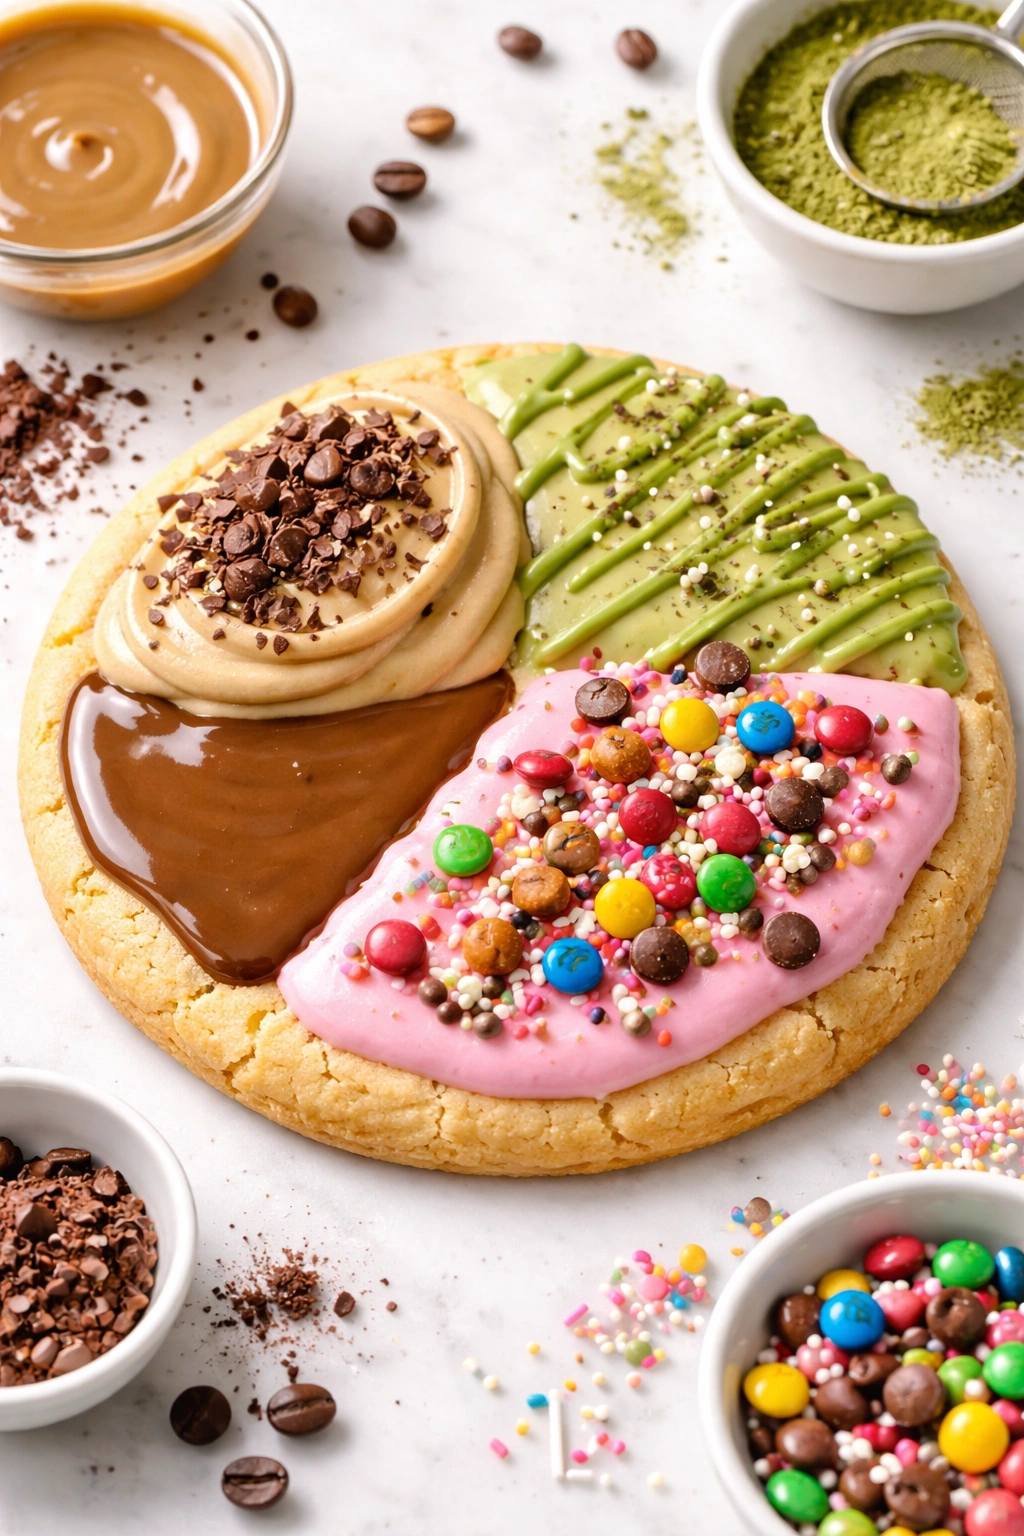
Once you’ve mastered the base Crumbl-style cookie, the possibilities multiply. The foundation is forgiving and takes well to variations. You can add espresso powder to chocolate dough, incorporate matcha for a green tea flavor, add crushed candy pieces, swirl in peanut butter, or layer flavors on top with creative frosting combinations.
When decorating, remember that Crumbl keeps their presentation relatively simple — usually just a frosting or glaze with minimal additional toppings. But that’s their choice; your kitchen, your rules. Sprinkles, drizzles, edible glitter, crushed cookies, nuts, or chocolate shavings all work beautifully. Let the glaze or frosting set before adding toppings so they don’t sink in.
The glaze-to-cookie ratio matters. You want enough glaze that it’s visible and creates that signature look, but not so much that it’s overwhelming or drips everywhere when bitten. When glazing, dip only the top third to half of the cookie for the most elegant appearance. Let excess drip off naturally rather than trying to be too neat about it.
Troubleshooting Your Copycat Crumbl Cookies
If your cookies spread too thin, your dough wasn’t cold enough. Extend the chilling time next time, or portion the dough onto baking sheets and chill those for 30 minutes right before baking.
If your cookies bake up too cake-like and not pillowy enough, you likely overmixed the dough. Mix only until ingredients just disappear into the dough — streaks of flour are fine, overmixing is not. Overmixing develops gluten, which makes the cookies tough and dense rather than tender.
If your cookies are too crispy, you either baked them too long or your oven runs hot. Try reducing the bake time by 1-2 minutes next time, or lower the oven temperature by 10-15°F. Remember, the cookies should look slightly underbaked when you pull them from the oven.
If your glaze or frosting is too thin, you added too much liquid. Add a bit more powdered sugar to thicken it. If it’s too thick, add liquid one teaspoon at a time. If it’s grainy, the sugar might not be sifted — sift and rewhisk.
Final Thoughts
Crumbl-style cookies aren’t complicated, but they do require attention to detail and respect for the technique. The magic isn’t in unusual ingredients or secret tricks — it’s in the fundamentals: quality ingredients, proper creaming, adequate chilling, and knowing when to pull them from the oven. Once you internalize these principles, you’ll be able to bake these cookies in your sleep, and you’ll never need to wait in line or overpay for a cookie again.
The real satisfaction comes from pulling a batch of homemade Crumbl-style cookies from your oven, seeing them still soft and pillowy hot from the bake, glazing them exactly how you want, and biting into something that tastes every bit as indulgent as the original — maybe even better, because you made it yourself. Start with the vanilla version to learn the technique, then experiment with the variations once you’re confident. Your kitchen is about to smell incredible, and your friends are going to wonder where you’re ordering these from until you tell them you made them at home.