When your energy dips in the afternoon or you need something to fuel a workout, reaching for a handful of homemade energy balls beats diving into your pantry for packaged snacks every single time. These little spheres of concentrated nutrition taste like dessert — rich, satisfying, and genuinely crave-worthy — but they’re built from whole ingredients your body actually recognizes and uses. Unlike commercial energy bars loaded with refined sugars and unpronounceable additives, homemade energy balls give you real control over every single ingredient, letting you dial in exactly how sweet, nutty, chocolatey, or protein-packed you want them to be.
The beauty of energy balls isn’t just nutritional — it’s practical. You can batch-make them on Sunday afternoon and grab them throughout the week without any thinking or prep required. Toss them in a container in your bag, leave them in your desk drawer, or stash them in the freezer for months of ready-to-go fuel. They require no baking, no special equipment, and almost no actual cooking skill — just a food processor and maybe five minutes of your time, plus a few hours of chilling. Even first-time cooks find these nearly foolproof.
I’ve made energy balls in dozens of flavor combinations over the years, and I’ve learned what actually works versus what sounds good in theory but ends up dry, crumbly, or unappealing after a day in the fridge. The ones that have earned permanent rotation in my kitchen are the recipes I’m sharing here — straightforward, genuinely delicious, and endlessly adaptable to whatever ingredients and tastes you prefer. Let’s walk through how to make them perfectly every single time.
What Energy Balls Are and Why They’re Perfect

Energy balls are no-bake, bite-sized protein snacks made by combining a base of nuts or seeds with a sticky binder — usually nut butter, dates, or coconut oil — plus mix-ins like chocolate chips, dried fruit, or coconut flakes. The mixture gets rolled into small spheres, then chilled until firm. What makes them so practical is that they require absolutely zero baking knowledge and come together in under fifteen minutes of hands-on time.
The real magic is how energy-dense they are compared to their tiny size. A single walnut-sized energy ball packs protein, healthy fats, and naturally-occurring carbohydrates that stabilize your blood sugar and actually fuel your body instead of sending you on a sugar crash two hours later. Because they’re concentrated nutrition, they’re genuinely satisfying — one or two is usually enough to push through an afternoon slump or refuel after exercise, rather than needing to eat half a granola bar to feel satisfied.
Why Homemade Energy Balls Beat Store-Bought

Commercial energy bars and balls often rely on sweeteners like high-fructose corn syrup, agave nectar, or artificial alternatives that your body processes quickly, leaving you hungry again shortly after eating. They’re also packed with preservatives and stabilizers that keep them shelf-stable for months but do nothing for your actual nutrition. When you make energy balls at home, you know exactly what’s going in — you can skip the stuff you don’t want and add more of what you do.
Homemade energy balls also cost a fraction of what you’d pay for equivalent store-bought versions. A batch of twenty balls might cost three or four dollars in ingredients, while pre-made bars often run two dollars per single bar. Over weeks and months, that adds up fast. Beyond the cost and ingredient transparency, homemade versions let you customize the texture, sweetness level, and flavor profile in ways no commercial product can match. You can make them denser or chewier, more chocolate-forward or more subtle, or tailor them to your specific dietary needs — whether that’s keto, vegan, paleo, or completely allergen-free.
The Key Ingredients You’ll Need
The foundation of every energy ball is a combination of something chunky and something sticky. The chunky part usually comes from nuts (almonds, walnuts, pecans), seeds (sunflower, pumpkin, hemp), or dried fruits like dates and figs. The sticky part is typically a nut butter like almond, peanut, or cashew, sometimes combined with a small amount of coconut oil or honey to get the texture just right.
From there, you layer in flavor and nutrition. Cocoa powder, dark chocolate chips, vanilla extract, and cinnamon are flavor staples that appear in nearly every successful energy ball recipe. Many recipes include a protein boost — either plant-based protein powder, collagen, or extra nuts — though it’s not strictly necessary if you’re already using nuts and nut butter as your base. Dried fruits like cranberries, raisins, and apricots add natural sweetness and chewiness, while seeds like chia and flax add nutritional density without much flavor. Once you understand these categories and how they work together, you can confidently improvise variations.
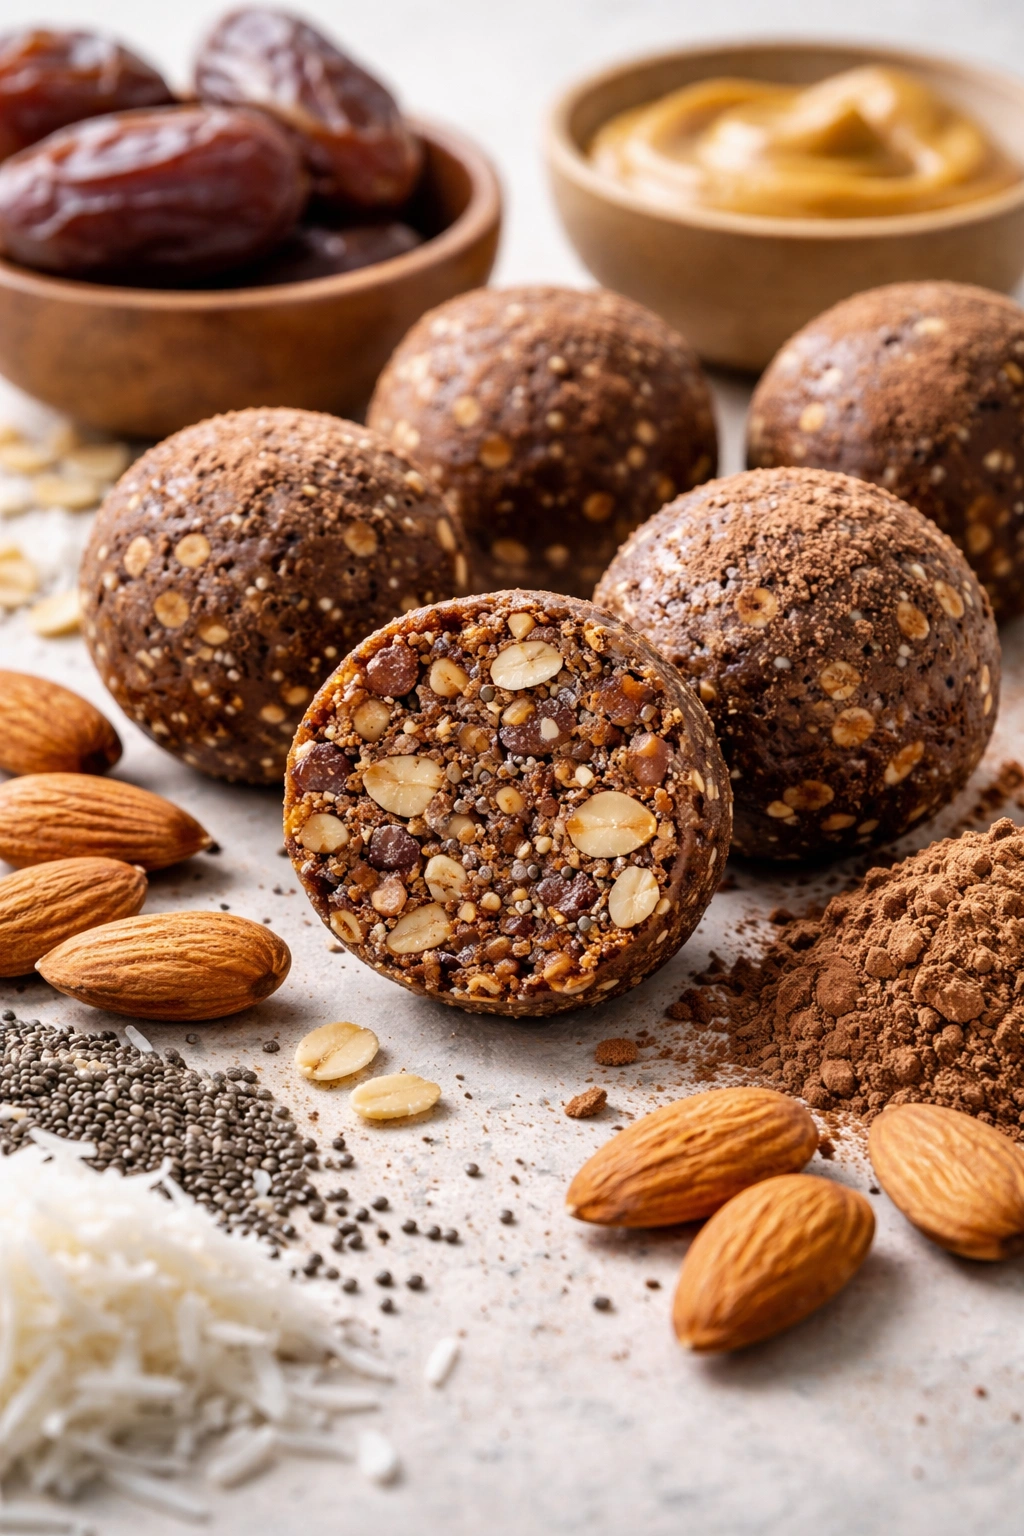
No-Bake Chocolate-Almond Energy Balls with Dates
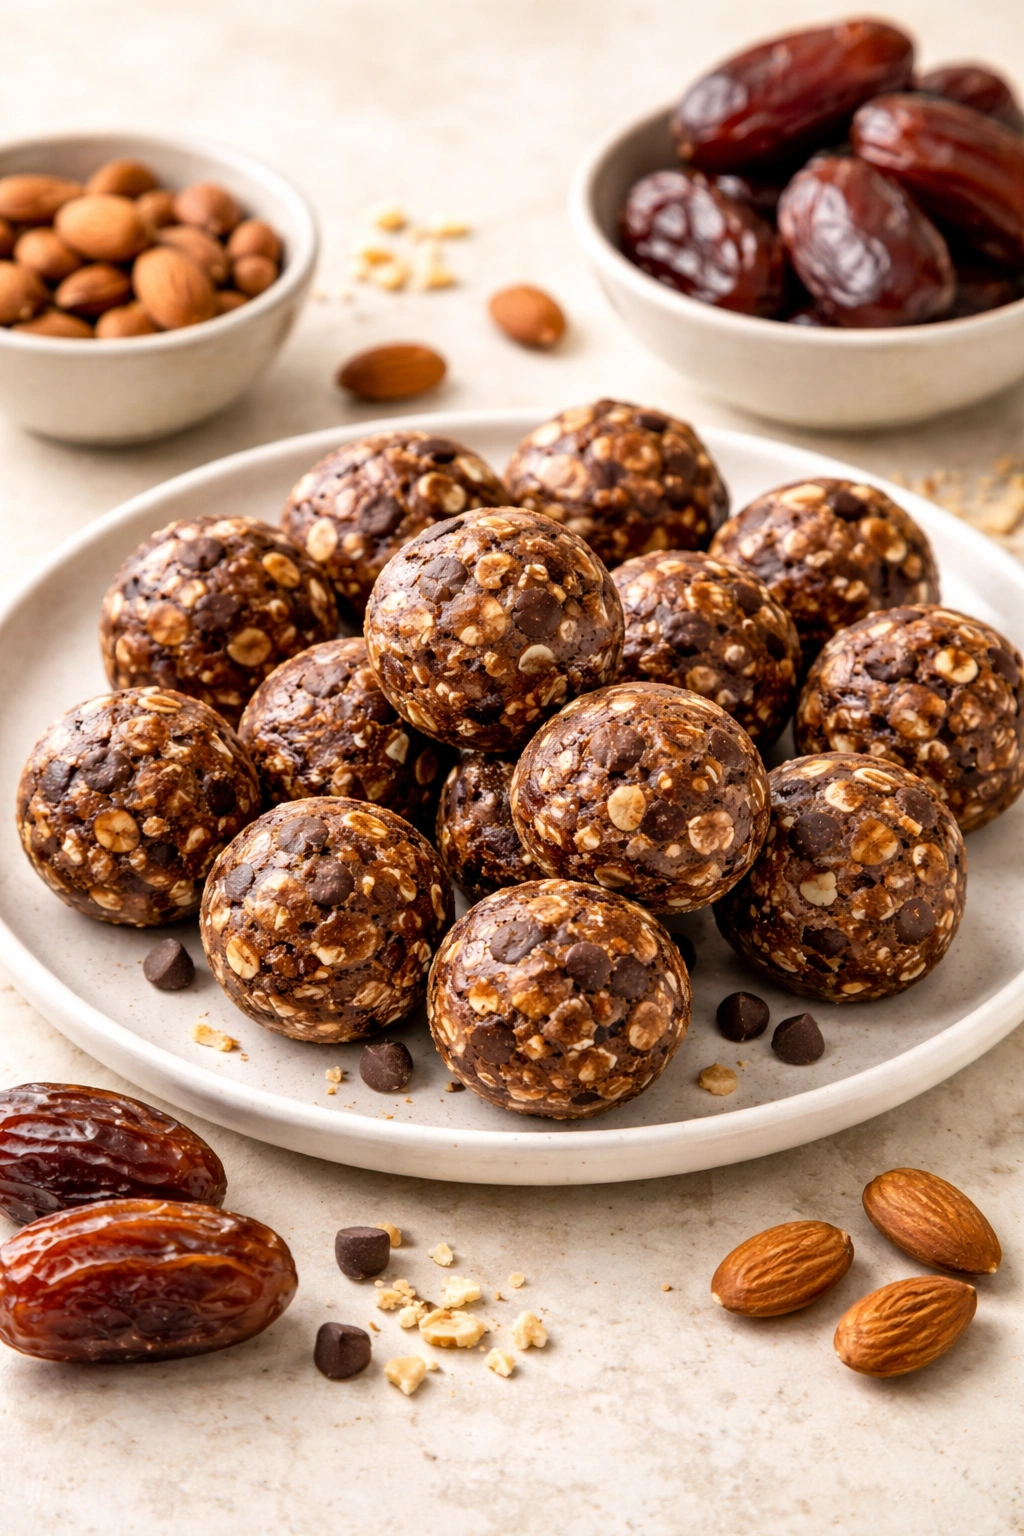
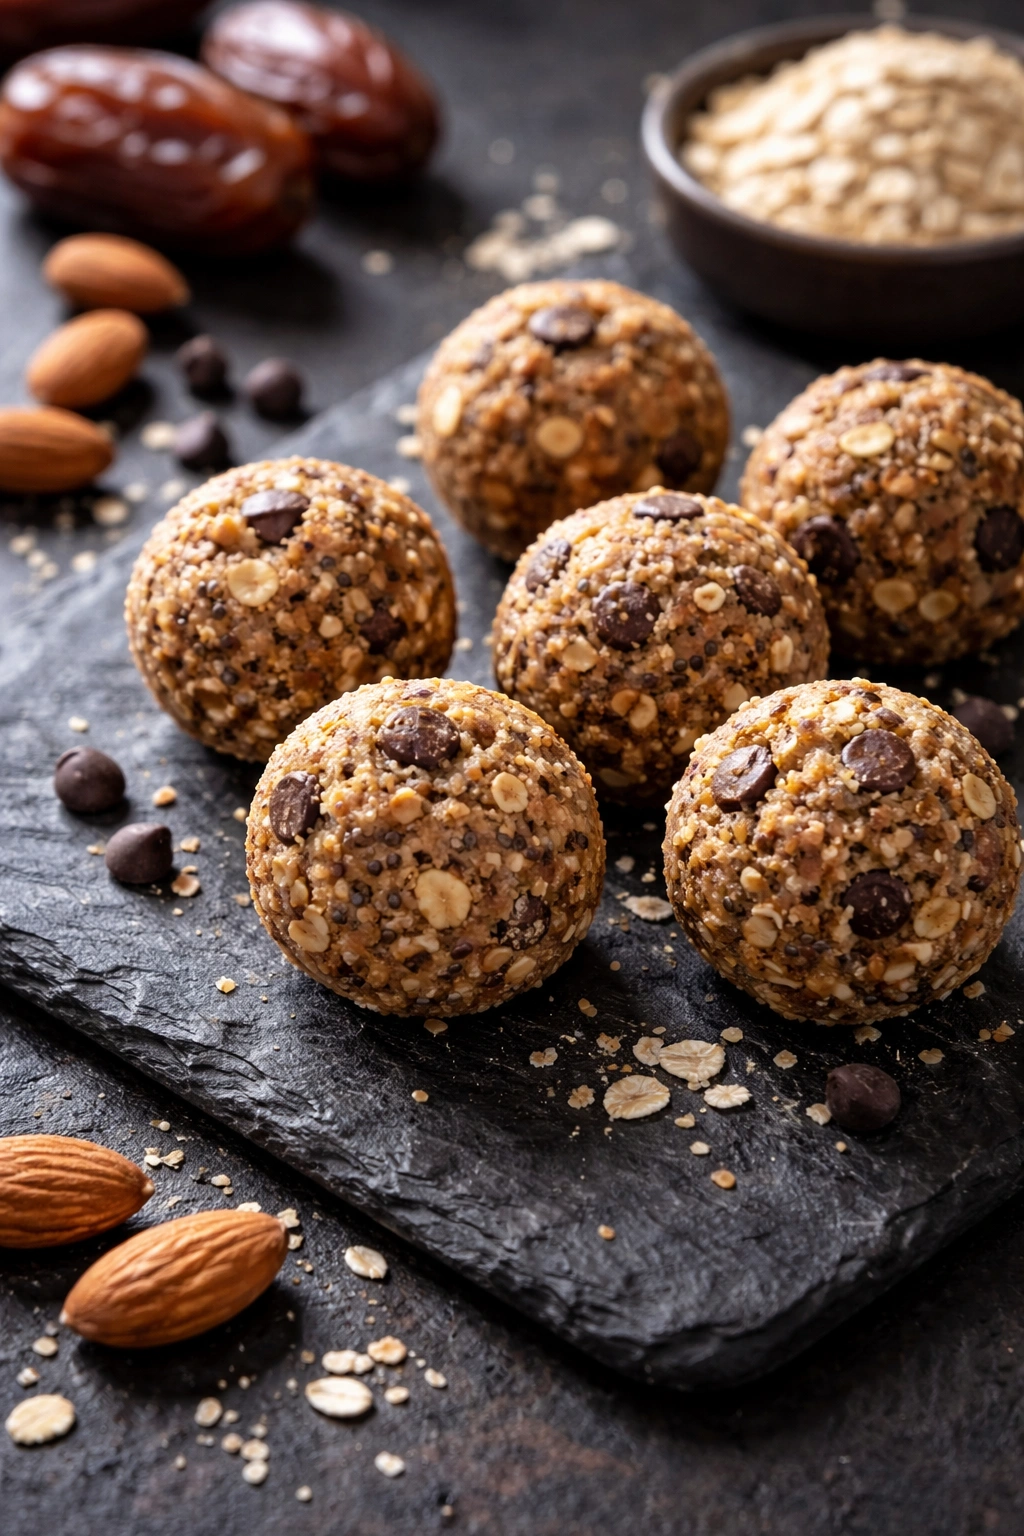
The version I make most often combines chewy dates, toasted almonds, and dark chocolate with a hint of sea salt that makes the chocolate flavor pop. The dates do most of the heavy lifting as a binder — they’re naturally sticky and sweet, which means you need almost no added sweetener. These balls end up dense and satisfying, the kind you eat slowly instead of mindlessly munching through.
Yield: Makes about 20 energy balls (about 10 servings of 2 balls each)
Prep Time: 15 minutes
Cook Time: None
Total Time: 15 minutes active + 2 hours chilling
Difficulty: Beginner — no special equipment beyond a food processor, and the steps are straightforward.
Ingredients
For the Energy Balls:
- 1 cup raw almonds (about 5.3 ounces)
- 1 cup pitted Medjool dates (about 8 ounces, roughly 18-20 whole dates)
- ⅓ cup natural almond butter (or peanut butter if you prefer)
- 3 tablespoons unsweetened cocoa powder
- ⅓ cup dark chocolate chips (60-70% cacao or higher)
- 1 teaspoon pure vanilla extract
- ¼ teaspoon fine sea salt
- 2 tablespoons coconut oil, refined and neutral (optional but helpful if your dates are quite dry)
For Rolling (optional):
- 2 tablespoons unsweetened cocoa powder
- 2 tablespoons shredded unsweetened coconut
- 1 tablespoon finely chopped dark chocolate or cocoa nibs
Instructions
Prepare Your Ingredients:
-
Roughly chop the almonds into smaller pieces — about the size of a pea — using a food processor with the pulse setting, about 20-30 quick pulses. Don’t grind them into a fine powder; you want some texture and bite to remain. Transfer the chopped almonds to a large mixing bowl and set aside.
-
Add the pitted dates to the same food processor (no need to wash it between batches) and pulse until the dates are broken down into very small pieces with some moisture visible and clinging to the sides, roughly 15-20 pulses. The dates should look like damp breadcrumbs more than a paste.
Combine Everything:
-
Pour the processed dates into the bowl with the chopped almonds. Add the almond butter, cocoa powder, chocolate chips, vanilla extract, and sea salt.
-
Fold everything together with a sturdy spatula or wooden spoon, pressing gently as you fold to help the sticky date pieces distribute evenly and start binding everything. The mixture will come together more and more as you work it. If the mixture feels quite dry and crumbly after a minute of folding and doesn’t hold together when squeezed, add the optional coconut oil one tablespoon at a time until it reaches a texture that holds together but isn’t wet or oily.
-
Test the consistency by pressing a small handful of the mixture — it should stick together firmly without being damp or greasy. The mixture won’t be as smooth as cookie dough; it’ll have a chunky, lumpy texture, and that’s exactly what you want.
Advertisements
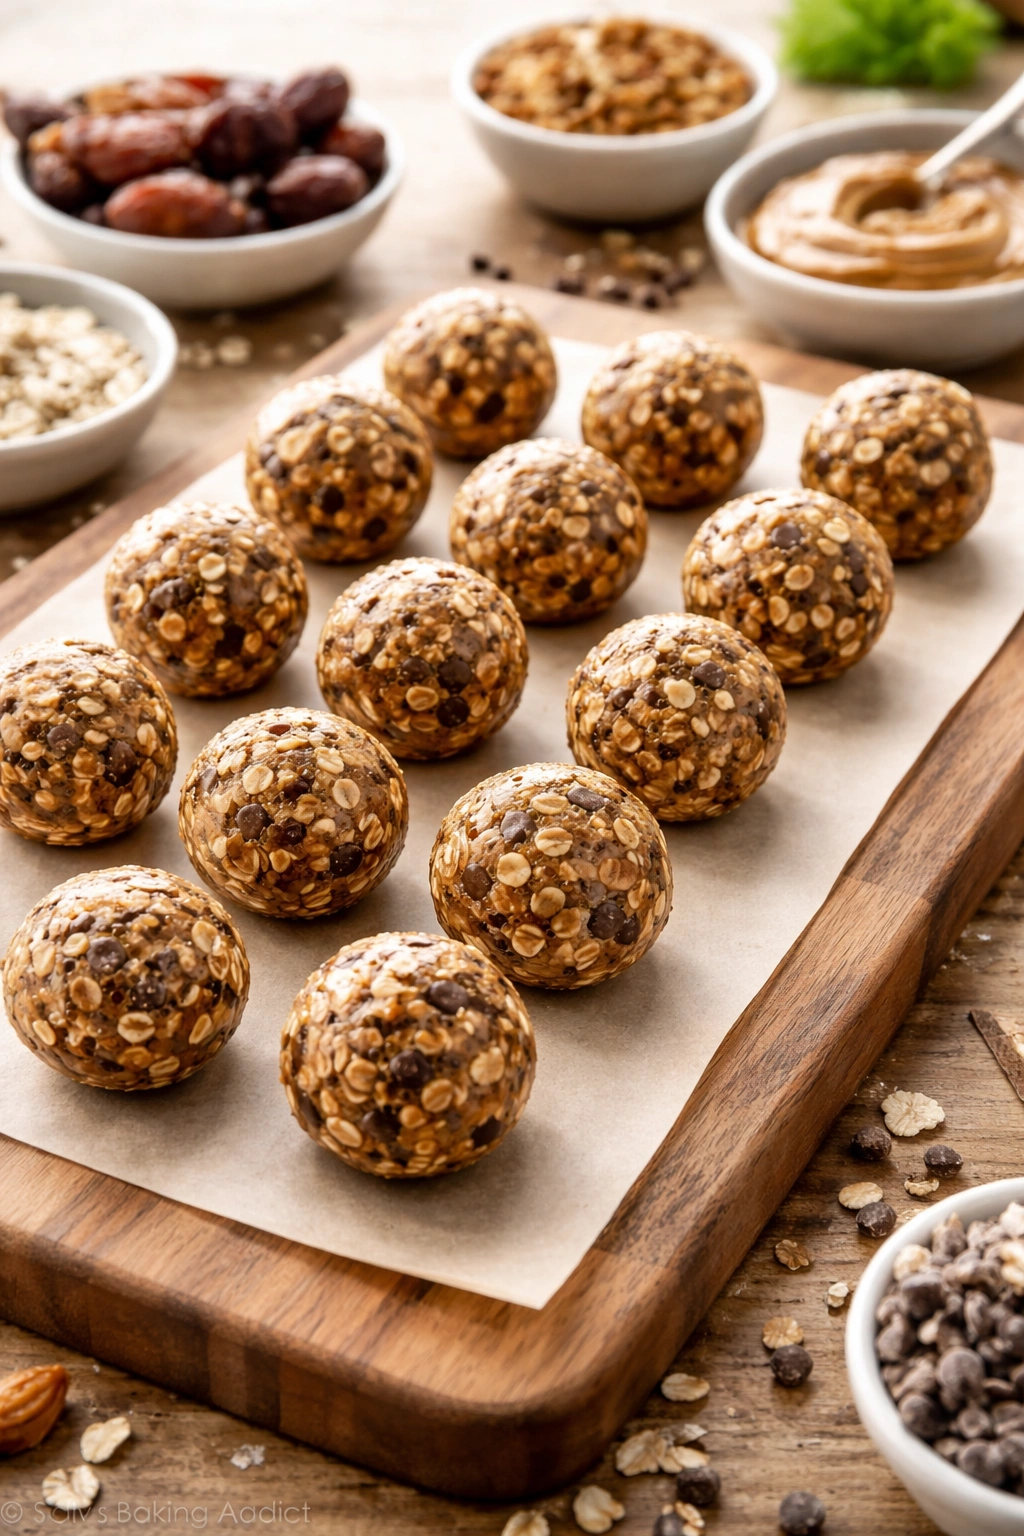
Roll and Chill:
-
Scoop the mixture using a small cookie scoop (the kind that holds about 1 tablespoon of dough) or a melon baller, depositing each scoop onto a parchment-lined baking sheet. Aim for consistent size so they chill evenly — each ball should be roughly the size of a walnut in its shell.
-
Using the palms of your hands, roll each scoop into a smooth ball. The warmth of your hands will make the mixture slightly more pliable, which helps it hold together better. Don’t overthink this step — they don’t need to be perfectly spherical, and some slight visible texture is actually appealing.
-
If you want to coat them, roll each ball in one of the optional coatings: cocoa powder for a matte, sophisticated finish; shredded coconut for a tropical vibe; or chopped dark chocolate for a bumpy, decadent look. You can also leave them uncoated and plain — they look beautiful either way.
-
Place the rolled balls on a parchment-lined baking sheet and transfer to the refrigerator for at least 2 hours, or until they feel firm throughout when you gently squeeze one. They’ll firm up further as they chill.
Storage:
- Once chilled and firm, transfer the energy balls to an airtight container. They’ll keep in the refrigerator for up to two weeks, or frozen for up to three months. You can eat them straight from the fridge or freezer — they taste equally good at either temperature.
Tips for Perfect Energy Balls

The single most important thing to get right is the date quality. Medjool dates are naturally moist and sweet, which makes them perfect for binding — other varieties like Deglet Noor are often drier and will create a crumbly mixture that won’t hold together. If you buy dates and find them quite hard or dry, soak them in warm water for ten minutes before processing, then drain and pat them dry. This restores their moisture without making the mixture wet.
Your food processor should be powerful enough to break down almonds into small pieces without creating a nut butter. If your processor is small or older, pulse in shorter intervals and check frequently — you want pieces the size of lentils or peas, not powder or paste. Conversely, if you pulse too much, the almonds will warm up and start releasing their oils, which can make your energy balls greasy and overly dense. Stop as soon as the pieces look right.
The temperature of your kitchen matters. If it’s quite warm, the chocolate chips and coconut oil in the mixture will stay slightly softer for longer, which means longer chilling times. Cold kitchens are your friend here — the mixture sets up faster and holds together better. If you live somewhere warm, chill the mixing bowl and your hands before rolling for easier handling.
When rolling, resist the urge to make them perfectly smooth or to press them too firmly. The mixture is fragile at room temperature, and squeezing too hard can compress them and change the texture in the finished product. Roll gently with just enough pressure to keep them together. Once they’re chilled, they’ll be sturdy enough to squeeze or bite without falling apart.
Common Mistakes to Avoid
The most frequent mistake is using dates that are too old, hard, or dry to bind the mixture properly. You end up with a pile of crumbly bits that won’t roll into balls, no matter how much you try. Always taste a date before you buy them in bulk — they should be plump, soft, and chewy, not hard or crystallized. Buying from a store with good turnover ensures fresher dates.
Another common problem is over-processing the almonds and accidentally creating almond butter or almond flour instead of chopped pieces. This changes the texture of the finished balls, making them too dense and fine-crumbed. The solution is to pulse conservatively, checking your progress frequently. You can always pulse more, but you can’t un-process.
Don’t skip the chilling step thinking your balls will hold together at room temperature. Without proper chilling time, they’ll be soft and may fall apart or squish when you grab them. Two hours is the absolute minimum — overnight is even better. If you’re in a hurry, you can chill them in the freezer for 45 minutes to an hour with similar results.
A subtle but important mistake is adding too much liquid (whether from wet dates, coconut oil, or honey) and creating a mixture that’s more like fudge than a firm dough. Start without liquid additions and only add if the mixture feels truly crumbly and won’t hold together when squeezed. It’s far easier to add a tablespoon more coconut oil than to dry out an overly wet batch.
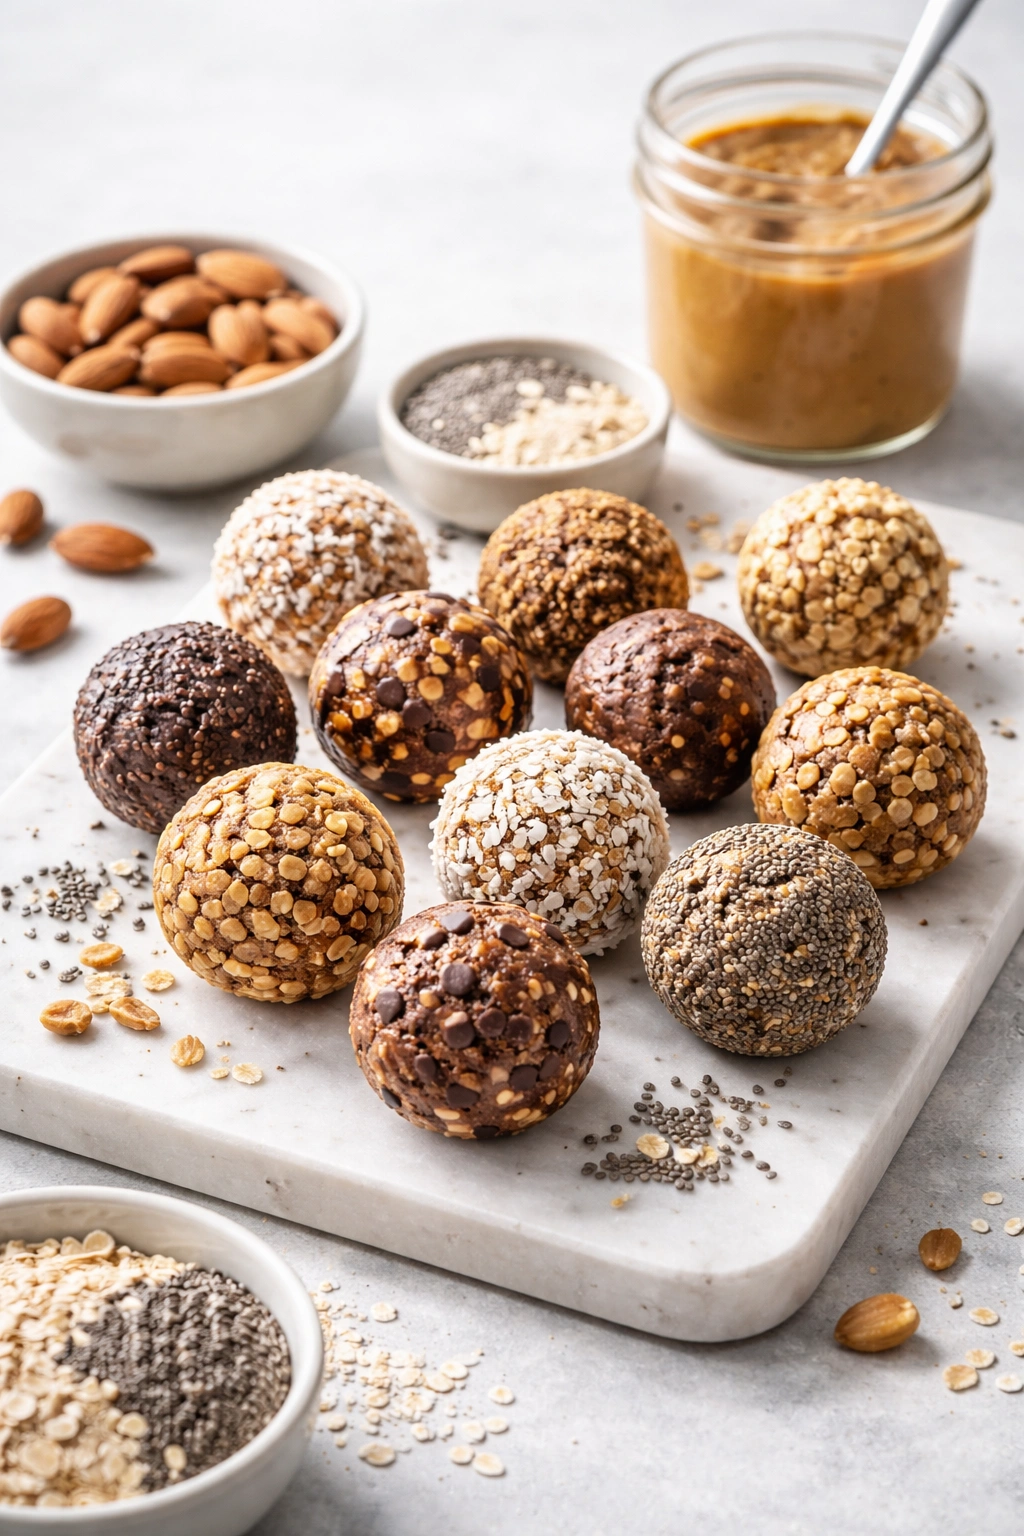
Flavor Variations to Try

The beauty of energy balls is how infinitely adaptable they are. Here are proven flavor combinations that work beautifully:
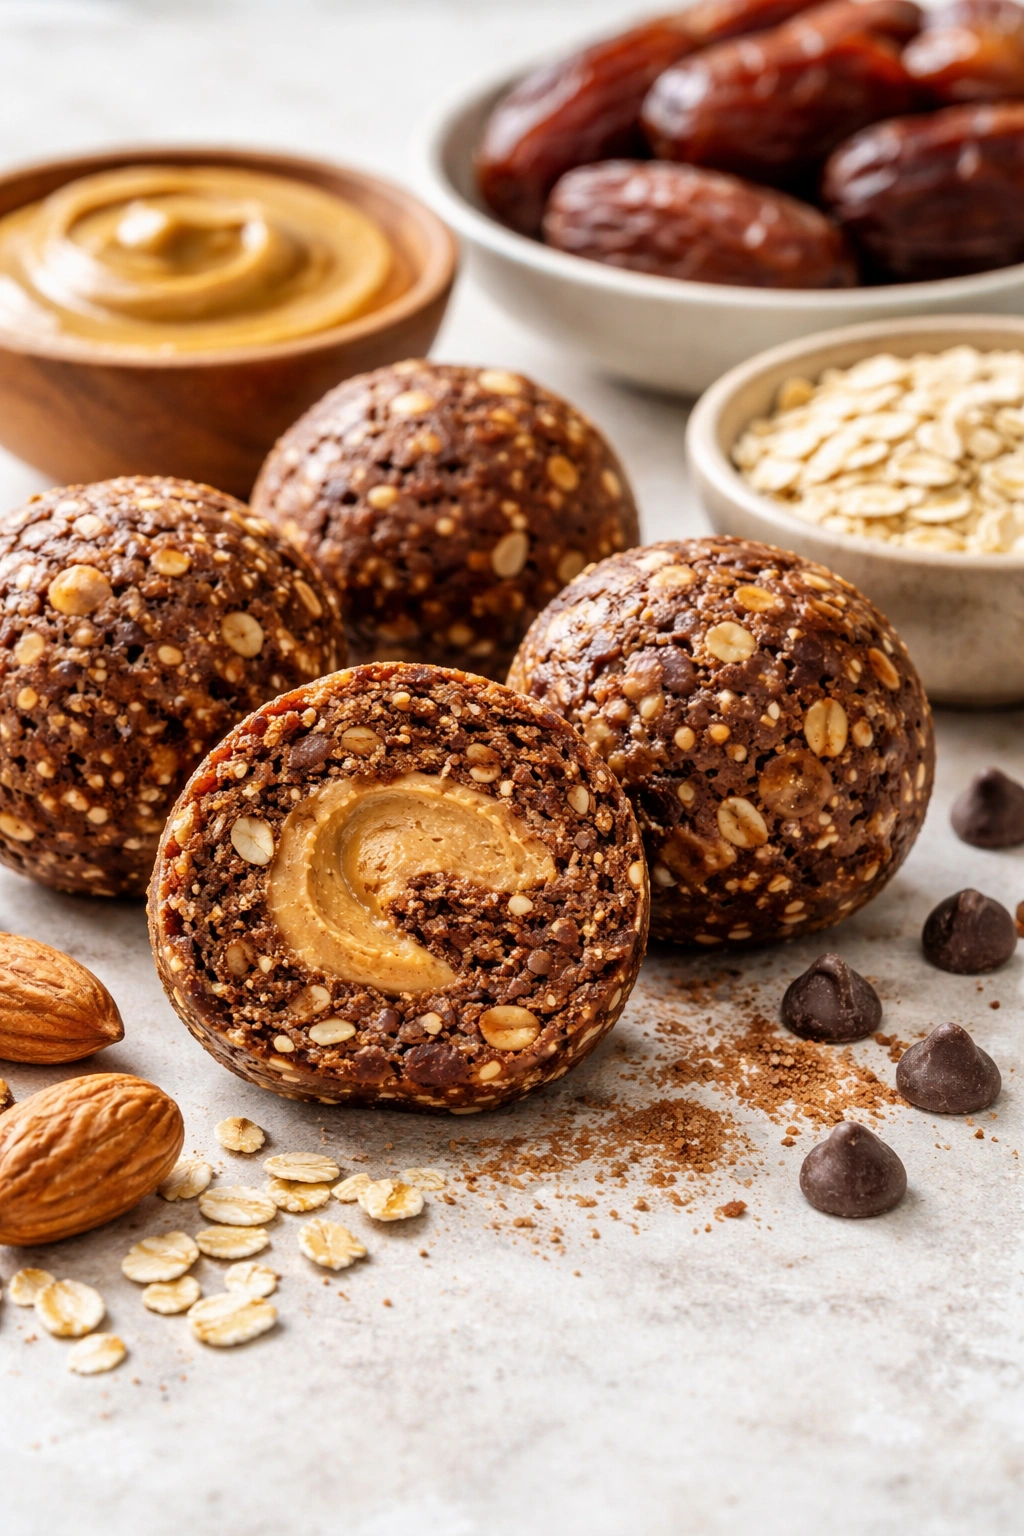
Peanut Butter Cup: Replace the almond butter with natural peanut butter and use an extra ¼ cup dark chocolate chips. Add ½ teaspoon of instant espresso powder if you have it — it deepens the chocolate flavor without making them taste like coffee. These taste like homemade versions of the classic candy.
Coconut Chai: Replace 1 cup of almonds with ¾ cup almonds and ¼ cup shredded unsweetened coconut. Add ¼ teaspoon ground ginger, ⅛ teaspoon ground cardamom, ⅛ teaspoon ground cloves, and a tiny pinch of black pepper along with the cocoa powder. Use only ⅓ cup chocolate chips instead of the full amount. These have warmth and spice underneath the chocolate.
Apple Pie Spice: Replace ¼ cup of almonds with ¼ cup chopped dried apples. Add 1 teaspoon ground cinnamon, ¼ teaspoon ground nutmeg, and a tiny pinch of ground cloves. Omit the cocoa powder and dark chocolate chips entirely. These are sweeter and fruitier than the original, with warming spices throughout.
Triple Nut: Use ⅔ cup raw almonds, ⅓ cup raw walnuts, and ⅓ cup raw pecans. Replace the almond butter with natural cashew butter for a milder, more neutral base. Use the same dates, cocoa, chocolate, and salt. These are nuttier and less chocolate-focused than the original.
Everything But The Kitchen Sink: Keep the almonds and dates, but add ¼ cup seeds (mix of sunflower, pumpkin, and hemp), 2 tablespoons unsweetened coconut flakes, and ¼ teaspoon ground cinnamon along with the cocoa powder. Use ½ cup chocolate chips instead of ⅓ cup. These are the most nutrient-dense version and have a more complex texture.
The key to successful variation is understanding which components are structural (the almonds and dates do the binding) and which are flexible (everything else can be swapped). As long as you keep the almonds and dates as your base, you can experiment with flavor variations confidently.
Storage and Make-Ahead Guide
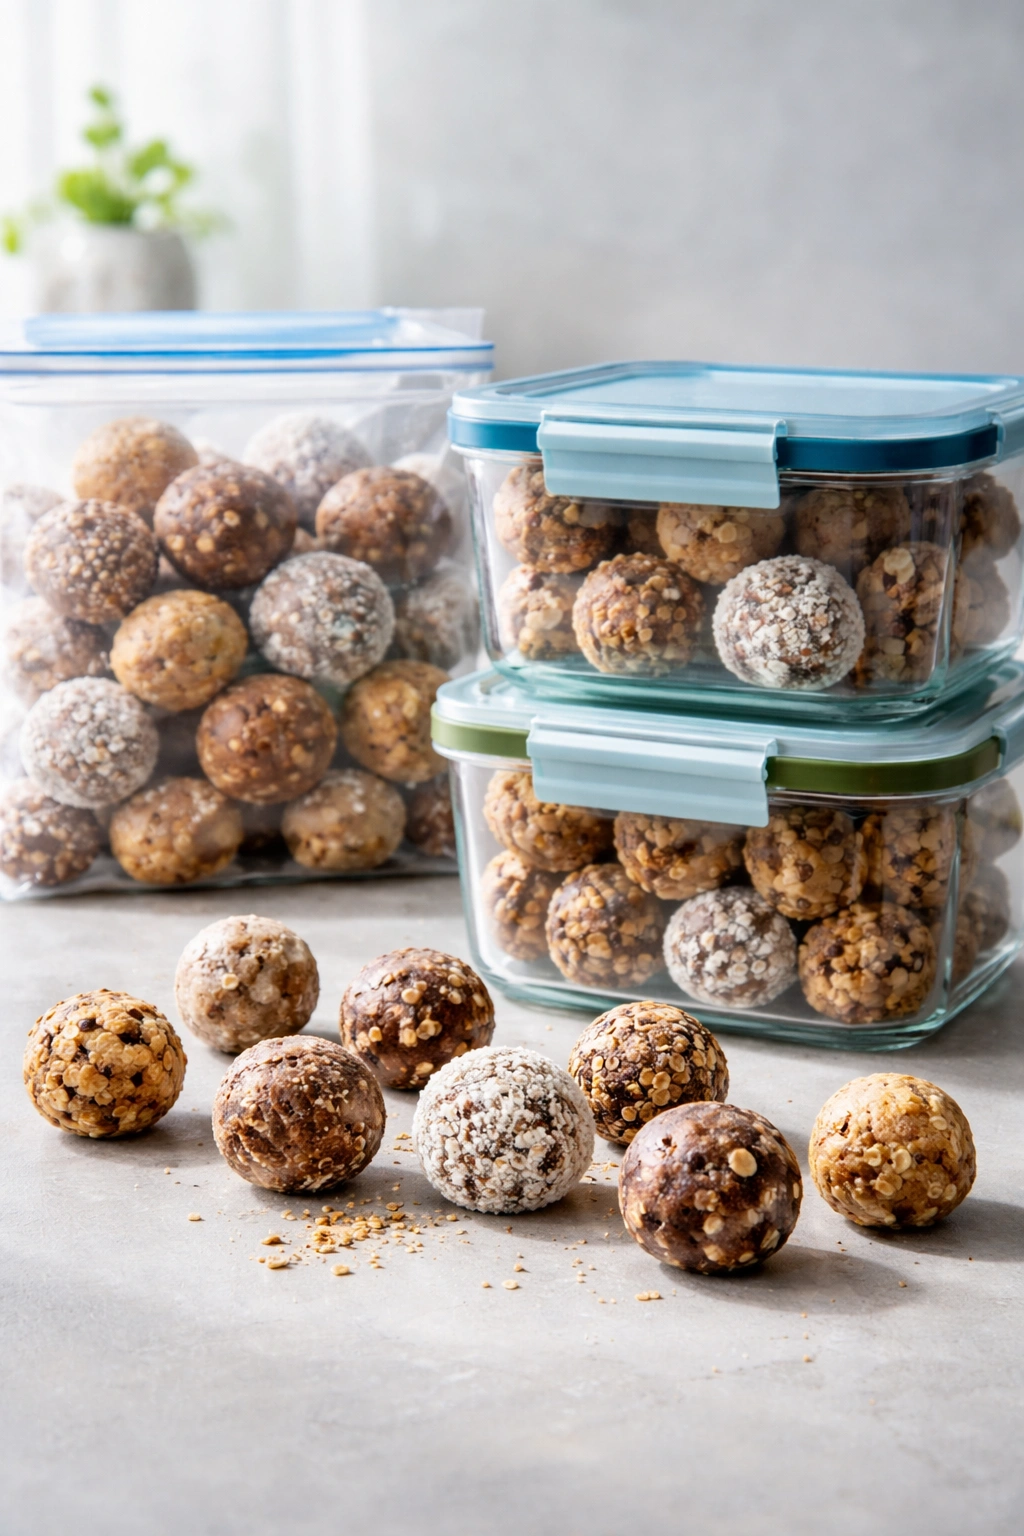
Energy balls are genuinely one of the easiest snacks to prepare in advance. In the refrigerator, they’ll keep perfectly for two weeks in an airtight container — that’s two full weeks of grab-and-go fuel without any degradation in texture or taste. The cold actually helps them hold together better, so pulling one straight from the fridge is ideal.
Frozen energy balls are even more impressive. Stored in an airtight freezer container or freezer bag, they’ll keep for up to three months without any noticeable quality loss. You can eat them straight from the freezer — they take on an almost frozen-truffle texture that’s actually quite pleasant — or let one sit at room temperature for fifteen minutes to soften slightly. Many people prefer them partially frozen because they last longer in your mouth and feel more indulgent.
You can actually make energy balls multiple weeks in advance and simply pull out what you need. Store a few days’ worth in the fridge and keep the rest frozen. This strategy works beautifully if you make a big batch on a Sunday and want to have them ready throughout the month. Just thaw them to room temperature or eat them cold — both work equally well.
The mixture itself also freezes well, though this is less practical than freezing finished balls. If you make the mixture and discover you don’t have time to roll it all out, spread it on a parchment-lined baking sheet, freeze until solid, then break into chunks and store in a freezer bag. You can thaw it slightly and roll the balls whenever you’re ready.
Creative Serving Ideas
Energy balls are endlessly versatile for serving. The simplest approach is what I do most often — pile a handful in a small container and toss in your bag for whenever you need a quick energy boost. Keep them in your desk drawer at work, your gym bag, or your car’s glove compartment. They’re shelf-stable in a cool environment for several hours, which means they’re perfect car snacks for road trips.
For something more intentional, arrange energy balls on a small board with other snacks like nuts, dried fruit, fresh berries, and a small cheese selection. They’re elegant enough for entertaining because they look intentional and thoughtful despite requiring minimal effort. Guests are often surprised when you tell them they’re homemade.
Crumble energy balls over morning oatmeal or yogurt for added texture and nutrition. They soften slightly as they warm, creating little pockets of chocolatey richness throughout your bowl. Add them to smoothie bowls right before serving so they stay intact and provide little pockets of texture and surprise.
Pack a few in a small container as a post-workout snack paired with a banana or glass of milk. The combination of carbohydrates from the fruit or milk with the protein and healthy fats in the energy balls creates a well-rounded refuel that actually helps with recovery.
For something different, serve them as a casual dessert after a light dinner. Pair them with coffee or herbal tea, and offer a few to guests instead of more elaborate desserts. Most people find them more satisfying than a standard cookie because they’re denser and more flavorful.
Pairing Suggestions and Best Times to Eat
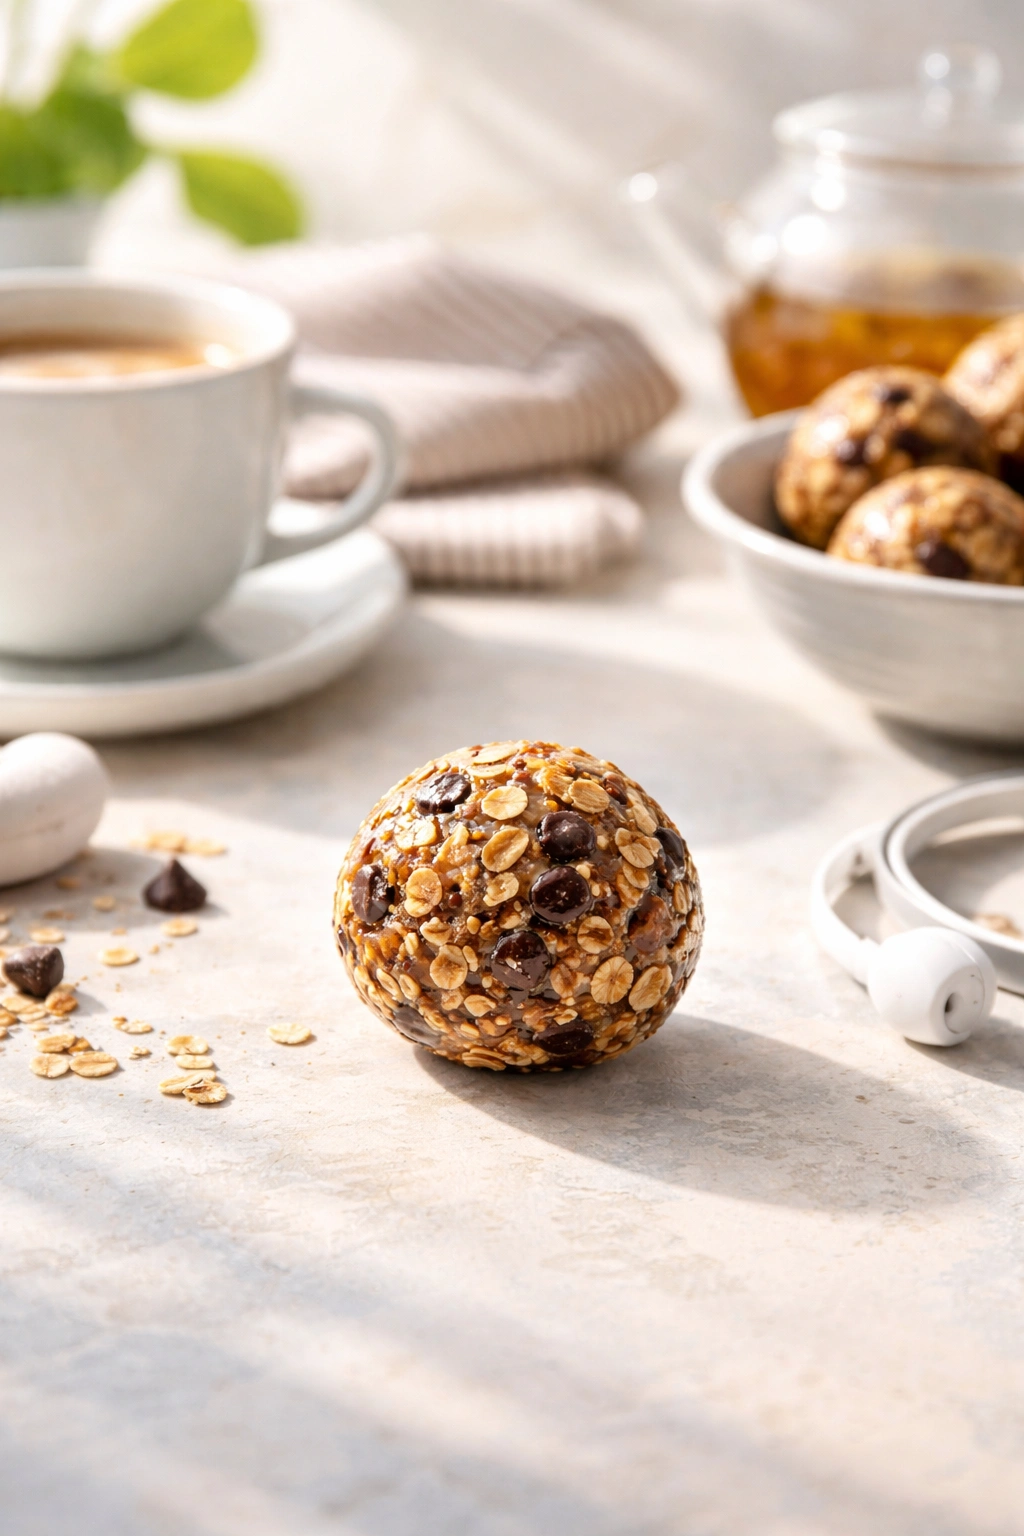
Energy balls pair beautifully with warm beverages. Serve them alongside black coffee — the slight bitterness of the coffee contrasts perfectly with the sweet, chocolatey richness of the balls. They’re equally good with herbal teas like chamomile or peppermint, or with a simple cup of hot water with lemon if you prefer something lighter.
The mid-afternoon slump (roughly 3-4pm) is the ideal time to reach for an energy ball. This is when your morning breakfast and lunch nutrients are wearing off but dinner is still hours away. A single ball and a glass of water or some herbal tea provides enough sustained energy to push through until your next proper meal. You get the benefit of calming your hunger without spoiling your appetite.
Before exercise or a workout, eat one or two energy balls with some water about 30 minutes before you start. The combination of natural sugars from the dates and carbs from the nuts provides quick energy, while the healthy fats and protein help sustain that energy throughout your workout rather than burning out quickly.
After exercise, eat them within 30 minutes to an hour for recovery. Pair with a glass of milk, a protein smoothie, or a piece of fresh fruit to round out the nutrient profile and help your muscles recover effectively.
Final Thoughts

Homemade energy balls are proof that genuinely nutritious food doesn’t need to be complicated or time-consuming to make. Once you’ve made a batch successfully, you’ll wonder why you ever spent money on commercial versions that pale in comparison. The confidence you get from knowing exactly what’s in your snack — and tasting how much better it is than anything in a wrapper — is a bonus.
The real power of energy balls is that they remove the barrier between wanting a healthy snack and actually grabbing one. When they’re already made and sitting in your fridge or freezer, you’ll naturally reach for them instead of less nutritious options that require no prep. Batch-making them once a week or every two weeks creates a small habit that pays dividends throughout your month in terms of steady energy, better blood sugar, and genuine satisfaction.
Start with the basic chocolate-almond version, get comfortable with the method, then experiment with the variations that appeal to you. Once you’ve made energy balls a few times, you’ll develop an intuition for the texture and consistency that works for your kitchen and your taste preferences. That intuition is worth more than following any recipe perfectly — it’s the foundation of confident, creative cooking.