There’s something magical about hitting a dinner time deadline with a meal that tastes like you’ve been cooking all afternoon—but only took 30 minutes from start to finish. Instant Pot chicken and rice delivers exactly that kind of kitchen magic. It’s the kind of one-pot meal that handles weeknight chaos with grace, feeds a hungry family, and leaves you with minimal cleanup. The chicken turns out genuinely tender and juicy, the rice gets creamy and perfectly seasoned, and everything that cooks together actually belongs together, creating layers of flavor that make this far more interesting than the sum of its simple parts.
The beauty of this recipe lies in its adaptability. Whether you’re reaching for chicken breasts or thighs, you prefer white rice or brown rice, or you want to load it up with vegetables and fresh herbs, Instant Pot chicken and rice works. It’s equally at home as comfort food on a Tuesday night or as a weeknight hero when you’re juggling schedules and cooking demands. The pressure cooker does the heavy lifting while you’re free to do something else—fold laundry, help with homework, sit down with your feet up—and when that timer goes off, dinner is truly ready to serve.
Why This Recipe Becomes a Weeknight Favorite
The appeal of this dish runs deeper than convenience, though that’s certainly part of it. Chicken and rice represent the kind of balanced plate most home cooks are aiming for: lean protein, whole grains, vegetables, and enough flavor that nobody at the table feels like they’re eating a “diet meal.” The Instant Pot method locks in moisture that a stovetop approach might lose, keeping the chicken impossibly tender while the rice absorbs all the savory broth and aromatics around it. You’re getting restaurant-quality results without the restaurant-quality effort or the pile of pans in your sink.
What makes this version stand out from countless other pressure cooker recipes is the understanding that cooking chicken and rice together requires precision. Too much liquid and you’re eating soup. Too little and you get the dreaded “burn warning.” Get it right, and you have a creamy, cohesive dish where every bite delivers balanced flavors—savory chicken, tender-firm rice, and bright notes from garlic, lemon, or herbs depending on which version you make.
How the Instant Pot Transforms These Simple Ingredients
The pressure cooker’s sealed environment creates the ideal conditions for cooking chicken and rice simultaneously. Because no steam escapes, the liquid that cooks the rice stays in the pot, and the chicken sits just above it, getting perfectly steamed while the grain underneath absorbs flavor. This dual-cooking approach is actually more sophisticated than it sounds—the residual heat and steam gently cook the chicken through without overcooking it, while the rice below soaks up all the aromatic, savory liquid. You end up with juicy chicken pieces and fluffy rice, not the mushy, overcooked mess you might fear from cooking both together.
The ingredient list reads like a pantry staple collection. Chicken breasts or thighs. White or brown rice. Chicken broth. Aromatics like onion and garlic. Maybe some Parmesan cheese or a squeeze of fresh lemon. Perhaps some frozen vegetables for color and nutrition. These are ingredients most home cooks already have on hand, which means you can pull this meal together without a special shopping trip.
Essential Equipment and Ingredients for Success
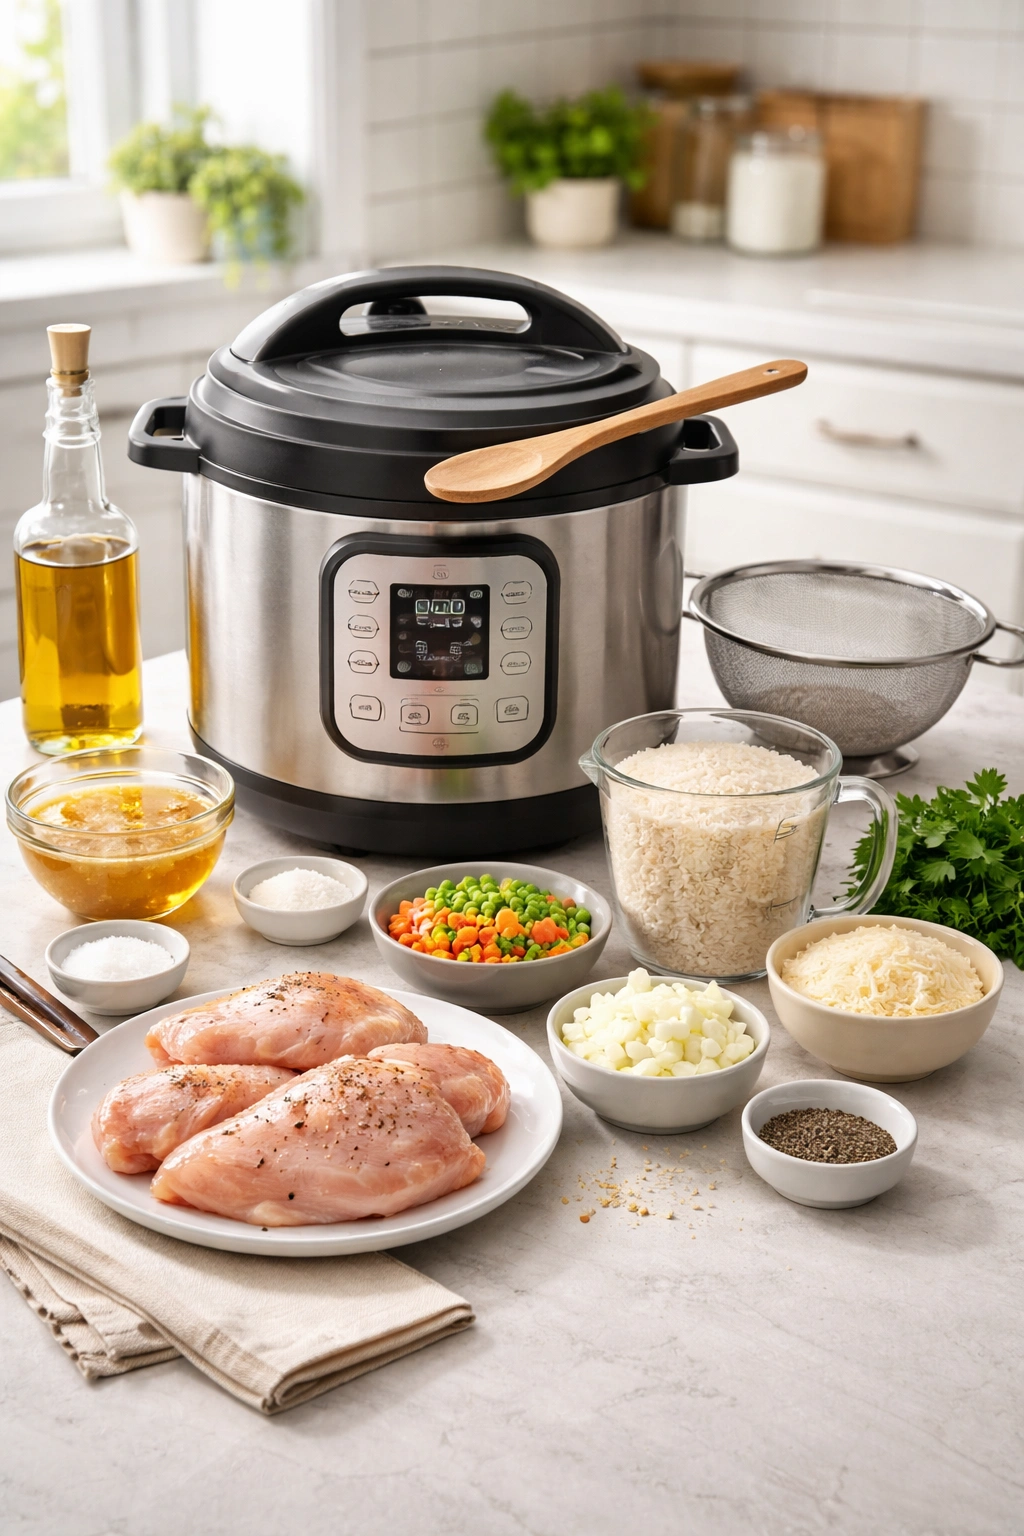
A 6-quart Instant Pot is the workhorse for this recipe, though an 8-quart model works beautifully if that’s what you own. You’ll also want a sturdy wooden spoon or silicone spatula for the sauté step—this is when you’re building flavor and scraping up browned bits. A fine-mesh strainer is genuinely helpful for rinsing rice (this removes excess starch and prevents gummy texture), though it’s not absolutely required.
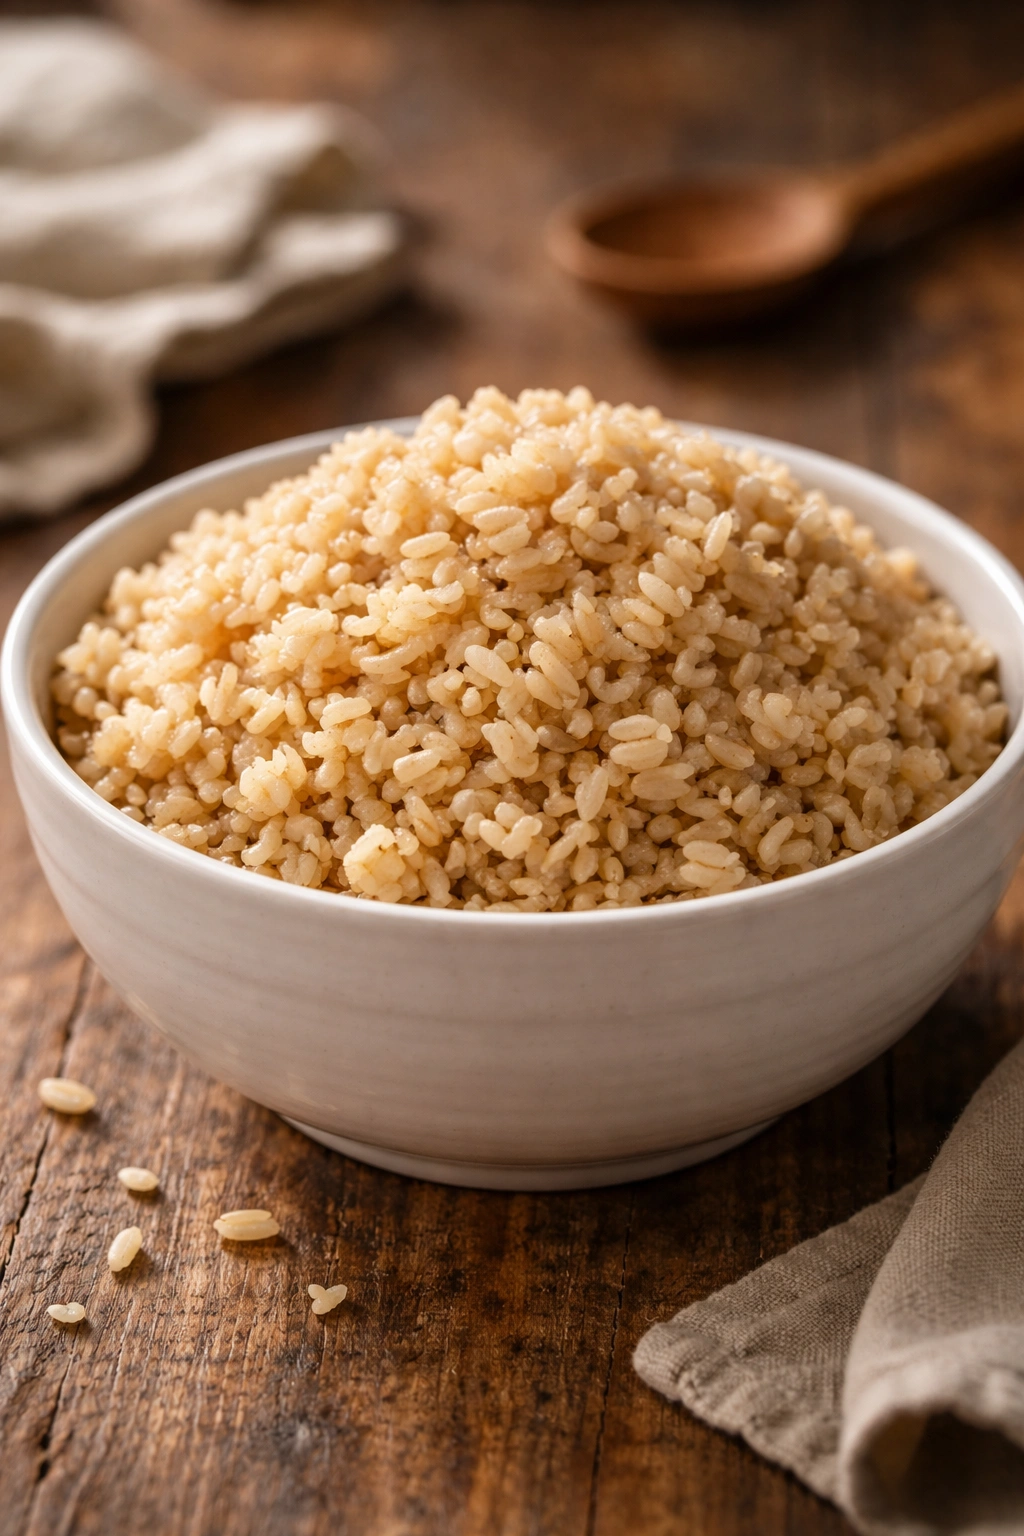
When it comes to ingredient choices, here’s where knowledge makes a real difference. Long-grain white rice is the easiest entry point for this recipe. It cooks in 8 minutes at high pressure, which is perfectly timed to cook boneless chicken breasts all the way through without drying them out. Brown rice changes the entire cooking timeline—it needs 20-22 minutes to cook properly, which means you’ll want to use chicken thighs instead of breasts, as the longer cooking time would make breasts tough and dry. The chicken choice matters because different cuts have different water content and density. Chicken breasts cook faster and are leaner; thighs are more forgiving and stay juicier even with longer cooking.
Chicken broth is the liquid foundation, and using low-sodium broth gives you control over the final salt level. The broth amount varies depending on your rice texture preference—use 3 cups for firmer rice with more defined grains, or 4 cups for creamier, more risotto-like consistency. Both are delicious; it’s purely about what your family prefers.
Yield: Serves 4 to 6 | Makes one 6-quart Instant Pot full
Prep Time: 15 minutes
Cook Time: 25 minutes (includes pressure building time and release)
Total Time: 40 minutes
Difficulty: Beginner — The steps are straightforward, no special techniques required, and the Instant Pot handles all the work once you close the lid.
Ingredients for Classic Creamy Instant Pot Chicken and Rice
For the Chicken and Rice:
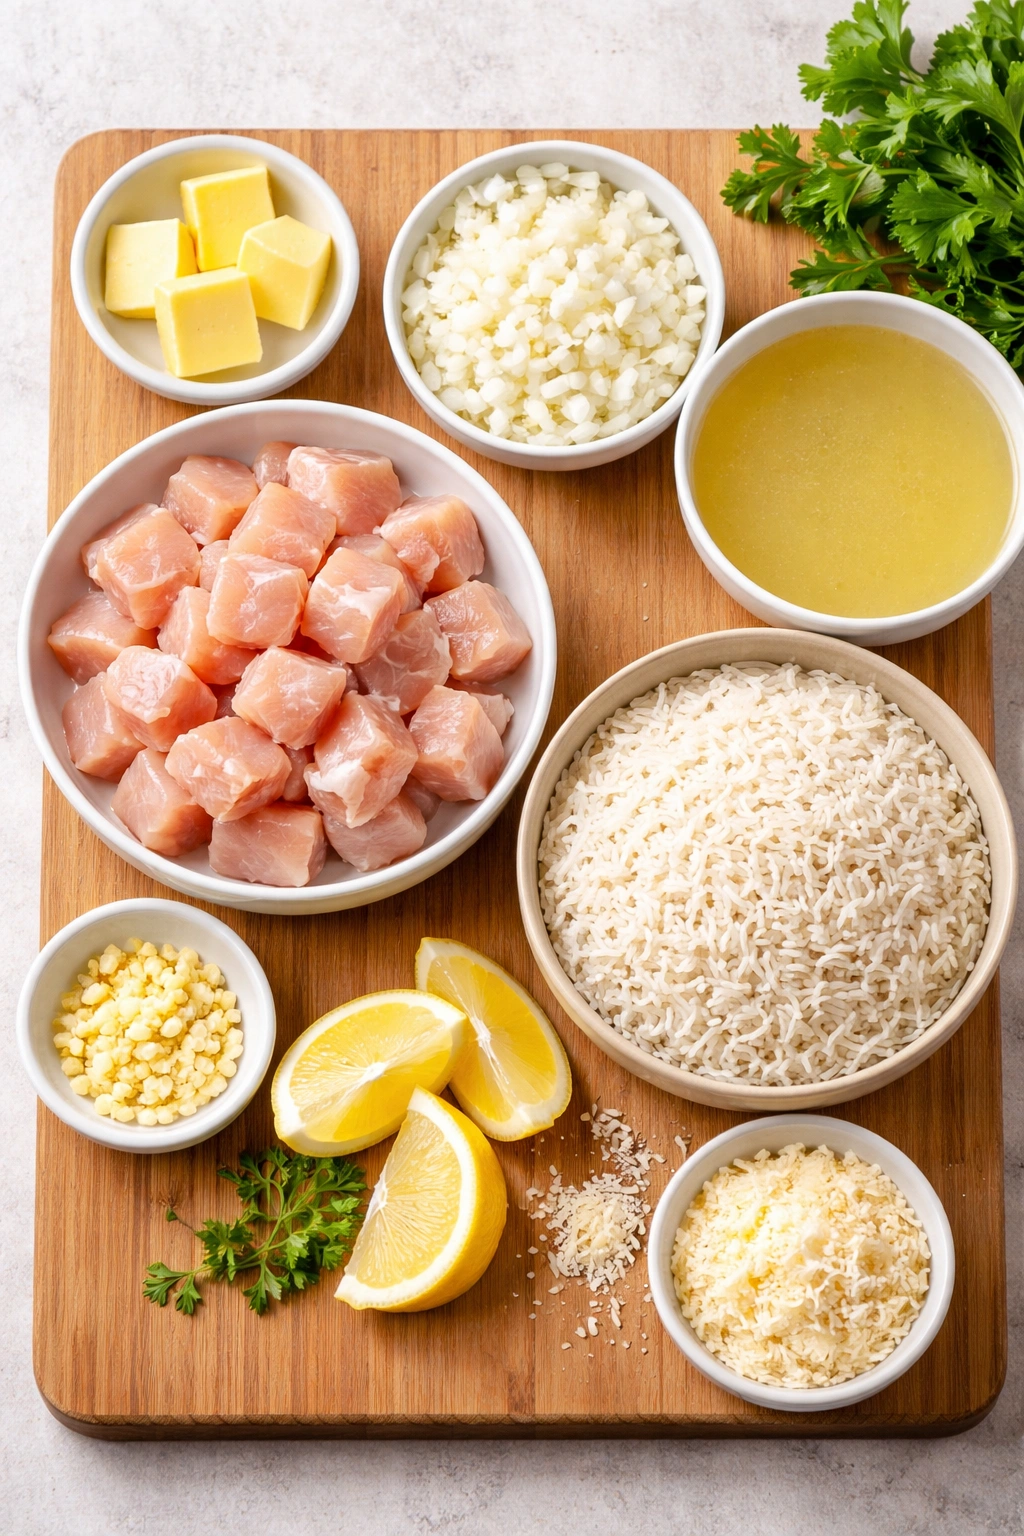
- 4 tablespoons unsalted butter, cut into small pieces
- 1½ pounds boneless, skinless chicken breasts (approximately 2–3 large breasts), cut into bite-sized pieces, or use chicken thighs
- 1 cup chopped yellow onion (approximately 1 medium onion)
- 4 large cloves fresh garlic, minced (approximately 2 tablespoons)
- 1½ cups long-grain white rice, rinsed well under cold water and drained
- 3 to 4 cups low-sodium chicken broth (see note: 3 cups for firmer rice, 4 cups for creamier consistency)
- 2 tablespoons fresh lemon juice (approximately juice from 1 large lemon)
- 1 teaspoon salt, or more to taste
- ¼ teaspoon freshly ground black pepper, or more to taste
- ½ teaspoon dried Italian seasoning (optional but recommended)
For Finishing the Dish:
- 1 cup freshly shredded Parmesan cheese, or grated, at room temperature
- 2 tablespoons fresh parsley, finely chopped (optional garnish)
- Additional Parmesan cheese for serving
Optional Additions and Adaptations:
- 2 cups fresh small broccoli florets (add after cooking)
- 1 cup frozen peas (add after cooking)
- 2 medium carrots, diced small (sauté with onion and garlic)
- 1 red bell pepper, diced small (sauté with onion and garlic)
- 2 teaspoons fresh thyme leaves or 1 teaspoon dried thyme
- 1 teaspoon dried oregano
Preparing Your Ingredients Before You Start

The key to smooth cooking is having everything prepped and ready before you turn on the Instant Pot. Chop your onion into small, even pieces—this helps it soften quickly during sautéing and distribute evenly throughout the finished dish. Mince your garlic fresh; pre-minced garlic from a jar will work in a pinch, but fresh garlic delivers noticeably brighter flavor. If you’re adding any vegetables like carrots or bell pepper, dice them into small, roughly equal pieces so they cook at the same rate. Rinse your rice thoroughly in a fine-mesh strainer under cold running water, stirring gently with your fingers, until the water runs mostly clear. This crucial step removes excess starch that can make rice gummy or sticky—it’s the difference between fluffy individual grains and a starchy paste.
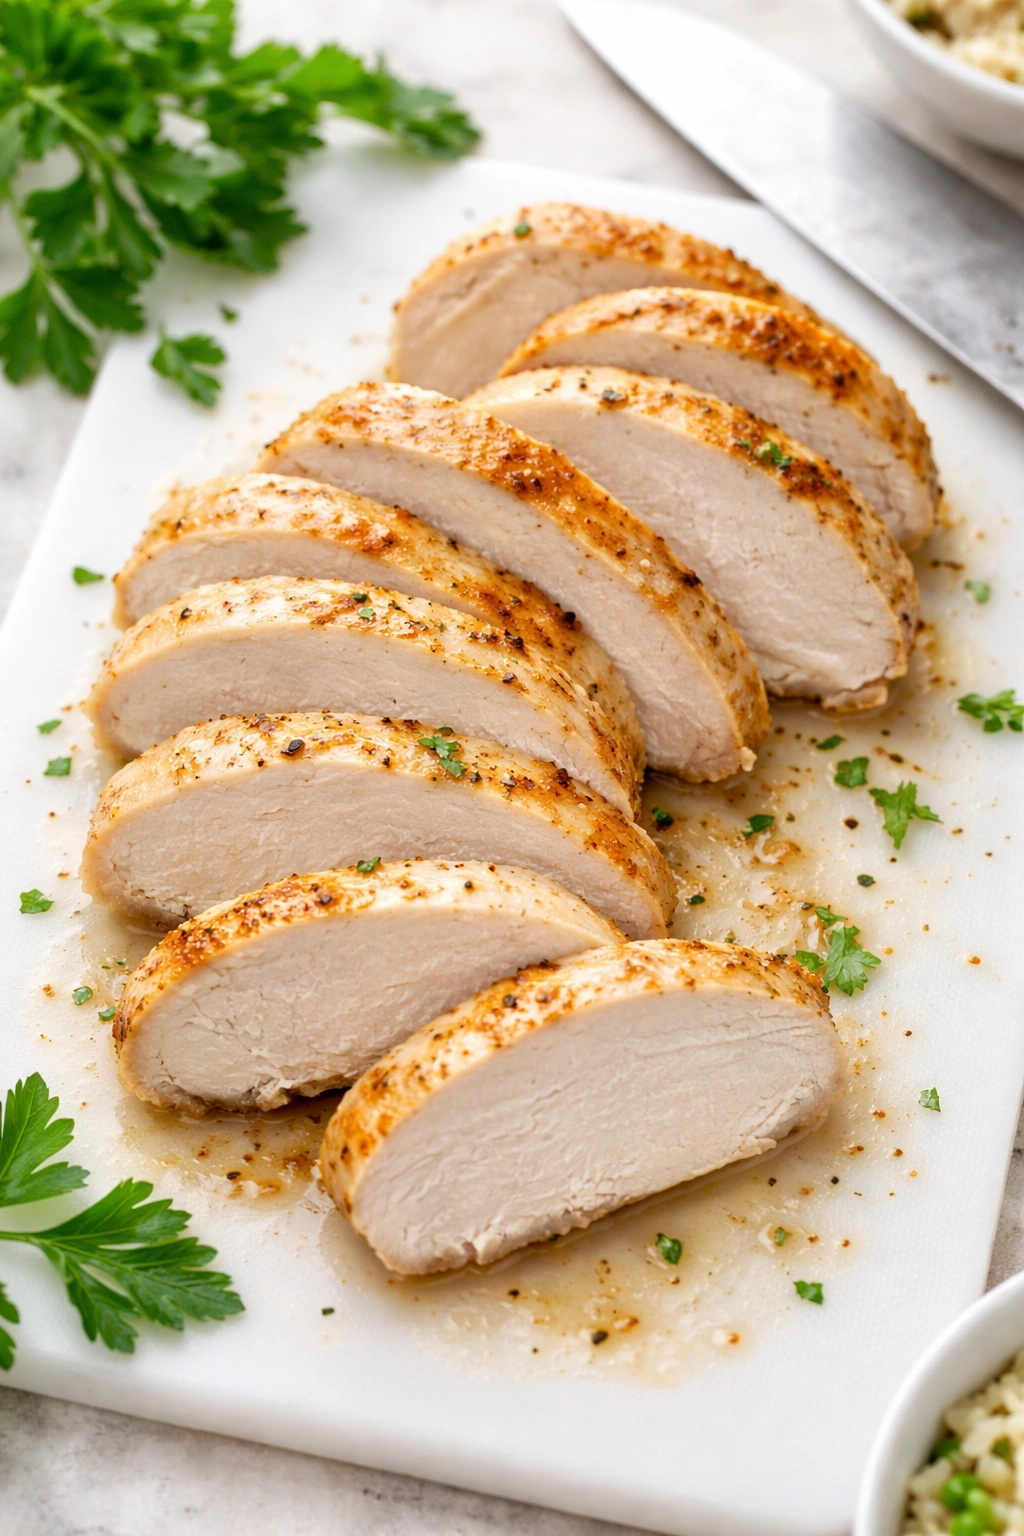
Cut your chicken breasts into bite-sized pieces, roughly 1 to 1½ inches. Uniform sizing matters here because pieces of wildly different sizes will cook unevenly—smaller pieces might be overcooked while larger pieces are still slightly undercooked. If you’re using chicken thighs, cut them into similar bite-sized pieces, removing any excess fat if you prefer, though a little fat adds richness and flavor.
How to Make Instant Pot Chicken and Rice
Sauté and Build the Base:
-
Set your Instant Pot to sauté mode and allow it to preheat for a few minutes until the display says “hot.” This is important—a properly preheated pot gives you the best searing action for building flavor.
-
Add 4 tablespoons of unsalted butter to the hot pot and let it melt completely, about 30 seconds. You’ll see it start to foam slightly—that’s when it’s ready for the next step.
-
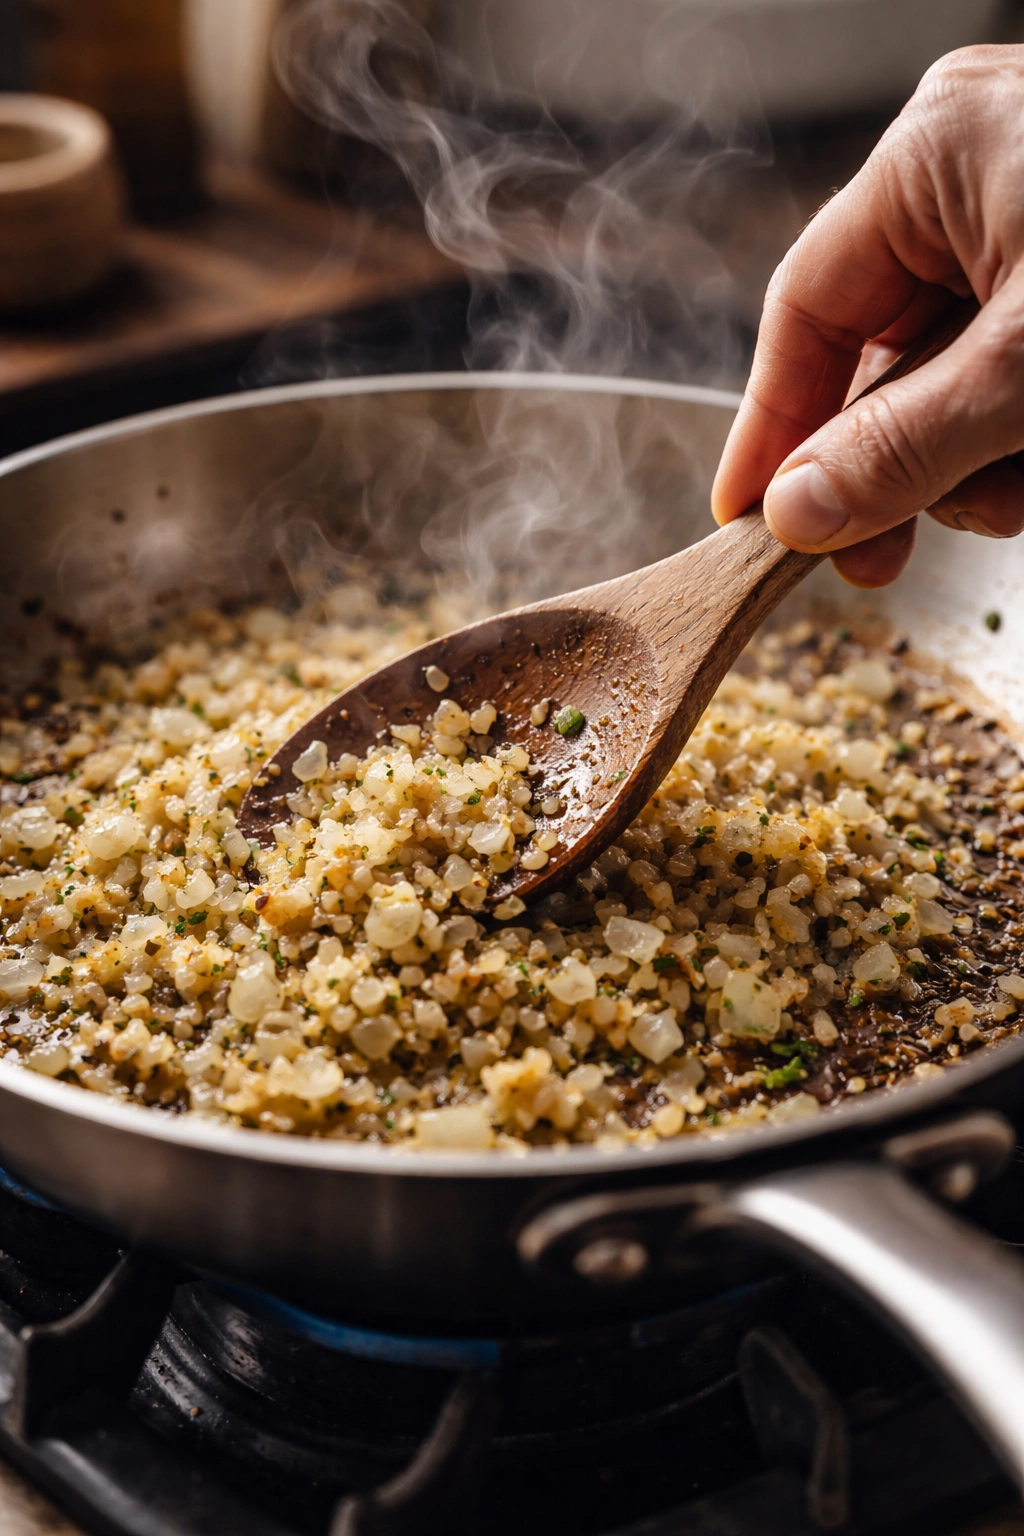
Add your chopped onion to the melted butter and sauté, stirring occasionally with a wooden spoon, for about 3 to 4 minutes until the onion pieces become translucent and soft and start showing just the slightest golden edges. Don’t rush this step—the onion is building the flavor foundation for the entire dish.
-
Stir in your minced fresh garlic and cook, stirring constantly, for about 30 seconds. Fresh garlic burns quickly, so you’re just blooming it in the hot butter to wake up its flavors without browning it. You’ll smell that beautiful garlicky aroma fill the kitchen—that’s how you know this step is working.
-
If you’re using any raw vegetables like diced carrots or bell pepper, add them now along with the garlic, and cook for another 1 minute, stirring gently.
Sear the Chicken (Optional but Recommended):
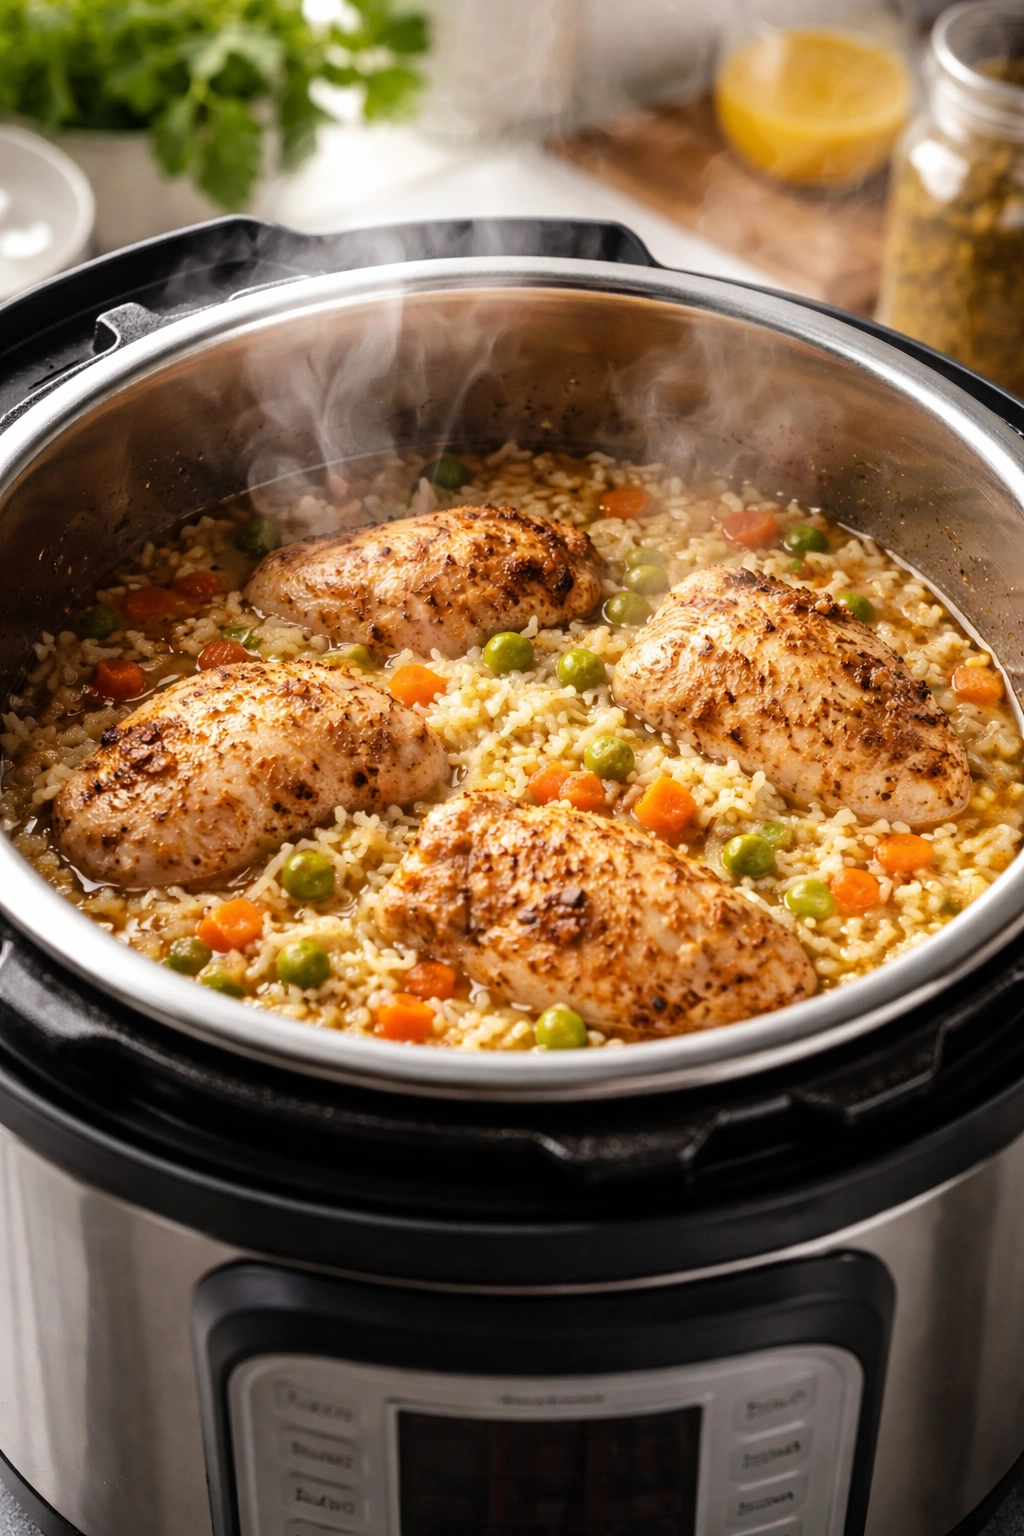
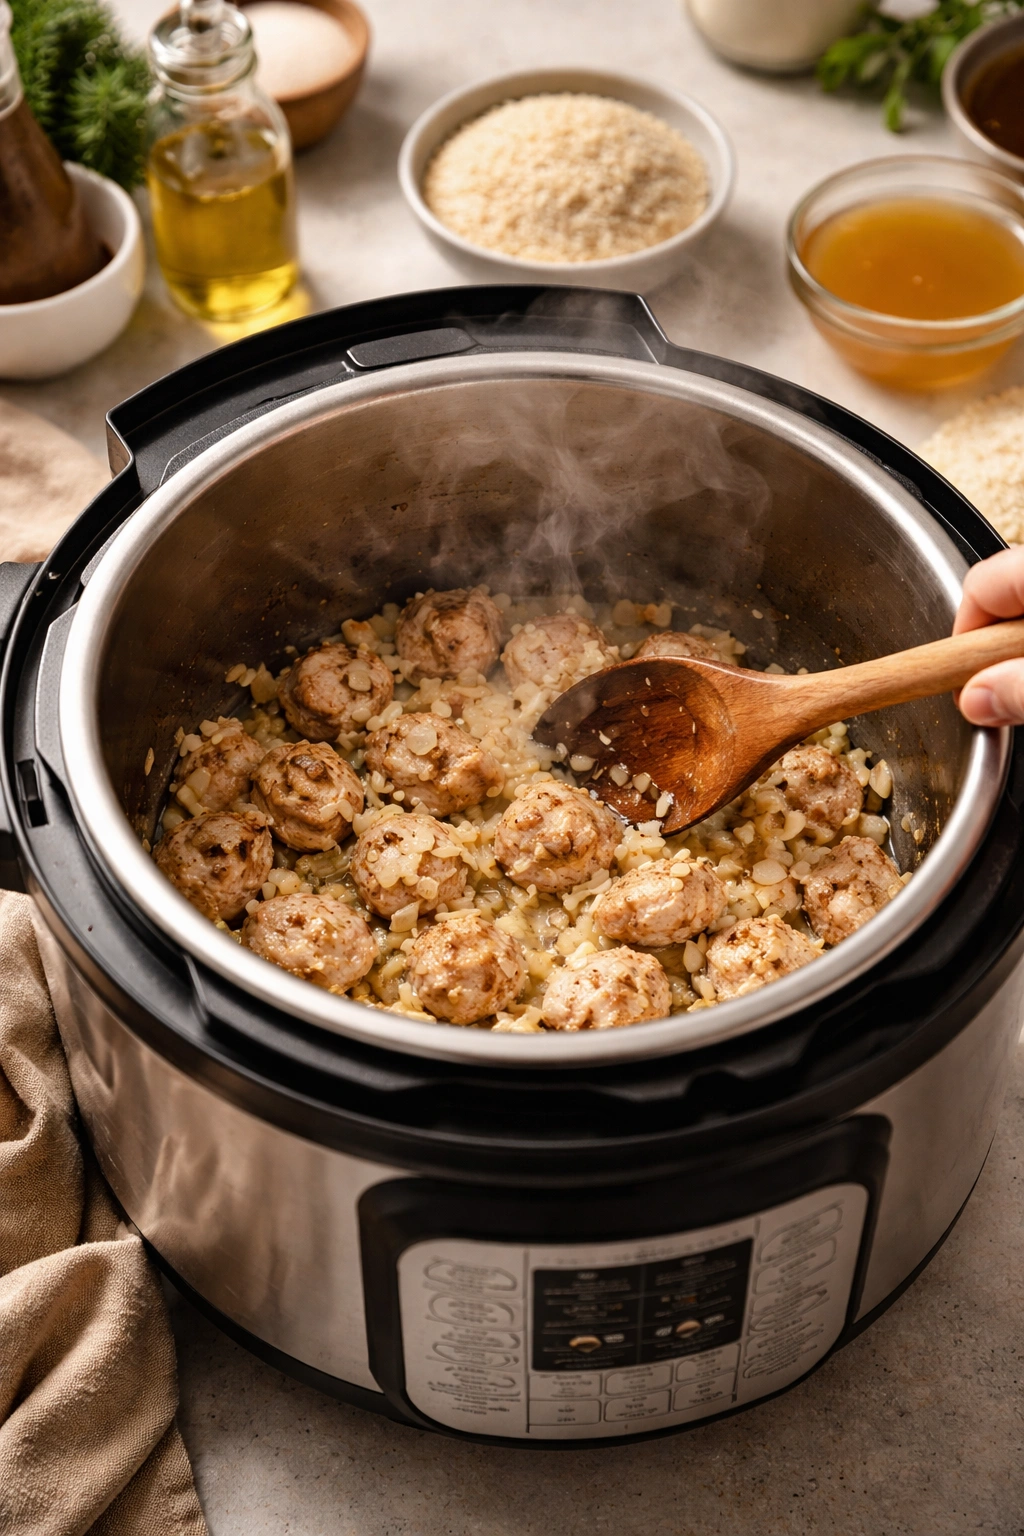
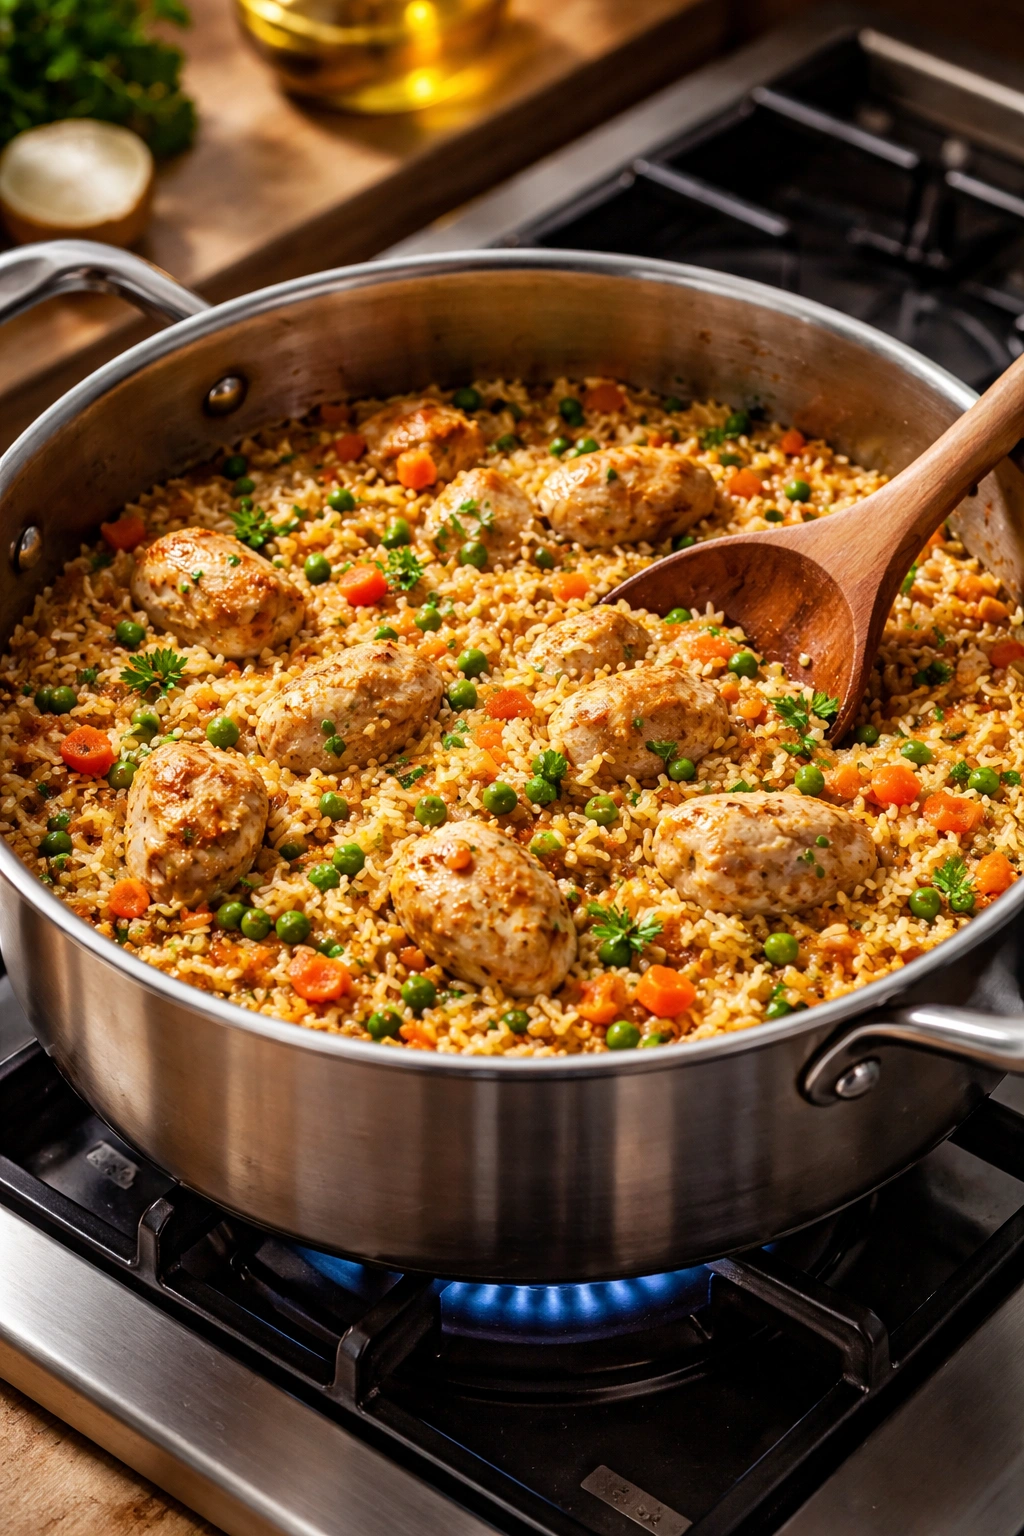
- Add your cut chicken pieces directly to the pot with the onions and garlic. Stir well to coat the chicken with the butter and aromatics. Cook, stirring occasionally, for 3 to 4 minutes until the chicken pieces are opaque on all sides and have picked up some light golden color. This step isn’t strictly necessary for food safety—the pressure cooking will fully cook the chicken—but it adds incredible depth of flavor to the finished dish by developing fond (browned bits) on the bottom of the pot. These caramelized bits dissolve into the cooking liquid and season everything.
Add Rice and Broth:
-
Add your rinsed rice and the Italian seasoning (if using) directly to the pot. Stir for about 1 minute, allowing the rice to toast slightly in the remaining butter. This toasting adds a subtle nutty flavor to the finished rice.
-
Pour in your chicken broth—use 3 cups for firmer rice or 4 cups for creamier, more risotto-like consistency—and add the fresh lemon juice. This is a critical moment: stir the rice and broth together very well, scraping the bottom of the pot with your wooden spoon to loosen any browned bits of onion or garlic stuck there. These golden bits are pure flavor, and they’ll dissolve into the liquid during cooking. Do not skip this deglazing step, as it helps prevent the “burn” warning.
-
Make sure all the rice is submerged in the liquid, not sitting on the sides or top of the pot. If necessary, gently push it down with your spoon so it’s covered by the liquid.
Advertisements
Pressure Cook:
-
Secure the lid on your Instant Pot and make absolutely certain the pressure release valve is in the sealing position (you should hear or feel it click into place). If the valve isn’t sealed, your pot won’t pressurize and your rice will be undercooked.
-
Press the cancel button to turn off sauté mode, then press the manual or pressure cook button and set it to high pressure for 8 minutes. The Instant Pot will take about 10 minutes to come up to pressure—you’ll hear the sealing noise and the display will change—and then the 8-minute cook time will begin counting down.
-
When the 8-minute cook time finishes and the pot beeps, do not open the lid yet. Instead, let the pressure release naturally for 2 minutes. This is crucial: if you let it natural release for longer than 2 minutes, the residual heat continues cooking the rice and it will turn gummy and overcooked. Set a timer on your phone the moment the beep sounds so you don’t lose track of time.
-
After exactly 2 minutes, carefully move the pressure release valve to the venting position to release any remaining pressure. Be extremely cautious as escaping steam is incredibly hot. Wait until the safety pin drops down and you hear the final hiss, then carefully open the lid, lifting it away from your face so the steam doesn’t hit you.
Finish and Serve:
-
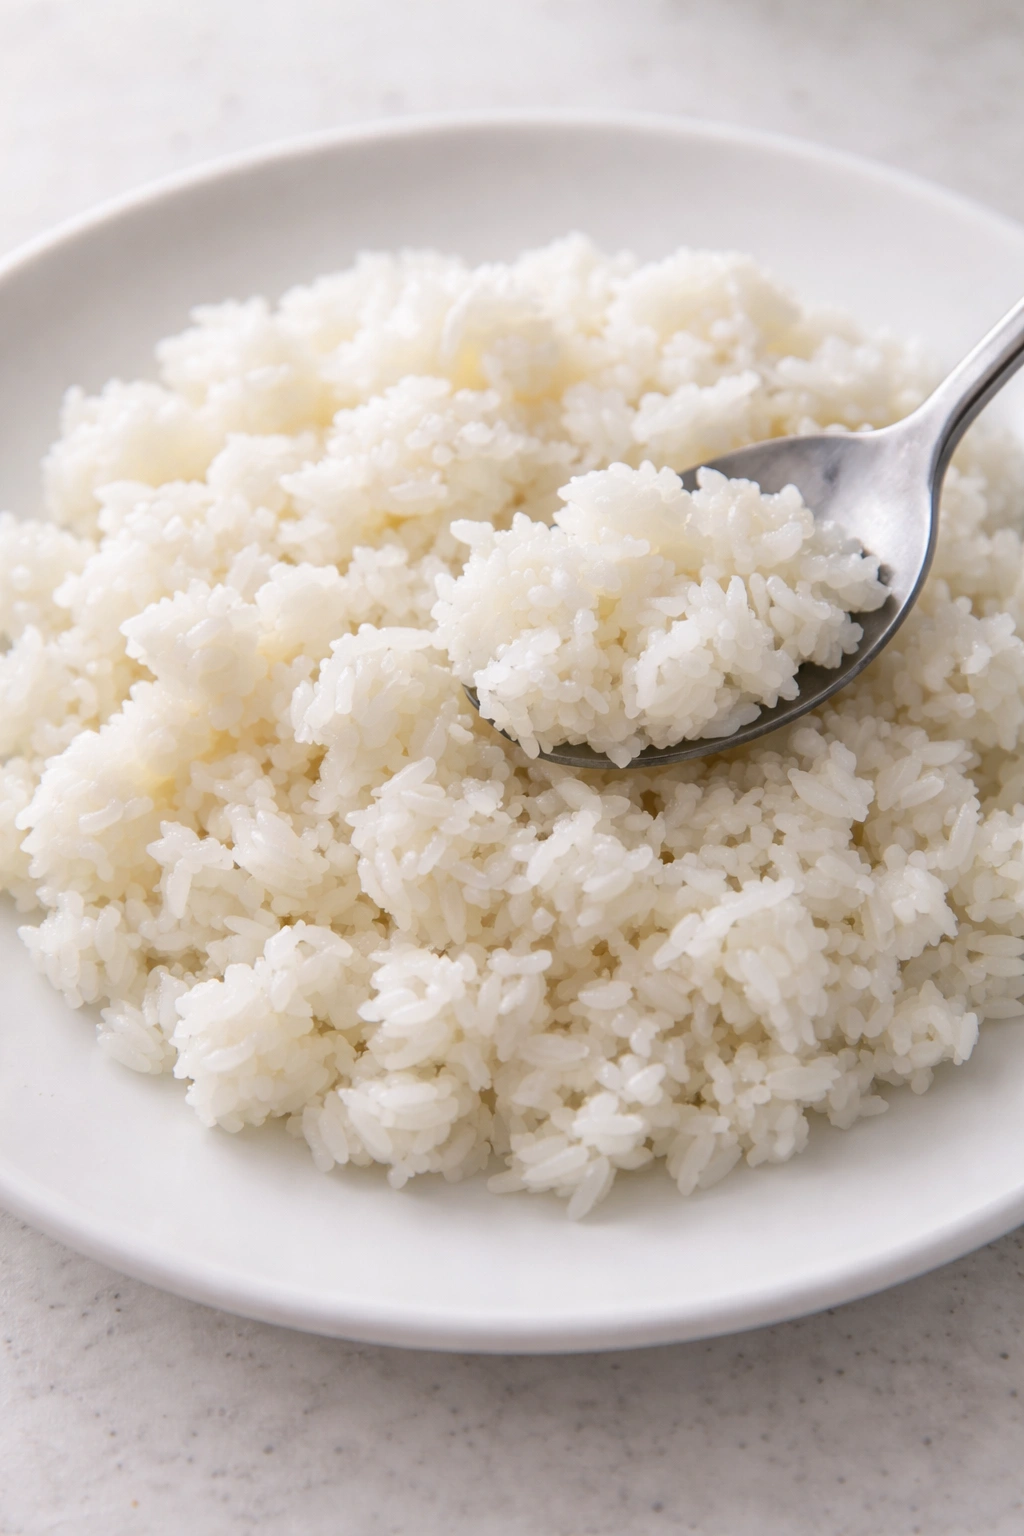
Stir the chicken and rice mixture very well. The mixture should be creamy and cohesive, with the rice tender and the chicken pieces cooked all the way through. If there’s excess liquid sitting on top, don’t worry—set the Instant Pot back to sauté mode and let it cook, stirring frequently, until the liquid absorbs into the rice, about 2 to 3 minutes.
-
Taste the mixture and add 1 cup of freshly shredded Parmesan cheese, 1 teaspoon salt, and ¼ teaspoon black pepper. Stir until the cheese melts and incorporates completely into the creamy mixture. Taste it again and add more Parmesan, salt, pepper, or lemon juice if you’d like—everyone’s salt preference is different, so you might need slightly more or slightly less than the recipe calls for.
-
If you’re adding fresh broccoli florets or frozen peas, stir them in now. The residual heat will warm them through in about 2 minutes without making them mushy.
-
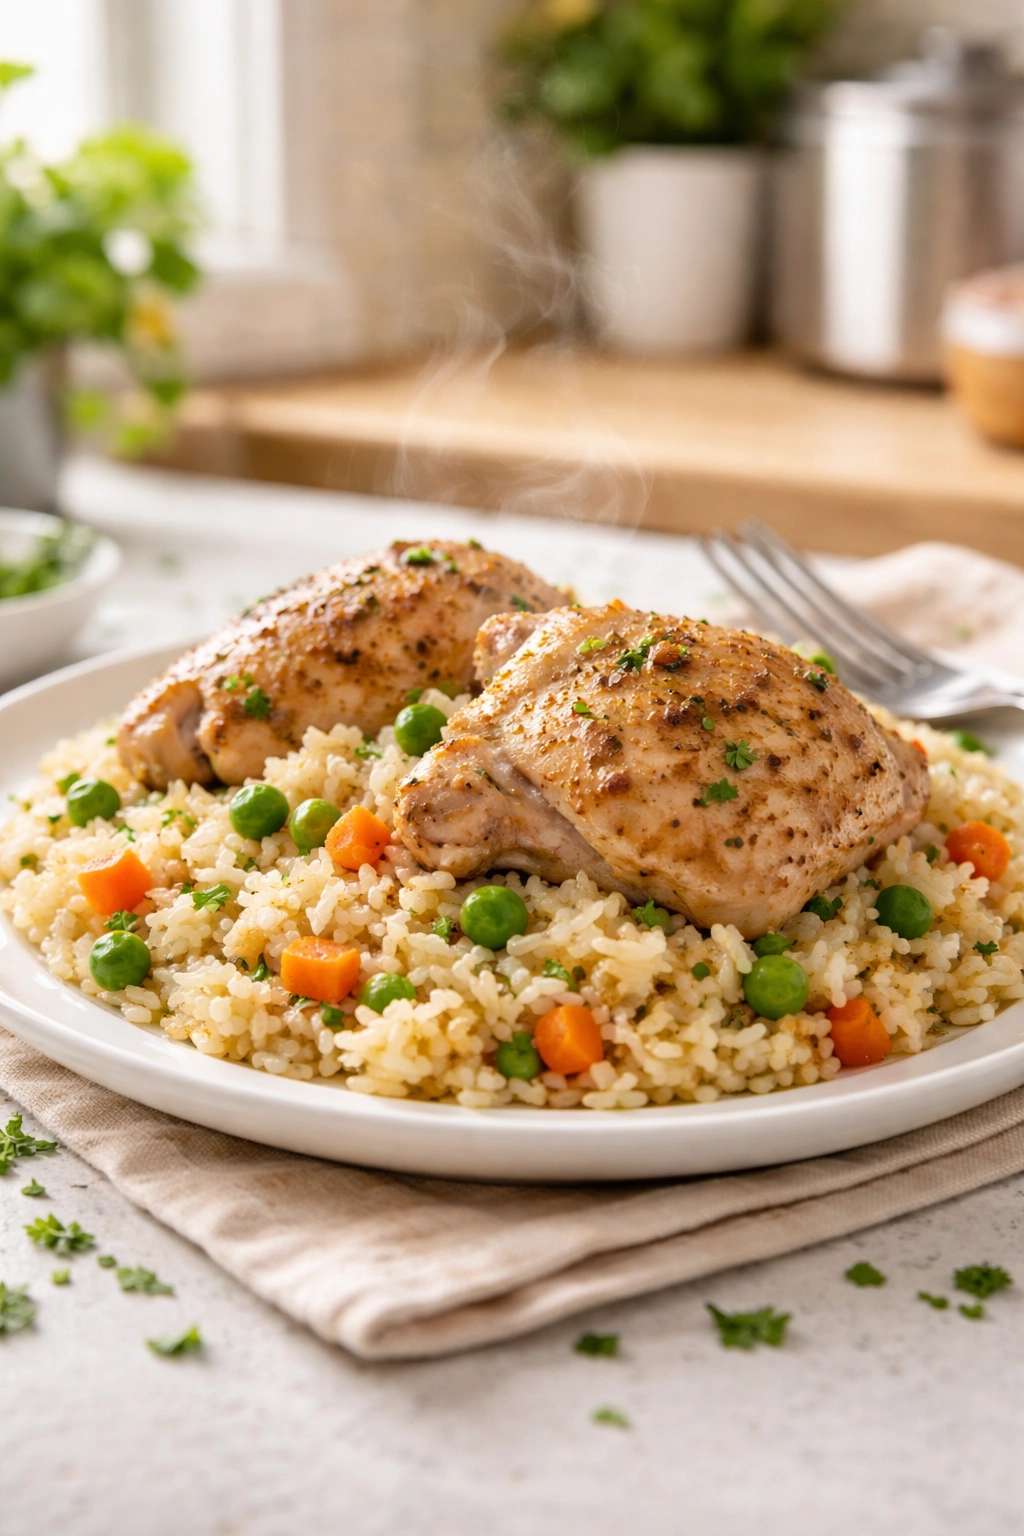
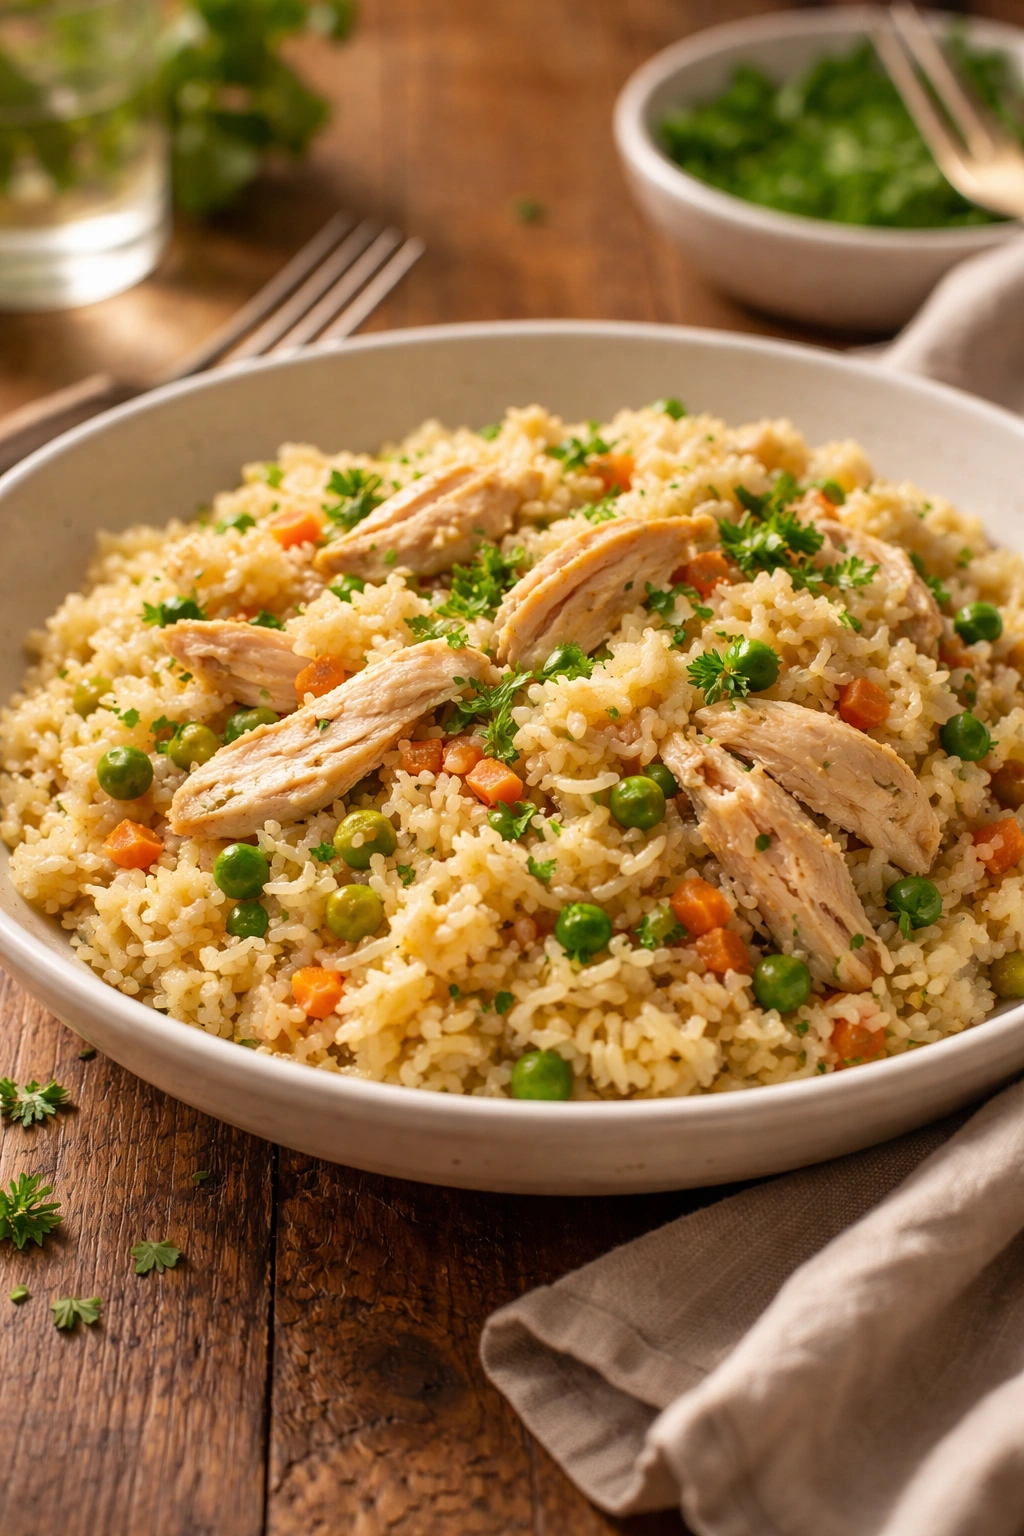
Portion the chicken and rice into bowls or plates, garnishing with additional shredded Parmesan and fresh chopped parsley if desired. Serve immediately while hot.
Advertisements
Pro Tips for Perfect Results Every Time
Use the right rice. This cannot be overstated: long-grain white rice is your friend for an 8-minute cook time. Brown rice requires roughly triple the cooking time and will turn chicken breasts into dry, stringy disappointment. Minute rice or instant rice is pre-cooked and will turn into mush. Arborio rice (risotto rice) is a different animal with different starch content. Stick with long-grain white rice until you’re very confident experimenting with alternatives.
Rinse your rice thoroughly. That cloudy starch that comes off the rice when you rinse it under cold water is what causes gummy texture. A quick rinse—usually 30 seconds of running water while stirring gently—removes most of it. This step genuinely matters for texture.
Don’t skip the sauté step. Yes, you can technically dump raw chicken and rice straight into cold broth and pressure cook it, and it will be edible. But sautéing the aromatics and searing the chicken builds fond—those caramelized brown bits—that dissolve into the liquid and create actual flavor depth. Five extra minutes of sautéing transforms this from “fine” to “why does this taste so good?”
Deglaze properly. After you add the broth and lemon juice, spend a full 30 seconds scraping the bottom of the pot with a wooden spoon, making sure to loosen and dissolve all those browned bits. This step prevents the “burn” warning that can interrupt your cooking.
Respect the 2-minute natural release. I know it’s tempting to quick release immediately when the beep sounds, especially when you’re hungry. Don’t do it. Two minutes of natural release lets the rice finish absorbing liquid gently. Quick release too fast and you’ll have crunchy rice. More than 2 minutes and the residual heat overcooks everything into mushiness. Set a phone timer the instant the beep sounds.
Layer your ingredients intentionally. When you add the broth and rice, don’t just dump everything in and stir aggressively. Add the broth, stir once to distribute it, then let the rice settle. This layering helps prevent scorching on the bottom of the pot.
Common Mistakes to Avoid
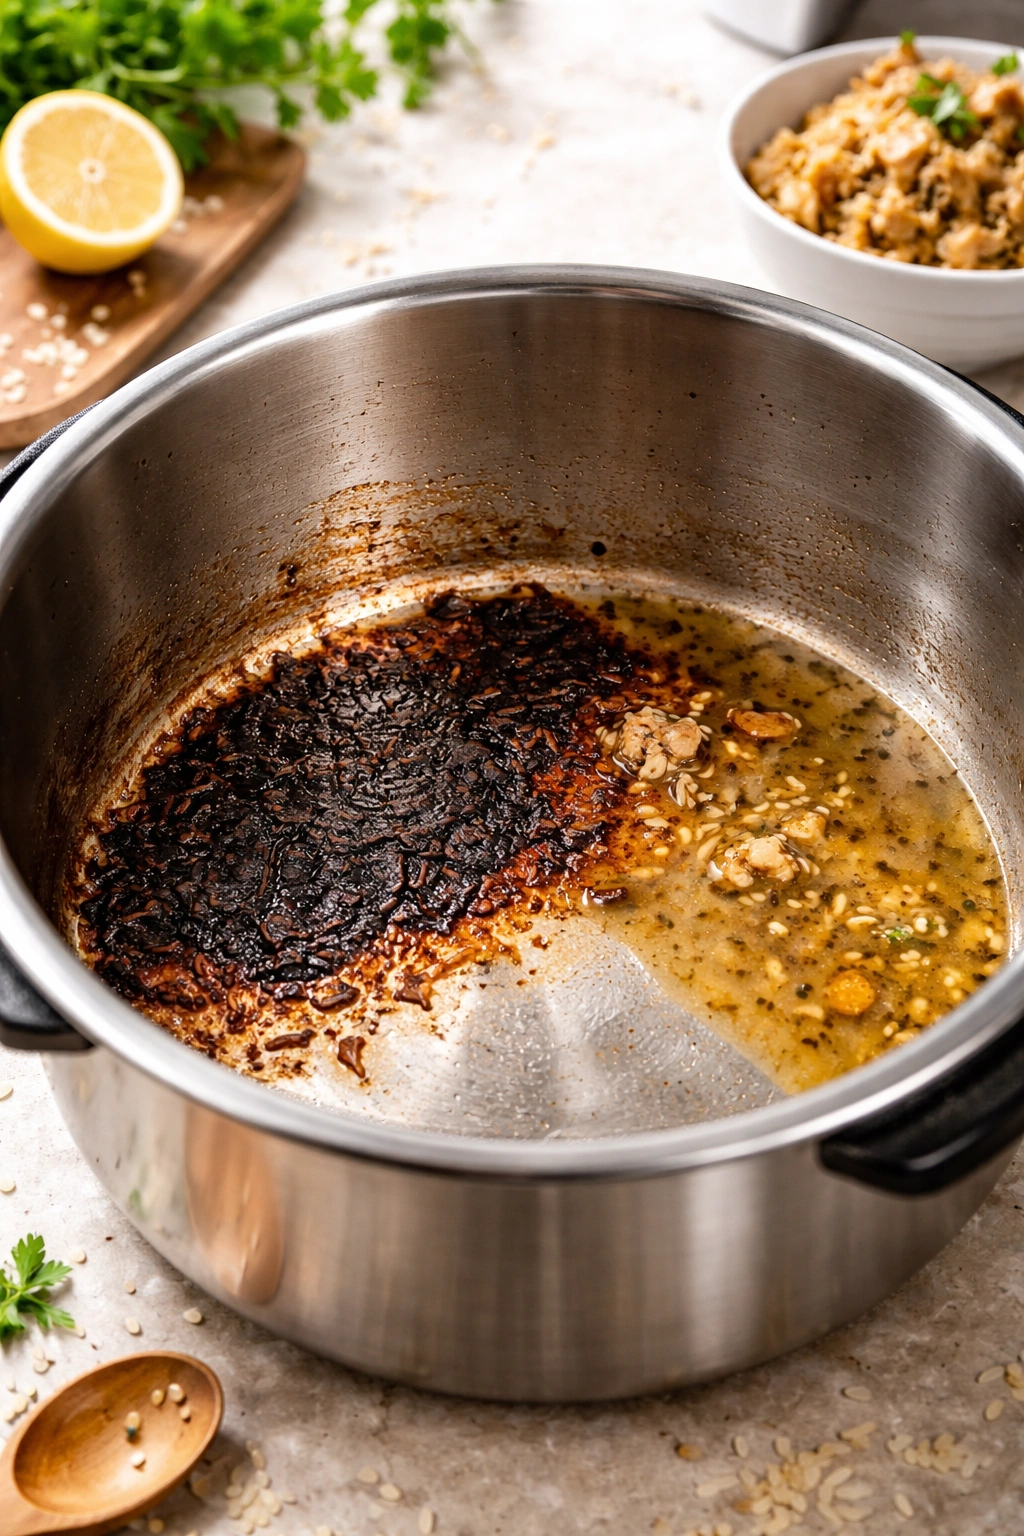
Getting the “burn” warning before pressure cooking even starts. This happens when the bottom of the pot gets too hot before there’s enough liquid to protect it. Prevention: don’t let the rice or chicken sit on the hot pot bottom without liquid. Add your broth immediately after you add your rice, and deglaze thoroughly before closing the lid.
Rice that turns into a gluey, sticky paste. This is almost always caused by extending the natural release beyond 2 minutes. The residual heat keeps cooking the rice even though the burner is off. Set that timer and stick to it.
Rice that stays crunchy or undercooked. This usually means your pot didn’t reach full pressure before cooking started. Double-check that your pressure valve is definitely in the sealing position and listen for the hissing sound that indicates pressure building. If the Instant Pot shows an error message before the cook time even begins, your rice will be undercooked. Also, if you’re at high altitude (above 3,000 feet), you may need to add an extra minute or two to the cook time.
Chicken that’s dry or rubbery. Overcooked chicken usually happens when you extend the pressure cooking time beyond 8 minutes or when you don’t release pressure properly at the end. Eight minutes at high pressure is precisely timed for boneless chicken breasts to cook through while staying juicy. Chicken thighs are more forgiving and stay juicy even with longer cooking, which is why they’re better for brown rice recipes.
Oversalty rice. Chicken broth already contains salt, and Parmesan cheese is salty. If you add too much additional salt, the finished dish becomes genuinely unpalatable. Taste before serving and adjust salt gradually. You can always add more salt, but you can’t remove it.
Variations and Adaptations to Make It Your Own
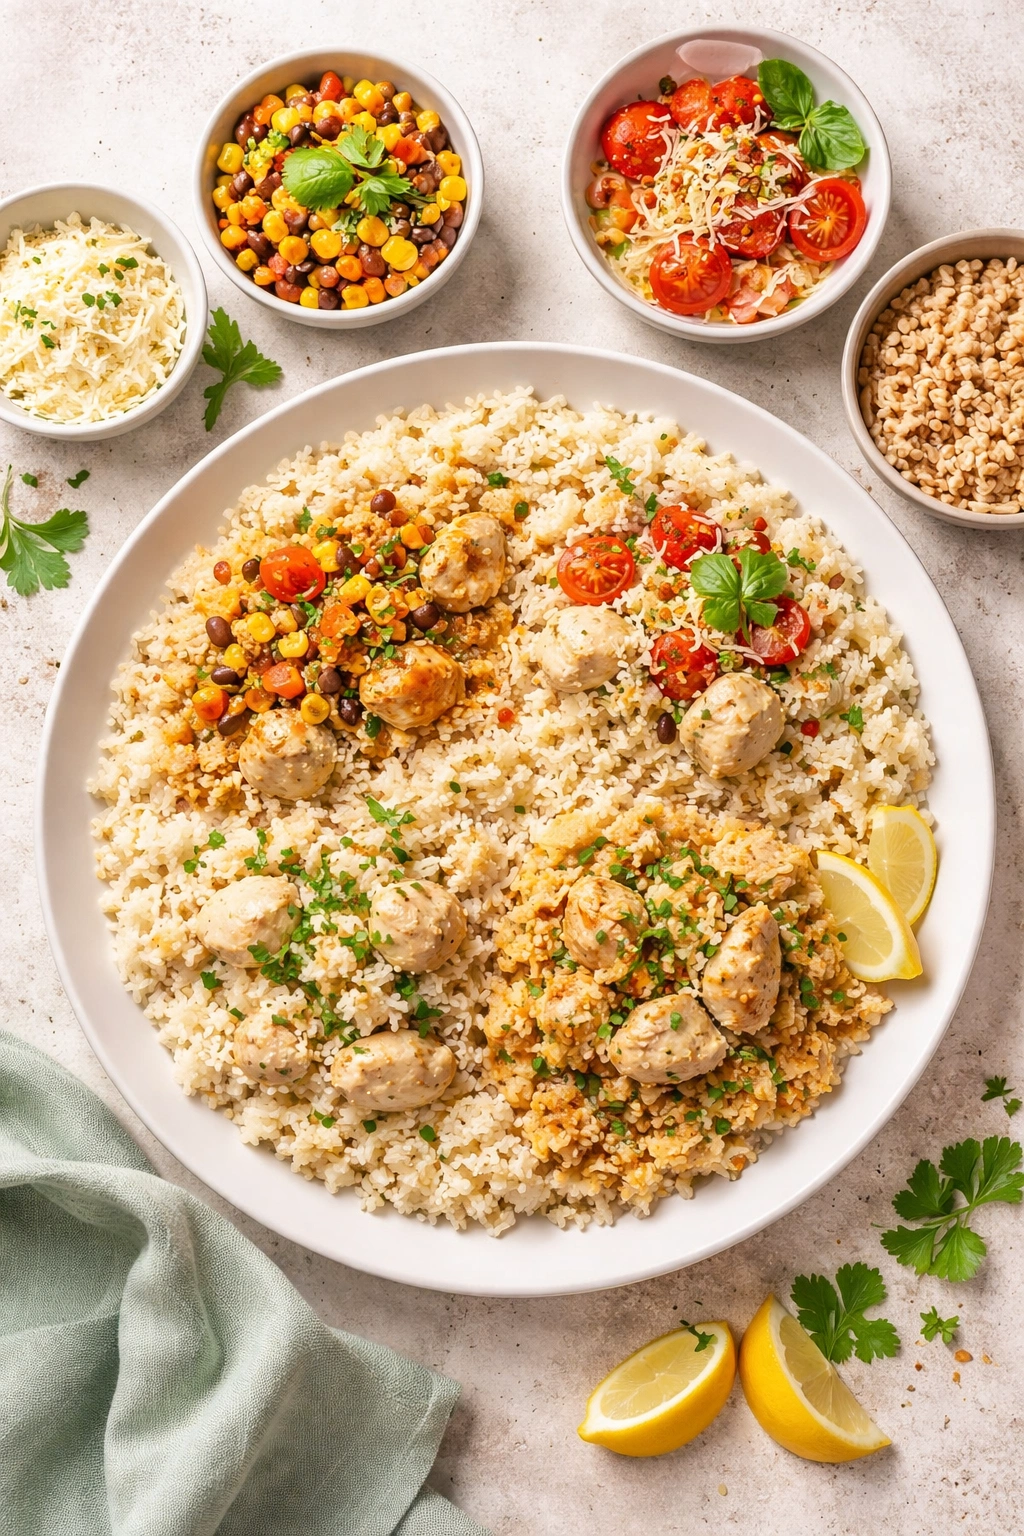
Creamy Parmesan version (the classic). This is the version described in the recipe above—finish with shredded Parmesan and lemon juice for a light, bright, creamy dish. It’s elegant enough for company but simple enough for a random Tuesday.
Mexican-inspired chicken and rice. Use 4 cups chicken broth, and add 1 teaspoon dried cumin, 1 teaspoon smoked paprika, and ½ teaspoon chili powder to the sauté step along with the onion and garlic. Finish with fresh cilantro and lime juice instead of lemon. Top with diced avocado, sliced jalapeños, and a dollop of sour cream when serving.
Italian seasoning version. Add 1½ teaspoons dried Italian seasoning during the rice-toasting step. Finish with fresh basil instead of parsley and serve with a side of garlic bread for soaking up every drop of the creamy broth.
Brown rice and chicken thighs. Use 1½ pounds bone-in, skinless chicken thighs instead of breasts, increase the cook time to 22 minutes at high pressure, and allow for a 10-minute natural release before quick releasing. The longer cooking time won’t dry out thighs the way it would breasts. Use 4 cups chicken broth to account for brown rice’s longer cooking time.
Vegetable-loaded version. Add 1 cup diced carrots and 1 cup diced bell pepper during the sauté step, cooking them with the onions for 2 minutes. After pressure cooking is complete, stir in 2 cups fresh broccoli florets or 1 cup frozen peas. The residual heat will cook them through in 2-3 minutes without making them mushy.
Lighter version without cheese. Skip the Parmesan entirely and finish instead with fresh herbs—a handful of chopped fresh parsley, dill, or cilantro depending on your flavor preference. A squeeze of fresh lemon juice provides brightness. This version showcases the chicken and rice flavors without dairy richness.
Garlic lover’s version. Double the garlic (use 8 cloves instead of 4) and add ½ teaspoon garlic powder to the rice mixture for deep, savory garlic flavor throughout. Add a few slices of fresh garlic to the finished dish for bursts of fresh garlic intensity.
One-pot meal with proteins and veggies. Layer diced carrots, peas, and broccoli directly in the pot with the rice before cooking. Everything cooks together, creating a nutritionally complete one-pot meal with protein, whole grain, and vegetables all in one dish.
Best Serving Suggestions and Pairings
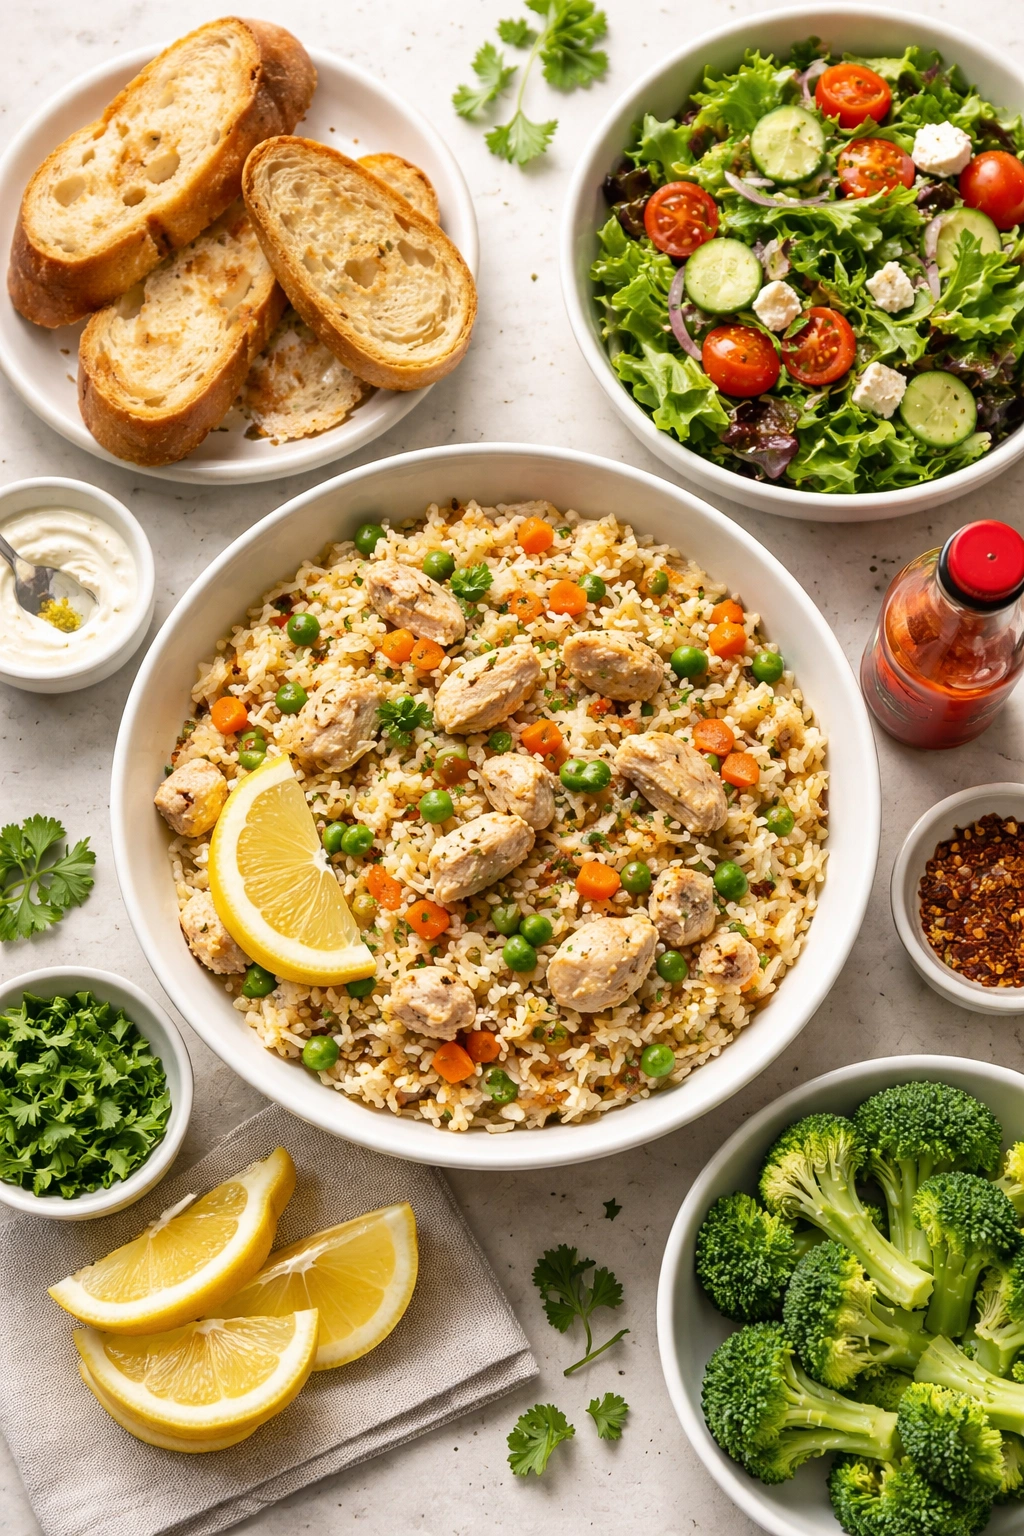
Serve it as is. Honestly, this dish is complete and balanced all by itself—protein, grain, and enough vegetable content (especially if you add peas or broccoli) to call it a full meal. Spoon it into bowls and you’re done.
Add a fresh green salad. A simple arugula salad with lemon vinaigrette or a kale salad with a sharp dressing provides a cool, fresh contrast to the warm, creamy chicken and rice. The acidity in the dressing cleanses your palate between bites.
Serve with crusty bread. A warm baguette or garlic bread is perfect for soaking up every drop of the creamy broth. This turns a simple dinner into something that feels a little more celebratory.
Top with fresh herbs and a squeeze of citrus. Just before serving, top individual bowls with fresh chopped parsley, dill, or cilantro and a squeeze of fresh lemon or lime juice. These bright additions elevate the flavor and add visual appeal.
Pair with a simple side vegetable. Roasted Brussels sprouts, steamed green beans, or sautéed spinach all complement this dish beautifully without feeling redundant.
Offer hot sauce on the side. Many people love a drizzle of their favorite hot sauce over chicken and rice—it adds spice and another flavor dimension. Have a bottle available at the table and let people season to their own preference.
Serve at room temperature for leftovers. The next day, this dish is delicious served as a chicken and rice bowl at room temperature, almost like a deconstructed salad. It’s perfect for packed lunches.
Storage and Reheating for Maximum Freshness
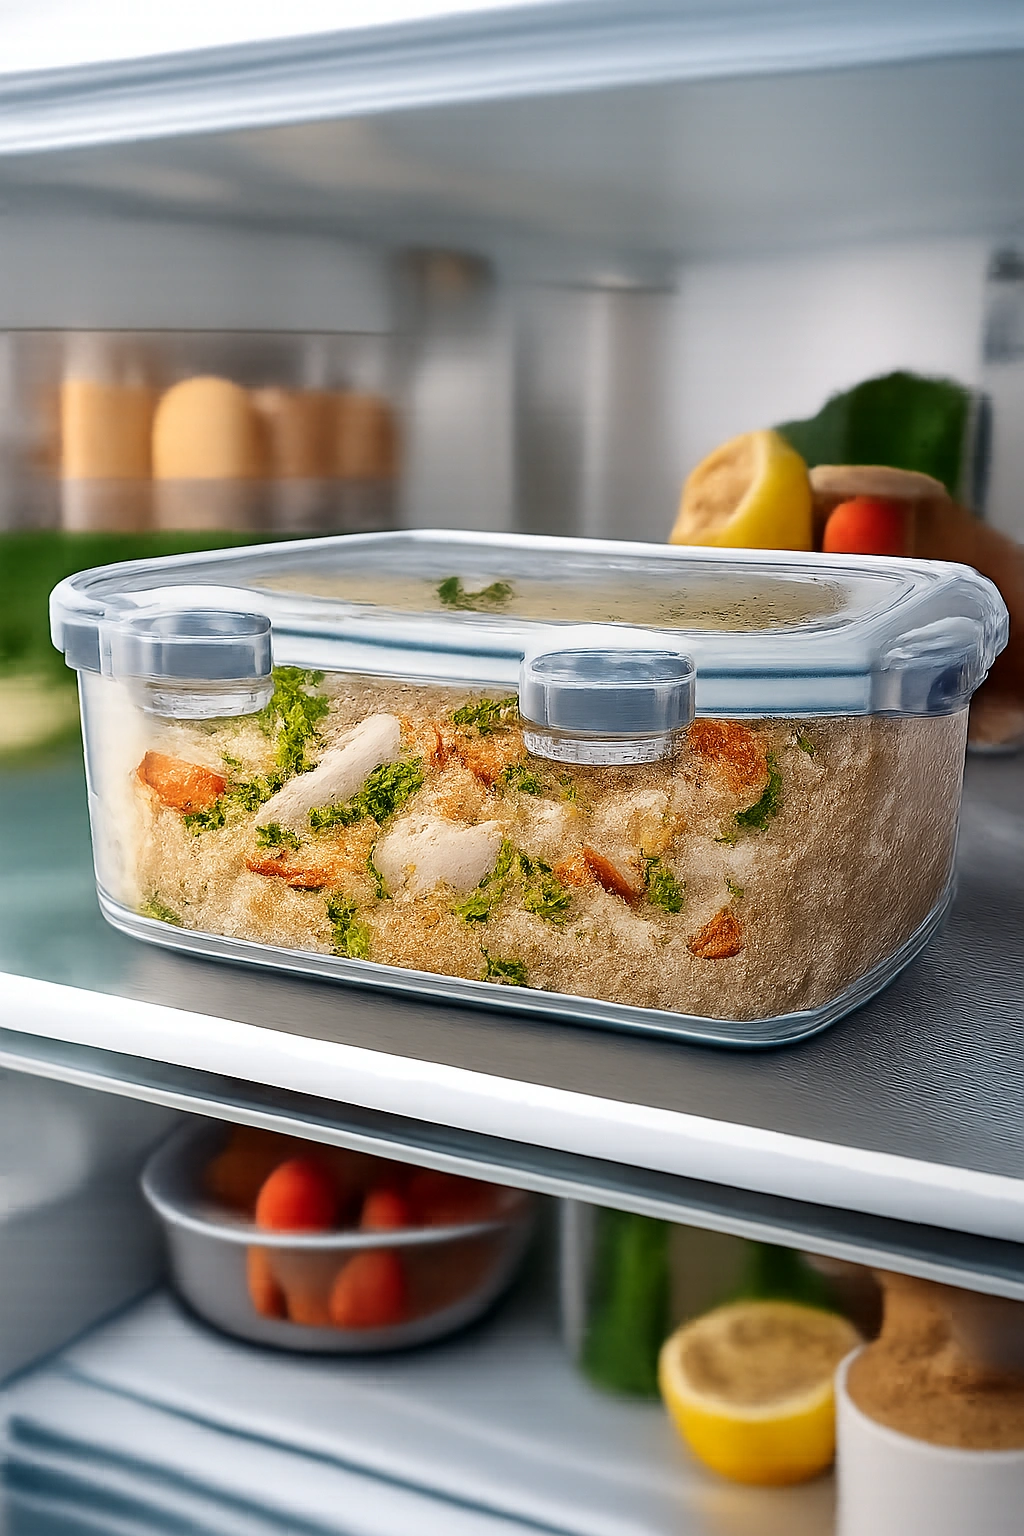
Refrigerator storage. Leftover chicken and rice keeps in an airtight container in the refrigerator for up to 3 days. The rice will thicken considerably as it cools and firms up, especially if you used chicken thighs (which have more fat). This is completely normal and not a sign anything went wrong.
Reheating on the stovetop. This is the best method for restoring the creamy consistency. Put your desired portion in a medium saucepan over low heat and add a splash of chicken broth or water—about ¼ cup per 2 cups of rice. Use a wooden spoon to gently break the rice into pieces while it warms. Cover with a lid to steam it through, and let it heat for about 5 to 10 minutes until steaming hot. Stir occasionally so it heats evenly.
Reheating in the microwave. Transfer your portion to a microwave-safe bowl, add a tablespoon of water or broth, cover loosely with a microwave-safe lid or paper towel, and microwave in 1-minute intervals, stirring between each minute, until heated through. This usually takes 2 to 3 minutes depending on portion size. The microwave heats less evenly than the stovetop, so stirring between intervals prevents hot spots.
Freezing for later. You can freeze leftover chicken and rice in an airtight freezer container for up to 2 to 3 months. Cool the food completely before freezing. To thaw, refrigerate overnight, then reheat using the stovetop method with added broth. The texture of rice changes slightly after freezing and thawing, becoming slightly softer, so while freezing works, eating fresh or refrigerated leftovers is preferable if possible.
Make-ahead strategy. You can prep all your ingredients the night before—chop your vegetables, cut your chicken, measure your rice and broth into containers, and store everything in the fridge. In the morning or evening, everything comes together in the Instant Pot in less than 40 minutes total, with maybe 15 minutes of actual hands-on work.
Frequently Asked Questions About Instant Pot Chicken and Rice
Can I use brown rice instead of white rice?
Brown rice absolutely works, but it requires a completely different approach. Brown rice needs approximately 22 minutes at high pressure compared to 8 minutes for white rice. If you cook brown rice for only 8 minutes, it will be crunchy and undercooked. The longer cooking time means you’ll want to use chicken thighs instead of breasts—the 22-minute cook time would make chicken breasts tough and dry, but thighs stay juicy and tender throughout. Use 4 cups chicken broth instead of 3, since brown rice absorbs more liquid. Allow for a 10-minute natural release instead of 2 minutes. Brown rice takes more liquid and more cooking time, but the result is a heartier, nuttier dish that works beautifully with the longer cooking timeline.
What if my rice comes out sticky or gluey?
Sticky rice almost always indicates overcooking, typically caused by extending the natural release beyond 2 minutes. The residual heat in the pot keeps cooking the rice even though the burner is off. If you know you’ve done this, it’s unfortunately too late to fix—you’ve already overcooked it. For next time, set a timer the moment the pot beeps and stick to exactly 2 minutes of natural release before quick releasing. Also make sure you’re using long-grain white rice and that you rinsed it thoroughly under cold water before cooking. If your rice is still coming out sticky even when you follow the 2-minute natural release rule, you may be starting with older rice or a variety that naturally cooks stickier—try a different brand.
Can I double this recipe?

Doubling the recipe is technically possible if you have an 8-quart Instant Pot, but it’s not recommended in a 6-quart model—the pot will be too full and liquid may escape during pressurization. Even in an 8-quart pot, doubling ingredients means they take longer to come to pressure and the ratios change slightly. If you’re cooking for a crowd, make the recipe as written and simply repeat it twice. That’s more reliable than trying to jury-rig a doubled version.
What if I don’t have fresh lemon juice?
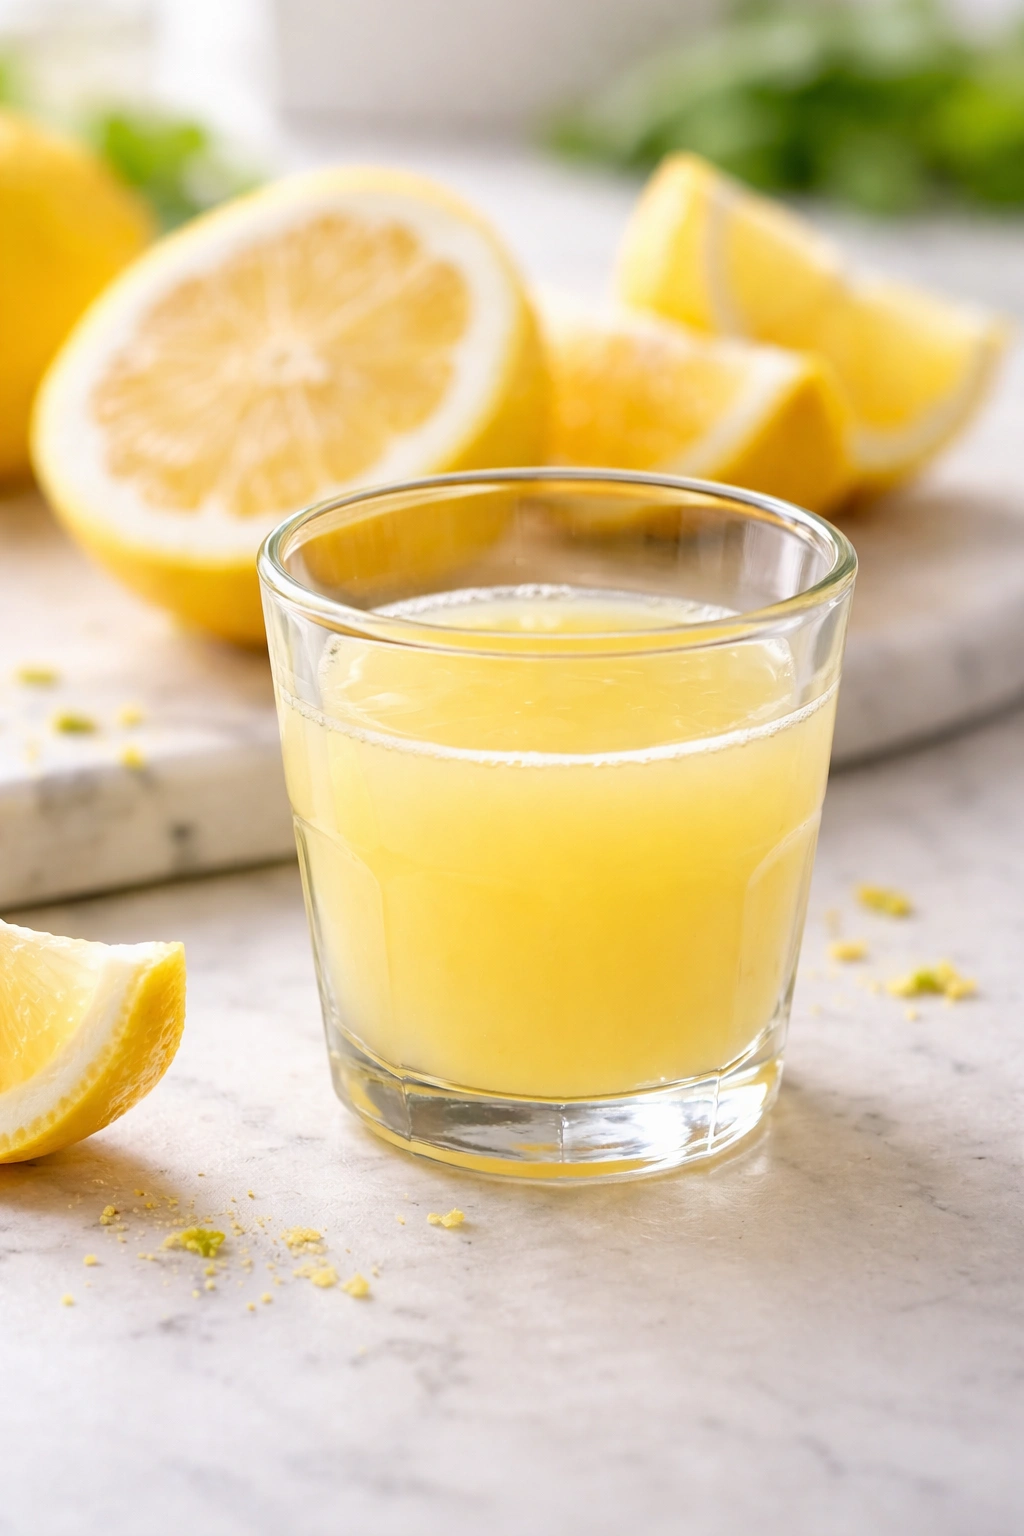
Fresh lemon juice is genuinely best here because it provides bright, sharp acidity that lifts all the other flavors. If you don’t have a fresh lemon, bottled lemon juice works in a pinch—use about 1½ tablespoons. The flavor won’t be quite as bright and lively as fresh, but it will still work. You could also substitute fresh lime juice for an entirely different flavor profile, or use a squeeze of white wine or a splash of white vinegar if you’re completely out of citrus.
Can I use frozen chicken?
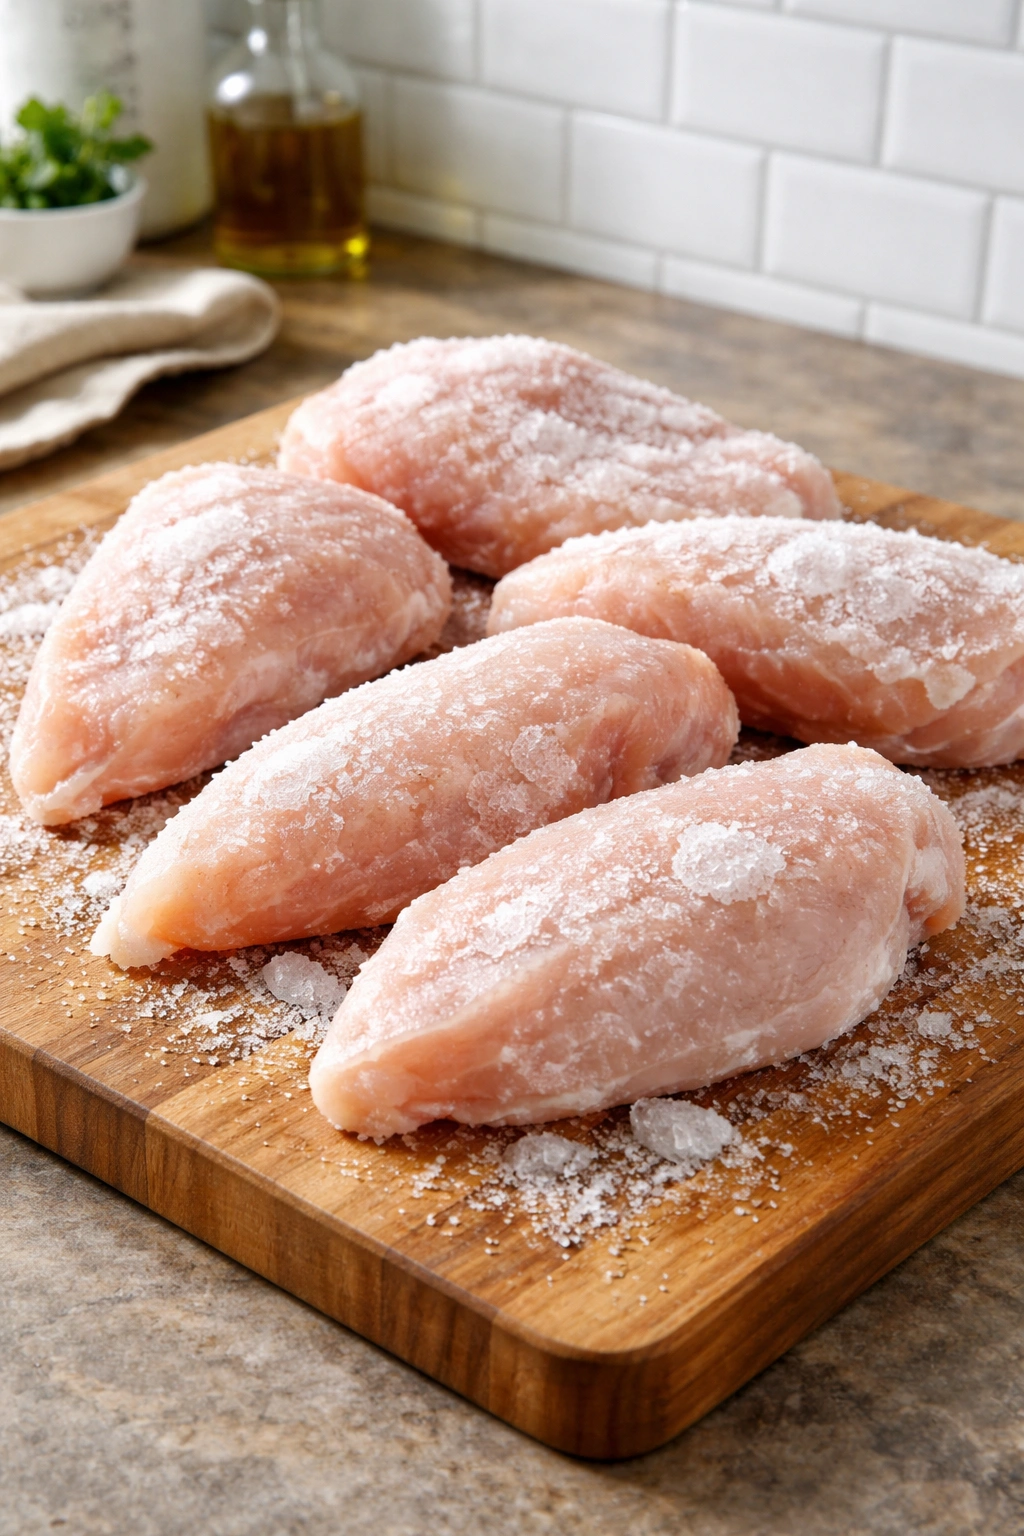
Yes, frozen chicken works here with one important caveat: make sure your chicken pieces are separated and not frozen in one solid block. If you’re using large frozen chunks, they may not cook through in 8 minutes. Frozen chicken will also add 5 to 10 minutes to the time it takes the pot to come to pressure, since the Instant Pot has to thaw the chicken before pressurizing. You can use frozen chicken without thawing, but plan on the overall cooking time being longer. For best results, thaw your chicken in the refrigerator overnight before cooking.
Why does my Instant Pot show a “burn” warning?
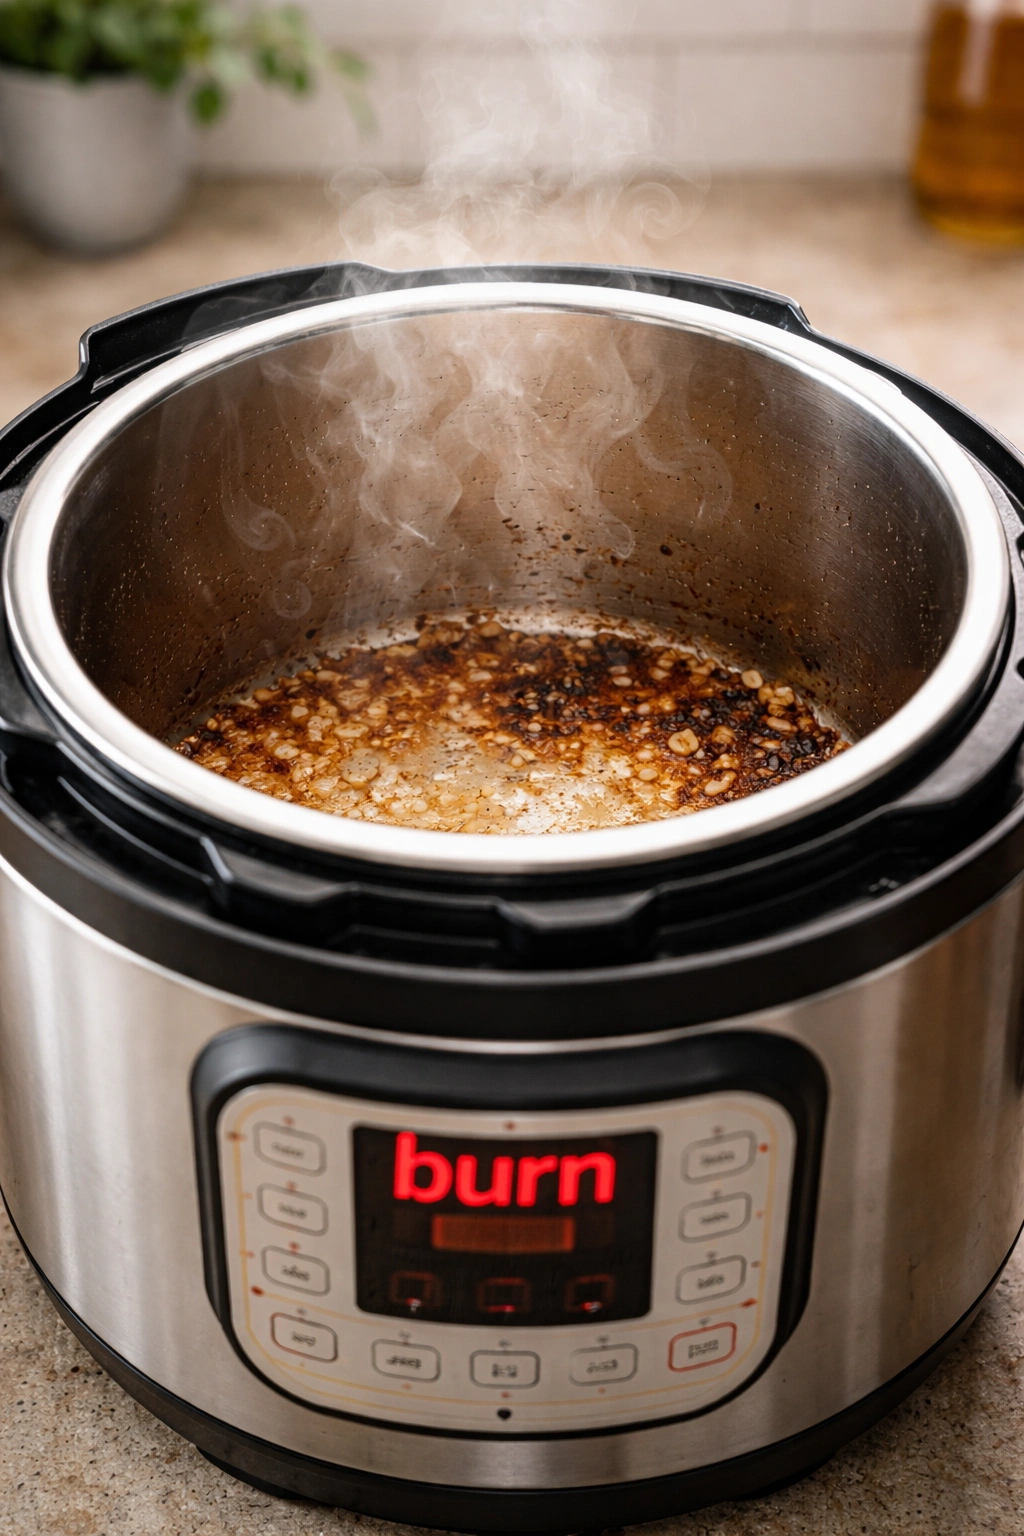
The “burn” warning appears when the pot’s temperature sensor detects that the bottom of the pot is getting too hot and dry. This happens when rice or other solids sit directly on the hot pot bottom without enough liquid to protect them. Prevention is the solution: always add your broth immediately after adding your rice, and deglaze the bottom of the pot thoroughly by scraping with a wooden spoon to loosen any browned bits. Make sure you’re adding enough liquid (at least 3 cups) and that your rice is fully submerged in the liquid before you close the lid.
How do I know when the chicken is fully cooked?
Properly cooked chicken should reach an internal temperature of 165°F (74°C). In this recipe, 8 minutes at high pressure in an Instant Pot will cook boneless, skinless chicken breasts completely through every time—they’ll be white all the way through with no pink, and they’ll easily break apart with a fork. If you’re uncertain whether your chicken is cooked through, use an instant-read meat thermometer inserted into the thickest piece. Eight minutes is precisely calibrated for chicken breasts to be fully cooked while staying juicy; don’t reduce the time thinking you’ll preserve juiciness, or you risk undercooking it.
Can I make this recipe on the stovetop instead?
Absolutely. Use a large, heavy-bottomed pot with a lid. Follow the same sauté steps, then cover the pot and transfer it to a preheated 375°F (190°C) oven. Bake for about 30 minutes until the rice is tender and the liquid is absorbed. Check it around the 25-minute mark—oven temperatures vary. Alternatively, you can simmer it covered on the stovetop over medium-low heat for about 20 to 25 minutes, but the oven method gives more even cooking.
Final Thoughts
Easy Instant Pot chicken and rice delivers something increasingly rare in weeknight cooking: a meal that’s genuinely simple to make, delivers real comfort and flavor, and feels like a genuine accomplishment when you set it on the table. The key to success isn’t complicated or mysterious—it’s using the right rice type, respecting the pressure cooking timeline, and not overthinking the process.
The beautiful part about this recipe is how forgiving it becomes once you understand the basic framework. You can adapt it endlessly to what your family loves and what’s in your pantry. Spanish-spiced with cilantro and lime. Italian with fresh basil and extra garlic. Loaded with fresh vegetables. Finished with Parmesan or left simple with just bright lemon. Every version works because you’re starting with a solid technique that handles these variations gracefully.
Make this recipe once and you’ll understand why it’s become such a staple in so many home kitchens. After that, you’ll find yourself making it again and again, finding new variations and ways to adapt it to different nights and different moods. That’s the mark of a truly great weeknight dinner recipe—it works hard for you, tastes genuinely good, and never feels like you’re settling for something less than what your family deserves.