There’s a reason bacon-loving home cooks have stopped panicking over splattering grease on the stovetop. Once you discover oven-baking bacon, you’ll wonder why you spent years standing in front of a skillet, flipping strips one by one, burning your forearms on hot fat, and dealing with uneven cooking that left some pieces crispy while others stayed floppy. Baking bacon in the oven is a complete game-changer — and it’s so simple that you’ll feel a little foolish for not discovering it sooner.
The beauty of this method is that it delivers restaurant-quality bacon in your home kitchen with almost zero effort. You’re not wrestling with strips, you’re not hovering over the stove, and you’re not sacrificing the crispy, evenly-browned texture that makes bacon so irresistible. Instead, you’re working with the oven’s dry, even heat to cook dozens of strips all at once, all cooked to the same level of crispiness, and all ready at the exact same moment. Whether you’re making breakfast for your family or prepping a massive batch for a brunch gathering, this technique will become your secret weapon.
This isn’t just about convenience, though that’s certainly part of the appeal. Oven-baking bacon produces a superior texture because the heat surrounds the bacon from all sides, rendering out the fat in a way that creates genuinely crispy edges without any burnt or chewy spots. The bacon cooks more evenly than it ever could in a skillet, and you can adjust the final texture by varying your oven temperature and timing. Want it barely crispy with some chew? Choose a lower temperature. Prefer it shatteringly crunchy? Go hotter and longer. The control is entirely in your hands.
Why Oven-Baking Beats Stovetop Cooking
The stovetop method has dominated bacon preparation for generations, but it comes with real limitations that most people accept without questioning them. You’re confined to whatever space the pan offers, which typically means cooking 4-8 strips at a time. You’ve got to flip each piece individually to ensure even cooking on both sides. The pan heats unevenly, so bacon over the burner gets hotter than bacon away from it. Fat splatters onto the stove, your clothes, and your forearms. And if you’re not standing right there watching, you end up with burnt edges or, worse, rubbery bacon that never crisps up properly.
Oven-baking eliminates nearly every one of these problems at once. A standard baking sheet gives you room for 20+ strips, depending on your bacon thickness and how much overlap you’re comfortable with. The oven’s heat is radiant and consistent, so every strip cooks at the same rate and reaches the same level of crispiness. There’s no flipping required — the bacon simply sits there while the oven does the work. Fat renders downward into the pan instead of splattering upward onto your stove. And perhaps most importantly, you can walk away. Literally. Set the timer, go pour your coffee or shower, and come back to perfectly cooked bacon.
The texture you achieve is fundamentally different. Stovetop bacon often ends up with one side that’s crispier than the other, simply because one side is in direct contact with the hot pan. Oven-baked bacon crisps evenly on both sides because the heat surrounds it. The edges become genuinely crunchy, the fat renders completely, and the meat develops a slightly darker, more flavorful surface. There’s no comparison in terms of the final result.
Choosing the Right Bacon for Oven-Baking

Not all bacon behaves the same way in the oven, and choosing the right type makes a real difference in your results. The fundamental question is this: are you buying thin, regular, thick-cut, or specialty smoked bacon? Each one has its place, and each one requires slightly different timing and temperature adjustments.
Thin-cut bacon is what most supermarkets sell as standard. It’s the fastest to cook — usually ready in 12-15 minutes at 400°F. This is the type to choose if you’re in a rush or want maximum crispiness with minimal effort. The downside is that thin bacon can burn more easily, especially if your oven runs hot. It’s also less forgiving if you lose track of time; 2 minutes over and you’ve crossed into burnt territory.
Regular or medium-cut bacon is the sweet spot for most home cooks. It’s thick enough to remain tender in the center while the edges crisp up beautifully. It usually takes 18-22 minutes at 400°F to reach peak crispiness. This thickness gives you a wider window of time where the bacon is perfectly cooked, which means even if you’re off by a few minutes, you’ll still get excellent results. Regular bacon is also more forgiving of oven temperature variations.
Thick-cut bacon is a luxury choice that makes incredible breakfast sandwiches and delivers satisfying meatiness in every bite. You’ll need to increase your cooking time to 22-28 minutes at 400°F. The advantage is that the center stays tender and rich while the edges crisp up, creating wonderful textural contrast. The disadvantage is that achieving even cooking throughout requires your attention to detail — you might need to rotate the pan halfway through so all the strips are exposed to the same oven temperature.
Specialty bacon — whether it’s applewood-smoked, peppered, maple-glazed, or any other variety — cooks faster because of its lower water content. These varieties are already seasoned, so you’re not adding anything additional. Just be aware that sugar-based glazes can caramelize and brown faster, so watch them more closely to avoid burnt edges.
The type of bacon you buy also matters beyond just thickness. Higher-quality, uncured bacon and heritage breed bacon both cook beautifully in the oven. They tend to have higher fat content, which renders into rich, flavorful liquid as the bacon cooks. Conversely, very lean bacon (often labeled as “center-cut” or “eye of round”) cooks faster and ends up crispier because there’s less fat to render. If you prefer chewy bacon, lean varieties work against you. If you love maximum crispiness, lean bacon is your friend.
Preparing Your Oven and Equipment
Before any bacon touches heat, take a minute to set up your oven correctly. This preparation step is easy but critical — doing it wrong means uneven cooking or, worse, a smoking oven.
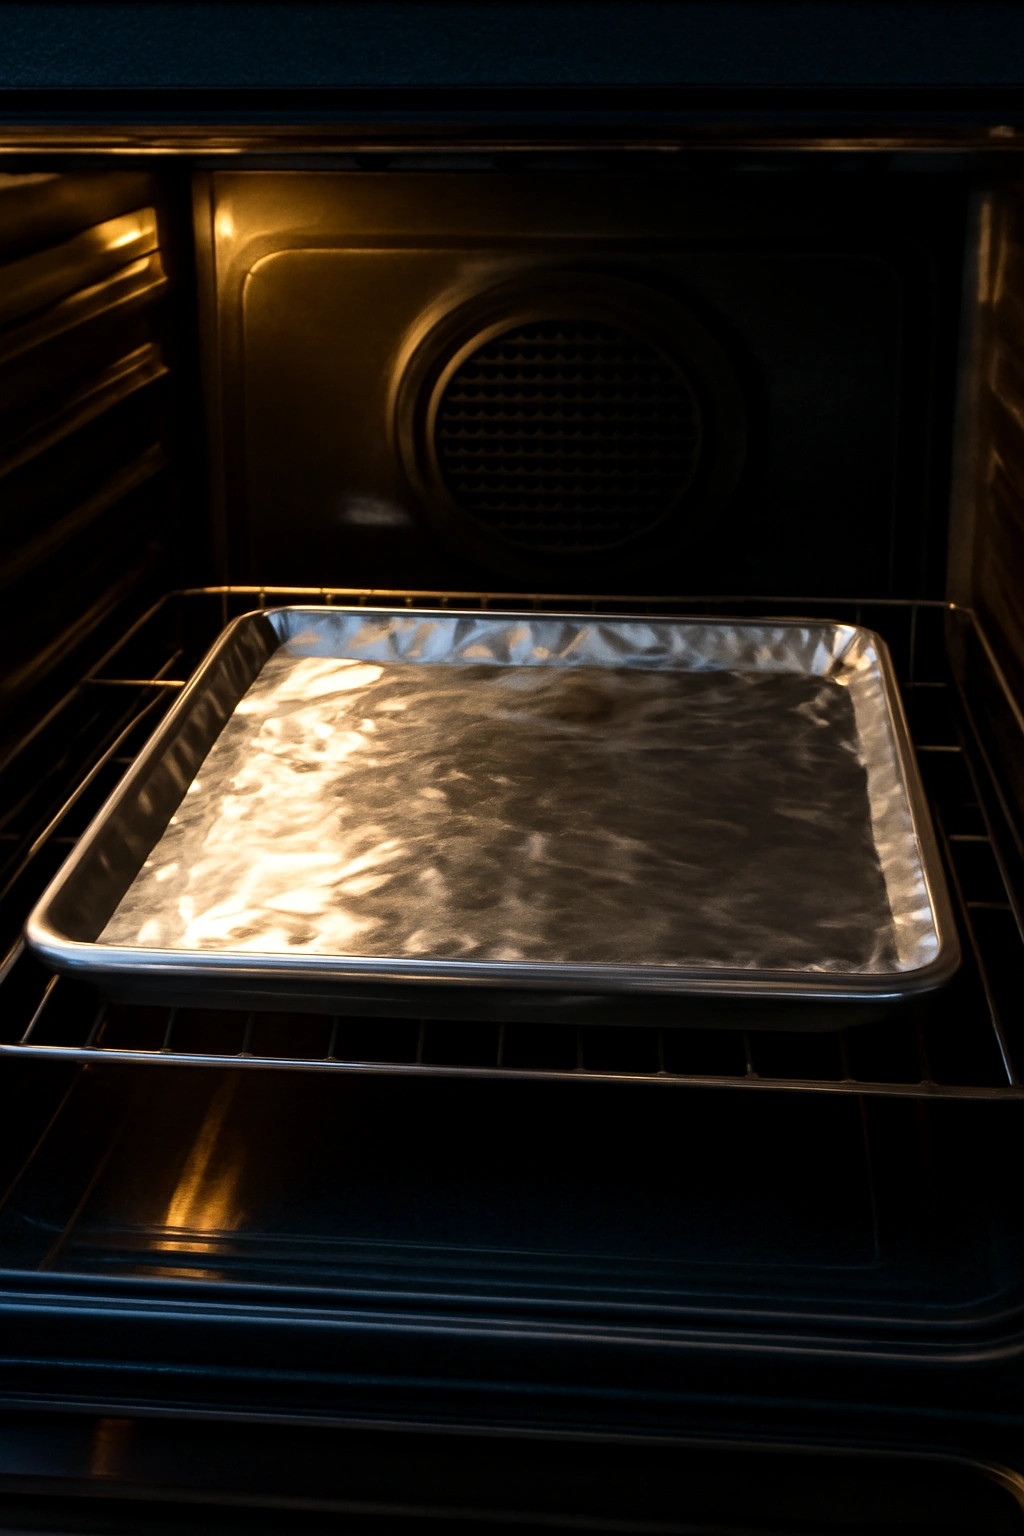
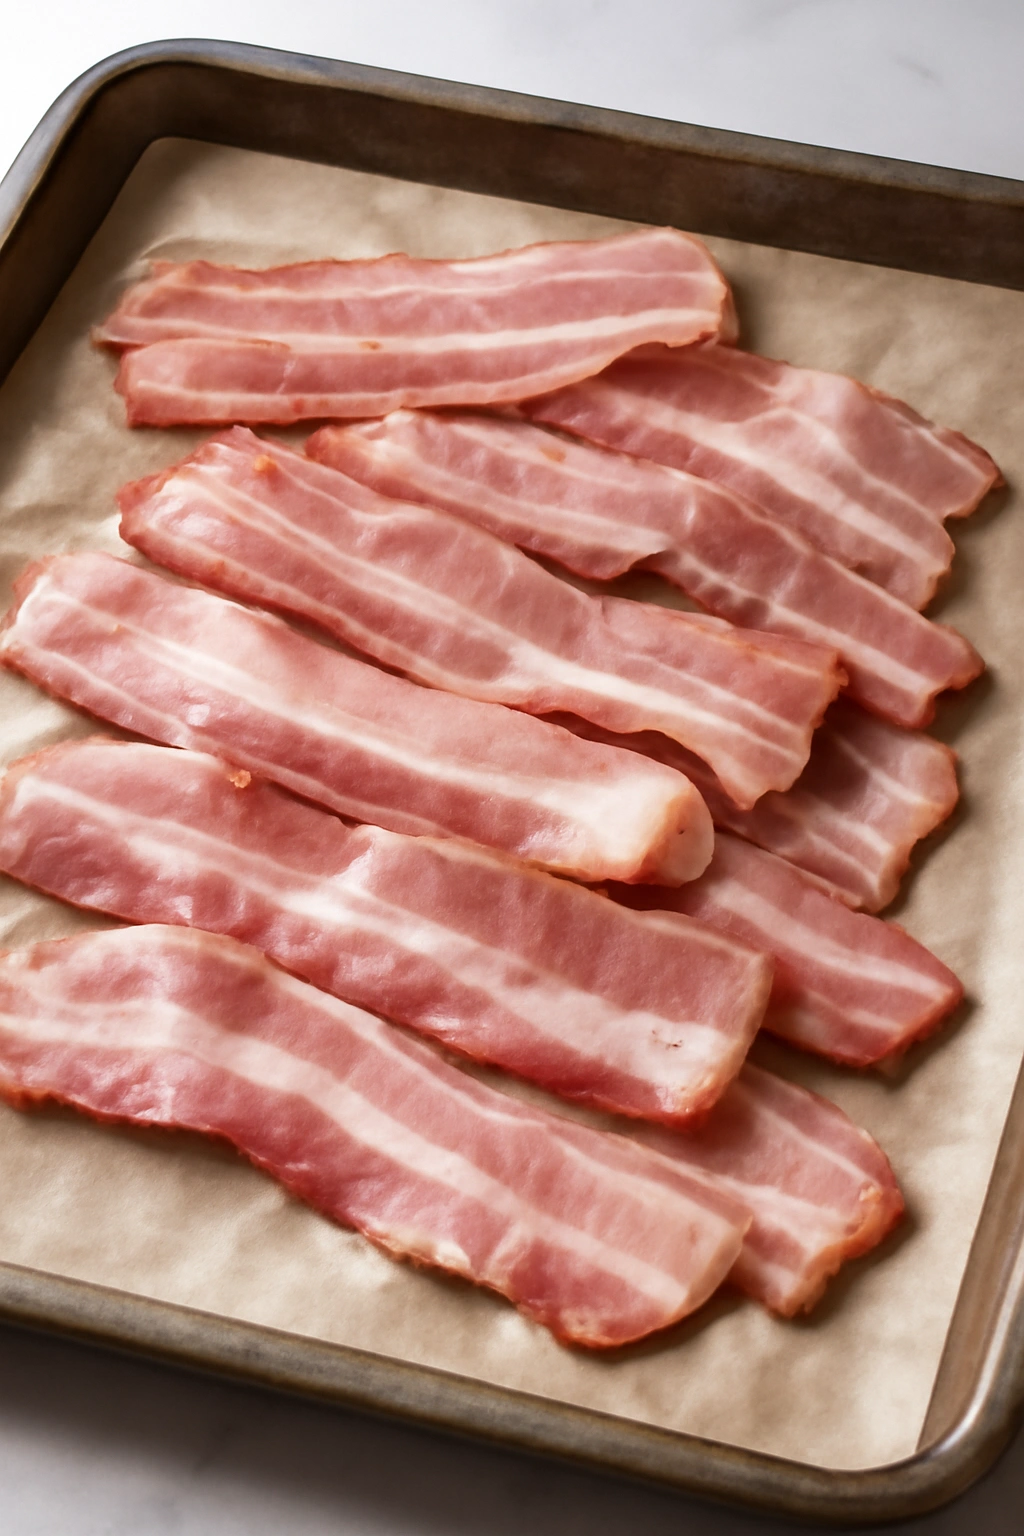
Line your baking sheet with foil for the easiest cleanup. Lay the foil shiny-side up (it truly doesn’t matter, but consistency matters when you’re building a habit). If you’re a no-foil person, use a silicone baking mat instead. Alternatively, use a sheet without any liner, but know that you’ll be scrubbing. Foil is genuinely the path of least resistance here. Make sure the foil covers the entire sheet and goes up the sides slightly, so any rendered fat pools in the bottom rather than sliding off.
Position your oven rack in the middle position. This ensures that the bacon is roughly equidistant from the heating element on top and the heating element on the bottom (if your oven has one). If the rack is too high, the top of the bacon browns before the fat fully renders. If it’s too low, the bottom gets too much direct heat and can brown unevenly.
Some home cooks place a second sheet pan on the rack directly above their bacon-filled pan. This acts as a makeshift heat shield and prevents the top from browning as quickly. This technique is useful if your oven has a particularly aggressive upper heating element, or if you prefer bacon that’s crispier on the bottom than the top. Just remember that adding this shield increases cooking time by 2-3 minutes, since some heat is blocked.
Preheat your oven thoroughly. This typically takes 15-20 minutes. Preheating ensures that the bacon hits the correct temperature the moment it goes in, which means consistent cooking times and reliable results. A cold oven means uneven heat exposure, soggy bacon, and longer overall cooking time. Skip this step and you’ll regret it.
Arranging Your Bacon for Even Cooking
How you position the bacon on the sheet impacts how evenly it cooks and how crispy it gets. This is where precision translates into perfect results.
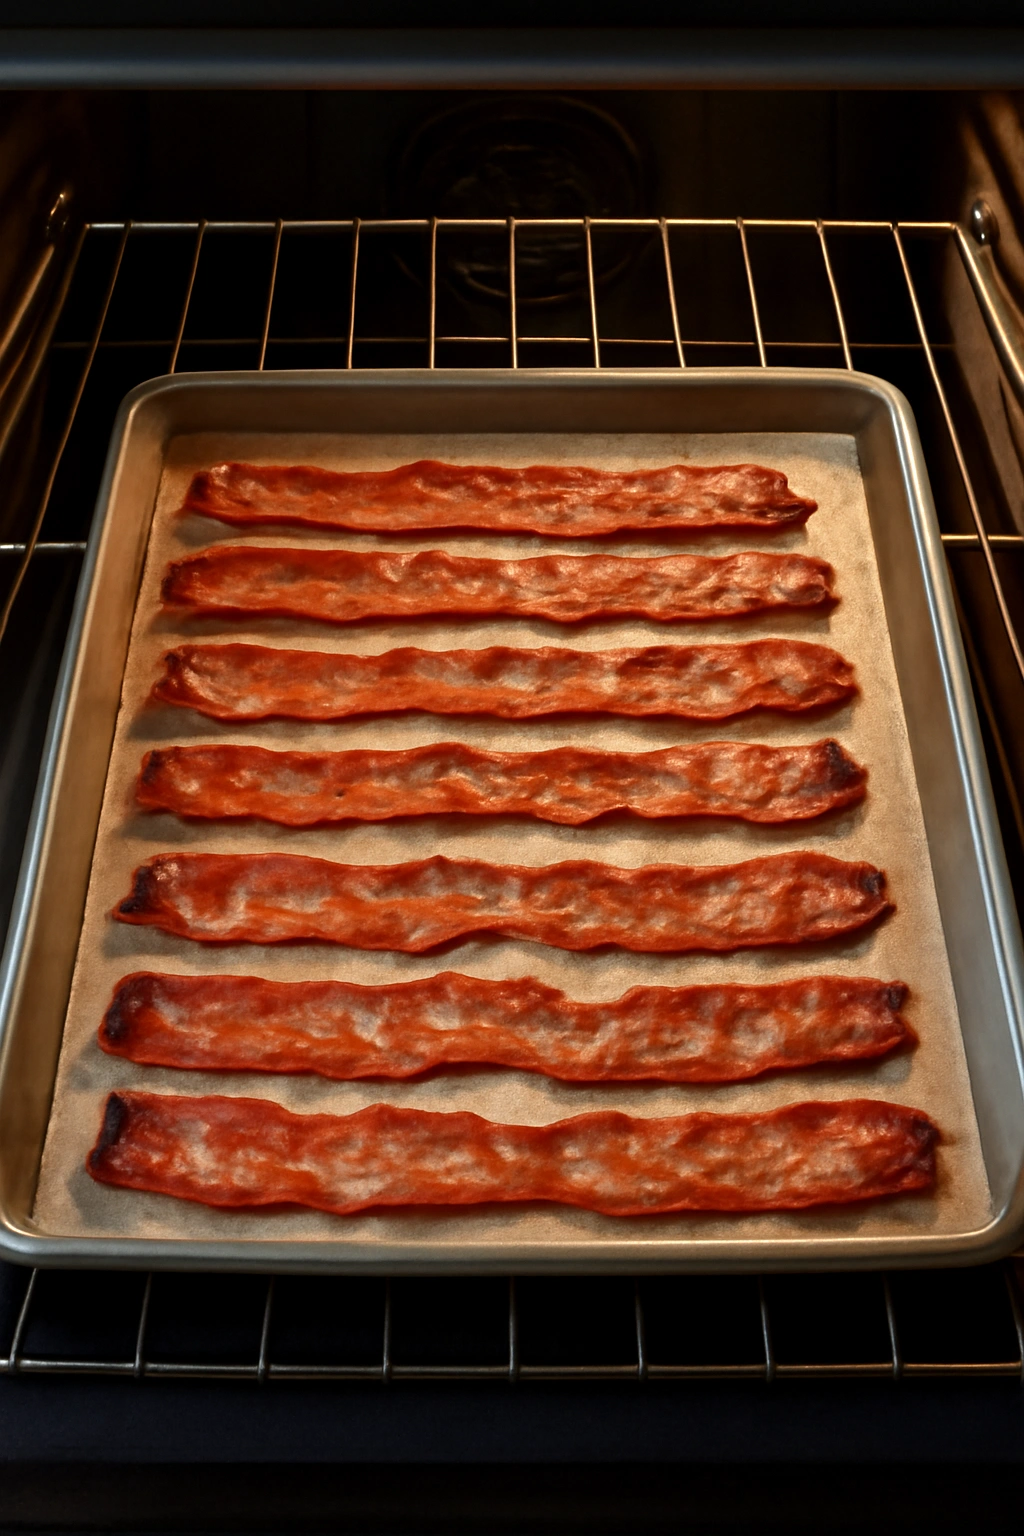
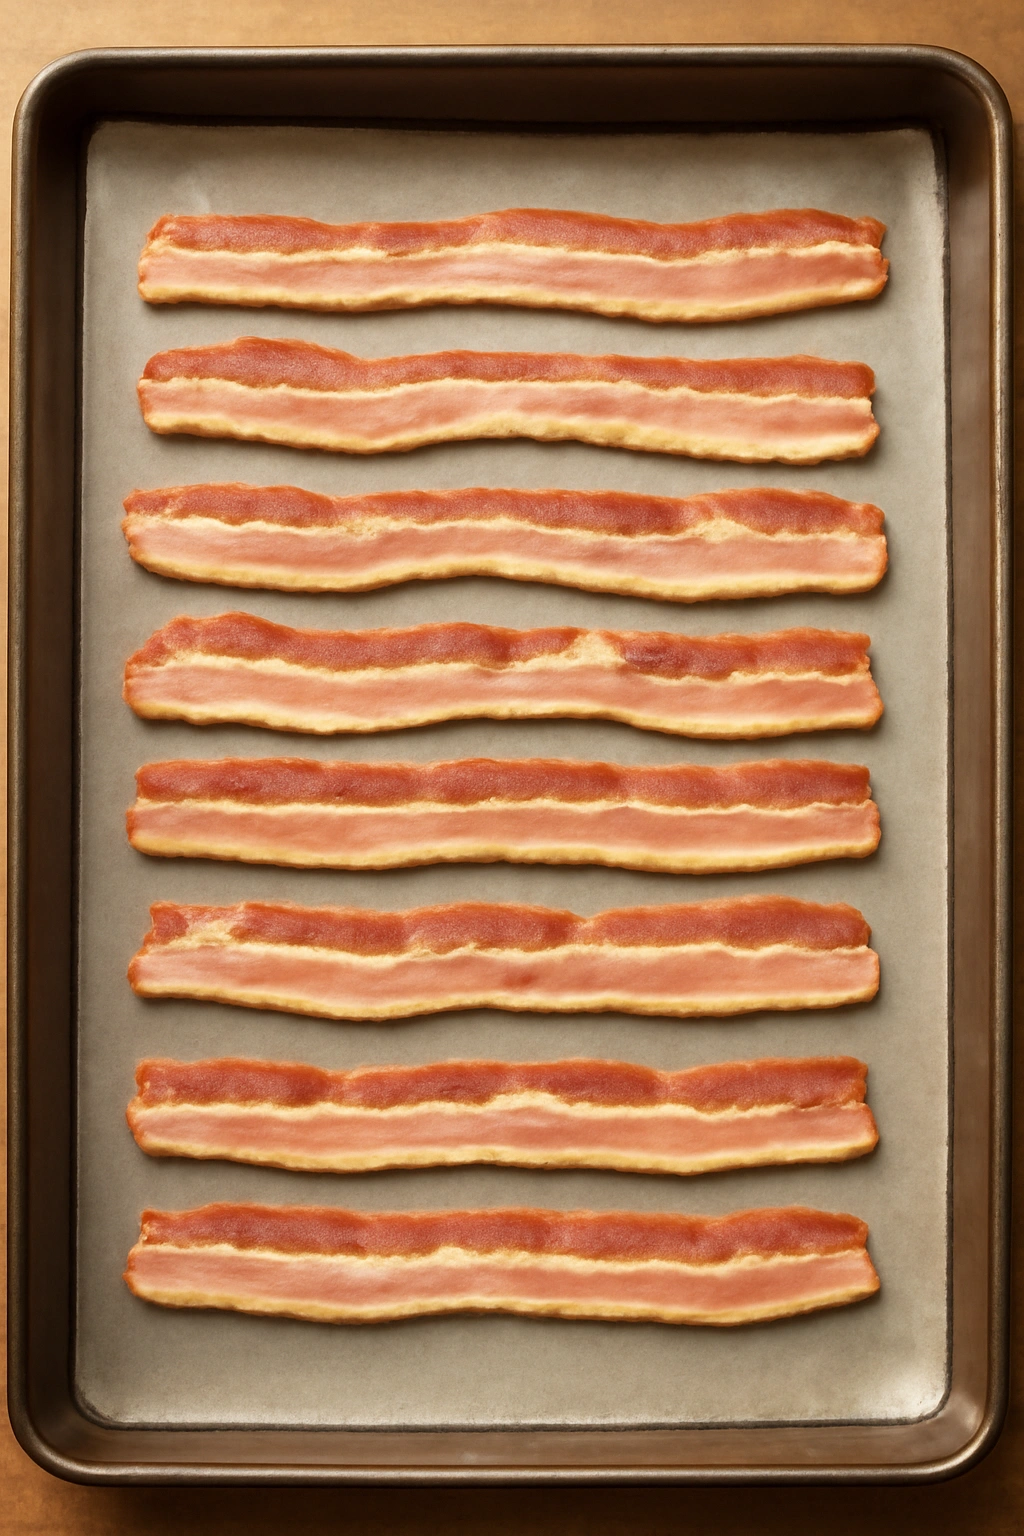
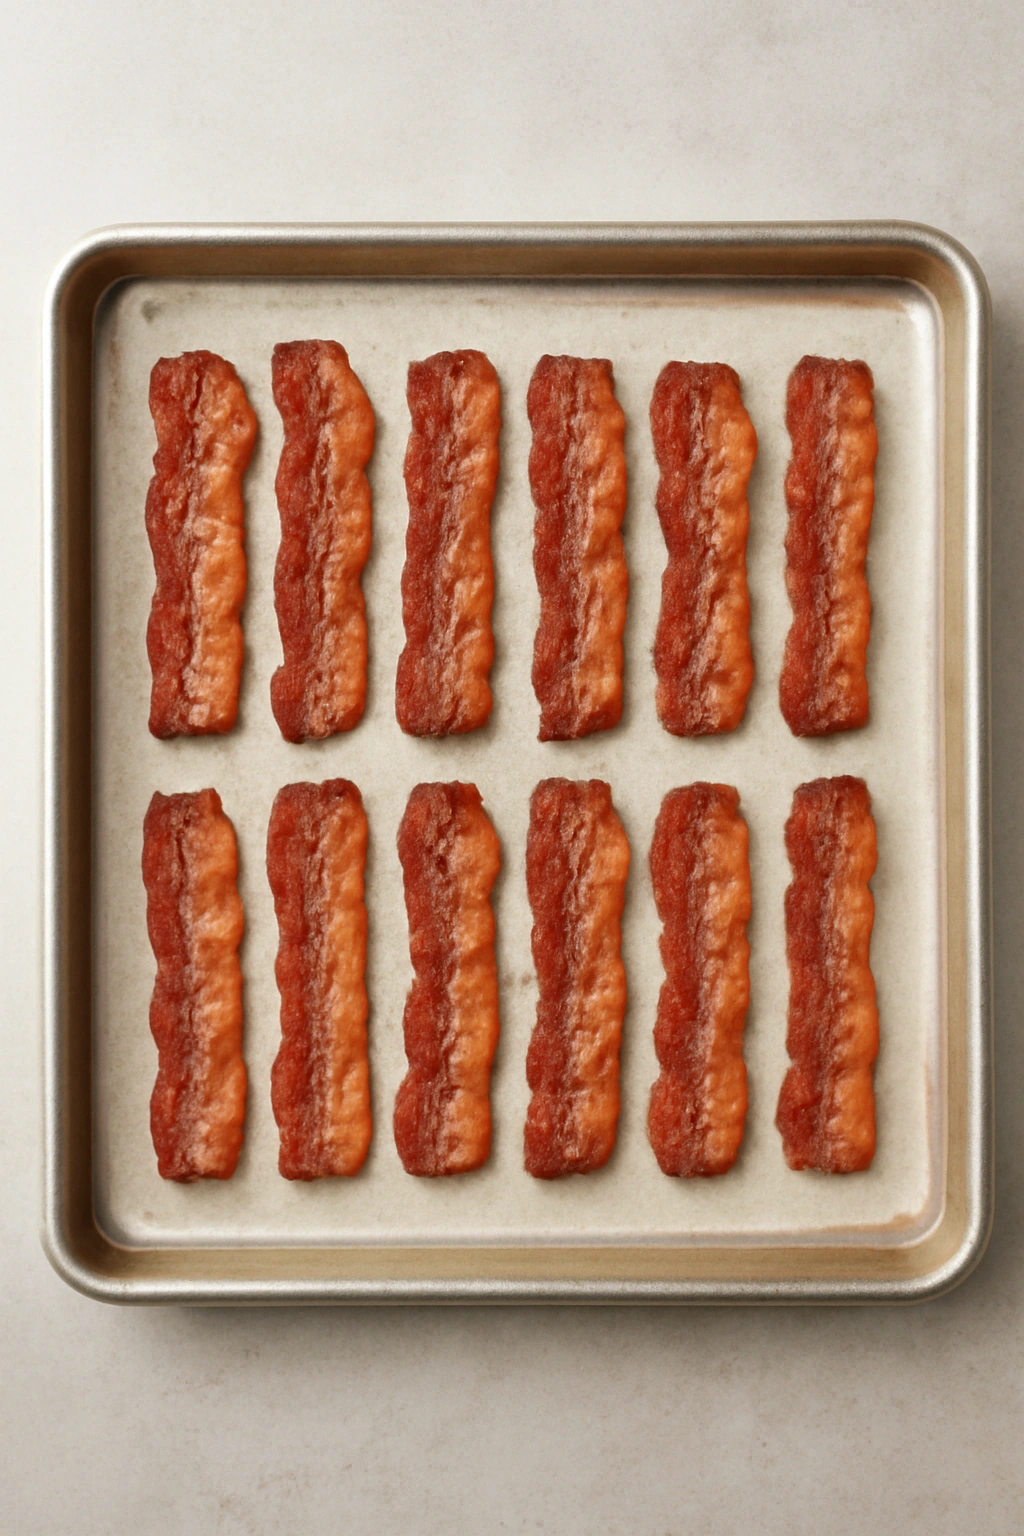
Lay each strip out flat without overlapping. This is non-negotiable for even cooking. If strips overlap, the area where they touch stays steamy and soft while the exposed parts crisp up. You can pack the sheet pretty densely — bacon shrinks as it cooks, so what looks crowded at the start has plenty of breathing room once the water renders out — but every strip needs its own space.
If you can’t fit all your bacon in a single layer without overlapping, use two baking sheets instead. Running two sheets simultaneously (one on each rack position, rotated halfway through cooking) takes no more time than cooking one sheet. The real cost is oven space, not active effort.
Arrange strips in neat rows for consistency. This makes it easier to rotate the sheet halfway through and ensures that strips in the corners and strips in the center all get similar heat exposure. If your bacon arrangement is chaotic, some strips will inevitably get more heat than others, and you’ll end up with uneven crispiness. Neat rows take two extra minutes and deliver noticeably better results.
Don’t prick or score the strips before cooking. Some older recipes suggest poking holes in the bacon to release fat and speed cooking. Modern bacon has less fat content than it did decades ago, and pricking really doesn’t make any meaningful difference. All you’re doing is giving the bacon extra places to dry out during cooking. Skip this step.
Setting Your Temperature for the Texture You Want

This is where you gain control over the final outcome. Bacon texture is primarily controlled by temperature, with timing as the secondary variable. Higher temperature = crispier, faster. Lower temperature = chewier, slower. Pick your target texture first, then let that determine your temperature choice.
400°F is the standard sweet spot for most bacon. This temperature delivers a good balance between crispy edges and a slightly chewy center, with cooking times that usually fall in the 15-22 minute range depending on thickness. This is where to start if you’ve never oven-baked bacon before. At this temperature, thin bacon crisps in 12-15 minutes, regular bacon in 18-22 minutes, and thick bacon in 22-28 minutes.
425°F cooks bacon faster and produces maximum crispiness. This is your choice if you want truly crunchy bacon that shatters when you bite it. The trade-off is a narrower margin of error — you need to watch your bacon more carefully because the higher temperature means things can go from perfect to burnt in just a few minutes. Expect thin bacon at 425°F to be done in 10-14 minutes, regular in 15-18 minutes, and thick in 18-25 minutes. This temperature also produces more active sizzling in the pan, so you might see more fat splatter up onto the oven sides.
375°F cooks bacon slowly and keeps more chew in the center. This is ideal if you prefer bacon that’s crispy on the edges but still tender in the middle — that classic bacon texture many people grew up with. Expect cooking times to extend by 5-8 minutes compared to 400°F. Thin bacon takes 17-20 minutes, regular takes 23-27 minutes, and thick takes 28-32 minutes. The advantage is that there’s almost no risk of burning; you have a 10-minute window where the bacon remains perfectly cooked.
Cast iron affects the outcome. If you’re using a cast iron skillet instead of a baking sheet, the bottom of the bacon cooks faster because cast iron is an excellent heat conductor and sits flush against the pan. Reduce your oven temperature by 25°F and check the bacon’s progress at the earlier time markers. The upside is that cast iron bacon develops extraordinary crust and texture. The downside is that you need to monitor it more carefully.
The Baking Process and What to Expect
Once your oven is preheated and your bacon is arranged, the actual baking is surprisingly simple. Set your timer, close the oven door, and walk away. That’s genuinely it.
During the first 10 minutes, nothing dramatic happens visually. The bacon loses its raw color and starts to darken slightly. You’ll start to smell bacon, which is always wonderful. The fat begins to render into the pan, pooling in the corners and edges. If you open the oven door to peek (and let’s be honest, most people do), you’ll notice the bacon has lost maybe 20-30% of its width as water cooks out.
Around the 12-minute mark (for regular bacon at 400°F), things start to accelerate. The edges of each strip begin developing color. The fat sizzles audibly in the pan. The kitchen smells unmistakably like bacon in the best possible way. This is when you might see a bit more smoke than before, which is completely normal — fat burning in the oven produces smoke, but as long as it’s moderate (not billowing), you’re fine.
At the halfway point through your expected cooking time, rotate your baking sheet 180 degrees. This ensures that the bacon in the back of the oven, which typically gets more heat, doesn’t cook faster than the bacon in the front. If you’re using two baking sheets, swap their positions at this point too (move the top sheet to the bottom rack and vice versa). This is the only active work involved in the entire process.
In the final 5 minutes, the bacon develops its final color. The edges get noticeably darker and crispier. The center of each strip takes on a deeper reddish-brown tone. The fat stops bubbling quite as aggressively, which is your signal that the water has mostly cooked out. The kitchen reaches peak bacon aroma — you might find family members mysteriously appearing in the kitchen just as the timer’s about to go off.
Testing Bacon for Doneness
Doneness is ultimately a texture preference, but there are some objective markers that tell you when your bacon has crossed from underdone to perfectly crisped to burnt.
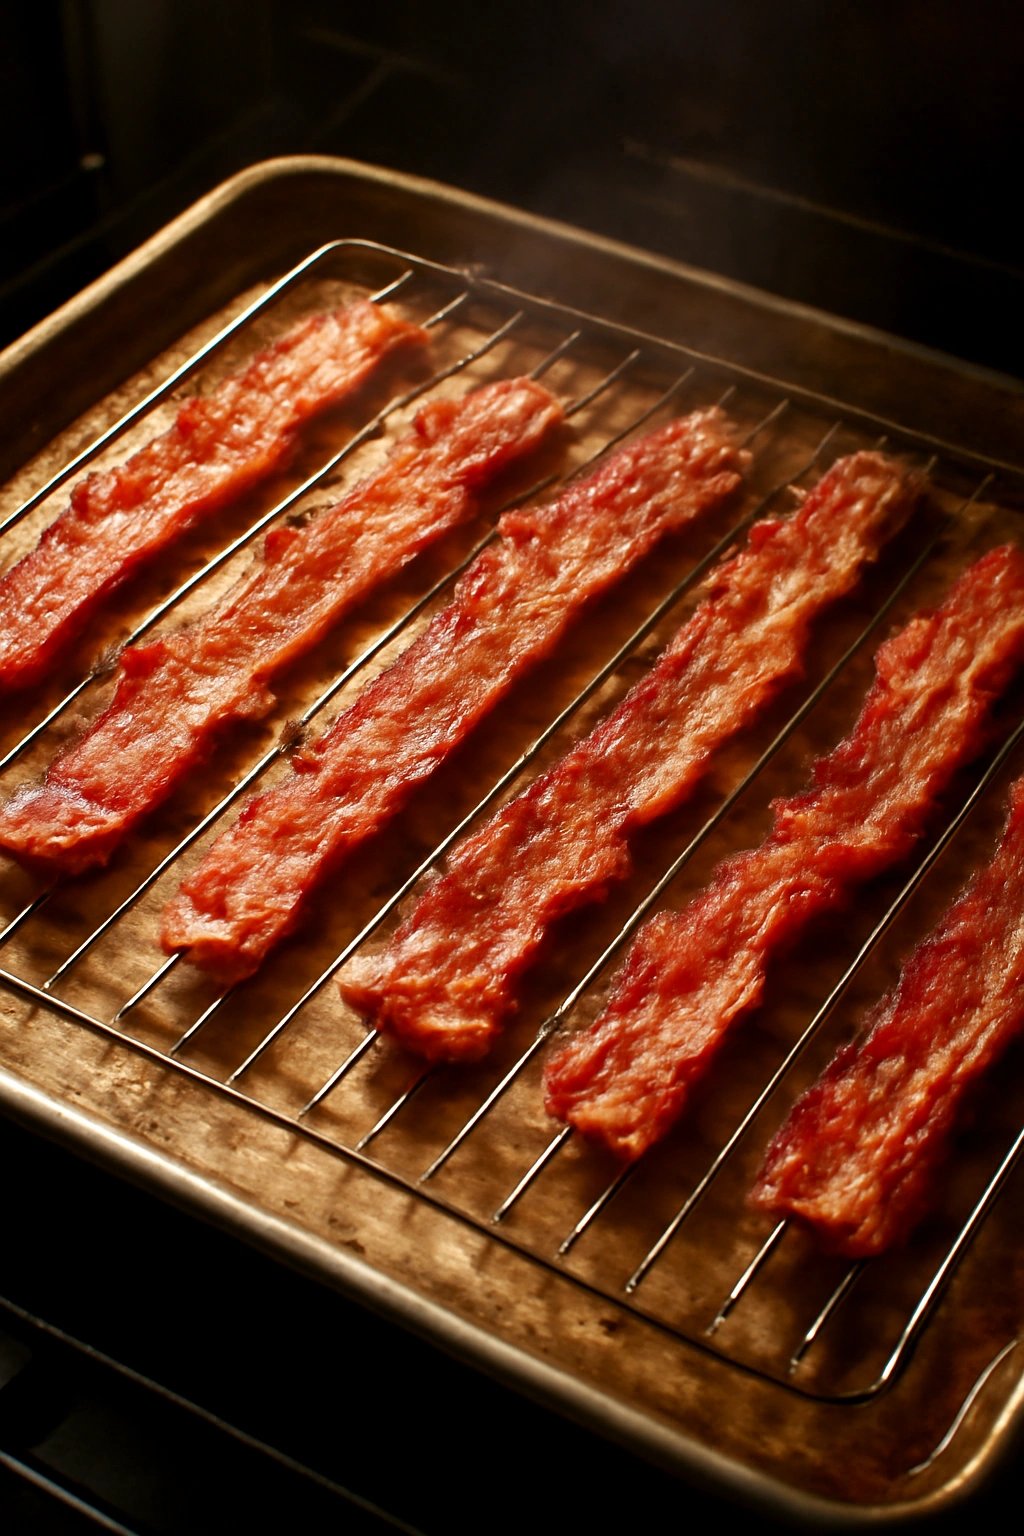
Perfectly crispy bacon is tan to golden brown across the entire surface. The edges are noticeably darker — sometimes quite dark, almost burgundy — but the center of each strip shows that golden-brown color. When you touch it (carefully, it’s hot), the bacon feels firm and slightly rigid, but not so brittle that it shatters. When you bite it, you get a satisfying crunch followed by a slight chew in the very center.
Underdone bacon is still pliable when it comes out of the oven. It bends rather than snaps. The color is pale to light tan. When you bite it, you taste a chewy texture that feels almost raw. This is fixable — just put it back in the oven for 3-4 more minutes.
Overdone bacon shatters when you touch it. The color is very dark, often approaching black in spots. When you bite it, the entire piece crumbles immediately with no chew at all. The flavor tips toward burnt. Once you’ve reached this point, you can’t fix it — you’ve cooked it past the point of no return. For next time, reduce your temperature by 25°F or reduce your cooking time by 3-5 minutes.
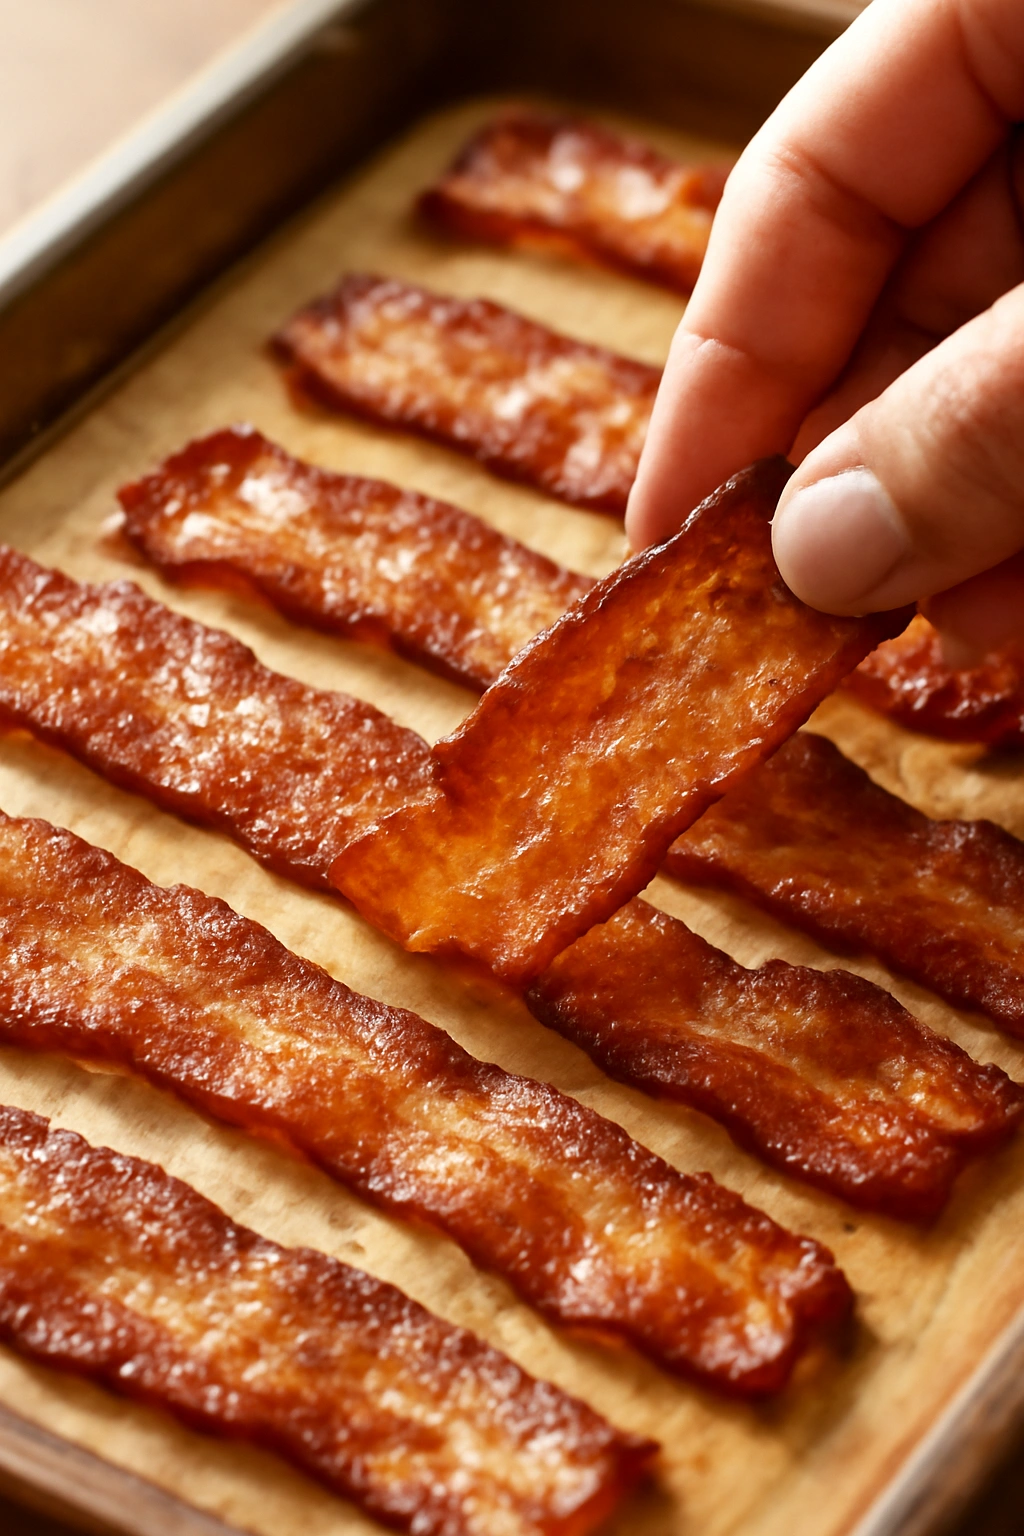
The best way to test is to remove one strip from the pan and let it cool for 30 seconds on a paper towel. Once it’s cool enough to touch safely, bend it gently. If it snaps, it’s done. If it bends without breaking, it needs more time. This single-strip test is your insurance against the entire batch being underdone.
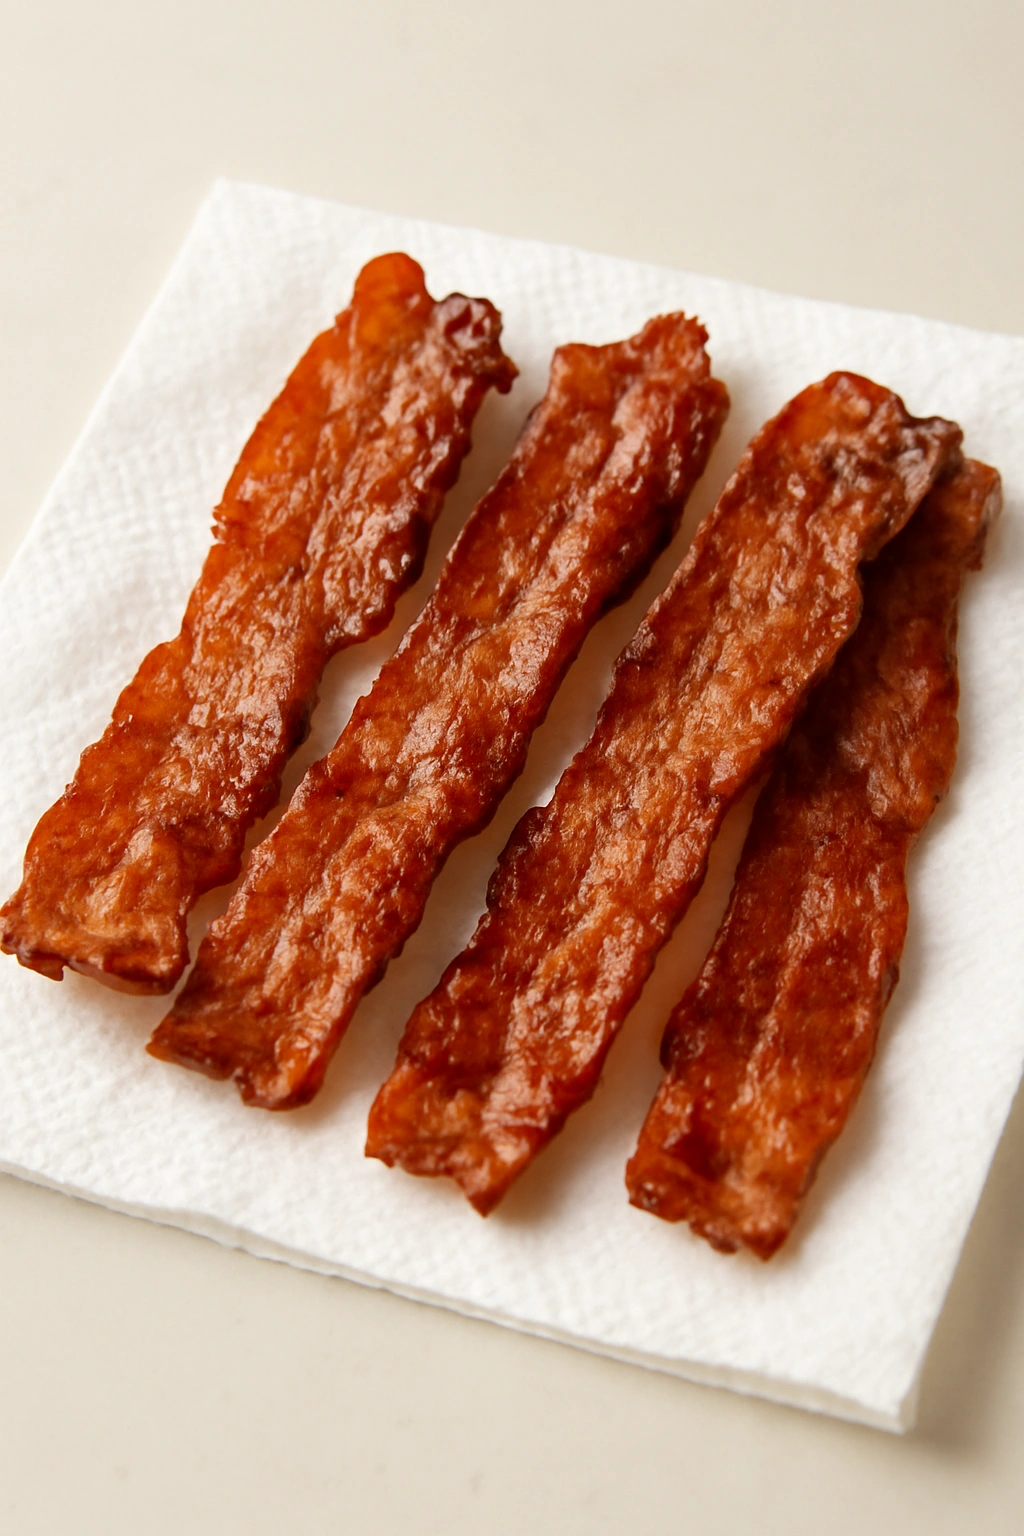
Removing and Draining the Bacon
The moment your bacon reaches peak crispiness, remove the entire baking sheet from the oven. Don’t leave it in for “just one more minute” — residual heat will continue cooking the bacon even after it’s removed from the oven. Use oven mitts (the sheet is extremely hot and the rendered fat is actively bubbling), and place the sheet on a heat-safe surface.
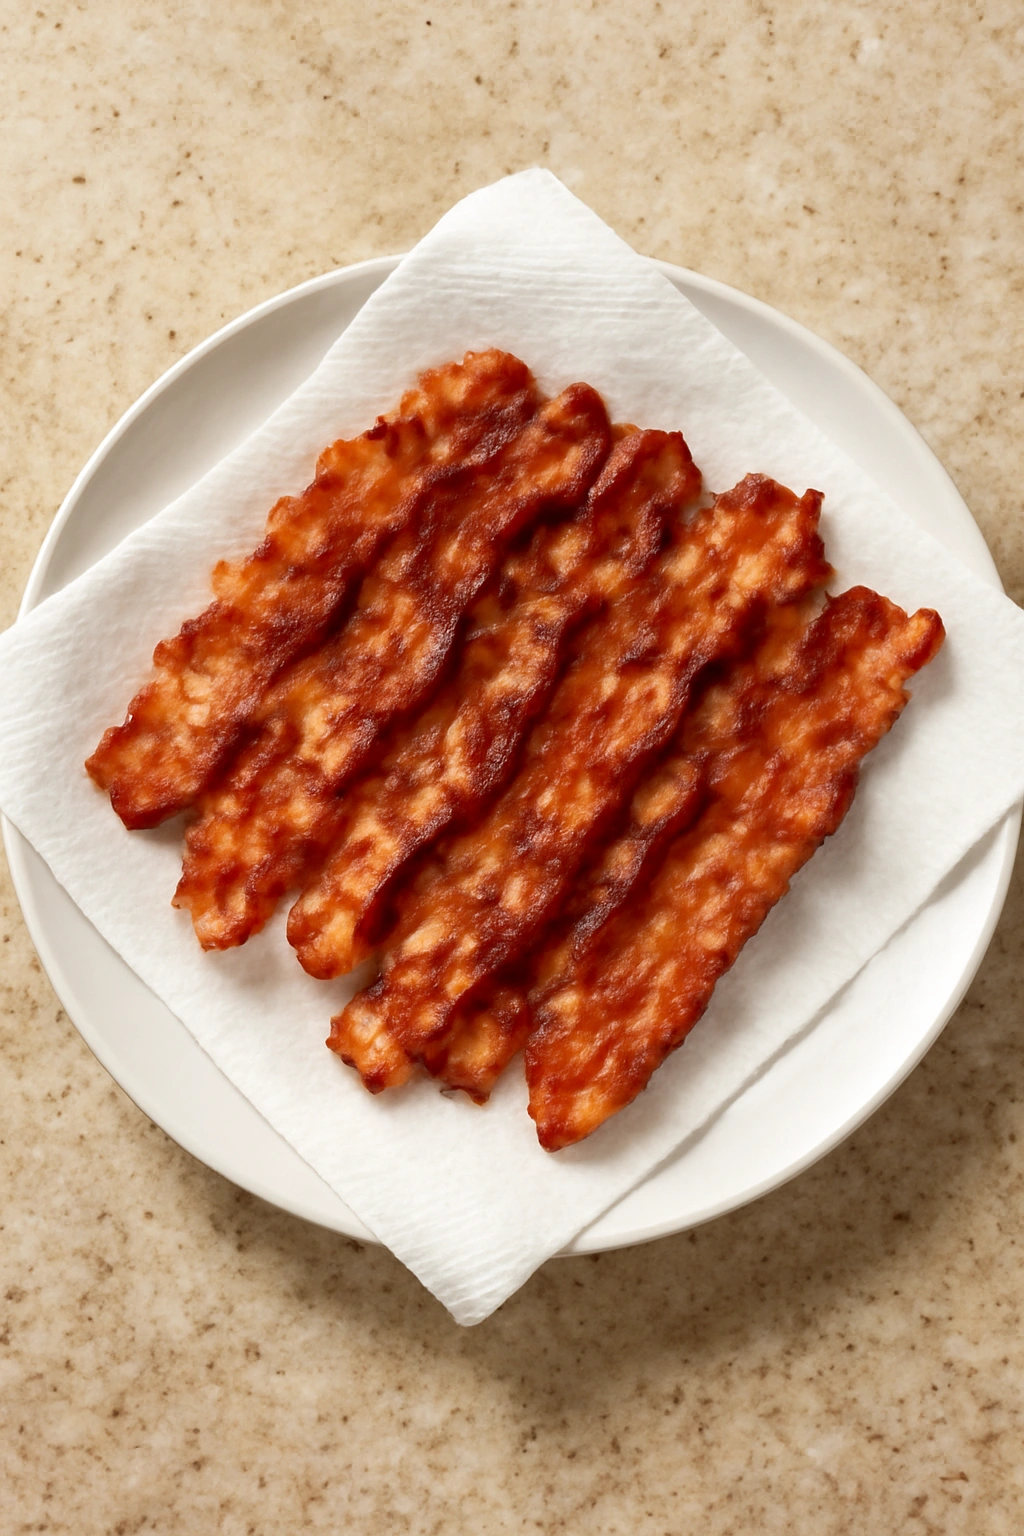
Transfer the bacon immediately to a paper towel-lined plate. This is crucial. The paper towels absorb the excess rendered fat, which prevents your bacon from continuing to steam and lose some of that crispiness. If you leave bacon sitting in the rendered fat on the hot baking sheet, the bottom side gets soggy as the steam reabsorbs into the meat. Paper towels prevent this.
Line your plate with a double or triple layer of paper towels — single-layer towels are too thin and will get saturated quickly, and you don’t want excess grease dripping through. As you transfer each strip, arrange it on the towels in a single layer, not overlapping. If you’re making multiple batches, you can layer the bacon with paper towels between layers, but keep the total height reasonable so the weight of upper layers doesn’t crush the crispiness of lower layers.
Let the bacon rest for 2-3 minutes before eating it. This sounds counterintuitive, but cooling slightly allows the crispy exterior to set permanently. Bacon that’s piping hot is still soft, even though you’ve cooked out the water. As it cools, the exterior hardens into true crispiness. This brief rest is the difference between bacon that feels crispy when it’s hot but turns chewy as it cools, versus bacon that stays crispy for hours.
Common Mistakes That Ruin the Results
Even though oven-baking bacon is simple, there are a handful of mistakes that happen surprisingly often. Knowing what they are means you can avoid them entirely.
Cooking bacon on a cold baking sheet is the #1 mistake. You put your bacon in the oven before it finishes preheating, thinking you’ll save time. The reality is that the first 10 minutes in a cold oven means uneven heating and inconsistent cooking. By the time the oven reaches full temperature, the bacon closest to the heating elements is already well past the point where the other bacon is. Always preheat fully — those 15-20 minutes aren’t wasted time, they’re time spent ensuring perfect results.
Stacking strips on top of each other is the second biggest mistake. You did this to save oven space, but the overlapped portions steam instead of crisping. When you peel apart the strips, they’re soft and stuck together, which defeats the entire purpose of this method. Use two baking sheets if necessary. Trust me on this.
Skipping the paper towel step means your bacon stays greasy and slightly soggy instead of properly crisp. The rendered fat doesn’t go anywhere — it just keeps sitting underneath the bacon, keeping it from drying completely. Paper towels genuinely matter here.
Opening the oven door constantly to check progress extends cooking time and cools the oven, leading to inconsistent results. Set your timer and trust the process. Check once at the halfway point to rotate the sheet, then again about 2 minutes before the expected doneness time. That’s it. More frequent checking just wastes heat and your patience.
Choosing an oven temperature that’s too high leads to burnt edges before the center is cooked. If your oven runs particularly hot (many older ovens do), start at 375°F instead of 400°F. You can always increase the temperature next time if bacon isn’t crispy enough, but burnt bacon can’t be fixed.
Assuming all thick-cut bacon is created equal. Some butcher-cut bacon is genuinely thick, while commercial “thick-cut” bacon is sometimes just standard thickness. If the package doesn’t give you a weight, grab a strip and feel it — real thick-cut bacon is noticeably meaty and weighs more than standard bacon. Adjust your expectations and cooking time accordingly.
Storage and Reheating for Maximum Freshness
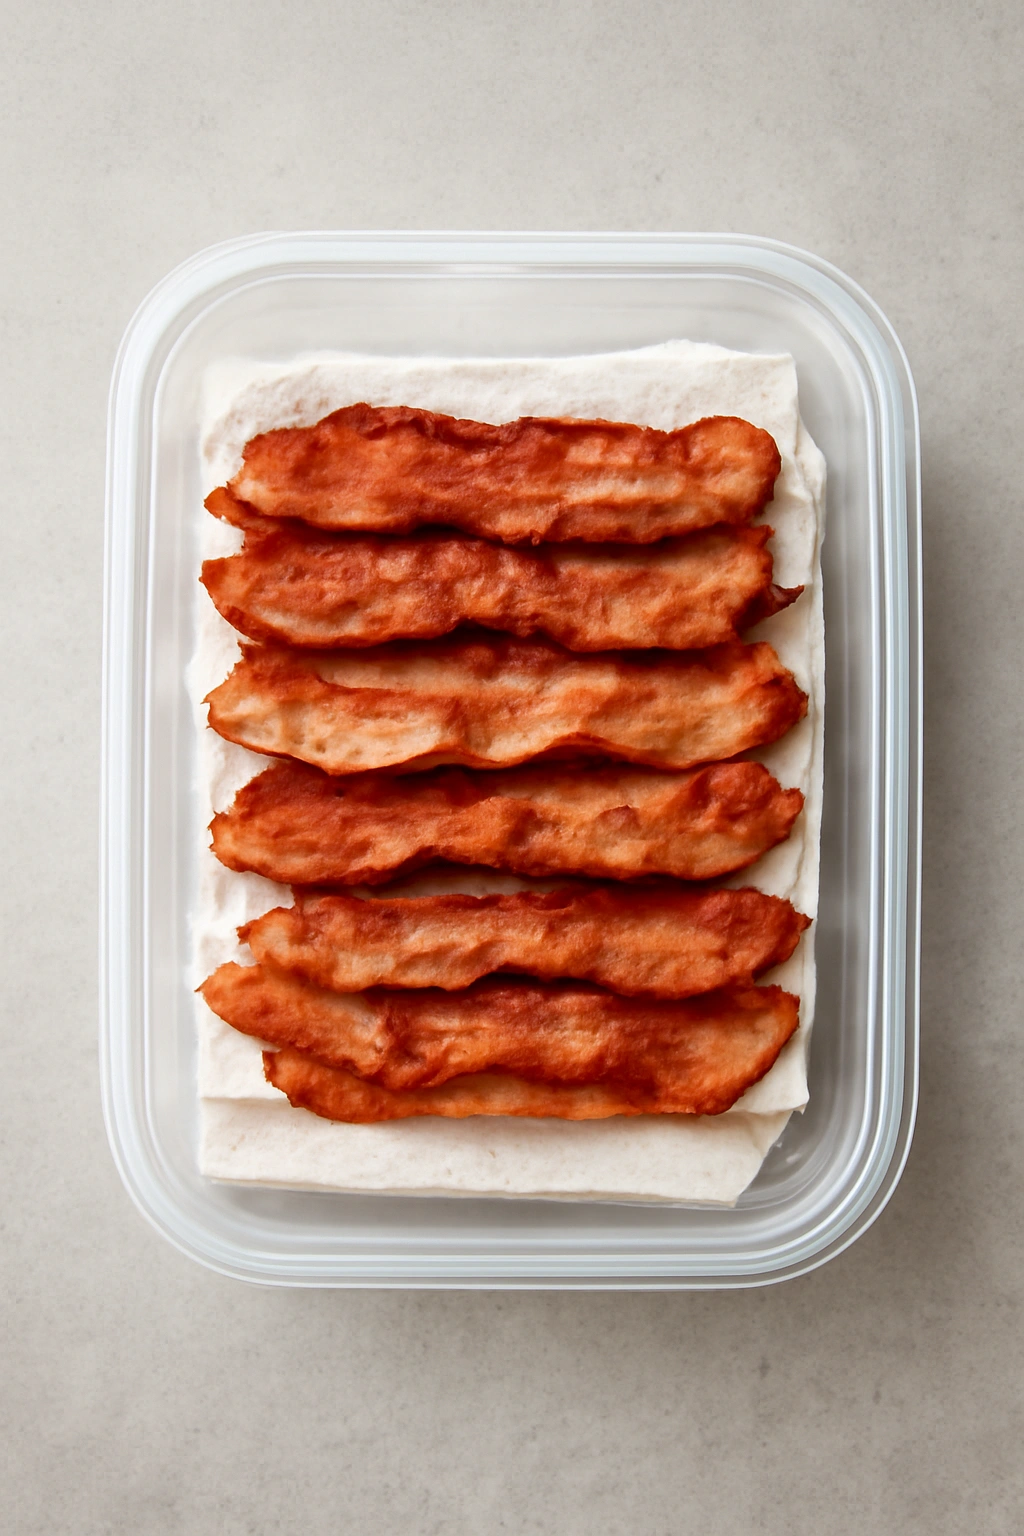
Cooked bacon keeps for 4-5 days in the refrigerator if stored properly. Once the bacon has completely cooled, transfer it to an airtight container or zip-top bag. Layer it with paper towels if you’re stacking multiple layers — this prevents the stack from compressing and the moisture from reabsorbing into lower layers. Squeeze out as much air as possible from the bag to prevent oxidation.
Frozen bacon lasts for 1-2 months. Use the same storage method as refrigerated bacon, but store it in the freezer instead. Interestingly, properly frozen and thawed bacon often tastes fresher than refrigerated bacon that’s 5 days old, because freezing halts all the oxidation and flavor degradation that happens in the fridge.
Reheating bacon is essential for bringing back crispiness. Room-temperature bacon that’s been stored is no longer crispy — the exterior reabsorbs moisture and becomes chewy. To restore crispiness, preheat your oven to 325°F and arrange the bacon on a baking sheet lined with foil. Bake for 5-7 minutes, just until it’s warmed through and the exterior crisps up again. The microwave is tempting but often leads to rubbery, overcooked bacon. Oven reheating restores the original texture much more reliably.
Pro tip: Make bacon ahead of time for your week. Bake a full batch of bacon on a quiet Sunday morning, store it properly, and you’ve got ready-to-eat bacon for the entire week. Reheat individual portions as needed. This is a genuine time-saver on busy mornings.
Seasoning and Flavor Variations Beyond Plain Bacon
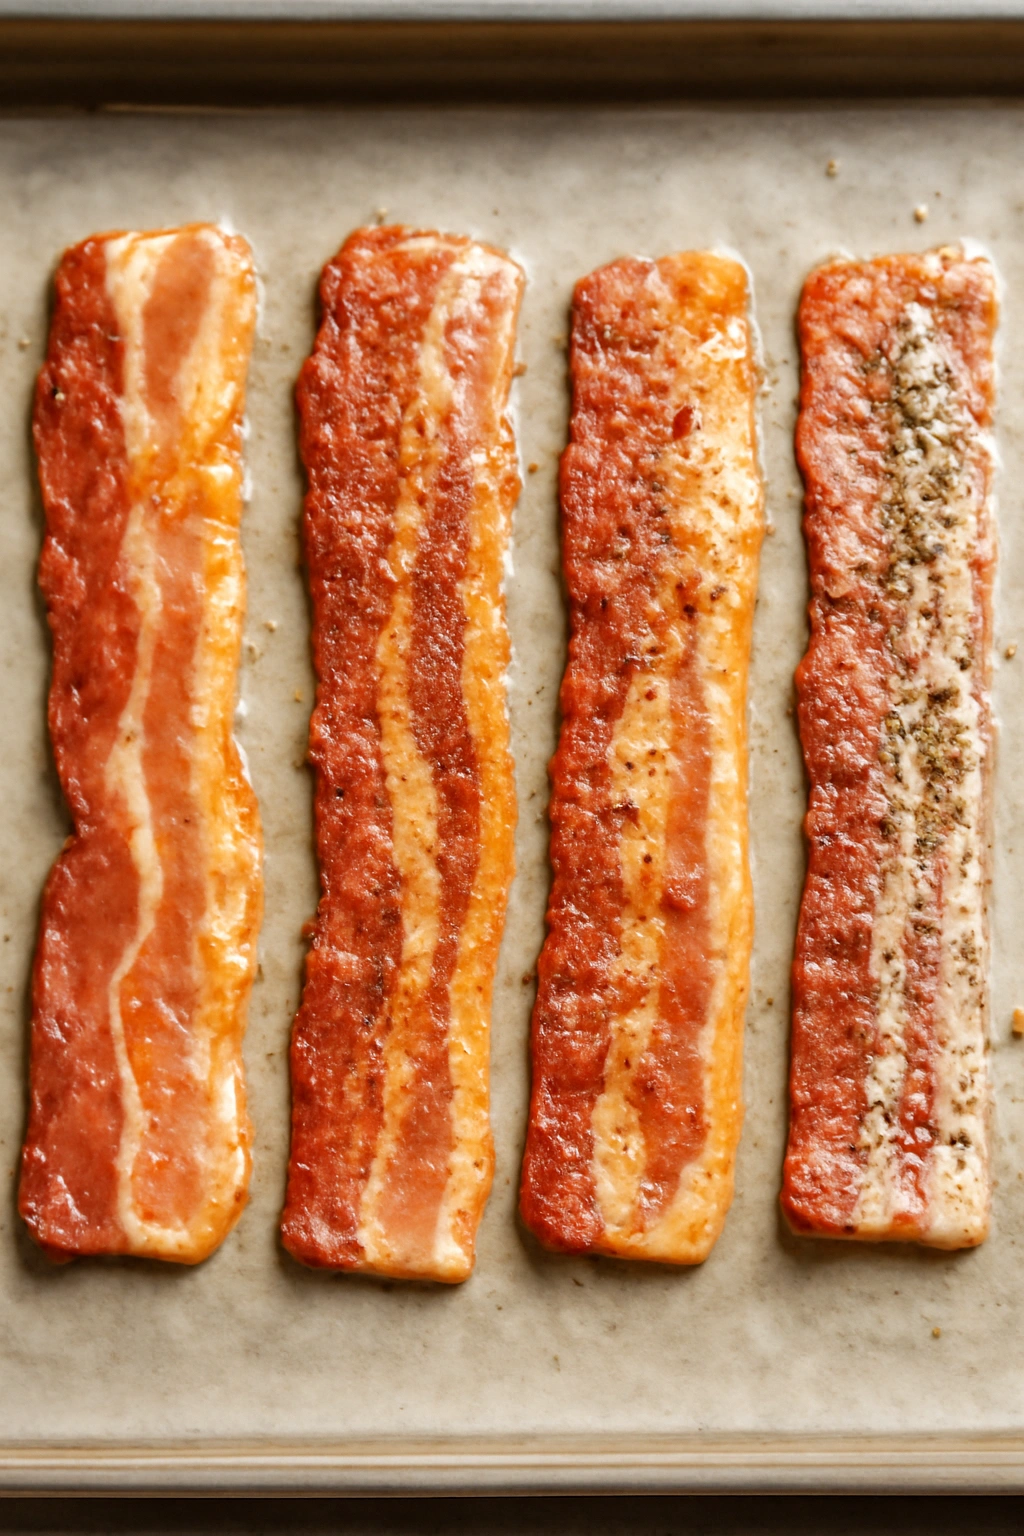
Plain, properly cooked bacon is nearly perfect on its own, but seasoning opens up new possibilities. The best time to add seasonings is right before the bacon goes into the oven, while the strips are still raw and the seasoning can bond with the surface.
Maple and brown sugar is a classic combination. Mix 2 tablespoons brown sugar with 1 tablespoon pure maple syrup and brush this mixture lightly onto each strip before baking. The sugar will caramelize slightly in the oven, creating a sweet, sticky glaze. Watch it carefully — the sugar can burn at 400°F, so consider reducing your temperature to 375°F when using this variation. The result is bacon that’s almost candy-like on the outside with salty, smoky meat inside.
Chili and garlic gives you spicy breakfast bacon. Mix together 1 teaspoon chili powder, ½ teaspoon garlic powder, and ¼ teaspoon cayenne pepper, then dust each strip lightly with this blend before baking. It bakes right into the surface and creates crispy, flavorful edges.
Fresh cracked black pepper and herbs is understated and sophisticated. Coarsely crack some black pepper (the kind with big, visible pieces), add a pinch of smoked paprika, and dust the top of each strip. Thyme or rosemary can be added too — just be sparing, since dried herbs can burn if used too heavily.
Honey and sriracha creates a spicy-sweet glaze. Mix 1 tablespoon honey with ½ teaspoon sriracha and brush onto strips before baking. Again, watch for sugar burning at higher temperatures.
The most important thing to remember: don’t add seasonings that contain much salt directly to the bacon before baking. Salt draws moisture to the surface and can prevent crisping. If you want to add extra salt, season after cooking instead.
Crispy Bacon for Crowds and Special Occasions

The real superpower of oven-baking bacon becomes apparent when you’re feeding a large number of people. A single standard baking sheet holds enough bacon to feed 8-10 people comfortably. Two sheets hold 15-20 people’s worth. Three sheets hold everyone.
Set multiple baking sheets in the oven simultaneously. One on the middle rack, one on the upper-middle rack (if your oven has that option), and one lower if there’s space. The top sheet will cook slightly faster due to proximity to the upper heating element, so rotate more frequently for the top sheet. Most ovens can handle 2-3 sheets at once without problems. If you’re doing more than that, consider cooking in batches.
Stagger your sheet insertions if you need bacon ready at different times. Insert the first sheet at time zero, then 5 minutes later add a second sheet, then 5 minutes after that add a third. This way, the first sheet finishes 10 minutes before the last sheet, and bacon comes off the line continuously rather than all at once.
Estimated timing for large batches: If you need 40 strips of medium-cut bacon at 400°F, arrange 20 strips on each of two baking sheets. Insert both sheets simultaneously. They’ll both be done in about 20 minutes. If you need 60 strips, do three batches of 20 strips each, removing and inserting sheets in 15-minute intervals. This keeps fresh, hot bacon appearing continuously instead of a chaotic moment where everything finishes at once.
Achieving Restaurant-Quality Results Every Time
The difference between home bacon and restaurant bacon often comes down to consistency and technique. Restaurants don’t flip bacon. They don’t watch it constantly. They follow a repeatable process that produces the same result every time.
Consistency comes from precision. Use the same oven temperature every time you bake bacon. After your first successful batch, write down the exact temperature and timing that worked for you in your specific oven. Then replicate it exactly next time. Once you’ve done it three times, you won’t need notes — the process becomes automatic.
Invest in an oven thermometer if you don’t already have one. Many home ovens run hotter or cooler than displayed, and knowing your oven’s actual temperature eliminates frustrating inconsistency. Just place the thermometer on your baking sheet before you insert the bacon and check the actual temperature once the oven has preheated. If there’s a difference between what the dial says and what the thermometer shows, adjust your dial accordingly.
Handle the bacon minimally. Once it’s on the baking sheet, the less you touch it, the better. Don’t poke it, don’t flip it, don’t move it around (except for that one rotation at the halfway point). The more the bacon moves, the more the texture becomes compromised and the more uneven cooking becomes.
Use quality bacon. This truly matters. Bacon from a local butcher or a higher-tier grocery store tends to have better flavor and texture than super-cheap supermarket bacon. You don’t need to spend a fortune, but spending slightly more for better bacon makes a noticeable difference in your results.
Final Thoughts
Oven-baking bacon has legitimately changed how home cooks approach breakfast. It’s faster than stovetop cooking, it’s vastly more convenient, and most importantly, it produces superior results every single time. Once you experience perfectly crispy oven-baked bacon, you’ll struggle to understand why you ever stood in front of a sizzling skillet.
The beauty of this method is that it removes all the guesswork from bacon preparation. You’re not juggling strips, you’re not worried about uneven cooking, and you’re not gambling on whether you’ll end up with burnt or undercooked results. Instead, you’re following a straightforward process that delivers consistent, restaurant-quality bacon that’s crispy on the outside, slightly chewy in the center, and perfectly rendered without any greasy residue.
Start with a standard 400°F for regular bacon, plan for about 20 minutes, and don’t skip the paper towel draining step. Once you’ve done it once, the process becomes second nature. You’ll find yourself batch-baking bacon on quiet Sunday mornings, storing it for the week, and wondering why every meal doesn’t start with crispy oven-baked bacon. That’s the real magic of this technique — it makes excellent bacon so easy that you’ll want it constantly.